Need a summery dessert for a party/picnic? In my mind, anything with blueberries is a sure bet. The Hubs happened to mention he just came across this recipe earlier in the day and thought it might be just the dessert I was looking for to bring to a garden luncheon. Indeed it was!
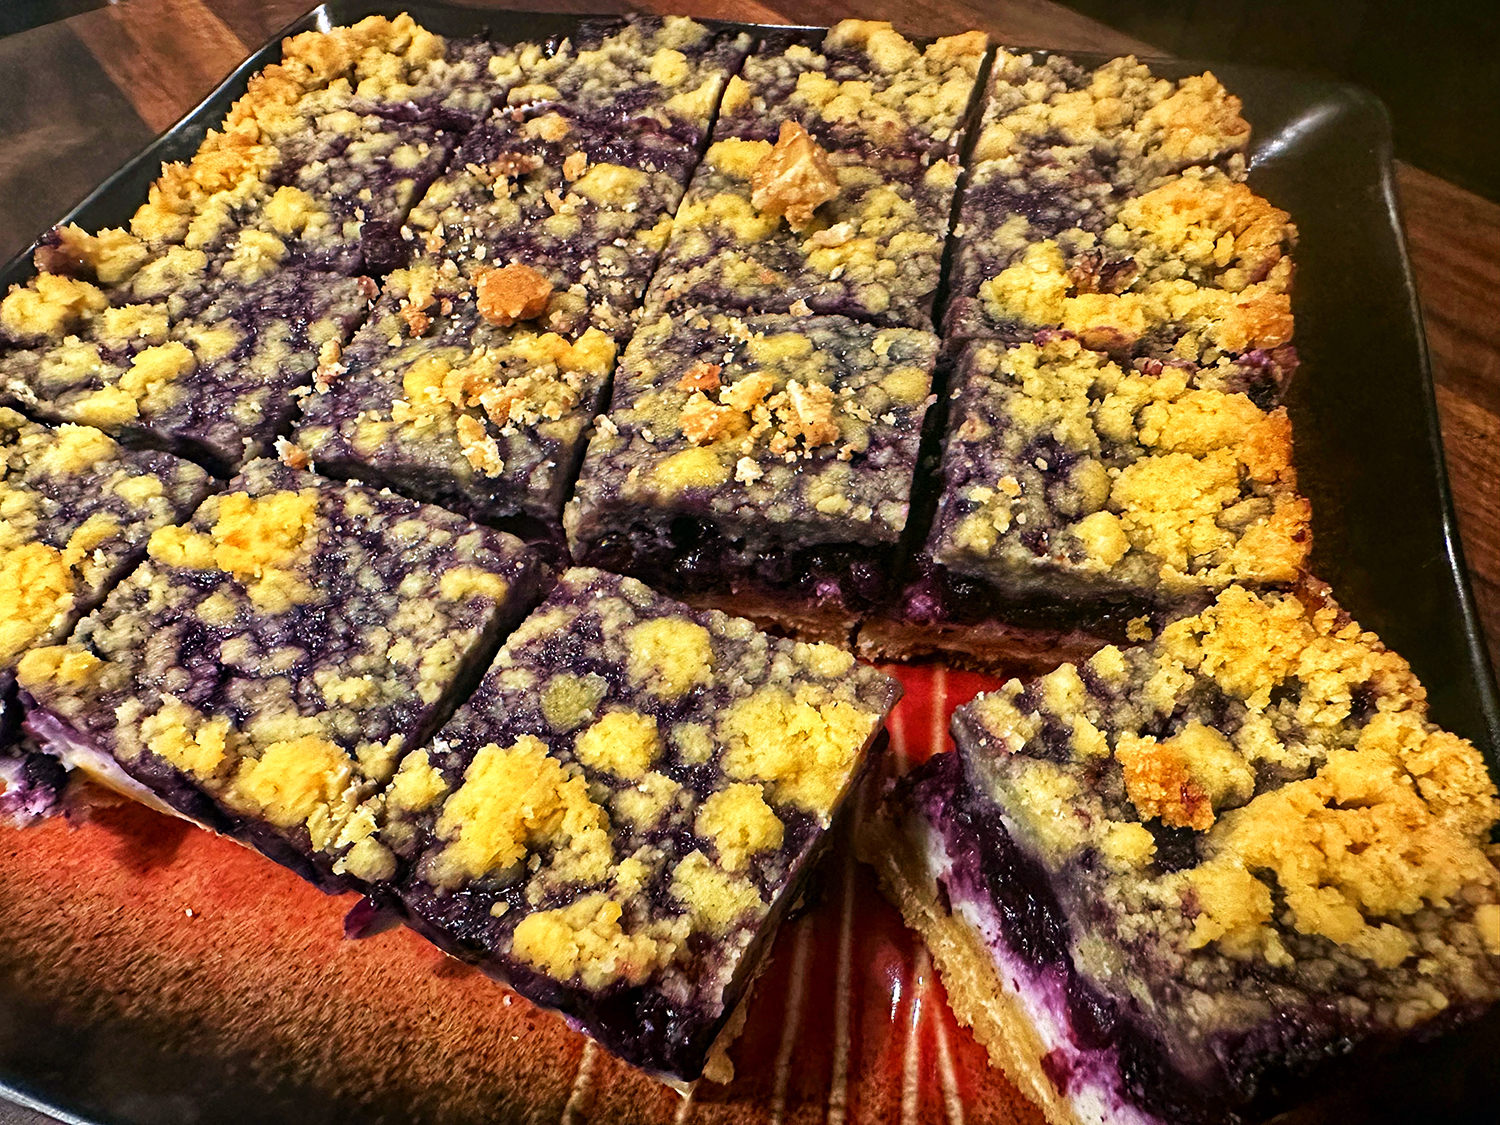
“At first glance, these bars may look like every other fruit crumble bar you’ve had, but they have a secret. Between the jammy fruit and buttery shortbread is a bonus layer of sweetened cream cheese you never knew you needed until now.”
Did you know wild blueberries are less watery than conventional blueberries and have a more concentrated blueberry flavor? They are available frozen and need not be thawed before using, but you can use whichever variety you find. These bars will be delicious no matter what. For a bright note, I incorporated fresh zest from half of a large lemon into the cream cheese filling.
There are so many store-bought shortbread cookie varieties to choose from, and they make the recipe easier than making shortbread from scratch. But if that’s your thing, by all means, go for it. You’ll need about 1 pound total of shortbread cookies such as Lorna Doone, Walkers, Kirkland brand, Trader Joe’s Vanilla Wafers, etc.
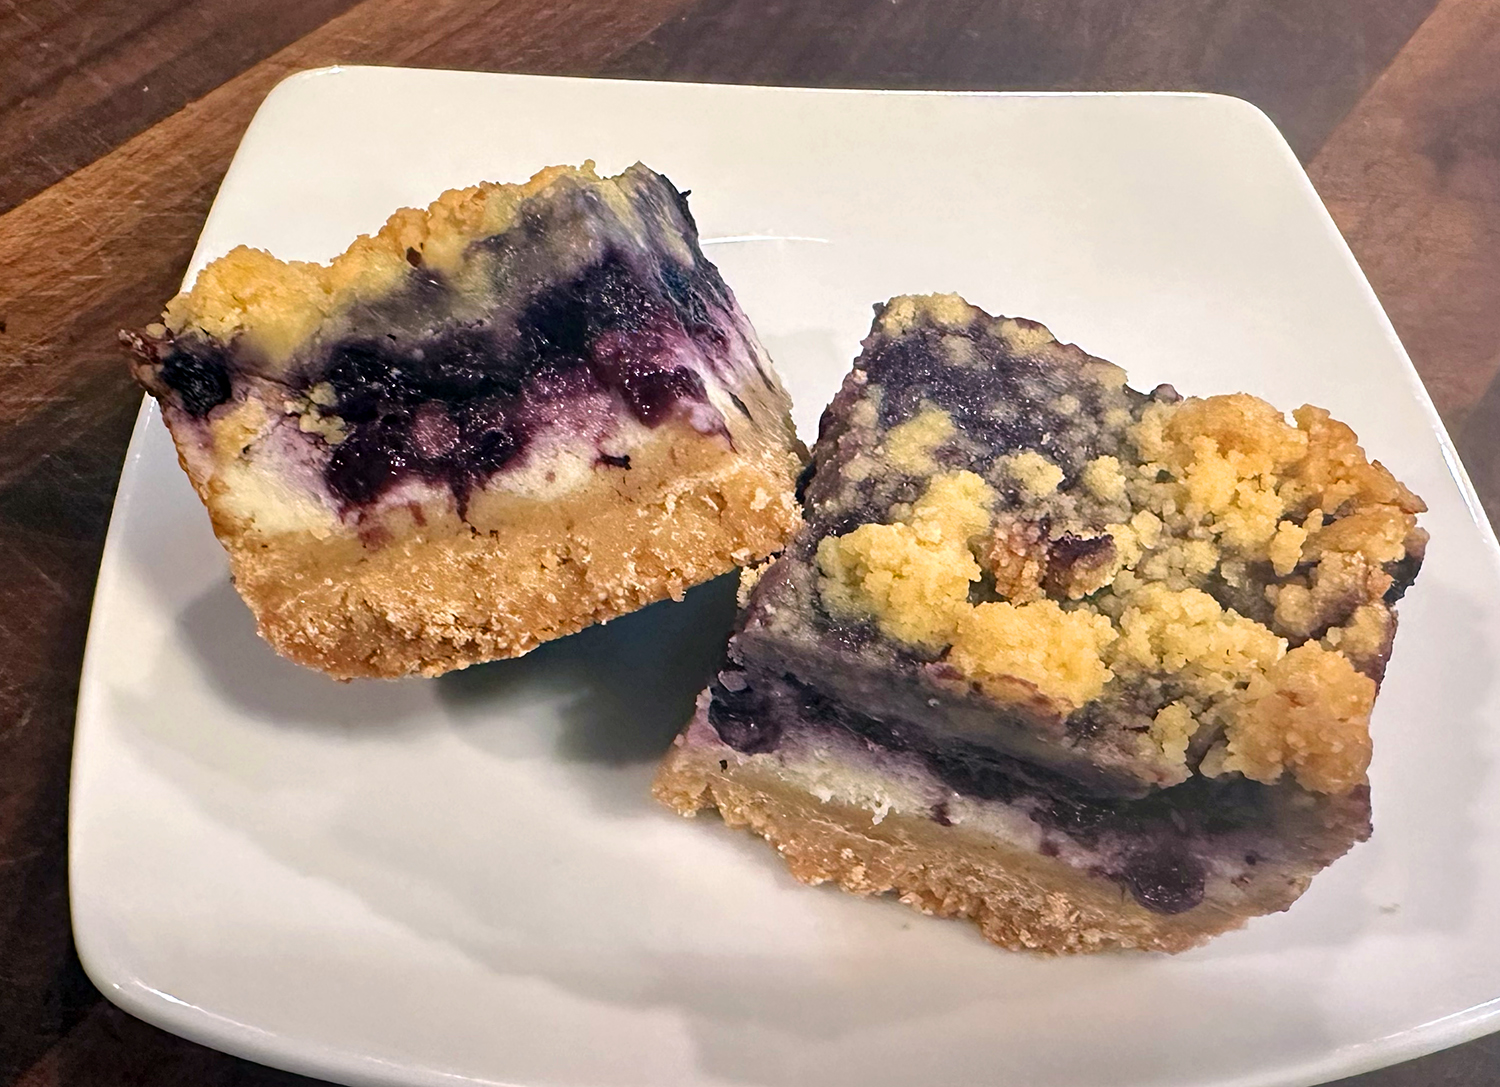
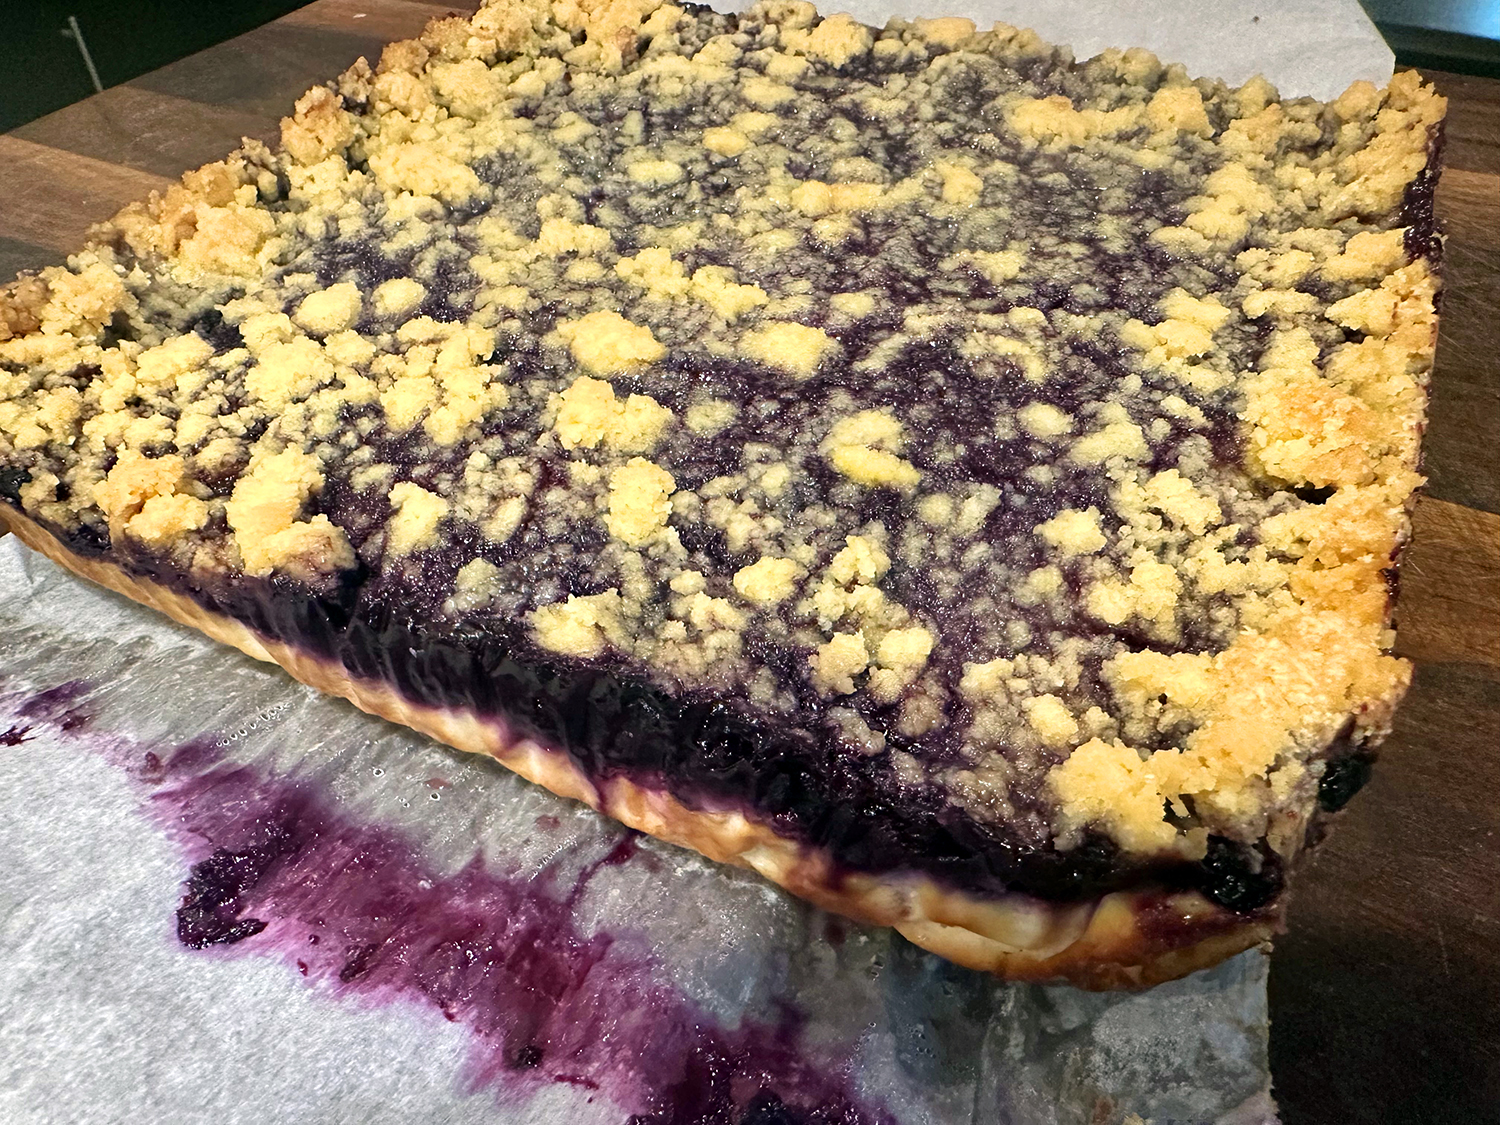
I let them cool completely on the rack (about 3-4 hours). Then I wrapped the pan with plastic wrap and refrigerated the pan overnight before slicing the 2 edges along the glass with a knife to loosen, lifting them out with the parchment overhang, then cutting into 16 even squares.
Blueberry Pie Bars
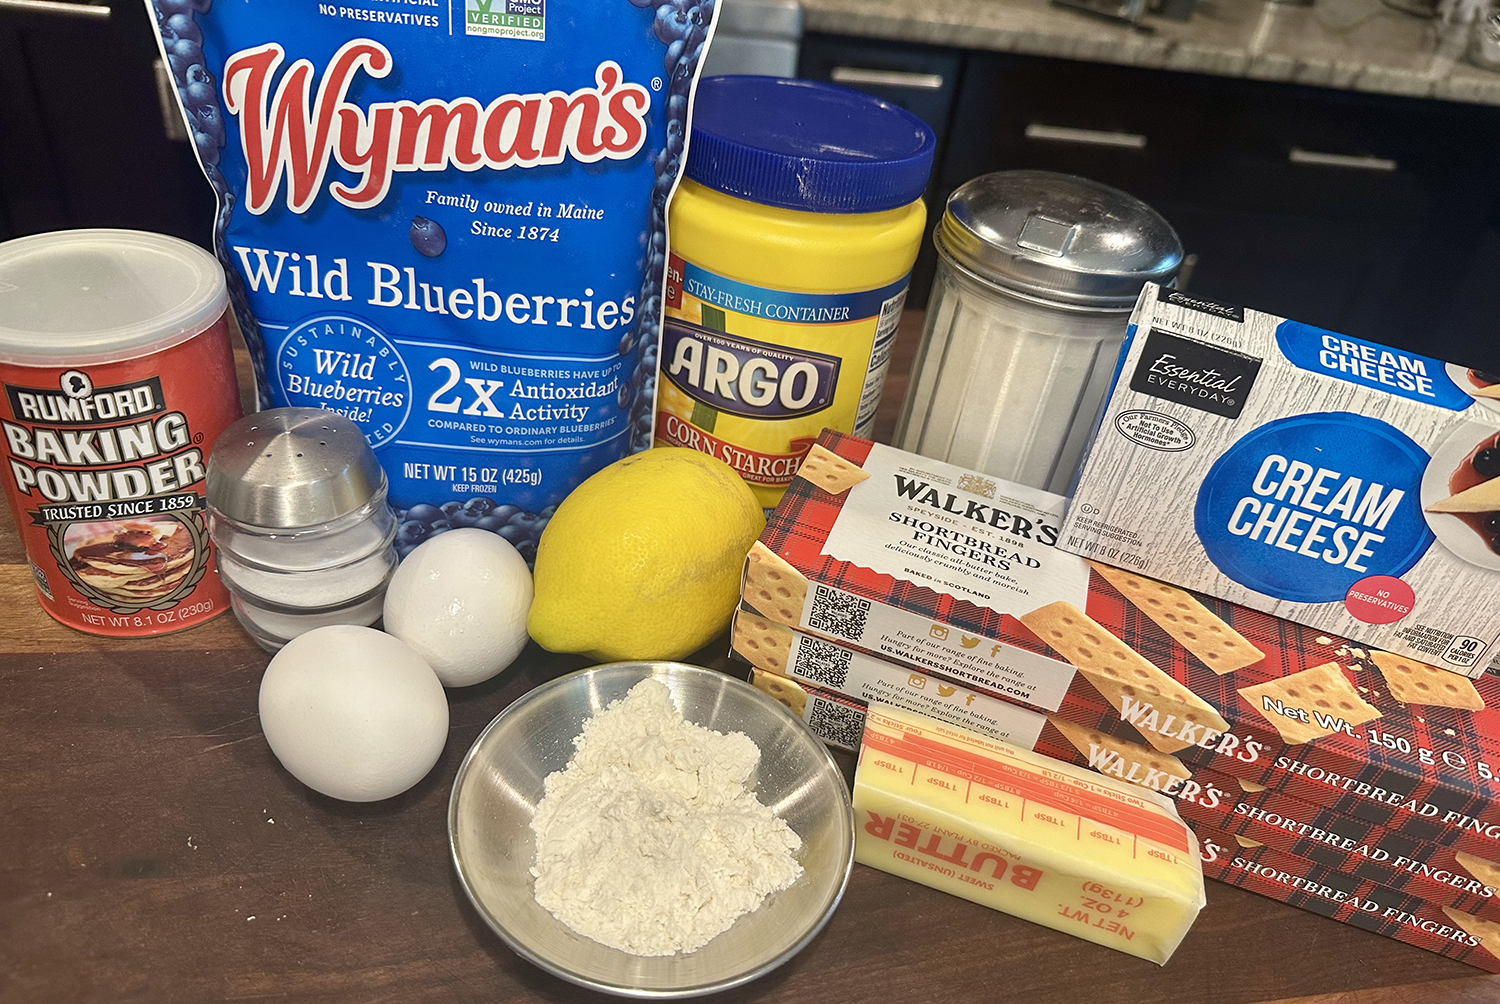
Ingredients
For the Crust:
- 10 ⅔ oz. shortbread cookies (2, 5.3-oz packages)
- 3 Tbsp. granulated sugar
- 1 Tbsp. all-purpose flour
- ½ tsp. kosher salt
- 4 Tbsp. unsalted butter (½ stick), melted


For the Fillings:
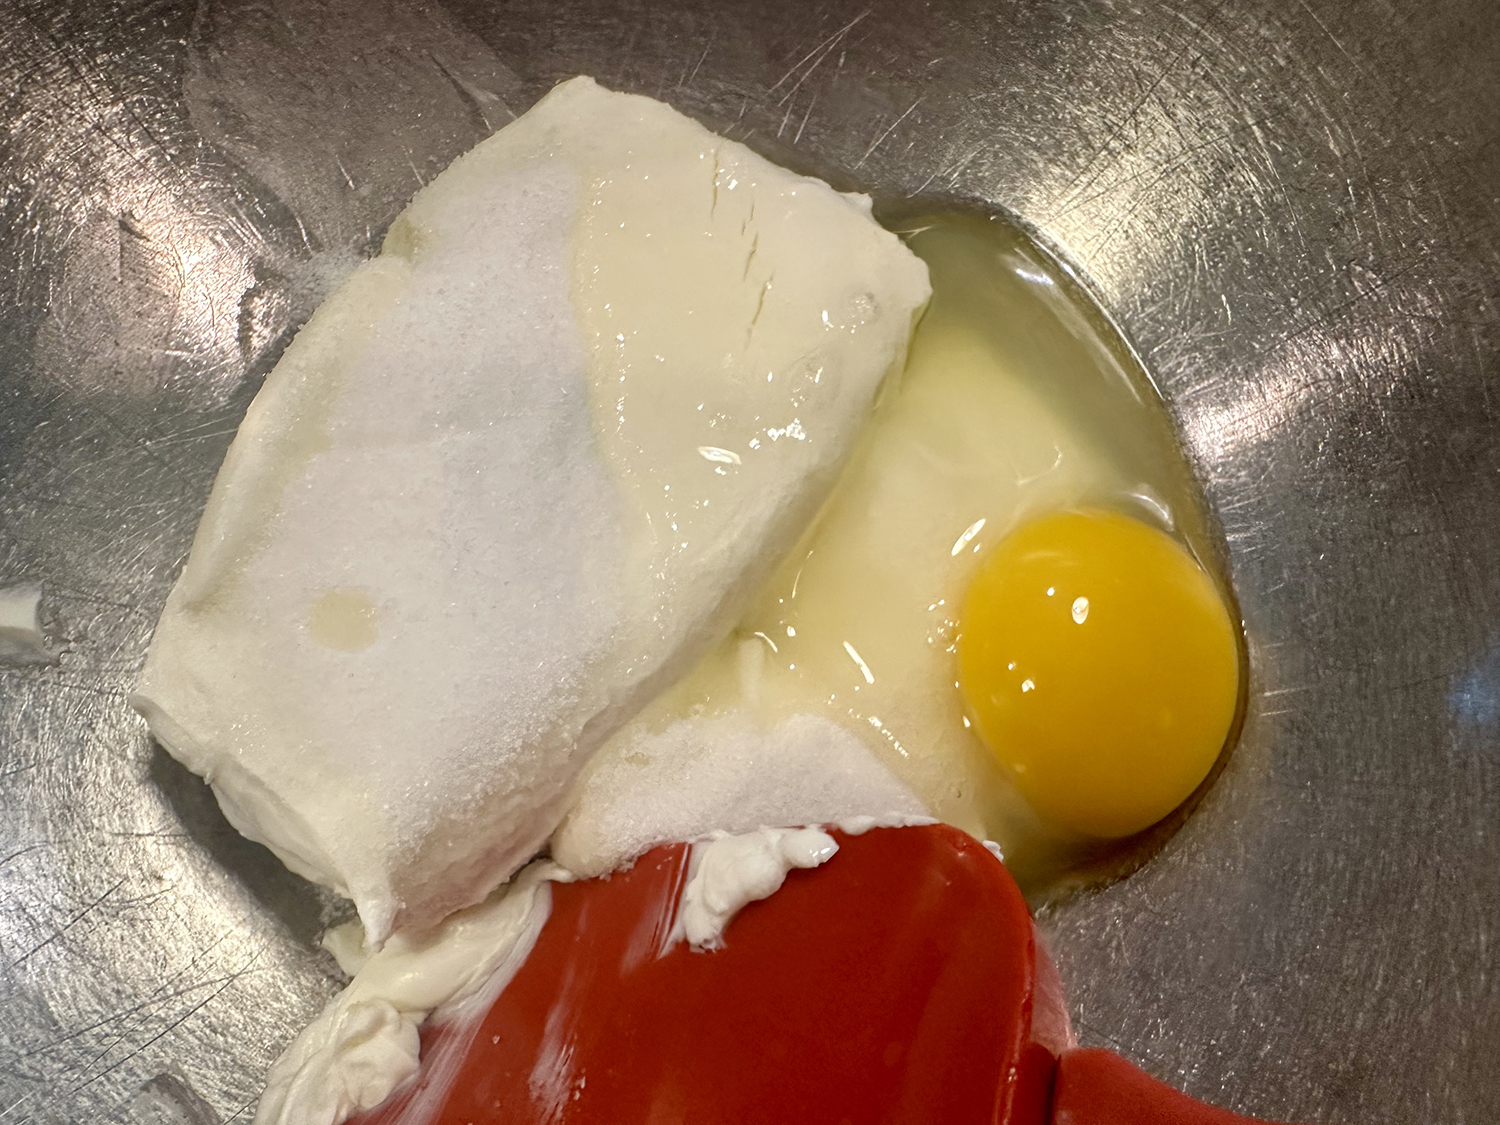
- 8 oz. cream cheese, at room temperature
- 1 tsp. lemon zest
- ¼ cup plus ⅓ cup granulated sugar
- 1 large egg
- 3 cups (12 oz.) wild blueberries, fresh or frozen, but not thawed
- 1 Tbsp. cornstarch
- Pinch of kosher salt


For the Topping:
- 5 ⅓ oz. shortbread cookies (1, 5.3-oz. package)
- 1 Tbsp. all-purpose flour
- ¼ tsp. kosher salt
- ½ tsp. baking powder
- 1 Tbsp. granulated sugar
- 2 Tbsp. unsalted butter, at room temperature
- 1 large egg yolk


Directions
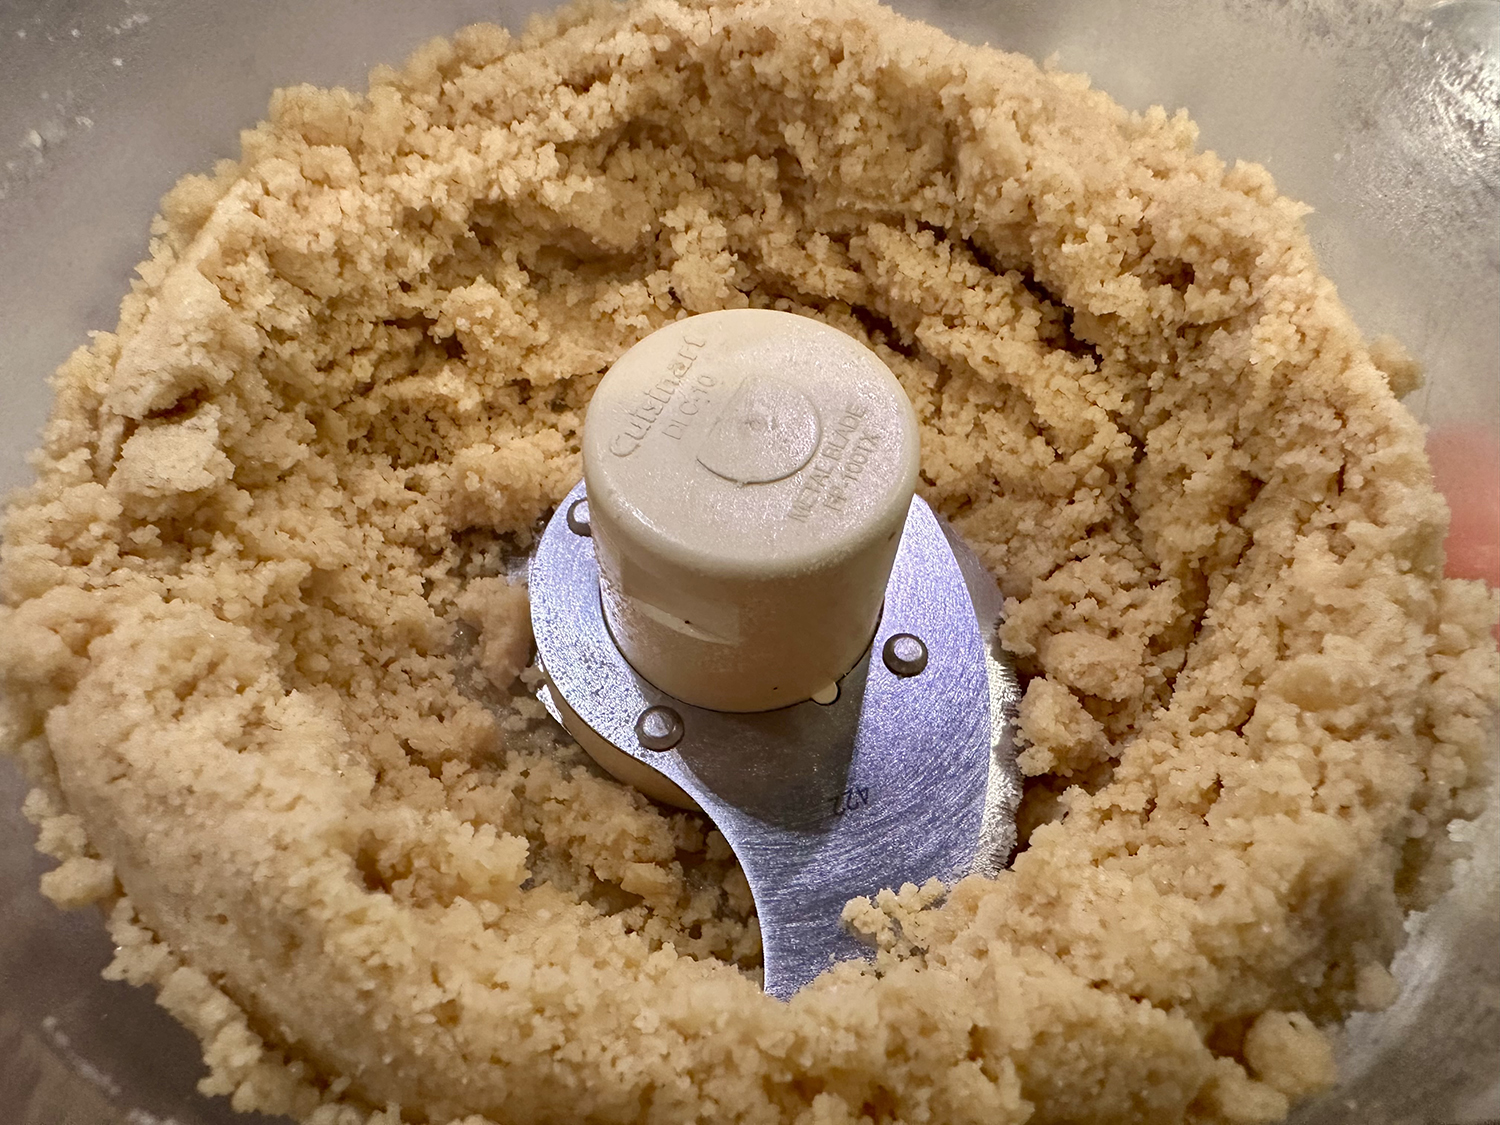
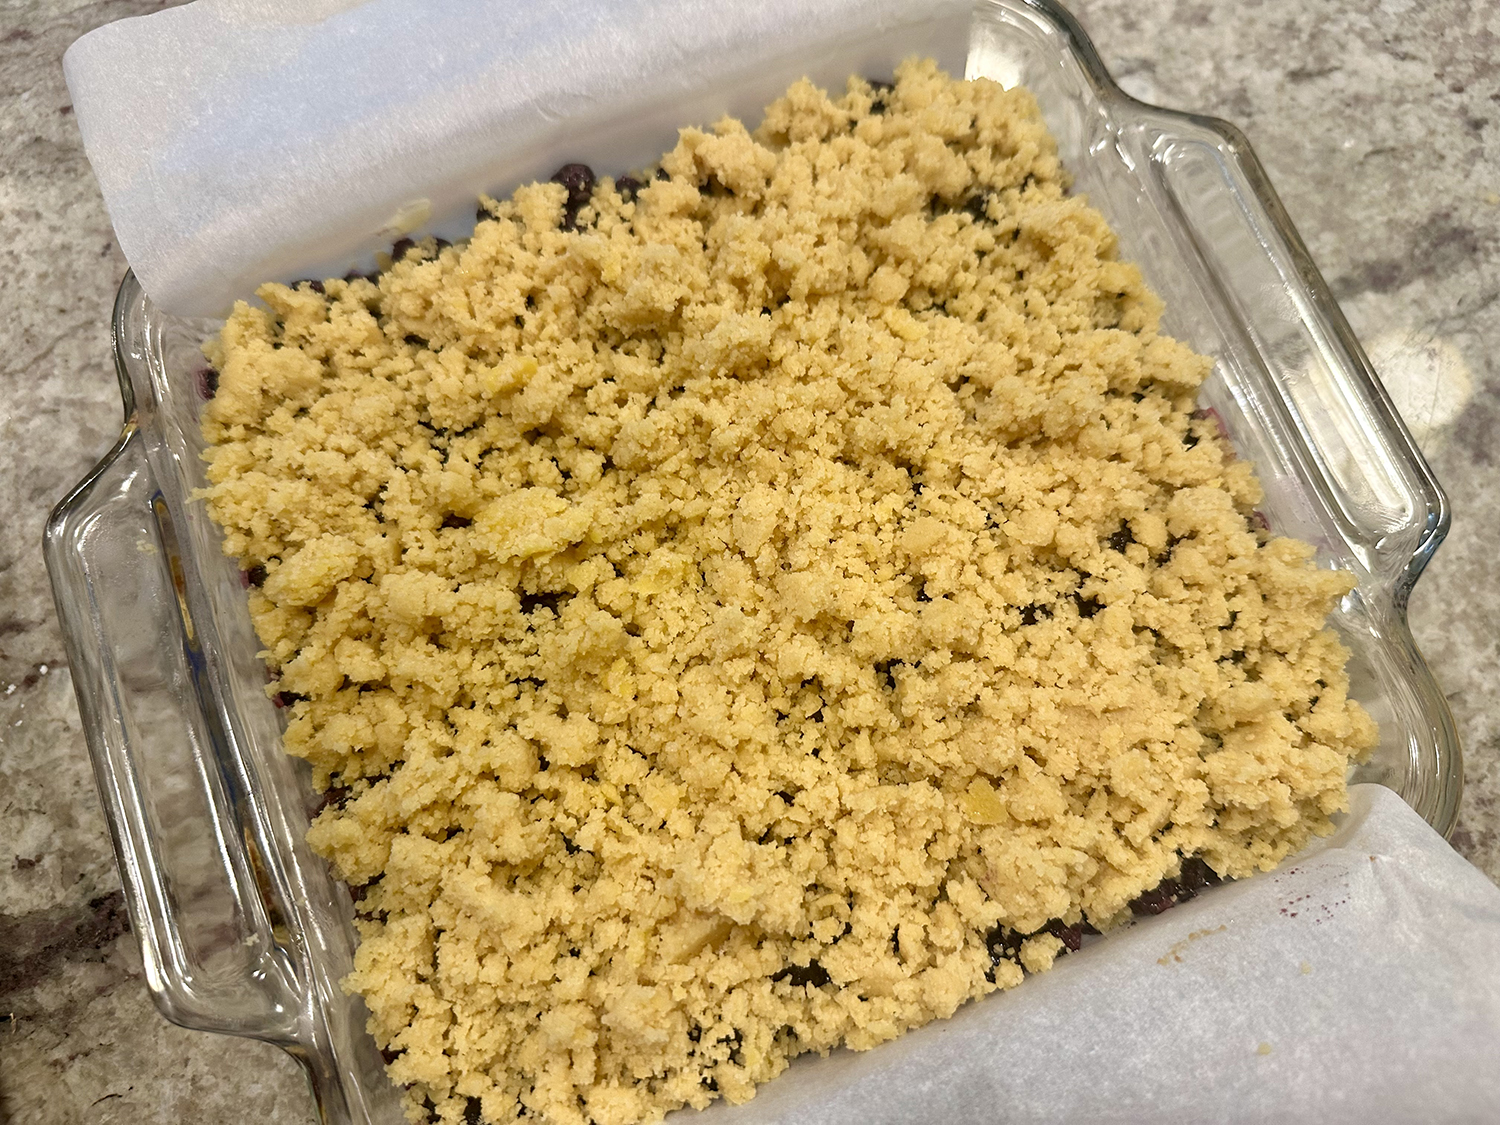
- Heat oven to 350 degrees. Line a 9-inch square pan with parchment paper, leaving a 2-inch overhang on two sides. In a food processor, combine shortbread cookies, sugar, flour and salt and pulse until you have fine crumbs. Add butter and pulse until crumbs are evenly moistened. Transfer mixture into the prepared pan and press down into an even layer. Bake until fragrant and a shade darker, about 20 minutes.
- Meanwhile, prepare filling: In a medium bowl, add cream cheese, lemon zest, ¼ cup of sugar and 1 egg and mix until smooth. In a separate medium bowl, add blueberries, remaining ⅓ cup sugar, cornstarch and salt, and toss to combine.
- Prepare topping: In a food processor, combine shortbread, flour, salt, baking powder and sugar and pulse to combine. Add butter and egg yolk, and pulse until the mixture is evenly moistened.
- Remove crust from oven and top it evenly with cream cheese mixture and then blueberry mixture. Sprinkle topping over blueberry layer, squeezing to make some larger clumps. Bake until filling is set and no longer jiggly, 35 to 40 minutes. (It took 50 minutes for ours to gel.) Transfer to a rack to cool completely then chill (another 3 to 4 hours), then in the refrigerator for at least 1 hour, up to overnight.
- To serve, use a sharp knife to release edges. Using parchment overhang, lift and transfer to a cutting board and cut into 16 squares.
Adapted from a recipe by Samantha Seneviratne for NYTimes Cooking