Tag Archives: main entrée

Potato and Zucchini Spanish Tortilla

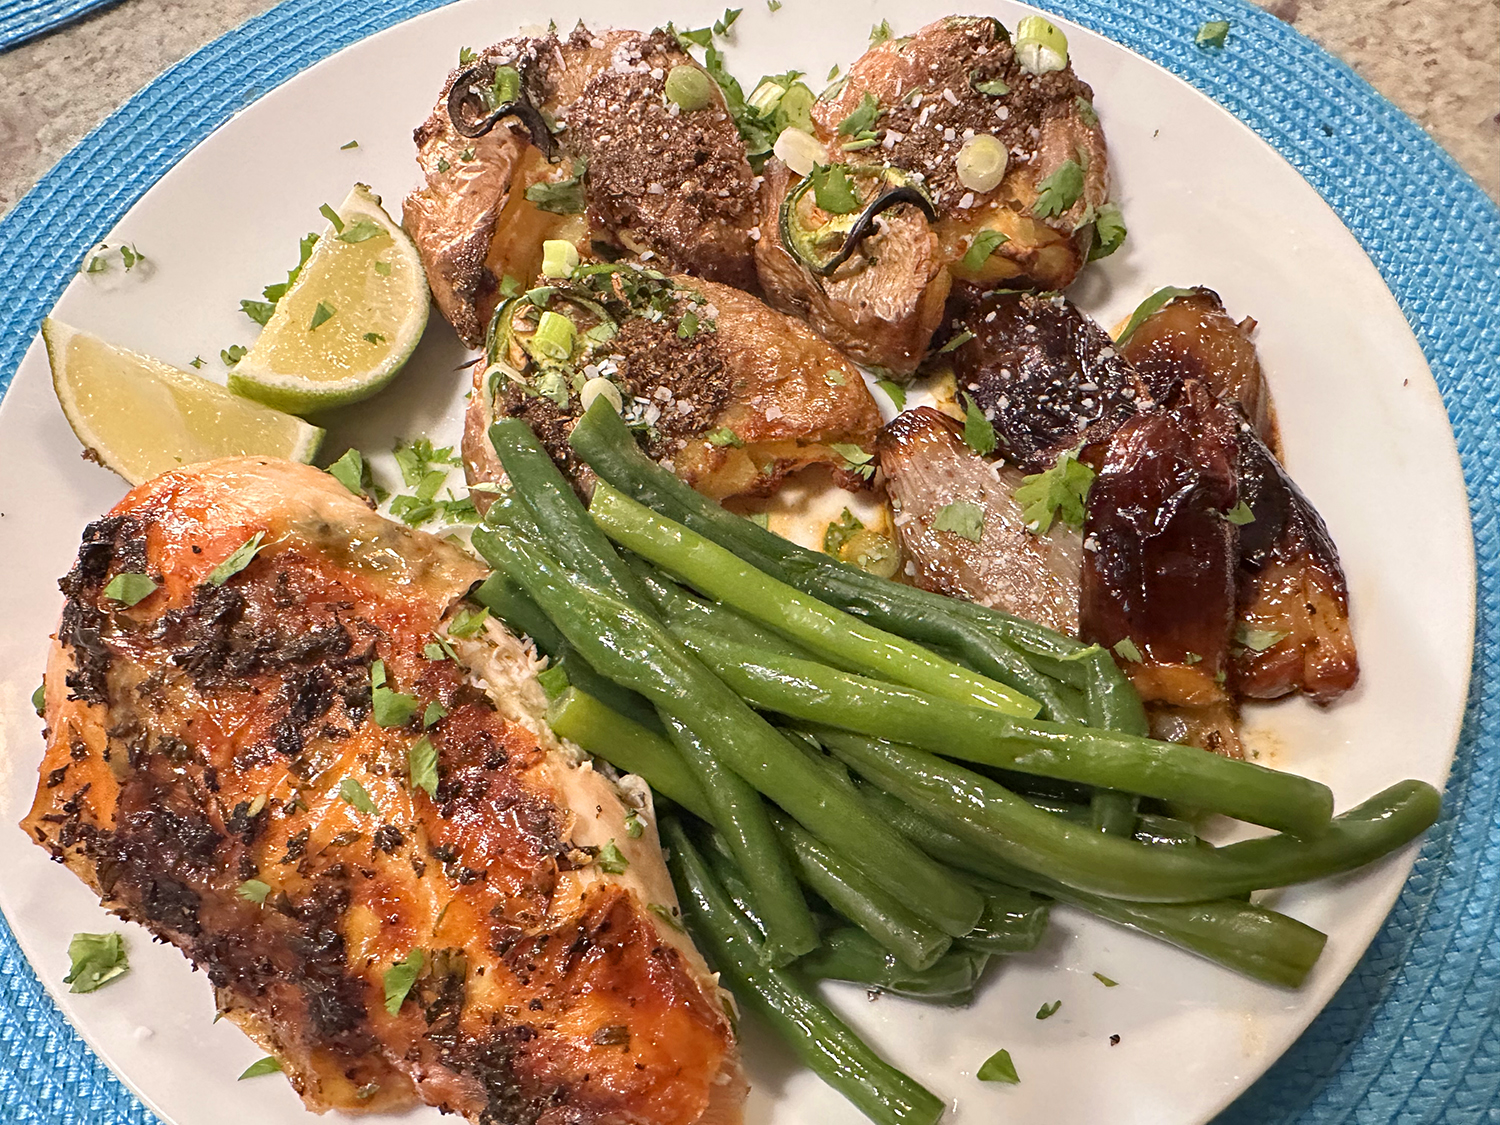
The beauty of this dish, is not only that it is texturally satisfying, but it can be served at any meal in the day as a side dish OR an entrée. We’ve experienced the Spanish tortillas lining the counters at tapa and pintxo bars all over Spain. They’re one of the most beloved and popular dishes in Spanish cuisine and are eaten at any time of day: breakfast, lunch, dinner, on school field trips, after beach excursions…. or just because you’re hungry…

For purists, a Spanish tortilla should only contain 4 ingredients: olive oil, potatoes, eggs, and salt. Personally, onion is a must but in this recipe zucchini is also added, which ends up melting into the potatoes creating a velvety dish. The trick to creamy tortilla is to use lots of olive oil—more than what you would ever think you need.

According to America’s Test Kitchen (ATK), it is about poaching the potatoes and zucchini in the oil and not really frying to a crisp. The potatoes and zucchini will absorb some of the oil, but a lot of it will get drained after they are cooked (leftover oil can be reused after straining so it doesn’t go to waste). Everything gets mixed with eggs and is given a quick scramble in the pan, then it’s flipped, using a plate, and finished with a quick stint in the pan on the second side.

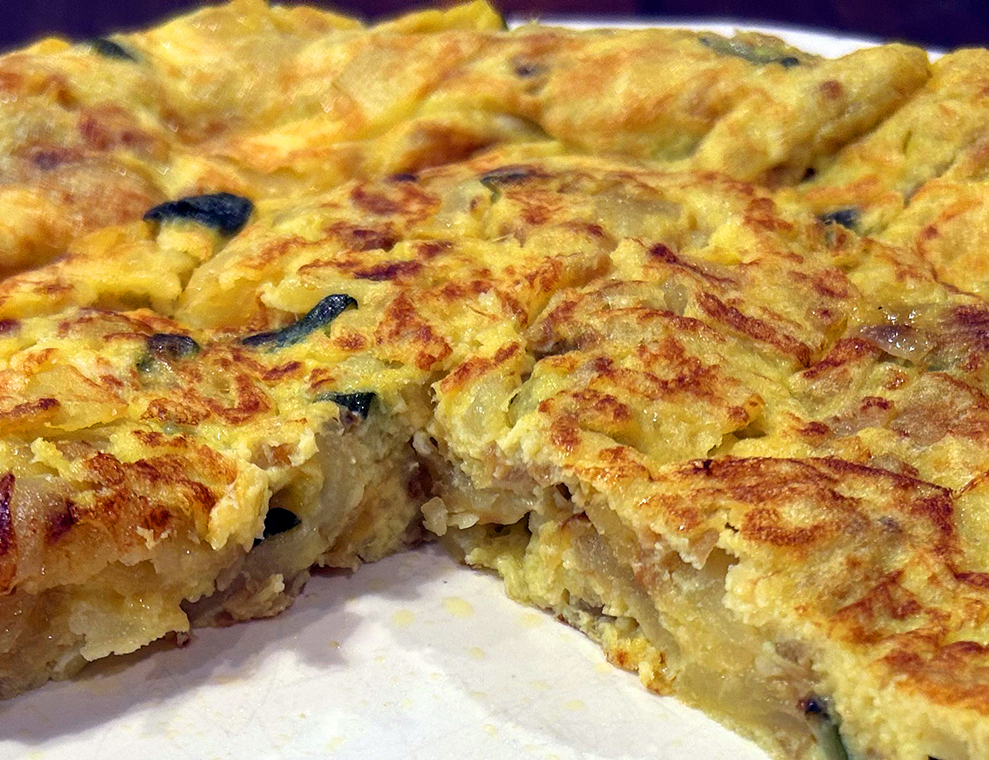
In Spain, a true tortilla should have a soft and creamy interior and exterior that is light in color. It should not be cooked through or deeply caramelized on the outside, but of course, you can cook it a bit longer to your liking. Loved it! As melt-in-your-mouth tender as the ones they serve in Spain.

NOTES: It is best to wait a few minutes before cutting into it as it will set a bit more with carryover cooking. It is important to use a nonstick pan so the tortilla slides easily out of it. 

Potato and Zucchini Spanish Tortilla

  • Servings: 4
  • Difficulty: easy
  • Print

Ingredients

  • 1 cup extra-virgin olive oil
  • 1 small onion, chopped fine
  • 1 lb. Yukon gold potatoes, peeled, halved lengthwise and sliced crosswise 1/8-inch thick
  • 8 oz. zucchini, cut into 1/2-inch pieces
  • 1 1/4 tsp. table salt, divided
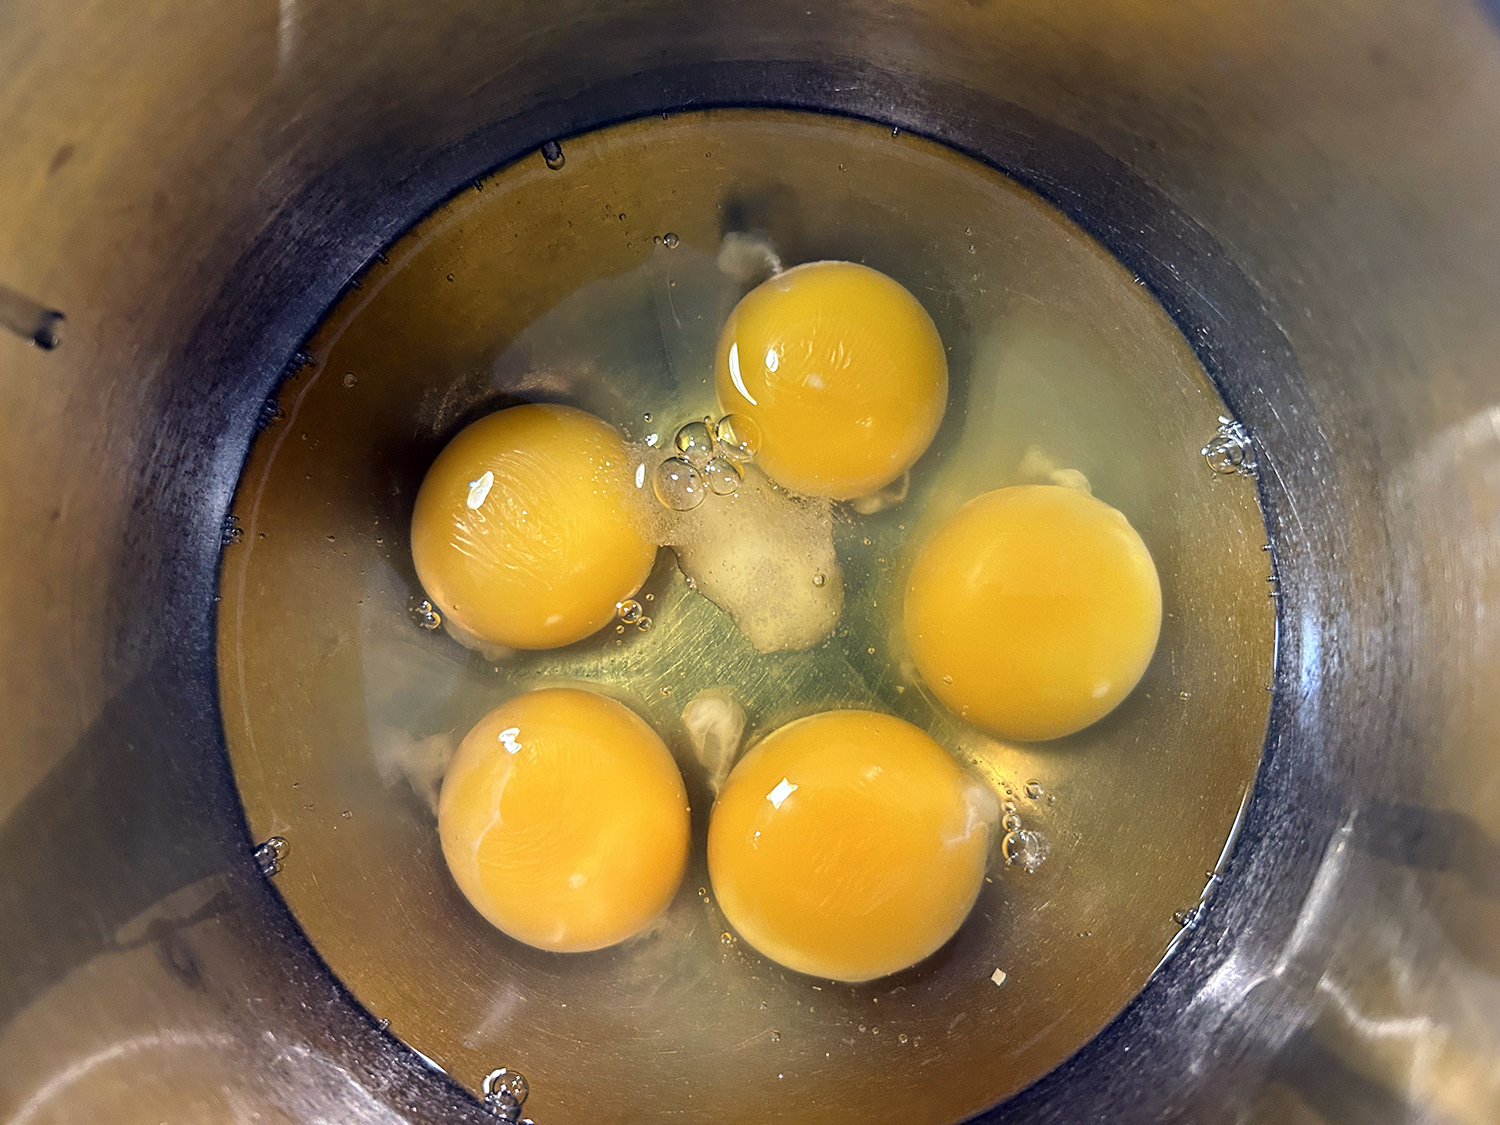
  • 5 large eggs

Directions

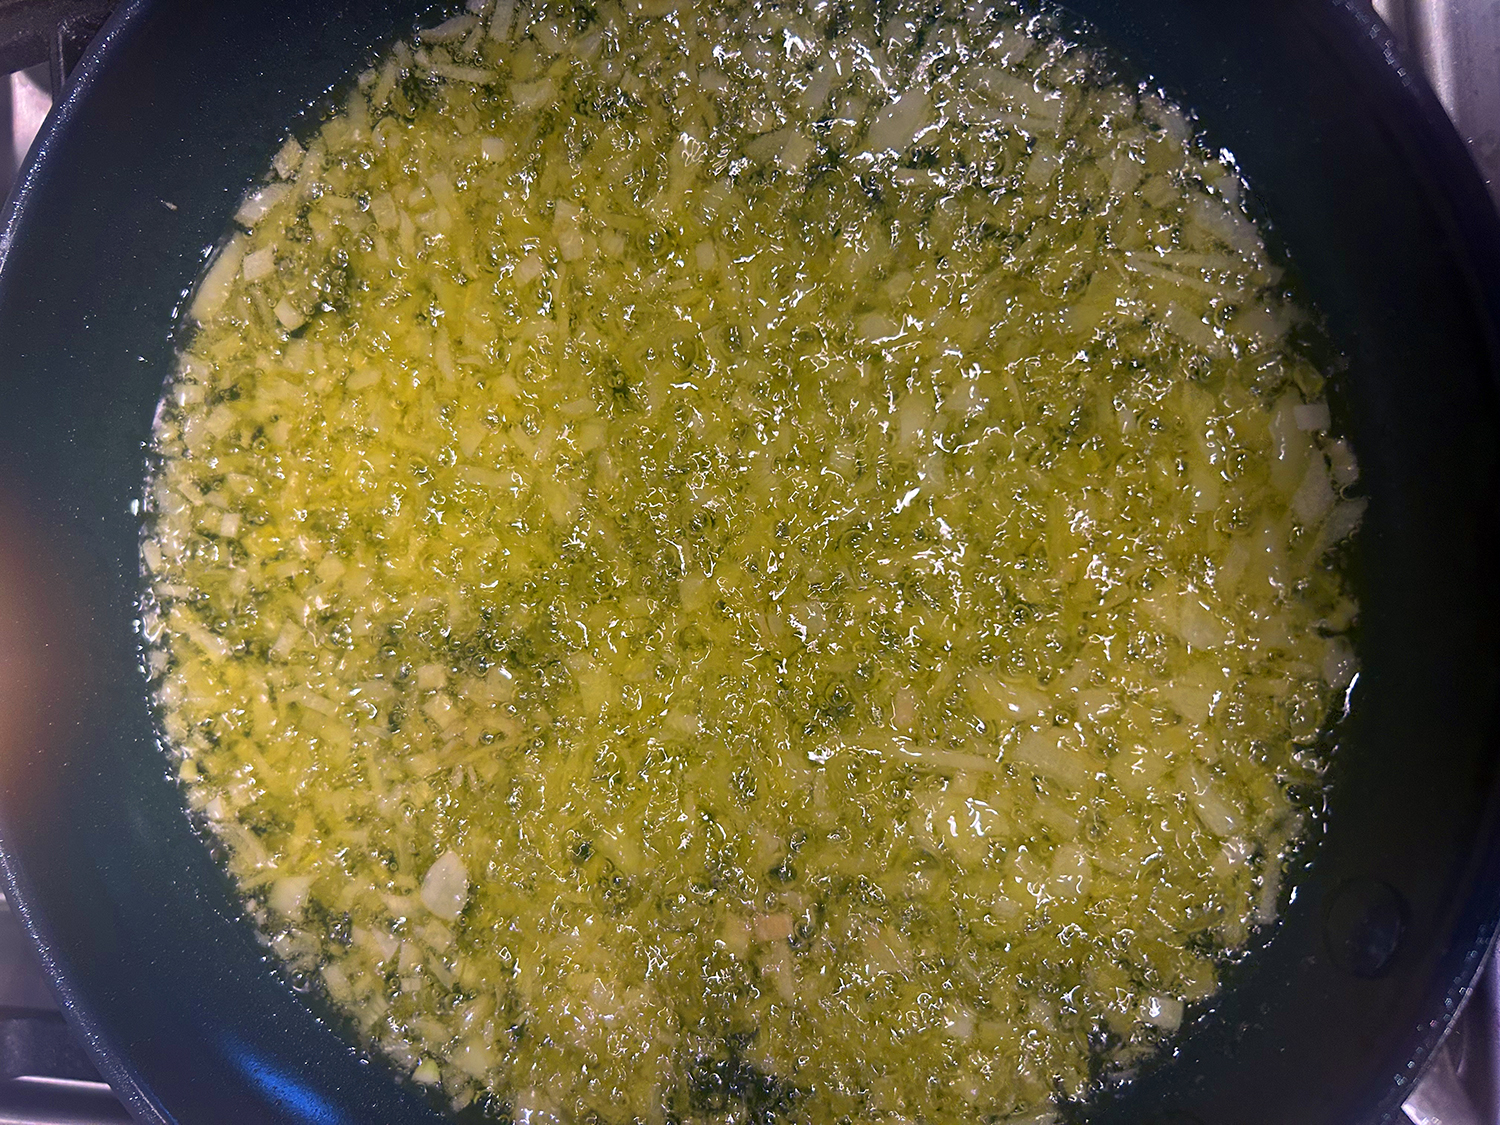
  1. Heat 1 cup extra-virgin olive oil in 10-inch nonstick skillet over medium heat until shimmering. Add 1 small finely chopped onion and cook until just softened but not browned, 3 to 5 minutes.
  2. Stir in 1 pound Yukon gold potatoes (peeled, halved lengthwise, and sliced crosswise into ⅛-inch-thick pieces), 8 ounces chopped zucchini, and ¾ teaspoon table salt. Compress vegetables to submerge in oil as much as possible (it’s OK if vegetables aren’t fully submerged; as they cook they will shrink and become submerged). Cook until potatoes and zucchini are very tender and lightly caramelized, 25 to 30 minutes, stirring occasionally (zucchini should be falling apart). Remove from heat.
  3. Whisk 5 large eggs and remaining ½ teaspoon table salt together in large bowl. Strain vegetable-oil mixture through fine-mesh strainer set over clean bowl. Transfer vegetables to bowl with eggs, stirring to combine, and set strained oil aside.
  4. Heat 1 tablespoon strained oil in now-empty skillet over medium heat until shimmering. Add egg-vegetable mixture and cook, stirring center to scramble eggs lightly, until edges are set, about 1 minute. Run rubber spatula along edges of pan, then shake skillet gently to loosen tortilla from skillet. Cook for additional 1 to 2 minutes until set but not browned.
  5. Remove skillet from heat. Run rubber spatula along edges of pan, then shake skillet gently to loosen tortilla from skillet. Place large flat plate over tortilla in skillet and, holding plate with 1 hand and skillet handle with your second hand, invert skillet to transfer tortilla to plate. Slide tortilla back into now-empty skillet, tucking edges of tortilla as needed around perimeter of skillet, and cook over medium-high heat until second side is just set, 1 to 2 minutes.
  6. Gently slide tortilla onto serving plate and let rest for 10 minutes. Serve warm or at room temperature, drizzling with extra strained oil if desired.

http://www.lynnandruss.com

Recipe by Aran Goyoaga for America’s Test Kitchen’s Cooks Country

Pan-Seared Sesame-Crusted Tuna Steaks

There was a good sale on tuna steaks at our favorite supermarket a few weeks back, even though tuna was not on our short list for the week’s meals. But we repackaged them for future use and placed them in the freezer. A few weeks later we remembered we had the tuna and found a perfect recipe from America’s Test Kitchen.

Problem was, the recipe was for 4 people, which in normal cases, typically is not an issue because we will eat them for lunch the next day. No problem, we just cut the recipe in half, including the ginger soy sauce.

The fact that there are minimal ingredients, and takes very little time for prep and cooking, makes it a winner-dinner for mid-week. Paired with a side dish of Soy-Braised Baby Bok Choy, we enjoyed a tasty, healthy and quick dinner.

Pan-Seared Sesame-Crusted Tuna Steaks

  • Servings: 4
  • Difficulty: easy
  • Print

Ingredients

  • ¾ cup sesame seeds
  • 4 tuna steaks, 8 oz. each and about 1 inch thick
  • 2 Tbsp. vegetable oil
  • Salt and ground black pepper

Directions

  1. Spread sesame seeds in shallow baking dish or pie plate. Pat tuna steaks dry with paper towel; use 1 tablespoon oil to rub both sides of steaks, then sprinkle with salt and pepper. Press both sides of each steak in sesame seeds to coat.
  2. Heat remaining 1 tablespoon oil in 12-inch nonstick skillet over high heat until just beginning to smoke; swirl to coat pan. Add tuna steaks and cook 30 seconds without moving steaks. Reduce heat to medium-high; continue to cook until seeds are golden brown, about 1 1/2 minutes.
  3. Using tongs, carefully flip tuna steaks; cook, without moving steaks, until golden brown on second side, about 1 1/2 minutes for rare (opaque at perimeters and translucent red and cool at center when checked with tip of paring knife) or 3 minutes for medium-rare (opaque at perimeters and reddish pink at center). To serve, cut into 1/4-inch-thick slices.

Ginger Soy Sauce with Scallions

This savory sauce flavored with fresh ginger and scallions is the perfect accompaniment for our Pan-Seared Sesame-Crusted Tuna Steaks.

Ingredients

  • ¼ cup soy sauce
  • ¼ cup rice vinegar
  • ¼ cup water
  • 2 ½ tsp. sugar
  • 1 medium scallion, sliced thin
  • 2 tsp. minced fresh ginger
  • 1 ½ tsp. toasted sesame oil
  • ½ tsp. red pepper flakes

Directions

Combine all ingredients in a small bowl, stirring to dissolve sugar.

http://www.lynnandruss.com

Chili-Spiced Chicken Thighs and Potatoes

Chicken thighs have plenty of flavorful juices and fat, but they don’t release them until the meat is almost done, which is far too late to be helpful in roasting your potatoes. To better utilize the fat from the chicken, trim the thighs well and roast the trim on its own to render its fat.

Meanwhile, slash the flesh side of the thighs and cover them with a simple spice mix, taking care to get the mixture deep into the slashes. To ensure that the potatoes absorb all the savory juices thrown off by the roasting chicken thighs, parboil the spuds with baking soda. Its alkalinity quickly breaks down the pectin in the exteriors.

After drying the potatoes briefly, stir them vigorously with the fat rendered from the chicken trim and some kosher salt. The salt roughed up the exteriors, creating plenty of entry points for the flavorful chicken juices to suffuse the spuds as they roasted. Starting the potatoes lower in the oven provides plenty of bottom heat to jump-start browning. After adding the chicken, move the sheet up in the oven where the plentiful top heat ensures that the chicken skin becomes crisp. Sliced scallion and a spritz of citrus provides fresh flavor that complements the richness of the potatoes and chicken.

Chicken thighs are very forgiving in terms of doneness, so don’t worry if yours are different sizes. Use Yukon Gold potatoes here, but you can substitute russets if that’s what you have on hand.

Chili-Spiced Chicken Thighs and Potatoes

  • Servings: 4-6
  • Difficulty: easy
  • Print

Ingredients

  • 3½ tsp. kosher salt, divided
  • 1 tablespoon chili powder
  • 1 tsp. paprika
  • ½ tsp. pepper
  • ½ tsp. garlic powder
  • ¼ tsp. cayenne pepper
  • 3 lbs. bone-in chicken thighs
  • 3 lbs. Yukon gold potatoes, peeled and cut into 1-inch pieces
  • ½ tsp. baking soda
  • 1 scallion, sliced thin on bias
  • lime wedges

Directions

  1. Adjust oven racks to lowest and top positions and heat oven to 450 degrees. Combine 1½ teaspoons salt, chili powder, paprika, pepper, garlic powder, and cayenne in small bowl. Bring 2 quarts water to boil in Dutch oven.
  2. Place 1 thigh skin side down on cutting board. Cut away any pockets of fat and any skin that extends beyond meat and reserve trim. Make three ½-inch-deep slits in flesh parallel to bone. Turn skin side up. Repeat with remaining thighs. Using tip of paring knife, poke skin of each thigh 8 to 10 times. Sprinkle 1½ teaspoons spice mixture evenly over skin of thighs. Turn thighs over and sprinkle remaining spice mixture over flesh side. Rub mixture into slits.
  3. Place 1 thigh skin side down on cutting board. Cut away any pockets of fat and any skin that extends beyond meat and reserve trim. Make three ½-inch-deep slits in flesh parallel to bone. Turn skin side up. Repeat with remaining thighs. Using tip of paring knife, poke skin of each thigh 8 to 10 times. Sprinkle 1½ teaspoons spice mixture evenly over skin of thighs. Turn thighs over and sprinkle remaining spice mixture over flesh side. Rub mixture into slits.
  4. Scatter trim over surface of rimmed baking sheet. Roast on lower rack until trim is mostly crisped and fat is rendered, 8 to 10 minutes. Discard trim and leave fat in baking sheet. While trim is rendering, add potatoes and baking soda to boiling water and return to boil. Boil for 2 minutes and drain well. Return potatoes to Dutch oven and place over low heat. Cook, shaking pot occasionally, until any surface moisture has evaporated, about 2 minutes. Remove from heat.
  5. Add rendered fat and remaining 2 teaspoons salt to potatoes and stir with rubber spatula until potatoes are coated with starchy paste, about 30 seconds. Transfer potatoes to now-empty sheet pan and spread into even layer. Roast on lower rack until undersides of potatoes are brown and crisp, about 15 minutes.
  6. Using thin metal spatula, flip potatoes. Push potatoes aside to clear 1 space for each thigh. Place thighs skin side up in cleared spaces. Roast on upper rack until chicken is browned and crisp and largest thigh registers at least 185 degrees, 25 to 30 minutes, rotating pan halfway through roasting.
  7. Transfer thighs to platter to rest. Stir potatoes to coat with any remaining liquid and spread over surface of baking sheet. Return pan to upper rack and roast until potatoes are mostly dry, about 5 minutes. Transfer to platter with chicken and sprinkle potatoes with scallion. Serve, passing lime wedges separately.

http://www.lynnandruss.com

Recipe by Andrea Geary for America’s Test Kitchen

Sausage-Stuffed Butternut Squash

Sausage Stuffed Butternut Squash is a Fall comfort food that features Italian sausage, pecans, cranberries, and spinach. This flavorful family-friendly dinner is packed with veggies, fiber, and protein, and is gluten-free. It’s simple enough to make on a weeknight (although it takes a bit more than an hour), and perfect to serve as a side dish or main course.

This flavorful comfort food dinner will keep you full and you don’t really need anything else to serve with it, although we paired ours with a side salad. It is suggested that you use spicy Italian sausage. We happened to have the sweet variety, so we added red pepper flakes to the mixture. Another change we made was adding a tablespoon of grated parmesan on top after the squash has cooked, then popping back into the over for another 10 minutes.

Storage and reheating Tips: Refrigerate. Store the leftovers in an airtight container in the refrigerator for up to 4 days. Freeze. You can easily freeze this dish in an airtight container for up to 2 months. Reheat. Reheat the squash in the preheated oven at 350 F for about 30 minutes or until all the ingredients are heated through.

Sausage-Stuffed Butternut Squash

  • Servings: 4 as a main; 8 as a side
  • Difficulty: easy
  • Print

Ingredients

Roasted Butternut Squash

  • 2 butternut squash medium or large
  • 2 Tbsp. olive oil
  • ¼ tsp. salt or more
  • Black pepper freshly ground

Sausage filling

  • 1 Tbsp. olive oil
  • 1 onion small, diced
  • 14 oz. Italian spicy sausage, crumbled
  • 4 cloves garlic minced
  • 1 Tbsp. Italian seasoning
  • 5 oz. fresh spinach
  • ½ cup dried cranberries
  • ½ cup pecans chopped
  • ¼ grated Parm, divided

Directions

How to roast butternut squash

  1. Preheat oven to 400 F.
  2. Slice the the butternut squash in half lengthwise. Use a spoon to scoop out the seeds and fleshy strands tangled with the seeds.
  3. Place butternut squash cut sides up on a baking sheet. Drizzle the cut sides of the butternut squash halves with olive oil and rub the oil into the squash. Season generously with salt and pepper.
  4. Turn the squash halves over, and place it cut sides down on a baking sheet.  Tip: you can line the baking sheet with parchment paper for easy clean-up.
  5. Roast in the preheated oven at 400 F for about 40 minutes.

Make sausage filling

  1. Make the sausage filling while the squash is being roasted in the oven.
  2. In a large skillet, heat olive oil, add diced onion, and cook it on medium-high heat for about 4-5 minutes until cooked and a bit charred.
  3. Add crumbled sausage, minced garlic, and Italian seasoning and cook for about 5 minutes or more on medium heat until the sausage is completely cooked through.
  4. Add fresh spinach and cook for another 5 minutes on medium heat until the spinach wilts.
  5. Add dried cranberries and chopped pecans and mix everything.
  6. Season with salt and pepper, if needed.

Assembly

  1. By this time, you have roasted the butternut squash for 40 minutes. Remove them from the oven and turn the cooked squash halves cut sides up.
  2. Let it cool slightly. Using a spoon, scoop out the flesh leaving about a 1-inch border along the sides. Add the scooped up flesh to the meat mixture, and stir in well.
  3. Divide the sausage filling among the 4 halves and stuff the squash until the mixture is a little bit higher than level.
  4. Top top each with one tablespoon grated parmesan, and pop back into the oven for 10 minutes. Serve immediately.

http://www.lynnandruss.com

Adapted from a recipe from Juliasalbum.com

Roast Tarragon-Cognac Chicken

Chef/author Melissa Clark tell us “The sophisticated, French flavors of brandy, butter and tarragon season this golden-skinned roast chicken, adding panache to what is otherwise an easy and straightforward recipe.”

Nothing like a fabulous meal using a limited number of ingredients. We decided to include about a dozen shallots to surround the poultry and add the beloved allium flavor. As they roast with the chicken, the shallots become all soft and jammy.

Serving the chicken with mashed potatoes or polenta, provide a soft bed to absorb all the heady, buttery juices. But we were jonesing to try the “Gunpowder Potatoes” in this case. If you choose the mashed potatoes idea, go ahead and make a flavorful pan sauce, especially if you add those shallots.

Oh, and if you’re not a tarragon fan, fresh thyme makes an excellent, milder substitute.

Roast Tarragon-Cognac Chicken

  • Servings: 4
  • Difficulty: easy
  • Print

Ingredients

  • 1 4-lb. whole chicken
  • 10-12 shallots, trimmed and peeled
  • 2 tsp. coarse gray sea salt or 2½ teaspoons kosher salt (such as Diamond Crystal)
  • 6 Tbsp. unsalted butter, softened
  • 1 bunch fresh tarragon, leaves and tender stems coarsely chopped (about ¾ cup)
  • 2 Tbsp.s Cognac
  • 1 tsp. freshly ground black pepper

Directions

  1. Pat the chicken dry and salt the bird inside and out. Transfer to a plate or baking dish, preferably on a rack, and refrigerate uncovered for at least 1 hour or overnight. (Ours was in the fridge for 4 hours.)
  2. When ready to cook the chicken, heat the oven to 400 degrees.
  3. In a small bowl, combine butter, tarragon, 1 tablespoon Cognac and the pepper. Rub mixture inside the chicken cavity and over and under the chicken skin.
  4. Place chicken on a rimmed sheet pan or in a large, ovenproof skillet. Roast, breast side up, until the skin is golden and crisp, and the juices run clear when you insert a fork in the thickest part of the thigh (165 degrees), about 1 hour.
  5. Turn off the oven — don’t skip this step, or the Cognac may overheat and catch fire — and transfer the pan with the chicken to the stovetop. Pour the remaining 1 tablespoon Cognac over the bird and baste with some of the buttery pan juices. Immediately return the chicken to the turned-off oven and let rest there for 10 minutes before carving and serving.

http://www.lynnandruss.com

Adapted from a recipe by Melissa Clark for NYTimes Cooking

Chinese Ginger-Soy Braised Pork

There are as many versions of this hong shao rou dish as there are families because recipes for Chinese red-cooked pork vary by region and often are passed down within generations. The up-shot though, is succulent pork coated in savory spiced caramel. And the verdict? In a word, FANTASTIC!!

Dark soy sauce develops a crimson tint with long-cooking, lending hong shao rou its characteristic hue. This Instant Pot iteration from Milk Street omits the condiment, which can be tricky to source, resulting in a dish that’s less red but no less delicious. The pork shoulder is braised with ginger, garlic and warm spices, rounded out by sugar, soy sauce and dry sherry, an easier-to-find alternative to Shaoxing, the rice wine traditionally used in the dish. (We had some Shaoxing on hand.)

Whether pressure- or slow-cooked until fork-tender, the meat is reserved and its aromatic braising liquid is reduced into a sticky-sweet sauce. Assertive and robust in flavor, hong shao rou is best served with plain rice and simple steamed or stir-fried vegetables. So we paired ours with steamed jasmine rice and baby bok choy sautéed with ginger, garlic, Shaoxing rice wine—many of the same ingredients as the pork.

NOTE: Don’t add liquid to the pot other than the ⅓ cup of dry sherry. Allowing the pork to braise in its own juices yields rich, meaty flavor and results in less liquid to reduce to a glaze at the end.

Chinese Ginger-Soy Braised Pork

  • Servings: 4
  • Difficulty: easy
  • Print

Ingredients

  • 1/4 cup white sugar
  • 3 lbs. boneless pork shoulder, trimmed of fat, cut into 1-inch chunks
  • 1 bunch scallions, thinly sliced, whites and greens reserved separately
  • 1/4 cup minced fresh ginger
  • 4 medium garlic cloves, minced
  • 1 cinnamon stick
  • 3 star anise pods
  • 1/3 cup dry sherry or Shaoxing wine
  • 2 Tbsp. soy sauce, preferably dark soy sauce
  • Kosher salt and ground black pepper

Directions

  1. On a 6-quart Instant Pot, select Normal Sauté. Add the sugar and 1 tablespoon water, then cook, stirring occasionally, until the sugar has liquified and is golden brown, 6 to 8 minutes.
  2. Add the pork and toss to coat. Cook, stirring occasionally, until the pork is no longer pink and has rendered some fat, 7 to 10 minutes.
  3. Stir in the scallion whites, ginger, garlic, cinnamon, star anise, sherry and soy sauce. Press Cancel, then distribute the mixture in an even layer.

FAST: Lock the lid in place and move the pressure valve to Sealing. Select Pressure Cook or Manual; make sure the pressure level is set to High. Set the cooking time for 25 minutes. When pressure cooking is complete, allow the pressure to release naturally for 5 minutes, then release the remaining steam by moving the pressure valve to Venting. Press Cancel, then carefully open the pot. OR

SLOW: Select More/High Sauté and bring the mixture to a boil. Press Cancel, lock the lid in place and move the pressure valve to Venting. Select Slow Cook and set the temperature to More/High. Set the cooking time for 4½ to 5½ hours; the pork is done when a skewer inserted into a piece meets no resistance. Press Cancel, then carefully open the pot.

  1. Transfer the pork to a medium bowl, leaving the cooking liquid in the pot. If necessary, using a large spoon, skim off and discard the fat from the surface of the liquid.
  2. Select More/High Sauté, bring the liquid to a boil and cook, stirring occasionally, until reduced to the consistency of honey, 13 to 15 minutes. Remove and discard the cinnamon and star anise.
  3. Return the pork and any accumulated juices to the pot and cook, stirring, until heated through, 2 to 3 minutes. Press Cancel to turn off the pot.
  4. Taste and season with salt and pepper. Serve sprinkled with the scallion greens.

http://www.lynnandruss.com

Recipe by Rose Hattabaugh for Milk Street

Lemon and Garlic Baked Chicken

Garlic and lemon with chicken is an iconic pairing that satisfies almost any appetite. In this recipe, poultry pieces are marinated in lemon and garlic, then topped with a sauce made with more of the same, producing extremely flavorful and juicy chicken.

One of the toppings is pimento which adds not only a bright pop of color, but more depth of flavor. If you’ve ever tried southern pimento cheese, or enjoyed pimento stuffed green olives, you have already tried the pimento pepper in pickled form. The word “pimiento” translates to “pepper” from Spanish. Pimento peppers are not spicy, but rather mild, sweet and succulent.

While the recipe indicates to start with a whole chicken and cut it down into pieces (our preference), you could just as easily buy bone-in, skin-on pieces to begin with, especially if the eaters go for all white meat or all dark meat.

Please keep in mind that the chicken needs to marinate at least an hour up to overnight. Doing so in the morning, allows for about 8-10 hours.

There is a good amount of sauce left in the skillet so dredge your side veg into it. Our broccolini sopped up many of the juices creating a more cohesive dinner.

Lemon and Garlic Baked Chicken

  • Servings: 4
  • Difficulty: easy
  • Print

Ingredients

  • 1/2 cup plus 2 Tbsp. olive oil
  • 2 Tbsp. fresh lemon juice 
  • 2 1/2 tsp. garlic powder 
  • 2 1/2 tsp. kosher salt, plus more to taste 
  • 1/2 1/2 tsp. freshly ground black pepper, plus more to taste 
  • One 3 1/2- to 4-lb. chicken, cut into pieces 

Sauce:

  • 2 Tbsp. unsalted butter
  • 1 1/2 tsp. honey, plus more if needed 
  • 1 1/2 tsp. chopped fresh oregano 
  • 4 cloves garlic, minced 
  • Juice of 2 lemons (about 1/4 cup) plus 1/2 tsp. lemon zest 
  • One 4-oz. jar diced pimientos, drained 
  • 1/4 cup chopped fresh parsley 
  • Lemon wedges, for garnish

Directions

  1. Whisk together the olive oil, lemon juice, garlic powder, salt and pepper in a small bowl. Add the chicken pieces to a large resealable plastic bag and pour the marinade over the top. Seal the bag, removing as much air as possible, and massage the marinade around the chicken to coat evenly.
  2. Refrigerate for at least an hour and up to overnight.
  3. Preheat the oven to 400 degrees F.
  4. Remove the chicken from the marinade and transfer, skin-side up, to a large cast-iron skillet. Pour half the marinade all over the chicken in the skillet.
  5. Sprinkle the chicken with a generous pinch of salt and pepper. Roast until the chicken is deeply browned, the meat is cooked through and the juices run clear, about 30-40 minutes. (An instant-read thermometer inserted in the thigh, avoiding bone, should read 165 degrees F.)
  6. Remove the chicken to a platter and let rest while you make the sauce.
  7. For the sauce: Melt the butter in a saucepan over medium heat. Whisk in the honey, oregano, garlic, lemon juice and zest and 1/4 cup skimmed drippings from the skillet and bring to simmer.
  8. Taste and season with salt and pepper, and if too tangy, add a bit more honey. Pour the sauce over the chicken, then garnish with the pimientos, chopped parsley and lemon wedges and serve.

http://www.lynnandruss.com

Recipe from Food Network

Sweet and Sticky Grilled Chicken

We just can’t get enough of roasted or grilled chicken. The bird is so versatile and the ways to prepare it are endless! “Pantry superstars do the heavy lifting in this easy, crowd-pleasing grilled chicken dinner.”

Now If you can find a whole chicken that is already split, the result is a chicken dinner with the same properties of spatchcocking (quick-cooking, lots of surface area to get charred, crispy skin) but which is more manageable than dealing with a whole bird. If you can’t score one, buy a whole chicken, butterfly it, then split it yourself by slicing directly between the two breasts.

The chicken got a bit too charred on the outside, but the inside meat was succulent and juicy!

For the tangy glaze, stir up a few condiment powerhouses like marmalade, Dijon mustard, and sherry vinegar, and brush them onto the chicken after cooking it most of the way through, covered over indirect heat. For the final 10 to 15 minutes, transfer the chicken halves to direct heat and baste with every flip until glistening and charred. Leftover glaze can be cooked down as a sauce to serve alongside the finished dish. 

Word to the wise, have extra napkins on hand 😉

Sweet and Sticky Grilled Chicken

  • Servings: 4
  • Difficulty: easy
  • Print

Ingredients

  • 1 3½–4-lb. chicken, backbone removed, halved
  • Kosher salt, freshly ground pepper
  • ½ cup orange marmalade or seedless jam of choice
  • ⅓ cup Dijon mustard
  • ⅓ cup sherry vinegar or red wine vinegar
  • 3 Tbsp. soy sauce
  • 1 jalapeño, finely chopped (optional)
  • 5 garlic cloves, finely grated
  • 1 Tbsp. vegetable oil, plus more for grill
  • Flaky sea salt

Directions

  1. Generously season chicken halves all over with salt and pepper. Let sit at room temperature at least 15 minutes, or chill up to 1 day. If chilling, let sit at room temperature 1 hour before grilling.
  2. Whisk marmalade, mustard, vinegar, soy sauce, jalapeño (if using), and garlic in a small bowl to combine. Set glaze aside.
  3. Prepare a grill for medium-high indirect heat (for a charcoal grill, bank coals on one side of grill; for a gas grill, leave one or two burners off). Lightly oil grate. Pat chicken dry with paper towels, then rub with 1 Tbsp. oil. Place, skin side down, over indirect heat. Cover grill and grill chicken, turning halfway through, until skin is lightly browned and an instant-read thermometer inserted into thickest part of thighs registers 120°–130°, 15–20 minutes.
  4. Uncover grill, turn chicken over, and move over direct heat. Brush chicken with reserved glaze. Grill, turning often and brushing generously with glaze (move to indirect heat if browning too quickly), until charred in spots and an instant-read thermometer inserted into thickest part of breast registers 150° (it will climb to 160° as chicken rests), 10–15 minutes. Transfer chicken, skin side up, to a cutting board; let rest 15 minutes.
  5. While chicken is resting, transfer any remaining glaze to a small saucepan and cook over medium-high heat, stirring occasionally, until bubbling and slightly thickened, about 5 minutes.
  6. Carve chicken and transfer to a platter; sprinkle with sea salt. Serve with sauce alongside.

http://www.lynnandruss.com

Recipe by Zaynab Issa For Bon Appétit

Braised Lamb Shoulder Chops with Capers, Balsamic Vinegar, and Red Peppers

Typically, we find lamb shoulder chops to be a tough cut of meat and benefit from a longer braise. However, Cook’s Illustrated tried a much shorter braise than usual for this lamb chop recipe—just enough to cook the meat. After only 15 to 20 minutes, they claimed the lamb was tender, but we beg to differ.  

Our initial concerns at the short amount of time (15 to 20 minutes originally) the lamb chops cooked were well-founded. After 20 minutes, they were still tough and we added another 10 minutes to the braise. In fact, they could have used even more time to tenderize. In the past, we’ve always braised them, covered over low heat for 2 hours, until they were fall-apart tender.

The much-anticipated caper and red pepper sauce with the deglazing liquid was delicious! Because we only cooked two chops, there was some sauce leftover which we made good use of on some pork chops the following day. Our pairings for the lamb included a side salad and a recent new potato fave, Crispy Parmesan Potatoes.

included

  • Servings: 4
  • Difficulty: easy
  • Print

Ingredients

  • 4 lamb shoulder chops, about 3/4 inch thick, trimmed of external fat
  • Salt and ground black pepper
  • 2 Tbsp. olive oil
  • 1 small onion, chopped fine
  • 1 red bell pepper, seeded and diced small
  • 2 small cloves garlic, minced
  • ⅓ cup dry red wine
  • 1 cup canned tomatoes packed in puree, chopped
  • 2 Tbsp. minced fresh parsley leaves
  • 2 Tbsp. capers, drained
  • 2 Tbsp. balsamic vinegar

Directions

  1. Sprinkle chops with salt and pepper to taste.
  2. Heat 1 tablespoon of the oil in 12-inch heavy-bottomed nonreactive skillet over medium-high heat. Cooking in 2 batches to avoid overcrowding, add 2 chops; sauté until brown on both sides, 4 to 5 minutes. Remove from pan; set aside. Repeat.
  3. Pour fat from pan; return pan to medium heat, adding remaining tablespoon of oil. Add onion and pepper; sauté until softened, about 4 minutes.
  4. Add garlic; cook until fragrant, about 1 minute longer.
  5. Add wine; simmer until reduced by half, scraping browned bits from pan bottom with wooden spoon, 2 to 3 minutes.
  6. Stir in tomatoes, then return chops to pan. Reduce heat to low; cover and simmer until chops are cooked through but tender, at least 30 minutes.
  7. Transfer chops to each of four plates. Stir parsley, capers, and balsamic vinegar into braising liquid; simmer until sauce thickens, 2 to 3 minutes. Adjust seasonings, spoon portion of sauce over each chop, and serve.

http://www.lynnandruss.com

Adapted from a recipe by Cook’s Illustrated