Tag Archives: main dish

Chile Relleno Casserole

Here is a homey chile relleno casserole with layers of cumin-spiced beef, cheddar, eggs and canned poblano peppers. However, in our area, canned poblanos are impossible to source locally, but they are available online at a few places such as MexGrocer.com. You can use fresh poblanos (see NOTE below), it just will add about 30 more minutes to the prep.

The dish, while very flavorful, is not really spicy at all. If you choose to raise the level of heat, a couple of options would be to add a can of diced green chiles, and/or a few chopped chipotle chiles in adobo sauce stirred into the cooked meat mixture.

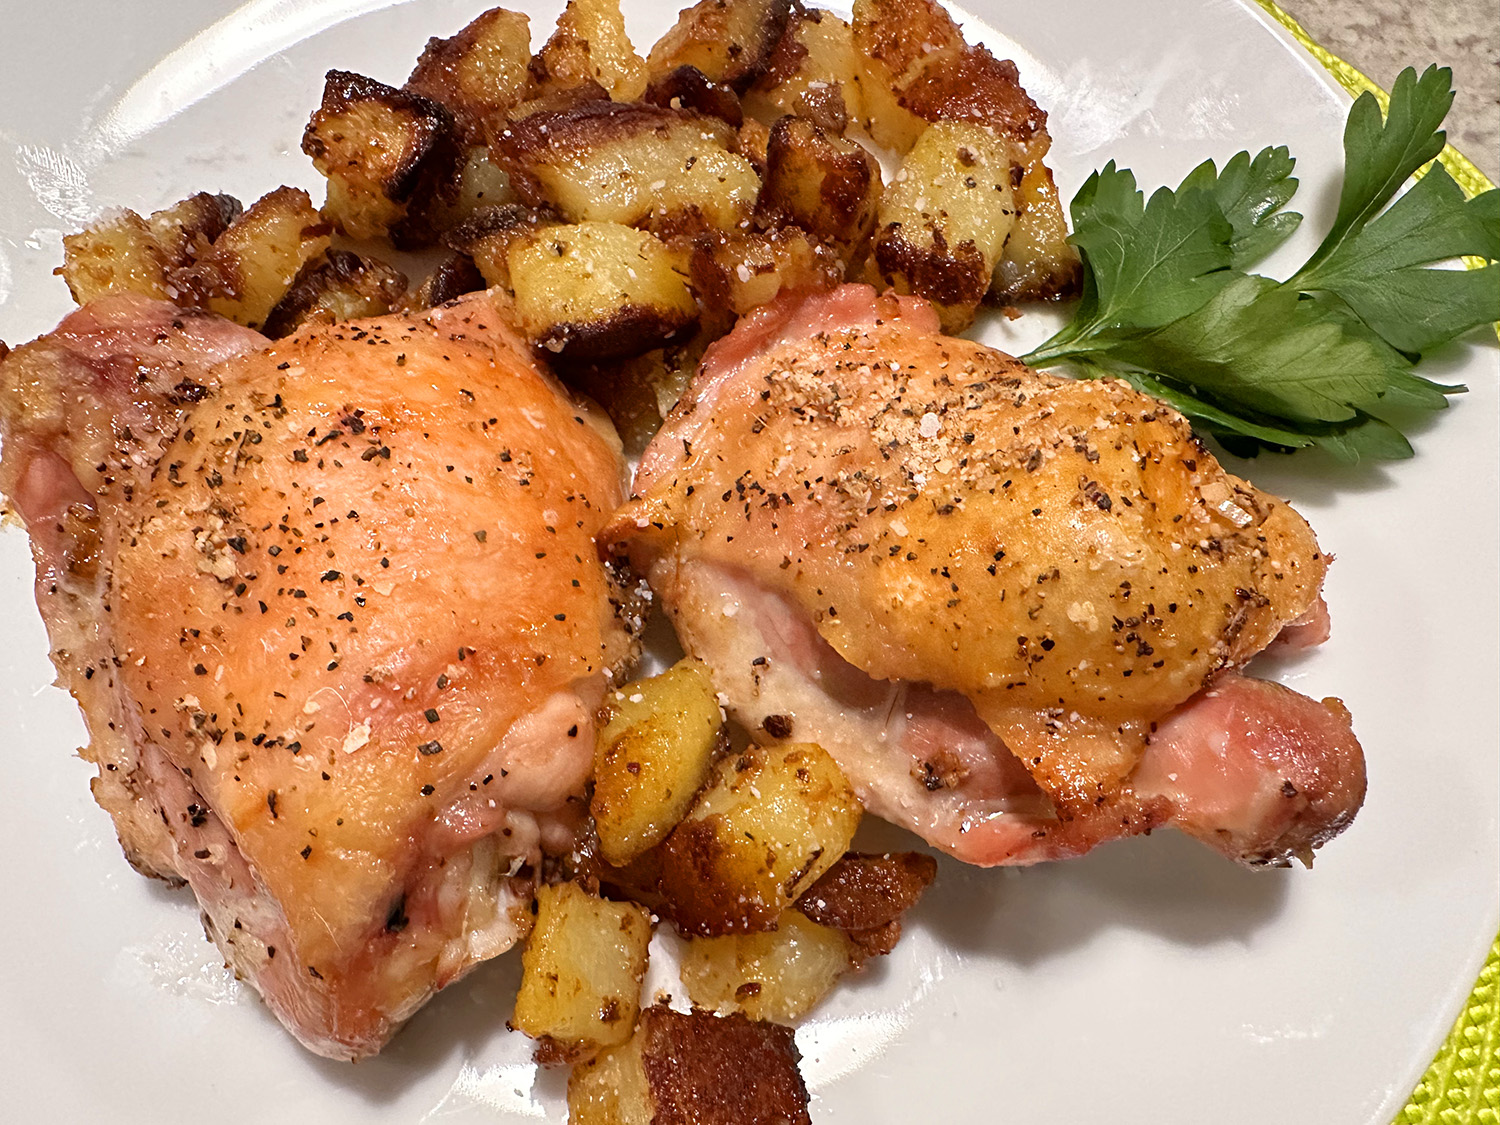
Once it comes out of the oven, let it stand for 10 minutes before cutting into it. We paired ours with a side of boxed rice and beans, and a side salad.

NOTE: To use fresh rather than canned poblanos, position an oven rack 4 to 6 inches from the oven’s broiler element; preheat to broil. Place the poblanos on a large, rimmed baking sheet and broil until they brown in spots and blister without charring, watching them carefully and turning them with tongs until they are blistered all over. Transfer them to a heatproof bowl and cover with a plate or pan lid to let them steam and cool enough to be handled, at least 10 minutes, probably longer. When the poblanos are cool enough to handle, use your fingers to carefully remove and discard their skins. Make a vertical slit from the stem end to the tip of each pepper. Gently remove the seeds and stems and open the peppers so the flesh lies flat.

Chile Relleno Casserole

  • Servings: 6
  • Difficulty: easy
  • Print

Ingredients

  • 1 lb. ground beef, preferably 90/10 blend
  • 1 cup (4 oz.) chopped yellow onion
  • 2 tsp. ground cumin
  • 1 tsp. fine salt, divided
  • 3/4 tsp. freshly ground black pepper
  • Unsalted butter, for greasing
  • 1 (27 1/2-oz.) can whole poblano peppers, drained (may substitute 6 large fresh poblanos; see Note)
  • 2 cups (8 oz.) shredded cheddar cheese
  • 1/4 cup all-purpose flour
  • 1 1/2 cups whole milk
  • 4 large eggs, beaten

Directions

  1. Position a rack in the middle of the oven and preheat to 375 degrees.
  2. In a large skillet over medium-high heat, cook the beef and onions, breaking up the meat with a wooden spoon and browning the beef until it just starts to turn crispy, about 10 minutes. Using a slotted spoon, transfer the mixture to a medium bowl, leaving behind as much fat as possible in the pan. Season the mixture with the cumin, 3/4 teaspoon of the salt and the black pepper.
  3. Grease a 9-inch square baking dish with the butter or the fat rendered from the beef. Gently remove the stems and seeds from the poblanos and open the peppers so the flesh lies flat. Line the bottom of the pan with the poblanos, skin side down, overlapping them some to cover completely. Chop any remaining poblanos and set aside. Layer the meat-onion mixture over the whole poblanos and top with the shredded cheese and the reserved chopped peppers.
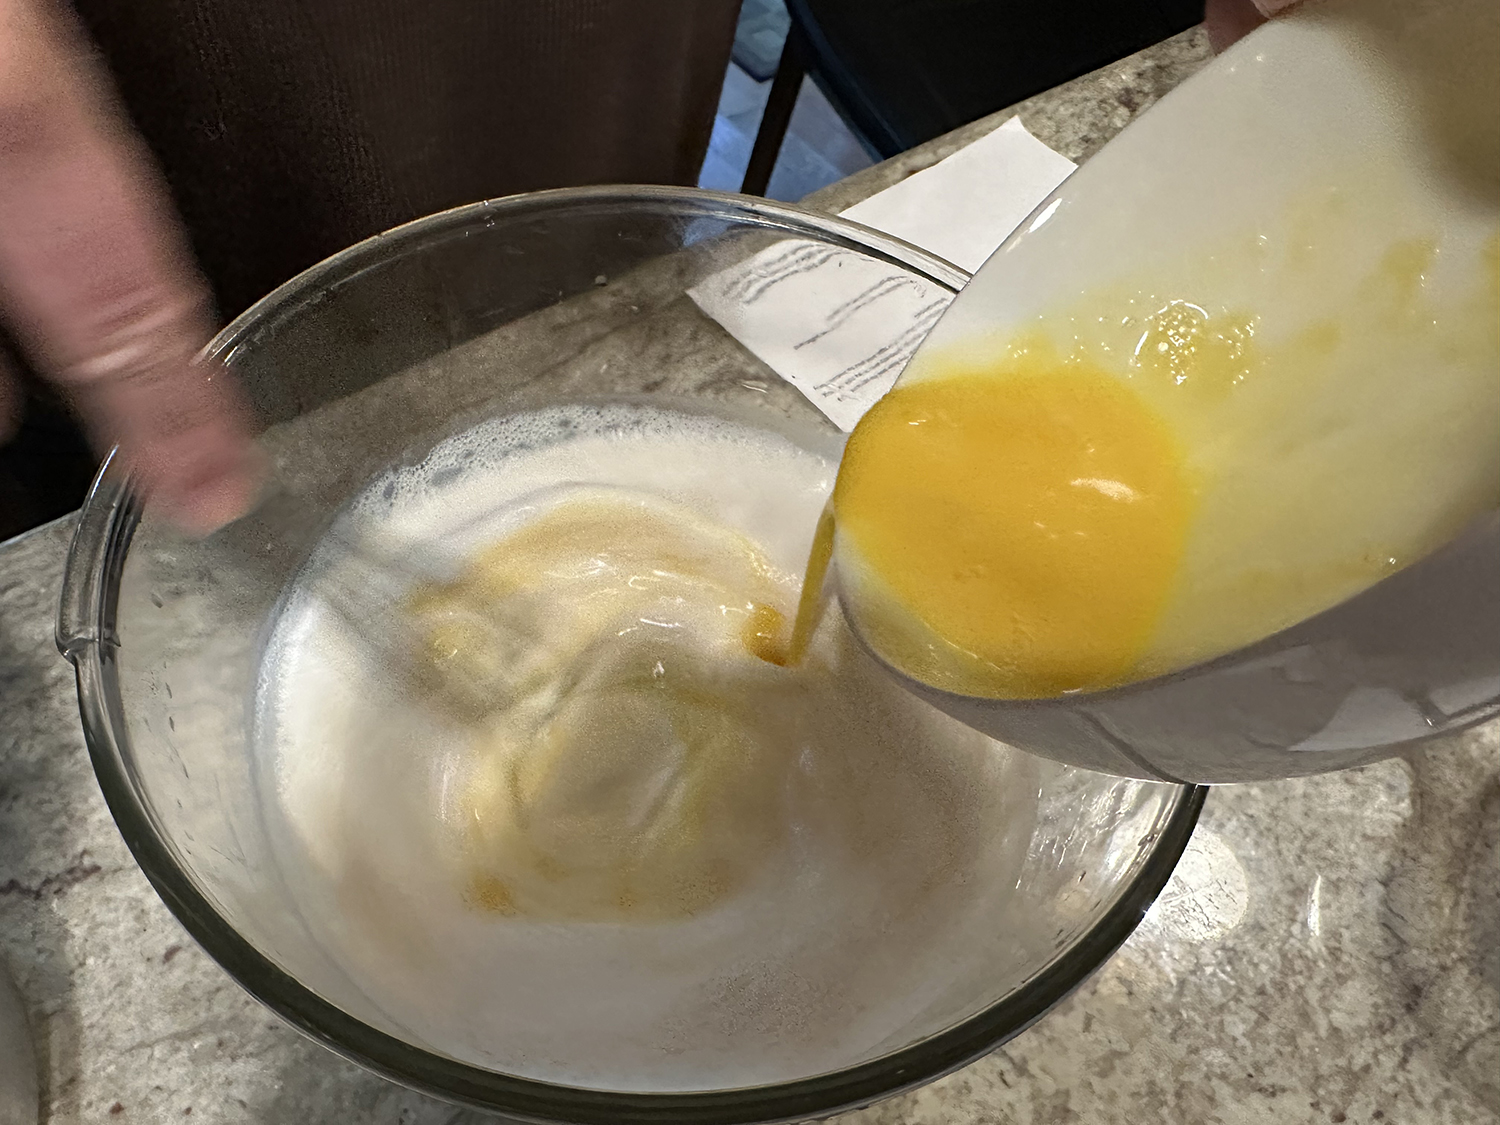
  4. In a medium bowl, whisk together the flour and the remaining 1/4 teaspoon of salt. While whisking, gradually pour in the milk, breaking up any clumps of flour. Whisk in the eggs and pour the mixture evenly into the baking dish.
  5. Bake the casserole for 45 minutes, or until it has puffed and browned. Remove from the oven and let stand at room temperature before cutting into it.

Make ahead: The unbaked casserole can be assembled, covered tightly and refrigerated for up to 2 days. Rest it on a countertop for about 30 minutes; then bake as directed.

http://www.lynnandruss.com

Adapted from a recipe by Caroline Hatchett for the Washington Post

Slow-Roasted Pork Shoulder with Fennel, Garlic and Rosemary

Often a pork roast can be dried out when it’s done cooking. But this lovely recipe from Milk Street is extremely simple to make and uses just over a handful of ingredients. The lefotovers were still juicy and full of flavor.

This recipe takes inspiration from porchetta, a Tuscan-style pork roast seasoned with garlic, herbs and spices. A simple fragrant seasoning paste rub is made and the mixture is massaged into shallow cuts in the meat’s fat cap so it clings to the roast.

Roasting meat on a baking sheet, rather than in a roasting pan, promotes better air circulation, accelerating cooking and boosting browning. Use the time while the meat rests to throw together a zingy-fresh parsley-caper sauce that’s a perfect foil to the richness of the meat.

One noted difference that we made was to tie the pork with kitchen twine 3 or 4 times around the girth of the roast. And as ours didn’t have much of a fat cap, we made the cuts directly into the top of the meat. Butter-Roasted Carrots with Za’atar and Pomegranate Molasses, and garlicky mashed potatoes with gravy rounded out the meal.

Slow-Roasted Pork Shoulder with Fennel, Garlic and Rosemary

  • Servings: 6-8
  • Difficulty: easy
  • Print

Ingredients

  • 3 Tbsp. fennel seeds
  • ½ cup extra-virgin olive oil, divided
  • ⅔ cup lightly packed fresh rosemary
  • 9 medium garlic cloves, 8 smashed and peeled, 1 finely grated, reserved separately
  • Kosher salt and ground black pepper
  • 5 lb. boneless pork shoulder roast, untrimmed
  • 2 cups lightly packed fresh, flat-leaf parsley, chopped
  • ¼ cup drained capers, plus 3 Tbsp. caper brine

Directions

  1. Heat the oven to 300°F with a rack in the middle position. In a food processor, process the fennel seeds to a mixture of finely ground and coarsely cracked seeds, about 2 minutes. Add ¼ cup of the oil, the rosemary, smashed garlic cloves, 1 tablespoon salt and 2 teaspoons pepper. Process to form a paste, about 30 seconds, scraping the bowl as needed.
  2. With a knife, score a crosshatch pattern into the surface fat on top of the roast. Using your hands, rub the paste onto all sides of the roast and into the cuts. Place the pork fat side up on a rimmed baking sheet and roast until the center reaches 195°F, about 4 hours. (Ours took 4 1/2 hours to come to temp.)
  3. When the roast is done, tent with foil and let rest for about 15 minutes. Meanwhile, in a small bowl, stir together the remaining ¼ cup oil, grated garlic, parsley, capers and brine and ¼ teaspoon pepper. Transfer the roast to a cutting board. Cut into slices, then transfer to a platter. Serve with the sauce.

http://www.lynnandruss.com

Recipe by Dimitri Demopolous for Milk Street

Roasted Chicken Thighs with Schmaltzy Potatoes

A simple dish of crisp-skinned, tender chicken and browned, lightly crisped potatoes that are infused with chicken flavor. In fact, only three ingredients, plus salt and pepper—to end up with a delicious dinner, who doesn’t like that? Throw in a side salad, voila, dinner done!

OK, in the first go-around as beta-testers for America’s Test Kitchen, the recipe was a pared-down version of the one they actually published months later in Cook’s Illustrated. This updated rendering has 5 additional spices in the list of ingredients. As fans of bold tastes, we welcomed the extra seasonings. If you’d like to keep it simple, just omit the chili powder through cayenne.

Chicken thighs have plenty of flavorful juices and fat, but they don’t release them until the meat is almost done, which is far too late to be helpful in roasting your potatoes. To better utilize the fat from the chicken, trim the thighs well and roast the trim on its own on a rimmed baking sheet to render its fat.

Meanwhile, slash the flesh side of the thighs and cover them with a simple spice mix, taking care to get the mixture deep into the slashes. To ensure that the potatoes could absorb all the savory juices thrown off by the roasting chicken thighs, parboil the spuds with baking soda. Its alkalinity quickly breaks down the pectin in the exteriors.

After drying the potatoes briefly, stir them vigorously with the fat rendered from the chicken trim and some kosher salt. The salt roughs up the exteriors, creating plenty of entry points for the flavorful chicken juices to suffuse the spuds as they roast.

Starting the potatoes lower in the oven provides plenty of bottom heat to jump-start browning. After adding the chicken, move the sheet up in the oven where the plentiful top heat ensures that the chicken skin becomes crisp. Sliced scallion and a spritz of citrus provide fresh flavor that complements the richness of the potatoes and chicken.

NOTE: Chicken thighs are very forgiving, so don’t worry if yours are of different sizes.

  • Difficulty: easy
  • Print

Ingredients

  • 3½ tsp. kosher salt, divided
  • 1 Tbsp. chili powder
  • 1 tsp. paprika
  • ½ tsp. pepper
  • ½ tsp. garlic powder
  • ¼ tsp. cayenne pepper
  • 3 lbs. bone-in chicken thighs
  • 3 lbs Yukon gold potatoes, peeled and cut into 1-inch pieces
  • ½ tsp. baking soda
  • 1 scallion, sliced thin on bias
  • lime wedges

Directions

  1. Adjust oven racks to upper-middle and lower-middle positions and heat oven to 450 degrees.
  2. Place 1 thigh skin side down on cutting board. Cut away any pockets of fat and any skin that extends beyond meat and reserve trim. Repeat with remaining thighs. Scatter trim over surface of rimmed baking sheet and roast on lower rack until trim is mostly crisped and rendered, about 10 minutes. Discard trim and leave fat in baking sheet.
  3. While trim is rendering, bring 8 cups water to boil in Dutch oven. Add potatoes and baking soda and return to boil. Boil for 2 minutes and drain well. Return potatoes to Dutch oven and place over low heat. Cook, shaking pot occasionally, until any surface moisture has evaporated, about 2 minutes. Remove from heat.
  4. Add 2 teaspoons salt and rendered chicken fat and stir with rubber spatula until potatoes are coated with starchy paste, about 30 seconds. Transfer potatoes to now-empty sheet pan and spread into even layer. Roast on lower rack until undersides of potatoes are brown and crisp, about 20 minutes.
  5. While potatoes are roasting, season chicken on both sides with remaining 1 ½ teaspoons salt and pepper. Let sit on cutting board until needed. Using thin metal spatula, flip potatoes. Push potatoes aside to clear one space for each thigh. Place thighs skin side up in cleared spaces.
  6. Roast on upper-middle rack until chicken is browned, crisp, and the largest thigh registers at least 185 degrees, about 40 minutes.
  7. Transfer thighs to platter to rest. Stir potatoes and spread over surface of baking sheet. Return to upper rack and roast until potatoes are mostly dry, about 5 minutes. Transfer to platter with chicken and serve.

http://www.lynnandruss.com

Recipe by Andrea Geary for America’s Test Kitchen

Pan-Seared Scallops With Chorizo and Corn

We recently made another dish that featured scallops and chorizo—an odd, but very successful combination it seems. That first Scallops and Chorizo in Tomato Sauce dish was a real hit in our house, so we thought we’d give this recipe highlighting both of those same proteins an equal chance. Oh, so glad we did. Fantabulous! Is that a word?

Large sea scallops are treated to the flavorful oil left behind when you cook the chorizo—and we agree with the description from Bon Appétit, “it’s basically liquid gold!”

There is no doubt, we’ll be making this again! Of course, fresh corn on the cob is a must, so you want to be making this dish during the peak of corn season, if at all possible.

Four portions seemed a little miserly to us, allowing only three scallops per diner. Split three ways, each person gets four scallops, a more reasonable quantity. You could easily use a total of 16 scallops, instead of 12, without changing the amounts of the other ingredients.

The melded flavors are fantastic with a bright note from the squeeze of fresh lime juice. We practically licked our plates clean.

Pan-Seared Scallops with Chorizo and Corn

  • Servings: 3-4
  • Difficulty: easy
  • Print

Ingredients

  • 3 ears of corn, husked
  • 3 Tbsp. extra-virgin olive oil, divided
  • 2 oz. smoked Spanish chorizo, finely chopped
  • 12 scallions, white and pale green parts only, thinly sliced
  • 4 garlic cloves, thinly sliced
  • ½–1 serrano chile (depending on heat), finely chopped
  • ¾ tsp. kosher salt, plus more
  • 1 cup buttermilk
  • ⅓ cup chopped cilantro
  • 12 large sea scallops (about 1 lb.), side muscle removed, patted dry
  • 2 Tbsp. unsalted butter
  • 1 lime, halved
  • Lime wedges (for serving)

Directions

  1. Cut kernels from corncobs and place in a medium bowl. Using the back of a chef’s knife, scrape milk from cobs into the bowl; discard cobs.
  2. Heat 1 Tbsp. oil in a medium saucepan over medium. Cook chorizo, stirring occasionally, until it starts to get crisp, about 2 minutes. Carefully pour chorizo oil into a small bowl (use a slotted spoon to hold back chorizo); set chorizo oil aside.
  3. Return chorizo pan to medium heat and add scallions, garlic, chile, 1 Tbsp. olive oil, and ¾ tsp. salt. Cook, stirring occasionally, until vegetables are softened but not browned, about 2 minutes.
  4. Add corn kernels and cook, stirring occasionally, until bright yellow and softened, 5–7 minutes. Remove from heat and let corn mixture cool in pan 5 minutes. Gently mix in buttermilk and cilantro. Taste and season with more salt if needed.
  5. Season scallops generously with salt. Heat reserved chorizo oil and remaining 1 Tbsp. olive oil in a large skillet over medium-high until just beginning to smoke. Cook scallops on one side, reducing heat if they are taking on too much color and moving around in pan for even browning, until a golden brown crust forms on the bottom, about 3 minutes.
  6. Reduce heat to medium-low and turn scallops over. Add butter to skillet and, using a spoon, baste scallops with butter 30 seconds. Transfer scallops to a plate. Squeeze halved lime over.
  7. Divide corn mixture among plates and arrange scallops on top. Serve with lime wedges for squeezing over.

http://www.lynnandruss.com

Recipe by Molly Baz for Bon Appétit

Zucchini Carbonara

A fantastic vegetarian riff on classic pasta carbonara, typically made with eggs, cured pork and cheese. The guanciale or pancetta traditionally used is replaced by garlicky, golden-brown zucchini that itself brings a meatiness to the dish. And there is no butter or cream used in making the satiny sauce.

The squash is sautéed and the pasta boiled, then the two are tossed with a mixture of umami-packed Parmesan, tangy pecorino Romano, rich eggs and starchy pasta cooking water. The resulting sauce is silky-smooth and creamy, yet light. Add lemon zest to the mix to bring fresh, zingy notes, as well as red pepper flakes for subtle heat.

Don’t add the egg-cheese mixture until the pot is off the heat. This will prevent the eggs from overcooking and ensure that the sauce’s texture is velvety smooth.

One major difference from the original recipe in Milk Street, was the sliced zucchini had to be portioned into 4 groups, each done separately in the 12-inch skillet, adding about 15 more minutes, bringing the total time to about one hour.

We also did not discard the cooked garlic (blasphemy!). Instead, we minced it and tossed it into the zucchini with the red pepper flakes. The Hubs mentioned at least three times that, for company, this would be a great first course to an Italian-themed dinner.

Zucchini Carbonara

  • Servings: 4-6
  • Difficulty: easy
  • Print

Ingredients

  • 1 large egg plus 1 large egg yolk
  • 1 oz. pecorino Romano cheese, finely grated (½ cup), plus more to serve
  • 1 oz. Parmesan cheese, finely grated (½ cup), plus more to serve
  • 1 Tbsp. grated lemon zest
  • Kosher salt and ground black pepper
  • 3 Tbsp. extra-virgin olive oil, divided
  • 2 large garlic cloves, smashed and peeled
  • 1 1/2 lbs. small to medium zucchini, trimmed and sliced into ¼-inch rounds
  • 1/4-1/2 tsp. red pepper flakes
  • 1 lb. rigatoni, mezzi rigatoni or ziti

Directions

  1. In a small bowl, whisk together the whole egg plus yolk, both cheeses, the lemon zest and ½ teaspoon black pepper; set aside. In a 12-inch nonstick skillet over medium, combine 1½ tablespoons of the oil and the garlic. Cook, stirring occasionally, until the garlic is lightly browned, 2 to 3 minutes. Remove and discard the garlic, then add half the zucchini in an even layer and sprinkle lightly with salt. Cook, without stirring, until golden brown on the bottoms, 3 to 4 minutes.
  2. Stir the zucchini, flipping the slices, then redistribute in an even layer. Cook until golden brown on the second sides, another 3 to 4 minutes. Transfer to a plate. Add the remaining 1½ tablespoons oil to the skillet, then cook the remaining zucchini in the same way. (You may have to do this in more than two batches, it took us four.) Off heat, add the first batch of zucchini to second in the skillet. Stir in the pepper flakes and set aside.
  3. In a large pot, bring 4 quarts water to a boil. Stir in the pasta and 1 tablespoon salt, then cook, stirring occasionally, until al dente. Reserve about 1 cup of the cooking water, then drain. Return the pasta to the pot, then add ½ cup of the reserved pasta water and the zucchini. Cook over medium-high, stirring, until heated through, about 1 minute.
  4. Off heat, add the egg mixture; stir until the sauce thickens slightly and clings to the pasta and zucchini, 2 to 3 minutes. If needed, add reserved pasta water 1 tablespoon at a time to adjust the consistency. Taste and season with salt and black pepper. Serve sprinkled with additional black pepper and cheeses.

http://www.lynnandruss.com

Recipe from Milk Street

Steak with Olive White-Wine Pan Sauce

Craving a quick red meat meal? Rib-eye steaks are front and center here, while pimento-stuffed green olives and white wine provide a salty, briny component. With just the two of us for dinner, only one steak was necessary, but it was big and thick—we even had some leftovers. We did not cut back on the other ingredients, and intentionally used more than a half cup of the olives.

Oh, an addition to the recipe was dry-aging our steak. Dry-aging, improves flavor and texture while making cuts easier to cook simply and beautifully. Tenderization occurs when enzymes naturally present in the meat act to break down some of the tougher muscle fibers and connective tissues. A well-aged steak should be noticeably more tender than a fresh steak.

As you are well aware, dry-aged meat at a restaurant or grocery store can cost twice as much as its younger counterparts, but you can do it at home, better—and for free. Exposing meat to cold, circulating air for an extended period of time gently dehydrates it, concentrating flavor and increasing the ratio of fat to muscle. It’s best to dry-age a steak on a rack, uncovered, overnight and up to several days.

Don’t slice the steaks until they have rested for 10 minutes. Resting not only permits the meat to finish cooking with residual heat, it gives the muscle fibers a chance to relax, thereby allowing the juices forced to the surface during cooking to redistribute throughout meat. This results in less moisture loss during slicing.

A little history behind this recipe: This is a riff on a dish from the new edition of “Spain: The Cookbook” written by Simone Ortega and first published in Spain in 1972. The 1,080-recipe tome has since become a bible of Spanish home cooking. We use pimento-stuffed green olives to add pops of bright color and flavor to the white wine pan sauce. Serve with warm, crusty bread to soak up any sauce left on the plate.

Steak with Olive White-Wine Pan Sauce

  • Servings: 4-6
  • Difficulty: easy
  • Print

Ingredients

  • 2 1-lb. boneless ribeye steaks, each about 1 inch thick, trimmed and patted dry
  • Kosher salt and ground black pepper
  • 1 Tbsp. grapeseed or other neutral oil
  • 3 Tbsp. salted butter, cut into 1-Tbsp. pieces, divided
  • 1 medium garlic clove, smashed and peeled
  • ½ cup pimento-stuffed green olives, finely chopped, plus 1 Tbsp. olive brine
  • ½ cup dry white wine
  • 1 Tbsp. sherry vinegar

Directions

  1. Season the steaks on both sides with salt and pepper. If possible, dry age the steak on a rack, uncovered, overnight and up to several days.
  2. In a 12-inch skillet over medium-high, heat the oil until barely smoking.Add the steaks, reduce to medium and cook until well browned on the bottoms, 5 to 7 minutes.
  3. Flip and cook for 3 minutes, then add 1 tablespoon of butter and the garlic. Swirl the pan to distribute the butter and continue to cook until the second sides of the steaks are well browned, another 3 to 4 minutes. Transfer to a serving platter, tent with foil and let rest for 10 minutes.
  4. While the steaks rest, remove and discard the garlic, then set the pan over medium-high. Add the olives and cook, stirring, until fragrant, 30 to 60 seconds. Add the wine, bring to a simmer and cook, scraping up any browned bits, until the liquid has almost evaporated, about 3 minutes.
  5. Remove from the heat, stir in the olive brine, vinegar and remaining 2 tablespoons butter, then stir until melted. Remove from the heat, then taste and season with salt and pepper. Cover and set aside.
  6. After the steaks have rested, cut them on the diagonal into ¼- to ½-inch-thick slices. Transfer to a platter, pour over any accumulated juices and spoon on the sauce.

http://www.lynnandruss.com

Adapted from a recipe for Milk Street

Salmon with Avocado Sauce and Tomato-Cilantro Salsa

Milk Street borrows from Colombia’s take on guacamole—spiked with both lime juice and vinegar as well as fresh chilies—to create an easy, no-cook sauce for salmon fillets. A fresh tomato-cilantro salsa finishes the dish, adding a bright, acidic note to balance the rich, savory fish.

Don’t shy away from using the habañero chili. Its fruity flavor pairs perfectly with the avocado. It does give bold spiciness to the sauce, but the richness of the salmon keeps the heat in check. The recipe makes enough avocado salsa, so you could easily by 2-pounds* of salmon or more to feed more dinner guests.

For just the two of us, we purchased a one-pound piece of organic salmon and split it into two filets. Fresh corn on the cob and a hefty side salad rounded out the healthy, flavorful meal.

Seared Salmon with Avocado Sauce and Tomato-Cilantro Salsa

  • Servings: 4
  • Difficulty: easy
  • Print

Ingredients

  • 1 1/2 cups cherry or grape tomatoes, roughly chopped
  • 5 Tbsp. lime juice, divided, plus lime wedges, to serve
  • Kosher salt
  • 2 scallions, cut into 1-inch lengths
  • 1 Anaheim chili, stemmed, seeded, cut into rough 1-inch pieces
  • 1 habañero chili, stemmed and seeded
  • 2 Tbsp. white vinegar
  • 1 1/2 cups fresh cilantro leaves and tender stems, divided
  • 1 ripe avocado, halved, pitted, peeled and chopped
  • 4 6-oz. center-cut salmon fillets (each 1 to 1¼ inches thick), patted dry
  • 1 Tbsp. grapeseed or other neutral oil
  • 2 Tbsp. salted butter

Directions

  1. In a medium bowl, toss the tomatoes with 1 tablespoon of the lime juice and a pinch of salt. Set aside.
  2. In a blender, combine the scallions, both chilies, vinegar, 2 tablespoons of the remaining lime juice and ½ teaspoon salt. Blend until smooth, about 30 seconds. Add ¾ cup of the cilantro and the peeled avocado.
  3. With the blender running, stream in 3 tablespoons water and blend until smooth and creamy, about 1 minute, scraping the blender jar as needed; if needed, add up to 1 tablespoon more water to achieve the correct consistency. Set aside.
  4. Season the salmon on both sides with salt. In a 12-inch nonstick skillet over medium-high, heat the oil until shimmering. Add the fillets flesh side down, reduce to medium and cook until golden, about 4 minutes.
  5. Using a wide metal spatula, flip the fillets, add the butter and increase to medium-high. Once the butter stops foaming, spoon it over the fillets, adjusting the heat to prevent the butter from burning.
  6. Cook and baste the fish until the thickest parts reach 115°F to 120°F, or are nearly opaque when cut into, 2 to 3 minutes. Pour the remaining 2 tablespoons lime juice into the pan and baste the fillets once or twice more.
  7. With a wide metal spatula, transfer the fillets to individual plates. Spoon about 2 tablespoons avocado sauce over each fillet.
  8. Add the remaining ¾ cup cilantro to the tomatoes and toss, then spoon over the salmon. Serve the remaining avocado sauce on the side, along with lime wedges.

http://www.lynnandruss.com

Recipe from Milk Street

Iraqi-Spice Crusted Chicken

This just sounded delicious from the moment we started reading the recipe. To shorten the very long list of spices that typically make up the aromatic rub for traditional Iraqi grilled chicken, Milk Street reached for both curry powder and garam masala. These two Indian seasoning blends add up to about a dozen different spices at play in this recipe.

Ground sumac in the rub lends the chicken earthy, citrusy notes and, along with the paprika, a deep, brick-red hue. Spatchcocked and grilled, the bird cooks in under an hour and is rich and complexly flavored, with smokiness from the grill.

Well, ours started on the hot grill but within 15 minutes of placing the bird on the grates, Mother Nature came roaring in with a wicked storm. Plan B, of roasting the chicken in a 450° oven was the second method of choice. It still ended up super juicy and bursting with flavor. To complete the meal we served fresh corn on the cob and a tomato salad.

Many supermarkets now carry ready-to-cook spatchcocked chickens. So if you are a little hesitant to do it yourself, save yourself a bit of aggravation and buy one. We like to get the whole bird for the extra body parts (neck, back, hearts, etc.) to make homemade chicken stock.

One step not in the original recipe, but ensures juicy white meat, is brining the chicken in a mixture of water, salt and sugar in a ziploc bag for 2, or up to 4 hours. See instructions below.

BTW, don’t forget to open the grill vents, both on the bottom of the grill and on the lid, if you’re using charcoal. This is will allow airflow so the fire does not extinguish during the covered cooking time.

Iraqi-Spice Crusted Chicken

  • Servings: 4
  • Difficulty: easy
  • Print

Ingredients

  • 2½ Tbsp. extra-virgin olive oil, divided
  • 3 medium garlic cloves, grated
  • 1 Tbsp. ground sumac
  • 2 tsp. ground coriander
  • 2 tsp. curry powder
  • 1 tsp. garam masala
  • 1 tsp. sweet or hot paprika
  • ¾ tsp. ground cumin
  • ½ tsp. ground cardamom
  • Kosher salt and ground black pepper
  • 1 whole chicken, about 4 lbs.
  • Lemon wedges, to serve

For Brine

  • 1 qt. cold water
  • 6 Tbsp. table salt
  • 6 Tbsp. white sugar

Directions

  1. In a small skillet over low, combine 1½ tablespoons of oil and the garlic. Cook, stirring frequently, until fragrant and sizzling, but not browned, about 2 minutes. Transfer to a small bowl and set aside. In another small bowl, stir together the sumac, coriander, curry powder, garam masala, paprika, cumin, cardamom, 1 tablespoon salt and 1 teaspoon pepper. Add 2 tablespoons of the spice mixture to the garlic oil and stir to form a paste.
  2. To Spatchcock: Place the chicken breast down on a cutting board. Using sturdy kitchen shears, cut along both sides of the backbone, from top to bottom; remove and discard the backbone (or save to make broth).
  3. To Brine: Stir sugar and salt into water until dissolved. Brine spatchcocked chicken in mixture for 2-4 hours. Drain, rinse, and dry chicken with paper towels before cooking.
  4. Open up the chicken, then turn it skin up. Use the heel of your hands to press down firmly on the thickest part of the breast until the wishbone snaps. Loosen the skin over the chicken’s breasts and thighs by gently working your fingers between the skin and the flesh. Using your fingers, evenly distribute the garlic-spice paste under the skin and rub it into the flesh. Sprinkle the remaining spice mixture evenly on both sides of the chicken, patting gently to help it adhere. Let stand uncovered at room temperature for about 45 minutes.
  5. Prepare a grill for indirect, high-heat cooking. For a charcoal grill, spread a large chimney of hot coals evenly over one side of the grill bed; open the bottom grill vents and the lid vent. For a gas grill, turn all burners to high. Heat the grill, covered, for 5 to 10 minutes, then clean and oil the cooking grate.
  6. Insert an 8-inch metal or wooden skewer laterally through one of the chicken’s drumsticks and into the other to hold the legs in place. Tuck the wing tips to the back. If using a gas grill, leave the primary burner on high and turn off the other burners. Set the chicken skin up on the cooler side of the grill, legs facing the heat. Cover and cook for 25 minutes.
  7. Using tongs, rotate the chicken to bring the breast side closest to the heat. Cover and cook until the thickest part of the breast reaches 160°F and the thighs reach 175°F, another 25 to 35 minutes.

http://www.lynnandruss.com

Recipe by Milk Street

Jerk Shrimp with Pineapple Salad

If you have ever been to the Caribbean islands, then you must have had an encounter with jerk seasoning. Commonly recognized as a hallmark of Caribbean cuisine, jerk shrimp stands alongside jerk chicken as one of Jamaica’s signature dishes.

According to the Bon Appétit article, many recipes for this bright, summery grilled shrimp dinner start with a homemade jerk seasoning marinade (a mixture of puréed Scotch bonnet peppers, allspice, ginger, and a host of other aromatics that might include bell peppers, habaneros, soy sauce, jalapeños, brown sugar, fresh thyme, and more).

Others may rely on a premade spice blend with an equally long list, including cayenne pepper, garlic powder, and paprika. This Jamaican jerk shrimp recipe, however, comes together quickly thanks to a scoop of store-bought jerk seasoning paste, which acts as an instant flavor enhancer for the seafood. Not able to source the paste easily, we bought a liquid jerk marinade, and reduced it down to a thicker consistency.

You can use fresh (highly recommended) or frozen shrimp for this dish; if buying fresh, look for large or jumbo deveined shrimp, and if using frozen, thaw the shrimp in the refrigerator overnight. Marinate the raw shrimp for at least 30 minutes (and up to 8 hours; any longer and the shrimp will start to get mushy).

To balance the heat, pair the jerk shrimp with a citrusy, herbaceous pineapple salad. No fresh pineapples to be found? Opt for a mango salsa. Serve as is, or tuck everything into tortillas for shrimp tacos, or pile onto a plate with grilled vegetables. Add a colorful salad to round out the meal, and you have one fancy, flavorful, nutritious healthy dinner!

OK, let’s talk about the elephant in the room. That would be cilantro in this case, and the recipe calls for a full cup. According to recent statistics, a whopping 10% of the population can’t stand and/or tolerate cilantro. So the obvious switch out is fresh basil.

And while it is visually more attractive to leave the shrimp tails on, they are a bit of mess to remove once they are grilled and on your plate. So we say, just get rid of them before you throw the shrimp in with the jerk seasoning.

Jerk Shrimp with Pineapple Salad

  • Servings: 4
  • Difficulty: easy
  • Print

Ingredients

  • ¼ cup mild jerk seasoning paste
  • 1 Tbsp. vegetable oil, plus more for grill
  • 2 lb. large shrimp, peeled, deveined
  • 1 tsp. Diamond Crystal or ½ tsp. Morton kosher salt, plus more
  • Freshly ground pepper
  • 1 medium pineapple, peeled, cored, sliced into ½”-thick rounds
  • ½ medium red onion, thinly sliced
  • 1 Persian cucumber, halved, thinly sliced
  • 1 cup finely chopped cilantro; or fresh basil
  • ⅓ cup fresh lime juice, about 3 limes

Directions

  1. Whisk ¼ cup mild jerk seasoning paste and 1 Tbsp. vegetable oil in a medium bowl. Add 2 lb. large shrimp, peeled, deveined, and lightly season with kosher salt and freshly ground pepper; toss to coat. Cover and chill at least 30 minutes and up to 8 hours.
  2. Meanwhile, prepare a grill for medium heat; oil grate. Grill 1 medium pineapple, peeled, cored, sliced into ½”-thick rounds, turning halfway through, until tender and there are deep brown marks on both sides, about 4 minutes. Transfer to a cutting board and let cool slightly.
  3. Cut pineapple into ¼” pieces; place in a large bowl. Add ½ medium red onion, thinly sliced, 1 Persian cucumber, halved, thinly sliced, 1 cup finely chopped cilantro, ⅓ cup fresh lime juice, and 1 tsp. Diamond Crystal or ½ tsp. Morton kosher salt; toss well.
  4. Thread shrimp onto skewers. Cook shrimp on grill until opaque and lightly charred, 3–4 minutes per side.
  5. Spoon pineapple salad onto plates with a slotted spoon, then top with shrimp. Spoon any juices left in bowl over shrimp.

To make without a grill: Heat broiler. Spread marinated shrimp out on one side of a rimmed baking sheet (do not skewer); arrange pineapple on other side. Broil, turning halfway through, until shrimp are opaque and pineapple is blistered in spots, about 5 minutes.

http://www.lynnandruss.com

Recipe by Inés Anguiano for Bon Appétit

Steak with Preserved-Lemon-Marinated Tomatoes

Toss peak heirloom tomatoes in a simple preserved lemon, soy sauce, and chile marinade while you sear off a nice, well-marbled steak for a dinner for two in no time. The rich, fatty meat is just the right counterpoint to the punchy salad. Returning to this recipe off-season? Opt for cherry tomatoes instead of heirloom.

The Hubs used ghee instead of olive oil in the cast iron pan. Toward the end of searing the steak, he spooned the juices over the meat numerous times. An optional flavor booster was including one large smashed garlic glove and a sprig of fresh rosemary to the scalding skillet, discarding them when steak is ready.

OK, most home cooks are not going to have preserved lemons on hand. We pretty much always do. Preserved lemons are one of those ingredients that sound exotic and hard-to-find but are actually really easy to make. However they do take a few weeks, so if you don’t have the time, there are some good preserved lemon substitutes.

If you have a few hours, you can make a quick, substitute. Just squeeze the juice from a lemon, keeping it for another use. Then finely slice the lemon skins and toss in plenty of fine salt. The finer you slice, the quicker they will ‘preserve’. Stand for at least an hour (preferably longer) then use as per your recipe.

A little lemon zest will add a different type of lemony fragrance to your dish. It will be much milder but better than nothing. But plan ahead, and do try to have the real McCoy preserved lemons for the best results.

Steak with Preserved-Lemon-Marinated Tomatoes

  • Servings: 2-3
  • Difficulty: easy
  • Print

Ingredients

  • 1, 1-lb. New York strip steak (1″–1¼” thick)
  • Kosher salt, freshly ground pepper
  • 2 red Thai chiles or 1 red Fresno or jalapeño chile, halved
  • 2 Tbsp. soy sauce
  • 2 Tbsp. thinly sliced preserved lemon, plus 2 tsp. brine
  • 2 Tbsp. extra-virgin olive oil, divided
  • 2 lb. assorted heirloom tomatoes, halved, cut into wedges if large

Directions

  1. Season one 1-lb. New York strip steak (1”–1¼” thick) all over with kosher salt and freshly ground pepper and let sit 15 minutes.
  2. Meanwhile, whisk 2 red Thai chiles or 1 red Fresno or jalapeño chile, halved, 2 Tbsp. soy sauce, 2 Tbsp. thinly sliced preserved lemon, 2 tsp. lemon brine, and 1 Tbsp. extra-virgin olive oil in a large bowl to combine. Add 2 lb. assorted heirloom tomatoes, halved, quartered if large, and toss to coat. Chill tomato mixture until ready to use.
  3. Heat a dry large cast-iron skillet over medium-high until very hot. Drizzle remaining 1 Tbsp. extra-virgin olive oil over steak; rub all over to coat evenly. Cook, turning every 2 minutes or so, until deeply browned and an instant-read thermometer inserted into the thickest part registers 120°, 8–10 minutes for medium-rare. Transfer to a cutting board, tent with foil, and let rest 10 minutes.
  4. Slice steak against the grain ¼” thick. Add steak to marinated tomato mixture and toss to coat. Using a slotted spoon, transfer steak and tomatoes to a platter and drizzle some of the marinade remaining in bowl over (discard the rest). Season with pepper.

http://www.lynnandruss.com

Recipe by Zaynab Issa for Bon Appétit

Mustardy Grilled Cabbage and Kielbasa

Mustard and sausage lovers, this one’s for you. Smoky kielbasa and charred-but-still-crisp cabbage, all drizzled with a bright mustardy dressing, become a full, bulked-up meal thanks to seasoned small potatoes.

When wrapped in a foil packet, the potatoes become perfectly tender in just under half an hour on the grill, making them a simple addition to any dinner you’re already lighting a fire for. Don’t be shy about showering on dill at the end—the herb brings some welcome freshness to the plate.

In place of kielbasa, we used Butifarra which we had on hand. In order not to burn items to a crisp, if you have a hot grill like we do, keep it at medium heat. We also increased mayo-mustard mixture by 50%, and flipped the potato package halfway through grilling.

*In the end, the cabbage was still a bit tough. For a softer experience, quarter the head of cabbage thru core. Put the quarters in a bowl with some water, cover and microwave on high for 3-4 minutes to soften. Then, cut into wedges…

Mustardy Grilled Cabbage and Kielbasa

  • Servings: 4
  • Difficulty: easy
  • Print

Ingredients

  • Vegetable oil (for grill)
  • 1 lb. small red potatoes, halved, quartered if larger
  • 1 tsp. Diamond Crystal or ½ tsp. Morton kosher salt
  • ½ tsp. garlic powder
  • ½ tsp. smoked paprika
  • 4 Tbsp. plus 1 tsp. extra-virgin olive oil, divided
  • Freshly ground pepper
  • 1 Tbsp. mayonnaise
  • 1 Tbsp. Dijon mustard
  • 3 Tbsp. whole grain mustard, divided
  • 1 small head of savoy cabbage, cut through core into 2”–3”-thick wedges (*see above head note)
  • 12-oz. kielbasa links, halved lengthwise
  • 3 Tbsp. apple cider vinegar
  • Torn dill (for serving)

Directions

  1. Prepare a grill for medium-high heat; oil grate with vegetable oil. Combine 1 lb. small red potatoes, halved, quartered if larger, 1 tsp. Diamond Crystal or ½ tsp. Morton kosher salt, ½ tsp. garlic powder, ½ tsp. smoked paprika, and 3 Tbsp. extra-virgin olive oil in a medium bowl, season generously with freshly ground pepper, and toss to combine. Scrape out onto a large sheet of foil; reserve bowl. Bring foil edges together to make a packet; crimp to seal tightly. Place on grate; cook potatoes until tender, 25–28 minutes, turning halfway through.
  2. Whisk 1 Tbsp. mayonnaise, 1 Tbsp. Dijon mustard, 1 Tbsp. whole grain mustard, and 1 Tbsp. extra-virgin olive oil in reserved bowl to combine. (We suggest you increase this mixture by 50%) Rub mayonnaise mixture over 1 small head of savoy cabbage, cut through core into 2″–3″-thick wedges, working between leaves; reserve bowl. Grill cabbage, turning halfway through, until tender and both cut sides have deep brown marks, 7–9 minutes. Transfer to a platter.
  3. Grill kielbasa, turning halfway through, until charred in spots, about 10 minutes. Transfer to same platter.
  4. Whisk 3 Tbsp. apple cider vinegar, remaining 2 Tbsp. whole grain mustard, and remaining 1 tsp. extra-virgin olive oil in reserved bowl. Set dressing aside.
  5. Arrange potatoes on top of kielbasa and cabbage. Drizzle reserved dressing over. Scatter torn dill on top and season with more pepper.

To make without a grill: Preheat oven to 400°. Spread seasoned potatoes out on a foil-lined rimmed baking sheet; roast until just tender enough to pierce with a knife, 25–30 minutes. Remove from oven. Heat broiler. Add dressed cabbage and kielbasa to baking sheet with potatoes; broil, turning halfway through, until cabbage is tender and charred in spots and kielbasa is browned, 10–14 minutes.

http://www.lynnandruss.com

Adapted from a recipe by Kendra Vaculin for Bon Appétit

Sweet-and-Tangy Chicken Thighs and Couscous

The perfect dinner, using the freshest garden ingredients, with a real WOW factor! We are talking the ultimate summer on a platter meal. We all could use a back-pocket chicken recipe, and this pantry-friendly version lives up to its name. The vinegary marinade leans on spice-cabinet stalwarts to make a quick brine that delivers juicy meat with a sweet-and-tangy finish in just 15 minutes (even better if you have time for an overnight soak).

You can get started on a simple seasonal Israeli couscous salad while the marinade does its thing. The grill takes care of both the corn and chicken here, but Bon Appétit says if you don’t have access to a grill (or would like to enjoy this year-round), your trusty broiler can achieve the same char for both ingredients. However you cook the chicken, be sure to give the thighs some time to rest before slicing.

As several reviewers claimed that the couscous was too bland, we added flavor by using homemade chicken stock in place of water. And a time saver during dinner prep, make marinade the night before and add the chicken to the marinade the morning of.

Sweet-and-Tangy Chicken Thighs and Couscous

  • Servings: 4
  • Difficulty: easy
  • Print

Ingredients

  • 3 Tbsp. sugar
  • ¼ cup plus 1 Tbsp. apple cider vinegar or red wine vinegar
  • 1 Tbsp. plus ½ tsp. Diamond Crystal or 2 tsp. Morton kosher salt, divided, plus more
  • 1 Tbsp. onion powder
  • 2 tsp. garlic powder
  • 2 tsp. paprika
  • 3 Tbsp. extra-virgin olive oil, divided, plus more for brushing
  • 1½ lb. skinless, boneless chicken thighs (about 6)
  • 1 cup Israeli couscous
  • 1 1⁄4 cups chicken or vegetable stock, preferably homemade
  • Vegetable oil (for grill)
  • 2-3 medium ears of corn, shucked
  • 12-15 oz. cherry tomatoes, halved
  • Freshly ground pepper
  • 1 lemon
  • Basil leaves, for serving

Directions

  1. Whisk 3 Tbsp. sugar, ¼ cup apple cider vinegar or red wine vinegar, and 1 Tbsp. Diamond Crystal or 1¾ tsp. Morton kosher salt in a small bowl until sugar and salt are mostly dissolved. Whisk in 1 Tbsp. onion powder, 2 tsp. garlic powder, 2 tsp. paprika, and 1 Tbsp. extra-virgin olive oil.
  2. Pour marinade into a large resealable plastic bag. Add 1½ lb. skinless, boneless chicken thighs (about 6), close bag, and turn to coat. Let sit at room temperature 15 minutes, or chill, turning occasionally, up to 12 hours.
  3. Meanwhile, heat 1 Tbsp. extra-virgin olive oil in a medium saucepan over medium-high. Add 1 cup Israeli couscous and cook, stirring to coat, until golden brown, 1–2 minutes. Carefully pour in 1¼ cups water (or preferably homemade chicken or vegetable stock) and add ½ tsp. Diamond Crystal or ¼ tsp. Morton kosher salt; stir well. Bring to a boil; immediately reduce heat to low and cover. Simmer until tender, 8–10 minutes. Remove lid, gently fluff, and let sit to allow excess moisture to evaporate.
  4. Meanwhile, prepare grill for medium-high heat; oil grate with vegetable oil. Brush 2 or 3 medium ears of corn, shucked, with olive oil; grill, turning often, until tender and charred in spots, 3 minutes per side turning 4 times total. Transfer to a cutting board and let cool. Cut kernels from corn cobs in a small rimmed baking sheet.
  5. Remove chicken from marinade, letting excess drip back into bag. Grill, reducing heat or moving to a cooler spot if charring too quickly, until cooked through and well browned, about 5 minutes per side. Each time you turn the chicken, brush with leftover marinade. Transfer to cutting board and let rest 10 minutes.
  6. Add cherry tomatoes, halved, and corn to pot with Israeli couscous and toss to combine. Drizzle in remaining 1 Tbsp. apple cider vinegar or red wine vinegar and 1 Tbsp. extra-virgin olive oil, season with salt and freshly ground pepper, and toss again. Transfer couscous salad to a platter. Finely grate zest from 1 lemon over, then cut lemon into wedges. Season salad with more pepper.
  7. Slice chicken and arrange over salad. Top with basil leaves and serve with lemon wedges.
  8. To make without a grill: Heat broiler. Place a wire rack inside a foil-lined rimmed baking sheet. Brush rack with vegetable oil. Place corn on rack; broil until tender and charred in spots, 8–10 minutes. Transfer to cutting board; let rest. Remove chicken from marinade, letting excess drip back into bag, and arrange, smoother side up, on same rack. Broil, turning once, until golden brown, 12–14 minutes.

http://www.lynnandruss.com

Adapted from a recipe by Hana Asbrink for Bon Appétit

Classic Pork Fried Rice

Pork Fried Rice is usually a dish we make with leftovers from a pork loin (or tenderloin) dinner. Here, we changed things up a tad by trying this restaurant-quality version from The Woks of Life. The rendition, in contrast to our typical Pork Fried Rice uses only half the amount of eggs, two versus four.

The intended pork meat is supposed to be Chinese BBQ pork (char siu). Char siu originally comes from Cantonese cuisine, and it means “fork roasted”, which is a nod to the traditional cooking method of skewering seasoned pork with long forks, and placing them in an oven or over a fire. It is known for its vibrant red exterior.

If you’ve never had Char Siu before, it’s one of the most tender and juicy balances of savory, sweet pork you might ever have. It’s got umami from various ingredients (like fermented bean curd, hoisin, oyster sauce), a bit of zest from wines, and sweetness from brown sugar and honey. Five spice powder, a popular Chinese ingredient, ties it all together with a distinctive blend of spices. It’s absolutely delicious.

Alas, we did not have any Char Siu, but plan to either make some or buy it at our local Asian foodmart for the next go-around.

Classic Pork Fried Rice

  • Servings: 6
  • Difficulty: easy
  • Print

Ingredients

  • 1 Tbsp. hot water
  • 1 tsp. honey
  • 1 tsp. sesame oil
  • 1 tsp. Shaoxing wine (or dry cooking sherry)
  • 1 Tbsp. soy sauce
  • 1 tsp. dark soy sauce
  • 1/4 tsp. white pepper
  • 5 cups cooked Jasmine rice, (add 1 tsp. oil to rice when cooking)
  • 1 Tbsp. oil
  • 1 medium onion, diced
  • 1 Lb. Chinese BBQ pork (char siu), cut into 1/2 inch chunks
  • 1 tsp. salt
  • 1/2 cup bean sprouts
  • 2 eggs, scrambled
  • 2 scallions, sliced

Directions

  1. Start by combining the hot water, honey, sesame oil, shaoxing wine (if using), soy sauce, dark soy sauce, and white pepper in a small bowl. This is the sauce that you’ll be adding to the rice, and it’s much easier to have it combined and ready to go before you start cooking.
  2. Take your cooked rice and fluff it with a fork or with your hands (you can rinse your hands in cold water if the rice starts sticking to them). There shouldn’t be any big clumps!
  3. With the wok over medium heat, add a tablespoon of oil and sauté the onions until translucent and then stir in the roast pork. Add the rice and mix well. If the rice is cold from the refrigerator, continue stir-frying until the rice is warmed up, which will take about 5 minutes. If the rice was made fresh, then you just need to mix until everything is incorporated.
  4. Add the sauce mixture and salt and mix with a scooping motion until the rice is evenly coated with sauce. You will have to break up any remaining clumps of rice with the spatula as best as possible, but no need to be obsessive. The rice should be hot by this time.
  5. Toss in your mung bean sprouts, scrambled eggs, and scallions. Mix thoroughly for another minute or two and serve!

http://www.lynnandruss.com

Recipe compliments of Bill from The Woks of Life

Grilled Tandoori Lamb with Cilantro Chutney

Here, ‘tandoori’ refers to the yogurt-based, aromatically spiced marinade that can be used on grilled, broiled, or baked meat. You can adjust the spices to your own personal preferences. Serve with flatbread or rice and cilantro chutney (recipe below).

It becomes an easy weeknight meal if you prep the lamb in the marinade the night before.

As a side, you may want to pair the lamb with steamed rice, red onion slices, and or grape tomatoes for a pop of color. Since fresh corn was available, we opted for that as our starch. Although optional, the cilantro chutney also adds additional color and a welcome fresh, citrusy taste.

Grilled Tandoori Lamb with Cilantro Chutney

  • Servings: 4
  • Difficulty: easy
  • Print

Ingredients

  • 1 cup plain yogurt
  • ½ cup lemon juice
  • ¼ cup finely minced onion
  • 2 cloves crushed garlic
  • 1 Tbsp. freshly grated ginger
  • 2 tsp. garam masala
  • 2 tsp. paprika
  • 1 tsp. ground cumin
  • ½ tsp. turmeric powder
  • ½ tsp. cayenne pepper
  • 2 lbs. boneless lamb shoulder, cut into 2 inch pieces
  • 2 tsp. kosher salt, divided
  • 1 Tbsp. vegetable oil
  • ½ cup chopped cilantro
  • 4 small fresh lemon wedges

Directions

  1. Whisk yogurt, lemon juice, onion, garlic, ginger, garam masala, paprika, cumin, turmeric, and cayenne pepper together in a bowl until combined.
  2. Toss lamb and salt into marinade; mix until lamb pieces are coated evenly. Cover mixture with plastic wrap and refrigerate overnight, or at least 4 hours.
  3. Skewer lamb pieces so they barely touch. Wipe off excess marinade with a paper towel. Brush with vegetable oil and sprinkle with salt.
  4. Preheat grill for medium heat and lightly oil the grate.
  5. Grill skewers on medium heat until lamb springs back to the touch, about 5 to 7 minutes on each side.
  6. Garnish with red onions, lemon wedges, and chopped cilantro as desired.

http://www.lynnandruss.com

Recipe courtesy of allrecipes.com

Spicy Cilantro Chutney

Spicy Cilantro Chutney

  • Servings: 2 cups
  • Difficulty: easy
  • Print

Ingredients

  • 1 bunch cilantro (about 2 cups), thick stems removed
  • 1 jalapeño, seeded, coarsely chopped
  • 1 garlic clove, smashed
  • 1 tablespoon fresh lime juice
  • 1 tablespoon vegetable oil
  • Kosher salt

Directions

Pulse cilantro, jalapeño, garlic, lime juice, and oil in a food processor until very finely chopped; season with salt. Chutney can be made 2 days ahead.

http://www.lynnandruss.com

Recipe courtesy of Bon Apétit

Flank Steak with Tomato-Eggplant Ragù

Seared flank steak is finished with a rustic sauce-like side of eggplant, tomatoes, garlic and herbs. Crumbled feta cheese adds briny notes that contrast nicely with the sweetness of the vegetables and the richness of the beef. Milk Street borrowed some of the flavors of Greek moussaka for this quick-one pan meal.

In Italian cuisine, the word “ragù” refers to a whole category of meat sauces. However, this recipe is a veggie-forward version as an accompaniment to the steak. The original directions instructs you to divide the flank steak into 4 sections and cook it in a pan. *We decided to grill it, about 9-10 minutes total for a medium-rare finish. The meat then sits, covered with foil, for another 10 minutes before slicing.

FYI, don’t drain the juices from the tomatoes. The liquid helps form the sauce and prevents the eggplant from drying out so that the pieces become silky-soft. When slicing the flank steak for serving, make sure to slice it against the grain for the tenderest texture.

Paired with the first white sweet corn of the season, it was a fabulous meal!

Flank Steak with Tomato-Eggplant Ragù

  • Servings: 4
  • Difficulty: easy
  • Print

Ingredients

  • 1½ lbs. flank steak, trimmed, halved lengthwise, then crosswise
  • Kosher salt and ground black pepper
  • 4 Tbsp. extra-virgin olive oil, divided
  • 1 lb. eggplant, cut into 1-inch chunks
  • 14½ oz. can diced tomatoes
  • 4 medium garlic cloves, minced
  • 2 tsp. dried oregano
  • ¾ tsp. ground cinnamon
  • ½ cup lightly packed fresh mint, chopped
  • 1½ oz. feta cheese, crumbled (about ⅓ cup)

Directions

  1. Season the steak with salt and pepper. *(See above to grill.) In a nonstick 12-inch skillet over medium-high, heat 2 tablespoons of oil until shimmering. Add the steak and brown on both sides, 6 to 8 minutes total, flipping the pieces once. Transfer to a plate.
  2. In the same pan over medium-high, combine the remaining 2 tablespoons oil, the eggplant and 1 teaspoon salt. Cook, stirring occasionally, until browned and softened, 5 to 6 minutes.
  3. Reduce to medium and add the tomatoes with juices, the garlic, oregano and cinnamon. Cook, stirring occasionally, until thickened and the eggplant has begun to break down, about 5 minutes.
  4. Off heat, stir in any accumulated beef juices and half the mint. Taste and season with salt and pepper. Thinly slice the steak against the grain and place on a platter. Spoon the eggplant mixture on and around the steak, then sprinkle with feta and the remaining mint.

http://www.lynnandruss.com

Recipe adapted from Julia Rackow for Milk Street