You will adore the richness of this olive oil cake—the delicate savory undertones pair so elegantly with the herbaceous rosemary and zesty citrus. Olive oil cakes are so moist which renders them appropriate for rainbow layer cakes, sturdy for decorating, and excellent for freezing. Or simply, just a dusting of powdered sugar and you’re good to go!
Top it with a sprinkling of confectioners’ sugar using a pattern or paper doily to make it more festive—I used two star-shaped cookie cutters. It’s best to shake on your design just before serving as the cake is very moist and the confectioners’ sugar will melt into it. If desired, serve with a dollop of good French vanilla ice cream to take it over the top.
Preheat the oven to 325 ˚F. Line a 9-inch springform pan with parchment paper.
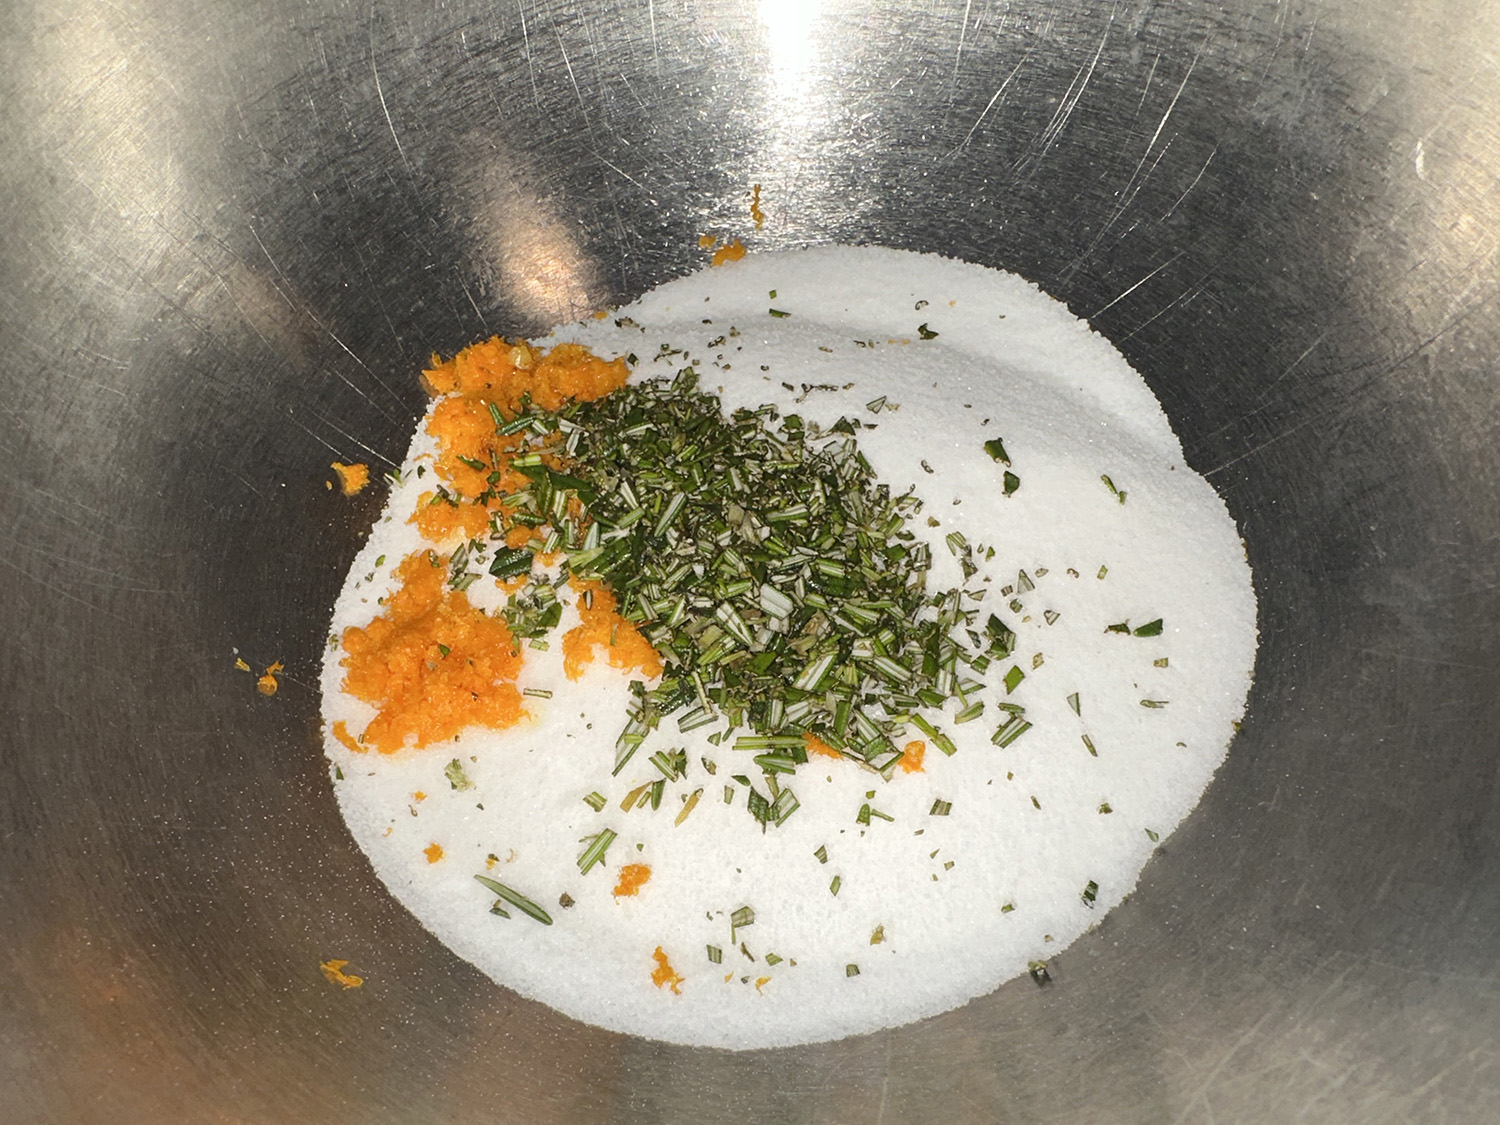
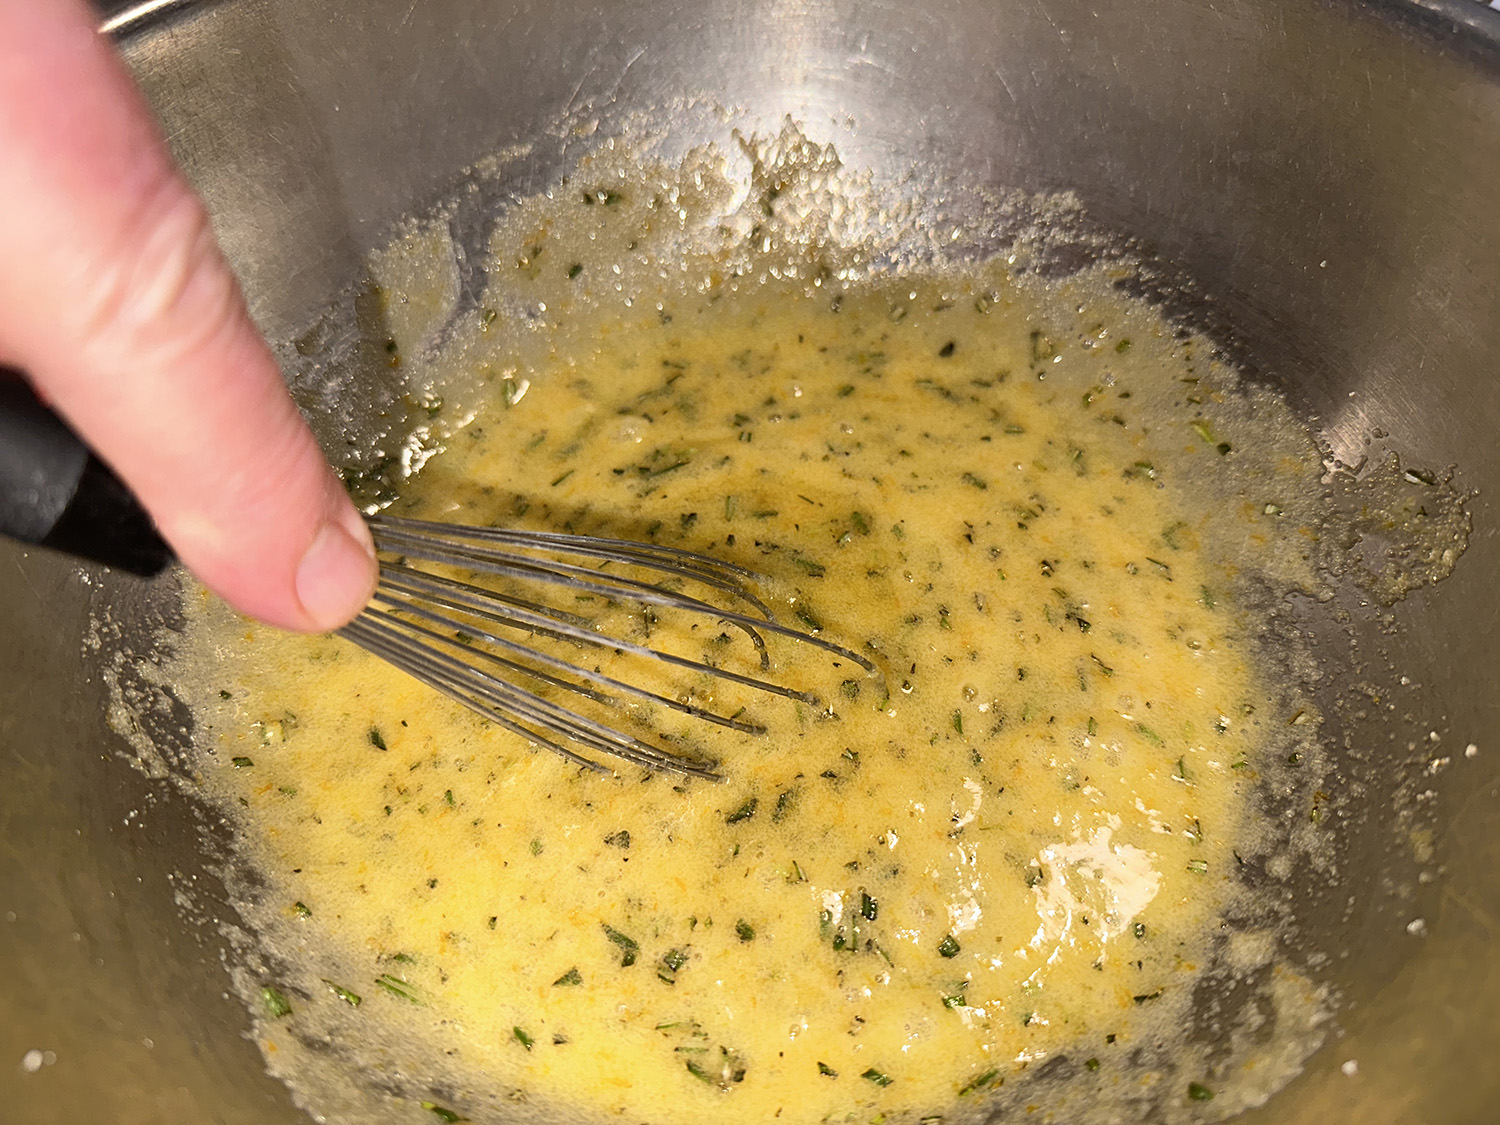
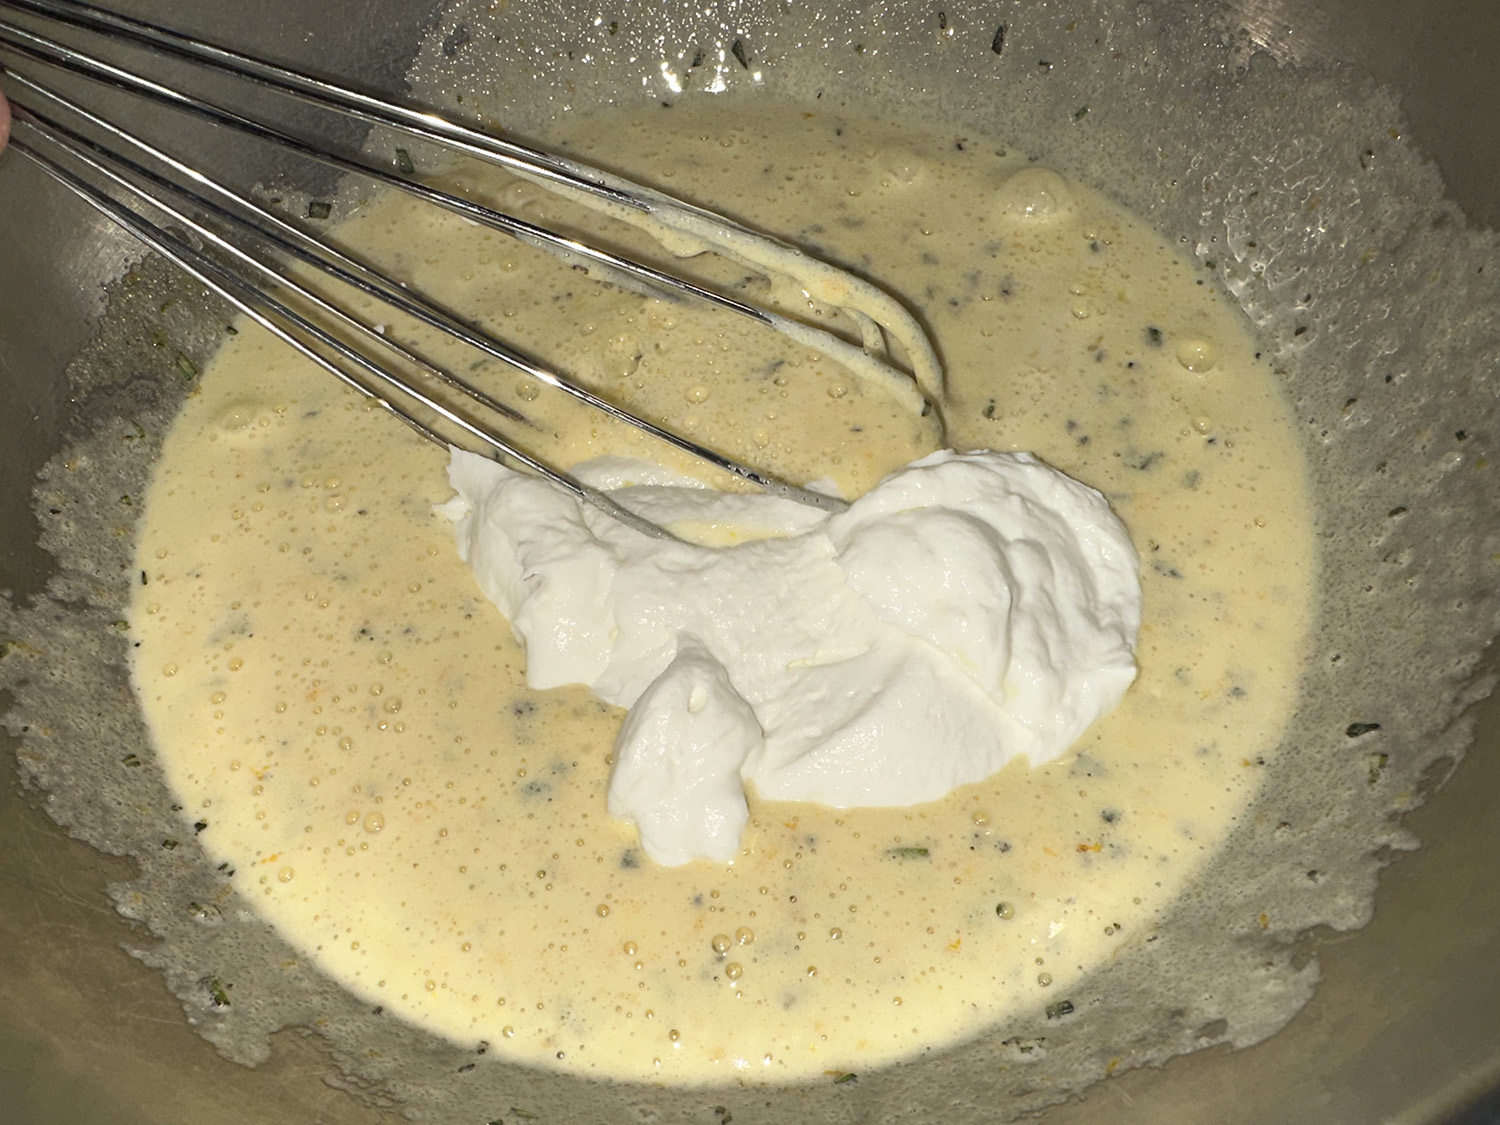
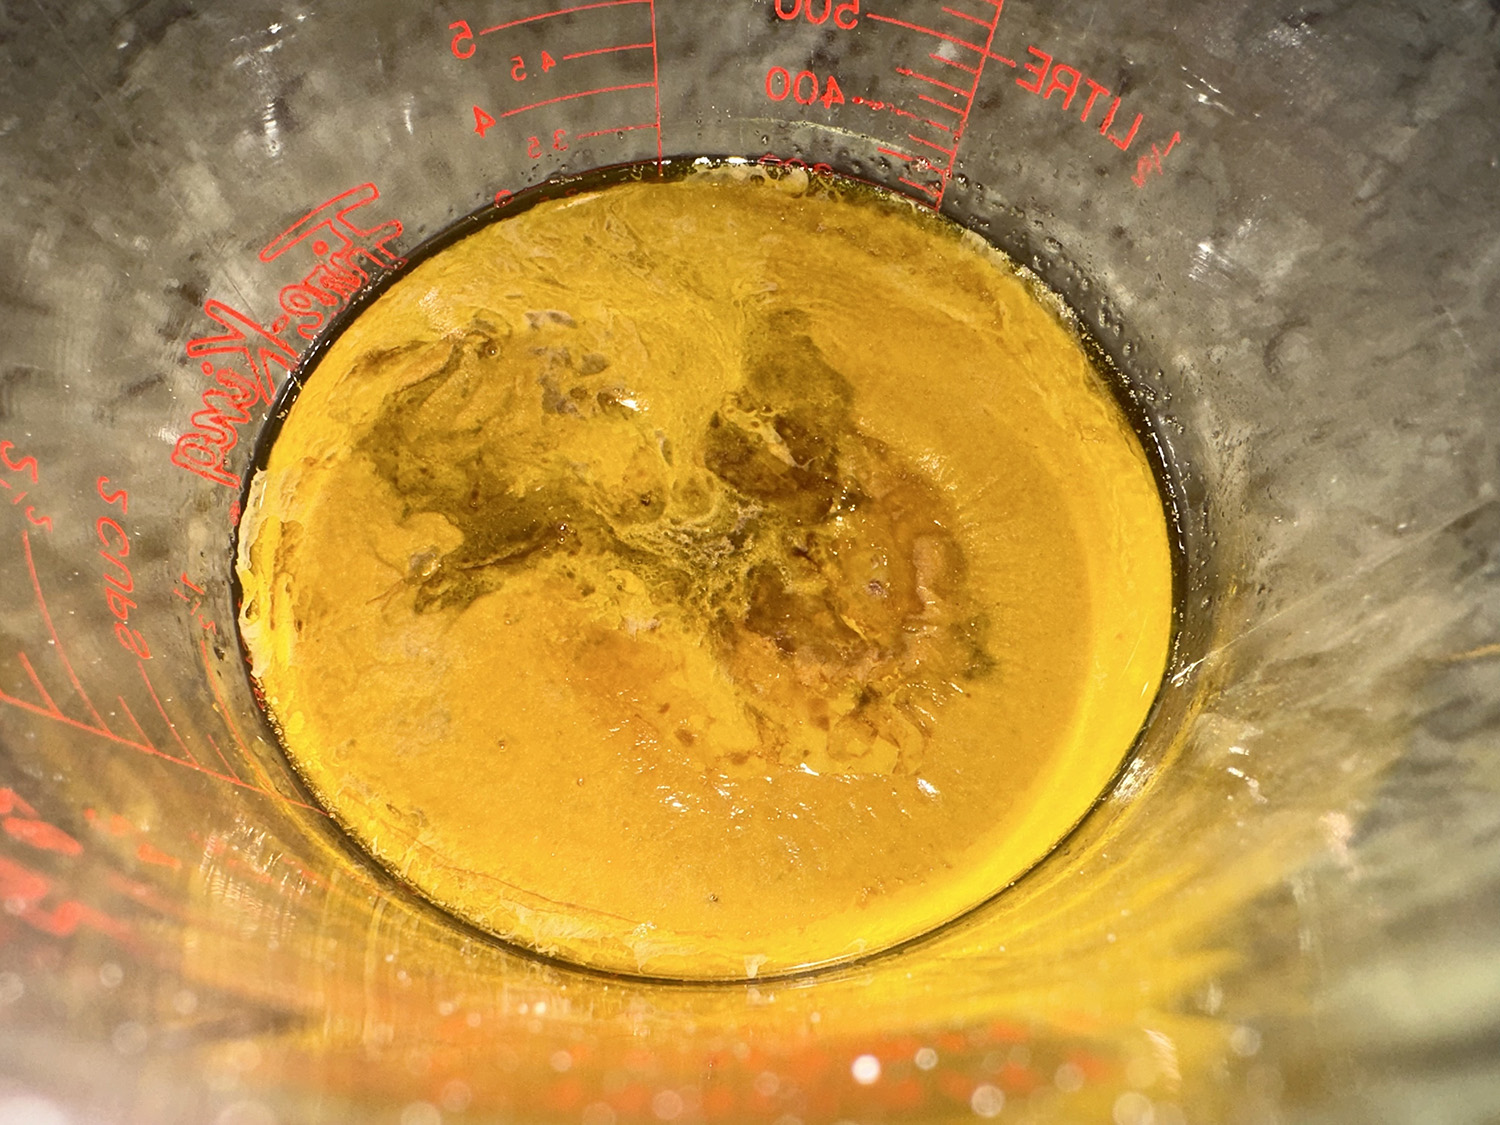
Add the sugar, orange zest, and rosemary to a bowl and, using your fingertips, rub everything together until the sugar is fragrant and damp. Add the eggs and whisk until pale and thick. Beat in the yogurt and orange juice, then gradually whisk in the olive oil.
Sift the flour, baking soda and salt into a large bowl until aerated. Slowly pour in the wet ingredients and, using a large spoon or spatula, gently fold everything together until just combined. Pour the batter into the prepared cake tin.
Bake for 45-50 minutes (ours took a total of 60), until a toothpick inserted in the center of the cake comes out clean. Cool in the pan on a wire rack for 20 minutes, then invert the cake onto the rack to cool completely.
When cool and ready to eat, dust with confectioners’ sugar.
The fabulous entrée tastes surprisingly complex for the short amount of time it takes to prepare. The scallops and leeks really do release flavor into the couscous, and the vinaigrette definitely completes the dish. It is a great “special occasion” meal that anyone who loves scallops is sure to remember.
Cooking the scallops on a bed of Israeli couscous, leeks, and white wine is easy and allows the pearls of pasta to absorb the scallops’ briny liquid. To ensure the scallops finish cooking at the same time as the rest of the dish, jump-start the leeks and couscous in the microwave, adding garlic and a pinch of saffron* to subtly perfume the dish.
Stir in wine and boiling water (with the blooming saffron, if using), which starts the dish off hot and shortens the cooking time. Using a very hot oven and sealing the pan with foil promises perfectly, and efficiently, cooked scallops that steam atop the couscous. A quick tarragon-orange vinaigrette to drizzle over the finished dish provides an appealing accent that complements the scallops and leeks without overpowering them.
It is recommend that you buy “dry” scallops, which don’t have chemical additives and taste better than “wet.” Dry scallops will look ivory or pinkish; wet scallops are bright white.
TIPS: For an accurate measurement of boiling water, bring a full kettle of water to a boil and then measure out the desired amount. *If using saffron threads, pulverize them in a mortar with pestle and then put them in the hot water to bloom.
One-Pan Baked Scallops with Couscous, Braised Leeks and Tarragon-Orange Vinaigrette
1 lb. leeks, white and light green parts only, halved lengthwise, sliced thin, and washed thoroughly
1 cup Israeli couscous
5 Tbsp. extra-virgin olive oil, plus extra for serving
4 garlic cloves, minced
Salt and pepper
Pinch saffron threads (optional, *see above tip)
¾ cup boiling water
¼ cup dry white wine
1½ lbs. large sea scallops, tendons removed
2 Tbsp. minced fresh tarragon
1 Tbsp. white wine vinegar
½ Tbsp. Dijon mustard
½ tsp. grated orange zest plus 1 Tbsp. juice
Directions
Adjust oven rack to middle position and heat oven to 450 degrees. Combine leeks, couscous, 2 tablespoons oil, garlic, ½ teaspoon salt, ¼ teaspoon pepper, and saffron (if using), in a bowl. Cover, and microwave, stirring occasionally, until leeks are softened, about 6 minutes. Stir in boiling water and wine, then transfer mixture to 13 by 9-inch baking dish.
Pat scallops dry with paper towels and season with salt and pepper. Nestle scallops into couscous mixture and cover dish tightly with aluminum foil. Bake until couscous is tender, sides of scallops are firm, and centers are opaque, 20 to 25 minutes.
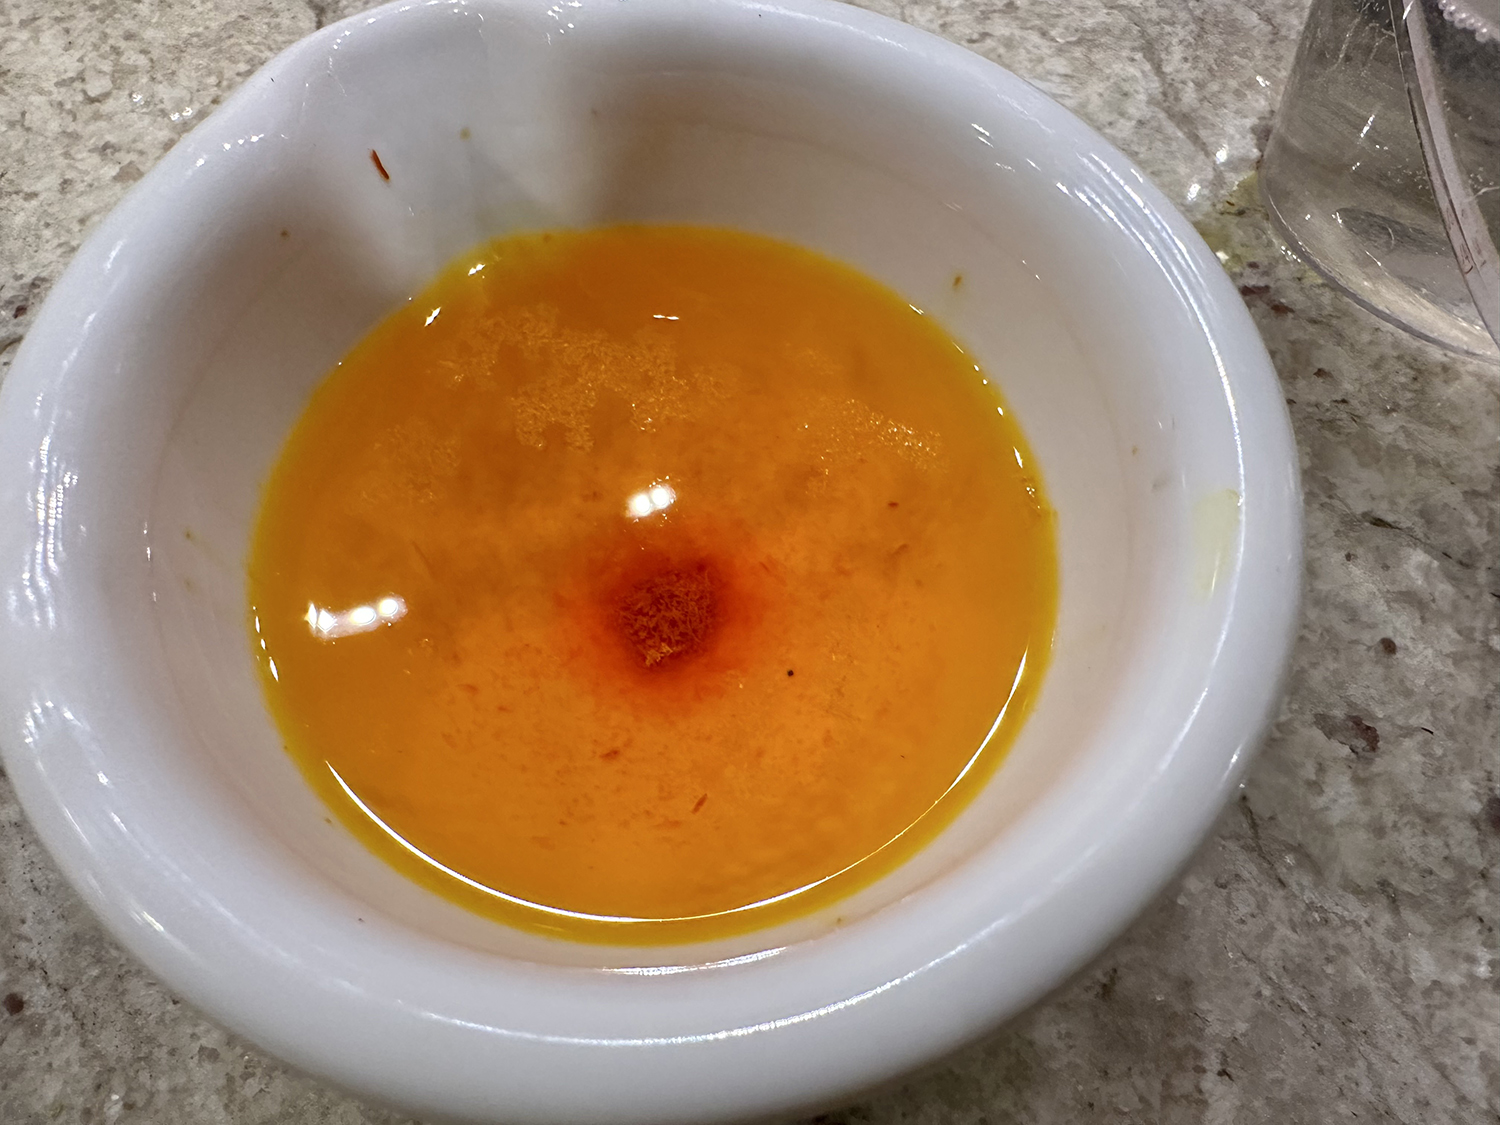
Meanwhile, whisk remaining 3 tablespoons oil, tarragon, vinegar, mustard, orange zest and juice, and ⅛ teaspoon salt together in bowl.
Remove dish from oven. Drizzle vinaigrette over scallops and serve, passing extra oil separately.
Looking for a swoon-worthy side dish? Crispy on the outside and soft in the center, these tubers are buttery, cheesy, herby and completely addictive. They also require only one pan, less than 10 ingredients, and just about an hour to make. You had me at potato…
According to the chef Robin Miller, Italian seasoning is a good medley of oregano, basil, thyme and rosemary. Add these herbs individually (about 1 teaspoon each) or substitute your favorites from the spice rack. Other options include adding garlic powder, or onion powder instead. Paprika would be a nice addition for folks who put paprika on everything. For a spicy version, add cayenne pepper or your favorite fiery spice blend.
Once your potatoes are halved, use a small, sharp knife to “score” the flesh, which just means to slice vertically and then horizontally, about ⅛-inch into the flesh, making a crosshatch pattern. This simple yet crucial step allows the butter, cheese and herbs to seep into the nooks and crannies, ensuring maximum flavor all the way to the center of the spud.
Since the main flavor of these crispy potatoes is Parmesan, choose a good-quality cheese. That doesn’t mean you need Italian cheese with a pricy label, any grated cheese made with real Parmesan will suffice.
Our only issue had to do with the amount of potatoes. The recipe called for 2 pounds, which would have been way too much for the pan. We found that 1 pound was the perfect quantity to fit our enameled cast iron pan (although we did not cut back on the remaining ingredients). We believe if you use a half-sized rimmed baking sheet, you should fit most of the halved two pound spuds and the other ingredients.
1 ½ to 2 lbs. of small red and/or gold potatoes, washed and patted dry, scored
½ cup plus 1 Tbsp. of grated Parmesan cheese, divided
1 ½ Tbsp. Italian herb seasoning
½ tsp. garlic powder
Salt and freshly ground black pepper
Olive oil, for brushing the potatoes
Chopped fresh parsley or chives, optional for serving
Directions
Place butter in a 13×9-inch baking pan. Place the pan in the oven and turn the oven on to 400 F to preheat. When the butter is bubbly, remove the pan and set aside.
Meanwhile, halve each potato and score the flesh by making a crosshatch pattern about ⅛-inch deep.
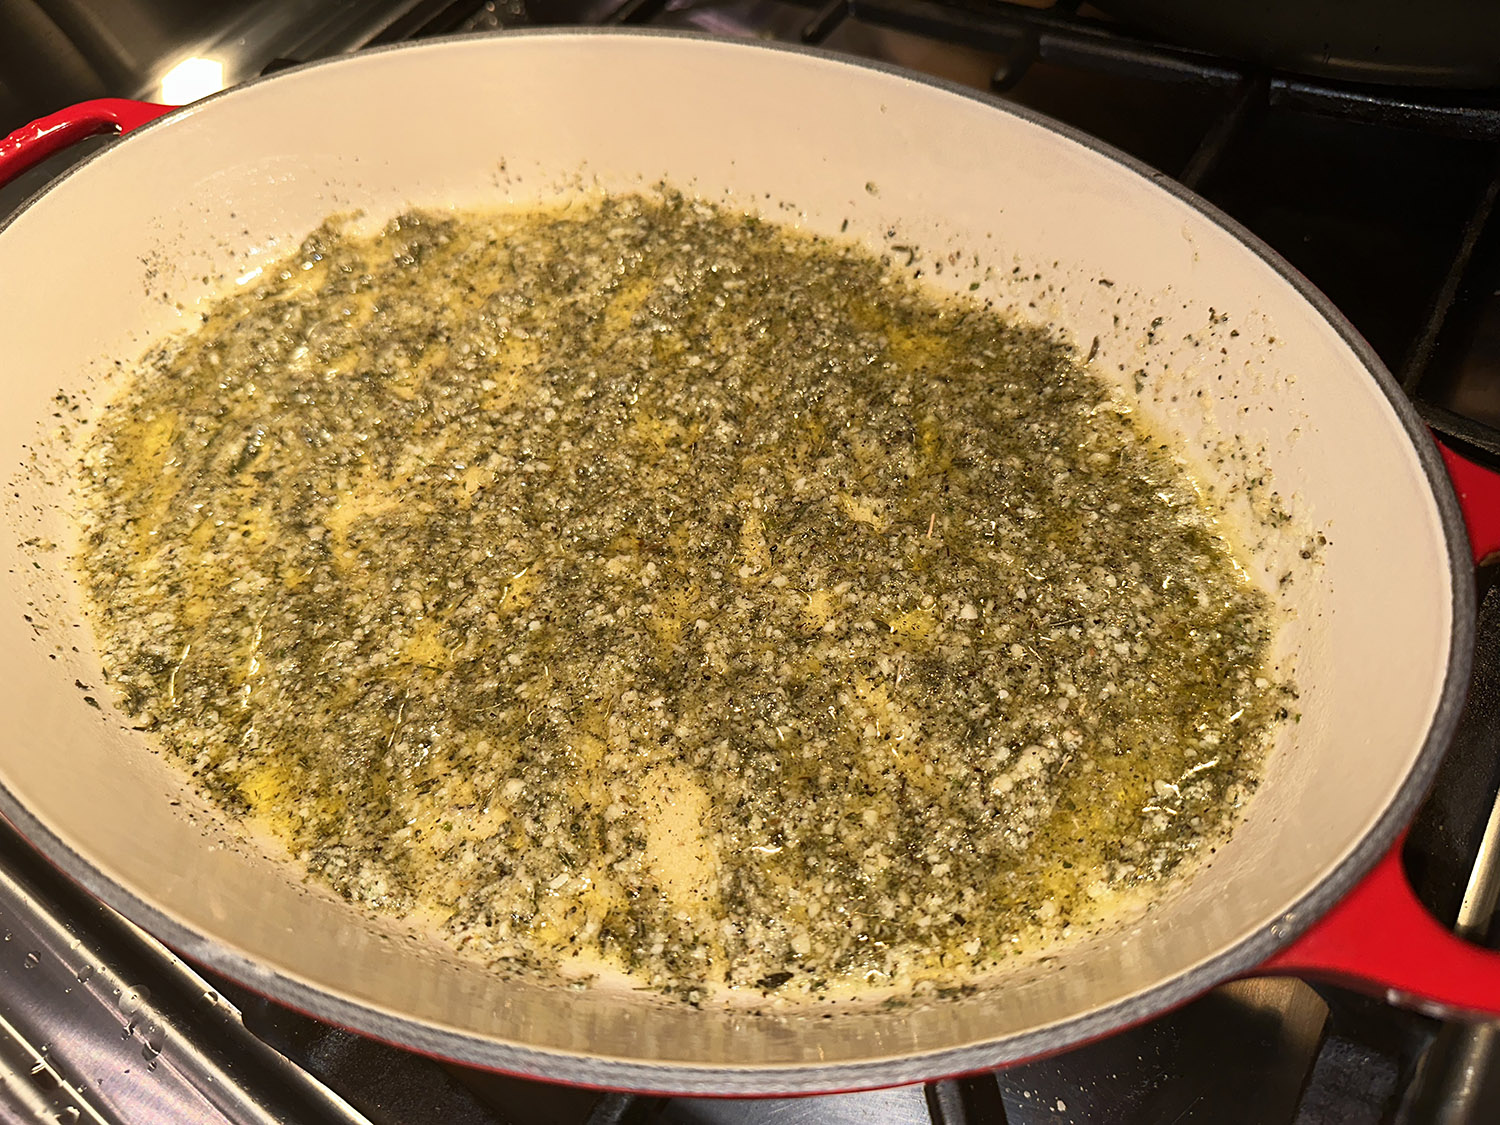
In a small bowl, combine ½ cup Parmesan cheese, Italian seasoning, garlic powder, 1 teaspoon salt and ½ teaspoon black pepper. Mix well and to the pan. Mix with melted butter to form a paste and spread in an even layer on the bottom of the pan.
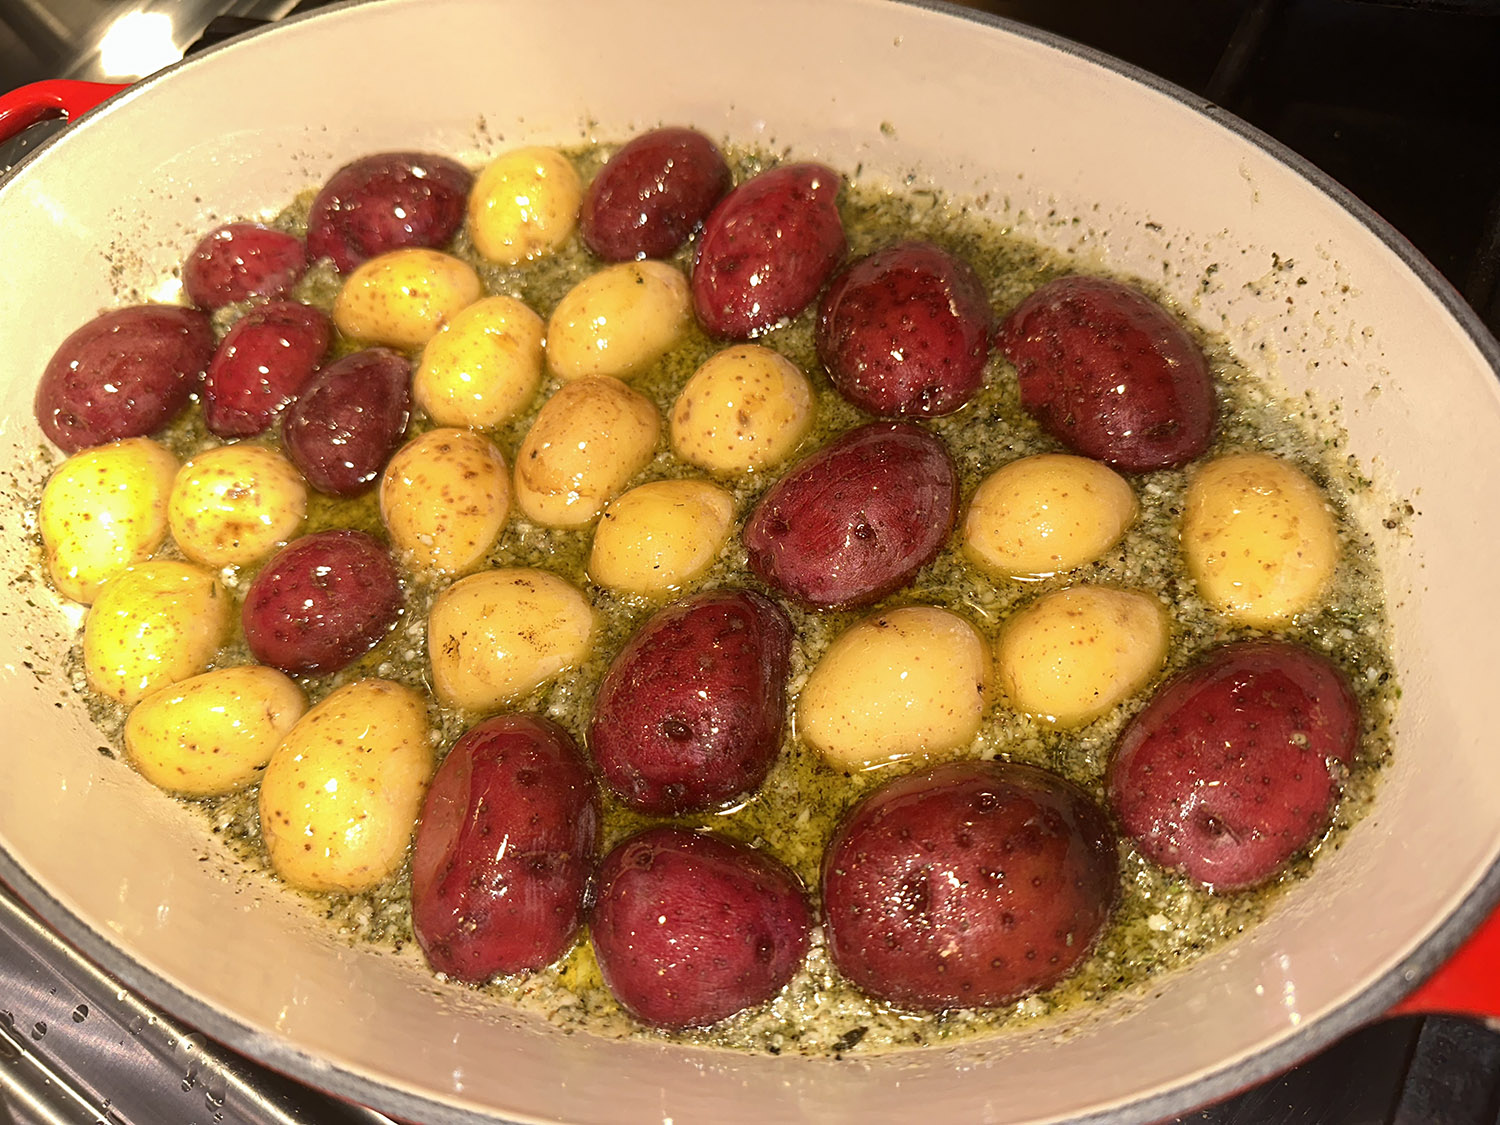
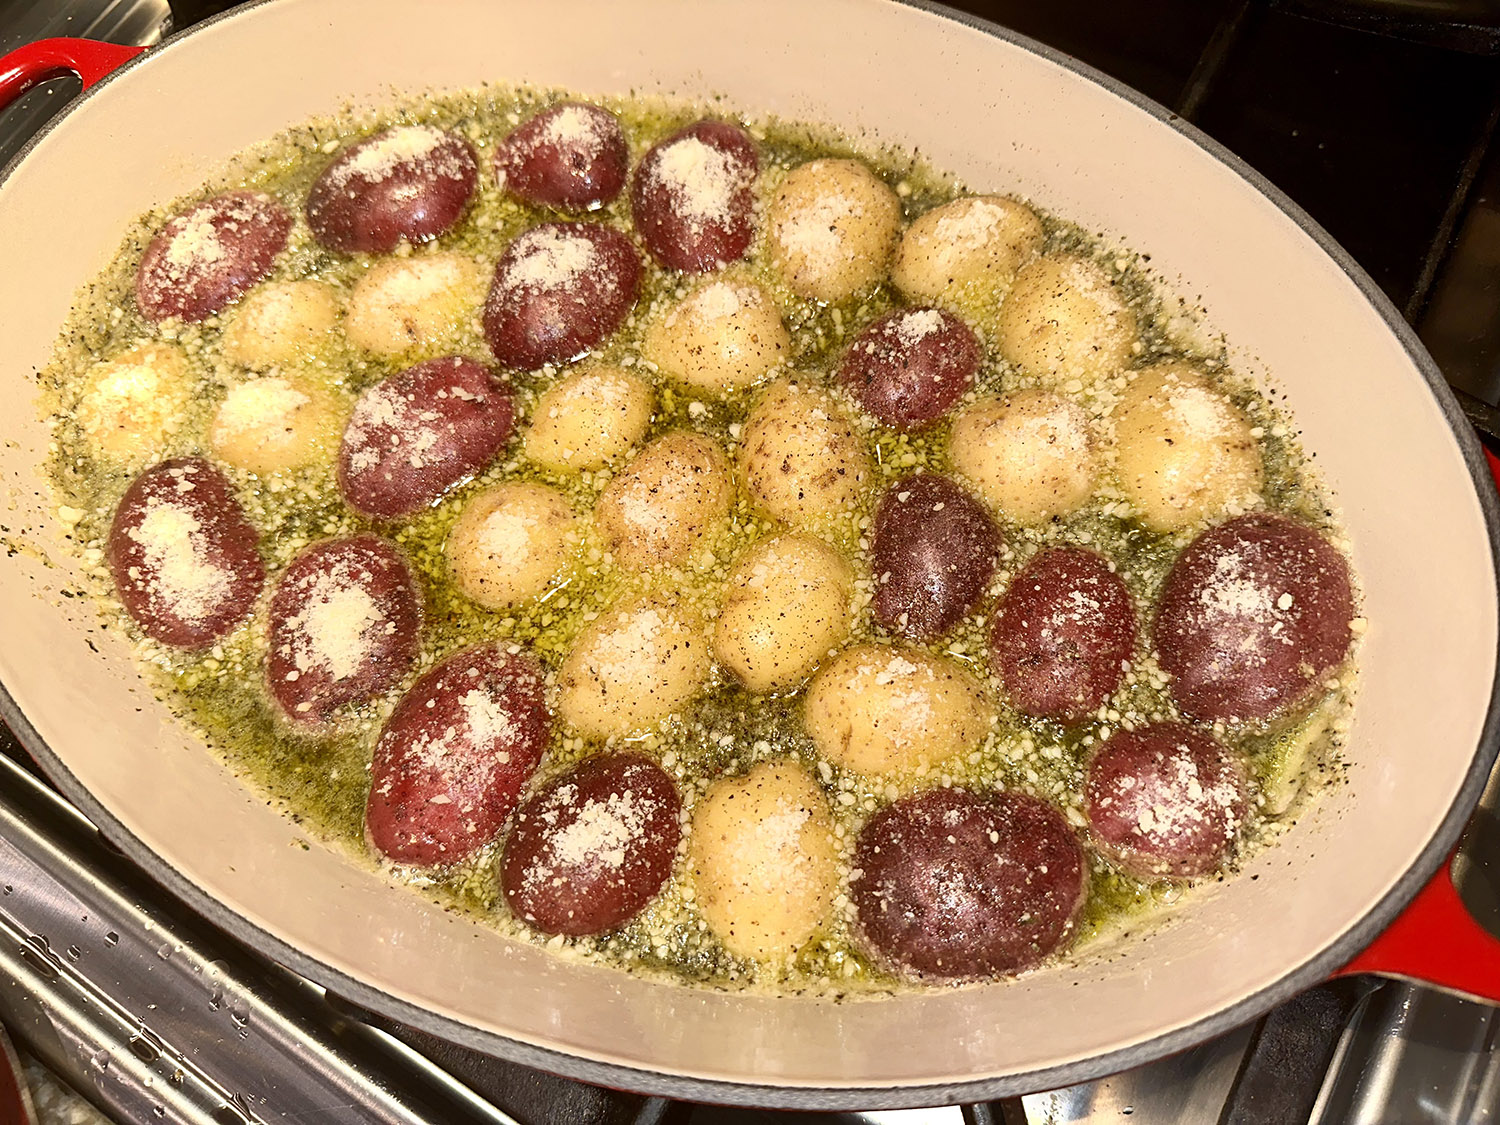
Nestle the potatoes cut side down into the cheese and butter mixture. Brush the skins of the potatoes with olive oil, season with salt and black pepper and sprinkle with the remaining tablespoon of Parmesan cheese.
Place the pan in the oven to bake uncovered for 35 to 40 minutes or until the potatoes are fork tender with a crispy crust.
Remove potatoes from the pan and allow to cool for 5 to 10 minutes to allow the cheese to set. Top with parsley or chives, if you like, and serve.
The Bijou is a gem made with four different liquors. You can craft this classic cocktail at home in just five minutes, then sit back and relax… How about this adult libation for New Year’s Day?
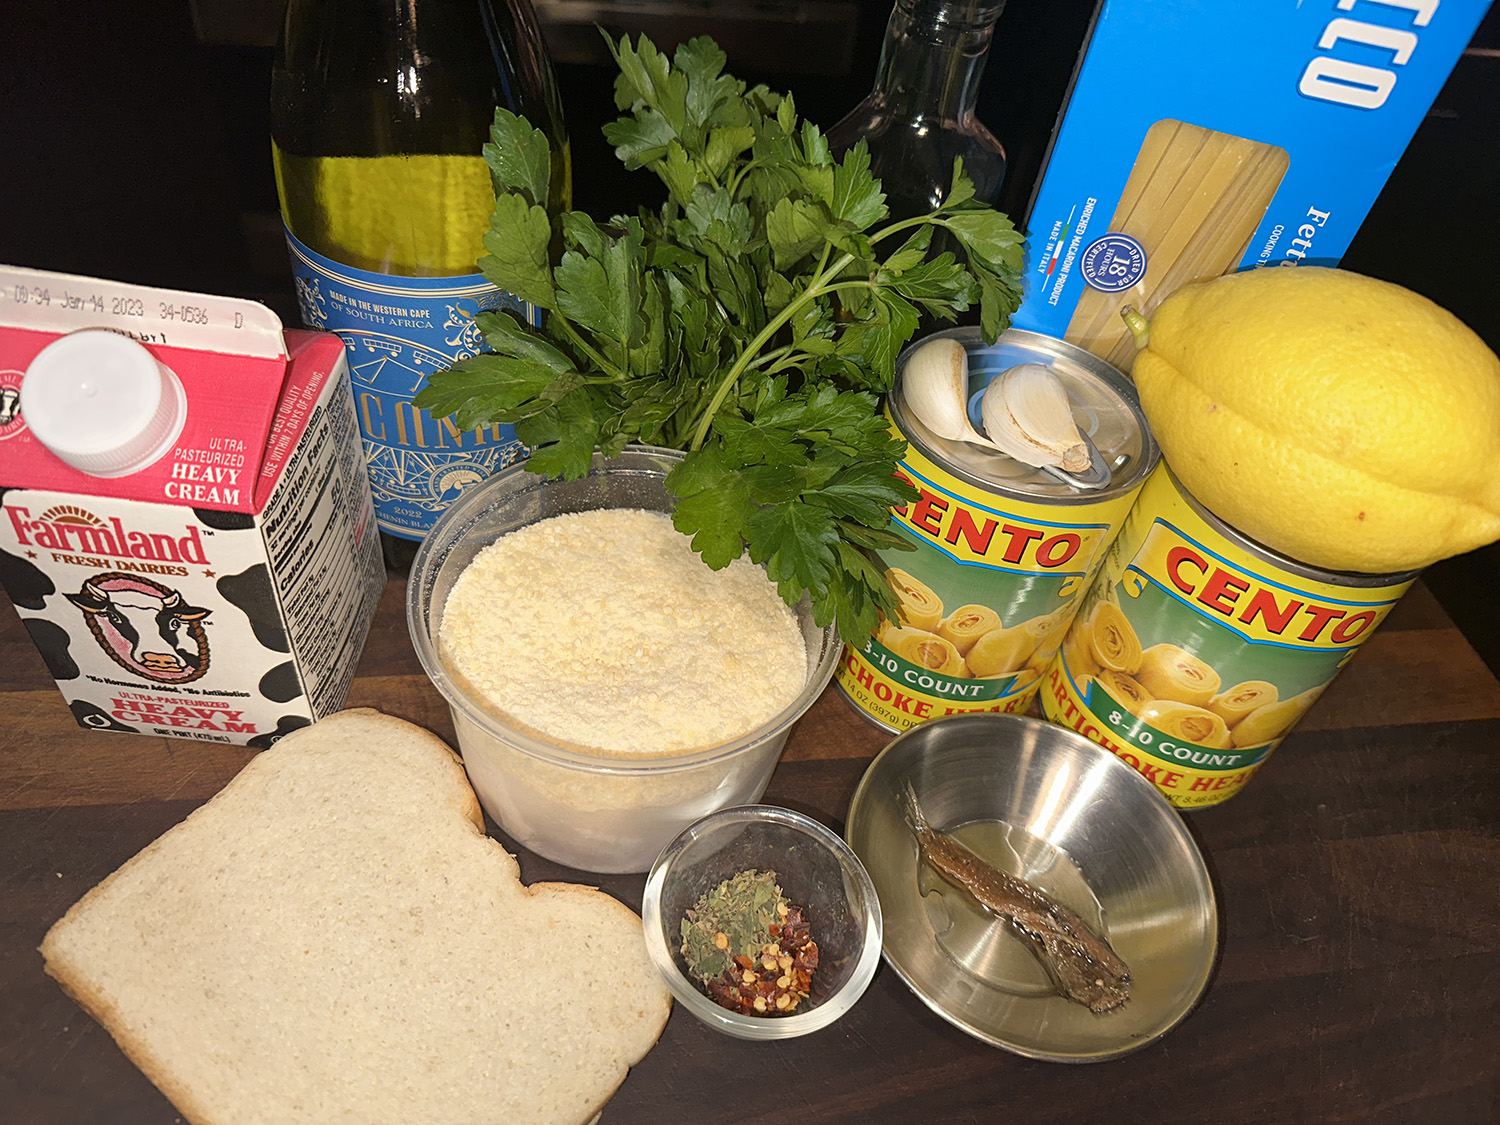
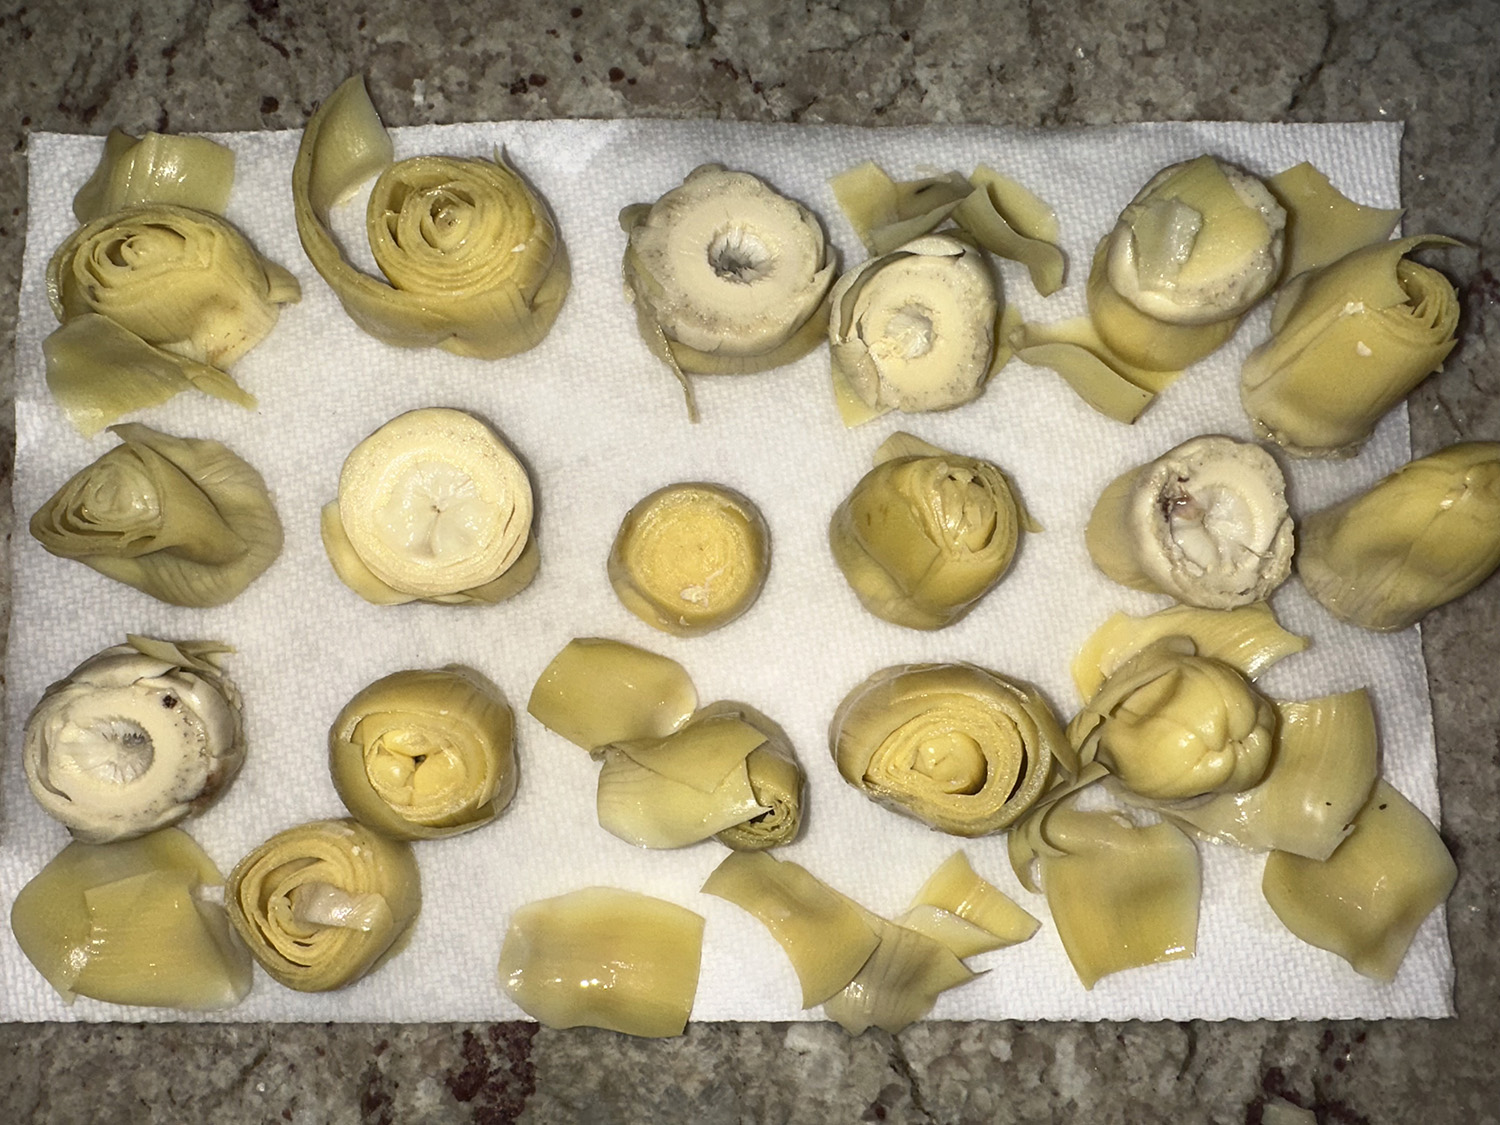
Jarred artichoke hearts and tagliatelle make a quick and elegant dinner. The leaves from jarred artichoke hearts need to be separated from the hearts and then given a quick soak to temper the harsh flavors they pick up from the brine. Slice the hearts in half and then dry them well so that they can be easily browned to bring out their natural nuttiness.
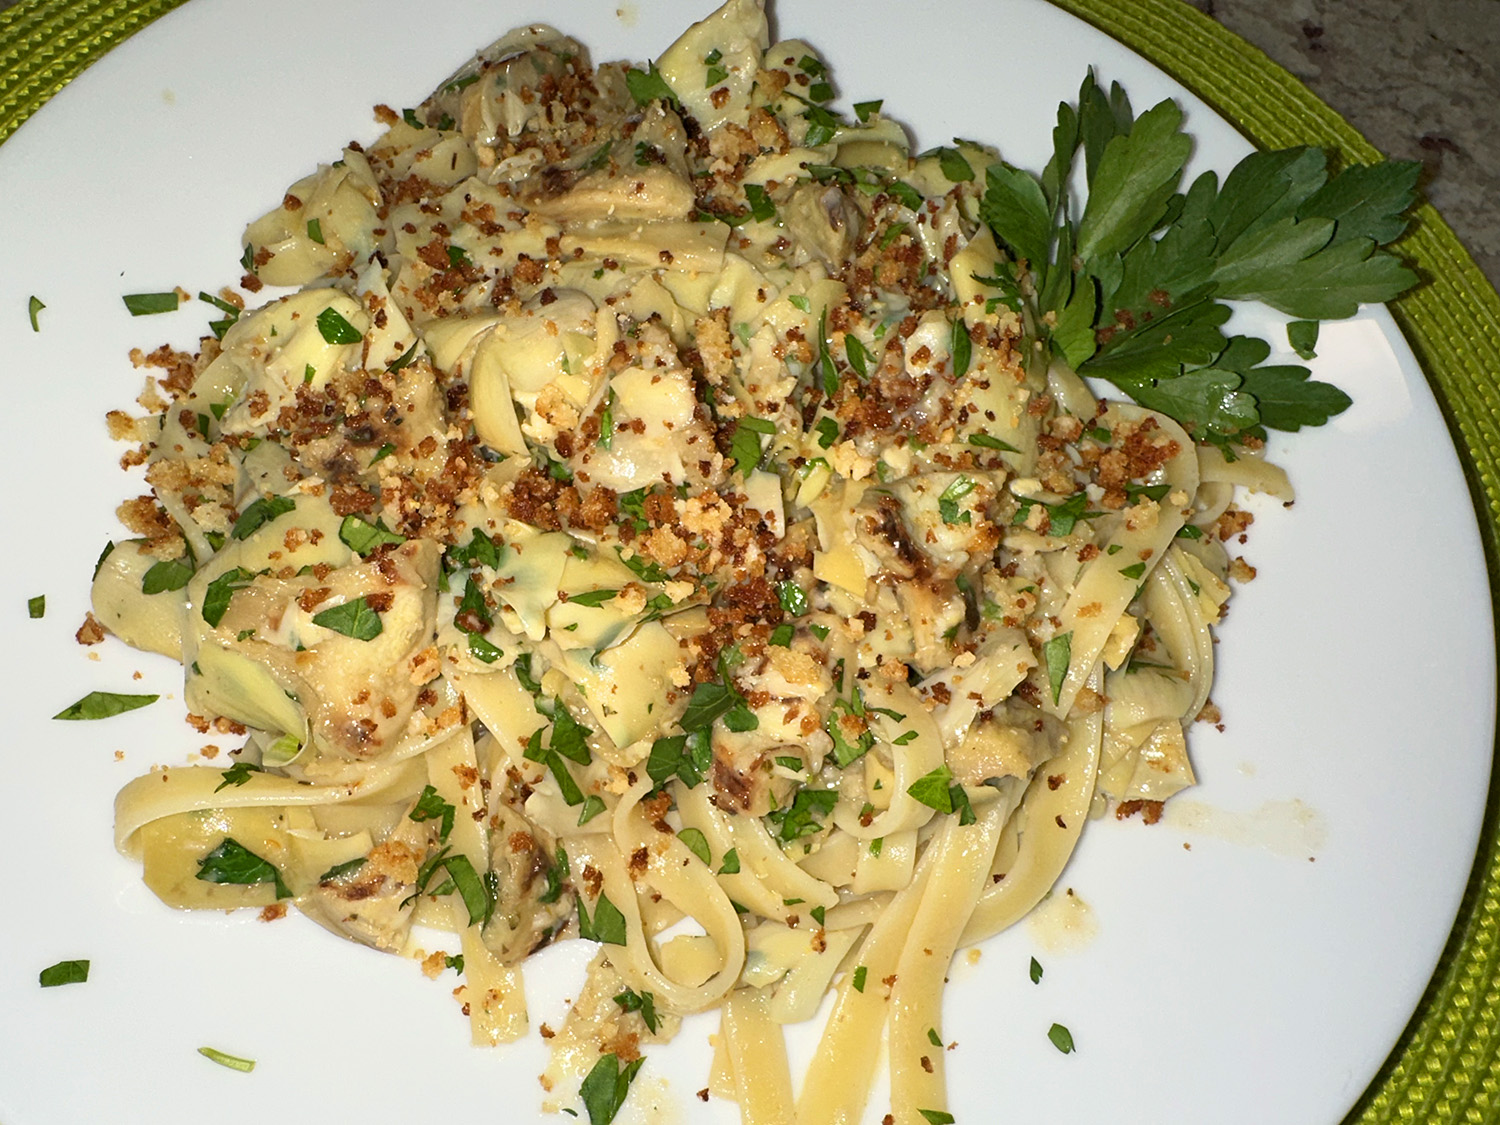
Anchovy gives the sauce savory depth without imparting a fishy taste—don’t omit it; and cream ties together the aromatics, wine, and artichoke flavor. A simple Parmesan bread-crumb topping gives the dish some savory crunch. Even though it adds more carbs, the crumb topping adds another dimension and necessary texture.
Jarred artichoke hearts labeled “baby” or “cocktail” that are 1 1/2 inches or shorter in length are preferred. Larger artichoke hearts tend to have fibrous leaves. But, if you must use larger hearts, trim the top 1/4 to 1/2 inch from the leaves. Do not use marinated or oil-packed artichoke hearts. You’ll need two 9.9-ounce jars of artichokes for this recipe—however, because we love artichokes, we added two 14-ounce jars.
This recipe can easily be doubled to feed 4 or 5 guests. Unable to source tagliatelle (who knows why, it is usually a popular pasta), we substituted fettuccini, though pappardelle would also work.
1 ½ cups jarred whole artichoke hearts packed in water, preferably baby or cocktail size
1 slice hearty white sandwich bread, torn into 1-inch pieces
3 ½ Tbsp. extra-virgin olive oil
¼ cup grated Parmesan cheese, plus extra for serving
Salt and pepper
2 garlic cloves, minced
1 anchovy fillet, rinsed, patted dry, and minced
¼ tsp. dried oregano
Pinch red pepper flakes
¼ cup dry white wine
1 Tbsp. heavy cream
6 oz. tagliatelle
2 Tbsp. minced fresh parsley
½ tsp. grated lemon zest
Directions
Cut leaves from artichoke hearts. Cut hearts in half and dry with paper towels. Place leaves in bowl and cover with water. Let leaves stand for 15 minutes. Drain well.
Pulse bread in food processor until finely ground, 7 to 10 pulses. Heat 1 tablespoon oil in 8-inch nonstick skillet over medium heat until shimmering. Add bread crumbs and cook, stirring constantly, until crumbs begin to brown, 2 to 4 minutes.
Add 2 tablespoons Parmesan and continue to cook, stirring constantly, until crumbs are golden brown, 1 to 2 minutes. Transfer crumbs to bowl and season with salt and pepper to taste. Wipe out skillet.
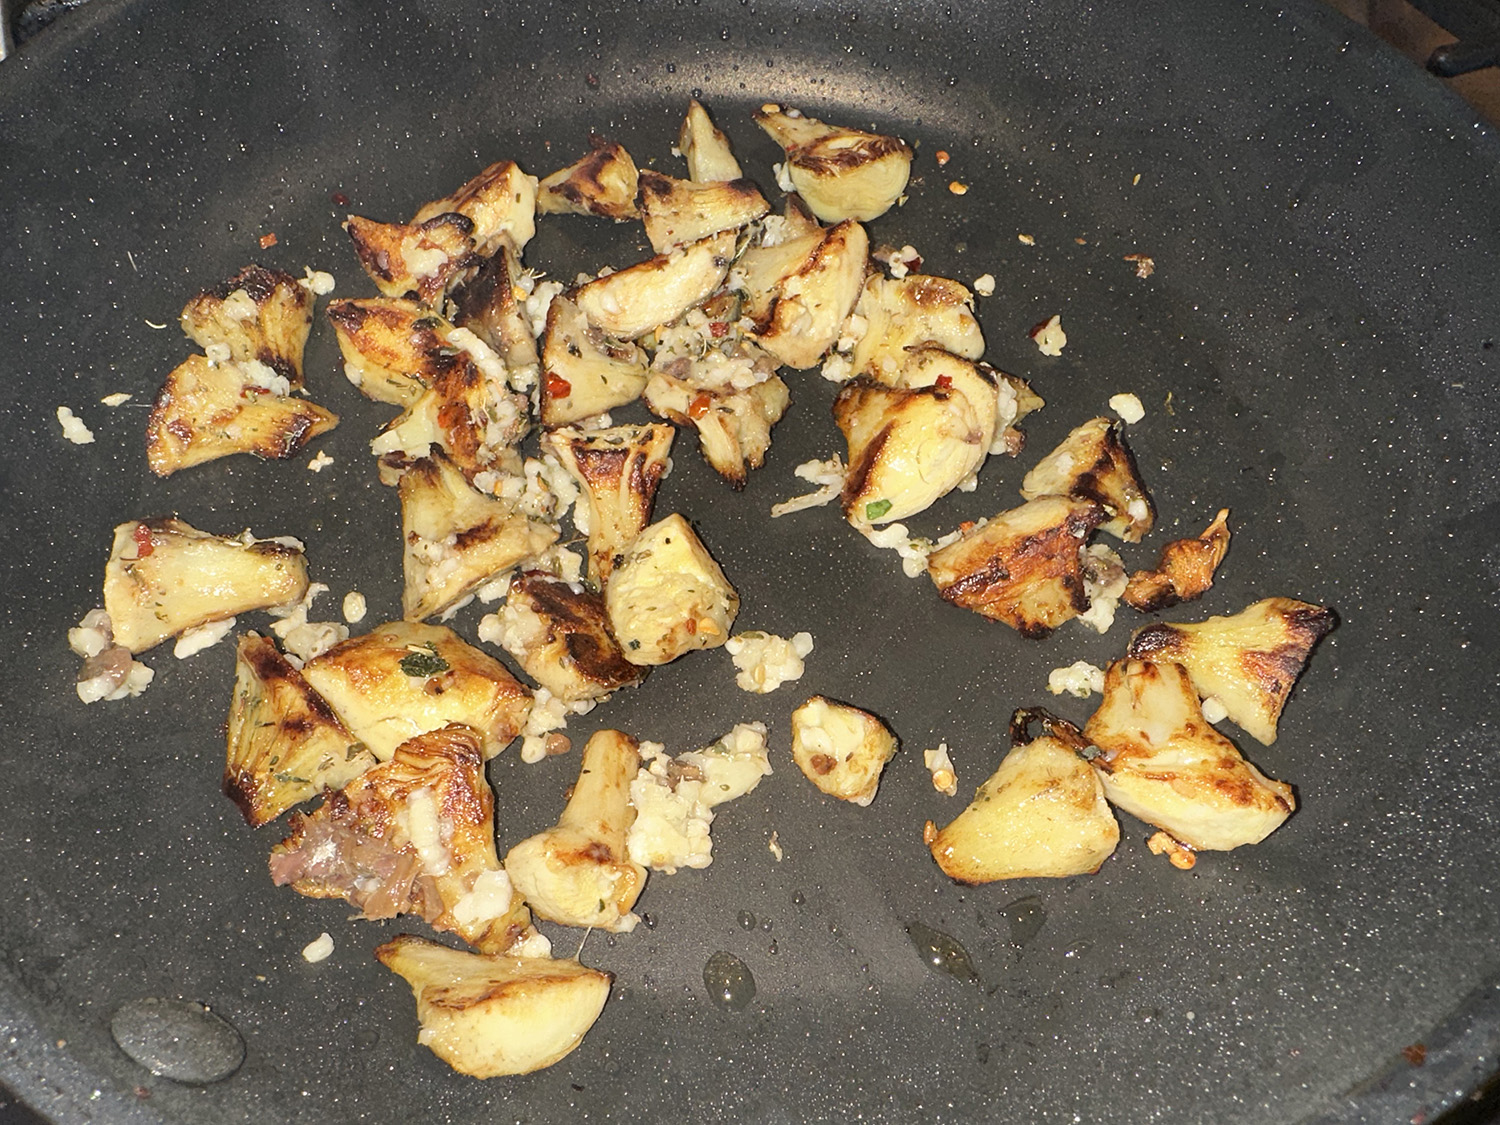
Heat 1/2 tablespoon oil in now-empty skillet over medium-high heat until shimmering. Add artichoke hearts and pinch salt; cook, stirring frequently, until hearts are spotty brown, 5 to 7 minutes.
Add garlic, anchovy, oregano, and pepper flakes; cook, stirring constantly, until fragrant, about 30 seconds.
Stir in wine and cream and bring to simmer. Remove skillet from heat and stir in artichoke leaves. Set aside.
Meanwhile, bring 2 quarts water to boil in large pot. Add pasta and 1/2 tablespoon salt and cook, stirring often, until al dente. Reserve 3/4 cup cooking water, then drain pasta and return it to pot. Stir in artichoke sauce, remaining 2 tablespoons Parmesan, 1/3 cup reserved cooking water, remaining 2 tablespoons oil, parsley, and lemon zest. Adjust consistency with remaining reserved cooking water as needed. Season with salt and pepper to taste. Serve, passing bread-crumb mixture and extra Parmesan separately.
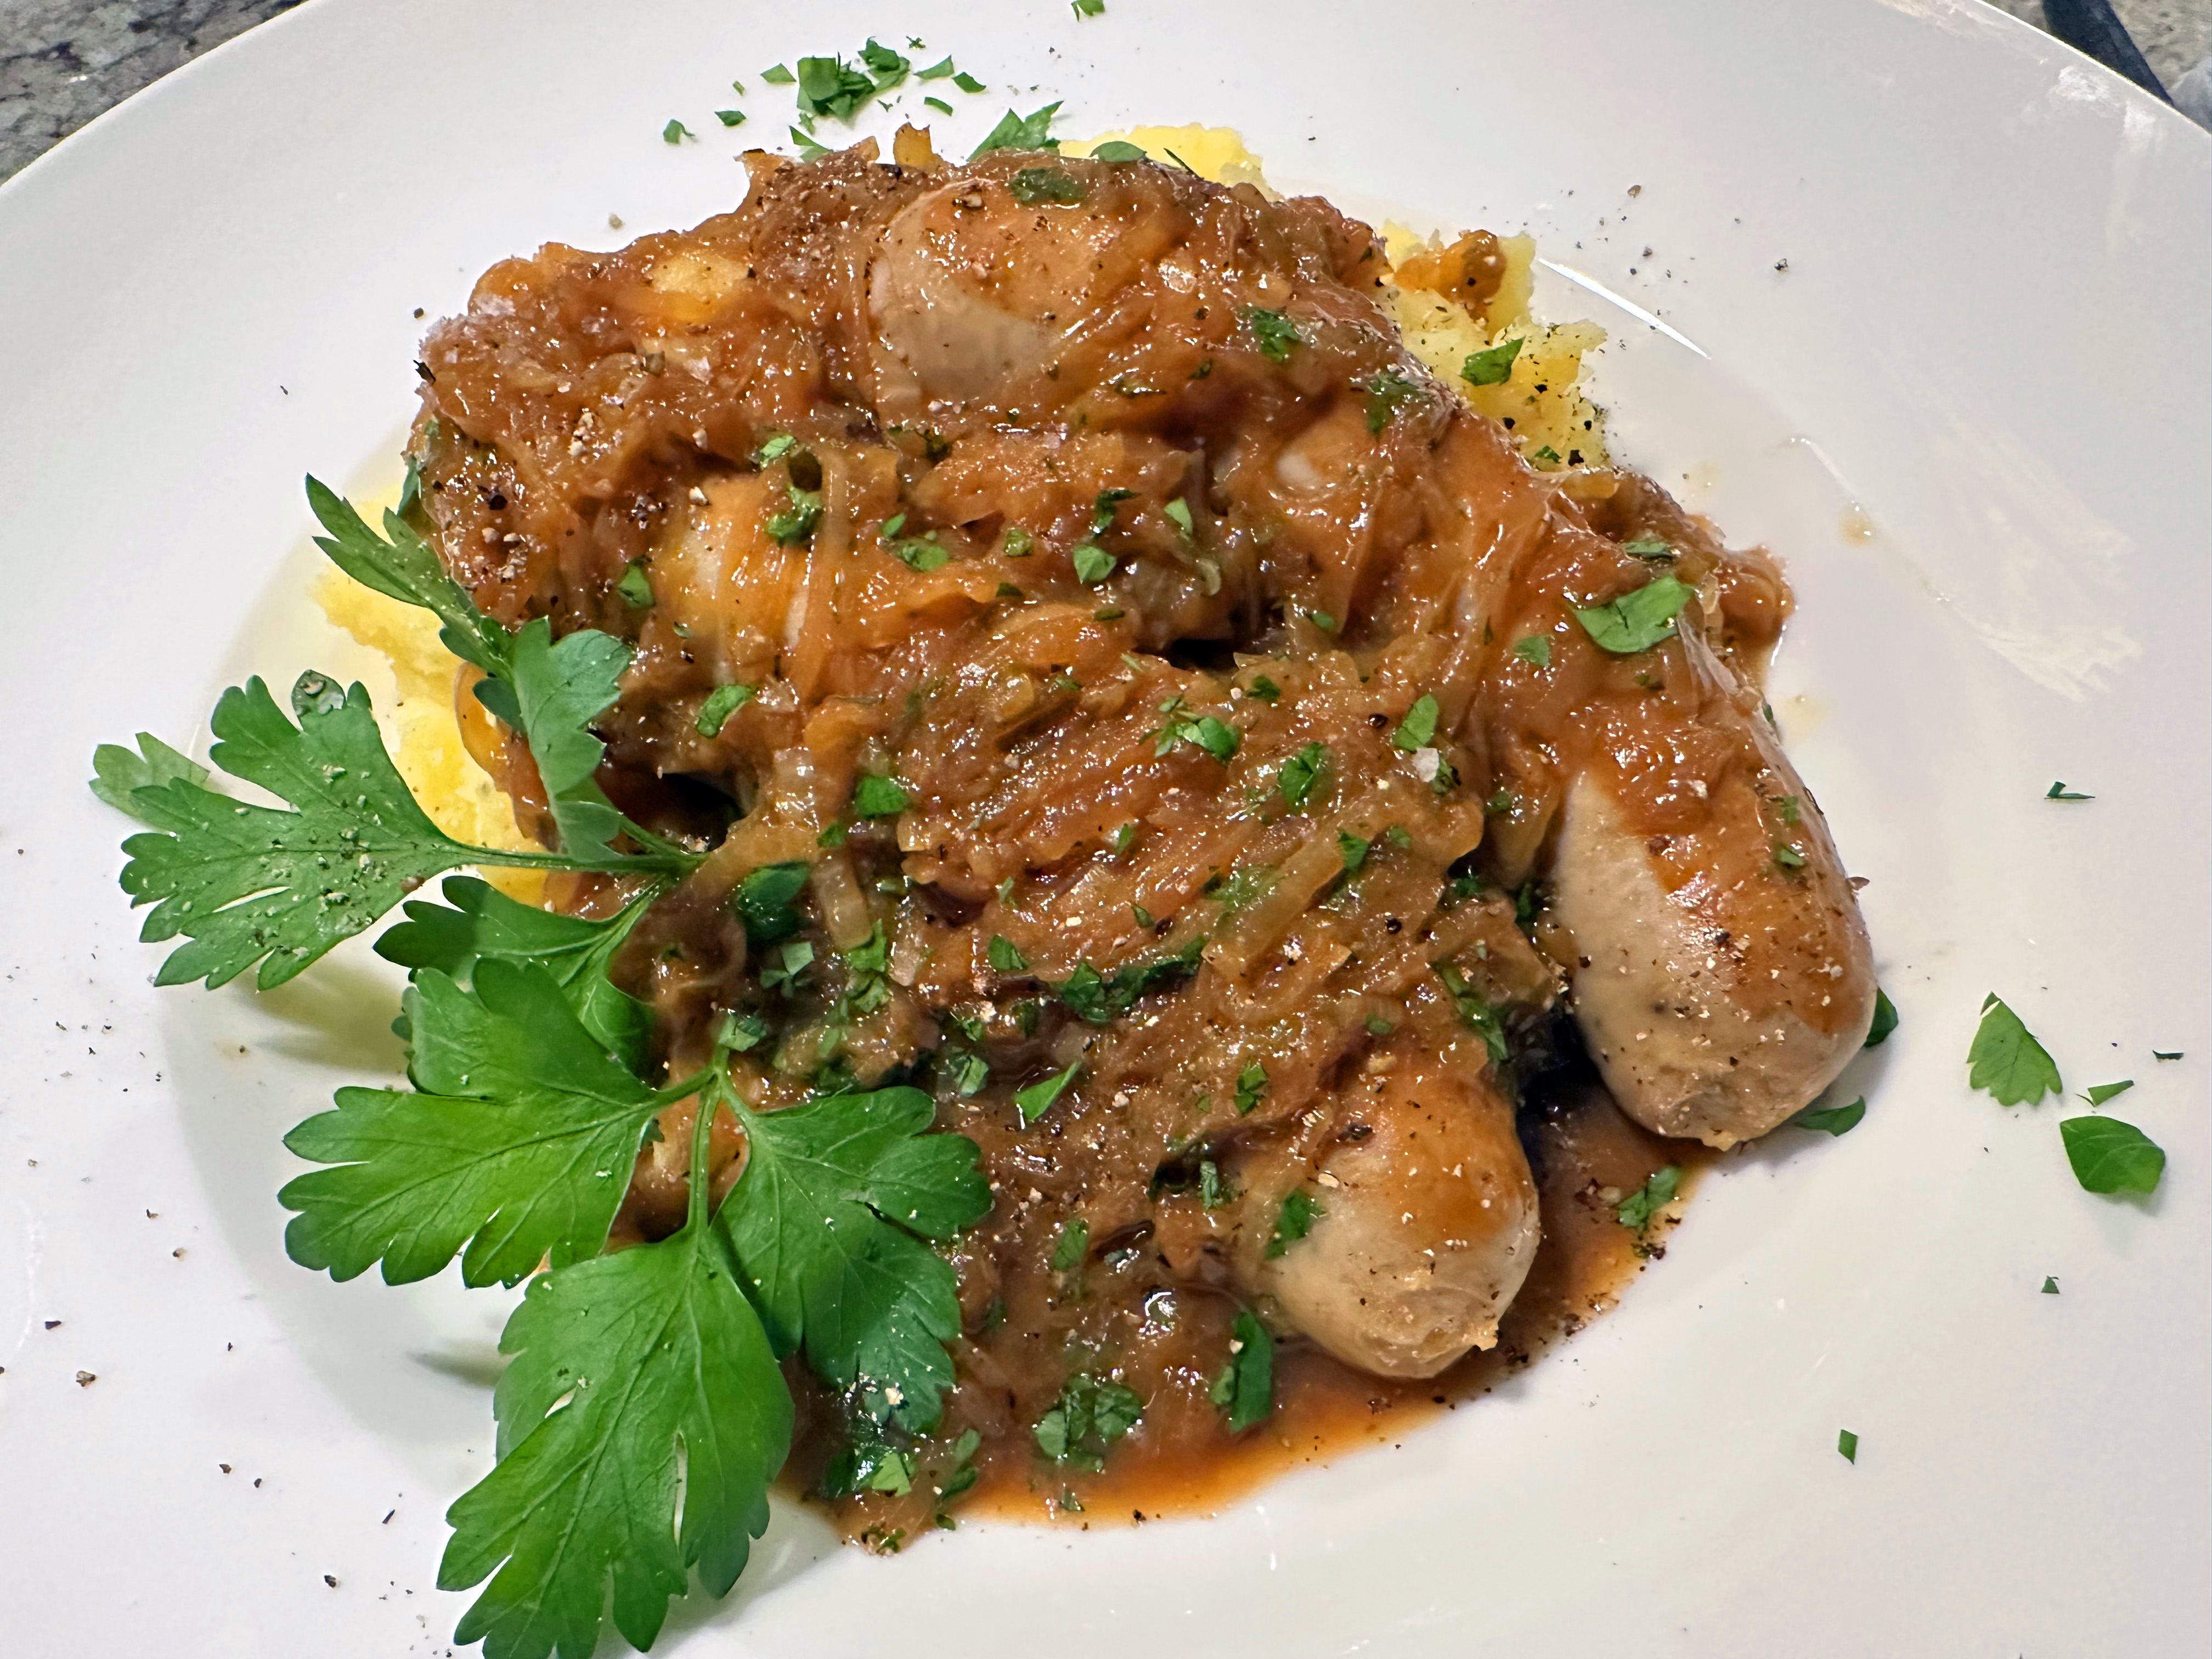
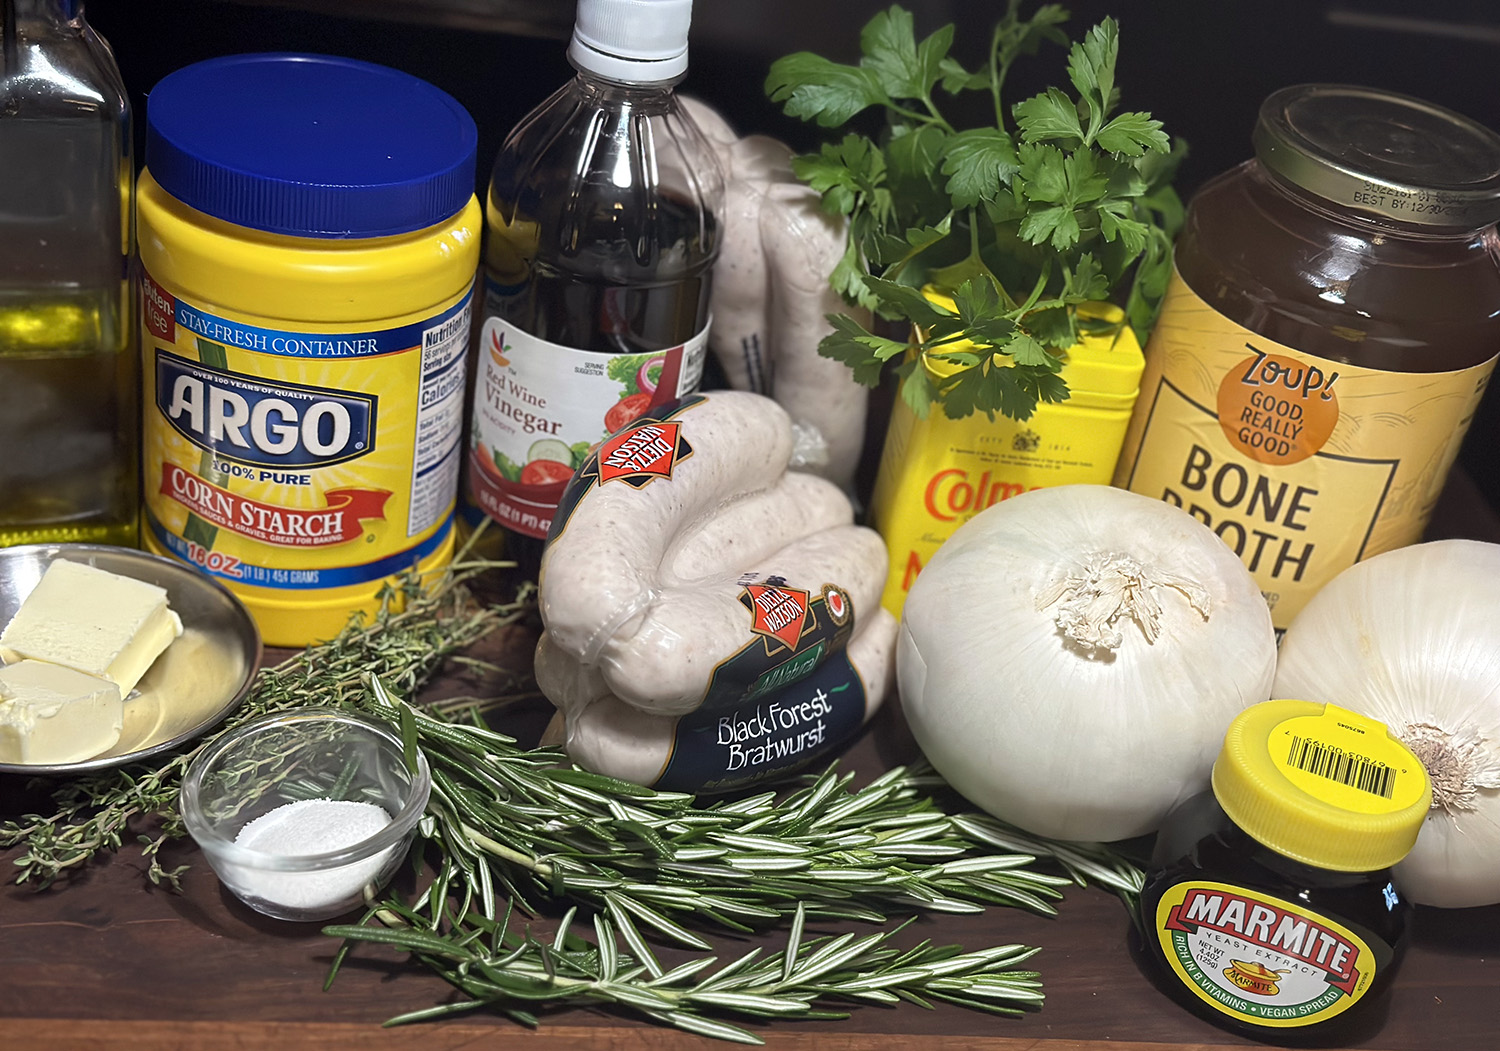
Ever eat Bangers and Mash that left you underwhelmed? So this version found in Milk Street Magazine, enticed us to want to try making it on our own. It’s clearly not a complicated recipe, and the flavor profile looked downright yummy. So after ordering the Marmite online, and receiving it a few days later, we took the plunge.
Great bangers and mash with onion gravy, the iconic British pub staple, revolves around plump, well-browned links napped with an ultrasavory sauce. Searing the sausages ensures that the links develop attractive, flavorful browning; steaming cooks them through gently so that they are plump and juicy.
Adding the onions (thin-sliced so that they softened quickly) to the pan to steam with the sausages jump-starts their cooking. Continuing to sauté them after the sausage comes out further softens them and caramelizes their sugars; doing so also develops a deep, flavor-packed fond on the bottom of the skillet.
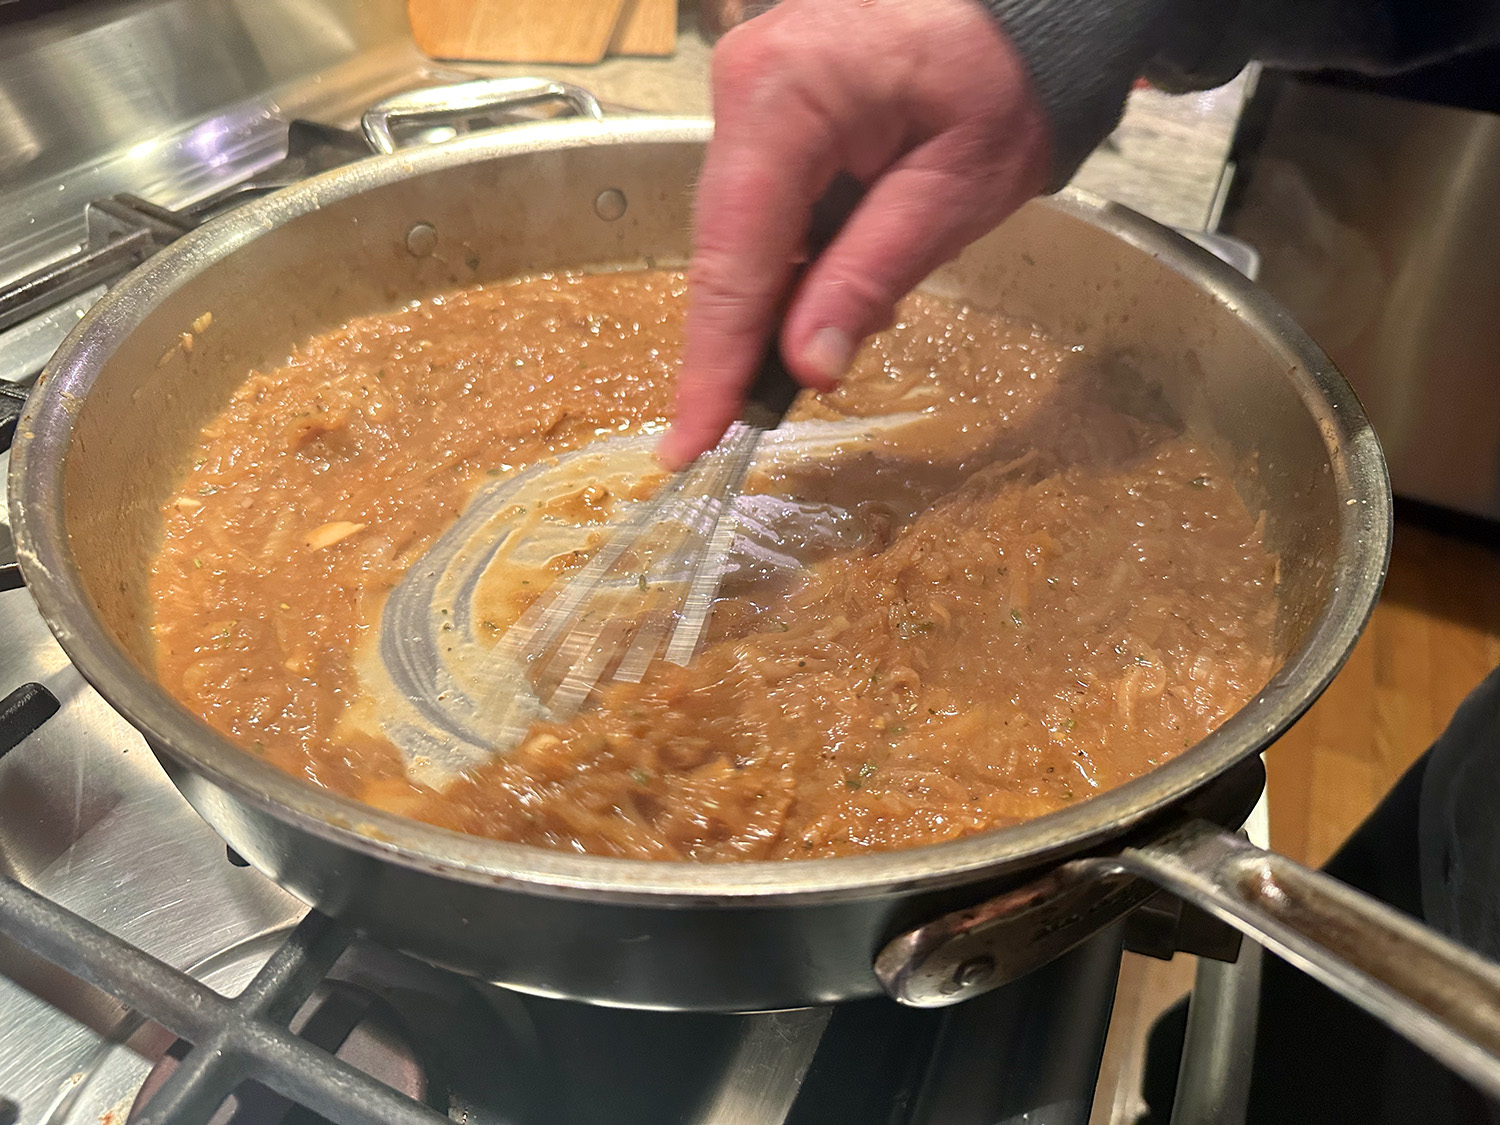
Deglazing the pan with a highly seasoned beef broth captures the fond, and simmering the onions in the broth tenderizes them more and concentrates the flavor of the gravy. A cornstarch slurry and butter, whisked in just before serving, gives the gravy the requisite viscosity, shine, and richness.
To capture every bit of that savory flavor base, deglaze the pan with beef broth that is seasoned with dry mustard, rosemary, thyme, and Marmite the glutamate-rich British yeast extract that infuses the gravy with meaty fussed-over flavor. Marmite is sold at most grocery stores or easliy accessible online.
If Cumberland sausage is unavailable, you can substitute bratwurst or any mildly spiced fresh pork sausage. For the best-tasting gravy, cook the onions until a dark fond forms in the skillet. Serve the sausages and gravy over your favorite mashed potato recipe.
Heat oil in 12-inch skillet over medium heat until shimmering. Arrange sausages in pan and cook, turning once, until browned on 2 sides, about 5 minutes. Move sausages to 1 side of skillet. Add onions, evenly distributing around bottom of pan, and nestle sausages on top. Add ½ cup water and immediately cover. Cook, turning sausages once until they register between 160 and 165 degrees and onions have softened, about 10 minutes.
While sausages cook, whisk broth, Marmite, mustard, thyme, and rosemary in 4-cup liquid measuring cup until Marmite dissolves.
Transfer sausages to plate and tent with aluminum foil. Make sure onions are spread evenly; cook without stirring until beginning to brown, about 5 minutes (if onions have not browned, increase heat to medium-high). Continue to cook, stirring occasionally, until onions are tender and well browned, and dark fond forms on bottom of skillet, 3 to 5 minutes longer. Stir in sugar, pepper, and salt and cook for 1 minute.
Add broth mixture, increase heat to medium-high, and bring to boil. Cook, scraping up any browned bits from bottom and sides of skillet and stirring back into sauce, until sauce is slightly reduced, about 5 minutes. Combine cornstarch and remaining 1 tablespoon water in small bowl. Whisk cornstarch mixture into sauce and cook until sauce is glossy and has consistency of heavy cream, about 2 minutes.
Off heat, whisk in butter, 1 piece at a time. Stir in vinegar and season with salt and pepper to taste. Sprinkle with parsley and serve.
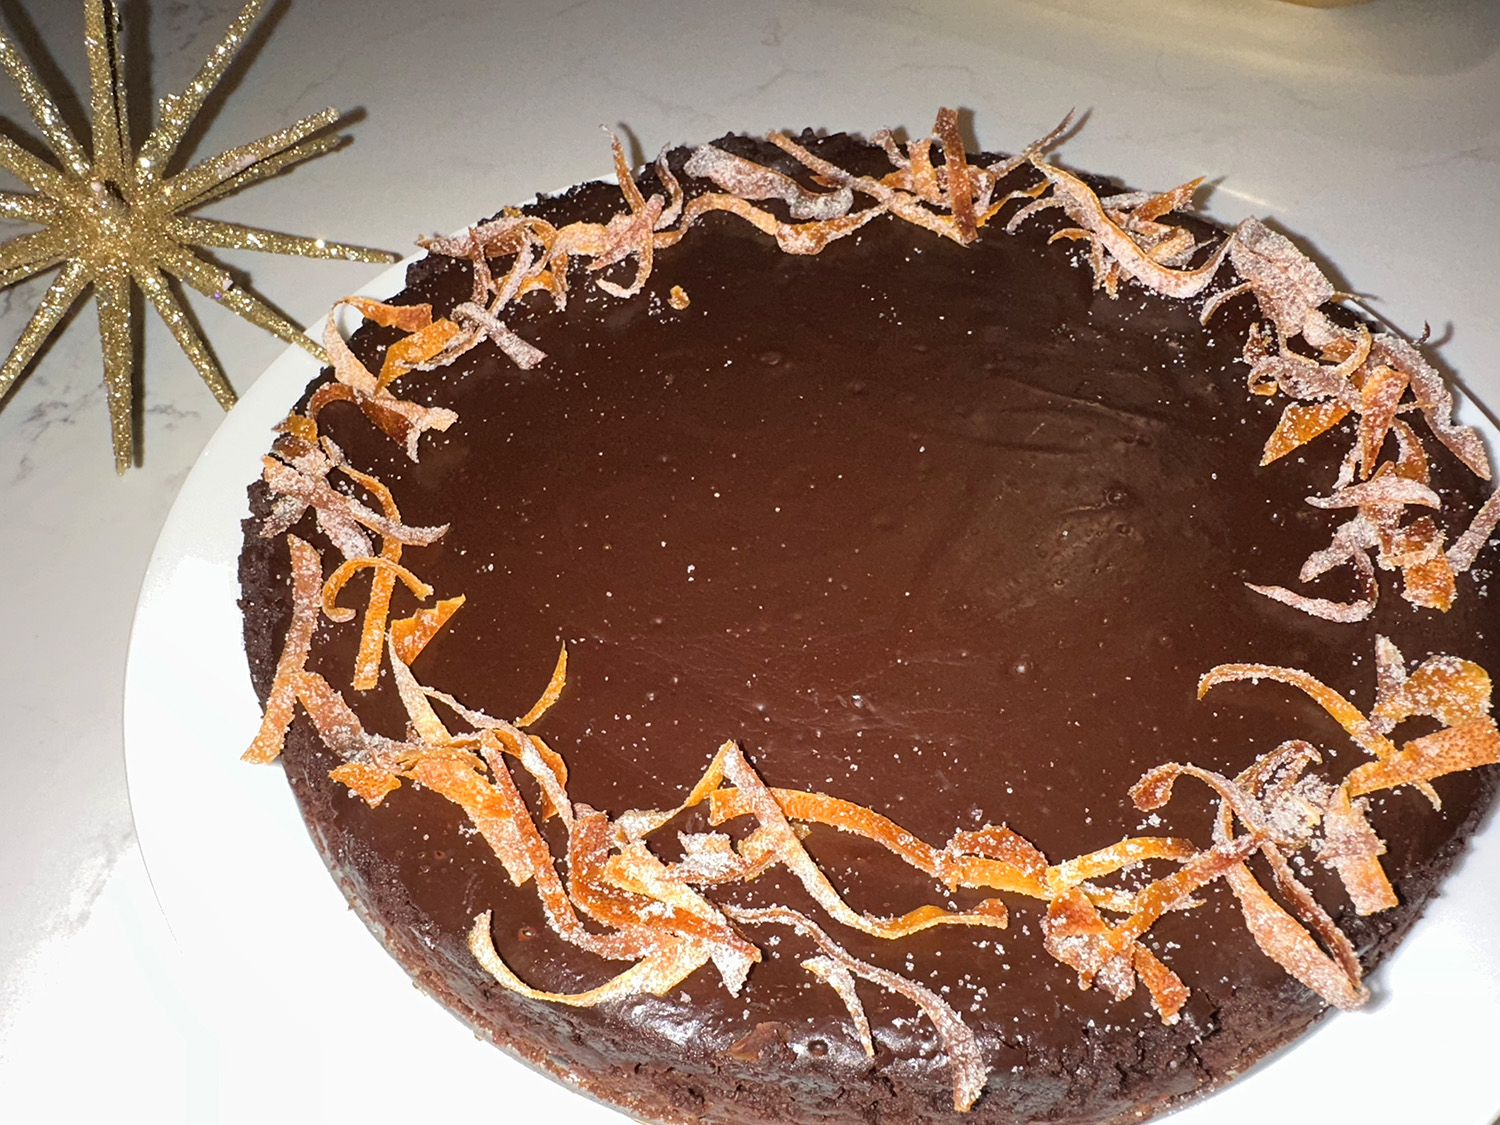
A dessert to die for. Bête Noire is a flourless chocolate cake that gets its silky, ultrasmooth, almost custard-like texture from the sugar syrup in the base, as well as from gentle baking. This version brings a uniquely complex flavor by caramelizing sugar with black peppercorns before dissolving the caramel with orange juice and bourbon.
A combination of bittersweet and semi-sweet chocolate yields a rounder, richer finish than just one type of chocolate, while Angostura bitters lends a spiciness and depth that balances the sweetness of the dessert.
Milk Street did away with the classic ganache coating and opted to use quickly candied orange zest for a garnish that adds contrasting color and texture. Though the cake requires at least 4 hours of chilling to fully set, it’s best served at room temperature, so don’t forget to remove the cake from the refrigerator at least two hours before serving. For neat slices, dip the knife in hot water, then wipe it dry before each cut.
Don’t use a whisk to combine the ingredients for the batter; a large silicone spatula is better. A whisk incorporates air, which leads to bubbles rising to the surface during baking and marring the smooth, shiny surface. Also, don’t forget to run a knife around the edges of the cake the moment it comes out of the oven; loosening the edges from the sides of the pan prevents the cake from cracking as it cools. Finally, don’t cover the cake before refrigerating, as a cover may trap condensation that can drip onto the cake.
8 Tbsp. (1 stick) salted butter, cut into 16 pieces, plus more for the pan
12 oz. bittersweet chocolate, finely chopped
4 oz. semi-sweet chocolate, finely chopped
1 large navel orange
¾ cup + ⅓ cup white sugar
½ cup bourbon
3 Tbsp. black peppercorns
2 Tbsp. Angostura bitters
6 large eggs, beaten
Whole-milk Greek yogurt, to serve
Directions
Heat the oven to 275°F with a rack in the middle position. Coat the bottom and sides of a 9-inch springform pan with butter. Line the bottom of the pan with kitchen parchment, then butter the parchment. Set a wire rack in a rimmed baking sheet. In a large bowl, combine the bittersweet and semi-sweet chocolates and the butter; set a fine mesh strainer across the bowl, then set aside.
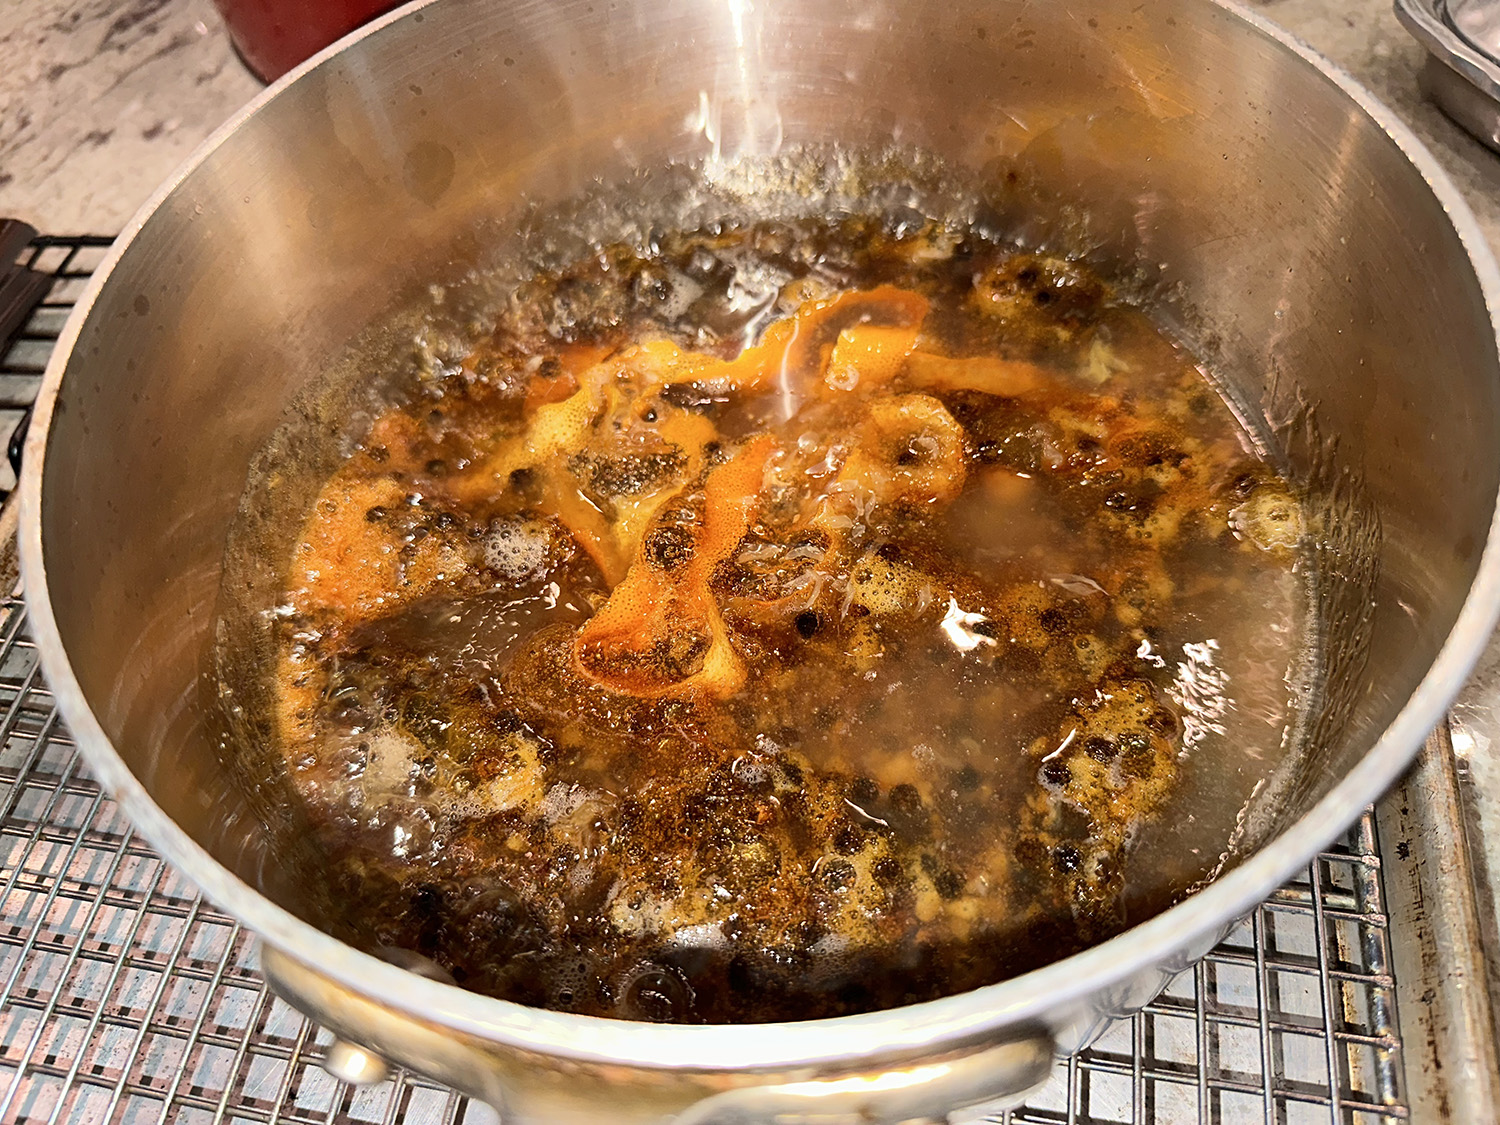
Using a vegetable peeler, remove just the outer zest of the orange, not the white pith just beneath, in long strips; set the strips aside. Halve the orange and juice into a liquid measuring cup. Measure 3 tablespoons of the juice into a medium saucepan. Add the bourbon to the remaining juice in the measuring cup, then add enough water to equal 1 cup total liquid; set aside.
Add the ¾ cup sugar to the juice in the saucepan, then add the zest strips and peppercorns. Set over medium-high and cook, without stirring but occasionally swirling the pan, until the sugar dissolves, 1 to 2 minutes. Continue cooking, swirling the pan often, until the sugar caramelizes to deep mahogany brown and the peppercorns begin to pop, 4 to 5 minutes. Remove the pan from the heat and carefully pour in the orange juice–bourbon mixture; the caramel will bubble up and harden. Set the pan over medium, bring to a simmer and cook, stirring, until the caramel has dissolved and the peppercorns no longer stick together, 1 to 2 minutes. Remove from the heat and stir in the bitters.
Immediately pour the hot sugar syrup through the strainer into the chocolate-butter mixture; reserve the strained solids. Jostle the bowl to ensure the chocolate and butter are fully covered with syrup, then let stand for 2 to 3 minutes. Using a silicone spatula, gently stir until the mixture is well combined and completely smooth; it should be barely warm.
Add the beaten eggs to the chocolate mixture and stir with the spatula until homogenous and glossy, 2 to 3 minutes. Pour into the prepared springform pan. Gently tap the sides of the pan to remove any air bubbles, then use the back of a spoon to smooth the surface. Set the pan on the prepared baking sheet and bake until the cake barely jiggles when the pan is gently shaken, about 45 minutes.
Remove from the oven and immediately run a thin, sharp knife around the edges to loosen the sides of the cake from the pan. Cool to room temperature in the pan, then refrigerate uncovered for at least 4 hours or up to 24 hours.
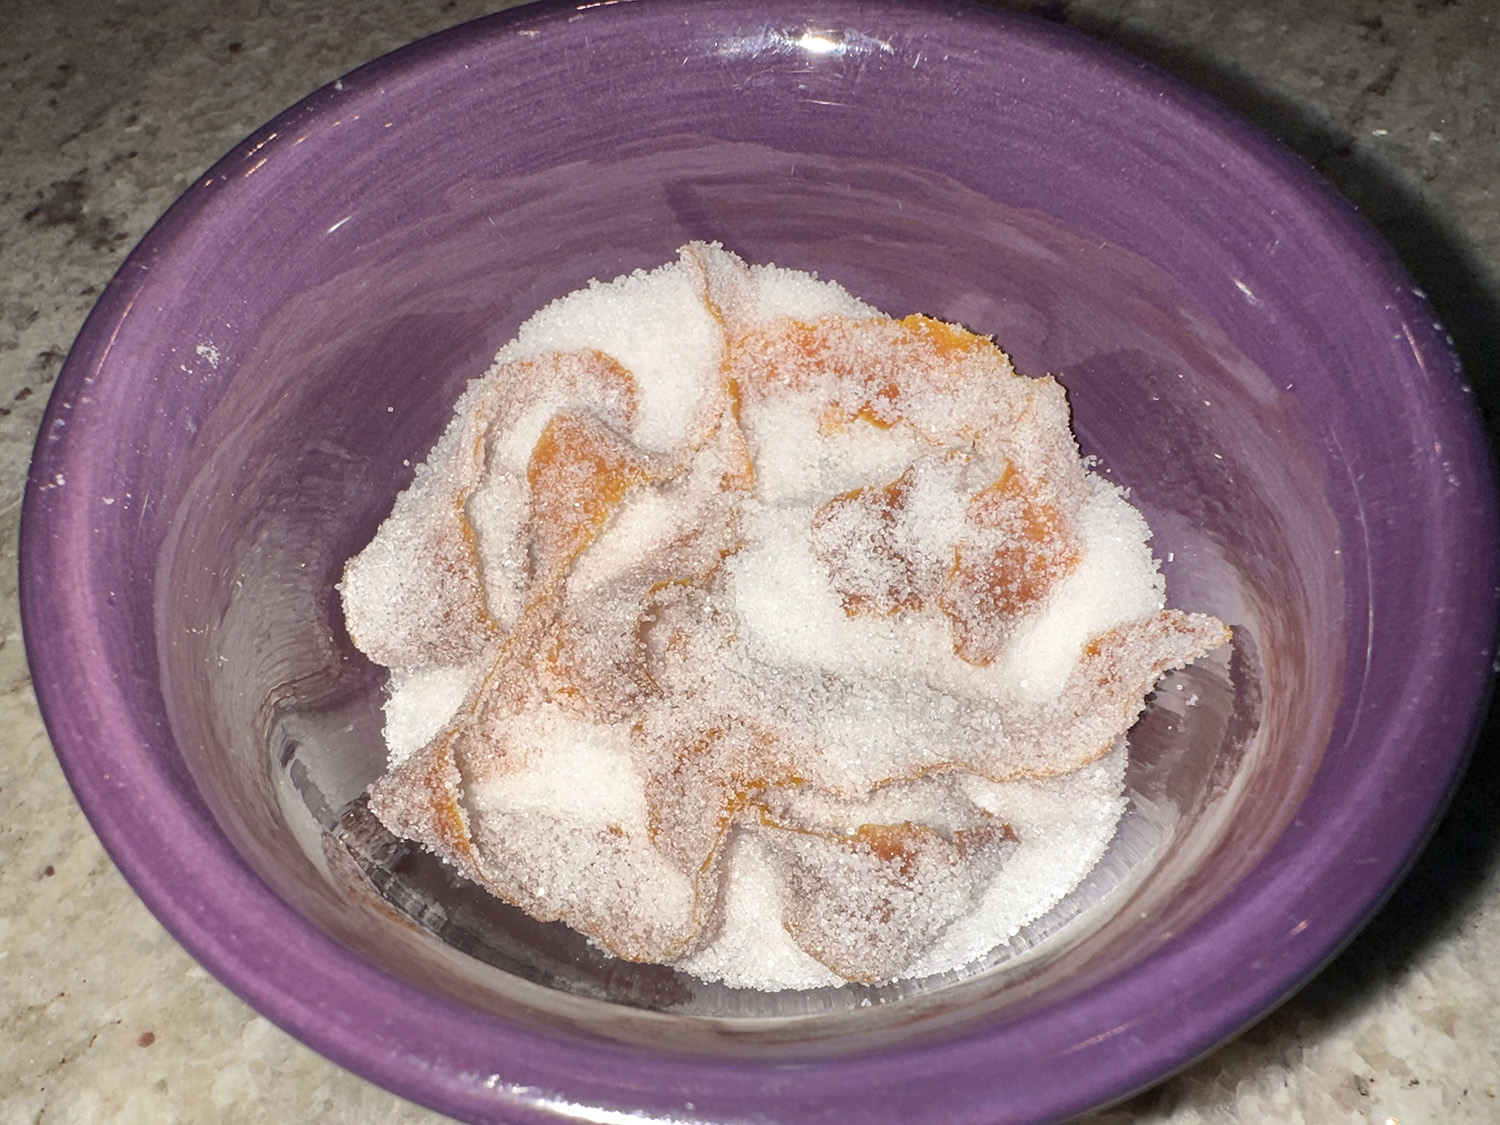
While the cake cools transfer the zest strips from the strainer to a small, shallow bowl, removing and discarding any peppercorns stuck to them. Sprinkle the strips with ⅓ cup sugar, then toss until the strips are completely coated. Cover loosely and store at room temperature until ready to serve.
About 2 hours before serving, remove the cake from the refrigerator. Remove the zest strips from the sugar and shake off excess sugar; reserve the sugar for another use. Cut the strips lengthwise into thin strips. Remove the sides of the springform pan. Arrange the zest slivers on the cake around the edges. Slice the cake and serve with small spoonfuls of yogurt.
From grilling to roasting, cooking a whole chicken typically takes at least an hour. It takes time to get the meat to safe temperatures (165 for the light and 175 for the dark). Combined with preparing the sides, suddenly it’s taking a whole lot longer than an hour to get dinner on the table.
But with an Instant Pot (or pressure cooker), you can have a whole chicken and a built-in vegetable side dish on the table with just 30 minutes of cooking (plus prep). The controlled moisture and pressure means the chicken takes less time to cook and you don’t have to worry about dry meat or overcooking. The chicken cooks atop an assortment of root vegetables that can later be mashed to serve as a side.
From start to finish, this entire meal will be on your table in just over an hour—that includes completing any prep work, browning the chicken, making the sauce, and mashing the root vegetables. In other recipes, the chicken alone would take that long.
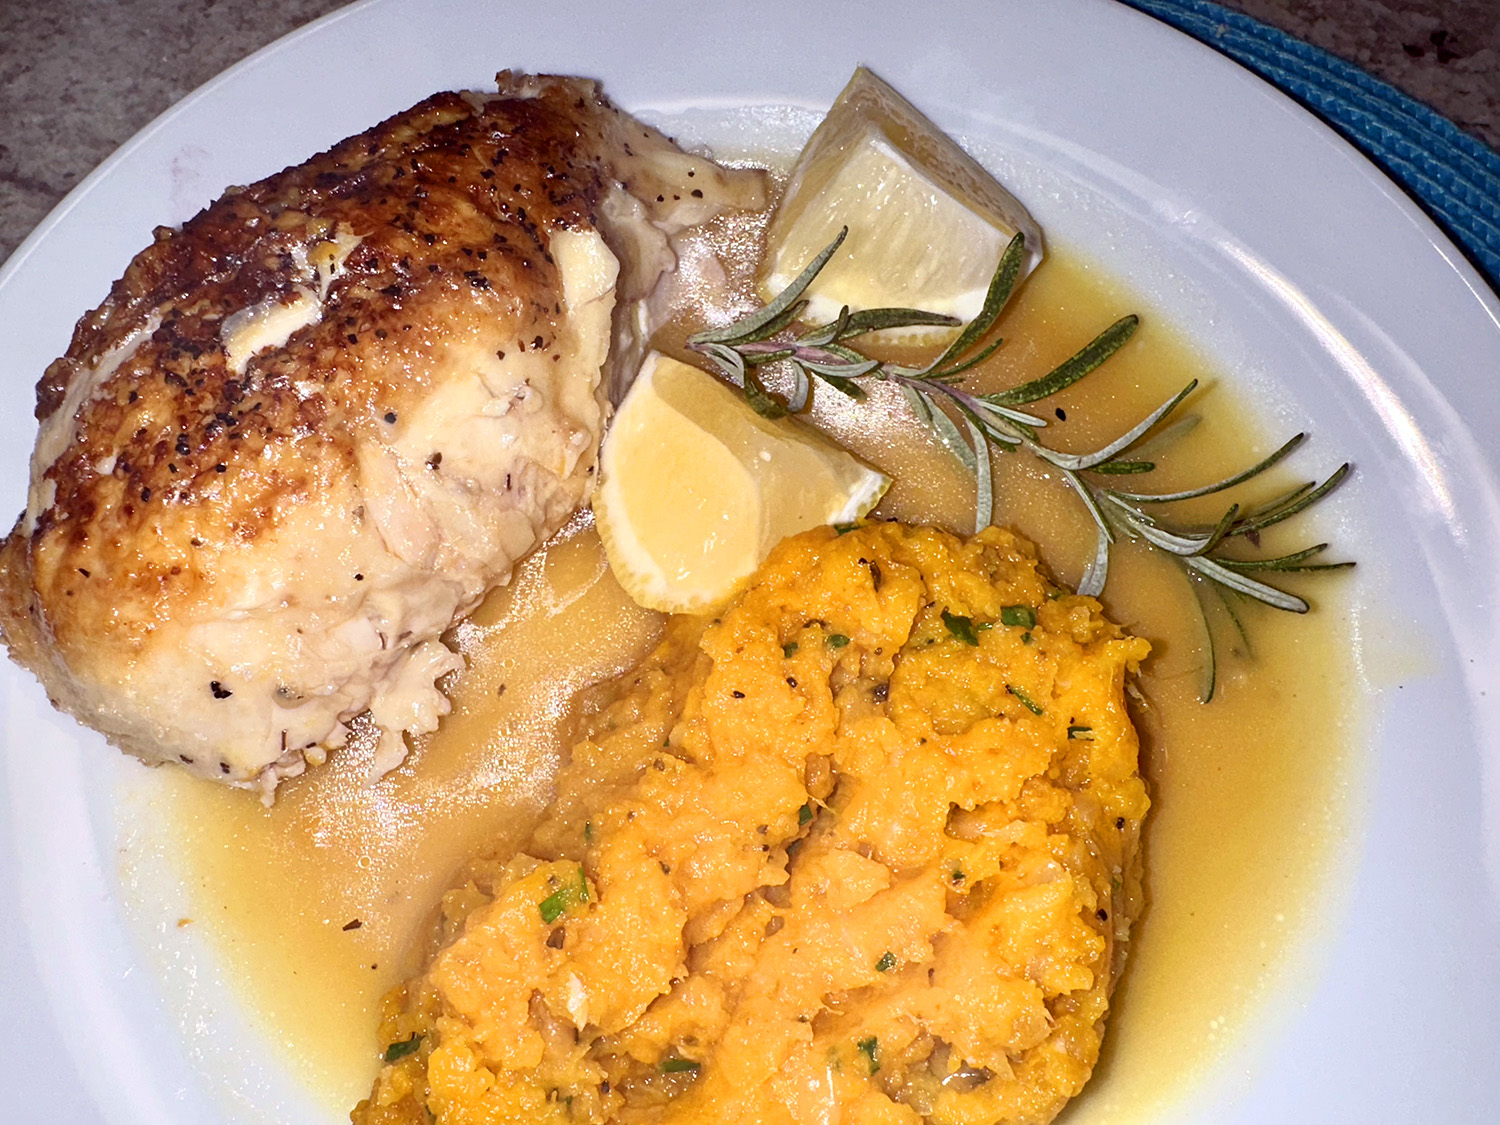
With this complete meal, you can be eating that tender, fall-off-the bone chicken in half the time it would normally take you. What’s the catch you ask? Bye-bye crackly skin, but that rotisserie chicken you pick up from your local grocery store doesn’t have any either, right? However, it will be pull-apart tender and bursting with the fresh flavors of rosemary, lemon, and chives.
The poultry was incredibly juicy and the root vegetable mash was amazing! The leftover broth could be made into a gravy with a touch of butter and a cornstarch slurry if desired.
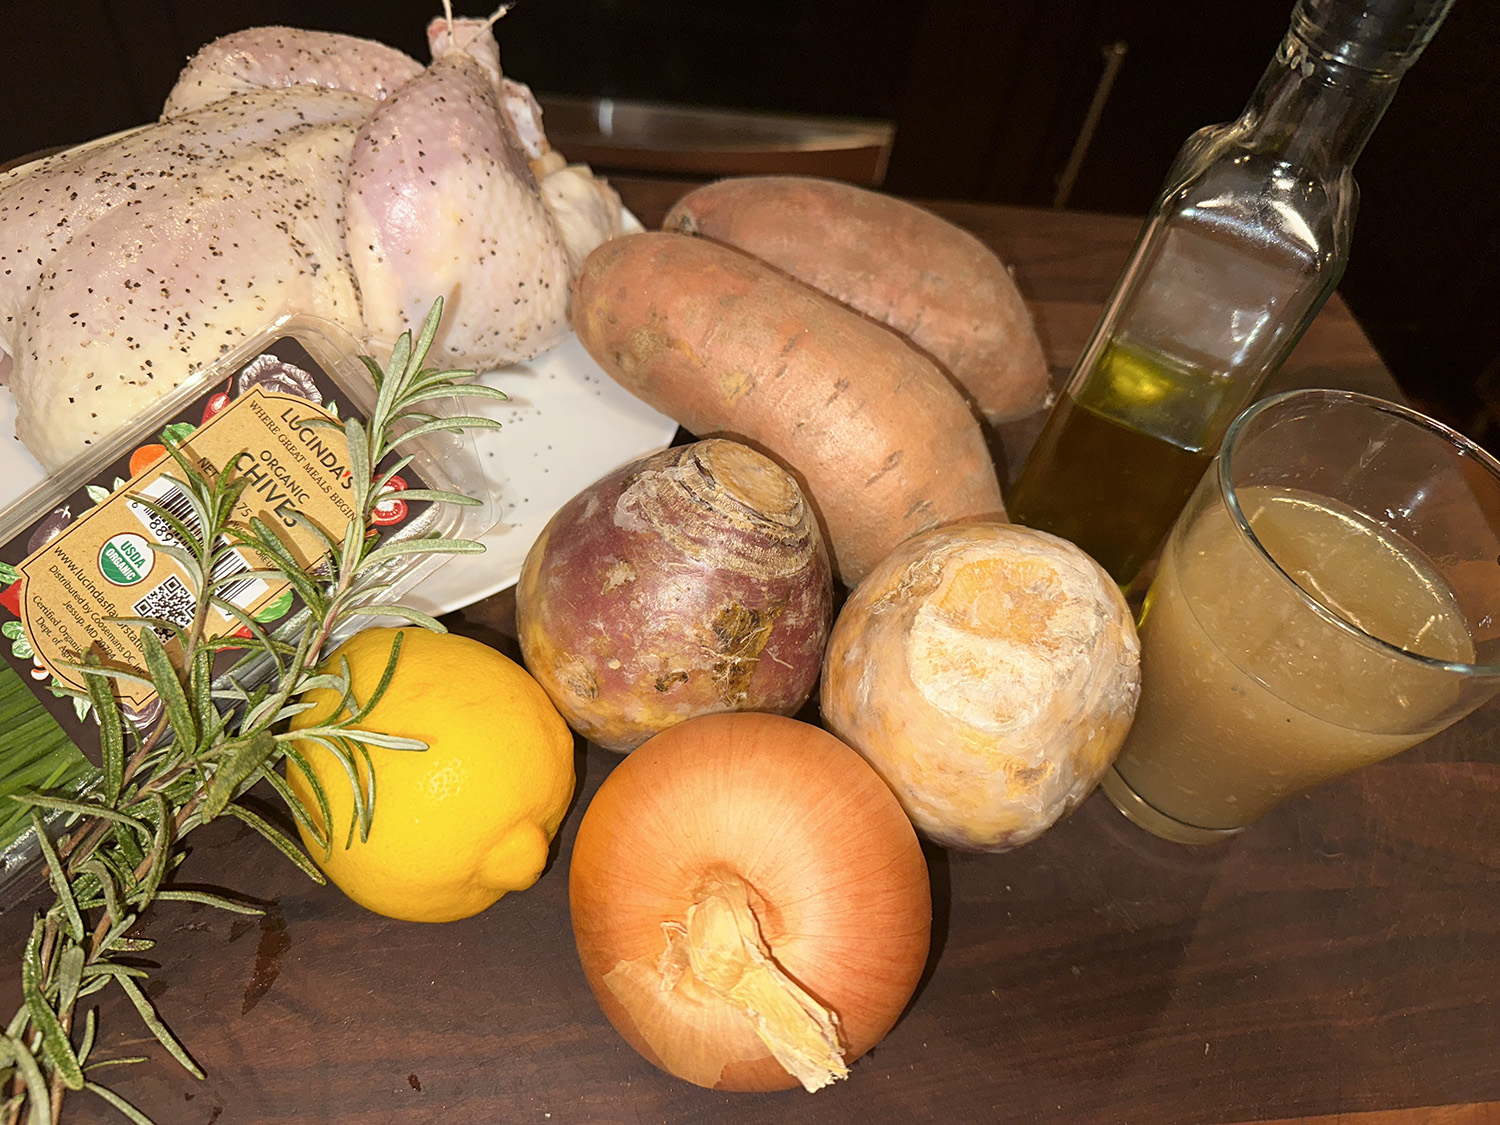
Instant Pot Whole Chicken with Root Vegetable Mash
1 lb. sweet potatoes, peeled and cut into 1-inch pieces
1 onion, peeled and quartered
¼ cup minced fresh chives
Lemon wedges
Directions
Pat chicken dry with paper towels and sprinkle with ¾ teaspoon salt and ½ teaspoon pepper. Tie legs together with kitchen twine and tuck wingtips behind back. Using highest sauté function, heat oil in Instant Pot until just smoking. Place chicken breast side down in pot and cook until well browned on first side, 6 to 8 minutes; transfer to plate. Turn off Instant Pot.
Add rosemary to fat left in pot and cook, using residual heat, until fragrant, about 30 seconds. Stir in broth, rutabaga, potatoes, onion, remaining ½ teaspoon salt, and remaining ¼ teaspoon pepper, scraping up any browned bits. Place chicken breast side up on top of vegetables and add any accumulated juices. Lock lid into place and close pressure-release valve. Select high pressure-cook function and cook for 24 minutes.
Turn off Instant Pot and quick-release pressure. Carefully remove lid, allowing steam to escape away from you. Transfer chicken to carving board, tent with aluminum foil, and let rest while preparing vegetables.
Strain broth and vegetables through fine-mesh strainer into fat separator. Return vegetables to now-empty pot and mash with potato masher until nearly smooth. Stir in chives and season with salt and pepper to taste. Let broth settle for 5 minutes, then transfer serving bowl and season with salt and pepper to taste. Carve chicken and discard skin, if desired. Serve chicken with vegetables, passing broth and lemon wedges separately.
Cheers, here’s to Christmas! For a delicious holiday drink you can quickly whip up, just mix the following ingredients, shake them up and let the party begin! We prefer cocktails that are not sweet, but if you prefer them more sugary, use regular cranberry juice instead of the unsweetened variety.
You can substitute cranberry vodka in place of blood orange vodka if necessary.
3⁄4 cup unsweetened cranberry juice (such as Ocean Spray)
1⁄2 cup blood orange vodka
1⁄4 cup Triple Sec liqueur
1 cup ice
Directions
Place the cranberries and two tablespoons of water in a small bowl, cover and microwave for 30 seconds. Set aside and cool completely, about 15 minutes.
Meanwhile combine the cranberry juice, blood orange vodka, Triple Sec and ice in a large cocktail shaker, put the lid on and shake for a full 30 seconds.
Place the cranberries in each of two martini glasses and pour in the cocktail mixture. Serve ice cold.
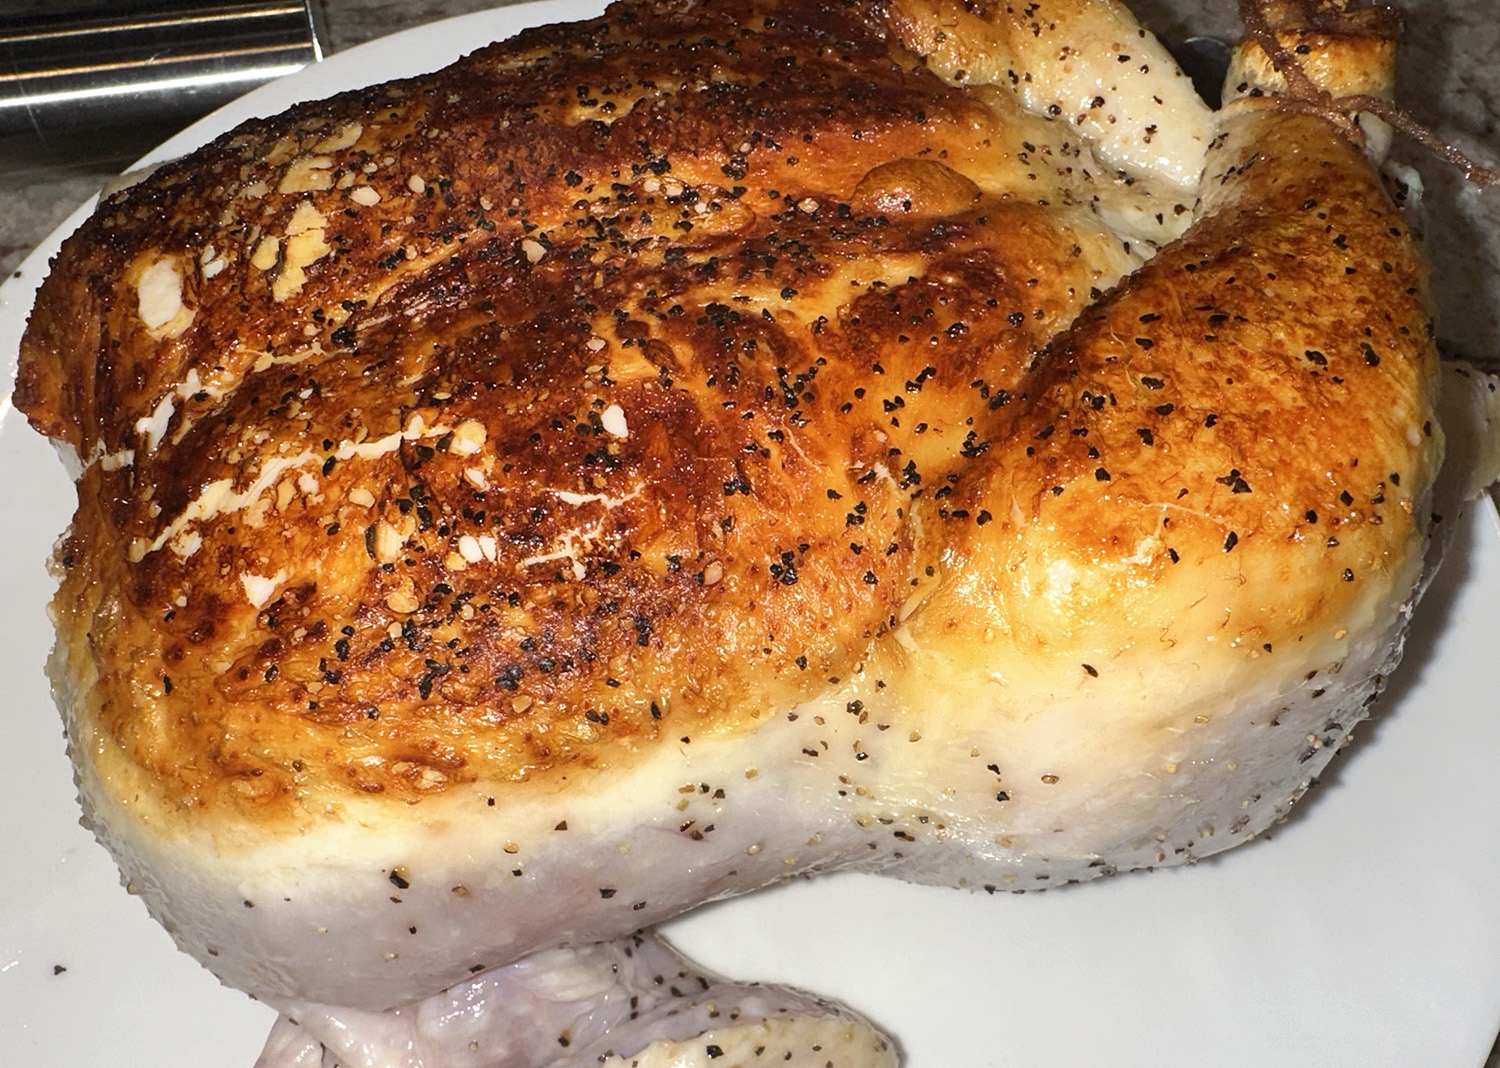
If you are a duck fan, then you must put this fabulous recipe on your shortlist. Never tried duck? Then this recipe is a great jumping off point. Keep in mind, the duck anatomy has quite a different bone structure than that of chicken or turkey. If you are unsure how to break one down, watch on a video, ask the butcher, or simply buy 4 duck legs.
On another note, all of the meat on a duck is dark meat, even the breast. But with this method all of the meat comes out juicy and tender—not greasy at all! Duck and goose are poultry and considered “white” meat. Because they are birds of flight, however, the breast meat is darker than chicken and turkey breast.
On the plus side, duck meat’s rich flavor and color provides a red meat eating experience with the health benefits of poultry. Duck meat is rich in iron and protein like beef but is leaner and has fewer calories like its poultry counterparts. Plus, duck fat is healthier with less saturated fat and more omega-3 fat than beef.
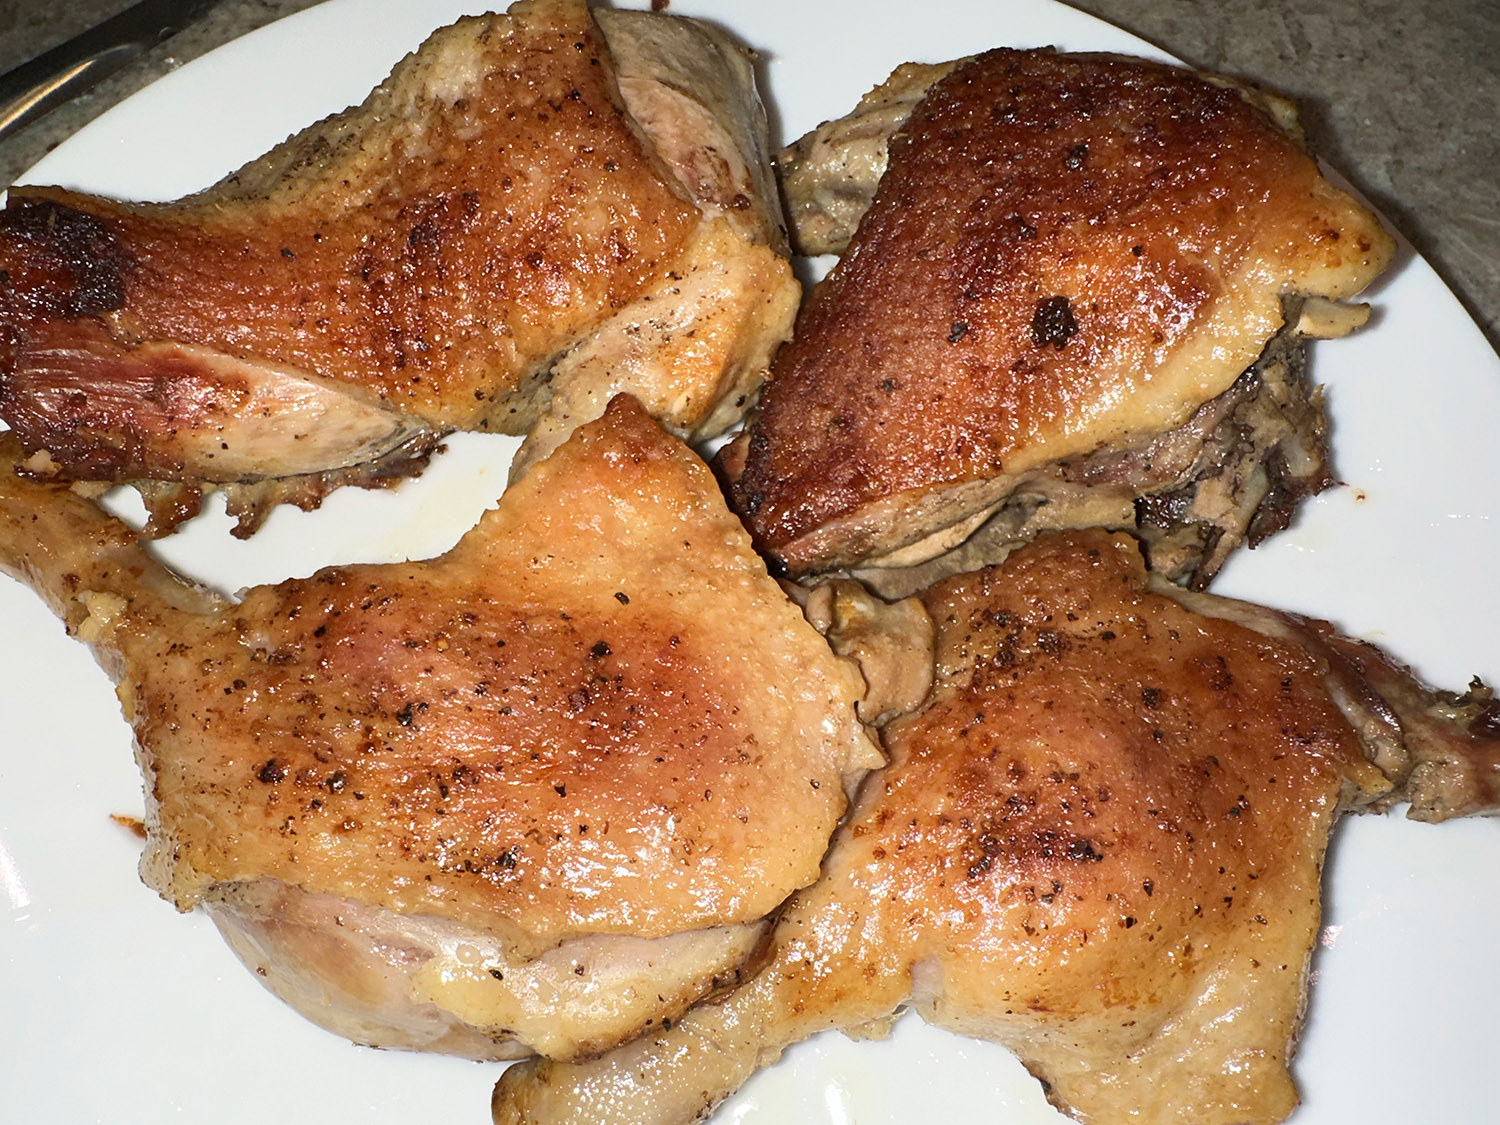
Speaking of the fat on a duck, you want to make sure it gets rendered down. The Hubs decided to render the extra pieces of fat and skin in another skillet, and when crisp he removed them from the hot oil on a paper towel-lined plate, sprinkled with salt and ate as a snack once cooled. With the remaining leftover oil (we had 3 cups!), he will freeze the fat and save it to make duck confit sometime in the future.
Once bottom browns, turn the pieces. Eventually liquid will evaporate and duck will cook in its fat only. At this point lower heat and continue to cook duck, turning occasionally, until it becomes tender, about 1 hour. While the skin does look nice and brown, it will not be crispy once it steams with the beans in a covered dish.
Rice would make a fine accompaniment, but we paired ours this time with Roasted Parmesan Potatoes, which were wonderfully crispy on the outside, meltingly tender on the inside. Stock will be made from the unused pieces of the duck, such as the back and wings.
Remove excess fat from duck. Season with salt and pepper and put in a skillet or saute pan that will fit it comfortably. Turn heat to medium and cover. Check once you hear sizzling; duck should be simmering in its own fat and exuding liquid. Adjust heat to create a steady simmer.
Once bottom browns, turn. Eventually liquid will evaporate and duck will cook in its fat only. At this point lower heat and continue to cook duck, turning occasionally, until it becomes tender, about 1 hour.
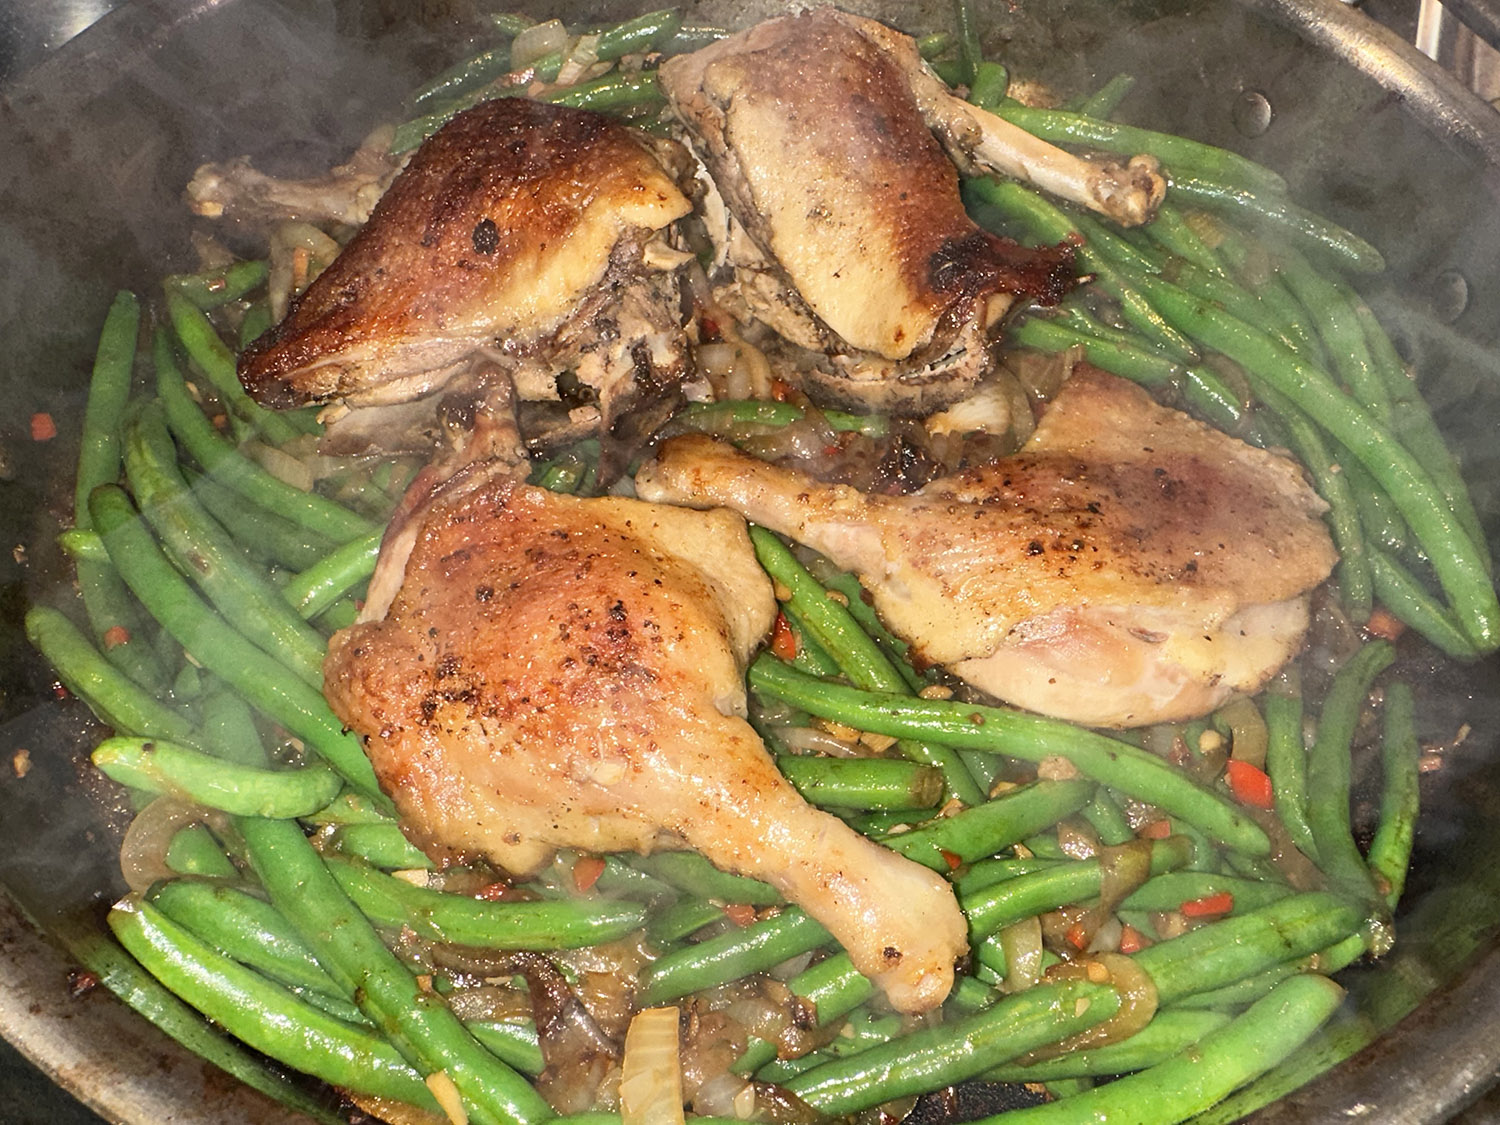
Transfer duck when tender to a plate. Pour off all but 2 tablespoons of fat. Turn heat to medium and add onion; cook until it softens, about 5 minutes. Add ginger, garlic and chilies and cook, stirring, for 30 seconds. Add beans and sugar and turn heat to high; cook, stirring occasionally, until beans begin to brown, about 5 minutes.
Add 2 tablespoons water and nam pla (fish sauce) or soy sauce. Put duck on top of bean mixture and bring to a simmer, Cover and cook until both beans and duck are very tender, 15 to 30 more minutes, adding a little more water if necessary to keep mixture moist. Uncover and stir in lime juice; taste and adjust seasoning, then sprinkle with cilantro and serve.
These delicate, melt-in-your-mouth cookies combine fresh lemon zest and orange blossom honey to play off the flavors of the namesake cocktail. They bring back fond memories of when I’d bake holiday cookies as a teenager, a variation of these were called Russian Tea Cakes, and they were (are?) addicting.
Floral orange blossom honey and fresh lemon zest give these powdered sugar–capped cookies from cookbook author Leah Koenig a delicate flavor and citrusy aroma. Their melt-in-your-mouth texture, with a faint nuttiness from the almond flour, makes them the perfect companion for a coupe of chilled Bee’s Knees; or a glass of chilled milk or cup of hot tea. Use a mild honey such as clover or wildflower to allow the bright lemon to shine. Avoid buckwheat honey, which can overpower the cookies’ subtleties.
1 cup unsalted butter (8 oz.), at room temperature
1 1/2 cups powdered sugar (about 6 oz.), divided
2 Tbsp. honey (preferably orange blossom)
2 1/2 tsp. grated lemon zest (from 2 lemons)
1 tsp. vanilla extract
1/4 tsp. kosher salt
1/2 cup almond flour (about 1 3/4 oz.)
2 cups all-purpose flour (about 8 1/2 oz.)
Edible gold luster dust (optional)
Directions
Preheat oven to 350°F with racks in upper third and lower third positions. Line 2 baking sheets with parchment paper, and set aside.
Combine butter, 1/2 cup powdered sugar, honey, lemon zest, vanilla, and salt in bowl of a stand mixer fitted with the paddle attachment. Beat on medium speed until light and fluffy, about 2 minutes. Reduce mixer speed to low; add almond flour, and beat until combined, about 30 seconds. Add all-purpose flour in 2 additions, beating on low speed and stopping to scrape down sides of bowl as needed, until dough comes together, about 45 seconds total.
Using a 1 1/2-inch (1-tablespoon) cookie scoop, scoop out cookies, and arrange at least 1 inch apart on prepared baking sheets. Bake in preheated oven until light golden, 12 to 15 minutes, rotating baking sheets between top and bottom racks after 7 minutes of baking time. Remove from oven. Transfer cookies to a wire rack, and let cool completely, about 30 minutes.
Place remaining 1 cup powdered sugar in a shallow bowl. Roll cooled cookies in sugar until fully coated. Sprinkle with edible gold luster dust, if desired.
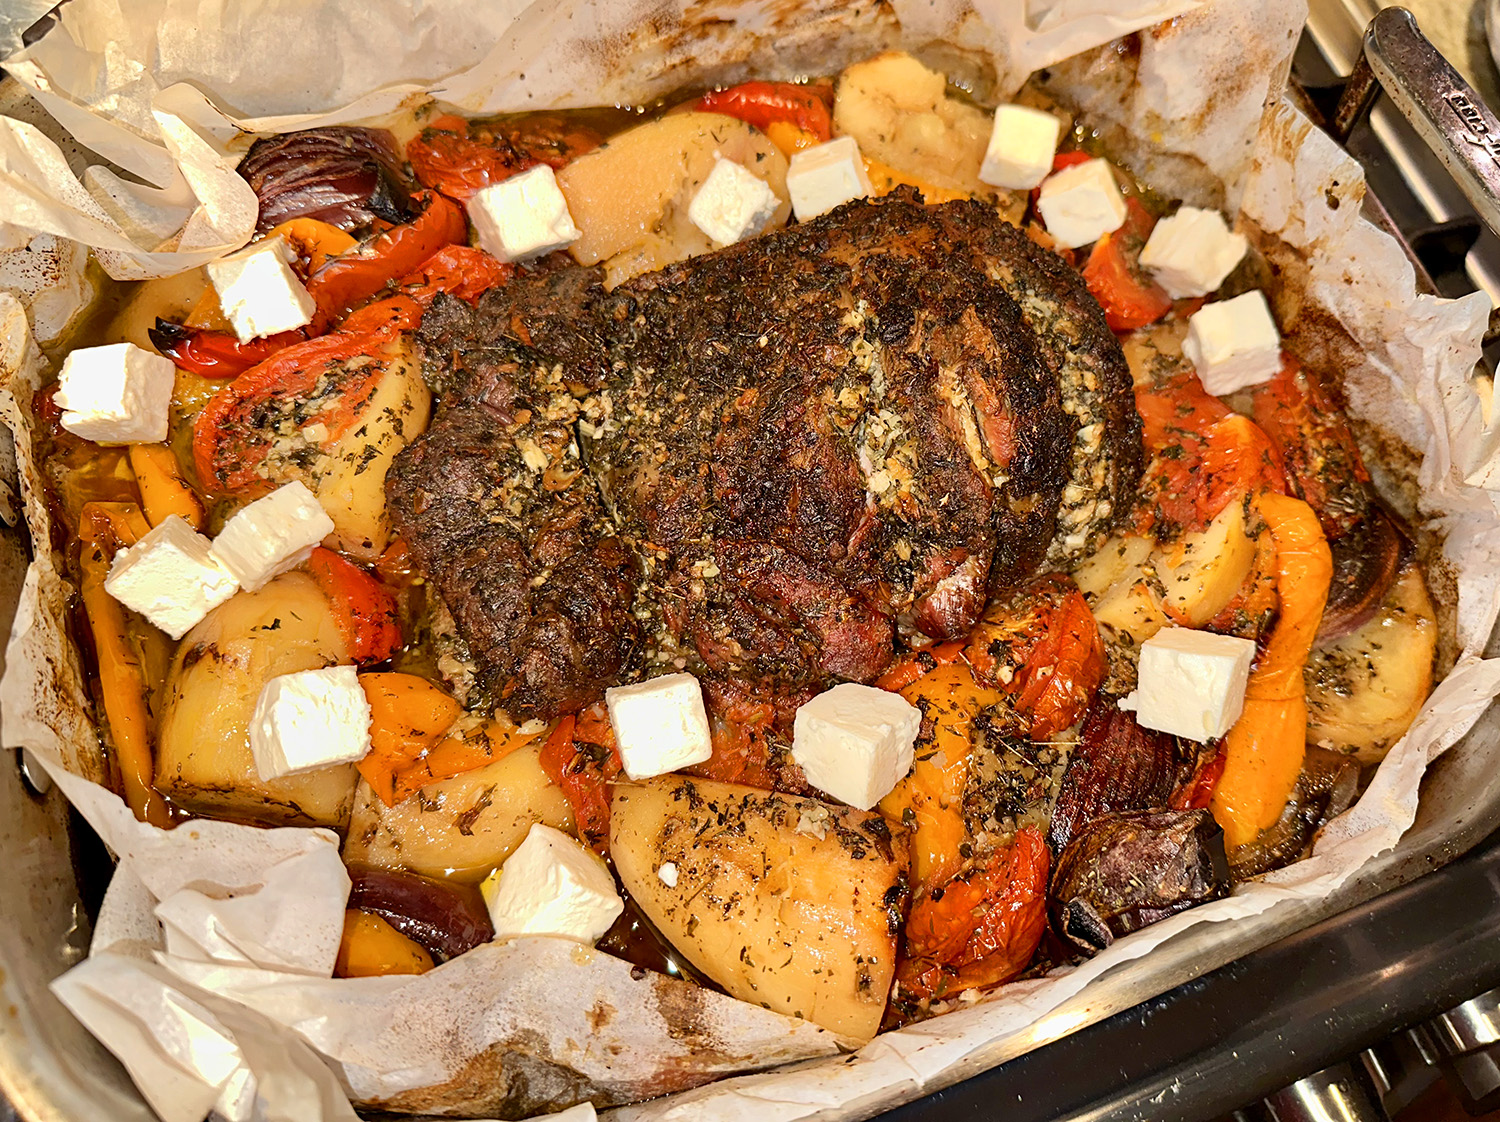
Neither quick to make, nor just a few ingredients, but if you’re looking for something to knock the socks of your dinner guests, this Greek Lamb Kleftiko recipe delivers on both taste and presentation. To put it simply, kleftiko is a traditional Greek dish of slow-roasted lamb cooked in parchment with potatoes and vegetables. This meal is the ultimate in one-pot cooking.
This foolproof method will give you perfectly tender lamb every time. The secret to succulent lamb and tender vegetables is cooking everything wrapped in parchment paper. And to make it even easier, use boneless leg of lamb. You could also make this in a large braising pot with a sheet of parchment across the pot under the lid.
Why cook in parchment? Not only does parchment protect your pan for easy clean-up, but when you envelop meat in parchment paper before roasting, it traps the heat and moisture, creating a steam pocket that helps the meat cook gently from the inside. The result is meltingly tender lamb that is never dry!
Extra virgin olive oil, I used Greek Private Reserve EVOO
4 to 5 large Russet potatoes, about 3 lbs., peeled and quartered
2 large sweet bell peppers, cored and cut into large chunks
2 large tomatoes, cut into thick wedges
1 large red onion, cut into large chunks
½ cup vegetable or beef broth
4 oz. feta cheese, cut into blocks, optional
Directions
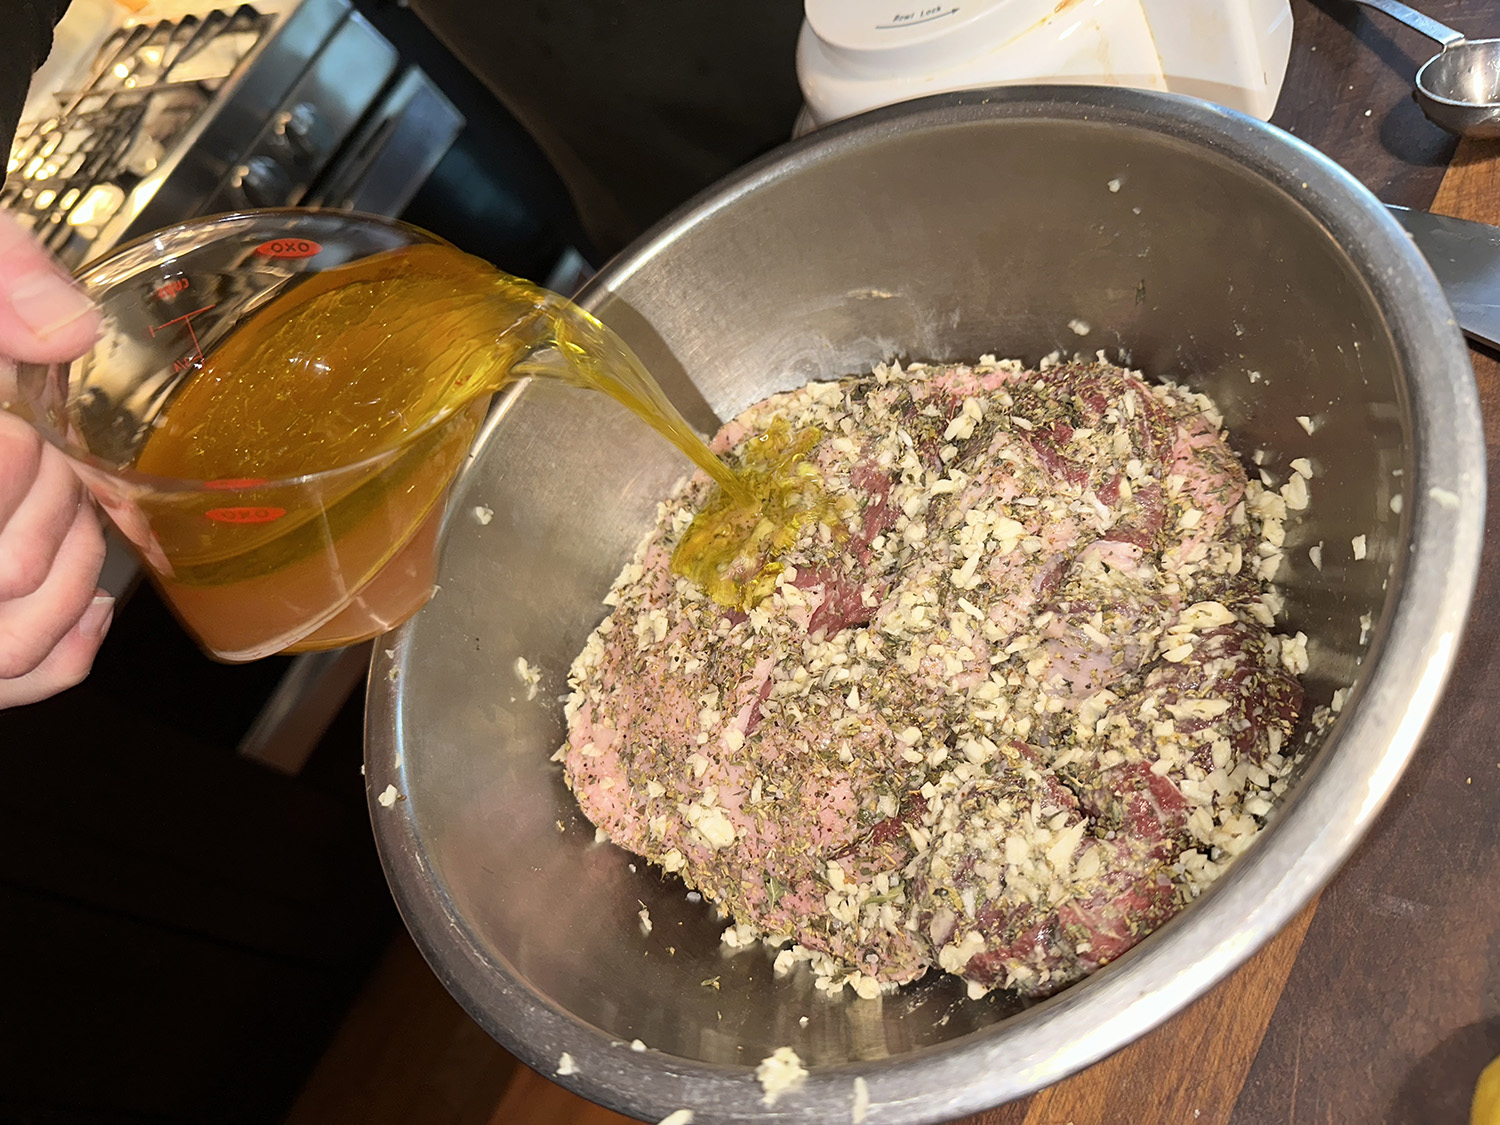
Season and marinate the lamb. Place the boneless leg of lamb in a large bowl. Using a sharp knife, make a few slits in the boneless leg of lamb. Rub the lamb all over with 2 tablespoons dried oregano and ½ tablespoon each dried thyme and dried parsley. Season well with kosher salt and black pepper on all sides. Then rub with the mustard and the majority of the garlic (reserving 1 tablespoon of the garlic for the vegetables). It’s important to push some of the garlic and seasoning into the slits you’ve cut earlier for best flavor.
Transfer the lamb to a large bowl and add the lemon juice, white wine, red wine vinegar, and about ¼ cup of extra virgin olive oil, turning the lamb in the bowl to make sure it is well coated. Set the lamb aside for a few minutes while working on the vegetables. (But if you do have the time, cover the bowl and refrigerate for 4-6 hours).
Preheat the oven to 375°F. And position a rack in the middle.
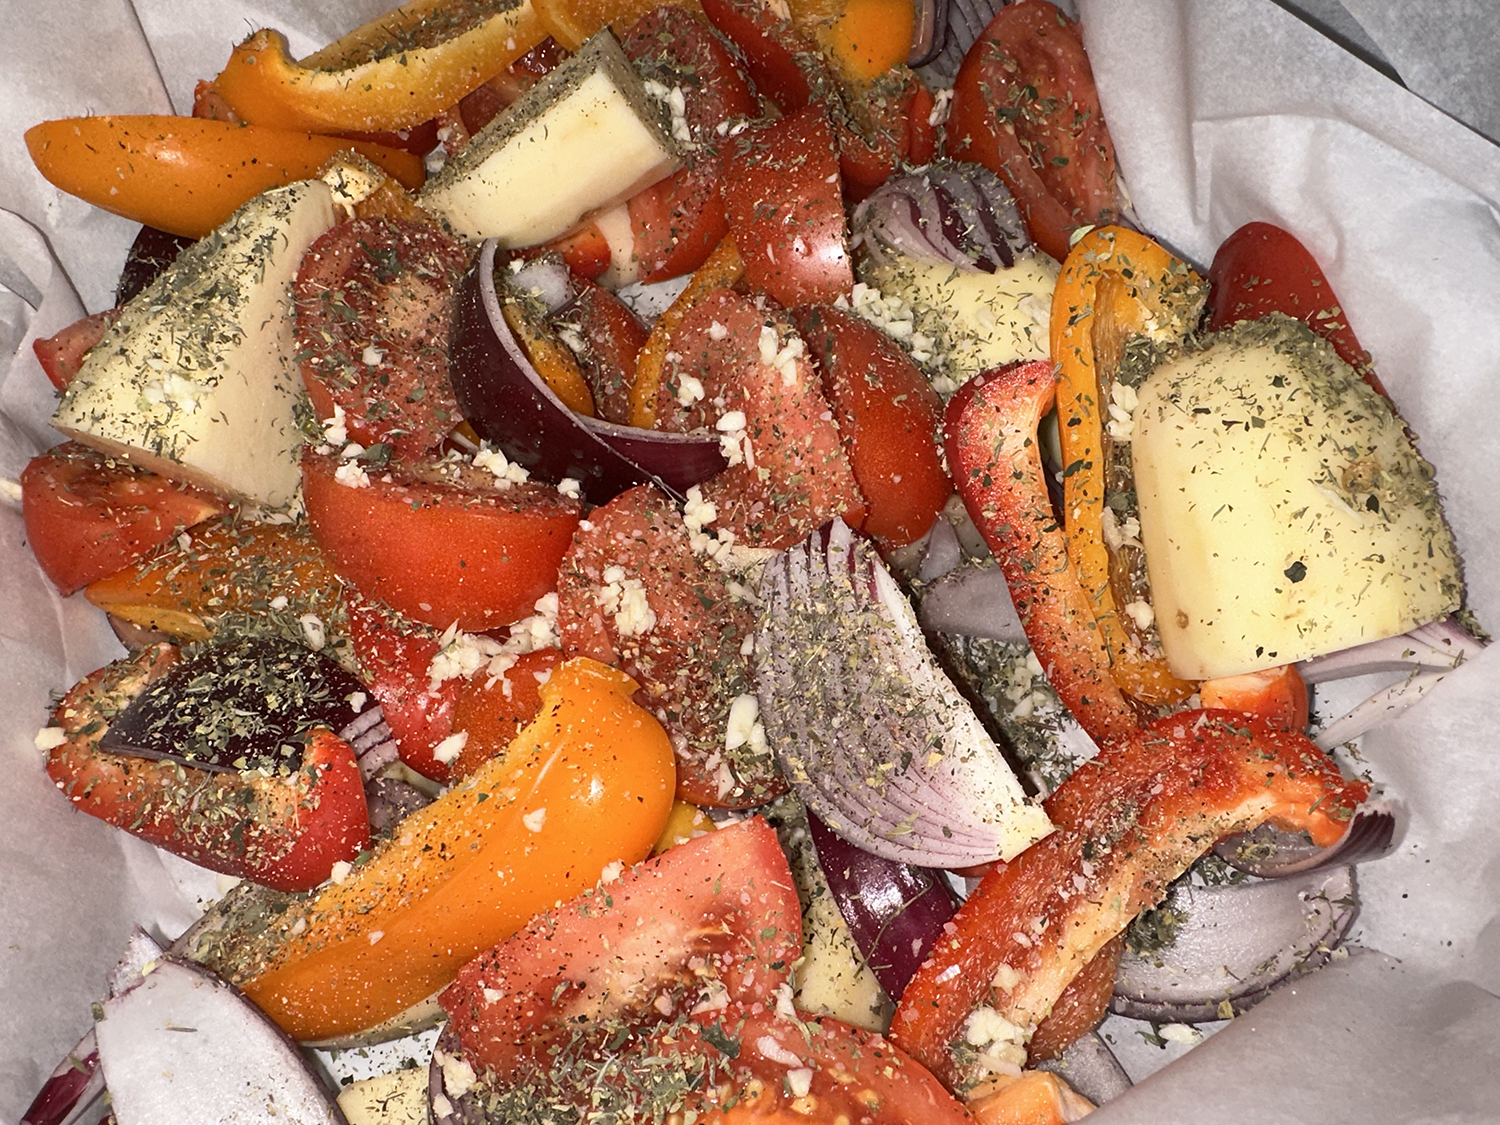
Prepare the roasting pan and parchment paper. Line a large roasting pan with two very large pieces of parchment paper, making a cross shape so that you have long pieces of parchment overhang on all sides of the pan (about 12 inches of parchment overhang on all sides of the pan).
Assemble the vegetables and lamb in the pan. Spread the potatoes, bell peppers, tomatoes, and onions in the bottom of the pan over the parchment. Season with a good pinch of kosher salt and black pepper and the remainder of the dried oregano, thyme, and parsley. Sprinkle the remainder of the garlic on top and drizzle with a little olive oil. Add the lamb on top of the vegetables and pour the broth in from the side of the pan.
Fold the parchment to cover the lamb and vegetables. Pull parchment paper sides together and tightly crimp them up to fully encase the lamb and vegetables in the parchment parcel.
Roast. Place the roasting pan on the center rack of your heated oven and cook for about 3 ½ to 4 ½ hours or until the meat is tender and falls apart easily at the touch of your fork (you can check partway through and add more broth or water, if needed).
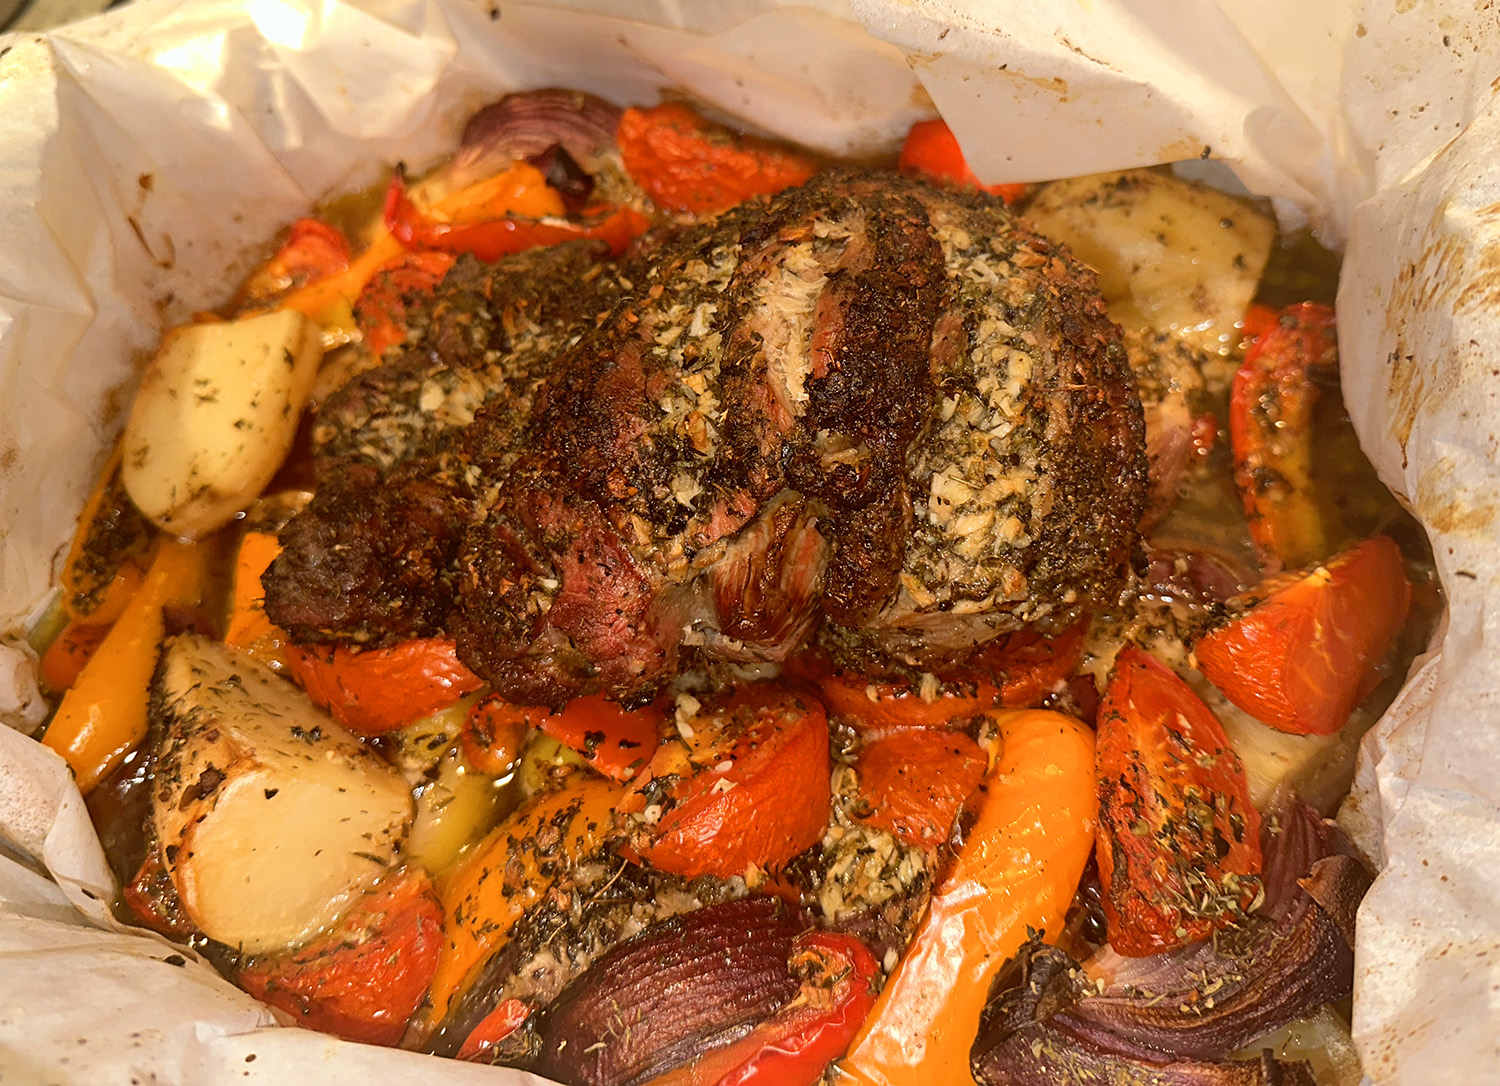
Brown. Uncover the meat and veggies and fold excess parchment paper into the inside of the pan. If using, add the feta cheese at this point. Raise the heat to 425°F and return the pan to the oven (uncovered) for 15-20 minutes until the lamb and vegetables gain some color.
Let rest. Once ready, allow the lamb kleftiko to sit for about 20 to 30 minutes before serving.
Serve. Pull the meat apart using two forks to shred. Serve the lamb in bowls over the vegetables.
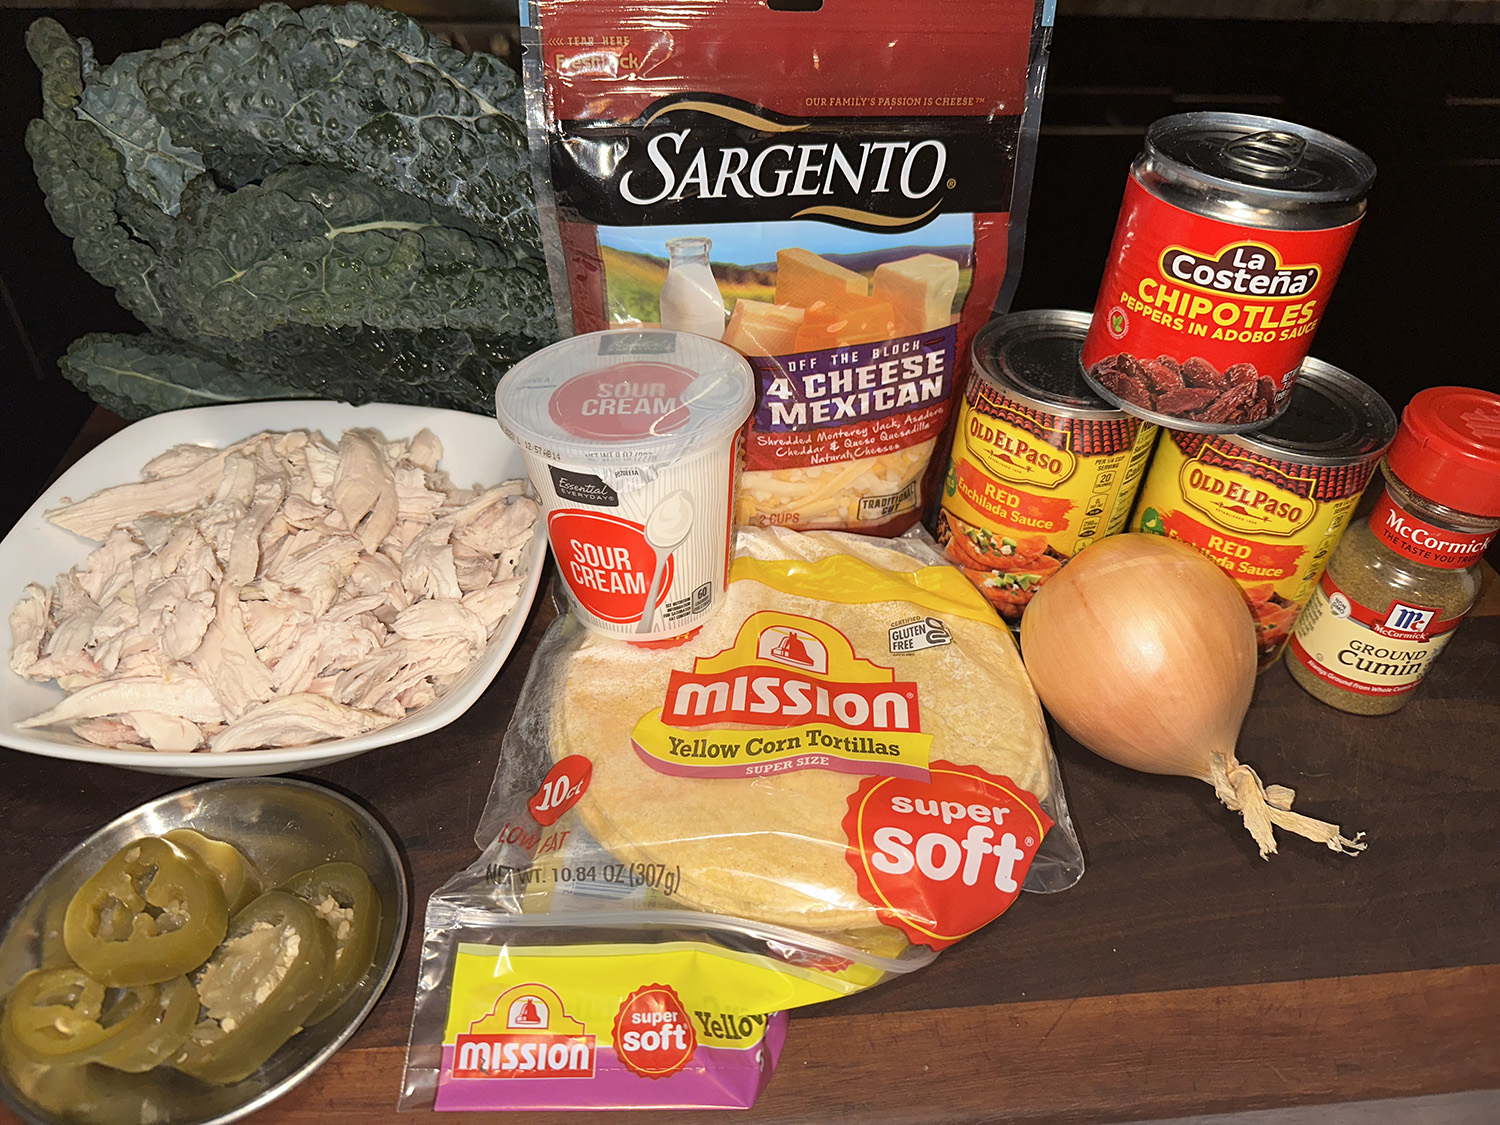
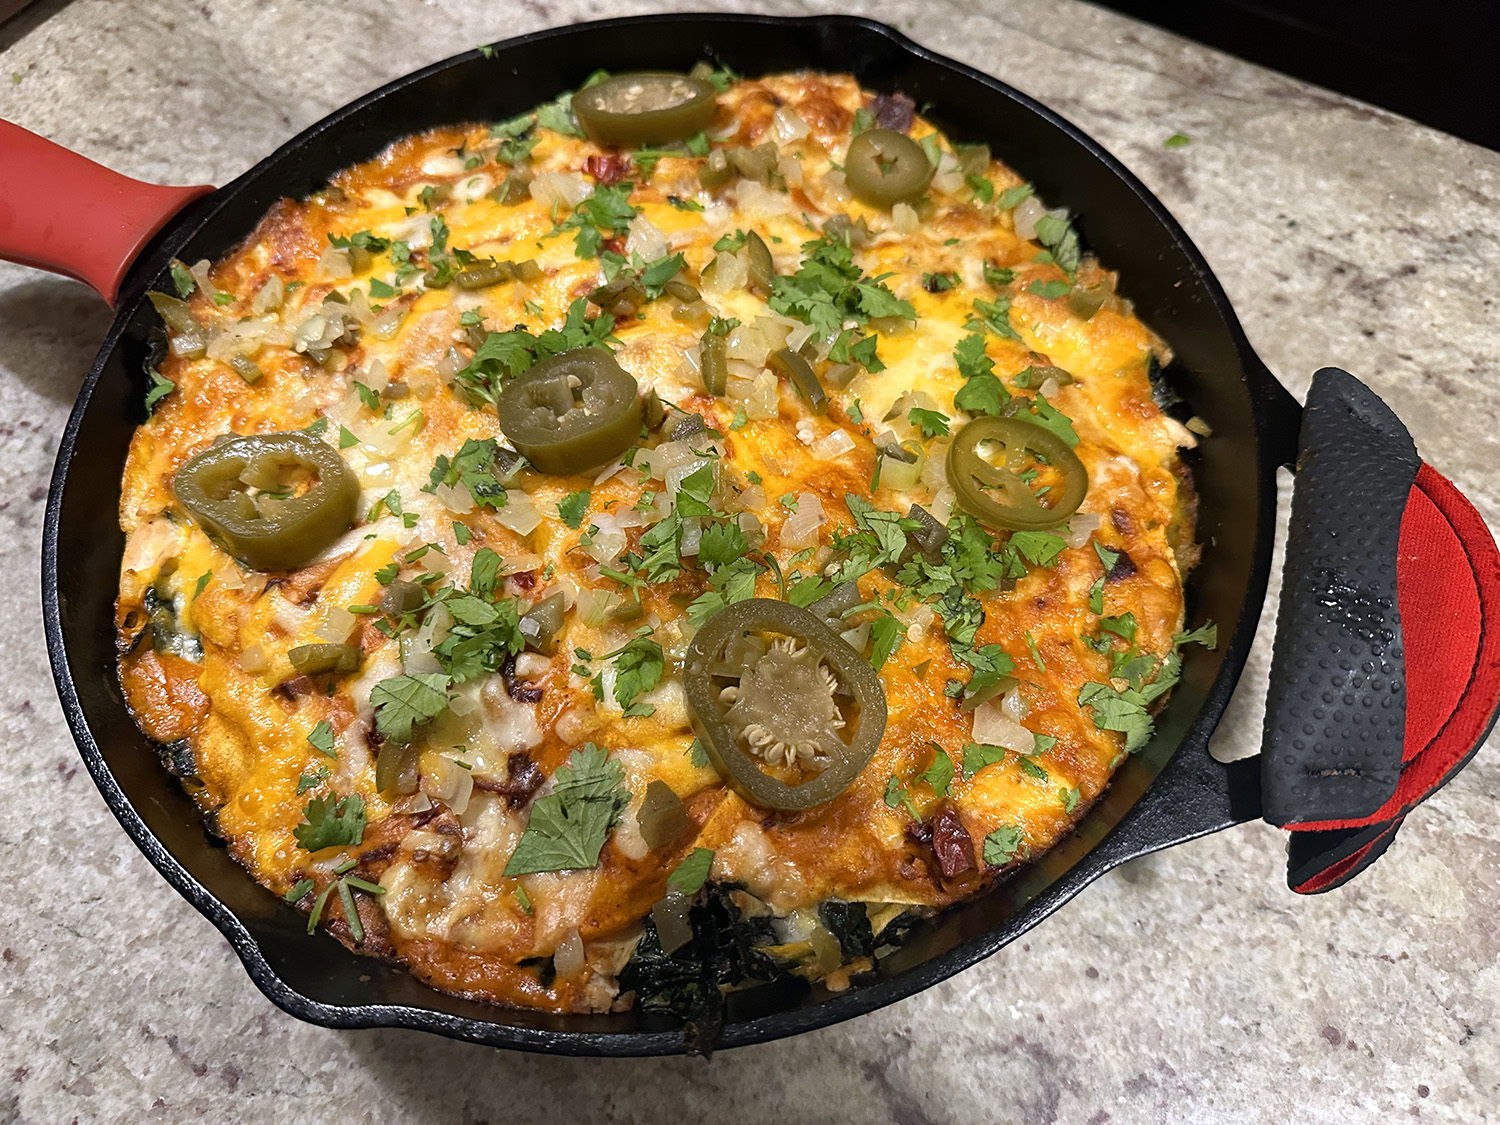
Not your typical enchilada, this fun meal utilizes rotisserie, or leftover chicken, and is sure to please. Some favorite toppings include cilantro, sour cream, guacamole and pickled jalapeños. The fact that only one pan is used, makes the meal even more appealing.
Not sure I’d go as far as “healthy” enchiladas but with the addition of kale, they are at least moving in the right direction.
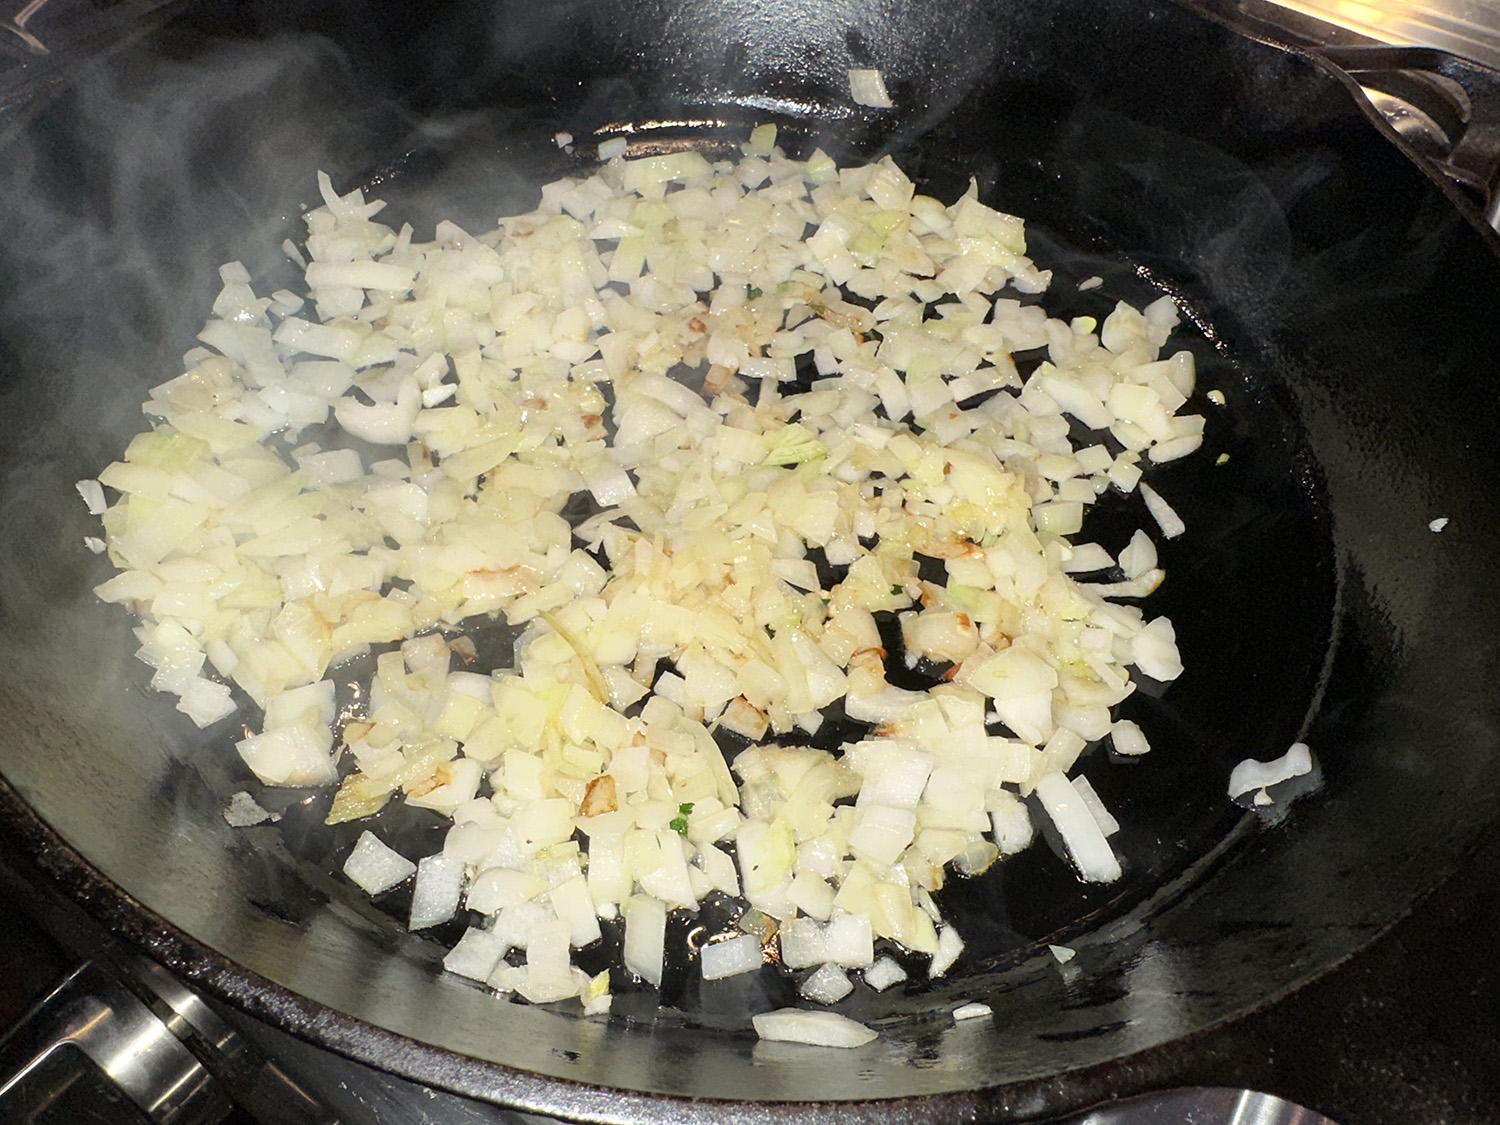
We made numerous changes starting with sautéeing the chopped onions in olive oil until softened, about 4-5 minutes. Removed the onions to a side dish then sautéed the kale in olive oil for a few minutes and added the water. Because we are “saucy” eaters, and to suit our own preferences, we doubled the enchilada sauce and included two cups of Mexican cheese blend. All noted in the list below.
Speaking of the sauce, we highly recommend doubling the three ingredients (enchilada sauce, sour cream and chipotles in adobo) because most of it gets sucked up into the tortillas. Those doubled amounts are indicated in the ingredients list below. If for some reason you’d rather stick to the original recipe, just cut those three ingredients in half; and use only 1 1/2 cups of cheese.
Heat 1 tablespoon of oil in a large cast-iron skillet (12-inch) over medium-high heat. Add onions and sauté until soft, about 4-5 minutes. Remove the onions and set aside.
Add additional tablespoon of olive oil; when hot add kale and water; cook, stirring, until bright green and wilted, about 2 minutes. Stir in chicken, cumin, salt and pepper; cook for 1 minute more. Transfer to a large bowl.
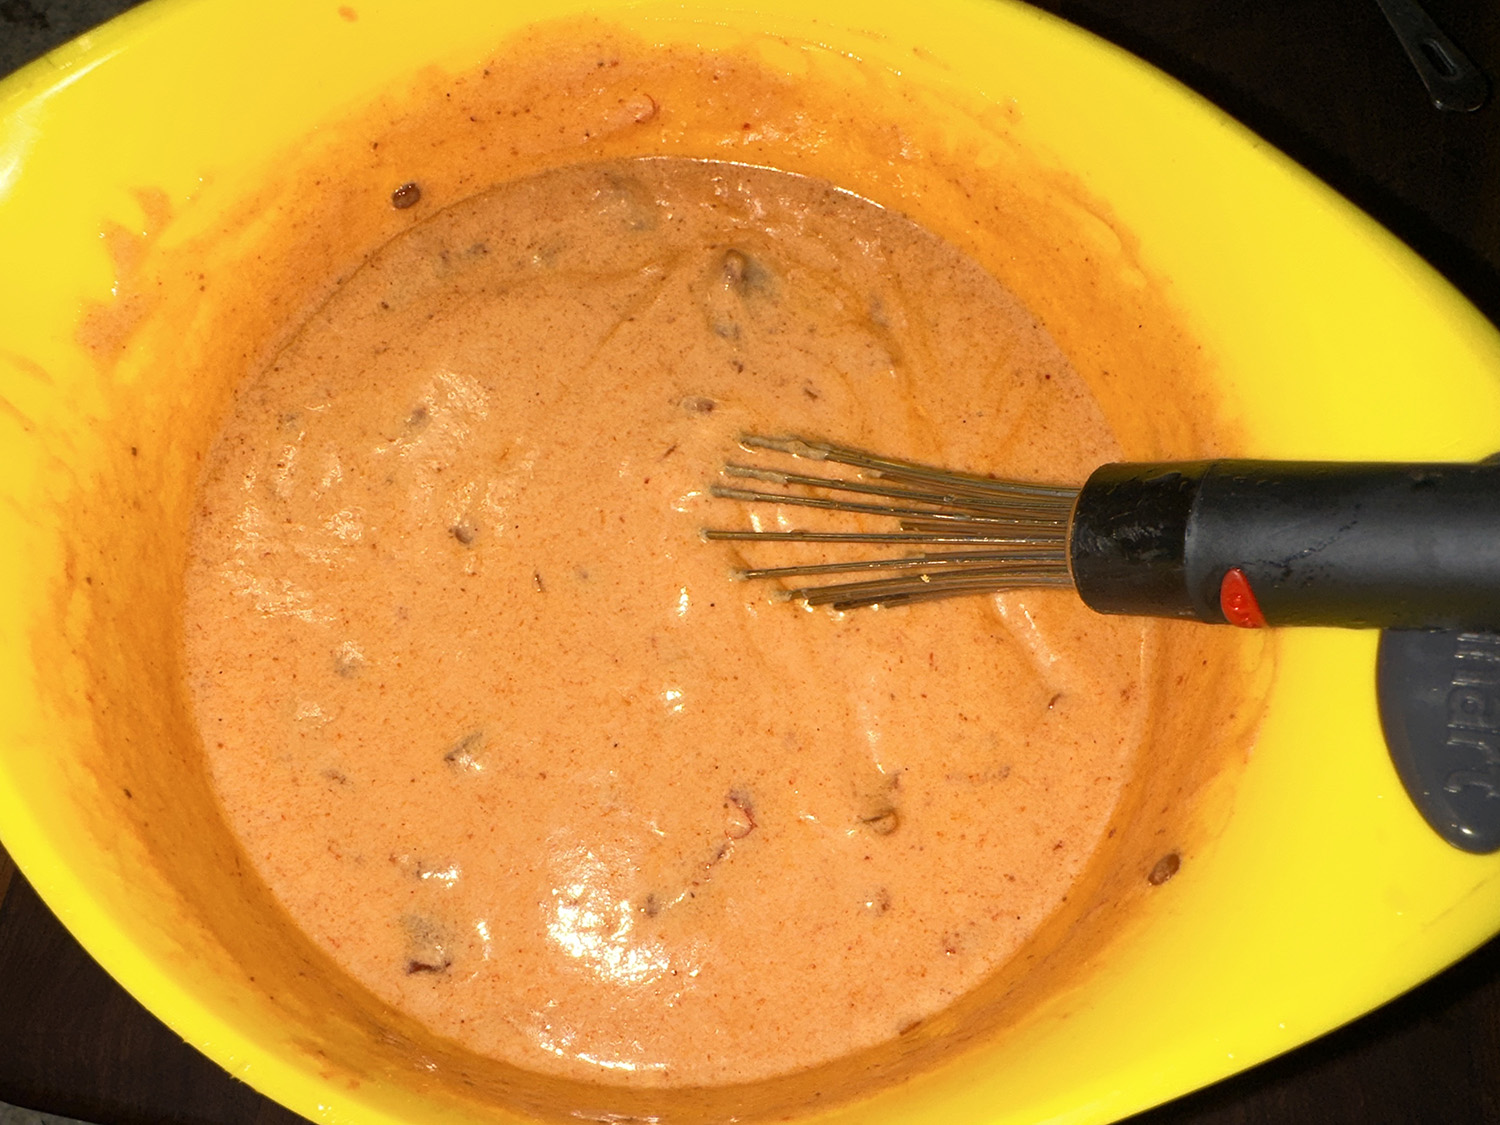
Combine enchilada sauce, sour cream and chipotles to taste in a small bowl. Spread 1 cup of the mixture in the pan. Place 4 tortillas over the sauce, overlapping them to cover the bottom. Top with half the chicken mixture, 1/4 cup onion and 3/4 cup cheese. Layer on half the remaining sauce, 4 tortillas, the remaining chicken, 1/4 cup onion and 3/4 cup cheese. Top with the remaining tortillas, sauce and cheese.
Bake the enchiladas until bubbling, 15 to 20 minutes. Sprinkle with the remaining 1/4 cup onion before serving.
Garnish with desired toppings such as cilantro, sour cream, guacamole and pickled jalapeños.
Thick and chewy M&M Christmas cookies with crispy edges, a soft center and bursting with chocolate flavor. Who can resist? The pops of red and green color from the M&M’s make them the perfect dessert to add to your holiday cookie platter. And the double shot of chocolate with both M&Ms and semi-sweet chocolate chips, well, just see for yourself…
For the dough, start by creaming the butter and sugars together with an electric mixer until creamy and fluffy. Then mix in the eggs and vanilla just until combined. Mix in the dry ingredients, then fold in the chocolate. Chill the dough for 30 minutes if you have the time.
Bake at 375°F for about 10 to 12 minutes. The edges should be barely golden brown when you remove them. Let set on the pan for a few minutes, then transfer to a cooling rack to cool completely. When cooled completely, indulge!
Another much-beloved cookie recipe: Many folks were asking me about the recipe for the Olive Oil Sugar Cookies with Pistachios and Lemon Glaze. You can find the post at this kink.
¾ cup semi-sweet chocolate chips (more if desired)
1 cup Christmas M&M’s (more for tops if desired)
Directions
Preheat the oven to 375°F. Line two baking sheets with silicone baking mats or parchment paper and set aside. In a large bowl, cream together the butter and sugars with beaters. Mix for 1-2 minutes, or until creamy and fluffy. Add the eggs and vanilla and mix just until combined.
Add the flour, baking soda and salt and mix just until combined. Fold in the chocolate chips and M&M’s. Refrigerate dough for 30 minutes if time allows.
Using a large cookie scoop (about 3 tablespoons), scoop the cookie dough onto the baking sheet about 2 inches apart. Place any extra chocolate chips or M&M’s on the top of the cookies if desired.
Bake for 10-12 minutes (longer if necessary), or until the edges are barely golden brown. Allow cookies to set on pan for 2-3 minutes, and then remove to a cooling rack.
These buttery, lime-infused cookies found in Food & Wine Magazine are topped with a sweet-and-sour glaze and finished with flaky sea salt and lime zest. A nice counterpart to the more typical sweetly-iced Christmas cookies.
Using traditional Mexican flavors and ingredients in nontraditional ways is one of chef Esteban Castillo’s favorite things to do at Chicano Eats, so taking the classic margarita cocktail and turning it into a cookie was a no-brainer. And a very adult-like treat.
The cookies are infused with agave nectar (or in our case, local honey) and fresh lime juice for a sweet-and-sour kiss of citrus and then finished with a glaze that incorporates lime juice and lime zest as well as a touch of tequila to really tie together the signature cocktail flavor.
The high ratio of butter to flour yields a short, or crumbly, melt-in-your-mouth texture. Chill the dough well before slicing to allow the butter to resolidify. Cookies may be stored in an airtight container at room temperature up to 1 week. Unglazed cookies can be frozen up to 1 month. Thaw completely at room temperature before topping with tequila-lime glaze.
The end result shape-wise was supposed to be a circle, although I shaped my logs in more oval format. While maybe not the most visually attractive, the taste elevates them to another level. Which got me thinking once they were baked, the ideal shape would be to use a margarita glass cookie cutter! And given the popularity of these cookies, I will be making more…
I doubled the cookie dough recipe, but kept the glaze to a single batch, which was more than plenty to ice the tops, even had some leftover.
1 1/2 tsp. grated lime zest plus 3 1/2 Tbsp. fresh lime juice (from 2 limes)
Additional Ingredients
Flaky sea salt, white sparkling sugar, and lime zest, for garnish (optional)
Directions
Make the cookie dough:
Beat butter, sugar, salt, and cream of tartar with a stand mixer fitted with the paddle attachment on medium speed until light and fluffy, 1 to 2 minutes. Add lime juice and agave; beat on low speed until just combined, about 15 seconds, stopping to scrape down sides of bowl as needed. Add flour; beat on low speed until evenly incorporated, about 15 seconds.
Divide dough in half. Shape each half into a smooth log (about 9 inches long). Wrap logs individually in plastic wrap. Chill in refrigerator until firm, at least 2 hours or up to 2 days.
Preheat oven to 350°F with racks in upper third and lower third positions. Line 4 baking sheets with parchment paper; set aside. Unwrap 1 dough log on a clean work surface (keeping remaining log chilled), and cut crosswise into 1/4-inch slices (about 36 cookies per log). Arrange cookies 1 inch apart on 2 prepared baking sheets. Transfer to freezer; chill 15 minutes. Bake in preheated oven until edges are just beginning to brown, 14 to 16 minutes, rotating baking sheets between top and bottom racks after 7 minutes of baking time. Remove from oven.
Let cookies cool completely on baking sheet, about 30 minutes. While cookies bake and cool, repeat the cutting, freezing, and baking process with remaining dough log and remaining prepared baking sheets.
Make the tequila-lime glaze:
Whisk together powdered sugar, tequila, and lime zest and juice in a medium bowl until smooth and thick. (Don’t be tempted to add any more liquid; the glaze will be very thick, but that’s the perfect consistency.)
Scoop tequila-lime glaze evenly on centers of cookies (about 3/4 teaspoon per cookie). Using the back of a spoon, spread glaze over cookies, leaving a 1/4-inch border around cookie edge. Before the icing sets, garnish lightly with flaky sea salt to taste, sparkling sugar, and lime zest, if desired. Let cookies stand until glaze hardens, about 30 minutes.