All posts by LynnHoll

Unknown's avatar

About LynnHoll

I have been an artist and designer all my life incorporating graphic design for websites, gardens, publications, fabrics, interior design and cooking. I am now retired from my professional job, but still create artistic visions in all forms on a daily basis.

Mayo-Roasted Thanksgiving Turkey With Gravy

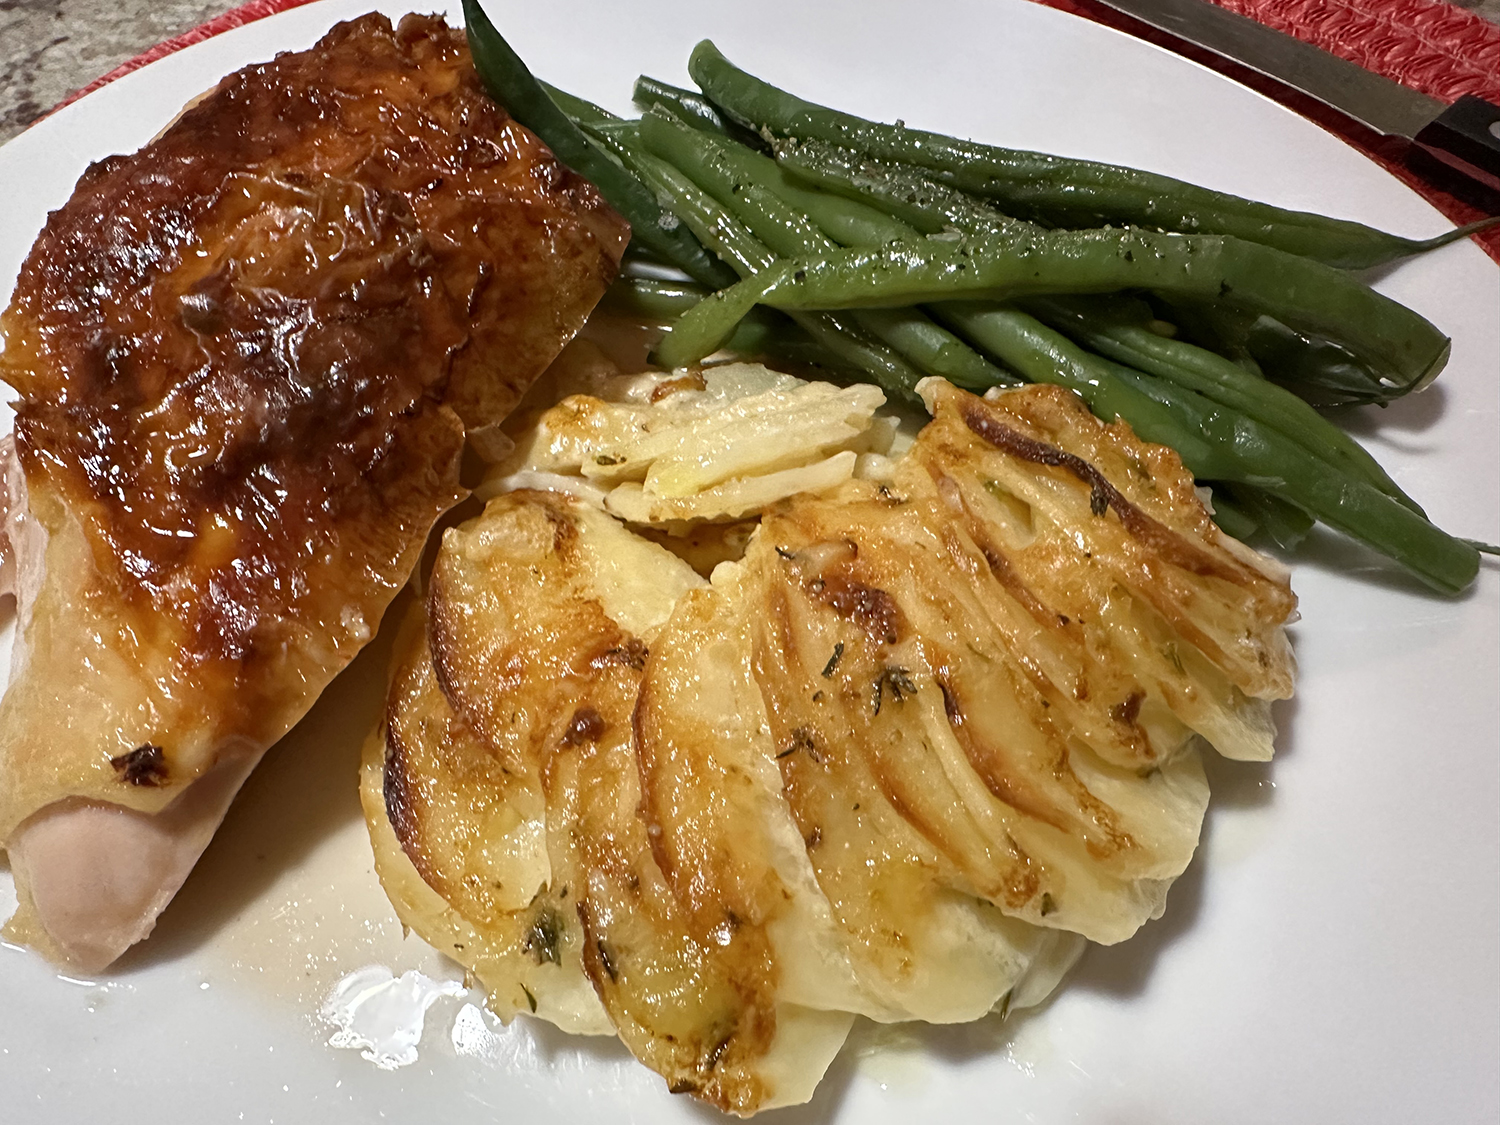
A turkey dinner with all, or some, of the trimmings is not just for Thanksgiving you know. Growing up, our mother made a turkey dinner several times a year, usually, Christmas, New Years and/or Easter. Our family of seven all loved it, and it is not that complicated. Plus, we loved the leftovers.

Thanksgiving dinner is one of those meals that is revered in our house to this day. There are certain staples that are a must such as, stuffing, mashed potatoes and gravy, cranberry sauce, and of course the star of the show, Mr. Tom Turkey. But we do not hesitate to try out different recipes concerning these staples. For instance, this year we cooked a Mayo-Roasted Thanksgiving Turkey With Gravy recipe from J. Kenji Lopez-Alt.

Some recipes for mayo-roasted turkey promise extra-juicy results with minimal effort. This one does no such thing. The mayonnaise won’t help the turkey stay juicy: Only salting and resting (a light curing process known colloquially as dry-brining) and carefully monitoring its internal temperature as it roasts will. The mayonnaise will, however, produce a turkey with glistening, burnished, golden-brown skin evenly flavored with herbs, no basting required. (Perfect for a photo op!)

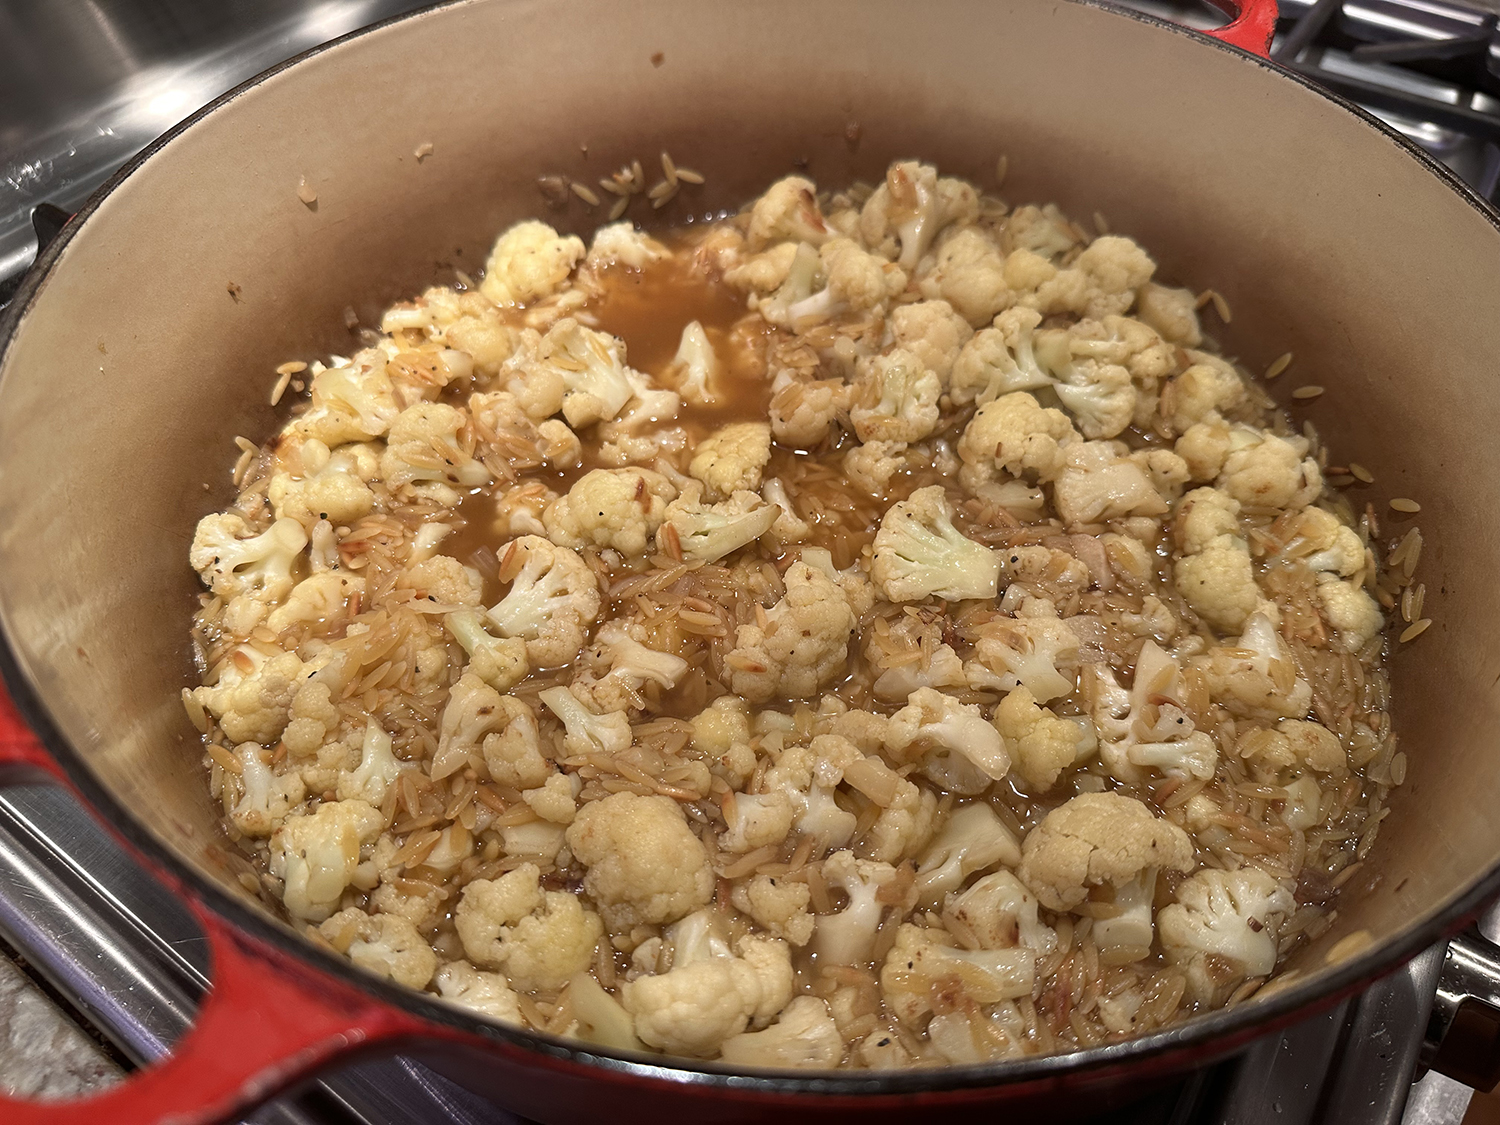
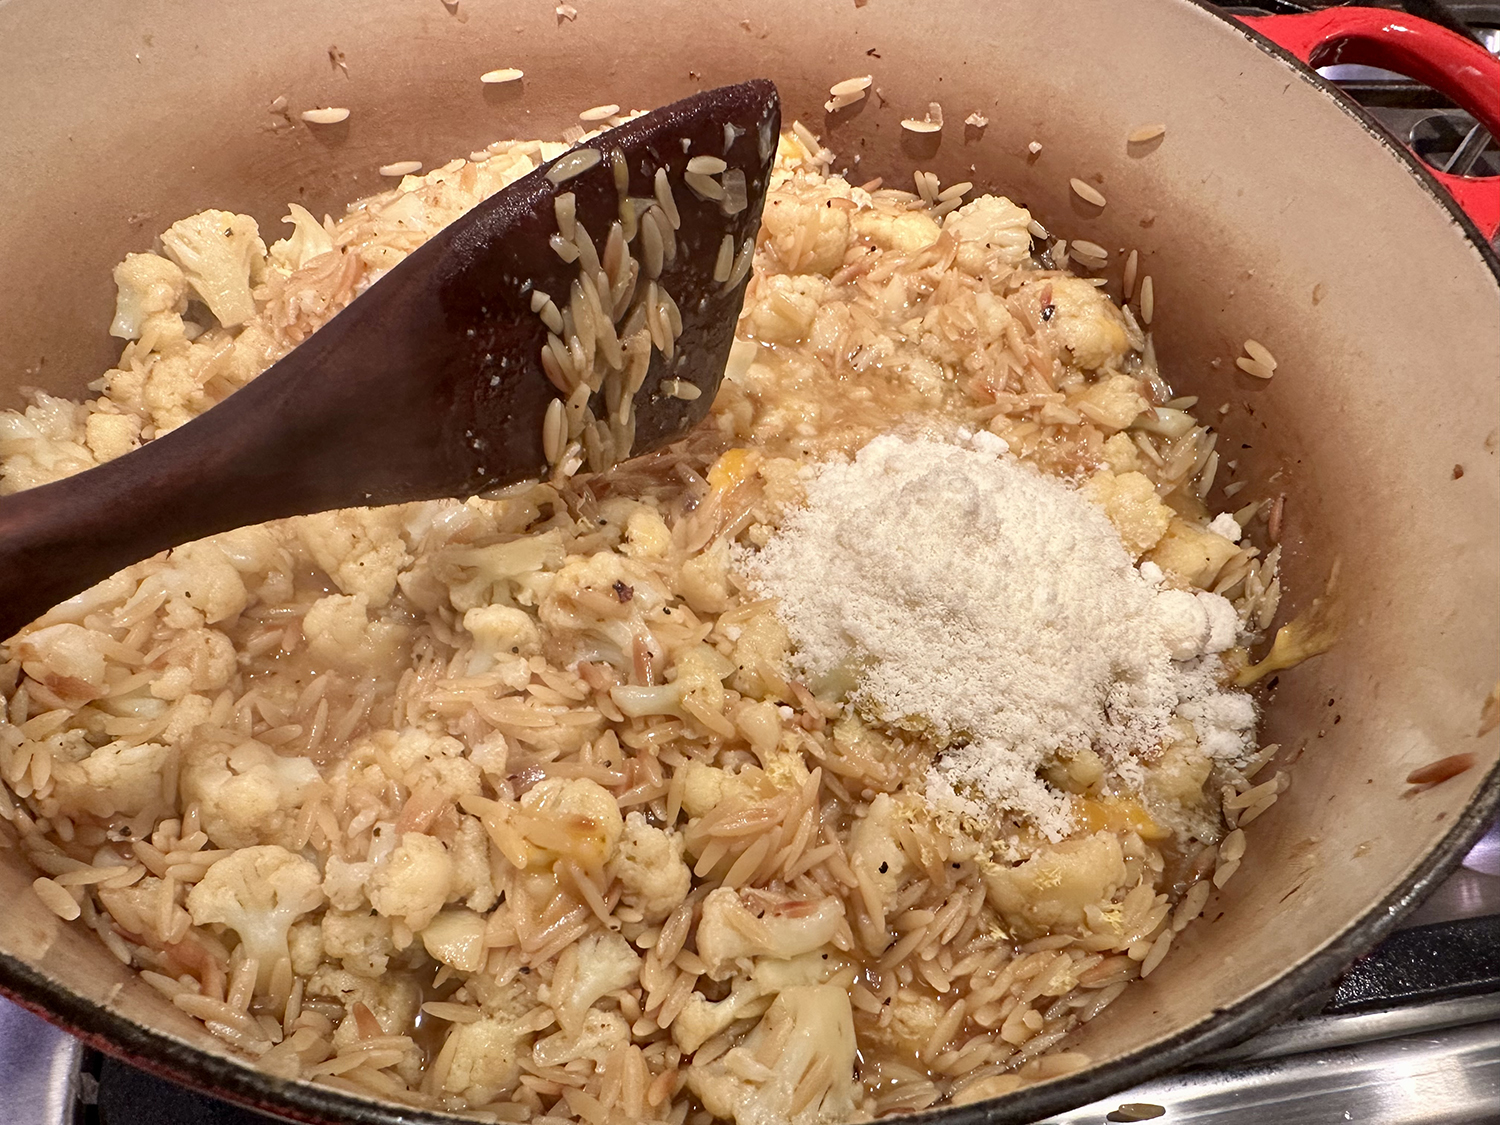
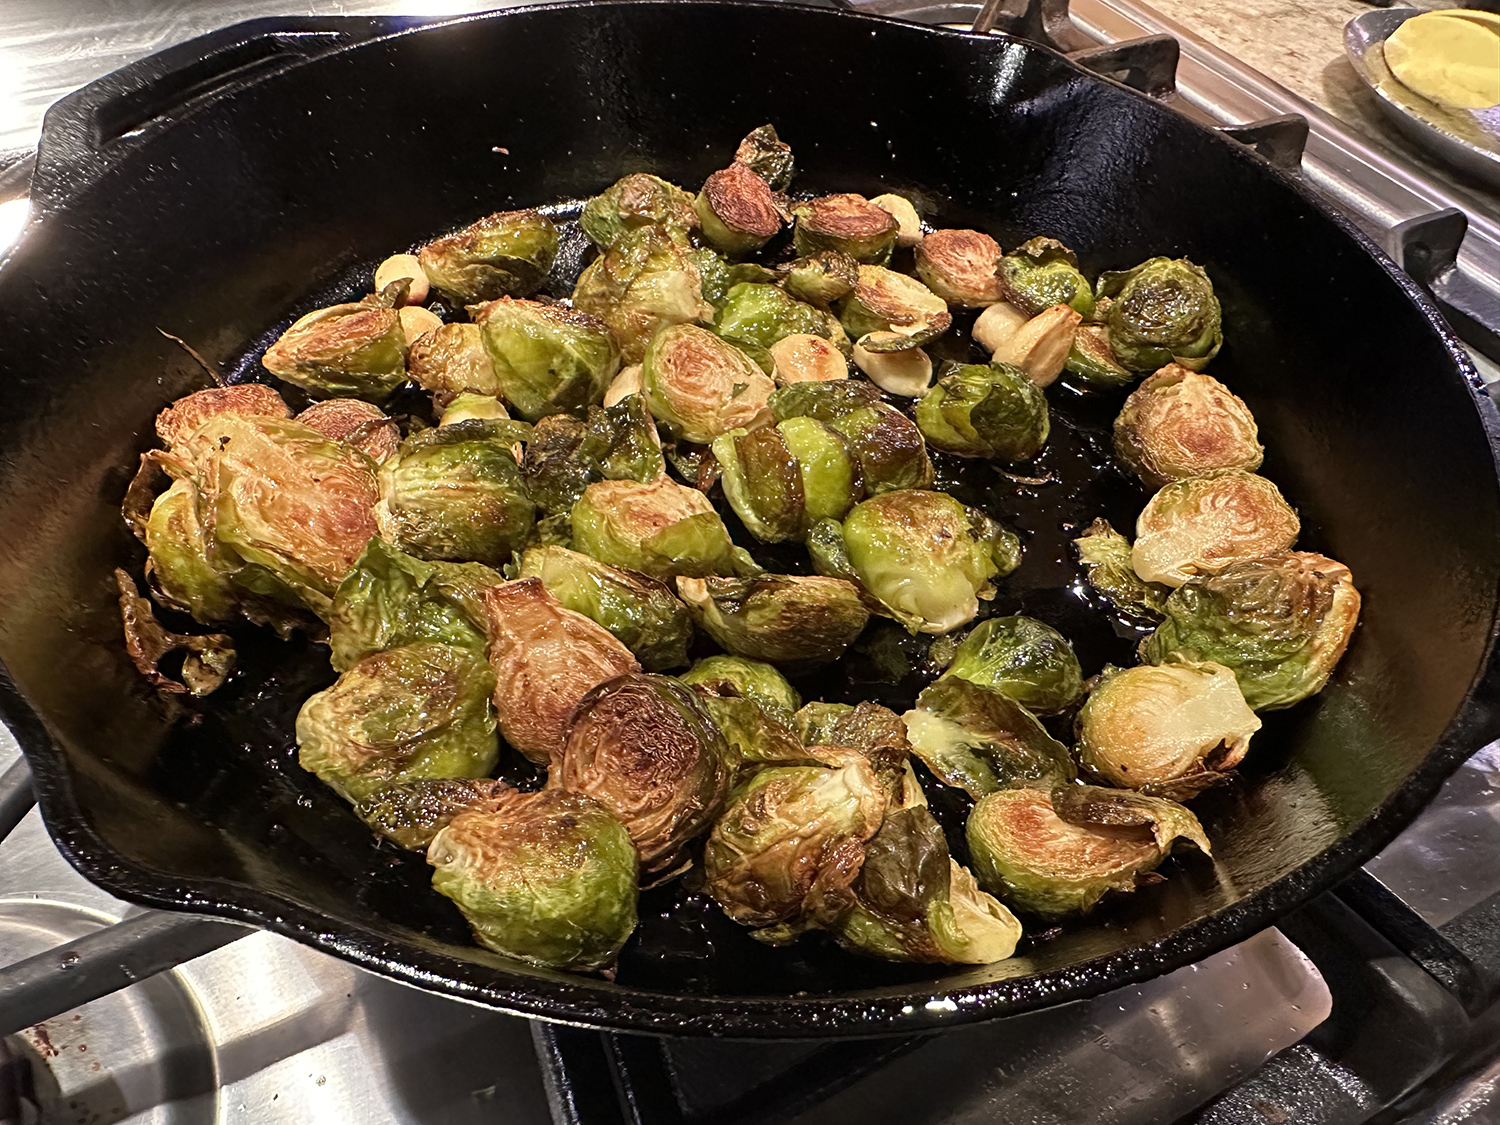
The mayo’s viscosity helps it stay in place as it roasts, while the extra protein from egg aids in browning. This recipe will make a little more mayonnaise than you’ll need. Use the excess for leftovers sandwiches, or toss it with roughly chopped vegetables (carrots, broccoli, brussels sprouts, zucchini or squash) before roasting at high heat for 10 to 15 minutes.

To the turkey ingredients we added bay leaves and fresh thyme. These herbs were placed on top of the cubed celery, onion and carrots, with the turkey placed ontop of it all to cook in the sheet pan.

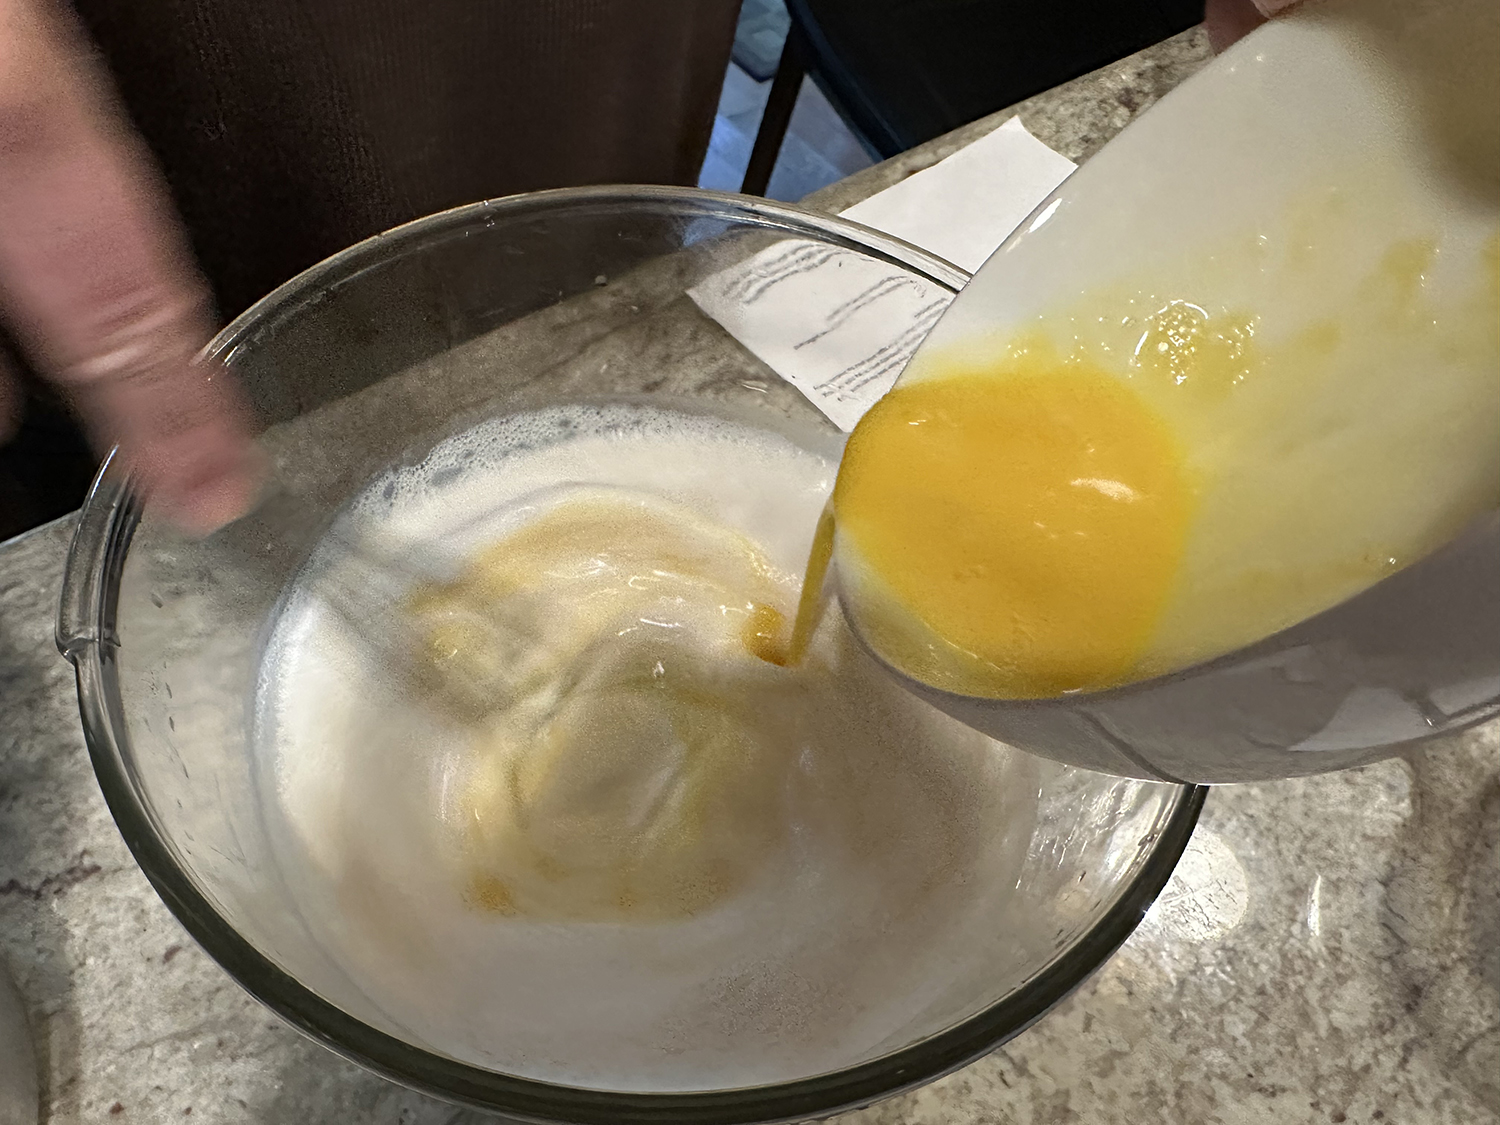
If spatchcocking intimidates, you can cook the turkey whole. Place a baking stone or steel directly on an oven rack set in the lowest position when heating your oven in Step 4. (Let it preheat for at least 45 minutes.) Place the whole turkey, breast-side up on the rimmed baking sheet. Roast as directed in Step 6 for 30 minutes, then reduce heat to 350 degrees, and continue roasting, tenting with aluminum foil if the skin starts brown too quickly, until the breast meat registers 150 degrees at its coolest point and the thigh and leg meat register at least 165 degrees at their coolest point, another 80 to 100 minutes. Remove from oven, transfer turkey to a cutting board as soon as you can handle it, then continue recipe as directed from Step 7. You can make the herb mayo from scratch, if you like. In a tall container just wide enough to fit the head of a hand blender, combine 2 teaspoons Dijon mustard, 3 medium garlic cloves, 1 whole egg, and the zest and juice of 1 lemon. Top with 1 cup neutral oil, such as vegetable, light olive oil or canola, so that the oil forms a distinct layer. Place the head of a hand blender firmly at the bottom of the container. (The garlic cloves should be entirely within the business-end of the blender.) Turn on the blender and, over the course of 15 seconds, slowly pull it up through the oil. A thick, stable mayonnaise should form. Remove the blender, shaking off most of the excess mayonnaise back into the jar. Proceed with the recipe.

Mayo-Roasted Thanksgiving Turkey With Gravy

  • Servings: 10-14
  • Difficulty: moderate
  • Print

Ingredients

For the Turkey:

  • 1 whole turkey, (10- to 14-lb.) backbone removed, neck, giblets and backbone reserved for the gravy (see Notes)
  • 1/2 cup kosher salt, or 6 tablespoons coarse salt
  • 2 celery ribs, diced
  • 1 large onion, diced
  • 1 large carrot, diced
  • 3 bay leaves
  • 6-8 sprigs of fresh thyme

For the Herb Mayo:

  • 1 1/2 cups mayonnaise
  • 1 cup loosely packed fresh parsley leaves, stems reserved
  • 1/2 cup loosely packed fresh sage leaves, stems reserved
  • 2 Tbsp. fresh thyme or oregano leaves, stems reserved
  • 2 scallions, roughly chopped
  • 1 lemon, zested
  • Kosher salt and freshly ground black pepper

For the Gravy:

  • 2 tsp. neutral oil, such as vegetable, light olive oil or canola
  • 2 celery ribs, roughly chopped
  • 1 large onion, diced
  • 1 large carrot, roughly chopped
  • Reserved backbone, and any neck or giblets from the turkey, roughly chopped
  • 1 1/2 quarts homemade chicken or turkey stock
  • Reserved herb stems from the Herb Mayo
  • 2 bay leaves
  • 1/4 cup all-purpose flour
  • 4 Tbsp. unsalted butter
  • 1 Tbsp. soy sauce

Directions

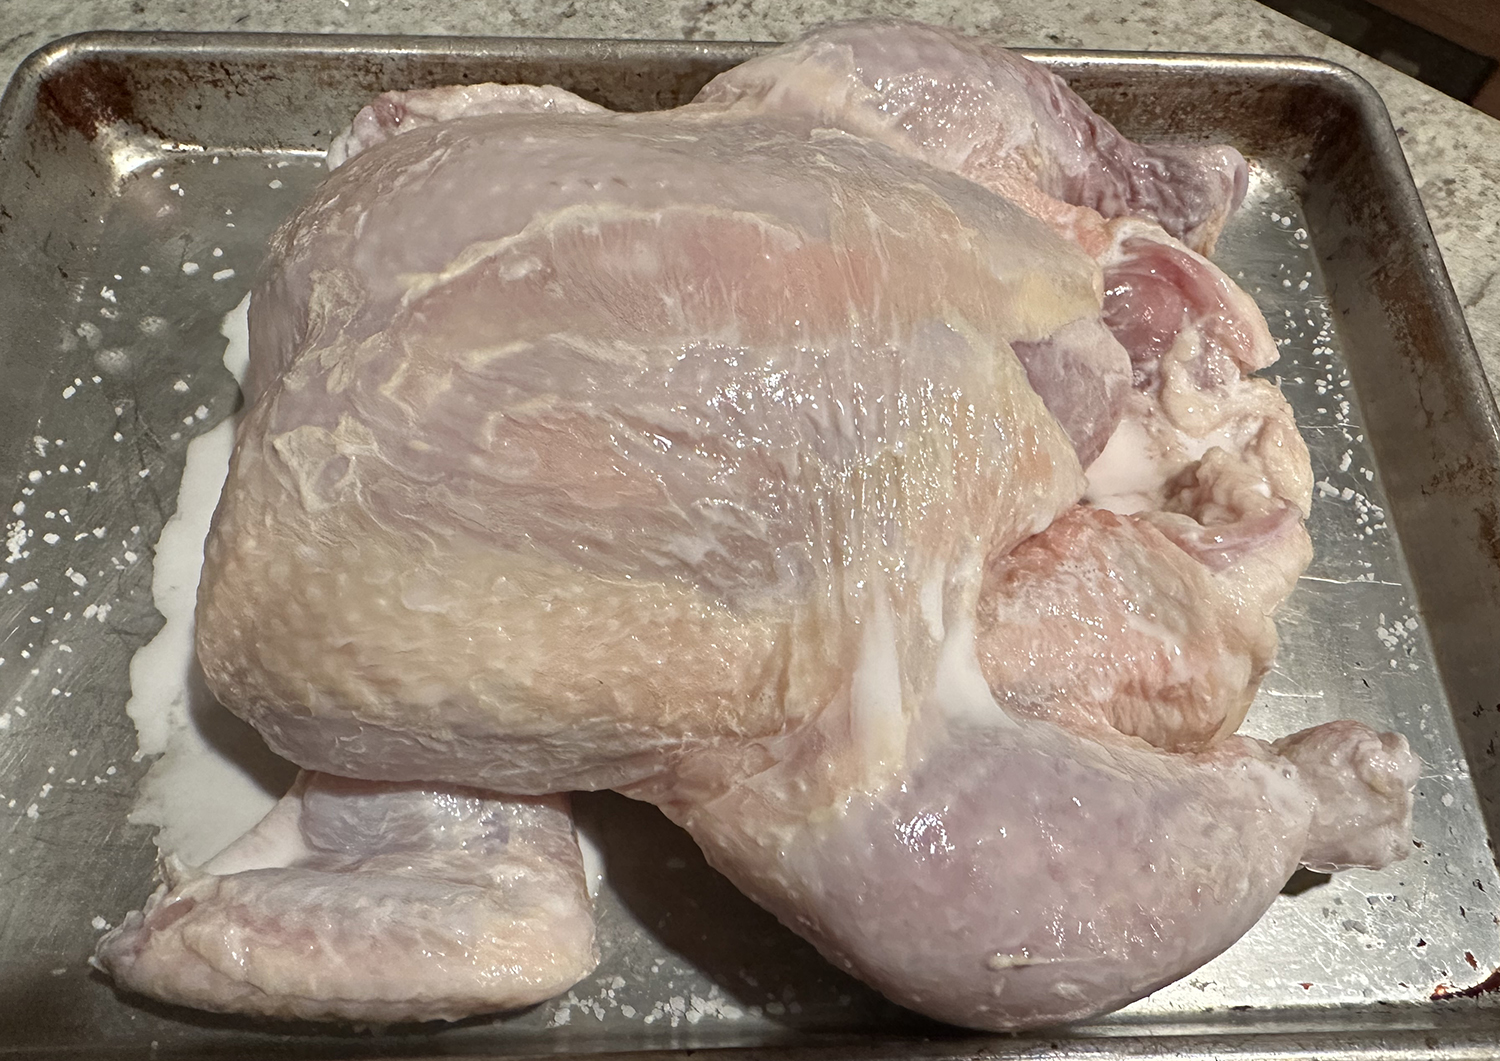
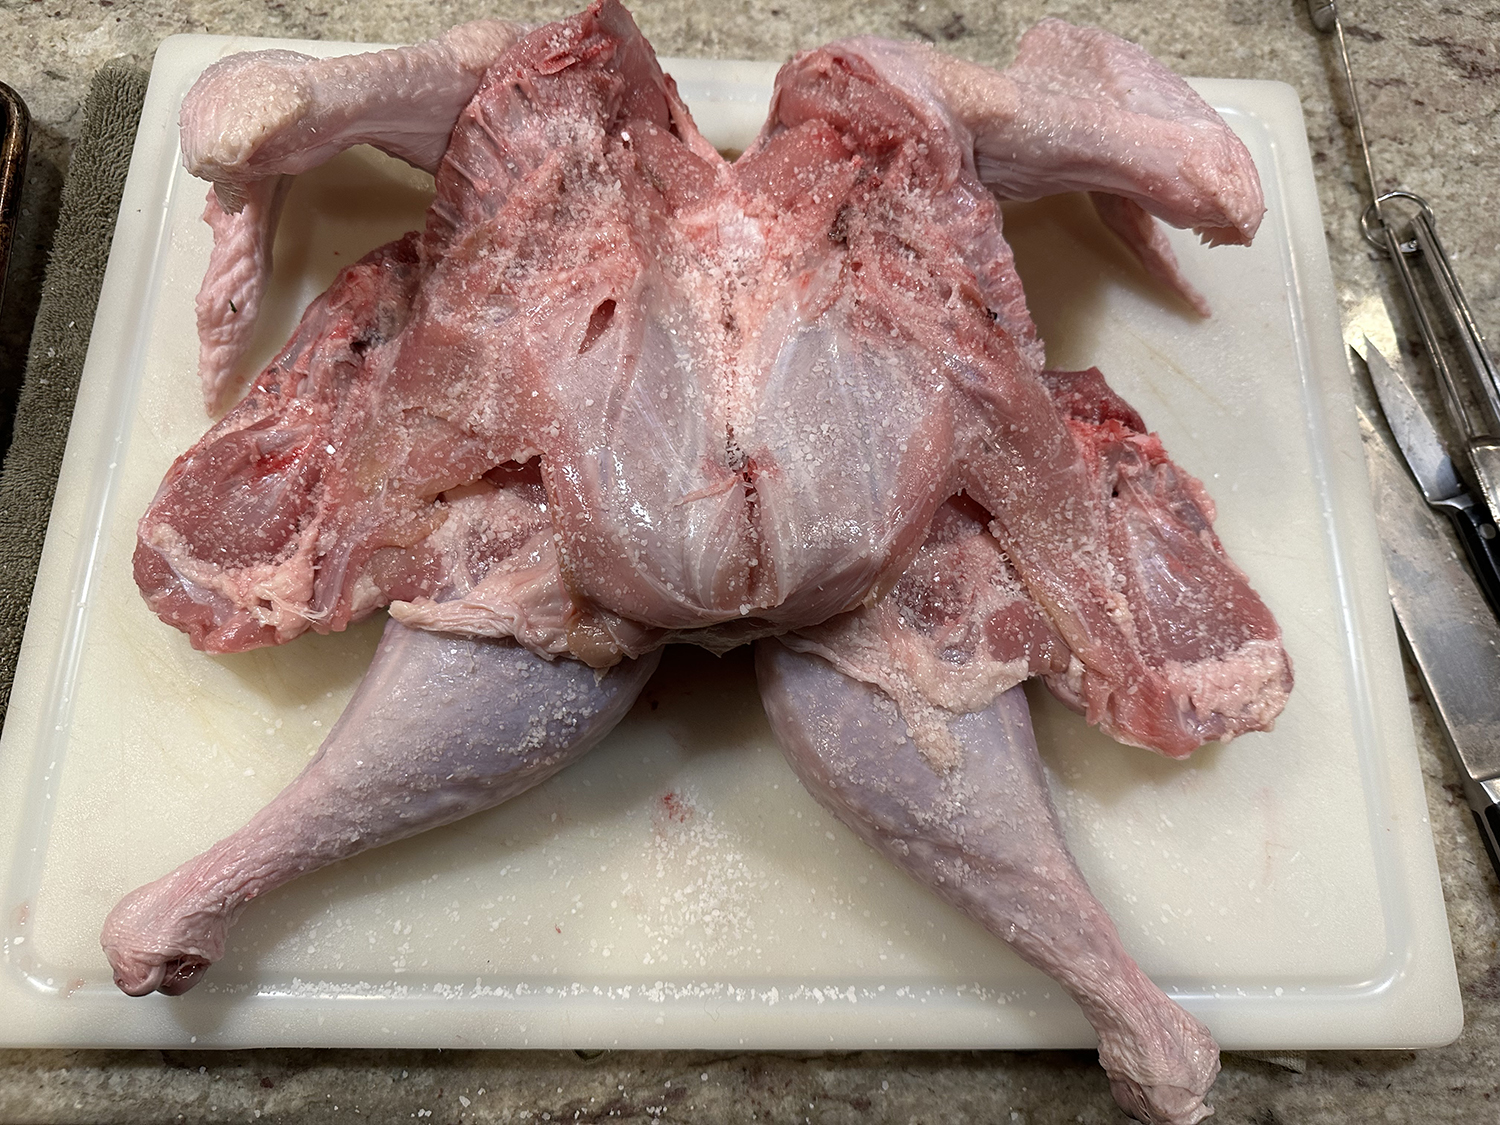
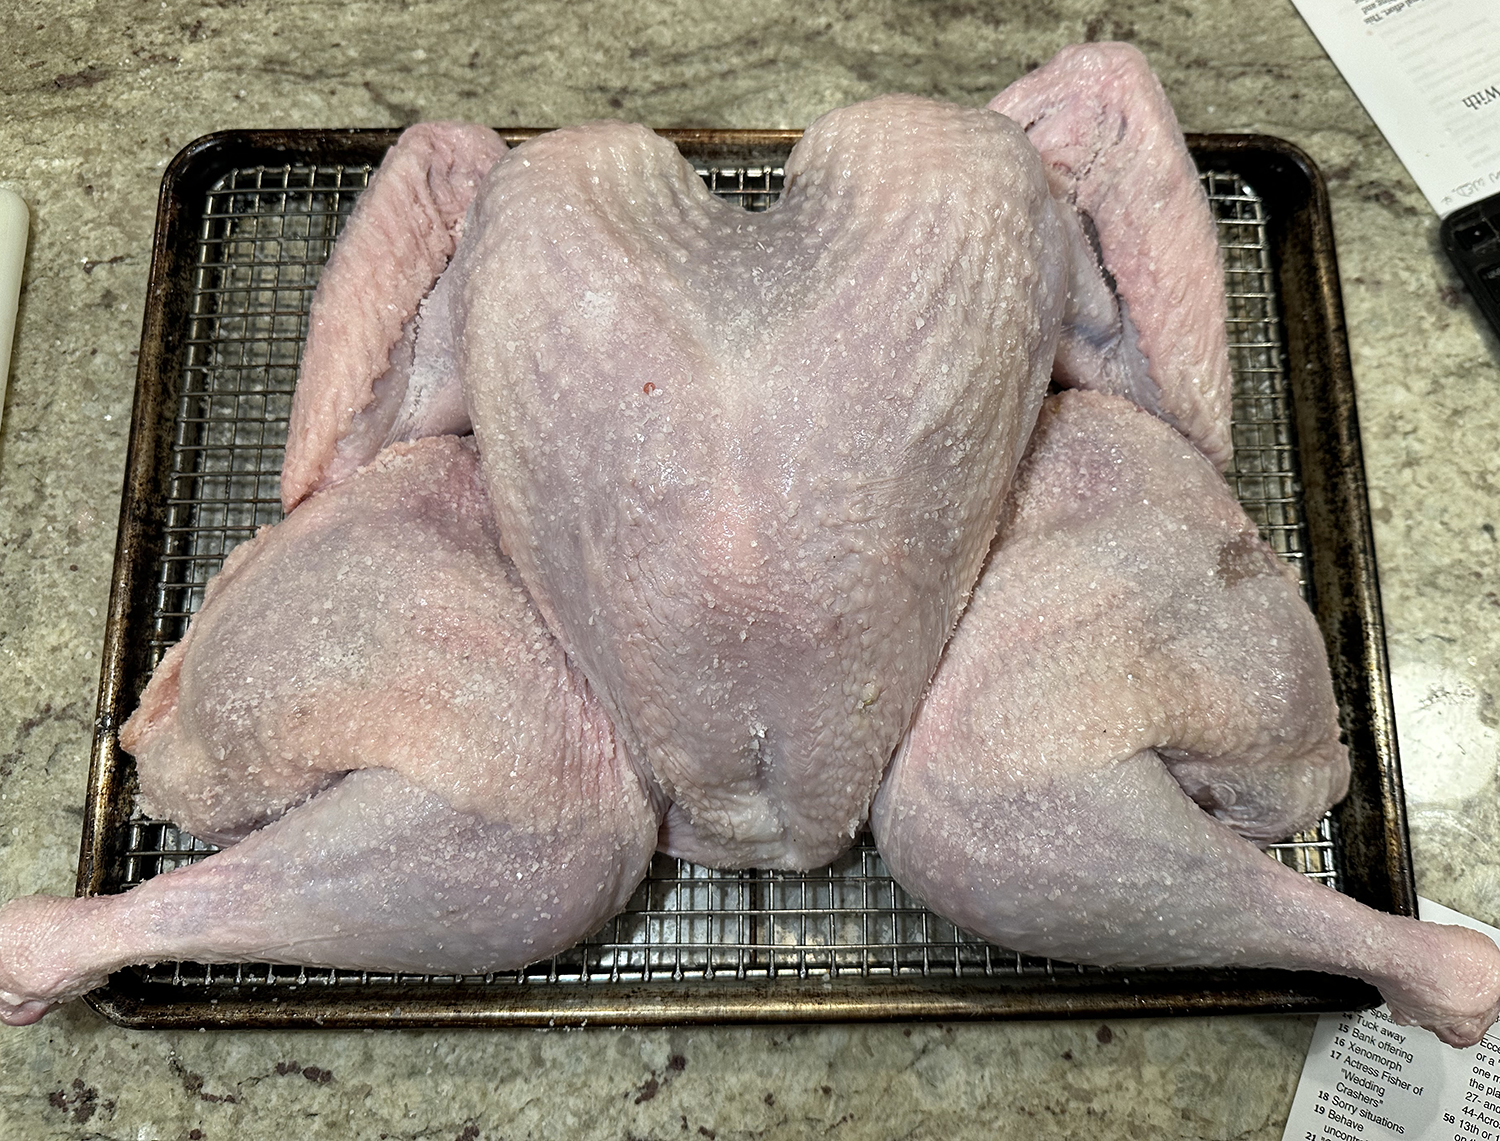
  1. Dry-brine the turkey: Pat the turkey dry with paper towels. Carefully loosen the skin from the breast of the turkey — going in through the neck may be easier here — until you can slide your hand between the skin and the meat. Season each turkey breast with 1 teaspoon salt, spreading it as evenly as possible with your hands. Sprinkle the remaining salt evenly over every surface of the turkey. Place the turkey skin-side up on a rimmed sheet pan, and refrigerate, uncovered, for 12 to 24 hours.
  2. While the turkey dry-brines, make the herb mayo: In a tall container just wide enough to fit the head of a hand blender (or using a regular blender or food processor), combine the mayonnaise with the parsley, sage, thyme, or oregano, scallions, lemon zest, and 1 tablespoon water. Season generously with salt and pepper. Use the hand blender to blend until it all forms a relatively smooth, pale-green sauce. Transfer to a sealed container until ready to use. You should have about 1¾ cups of herb mayo. (You can make the mayo in advance for up to a week and keep it in the fridge.)
  3. Roast the turkey: Take the turkey out of the refrigerator to let it rest as the oven heats. Adjust the oven rack to a lower-middle position and heat the oven to 425 degrees for a 10- to 12-pound bird or 400 degrees for a 12- to 14-pound bird. Line a sheet pan with aluminum foil. Scatter the diced celery, onion, and carrot over it. Place a cooling rack directly on top of the vegetables, then place the turkey on top, skin-side down.
  4. With your hands, slather ½ cup of the herb-mayo mixture over the exposed side of the turkey, making sure to lightly coat every surface. Flip the turkey skin-side up. Spread the legs out to the sides (they should remain skin-side up) and tuck the wing tips behind the breast. With your hands, spread a couple of tablespoons of the herb mayo between the skin and meat of the breast. Generously slather the rest of the turkey with the herb mayo, getting it into every crack and crevice. (Reserve any remaining herb mayo for your day-after-Thanksgiving sandwiches.)
  5. Transfer the turkey to the oven and roast until the breast meat registers 150 degrees at its coolest point (typically the deepest point of the breast next to the breastbone) and the thigh and leg meat register at least 165 degrees at their coolest point (typically the center of the joint between the drumstick and thigh or thigh and hip), 80 to 90 minutes, rotating halfway through. (You may want to start checking the turkey’s internal temperature after about 1 hour.) If any of the skin starts to darken too much during roasting, tent darker areas loosely with aluminum foil. Remove from oven, transfer to a cutting board, and let it rest.
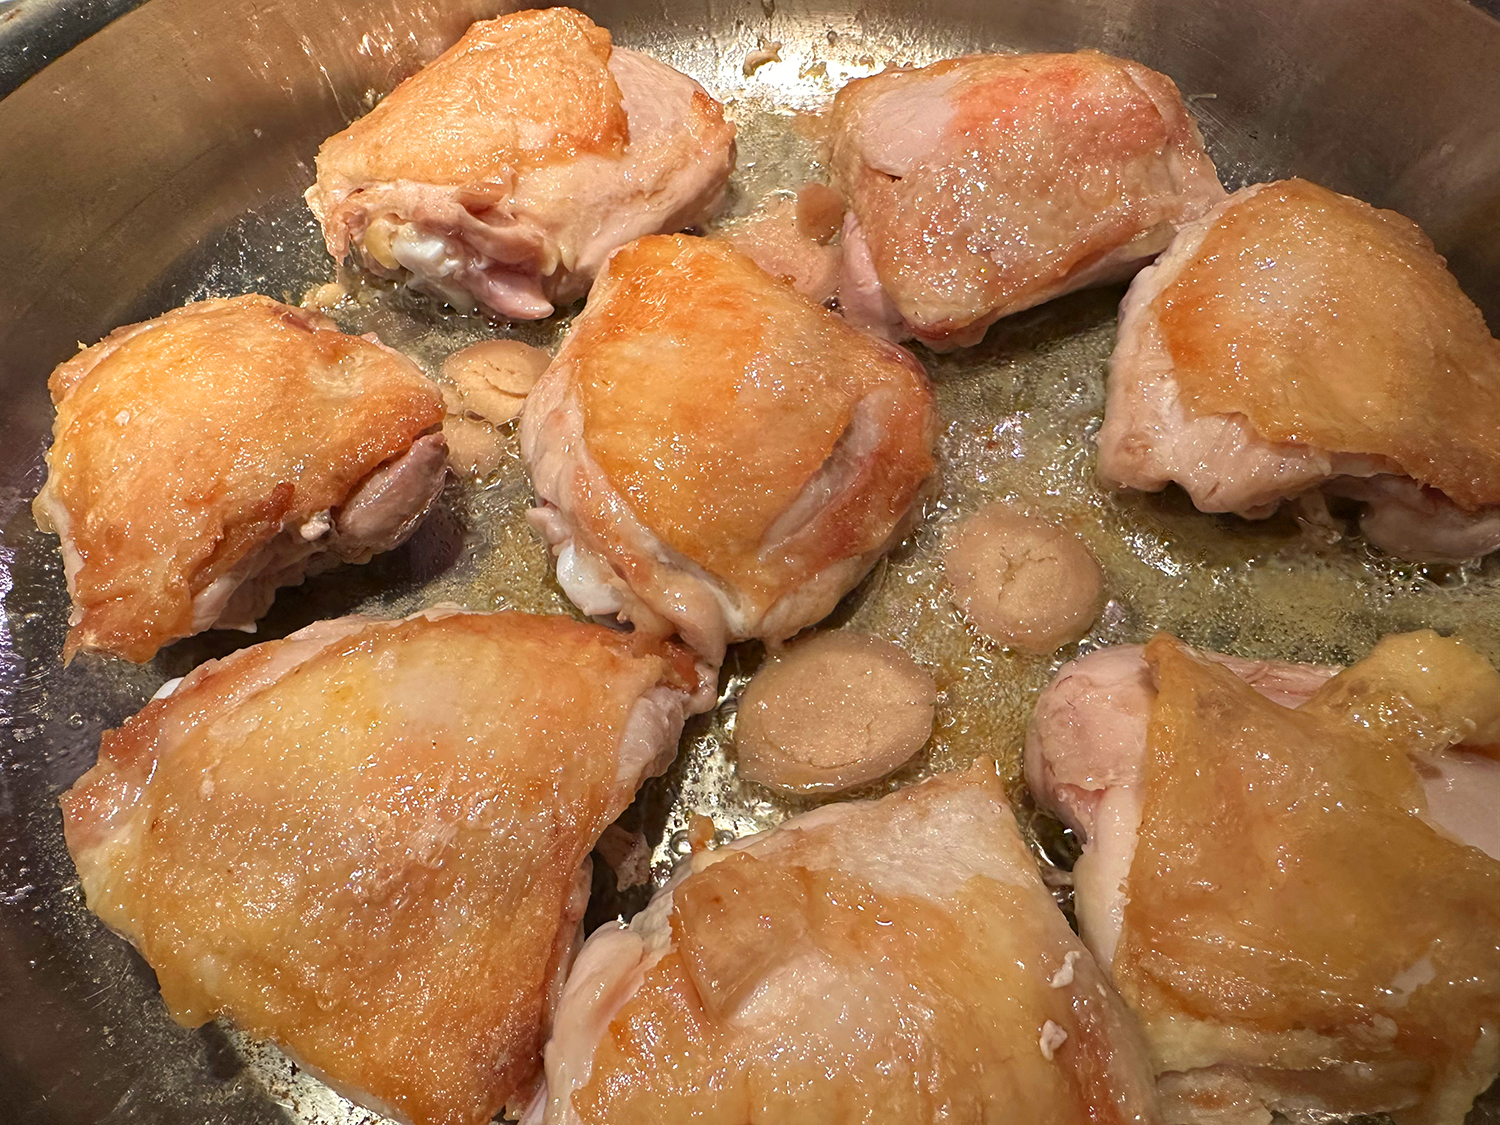
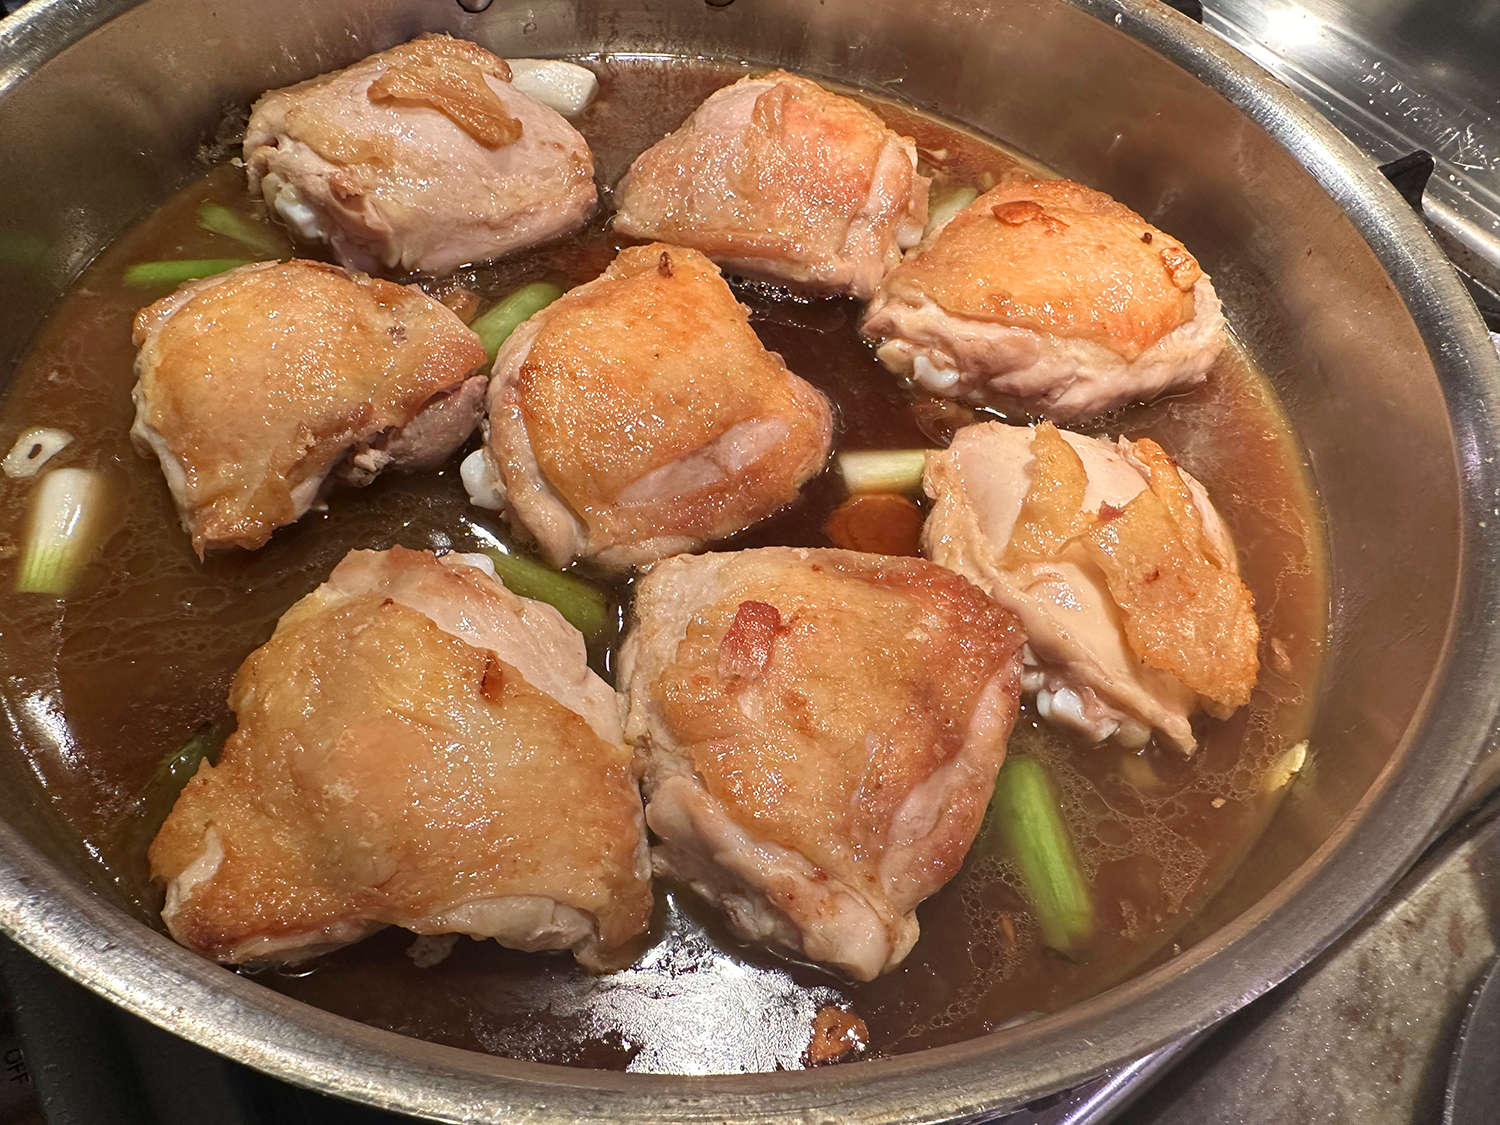
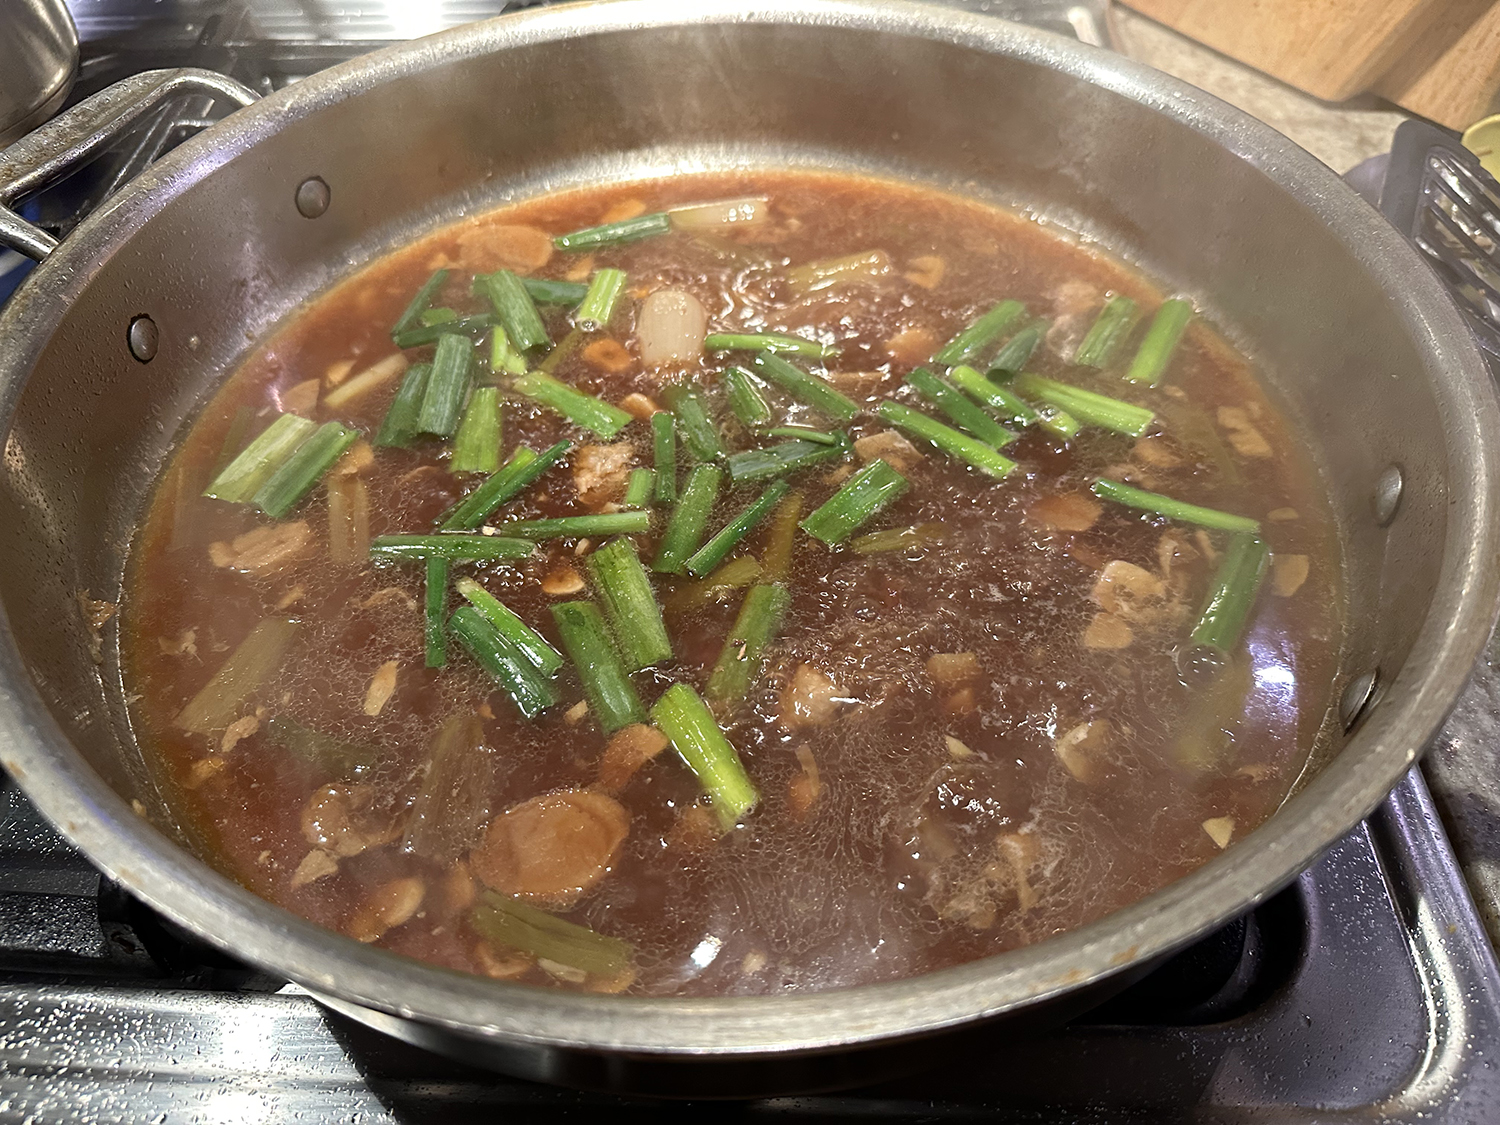
  6. While the turkey cooks, make the gravy: Heat the oil in a large saucepan over high until lightly smoking. Add the celery, onion, carrot, and turkey parts, and cook, stirring occasionally, until lightly browned, about 15 minutes. Add the stock, herb stems and bay leaves. Bring to a simmer and cook gently until reduced by about half, or until the turkey is done.
  7. After removing the turkey from the oven, strain the stock mixture through a fine-mesh strainer into a large bowl. Tilt and strain any collected liquids from the turkey-roasting tray into the same bowl. Discard the vegetables at the bottom of the tray. Skim off and discard most of the excess fat from the liquid.
  8. Heat the flour and butter in a medium saucepan over medium, stirring constantly with a whisk until the mixture is golden brown. Ladle the stock mixture into the saucepan, about a 1/2 cup at a time, whisking until smooth after each addition. Once all the stock is added, bring the gravy to a simmer until your desired consistency, stir in the soy sauce, and season to taste with salt and pepper.
  9. Carve and serve the turkey with the gravy.

http://www.lynnandruss.com

Slightly altered recipe by J. Kenji Lopez-Alt for NYTimes Cooking

Chili-Spiced Chicken Thighs and Potatoes

Chicken thighs have plenty of flavorful juices and fat, but they don’t release them until the meat is almost done, which is far too late to be helpful in roasting your potatoes. To better utilize the fat from the chicken, trim the thighs well and roast the trim on its own to render its fat.

Meanwhile, slash the flesh side of the thighs and cover them with a simple spice mix, taking care to get the mixture deep into the slashes. To ensure that the potatoes absorb all the savory juices thrown off by the roasting chicken thighs, parboil the spuds with baking soda. Its alkalinity quickly breaks down the pectin in the exteriors.

After drying the potatoes briefly, stir them vigorously with the fat rendered from the chicken trim and some kosher salt. The salt roughed up the exteriors, creating plenty of entry points for the flavorful chicken juices to suffuse the spuds as they roasted. Starting the potatoes lower in the oven provides plenty of bottom heat to jump-start browning. After adding the chicken, move the sheet up in the oven where the plentiful top heat ensures that the chicken skin becomes crisp. Sliced scallion and a spritz of citrus provides fresh flavor that complements the richness of the potatoes and chicken.

Chicken thighs are very forgiving in terms of doneness, so don’t worry if yours are different sizes. Use Yukon Gold potatoes here, but you can substitute russets if that’s what you have on hand.

Chili-Spiced Chicken Thighs and Potatoes

  • Servings: 4-6
  • Difficulty: easy
  • Print

Ingredients

  • 3½ tsp. kosher salt, divided
  • 1 tablespoon chili powder
  • 1 tsp. paprika
  • ½ tsp. pepper
  • ½ tsp. garlic powder
  • ¼ tsp. cayenne pepper
  • 3 lbs. bone-in chicken thighs
  • 3 lbs. Yukon gold potatoes, peeled and cut into 1-inch pieces
  • ½ tsp. baking soda
  • 1 scallion, sliced thin on bias
  • lime wedges

Directions

  1. Adjust oven racks to lowest and top positions and heat oven to 450 degrees. Combine 1½ teaspoons salt, chili powder, paprika, pepper, garlic powder, and cayenne in small bowl. Bring 2 quarts water to boil in Dutch oven.
  2. Place 1 thigh skin side down on cutting board. Cut away any pockets of fat and any skin that extends beyond meat and reserve trim. Make three ½-inch-deep slits in flesh parallel to bone. Turn skin side up. Repeat with remaining thighs. Using tip of paring knife, poke skin of each thigh 8 to 10 times. Sprinkle 1½ teaspoons spice mixture evenly over skin of thighs. Turn thighs over and sprinkle remaining spice mixture over flesh side. Rub mixture into slits.
  3. Place 1 thigh skin side down on cutting board. Cut away any pockets of fat and any skin that extends beyond meat and reserve trim. Make three ½-inch-deep slits in flesh parallel to bone. Turn skin side up. Repeat with remaining thighs. Using tip of paring knife, poke skin of each thigh 8 to 10 times. Sprinkle 1½ teaspoons spice mixture evenly over skin of thighs. Turn thighs over and sprinkle remaining spice mixture over flesh side. Rub mixture into slits.
  4. Scatter trim over surface of rimmed baking sheet. Roast on lower rack until trim is mostly crisped and fat is rendered, 8 to 10 minutes. Discard trim and leave fat in baking sheet. While trim is rendering, add potatoes and baking soda to boiling water and return to boil. Boil for 2 minutes and drain well. Return potatoes to Dutch oven and place over low heat. Cook, shaking pot occasionally, until any surface moisture has evaporated, about 2 minutes. Remove from heat.
  5. Add rendered fat and remaining 2 teaspoons salt to potatoes and stir with rubber spatula until potatoes are coated with starchy paste, about 30 seconds. Transfer potatoes to now-empty sheet pan and spread into even layer. Roast on lower rack until undersides of potatoes are brown and crisp, about 15 minutes.
  6. Using thin metal spatula, flip potatoes. Push potatoes aside to clear 1 space for each thigh. Place thighs skin side up in cleared spaces. Roast on upper rack until chicken is browned and crisp and largest thigh registers at least 185 degrees, 25 to 30 minutes, rotating pan halfway through roasting.
  7. Transfer thighs to platter to rest. Stir potatoes to coat with any remaining liquid and spread over surface of baking sheet. Return pan to upper rack and roast until potatoes are mostly dry, about 5 minutes. Transfer to platter with chicken and sprinkle potatoes with scallion. Serve, passing lime wedges separately.

http://www.lynnandruss.com

Recipe by Andrea Geary for America’s Test Kitchen

Santa’s Christmas Trash Cookies

Let’s talk trash. Not very appealing subject matter for a food blog is it? But here, Santa’s trash is another man’s treasure. More specifically, yours.

With the Winter Holidays fast approaching, I needed to start compiling the annual homemade cookie list. I like to include not only the tried-and-true favorites, but to introduce a new recipe or three. I asked the (now adult) kids what their “must haves” were, and one of them requested these Santa’s Christmas Trash Cookies.

Now the name is certainly NOT the most appetizing, but since it was requested, I felt they should definitely be part of the mix. And they seemed to have a quick turn-around time compared to my decorated sugar cookies, which literally take days.

Verdict? Trash never tasted so good!  A sweet and salty cookie recipe is a perfect match and always has you coming back for more. Imagine biting into soft, chewy cookies smooshed with loads of mini white and chocolate chips, Reese cups, M&Ms, pretzels, peanuts, sea salt and festive sprinkles! 

Seriously, you get the best of both worlds with epic sweet and salty yumminess in these holiday ‘junk food’ cookies! Be forewarned, they are addictive…

NOTES: Can add more potato or pretzels (up to ⅔ cup of each, if you wish for more saltiness). Feel free to modify any candies with whatever candies you prefer.

Santa's Christmas Trash Cookies

  • Servings: 16 cookies
  • Difficulty: easy
  • Print

Ingredients

  • 14 Tbsp. unsalted butter, room temperature
  • ½ cup granulated sugar
  • ½ cup brown sugar
  • 1 large egg
  • 1 tsp. vanilla
  • 2 ¼ cups all-purpose flour
  • 1 tsp. baking soda make sure it’s not expired
  • ¼ tsp. salt
  • ⅓ cup crushed potato chips; or cocktail peanuts, chopped
  • ⅓ cup crushed pretzels
  • ½ cup mini white chocolate Reese cups
  • ½ cup mini chocolate reese cups
  • ⅓ cup milk or semi-sweet chocolate chips
  • ½ cup M&M’s, red and green
  • ⅓ cup white chocolate chips
  • ¼ cup sprinkles of choice
  • Sprinkles of flaky sea salt for tops of cookies

Directions

  1. Preheat oven to 350º and line two baking sheets with parchment.
  2. In a medium bowl, whisk together flour, baking soda, and salt until combined, set aside.
  3. Using a mixer on, in a large bowl cream together butter and sugars for 1-3 minutes on medium speed until light and fluffy. Once the mixture turns pale yellow in color and has a light and fluffy texture, you’re done. Do not over-cream mixture.
  4. Beat in egg and vanilla until combined.
  5. Add dry ingredients to wet and mix until together until combined. (Dough will be very thick.)
  6. Add in potato chips or peanuts, pretzels, M&M’s, Reese cups, chocolate chips, and sprinkles and fold in with spatula. (Using mixer would crush them.)
  7. Using a medium sized scoop, scoop onto parchment paper and slightly press them down onto baking sheets and sprinkle with sea salt. Add additional pretzels, chips, candies and sprinkles to tops of cookies for decorative touches. If you want the cookies thick, don’t press down as much, you can control how thick you want them. Sprinkle with some sea salt if you wish.Can also chill dough until ready to use, scoop the dough balls and store them in fridge until ready to bake.
  8. Bake until edges are just starting to get golden, 7 to 8 minutes.
  9. Remove from oven and let cool 2 to 3 minutes, then transfer to cooling rack to cool completely.

http://www.lynnandruss.com

Adapted from a recipe by the bakingchocolatess.com

Orzotto: Two-Cheese Orzo with Cauliflower

A very flavorful side dish that’s not only visually enticing, this Two-Cheese Orzo with Cauliflower tastes fantastic too!

This “orzotto” has a creaminess similar to classic risotto thanks to the starchiness of the orzo pasta, but it’s easier and faster to prepare. A combination of melty cheddar cheese and nutty Parmesan lends richness, while cauliflower brings subtly sweet notes and makes the “orzotto” more substantial.

Chicken broth can be used in place of the vegetable broth (but then it’s no longer vegetarian). Herbs other than parsley work nicely, too—chives or dill are particularly good. This is a terrific side to a simple roasted chicken, or served as a side to steak, or as in our case, lamb loin chops; and it’s also hearty enough to be a meat-free main.

Don’t be shy about stirring after adding the broth. Frequent and brisk stirring helps create an especially creamy consistency. Be sure to also scrape along the bottom of the pot to ensure the mixture isn’t sticking to the bottom.

Ingredients

Two-Cheese Orzo with Cauliflower

  • Servings: 4-6
  • Difficulty: easy
  • Print

  • 2 Tbsp. extra-virgin olive oil
  • 1 medium shallot, minced
  • 2 medium garlic cloves, thinly sliced
  • Kosher salt and ground black pepper
  • 1 2-lb. head cauliflower, trimmed and cut into ½-inch pieces
  • 8 oz. (1¼ cups) orzo
  • 3 3/4 cups low-sodium vegetable broth, divided, plus more if needed
  • 2 oz. sharp cheddar cheese, shredded (1 cup)
  • 2 tsp. grated lemon zest, plus 2 Tbsp. lemon juice
  • 1 oz. Parmesan cheese, finely grated (½ cup), plus more to serve
  • 1/2 cup lightly packed fresh flat-leaf parsley, roughly chopped

Directions

  1. In a large Dutch oven over medium, heat the oil until shimmering. Add the shallot, garlic and ½ teaspoon salt; cook, stirring, until starting to brown, about 1 minute.
  2. Add the cauliflower and cook, stirring, until lightly browned in spots, 4 to 5 minutes.
  3. Add the orzo and cook, stirring, until beginning to brown, about 2 minutes.
  4. Stir in 2 cups of the broth and ½ teaspoon pepper; bring to a simmer over medium-high. Cook, uncovered and stirring, until the liquid is absorbed, about 5 minutes.
  5. Add 1½ cups of the remaining broth and simmer, stirring, until the liquid is again absorbed, the orzo is al dente and the cauliflower is tender-crisp, about 5 minutes.
  6. Stir in the remaining ¼ cup broth. Add the cheddar; stir until melted. Remove the pot from the heat. If the “orzotto” is dry and thick, stir in additional broth a few tablespoons at a time to reach the desired consistency.
  7. Stir in the lemon zest and juice, Parmesan and half of the parsley. Taste and season with salt and pepper. Serve sprinkled with the remaining parsley and additional Parmesan.

http://www.lynnandruss.com

Recipe by Rose Hattabaugh for Milk Street

Buttermilk-Brined Roast Chicken

The BEST roast chicken you’ve ever had, using only 3 ingredients? Well, here it is folks. The Hubs commented at least 3 times that this is his latest, greatest roast chicken. And we’ve made many a roasted chicken in our time. Not in the original recipe, at the last minute we decided to stuff the cavity with a half lemon, cut in two pieces, and several sprigs of thyme.

This recipe, adapted from Samin Nosrat’s “Salt Fat Acid Heat,” is inspired by the Southern grandma method of marinating chicken overnight in buttermilk before frying it. You’re roasting here, but the buttermilk and salt still work like a brine, tenderizing the meat on multiple levels to yield an unbelievably juicy chicken.

The pan drippings were bursting with flavor and would make a fantastic gravy, which we fully intend on doing next time. As a side dish, we paired our chicken with Cheesy Hasselback Potato Gratin.

As an added bonus, the sugars in the buttermilk will caramelize, contributing to an exquisitely browned skin. Be sure to leave 24 hours for marinating the chicken. While the beauty of roast chicken is that you can serve it anytime, anywhere, try serving it alongside panzanella, which plays the role of starch, salad and sauce.

Buttermilk-Brined Roast Chicken

  • Servings: 4
  • Difficulty: easy
  • Print

Ingredients

  • 1 chicken, 3½ to 4 lbs.
  • Kosher salt or fine sea salt
  • 2 cups buttermilk
  • Several sprigs of fresh thyme, optional
  • Half of a lemon, cut into two pieces, optional

Directions

  1. The day before you want to cook the chicken, remove the wingtips by cutting through the first wing joint with poultry shears or a sharp knife. Reserve for stock. Season chicken generously with salt and let it sit for 30 minutes.
  2. Stir 2 tablespoons kosher salt or 4 teaspoons fine sea salt into the buttermilk to dissolve. Place the chicken in a gallon-size resealable plastic bag and pour in the buttermilk. (If the chicken won’t fit in a gallon-size bag, double up 2 plastic produce bags to prevent leaks and tie the bag with twine.)
  3. Seal the bag, squish the buttermilk all around the chicken, place on a rimmed plate, and refrigerate for 12 to 24 hours. If you’re so inclined, you can turn the bag periodically so every part of the chicken gets marinated, but that’s not essential.
  4. Pull the chicken from the fridge an hour before you plan to cook it. Heat the oven to 425 degrees with a rack set in the center position.
  5. Remove the chicken from the plastic bag and scrape off as much buttermilk as you can without being obsessive. Stuff the cavity with lemon and thyme, if desired. Tightly tie together the legs with a piece of butcher’s twine. Place the chicken in a 10-inch cast-iron skillet or a shallow roasting pan.
  6. Slide the pan all the way to the back of the oven on the center rack. Rotate the pan so that the legs are pointing toward the rear left corner and the breast is pointing toward the center of the oven. (The back corners tend to be the hottest spots in the oven, so this orientation protects the breast from overcooking before the legs are done.) Pretty quickly you should hear the chicken sizzling.
  7. After about 20 minutes, when the chicken starts to brown, reduce the heat to 400 degrees and continue roasting for 10 minutes.
  8. Move the pan so the legs are facing the rear right corner of the oven. Continue cooking for another 30 minutes or so, until the chicken is brown all over and the juices run clear when you insert a knife down to the bone between the leg and the thigh. If the skin is getting too brown before it is cooked through, use a foil tent. Remove it to a platter and let it rest for 10 minutes before carving and serving.

http://www.lynnandruss.com

Recipe by Samin Rosrat for NYTimes Cooking

Cheesy Hasselback Potato Gratin

Looking for a side dish with a WOW factor? This golden and glorious mash-up of potato gratin and Hasselback potatoes, from the acclaimed food science writer J. Kenji López-Alt, has been engineered to give you both creamy potato and singed edge in each bite. The overall flavor is mild and therefore would go with about any entrée, be it chicken, steak, fish or pork.

The principal innovation here is placing the sliced potatoes in the casserole dish vertically, on their edges, rather than laying them flat as in a standard gratin, in order to get those crisp ridges on top. Allow extra time for the task of slicing the potatoes, for which it’s helpful to have a mandoline or food processor (though not necessary, strictly speaking). And do buy extra potatoes, just in case; you want to pack the potatoes tightly and keep them standing up straight.

NOTE: Because of variation in the shape of potatoes, the amount of potato that will fit into a single casserole dish varies. Longer, thinner potatoes will fill a dish more than shorter, rounder potatoes. When purchasing potatoes, buy a few extra in order to fill the dish if necessary. Depending on exact shape and size of potatoes and casserole dish, you may not need all of the cream mixture, although we used it all.

Cheesy Hasselback Potato Gratin

  • Servings: 6
  • Difficulty: moderate
  • Print

Ingredients

  • 4 oz. finely grated Gruyère or comté cheese
  • 2 oz. finely grated Parmigiano-Reggiano
  • 2 cups heavy cream
  • 2 medium cloves garlic, minced
  • 1 Tbsp. fresh thyme leaves, roughly chopped
  • Kosher salt and black pepper
  • 4½ to 5 lbs. russet potatoes, peeled and sliced ⅛-inch thick on a mandoline slicer (7 to 8 medium, see note above)
  • 2 Tbsp. unsalted butter, divided

Directions

  1. Adjust oven rack to middle position and heat oven to 400 degrees. Combine cheeses in a large bowl. Transfer ⅓ of cheese mixture to a separate bowl and set aside. Add cream, garlic and thyme to cheese mixture. Season generously with salt and pepper.
  2. Add potato slices and toss with your hands until every slice is coated with cream mixture, making sure to separate any slices that are sticking together to get the cream mixture in between them.
  3. Grease a 2-quart casserole dish with one tablespoon of butter. Pick up a handful of potatoes, organizing them into a neat stack, and lay them in the casserole dish with their edges aligned vertically. Continue placing potatoes in the dish, working around the perimeter and into the center until all the potatoes have been added. The potatoes should be very tightly packed. If necessary, slice an additional potato, coat with cream mixture, and add to casserole. Pour the excess cream/cheese mixture evenly over the potatoes until the mixture comes halfway up the sides of the casserole. You may not need all the excess liquid.
  4. Cover dish tightly with foil and transfer to the oven. Bake for 30 minutes.
  5. Remove foil and continue baking until the top is pale golden brown, about 30 minutes longer. Carefully remove from oven, dot with remaining butter, sprinkle with remaining cheese, and return to oven.
  6. Bake until deep golden brown and crisp on top, about 30 minutes longer. Remove from oven and let rest for a few minutes. Garnish with a few small stems of thyme and serve.

http://www.lynnandruss.com

Slightly adapted from a recipe by J. Kenji Lopez-Alt

Capellini with Smoked Paprika and Olives

We certainly had doubts when looking at the recipe and the amount of liquid. The juices from the large can of tomatoes plus 4 cups of water? The pound of angel hair pasta was supposed to absorb all of that? Well the recipe from Malcolm Jackson for Milk Street got many 5-star reviews so we went with it. Lo and behold, it was perfect.

This one-pan approach allows the noodles to absorb flavor as well as moisture as they cook. So stir often and taste the noodle for doneness. Keep in mind, the pasta will take 3 to 4 times longer to cook in the sauce than the package directions indicate.

For starters, you’ll need a pan that is at least 12”’ wide, preferably larger. If however, you don’t own a pot wide enough, you could break the dry pasta in half to fit flat into your pan.

This garlicky one-pot pasta takes inspiration from Catalan fideuà, a paella-like dish made with short, thin noodles. Smoked paprika adds earthy heat, while sherry contributes sweet, fruity notes—both balanced by the briny olives. As mentioned, the capellini is cooked directly in the tomato-based sauce, thickening it and imbuing the pasta with flavor while eliminating the need to boil water. This is a delicious weeknight dinner as is, but also pairs wonderfully with grilled shrimp or pan-roasted white fish. We paired ours with a side salad.

TIP: Make sure to stir the pasta often. The limited amount of water, as it evaporates, makes it easier for the pasta to stick to the bottom.

Capellini with Smoked Paprika and Olives

  • Servings: 4-6
  • Difficulty: easy
  • Print

Ingredients

  • 1/4 cup extra-virgin olive oil, plus more to serve
  • 3 medium garlic cloves, thinly sliced
  • 1 Tbsp. smoked paprika
  • 1/2 cup dry sherry OR dry white wine
  • 1 28-oz. can diced tomatoes
  • Kosher salt and ground black pepper
  • 4 cups of water
  • 1 lb. capellini
  • 1 cup pitted green OR black olives OR a combination, chopped
  • Roughly chopped fresh oregano OR finely grated manchego cheese OR both

Directions

  1. In a large pot over medium, heat the oil until shimmering. Add the garlic and paprika; cook, stirring, until fragrant, about 30 seconds. Stir in the sherry and cook until reduced by about half, 2 to 3 minutes.
  2. Stir in the tomatoes with juices and 1 teaspoon salt; bring to a simmer, stirring occasionally. Add 4 cups water and the pasta; stir to combine. Bring to a boil, then reduce to medium and cook, uncovered and stirring occasionally, until the pasta is al dente. (Which will be a lot longer than the package directions indicate.)
  3. Off heat, stir in the olives. Taste and season with salt and pepper. Serve drizzled with additional oil, and add toppings if desired.

http://www.lynnandruss.com

Recipe by Malcom Jackson for Milk Street

Spicy Roasted New Potatoes with Lemon and Herbs

Middle Eastern batata harra inspired these lightly spicy roasted potatoes. Tradition may inform much of Sami Tamimi’s cooking, but it doesn’t constrain it. His willingness to play is a delicious undercurrent to his book “Falastin,” a collection of stories and updated classic Palestinian recipes he wrote with Tara Wigley. In fact, nearly every recipe includes a note titled “Playing around.”

“After a while we realized that traditional recipes take a bit of time to do. Second, they’re not so pretty to look at,” says Tamimi. Taking the two things together he, and cookbook partner Tara decided to do something that both stayed true to the country but also something people will be able to do within the demands of having two kids when they get off work.

Typically, fried or roasted potatoes are tossed with olive oil, chili flakes, garlic and one or more spices, though variations abound depending on the region and even family. In North Africa, they’re doused in harissa and are quite spicy, whereas in Egypt they go heavier on the garlic and warm spices, such as turmeric, and have only mild heat.

Tamimi’s approach, builds upon his mother’s recipe, and skews toward Gazan flavors, with fresh green chilies, fresh dill and cilantro, and crushed cumin and coriander seeds that add both texture and flavor. The crushed spices are bloomed with garlic in hot oil, similar to an Indian tarka, then cooked briefly with the chilies and cherry tomatoes. The seasoned mixture is combined with the potatoes and roasted together, then tossed with the herbs and lemon zest and juice. “If you look at the ingredient list, you say, ‘Oh, it’s so simple,’ but the end result is so surprising,” he says.

Combining the fresh and roasted ingredients yields a brighter, bolder take on roasted potatoes. But Milk Street found it difficult to get the desired crispy, browned texture, so the tomatoes were eliminated and the oven temperature raised to 475°F. Trouble was, the higher heat risked burning the spices.

The fix was to first partially roast the potatoes with just oil, salt and pepper. Then combine more oil with the seasonings and let the flavors meld for a bit. When the potatoes are about two-thirds cooked, toss them with the flavored oil and return to the oven until golden brown and creamy. Fresh cilantro and lemon zest give the bright, balanced and crispy potatoes you want on your plate.

Don’t forget to oil the baking sheet with cooking spray to ensure the potatoes won’t stick to the surface.

Spicy Roasted New Potatoes with Lemon and Herbs

  • Servings: 4-6
  • Difficulty: easy
  • Print

Ingredients

  • 3 lbs. medium Yukon gold potatoes, unpeeled, quartered lengthwise then cut crosswise into 1-inch chunks. (Since our new potatoes were small, we just cut them in half.)
  • 3 Tbsp., plus ¼ cup extra-virgin olive oil, divided
  • Kosher salt and ground black pepper
  • 3-4 Fresno or jalapeño chilies, stemmed, halved lengthwise, seeded and thinly sliced crosswise
  • 8 medium garlic cloves, thinly sliced
  • 2 Tbsp. cumin seeds, crushed
  • 1 Tbsp. ground coriander
  • 2 Tbsp. grated lemon zest, plus lemon wedges to serve
  • ¼ cup finely chopped fresh cilantro

Directions

  1. Heat the oven to 475°F with a rack in the middle position.
  2. Mist a rimmed baking sheet with cooking spray and line with parchment paper. In a large bowl, toss the potatoes with 3 tablespoons oil and 1 teaspoon salt. Transfer to the prepared baking sheet, arranging the pieces cut side down in a single layer; reserve the bowl. Roast until light golden brown and a skewer inserted into the potatoes meets just a little resistance, about 20 minutes.
  3. Meanwhile, in the reserved bowl, stir together the remaining ¼ cup oil, the chilies, garlic, cumin and coriander.
  4. When the potatoes are almost tender, use a wide metal spatula to transfer them to the reserved bowl; leave the oven on. Gently toss the potatoes until well combined with the seasonings, then scrape the mixture back onto the baking sheet and distribute in an even layer.
  5. Roast until the garlic is light golden brown and a skewer inserted into the potatoes meets no resistance, another 10 to 15 minutes. Cool for about 5 minutes.
  6. Sprinkle the lemon zest and cilantro over the potatoes, then toss. Transfer to a serving dish. Serve with lemon wedges.

http://www.lynnandruss.com

Recipe by Sami Tamimi for Milk Street

Oven-Braised Pork Chops with Red Onion and Pears

Oh, what a wonderful cool-weather meal. Here’s where you want to get thick, bone-in chops, and take the temperature starting after they’ve been roasting in the oven for 10 minutes. The chops will be ready at 135 F. If they have not reached that temperature, return the skillet to the oven and check the chops’ internal temperature every 5 minutes until they reach the desired temperature. You definitely don’t want them to dry out.

Once the chops are done, remove them to a platter and cover them with aluminum foil. Give the pears and onions a stir, return them to the oven, and cook them until they are tender and the juices are syrupy and dark brown, this could be anywhere from 10-20 minutes depending on how long it took the pork to reach temperature.

The sugar in the honey helps to caramelize the pork, onion, and pears as they oven-braise. It is a technique that works well with other roasted meats and birds as well. Just mix a little honey with the pan juices and baste or brush the roast with that during the last 10 minutes or so of roasting.

For some dishes, you want the onions cut fine, so they almost disappear. Here, cut the onions large—and the pears, too—so they keep their shape and don’t fall apart. Even when ripe, Bosc pears stay firmer than most, making them just right for this dish.

To ensure juicy results with today’s very lean pork products, use a dry brine before cooking them. For this recipe, pat the pork chops dry with a paper towel. Season the pork chops generously on all sides with sugar, a total of one tablespoon divided between all four. Then season them generously with salt to taste. Place them on a wire rack set in a rimmed baking sheet and refrigerate them, uncovered, for at least 8 hours and up to 24.

Oven-Braised Pork Chops with Red Onion and Pears

  • Servings: 4
  • Difficulty: easy
  • Print

Ingredients

  • 2 cups balsamic vinegar
  • 4 Tbsp. extra virgin olive oil
  • 6 garlic cloves, peeled
  • 4 center-cut pork rib chops, each about 12 oz. and 1 1/4″ inch” thick
  • 1 large red onion (about 12 oz.), cut into 8 wedges
  • Salt
  • Freshly ground pepper
  • 2 ripe but firm bosc pears, peeled, cored and cut into 8 wedges
  • 1/4 cup red wine vinegar
  • 2 Tbsp. honey

Directions

  1. In a small saucepan, bring the balsamic vinegar to a boil over high heat. Adjust the heat to a gentle boil and boil until the vinegar is syrupy and reduced to about 1/2 cup. Set aside.
  2. Preheat oven to 425 degrees F. Season the chops well with salt and pepper on both sides. Heat the oil in a large, heavy skillet with a flameproof handle over medium-high heat. Whack the garlic cloves with the flat side of a knife and scatter them over the oil. Cook, shaking the skillet, until brown, about 2 minutes. Remove the garlic cloves and reserve.
  3. Lay the pork chops in and cook until the undersides are browned, about 5 minutes. Turn the chops and continue cooking them until the second side of the chops has browned, about 5 minutes. Remove the chops to a platter.
  4. Place the onion and pear wedges in the skillet with the cut side down. Once they are lightly browned, turn them over and brown the other side. Stir the red wine vinegar and honey together in a small bowl until the honey is dissolved. Pour the vinegar/honey mixture into the skillet and bring to a vigorous boil. Return the garlic cloves to the skillet.
  5. Return the chops to the skillet, placing them on top of the pears and onions. Place the skillet in the oven and roast for 10 minutes, then check the internal temperature of the pork chops. The chops will be ready at 135 F. If they have not reached that temperature, return the skillet to the oven and check the chops’ internal temperature every 5 minutes until they reach the desired temperature. Once the chops are done, remove them to a platter and cover them with aluminum foil. Give the pears and onions a stir, return them to the oven, and cook them until they are tender and the juices are syrupy and dark brown, this could be anywhere from 10-20 minutes depending on how long it took the pork to reach temperature.
  6. Remove the skillet from the oven. Return the chops to the skillet and turn to cover them in the pan juices. Place a chop in the center of each warmed serving plate. Check the seasoning of the onion-pear mixture, adding salt and pepper if necessary. Spoon the pears, onion, and pan juices around the chops. Drizzle the balsamic vinegar reduction around the edge of the plate.

http://www.lynnandruss.com

Recipe courtesy of Lidia Bastianich

Roasted Brussels Sprouts with Garlic

So easy, yet so elegant. This recipe for roasted Brussels sprouts from Mark Bittman is an ATK popular version and is perfect as a holiday side dish. If you haven’t yet figured out a go-to recipe, this simple preparation is the answer. It results in sweet caramelized Brussels sprouts which is sure to satisfy just about anyone.

  • Use oven-safe cast-iron pan, as noted above.
  • Getting sprouts brown is important to avoid bitter taste.
  • Smaller quantity of large, hand-selected sprouts is better than big bag of assorted sprouts.
  • Don’t cook more than can fit in pan with cut side down.

Roasted Brussels Sprouts with Garlic

  • Servings: 4-6
  • Difficulty: easy
  • Print

Ingredients

  • 1 lb. Brussels sprouts, trimmed
  • 4-6 Tbsp extra virgin olive oil, to coat bottom of pan
  • 5 cloves garlic, peeled salt and pepper to taste
  • 1 Tbsp. balsamic vinegar (maybe less, to taste)

Directions

  1. Heat oven to 400°F. Trim bottom of Brussels sprouts, and slice each in half top to bottom. Heat oil in cast-iron pan over medium-high heat until it shimmers; put sprouts cut side down in one layer in pan. Put in garlic, and sprinkle with salt and pepper.
  2. Cook, undisturbed, until sprouts begin to brown on bottom, and transfer to oven. roast for 10-20 minutes at 400°F with a few shakes of the pan in between..
  3. Taste, and add more salt and pepper if necessary. Stir in (CAREFUL, NOT TOO MUCH) balsamic vinegar, and serve hot or warm.

http://www.lynnandruss.com

Recipe by Mark Bittman for NYTimes Cooking

Sticky Oyster Sauce Chicken

The chicken is infused with intense umami flavor thanks to oyster sauce and a classic trio of Chinese aromatics: scallion (also known as green onions), ginger, and garlic to make for a luxurious, yet simple chicken dish complete with sticky gravy.

While this recipe calls for 4 whole chicken leg quarters—and I am not a fan—we used 8 bone-in chicken thighs. You may notice that the original recipe does not use cornstarch to thicken the sauce here. But if you simmer it for 5 to 10 minutes and it is still thin, add the cornstarch slurry (we needed to).

The skin-on chicken is key to getting that nice texture to the sauce. Turn the heat up to reduce the sauce if you like yours on the thicker side, as we do. 

Sticky Oyster Sauce Chicken

  • Servings: 4
  • Difficulty: easy
  • Print

Ingredients

  • 4 chicken leg quarters, or 8 chicken thighs
  • 2 Tbsp. neutral oil, such as vegetable, canola, or avocado oil
  • 4 slices fresh ginger, ¼-inch thick and smashed with the side of your knife
  • 3 cloves garlic, thinly sliced
  • 3 scallions, cut into 2-inch pieces, white and green portions separated
  • ¼ cup Shaoxing wine
  • 2 cups chicken stock, preferably homemade
  • 2 Tbsp. soy sauce
  • 3 Tbsp. oyster sauce
  • ¼ tsp. ground white pepper
  • ½ tsp. sesame oil

Directions

  1. Rinse the chicken and trim off any excess fat. This recipe calls for whole chicken leg quarters, but you can cut them into drumsticks and thighs for easier handling in the wok if desired.
  2. Heat the neutral oil in your wok or a large frying pan over medium high heat, spreading the oil around to coat. Place the chicken skin-side-down in the pan carefully, and sear for about 3 minutes, or until golden brown.
  3. Next, flip the chicken and add the smashed ginger slices to the bottom of the pan. Let both sides of the ginger slices cook and caramelize in the oil for 1 to 2 minutes.
  4. Next, add the garlic slices and white portions of the scallions. Let fry in the oil for a minute. Use a metal spatula to ensure the chicken is not stuck to the wok, but be gentle so as to not break up the chicken skin.
  5. Add the Shaoxing wine to deglaze the pan, and let cook for another 1 to 2 minutes. Add the chicken stock, soy sauce, oyster sauce, white pepper, and sesame oil. Stir until well combined and bring the liquid to a boil. Reduce the heat to a slow simmer. Cover and let cook for 15 minutes.
  6. Use tongs or chopsticks to turn the chicken quarters and let cook for another 15 minutes. There should be quite a bit of sauce in the pan.
  7. Next, uncover the chicken and check the temperature. Use a meat thermometer to check to make sure the internal temperature of the chicken is 165 degrees F. Alternatively, you can just poke the thickest part of the chicken leg quarter with a fork–the juice should run clear. If so, remove the chicken to a plate and cover with tinfoil.
  8. Add the green portions of the scallions to the sauce, and cook uncovered to reduce the liquid until it just begins to coat a spoon. At this point, you can be the judge of how thick or thin you want your sauce to be. Turn the heat up to reduce the sauce if you like yours on the thicker side. If necessary make a cornstarch slurry and add to the sauce to thicken. (It was necessary for us.)
  9. Once the sauce is thickened, add the chicken back to the skillet and cover for about 3-5 minutes.
  10. Serve the chicken, all of that luscious gravy, and the cooked down garlic, ginger, and scallions over a bed of white rice with your favorite veggies. Stir-fried bok choy or garlicky broccoli are great choices.

http://www.lynnandruss.com

Recipe from Bill for the WoksofLife.com

Rigatoni with Artichokes, Basil and Pecorino

Akin to the dish of pasta fresca con carciofi e pecorino from Bari, Italy, Milk Street formulated this easy adaptation. It is a great weeknight meal with flavors that are bright and fresh, and the prep is a breeze (chopping the basil is as arduous as it gets here).

Be sure to purchase jarred marinated artichoke hearts—they offer much more flavor than canned or frozen. You will need three 12-ounce jars to get the 3 cups drained artichokes called for. The hearts usually are halved or quartered; there’s no need to chop them after draining, as they will break apart during cooking.

When draining the artichoke hearts, you may want to use the delicious seasoned oil from the jar in place of at least some of the olive oil.

Served with a side salad, it is a quick, healthy-ish weeknight meal.

Rigatoni with Artichokes, Basil and Pecorino

  • Servings: 4-6
  • Difficulty: easy
  • Print

Ingredients

  • 1 lb. Rigatoni
  • Kosher salt and ground black pepper
  • ¼ cup extra-virgin olive oil
  • 3 cups drained oil-marinated artichoke hearts, patted dry
  • 4 medium garlic cloves, finely grated
  • ½ tsp. red pepper flakes
  • 2 oz. pecorino Romano cheese, finely grated (1 cup)
  • 1 Tbsp. grated lemon zest, plus 2 Tbsp. lemon juice
  • 1 cup lightly packed fresh basil, chopped
  • 3 Tbsp. salted butter, cut into 3 pieces

Directions

  1. In a large Dutch oven, bring 4 quarts water to a boil. Stir in the pasta and 1 tablespoon salt, then cook, stirring occasionally, until just shy of al dente. Reserve about 2 cups of the cooking water, then drain the pasta.
  2. Wipe out the pot, add the oil and heat over medium-high until shimmering. Add the artichokes and cook, stirring, until well browned, 5 to 7 minutes.
  3. Add the garlic and pepper flakes, then cook, stirring, until fragrant, about 30 seconds. Return the pasta to the pot, along with 1½ cups of the reserved pasta water. Cook, uncovered and stirring often, until the pasta is al dente and little liquid remains, 3 to 5 minutes.
  4. Remove from the heat. Add the pecorino, lemon zest and juice, basil and butter, then stir until the butter is melted. Stir in additional pasta water 1 tablespoon at a time until slightly saucy. Taste and season with salt and pepper.

http://www.lynnandruss.com

Recipe by Diane Unger for Milk Street

Pumpkin Dark Chocolate Chip Bars

Feeling a little decadent? Or need to create something out-of-the-ordinary for an open house or bake sale? Or just for you? In the Fall, pumpkin reigns king, so why not add a surprise companion with some dark chocolate?

While most pumpkin cookies skew cakey, these bars are as rich and chewy as the center of a chocolate chip cookie. And who doesn’t love those? To counteract the added moisture from the pumpkin purée, this recipe has a few tricks up its sleeve: For starters, it completely ditches the eggs.

Browning the butter does double duty, removing water while also giving the dough a deeper flavor with nutty notes. Baking the bars at a low temperature keeps the edges soft, resulting in an impossibly chewy cookie texture with a warm pumpkin spice flavor and pockets of molten chocolate.

The chocolate pieces take several hours to harden, so you may not want to package them until several hours go by, But in the meantime, go ahead and nosh on a few while they are still warm and gooey.

Pumpkin Dark Chocolate Chip Bars

  • Servings: 24 bars
  • Difficulty: easy
  • Print

Ingredients

  • ¾ cup unsalted butter (1½ sticks)
  • Nonstick cooking spray or neutral oil
  • 1¾ cups packed light brown sugar
  • ¾ cup canned pumpkin purée (not pumpkin pie filling)
  • 2 tsp. vanilla extract
  • 2½ cups all-purpose flour
  • 2 tsp. ground cinnamon
  • 1 tsp. baking powder
  • 1 tsp. baking soda
  • 1 tsp. kosher salt
  • 1 tsp. ground ginger
  • ¼ tsp. ground cloves
  • ¼ tsp. ground nutmeg
  • 10 oz. bag of dark chocolate chips, save about a 1/2 cup for the topping

Directions

  1. In a small (preferably light-colored) saucepan, melt the butter over medium heat. Continue cooking, stirring constantly to prevent the milk solids from burning, until the butter foams, darkens into a light amber color and becomes fragrant and nutty, about 3 to 4 minutes more. (Watch closely to make sure the butter doesn’t burn.) Immediately pour the butter along with any of the browned milk solids into a large heatproof mixing bowl. Let cool for 20 minutes until warm but no longer hot.
  2. While the butter cools, heat the oven to 325°F. Grease a 9-by-13-inch metal or glass baking pan with cooking spray or oil and line with a strip of parchment paper that hangs over the two long sides to create a sling.
  3. Add the brown sugar, pumpkin purée and vanilla extract to the cooled butter and whisk until smooth and glossy. Add the flour, cinnamon, baking powder, baking soda, salt, ginger, cloves and nutmeg and stir with a spatula just until a soft dough forms with no pockets of unincorporated flour. (Try not to overmix.) Add most of the chocolate chips and stir to evenly distribute throughout the dough.
  4. Transfer the dough to the prepared baking pan and press into an even layer using a spatula. Sprinkle the top with the remaining chocolate chips, pressing them in slightly so they stick.
  5. Bake until the bars are puffed, the top is lightly browned and a skewer or knife inserted into the center comes out clean with just a few moist crumbs attached or with smudges of melted chocolate, 30 to 45 minutes. (Mine took the full 45 minutes.)
  6. Let the bars cool in the pan on a wire rack for at least 1 hour. (Even after cooling for over 2 hours, the chocolate pieces were still too soft to package.) Using the parchment paper, lift the bars out of the pan and cut into 24 squares. The cookie bars will keep in an airtight container at room temperature for up to 5 days.

http://www.lynnandruss.com

Adapted from a recipe by Jesse Szewczyk for NYTimes Cooking

Braised Chicken and Tomatoes with Garlic and Dried Fruits

This braised chicken dish was off-the-charts DELICIOUS! I must admit, the dried prunes and apricots gave us pause, but after their brandy bath, and combined with the sliced shallots, it all melded together with the other ingredients into this pool of yummy jamminess.

Pollo a la catalana, or chicken simmered with wine and dried fruits, is a classic cool weather dish in the Catalonia region of Spain. A contrast of savory flavors and sweet accents characterizes the elegant braise, but there are no hard and fast rules to preparing it. But before you go tweaking it, I suggest you try the recipe as written below.

Barcelona home cook Cali Caparrós Sanchez shared her version with Milk Street, which is studded with apricots and prunes and spiked with a good measure of brandy. Picada (not to be confused with the Italian piccata)—is a blended or pounded pesto-like mix of olive oil, herbs, nuts, garlic and a starchy element such as bread or crackers to act as a binder—is customarily stirred into the dish at the finish. We used a large mortar and pestle to make the picada.

Milk Street adapted her recipe in this version. A mix of olive oil, grated garlic, chopped parsley and chopped smoked almonds (roasted or Marcona almonds are good, too) to spoon onto the braise just before serving.

The sauce wasn’t as thick as we would have liked it when the chicken pieces were ready, so we removed the thighs to a platter, covered with tinfoil, and continued reducing the sauce until it was the consistency we wanted. A portion of the picada was stirred into the sauce, the chicken uncovered, the sauce placed around the thighs, and the picada spooned on. It made a gorgeous presentation!

The smoked almonds may be unconventional, but their smokiness adds depth similar to pimentón. This simpler approach allows the flavors of the braise to be clearer and brighter. Serve with crusty bread and a simple salad; or as we did, with polenta.

NOTE: Don’t cover the pot when simmering the chicken. Allowing evaporation concentrates the braising liquid for richer flavor and consistency in the finished sauce. That said, don’t simmer too vigorously or the liquid may over-reduce and the dish will be left with too little sauce. Adjust the heat as needed to keep the liquid bubbling steadily but not approaching a boil.

Braised chicken and Tomatoes with Garlic and Dried Fruits

  • Servings: 4
  • Difficulty: easy
  • Print

Ingredients

  • 3/4 cup brandy
  • 3/4 cup pitted prunes, quartered
  • 1/3 cup dried apricots, quartered
  • 3 lbs. bone-in, skin-on chicken leg quarters, thighs or drumsticks, trimmed
  • Kosher salt and ground black pepper
  • 1 Tbsp. plus ¼ cup extra-virgin olive oil, divided
  • 1 head garlic, outer papery skins removed, top third cut off and discarded, plus 1 medium garlic clove, finely grated
  • 3 bay leaves
  • 2 medium shallots, halved and thinly sliced
  • 1 cup dry white wine
  • 1 14½-oz. can diced tomatoes
  • 1 cup lightly packed fresh flat-leaf parsley, finely chopped
  • 3 Tbsp. smoked almonds (see headnote), finely chopped

Directions

  1. In a small bowl, combine the brandy, prunes and apricots; set aside. Season the chicken on all sides with salt and pepper. In a large Dutch oven, combine 1 tablespoon of the oil and the garlic head, cut side down. Cook over medium-high until the cut side of the garlic is golden brown, about 3 minutes. Using tongs, transfer the garlic to a small plate or bowl.
  2. Place the chicken skin side down in the pot and cook without disturbing until well browned on the bottom, 5 to 8 minutes. Flip the chicken and cook until the second sides are lightly browned, 3 to 5 minutes. Remove the pot from the heat and transfer the chicken to a large plate, keeping the pieces skin side up.
  3. Return the garlic head, cut side down, to the pot and set the pot over medium. Add the bay and shallots; cook, stirring but leaving the garlic cut side down, until the shallots are lightly browned, 30 to 60 seconds. Add the wine and ¼ teaspoon each salt and pepper; bring to a simmer, scraping up any browned bits. Cook until reduced by about two-thirds, 5 to 7 minutes.
  4. Stir in the tomatoes with juices, dried fruit-brandy mixture and 1¼ cups water, then bring to a simmer. Nestle the chicken skin-side up in the pot and pour in any accumulated juices; the pieces should not be fully submerged. Simmer, uncovered, until a skewer inserted into the largest piece meets no resistance, 30 to 35 minutes. Meanwhile, in a small bowl, stir together the remaining ¼ cup oil, the parsley, almonds and grated garlic; set aside.
  5. Transfer the chicken to a platter. Remove and discard the bay. Using tongs, remove the garlic head and squeeze the cloves into the pot; discard the skins. Stir the garlic into the sauce, then taste and season with salt and pepper. Spoon the sauce over and around the chicken and garnish with the parsley-almond mixture.

http://www.lynnandruss.com

Adaptation from Courtney Hill for Milk Street

Chile Relleno Casserole

Here is a homey chile relleno casserole with layers of cumin-spiced beef, cheddar, eggs and canned poblano peppers. However, in our area, canned poblanos are impossible to source locally, but they are available online at a few places such as MexGrocer.com. You can use fresh poblanos (see NOTE below), it just will add about 30 more minutes to the prep.

The dish, while very flavorful, is not really spicy at all. If you choose to raise the level of heat, a couple of options would be to add a can of diced green chiles, and/or a few chopped chipotle chiles in adobo sauce stirred into the cooked meat mixture.

Once it comes out of the oven, let it stand for 10 minutes before cutting into it. We paired ours with a side of boxed rice and beans, and a side salad.

NOTE: To use fresh rather than canned poblanos, position an oven rack 4 to 6 inches from the oven’s broiler element; preheat to broil. Place the poblanos on a large, rimmed baking sheet and broil until they brown in spots and blister without charring, watching them carefully and turning them with tongs until they are blistered all over. Transfer them to a heatproof bowl and cover with a plate or pan lid to let them steam and cool enough to be handled, at least 10 minutes, probably longer. When the poblanos are cool enough to handle, use your fingers to carefully remove and discard their skins. Make a vertical slit from the stem end to the tip of each pepper. Gently remove the seeds and stems and open the peppers so the flesh lies flat.

Chile Relleno Casserole

  • Servings: 6
  • Difficulty: easy
  • Print

Ingredients

  • 1 lb. ground beef, preferably 90/10 blend
  • 1 cup (4 oz.) chopped yellow onion
  • 2 tsp. ground cumin
  • 1 tsp. fine salt, divided
  • 3/4 tsp. freshly ground black pepper
  • Unsalted butter, for greasing
  • 1 (27 1/2-oz.) can whole poblano peppers, drained (may substitute 6 large fresh poblanos; see Note)
  • 2 cups (8 oz.) shredded cheddar cheese
  • 1/4 cup all-purpose flour
  • 1 1/2 cups whole milk
  • 4 large eggs, beaten

Directions

  1. Position a rack in the middle of the oven and preheat to 375 degrees.
  2. In a large skillet over medium-high heat, cook the beef and onions, breaking up the meat with a wooden spoon and browning the beef until it just starts to turn crispy, about 10 minutes. Using a slotted spoon, transfer the mixture to a medium bowl, leaving behind as much fat as possible in the pan. Season the mixture with the cumin, 3/4 teaspoon of the salt and the black pepper.
  3. Grease a 9-inch square baking dish with the butter or the fat rendered from the beef. Gently remove the stems and seeds from the poblanos and open the peppers so the flesh lies flat. Line the bottom of the pan with the poblanos, skin side down, overlapping them some to cover completely. Chop any remaining poblanos and set aside. Layer the meat-onion mixture over the whole poblanos and top with the shredded cheese and the reserved chopped peppers.
  4. In a medium bowl, whisk together the flour and the remaining 1/4 teaspoon of salt. While whisking, gradually pour in the milk, breaking up any clumps of flour. Whisk in the eggs and pour the mixture evenly into the baking dish.
  5. Bake the casserole for 45 minutes, or until it has puffed and browned. Remove from the oven and let stand at room temperature before cutting into it.

Make ahead: The unbaked casserole can be assembled, covered tightly and refrigerated for up to 2 days. Rest it on a countertop for about 30 minutes; then bake as directed.

http://www.lynnandruss.com

Adapted from a recipe by Caroline Hatchett for the Washington Post