Monthly Archives: October 2024

Cheesy Mushroom-Thyme Fettuccine

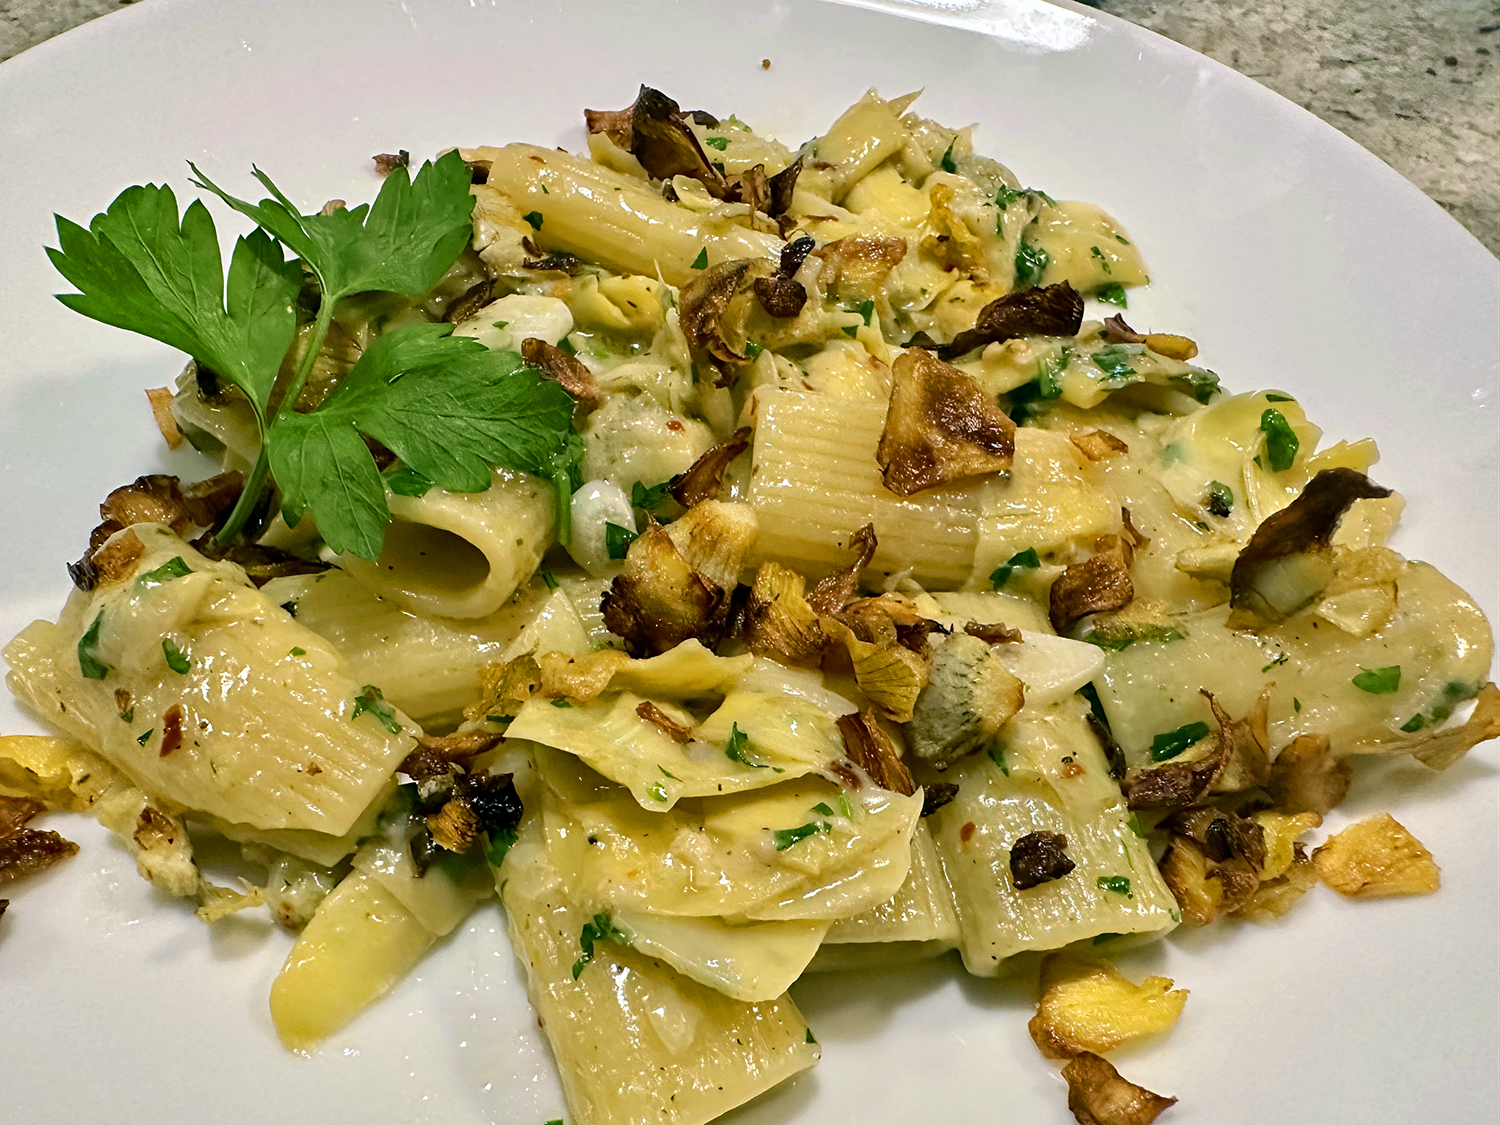
Inspired by the fettuccine con funghi from Italy, this recipe was developed for creating a quick yet elegant dinner using supermarket ingredients. Be sure to use dried fettuccine or pappardelle made with egg; this type typically is sold coiled into nests in 8.8-ounce packages. We opted for a 8.8 ounce package of quick cooking tagliarelle, a thin durum wheat egg pasta.

The texture of egg pasta is finer and more delicate than all-semolina pasta. Woodsy thyme is the classic herb for pairing with mushrooms; which is added in two stages for layered flavor. The aged, subtly sweet notes of brandy pair beautifully with the earthy creminis; dry sherry also works well.

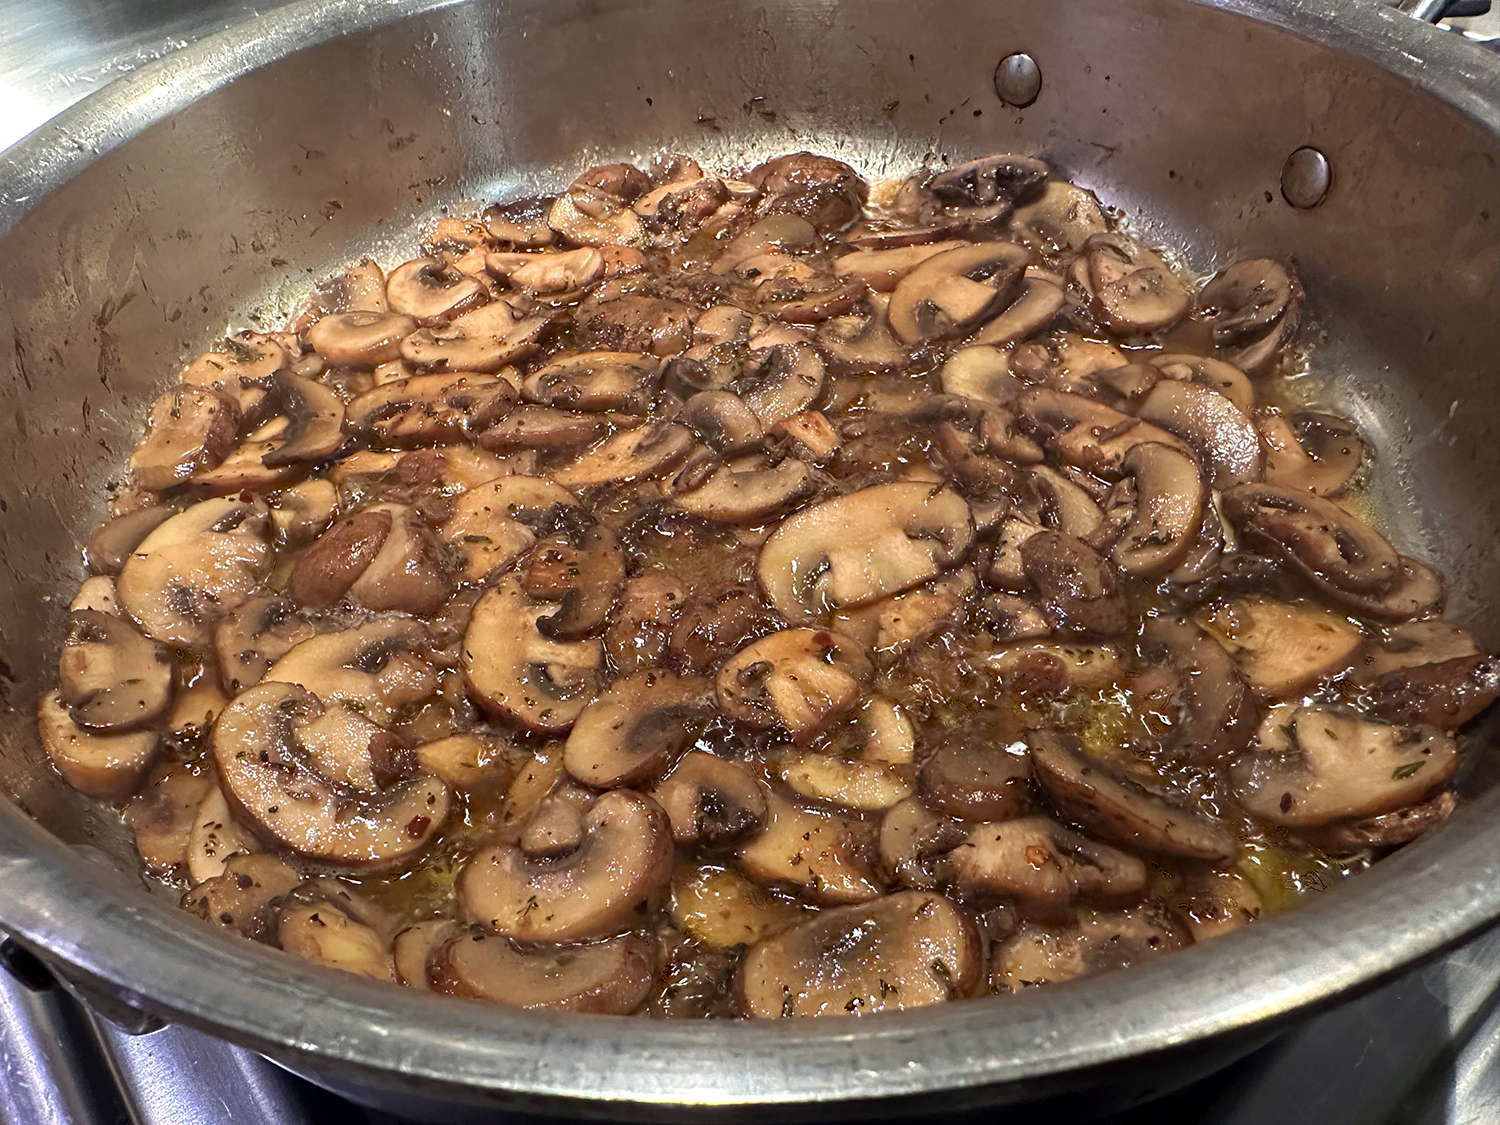
TIP: Don’t use pre-sliced cremini mushrooms. They tend to be dry and cardboardy, and the mushrooms are counted on to release their own moisture to build flavor into the dish.

If you are funghi lovers like we are, increase the amount of creminis to 1½ pounds—noted in the ingredients list below. Also the original recipe directed you to reserve one cup of the pasta water before draining, but we found that insufficient in making the dish as moisturishly silky as we had hoped. You may not need the entire two cups of the liquid, it will all depend on your choice of pasta, better safe than sorry.

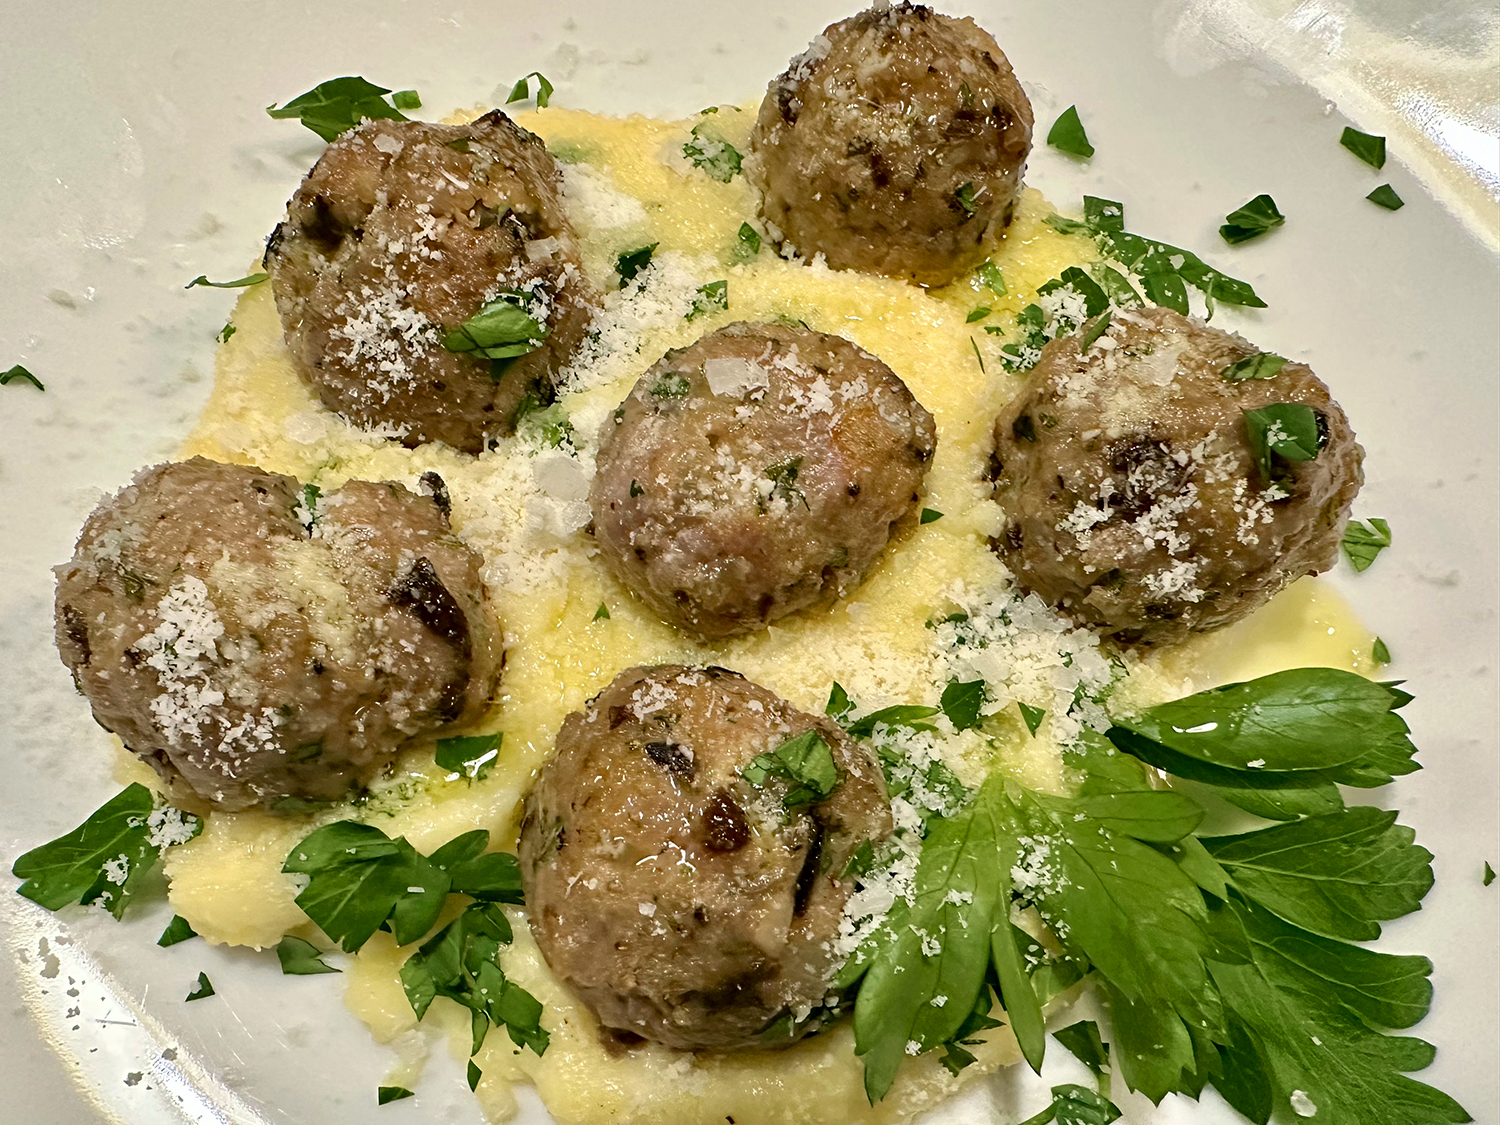
Served with a side salad, it was a perfect weeknight meal.

Cheesy Mushroom-Thyme Fettuccine

  • Servings: 4
  • Difficulty: easy
  • Print

Ingredients

  • ¼ cup extra-virgin olive oil
  • 2 medium garlic cloves, thinly sliced
  • 4 tsp. fresh thyme, chopped, divided
  • Pinch of red pepper flakes (optional, but worth it)
  • 1½ lb. cremini mushrooms, trimmed and thinly sliced
  • Kosher salt and ground black pepper
  • ⅓ cup brandy or dry sherry
  • 8.8 oz. package dried egg fettuccine, pappardelle, or similar pasta
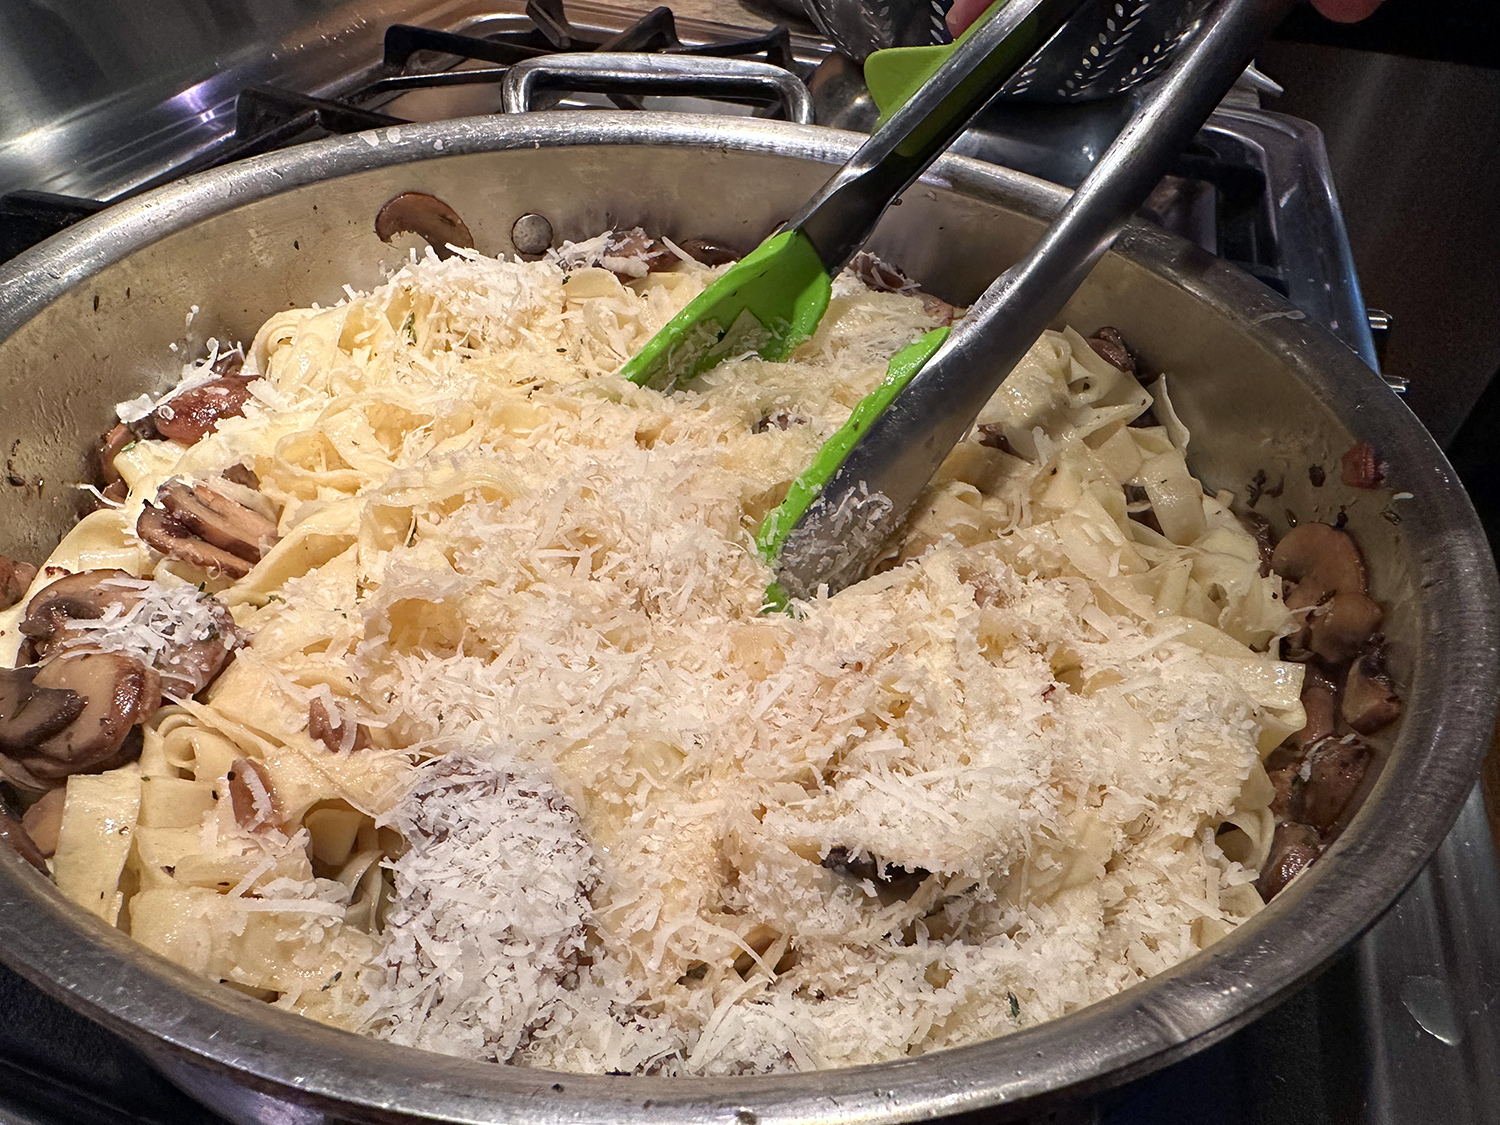
  • 1½ oz. Parmesan cheese, finely grated (¾ cup), plus more to serve
  • 2 Tbsp. salted butter, cut into 2 pieces
  • Chopped fresh flat-leaf parsley, to serve

Directions

  1. In a large pot, boil 3 quarts water. In a 12-inch skillet over medium, combine the oil, garlic, half of the thyme and pepper flakes (if using). Cook, stirring, until the garlic is golden brown, about 2 minutes.
  2. Add the mushrooms, ½ teaspoon salt and ¼ teaspoon black pepper. Cook over medium-high, stirring occasionally, until the mushrooms are browned at the edges, 8 to 10 minutes. Remove the pan from the heat and add the brandy. Return to medium-high and cook, scraping up any browned bits, until the liquid is syrupy, about 1 minute.
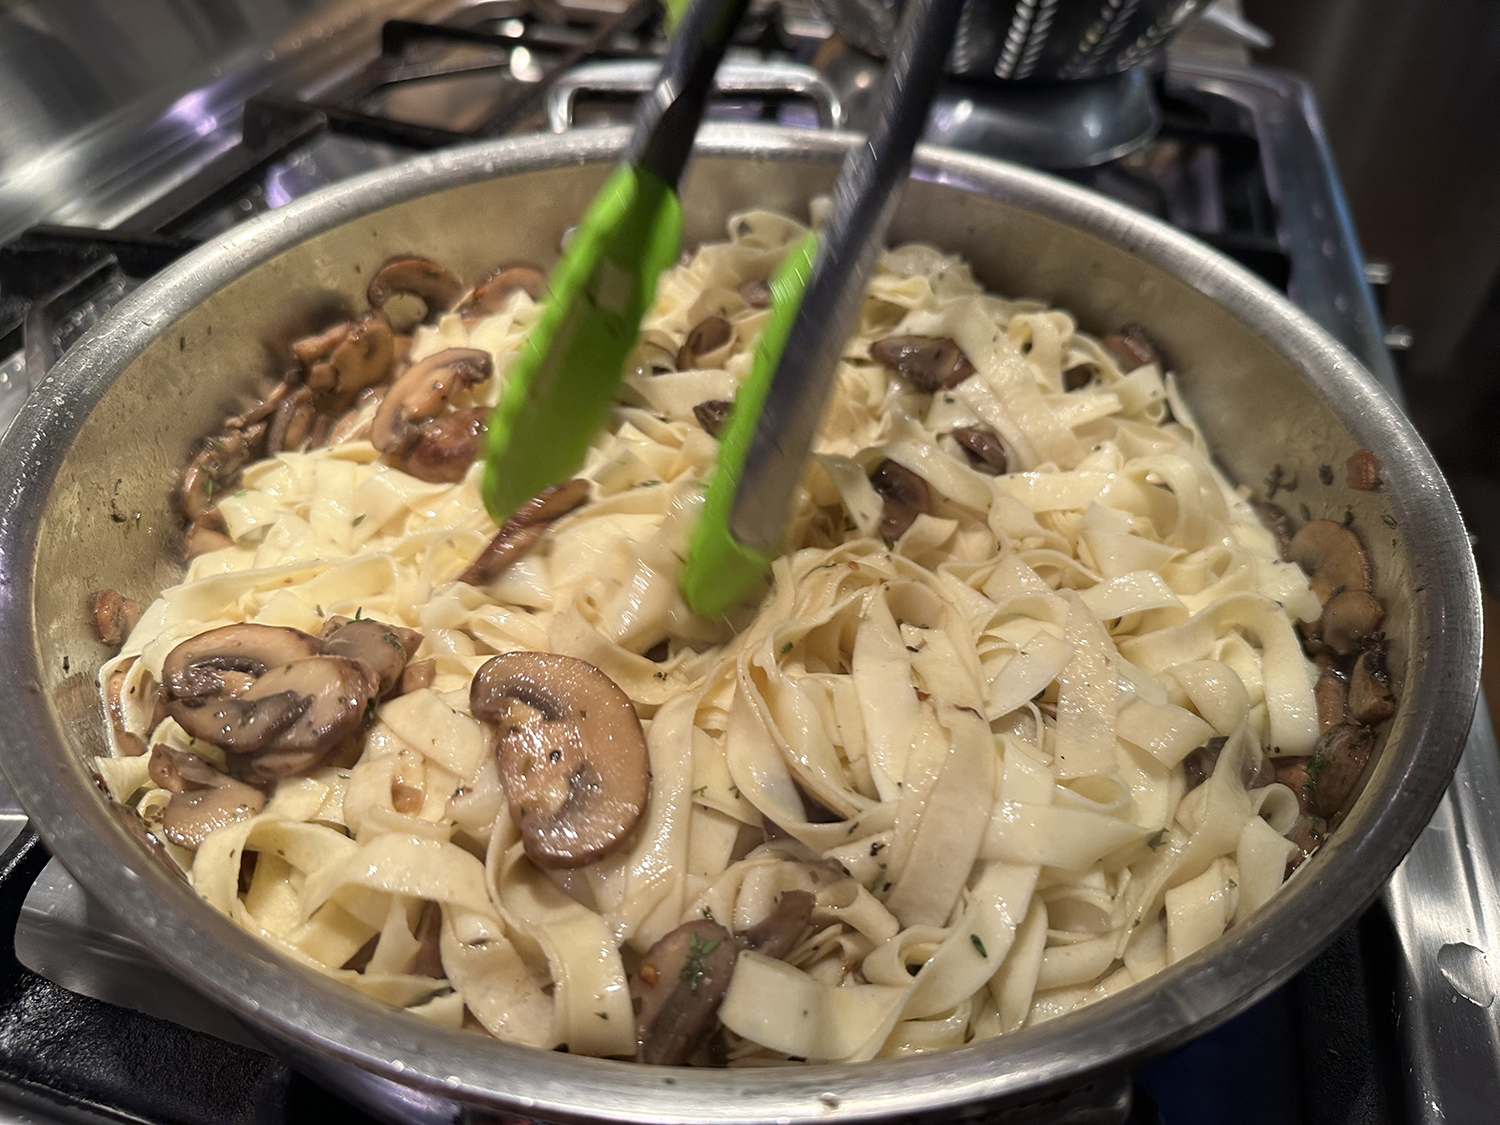
  3. When the water reaches a boil, add the pasta and 1 tablespoon salt; cook, stirring, until al dente. Reserve 2 cups of the pasta cooking water, then drain.
  4. To the mushroom mixture, add the pasta, Parmesan, butter, the remaining thyme and ½ cup of the reserved pasta water. Cook over medium-high, tossing constantly, until lightly coated and the cheese is melted, 2 to 3 minutes.
  5. Off heat, taste and season with salt and black pepper. Serve sprinkled with parsley and additional cheese.

http://www.lynnandruss.com

Adapted from a recipe by Courtney Hill for Milk Street

Persian Barley-Lentil Soup with Spinach

This hearty vegetarian soup combines two classic Persian soups: lentil and barley. Instead of dried limes common in Persian cuisine to infuse the broth with unique citrus notes, this recipe opts for easier-to-find fresh limes and uses the zest for fragrance and flavor and the juice to add tanginess.

For efficiency, prep the spinach and cilantro while the barley and lentils cook. And to round out the meal, serve with warmed bread or flatbread and a dollop of plain yogurt for richness. We were thoroughly impressed by this deeply flavored soup.

NOTE: This is the fast method using a pressure cooker or InstaPot and it all comes together in just under and hour. The slow method takes 5 to 6 hours, and we are not posting that recipe here.

Don’t use hulled barley instead of pearled barley. Hulled barley has had its inedible outer hull removed but retains its bran. Pearled barley, on the other hand, has been polished to remove the bran, which makes it quicker to tenderize; in this recipe, it cooks at the same rate as the lentils.

Persian Barley-Lentil Soup with Spinach

  • Servings: 4-5
  • Difficulty: easy
  • Print

Ingredients

  • 2 Tbsp. extra-virgin olive oil, plus more to serve
  • 1 medium yellow onion, chopped
  • 6 medium garlic cloves, chopped
  • 2 medium carrots, peeled, quartered lengthwise and sliced ½-inch thick
  • 2 Tbsp. tomato paste
  • 4 bay leaves
  • Kosher salt and ground black pepper
  • 1 Tbsp. grated lime zest, plus 3 Tbsp. lime juice, plus lime wedges to serve
  • ¾ cup pearled barley
  • ½ cup brown or green lentils
  • 1½ qts. low-sodium vegetable broth
  • 4 cups lightly packed baby spinach, chopped
  • 1 cup lightly packed fresh cilantro, chopped

Directions

  1. On a 6-quart Instant Pot, select More/High Sauté. Add the oil and heat until shimmering. Add the onion, garlic, carrots, tomato paste, bay and 1 teaspoon salt. Cook, stirring occasionally, until the vegetables begin to brown, about 5 minutes. Stir in the lime zest and juice, barley, lentils and broth, scraping up any browned bits, then distribute in an even layer.
  2. Press Cancel, lock the lid in place and move the pressure valve to Sealing. Select Pressure Cook or Manual; set the pressure level to High. Set the cooking time for 18 minutes. When pressure cooking is complete, quick-release the steam by moving the pressure valve to Venting. Press Cancel, then carefully open the pot.
  3. Remove and discard the bay, then stir in the spinach and cilantro. Taste and season with salt and pepper. Serve drizzled with oil and with lime wedges on the side.

http://www.lynnandruss.com

Recipe by Julia Rackow for Milk Street

Buttermilk Roasted Chicken and Veggies

A Sunday roast chicken dinner, for me, is synonymous with the advent of Fall and through the winter months. Roast a chicken and you know you have a comfortable meal. Alter that a little by butterflying the chicken, a surprisingly simple task that can be carried out with a pair of kitchen scissors, and you have a quick dinner that satisfies the soul as well as your taste buds.

Here, buttermilk, which is usually associated with fried chicken, helps to tenderize the chicken and conveys the aromatics: you really get the full value of the rosemary, pepper and garlic. If you want to substitute maple syrup for the honey, you can. Best of all, you can leave the marinating bird in the fridge for up to two days; thus, it gets more tender and you know you have a dinner that needs no more than to be popped into the oven. Now that’s a win in my book!

In the original recipe, it directs you to line a roasting pan with tinfoil. Next time we plan to eliminate the tinfoil lining and use a rimmed sheet pan. We believe we would get better caramelization on both the bird and the vegetables.

If you are not thrilled with the vegetable choices, swap any of them out for sweet potatoes, white potatoes, carrots, onions, or parsnips. Just make sure that they will fit in one layer in the sheet pan.

Buttermilk Roasted Chicken and Veggies

  • Servings: 4
  • Difficulty: easy
  • Print

Ingredients

For the Chicken

  • 1 4-lb. chicken
  • 2 cups buttermilk
  • ¼ cup plus 2 Tbsp. vegetable oil
  • 2 cloves garlic, lightly crushed
  • 1 Tbsp. crushed black peppercorns
  • 2 Tbsp. Maldon or other sea salt
  • 2 Tbsp. fresh rosemary leaves, roughly chopped
  • 1 Tbsp. honey

For the Vegetables

  • 1 lb. Brussels sprouts, trimmed and halved
  • 4-5 large shallots, peeled, quartered through the root end
  • 1 1/2 lbs. butternut squash, cut into 1 1/4-inch cubes (we only used half of our large butternut squash)
  • 2 Tbsp. olive oil
  • Salt

Directions

  1. Butterfly chicken by placing breast side down and using heavy-duty kitchen shears to cut along both sides of backbone. Discard backbone, turn chicken over and open it like a book. Press gently to flatten it.
  2. Place chicken in a large freezer bag. Add buttermilk, ¼ cup oil, garlic, peppercorns, salt, rosemary and honey. Seal bag securely and refrigerate overnight or up to two days.
  3. When ready to start prepping the veggies, heat oven to 400 degrees.
  4. Remove chicken from marinade and place on a rack so excess can drip off. Place the cut vegetables onto the roasting or sheet pan, drizzle with 2 tablespoons oil and 1 teaspoon salt, toss with your hands to coat evenly.
  5. Place the chicken, breast side up, on top of the vegetables. Drizzle the bird with remaining 2 tablespoons oil. After roasting for 45 minutes, stir the vegetables around the edges of the pan a bit, turn sheet pan halfway, continue roasting until well browned and until juices run clear when chicken is pierced where leg joins thigh, about another 20 minutes.
  6. Place chicken on a carving board and allow to rest for 10 minutes. While the chicken rests, stir the vegetables in the pan and place them back into the oven.
  7. After the ten minute rest, cut the chicken into pieces and place a portion on each of four plates, along with some of the roasted vegetables, and drizzle each serving with pan juices.

http://www.lynnandruss.com

Loosely adapted from a recipe by Nigella Lawson

Braised Potatoes with Garlic and Bay Leaves

As Chef/author Molly Stevens states “Sharing a meal from one pot, as you often do with a braise, creates a feeling of communality that leads to sharing a congenial meal.”

Molly’s side dish is quite simple, and uses only a handful of ingredients. Place the potatoes to fit snuggly in a single layer in your saucepan. Add enough water or stock to come halfway up the potatoes and add a generous drizzle of olive oil, a few whole cloves of garlic, bay leaves, salt and pepper.

The potatoes are covered and braised gently until tender, then the lid is removed. The heat is cranked up to evaporate the liquid. Then shake the pan back and forth so the spuds roll around and get coated in the garlicky-olive oil glaze that’s forming. And voila! a simple yet tasty side dish. These are a keeper for sure.

Feel free to vary the ingredients by changing the herbs (such as rosemary instead of bay leaves), substitute dry white wine for the water or chicken stock, or butter in place of olive oil.

Braised Potatoes with Garlic and Bay Leaves

  • Servings: 4-6
  • Difficulty: easy
  • Print

Ingredients

  • 1 ½ lbs. small red or white potatoes, scrubbed
  • 3 Tbsp. Extra Virgin Olive Oil (or Garlic Olive Oil)
  • 1 cup water or chicken stock
  • 2 bay leaves, fresh if possible
  • 2 to 3 garlic cloves, peeled and bruised
  • Coarse salt and freshly ground pepper

Directions

  1. Evaluate the potatoes: If the potatoes are larger than a golf ball, cut them in half. If you are leaving them whole, check to see if they have thick skins by scraping your thumb nail across the skin. If the skin doesn’t tear, remove a strip of skin around the circumference of each potato with a vegetable peeler – this will allow the flavors of the braising liquid to penetrate the potato better. If the skins are relatively thin, leave them intact.
  2. The braise: Place the potatoes in a saucepan large enough to hold them in a snug single layer without crowding Add the olive oil and pour in enough water or stock to come halfway up the sides of the potatoes. Tear the bay leaves in half and add them along with the garlic. Season with salt and pepper. Cover and bring to a simmer over medium heat. When the water is simmering, lower the heat to medium-low so the liquid simmers gently. Braise, lifting the lid and turning the potatoes with a spoon once halfway through, until the potatoes are just tender when pierced with a thin skewer, about 20 minutes.
  3. The finish: Remove the lid, increase the heat to high, and boil, gently shaking the pan back and forth, until the water evaporates and you can hear the oil sizzle, about 5 minutes. The braised garlic cloves will break down and coat the potatoes as you shake them in the pan. Serve hot.

http://www.lynnandruss.com

Recipe by Molly Stevens

Skillet-Braised Spicy Sausage with Cannellini Beans and Kale

A Spanish-Italian mash-up of sorts, this tasty meal can be adaptable to your specific tastes. We thought it was bit shy on the meat, and therefore if you want a more meat-centric meal, you could probably double, or at least increase by half, the amount of sausage*. We also sliced the sausage into more manageable bites.

To make it a bit more Spanish, use chorizo and spicy pimenton (smoked Spanish paprika). The beans and kale provide plenty of healthy fiber.

**Additional option: drain 1 14-ounce can of diced tomatoes, reserving the liquid. Add tomatoes when adding red wine and seasonings to onions. Use reserved juices as part of the 1 1/2 cups water to kale mixture.

Skillet-Braised Spicy Sausage with Cannellini Beans and Kale

  • Servings: 4
  • Difficulty: easy
  • Print
(Cook’s Country, ATK)

Ingredients

  • 1 lb. hot Italian sausage*
  • 1 3/4 cups water, divide**
  • 1 onion, halved and sliced thin
  • 2-4 garlic cloves, sliced thin
  • 2/3 cup red wine
  • 2 Tbsp. tomato paste
  • 1 1/2 tsp. smoked paprika
  • 3/4 tsp. table salt
  • 1 lb. lacinato kale, stemmed and torn into 2-inch pieces
  • 2 15-oz. cans cannellini beans, undrained
  • 1/4 cup extra-virgin olive oil
  • 2 tsp. sherry vineager

Directions

  1. Bring sausage links and 1/4 cup water to simmer in Dutch oven over medium heat. Cover and cook until sausages register at least 135°F, 8 to 10 minutes. (If pot contents begin to sizzle, add 1/4 cup water.)
  2. Uncover, and using pairing knife, pierce each link in 8 to 10 spots to release fat and juices. Continue to cook, uncovered, moving sausages as necessary until dark fond forms on bottom of pot, 2 to 4 minutes. Transfer sausages to cutting board.
  3. Add onion and garlic slices to now-empty pot, stirring constantly for 1 minute. Stir in wine scraping up any browned bits. Stir in tomato paste, paprika and salt. Simmer, stirring occasionally, until wine is reduced to thick , syrupy glaze, 4 to 5 minutes.
  4. Stir in kale and remaining 1 1/2 cups water, cover and cook until kale is wilted, about 5 minutes. Stir in beans and their liquid, cover and cook for 5 minutes longer. Return sausages to pot nestling links into kale and beans.
  5. Cover and continue to cook until sausages register 160°F, 8 to 10 minutes, flipping sausages ad tiring halfway through cooking. Transfer sausages to cutting board and cut each link into about 1/2-inch slices on a diagonal.
  6. Off heat, stir in oil and vinegar into kale mixture and season to taste with salt. Divide kale, beans and sauce into shallow bowls. Top with sausage and serve.

http://www.lynnandruss.com

Adapted from a recipe for Cook’s Country

Twice-Baked Potatoes with Roasted Brussels Sprouts and Gouda

My twice-baked potatoes are a requested favorite when hosting family and friends. They consist of russet potatoes, a bit of butter, sour cream, crumbled blue cheese and chives or scallions. I was definitely intrigued when I happened upon this adaptation.

This riff on twice-baked potatoes is inspired by Irish colcannon and French pommes de terre braytoises, which flavors potatoes with Dijon and tangy crème fraîche. This version opts for more readily available sour cream and Brussels sprouts instead of colcannon’s classic cabbage, charring them to deepen their flavor. The dish is great as a side, but it is hearty enough to be served on its own.

We paired our twice-bakeds with aged and grilled sirloin steaks and a medley of freshly picked green beans and cauliflower.

Each stuffed half is considered to be one serving, therefore four potatoes could conceivably feed eight, with an entrée of course. But with only two of us for dinner that day, we decided to individually wrap, put in an airtight freezer bag and freeze 4 of them, which will last up to three months. Twice-baked potatoes take a fair amount of work and time to make, so making them in bulk and freezing makes so much sense.

However, we eliminated the scallions/chives from the potato mixture for the ones earmarked for the freezer. Evidently when frozen, those greens can turn and provide an unwanted taste. Wrap each stuffed potato in a sheet of plastic wrap and then in foil and transfer them to the air-tight freezer bag and label it with the date before freezing. 

Baking instructions for thawed potatoes: Unwrap the potatoes and place in a baking dish or on a baking sheet. Sprinkle the tops of the potatoes with cheese. Bake potatoes at 425°F for 15 to 20 minutes, until the potatoes are hot and the cheese has melted. Add chopped chives or scallions as a garnish.

Twice-Baked Potatoes with Roasted Brussels Sprouts and Gouda

  • Servings: 4-8
  • Difficulty: easy
  • Print

Ingredients

  • 3 lbs. (3 or 4 medium) russet potatoes, scrubbed
  • 2 Tbsp. extra-virgin olive oil, divided
  • Kosher salt and ground black pepper
  • 12 oz. Brussels sprouts, trimmed and halved lengthwise
  • 8 oz. Gouda cheese OR smoked Gouda cheese, shredded (2 cups)
  • 3 Tbsp. Dijon mustard
  • 1/3 cup sour cream
  • 1 bunch scallions, thinly sliced

Directions

  1. Heat the oven to 400°F with a rack in the middle position. Coat the potatoes on all sides with 1 tablespoon of the oil and sprinkle with 1 teaspoon salt. Place on one side of a rimmed baking sheet.
  2. In a medium bowl, toss the sprouts with the remaining 1 tablespoon oil and ½ teaspoon each salt and pepper. Arrange the sprouts cut side down on the other side of the baking sheet; reserve the bowl. Roast the vegetables until the sprouts are charred, about 20 minutes.
  3. Transfer the sprouts to a cutting board. Continue roasting the potatoes until a skewer inserted into the centers meets no resistance, about another 40 minutes. Set aside to cool for 20 to 30 minutes; leave the oven on.
  4. Roughly chop the sprouts and return them to the bowl. Halve the potatoes lengthwise. Scoop the flesh from the halves into the bowl; return the skins, hollowed side up, to the baking sheet.
  5. To the bowl, add the cheese, mustard, sour cream and most of the scallions. Fold to combine, then taste and season with salt and pepper. Use the mixture to fill the skins. Bake until golden brown, about 30 minutes. Serve sprinkled with the remaining scallions.
  6. Any leftover spuds should be cooled completely, individually wrapped, stored in a freezer bag, and frozen for up to 3 months.

http://www.lynnandruss.com

Recipe by Hisham Ali Hassan for Milk Street

Spaghetti with Fresh Soppressata

One look at the long list of ingredients and you may well just thumb past this recipe. But we’ll tell you it was well worth the effort and time.

Store-bought Italian sausage gets a wine and fennel infusion to make fresh soppressata, which is the base for this pasta’s fresh and flavorful tomato sauce. The sauce is robust with a savory, fresh acidity, and the meat is tender and juicy.

You might associate soppressata with a charcuterie board (that was my initial reaction) but this comforting pasta is inspired by a family tradition of fresh sausage-making. In this recipe, store-bought Italian sausages are marinated in white wine to make fresh soppressata, which is the base for this pasta’s fresh and flavorful tomato sauce. A heap of spaghetti clings to the garlicky, sausage-laden sauce in an easy and impressive meal made to serve a small crowd. 

Most soppressata you’ll encounter is a dry, cured pork-based salami from southern Italy that is often — but not always — a little spicy. In this recipe, fresh soppressata is made by marinating uncooked sweet Italian sausage in white wine and adding spices like fennel, black pepper, and crushed red pepper.

We allowed 6 hours for the meat mixture to marinade, ensuring those flavors would have enough chance to meld.

Spaghetti with Fresh Soppressata

  • Servings: 6
  • Difficulty: easy
  • Print

Ingredients

  • 4 garlic cloves, grated (about 1 Tbsp.)
  • 1 1/3 cups dry white wine, divided
  • 1 lb. sweet Italian sausage, casings removed
  • 1 tsp. ground fennel
  • 1/2 tsp. black pepper
  • 1/2 tsp. crushed red pepper
  • 1/4 cup extra-virgin olive oil
  • 1 small yellow onion, finely chopped
  • 1 small carrot, finely chopped
  • 1 celery stalk, finely chopped
  • 1 28-oz. can whole peeled tomatoes, undrained and crushed
  • 1 14.5-oz. can whole peeled tomatoes, undrained and crushed
  • 1/8 tsp. kosher salt
  • 1 lb. uncooked spaghetti
  • 2 oz. Parmigiano-Reggiano cheese, grated
  • 1/4 cup chopped fresh basil, plus small leaves for garnish
  • 1 cup chopped fresh flat-leaf parsley, plus more for garnish

Directions

  1. Stir together garlic and 1/3 cup wine in a large bowl. Add sausage, fennel, black pepper, and crushed red pepper; stir well to combine. Cover and refrigerate for at least 1 hour or up to 12 hours.
  2. Heat oil in a large, deep, 12″ or larger skillet over medium until shimmering. Increase heat to high, and add sausage mixture; cook, stirring occasionally to break up clumps, until lightly browned, 6 to 7 minutes.
  3. Stir in onion, carrot, and celery; cook, stirring often, until softened, about 4 minutes. Add remaining 1 cup wine; cook, scraping up any browned bits on bottom of the skillet, until wine is nearly evaporated, 5 to 6 minutes.
  4. Stir in crushed tomatoes with juices and salt. Bring mixture to a simmer over high; reduce heat to medium-low, and simmer, stirring occasionally, until thickened and reduced by about half, 30 to 35 minutes.
  5. Bring a large pot of salted water to a boil over high. Add spaghetti; cook according to package directions for al dente, about 8 minutes. Drain pasta, reserving 1/2 cup cooking liquid. Stir spaghetti into sauce in skillet; stir in cheese, basil, and parsley.
  6. Add reserved cooking liquid, 1/4 cup at a time, if needed to thin sauce to desired consistency. Increase heat to medium-high; cook, stirring often, until sauce clings to pasta, about 2 minutes. Garnish with additional basil and parsley. Serve hot.

http://www.lynnandruss.com

Recipe by Andrew Carmellini for Food & Wine

Authentic Hunan Beef

Yes, there are a lot of ingredients. Yes, there are a lot of steps. Yes, there is a lot of prep. Yes, the process goes quickly (so make sure you have ALL of the prep work done beforehand). And YES, it is probably the best Hunan Beef we’ve ever had!

Bill from Woks of Life says “Our Hunan Beef recipe is an authentic Chinese version of the dish, not the Americanized version. Try it to taste what Hunan Beef should really be like!”

Peppers are vital to Hunan Beef, but the peppers you use are a matter of personal preference. We like to use a variety—both spicy and sweet. Poblano and Holland peppers are mild, but if you want more spice, you can add Fresnos or jalapeños to the mix.

Remember that the addition of the dried chili peppers can add a lot of spice (also depending on whether you chop them to release the seeds inside or leave them whole), so you’ll want to consider those factors as well. Slice all the fresh peppers crosswise into thin slices on the diagonal. Set aside the dried red peppers. Do not break them open or chop unless you want a very spicy Hunan Beef!

In the meantime, don’t forget to make your rice…

Authentic Hunan Beef

  • Servings: 4
  • Difficulty: easy
  • Print

Ingredients

For the beef:

  • 1 lb. flank steak, sliced 1/4-inch thick
  • 1/4 tsp. baking soda
  • 2 Tbsp. water
  • 1 tsp. oyster sauce
  • 1/3 cup cornstarch

For the Rest of the Dish:

  • 1 red Holland pepper, deseeded; can substitute red Fresno peppers
  • 1 small green bell pepper or poblano pepper, deseeded
  • 1 small red bell pepper, deseeded
  • 2 banana peppers, deseeded
  • 8 whole dried chili peppers
  • 1/2 tsp. granulated sugar
  • 2 Tbsp. hot water
  • 1/2 teaspoon Chinese black vinegar
  • 2 1/2 Tbsp. soy sauce
  • 1/4 teaspoon white pepper
  • 1/3 cup vegetable or canola oil for frying
  • 1 Tbsp. fresh ginger, sliced
  • 1/2 cup shallots, thinly sliced
  • 2 Tbsp. Shaoxing wine
  • 5 cloves garlic, sliced
  • 2 Tbsp. fermented black beans
  • 2 scallions cut at an angle into 2-inch lengths

Directions

  1. In a medium bowl, combine the sliced flank steak with the baking soda, water and oyster sauce. Massage these ingredients into the beef until any liquid has been absorbed by the meat. Marinate for 30 minutes.
  2. Lightly dredge all of the beef slices in cornstarch. Set aside until ready to fry.
  3. Slice all the fresh peppers crosswise into thin slices on the diagonal. Set aside the dried red peppers. Do not break them open or chop unless you want a very spicy Hunan Beef!
  4. Stir the sugar into 2 tablespoons of hot water until dissolved. Add the Chinese black vinegar, soy sauce, and ground white pepper. Mix until well combined and set aside.
  5. Heat your wok over high heat until smoking. Spread ⅓ cup oil around the wok, and sear the beef in three batches on both sides until browned and slightly crispy on the outside. Be sure the wok and oil are hot each time you add a batch of beef.
  6. Between each batch, drain the crispy beef by moving it up to the side of the wok. The oil will drain to the bottom and you can then transfer the beef to a sheet pan or plate.   
  7. After frying the beef, leave about 2 tablespoons of the oil in the wok, and remove any excess. If your wok got burned in the frying process, this is a good time to wash it. While you want the beef flavor from frying, you definitely don’t want burned bits in the stir-fry if you got carried away with the heat during frying.
  8. Set the wok over medium heat. Add the sliced ginger and fry until caramelized, about 30 seconds.
  9. Next, add the shallots. Continue to fry for another 30 seconds, and add the fresh peppers (except for the red holland or fresno peppers). Turn the heat up to high and stir-fry for 1 minute to get a nice sear on the peppers.
  10. Clear a section on the bottom of the wok, and add the dried chili peppers. Let them toast in the oil for 20 seconds. (If you want your dish spicier, add the dried chili peppers earlier, along with the shallots.)
  11. Next, pour the Shaoxing wine around the perimeter of the wok. Add the sliced garlic, fermented black beans, and the red Holland or Fresno peppers. Stir-fry for another 30 to 60 seconds on high heat.
  12. Next, add the fried beef and pour over the pre-prepared sauce. Maintain the highest heat possible and stir-fry everything together for 20 seconds. Add the scallions. Continue to stir fry until most––if not all––of the sauce has evaporated.
  13. Serve over steamed rice.

http://www.lynnandruss.com

Adapted recipe from Bill for Woks of Life

Roman-Style Chicken Cacciatore

Cacciatore without tomatoes? As it turns out, it is not always a chunky, tomato-heavy braise. At Piatto Romano in Rome, Milk Street learned how to make the Roman version—an elegant, minimalist dish bright with the acidity of white wine and vinegar and heady with rosemary, garlic and anchovies, not a tomato in sight. (And you would never know there were anchovies in it.)

With so few ingredients, deeply searing the bone-in, skin-on pieces is necessary for developing rich flavor. A quick sauté of aromatics followed by a deglazing with a full bottle of a light, dry white wine forms the cooking liquid that becomes the fabulous sauce.

To preserve the chicken’s browning during braising, the pieces are only partially submerged in liquid and cooked, uncovered, to completion in a 450°F oven; the dry heat keeps the skin crisp and caramelized even as the liquid simmers in the bottom of the pan. (You will need an oven-safe 12-inch skillet for this recipe.)

A good measure of white wine vinegar and minced rosemary finishes the dish, adding a surge of tartness and herbal notes to keep the flavors vibrant. This cacciatore is best with a starchy side, such as crusty bread, polenta or mashed potatoes. We served ours with garlic and rosemary-infused mashed potatoes, and a side of roasted carrots and Brussels sprouts.

What a tremendous weeknight meal that can just as well be the feature of an intimate dinner party. Adding the final zip of vinegar is just the right balance of acid.

Don’t forget to lower the heat before adding the wine. This helps prevent fiery flare-ups if the wine splashes out of the skillet.

Instead of chicken pieces, we used a whole chicken, cut it up and saved the remaining body parts (neck, back, heart, etc.) to add to our “body bag” of frozen chicken parts for future homemade stock.

Roman-Style Chicken Cacciatore

  • Servings: 4-6
  • Difficulty: easy
  • Print

Ingredients

  • 3-4 lb. bone-in, skin-on chicken thighs or breasts, trimmed and patted dry
  • Kosher salt and ground black pepper
  • 2 Tbsp. extra-virgin olive oil
  • 6 – 8 oil-packed anchovy fillets, patted dry
  • 6 medium garlic cloves, minced
  • 3 5-inch rosemary sprigs, plus 1 tsp. minced fresh rosemary, reserved separately
  • 1/4 tsp. red pepper flakes
  • 750 mL bottle dry white wine, such as pinot grigio or frascati
  • 1/4 cup white wine vinegar

Directions

  1. Heat the oven to 450°F with a rack in the middle position. If the chicken breasts are larger than about 12 ounces each, cut them in half crosswise. Season the chicken all over with salt and pepper.
  2. In a 12-inch oven-safe skillet over medium-high, heat the oil until shimmering. Add the chicken skin-side down and cook until golden brown on both sides, 8 to 10 minutes, flipping the pieces halfway through. Transfer to a large plate; set aside.
  3. To the skillet over medium, add the anchovies, garlic, rosemary sprigs and pepper flakes. Cook, stirring, until the anchovies have broken down and the mixture is fragrant, about 1 minute. Reduce to low, then slowly add the wine. Bring to a simmer over medium-high and cook, scraping up the browned bits, until the wine has reduced by about half, 8 to 10 minutes.
  4. Return the chicken skin-side up to the pan and add the accumulated juices. Transfer to the oven and cook until a skewer inserted into the thickest part of the chicken meets no resistance, 12 to 15 minutes.
  5. Remove the skillet from the oven (the handle will be hot) and set it on the stovetop. Transfer the chicken, skin side up, to a deep platter. Remove and discard the rosemary sprigs from the skillet. Add the minced rosemary and vinegar to the liquid in the skillet; bring to a simmer over medium-high. Cook, stirring, until reduced by about half, about 5 minutes. Remove from the heat, then taste and season with salt and black pepper. Spoon the sauce over and around the chicken.

http://www.lynnandruss.com

Adapted from a recipe from Courtney Hill for Milk Street

Crispy Artichoke Pasta

Quick, easy, tasty and filling—what’s not to like about that? Fast enough for a weeknight mad dash to dinner, this pantry pasta tastes more like a restaurant dish with its silky, flavorful sauce. The recipe uses canned artichokes which are brought to the peak of their crispy potential. The key is to remove as much water from the artichokes as possible by pressing them gently with paper towels (as you would tofu).

Some of the artichokes are fried in olive oil until shatteringly crisp, then the rest cook gently in more oil, along with garlic and chile flakes, to soften. They’re all mixed with pasta and Parmesan into a stunning weeknight meal. 

While the original recipe calls for one pound* of dried pasta, we cut that in half to 8 ounces, but kept the other ingredients as they were. However, using less rigatoni facilitated an adjustment for the amount of water. Save at least a cup of the pasta water before draining and introduce it bit-by-bit to the entire mixture until you get a silky consistency.

If you want to amp up the dish, you could add in some decent jarred tuna, crispy pancetta, bacon or prosciutto.

Crispy Artichoke Pasta

  • Servings: 4
  • Difficulty: easy
  • Print

Ingredients

  • Salt and black pepper
  • 1 lb. short cut pasta*, such as rigatoni or gemelli
  • 2 14-oz. cans whole or quartered artichoke hearts
  • ½ cup extra-virgin olive oil
  • 4 garlic cloves, thinly sliced
  • 1 tsp. crushed red pepper flakes
  • 3 Tbsp. unsalted butter, cut into small pieces
  • ½ cup finely grated Parmesan, plus more for serving
  • ⅓ cup finely chopped parsley

Directions

  1. Bring a large pot of water to a boil, then season generously with salt. Cook the pasta until a bit firmer than al dente, about 2 fewer minutes than listed on the package. (It’ll finish cooking in the sauce.) Reserve 2 cups of pasta water, then drain.
  2. While the water comes to a boil, drain the artichokes and place on a clean kitchen towel (or paper towels). Cover with another kitchen towel (or paper towels), and gently press down to remove the excess water. Give the artichokes a rough chop.
  3. Line a plate with paper towels. Set another large pot over medium-high heat, and pour in ¼ cup oil. When the oil is hot, after 1 to 2 minutes, add one-third of the artichokes and cook, stirring occasionally, until deeply brown and crisp in most spots, 3 to 5 minutes. Using a slotted spoon, scoop out the artichokes, transfer to the lined plate and season with salt.
  4. Adjust heat to medium, add the remaining ¼ cup oil and the remaining artichokes to the pot, along with the garlic and red pepper. Season with salt and pepper and cook, stirring occasionally, until the garlic begins to soften and everything smells very good, 2 to 3 minutes.
  5. Add the drained pasta and 1½ cups of the pasta water and bring to a simmer, still over medium heat. (This may seem like a lot of liquid, but it will thicken when the remaining ingredients are added.) Add the butter and sprinkle in the Parmesan and continue to cook, tossing vigorously, until the cheese is melted and the sauce is creamy and clings to the pasta, 2 to 3 minutes. If the sauce looks too thick, add more pasta water, 1 to 2 tablespoons at a time. Turn off the heat and stir in the parsley. Season to taste with salt and pepper.
  6. Divide among bowls or plates. Sprinkle the reserved crispy artichokes and more Parmesan on top before serving.

http://www.lynnandruss.com

Adapted from a recipe by Andy Baraghani for NYTimes Cooking

Pork and Porcini Meatballs

When the cooler weather starts hanging around for good, we gravitate away from al fresco dining and grilled fare to comfort food meals such as braises, casseroles, and roasted meats with sides of mashed potatoes and gravy.

Then there are meatballs. Those round succulent tasty balls of ground meat packed with a variety of herbs and spices. This Pork and Porcini Meatballs recipe was by Nancy Oakes for a recent Food & Wine magazine.

Her original recipe called for fresh or frozen porcini mushrooms, neither of which we have ever seen in our plethora of local supermarkets. Therefore, we went with dried porcinis that had to be reconstituted. That liquid was then used in place of the 1/4 cup of water*. You can buy a half (.5) ounce clamshell package of the funghi which is the perfect amount. Porcini mushrooms are a type of seasonal mushroom known for their meatier texture and rich, nutty flavor. They pop up from late summer into late autumn, peaking between September and October.

Also, the meatballs are supposed to be covered and refrigerated for 1, or up to 24 hours. We didn’t have that time, so we placed the rimmed baking sheet in the **freezer for 12-15 minutes. Then popped them directly into the heated oven.

The Hubs said that he liked the meatballs so much that they will now be our default meatballs, and are very versatile as to what you can do with them.

One recipe reviewer commented “These meatballs have a lingering savoriness, a heady aroma, and a juicy center. The porcini mushrooms add in a nuanced savoriness, and the cheeses add to that. The meat is so tender.”

Pork and Porcini Meatballs

  • Servings: 28 meatballs
  • Difficulty: easy
  • Print

Ingredients

  • 1 Tbsp. plus 2 tsp. olive oil, divided, plus more for serving
  • 1 small yellow onion, finely chopped (about 1 cup)
  • 1/4 cup chopped fresh or frozen porcini mushrooms
  • 1 garlic clove, finely chopped
  • 3/4 cup panko
  • 2 oz. Parmesan cheese, grated (about 1/2 cup), plus more for serving 
  • 2 oz. Pecorino Romano cheese, grated (about 1/2 cup)
  • 2 Tbsp. chopped fresh flat-leaf parsley, plus more for garnish
  • 2 tsp. chopped fresh rosemary
  • 1 tsp. chopped fresh mint
  • 1 tsp. kosher salt
  • 1 tsp. black pepper
  • 1 lb. ground pork
  • 1 large egg, beaten
  • 1/4 cup water* or use some of the liquid from the reconstituted porcinis
  • Cooked polenta or orzo, for serving

Directions

  1. Preheat oven to 400°F. Heat 1 tablespoon oil in a medium skillet over medium-low. Add onion, mushrooms, and garlic; cook, stirring often, until onion is softened, 5 to 6 minutes. Remove from heat; let cool 5 minutes.
  2. Stir together panko, Parmesan, Pecorino Romano, parsley, rosemary, mint, salt, and pepper in a large bowl until combined. Stir in pork, egg, and cooled onion mixture until thoroughly combined. Slowly add 1/4 cup water, stirring until incorporated. Cover mixture, and refrigerate at least 1 hour or up to 24 hours. **We didn’t have the time, so we put the sheet pan of meatballs in the freezer for about 12 minutes.
  3. Line a large rimmed baking sheet with aluminum foil; coat with remaining 2 teaspoons oil. Shape pork mixture into 28 (1-ounce) meatballs; transfer to baking sheet. Bake in preheated oven until an instant-read thermometer inserted in center of meatball registers 160°F, 15 to 17 minutes.
  4. Serve meatballs over polenta; drizzle with additional olive oil. Sprinkle with Parmesan and parsley; serve hot.

http://www.lynnandruss.com

Adapted from a recipe by Nancy Oakes for Food & Wine Magazine

Smoky Shrimp Saganaki

The name of the dish almost sounds Japanese, while the ingredients are an interesting mash-up inspired by Greek shrimp saganaki, that is combined wonderfully with sweet shrimp, tomatoes and feta with subtly smoky dried Mexican chiles. Identity crisis? In name only, because once you taste it, you are transported to another realm entirely — it is so utterly delicious!

The aromatics — cherry tomatoes and garlic, plus an assortment of dried and fresh chiles — simmer and confit in oil in the oven, with shrimp and feta added toward the end of cooking, broiling quickly, to create a wonderfully oozy, charred dish. Now that description certainly got our attention!

It’s a simple, one-pan weeknight meal that cooks in just 30 minutes. This recipe allows flexibility in your choice of chiles; whichever you choose, the gentle confiting of the chiles releases their flavors, adding nuanced heat to complement the bright and tangy tomatoes and feta. (Make sure to get the whole block feta, not the precrumbled variety.)

According to the chef, you can switch out the ancho chile for pasilla chile, or dial up the heat with a fruity Scotch bonnet. Enjoy this dish straight from the pan, mopped up with a piece of crusty bread. Any leftovers can be easily turned into a show-stopping pasta sauce, making this recipe a versatile addition to any recipe collection.

Smoky Shrimp Saganaki

  • Servings: 4
  • Difficulty: easy
  • Print

Ingredients

  • 1 chipotle chile (or similar), stem and seeds removed
  • 1 ancho chile (or similar), stem and seeds removed
  • 2 fresh long red chiles (or similar), split open lengthwise with the stem intact
  • 1 head garlic (1 clove minced, the rest separated but left skin-on and whole)
  • 24 oz. cherry tomatoes
  • ¾ cup extra-virgin olive oil
  • Fine sea salt and black pepper
  • 1 8-oz. block feta
  • ½ lb. peeled and deveined medium shrimp
  • ½ cup roughly chopped fresh cilantro
  • Crusty bread, for serving

Directions

  1. Heat the oven to 425 degrees.
  2. Add the chipotle chile, ancho chile, fresh chiles, whole garlic cloves, cherry tomatoes, oil, 1 teaspoon of salt and a good grind of pepper to a 10-inch cast-iron pan or an 8-by-11-inch broiler-safe baking dish. Tuck the dried chiles underneath so that they are submerged in oil to avoid burning. Bake for 10 minutes, then stir, keeping the dried chiles submerged in oil.
  3. Nestle the feta into the middle of the mixture, and return to the oven for 15 minutes, until the tomatoes are nicely charred and the feta has softened, then remove from the oven.
  4. While the feta cooks, delicately butterfly the shrimp by making a shallow cut using a sharp paring knife along the back of each shrimp from head to tail.
  5. Set the broiler to the highest setting and let it heat up for 5 minutes.
  6. Stir the shrimp and the crushed garlic into the tomato mixture, leaving the feta whole in the middle. Broil on the top rack for 3 to 5 minutes, until the shrimp is cooked through and the feta is golden brown.
  7. To serve, spoon some of the tomato mixture on top of the feta, then sprinkle over the cilantro. Serve with crusty bread.

http://www.lynnandruss.com

Recipe by Yotam Ottolenghi for NYT Cooking