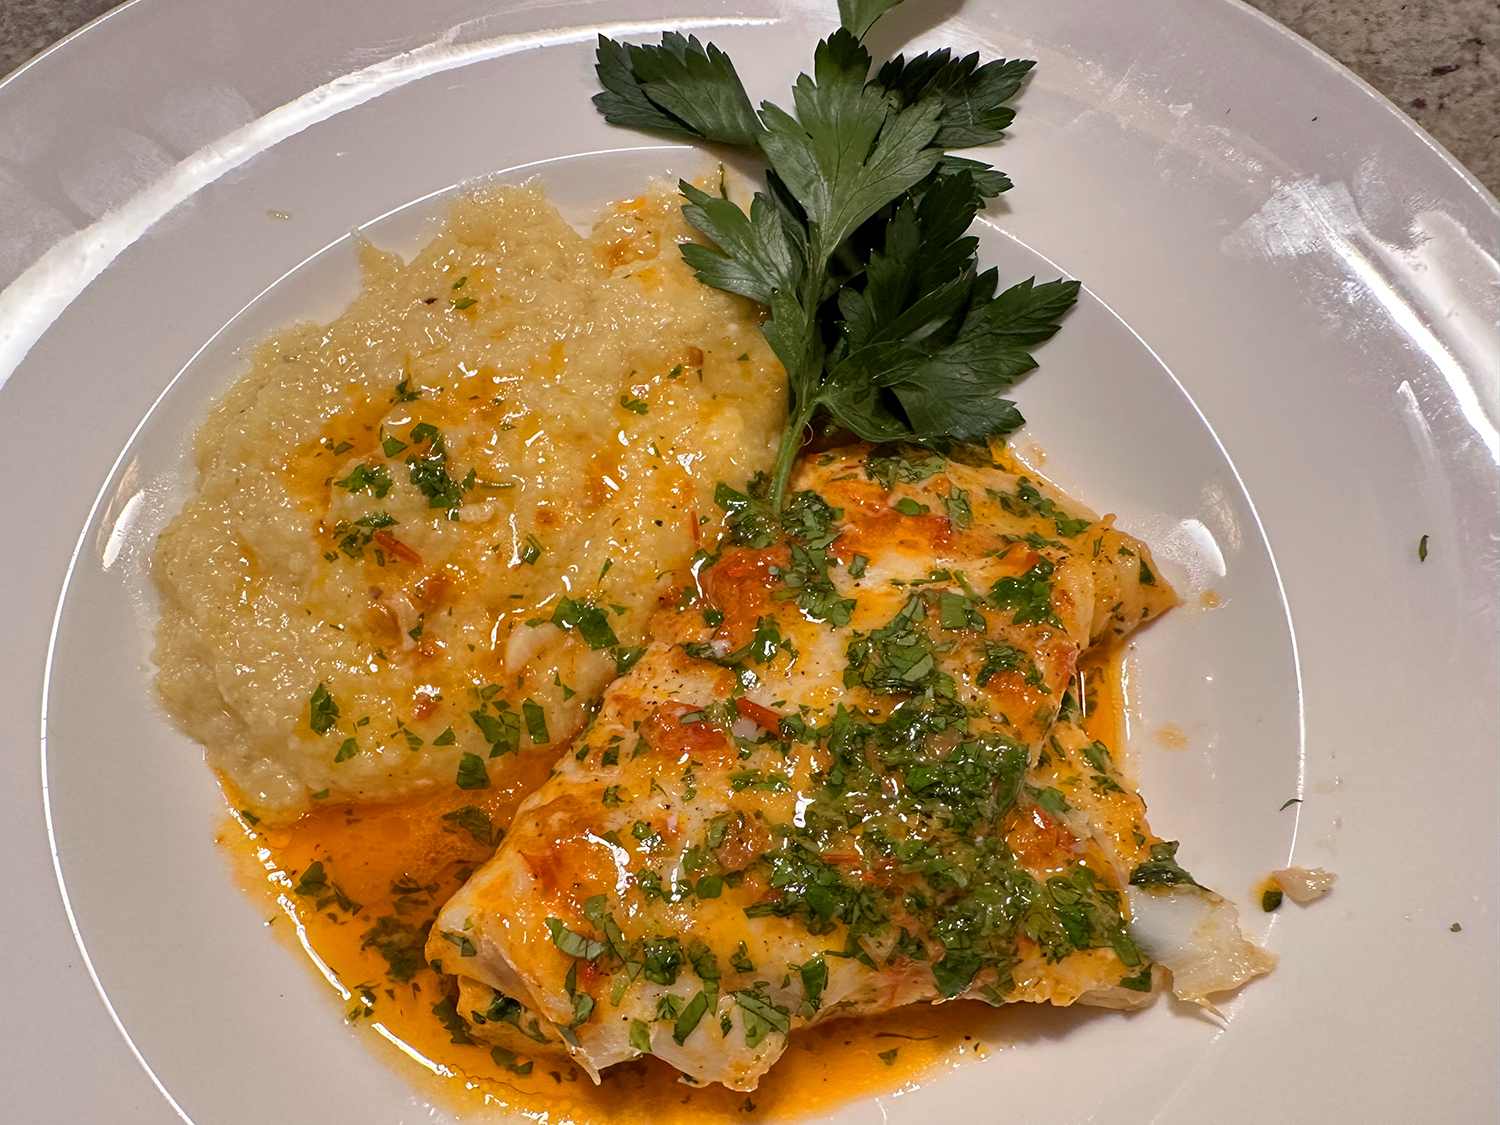
Our Monday dinner menu often includes a fish dish or something vegetarian. So Fine Cooking’s “Make It Tonight” Series came through again with this Butter-Basted Spiced Cod with Polenta by Ronne Day. Yes, we’ve made it before, but that was years ago and we were ready for a rehash.
As mentioned in an earlier post, baking cod in melted butter adds a richness to the fish that nicely balances the heat from the harissa, a yummy North African paste made of ground dried chile peppers, garlic, olive oil, and spices. Harissa comes in mild or spicy. Other uses for the condiment include stirring into couscous, stews, soups and pastas. You’ll find it packaged in cans, tubes and jars at well-stocked grocery stores and specialty markets.
We cut back on the amount of cod to one pound, enough for two 6-ounce fillets; although we used the full amounts of the remaining ingredients. A refreshing orange, fennel and red pepper salad with mint and lemon completed our meal.
1-1/2 tsp. crushed whole coriander seeds or ground coriander
2 medium lemons, 1 finely grated to yield 1/2 tsp. zest and squeezed for 2 Tbsp. juice, the other cut into wedges
Kosher salt
1 cup cornmeal
3 oz.(6 Tbs.) unsalted butter
4 6-oz. pieces cod loin
Freshly ground black pepper
2 Tbsp. harissa paste
2 tsp. coarsely chopped cilantro or parsley
Directions
Position a rack in the center of the oven and heat the oven to 400°F.
Heat a 3-quart saucepan over medium heat. Add the coriander and stir until fragrant, about 30 seconds.
Add 3 cups of water, the lemon zest, and 1 tsp. salt; turn the heat up to medium high.
Whisk in the cornmeal and cook, stirring often, until thick and creamy, about 20 minutes. (If the polenta gets too thick, loosen with a little hot water.)
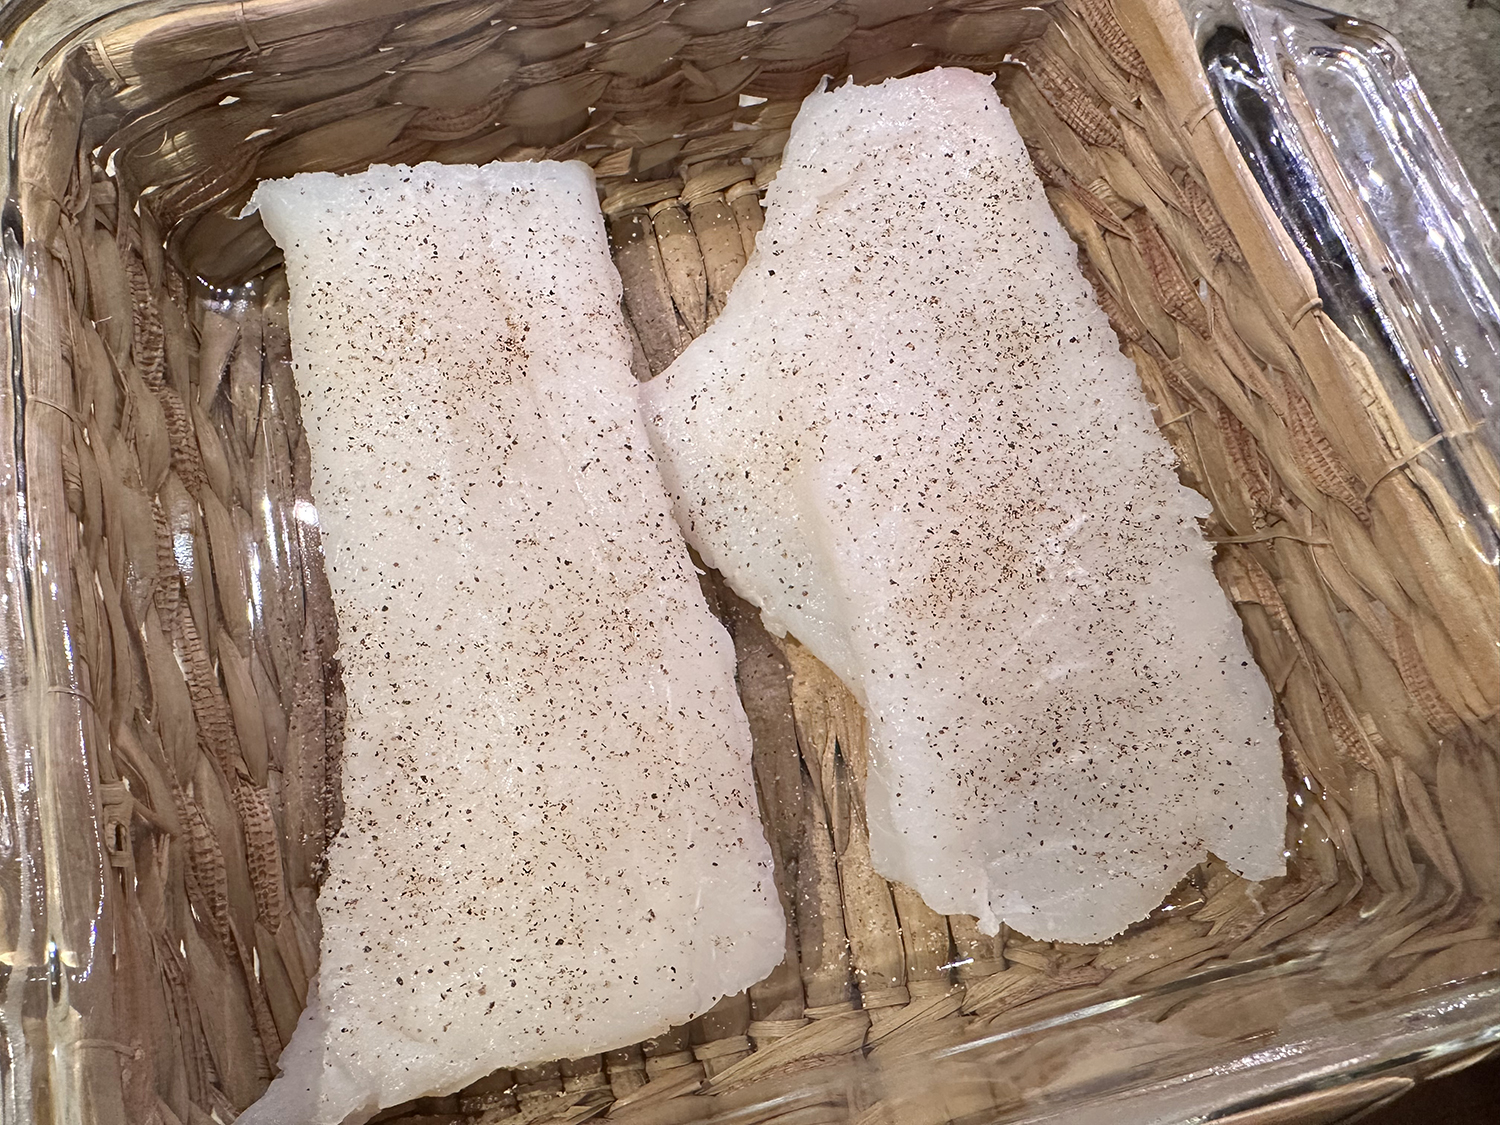
Meanwhile, melt the butter in a small saucepan. Season the fish lightly with salt and pepper and arrange in a 9×13 baking dish with space between each piece.
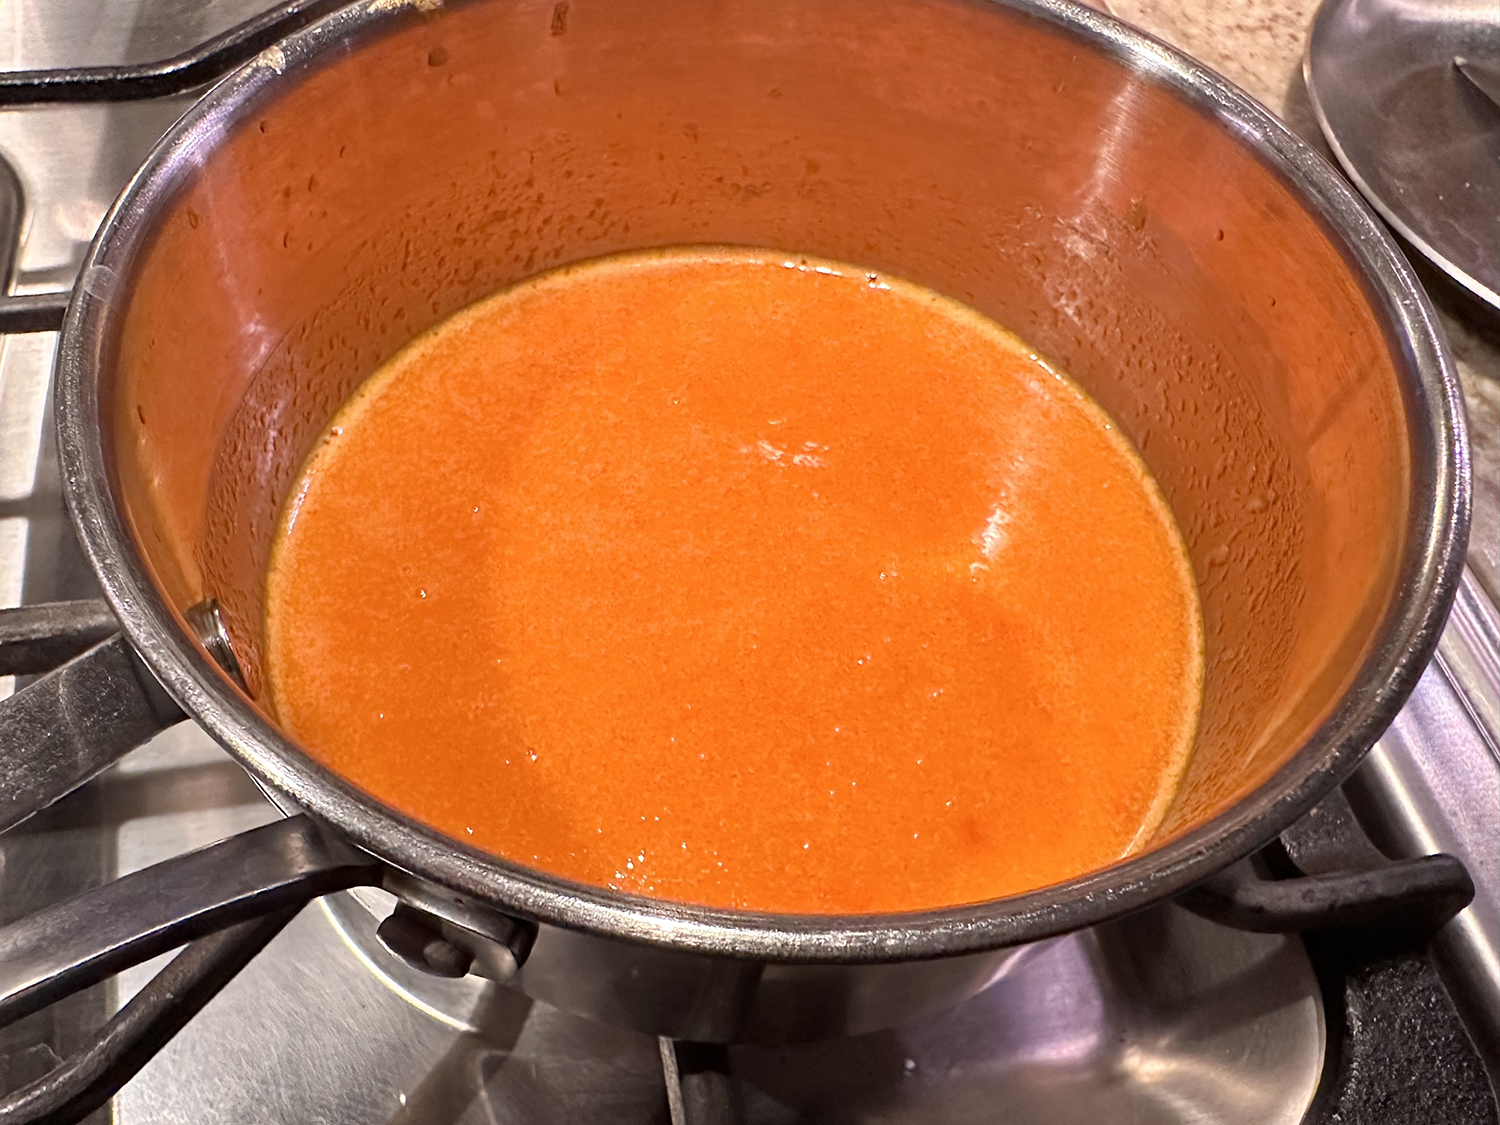
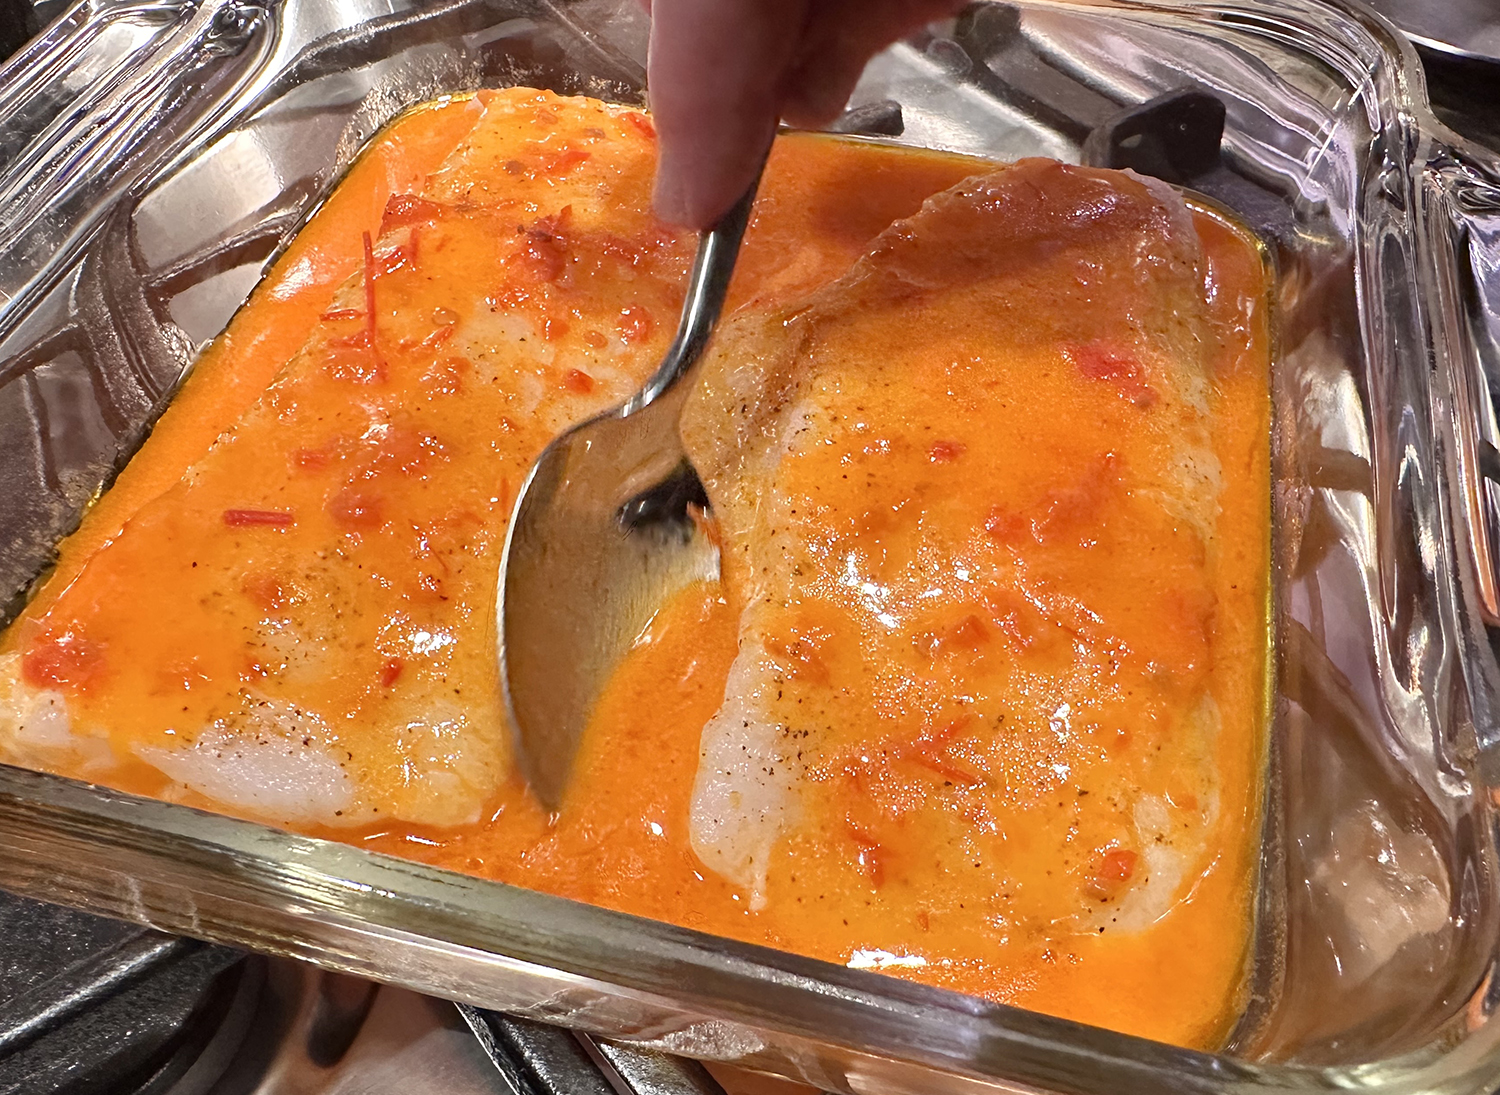
Remove the butter from the heat, stir in the harissa and lemon juice, and pour it over the fish.
Bake, basting every 5 minutes or so, until cooked through (the fish will flake easily), about 15 minutes. If necessary, cover with foil to keep warm.
Divide the polenta among 4 shallow bowls or plates. Top with the fish and spoon the butter over the fish.
Top with the cilantro or parsley and serve with the lemon wedges.
How about a banana bread that is moist on the inside, with a crunchy bite around the edges? While banana bread has been around for decades, the dish is now a global mainstay. Morning with coffee, noon as a quick bite for lunch, or after dinner shared with a scoop of ice cream—it doesn’t really matter what time of day you indulge. My personal preference is a warm slice with a dab of ghee, or a schmear of peanut butter; or let’s face it, just by itself is perfectly fine.
In this recipe, the crunch of pecans complements the bread’s softness, while miso (which we always have on hand) adds complexity alongside the banana’s sweetness. Be sure to utilize the ripest bananas you can find because it really will make a difference. This banana bread can hold for several days on the counter or in the fridge—if you have any left.
“Banana-bread recipes over the decades have in common bananas, sweetener, a chemical leavener, some fat and flour. But beyond that they can differ wildly.”
PJ Hamel
Banana bread is extremely flexible: If this recipe doesn’t work for you, just change it. Add a little more miso. Maybe lighten up on the sugar. Or toss in another half cup of pecans until you’ve adjusted it to suit your own preferences. I followed the directions without any alterations (other than what I did with the toasted pecans), and loved the results!
“Banana bread is both striking and unremarkable, simple and staggering, found on the counters of coffee shops and apartment bar tops and tiny cafes globally. A corner piece can shift your entire day. Or maybe your choice is a slice from the middle, full of flavor without the baggage of a crust. Or perhaps your ideal banana bread is whichever iteration is available — YouTube’s code sags under the weight of banana-bread recipes, and they’re each as delicious as the impulses behind them. It’s a dish as perfect as it is malleable.” — Bryan Washington
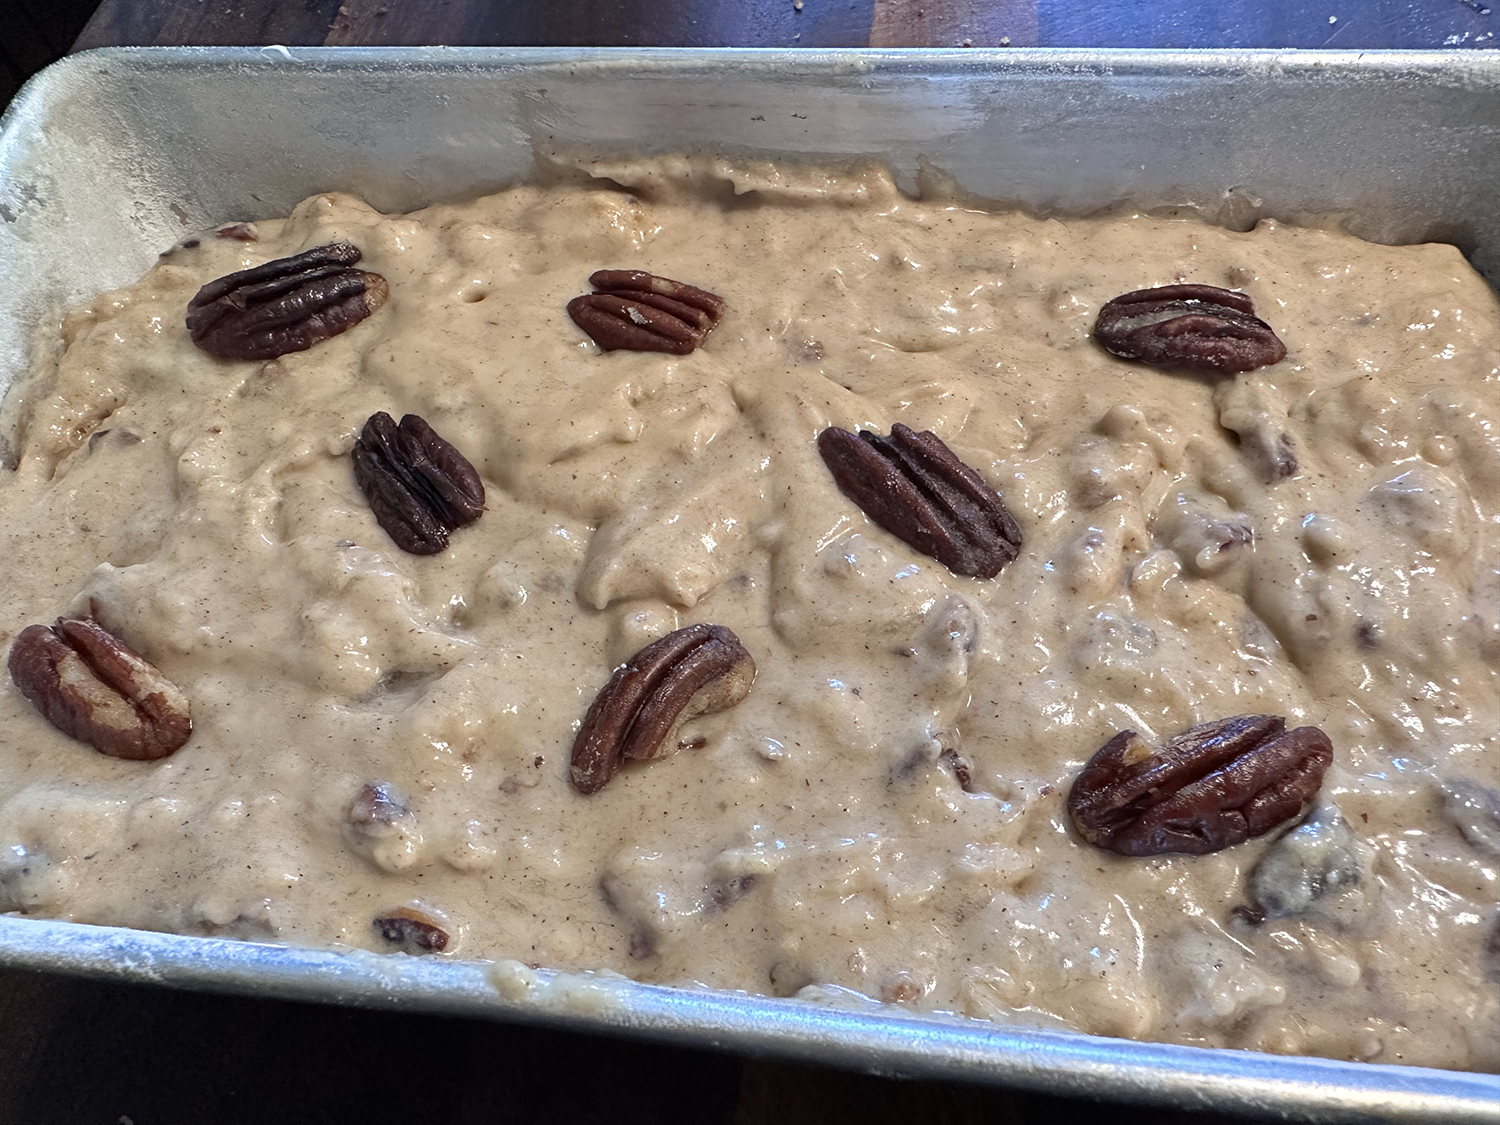
For the topping, you can add all of the chopped pecans to the batter, and place 8 or 9 whole roasted pecans to the top once in the loaf pan; or do half and half as instructed below. The indicated baking time of 60 to 80 minutes didn’t pan out for us. It took 1 hour and 35 minutes in the oven before the thin metal skewer stuck into the center came out clean.
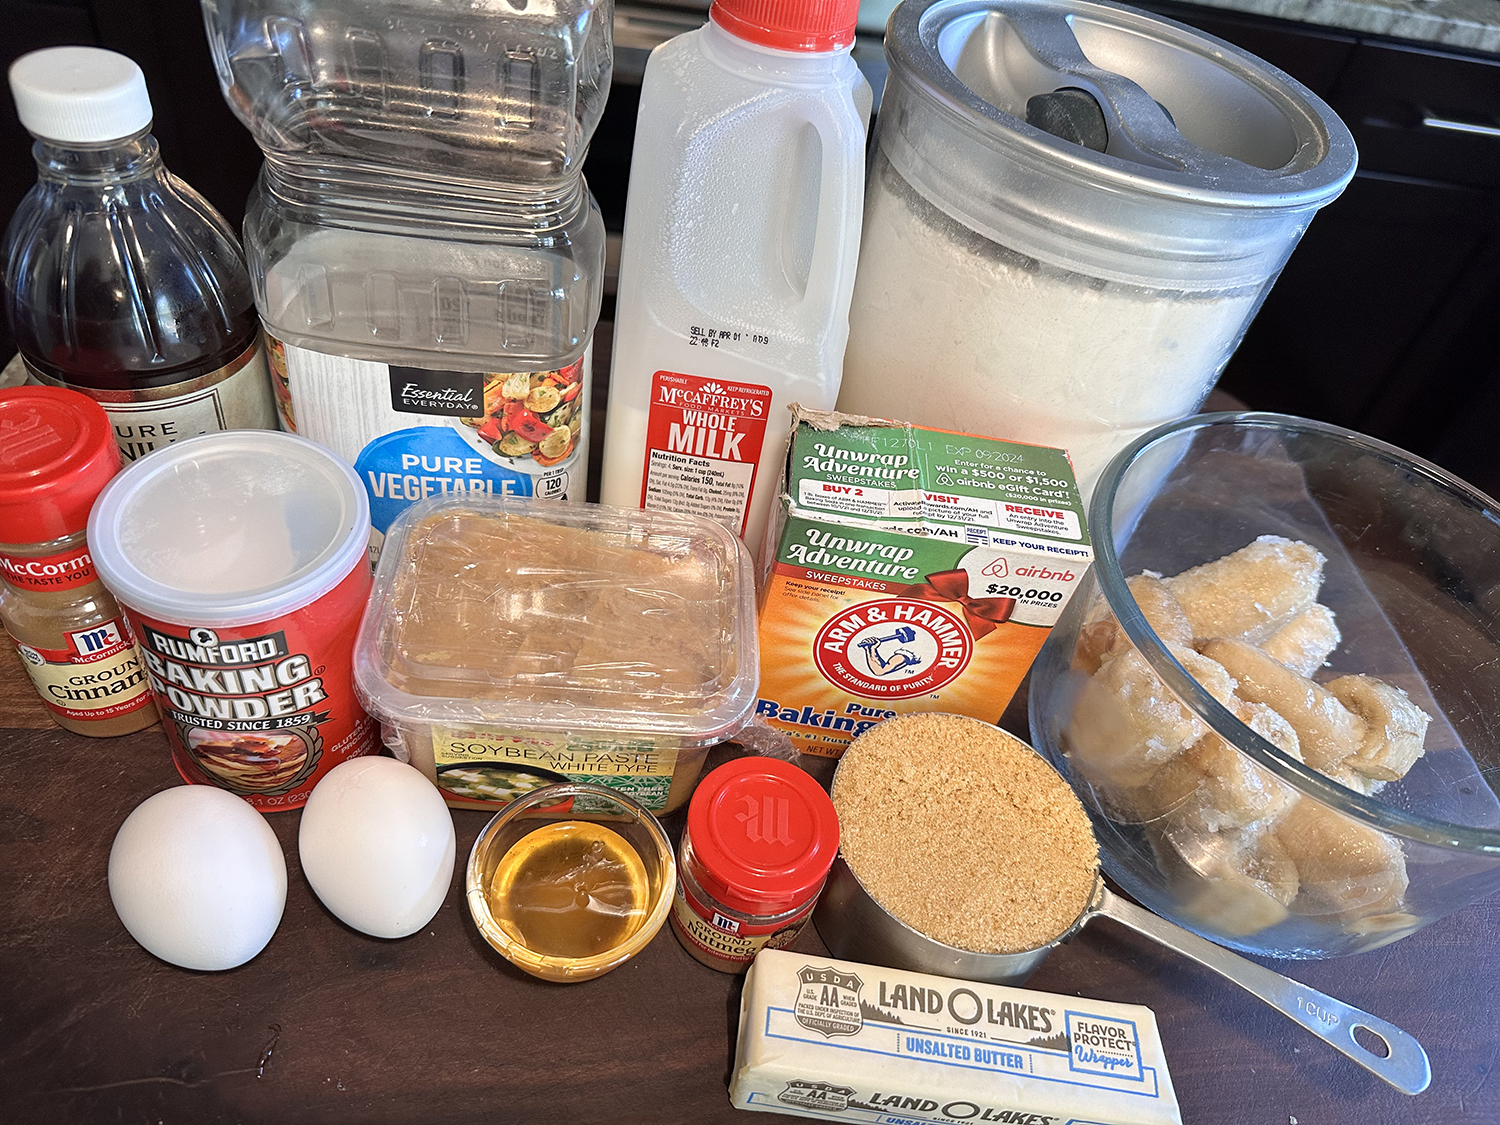
Heat oven to 350 degrees. Lightly oil a 9- or 10-inch loaf tin, then line the base with parchment paper. Also, grease and flour a loaf pan.
Toss pecans on a parchment-lined baking sheet with salt and oil. Bake until fragrant, 7 to 10 minutes. When cool, chop to your desired consistency.
While the pecans cool, whisk together flour, cinnamon, nutmeg, baking soda and baking powder in a medium bowl.
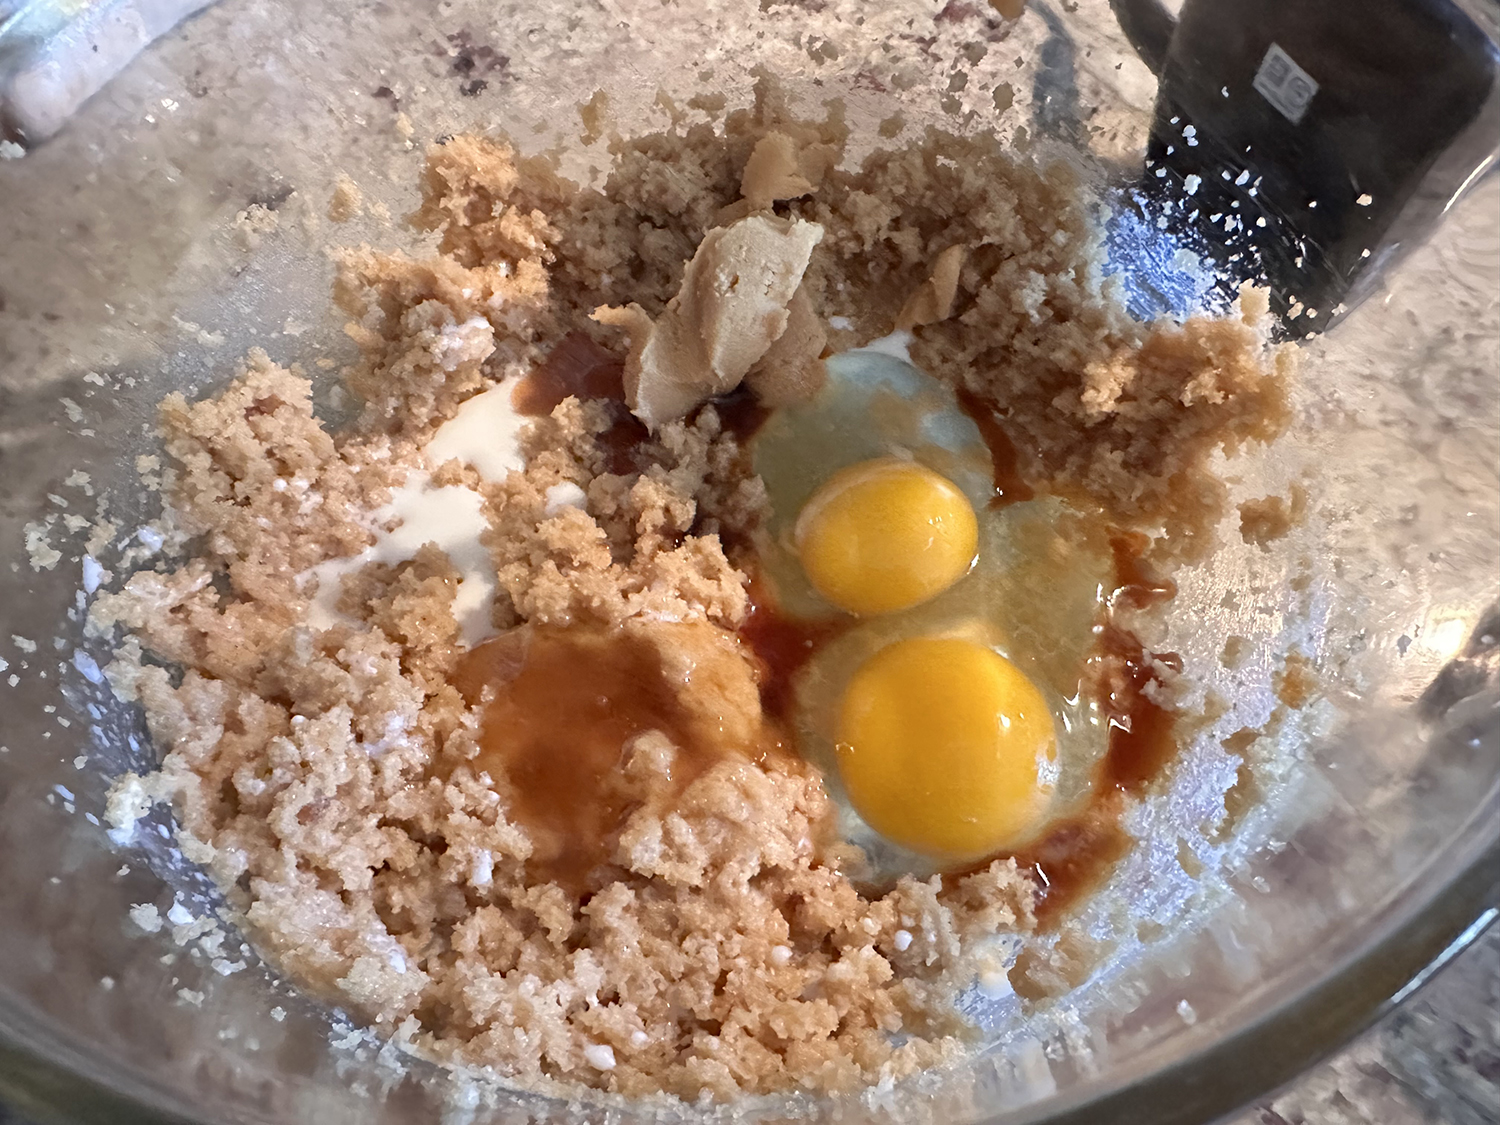
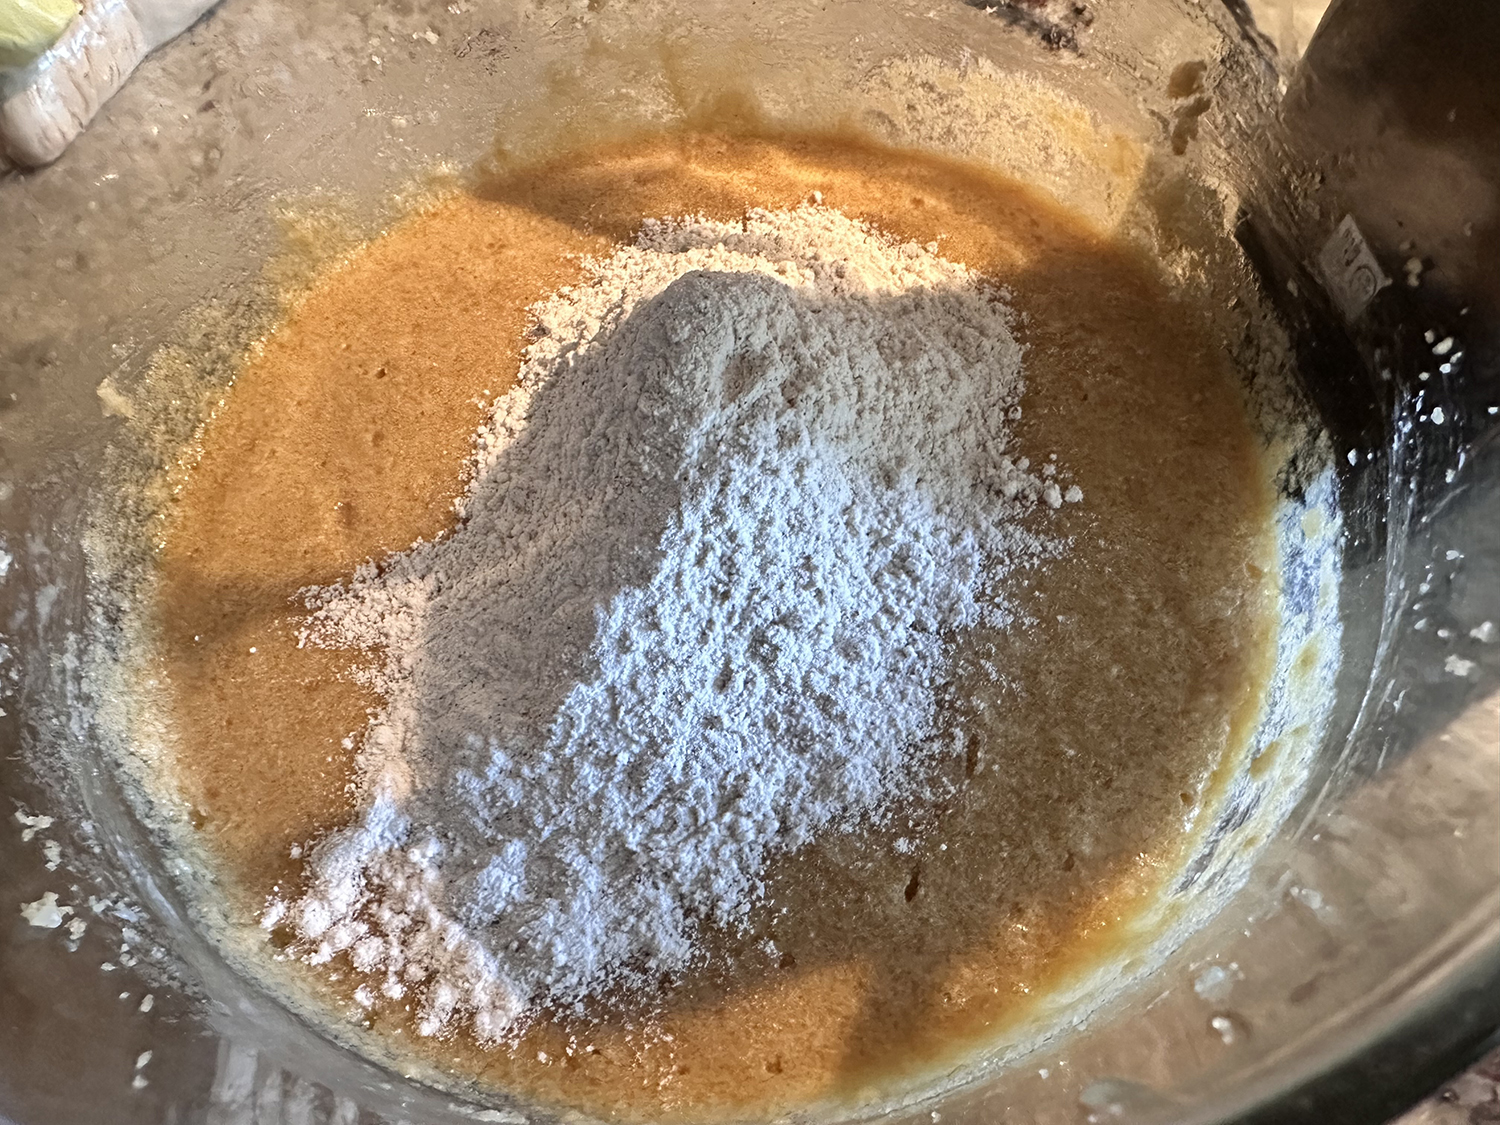
In a large bowl, beat butter and sugar using an electric mixer until creamy, 3 to 4 minutes. Beat in eggs, milk, miso, honey and vanilla extract until well-combined. Gradually beat in dry ingredients until just combined.
Using a spatula, stir bananas into the batter to combine evenly. Add half of the pecans (and any salt on the pan) to the batter and mix to combine evenly throughout. Add batter to the prepared loaf pan, smoothing when complete. Sprinkle the remaining pecans evenly on top.
Bake until a wooden skewer inserted in several areas around the center comes out clean, 1 hour to 1 hour 20 minutes (ours took 1 hour 35 minutes). Tent with foil if it starts to darken too much on top before the middle is baked through.
Let bread sit in tin for 10 minutes before removing and setting on a rack to cool for 60 minutes. Serve with coffee, ice cream or entirely by itself.
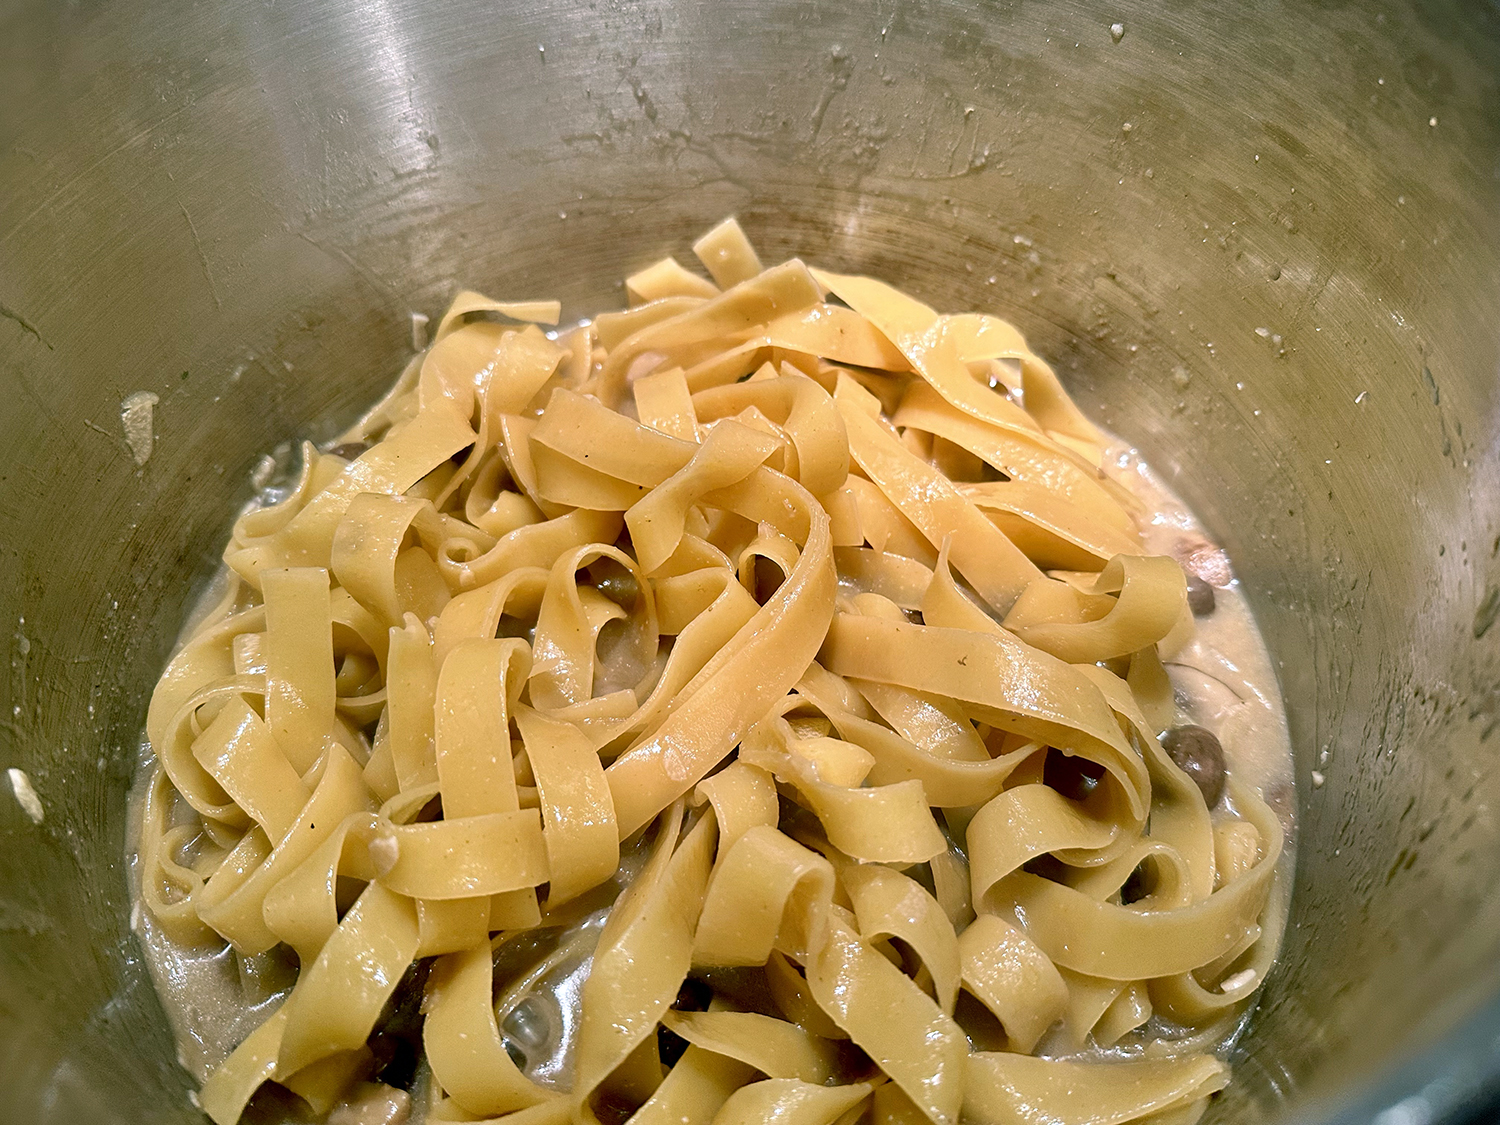
For this hearty vegetarian dish, the pasta is cooked directly in the sauce, so there’s no need to boil water in a separate pot. Japanese miso may seem an unlikely ingredient to pair with Italian pasta, but it deepens the mushrooms’ earthiness, and lightly browning the miso as it is done here develops even more flavor intensity so the dish tastes surprisingly meaty and rich.
Cavatappi is a good choice because its twisty shape is a good match for the chunky mushrooms, but any short pasta shape, such as penne or fusilli, works well, too. But because we used a larger flat pasta, we needed to add another cup of water to loosen the sauce.
Don’t forget to stir the pasta as it cooks. The pot will be quite full, so frequent stirring will help ensure that the pasta cooks evenly.
½ oz. pecorino Romano cheese, finely grated (¼ cup)
Directions
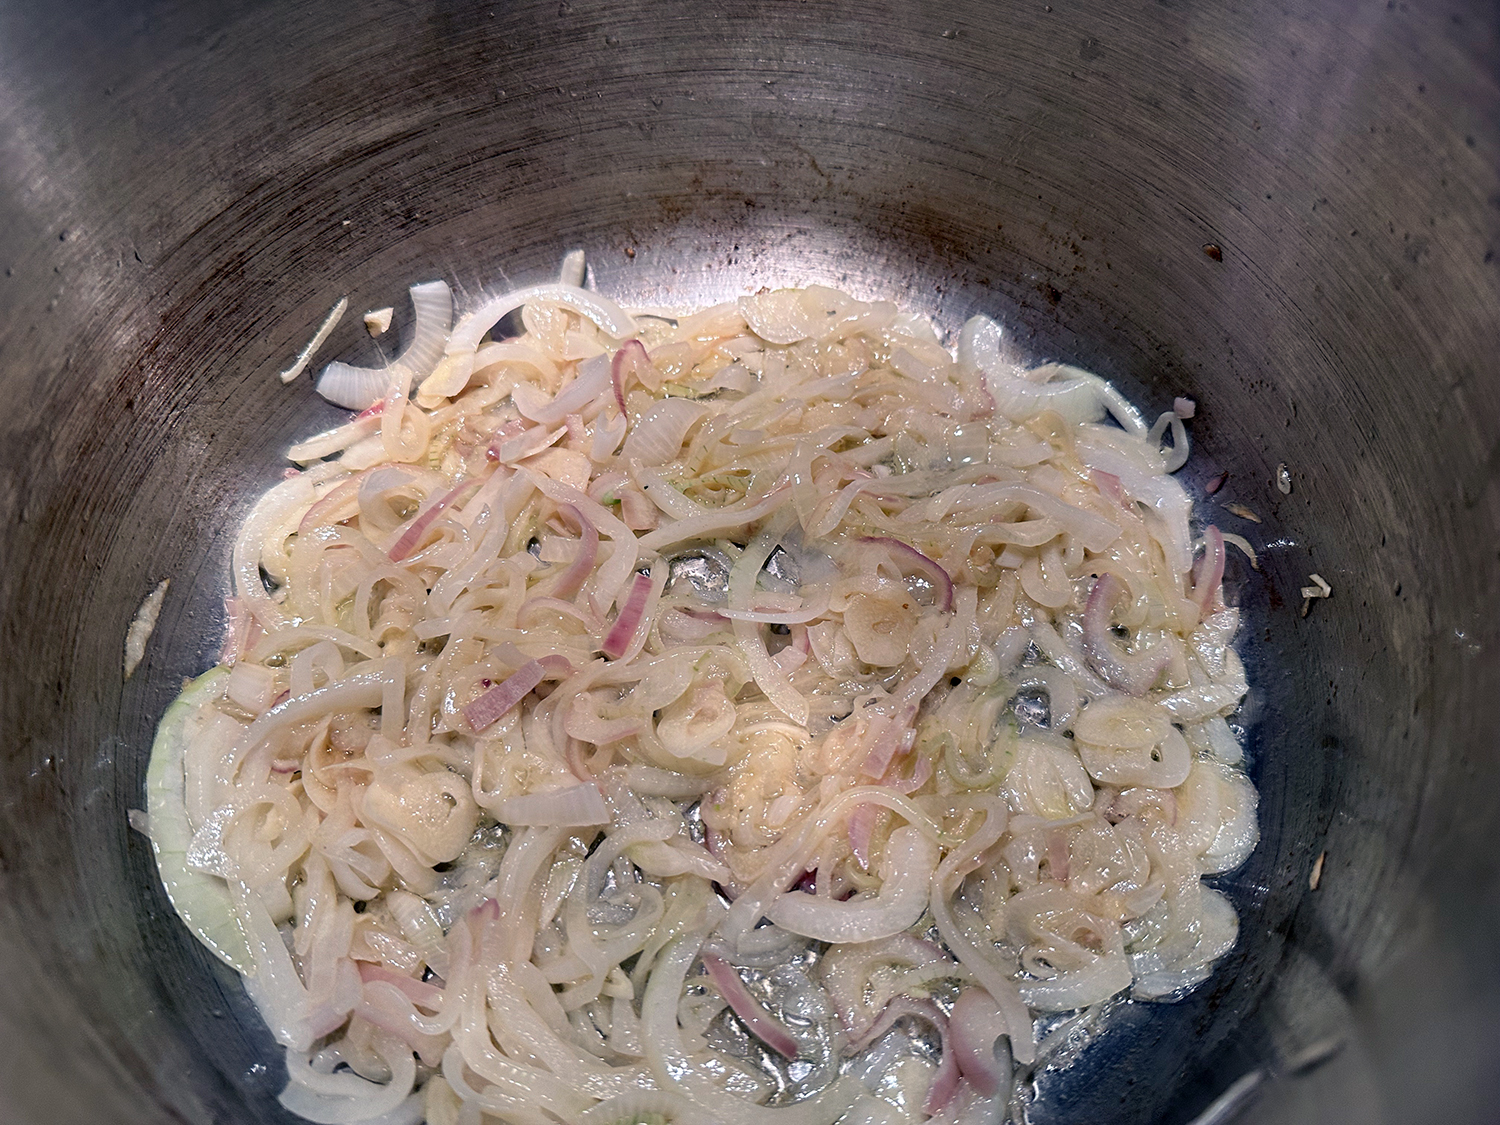
On a 6-quart Instant Pot, select More/High Sauté. (Or use a pressure cooker.) Add the butter and melt. Add the onion and garlic, then cook, stirring occasionally, until the onion begins to soften, about 5 minutes.
Stir in the miso and cook until lightly browned, about 2 minutes. Add the vermouth and cook, stirring, until almost fully evaporated, about 5 minutes.
Add 3 cups water (or 4 if necessary to loosen) and whisk until the miso dissolves. Stir in the mushrooms and bring to a boil, then distribute in an even layer.
Press Cancel, lock the lid in place and move the pressure valve to Sealing. Select Pressure Cook or Manual; make sure the pressure level is set to High. Set the cooking time for 5 minutes. When pressure cooking is complete, quick-release the steam by moving the pressure valve to Venting. Press Cancel, then carefully open the pot.
Select More/High Sauté. Bring the mixture to a boil and add the pasta. Cook, stirring often, until the pasta is al dente and and the sauce clings lightly, about 10 minutes. Press Cancel to turn off the pot.
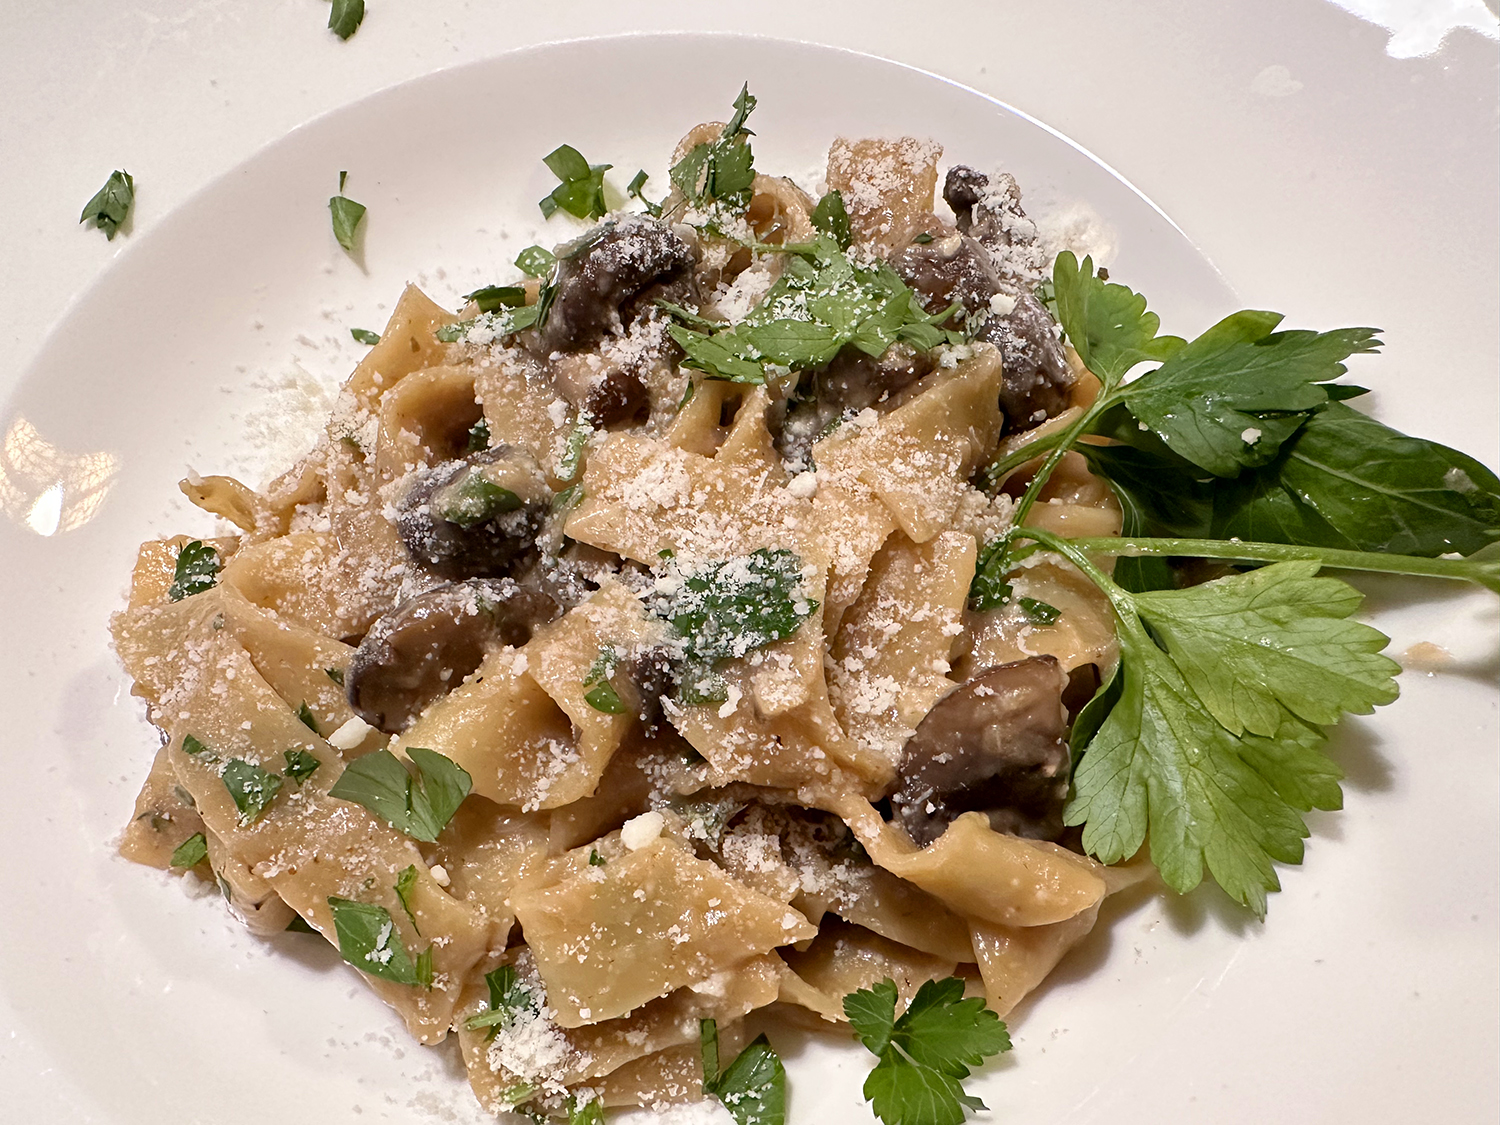
Stir in the thyme and lemon juice, then taste and season with salt and pepper. Transfer to a serving dish and sprinkle with the parsley and pecorino.
I declared this my favorite cod recipe to date. The flavor profile was spot on for me, although it may be a bit too spicy for some. In that case, cut back on the number of dried chiles.
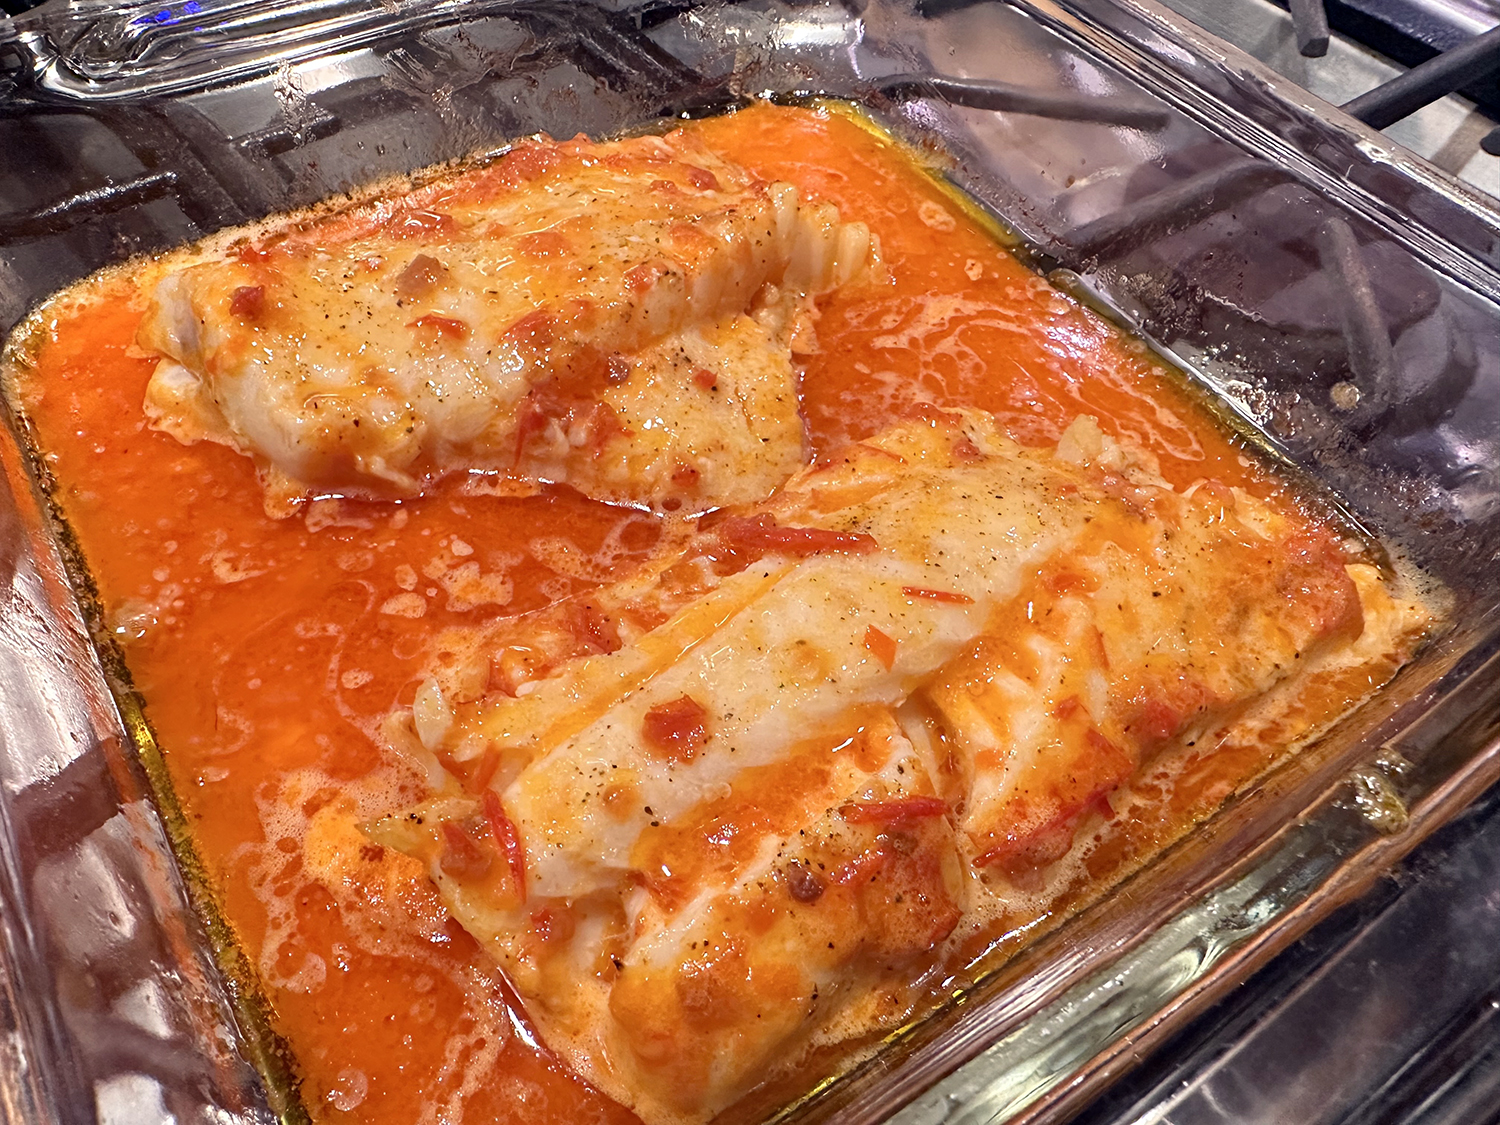
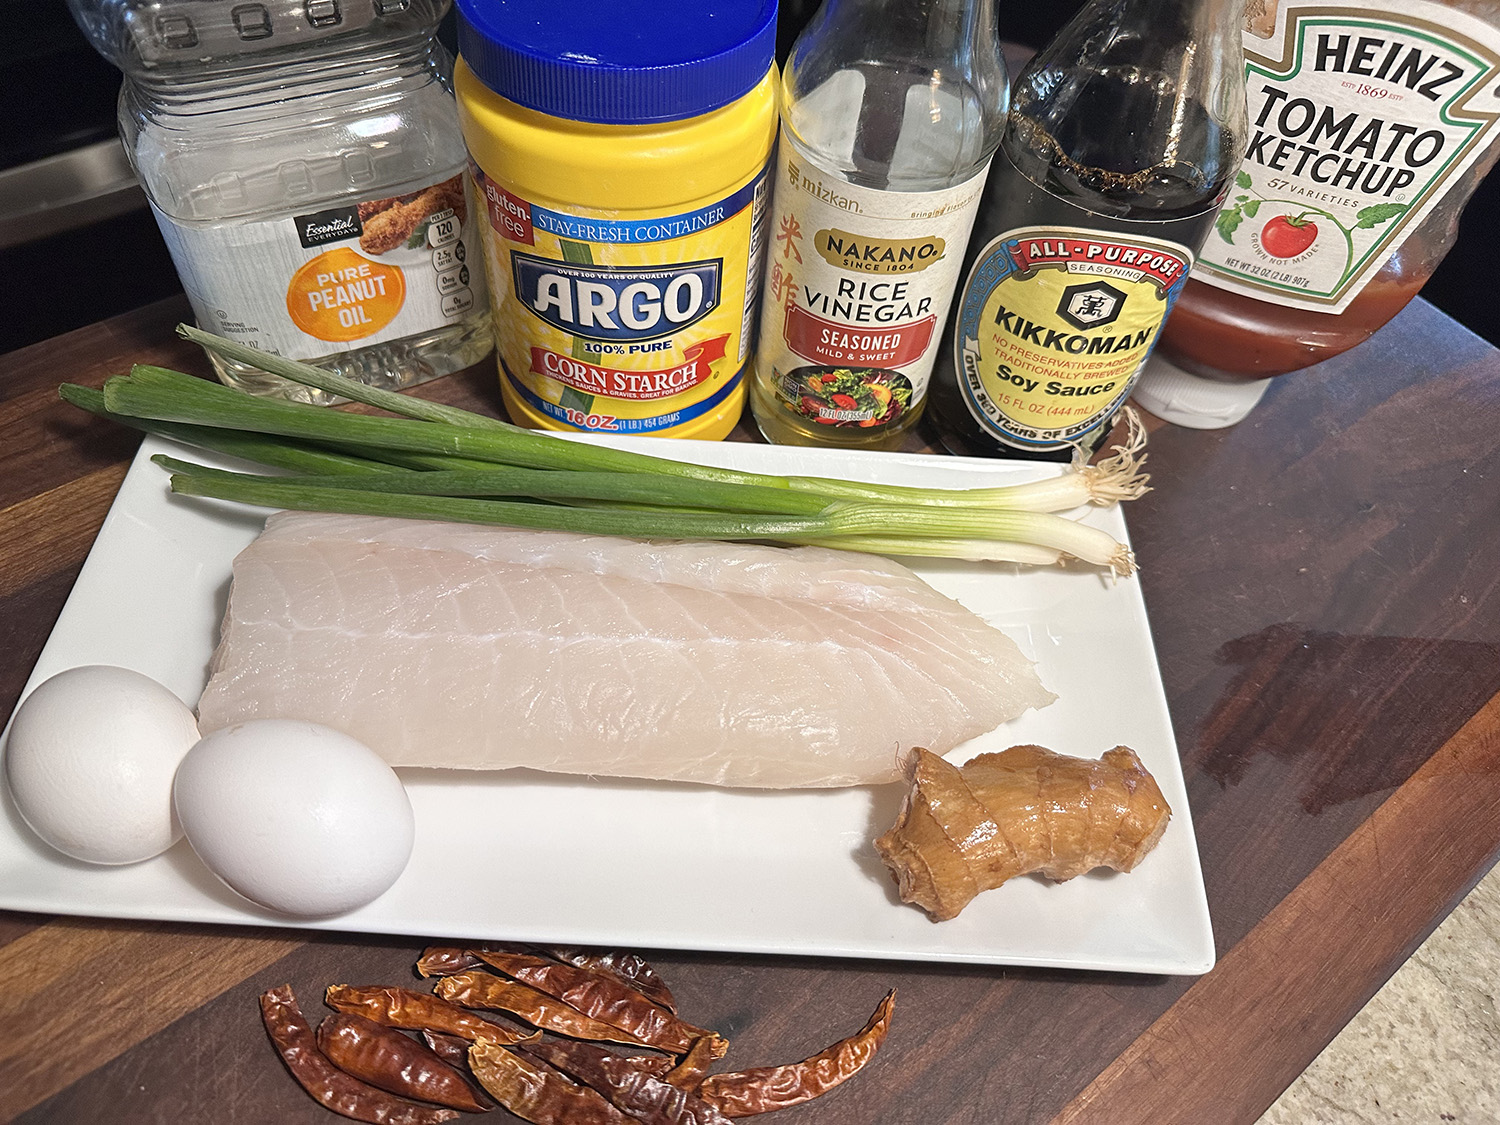
The Sichuan Braised Cod recipe from Fine Cooking makes a for quick and healthy supper, especially when served with a side salad. Only the two of us were sharing the meal so we bought a smaller piece of fish—just over a pound—and cut it into 3 equal sections.
The original recipe instructs you to flip the cooked cod in the sauce a couple of times. Fearing the fish would fall apart as it was flipped, we spooned the sauce over each fillet instead. To keep it pescatarian, we swapped out the chicken broth for homemade shrimp stock. Serve with steamed rice.
4 scallions, thinly sliced, white and green parts separated
1 1⁄2 Tbsp. minced ginger
Directions
in a small bowl, mix the 2 teaspoons cornstarch with 2 tablespoons vinegar. Add the broth, soy sauce and ketchup.
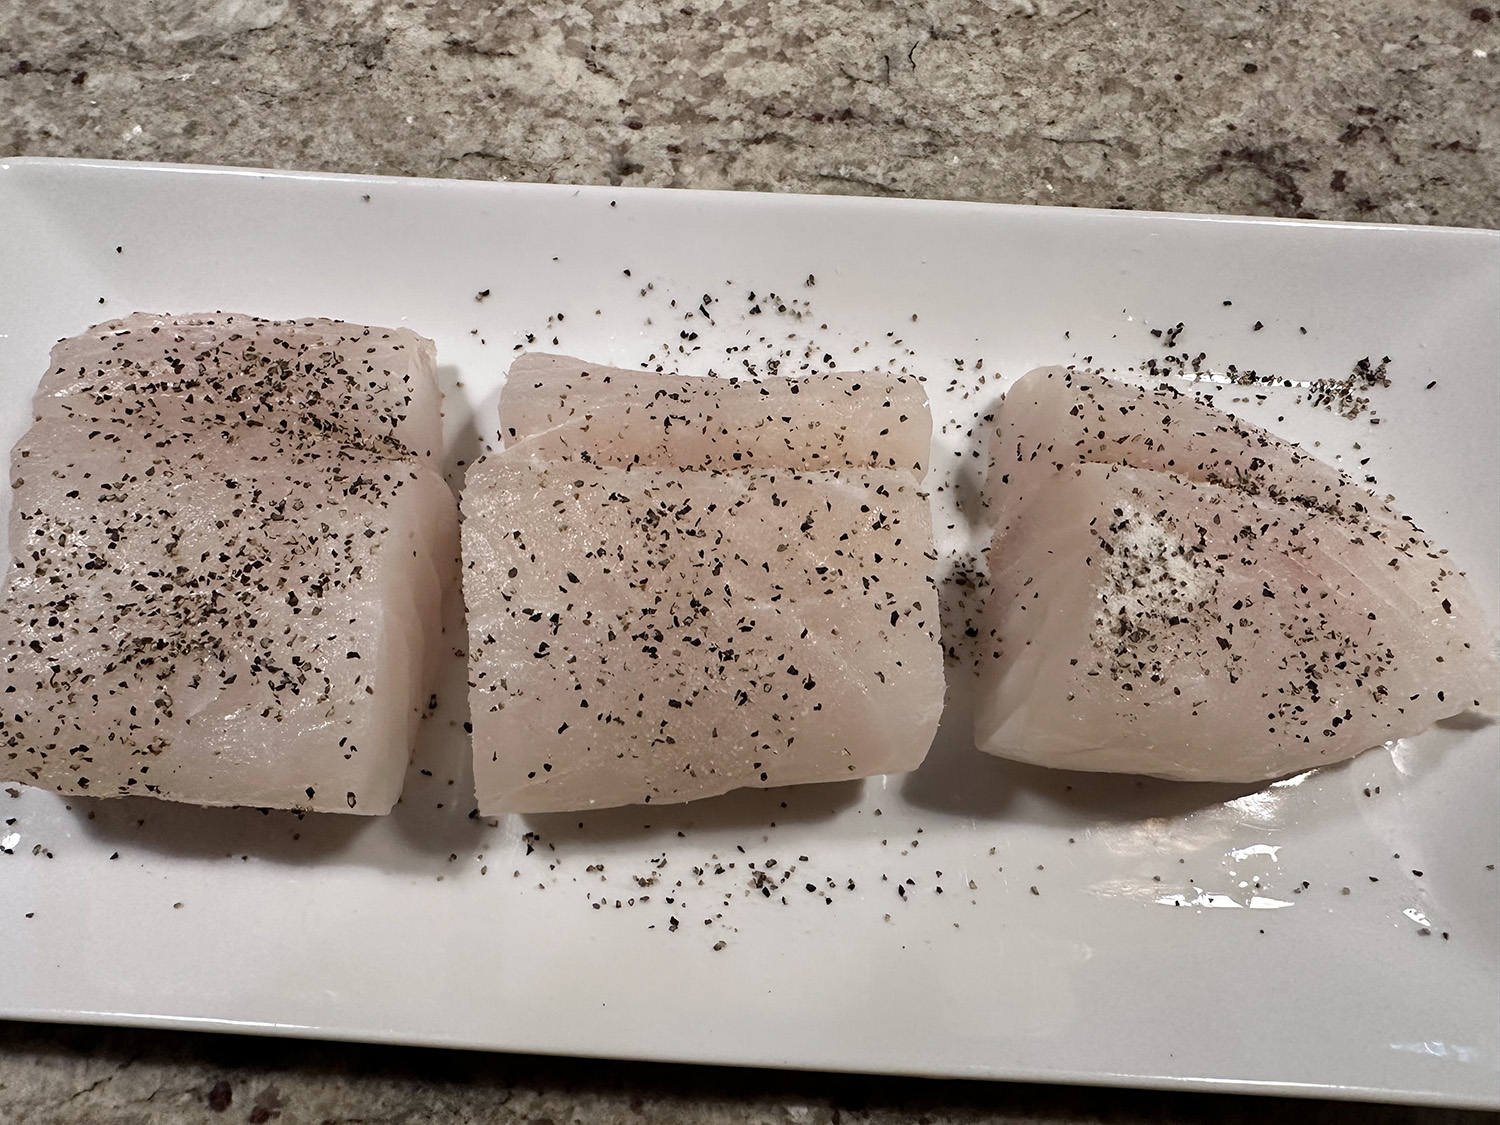
Season the fish with 1/2 teaspoon salt and 1/2 teaspoon pepper.
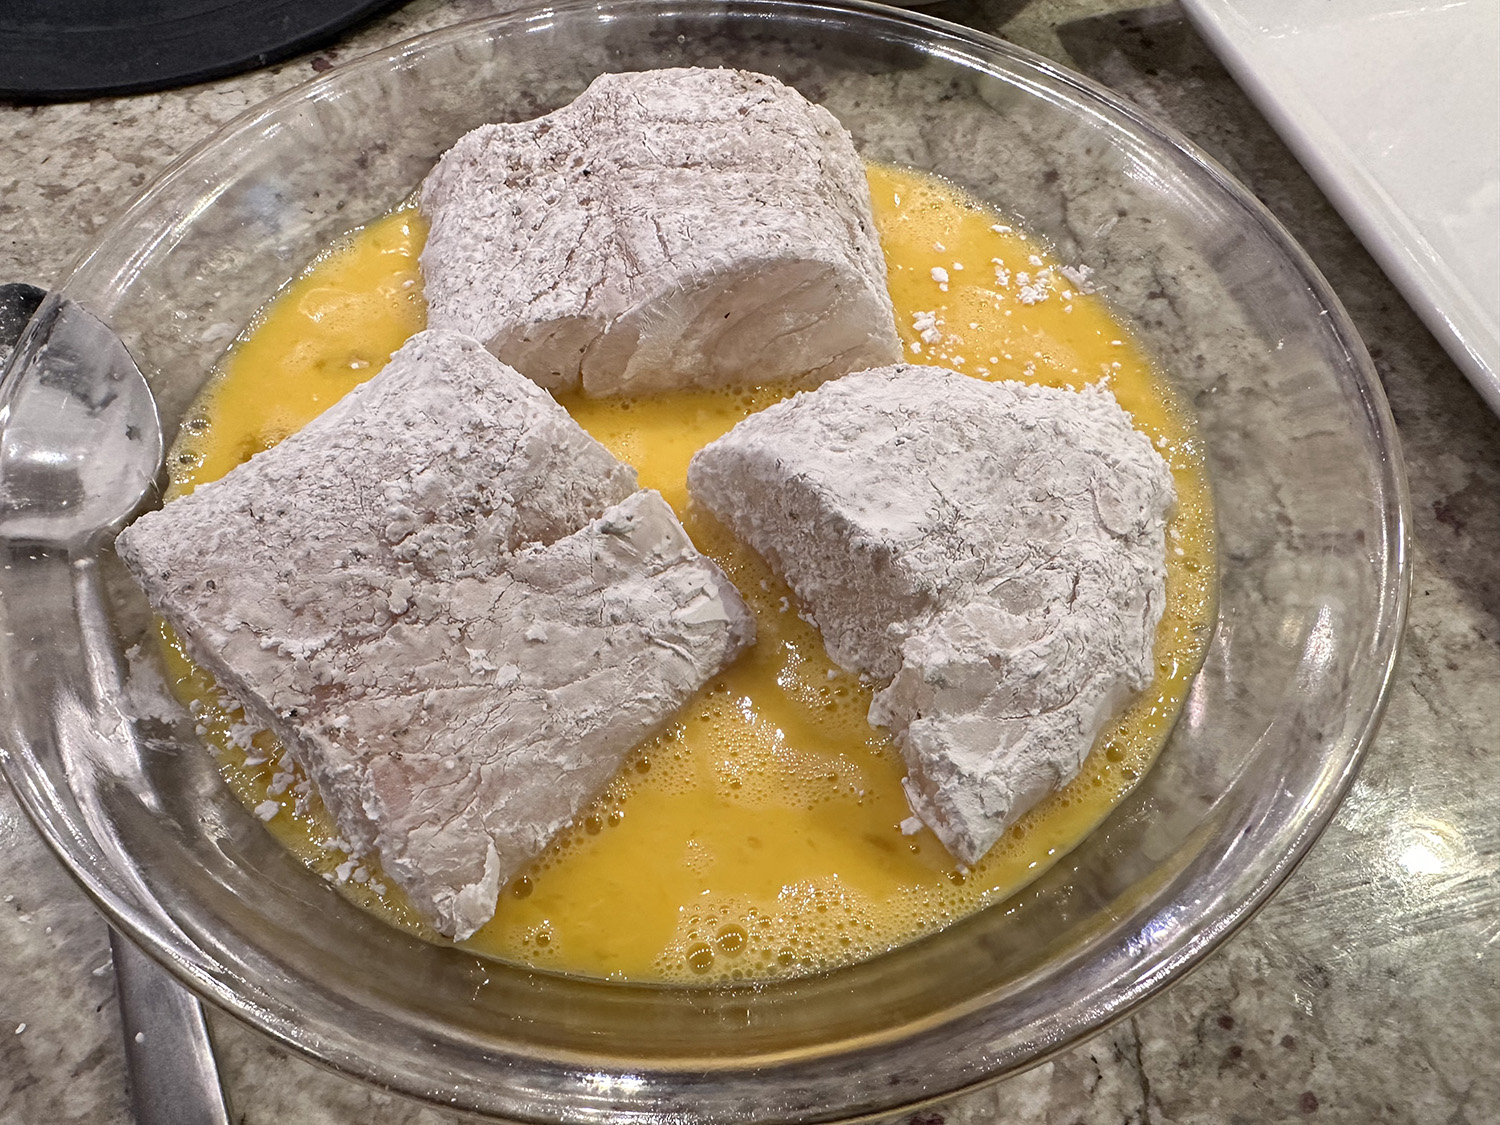
Spread the remaining 1/2 cup cornstarch on a plate, and put the eggs in a wide bowl. Dredge the fish in the cornstarch.
Heat 2 tablespoons oil in a 12-inch non-stick pan over medium-high heat until shimmering hot. Soak the fish in the egg for a couple of seconds, then add to the pan.
Cook, flipping every three minutes, until the cod is browned and a little firm to the touch, about 5 minutes total (it should not be cooked all the way through). Transfer the fish to a large plate.
Add the remaining 1 tablespoon oil to the pan, then add the chiles, white parts of the scallions, and ginger. Cook, stirring until the scallions become translucent and browned in a few places, about 2 minutes.
Give the cornstarch mixture a quick stir and then pour it into the pan. It should come to a boil and thicken quickly. Reduce the heat to medium-low, return the fish to the pan, and spoon the sauce over the fillets a couple of times to coat them in the sauce.
Cover the pan, leaving the lid slightly ajar, and cook until the fish is just cooked through and starting to flake, 3 to 5 minutes.
Taste the sauce for salt and vinegar, adding more to taste if needed. Serve immediately with the sauce spooned over the cod and sprinkled with scallion greens.
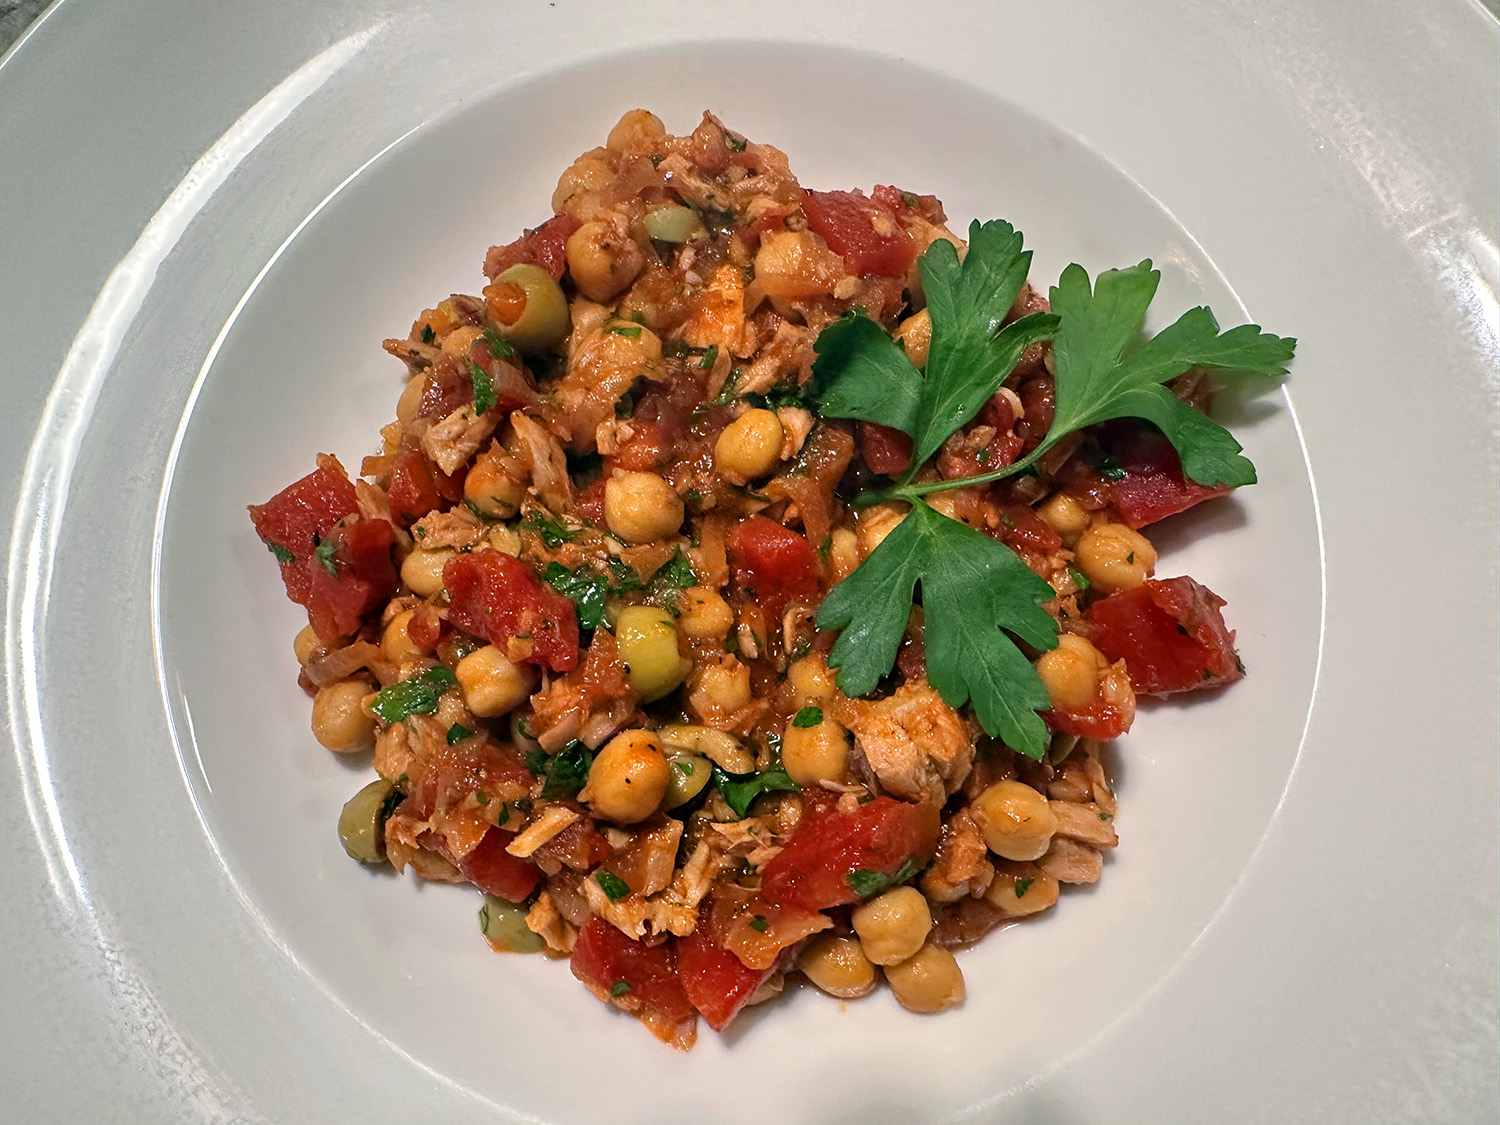
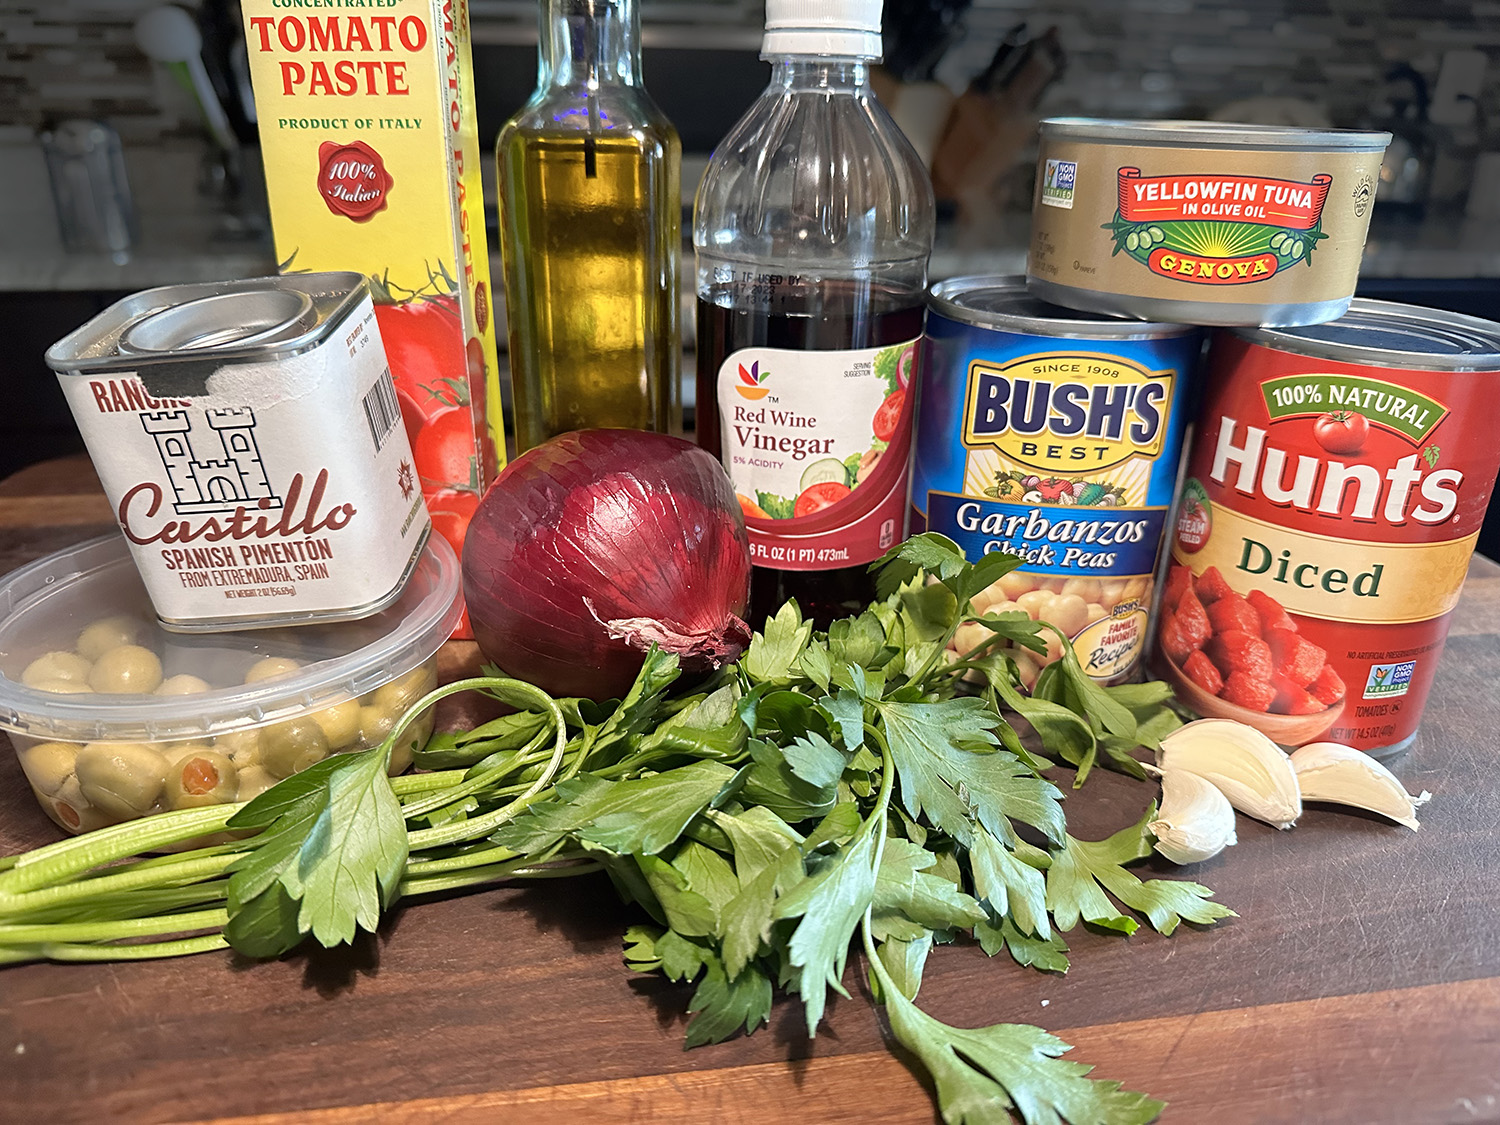
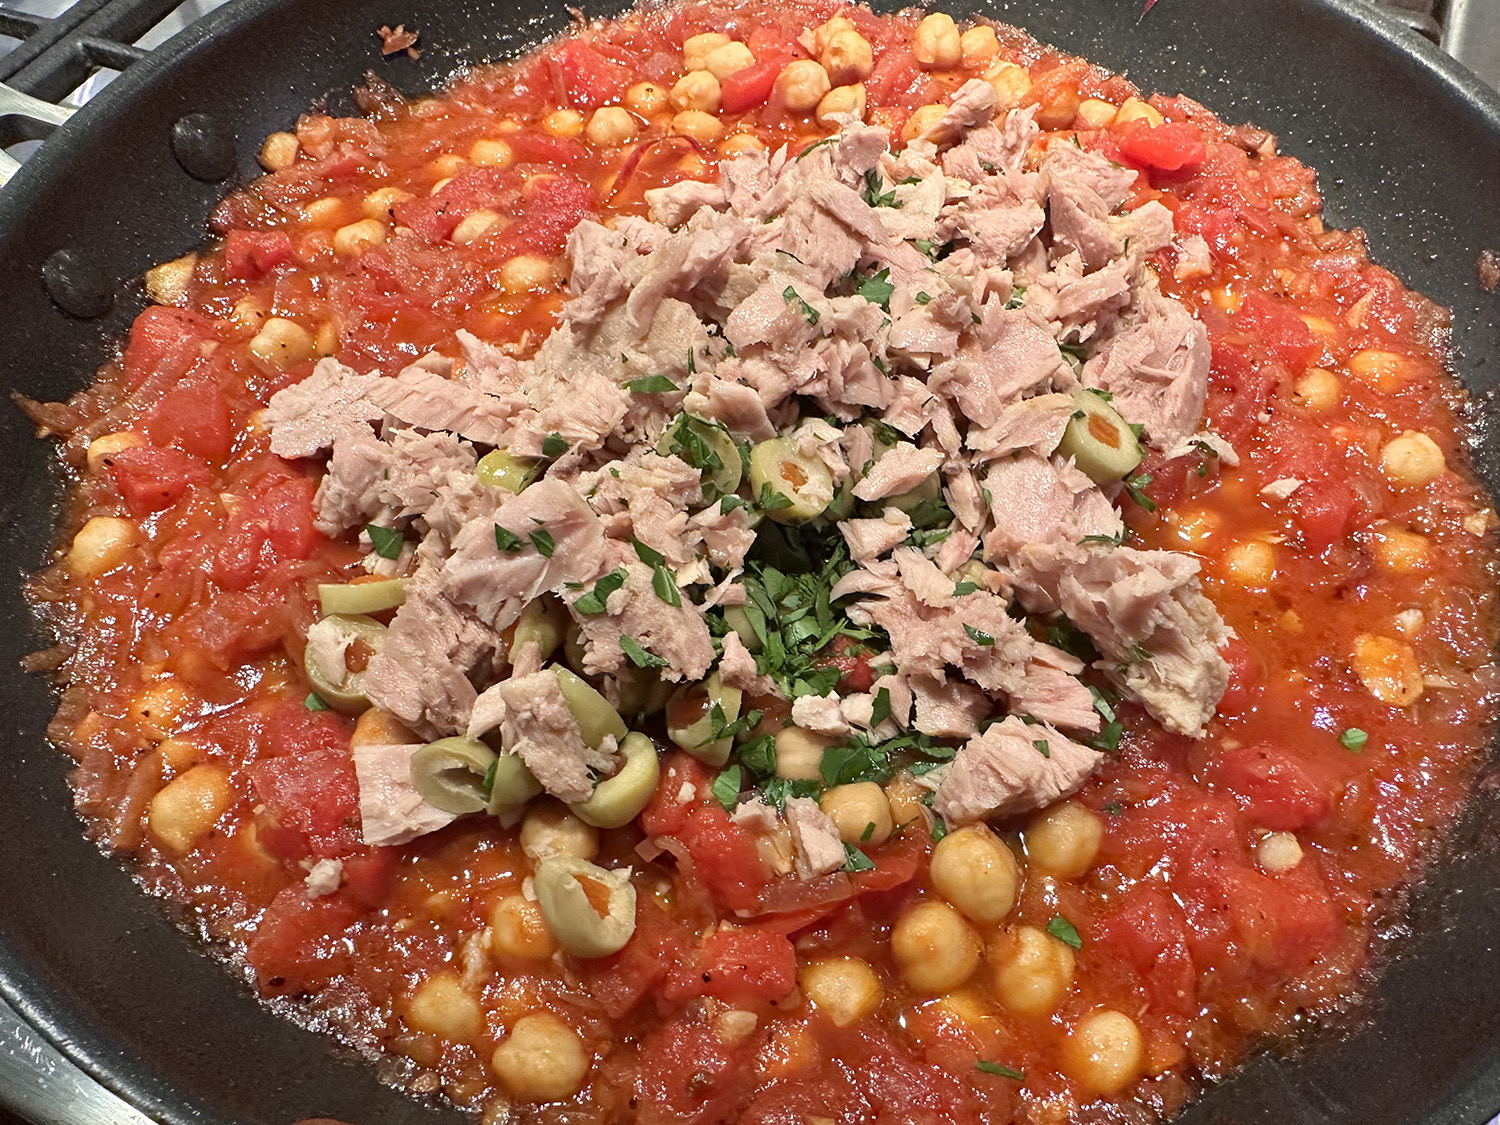
This simple and rustic Spanish recipe shows what a perfect match chickpeas and tuna are. Both ingredients have been eaten and enjoyed together throughout Spain for centuries. In this hearty dish they’re combined in a smoky tomato sauce made with garlic and onion, with a healthy measure of extra virgin olive oil to add depth and texture.
Robust ingredients commonly used in Spanish cooking are added, including sliced stuffed olives and red wine vinegar to heighten, but not overpower, the natural flavors of the other ingredients. The pairing of tuna and chickpeas isn’t only flavorsome, it also makes a very filling and nourishing meal that’s rich in both protein and fiber.
Serve this braise with crusty bread on the side to mop up every last bit of the luscious sauce, but you could also serve it with rice instead. Another accompaniment is crispy, golden pan-fried sliced potatoes, which is kind of like another classic Spanish recipe, Patatas Bravas. You could also use this mixture to stuff a baked potato, as a tasty empanada filling, or even served as a pasta sauce.
A rustic and flavorful Spanish dish of chickpeas cooked in a smoky tomato sauce, with canned tuna, and stuffed olives provided two hefty portions. Easily doubled for more diners. Our initial apprehension of too little tuna, was unfounded. We kept the ingredients the same as the original recipe and it was a perfect balance of flavors and textures.
Variations: Instead of canned chickpeas use white beans, or add some chorizo (cooked with the onion) in place of canned tuna. Serve with rice or potatoes instead of crusty bread.
½ tsp. Spanish smoked paprika (or use 1 tsp. regular paprika)
1 tsp. salt
½ tsp. freshly ground black pepper
14 oz. can chickpeas, rinsed and drained
6 o.z can tuna, drained and broken into chunks
10 pimento-stuffed olives, sliced into thin rounds
1 Tbsp. finely chopped fresh flat-leaf parsley
Directions
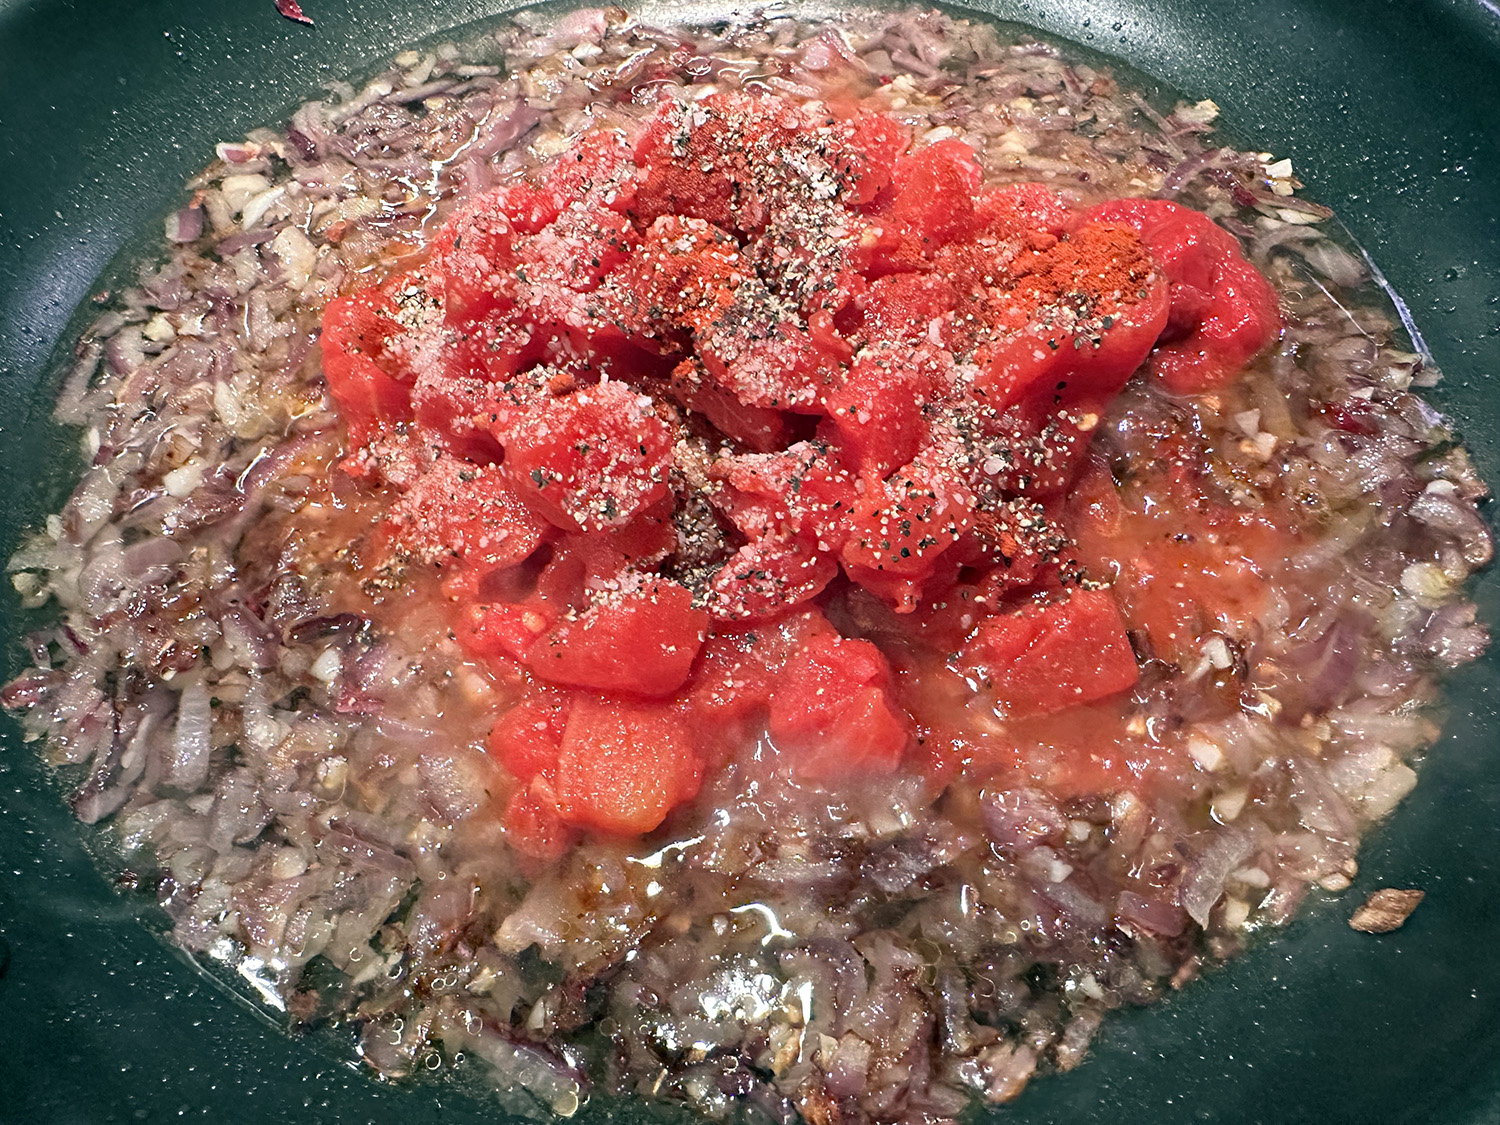
Heat 3 tablespoons of the oil in a frying pan over medium heat and cook the onion for 6 minutes, stirring occasionally.
Add the garlic and cook 2 minutes.
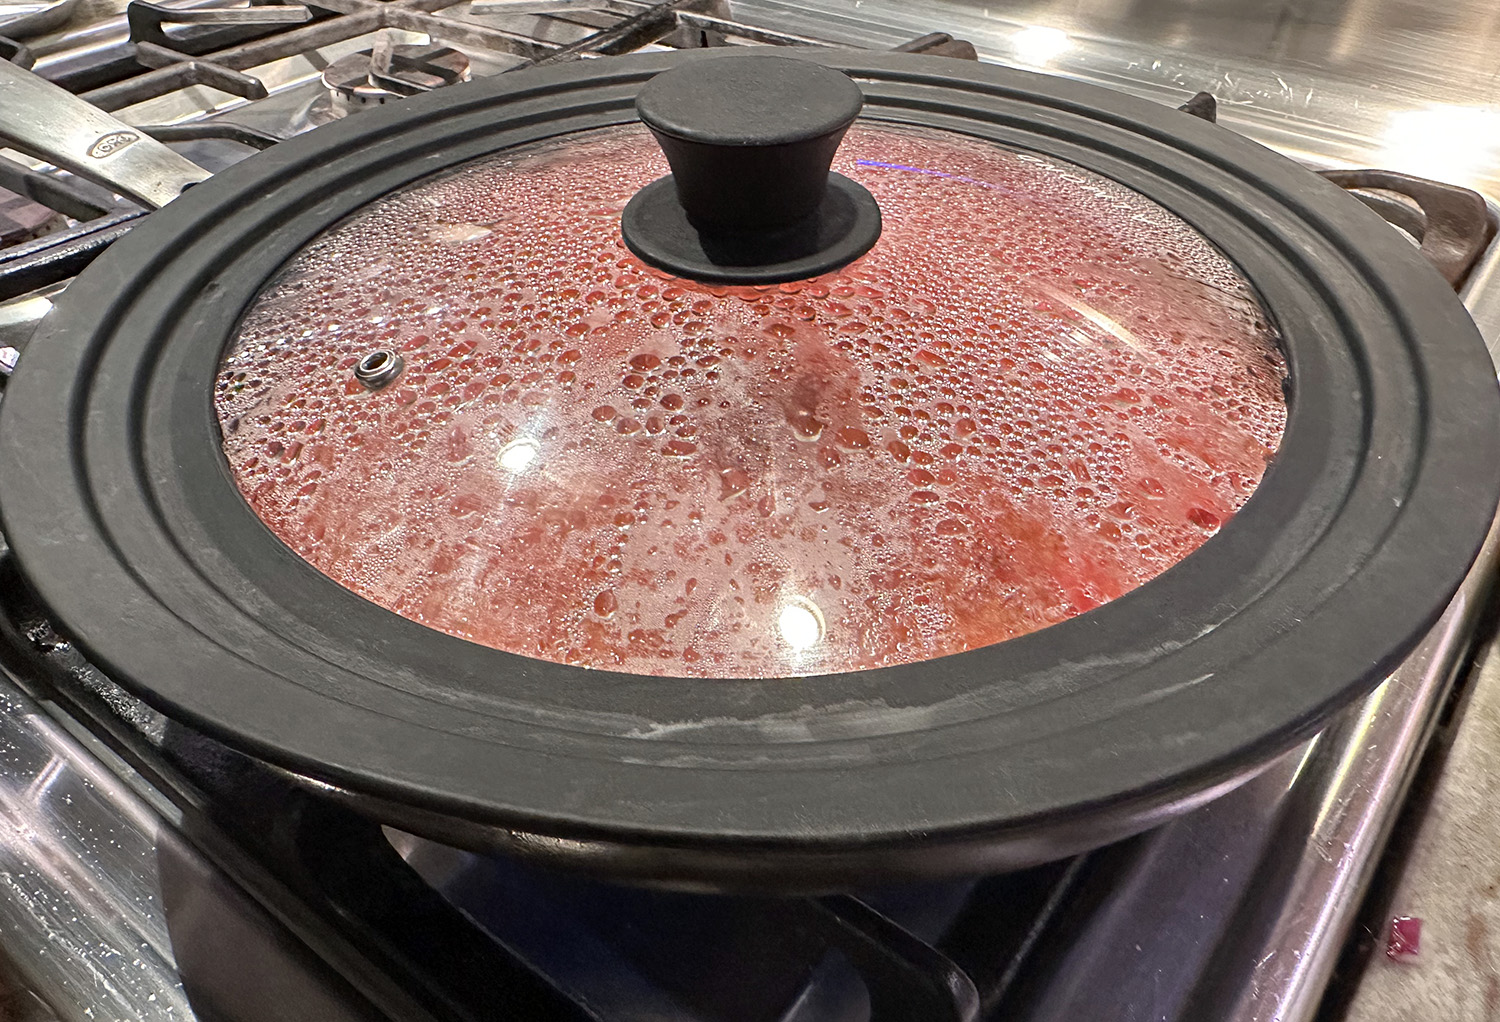
Add the tomatoes, tomato paste, water, vinegar, paprika, salt and pepper. INCREASE the heat to high and bring to a boil, then cover with a lid, reduce the heat and simmer for 10 minutes.
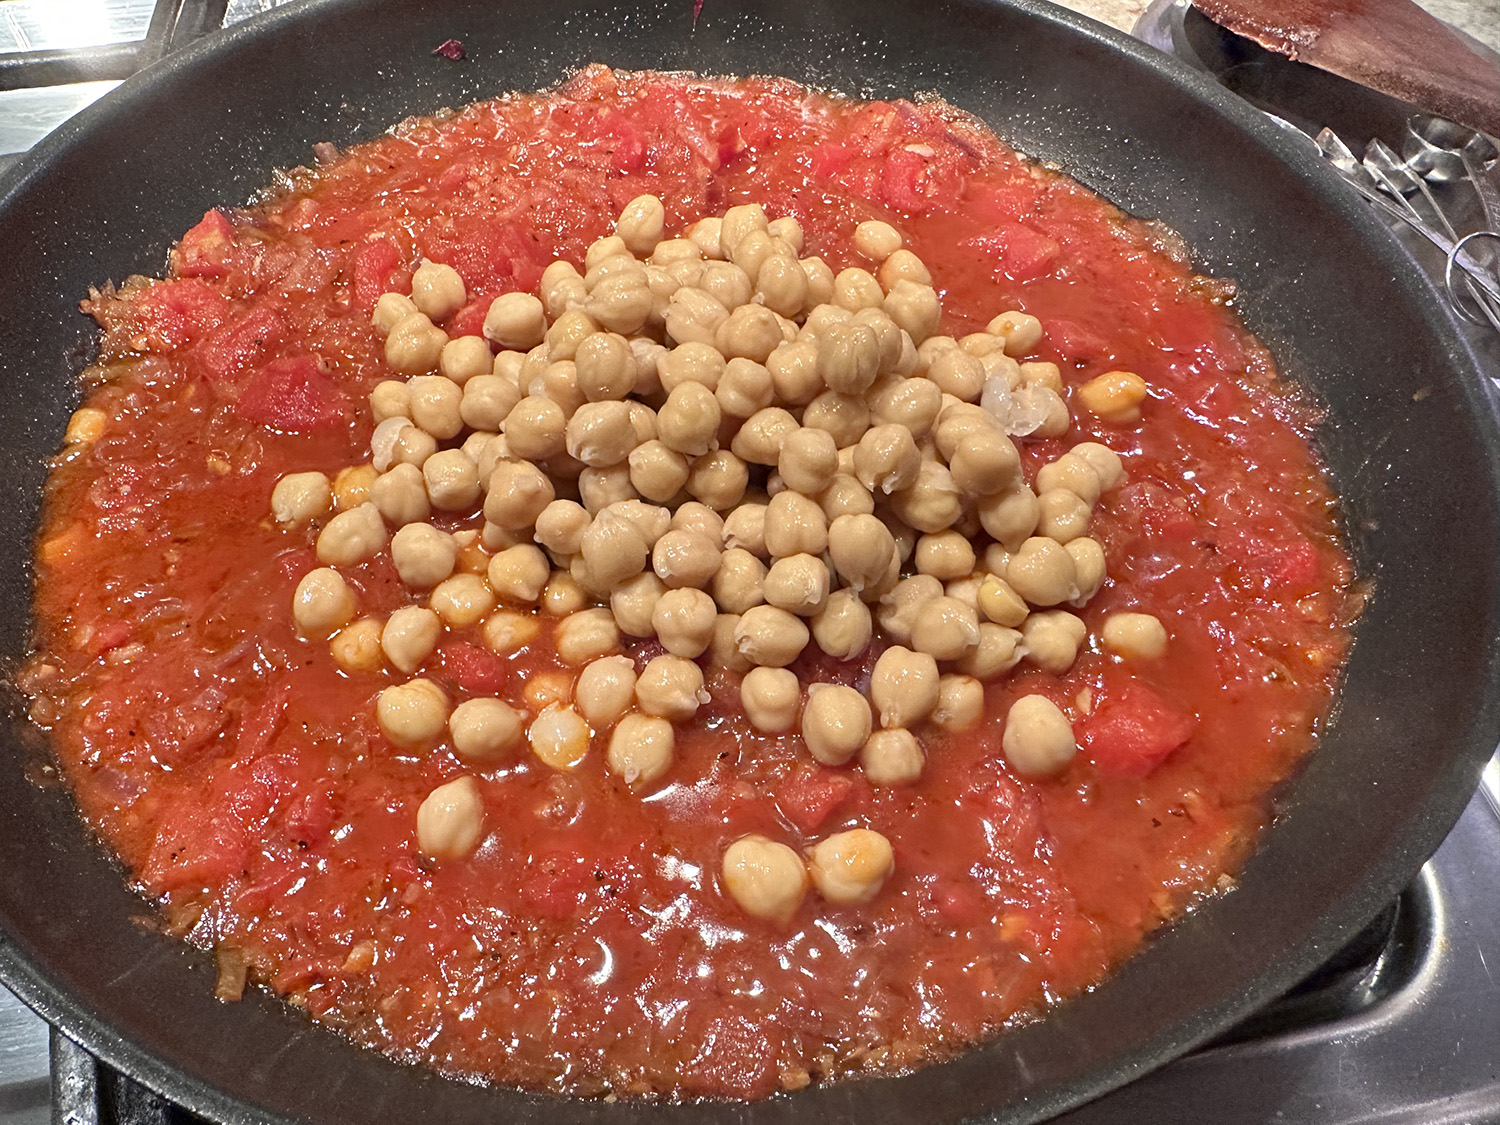
Add the chickpeas, stir to combine, cover and simmer for 10 minutes, stirring occasionally.
Stir in the tuna, olives, parsley and reserved tablespoon of oil.
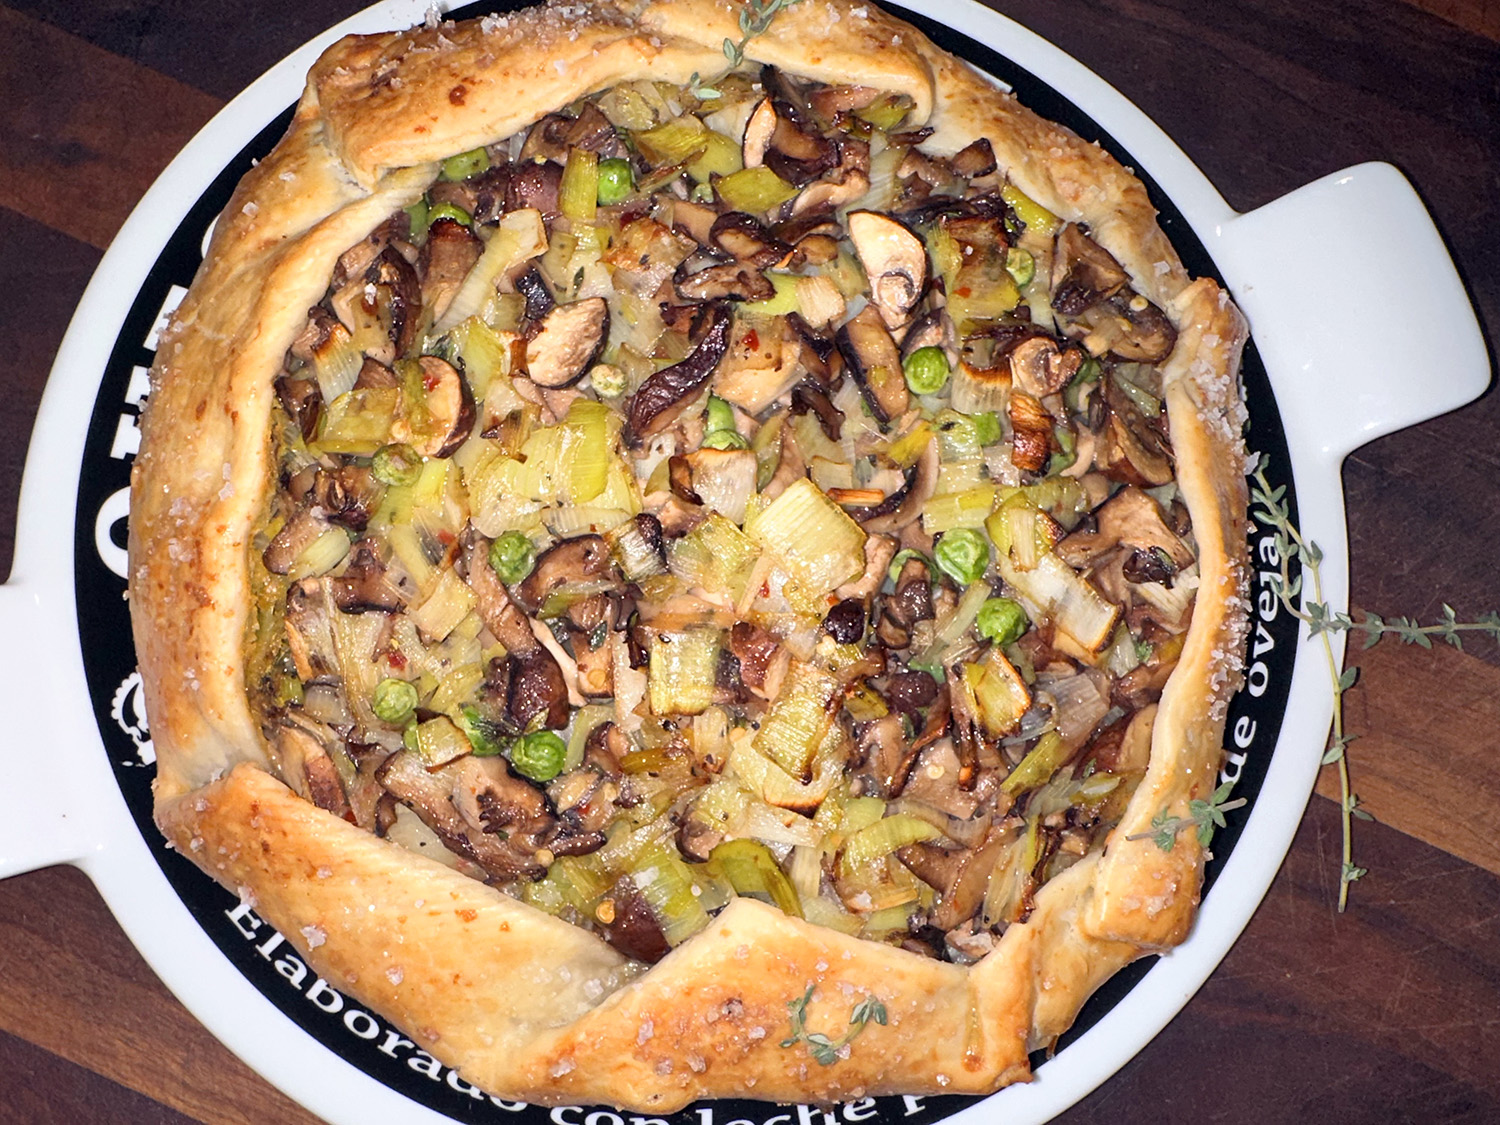
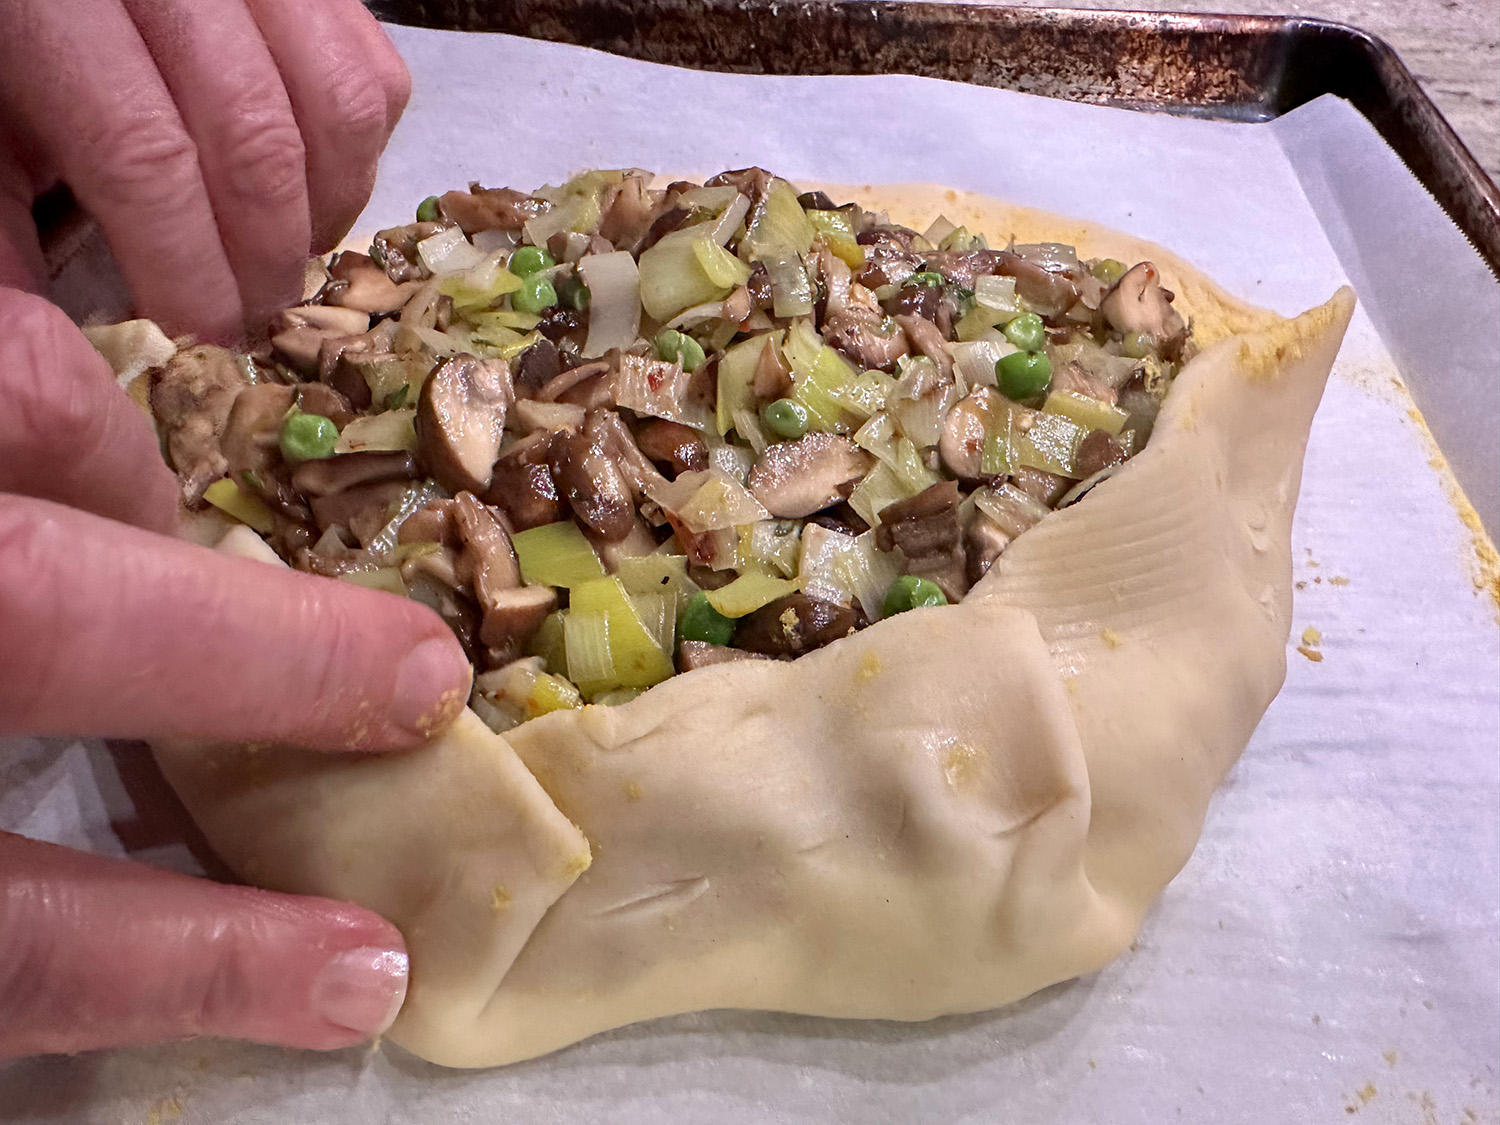
Made with pie crust and a handful of fresh ingredients, this SavoryMushroom Galette with Leeks is a delicious vegetarian dish that’s perfect served for dinner (with your favorite salad) or as an appetizer for a small crowd. Making this savory galette is super simple and requires no pie pan or any special equipment.
While you can use any type of mushrooms for this galette, baby portobello and cremini are two great choices—and it was what we used. If you can, add more than one type of mushroom for a depth in flavor. And if you are feeling a bit adventurous, feel free to switch up the filling by adding some caramelized onions, spinach, kale, or even small broccoli florets. Personally, we thought it was great as is!
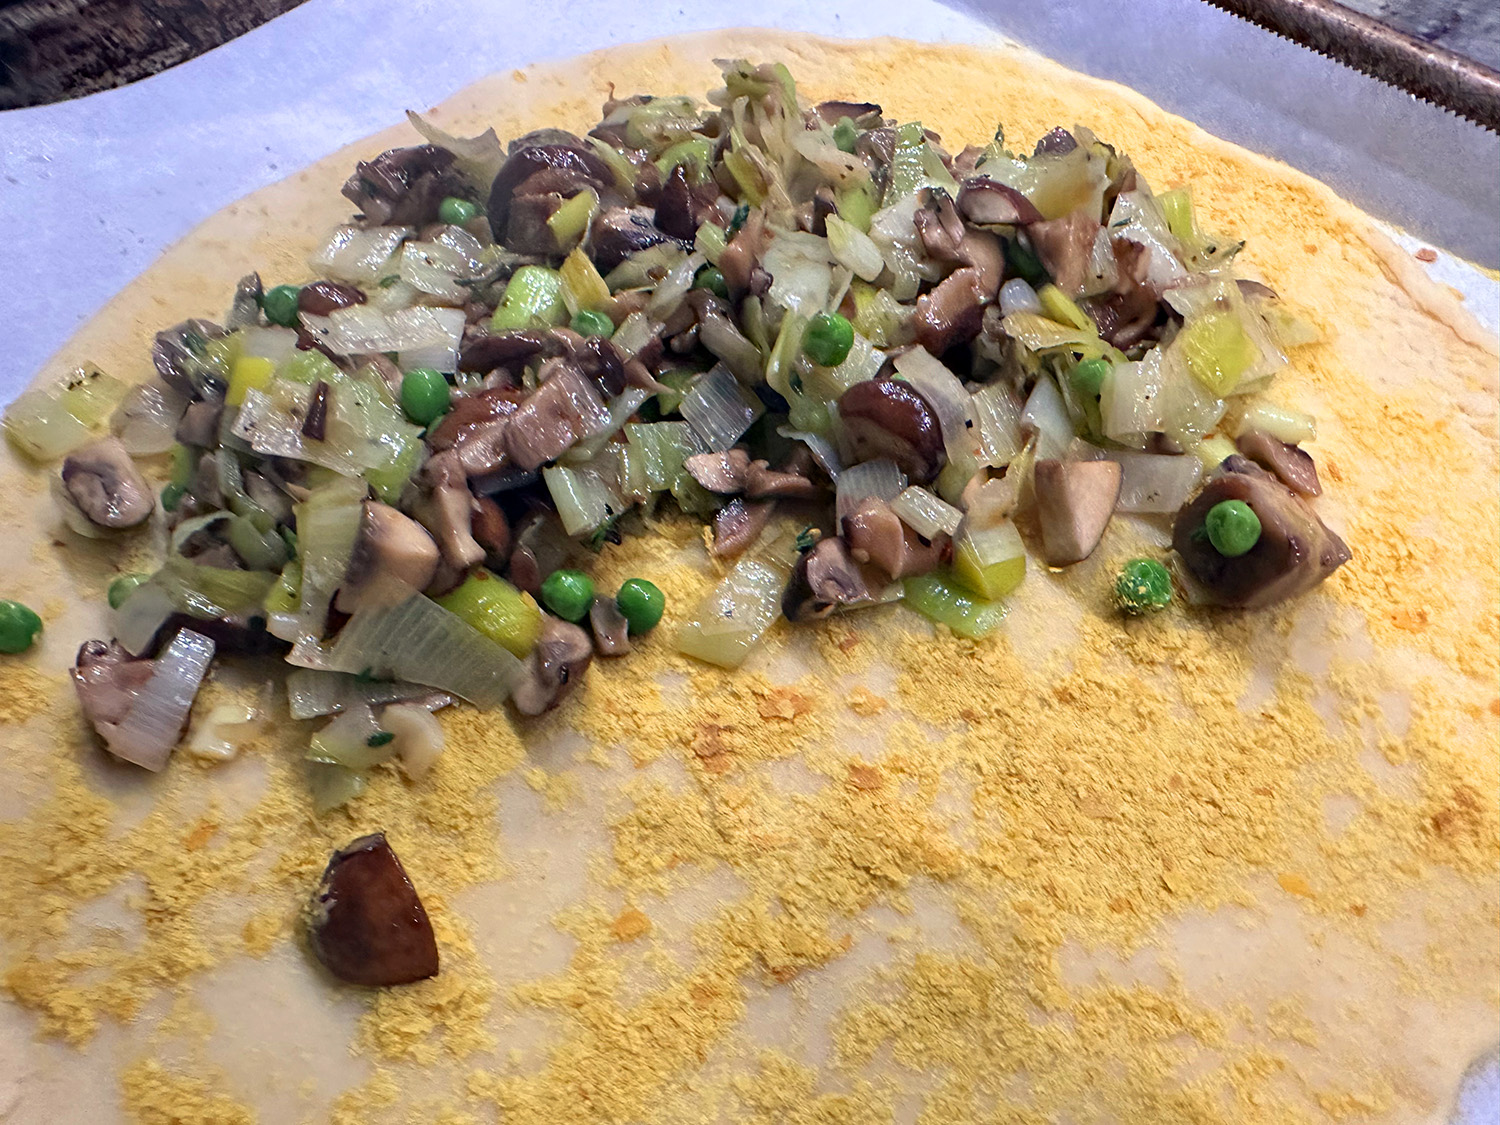
When folding the crust over, remember that you’re just creating a little edge and the center filling should be visible. With the filling on the pie dough, be sure to leave an edge of 1″ or so without any filling, to later fold the dough over. Be sure to spread the filling evenly as well for better baking.
Nutritional yeast was new to me (but not The Hubs). It, affectionately called “nooch” is a deactivated form of Saccharomyces cerevisiae, commonly known as baker’s or brewer’s yeast. The key word here is deactivated. Don’t try putting nutritional yeast in your next loaf of bread—it won’t make it rise! This funky, flaky yellow powder seems like a totally out-there ingredient, but today, it is used for making “cheesy” vegan sauces and dips, punching up popcorn, and adding savory flavor to soups, scrambles, and more. Who knew?
But the reasons to eat nooch go beyond its health benefits. Its flavor is nutty and savory, making it a delicious addition to all sorts of dishes. Most often, it’s used to add cheesy flavor to plant-based recipes like Vegan Mac and Cheese, creating the umami that Parmesan or cheddar cheese would add.
Between the two of us, we ate 3/4 of the galette with a side salad for dinner. If going to make as an appetizer, we suggest cutting the filling ingredients in half, otherwise it will be a bit wonky to try to eat.
1 large leek (or two medium leeks, white parts only, finely chopped, about 3 cups)
Kosher salt and black pepper
½ tsp. dried red pepper flakes
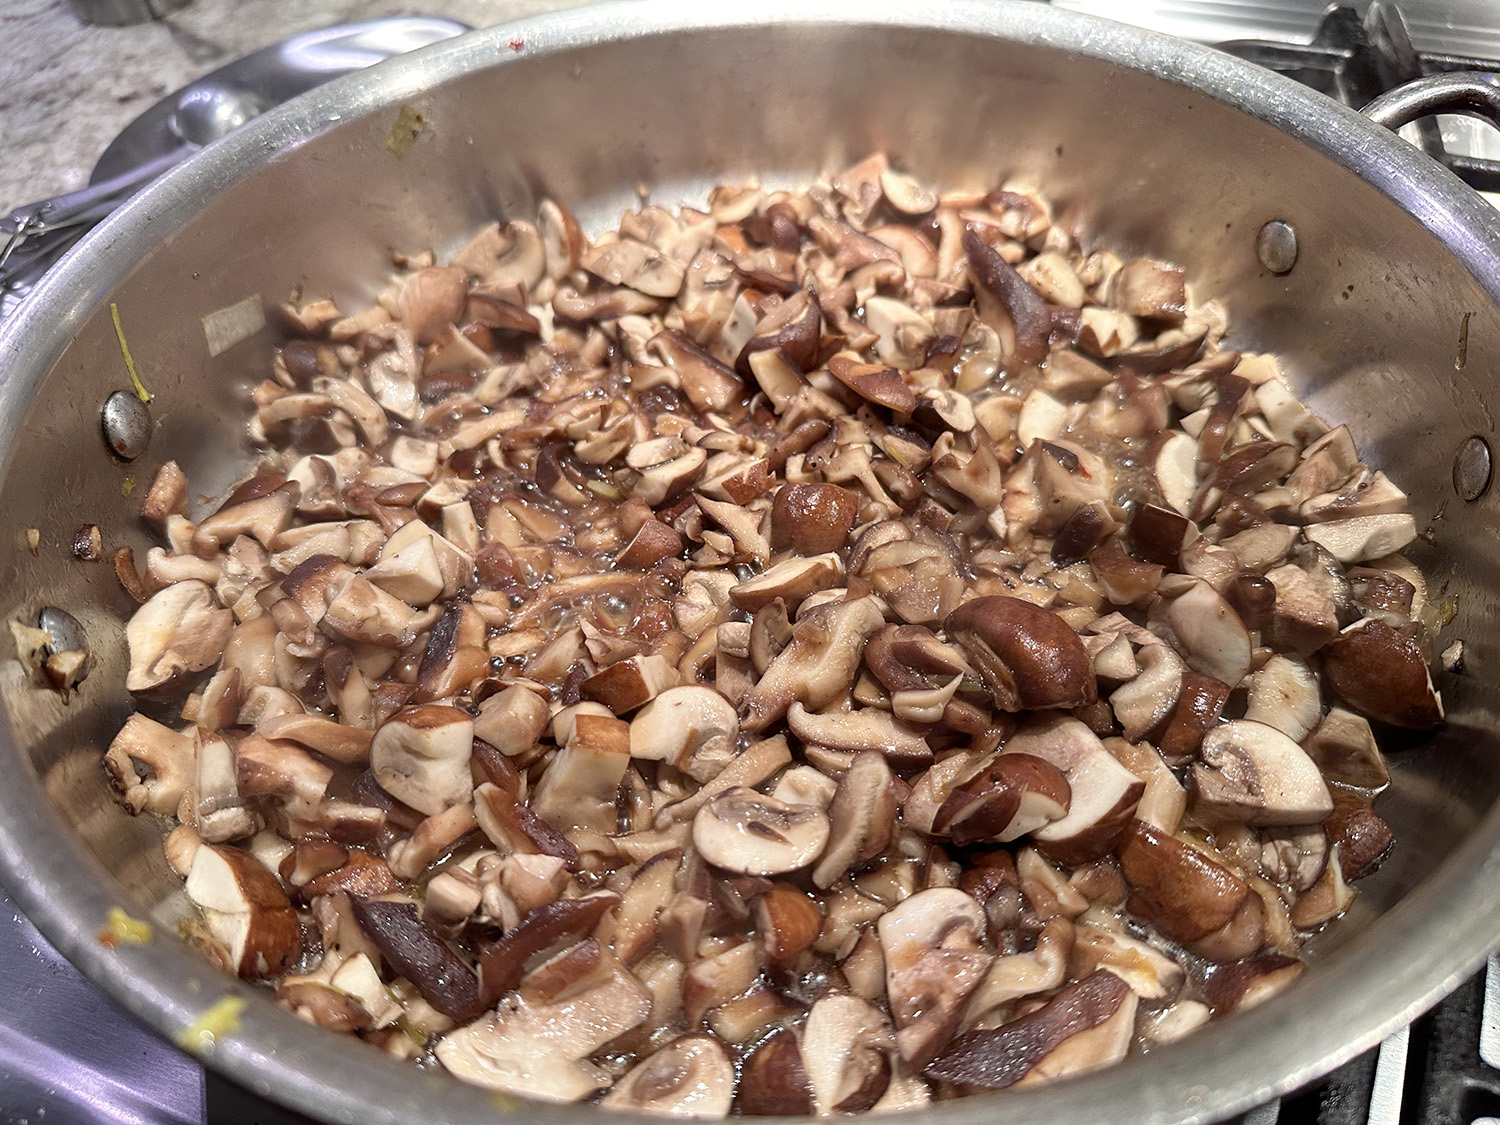
1 lb. mushrooms (any kind, stemmed, cleaned, and roughly chopped, about 7 cups)
3 fresh thyme sprigs, leaves only
⅓ cup frozen peas
9-inch pie dough round (store bought is fine)
1 Tbsp. nutritional yeast
1 large egg (whisked)
Flaky sea salt for sprinkling
Directions
Preheat the oven to 425°F. Line a sheet pan with parchment paper
In a large skillet over medium heat, combine 3 tablespoon of olive oil, the leeks, salt, pepper, and red pepper flakes. Cook, stirring occasionally, until the leeks are soft, about 4 minutes.
Push the leeks to the perimeter of the pan, then add the remaining 1 tablespoon olive oil and the mushrooms. Cook until the mushrooms have given off their juices and then shriveled, about 10 minutes, leaving the leeks on the perimeter.
Stir in the thyme and peas and cook another minute, folding in the leeks.
Place the pie dough on the prepared sheet pan and sprinkle the nutritional yeast all over it, pressing the flakes into the dough with your fingers or a rolling pin
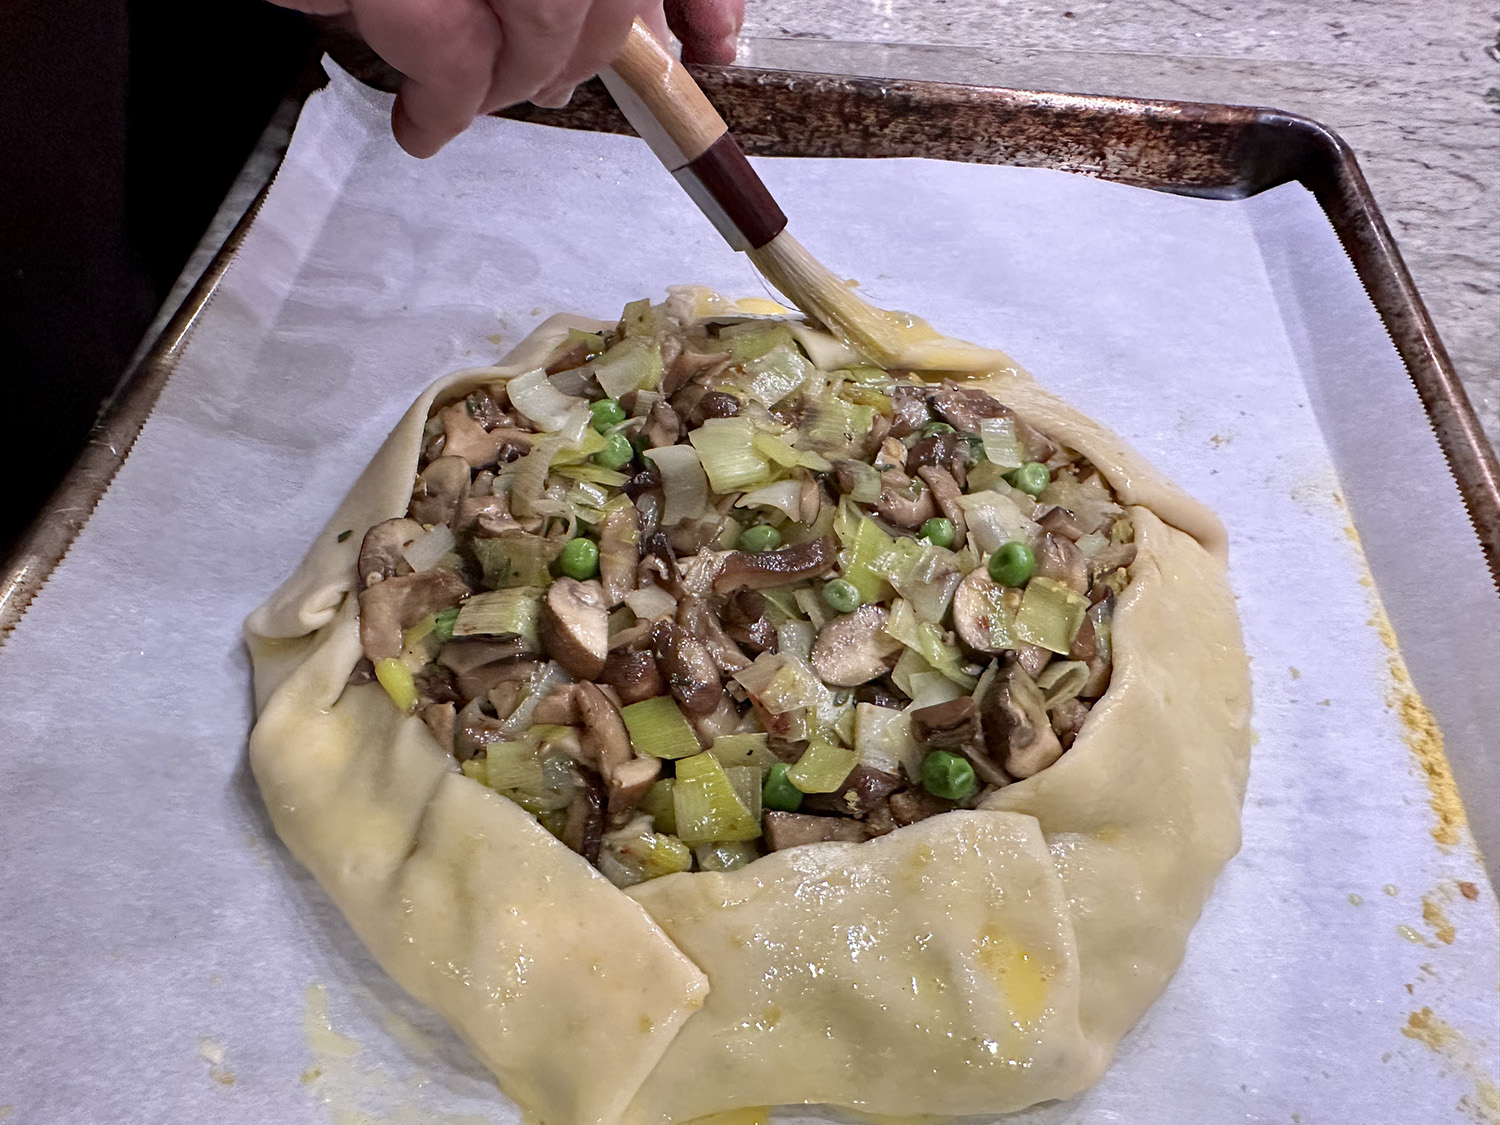
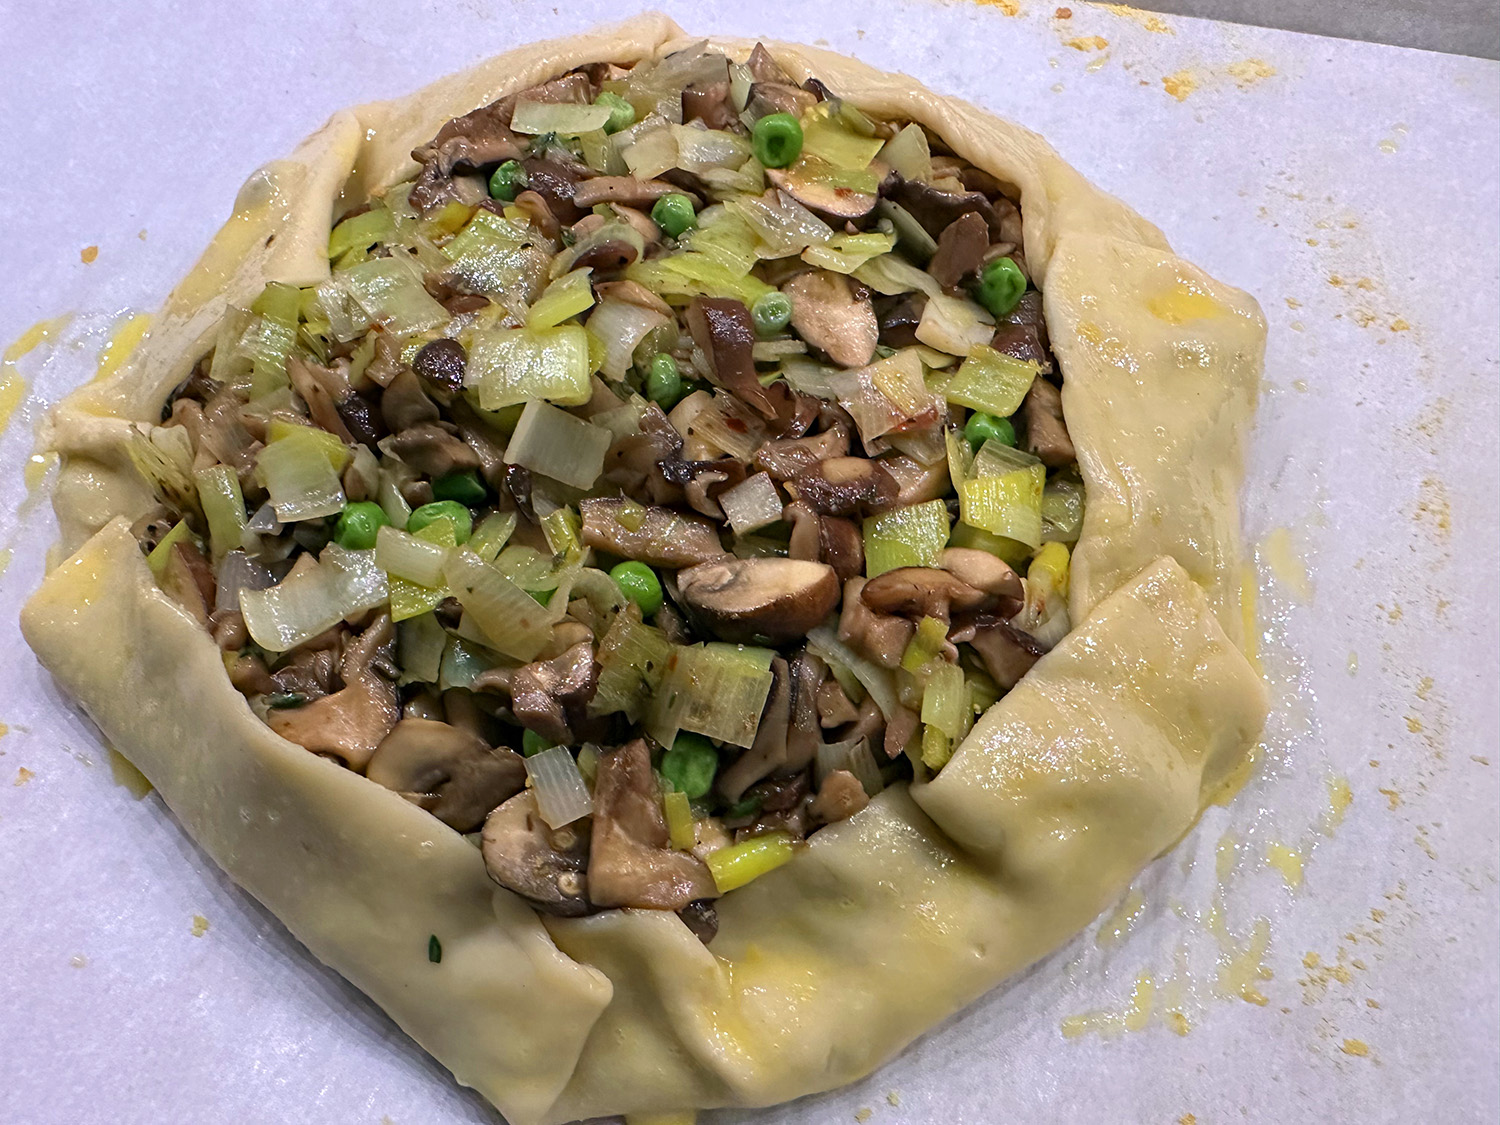
Spoon the mushroom-leek filling into the center, spreading it in an even layer and leaving a 1-inch border, then folding the edges over the filling, overlapping aa sou work your way around the perimeter.
Brush the dough with the whisked egg and sprinkle with the sea salt.
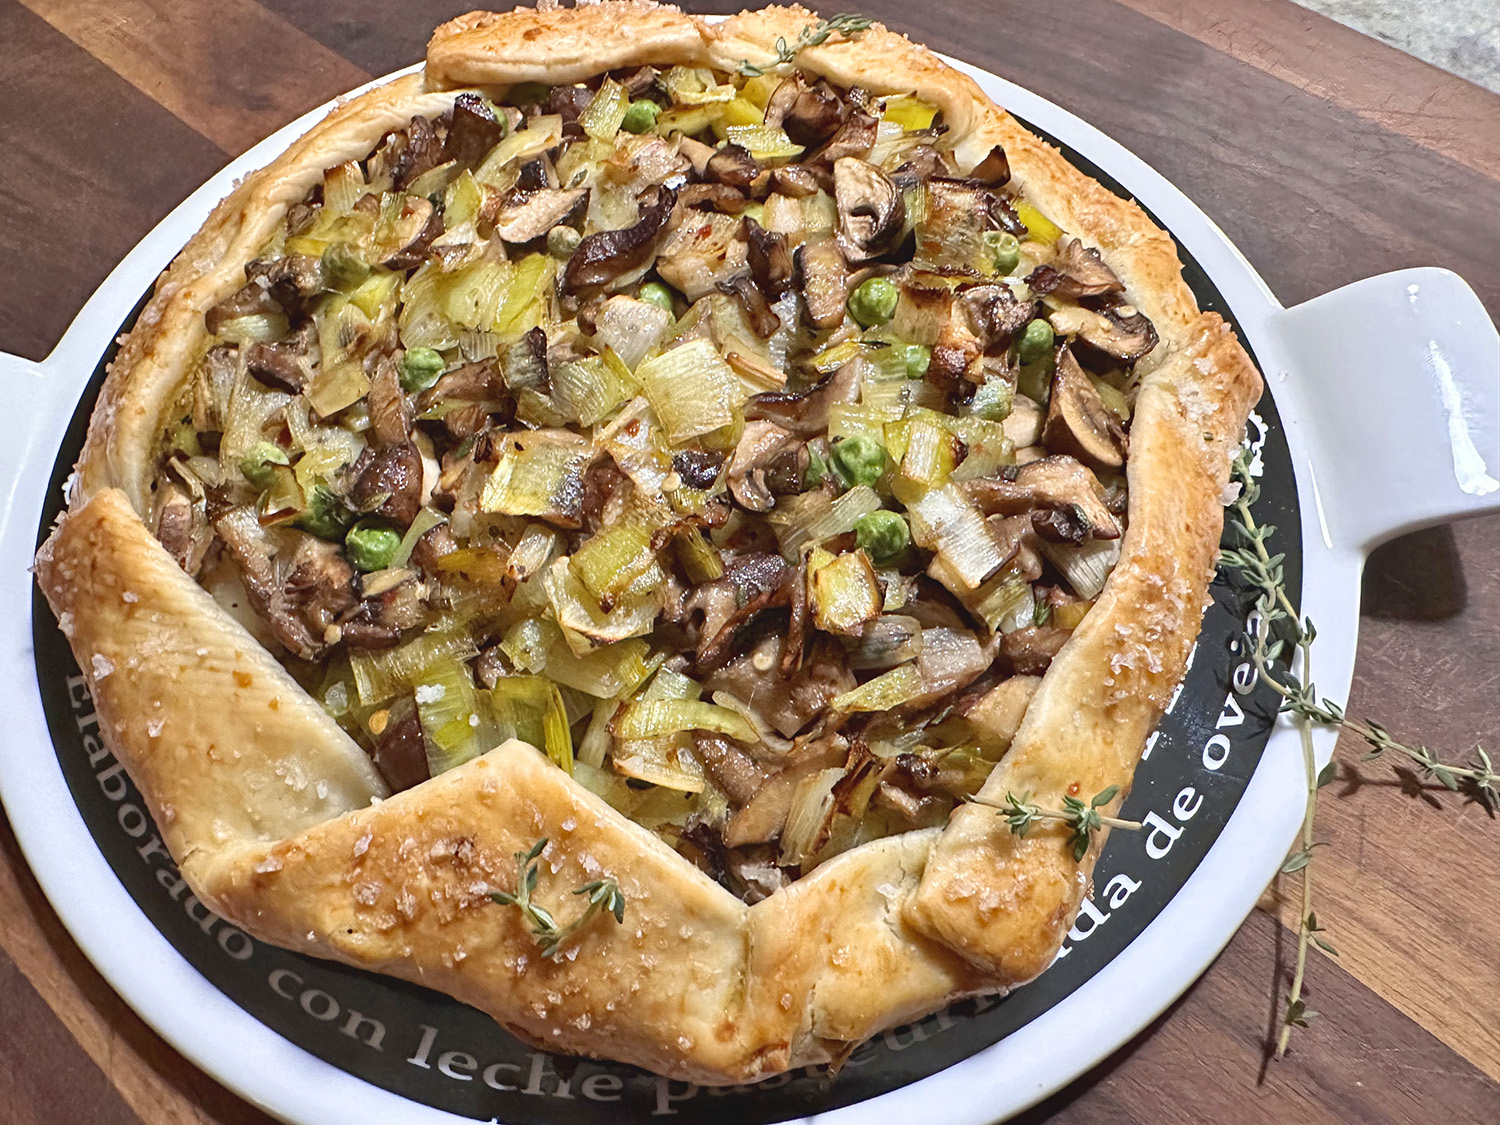
Bake in the heated oven until the crust is golden, 20 to 25 minutes.
Let cool about 5 minutes and then cut into 8 slices. Serve immediately.
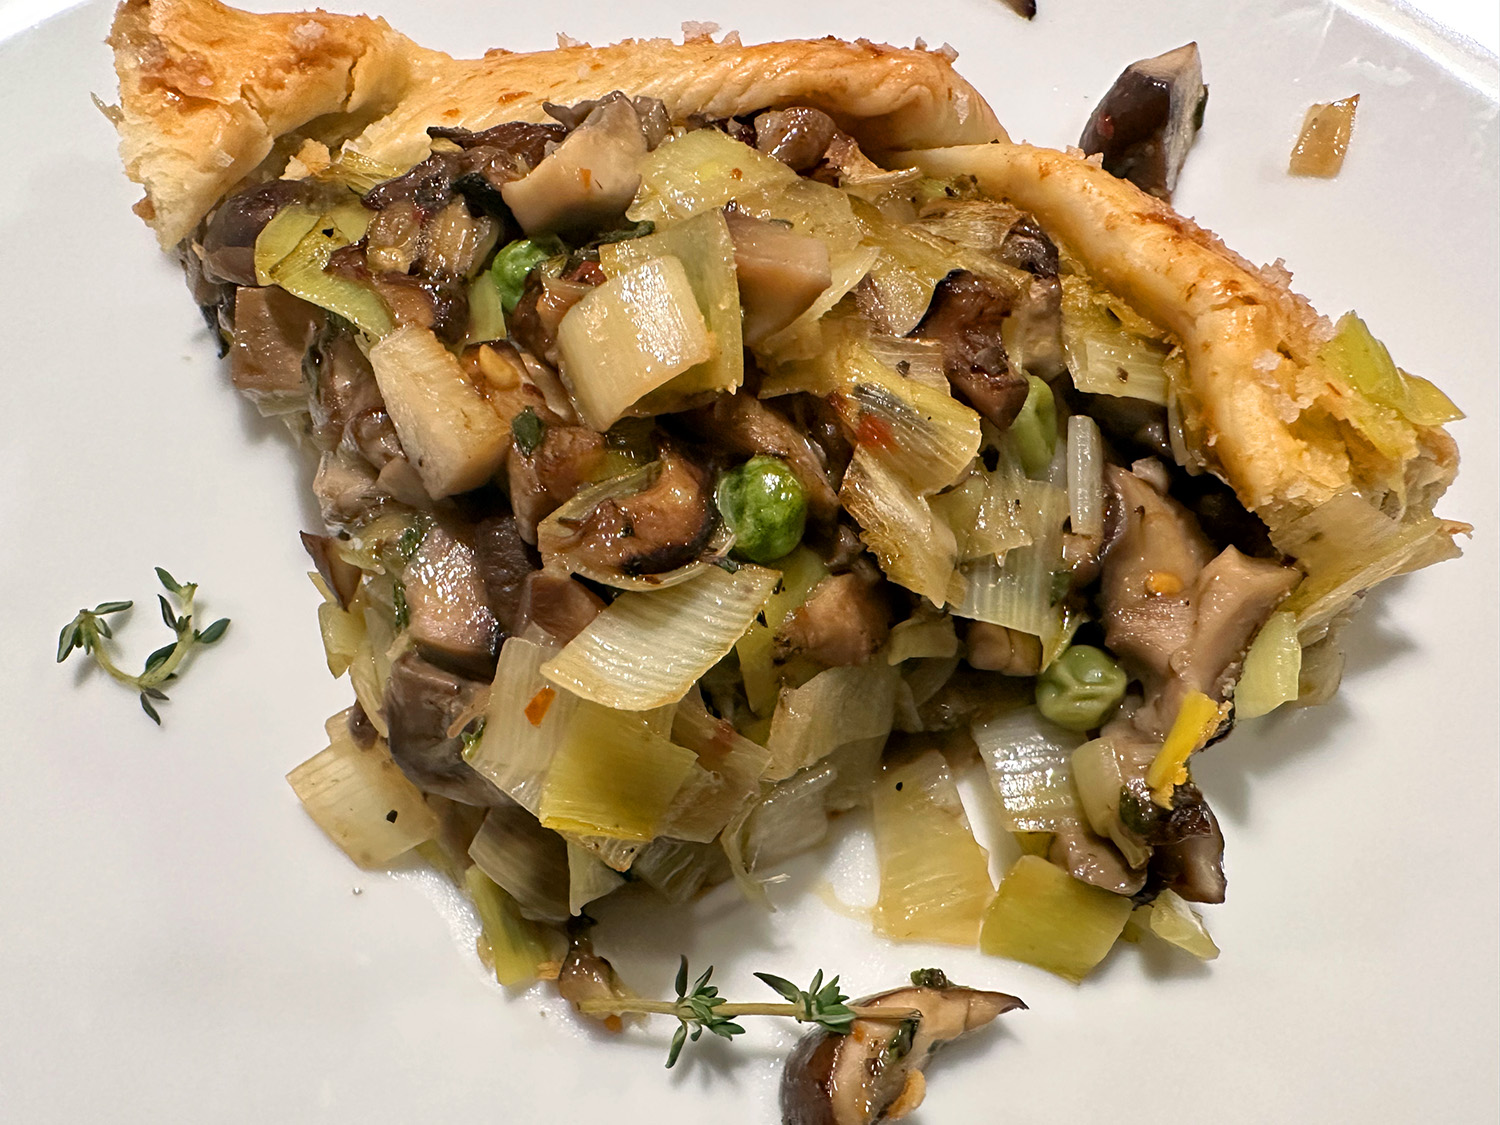
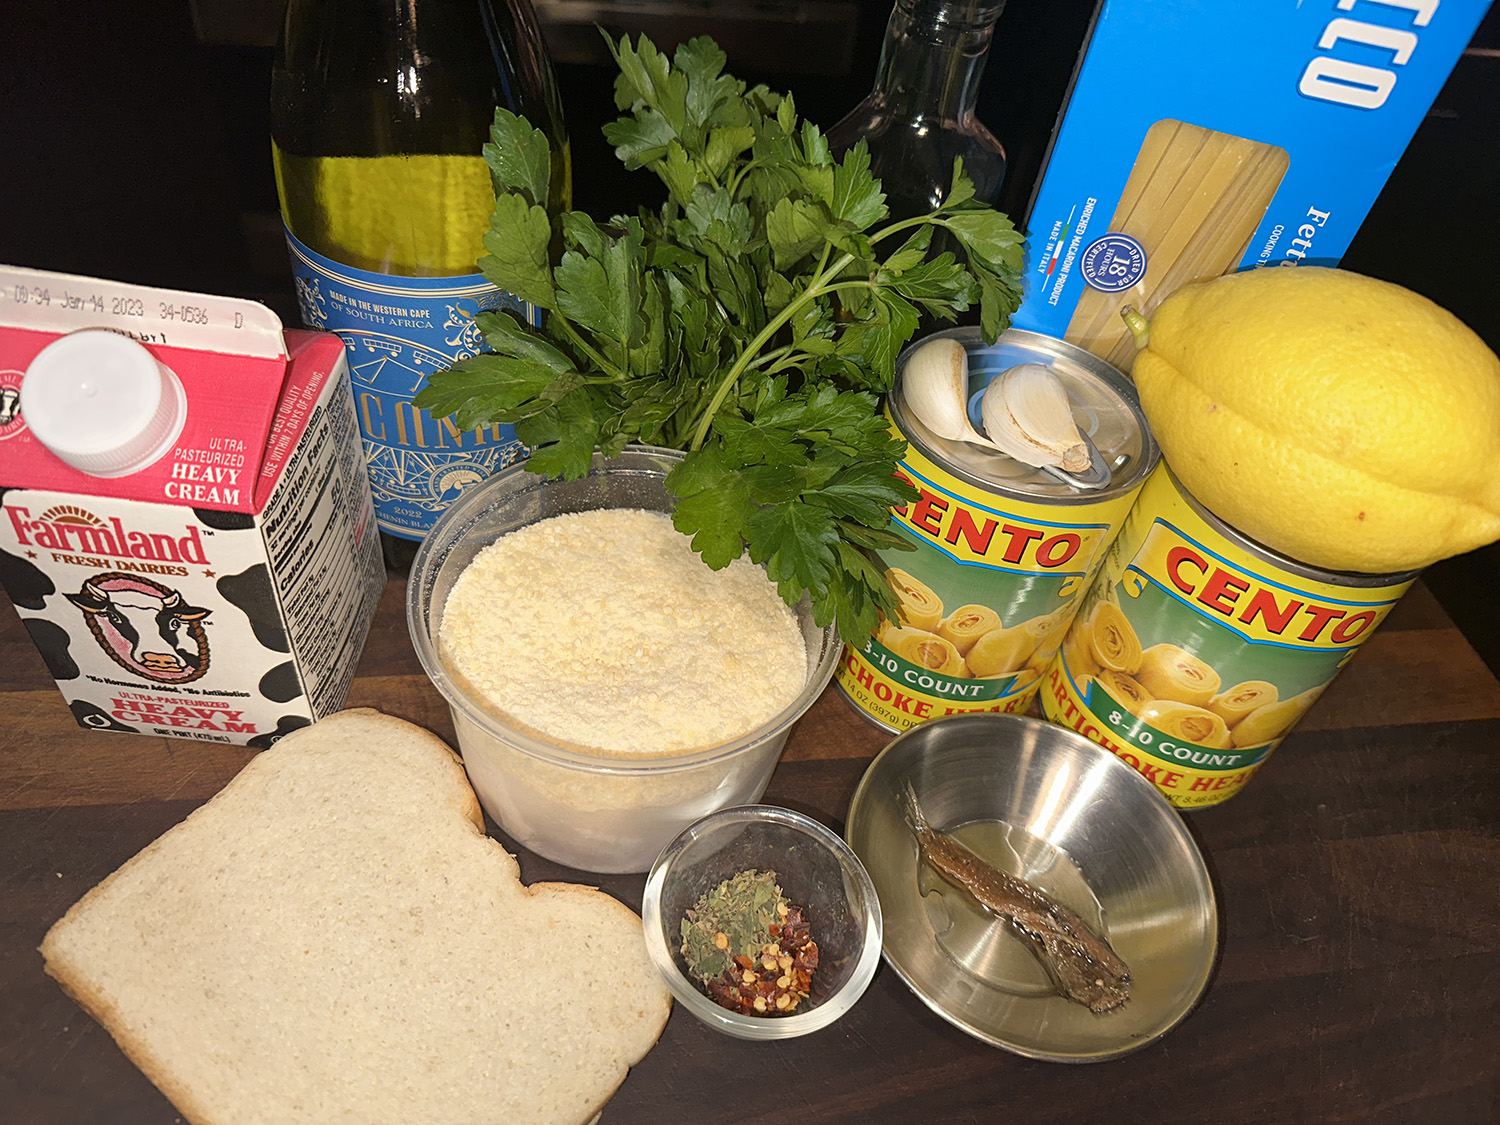
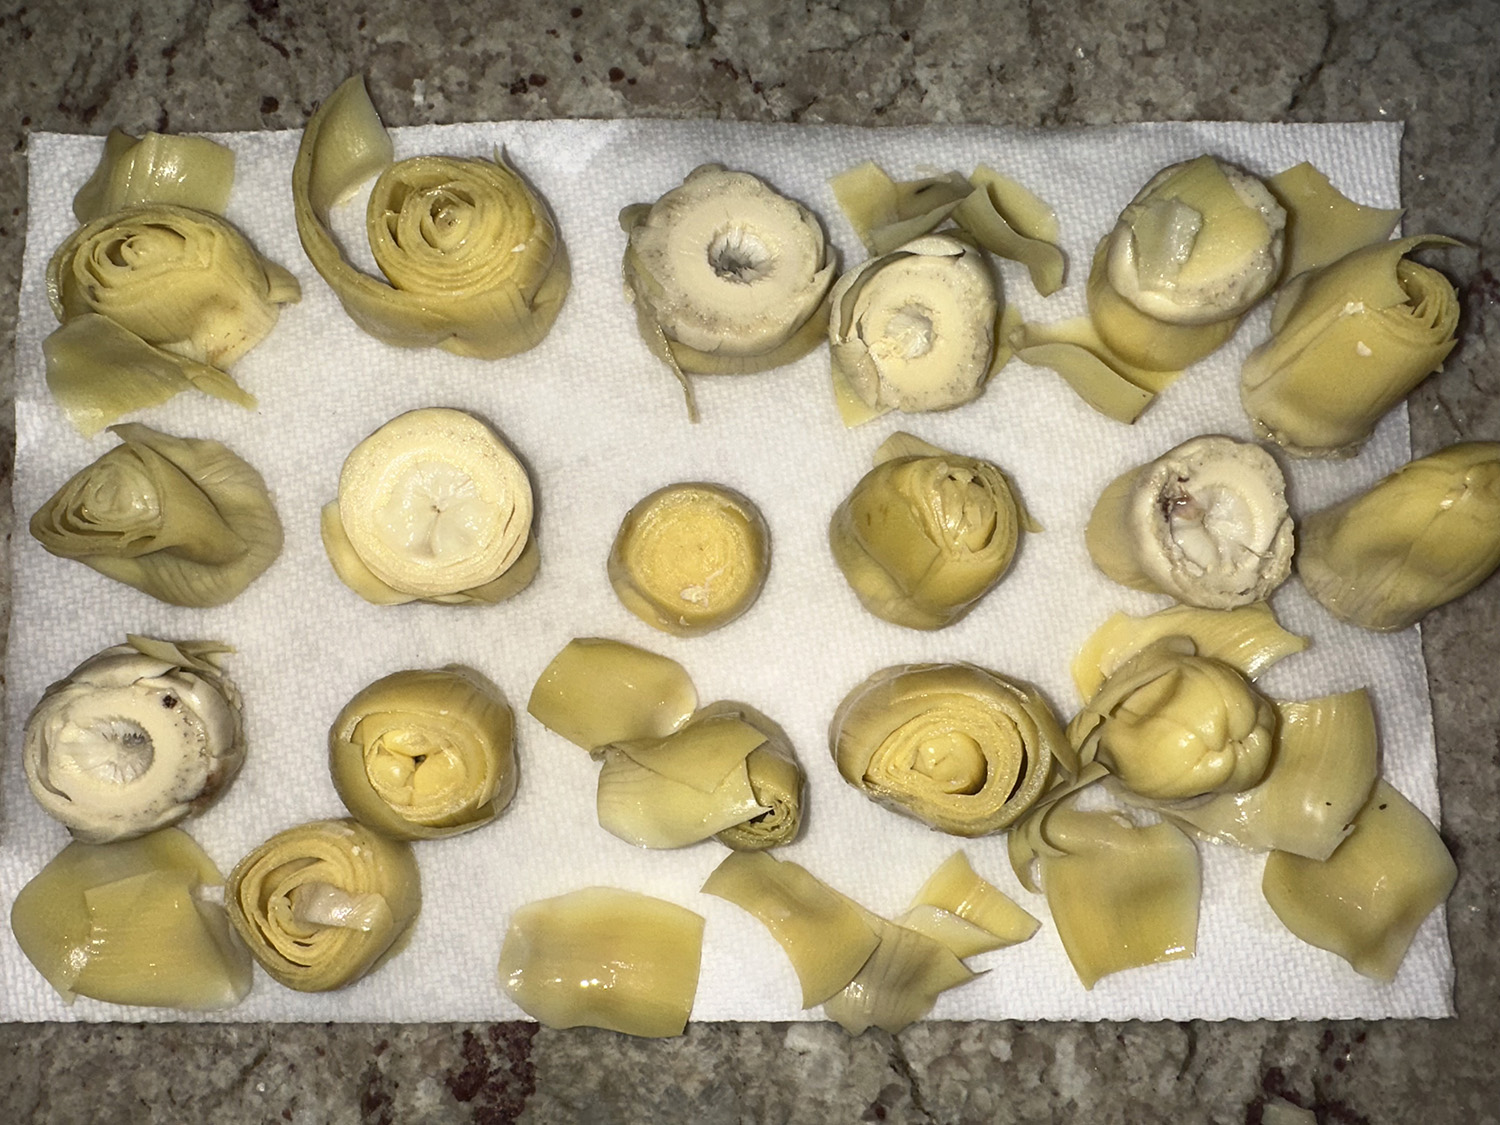
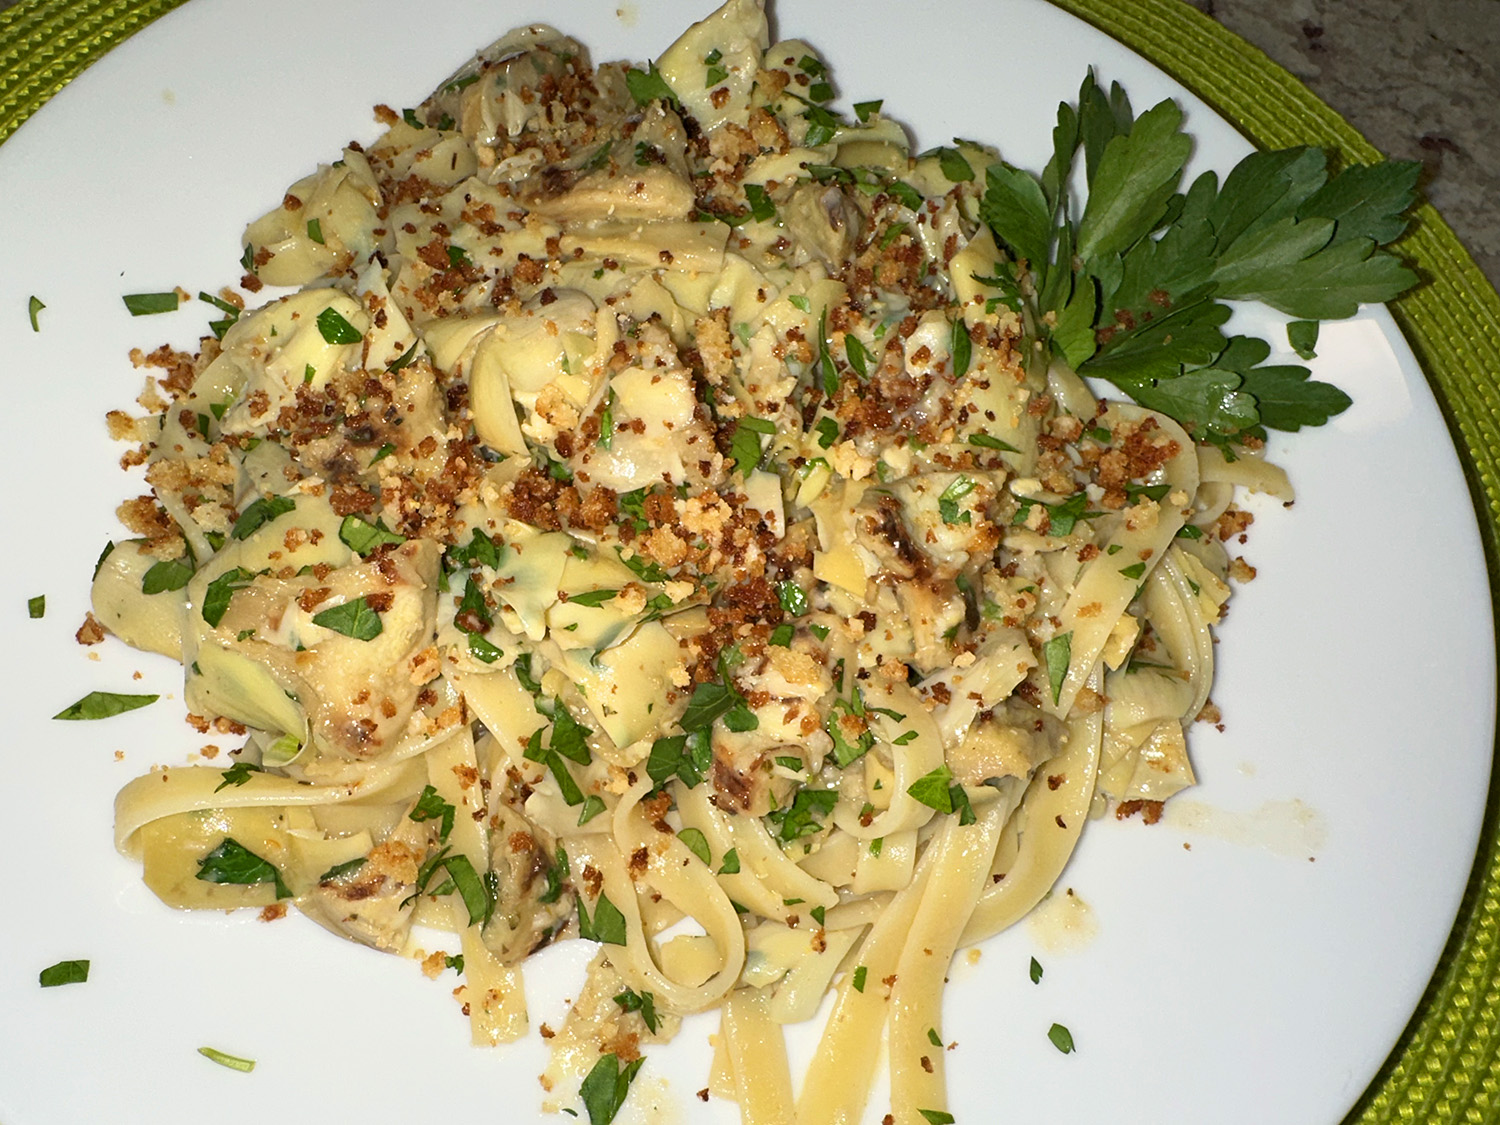
Jarred artichoke hearts and tagliatelle make a quick and elegant dinner. The leaves from jarred artichoke hearts need to be separated from the hearts and then given a quick soak to temper the harsh flavors they pick up from the brine. Slice the hearts in half and then dry them well so that they can be easily browned to bring out their natural nuttiness.
Anchovy gives the sauce savory depth without imparting a fishy taste—don’t omit it; and cream ties together the aromatics, wine, and artichoke flavor. A simple Parmesan bread-crumb topping gives the dish some savory crunch. Even though it adds more carbs, the crumb topping adds another dimension and necessary texture.
Jarred artichoke hearts labeled “baby” or “cocktail” that are 1 1/2 inches or shorter in length are preferred. Larger artichoke hearts tend to have fibrous leaves. But, if you must use larger hearts, trim the top 1/4 to 1/2 inch from the leaves. Do not use marinated or oil-packed artichoke hearts. You’ll need two 9.9-ounce jars of artichokes for this recipe—however, because we love artichokes, we added two 14-ounce jars.
This recipe can easily be doubled to feed 4 or 5 guests. Unable to source tagliatelle (who knows why, it is usually a popular pasta), we substituted fettuccini, though pappardelle would also work.
1 ½ cups jarred whole artichoke hearts packed in water, preferably baby or cocktail size
1 slice hearty white sandwich bread, torn into 1-inch pieces
3 ½ Tbsp. extra-virgin olive oil
¼ cup grated Parmesan cheese, plus extra for serving
Salt and pepper
2 garlic cloves, minced
1 anchovy fillet, rinsed, patted dry, and minced
¼ tsp. dried oregano
Pinch red pepper flakes
¼ cup dry white wine
1 Tbsp. heavy cream
6 oz. tagliatelle
2 Tbsp. minced fresh parsley
½ tsp. grated lemon zest
Directions
Cut leaves from artichoke hearts. Cut hearts in half and dry with paper towels. Place leaves in bowl and cover with water. Let leaves stand for 15 minutes. Drain well.
Pulse bread in food processor until finely ground, 7 to 10 pulses. Heat 1 tablespoon oil in 8-inch nonstick skillet over medium heat until shimmering. Add bread crumbs and cook, stirring constantly, until crumbs begin to brown, 2 to 4 minutes.
Add 2 tablespoons Parmesan and continue to cook, stirring constantly, until crumbs are golden brown, 1 to 2 minutes. Transfer crumbs to bowl and season with salt and pepper to taste. Wipe out skillet.
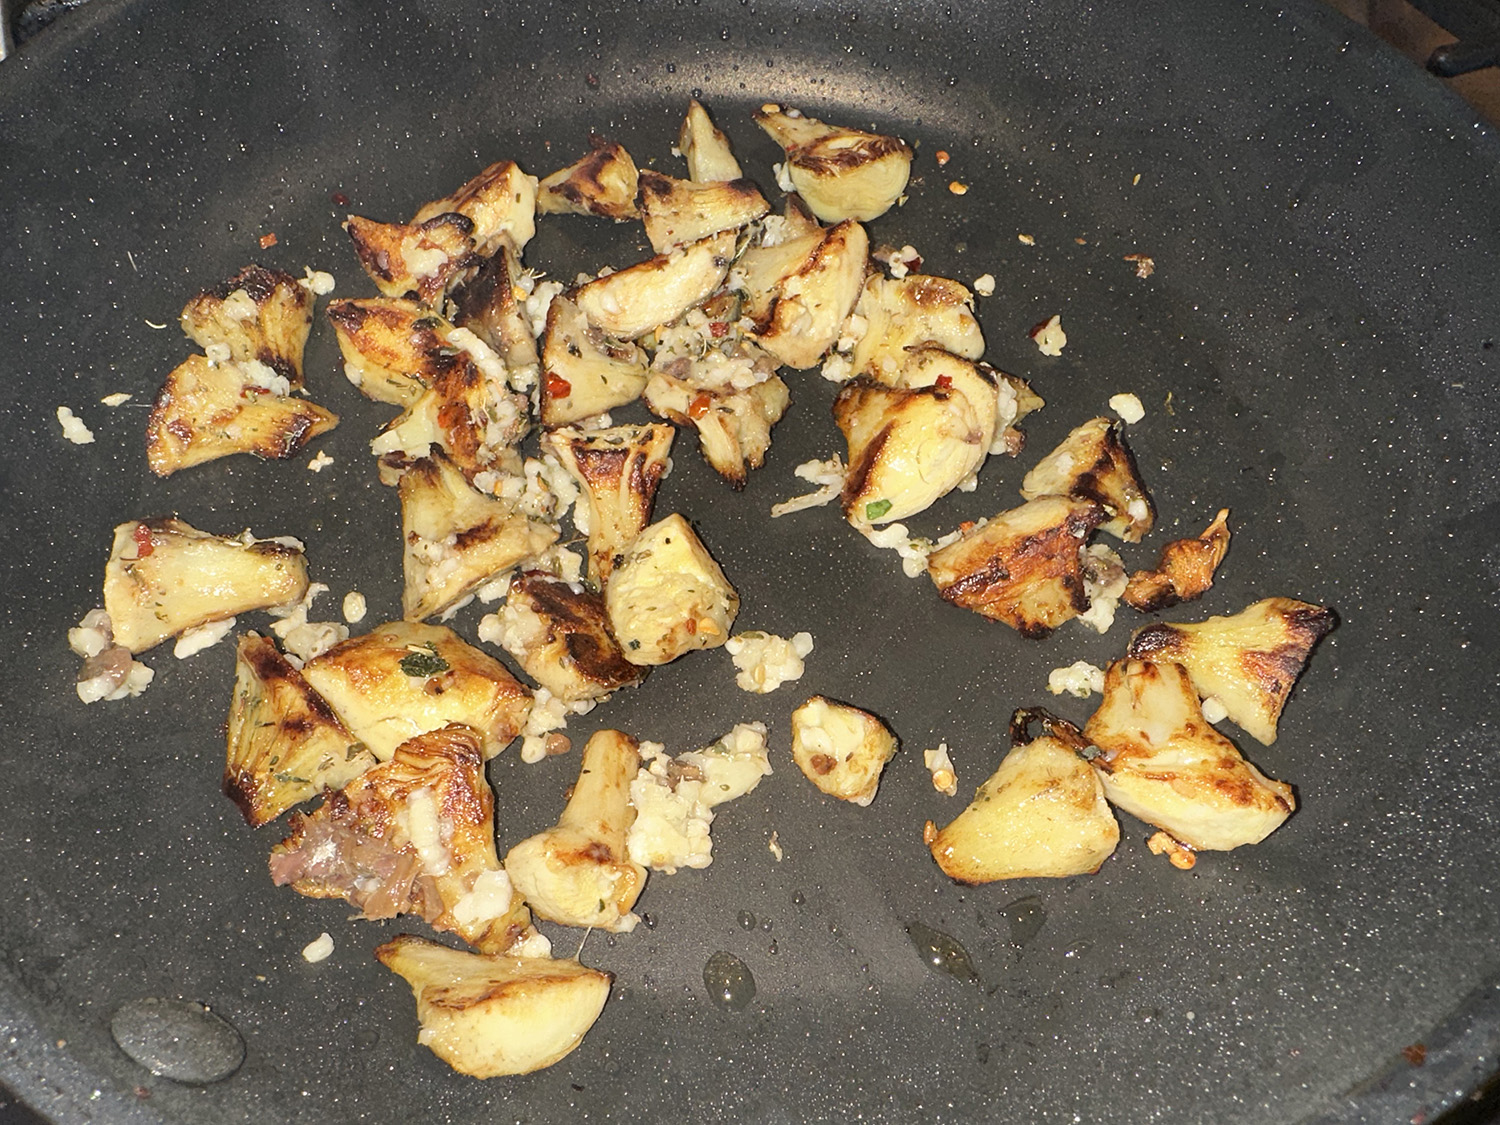
Heat 1/2 tablespoon oil in now-empty skillet over medium-high heat until shimmering. Add artichoke hearts and pinch salt; cook, stirring frequently, until hearts are spotty brown, 5 to 7 minutes.
Add garlic, anchovy, oregano, and pepper flakes; cook, stirring constantly, until fragrant, about 30 seconds.
Stir in wine and cream and bring to simmer. Remove skillet from heat and stir in artichoke leaves. Set aside.
Meanwhile, bring 2 quarts water to boil in large pot. Add pasta and 1/2 tablespoon salt and cook, stirring often, until al dente. Reserve 3/4 cup cooking water, then drain pasta and return it to pot. Stir in artichoke sauce, remaining 2 tablespoons Parmesan, 1/3 cup reserved cooking water, remaining 2 tablespoons oil, parsley, and lemon zest. Adjust consistency with remaining reserved cooking water as needed. Season with salt and pepper to taste. Serve, passing bread-crumb mixture and extra Parmesan separately.
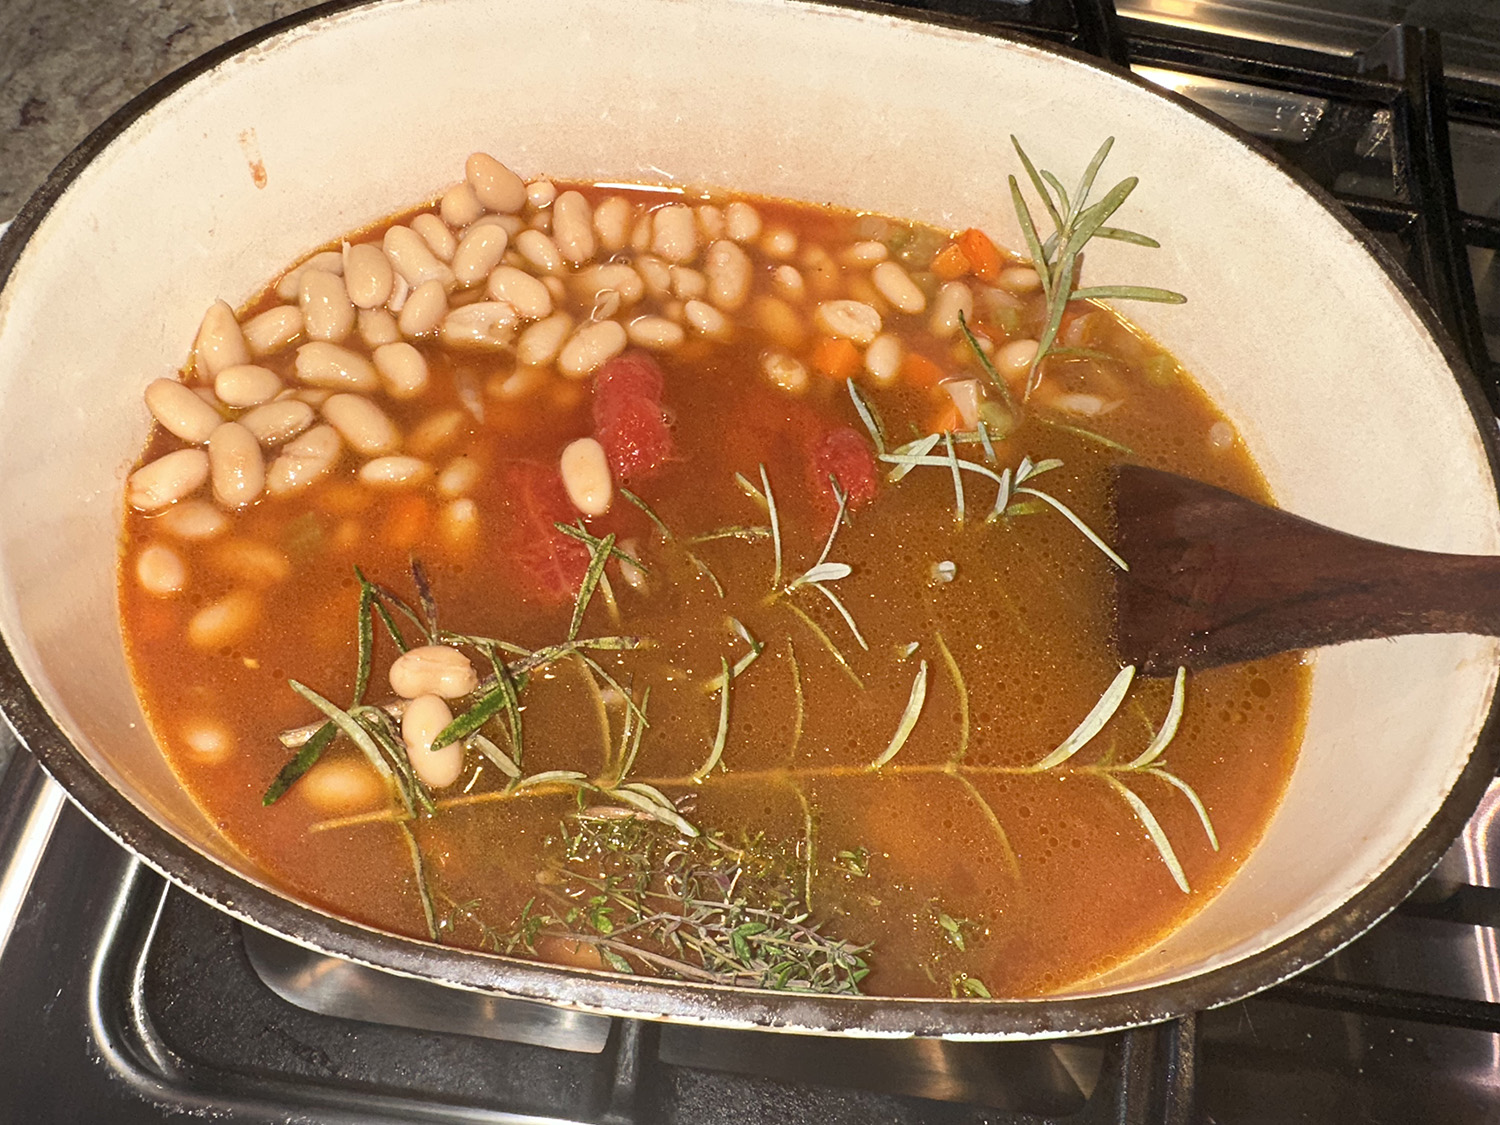
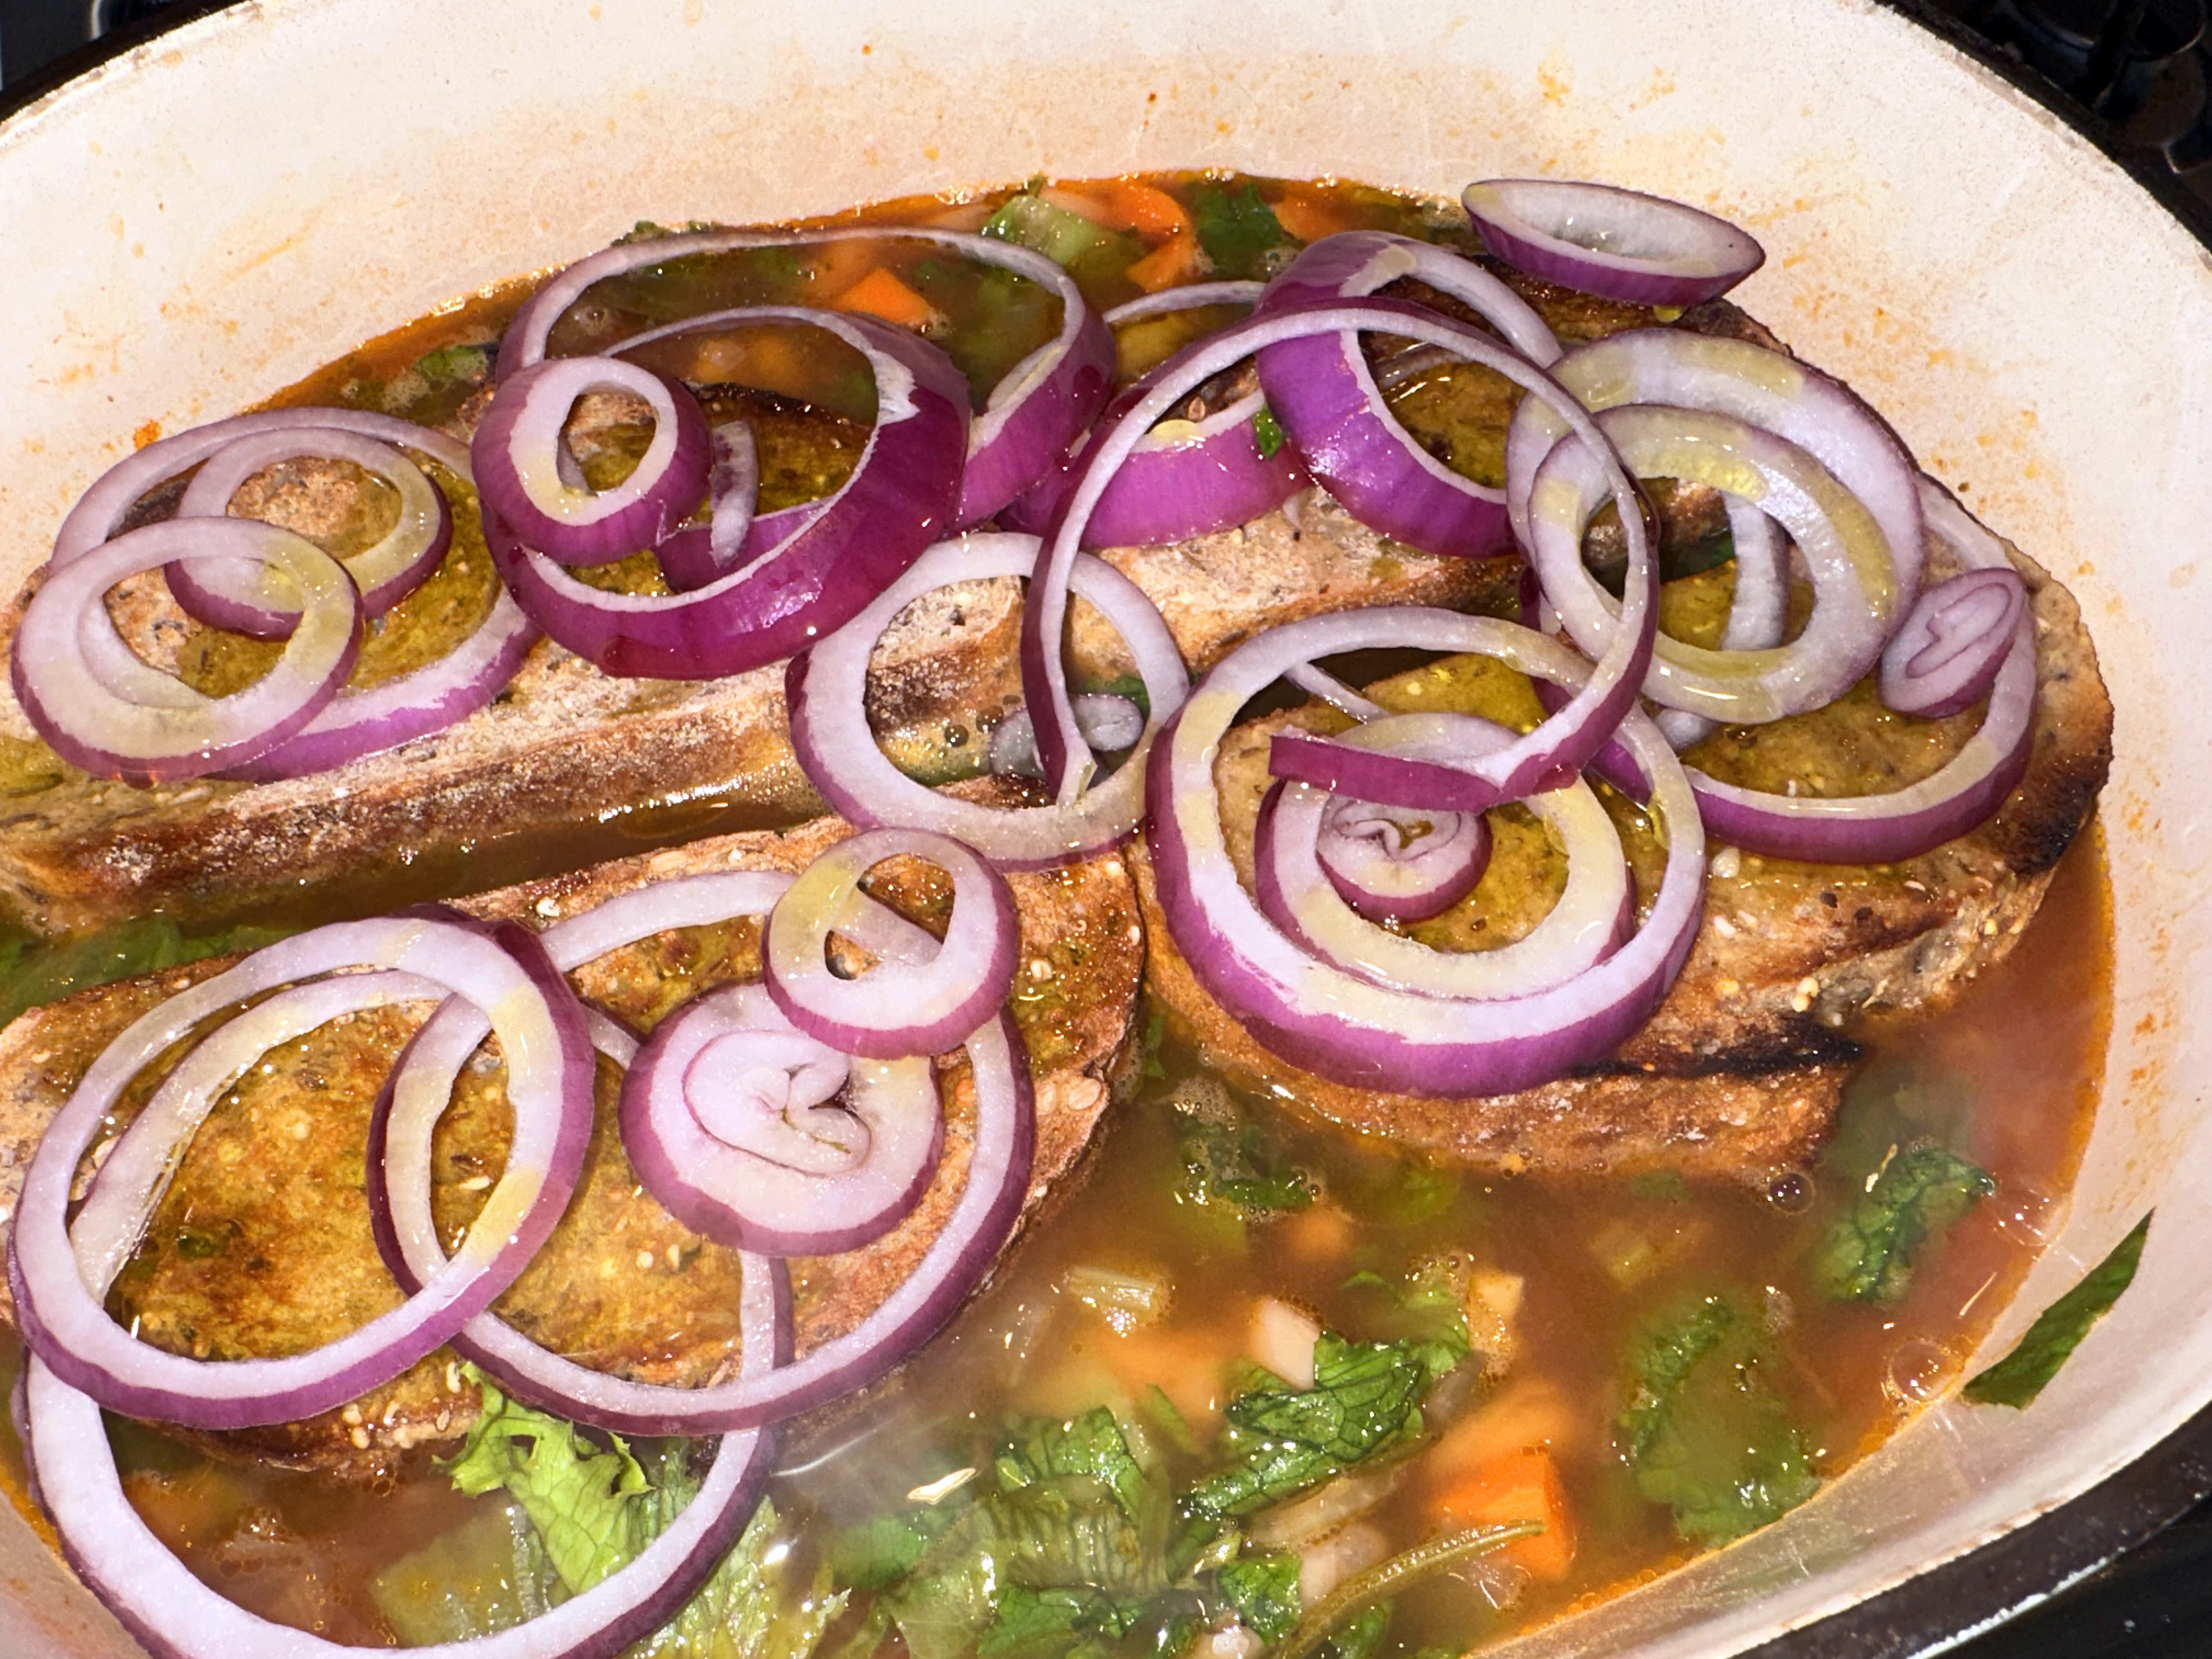
Such a thing as too many veggies? This recipe adds a pound of kale—that’s right, a full pound—to softened onions, carrots and celery, combined with beans and tomatoes. It’s simply a matter of bringing the other vegetables to the party in a simmer, then adding the kale and topping with the thick, toasted, crusty slabs of multi-grain bread. The whole dish bakes in the oven for a few minutes to crisp the toast and the Parmesan.
Confession, the supermarket carried kale, but it was lousy looking at best, so we opted for the substitute of escarole. And for a time-saver we used canned cannellinis, in fact we used two cans, about double the original amount!
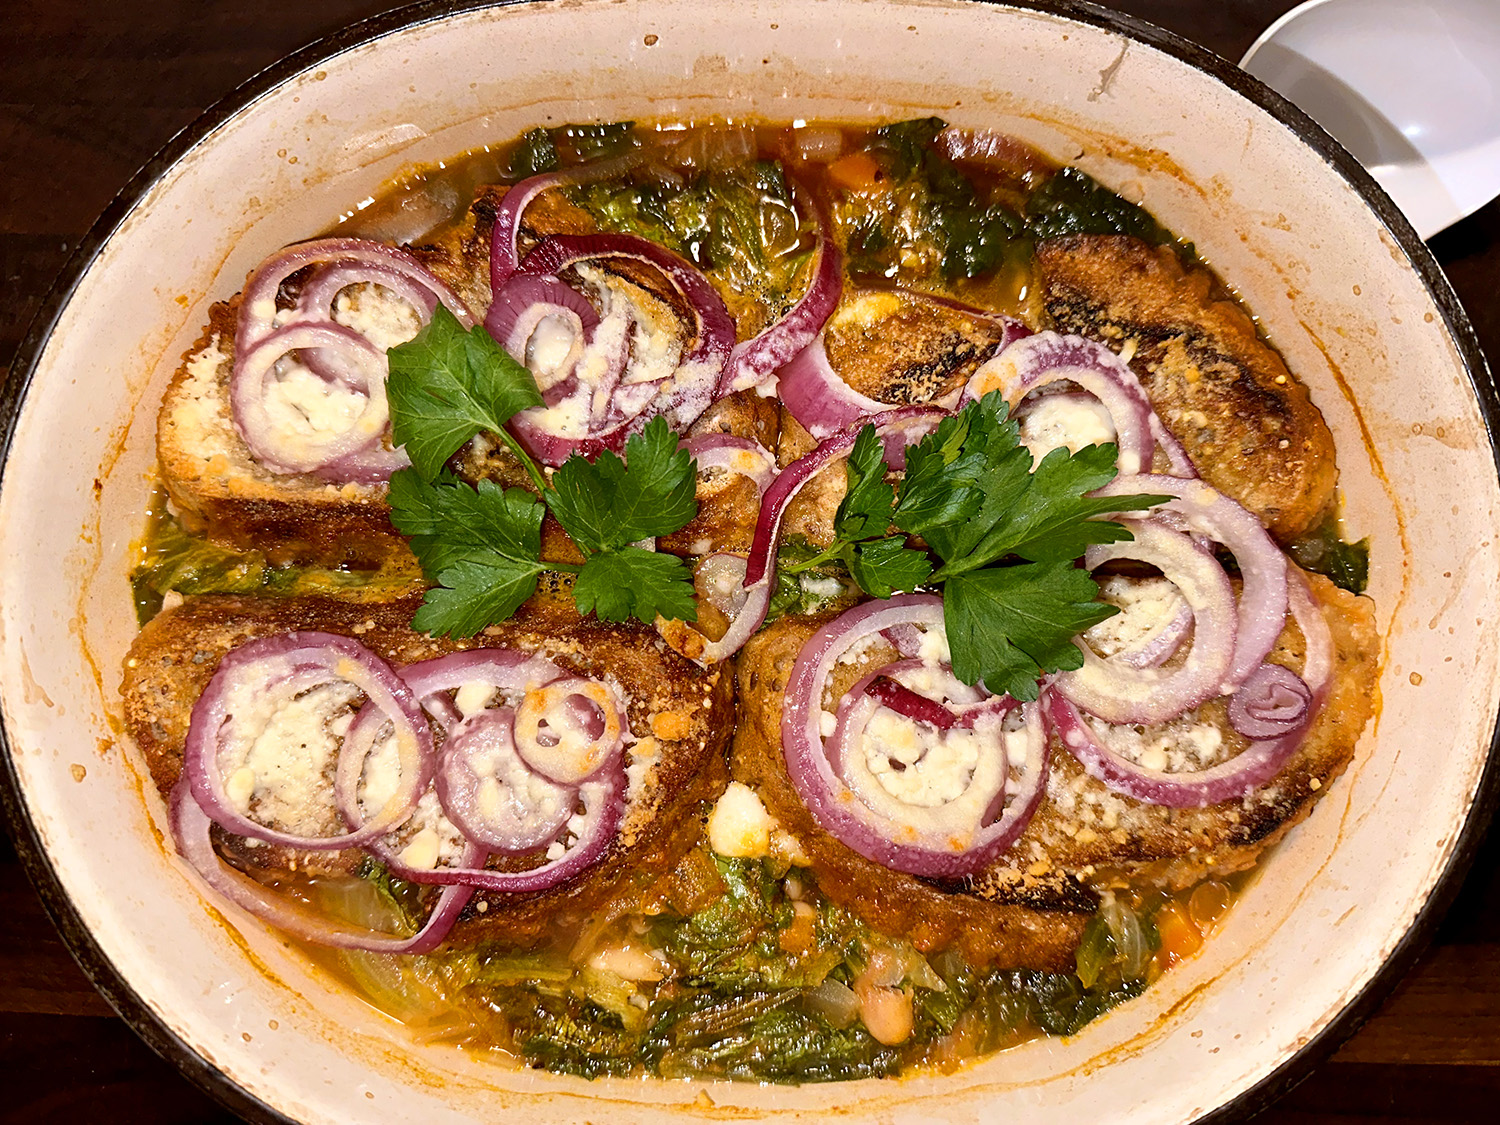
This might be just the ticket to feast on after indulging in all that rich food during the holidays. Make sure to get a thick crusty multi-grain loaf of bread that is cut into 1-inch thick slices and toasted. Add extra parmesan when serving, if desired.
Put 2 tablespoons of the oil in a large pot over medium heat. When it’s hot, add onion, carrot, celery and garlic; sprinkle with salt and pepper and cook, stirring occasionally, until vegetables are soft, 5 to 10 minutes.
Heat the oven to 500 degrees. Drain the beans; if they’re canned, rinse them as well. Add them to the pot along with tomatoes and their juices and stock, rosemary and thyme. Bring to a boil, then reduce heat so the soup bubbles steadily; cover and cook, stirring once or twice to break up the tomatoes, until the flavors meld, 15 to 20 minutes.
Fish out and discard rosemary and thyme stems, if you like, and stir in kale. Taste and adjust seasoning. Lay bread slices on top of the stew so they cover the top and overlap as little as possible. Scatter red onion slices over the top, drizzle with the remaining 3 tablespoons oil and sprinkle with Parmesan.
Put the pot in the oven and bake until the bread, onions and cheese are browned and crisp, 10 to 15 minutes. (If your pot fits under the broiler, you can also brown the top there.) Divide the soup and bread among 4 bowls and serve.
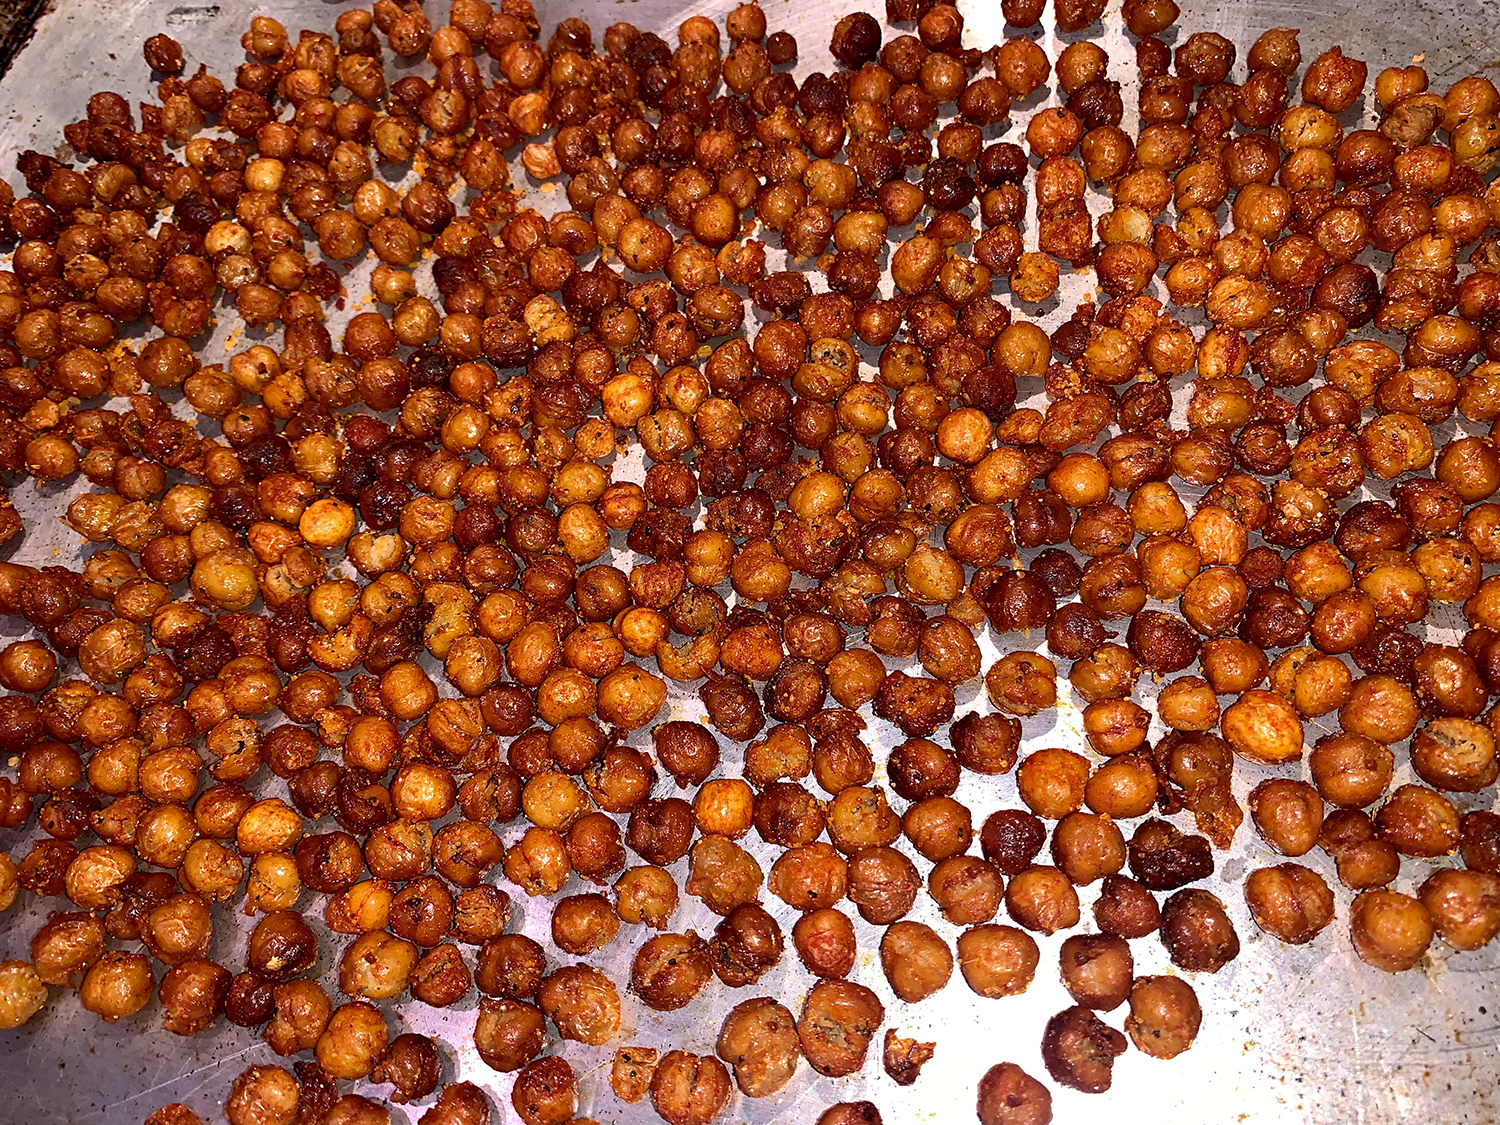
When cooking chickpeas, most recipes call for roasting them in the oven, but they never really crispen up enough. And when you crave a crunchy snack, roasting just won’t do the trick.
Switching to the stovetop and frying the chickpeas in olive oil provides the big crunch factor. A quick toss in a sweet-and-savory mixture of sugar and smoked paprika makes the chickpeas incredibly addictive.
To begin with, make sure to dry the chickpeas thoroughly with paper towels before placing them in the oil. In order to get crisp chickpeas, it’s important to keep the heat high enough to ensure the oil is simmering the entire time.
After about 12 minutes, test for doneness by removing a few chickpeas and placing them on a paper towel to cool slightly before tasting. If they are not quite crisp yet, continue to cook 2 to 3 minutes longer, checking occasionally for doneness.
Once I tasted them, I could hardly stop. What a great flavorful snack to munch on!
Combine paprika, sugar, salt, and pepper in large bowl. Heat oil in Dutch oven over high heat until just smoking. Add chickpeas and cook, stirring occasionally, until deep golden and crisp, 12 to 15 minutes.
Using slotted spoon, transfer chickpeas to paper towel–lined baking sheet to drain briefly, then toss in bowl with spice mix. Serve. (Chickpeas can be kept at room temperature for up to 2 hours.)
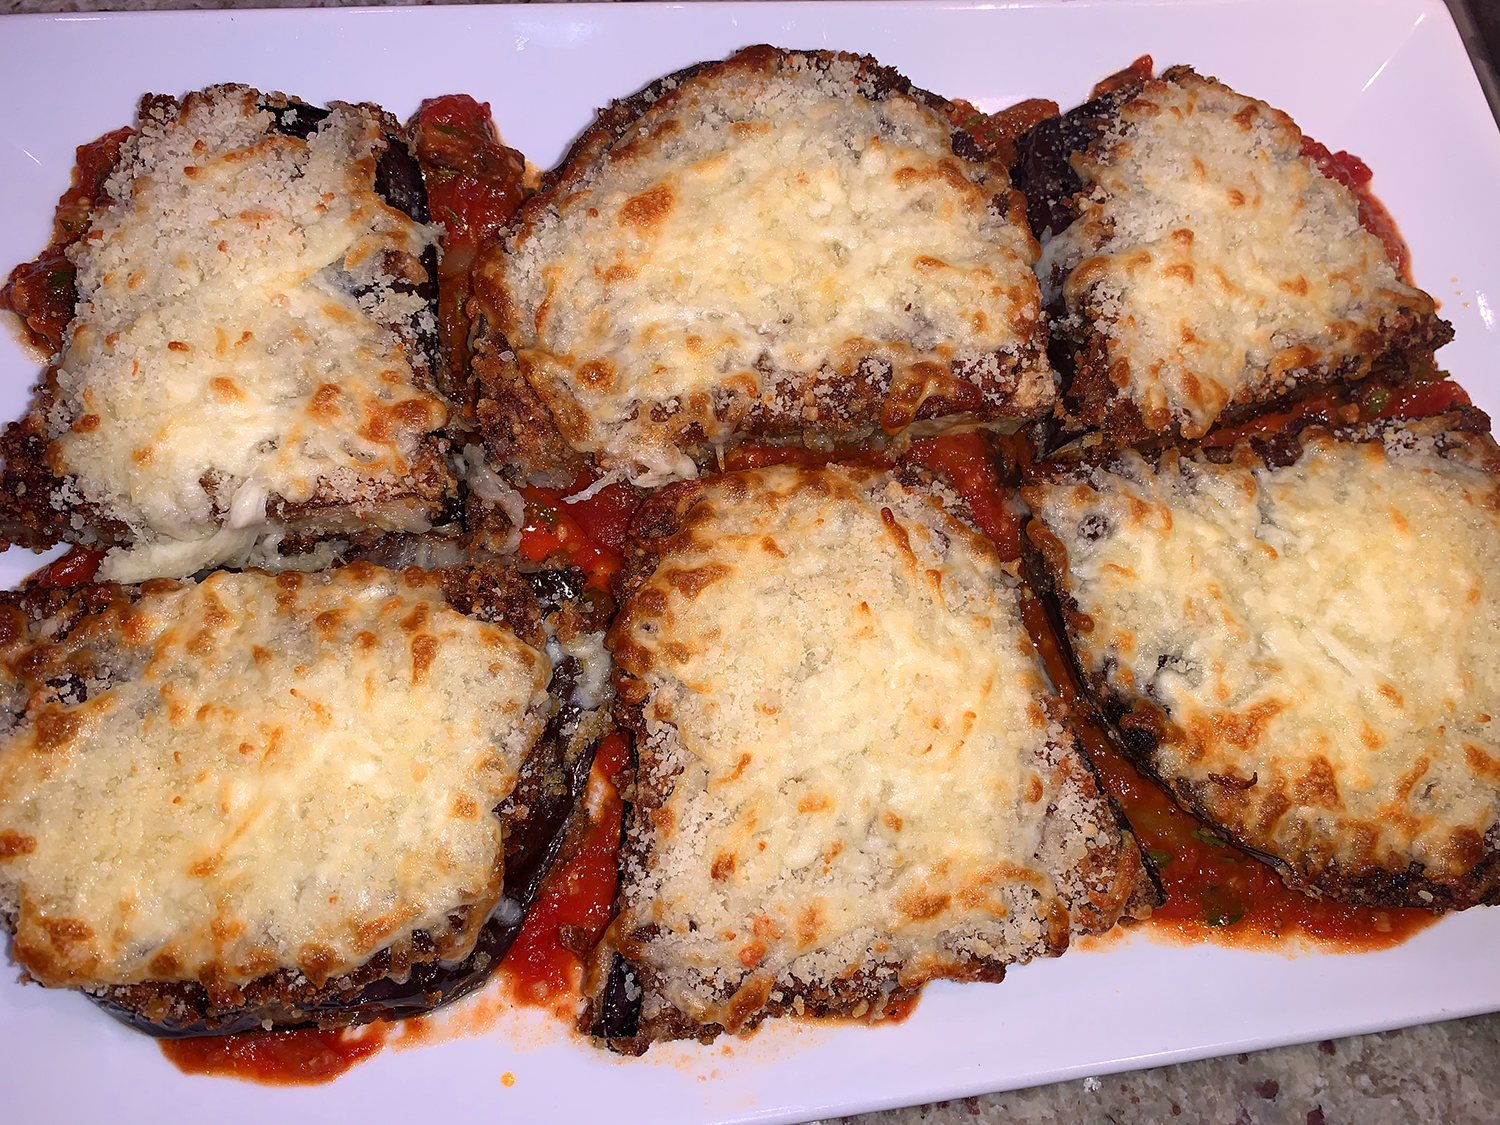
This is an incredibly tasty Eggplant Parm dish that has been streamlined not only for the number of people it feeds, but in its simplicity and amount of time it takes from start to finish. Some of the time-consuming steps have been omitted, such as salting the eggplant slices to reduce bitterness and peeling the outer skin. We were both bowled over by how flavorful it was!
To be honest, our eggplant was about 1 1⁄2 pounds, so we slightly deviated the recipe to accommodate for the larger size. For instance, we were able to carve out three 3⁄4″ slices, which after cutting crosswise made 6 planks. To compensate, we needed another egg in Step 2, and used an extra can of tomatoes.
Some of our other changes included increasing the amount of cheese (because that’s the way we roll 🙂 ), adjusting some of the cooking times, and frying the planks in two separate batches, otherwise, we kept everything else pretty much the same. With our changes, the finished dish easily feeds 3 people.
Recipe Notes: 1. Using a sharp knife, slice off one side of eggplant (reserve) and cut two 3/4-inch planks from the center. 2. Cut planks in half crosswise so they’ll neatly fit into the pan for frying in a single batch. 3. Chop reserved side pieces into strips, then into ½-inch cubes and set aside for building the tomato pan sauce.
1⁄2 cup olive oil, plus 3 Tbsp. olive oil, divided
4 garlic cloves, minced
1⁄4 tsp. red pepper flakes
1 14 1⁄2 oz. can diced tomatoes
1⁄4 cup chopped fresh basil
1⁄2 cup shredded provolone cheese
Directions
Bread Eggplant: Cut two 3/4-inch planks lengthwise from center of eggplant, halve each plank crosswise. Cut remaining eggplant into 1/2-inch dice and set aside.
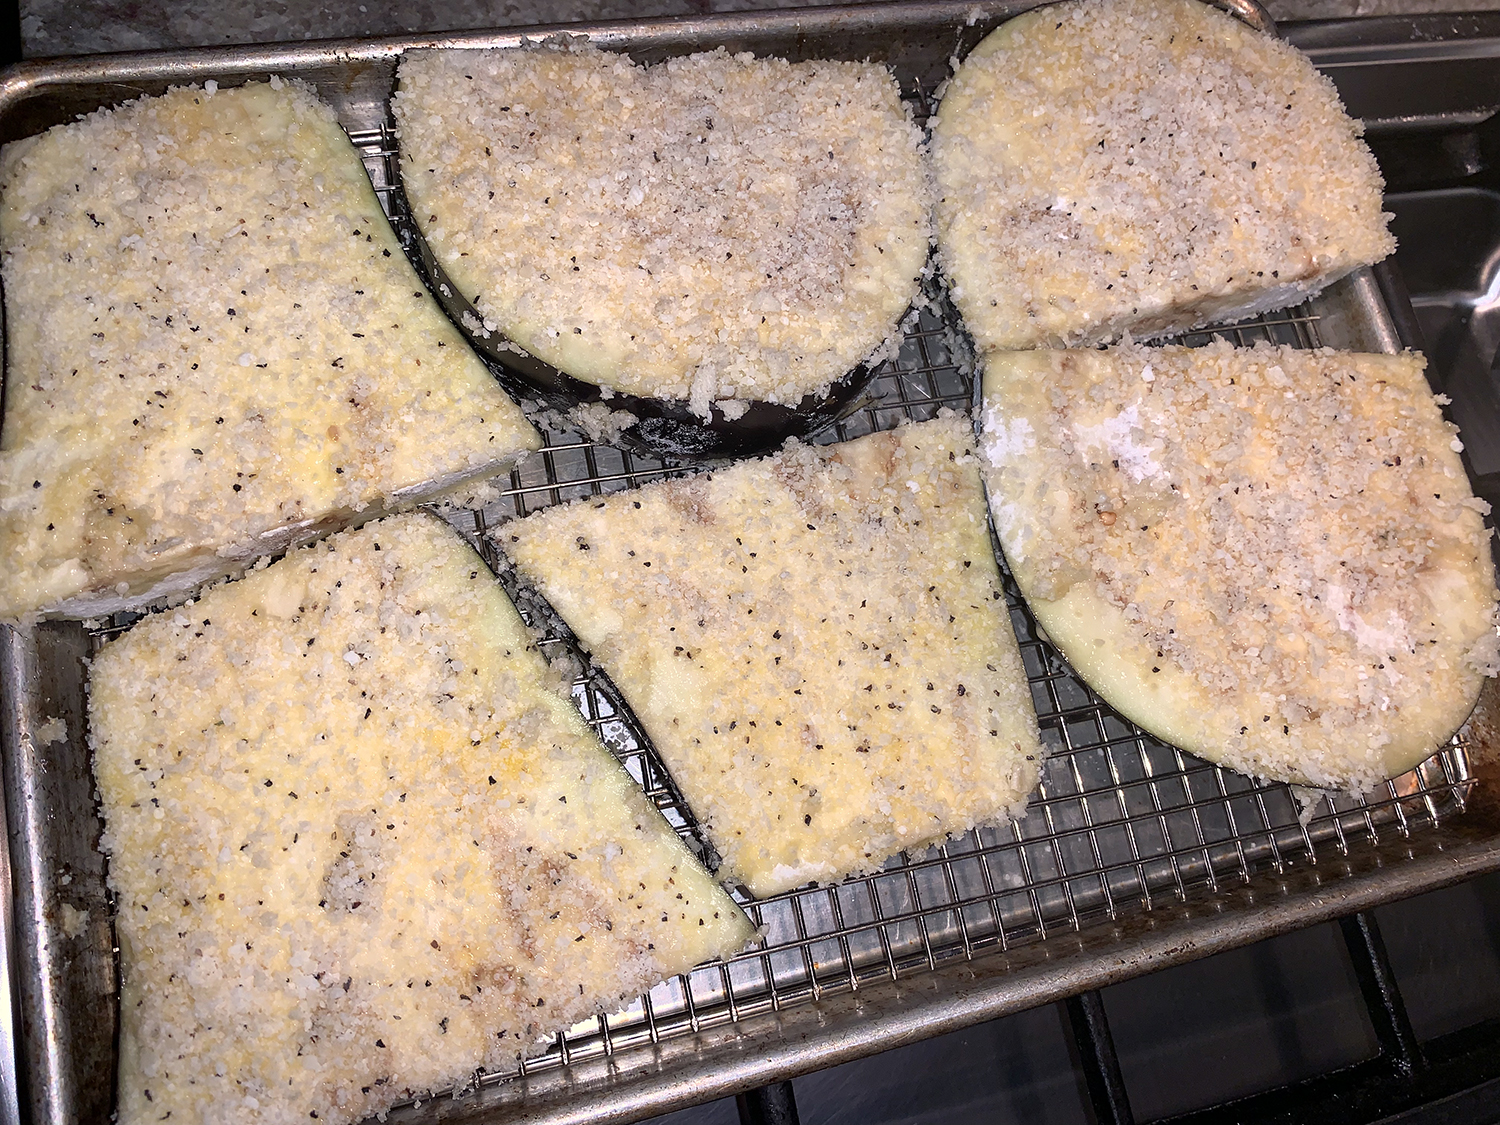
Place flour in shallow dish. Beat egg in second shallow dish. Combine bread crumbs, 1/4-cup Parmesan, 1/4 teaspoon salt and 1/4 teaspoon pepper in third shallow dish. One at a time, coat eggplant slices lightly with flour, dip them in egg and dredge in bread crumb mixture, pressing to adhere.
Transfer to wire rack set inside rimmed baking sheet and let sit 5 minutes (or refrigerate up to 1 hour).
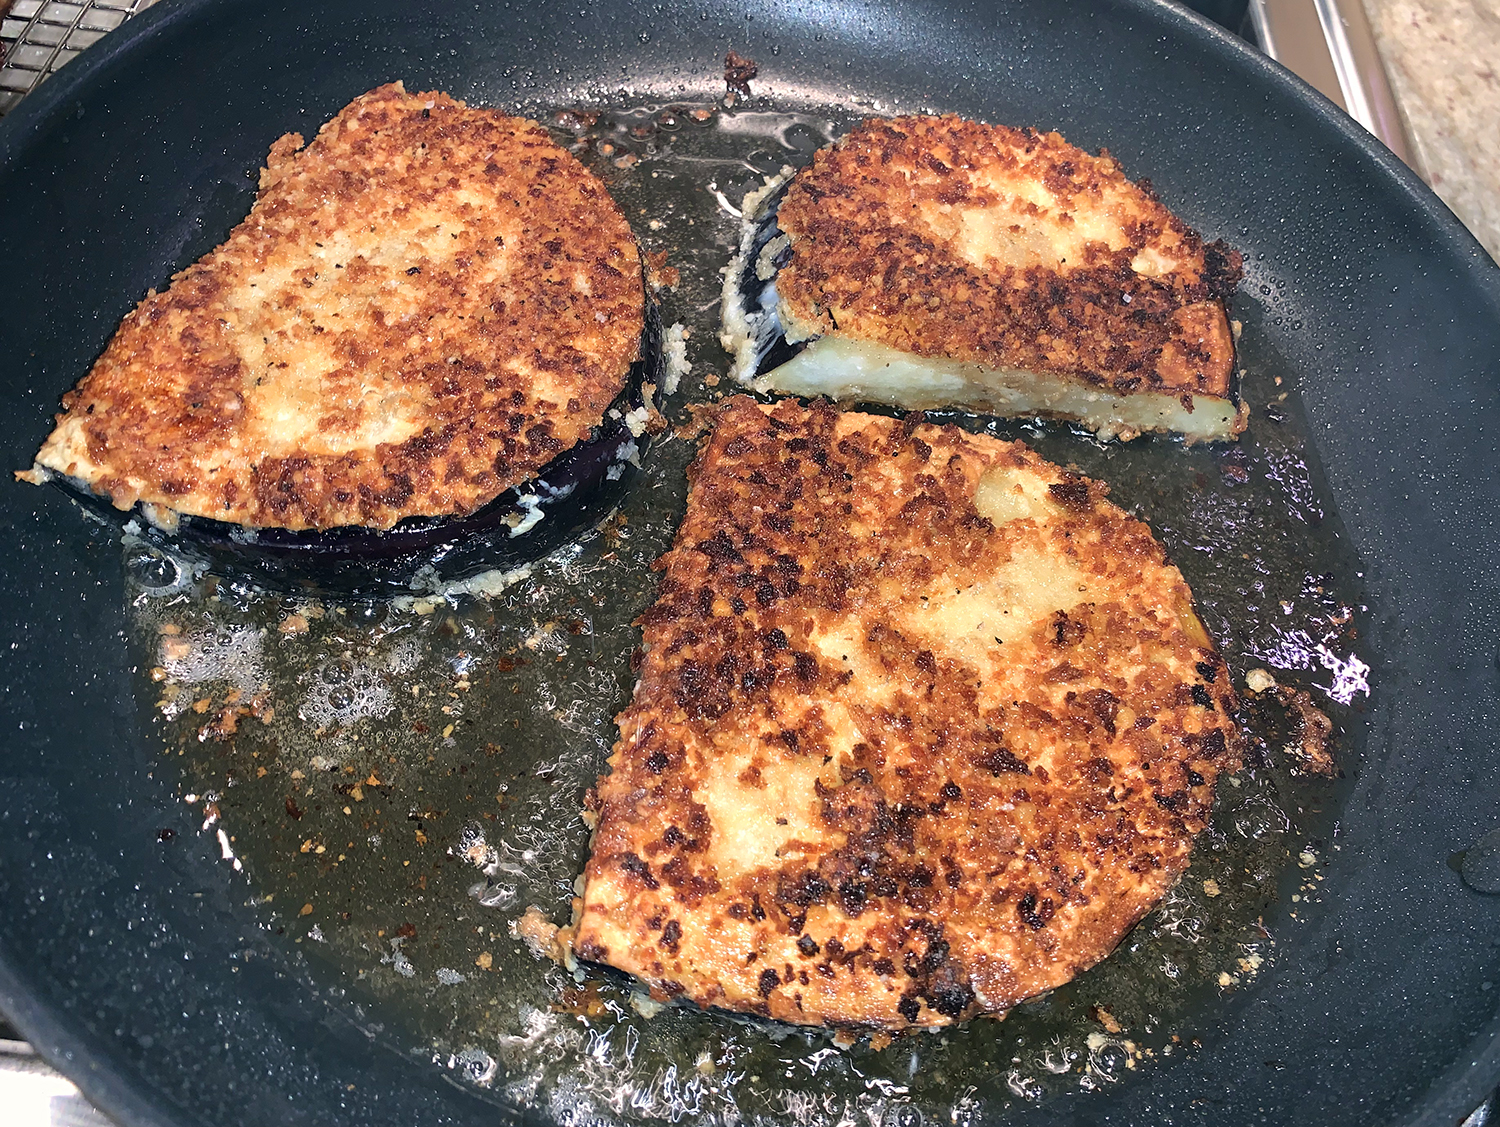
Cook Eggplant: Adjust oven rack to upper-middle position and heat oven to 450°F.
Heat 1/2 cup oil in large nonstick skillet over medium-high heat until shimmering. Cook eggplant slices until lightly golden browned, about 1 minute per side.
Transfer to wire rack set inside baking sheet and bake until eggplant is tender and deep golden brown, 15 to 18 minutes.
Make Sauce: Meanwhile, pour off oil and wipe out skillet with paper towels. Heat 2 tablespoons oil in empty skillet over medium-high heat until shimmering.
Add the reserved chopped eggplant and 1/4 teaspoon salt and cook, stirring occasionally, until lightly browned, about 3 minutes. Stir in remaining 1 tablespoon oil, garlic and pepper flakes and cook until fragrant, about 30 seconds.
Add tomatoes and reduce heat to medium. Simmer until eggplant is tender and sauce is thickened, about 5 minutes. Stir in basil and season with salt and pepper; cover and keep warm.
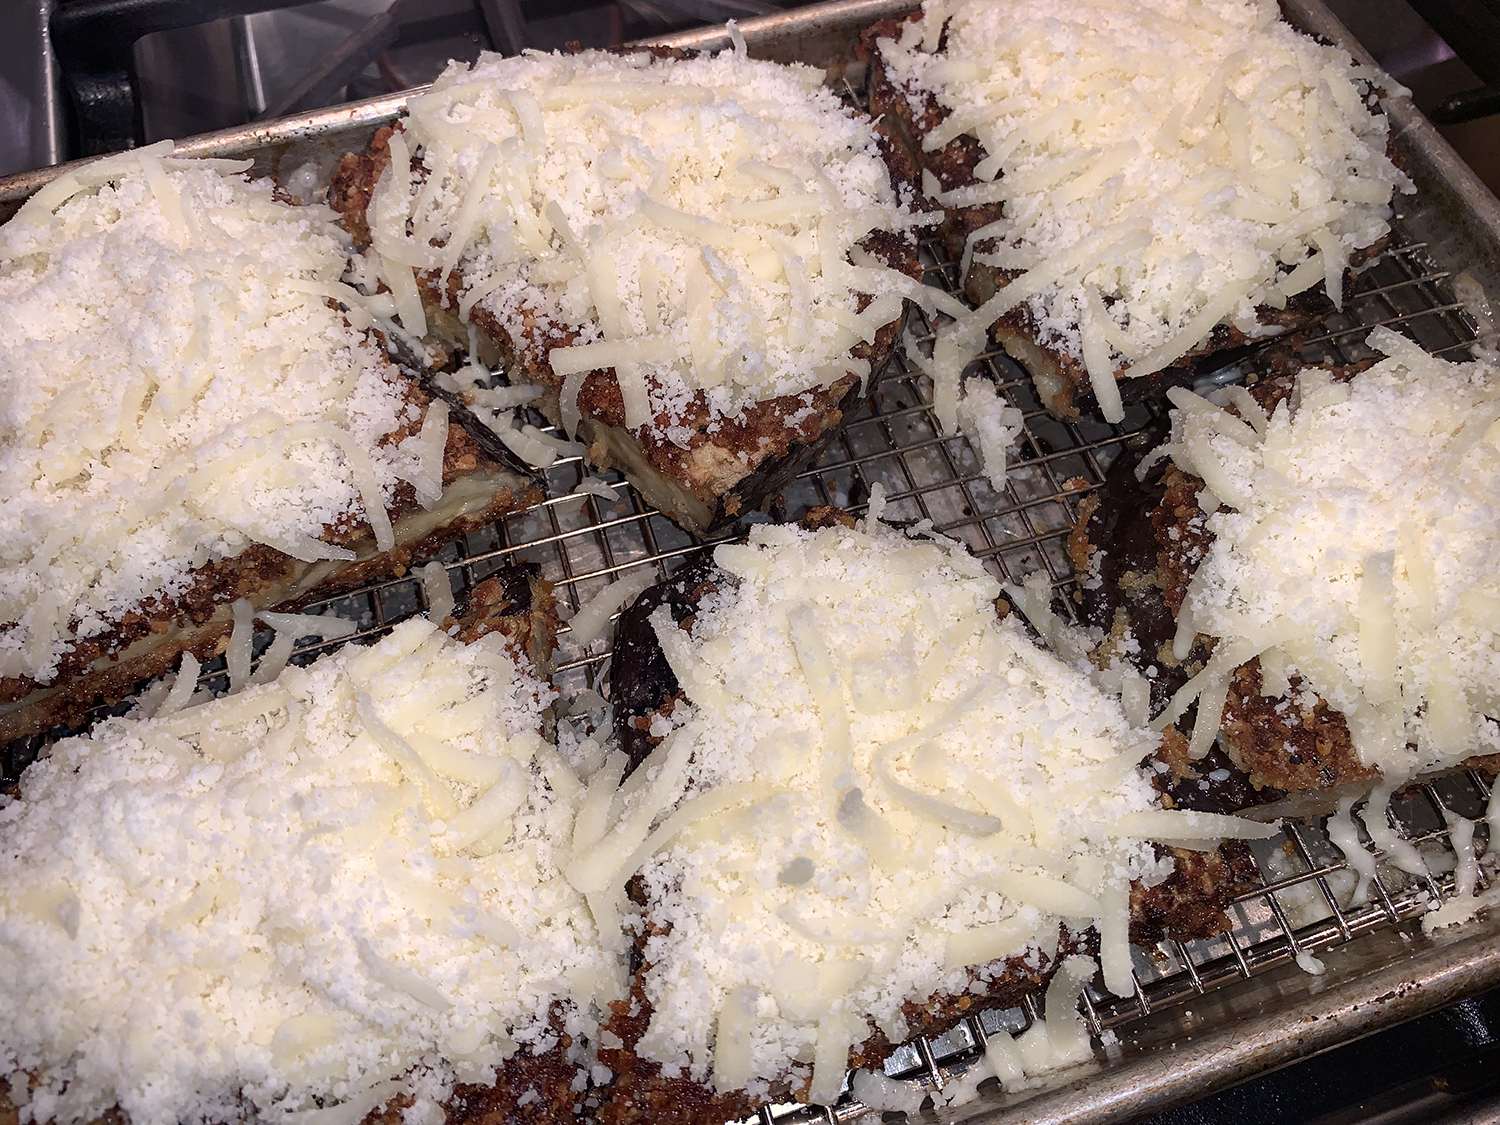
Assemble: Combine remaining 1/2 cup Parmesan and provolone in medium bowl. Top browned eggplant slices with cheese mixture and bake until cheese is melted, about 3 minutes (or longer if you increase the amount of cheese like we did).
Transfer half of sauce to platter and top with eggplant slices. Spoon remaining sauce over eggplant. Serve.
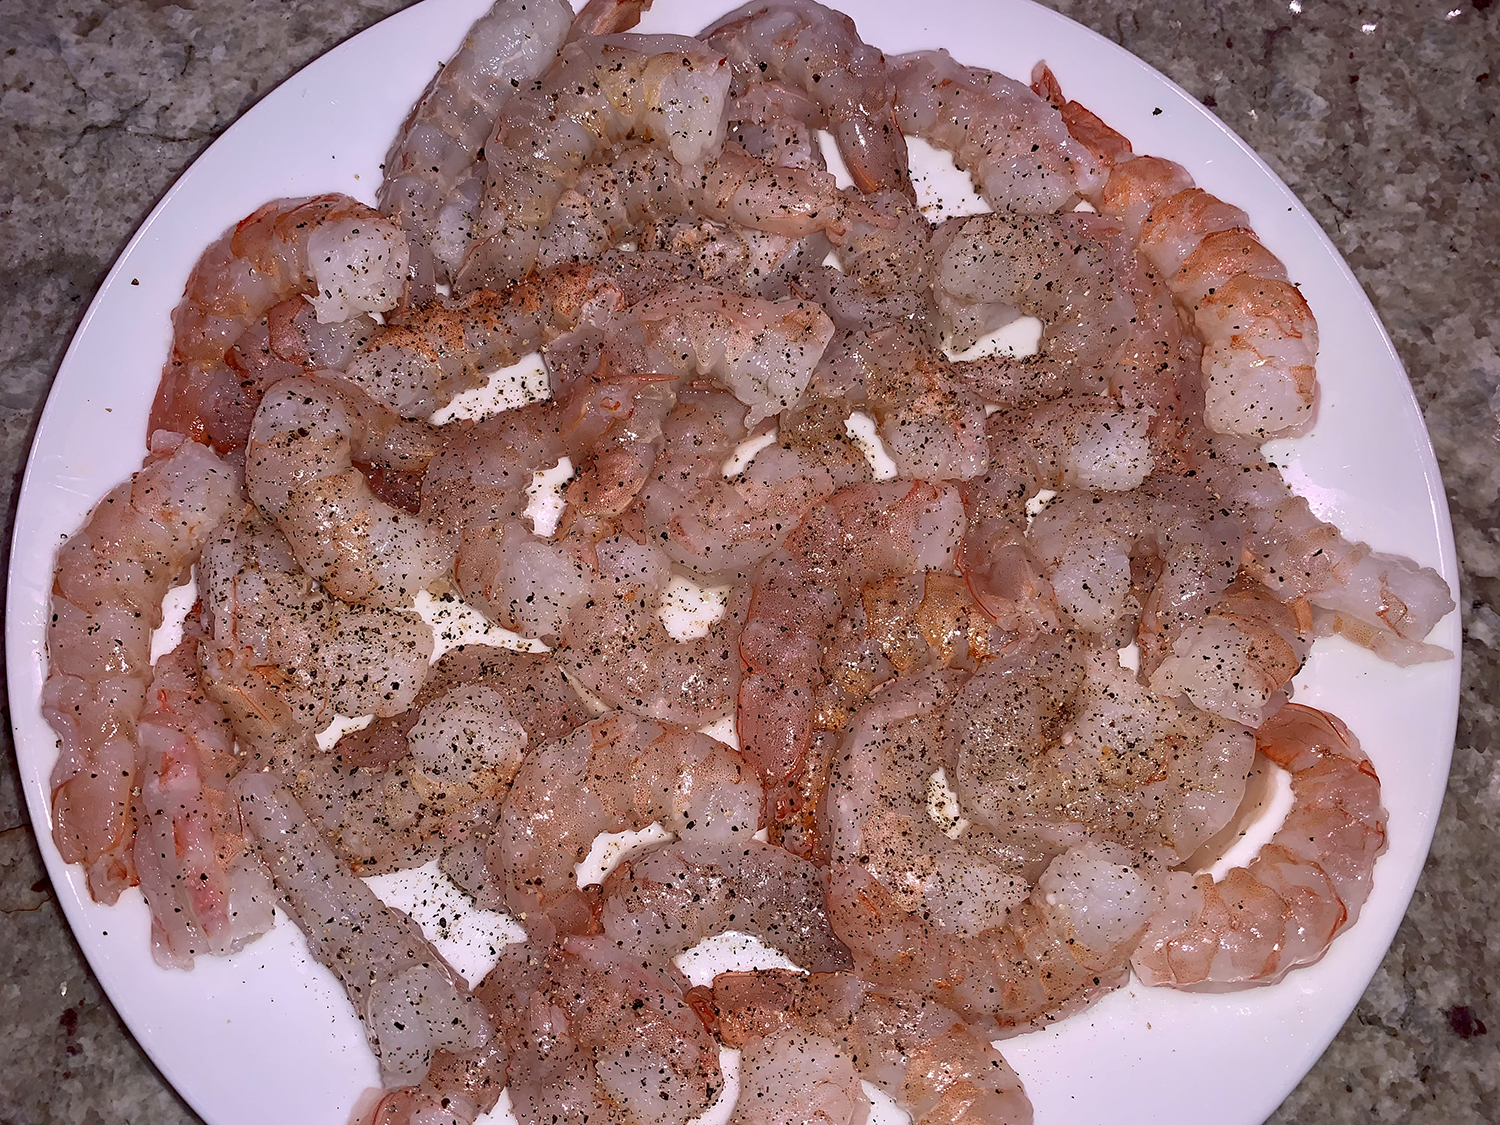
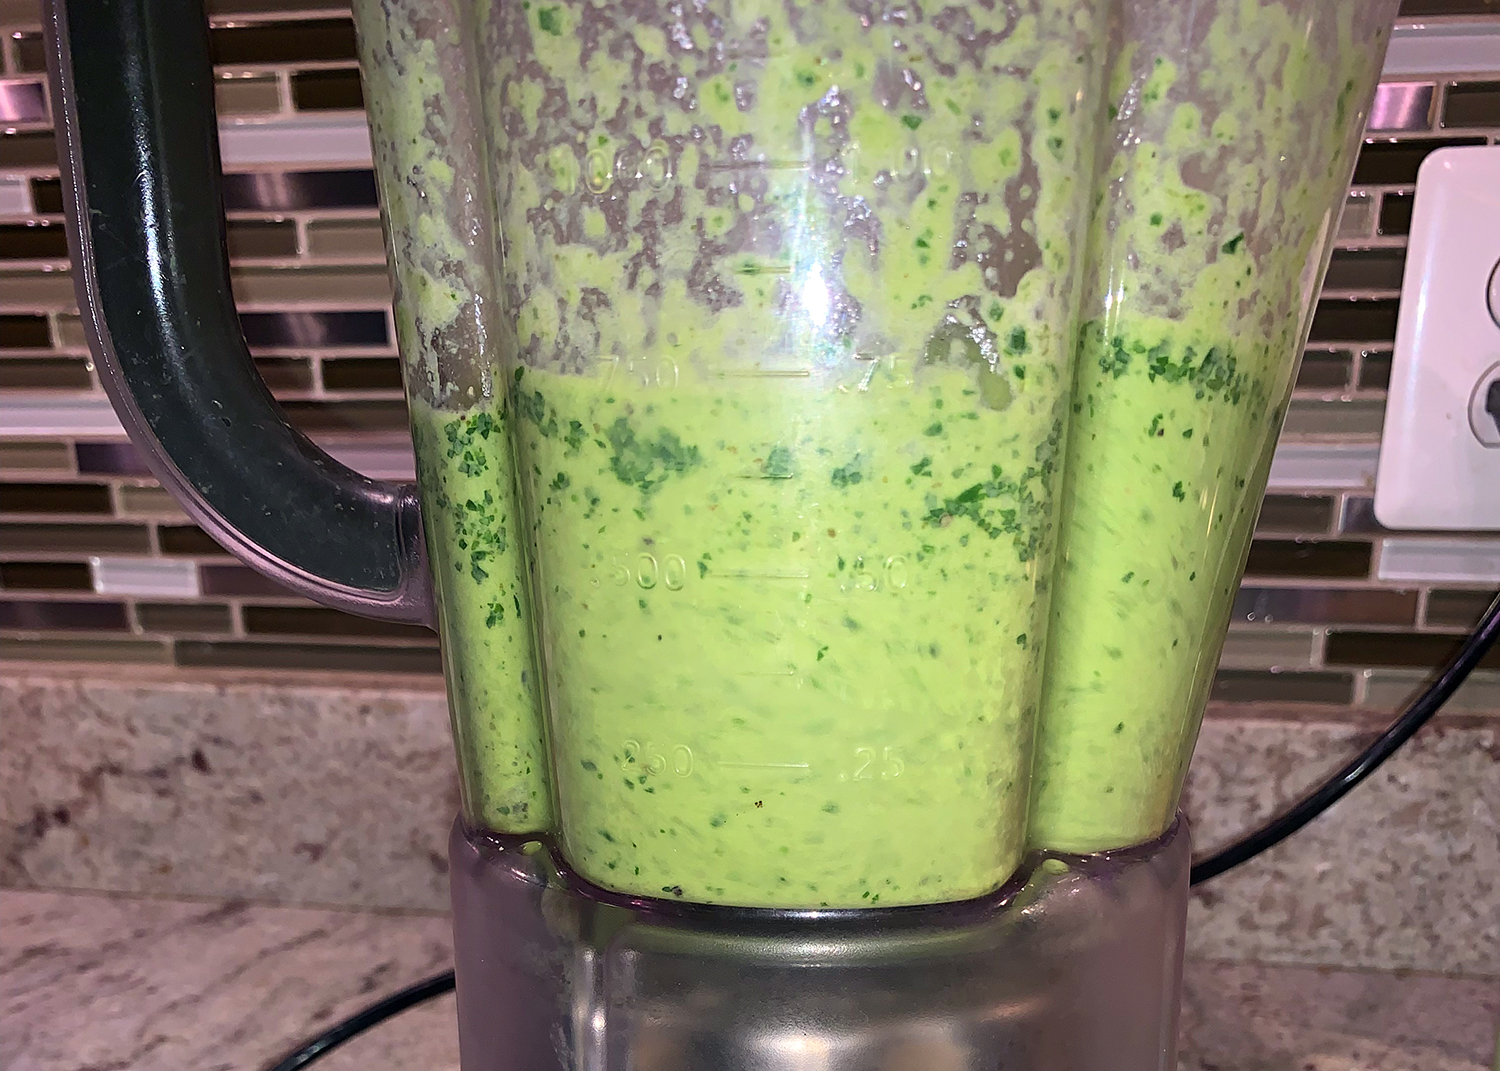
Based on a classic Mexican fish dish pescado en salsa poblano, or fish in poblano sauce, this recipe is a shrimp version. To make the creamy, vibrantly hued sauce that cloaks plump, gently cooked shrimp, poblano chilies, with their earthy flavor and moderate heat, are puréed with cilantro, alliums and Mexican crema, a rich cultured cream similar to, but milder than sour cream.
If crema isn’t available—and it wasn’t for us—sour cream works in its place. To make a more substantial meal, serve with warmed tortillas and rice and beans; over steamed rice; or as in our case, polenta cooked in shrimp stock.
Don’t be afraid to use the cilantro stems. Unlike parsley, cilantro has stems that are tender and will readily break down in the blender.
2 medium poblano chilies, stemmed, seeded and cut into 2-inch pieces
2 medium garlic cloves, smashed and peeled
1/2 medium white onion, thinly sliced, plus more to serve
Kosher salt and ground black pepper
1 1/2 lbs. extra-large (21/25 per pound) shrimp, peeled and deveined
1 tTbsp. lime juice, plus lime wedges to serve
3 cups lightly packed fresh cilantro, plus more to serve
1/3 cup Mexican crema or sour cream
Directions
In a 12-inch skillet over medium-high, heat the oil until barely smoking. Add the chilies and cook, stirring occasionally, until charred in spots, 2 to 4 minutes. Reduce to medium and add the garlic, onion, ¼ cup water and ½ teaspoon salt. Cover and cook, stirring often, until the vegetables are softened, 5 to 7 minutes. Meanwhile, in a small bowl, toss the shrimp with the lime juice, ½ teaspoon salt and ¼ teaspoon pepper; set aside.
Transfer the vegetable mixture to a blender; reserve the skillet. To the blender, add the cilantro, crema and ¼ teaspoon each salt and pepper. Blend on high until smooth, 1 to 2 minutes.
Pour the puree into the skillet and bring to a simmer over medium. Cook, stirring occasionally, until slightly thickened, 3 to 5 minutes. Add the shrimp and cook, stirring often, until opaque throughout, about 3 minutes.
Off heat, taste and season with salt and pepper. Transfer to a serving dish and garnish with additional cilantro and sliced onion; serve with lime wedges.
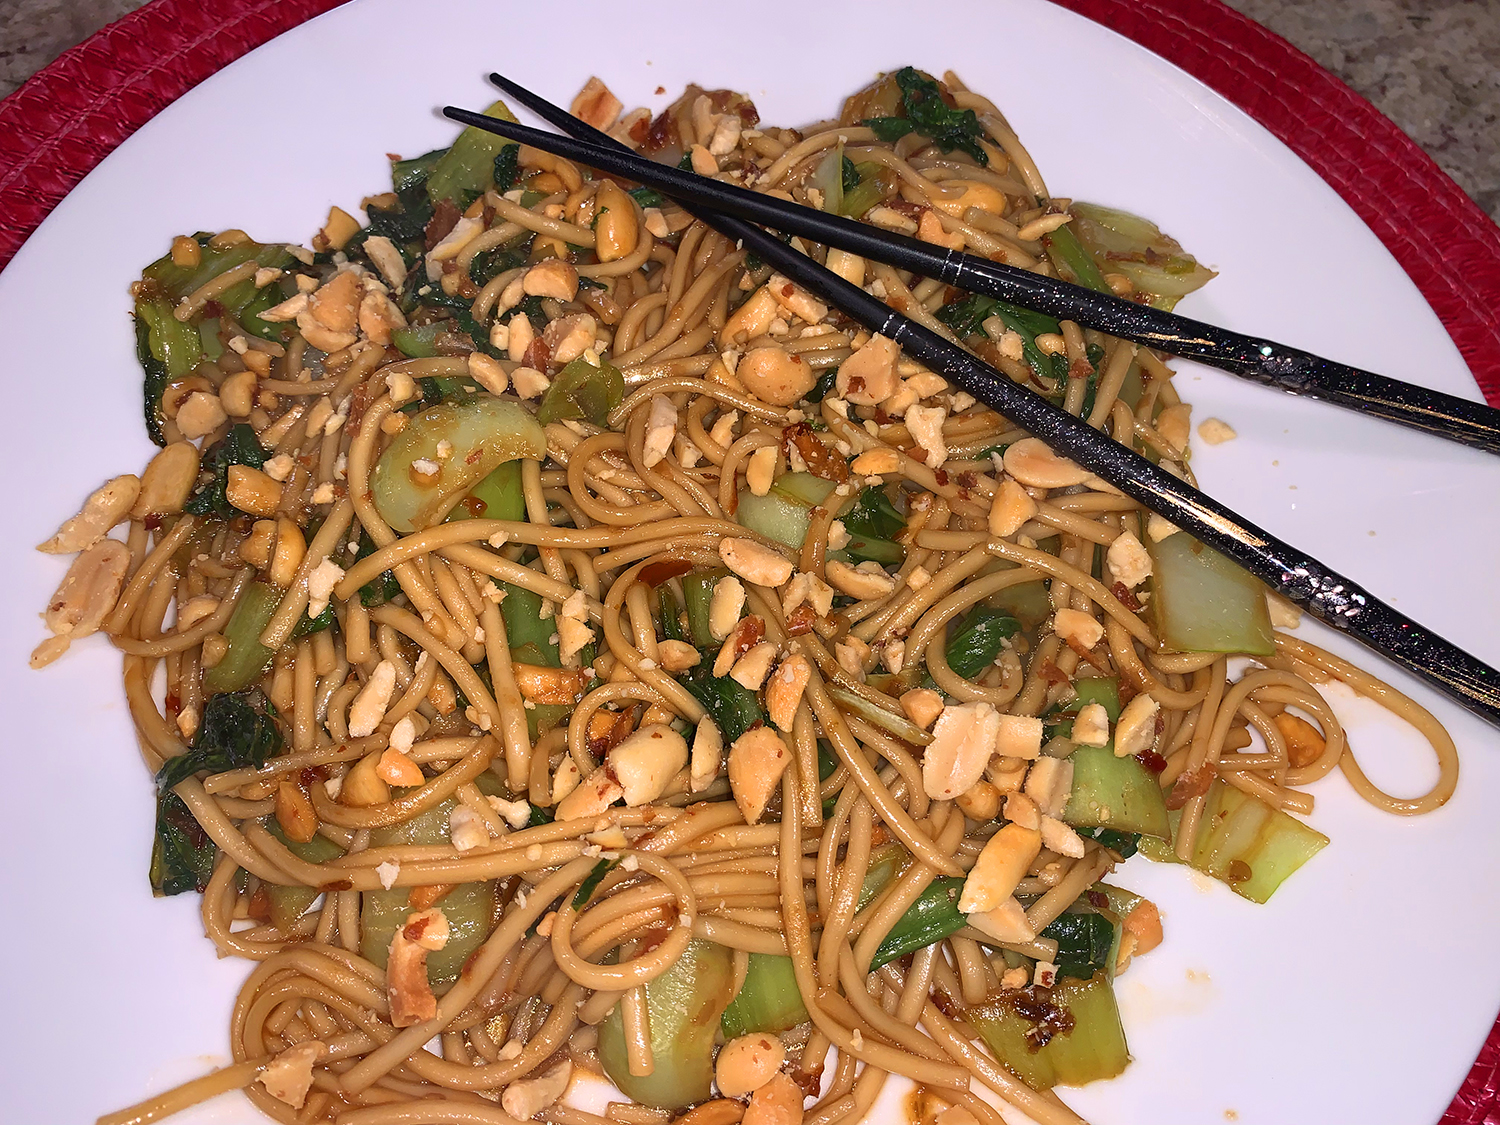
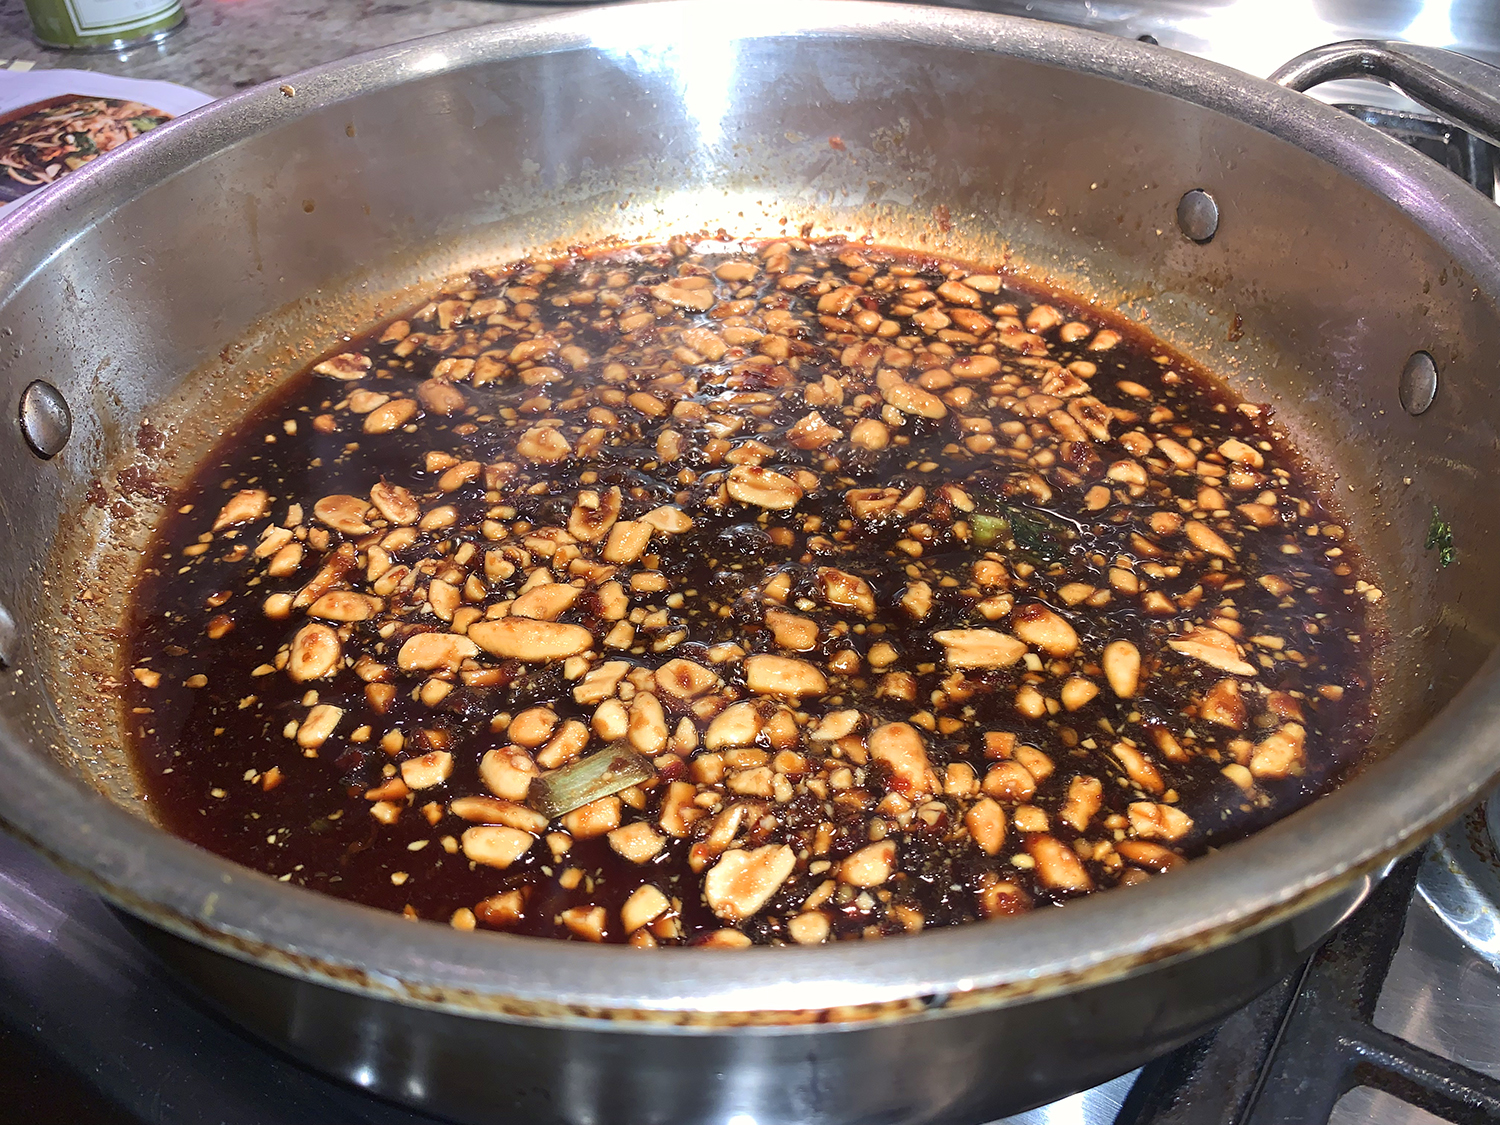
These noodles are an addictive combination of salty, spicy and sweet. For best results, use thick Asian wheat noodles, such as udon or lo mein, that cook up with chewy resilience. We try to include vegetarian dishes into our repertoire of meals, and this recipe is anything but ho-hum. Plus the ease of prep and limited ingredients let you serve dinner in under a half hour.
Chili crisp, a Chinese condiment sold in jars, is chili oil amped up with with red pepper flakes and additional spices. If you can find it, it’s a more flavorful alternative to standard chili oil. We used a chili-garlic paste, including the full two tablespoons. In fact, The Hubs added even more to his portion before tasting it–which probably wasn’t that wise 😉
If you want to amp up the veggies, one reviewer suggested including mushrooms, which we both agreed would be a good addition. Our Udon noodles weighed in at only eight ounces as opposed to the ten ounces the recipe called for. Luckily we didn’t have another mouth to feed because we polished off the entire skillet’s worth!
Mushrooms are widely known for their great taste and amazing health benefits. Packed with a ton of essential vitamins and minerals, they make for an excellent addition to your diet, adding flavor to many different recipes. Thank goodness we love them!
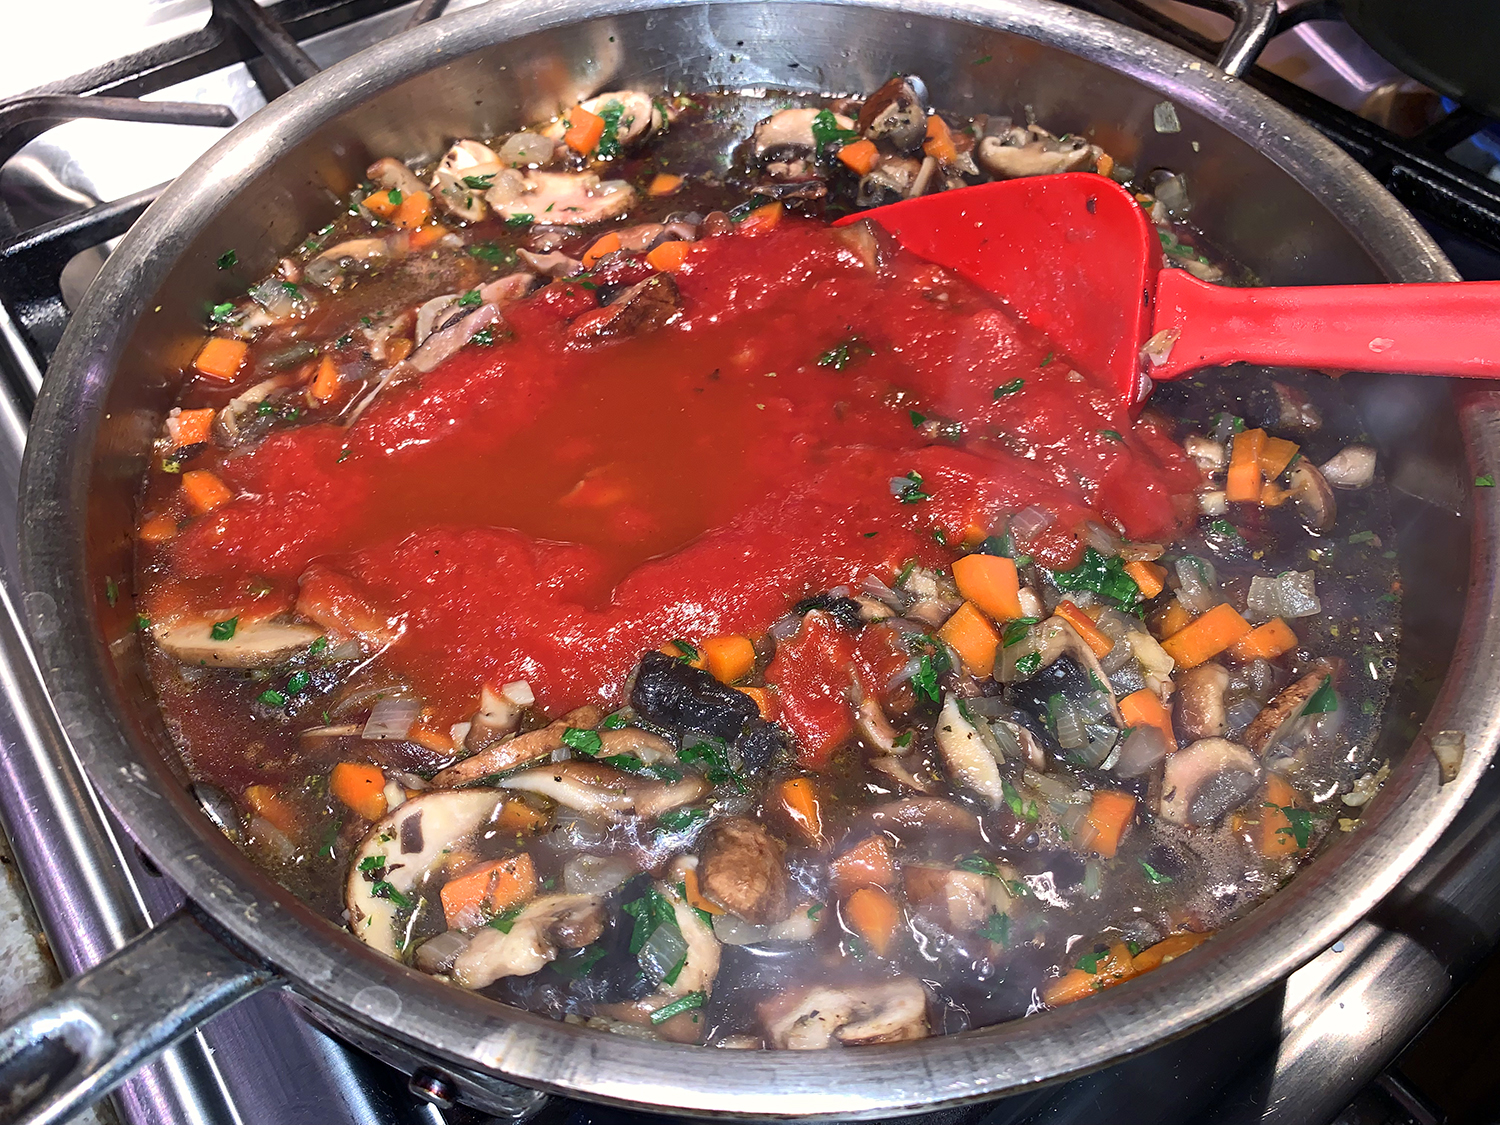
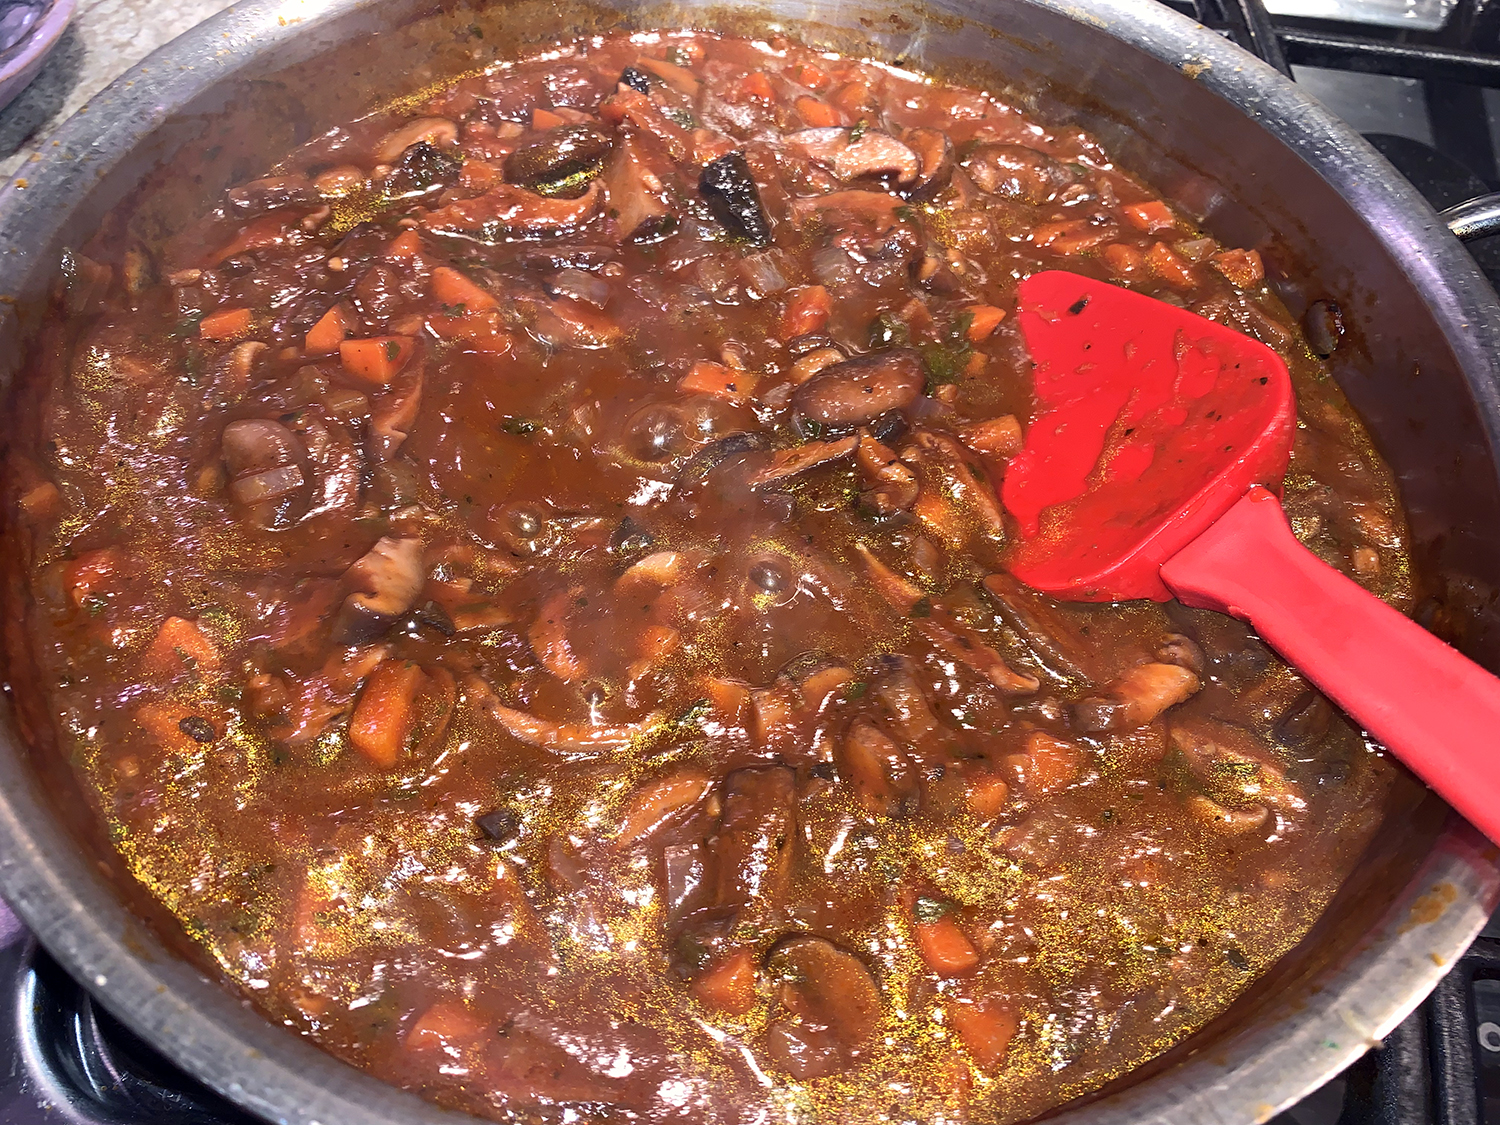
This hearty plant-based mushroom ragù consists of readily available fresh mushrooms and is ready in about an hour. Three types of the funghi are incorporated in this recipe, but feel free to use just one or two types to make the sauce even easier. Serve vegan ragù over polenta, pasta, couscous, or even as a topping for steak or chicken.
Classic or vegan mushroom ragù will keep in the refrigerator for up to 5 days in an airtight container; in the freezer for up to 6 months. To reheat, spoon the ragù sauce into a pot over medium heat until warmed through. If it has become too thick, add a little more liquid (water or vegetable broth) to loosen it a little.
Make it even a bit healthier by using a whole wheat pasta. Of course if you add grated cheese like we did, it is no longer vegan, but we were OK with that.
In a large pot, heat 3 tablespoons extra virgin olive oil over medium-high heat until shimmering but not smoking. Add the onions, carrots, and garlic. Season with a big pinch of kosher salt. Cook, stirring occasionally, until the vegetables have softened, about 5 minutes.
Add the mushrooms and season with another dash of salt. Add a drizzle more of olive oil and a little bit of the broth. Cook the mushrooms for about 5 minutes until they begin to soften and cook down a little bit.
Add the thyme, oregano, parsley, and a good dash of black pepper. Stir.
Finally, add the red wine, tomato sauce, and the remainder of the broth. Bring to a boil for 5 minutes, then reduce the heat to low and cover. Cook for 20 minutes or so covered, then uncover and allow the mushrooms to cook some more (about 15 to 20 minutes) until the mixture thickens to a ragù.
To finish, taste and adjust salt to your liking. Stir in a bit more fresh parsley. If you like, add in the chopped hazelnuts (optional).
Serve with your favorite pasta, polenta, or even pearl couscous
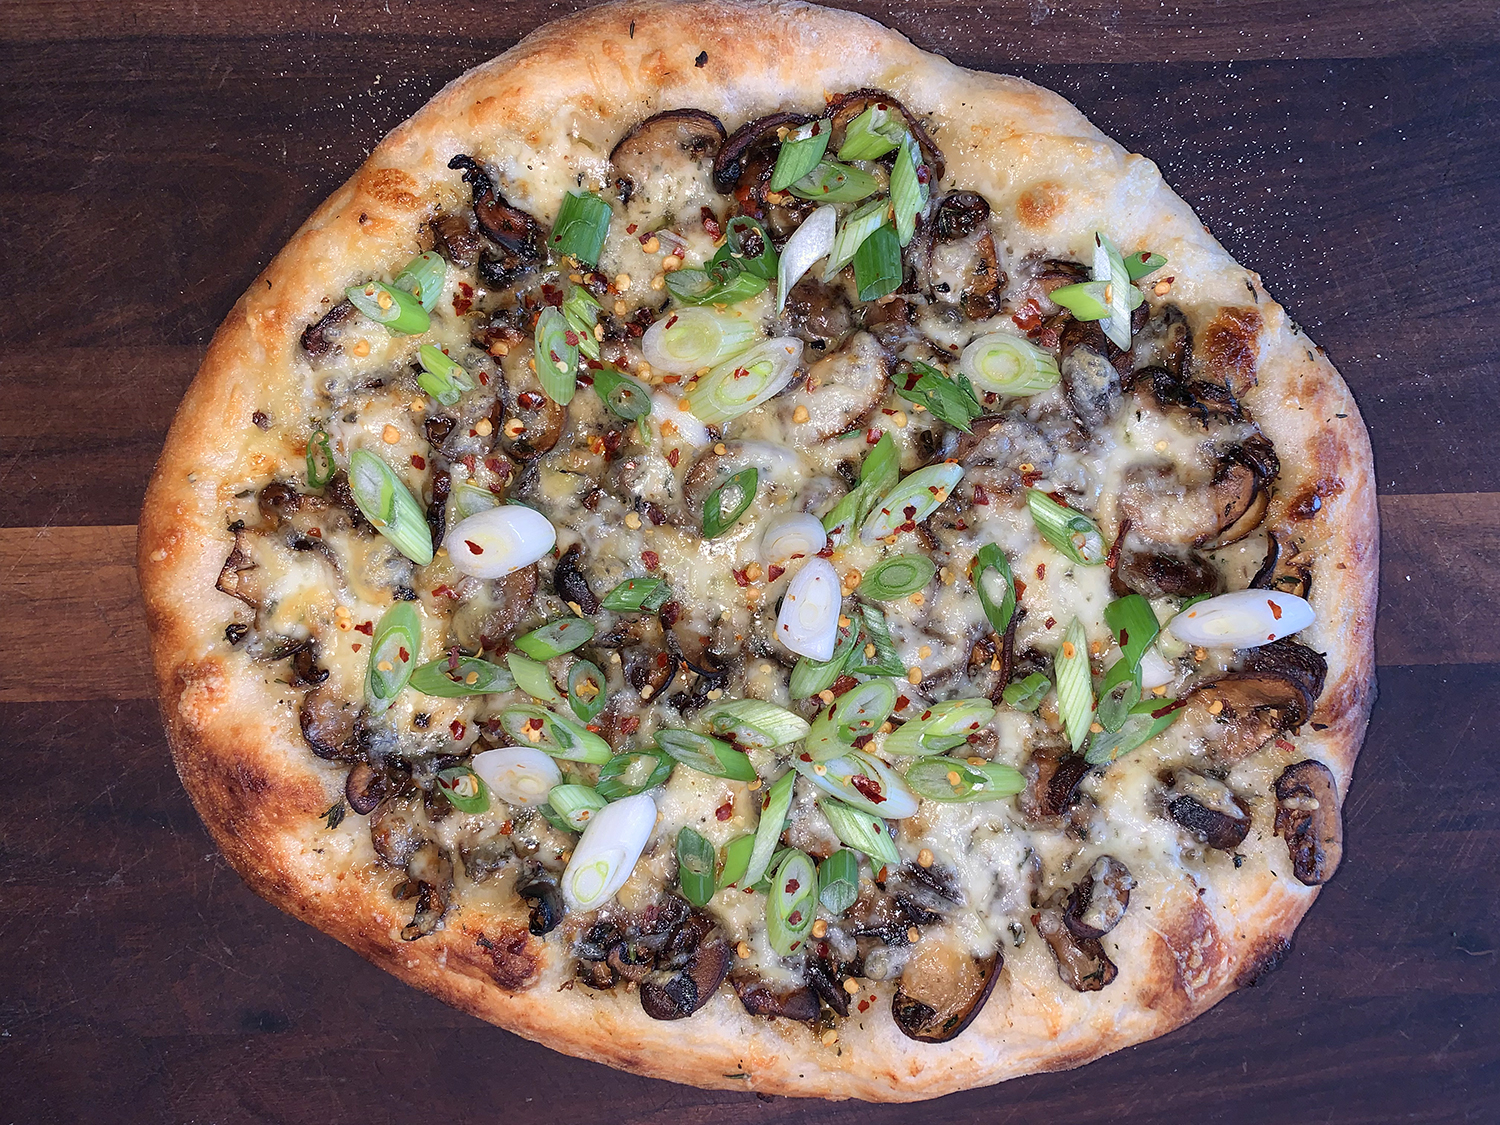
Having a ready-made pizza delivered to your doorstep is certainly the easy route. But often times we love a culinary challenge, and this pizza recipe from Milk Street proved to be just that. We made our dough from scratch, even warmed it up to a perfect 75° in a sous vide bath, but it still was tricky to stretch out. You can always purchase a pre-made dough and save yourself some aggravation, just sayin’…
Be aware, heating the oven and pizza steel or stone to 550°F takes about an hour. Use this time to roast portobello mushrooms, and to combine the fontina-Parmesan cream white sauce. Don’t undercook the mushrooms. Roasting them until well browned removes moisture that would otherwise make the pizza crust soggy. Another suggestion would be to use cremini mushrooms instead of portobello caps, then you wouldn’t have to remove any gills.
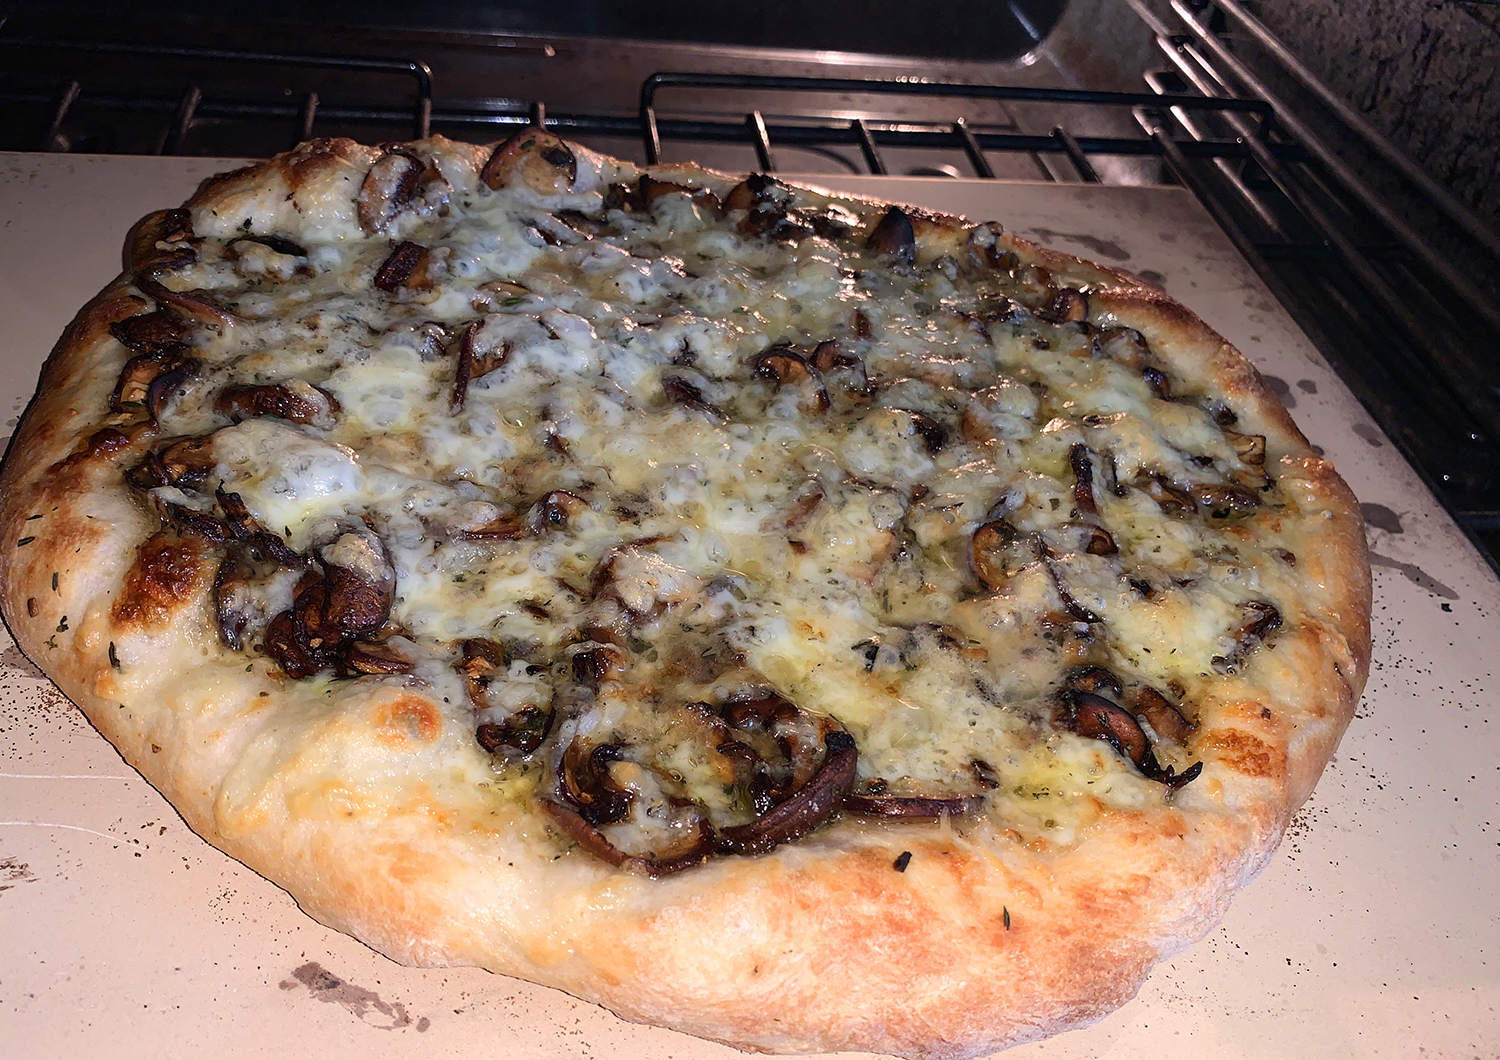
The second pie was more successful!
For a time-saver on dinner day, the mushrooms also can be prepped up to 24 hours ahead and refrigerated. When shaping the pizza dough, make sure that the edges are thicker than the center so they contain the cream sauce, which becomes runny during baking. For a crisp, well-browned bottom crust, if your oven only goes to 500°F, the pizza will need to bake for an extra two minutes.
The first attempt was unremarkable. The crust shape was more rectangular and we over-charred the mushrooms. Since the Fontina-Parmesan Cream makes enough for two pizzas, we made another several days later, which was more of a success story. This time we browned cremini mushrooms in a nonstick skillet on the stovetop. Plus we added about another cup of shredded fontina on top of the mushrooms. And that my friends, was a perfect pie!
1 cup fontina-Parmesan cream (recipe below); more on top of the mushrooms if desired.
2 scallions, thinly sliced on bias
1/4 tsp. red pepper flakes
Directions
At least 1 hour before baking, heat the oven to 550°F with a baking steel or stone on the upper-middle rack and a second rack in the lower-middle.
Cut the mushroom caps into ¼-inch slices. In a large bowl, toss the mushrooms, olive oil and ¼ teaspoon salt.
Spread the mushrooms in an even layer on a rimmed baking sheet. Roast on the lower oven rack, stirring once, until they have released their moisture, the moisture evaporates and the mushrooms begin to brown, about 15 minutes. OR, brown them in a nonstick skillet on the stovetop.
Stir in the thyme and garlic, then roast/cook in skillet until the mushrooms have browned and the garlic is no longer raw, another 3 to 4 minutes. Let cool completely on a wire rack.
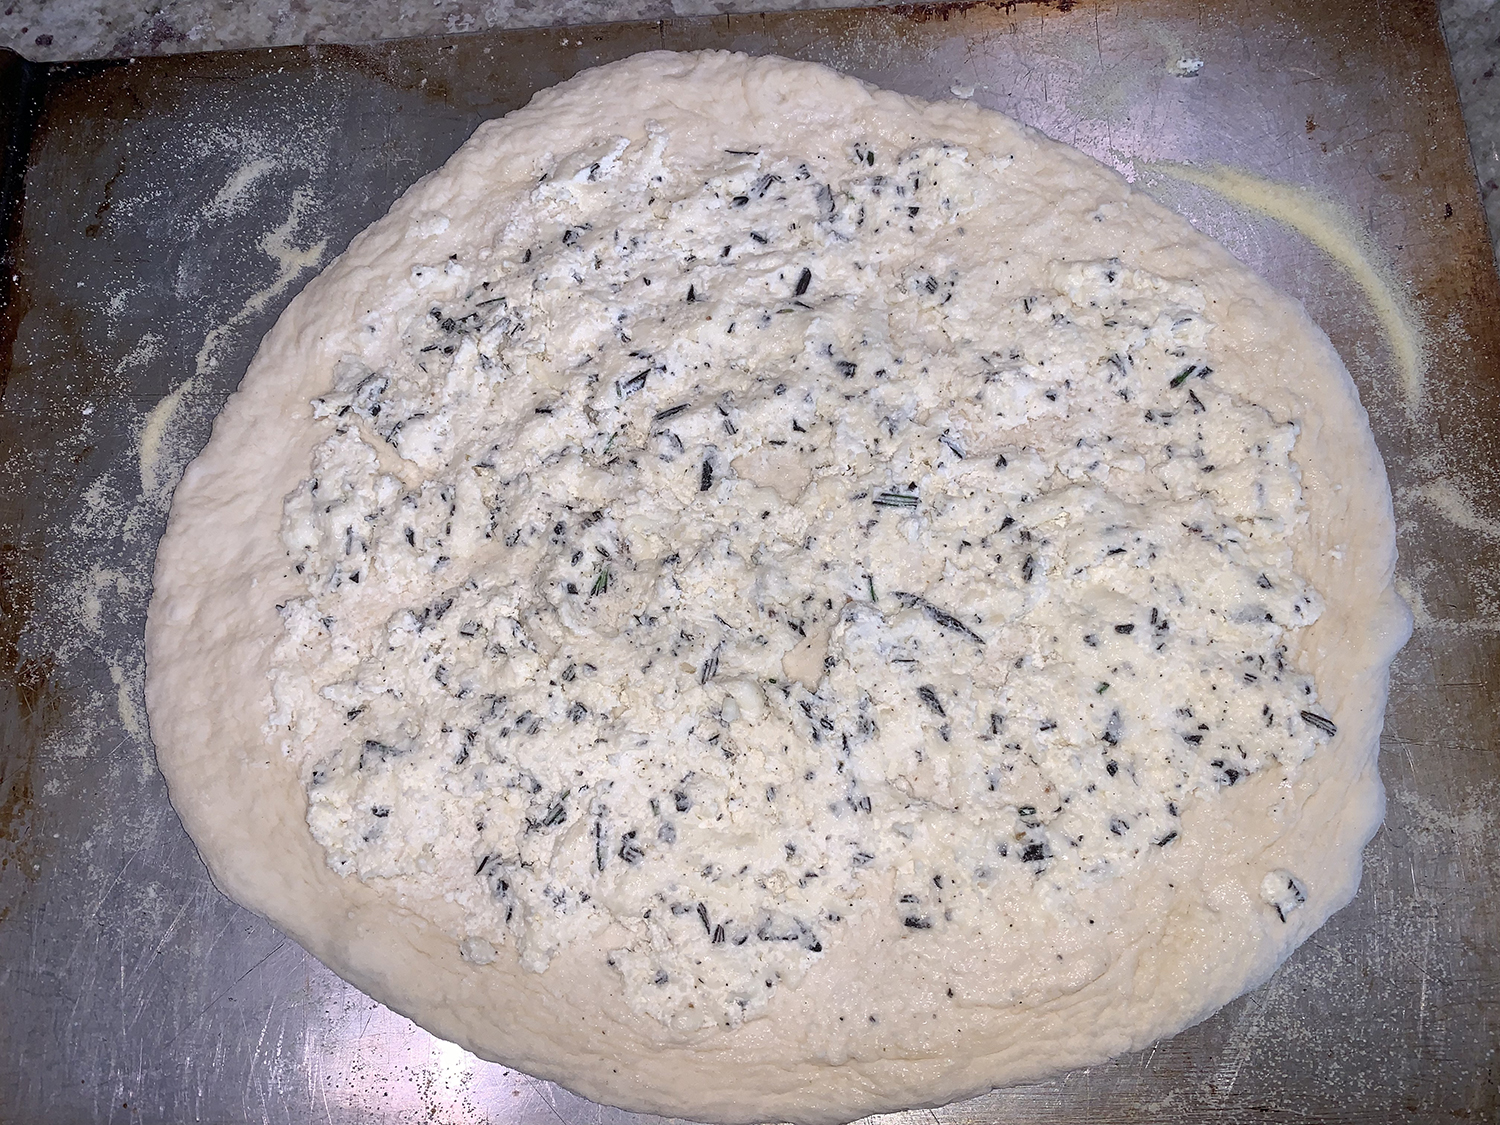
Turn the dough out onto a counter dusted generously with bread flour. Flour your hands and, using your fingers, press the dough, starting at the center and working out to the edges, into a 12-inch round, turning the dough over once. The round should be thin in the center, with slightly thicker edges. Lightly dust a baking peel, inverted baking sheet or rimless cookie sheet with the semolina. Transfer the dough to the peel and, if needed, reshape into a 12-inch round.
Using the back of a spoon, spread the fontina-Parmesan cream evenly on the dough, leaving ½-inch border at the edge. Scatter the mushrooms over it and season with pepper. If desired, add more shredded fontina on top of the mushrooms.
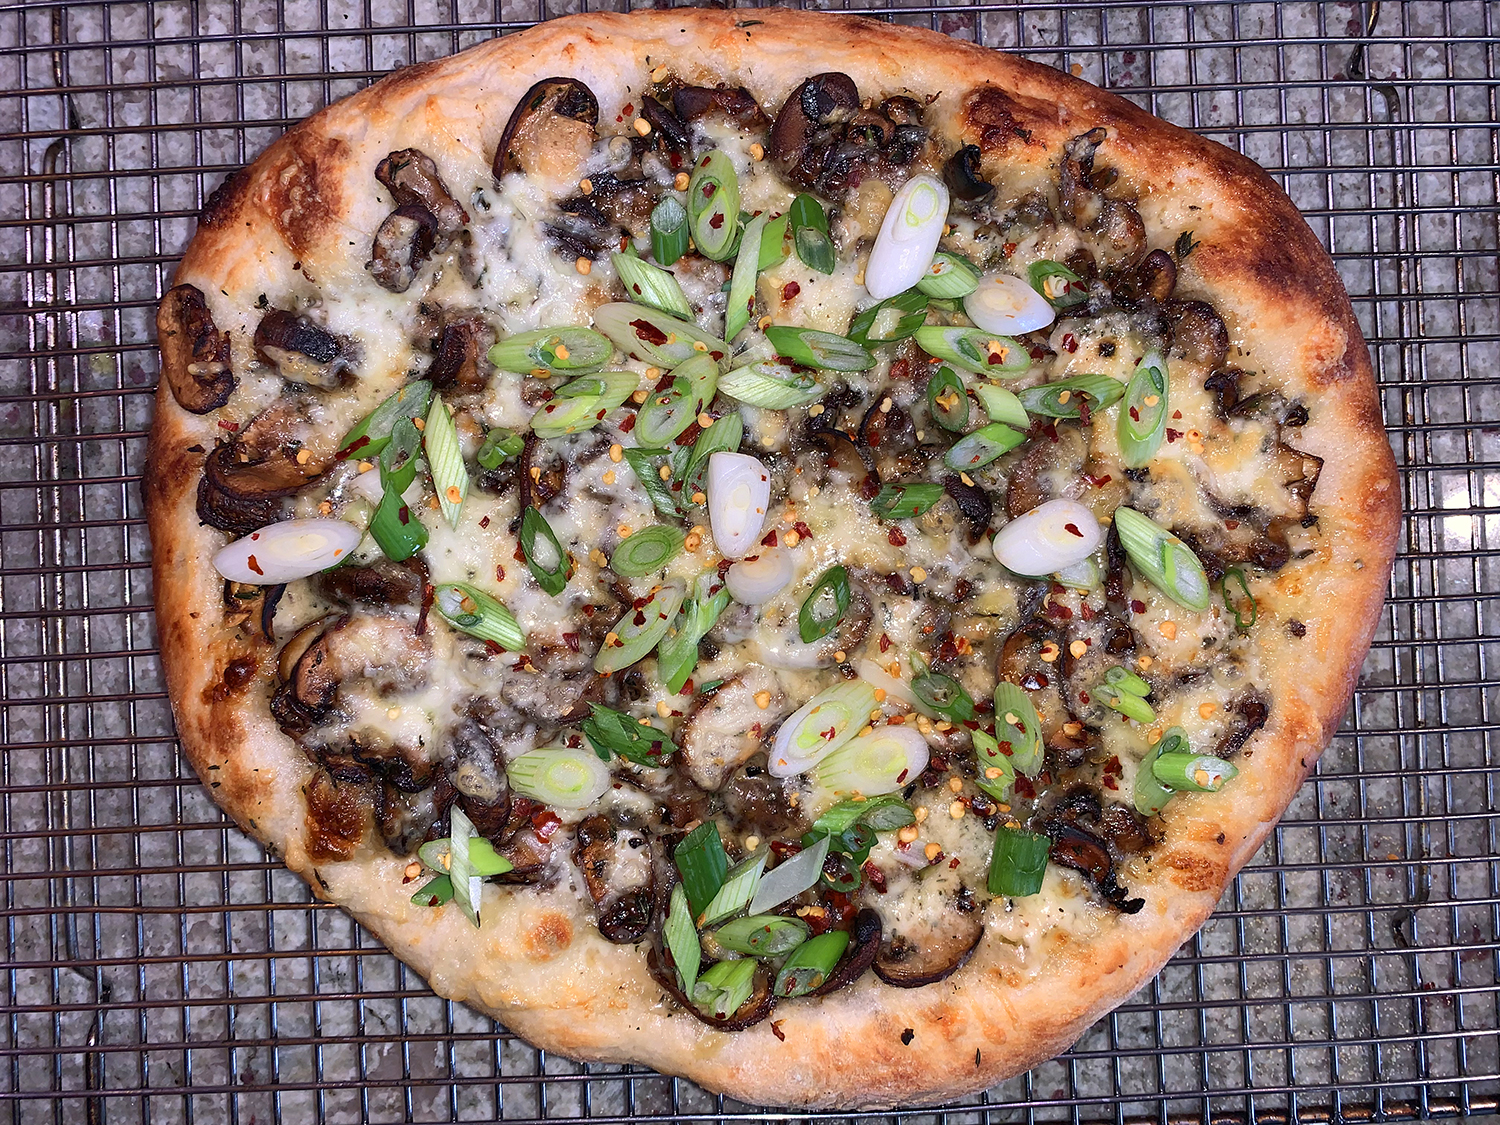
Slide the pizza onto the baking steel or stone and bake until the crust is well browned, 7 to 9 minutes.
Using the peel, transfer the pizza to a wire rack. Let cool for a couple of minutes, then sprinkle with scallions and red pepper flakes.
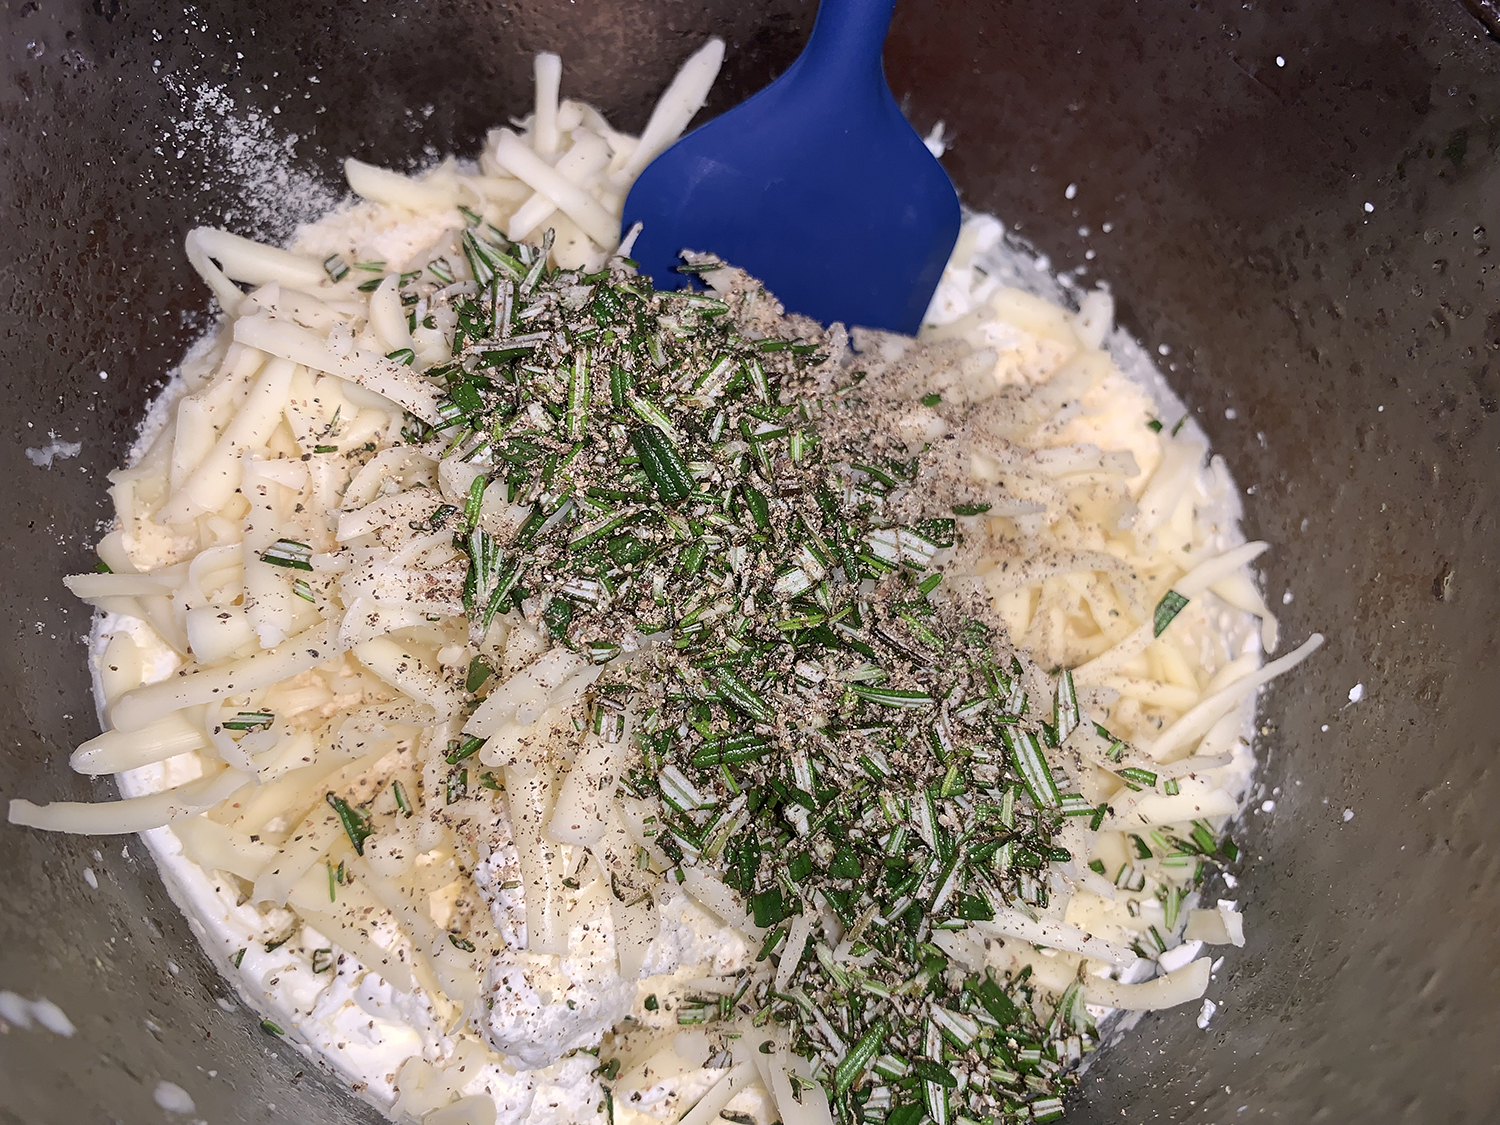
Fontina-Parmesan Cream
Ingredients
3/4 cup heavy cream, cold
1 cup shredded fontina cheese
1/4 cup grated Parmesan cheese
1 Tbsp. minced fresh rosemary
1/2 tsp. ground black pepper
Directions
In a stand mixer fitted with the whisk attachment, whip the cream on medium until stiff peaks form, about 2 1⁄2 minutes.
Using a rubber spatula, fold in the fontina, Parmesan, rosemary and pepper.
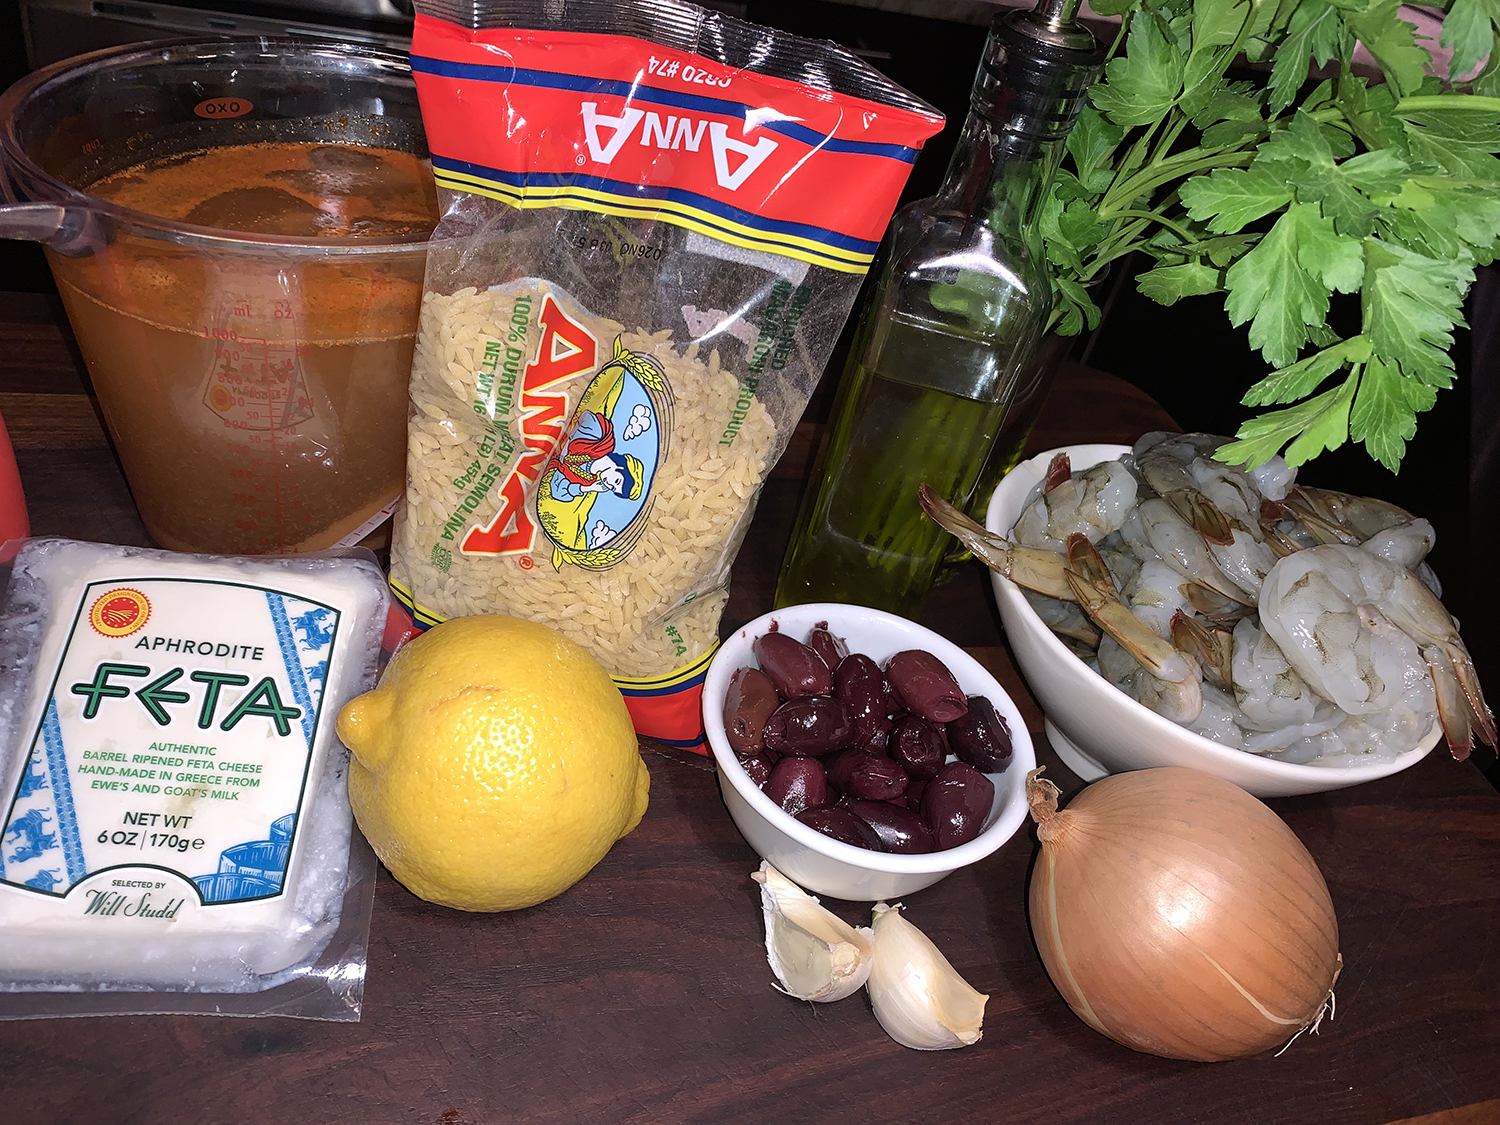
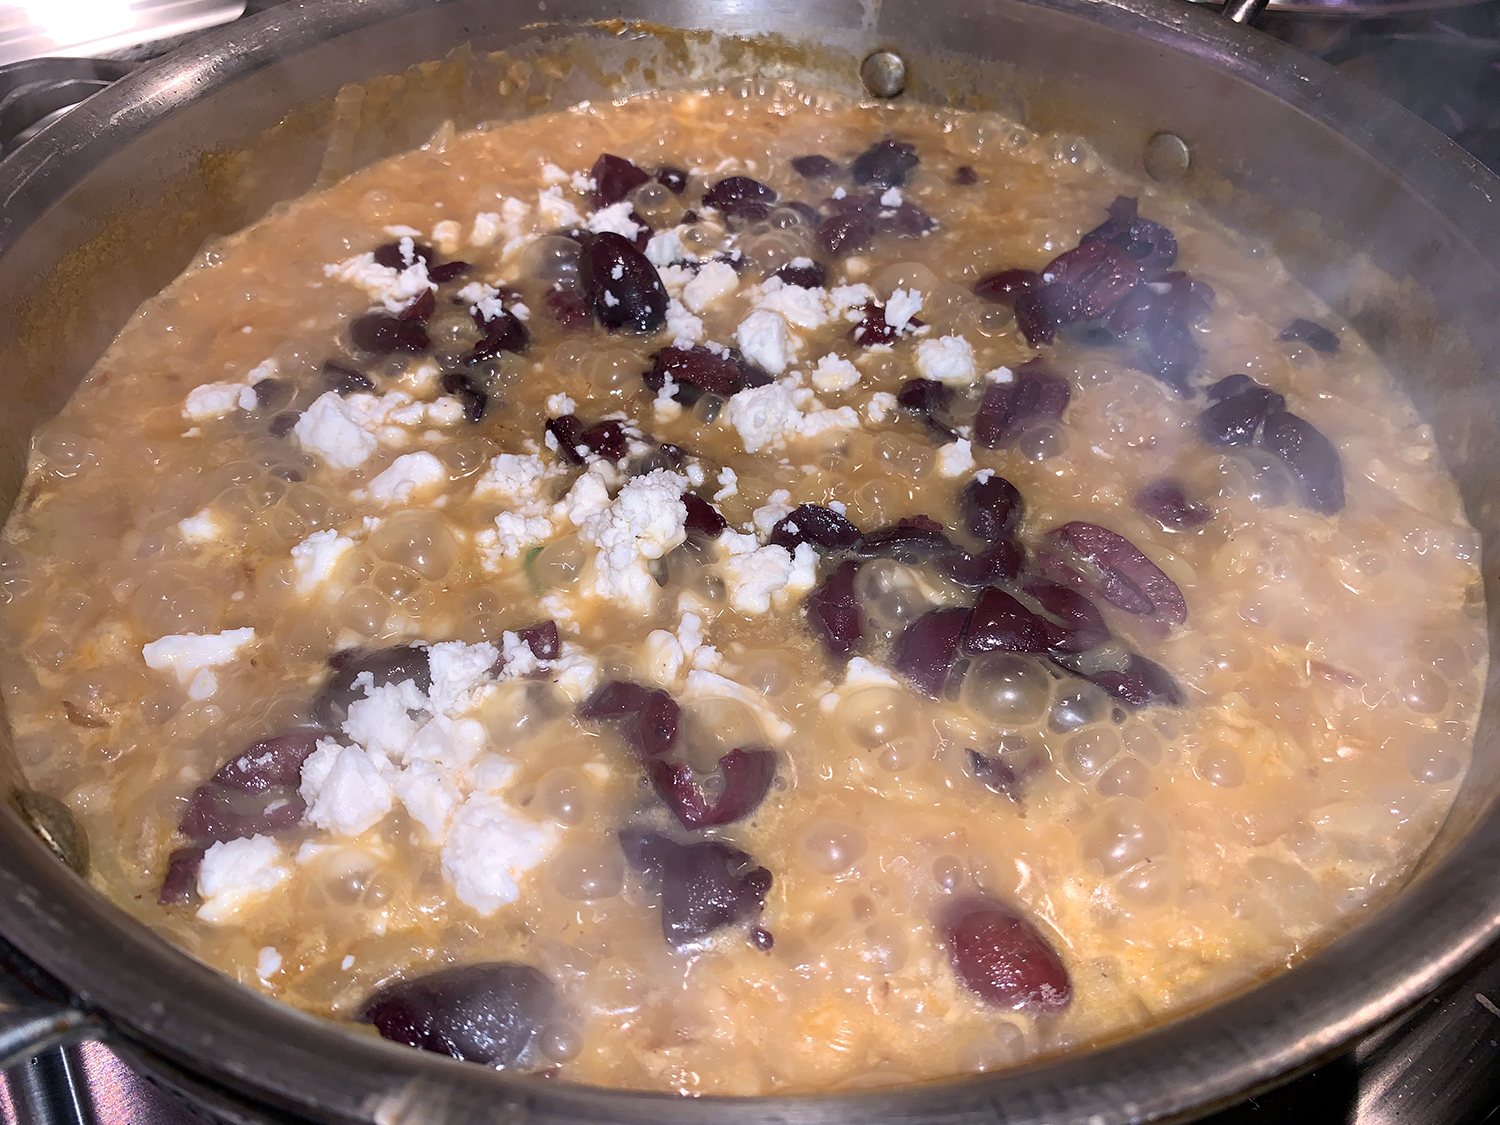
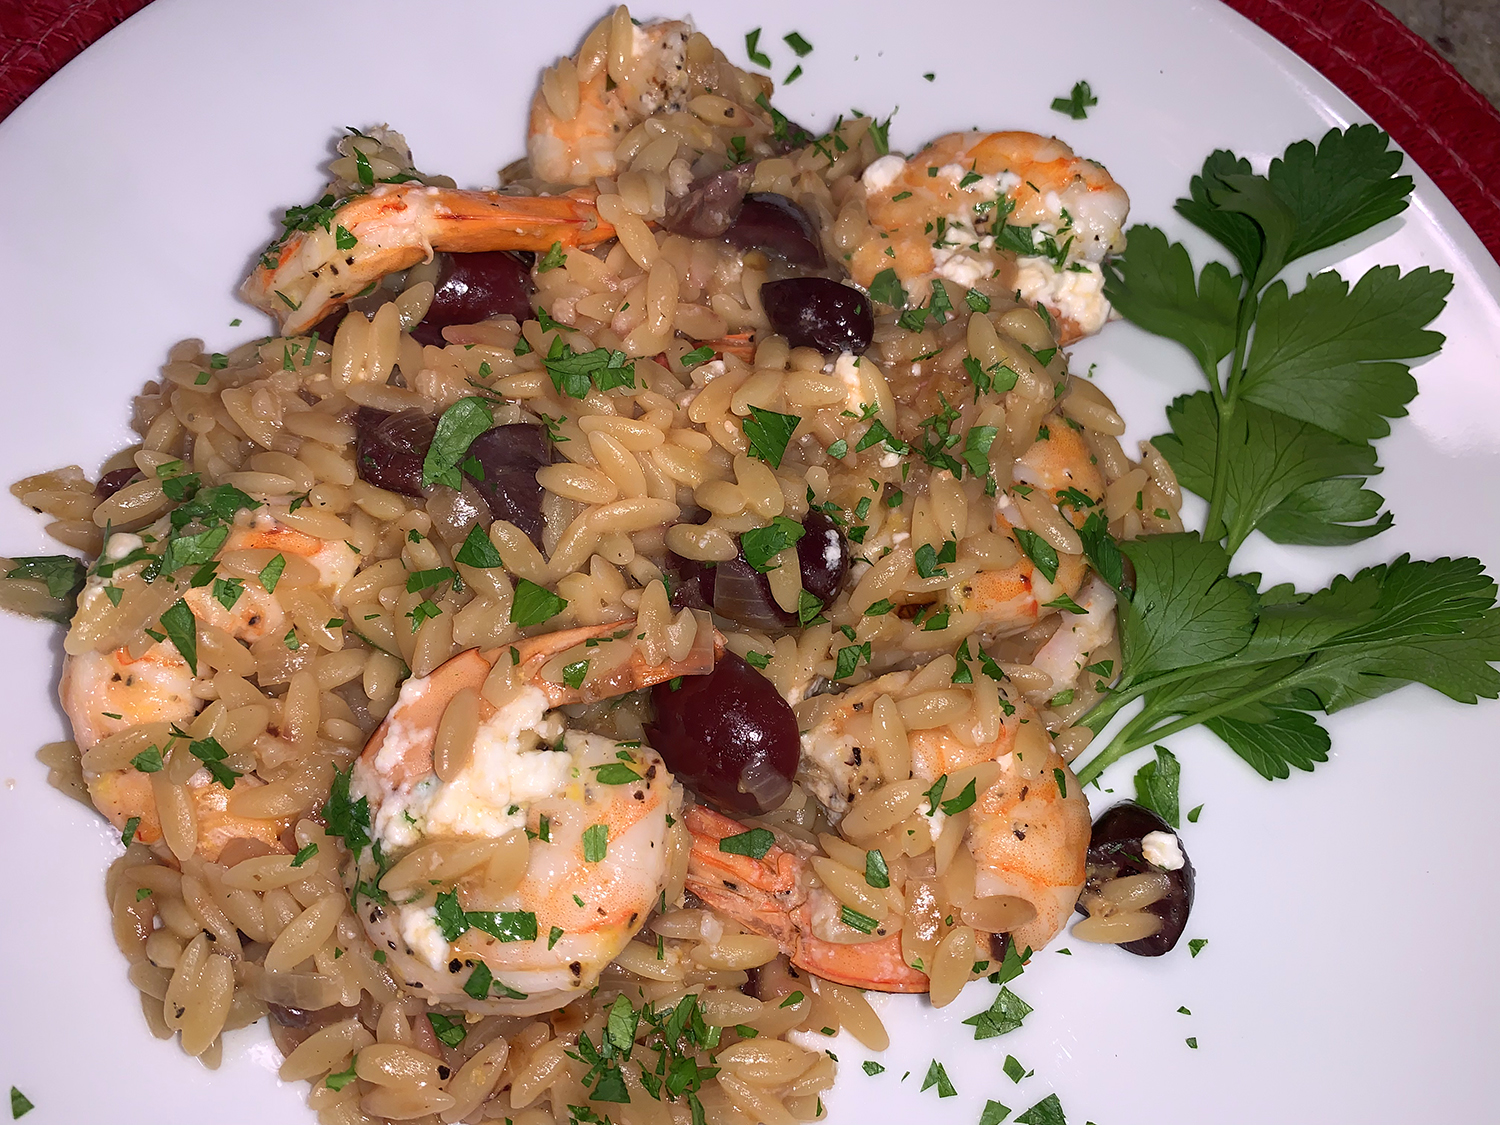
Does a Mediterranean diet appeal to you? Then these two recipes might be worth a try. The first from Cook’s Country, Orzo with Shrimp, Feta and Lemon dish will grab your attention. Cooking the orzo pilaf-style gives it extra flavor and allows you to control the slightly creamy consistency.
To keep this meatless, use seafood/shellfish stock as opposed to chicken broth. Also, if the broth you use is on the bland side, use 4 cups of the stock and omit the water. If, like our homemade shellfish stock, it is intense, dilute it with two cups of water.
Adjust the amounts of olives and feta to suit your own preferences. One version of the recipe indicated only a half cup of Kalamatas and only 2 ounces of feta, while the list below indicates double of each.
Because we cooked our meal in a 10-inch-wide nonstick pan, the shrimp took an extra two minutes to become opaque. Keep that in mind if using less than a 12-inch skillet.
1 ½ lbs. extra-large shrimp (21 to 25 per pound), peeled and deveined
2 Tbsp. extra-virgin olive oil, plus extra for drizzling
1 onion, chopped fine
2 garlic cloves, minced
2 cups orzo
2 cups seafood (or chicken) broth
2 cups water
1 cup pitted Kalamata olives, chopped coarse
4 oz. feta cheese, crumbled (1 cup)
Fresh parsley, for garnish
Directions
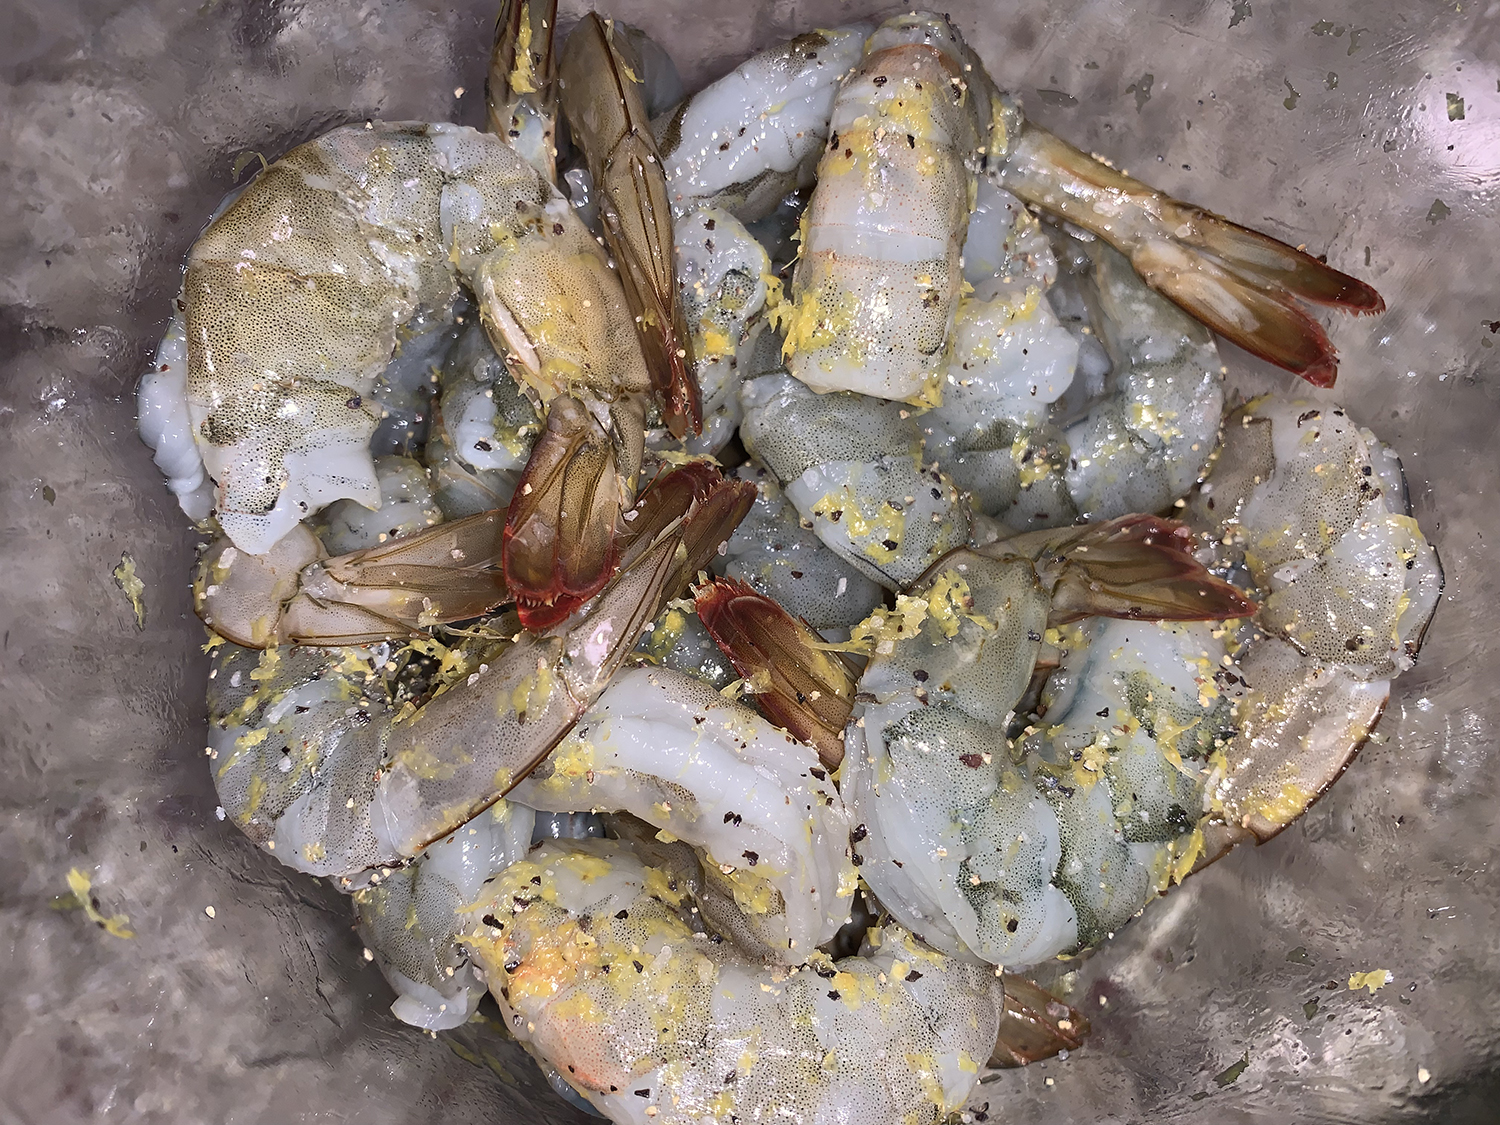
Mix lemon zest, 1/2 teaspoon salt, and 1/2 teaspoon pepper together. Pat shrimp dry with paper towels and toss with lemon-salt mixture to coat; set aside.
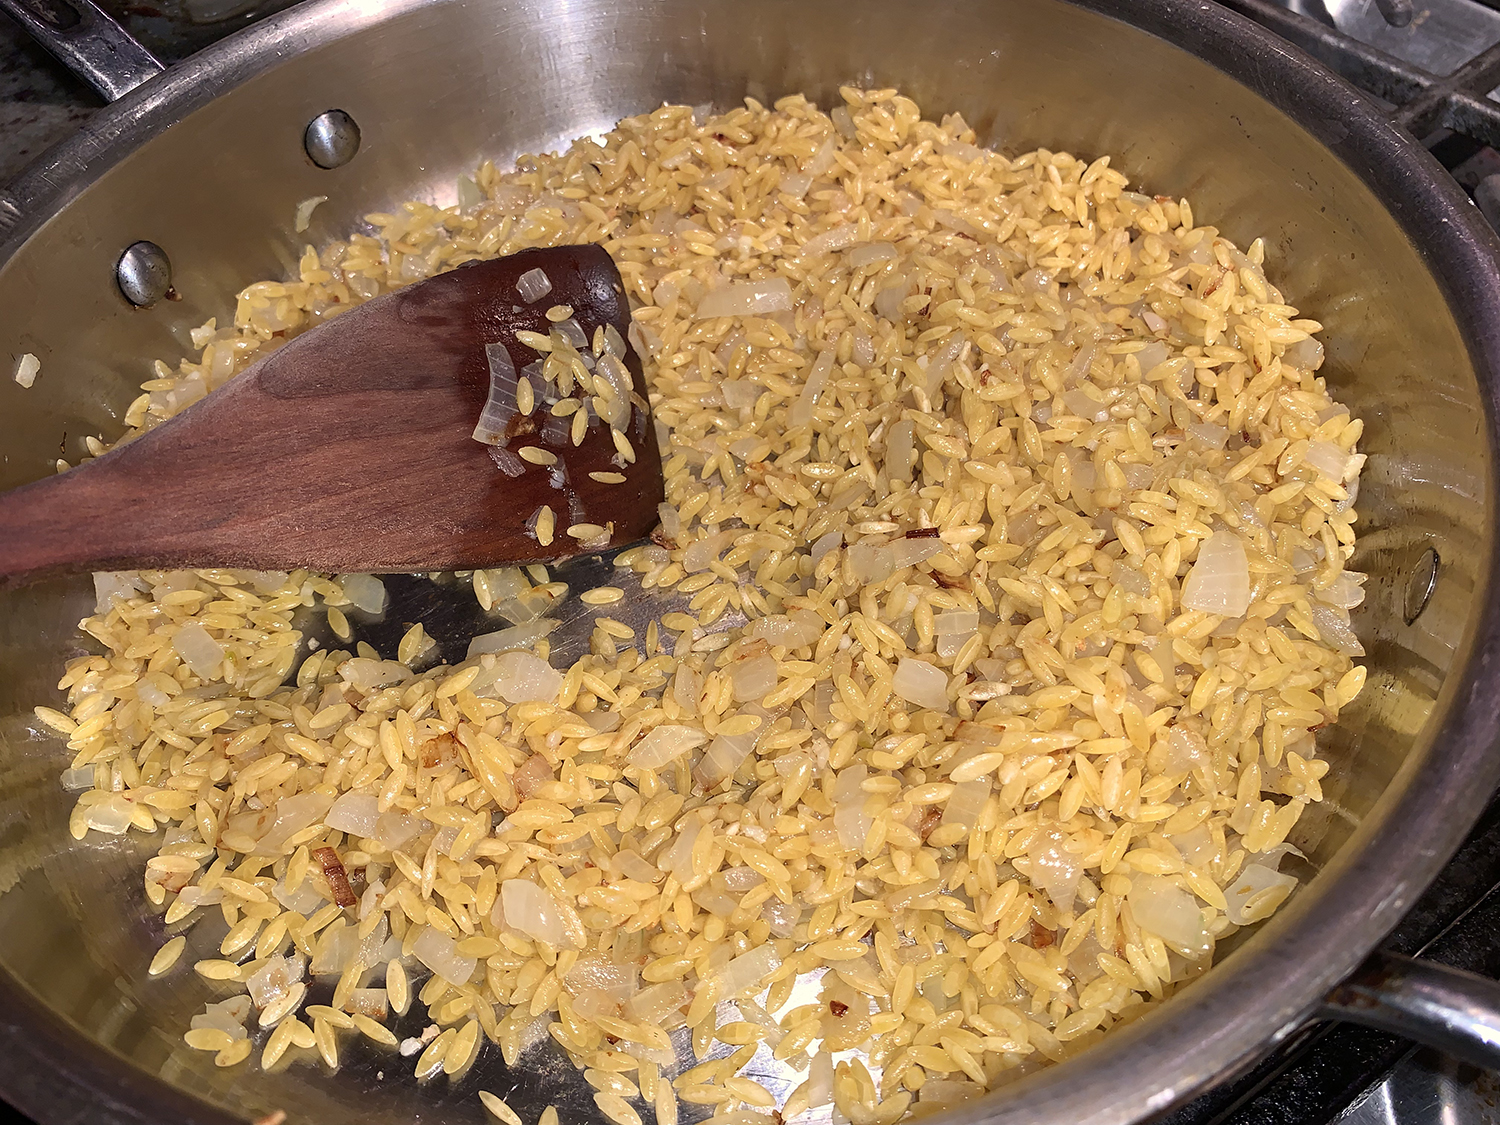
Heat 1 tablespoon oil in 12-inch nonstick skillet over medium-high heat until just smoking. Add onion and cook until softened, about 4 minutes.
Stir in garlic and cook until fragrant, about 30 seconds.
Stir in orzo and cook, stirring frequently, until orzo is coated with oil and lightly browned, about 4 minutes.
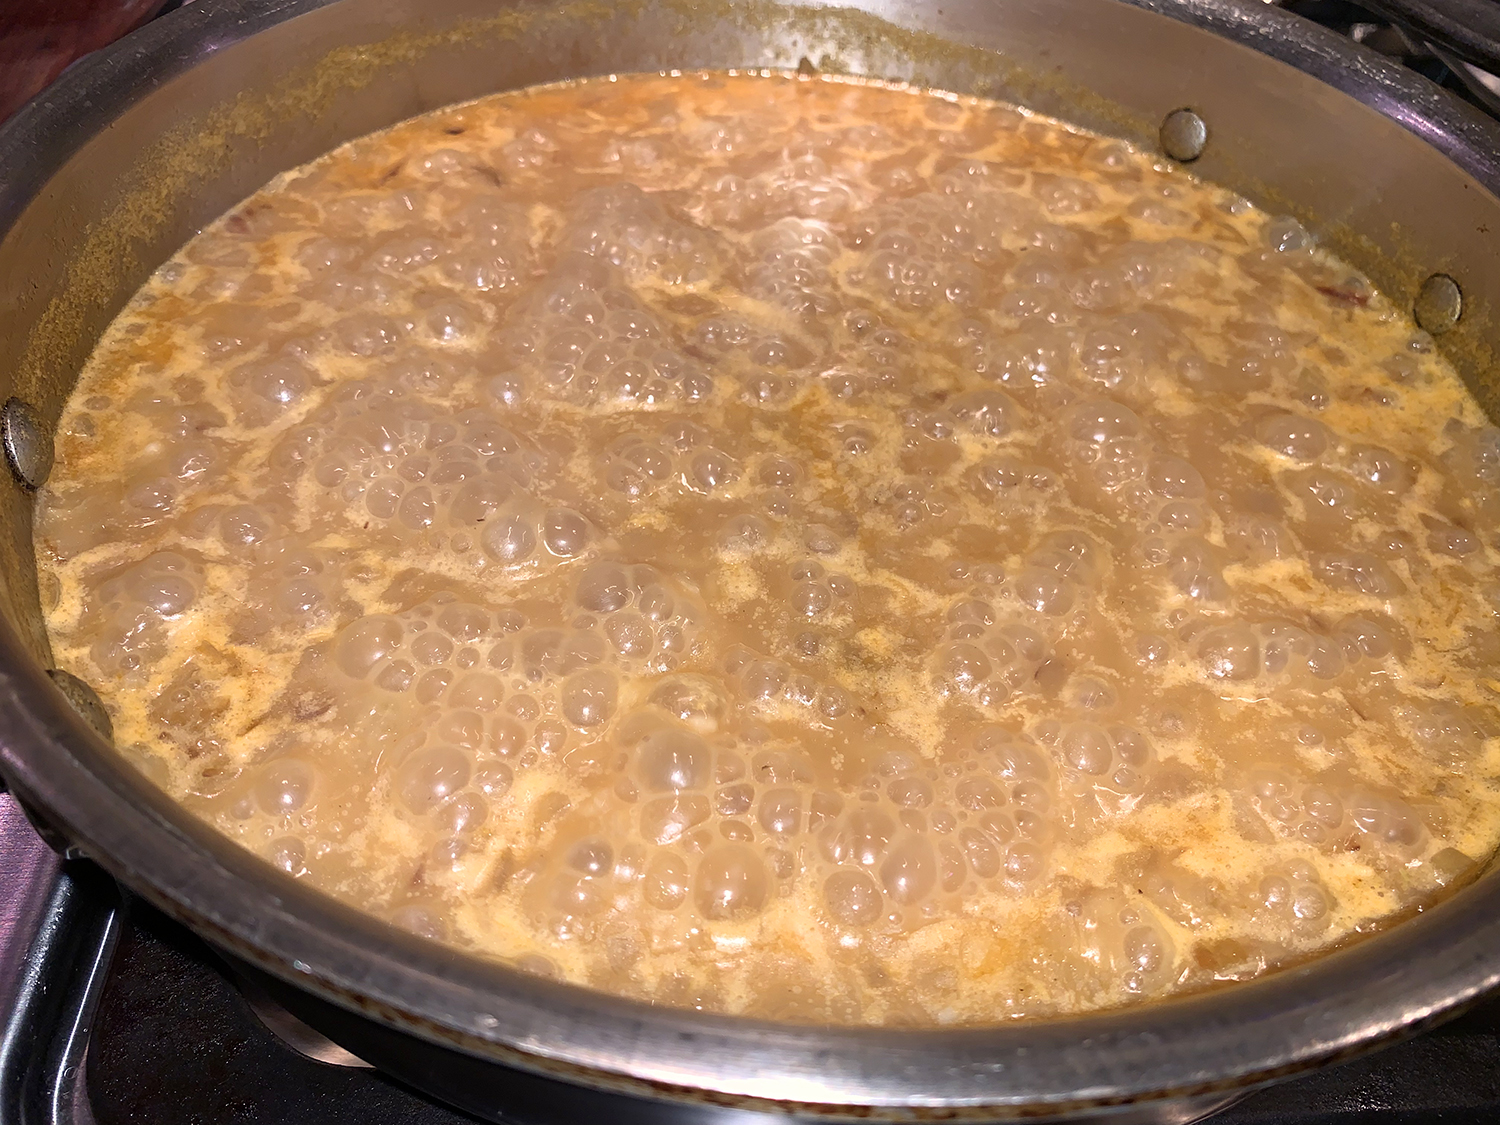
Add broth and water, bring to boil, and cook, uncovered, until orzo is al dente, about 6 minutes.
Stir in olives, 1/2 cup feta, and lemon juice. Season with salt and pepper to taste.
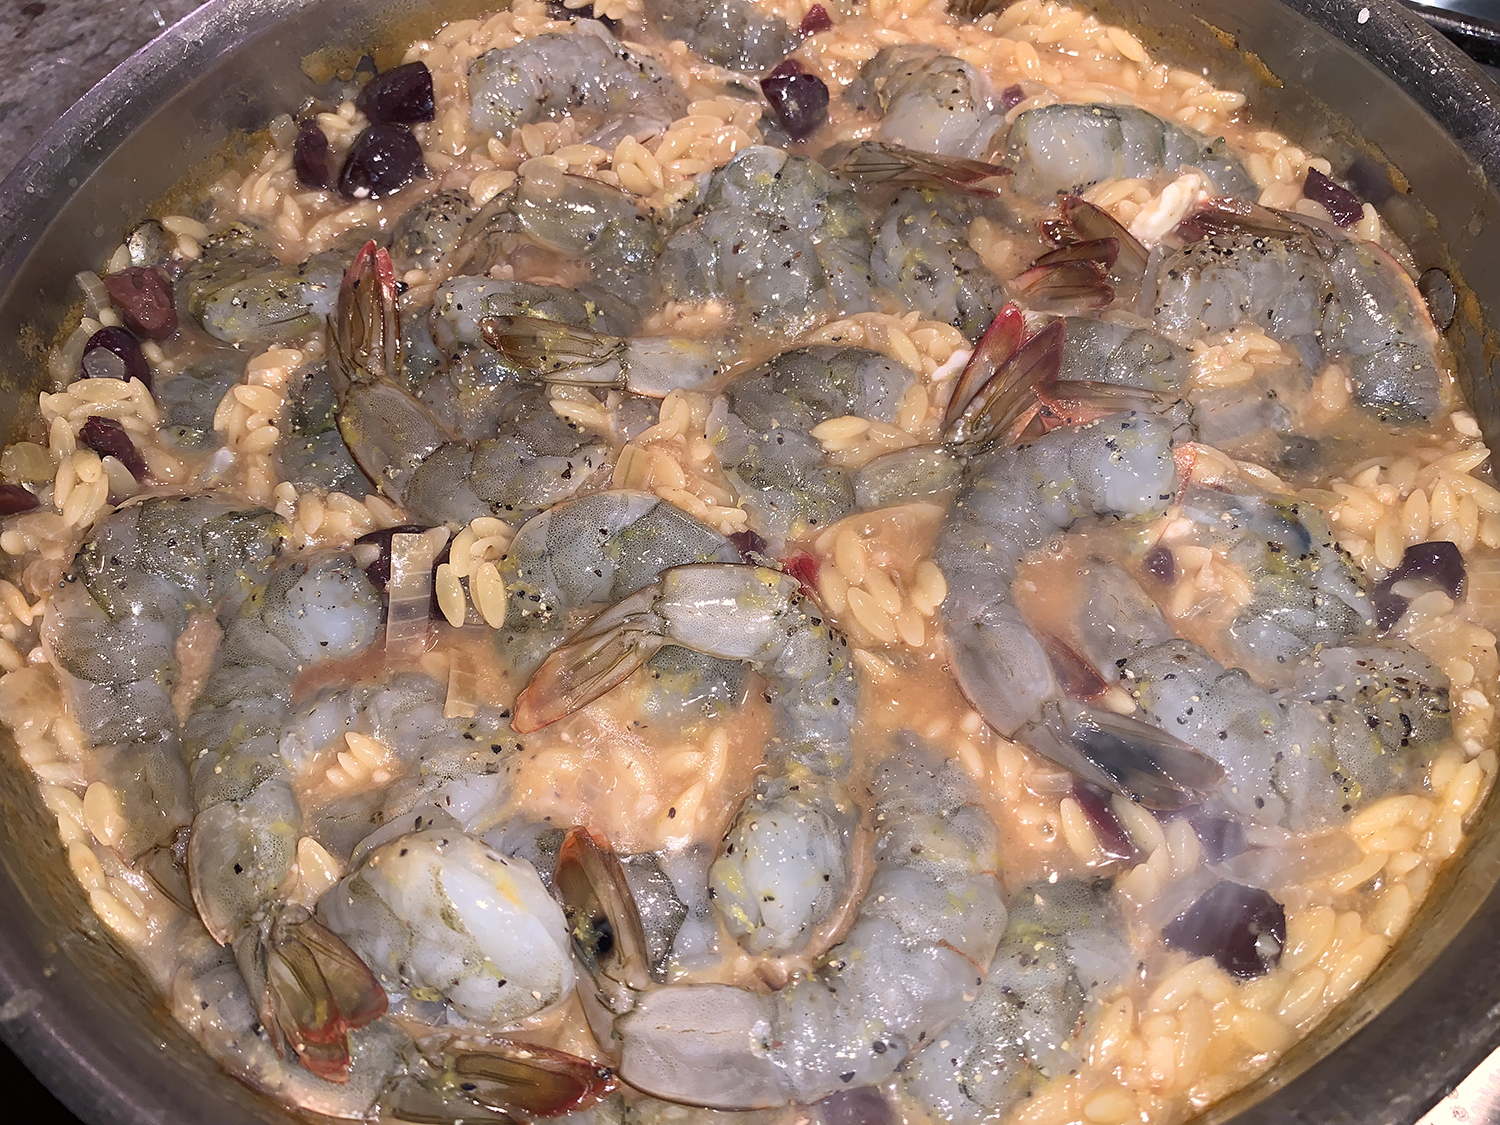
Reduce heat to medium-low, nestle shrimp into orzo, cover, and cook until shrimp are pink and cooked through, about 5 minutes.
Sprinkle remaining 1/2 cup feta over top and drizzle with extra oil. Serve.
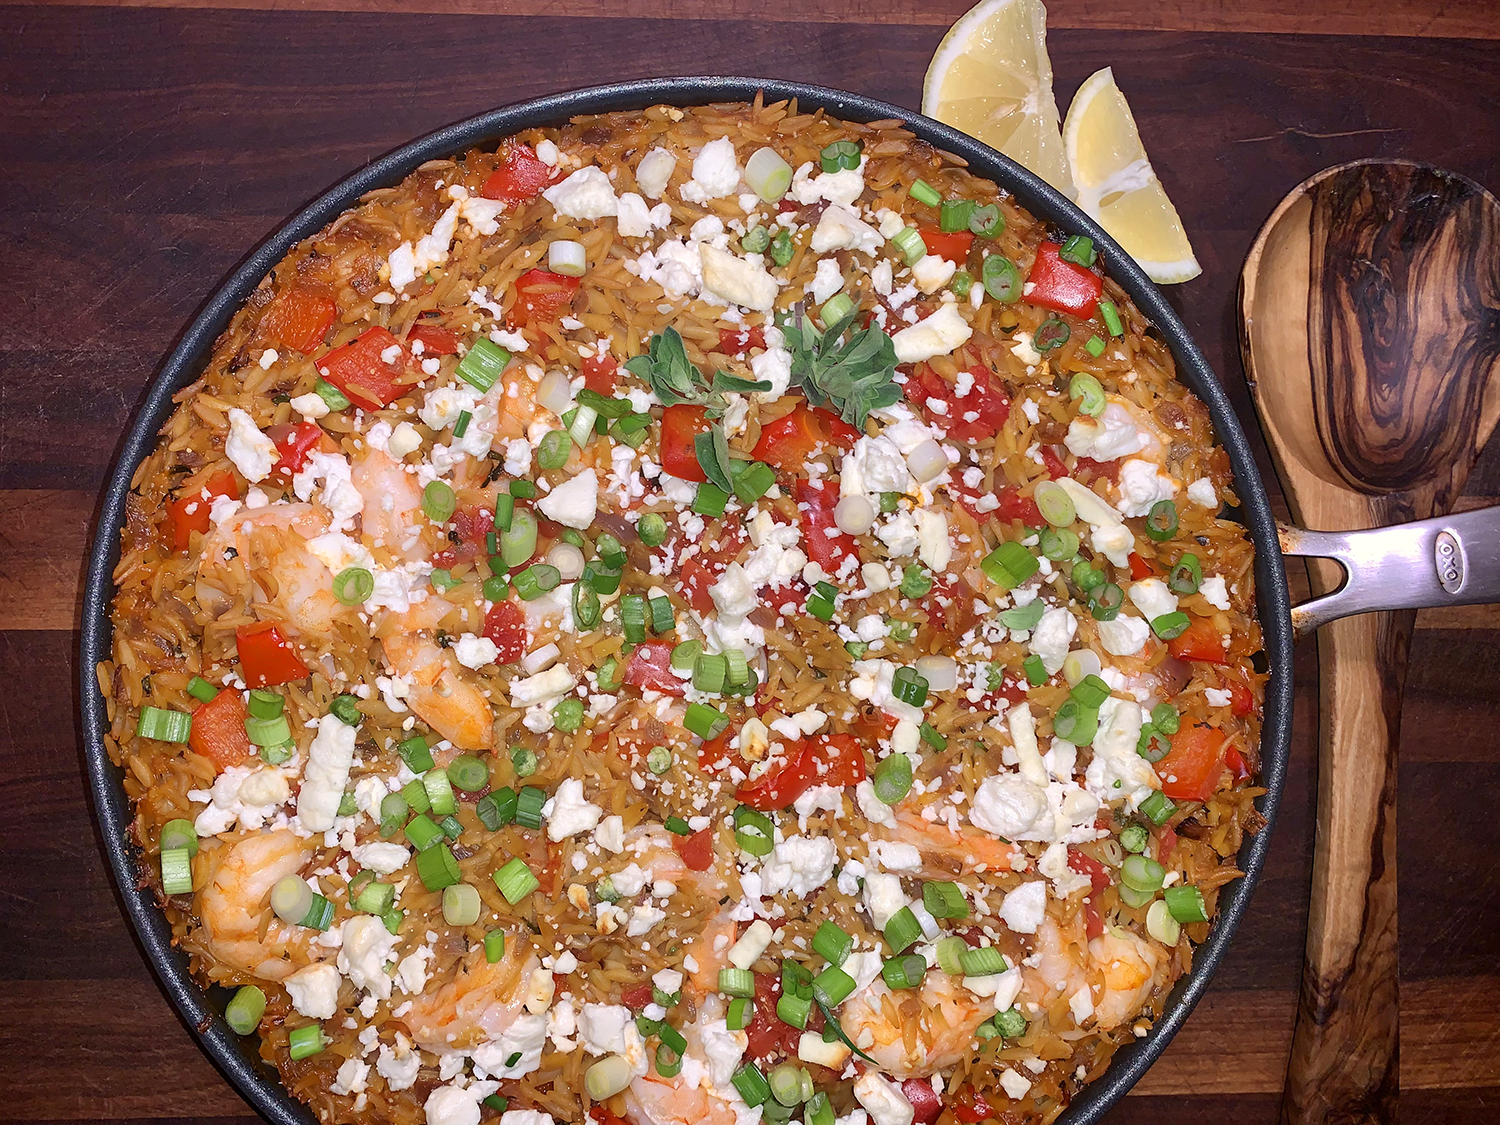
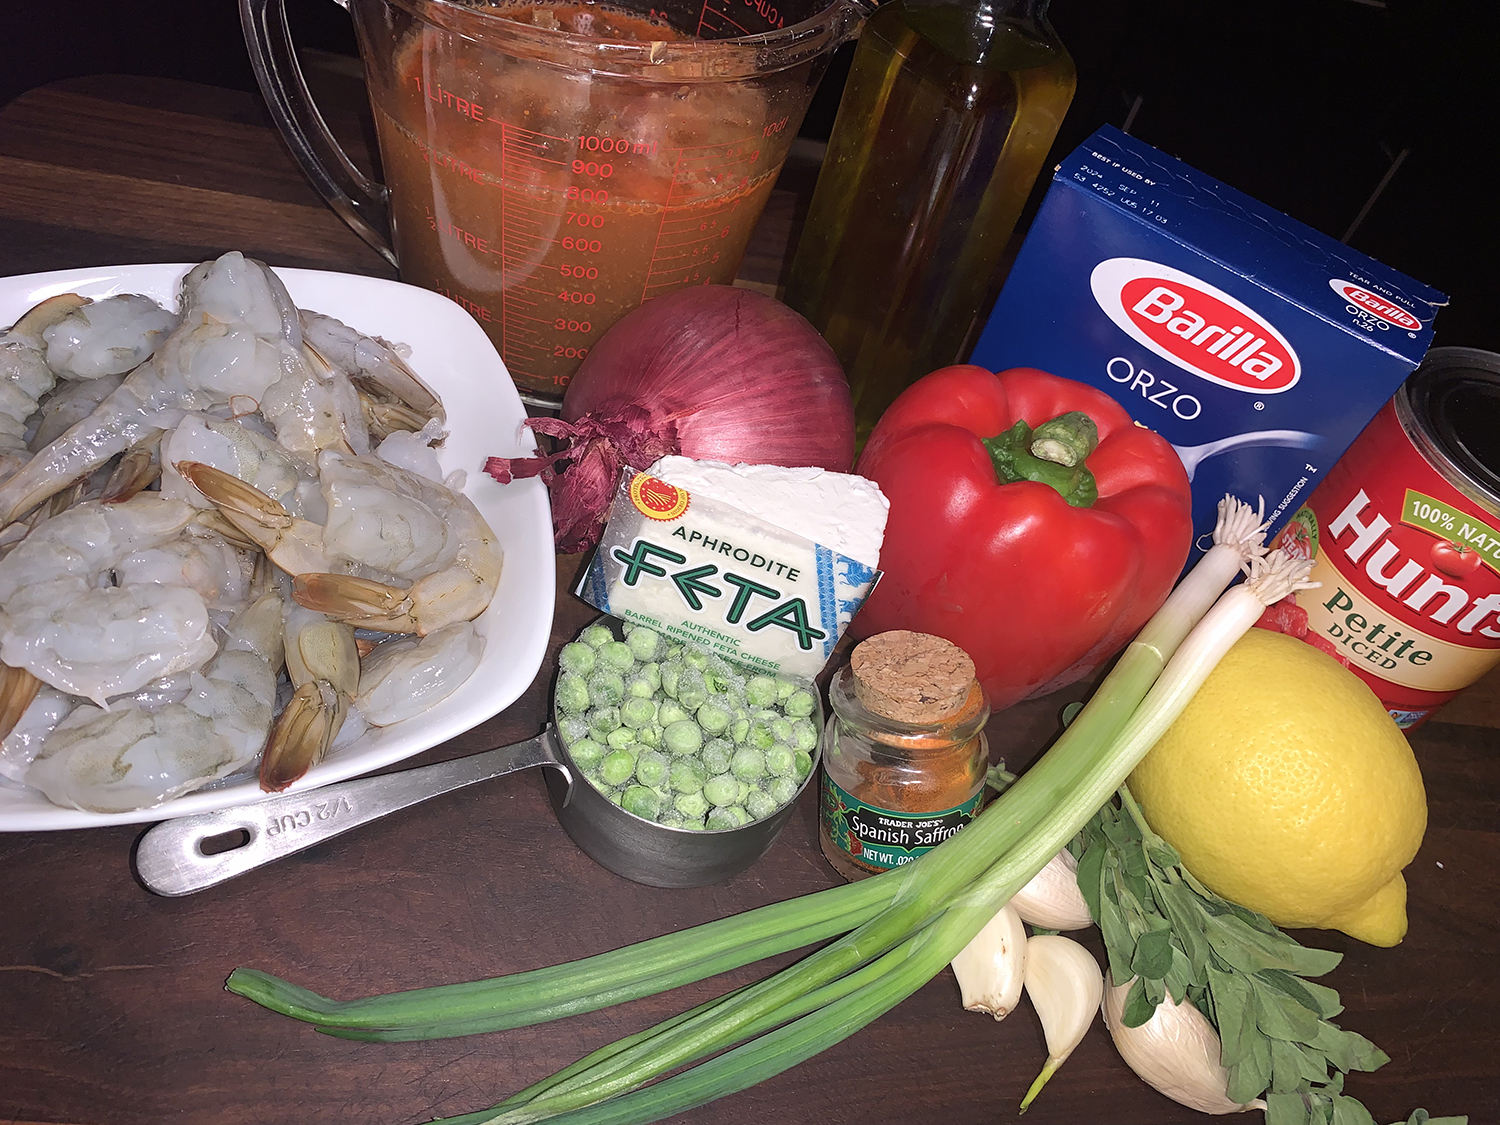
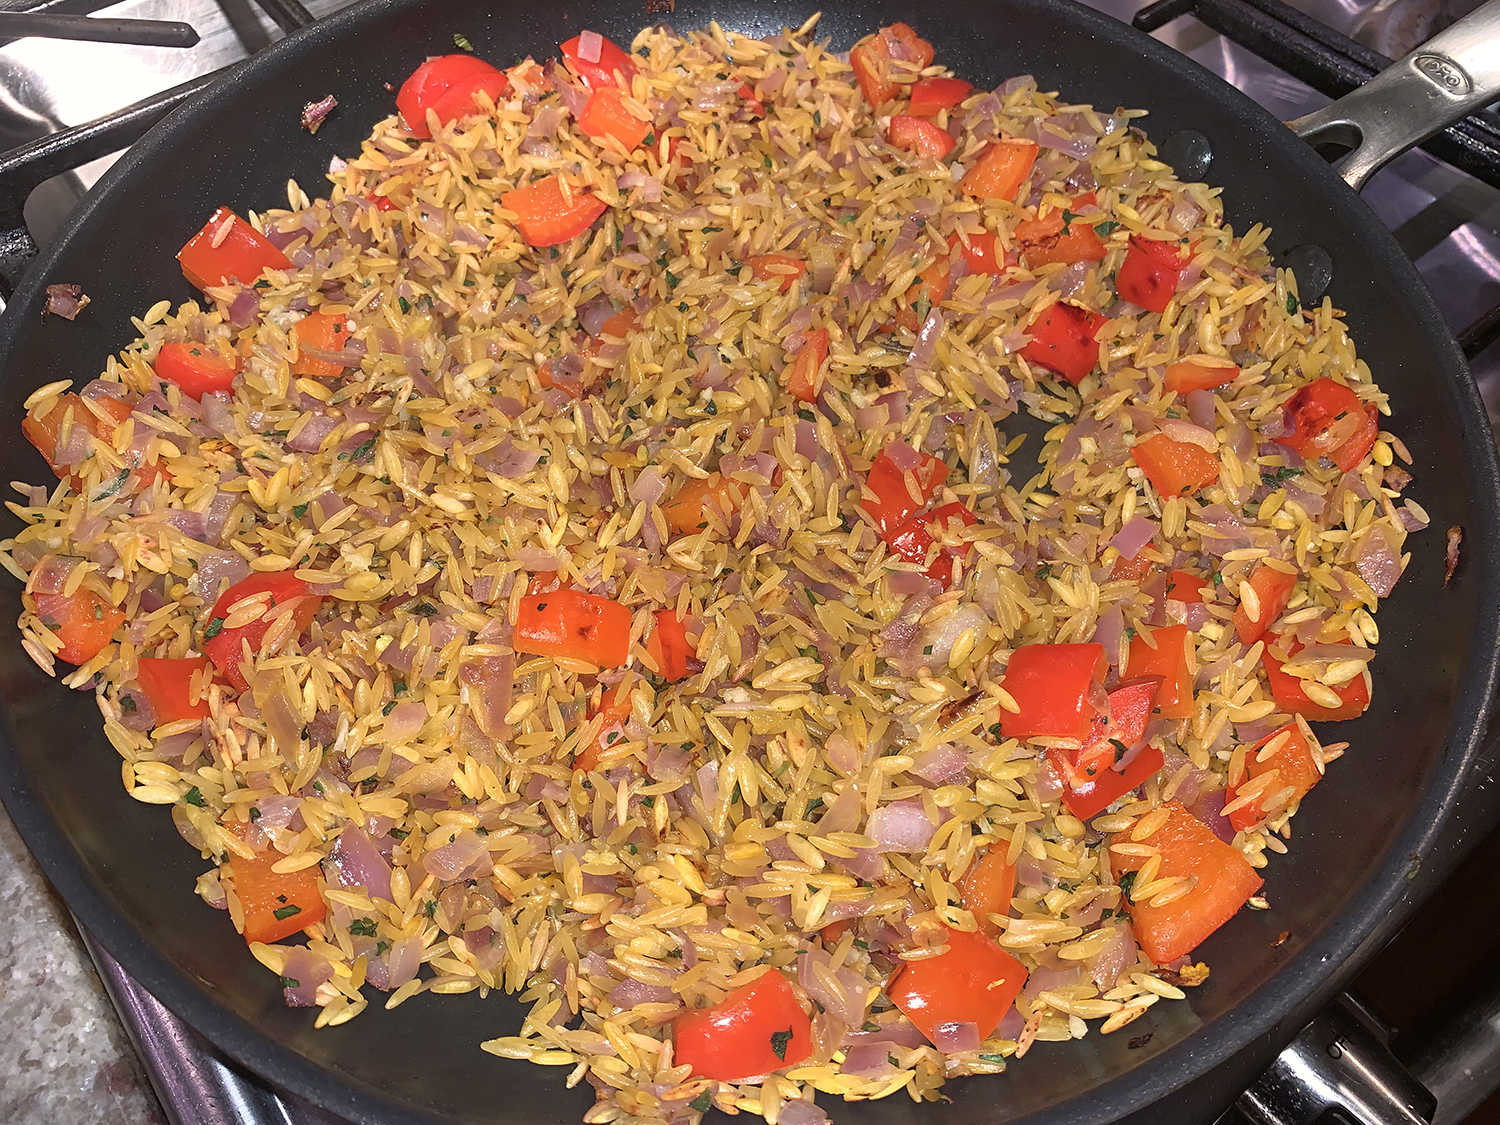
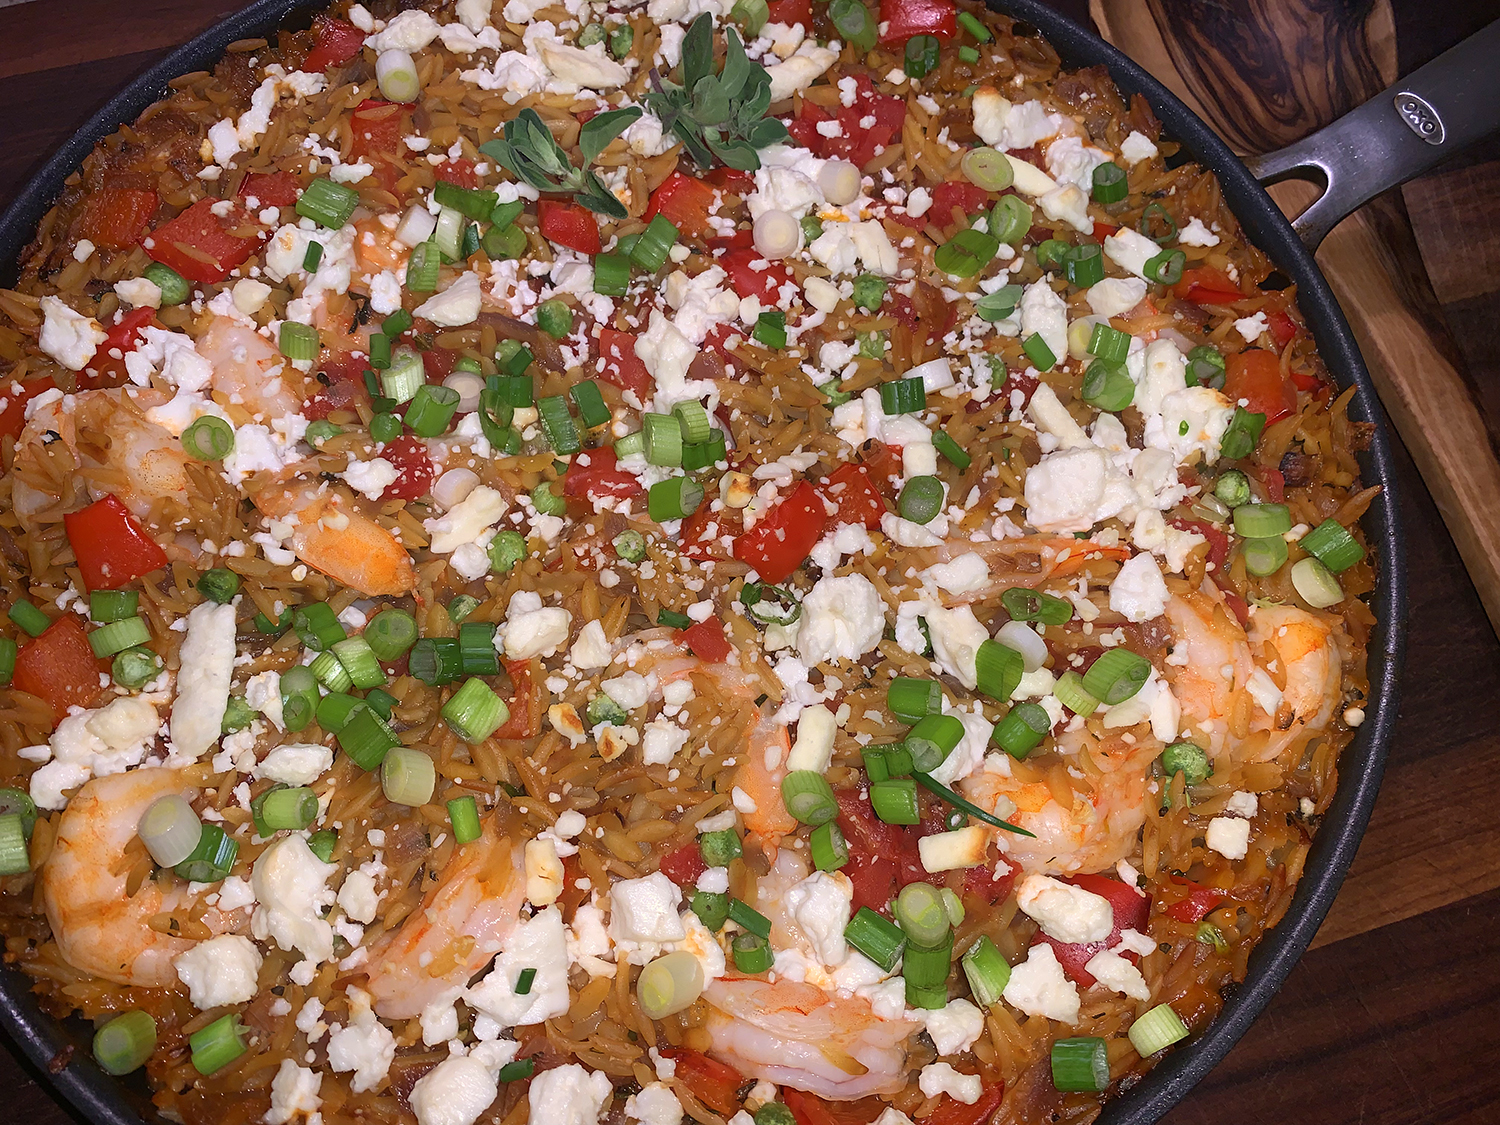
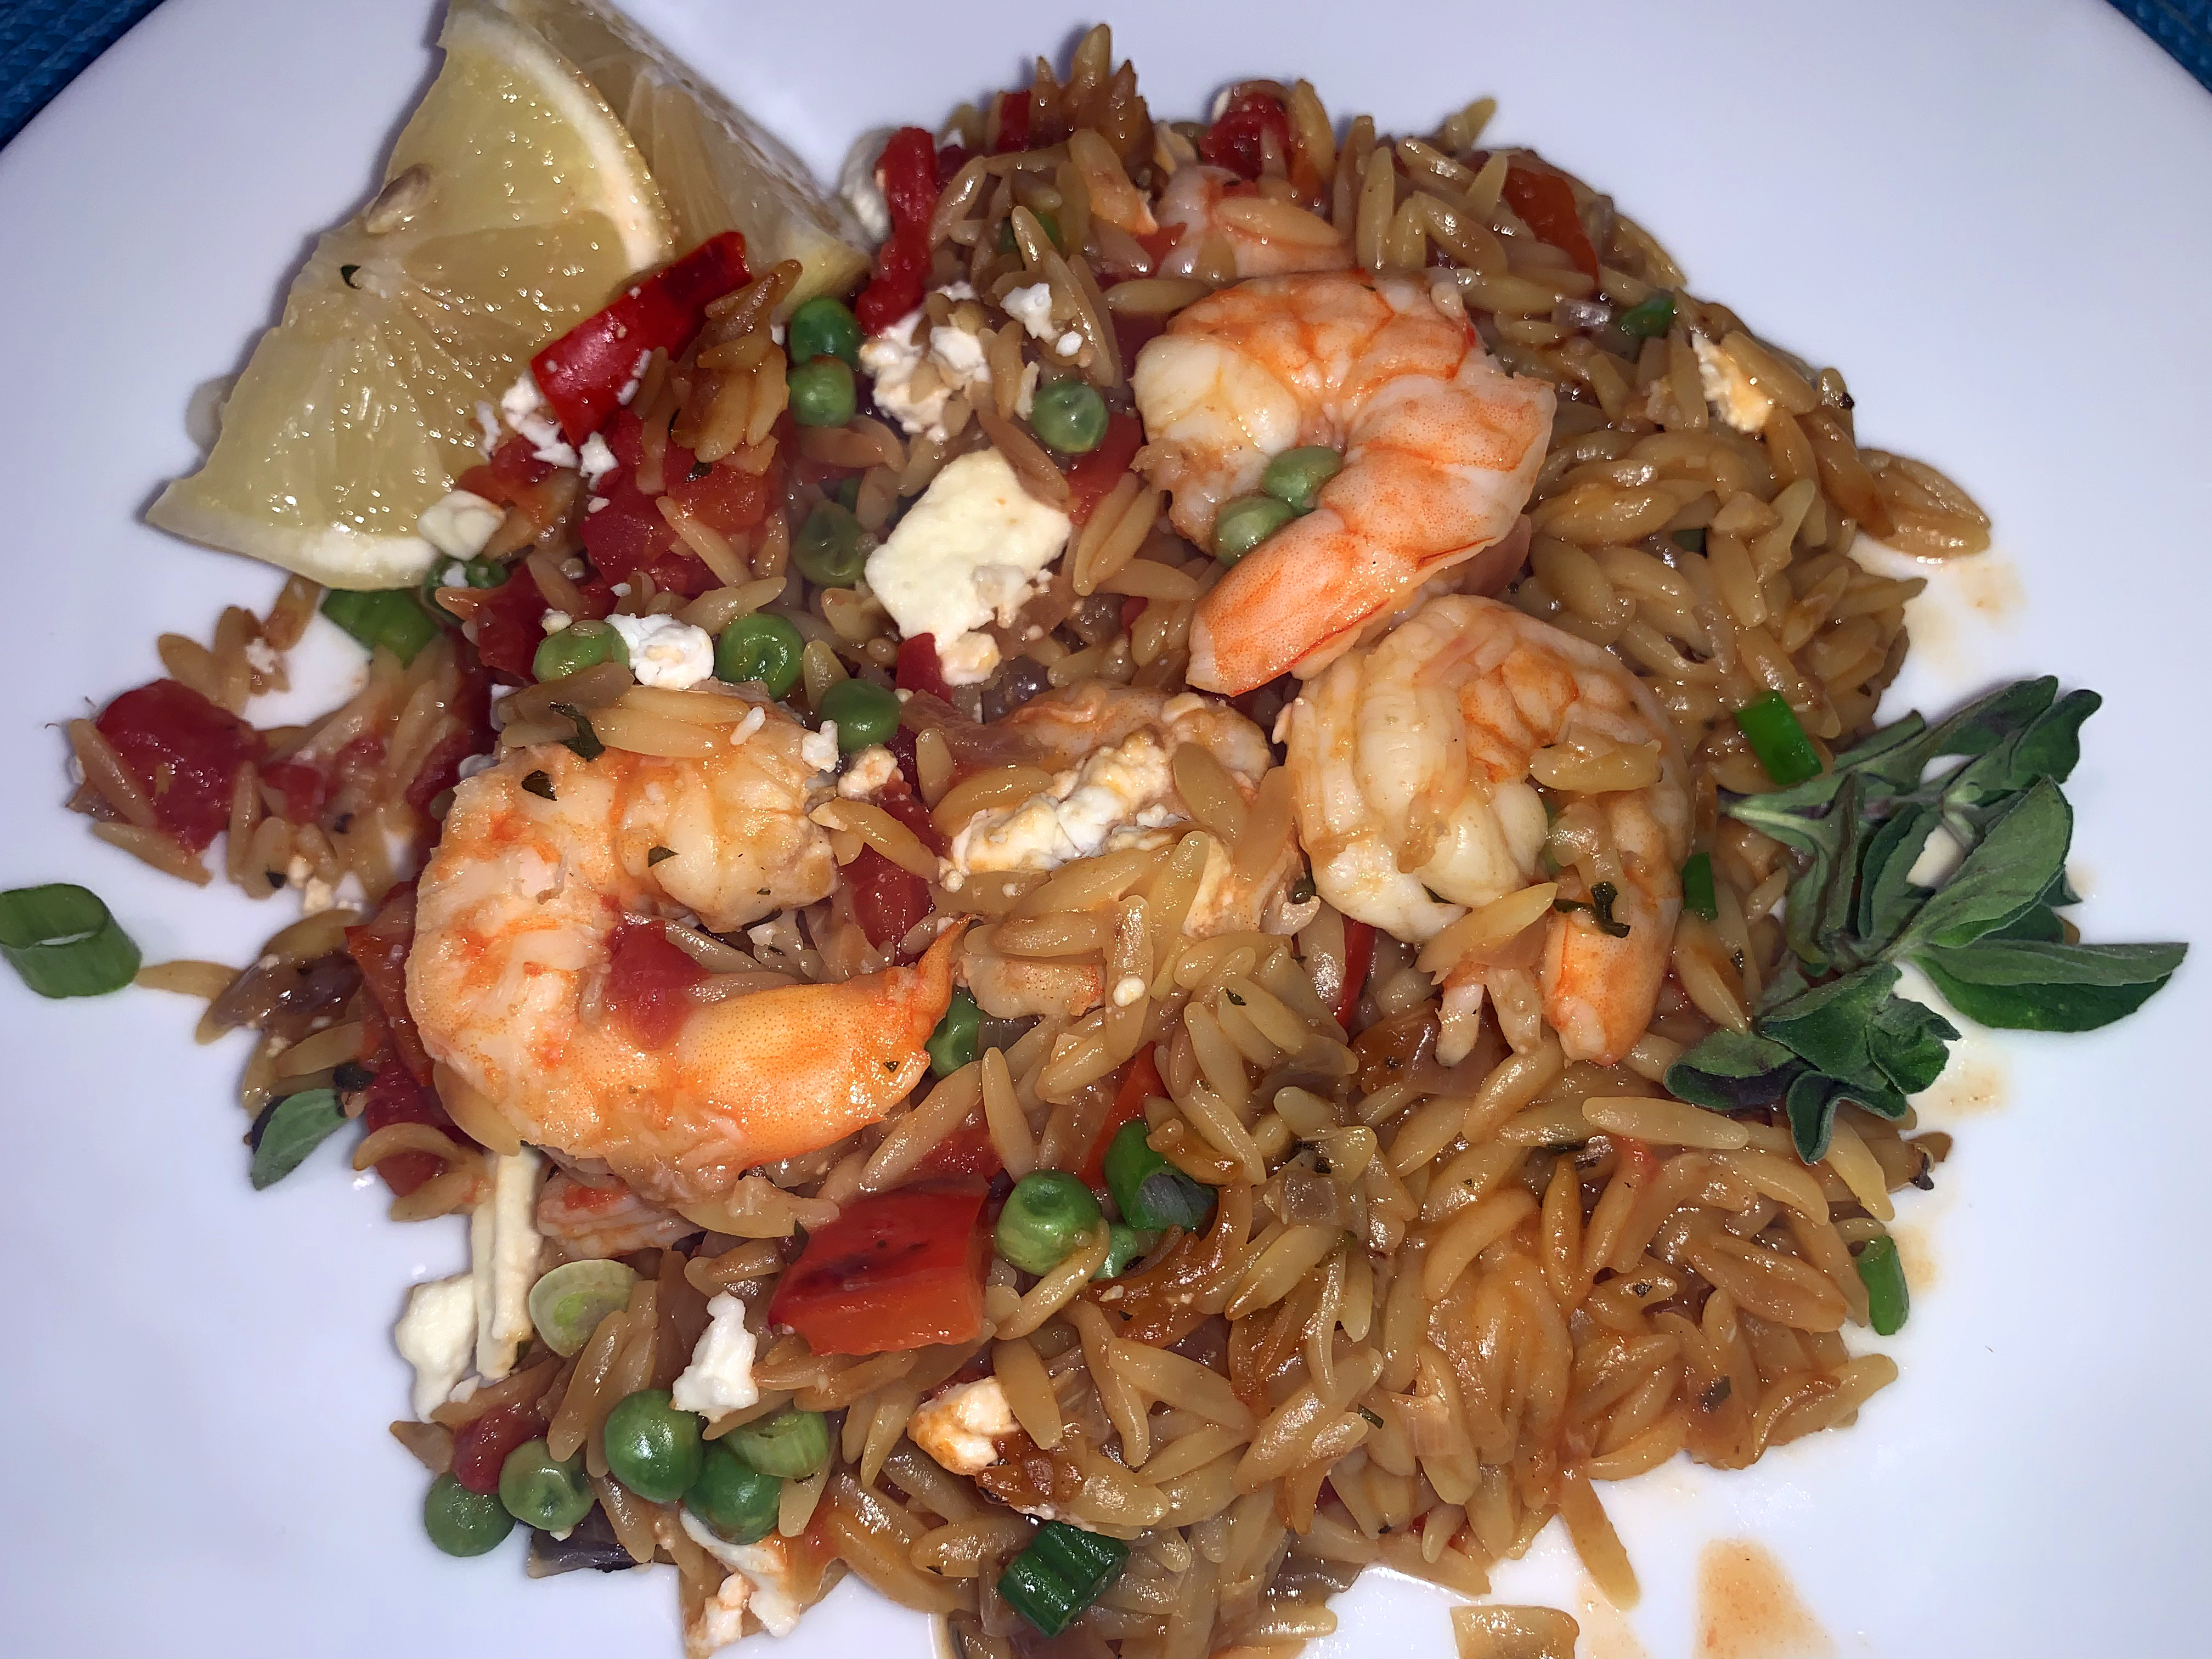
The second recipe, Baked Shrimp and Orzo with Feta and Tomatoes, is another Mediterranean-inspired shrimp dish similar to the Orzo with Shrimp, Feta and Lemon above, however this version gets started on the cooktop and then baked in the oven. It only calls for 1 pound of shrimp but we had 1 1⁄2 pounds and decided to use it all. The 12-inch skillet was brimming full. Our other change was incorporating homemade shellfish stock for the chicken broth.
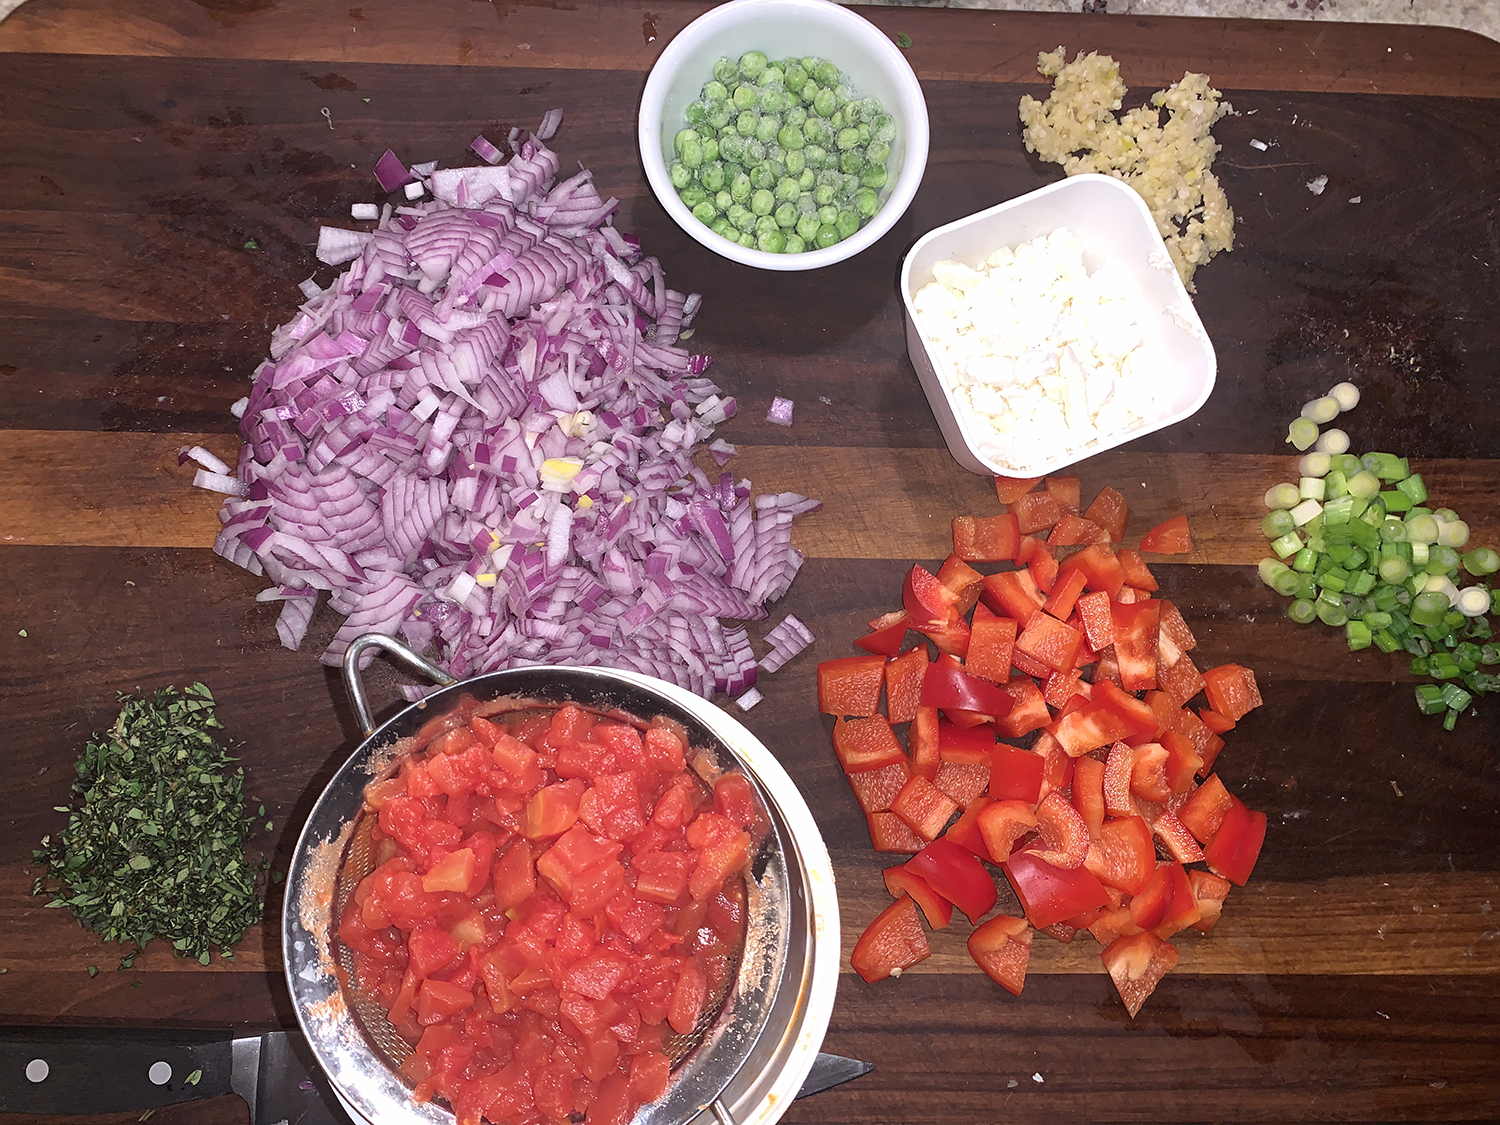
To build in plenty of Mediterranean flavor, start by sautéing chopped onion and red bell pepper, to soften them before adding in minced garlic and oregano. To guarantee perfectly cooked shrimp and pasta, sauté the orzo in the aromatics to unlock its toasty notes. The crumbled saffron threads, though not traditional, introduce a sunny hue and warm, complex flavor.
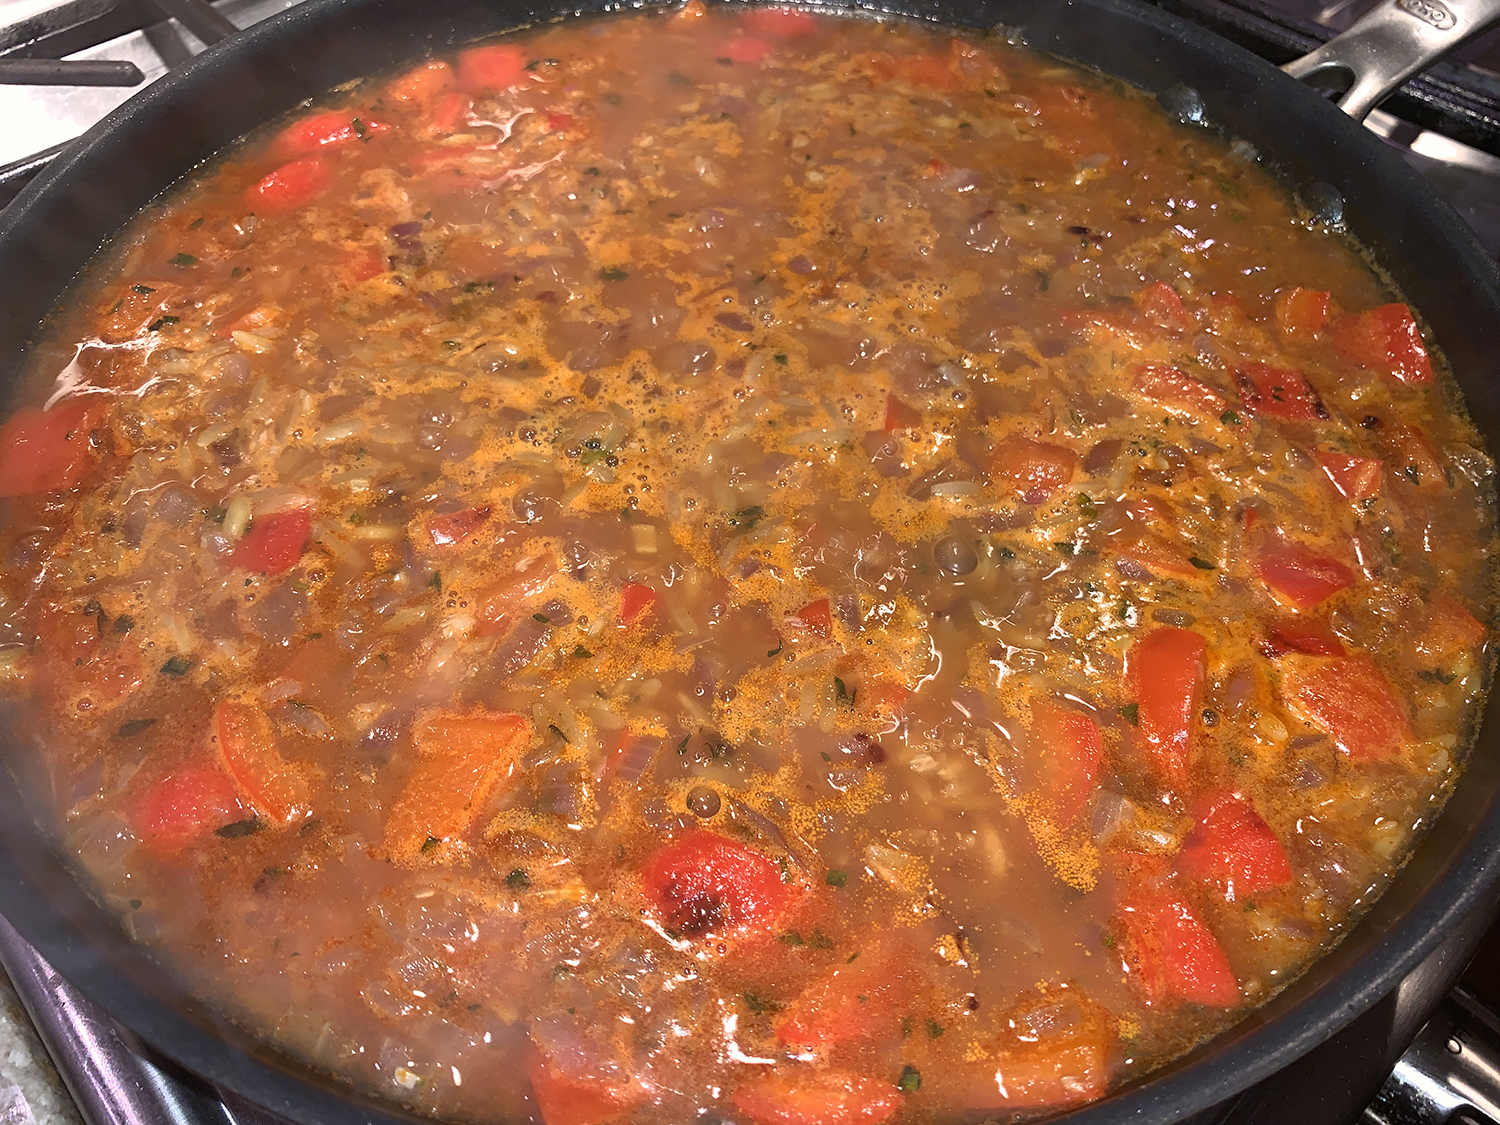
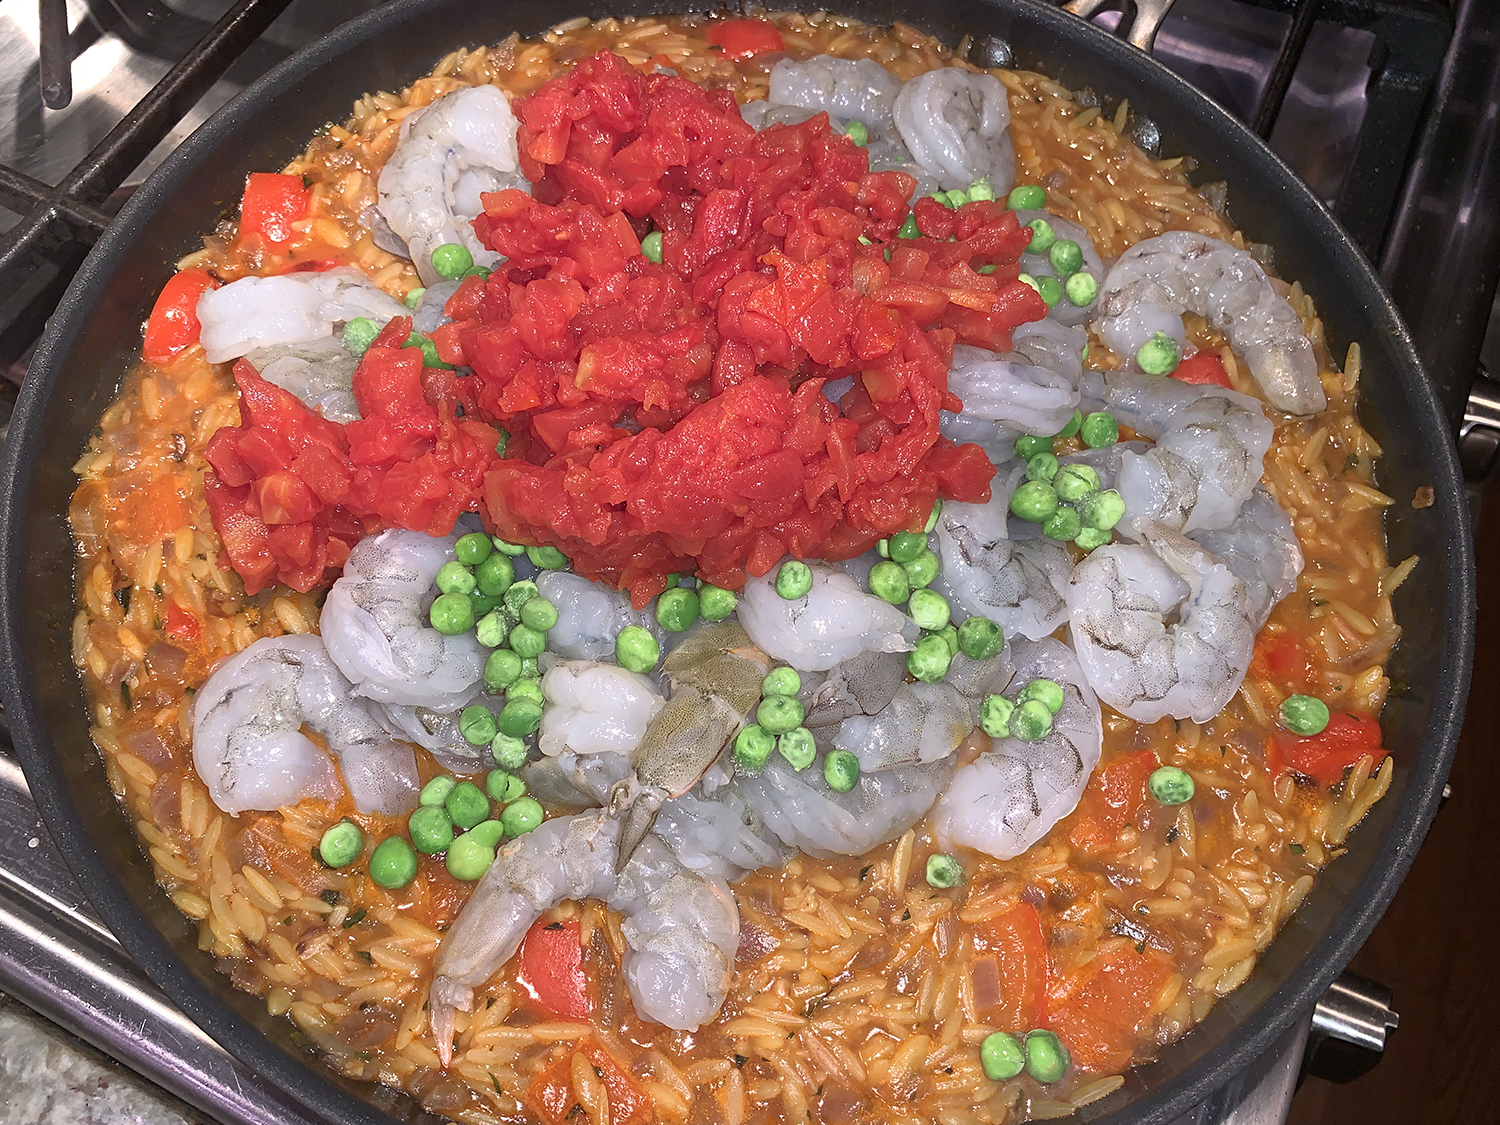
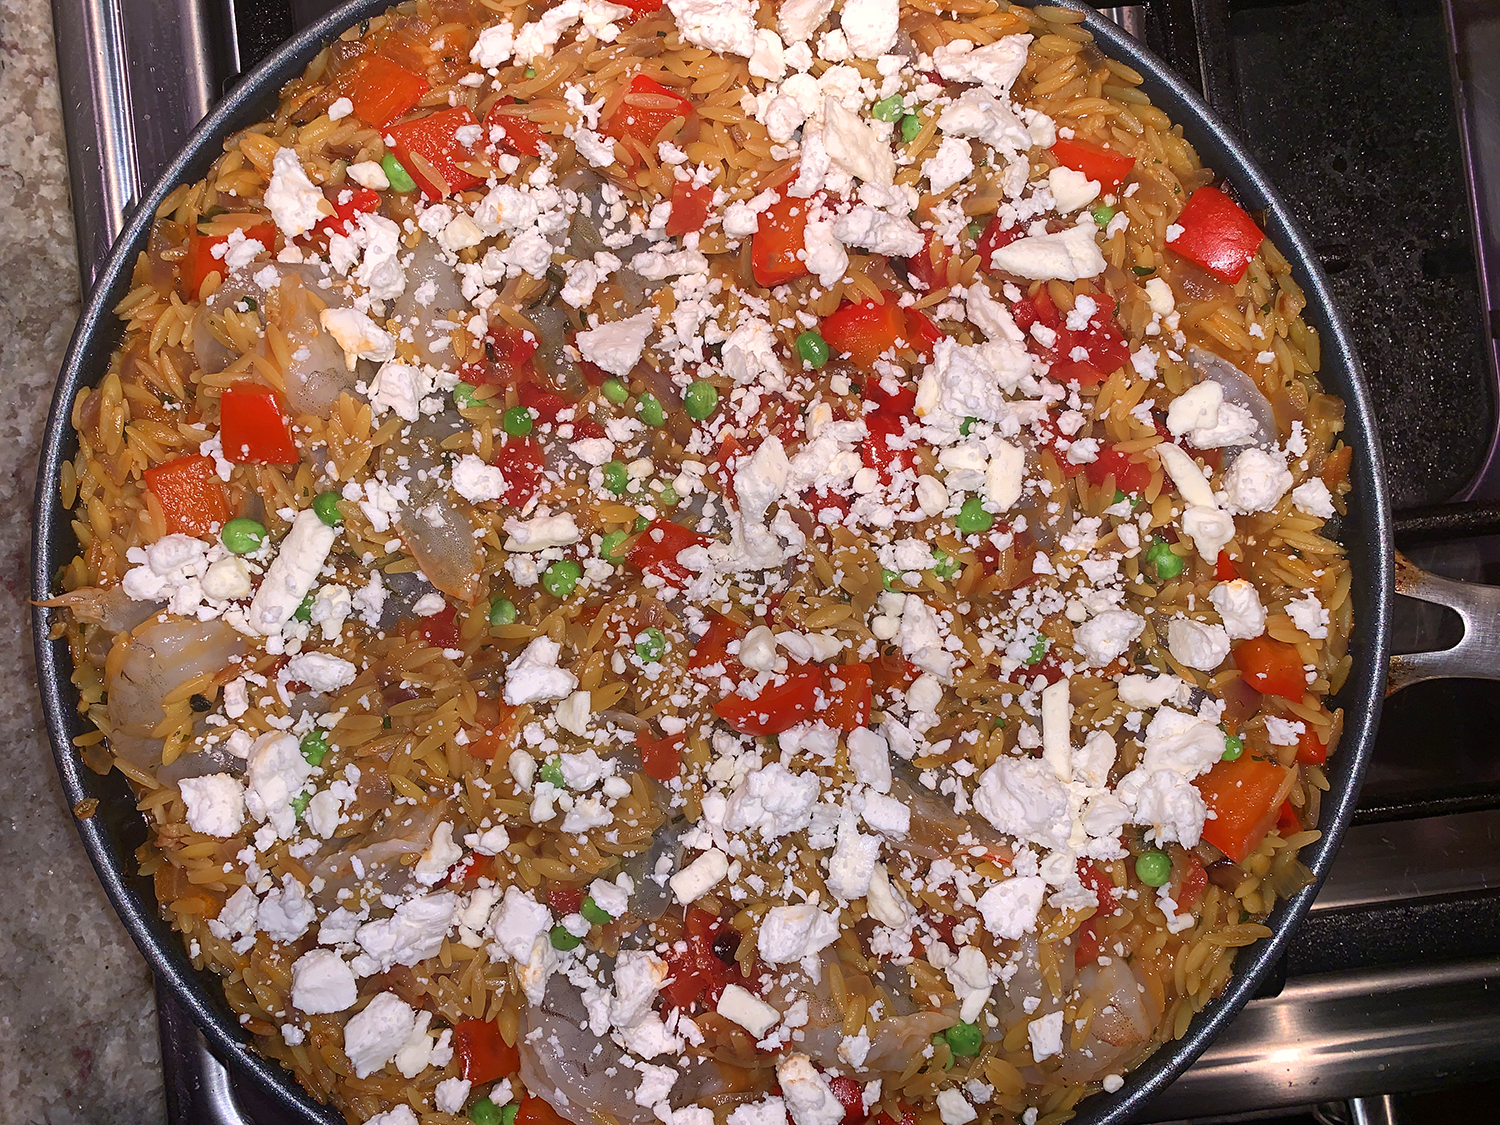
Chicken (or shellfish) broth and the drained juice from a can of diced tomatoes are then stirred in; as the orzo cooks to al dente, its releases starch (similar to a risotto) creating a sauce with a subtly creamy texture. To prevent the shrimp from overcooking, stir them right into the orzo, along with the reserved tomatoes and frozen peas, and transfer the skillet to the oven to cook through gently. A sprinkling of feta before baking reinforces the dish’s Greek flavors and promises an appealing browned, cheesy crust.
Make sure that the orzo is al dente, or slightly firm to the bite; otherwise it may overcook in the oven. If using smaller or larger shrimp, the cooking times may vary accordingly. You can leave the shrimp tails on, if desired. The small amount of saffron makes a big difference to the flavor and look of the dish, so be sure to include it. You will need a 12-inch oven-safe nonstick skillet for this recipe.
1 lb. extra-large shrimp (21 to 25 per pound), peeled, deveined, and tails removed
Salt and pepper
1 Tbsp. extra-virgin olive oil
1 red onion, chopped fine
1 red bell pepper, stemmed, seeded, and cut into ½-inch pieces
4 garlic cloves, minced
2 tsp. minced fresh oregano or ½ teaspoon dried
2 cups (12 oz.) orzo
Pinch saffron threads, crumbled
3 cups chicken or shellfish broth
1 (14.5-oz.) can diced tomatoes, drained with juice reserved
½ cup frozen peas
3 oz. feta cheese, crumbled (¾ cup)
2 scallions, sliced thin
Lemon wedges
Directions
Adjust oven rack to middle position and heat oven to 375 degrees. Pat shrimp dry with paper towels and season with salt and pepper; cover and refrigerate until needed.
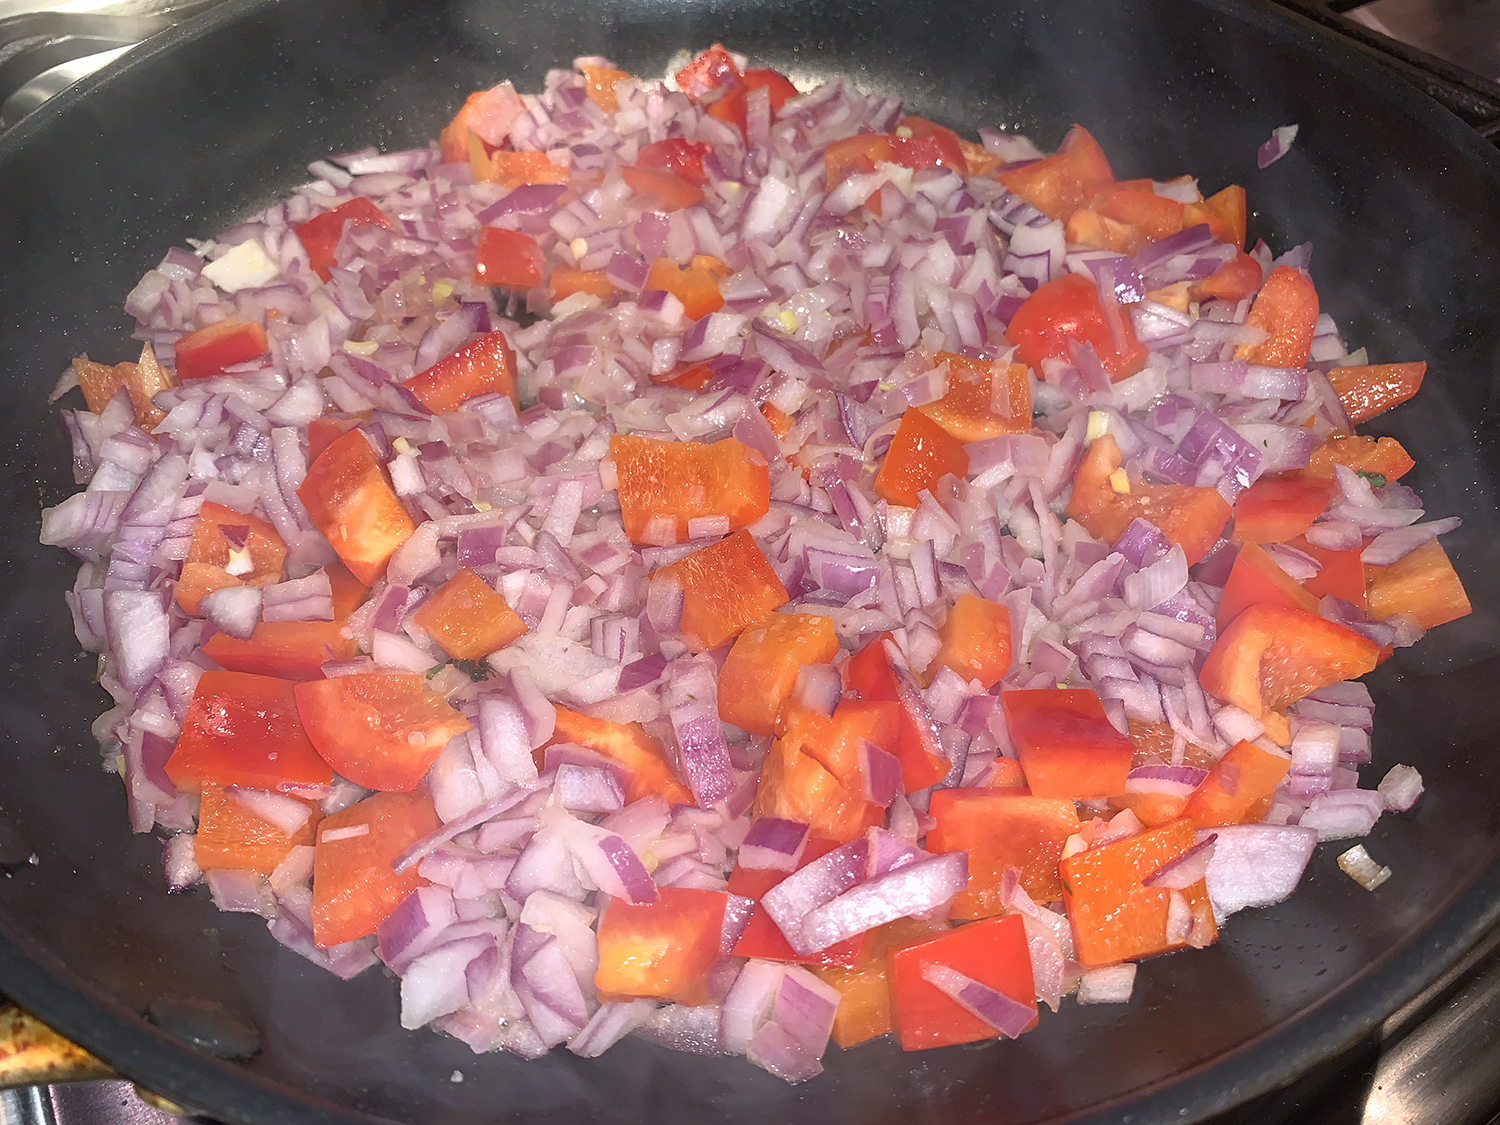
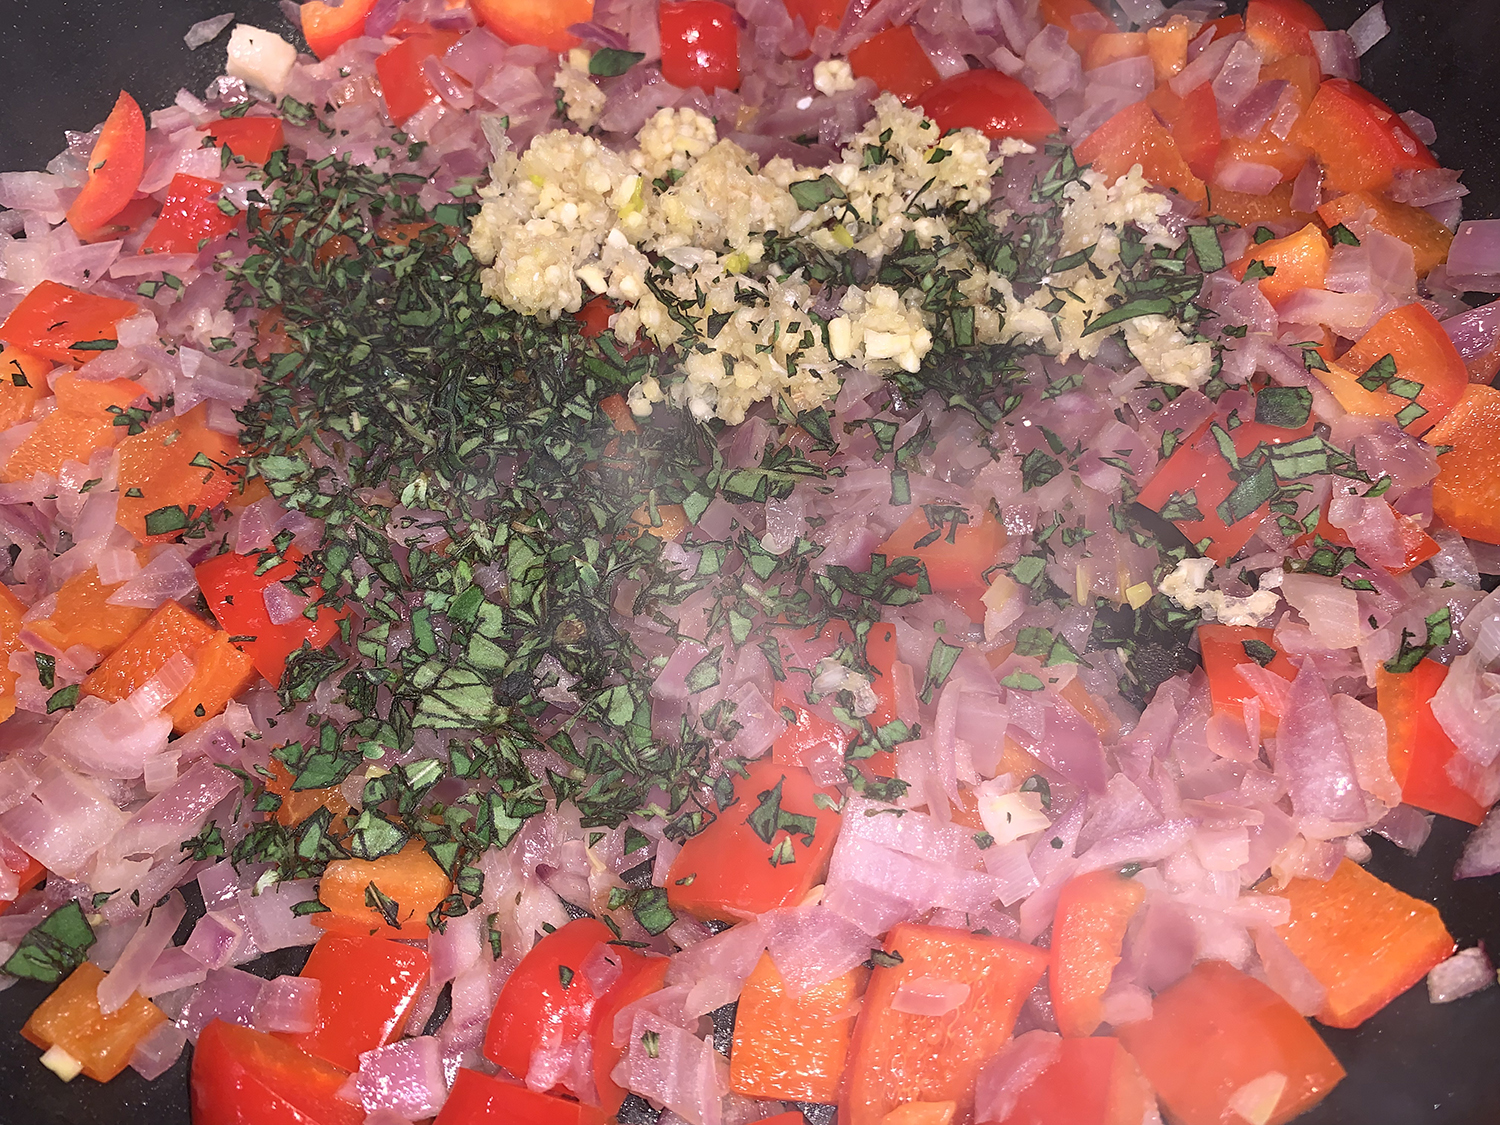
Heat oil in 12-inch oven-safe nonstick skillet over medium heat until shimmering. Add onion and bell pepper and cook until vegetables are softened, 5 to 7 minutes. Stir in garlic and oregano and cook until fragrant, about 30 seconds. Stir in orzo and saffron and cook, stirring often, until orzo is lightly browned, about 4 minutes.
Stir in broth and reserved tomato juice, bring to simmer, and cook, stirring occasionally, until orzo is al dente, 10 to 12 minutes.
Stir in shrimp, tomatoes, and peas, then sprinkle feta evenly over top. Transfer skillet to oven and bake until shrimp are cooked through and feta is lightly browned, about 20 minutes.
Remove skillet from oven (skillet handle will be hot). Sprinkle scallions over top and serve with lemon wedges.