I have been an artist and designer all my life incorporating graphic design for websites, gardens, publications, fabrics, interior design and cooking. I am now retired from my professional job, but still create artistic visions in all forms on a daily basis.
View all posts by LynnHoll →
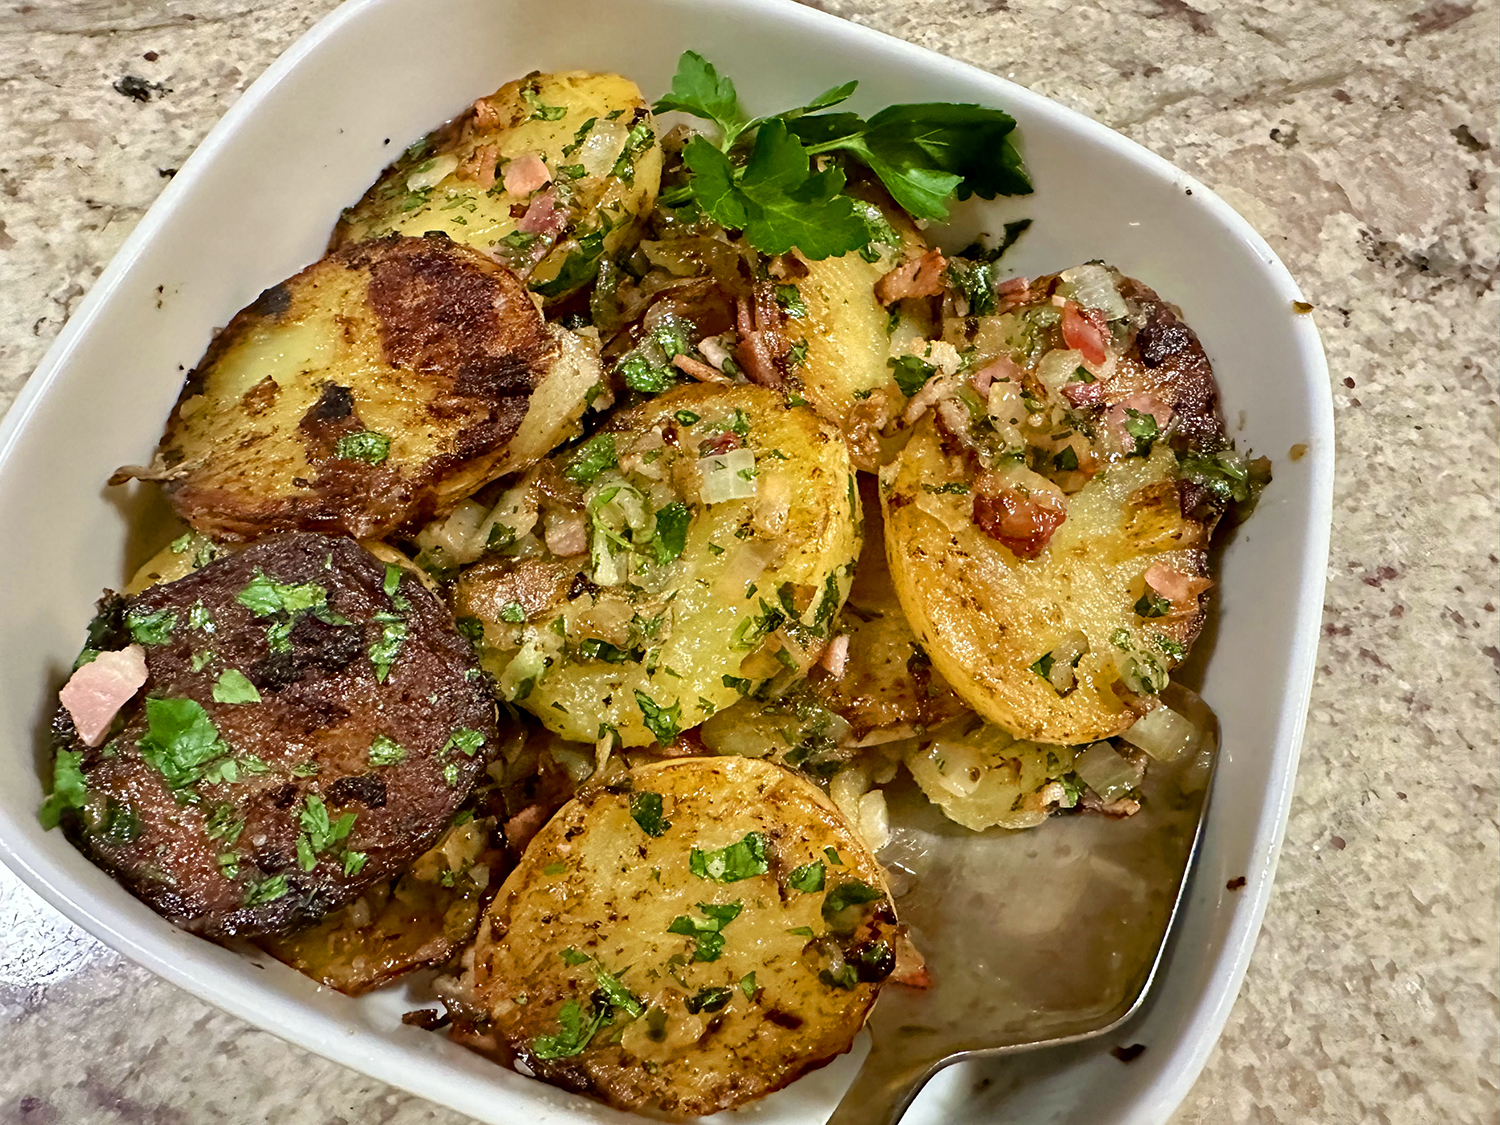
FYI, bratkartoffeln is a comforting German side dish of pan-fried potatoes, bacon, onions, and fresh herbs. For tender, golden-brown potatoes with slightly crisp edges, infuse them with smoky flavor from the bacon and slight oniony sweetness.
While the dish is typically made with leftover boiled potatoes, this recipe starts with raw, so the potatoes are cooked in a covered skillet, allowing them to steam and absorb flavor. When the lid is removed, the potatoes are allowed to brown and crisp around the edges.
Due to the fact that the potato slices did not fit in one layer in the skillet, they had to be jockeyed around several times (instead of just twice) while covered. And again with the lid off.
We left the potato skins on, even though the recipe instructs to peel them. The skins have additional nutritional value, plus it adds some texture to the dish. To peel, or not to peel, that is the question. That decision is up to you. Ours were served as a side dish, along with glazed carrots, for a sliced steak entrée.
Note from America’s Test Kitchen: For the most traditional flavor use a hickory-smoked bacon. If the bacon is difficult to chop, place it in the freezer for 10 to 15 minutes to firm it up. These rich, hearty potatoes pair nicely with bratwurst, schnitzel, or scrambled eggs.
2 lbs. Yukon gold potatoes, peeled and sliced crosswise ½ inch thick
½ tsp. table salt
1 Tbsp. chopped fresh parsley
Directions
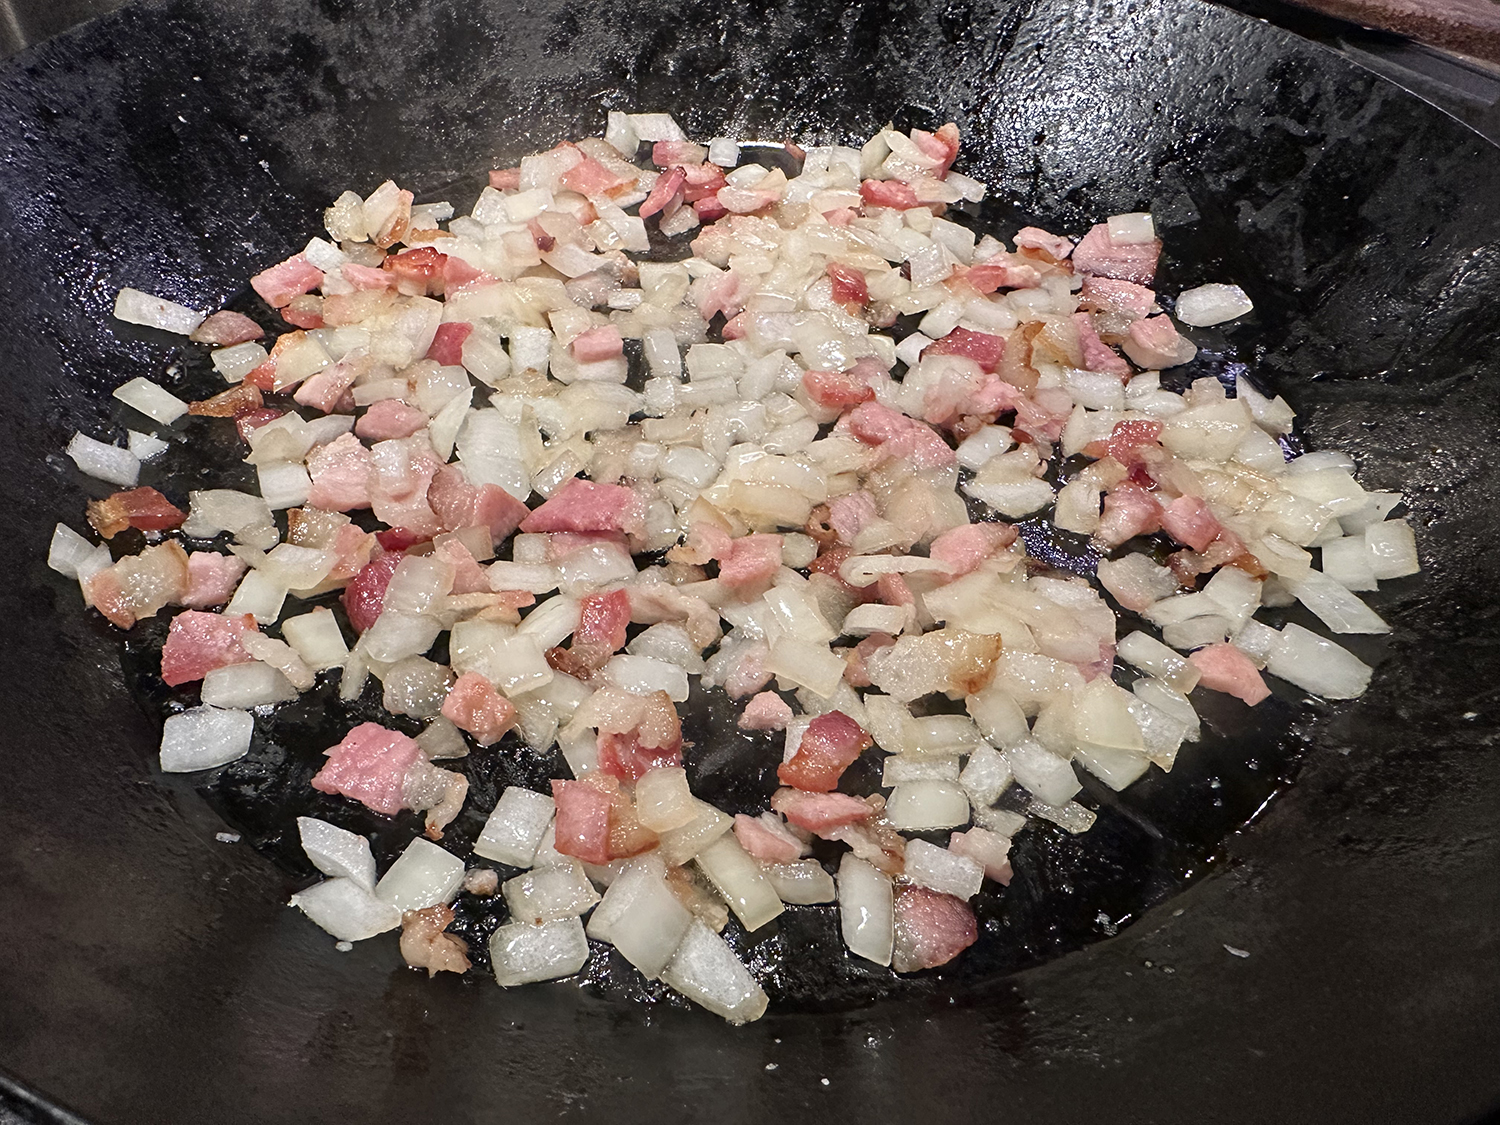
Cook bacon in 12-inch nonstick or carbon-steel skillet over medium-high heat until golden brown at edges and just starting to render, 3 to 5 minutes. Add onion and continue to cook until onion is soft and golden brown, 3 to 5 minutes. Using slotted spoon, transfer bacon and onion to bowl, leaving fat in skillet (you should have about 1 teaspoon).
Add butter to bacon fat and melt over medium heat. Add potatoes and salt and stir to coat potatoes evenly with fat. Cover and cook, shaking pan occasionally, for 9 minutes. After 9 minutes, potatoes should be bubbling at edges; if there is no moisture around potatoes, lower heat slightly; if there is no or little sizzling around potatoes, increase heat slightly. Cover and continue to cook until potatoes can be easily pierced with tip of paring knife, 6 to 9 minutes.
Remove lid and gently stir potatoes (it is OK if some potatoes break). Continue to cook, uncovered, gently stirring every 2 to 3 minutes until potatoes are golden brown (not all surfaces will be brown), about 10 minutes.
Gently stir in bacon, onion, and parsley. Season to taste with salt and pepper, transfer to platter, and serve.
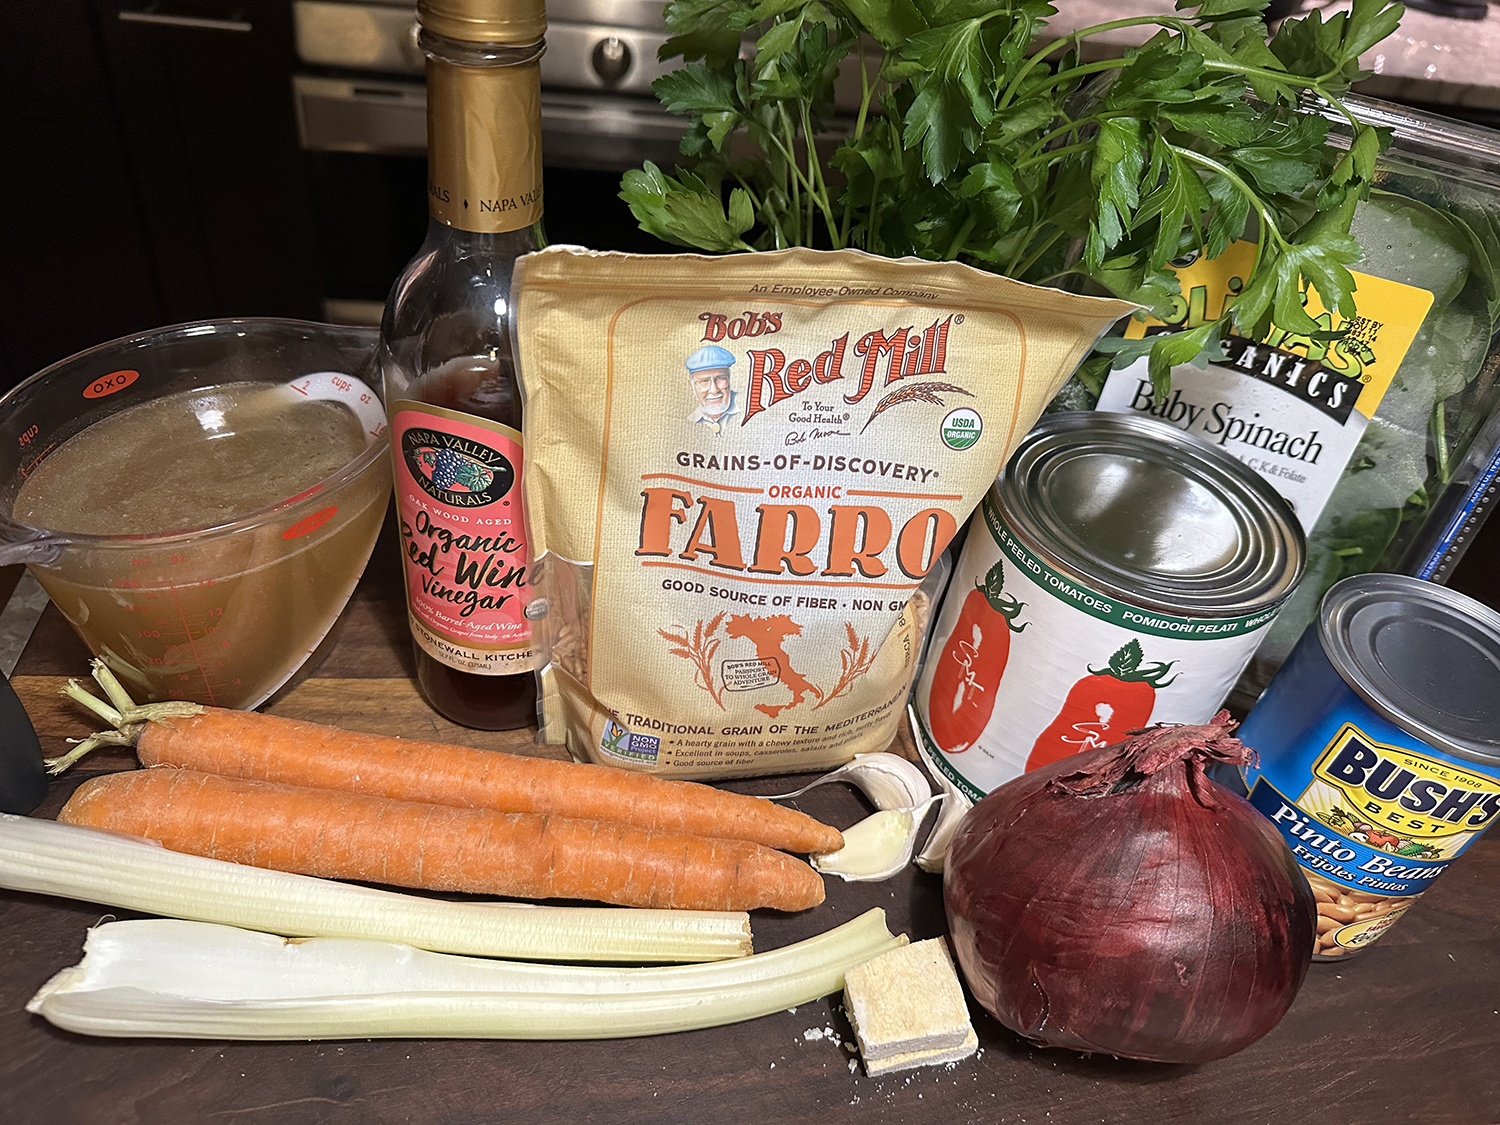
So tasty and so healthy! This warm-your-belly farro soup is quite easy to make; and it’s all done in one-pot which means fewer dishes. On a busy weeknight, this may be your ticket to something healthy, nutritious and pretty hands-off. To keep it vegetarian, use vegetable stock. That was not an issue for us so we used 6 cups of homemade chicken stock.
Farro soup with white beans and vegetables is a rich, hearty, and flavorful meal. Eat it on its own, pair it with crusty garlic bread or a simple salad and dinner is served! It’s like a hug in a bowl to keep you warm on chilly nights! And that is exactly the reaction we got.
We adapted the recipe slightly by including two cans of white beans instead of one. Since baby spinach is typically packaged in a 5-ounce clamshell, we included the entire thing instead of 2 cups. A nice toasted piece of garlic bread was the perfect companion!
Missing, or not fond of, some of the ingredients? Don’t worry, here are some substitutes:
Farro substitutes: While farro is traditional in this soup, you can use other grains like barley, spelt, freekeh, coarse bulgur, quinoa, or brown rice. Brown rice and quinoa are good ways to turn this soup into a gluten-free-friendly meal.
Add mushrooms: Cut mushrooms of your choosing into bite-sized pieces and saute them along with the carrots, onion, and celery. From there, follow the recipe as written.
Instead of spinach, you can use baby kale. Kale in general is tougher than spinach, and takes more time to wilt down. Baby kale is a bit softer, but will still likely have more body than spinach, even after sitting in the broth for a while.
Vegan option: Use vegetable stock and omit the parmesan rind and cheese for a vegan alternative. Without the parmesan rind, you will lose some of the nutty, rich flavor. If you want to mimic this flavor, use a little nutritional yeast. You can add 2 to 3 teaspoons right after you add the stock. It will dissolve quite quickly.
1 to 2 carrots, peeled and sliced into ¼-inch thick rounds
2 celery sticks, chopped
Kosher salt
2 large garlic cloves, minced
6 cups vegetable or chicken stock
1 28-oz. can whole San Marzano tomatoes, crushed by hand
2 15-oz. cans white beans, drained and rinsed
1 cup farro, rinsed and drained
1-inch Parmesan rind
5 oz. fresh baby spinach
1 cup chopped parsley
2 Tbsp. red wine vinegar
Grated Parmesan for serving
Directions
In a large Dutch oven or pot, heat 2 tablespoons extra virgin olive oil over medium heat until shimmering. Add the onions, carrots, and celery. Season with a little kosher salt and cook, tossing occasionally until the vegetables have softened.
Add the garlic and toss for 30 seconds or so, then add the tomatoes, stock, white beans, farro, and parmesan rind.
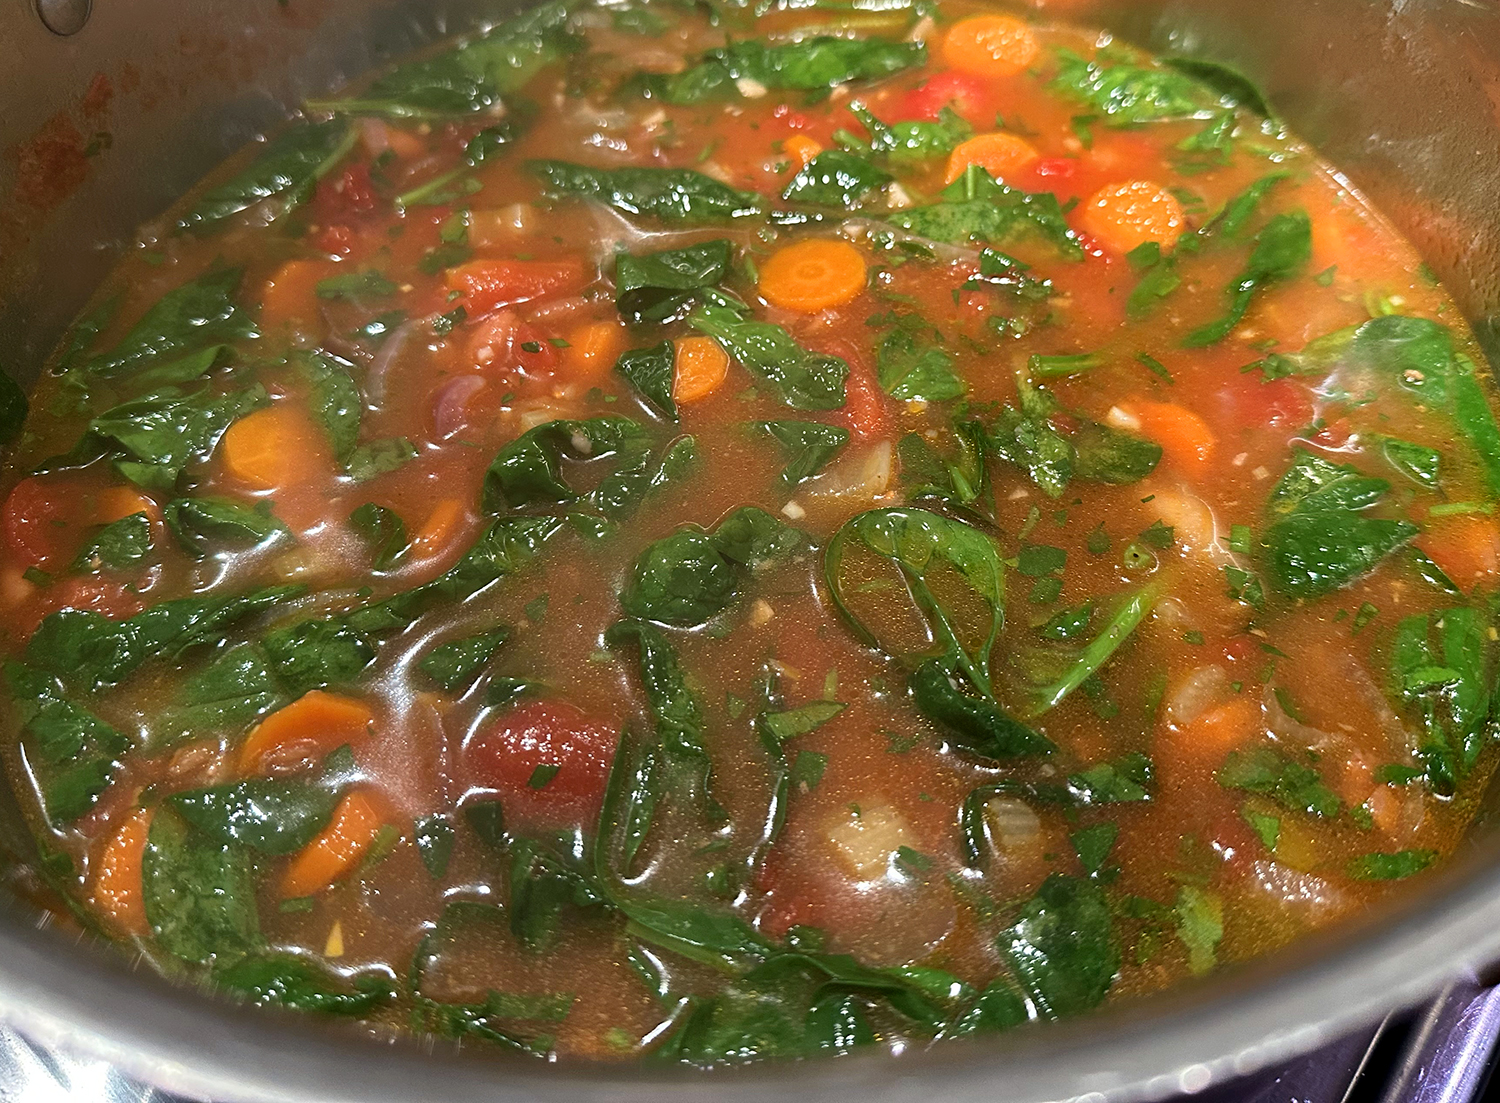
Bring the liquid to a boil, then lower the heat watching for the steady, gentle simmer. Allow the soup to simmer until the farro is tender, about 30 minutes or so.
Turn the heat off and remove the Parmesan rind (sometimes the rind will have dissolved into the soup). Stir in the spinach, parsley, and red wine vinegar.
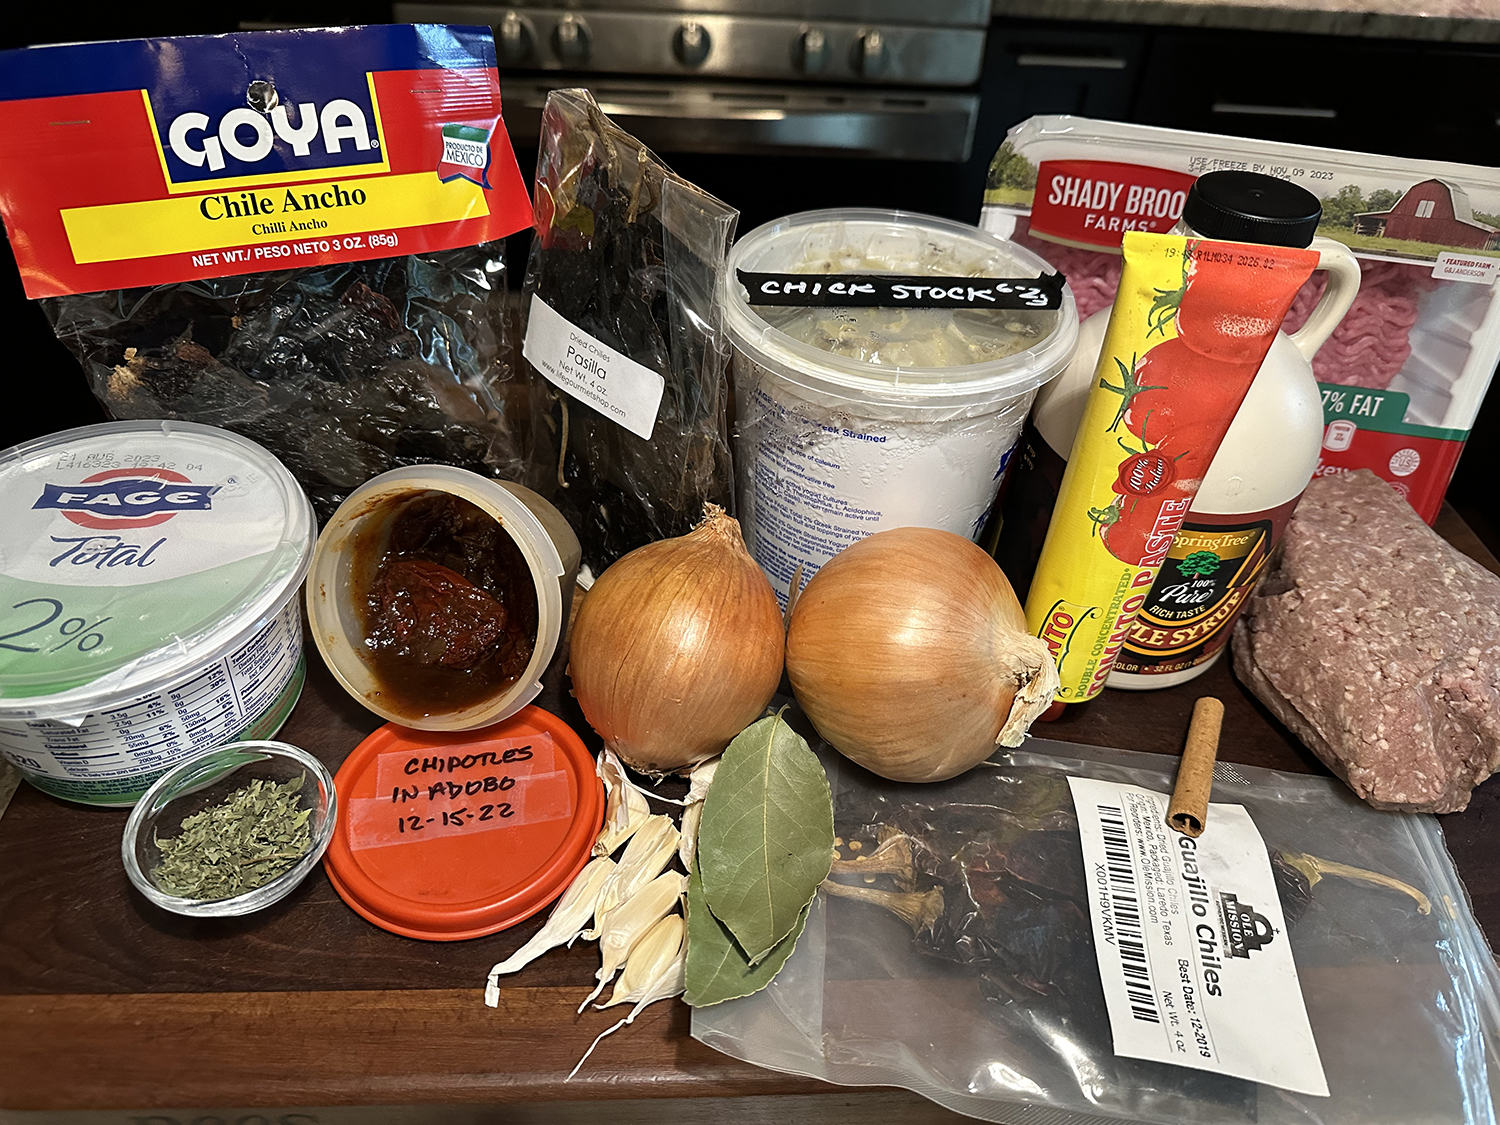
Cool weather, football season, toasty fireplaces, altogether signal chili season for us. So upgrade that vintage package of chili powder seasoning lurking in the back of your cabinet with something that takes a little more effort, but provides a welcome depth of flavor. Let this hearty turkey chili recipe guide you. To make it, you’ll blend a robust purée of dried chiles and canned chipotles to serve as the soup’s base.
Building a custom chile blend allows you to create the chili of your dreams, which is to say: don’t worry too much if you can’t find the exact chiles that are recommend. Dark ancho chiles are smoky and have a raisiny sweetness; skinny, wrinkly pasillas a rich jamminess; and smooth-skinned guajillos bring bright red color and acidity. If you need to swap one out, aim for something around the same heat level. Feel free to make a double batch and stick half in the freezer (for up to 6 months) to make satisfying your next weeknight chili craving even easier. Of course, you’d need two large pots to pull that off.
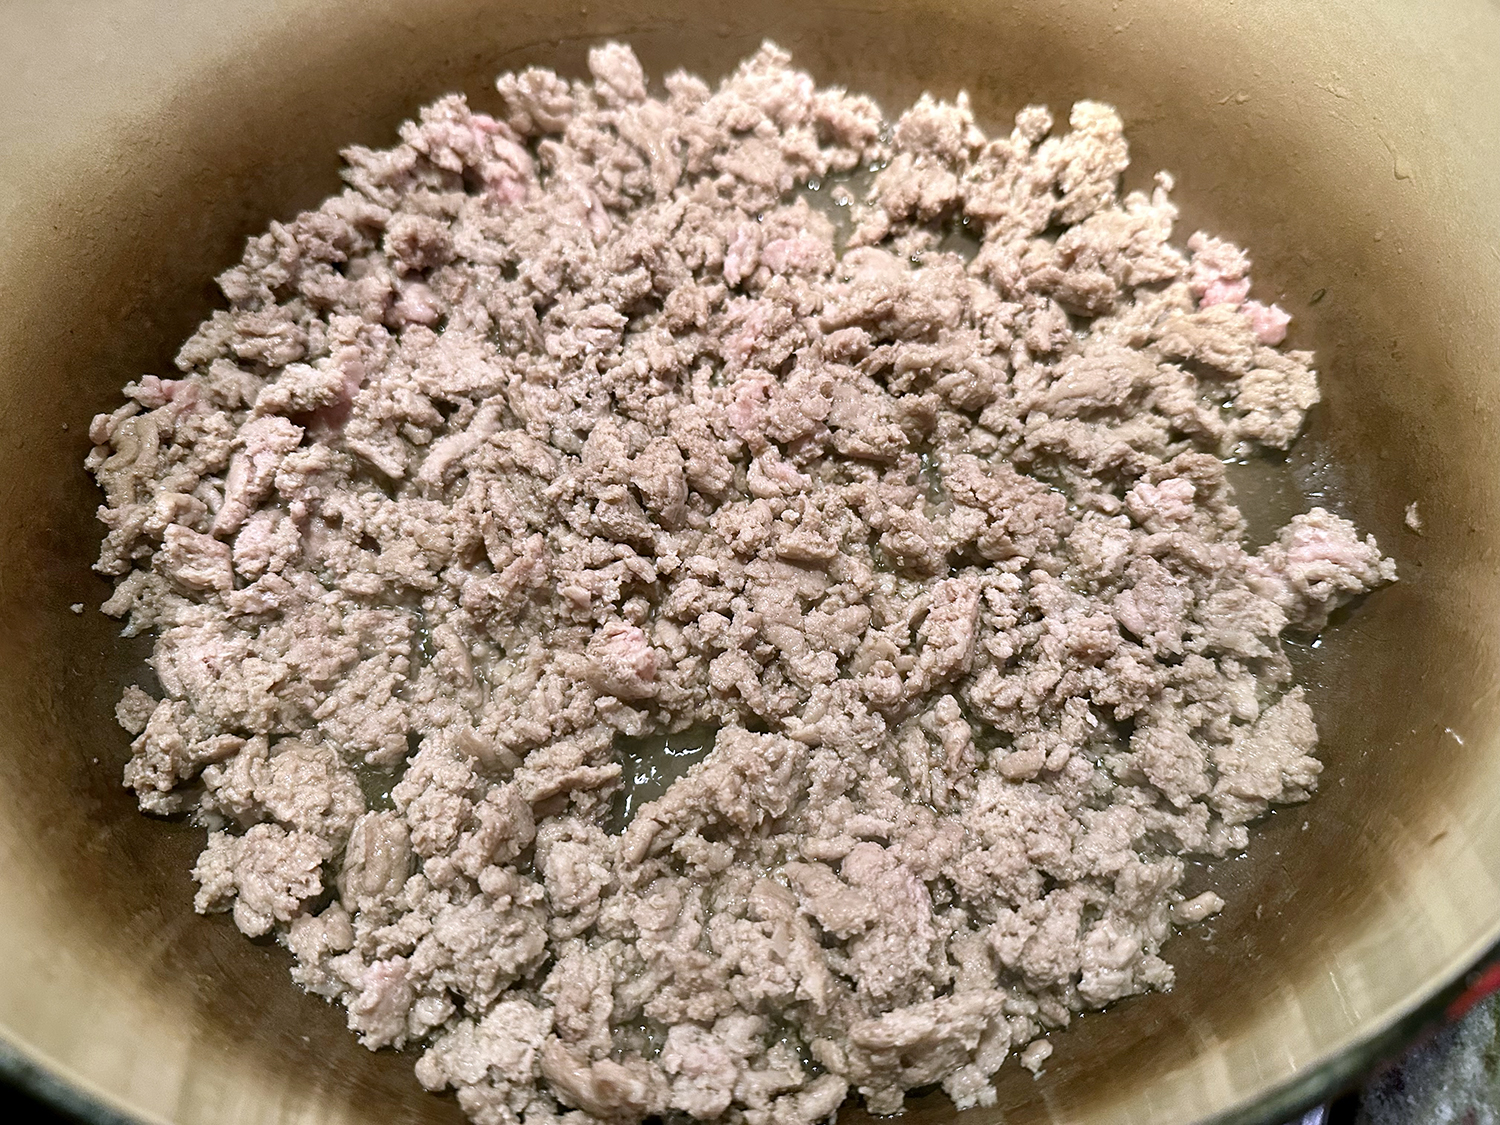
Dark meat turkey is preferred for its richer flavor and fat content, but if all you have in the fridge is lean ground turkey or ground chicken, it’ll work. Brown it in batches to get a really good sear—the crusty fond that forms on the bottom of the pot is big-time flavor. When you sauté the onion, use a wooden spoon to scrape up all those bits (the steam from the veggies will help release them) and stir them into the mix. The flavor a bottle of hard cider or beer added to chili is preferred, but if you’d rather cook without alcohol, substitute fresh apple cider, a can of crushed tomatoes or tomato juice, or add a cup more water instead.
Round out the soup with creamy white beans, but any canned bean will be a good substitute such as red kidney beans, pinto beans, or black beans. Like many comfort foods, chili is personal: put out bowls of shredded cheddar cheese, thinly sliced green onion, or pickled jalapeños, if you like. Serve with broken tostadas or tortilla chips for scooping or cornbread for dunking.
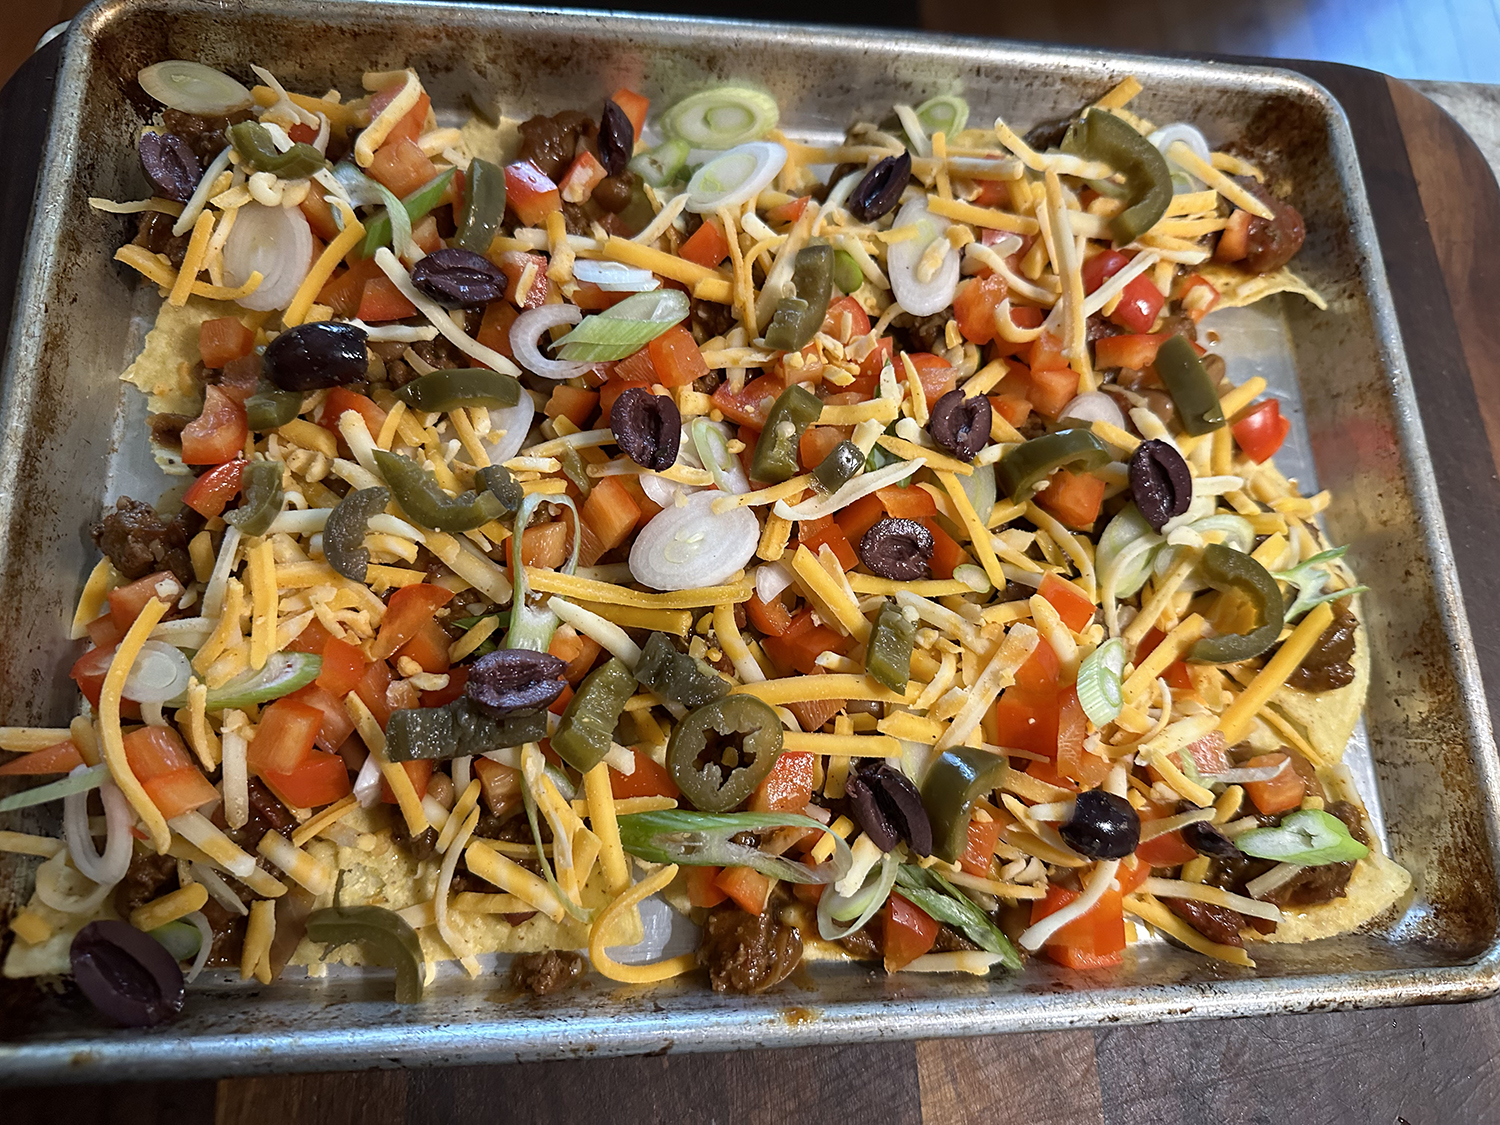
With any leftovers, create another meal by filling sweet baked potatoes topped with shredded cheese of your choice, or how about a platter of nachos to go with that football game? While we’ve made (and posted) many a chili recipe, this one has now taken the top spot overall!
2 15-oz. cans of fire roasted diced tomatoes, undrained
3 Tbsp. pure maple syrup
2 Tbsp. fresh lime juice (from 1–2 limes), optional
Handful of cilantro leaves and stems, finely chopped
Freshly ground black pepper
Tostadas (for serving)
Directions
Bring 4 cups low-sodium chicken broth to a simmer on stovetop in a large Dutch oven or other heavy large pot. Meanwhile, remove and discard stems from 3 large or 6 medium ancho chiles, 2 dried guajillo chiles, and 2 dried pasilla chiles. Tear flesh into a few pieces, letting seeds fall out. Transfer to a blender. Add hot broth and cover blender; let sit until chiles are softened, 25–30 minutes. Add 2 canned chipotle chiles in adobo and blend on high speed until smooth, about 1 minute; set aside.
Warm 2 tablespoons oil in same pot over medium-high heat. Season turkey all over with salt. Add half of turkey to pot and smash down with a wooden spoon to flatten against surface of pot and break into smaller clumps. Cook, undisturbed, until underside is browned, top side is no longer pink, and most of the liquid is cooked off, 8–10 minutes. Using a slotted spoon, transfer to a plate. Repeat with remaining turkey, another 8-10 minutes.
Heat remaining 2 tablespoons vegetable oil in same pot over medium. Add 2 white or yellow onions, finely chopped and 5 garlic cloves, smashed; season with kosher salt and stir to combine. Cover pot and cook, stirring occasionally, until onions are translucent, very soft, and starting to brown around the edges, 10–12 minutes. Add 1 tablespoon ground cumin and 2 tsp. dried oregano and cook, stirring frequently, until fragrant and sizzling, about 1 minute.
Add 2 tablespoons tomato paste and cook, stirring to coat vegetables, until paste darkens slightly, about 1 minute. Add one 12-oz. bottle hard cider or lager-style beer, one 3” cinnamon stick, and 2 bay leaves and scrape up any brown bits stuck to bottom of pot. Bring to a lively simmer and cook, stirring occasionally, until liquid is mostly reduced, about 5 minutes.
Add reserved chile purée, two 15.5-oz. cans cannellini beans, drained, rinsed, cans of diced tomatoes with their juices, and 3 tablespoons pure maple syrup to pot. Add 1 cup water to blender, swish around to loosen any remaining purée, then pour into pot; season with salt. Bring to a boil, reduce heat to medium-low, and gently simmer, partially covered and stirring occasionally, until liquid is thickened and very flavorful, about 1 hour. Add turkey and simmer until flavors have melded, about 30 minutes longer.
If desired, add 2 tablespoons fresh lime juice (from 1–2 limes), and a handful of cilantro leaves and stems, finely chopped as a garnish. Season to taste with salt.
Taste chili and season with kosher salt and freshly ground black pepper if needed. Remove from heat and fish out cinnamon stick and bay leaves. Divide chili among bowls. Top with cilantro and lime juice, and some broken tostadas.
Do ahead: Chili (without toppings) can be made 3 days ahead and tastes even better the next day. Transfer to an airtight container and chill. Reheat over medium-low.
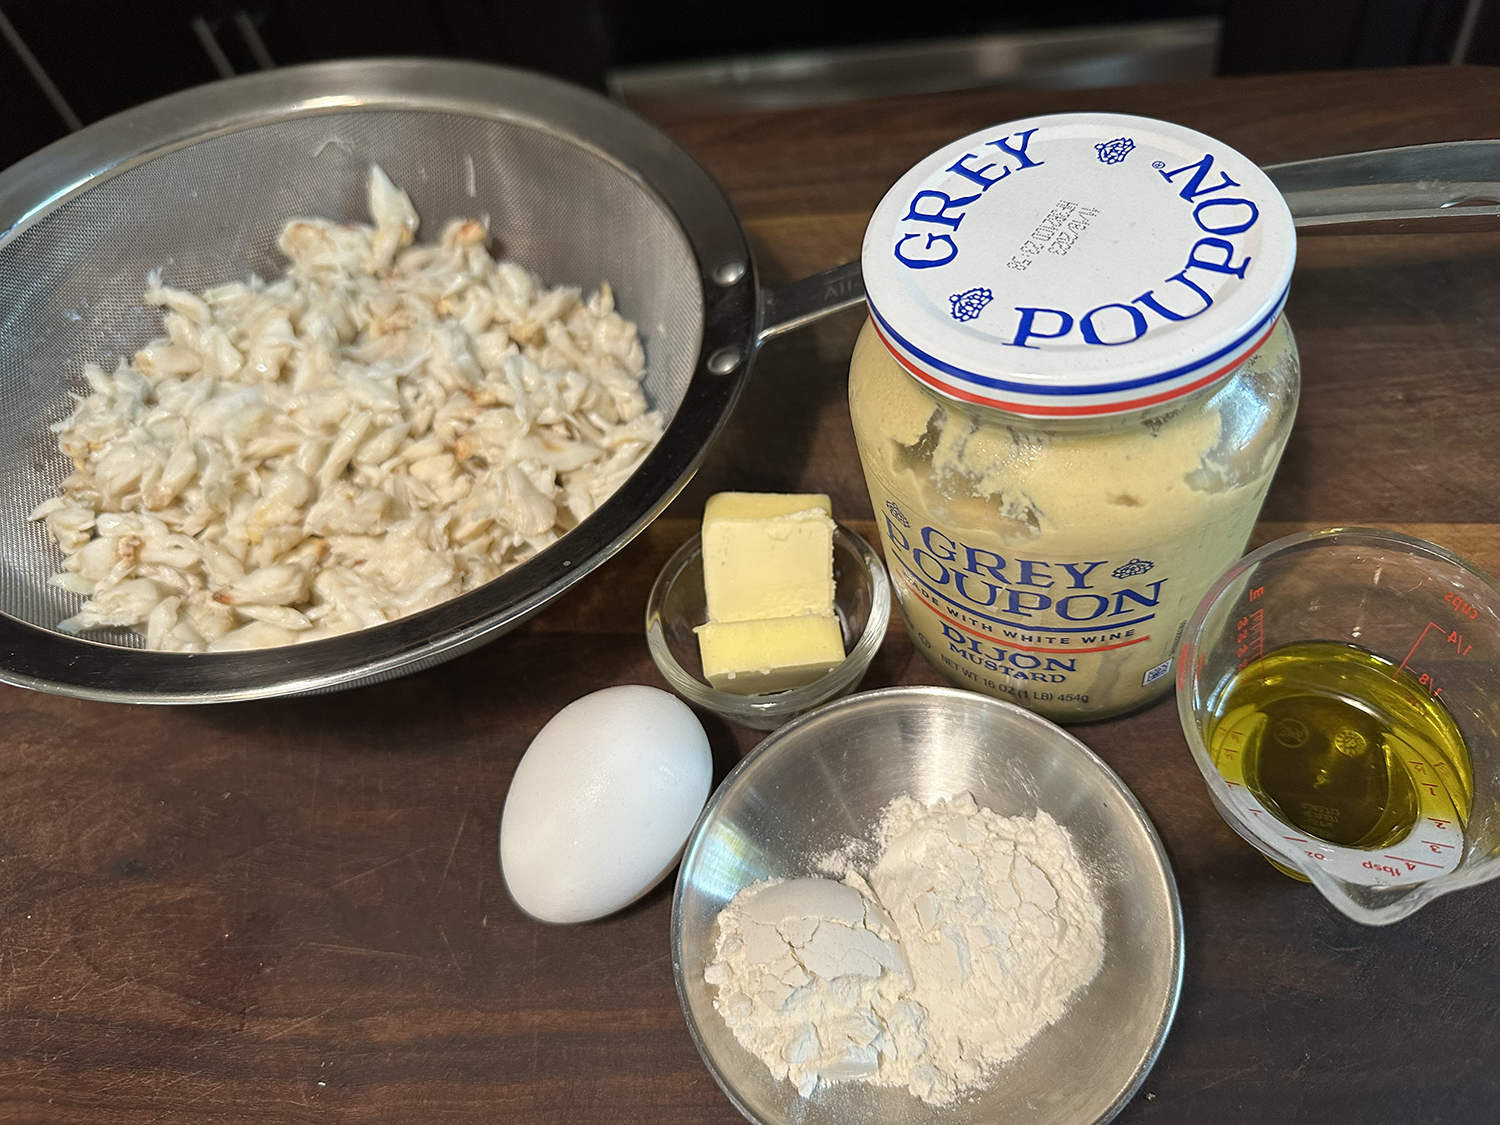
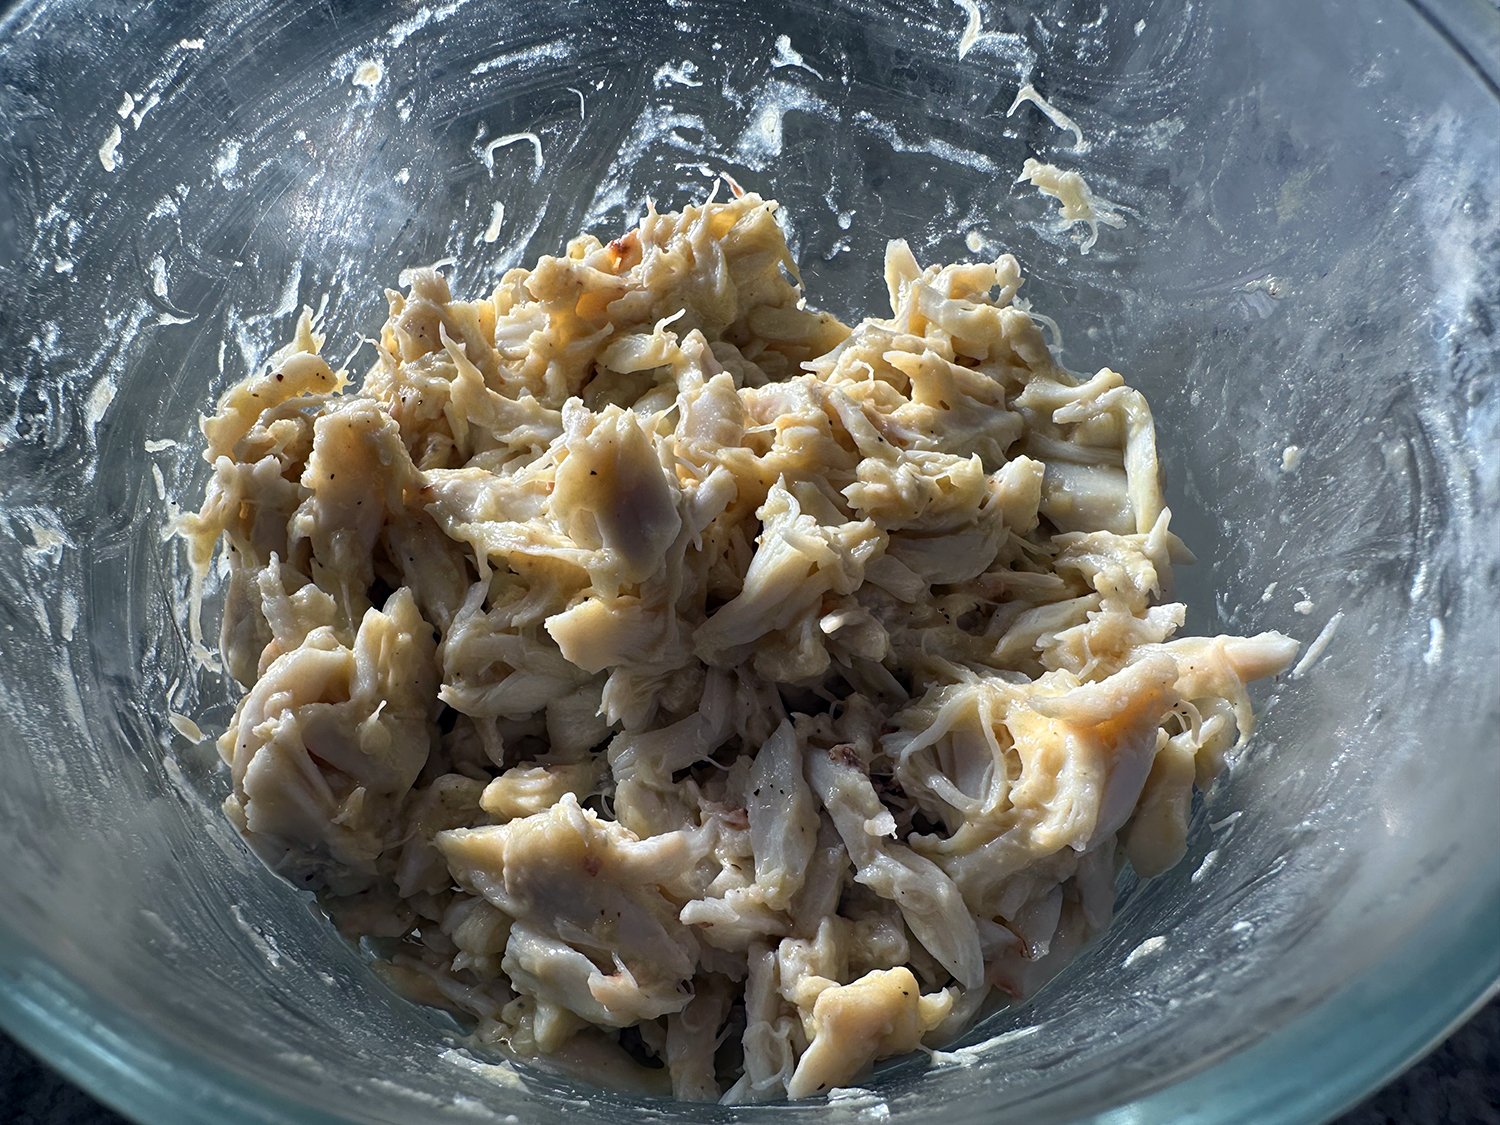
Seems like we are in unison with Chef Mark Bittman when it comes to good crab cakes, use this less-is-more approach. That being a ‘minimalist’ recipe which is heavy on the crab, and low on filler. The simplicity let’s the crab sing. And with the cost of crab meat in the stratosphere these days, you want to make sure the crustacean shines!
As Mark state, “Getting the most out of crab cakes often means putting the least into them. Since crab has the best texture and subtlest flavor of all crustaceans, the best crab cakes are those that showcase the crab, not another ingredient.”
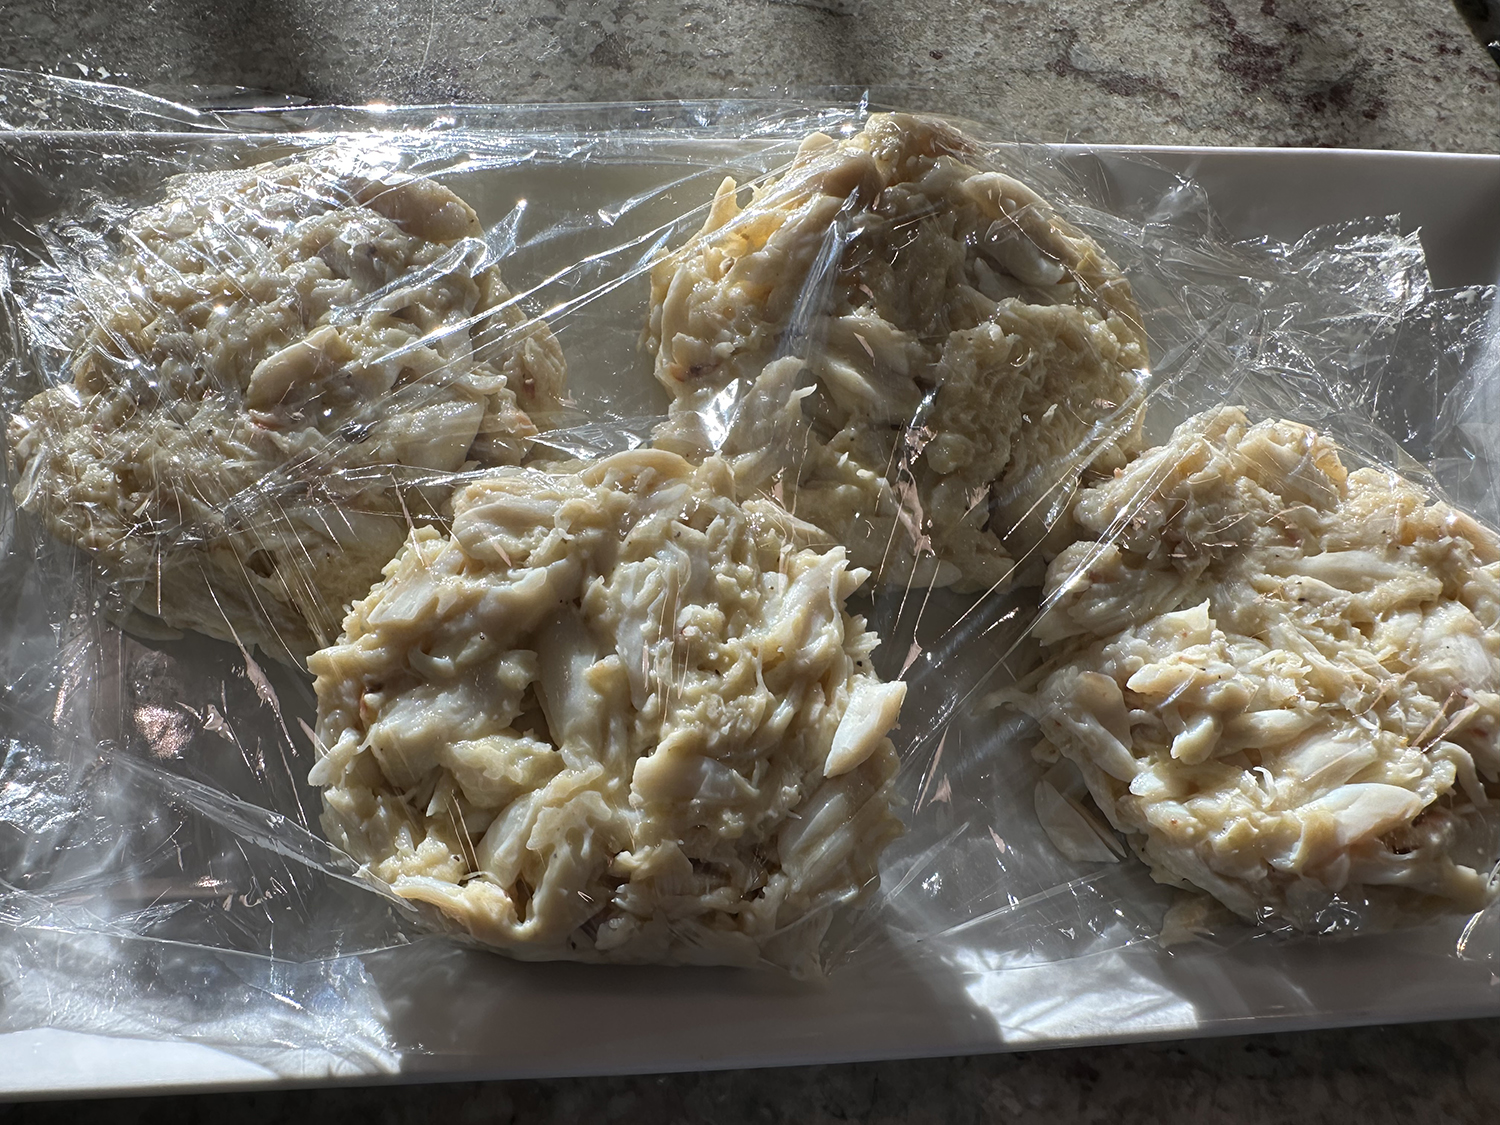
The loose mix is best chilled before shaping, but it is essential to chill it again for a half-hour or so (longer is better) before cooking. When cold, the cakes will hold together, and once the egg, the binding agent, does its work, they will retain their shape until attacked with a fork.
Some reviewers substituted panko bread crumbs for the flour. Whatever appeals to you most, go ahead. The cakes are fancy enough that you can serve them with a luxurious dinner, or low-key with coleslaw and french fries like we did. One patty per person is a normal size portion.
2 Tbsp. extra-virgin olive oil or neutral oil, like canola or grape-seed
4 Tbsp. butter (or use a total of 4 Tbsp. oil)
Lemon wedges
Directions
Gently combine crab, egg, mustard, salt, pepper and 2 tablespoons flour. Cover mixture, and put in freezer for 5 minutes. Shape mixture into 4 hamburger-shaped patties. Line plate with plastic wrap, and put crab cakes on it. Cover crab cakes with more plastic wrap, and refrigerate them for about 30 minutes (or as long as 1 day), or freeze for 15 minutes.
Put flour for dredging in a bowl. Combine oil and butter in 12-inch skillet, and turn heat to medium. When butter melts and its foam subsides, gently dredge a crab cake in the flour. Gently tap off excess flour, and add crab cake to pan; repeat with remaining crab cakes, and then turn heat to medium-high.
Cook, rotating cakes in pan as necessary to brown the first side, 5 to 8 minutes. Turn, and brown the other side (it will take slightly less time). Serve cakes hot, with lemon wedges.
Often a pork roast can be dried out when it’s done cooking. But this lovely recipe from Milk Street is extremely simple to make and uses just over a handful of ingredients. The lefotovers were still juicy and full of flavor.
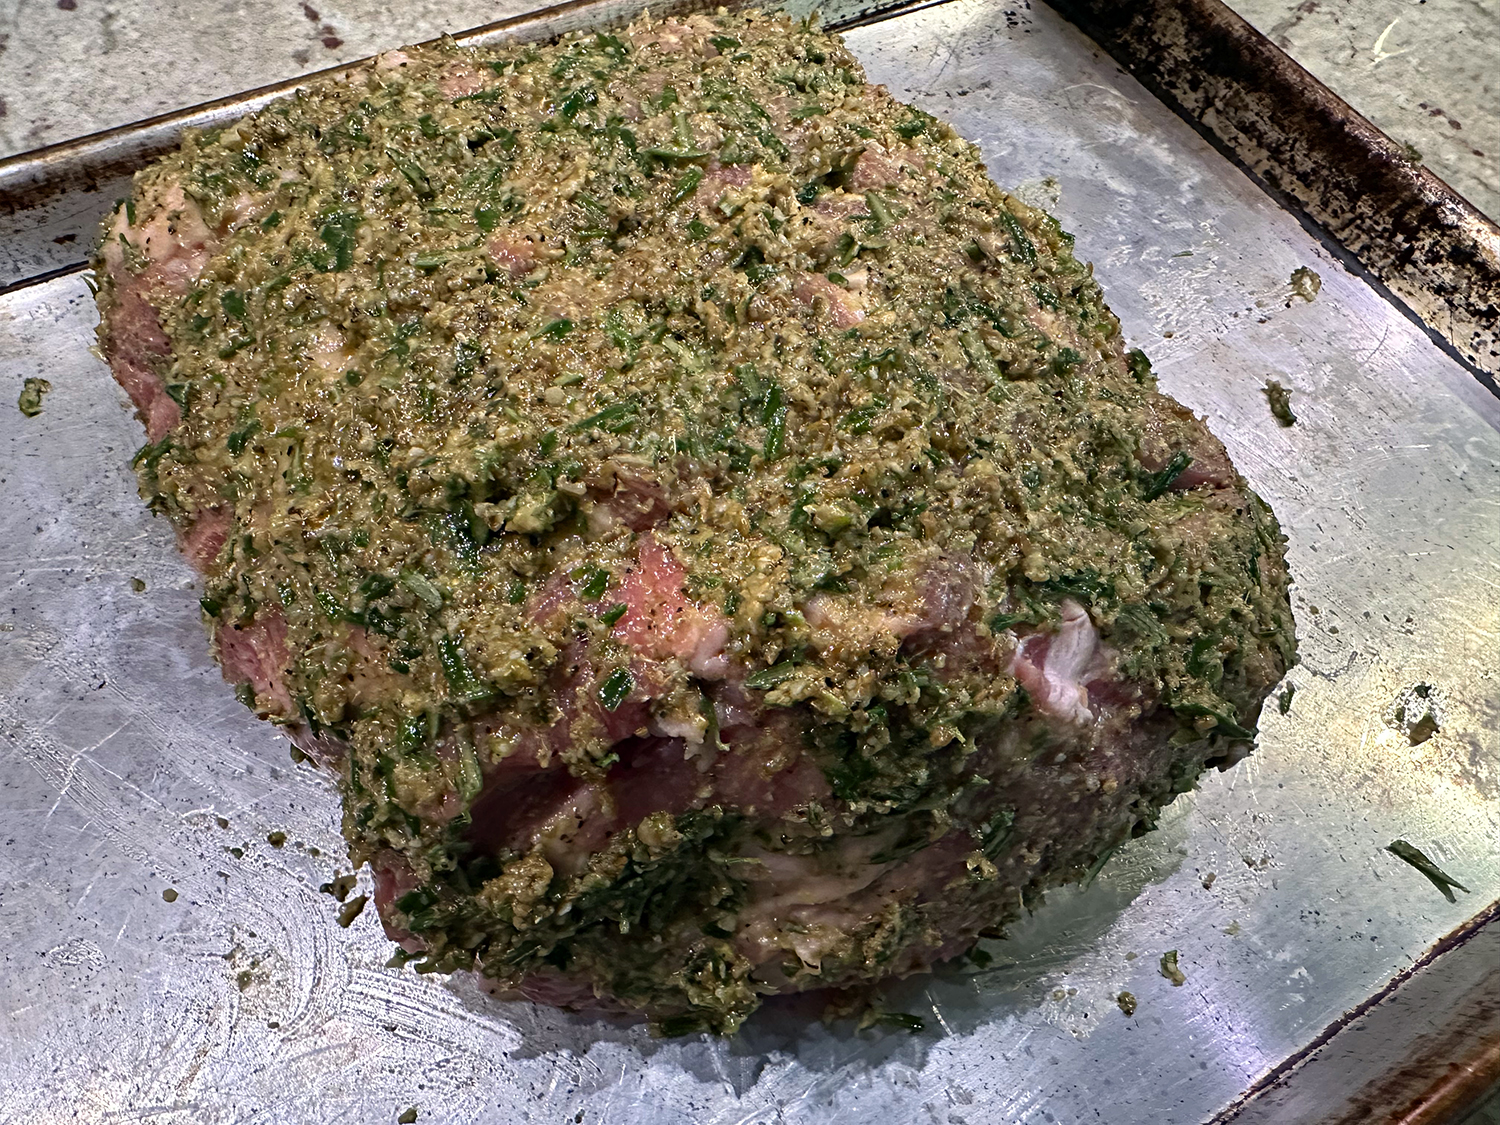
This recipe takes inspiration from porchetta, a Tuscan-style pork roast seasoned with garlic, herbs and spices. A simple fragrant seasoning paste rub is made and the mixture is massaged into shallow cuts in the meat’s fat cap so it clings to the roast.
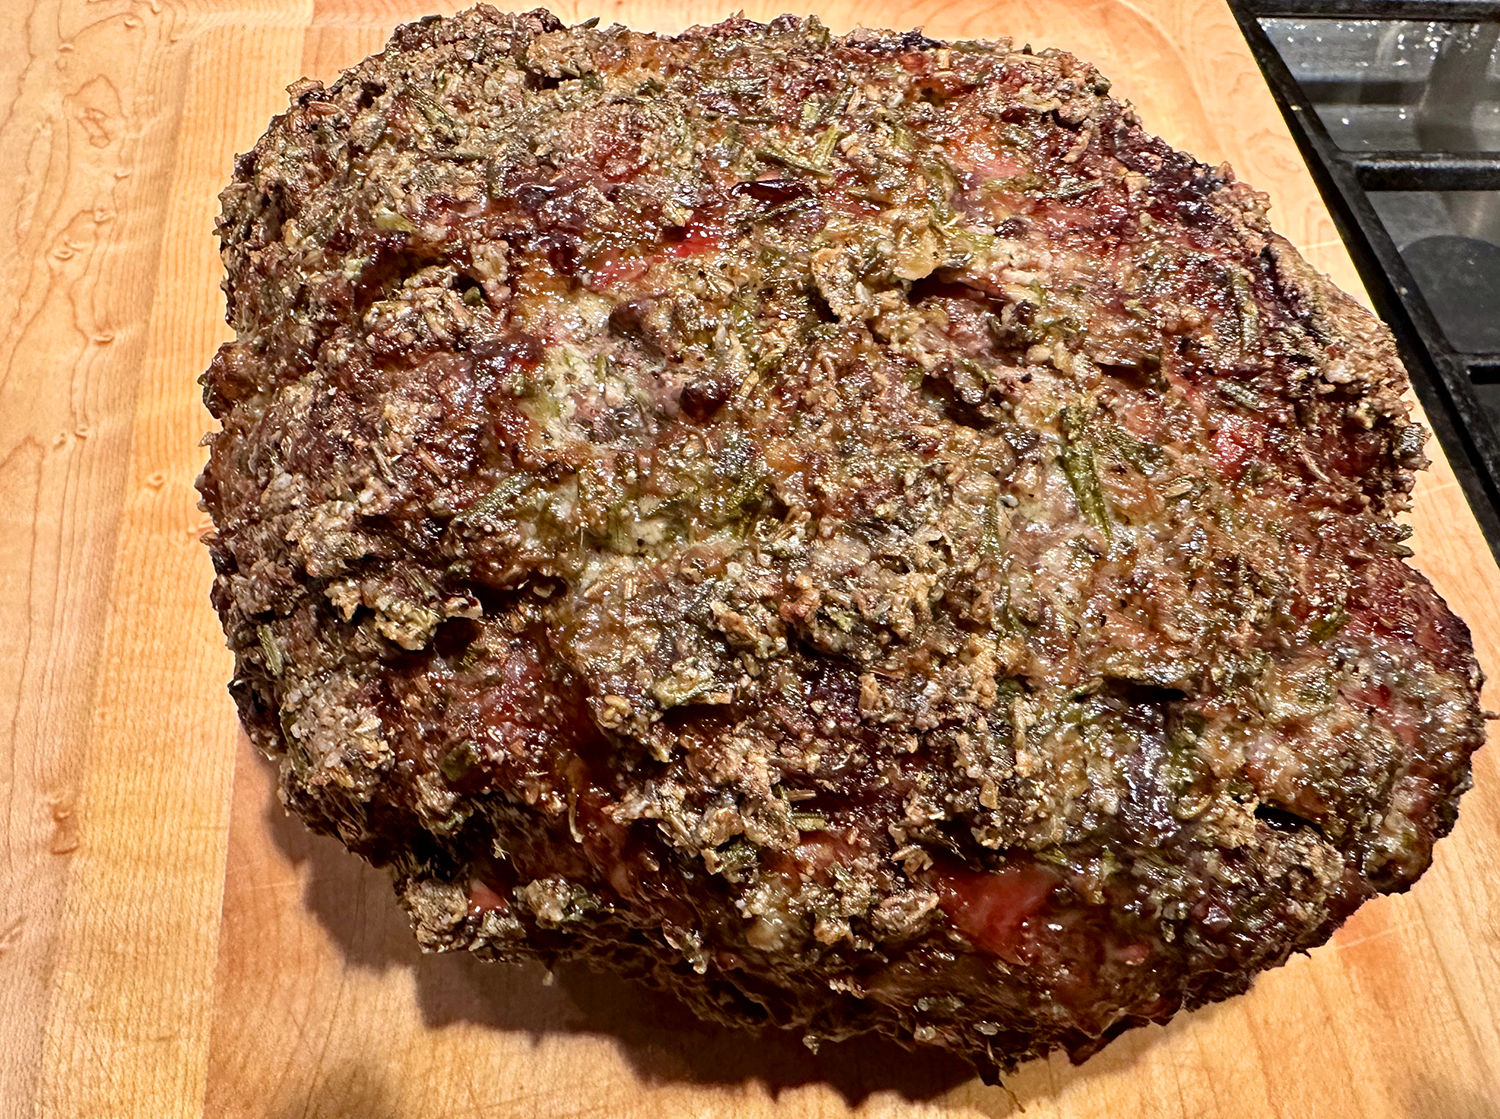
Roasting meat on a baking sheet, rather than in a roasting pan, promotes better air circulation, accelerating cooking and boosting browning. Use the time while the meat rests to throw together a zingy-fresh parsley-caper sauce that’s a perfect foil to the richness of the meat.
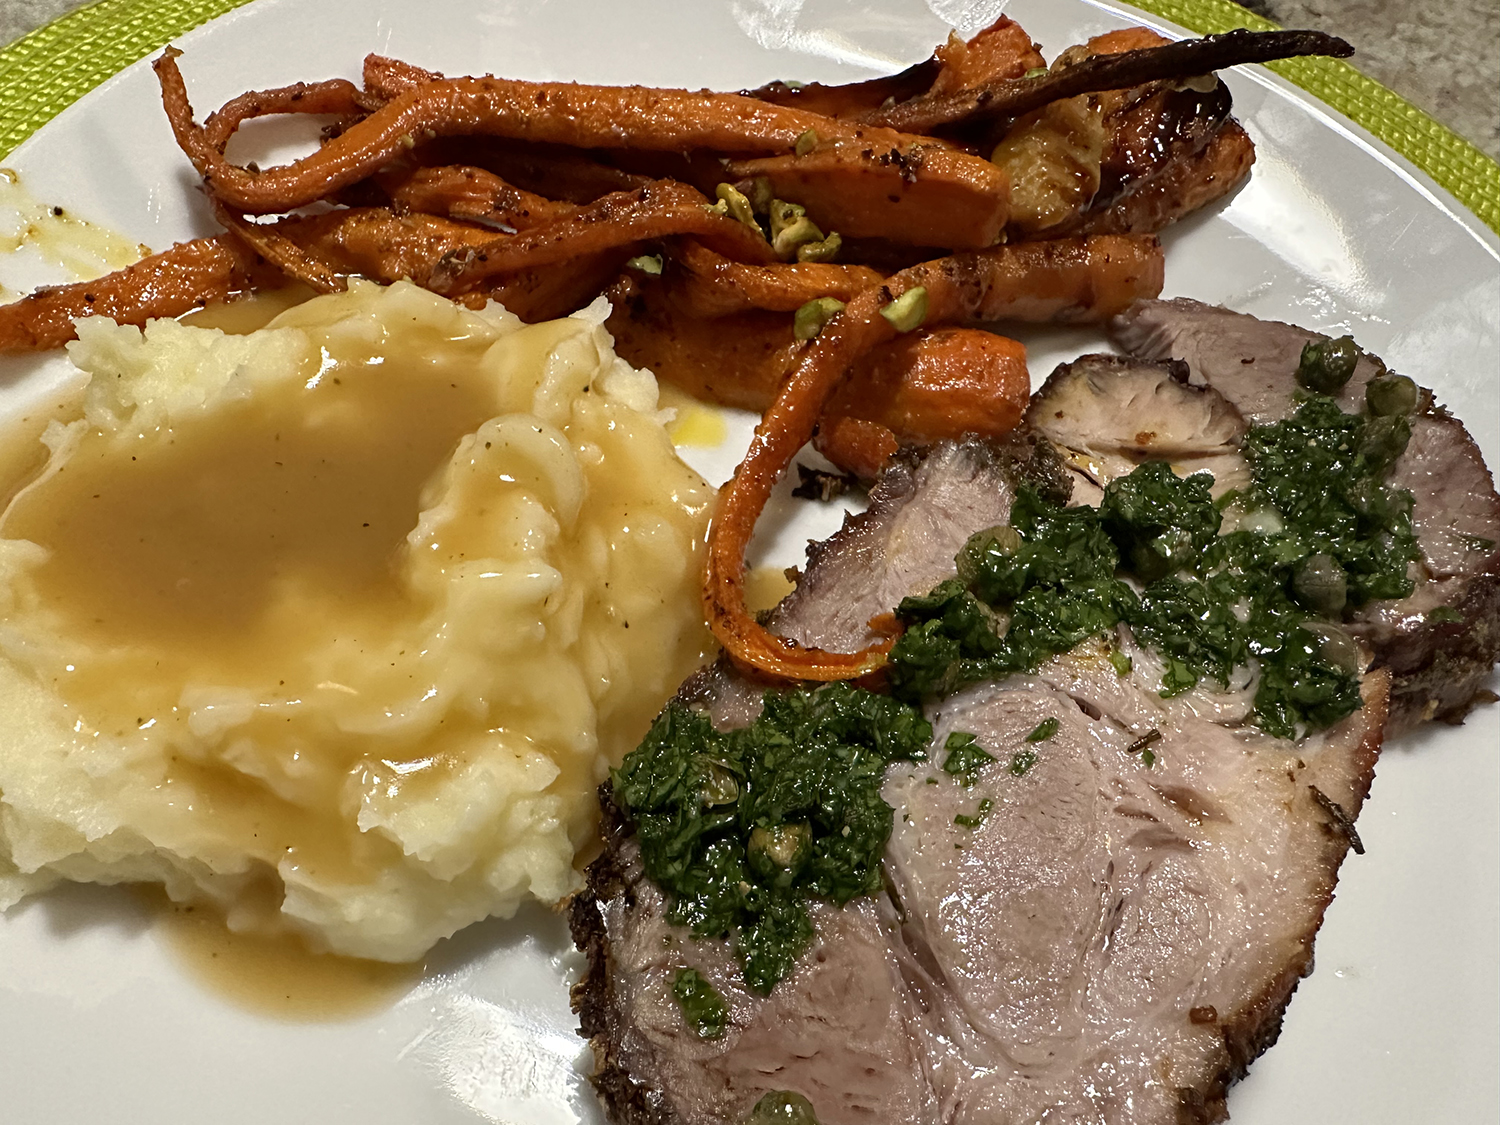
One noted difference that we made was to tie the pork with kitchen twine 3 or 4 times around the girth of the roast. And as ours didn’t have much of a fat cap, we made the cuts directly into the top of the meat. Butter-Roasted Carrots with Za’atar and Pomegranate Molasses, and garlicky mashed potatoes with gravy rounded out the meal.
Slow-Roasted Pork Shoulder with Fennel, Garlic and Rosemary
Heat the oven to 300°F with a rack in the middle position. In a food processor, process the fennel seeds to a mixture of finely ground and coarsely cracked seeds, about 2 minutes. Add ¼ cup of the oil, the rosemary, smashed garlic cloves, 1 tablespoon salt and 2 teaspoons pepper. Process to form a paste, about 30 seconds, scraping the bowl as needed.
With a knife, score a crosshatch pattern into the surface fat on top of the roast. Using your hands, rub the paste onto all sides of the roast and into the cuts. Place the pork fat side up on a rimmed baking sheet and roast until the center reaches 195°F, about 4 hours. (Ours took 4 1/2 hours to come to temp.)
When the roast is done, tent with foil and let rest for about 15 minutes. Meanwhile, in a small bowl, stir together the remaining ¼ cup oil, grated garlic, parsley, capers and brine and ¼ teaspoon pepper. Transfer the roast to a cutting board. Cut into slices, then transfer to a platter. Serve with the sauce.
This is a wonderful cool weather soup recipe that warms you like a soft blanket. The Hubs made the “shortened” version using a pressure cooker which condensed the overall time down to 34 minutes (24 minutes on high pressure; + 10 minutes natural release).
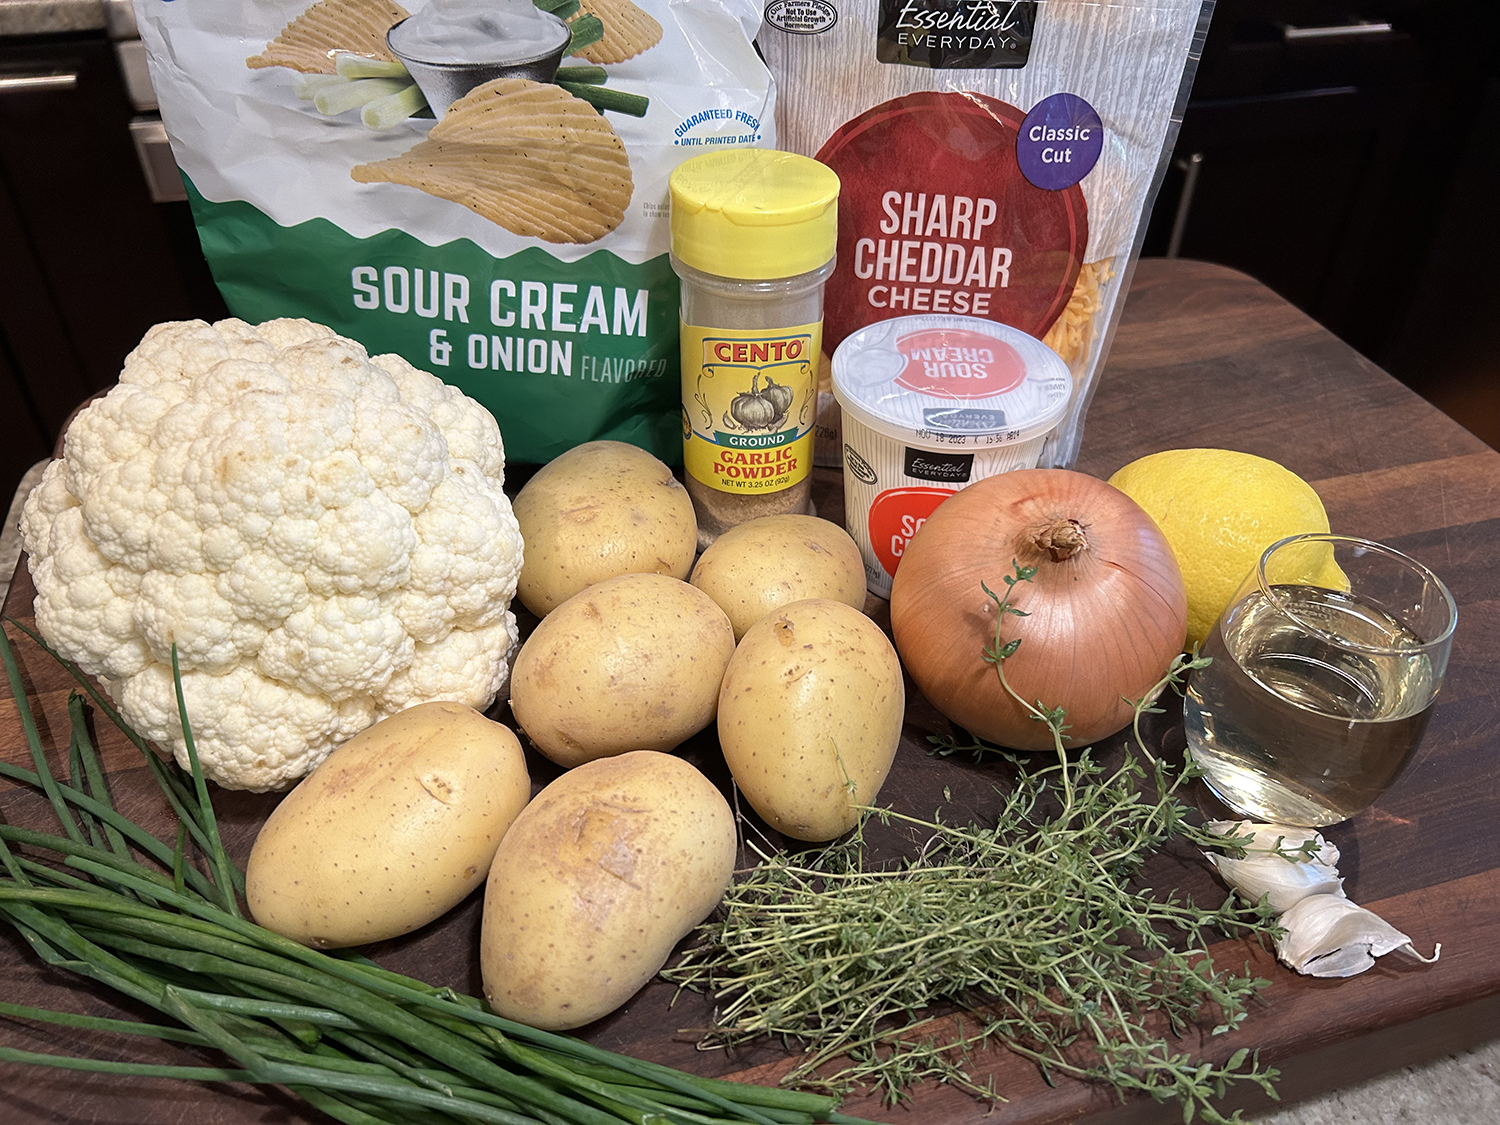
This creamy vegetarian soup is built on humble winter staples, but the addition of sour cream and chives make it feel special. If feeling decadent, you may want to crumble a few sour-cream-and-onion chips on top to take the theme all of the way.
It takes just a few minutes to throw the ingredients into the slow cooker, and the rest of the recipe almost entirely hands-off, making it very doable on a weekday. Use an immersion blender, if you have one, to purée it to a silky smooth consistency, but a potato masher works well for a textured, chunky soup. Ours was somewhere in between, with a slightly textured finish.
Slow-Cooker Cauliflower, potato and White Bean Soup
1 lb. Yukon gold potatoes, scrubbed, peeled and cut into 1- to 2-inch chunks
1 lb. cauliflower, chopped into large bite-sized florets and stems
2 15-oz. cans cannellini beans, drained
½ yellow onion, minced
3 garlic cloves, smashed and minced
3½ cups vegetable stock
3 Tbsp. unsalted butter
2 Tbsp. dry white wine
1 sprig fresh thyme or ½ tsp. dried thyme
½ tsp. garlic powder
Coarse kosher salt and black pepper
1 tsp. lemon juice (about ¼ lemon)
8 oz. sour cream (1 cup), at room temperature
½ cup chopped chives (about 1 small bunch)
Potato chips, preferably sour cream and onion, for topping; optional
Shredded cheddar, for serving
Directions
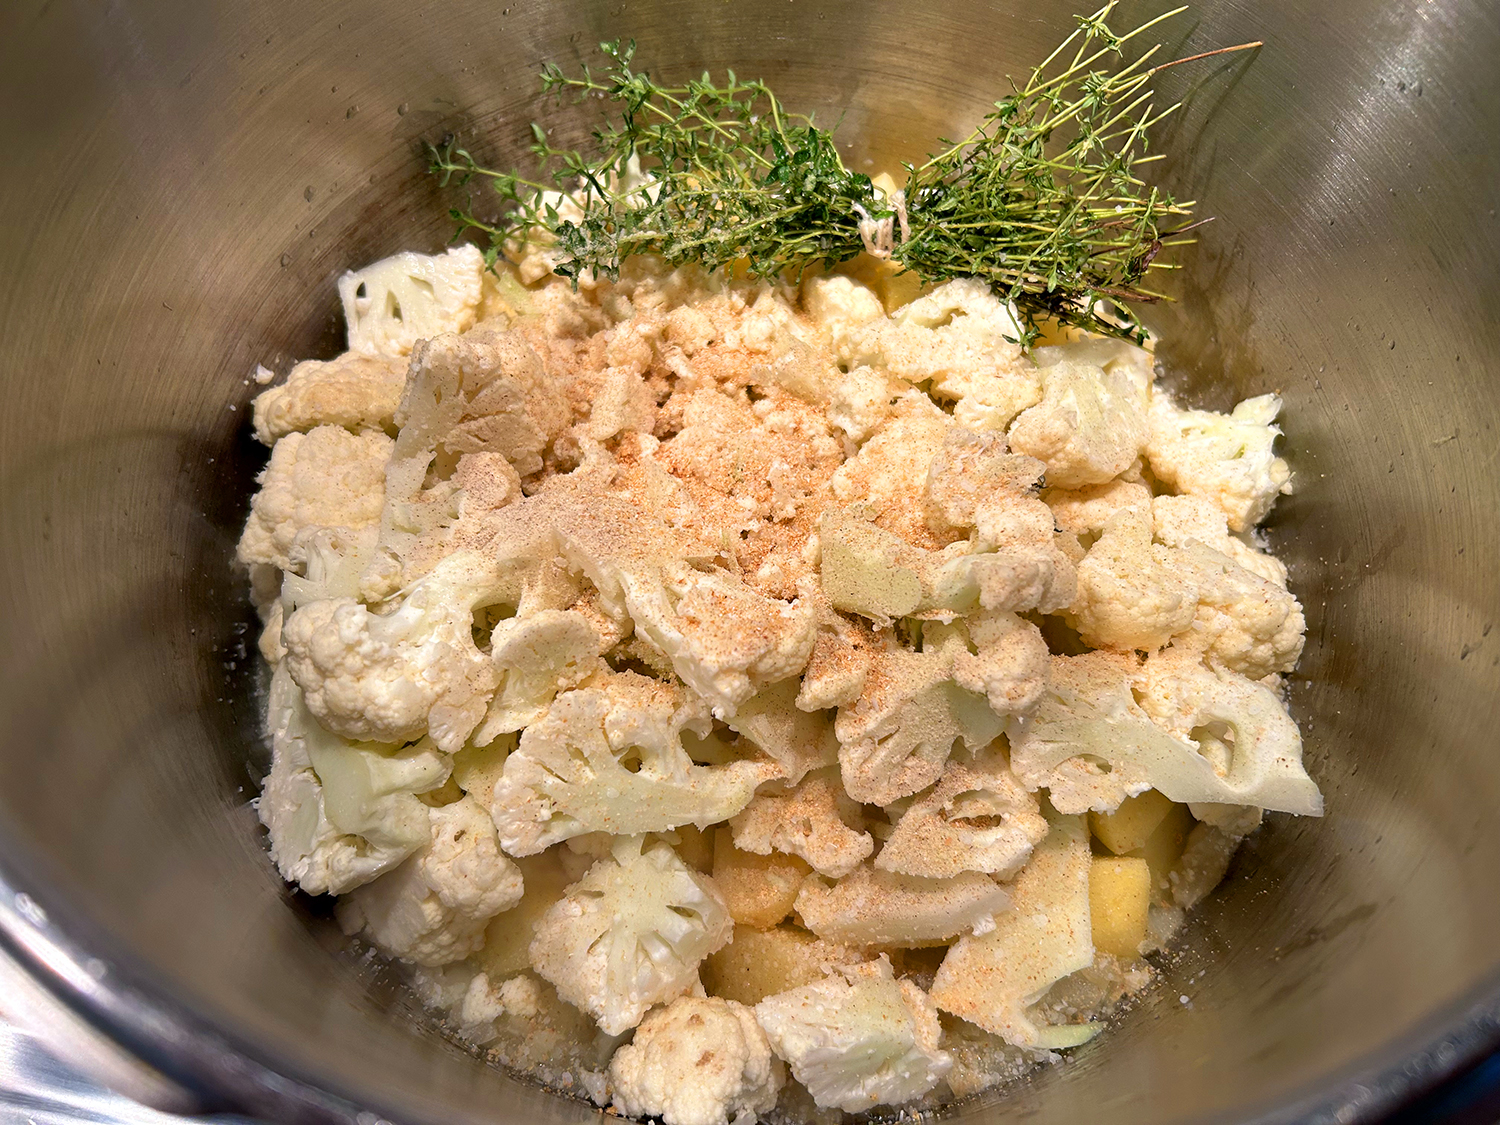
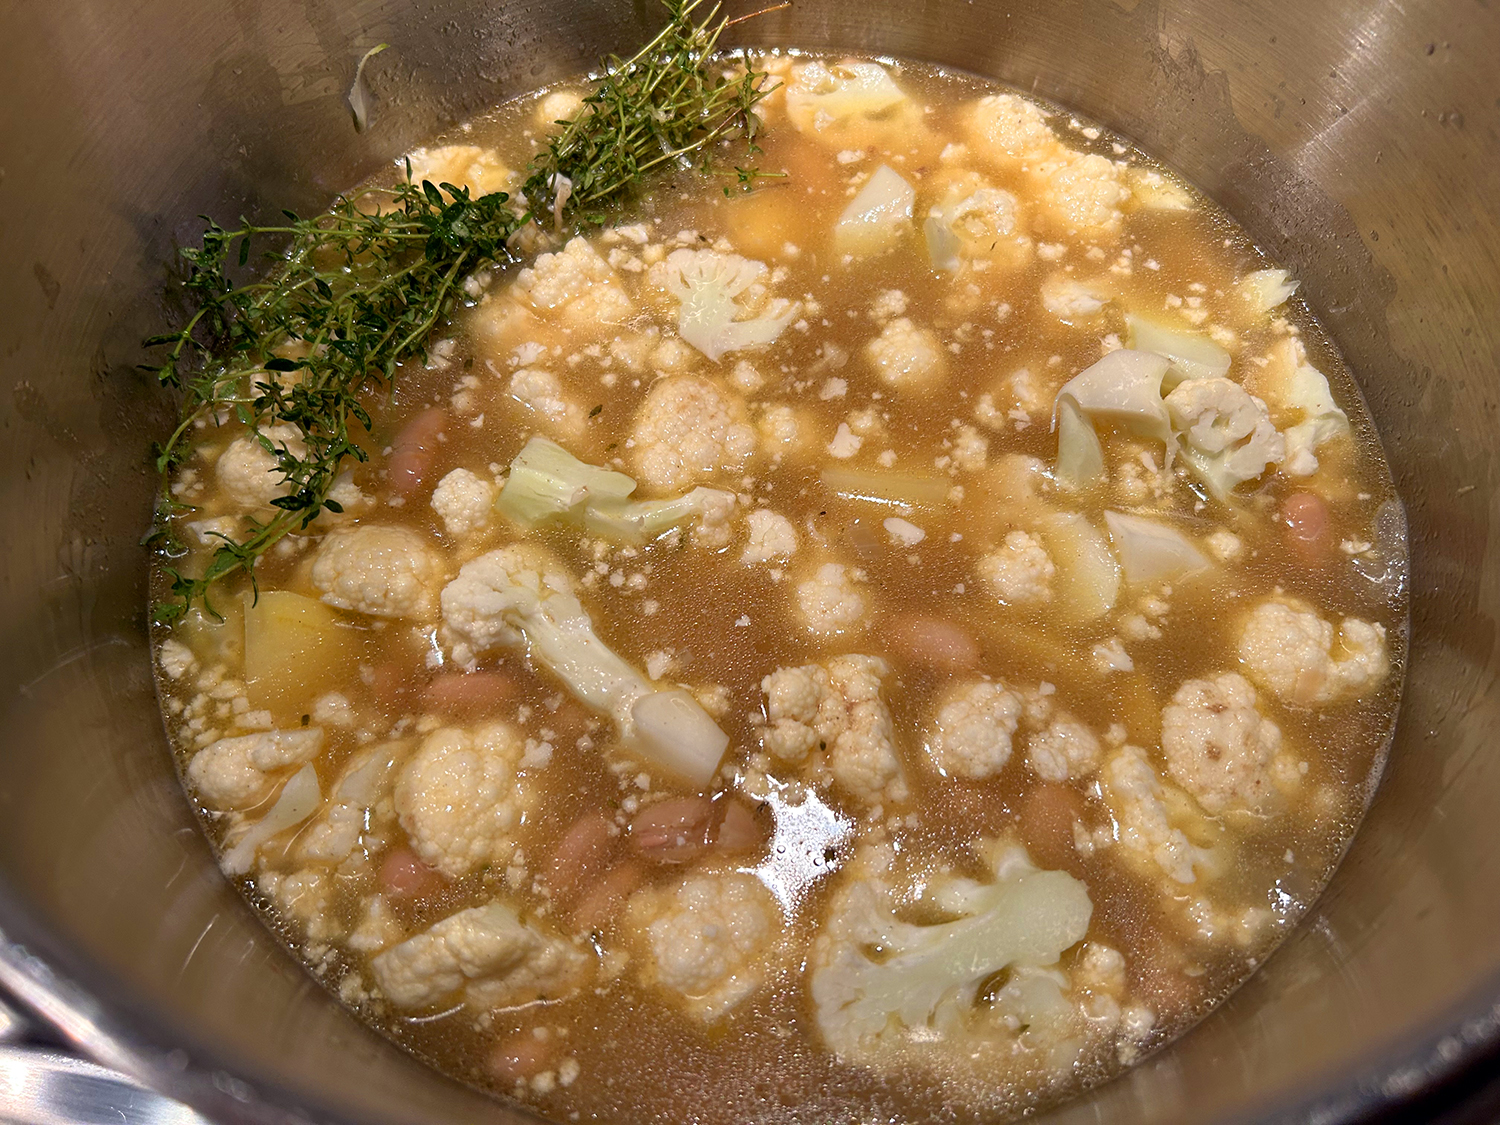
In a 6- to 8-quart slow cooker, combine the potatoes, cauliflower, beans, onion, garlic, vegetable stock, butter, wine, thyme, garlic powder and 1½ teaspoons kosher salt. Cover and cook until the vegetables are very tender, about 8 hours on low. (InstaPot: 24 minutes on high pressure; + 10 minutes natural release.)
Remove and discard the thyme sprig, and turn off the slow cooker. Add the lemon juice. To make a completely smooth and creamy soup, purée the ingredients using an immersion blender. (Or, purée the soup in a blender in two batches, transferring the puréed soup to a different pot.) To make a textured, chunky soup, smash the ingredients using a potato masher in the slow cooker.
Stir in the sour cream and chives. Taste and add additional salt if necessary. Serve in bowls topped with black pepper, crushed potato chips and shredded Cheddar.
For leftovers, gently reheat the soup on the stovetop or in the microwave until it just barely bubbles around the edges; don’t let it boil or the sour cream will break.
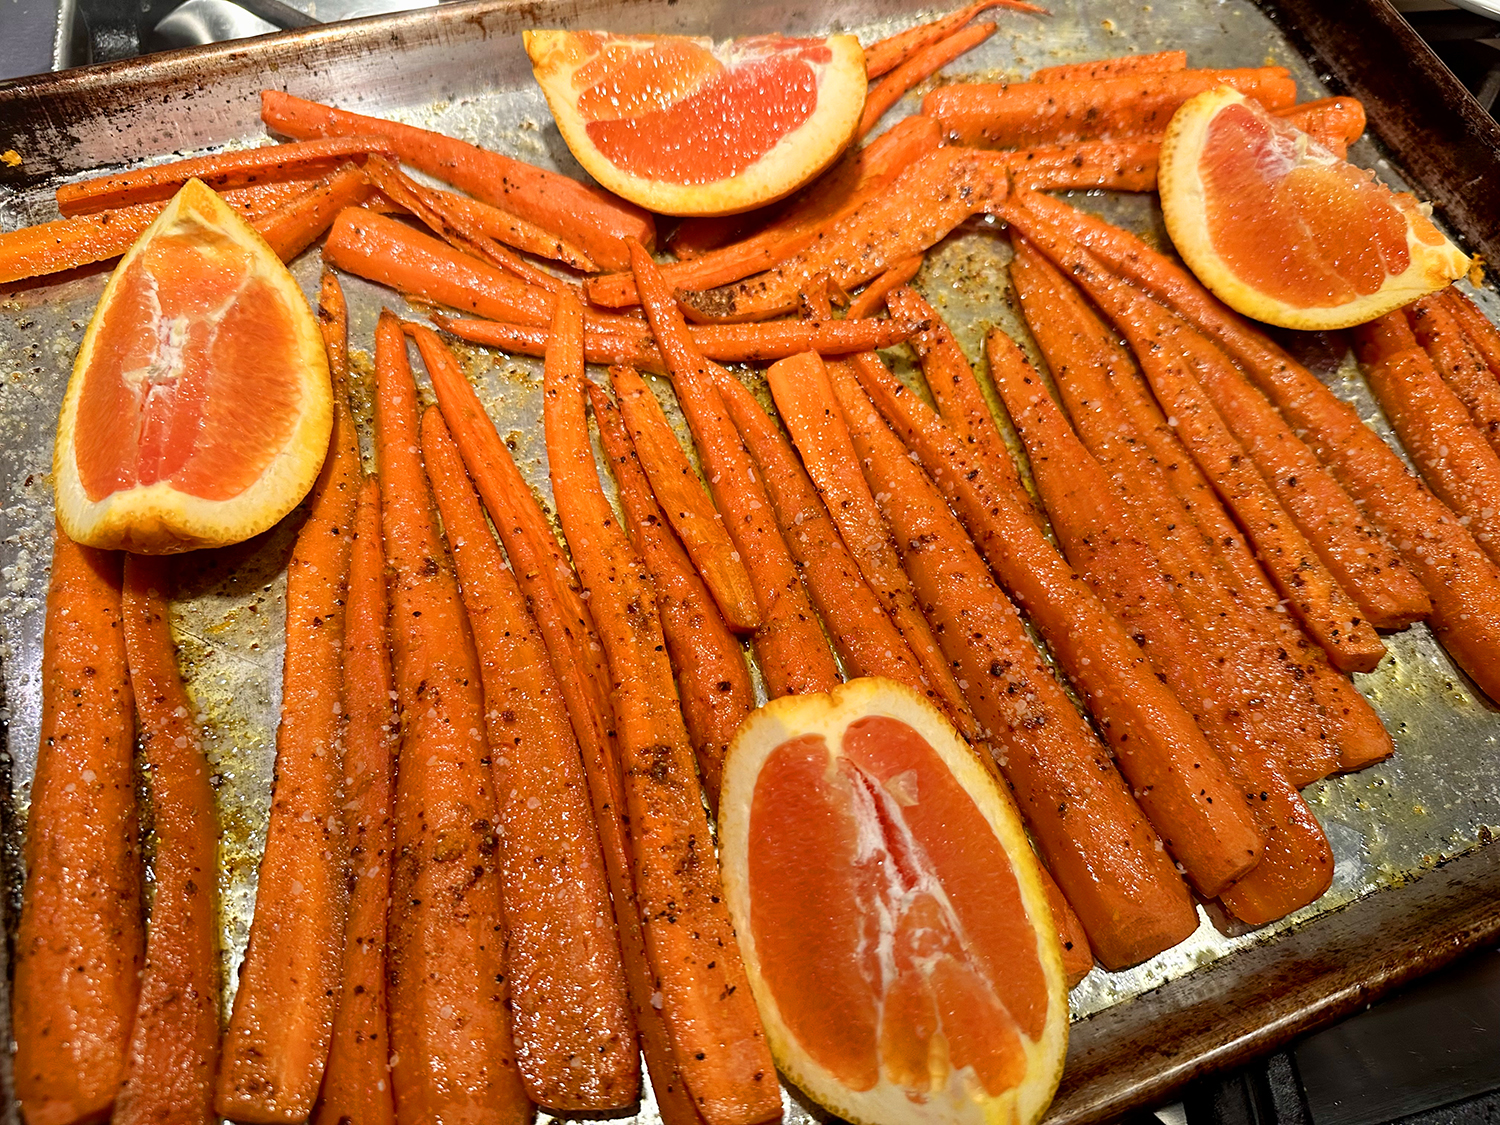
This lovely side dish is definitely company-worthy. Not only do they look and smell delicious, they taste phenomenal. Carrots roast in a moderately hot oven for almost an hour and become super-sweet and almost meltingly tender. Start them coated with olive oil, but drizzle them with melted butter partway through roasting.
The milk solids in the butter caramelize in the oven, adding a rich, nutty fragrance and flavor. Za’atar, a Middle Eastern seed and spice blend, and orange zest and juice bring complexity to the dish. Pistachios and sweet-tart pomegranate molasses are finishing touches that make this dish special.
Bunch carrots—the type sold with their greens attached—are especially good here because they’re slender and fresh. If using carrots with especially thick upper portions, after halving them lengthwise, halve them again to create more uniform pieces.
Even though we have Za’atar seasoning, we decided to do a mixx of one teaspoon each of ground coriander and Aleppo pepper. You can use any of the three spices or a mix of them.
Butter-Roasted Carrots with Za'atar and Pomegranate Molasses
2½ lbs. slender carrots, peeled and halved lengthwise (see headnote)
1 Tbsp. extra-virgin olive oil
Kosher salt and ground black pepper
1 orange
4 Tbsp. salted butter, melted
2 tsp. za’atar OR ground coriander OR Aleppo pepper
2 Tbsp. raw OR roasted pistachios, finely chopped
2 tsp. pomegranate molasses
Directions
Heat the oven to 350°F with a rack in the middle position. On a rimmed baking sheet, toss the carrots with the oil, ¾ teaspoon salt and ¼ teaspoon pepper, then distribute evenly. Roast for 30 minutes. Meanwhile, grate 1 teaspoon zest from the orange, then cut the orange into quarters.
Drizzle the carrots with the butter and sprinkle with the za’atar and zest. Toss, then redistribute evenly. Place the orange quarters cut sides up on the baking sheet. Roast until a skewer inserted into the largest carrot meets no resistance, another 15 to 20 minutes, stirring once about halfway through.
Squeeze the juice from 1 orange quarter over the carrots. Using a wide metal spatula, transfer to a platter, scraping up any browned bits. Taste the carrots and season with salt and pepper. Sprinkle with the pistachios and drizzle with the pomegranate molasses. Serve the remaining orange quarters on the side.
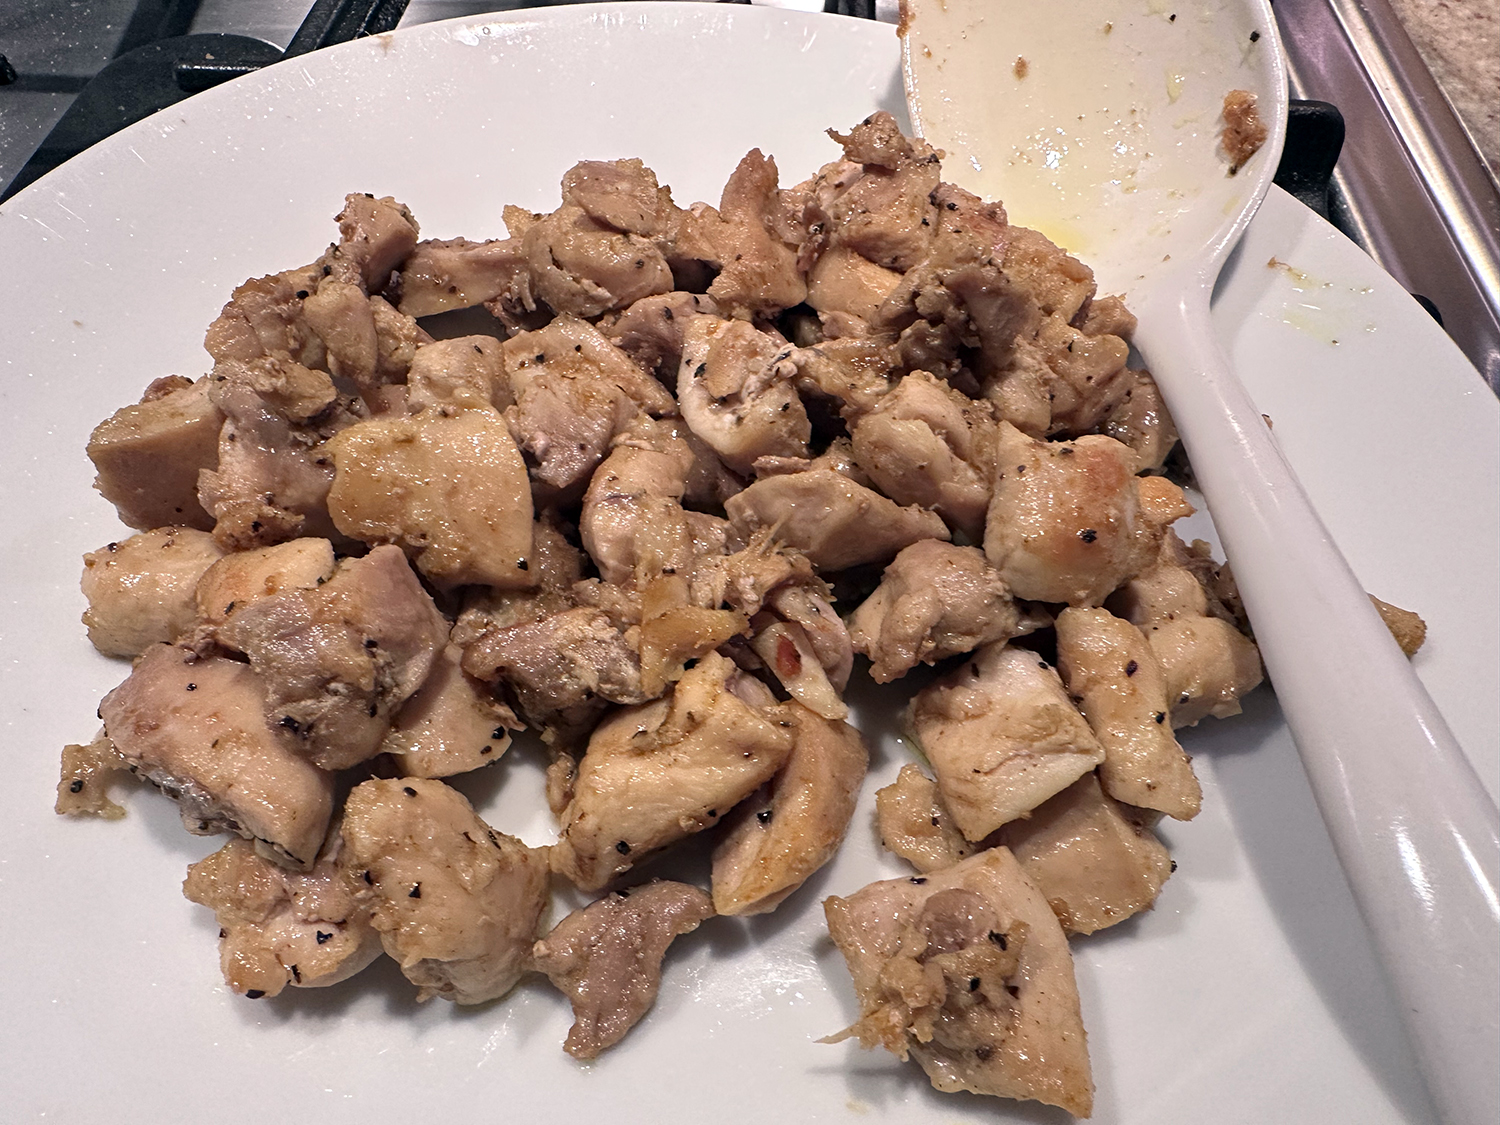
Another weeknight recipe that transports you out of the ordinary doldrums of your usual meal rotation. Nigerian fried rice, seasoned with curry powder, dried thyme and a handful of aromatics, inspired this meal-in-a-skillet. While beef liver and an assortment of vegetables are classic ingredients, here it is comprised of chicken thighs and green beans.
Instead of using just-cooked rice, which results in a softer, moisture texture in the finished dish, plain cooked rice that’s been chilled is used so the grains “fry” up light and fluffy. Fragrant basmati is especially good, but any type of long-grain white rice works.
Don’t be afraid to really scrape up the browned bits from the surface of the skillet after you’ve added the broth. The caramelization lends the fried rice great depth of flavor.
3 Tbsp. neutral oil or refined coconut oil, divided
1 lb. boneless, skinless chicken thighs, trimmed and cut into 1-inch pieces
2 tsp. curry powder, divided
Kosher salt and ground black pepper
4 scallions, thinly sliced, whites and greens reserved separately
2 Tbsp. minced fresh ginger
4 oz. green beans, trimmed and cut into 1-inch pieces
1 tsp. dried thyme
1 Fresno or jalapeño chili, stemmed, seeded and thinly sliced
4 cups cooked and chilled long-grain white rice, preferably basmati
1 cup chicken broth, preferably homemade
Directions
In a 12-inch skillet over medium-high, heat 2 tablespoons of the oil until barely smoking. Add the chicken and sprinkle with ½ teaspoon of the curry powder, ½ teaspoon salt and ¼ teaspoon pepper. Cook, stirring occasionally, until evenly browned, 4 to 6 minutes.
Push the chicken to the perimeter of the pan. To the center, add the remaining 1 tablespoon oil, scallion whites and ginger; cook, stirring, until lightly browned, about 1½ minutes. Into the scallion mixture, stir the beans, thyme, half of the chili, the remaining 1½ teaspoons curry powder and ¼ teaspoon each salt and pepper. Stir the chicken into the bean mixture; cook, stirring occasionally, until the beans are bright green, about 2 minutes. Stir in the rice, then add the broth and scrape up any browned bits. Cook, stirring, until the liquid is absorbed, 3 to 5 minutes.
Off heat, taste and season with salt and pepper. Serve sprinkled with the scallion greens and remaining chili.
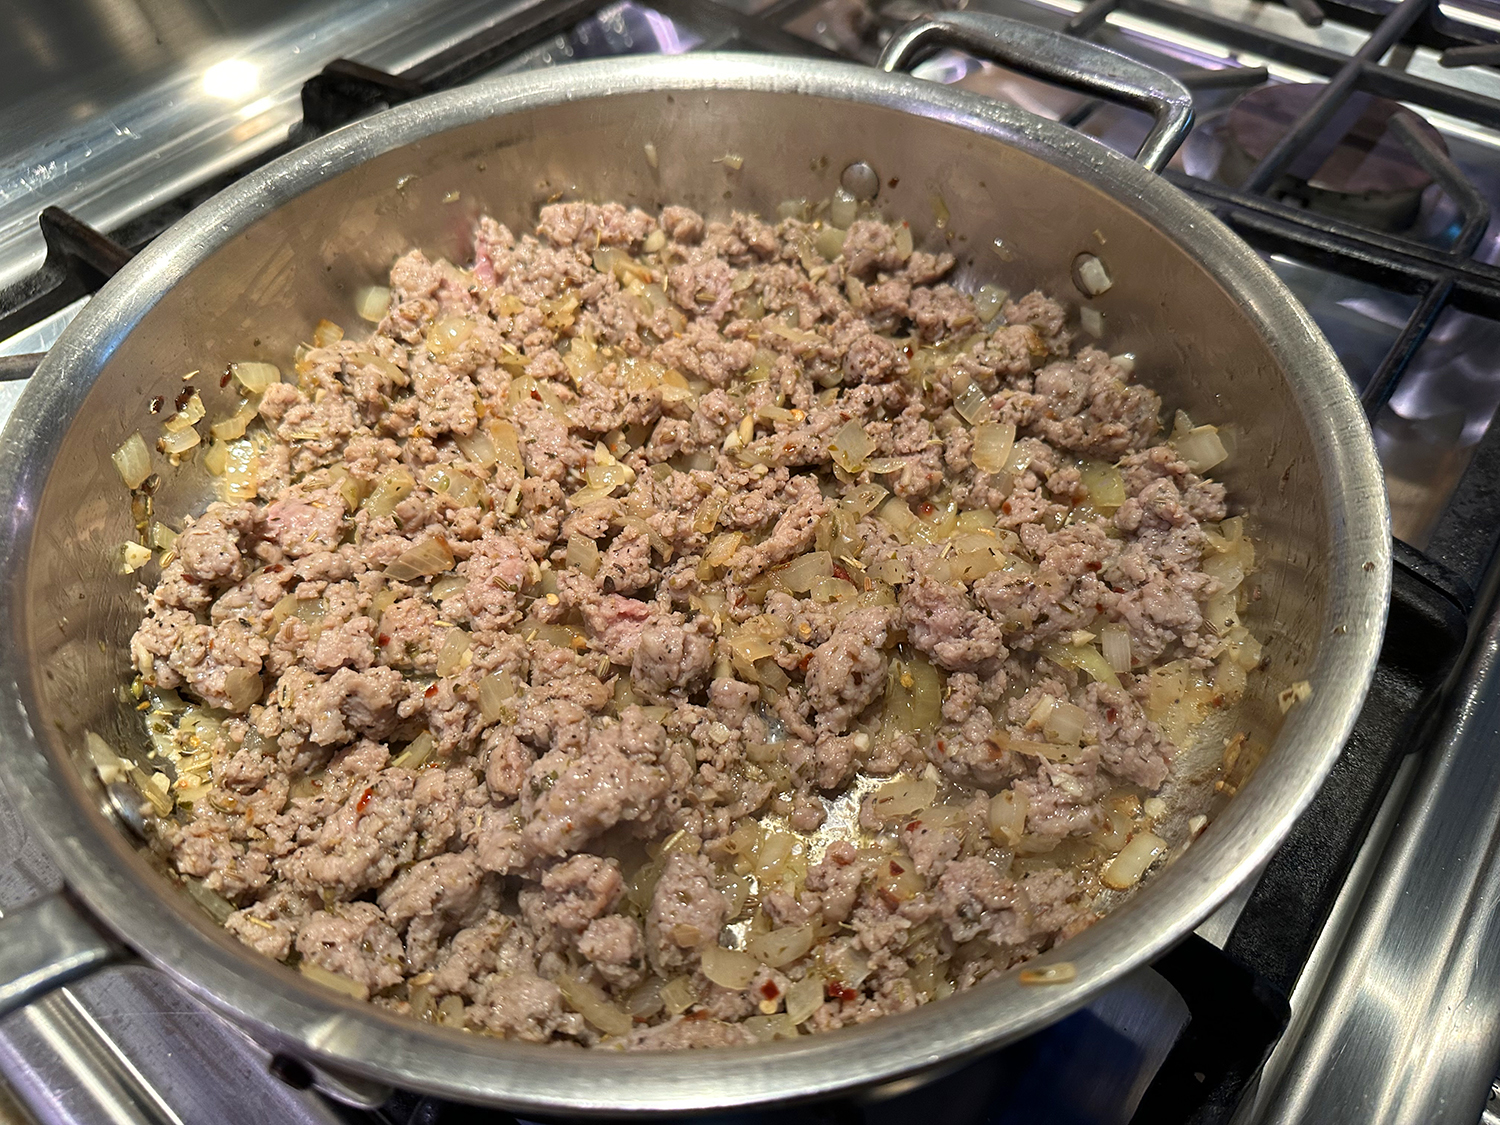
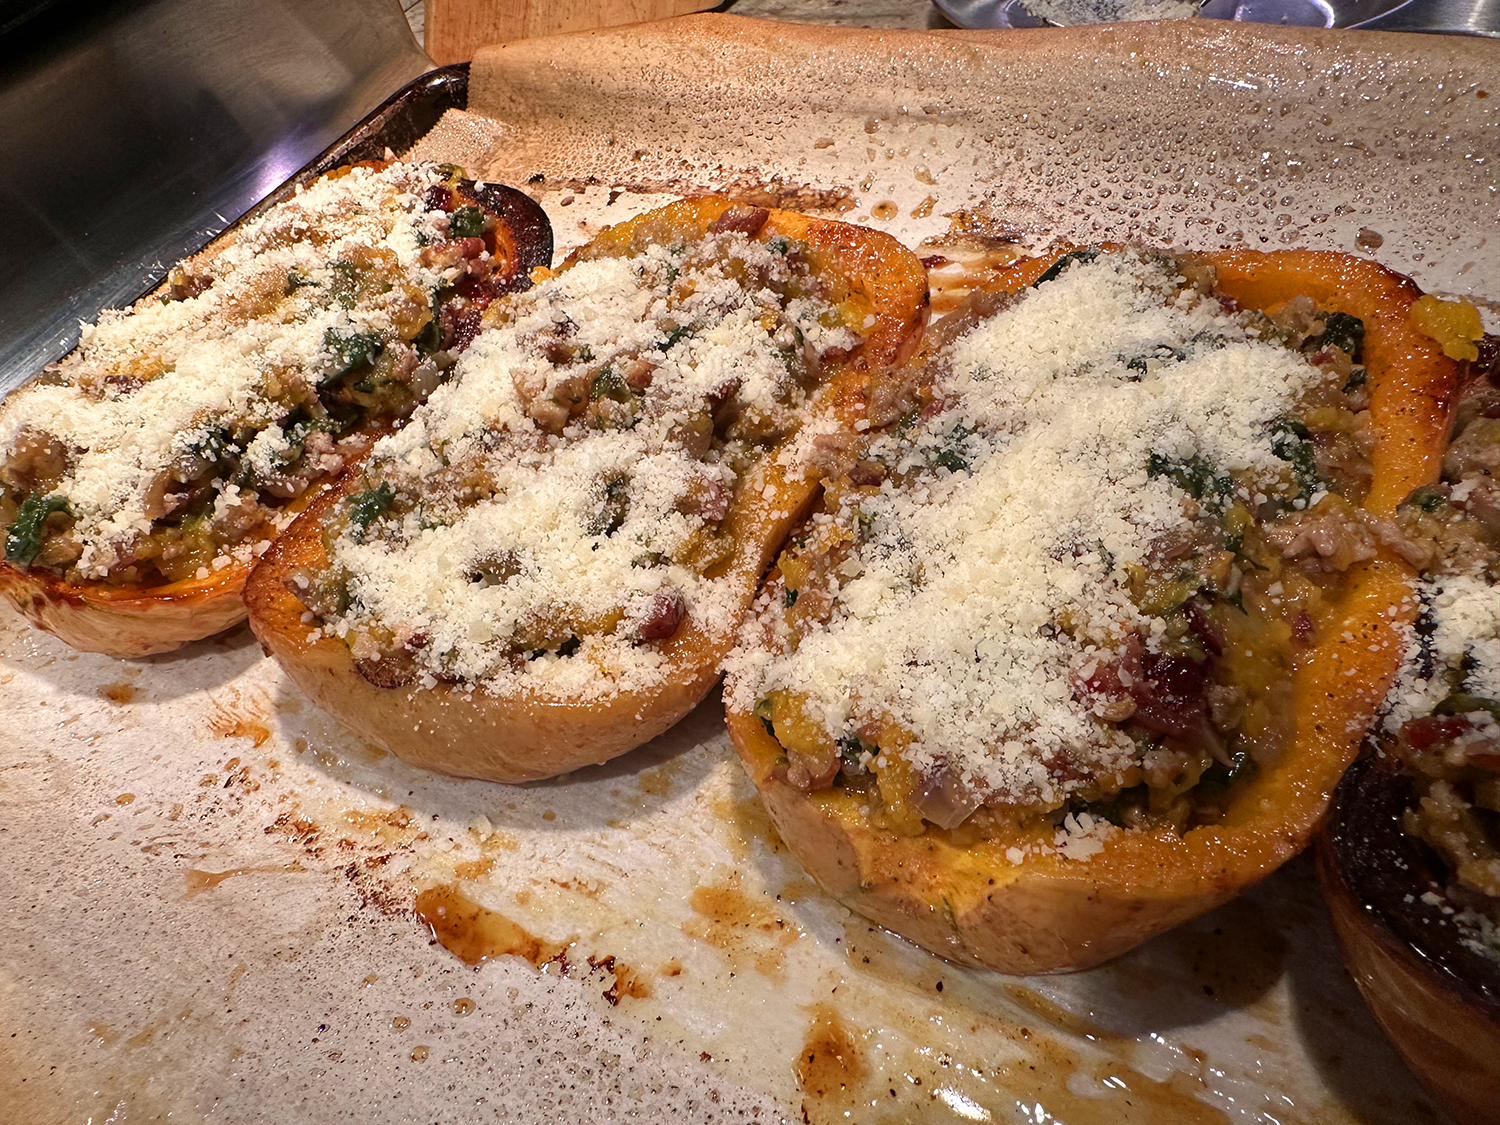
Sausage Stuffed Butternut Squash is a Fall comfort food that features Italian sausage, pecans, cranberries, and spinach. This flavorful family-friendly dinner is packed with veggies, fiber, and protein, and is gluten-free. It’s simple enough to make on a weeknight (although it takes a bit more than an hour), and perfect to serve as a side dish or main course.
This flavorful comfort food dinner will keep you full and you don’t really need anything else to serve with it, although we paired ours with a side salad. It is suggested that you use spicy Italian sausage. We happened to have the sweet variety, so we added red pepper flakes to the mixture. Another change we made was adding a tablespoon of grated parmesan on top after the squash has cooked, then popping back into the over for another 10 minutes.
Storage and reheating Tips:Refrigerate. Store the leftovers in an airtight container in the refrigerator for up to 4 days. Freeze. You can easily freeze this dish in an airtight container for up to 2 months. Reheat. Reheat the squash in the preheated oven at 350 F for about 30 minutes or until all the ingredients are heated through.
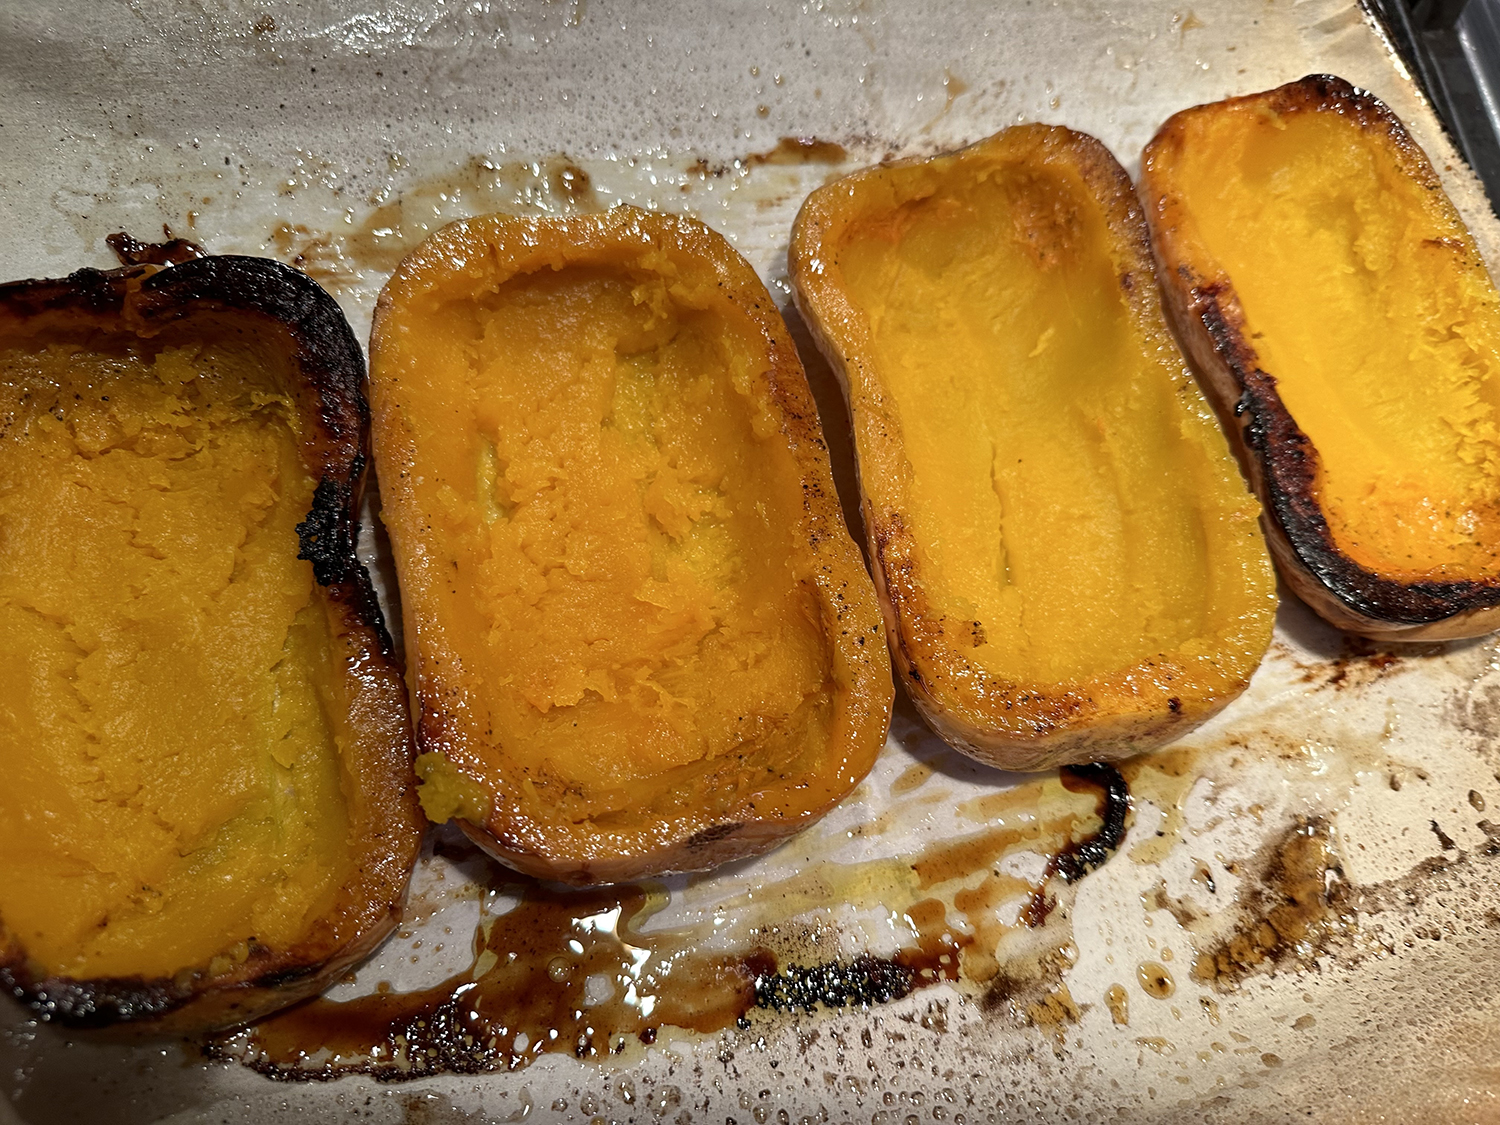
Slice the the butternut squash in half lengthwise. Use a spoon to scoop out the seeds and fleshy strands tangled with the seeds.
Place butternut squash cut sides up on a baking sheet. Drizzle the cut sides of the butternut squash halves with olive oil and rub the oil into the squash. Season generously with salt and pepper.
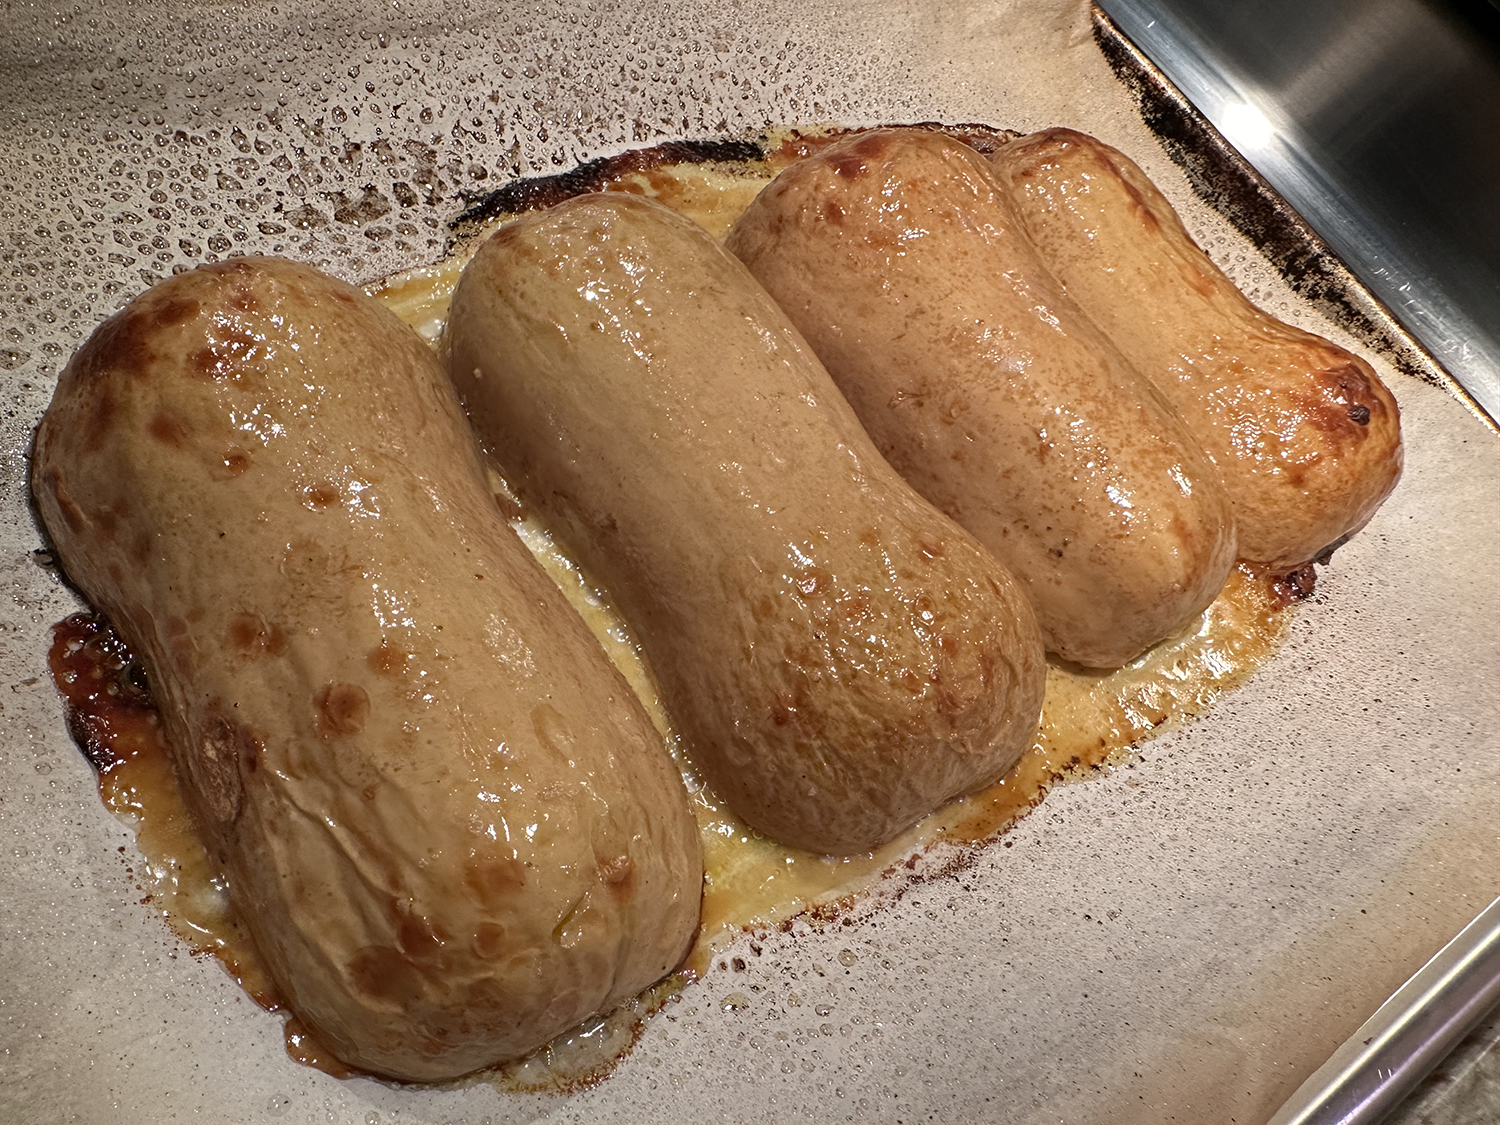
Turn the squash halves over, and place it cut sides down on a baking sheet. Tip: you can line the baking sheet with parchment paper for easy clean-up.
Roast in the preheated oven at 400 F for about 40 minutes.
Make sausage filling
Make the sausage filling while the squash is being roasted in the oven.
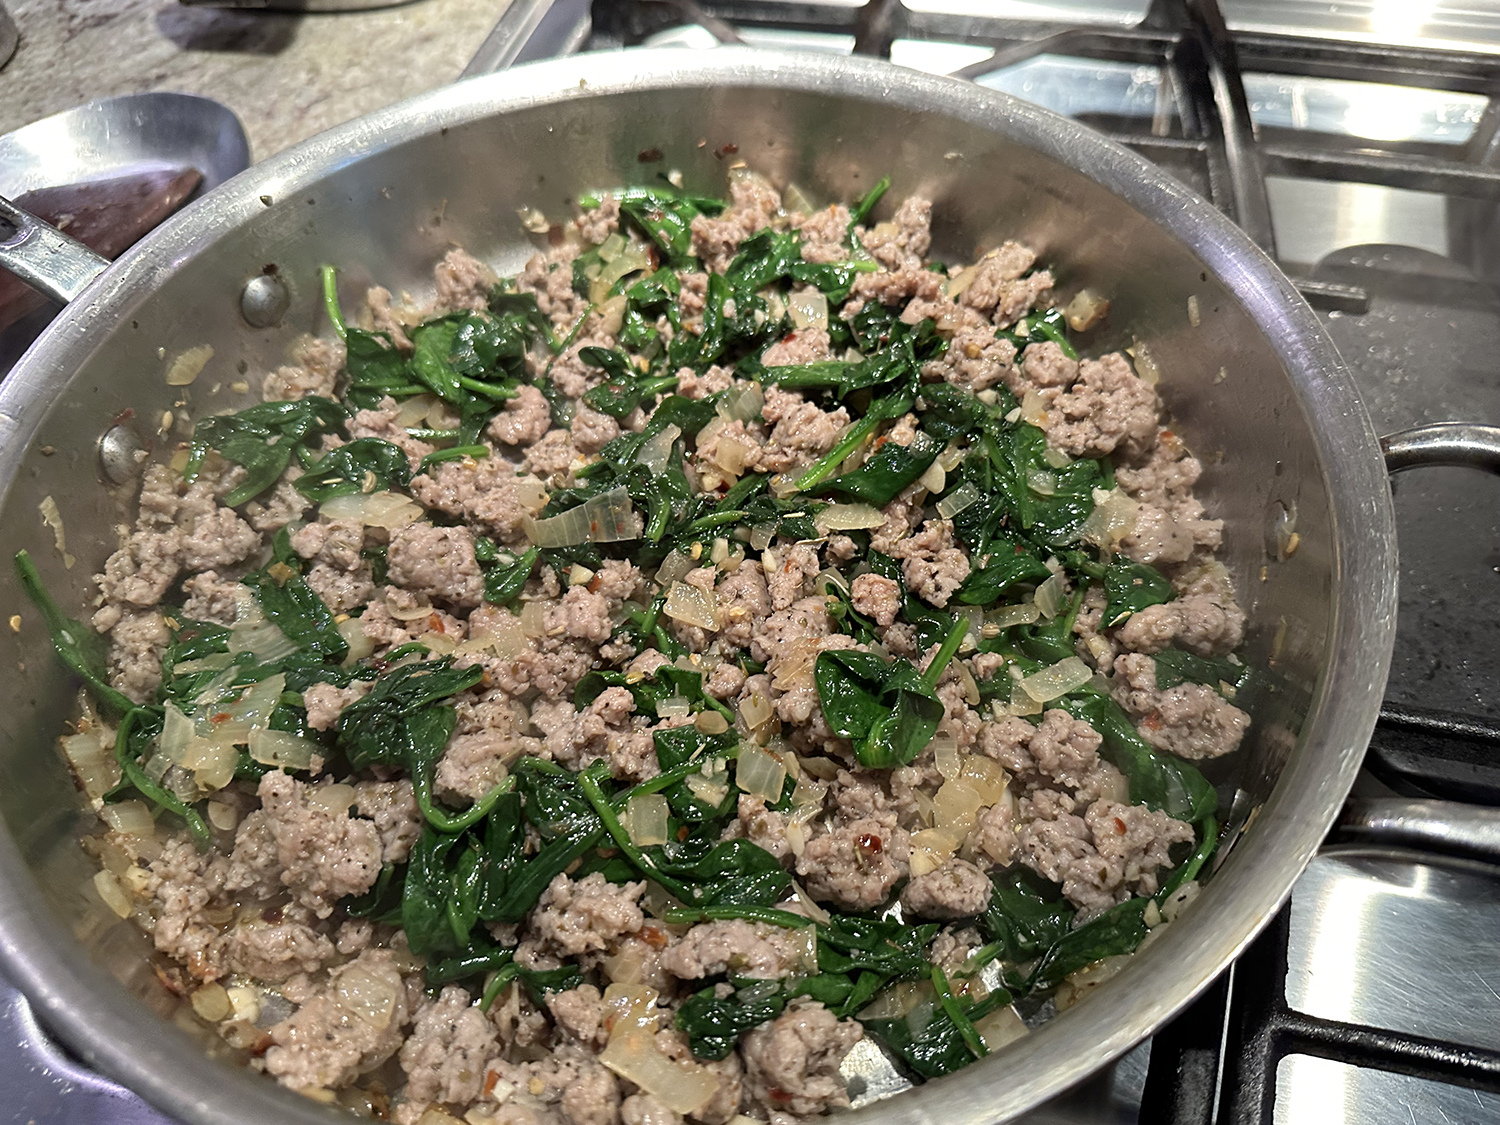
In a large skillet, heat olive oil, add diced onion, and cook it on medium-high heat for about 4-5 minutes until cooked and a bit charred.
Add crumbled sausage, minced garlic, and Italian seasoning and cook for about 5 minutes or more on medium heat until the sausage is completely cooked through.
Add fresh spinach and cook for another 5 minutes on medium heat until the spinach wilts.
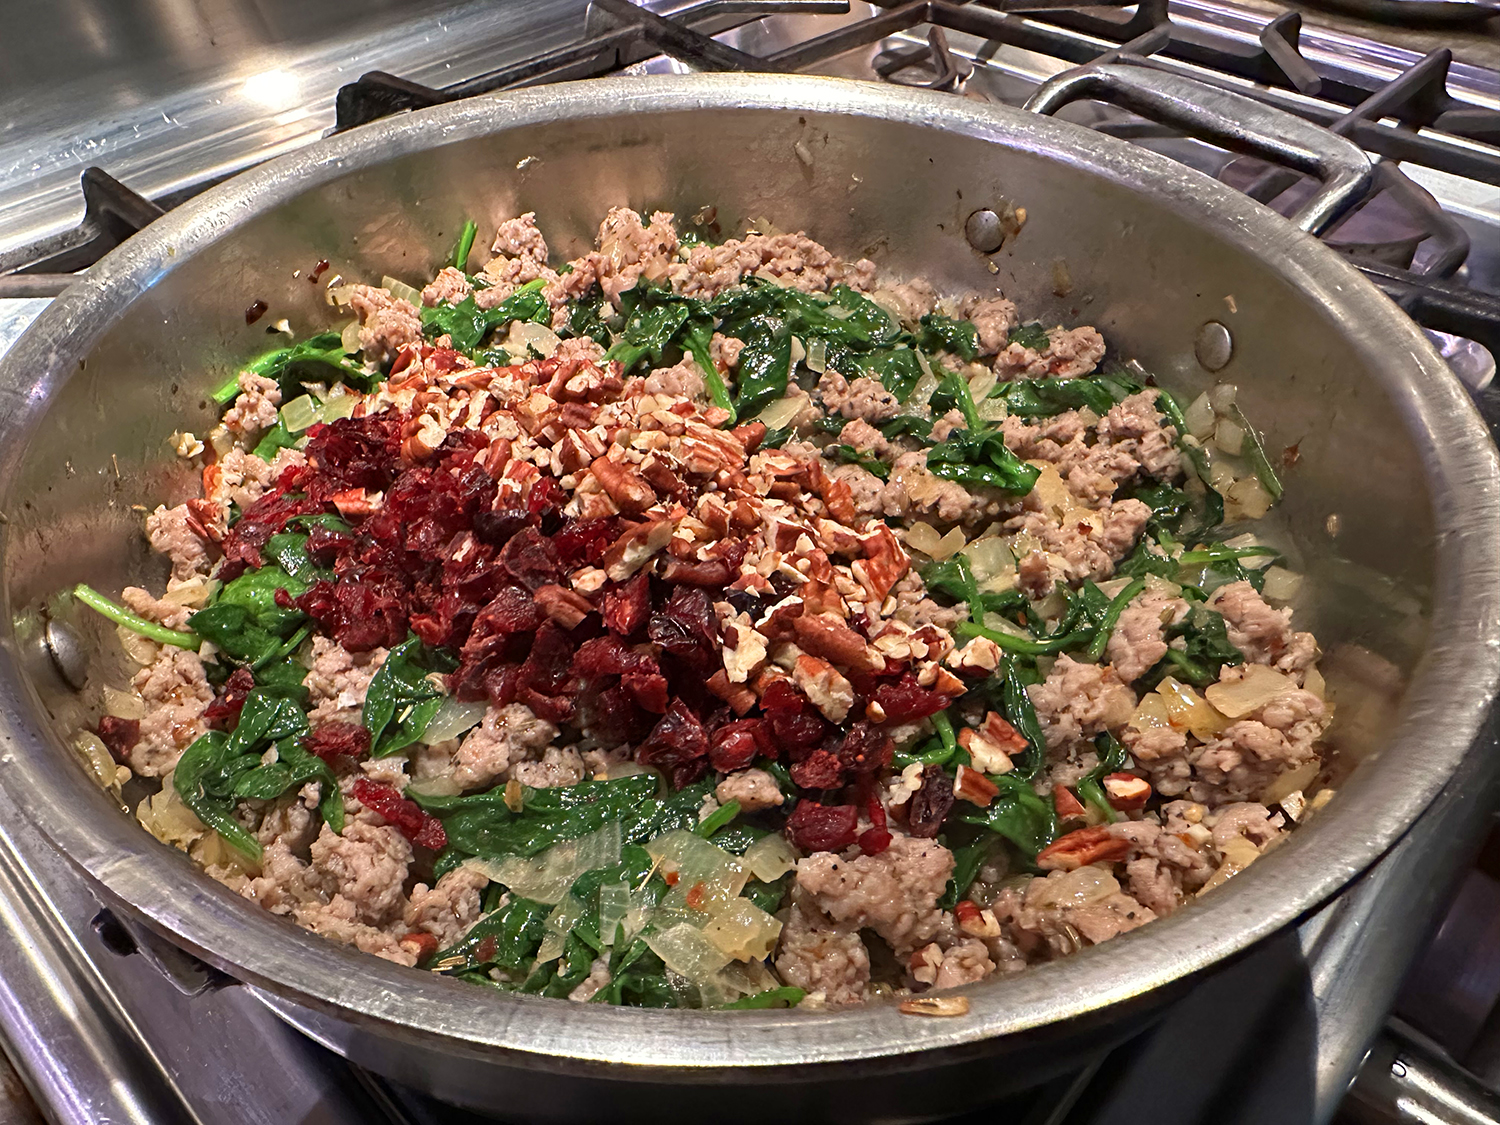
Add dried cranberries and chopped pecans and mix everything.
Season with salt and pepper, if needed.
Assembly
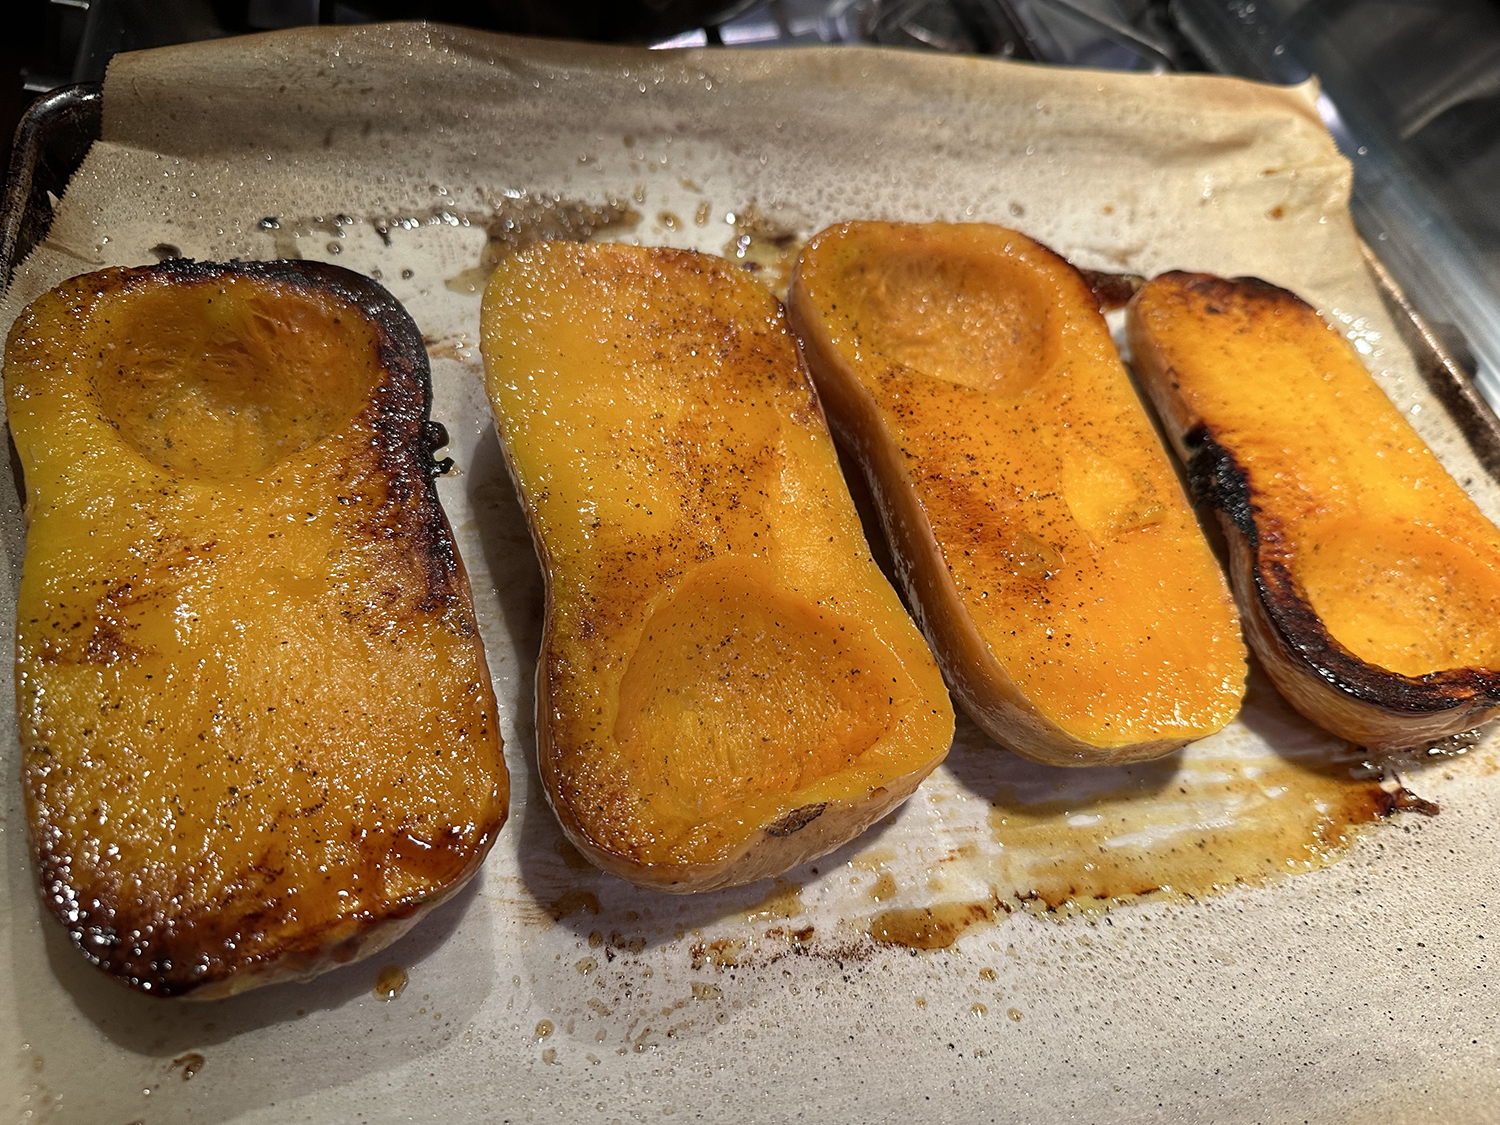
By this time, you have roasted the butternut squash for 40 minutes. Remove them from the oven and turn the cooked squash halves cut sides up.
Let it cool slightly. Using a spoon, scoop out the flesh leaving about a 1-inch border along the sides. Add the scooped up flesh to the meat mixture, and stir in well.
Divide the sausage filling among the 4 halves and stuff the squash until the mixture is a little bit higher than level.
Top top each with one tablespoon grated parmesan, and pop back into the oven for 10 minutes. Serve immediately.
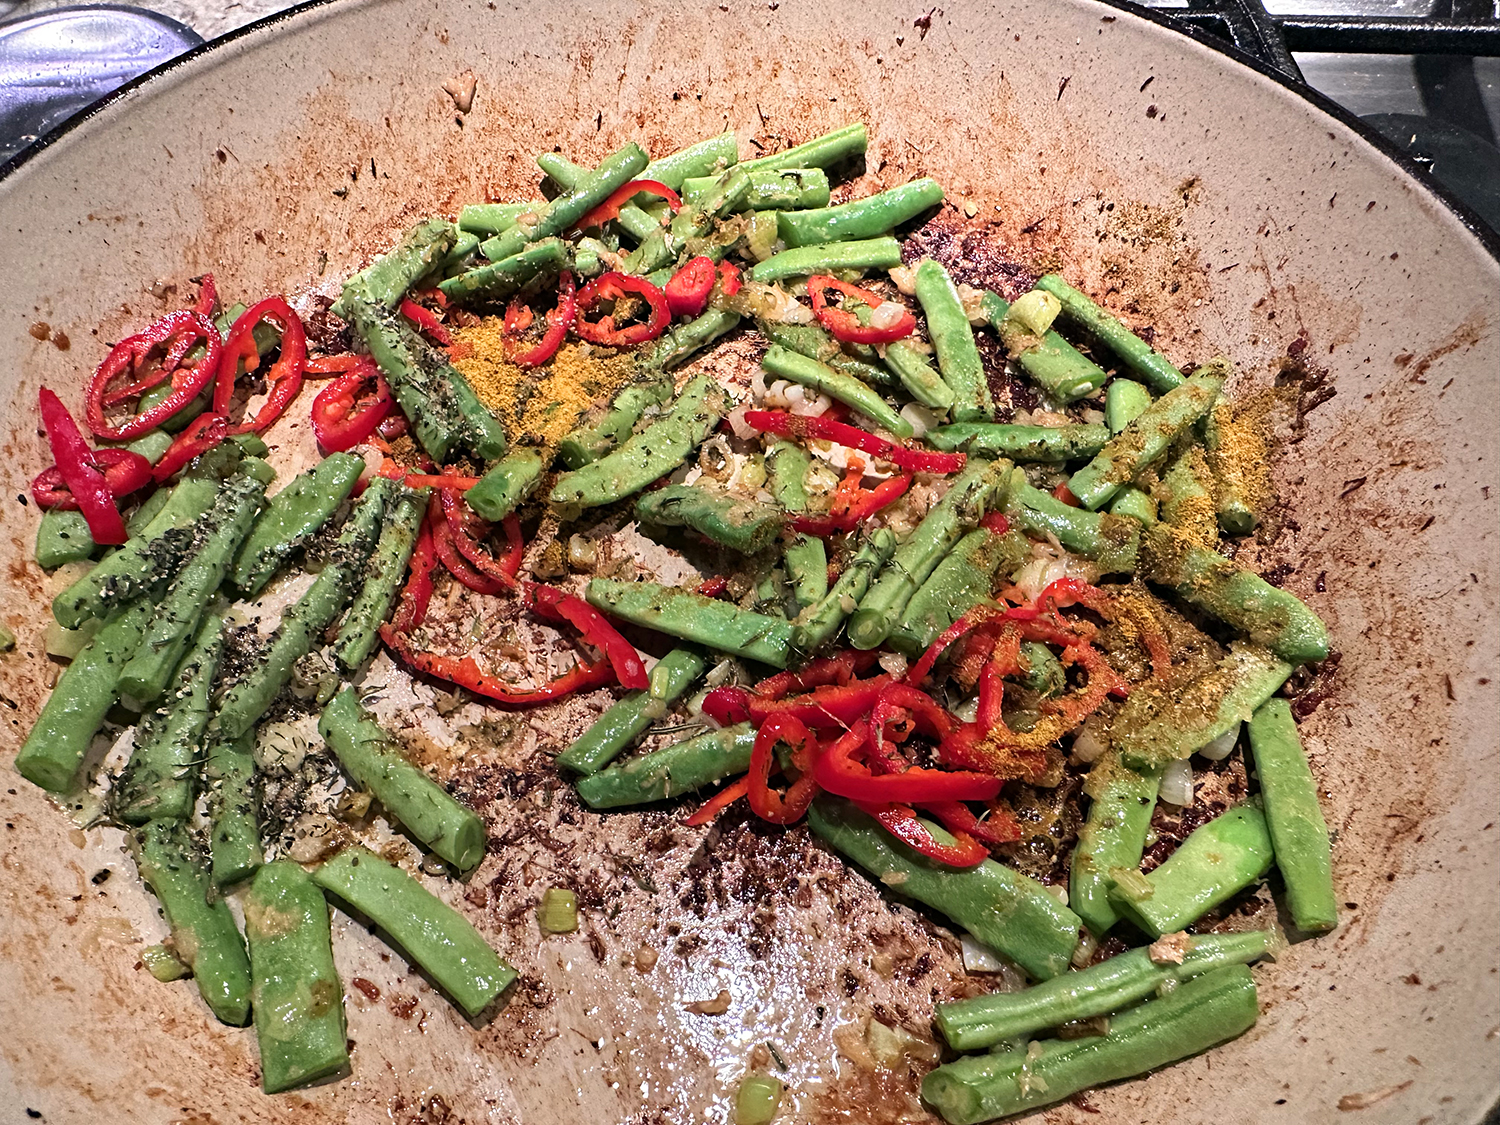
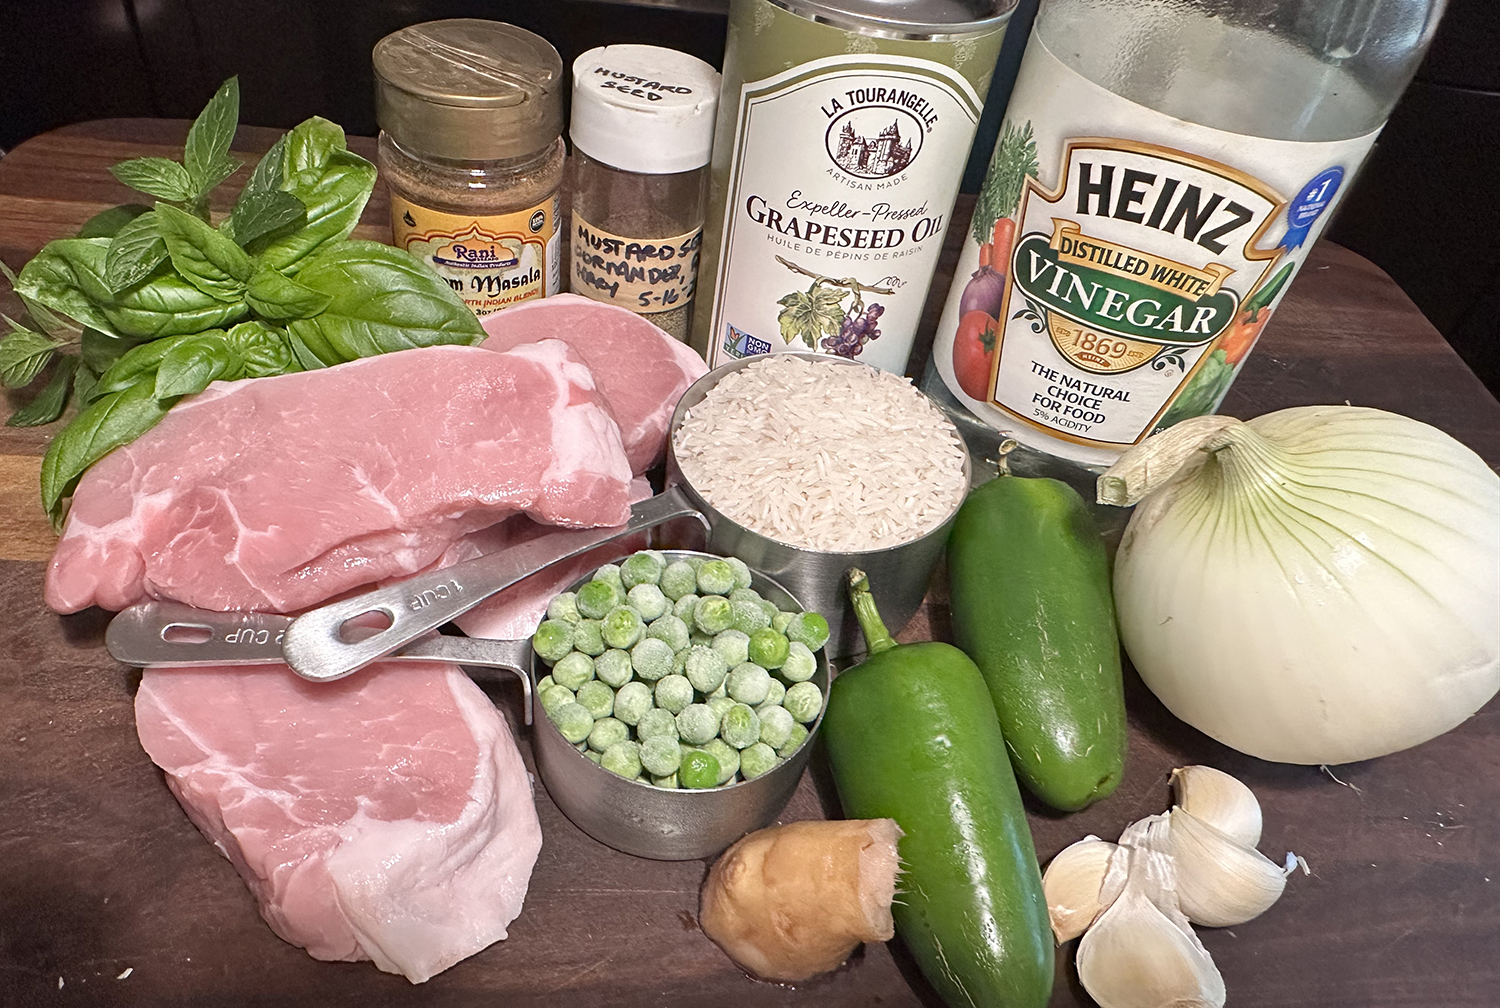
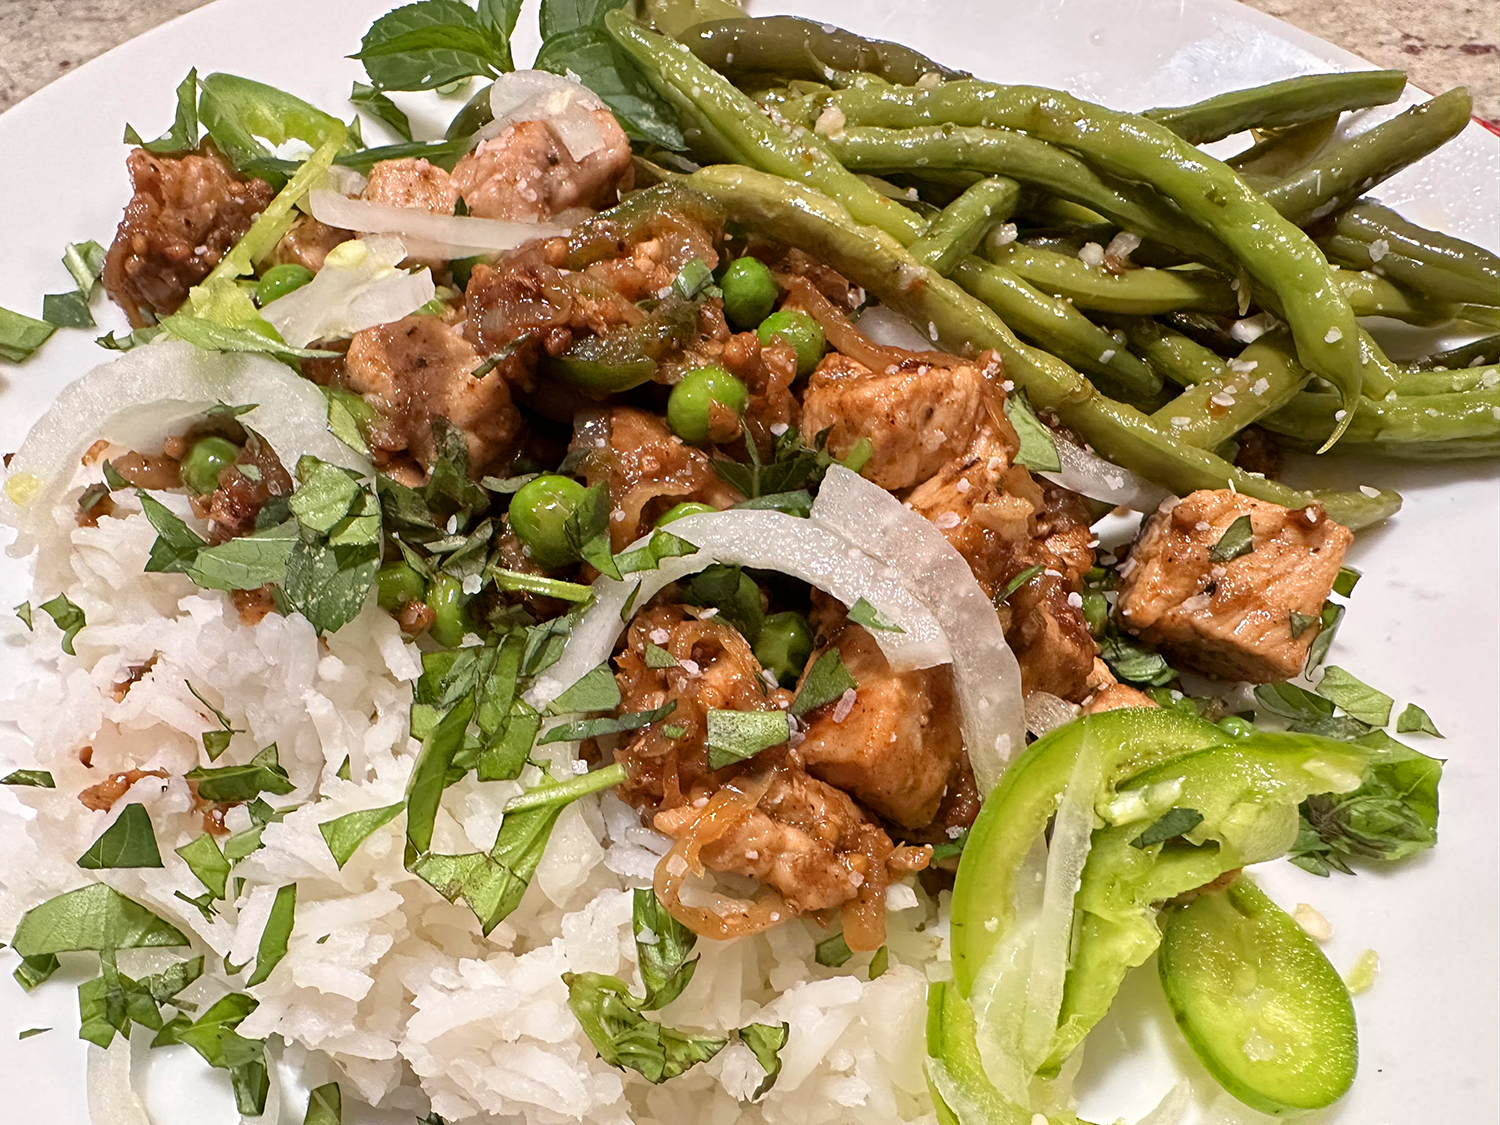
Fast, bold and casual, the perfect description for this weeknight stir-fry. The flavors are bold and bright. If you have a delicate palette, this may not be for you; however you could cut back on the chile peppers (it calls for serrano, we used jalapeños). Not a cilantro fan? A reasonable substitute for the cilantro is fresh basil and mint.
According to Milk Street, this stir-fry was inspired by a dish called pork ularthiyathu from the state of Kerala in southwestern India. Traditional recipes slowly braise the meat, then “dry-fry” it with aromatics until dark, rich and intensely flavored.
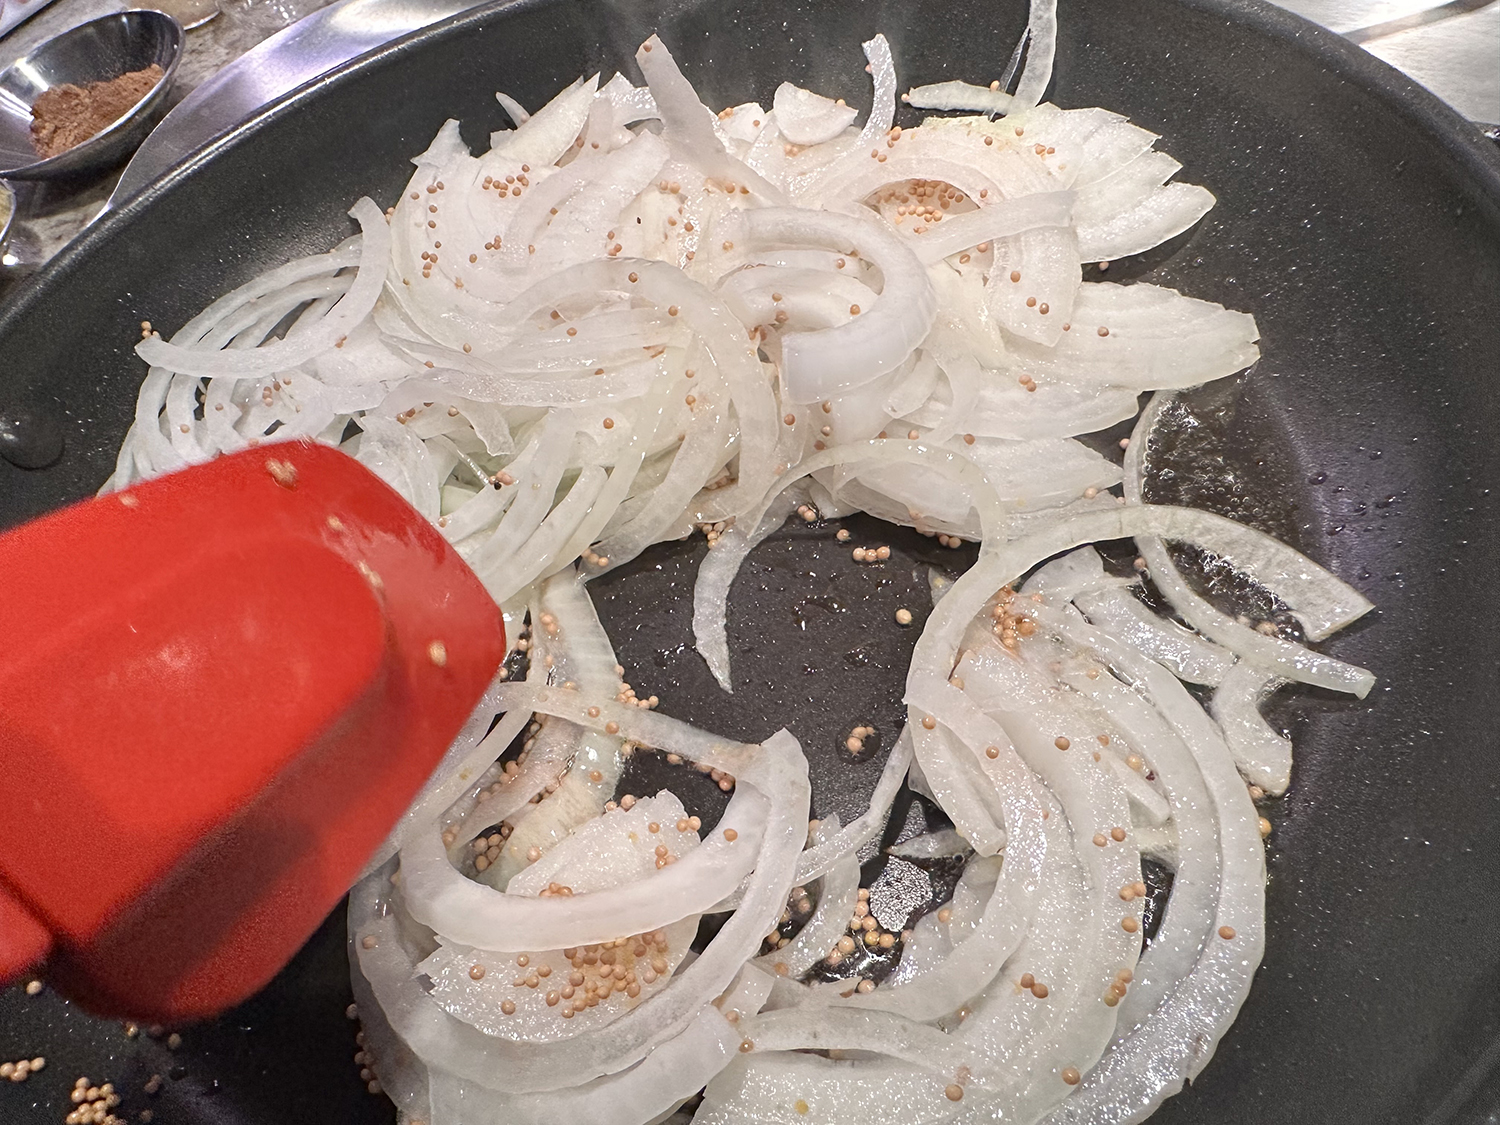
This is a weeknight-friendly version by stir-frying chunks of boneless pork loin chops with sliced onion and select spices. Peas add pops of color and sweetness. For balance and contrast in texture, make a tangy onion and fresh chili salad and pile it onto the stir-fry just before plating. Serve steamed basmati rice alongside. We also included a side of just-picked green beans and dressed with a similar spice profile.
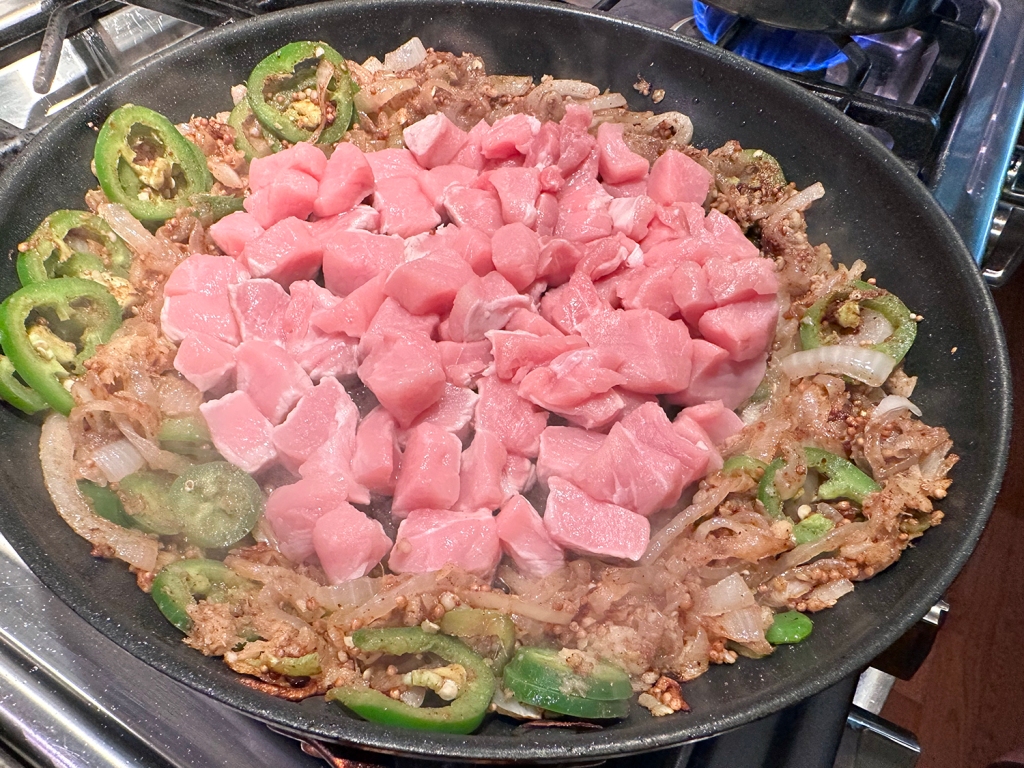
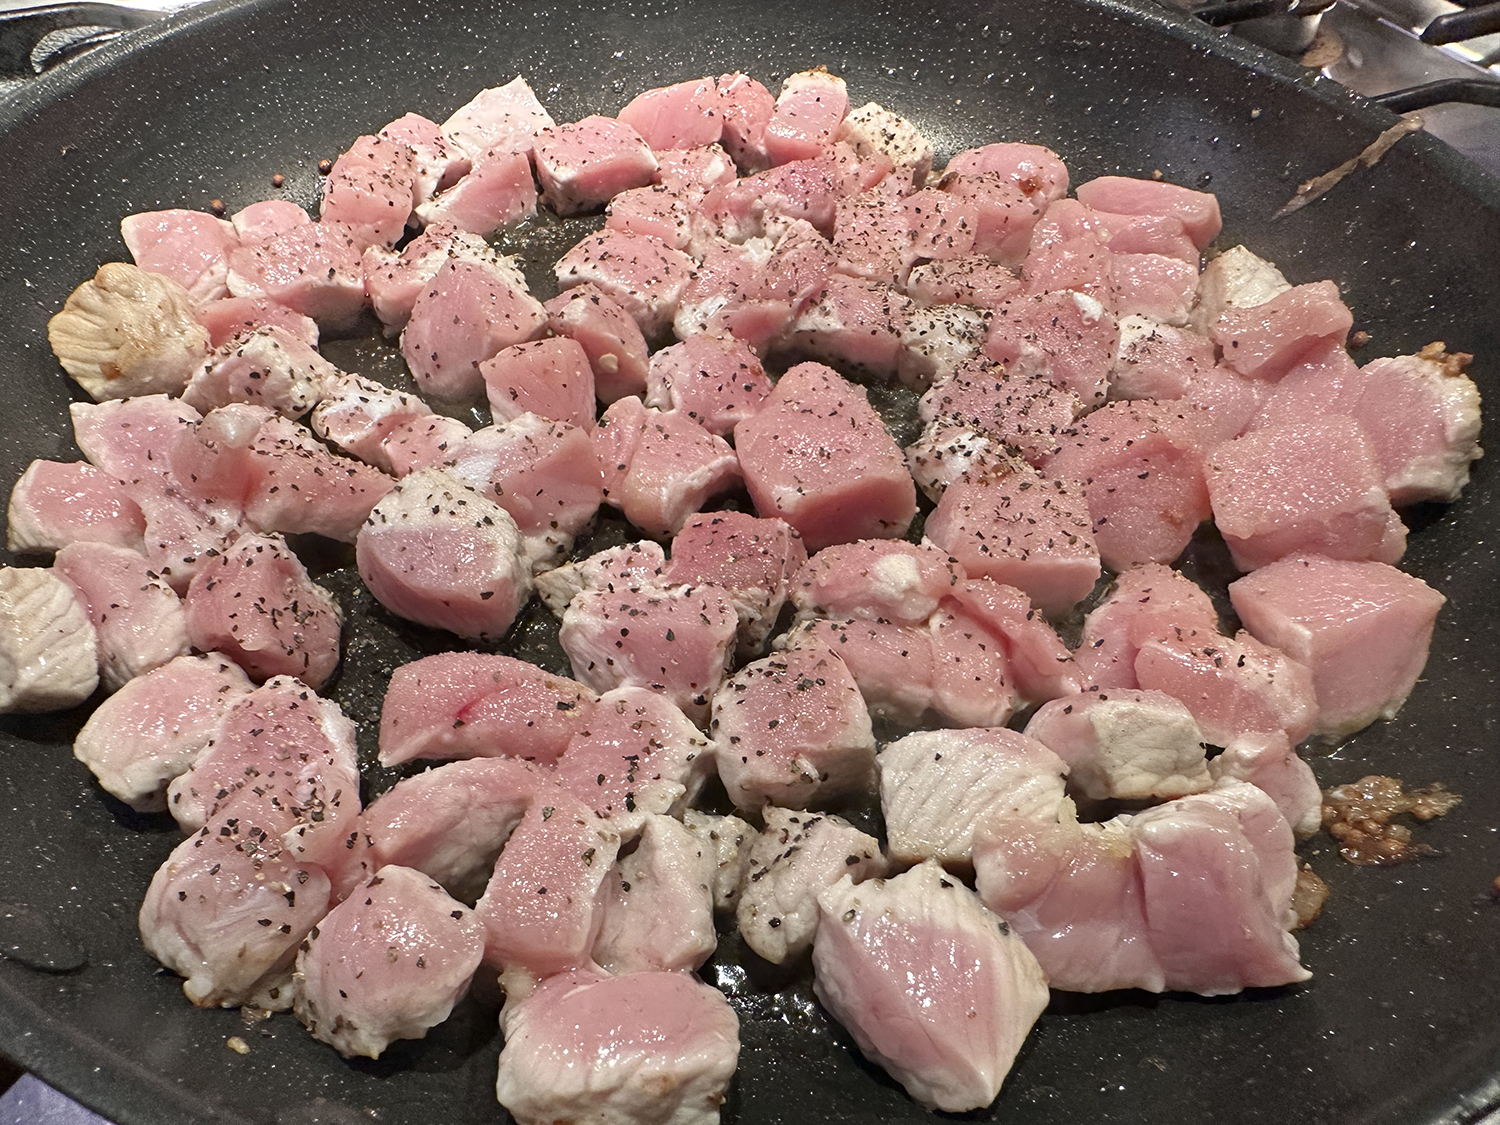
Don’t stir the pork for a couple of minutes after adding it to the skillet. Undisturbed cooking allows the pork to brown deeply, which is key to building flavor in the stir-fry. Once the pork is nicely seared, *stir to combine it with the onion mixture, pour in the first addition of water and scrape up the flavor-rich browned bits clinging to the pan.
*Here’s where the issue came in. With the onion mixture AND pork cubes, the skillet was overcrowded, and the ingredients were steaming instead of browning. To compensate, the Hubs removed the onion medley and cooked just the meat until charred a bit on the bottom; adding the mixture back to the pan after the pork browned. Next time he will use a wok.
2 serrano chilies, stemmed and sliced into thin rings
2 Tbsp. white vinegar
Kosher salt and ground black pepper
4 Tbsp. grapeseed or other neutral oil, divided
1 Tbsp. yellow mustard seeds
4 medium garlic cloves, finely grated
1 Tbsp. finely grated fresh ginger
2 tsp. garam masala
1 1/2 lbs. boneless pork loin chops, trimmed of fat, cut into ½- to ¾-inch chunks
1/2 cup frozen peas
1/2 cup water
1/4 cup lightly packed fresh cilantro, or a mix of fresh basil and mint
Directions
In a small bowl, stir together a quarter of the onion, half of the chilies, the vinegar and ⅛ teaspoon salt; set aside.
In a 12-inch skillet over medium-high, heat 3 tablespoons of the oil until shimmering. Add the remaining onion, the mustard seeds and ¼ teaspoon salt; cook, stirring, until lightly browned, 4 to 5 minutes.
Add the remaining chilies, the garlic, ginger and garam masala; cook, stirring, until fragrant, about 1 minute.
Push the mixture to the perimeter of the pan*; add the remaining 1 tablespoon oil to the clearing. Add the pork in an even layer and sprinkle with ½ teaspoon each salt and pepper. Cook without stirring until browned on the bottom, about 3 minutes.
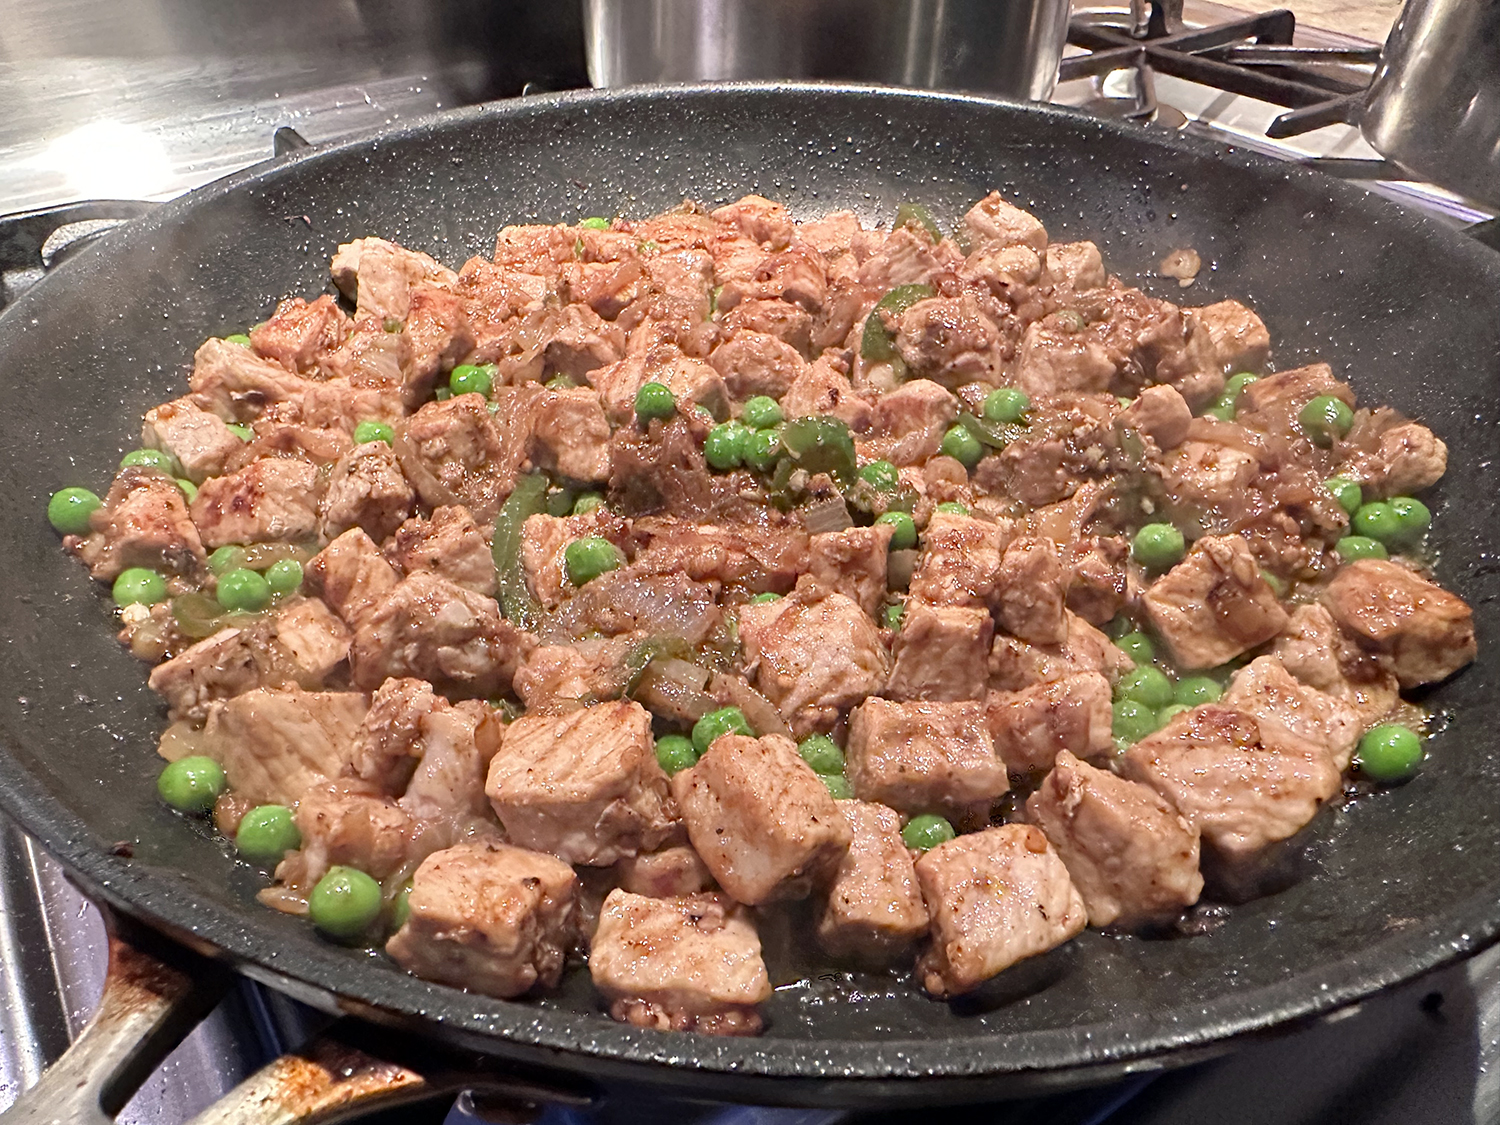
Stir the onion mixture into the pork; cook, scraping up any browned bits, until the pork is browned all over, 4 to 5 minutes.
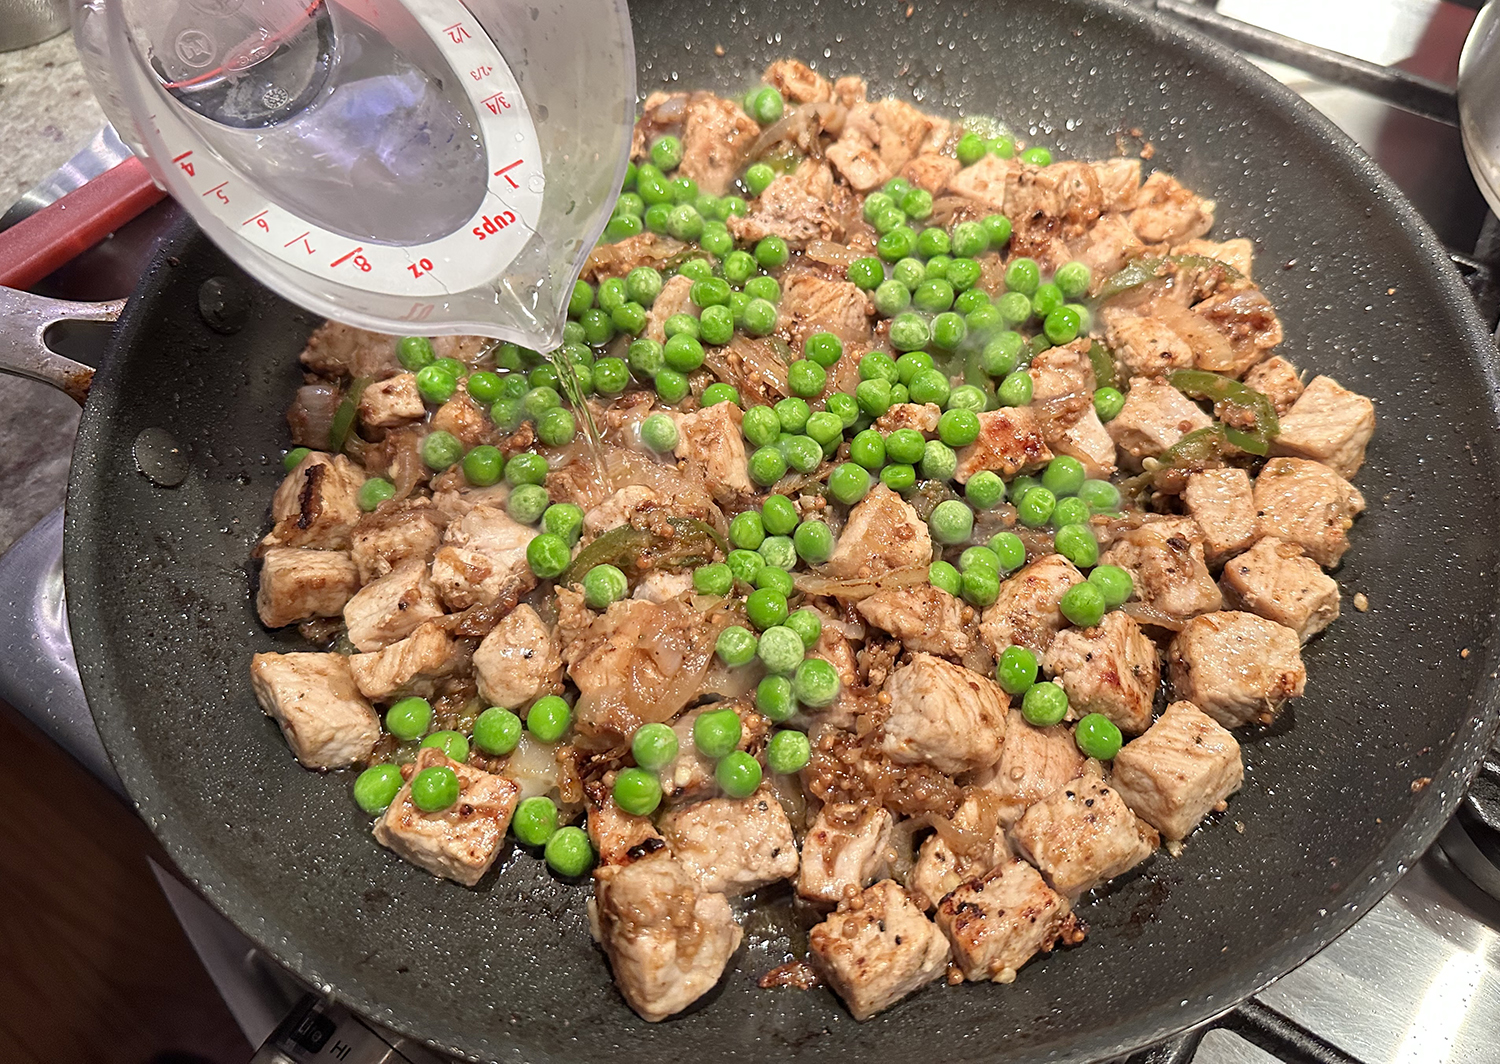
Add the peas and ¼ cup water; cook, stirring, until the pork is lightly glazed, about 1 minute. Taste and season with salt and pepper. Transfer to a serving dish and top with the reserved onion mixture and cilantro or other herbs.
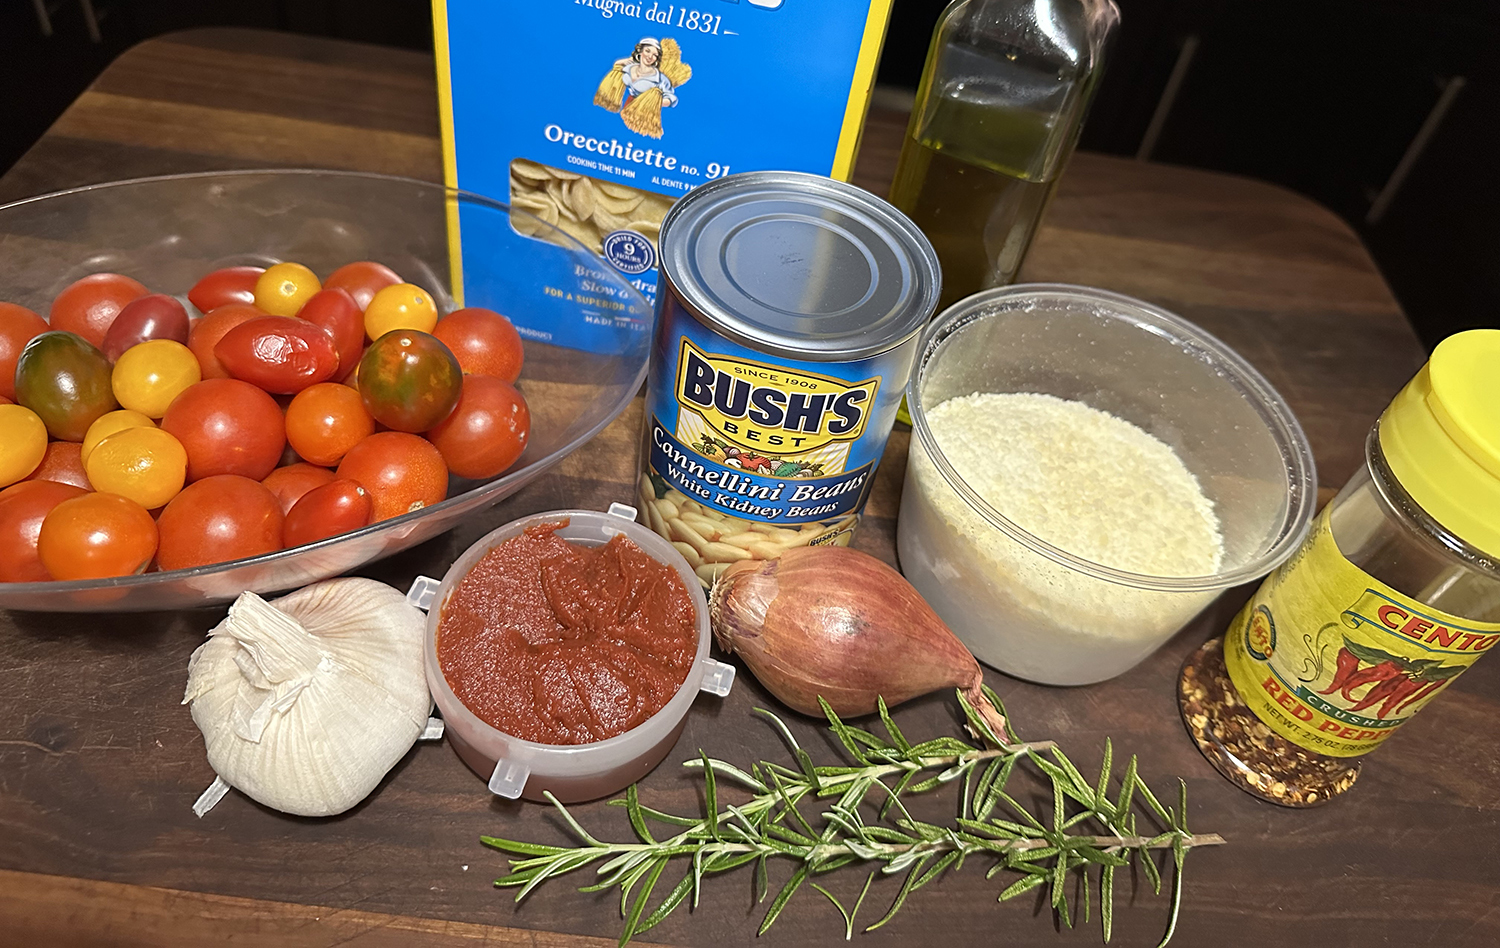
With a flavor profile inspired by pasta e fagioli, this weeknight pasta recipe coaxes rich flavor out of simple ingredients while enlisting the oven to create a luscious sauce from roasted tomatoes and white beans.
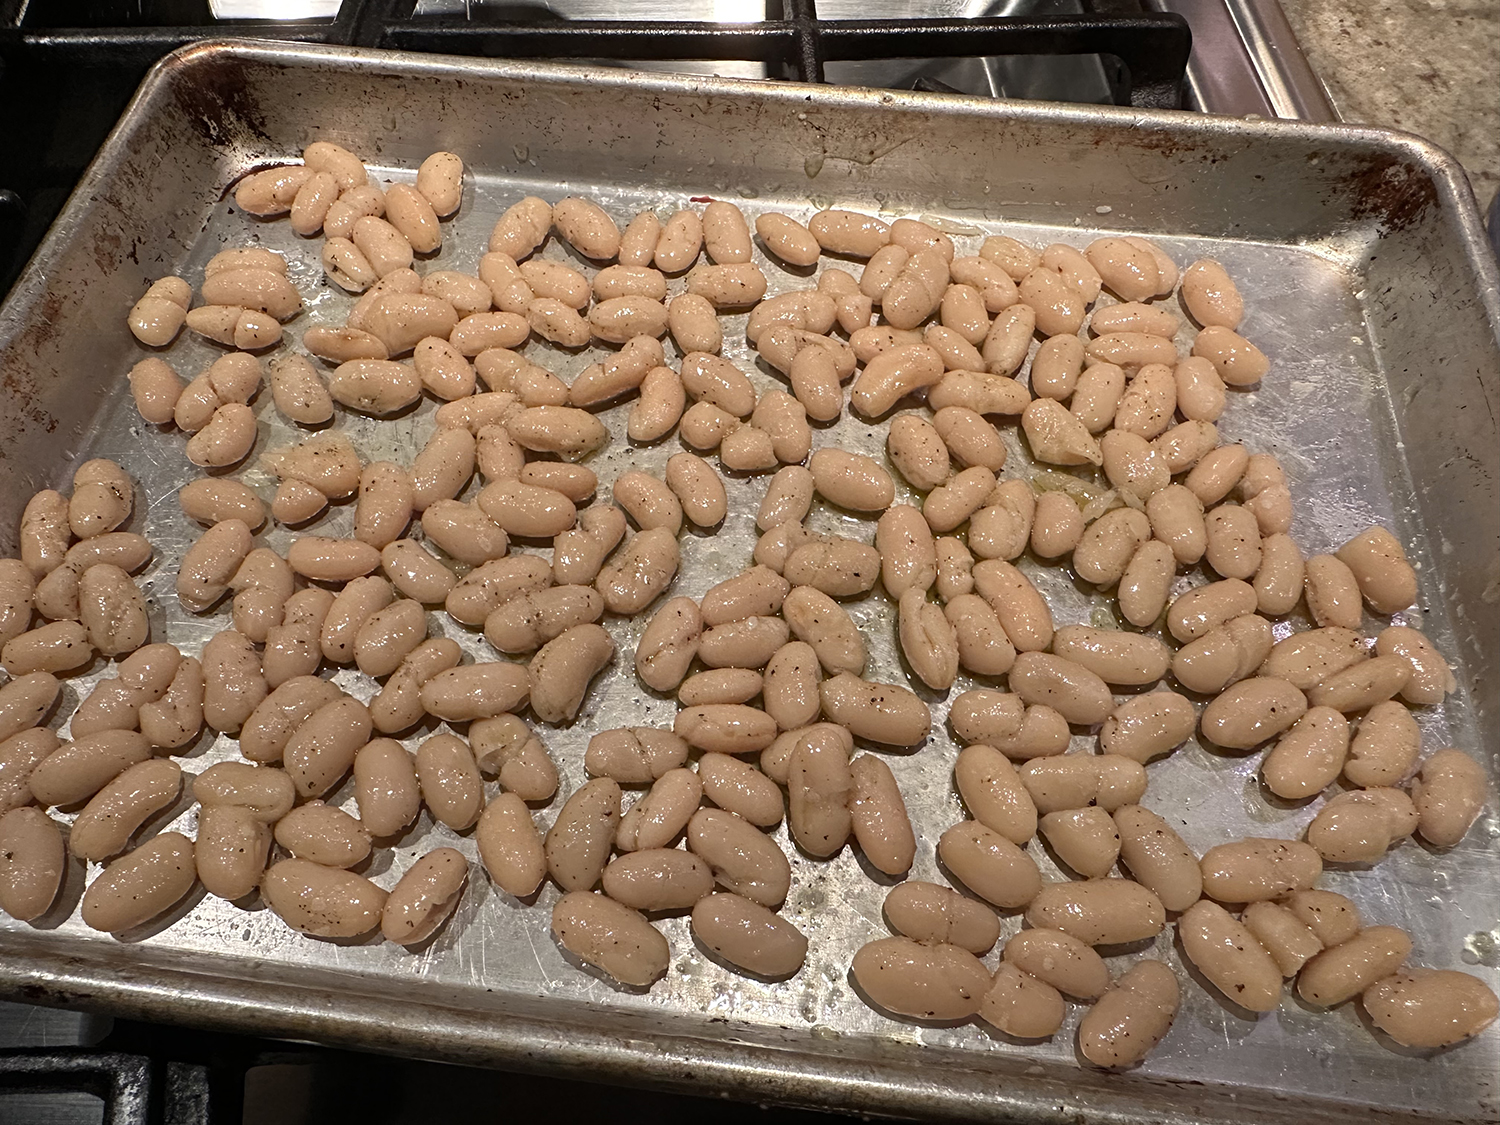
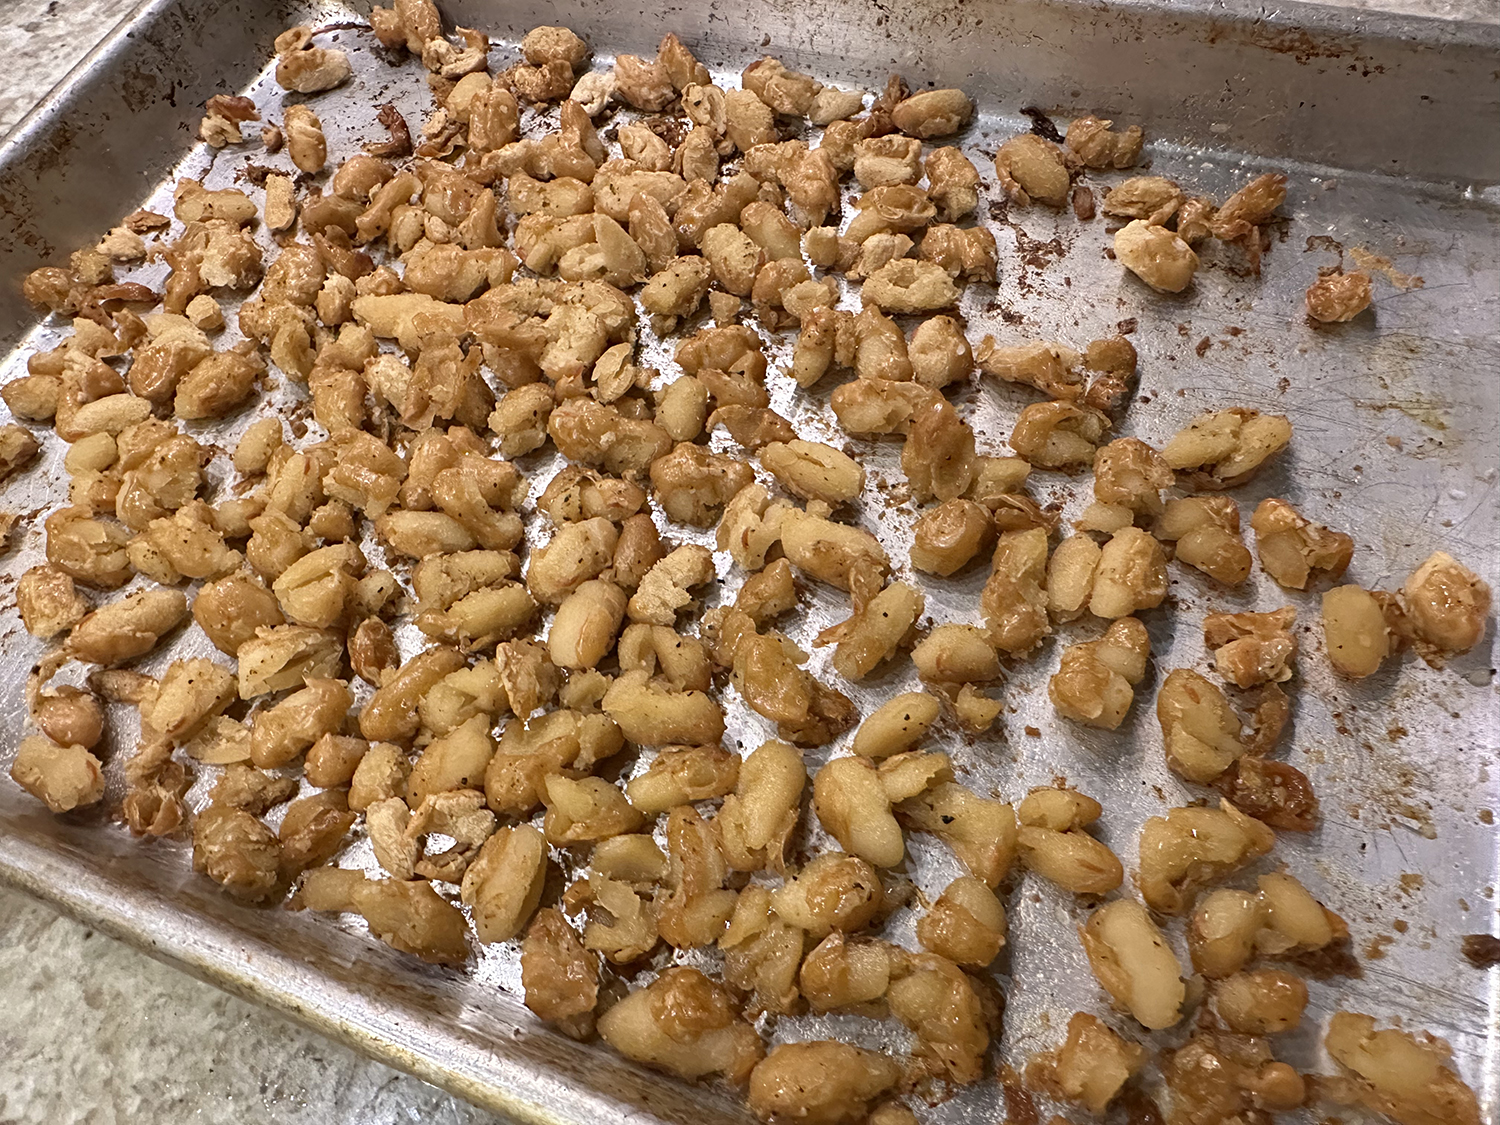
Essentially, the dish requires just three steps: Boil pasta, roast your sauce ingredients, then stir together until the pasta is glossy. When roasted in the oven, the beans become crispy, like croutons, and break down in a way that helps thicken the sauce.
Though a flurry of freshly grated cheese would be welcome on top, this otherwise-vegan dish doesn’t need it; although we used it. The roasted tomato sauce is rich and luscious, fortified by starchy pasta water, roasted beans and a good glug of extra-virgin olive oil.
Our changes included omitting the sugar, using only 8 ounces of pasta, and cutting the olive oil in half, but keeping the other ingredients at the original amounts. To summarize, the meal exuded complex textures that came from roasting the shallot, garlic and tomatoes; with a little crunch, a little creamy, a hint of smokiness, and a little glossy finish.
½ tsp. finely chopped fresh rosemary (or ¼ teaspoon dried)
½ tsp. red-pepper flakes
½ tsp. granulated sugar
16 oz. cherry tomatoes, halved
1 15-oz. can small white beans (preferably navy or cannellini beans), rinsed (or 1⅓ cups cooked white beans)
1 lb. orecchiette (or other shaped pasta that will cup or grasp the sauce)
Freshly grated Parmesan or pecorino (optional), for serving
Directions
Heat the oven to 375 degrees. Bring a large pot of salted water to a boil over high.
In a small bowl, stir together ¼ cup olive oil with the shallot, tomato paste, garlic, rosemary, red-pepper flakes and sugar. On a large baking sheet, toss the tomatoes with the dressing; season generously with salt and pepper, then spread in an even layer.
On a second baking sheet, toss the beans with 2 tablespoons olive oil; season generously with salt and pepper.
Roast the tomatoes and beans, stirring halfway through, until tomatoes slump and beans crisp, about 25 minutes.
While the tomatoes and beans roast, cook the pasta until al dente. Reserve 1 cup pasta cooking water then drain pasta.
Transfer the beans and tomatoes to the pot. Add ¼ cup pasta cooking water to the sheet pan from the tomatoes and use a flexible spatula to scrape the browned bits from the bottom of the sheet pan; transfer to the pot, then repeat with another ¼ cup pasta cooking water. (One thing they’ll teach you in French culinary school: Never, ever discard the sucs, those browned bits at the bottom of the pan that carry deep flavor.)
Add the pasta and the remaining ½ cup olive oil to the pot; stir vigorously until saucy. Season generously with salt and pepper, then add extra pasta water as needed to moisten until glossy. Divide among wide, shallow bowls and top with grated cheese, if desired.
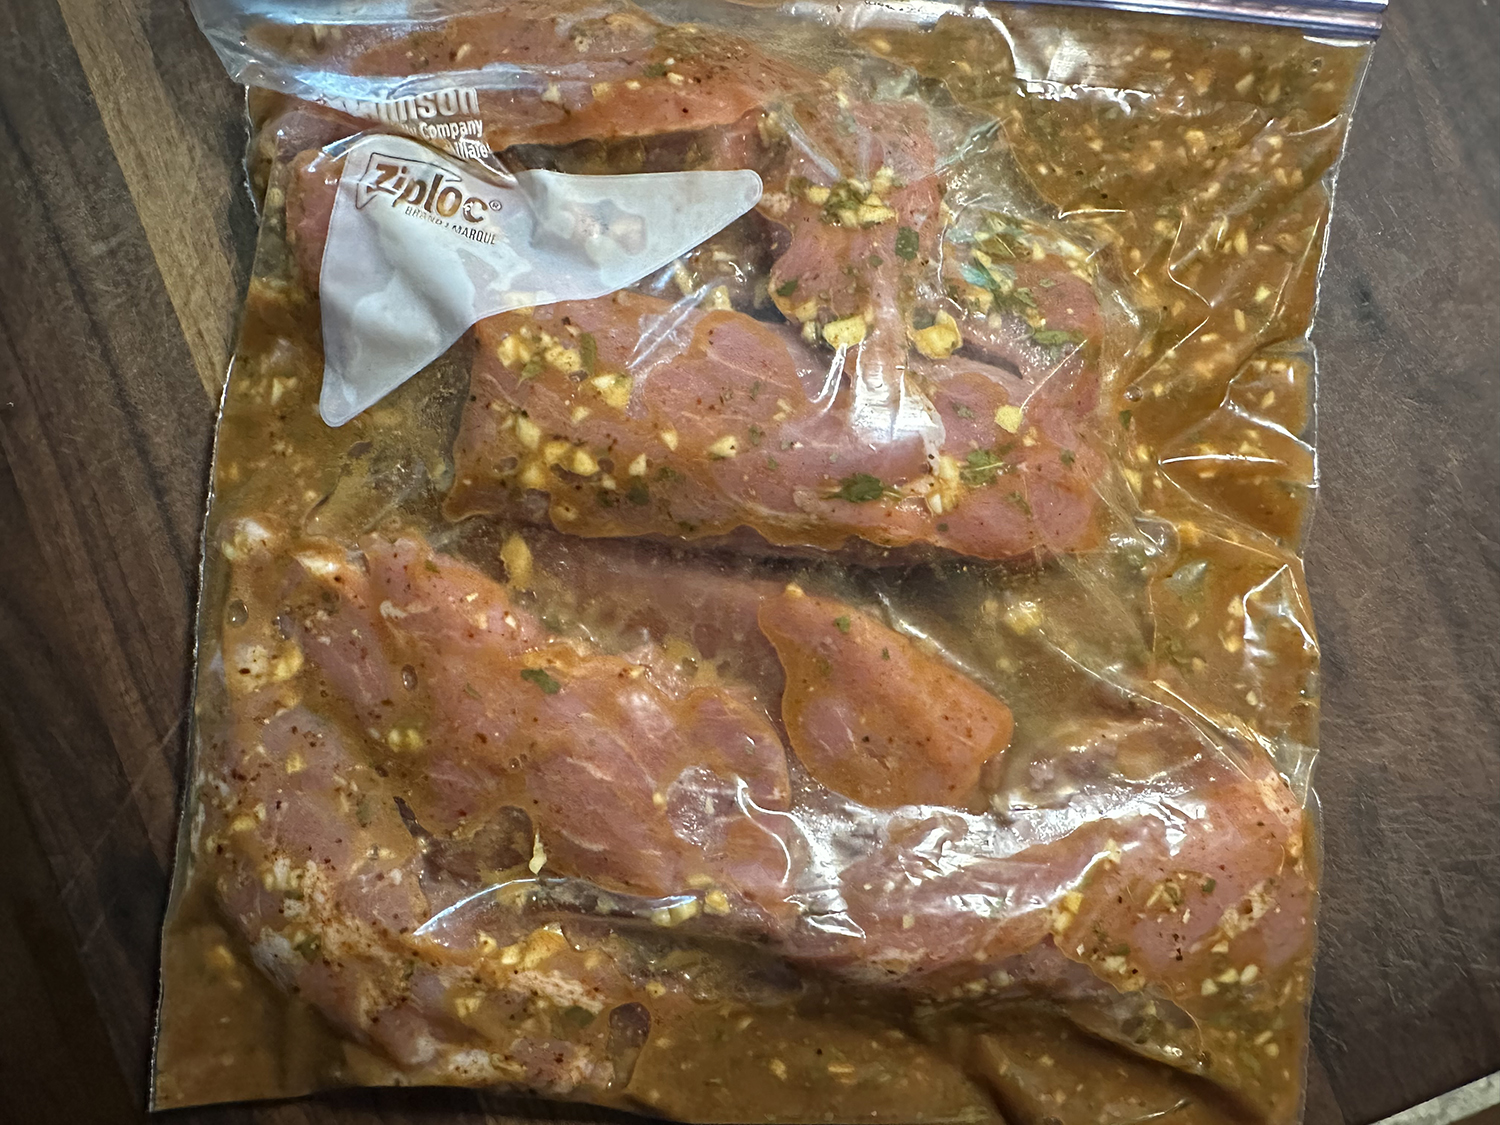
OK, it’s not truly an authentic Yucatan peninsula recipe, but it has vibrant citrus/chile flavors and a beautiful orange hue from ground annatto. The annato spice is hard to source locally. If you have enough time, you could order it online. In place of annato*, you can use 3/4 teaspoon of paprika and 1/4 teaspoon of turmeric as a substitute.
While the grilling takes very little time, you do have to marinade the meat from 4 to 6 hours.
According to Chef John, this easy marinade would work on all kinds of pork cuts, but the tenderloin is very user-friendly, and its mild flavor really takes to these ingredients. Once grilled, just think of all the many options for enjoying these tenderloin chunks. Sandwiches, salads, and tacos are all wonderful choices, or how about diced, which make an epic pan of nachos… you know how we love our nachos!
We made Braised Sweet Potatoes and Coriander, Orange and Olives as our side dish. Tossing flavorful marinade pains us to no end. So after we removed the pork from the ziploc bag, The Hubs put it in a small saucepan and reduced it down to a thick sauce. It was served at the dinner table so that diners can use as much as they desire, or not all. It does have a kick, so taste before you smother your pork with it.
1 tsp. annatto powder*, or more to taste, plus more to sprinkle on before grilling
1 tsp. ground dried chipotle pepper
1 tsp. ground cumin
½ tsp. cayenne pepper
½ tsp. dried oregano
½ tsp. freshly ground black pepper
2 pork tenderloins, trimmed
1 Tbsp. vegetable oil
Directions
Place orange juice, lemon juice, and lime juice in a bowl. Add garlic, kosher salt, annatto powder, chipotle powder, ground cumin, cayenne, oregano, and black pepper. Whisk until well blended.
Cut the tenderloins in half crosswise; cut each piece in half lengthwise. Place pieces in marinade and thoroughly coat with the mixture. Cover with plastic wrap with the wrap touching the surface of the meat and marinade. (Or transfer mixture to a resealable plastic bag.) Refrigerate 4 to 6 hours.
Transfer pieces of pork from marinade to a paper-towel-lined bowl to absorb most of the moisture. Discard paper towels. Drizzle vegetable oil and a bit more annatto powder on the pork.
Preheat an outdoor grill for medium-high heat and lightly oil the grate.
Place pieces evenly spaced on a hot grill. Allow meat to sear onto the grate until pieces can be easily turned, 4 or 5 minutes. Turn and grill on the other side another 4 or 5 minutes. An instant-read thermometer inserted into the center should read 135 to 140°. Transfer onto a serving platter and allow meat to rest about 5 minutes before serving.
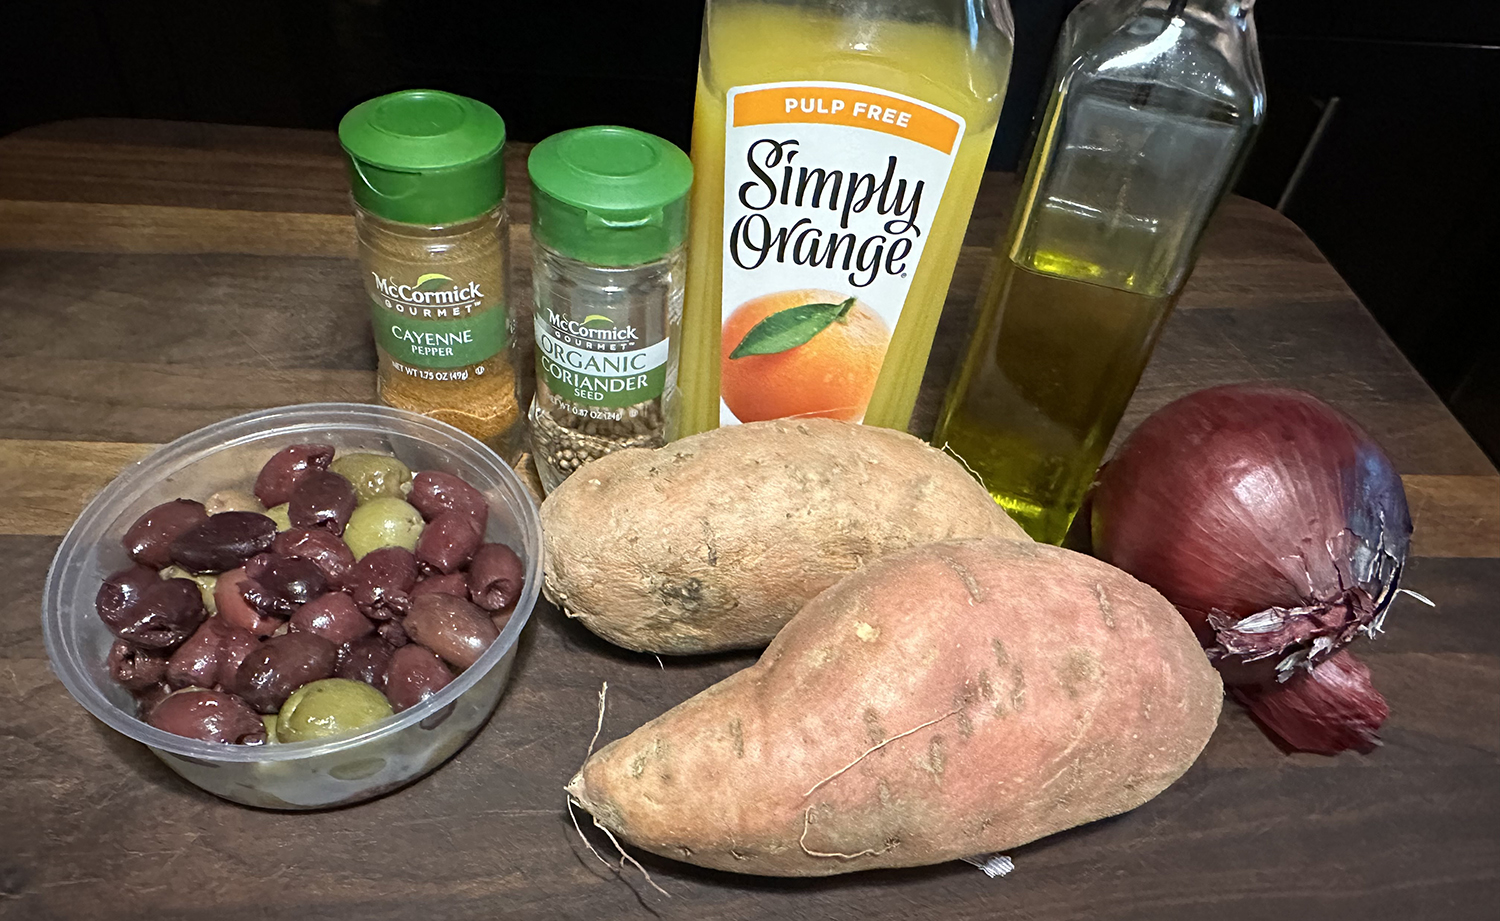
This colorful side dish taken from Milk Street features an unusual combination of flavors. Earthy sweet potatoes pair well with the subtle citrusy notes of coriander and the fruitiness of orange juice, while savory onion, spicy cayenne and salty olives balance the natural sugars.
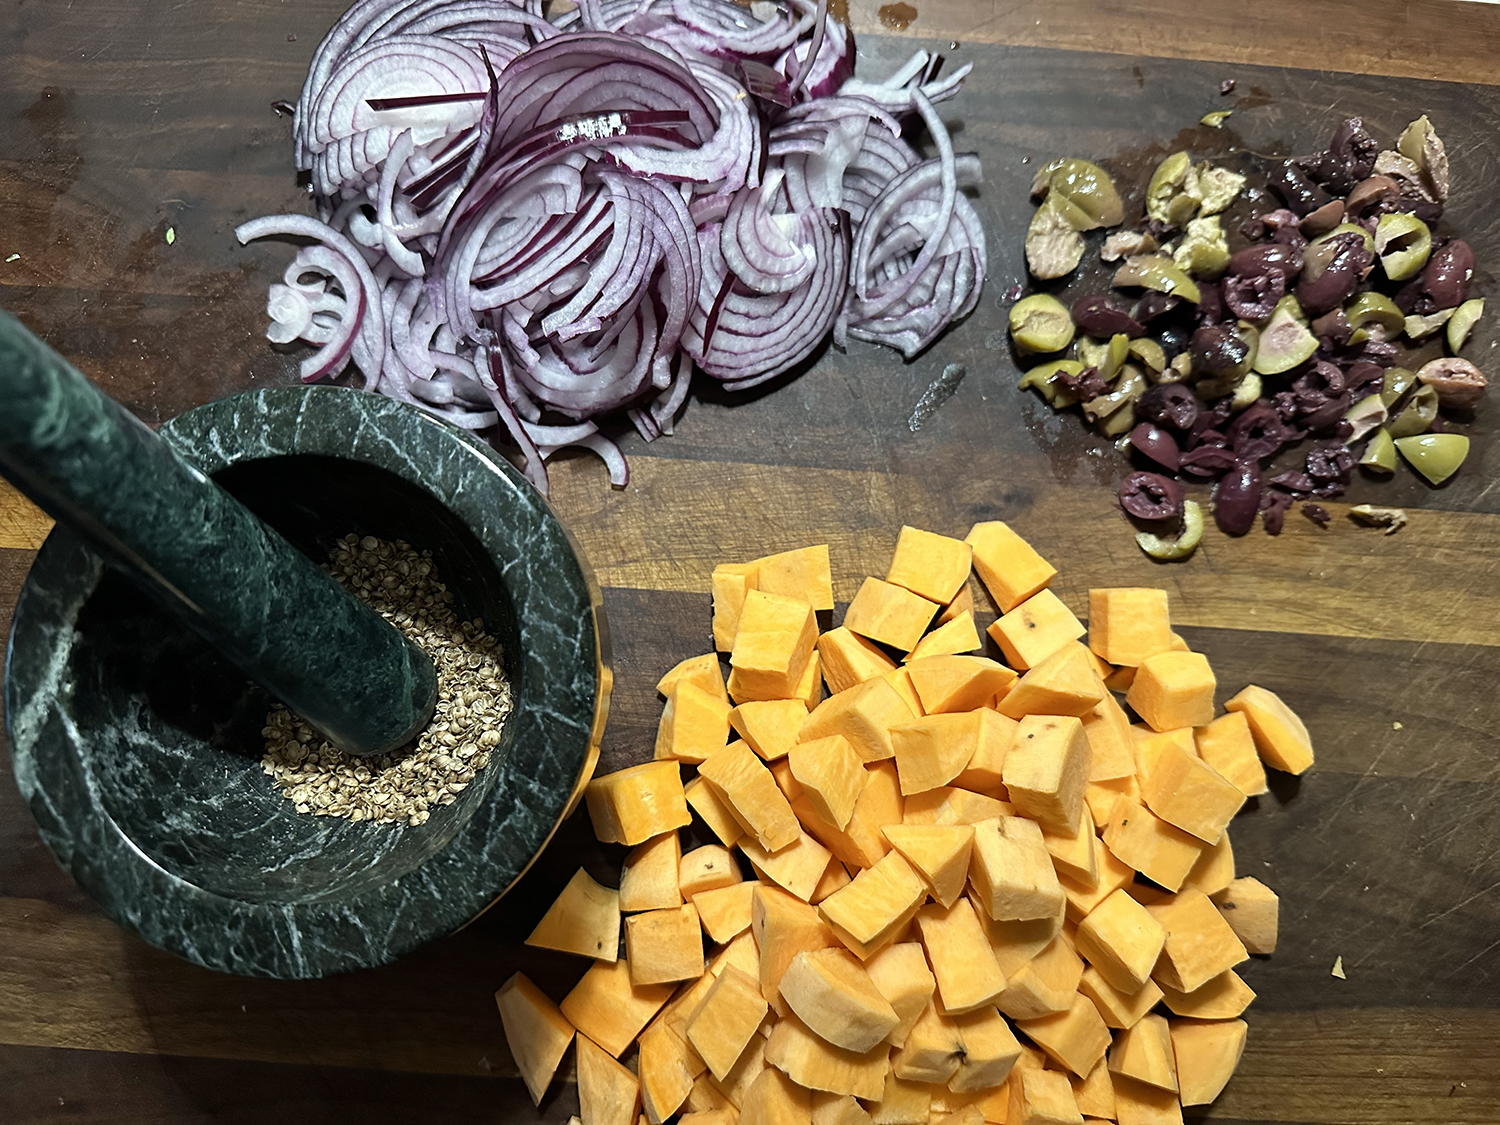
It has gained a place as one of the top side dishes we’ve ever made, it is phenomenal! The texture and flavor pop of lightly crushed coriander seeds where a mortar and pestle are the best tools for the task but the bottom of a heavy skillet works, too. If you prefer, you can use 1 tablespoon ground coriander in place of the seeds, but keep in mind, it will require less than a minute to bloom in the oil.
Don’t use a narrow saucepan or pot for this recipe. The wider diameter of a Dutch oven allows the potatoes to be distributed in a thinner layer, which results in more even cooking.
The flavor profile of this sweet potato dish blended nicely with our main course of Yucatan-Style Grille Pork.
Braised Sweet Potatoes and Coriander, Orange and Olives
2 lbs. orange-flesh sweet potatoes, peeled and cut into 1-inch chunks
⅔ cup orange juice
¼ tsp. cayenne pepper
½ cup black or green pitted olives, or a mixture, chopped
Directions
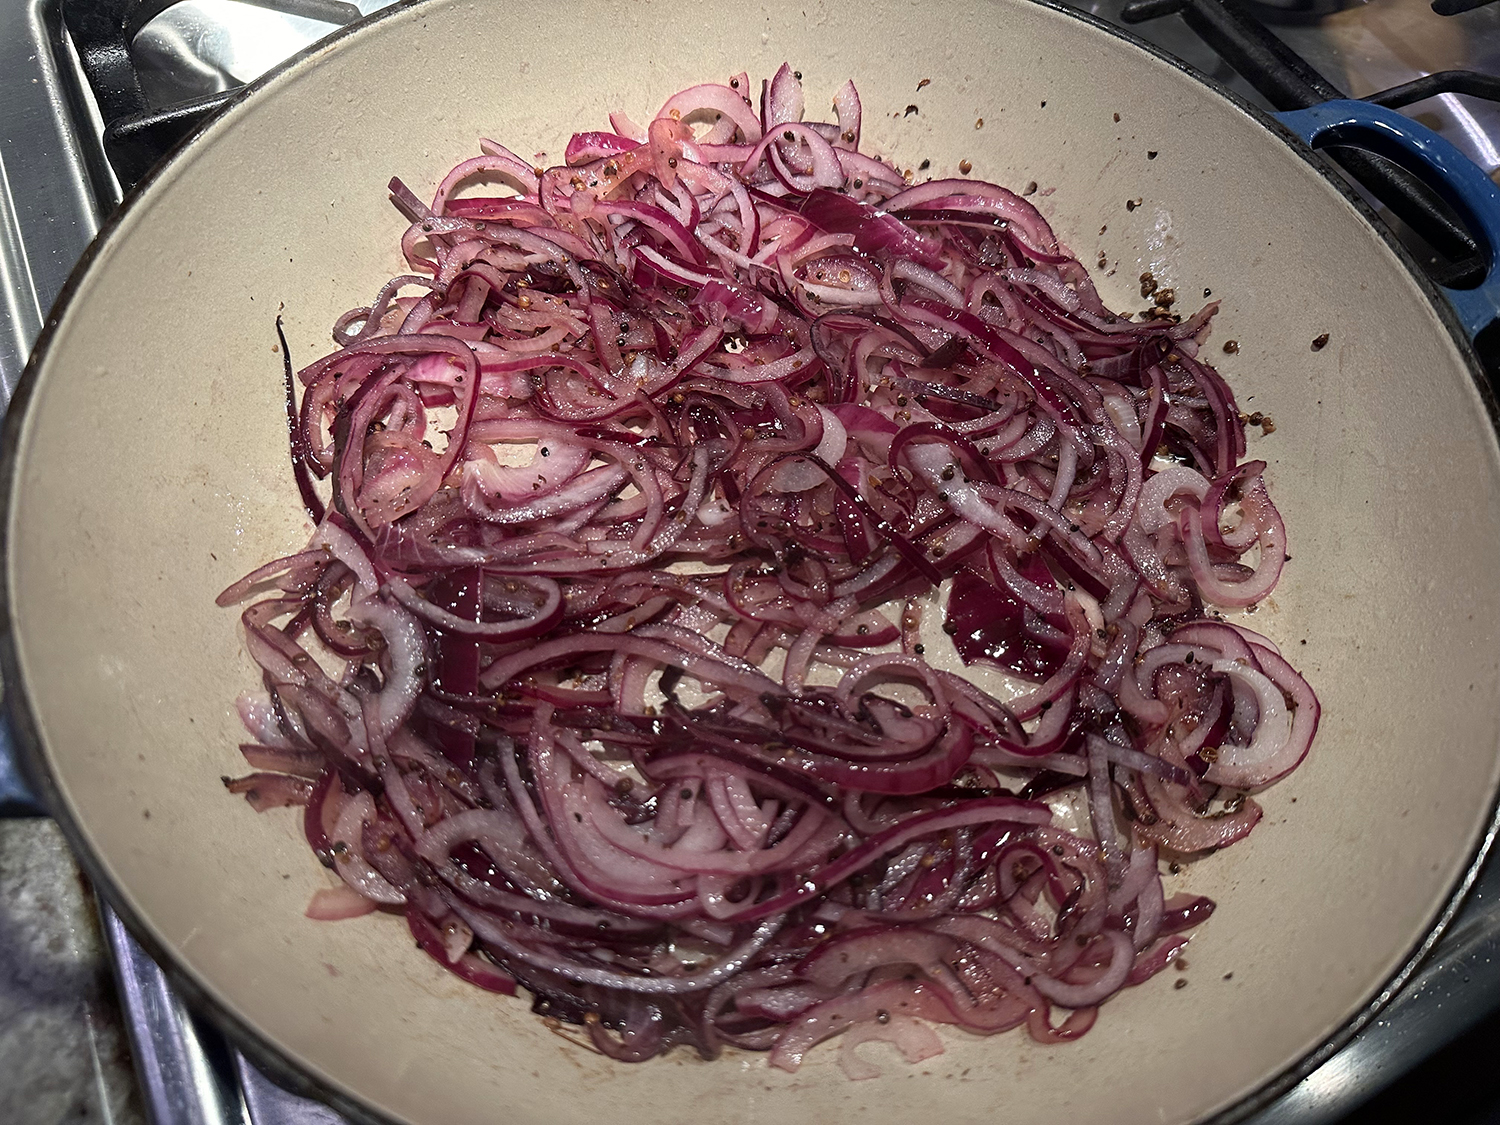
In a Dutch oven over medium-high, cook the oil and coriander seeds, stirring, until fragrant and sizzling, 2 to 4 minutes. Add the onion and ¼ teaspoon salt, then cook, stirring occasionally, until the onion is softened and lightly browned, 3 to 5 minutes.
Add the sweet potatoes, orange juice, cayenne, ½ teaspoon salt, ¼ teaspoon pepper and ½ cup water. Bring to a simmer, cover and reduce to medium. Cook, stirring occasionally, until a skewer inserted into the potatoes meets no resistance, 8 to 11 minutes.
Uncover and cook, stirring constantly, until the liquid has almost fully reduced and the potatoes are glazed, about 2 minutes. Off heat, stir in the olives. Taste and season with salt and pepper.
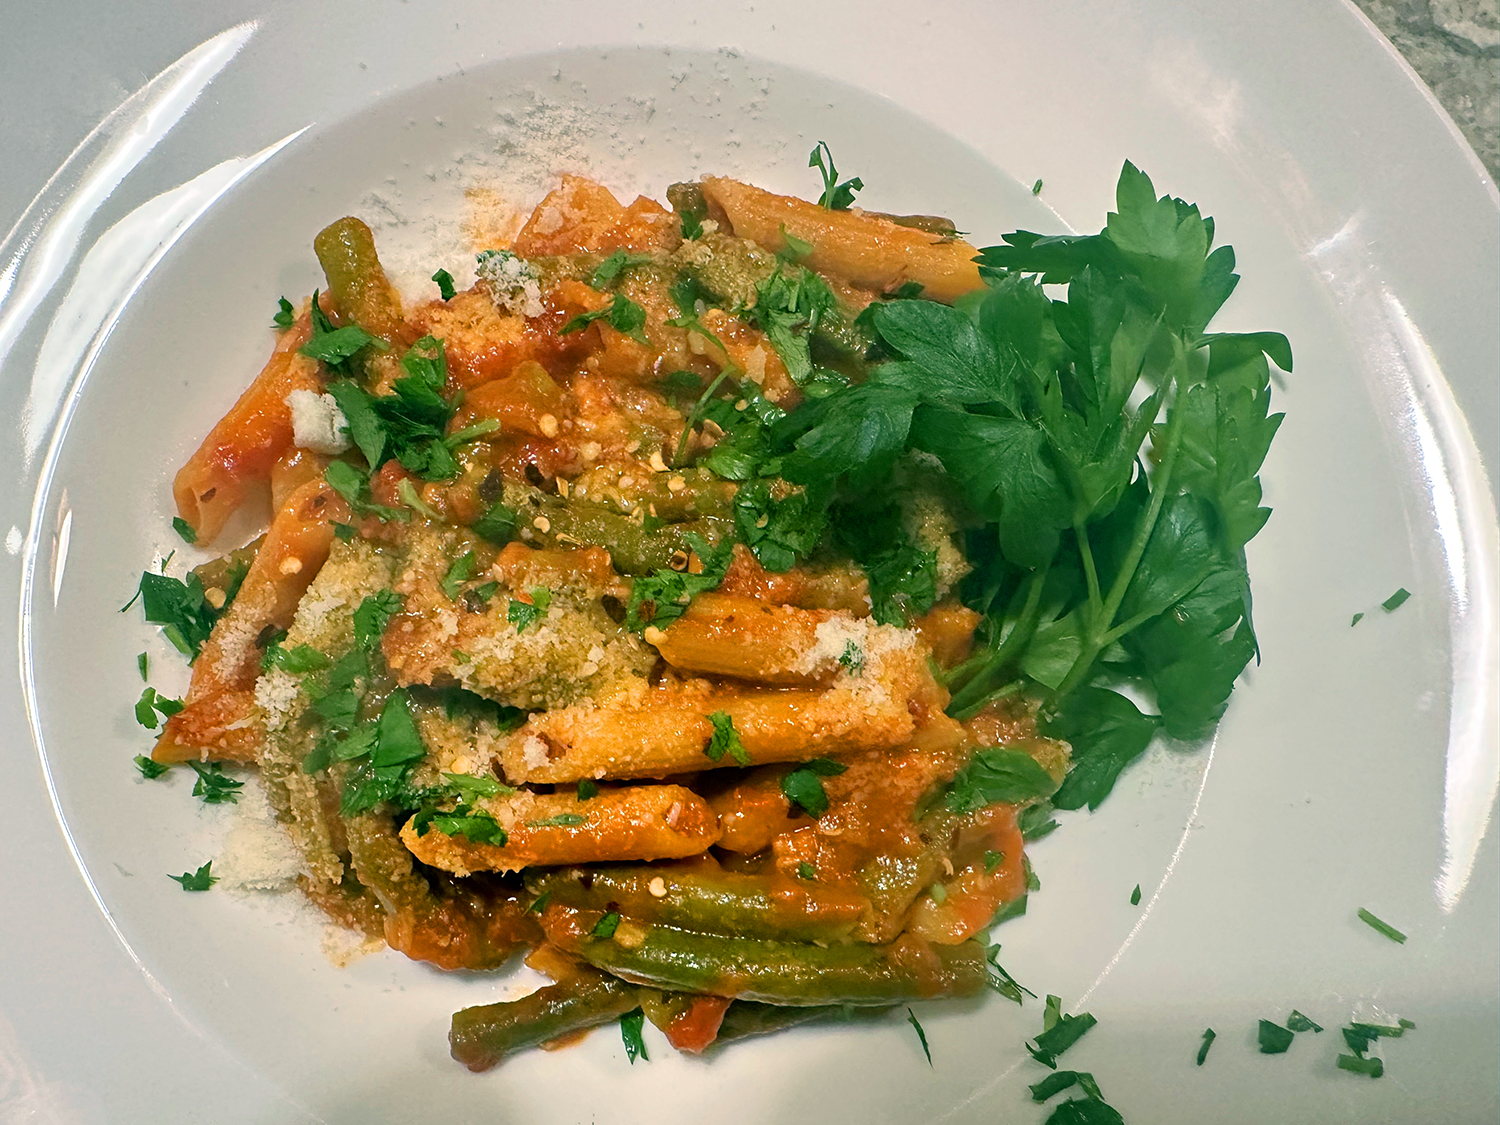
A wonderful, full-flavored pasta dish for vegetarians that even meat lovers will appreciate.
“A summer green bean is undoubtedly a thing of beauty, but it’s also short-lived. For those late-season or out-of-season green beans, forget blanching and slow-cook them into oblivion instead. Admittedly, the drab olive exterior is unfortunate, but don’t let looks fool you: The end result is disproportionately good—a silky bean with concentrated sweetness, no matter how tough or stringy it started out.” ~ Bon Appétit
The acidic tomatoes help the green beans retain their structure through the long cook, and a modest amount of lemon and cheese sharpen everything at the end. Think of this Italian classic as the summer counterpart to pasta e fagioli, the hearty soup featuring pasta and beans (often cannellini). It’s a hearty, vegetarian-friendly dish that’s easy on your wallet thanks to its reliance on a mix of seasonal produce and pantry staples. And if rent is due and the paycheck hasn’t cleared, make it with frozen green beans for an even more economical version.
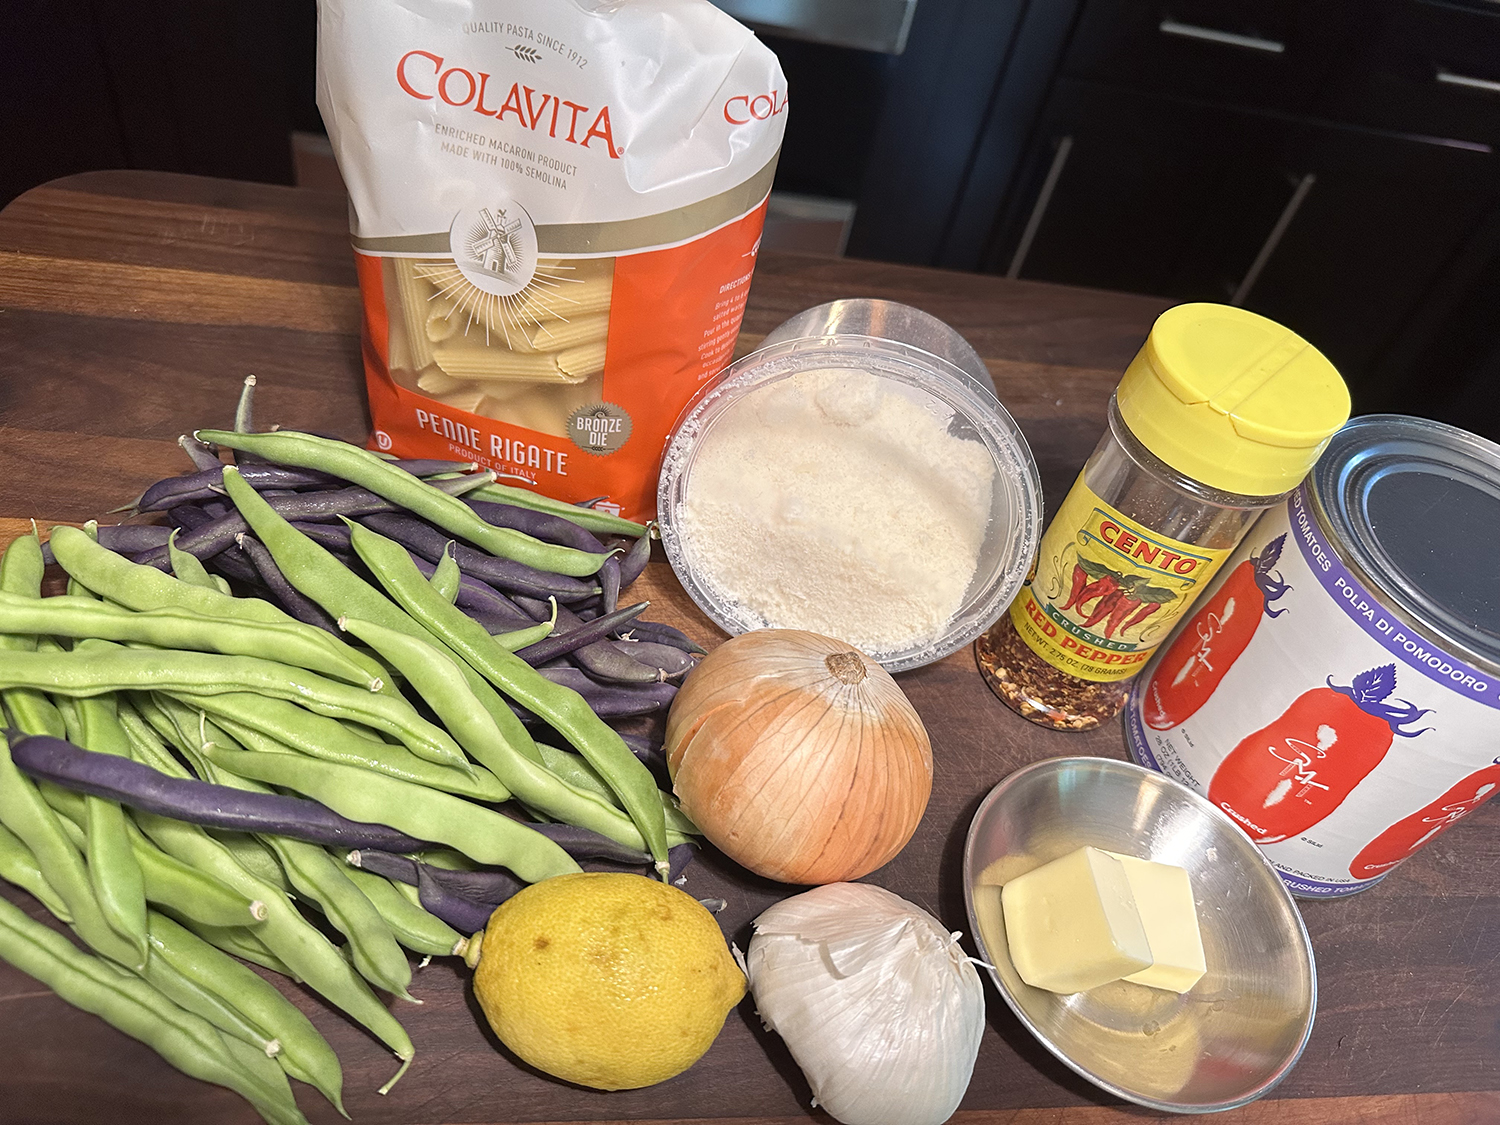
1/4 cup extra-virgin olive oil, plus more for drizzling
1 3/4 tsp. Morton kosher salt, plus more
1 lb. green beans, trimmed, cut into 2″ pieces
28 oz. canned crushed tomatoes
2 Tbsp. unsalted butter, divided
1 tsp. crushed red pepper flakes
12 oz. medium tube-shaped pasta, such as rigatoni, ziti, or penne
1 large lemon, zested, plus 1 tablespoon of juice
2 oz. Parmesan, finely grated (about 1 cup), plus more for serving
Coarsely chopped mint and/or parsley and lemon wedges, for serving
Directions
Cook 1 medium white or yellow onion, thinly sliced, 1 head of garlic, cloves separated, coarsely chopped, ¼ cup extra-virgin olive oil, and 1 Tbsp. Diamond Crystal or 1¾ tsp. Morton kosher salt in a large Dutch oven or other heavy pot over medium, stirring occasionally, until onion is translucent, 5–8 minutes.
Add 1 lb. green beans, trimmed, cut into 2″ pieces, one 28-oz. can crushed tomatoes, 1 Tbsp. unsalted butter, and 1 tsp. crushed red pepper flakes. Cover and cook, stirring occasionally, until beans are tender enough to cut with a spoon and beads of oil appear on surface of sauce, 25–35 minutes.
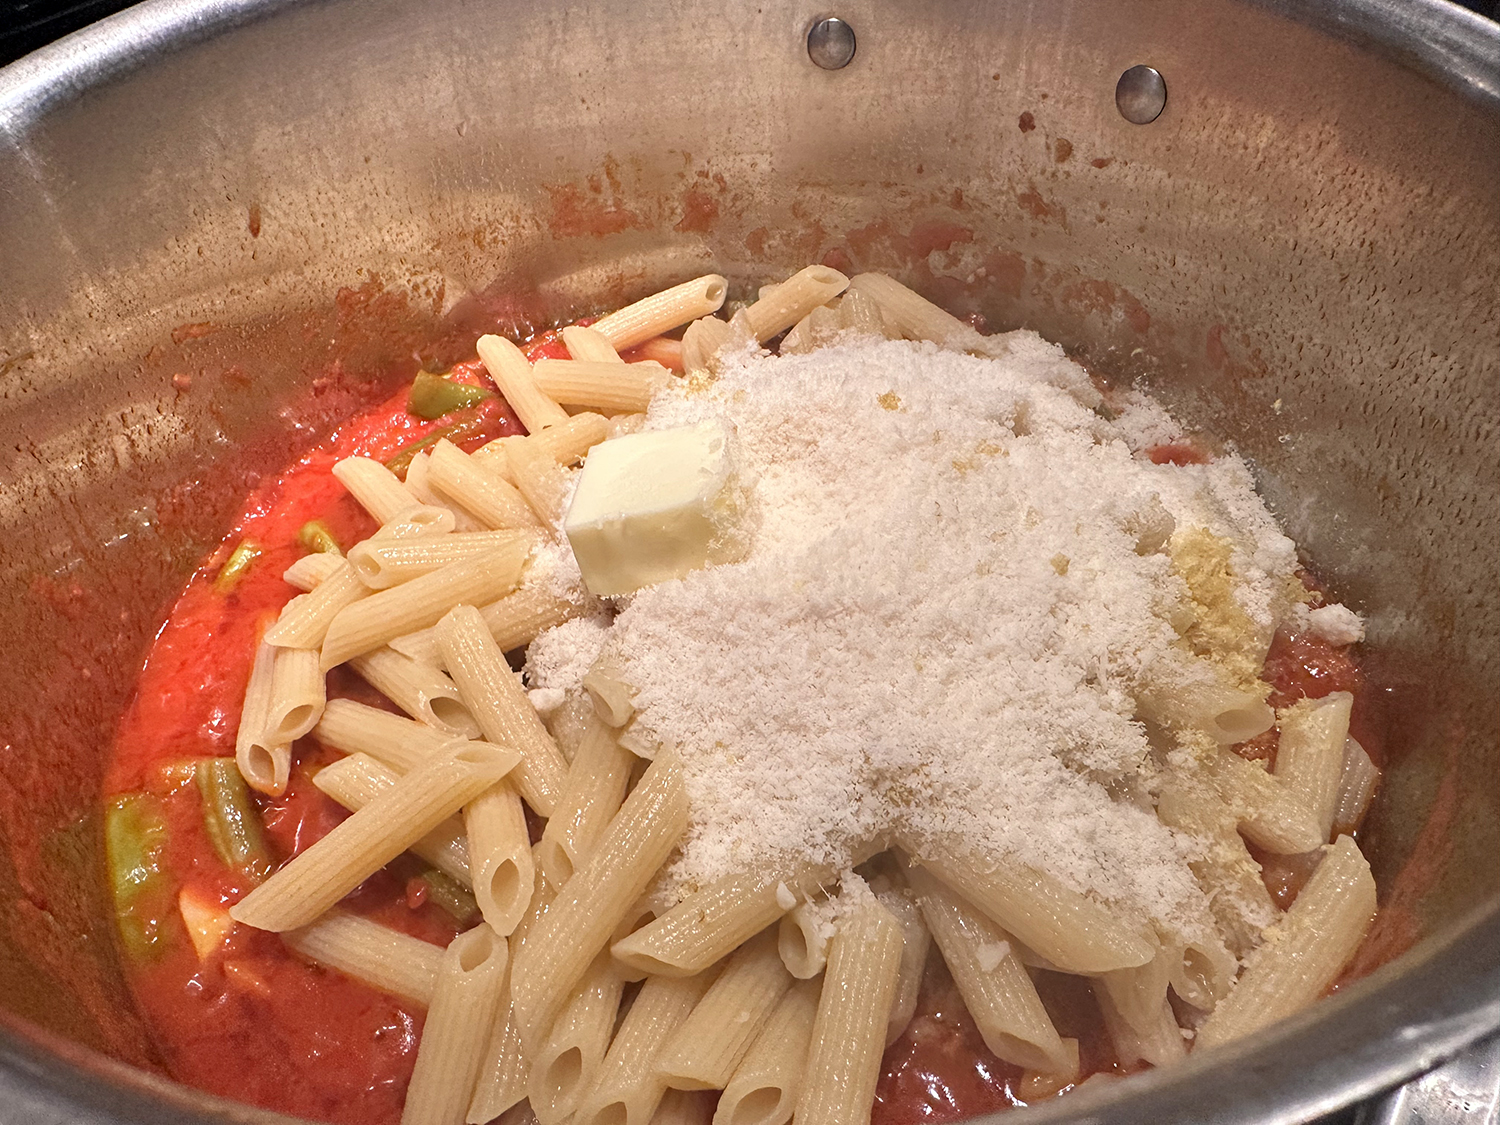
Meanwhile, cook 12 oz. medium tube-shaped pasta (such as rigatoni or penne) in a large pot of boiling salted water, stirring occasionally, until very al dente, about 2 minutes less than package directions (pasta will finish cooking in sauce). Drain, reserving about 1 cup pasta cooking liquid.
Add pasta to sauce along with zest of 1 large lemon, 2 oz. Parmesan, finely grated (about 1 cup), and remaining 1 Tbsp. unsalted butter. Increase heat to medium-high and cook, stirring vigorously and adding up to ½ cup reserved pasta cooking liquid as needed, until sauce is silky and pasta is coated and al dente, about 4 minutes. Remove from heat and stir in 1 Tbsp. fresh lemon juice. Taste and season with more salt if needed.
Transfer pasta to large bowl or platter and drizzle generously with oil. Top with coarsely chopped mint and/or parsley and more Parmesan. Serve with lemon wedges for squeezing over.
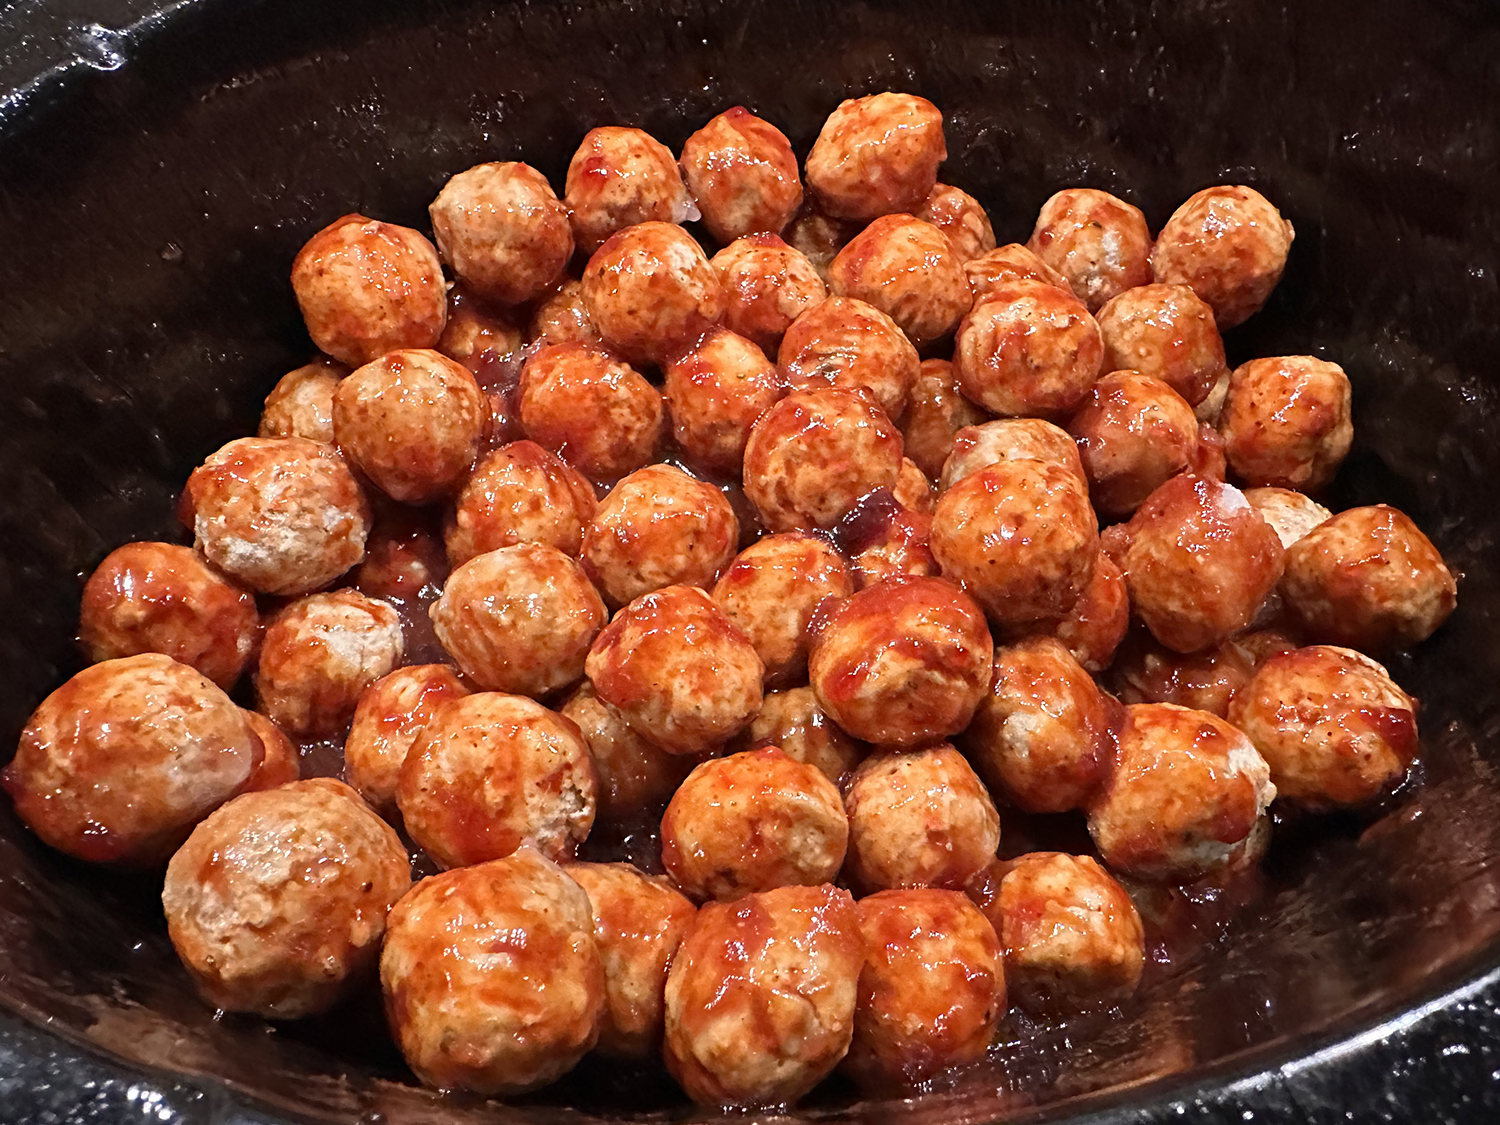
Very similar to the “retro meatballs” of yore, this sauce goes beyond just grape jelly and chili sauce. With the additional ingredients, the depth of flavor is slightly more pronounced.
If you grew up with go-go boots, hot pants, princess phones, and avocado green kitchens, you probably remember when saucy meatballs first became the rage at neighborhood parties in the ‘burbs. The secret ingredient was (drumroll, please)… grape jelly!
According to Southern Living, it’s still the secret ingredient, bringing a sweetness to the heat and spice of companion ingredients like chili sauce and barbecue sauce. And we still love those sweet-tangy-saucy little bites. They’re always crowd pleasers in the South (hey, in the North too), and they’re strictly a dump-and-stir proposition, leaving plenty of time to attend to other party chores.
Our preferences lean toward savory as opposed to sweet, so we upped the chili sauce by 25%. The recipe is easily finessed to appeal to your personal preferences. For instance, you could reduce the amount of grape jelly to lower the sweetness factor even more; double the mustard to 2 teaspoons; and/or use a tangier BBQ sauce. Another change we made was to the quantity of meatballs. The original recipe called for two pounds and we used three-and-a-quarter pounds, but did not increase the other ingredients.
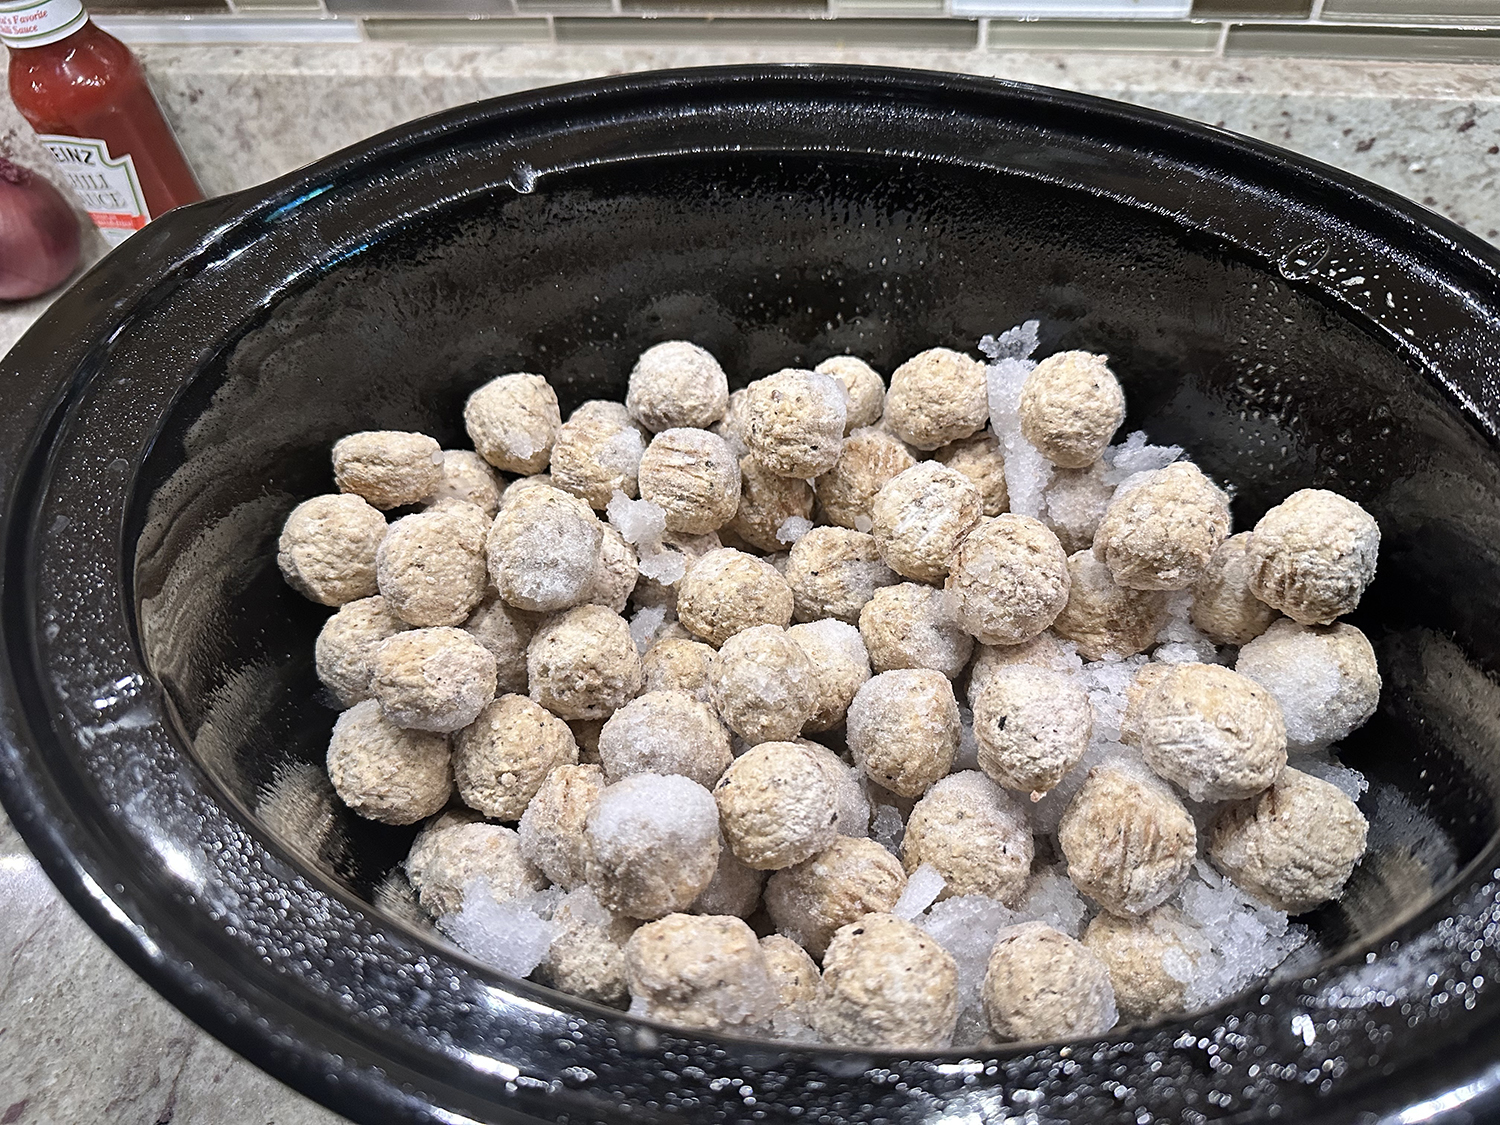
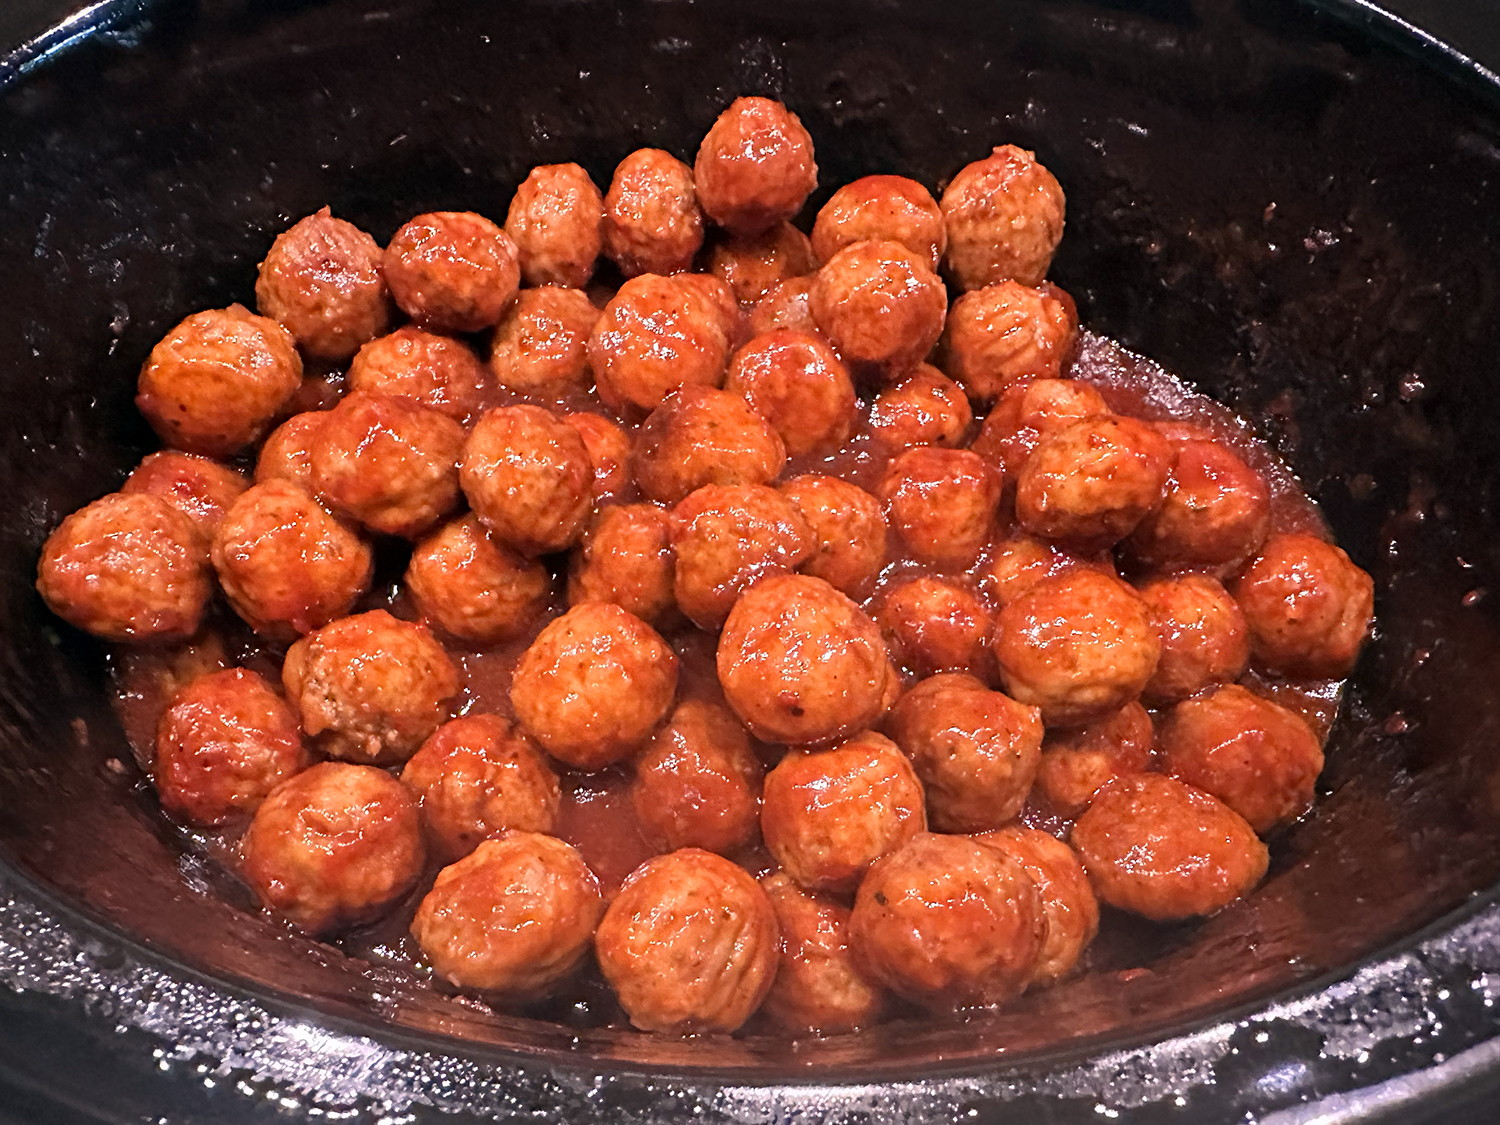
Easy-Peasy, just whisk together the sauce and give your slow cooker a spritz of cooking spray. In go the meatballs, in goes the sauce. Toss. Cook. Done.
Sprinkle chives on top before serving. Actually, you don’t even have to serve them. Just place a container of toothpicks next to your slow cooker, and guests can serve themselves. Try them and find out why this groovy appetizer from back in the day is once again a hit.
Whisk together grape jelly, chili sauce, barbecue sauce, mustard, Sriracha, salt, and pepper in a medium bowl. Lightly coat slow cooker with cooking spray.
Place frozen meatballs in slow cooker. Pour jelly sauce over meatballs, and toss to coat. Cover and cook on HIGH until sauce is thickened, 2 to 2 1/2 hours, stirring halfway through.