Tag Archives: american

Spicy Pork Stew with Peppers and Potatoes

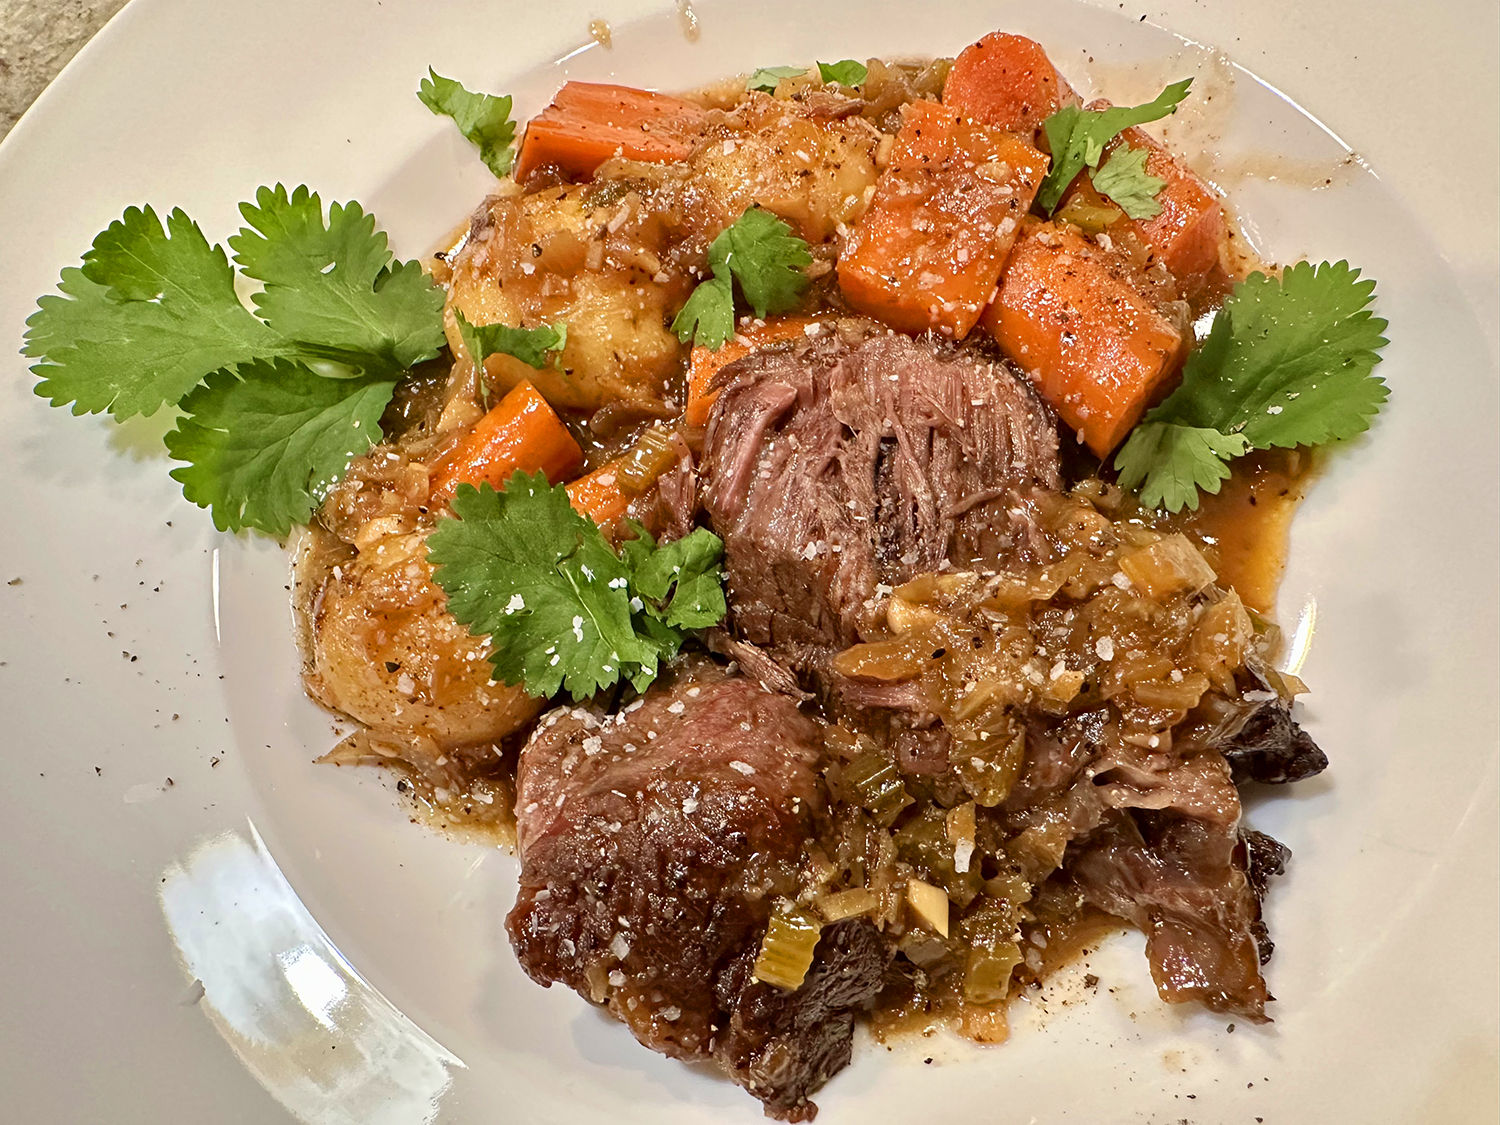
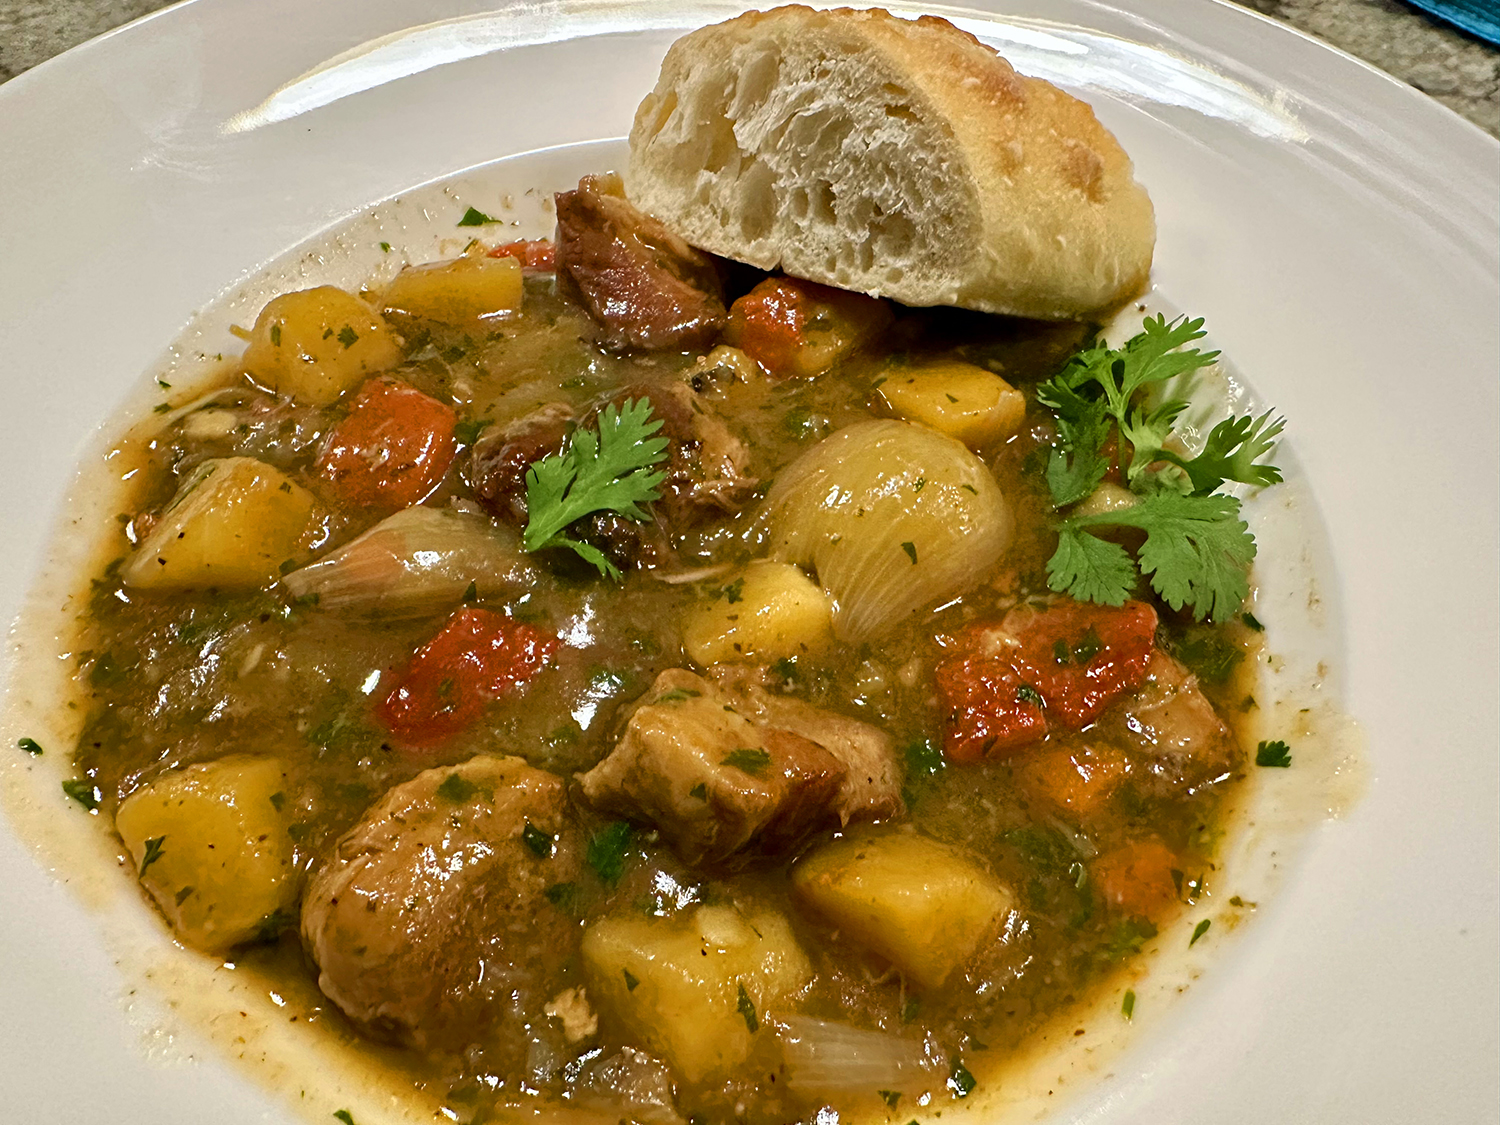
If you have a long, lazy afternoon ahead of you in the coming days, consider making this hearty stew by one of our favorite chef/authors, Molly Stevens. The inclusion of chipotles and roasted sweet peppers give this zesty pork stew a Southwestern flavor.

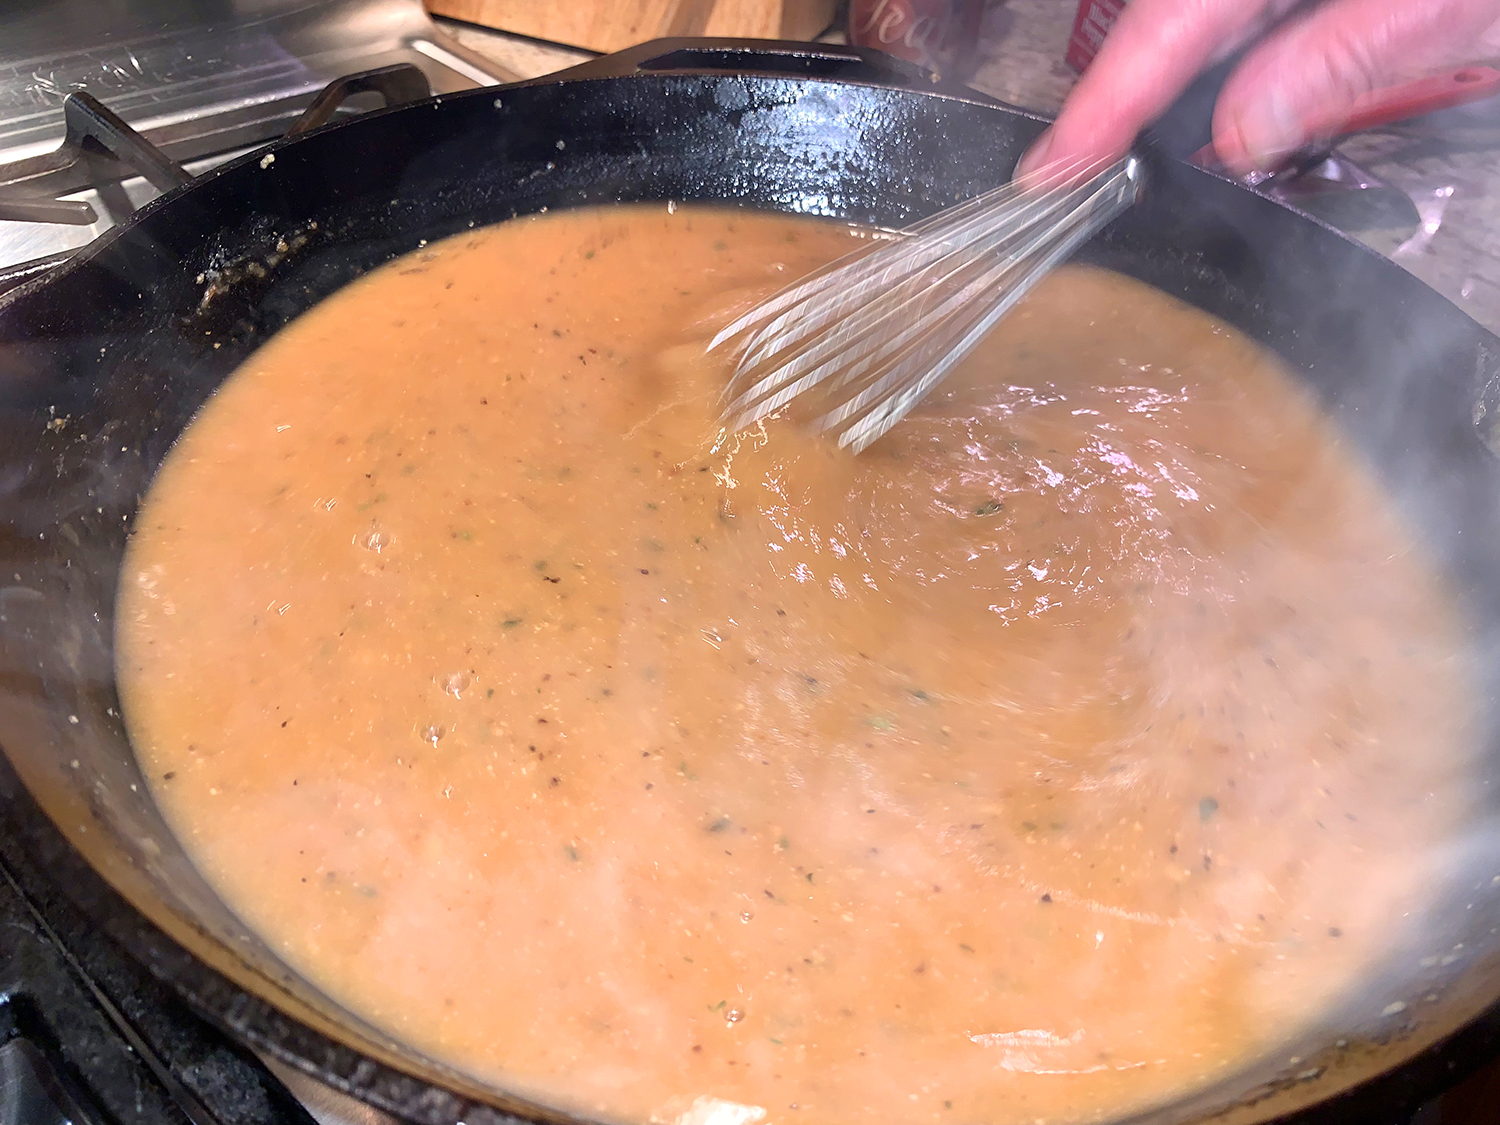
The original recipe produces a thin, watery liquid as the base while we prefer a thicker sauce. To accomplish this, you can either dredge the meat chunks in seasoned flour before browning them, and/or add a cornstarch slurry at the end, after degreasing (if necessary), but before adding cilantro.

The stew can be made up to 2 days ahead: Skip the degreasing step, cool to room temperature, cover, and refrigerate. Once the stew is chilled, lift the solidified fat off the top with a slotted spoon. Reheat the stew over medium-low heat to serve.

Spicy Pork Stew with Peppers and Potatoes

  • Servings: 4-5
  • Difficulty: easy
  • Print

Ingredients

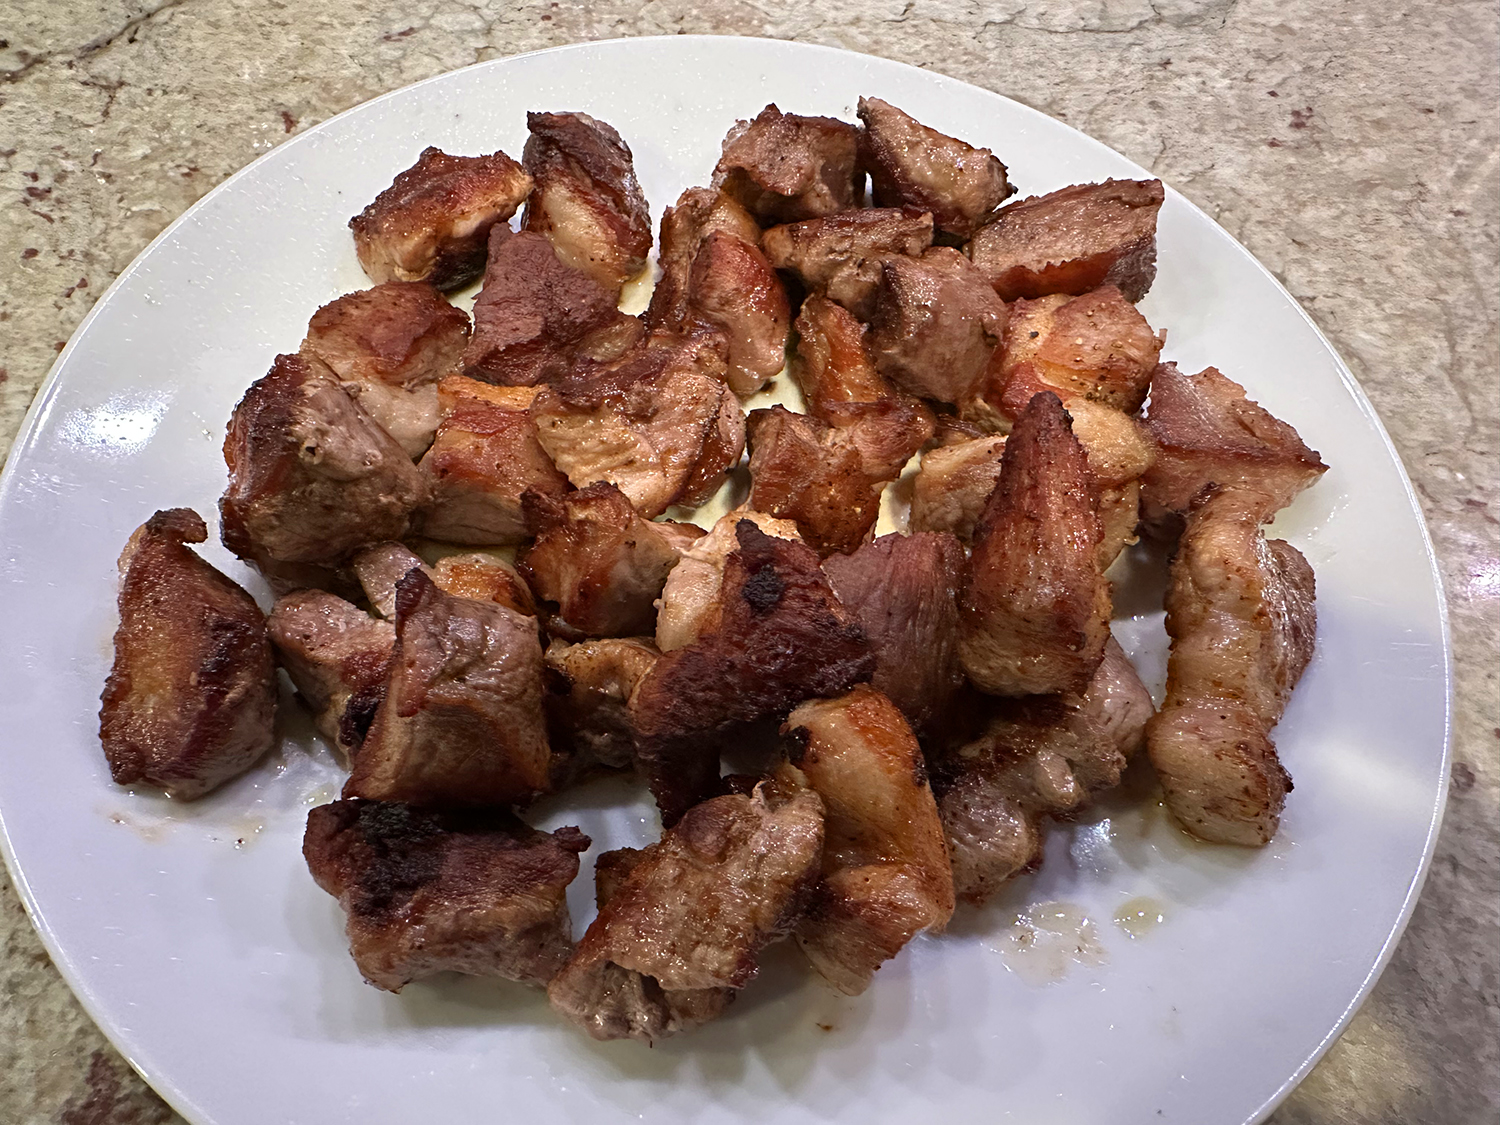
  • 3 lbs. boneless pork shoulder, trimmed of excess fat and cut into 1-1/2- to 2-inch pieces
  • 3 Tbsp. grapeseed oil or vegetable oil, more as needed
  • Kosher salt and freshly ground pepper
  • 1 medium yellow onion, coarsely chopped (about 1 cup)
  • 2 medium celery stalks, coarsely chopped (about 1/2 cup)
  • 1 medium carrot, coarsely chopped (about 1/3 cup)
  • 2 cloves garlic, minced
  • 1 Tbsp. chipotles in adobo, minced
  • 1 tsp. cumin
  • 1/2 tsp. dried oregano
  • 1 cup beer (any kind)
  • 2 1/2 cups homemade or lower-salt store-bought chicken broth
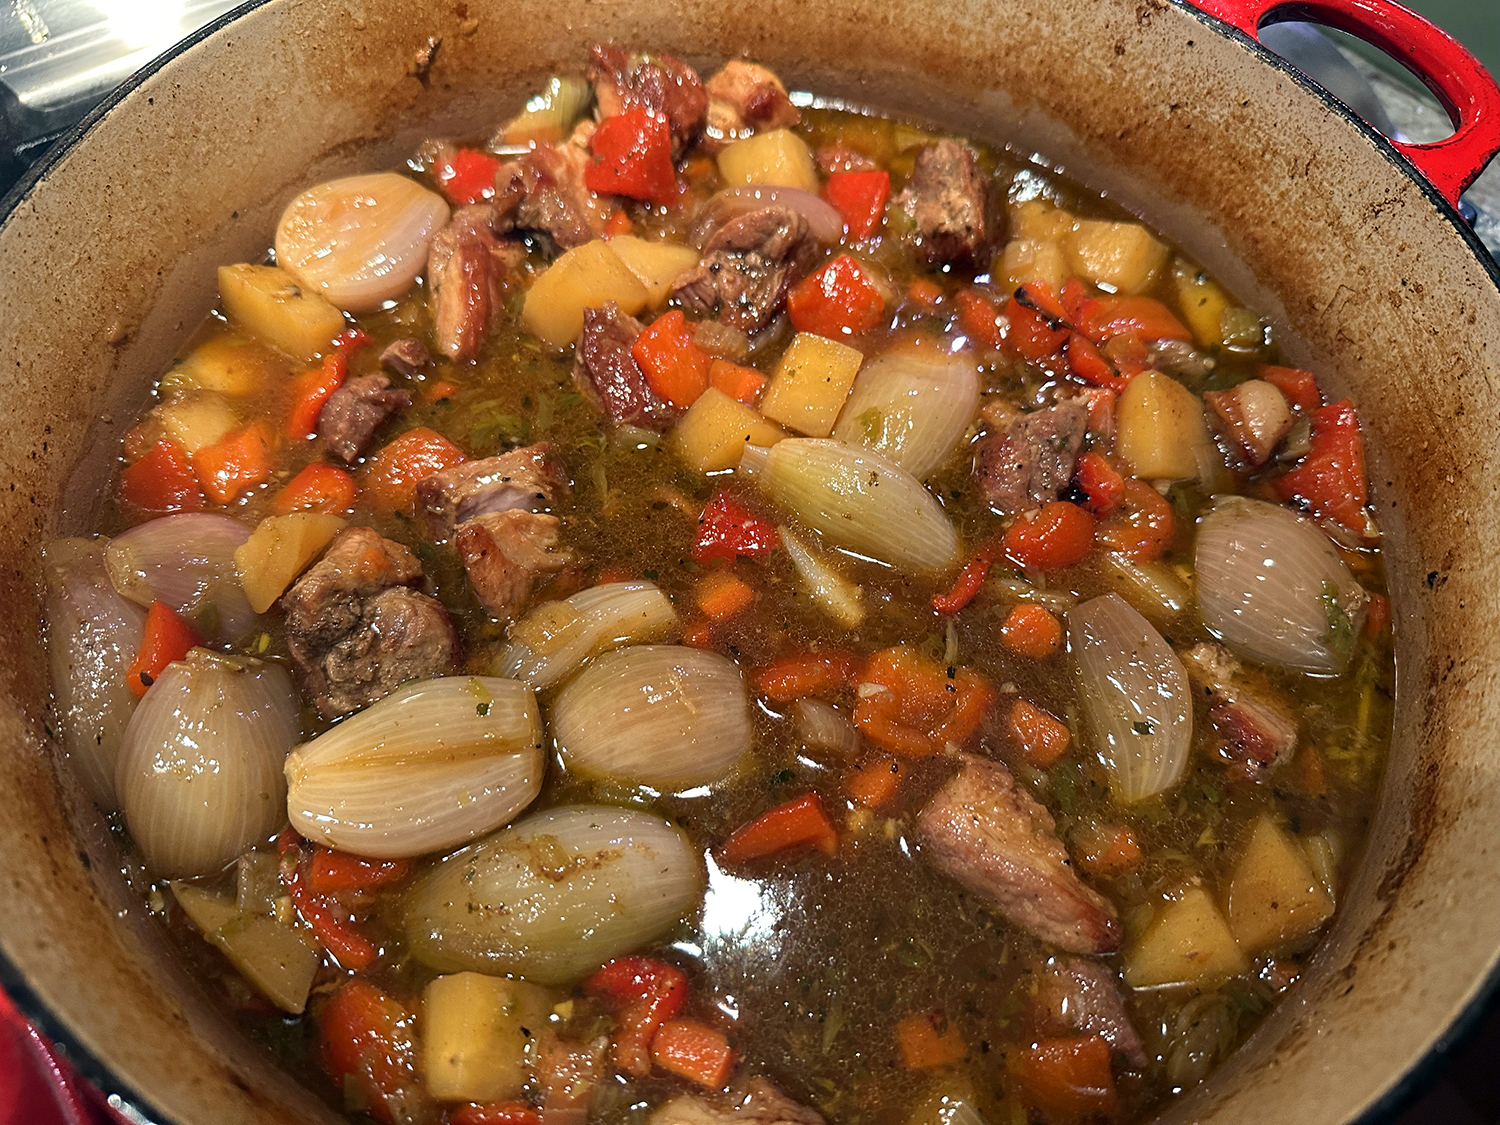
  • 2 cups peeled diced white potatoes (1-inch dice)
  • 2 cups halved or quartered shallots (leave whole if small)
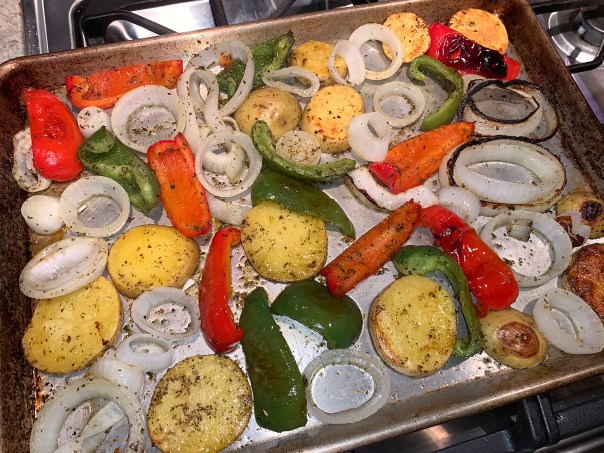
  • 2 cups chopped roasted, peeled red peppers (1-inch pieces)
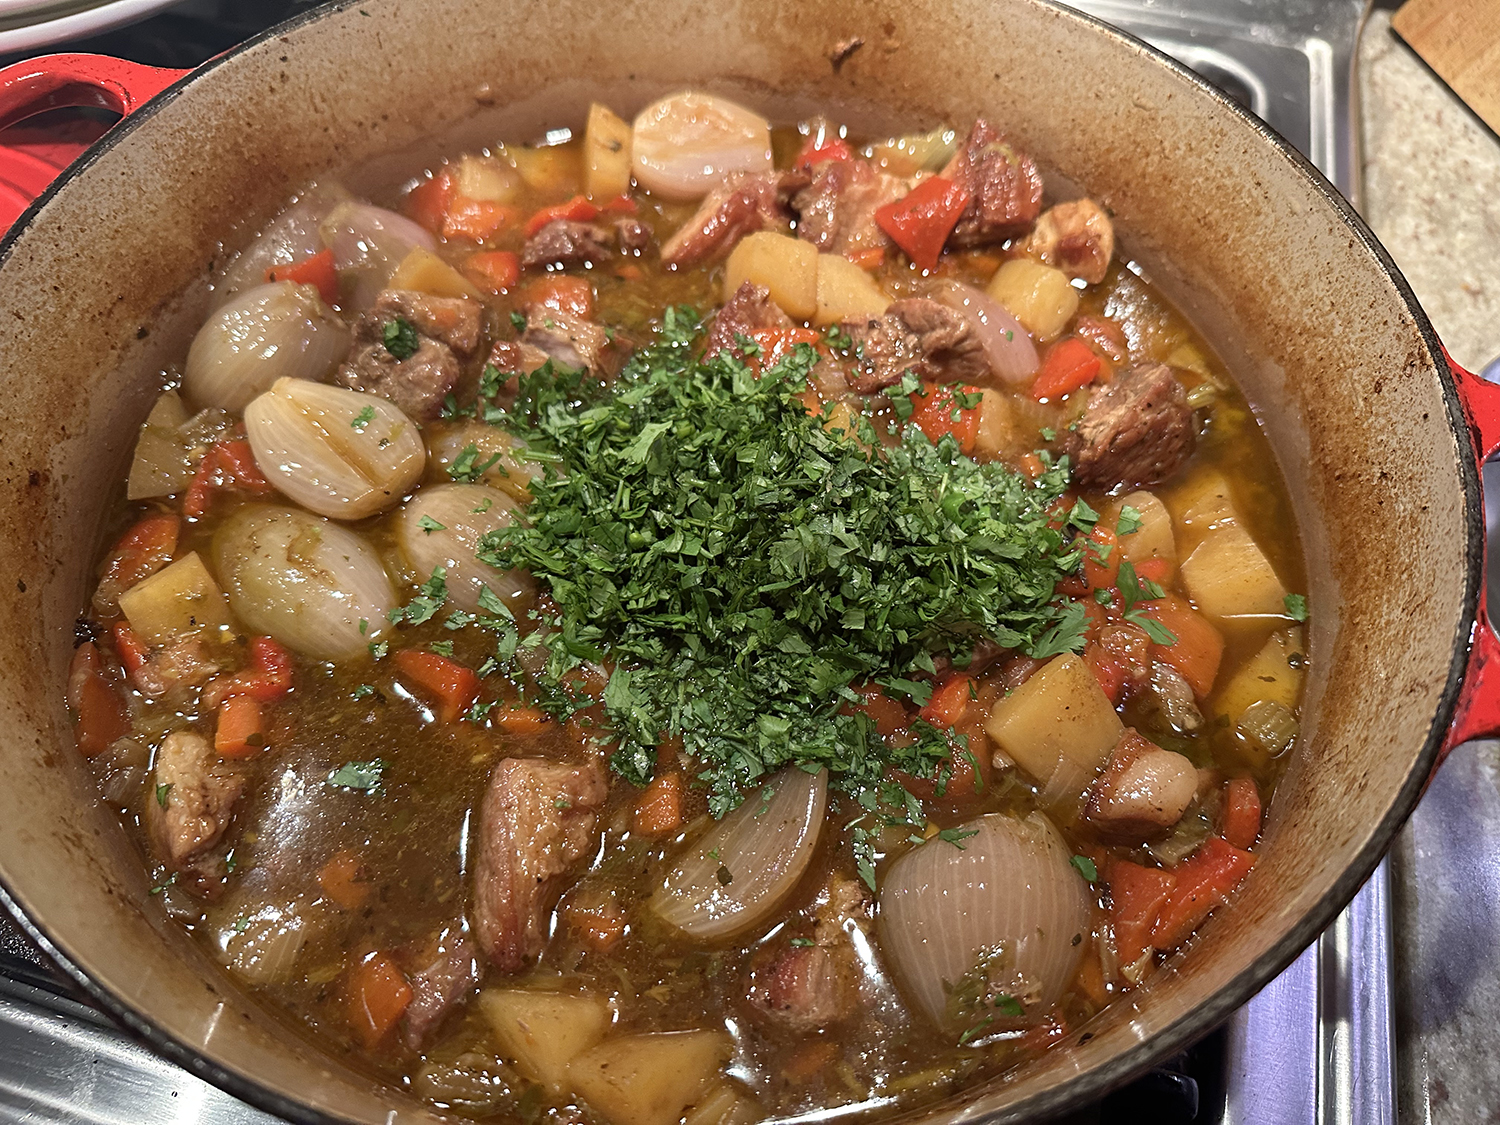
  • 1/4 cup chopped fresh cilantro

Directions

  1. Position a rack in the bottom third of the oven and heat the oven to 325°F.
  2. Spread the pork on paper towels to dry for 10 to 20 minutes before browning. (You can use this time to chop the onion, celery, and carrot). If the meat is very wet, pat it dry.
  3. In a 6-quart Dutch oven or other heavy-duty pot, heat the oil over medium to medium-high heat until shimmering hot. Season about one-third of pork with salt and pepper and arrange it in a single layer in the pot (there should be at least 1/2 inch of space between the pieces). Brown well on at least 4 sides, adjusting the heat as necessary; each batch should take about 10 minutes to brown. Transfer the pork to a large bowl or rimmed baking sheet as it browns and repeat with the rest of the pork, seasoning with salt and pepper before browning. Once all of the pork is browned, remove the pot from the heat to let it cool for a few minutes.
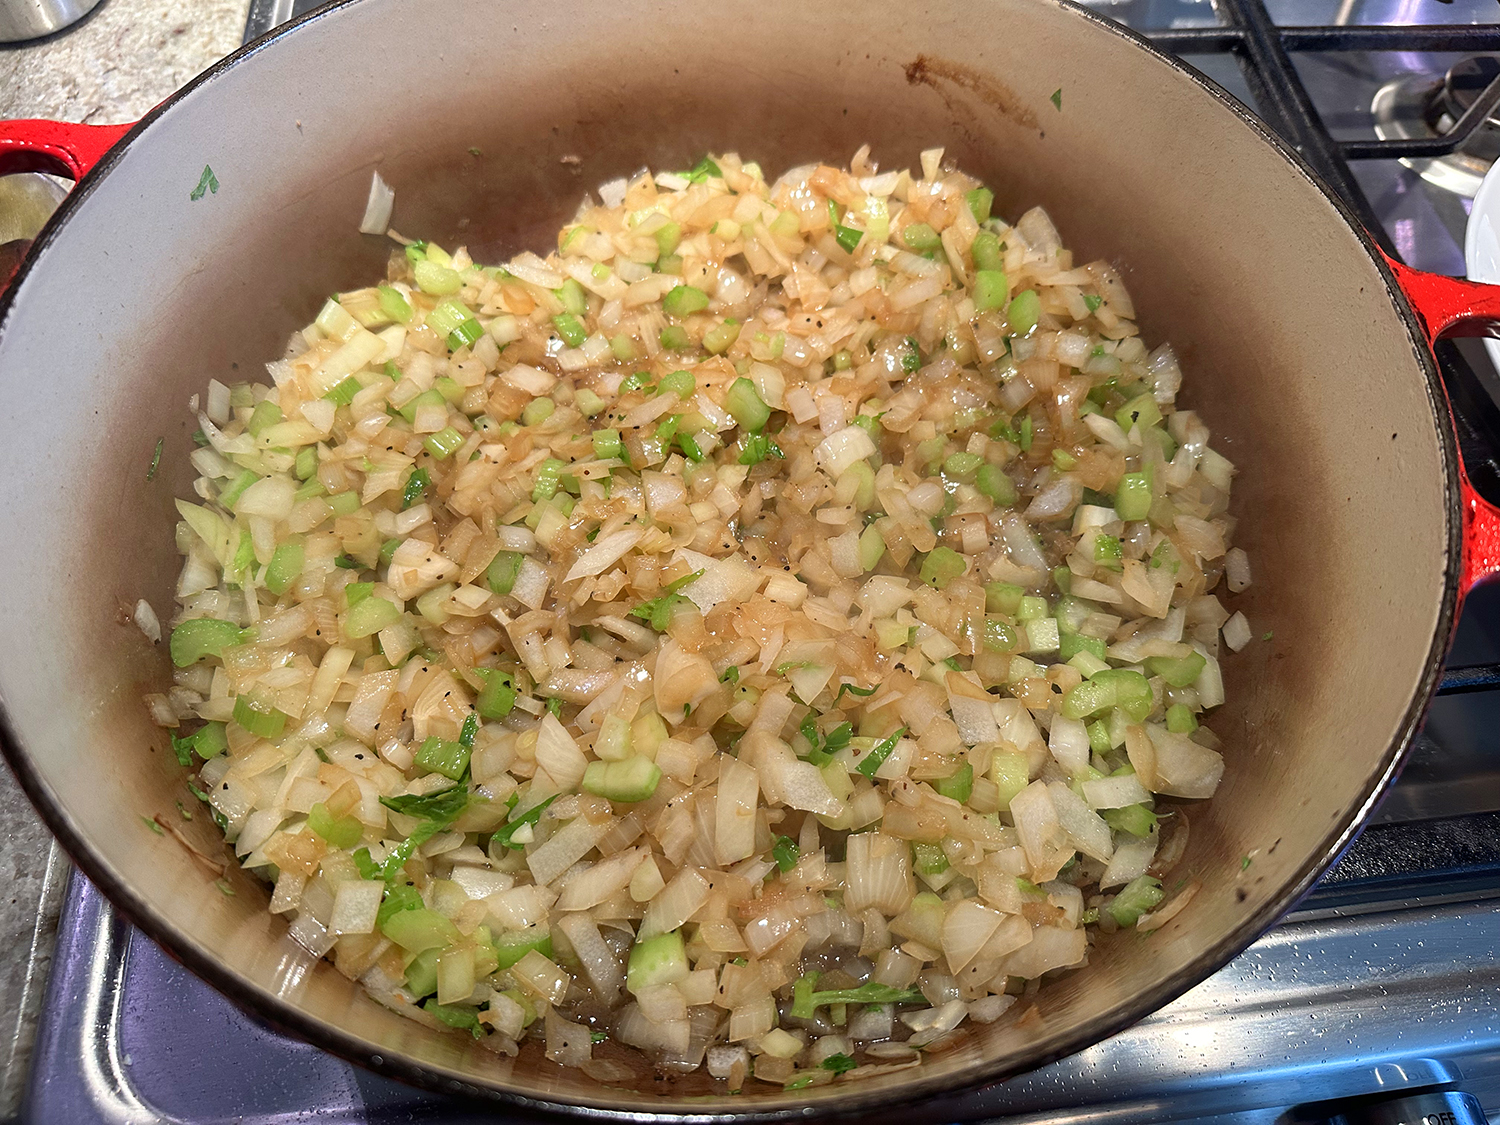
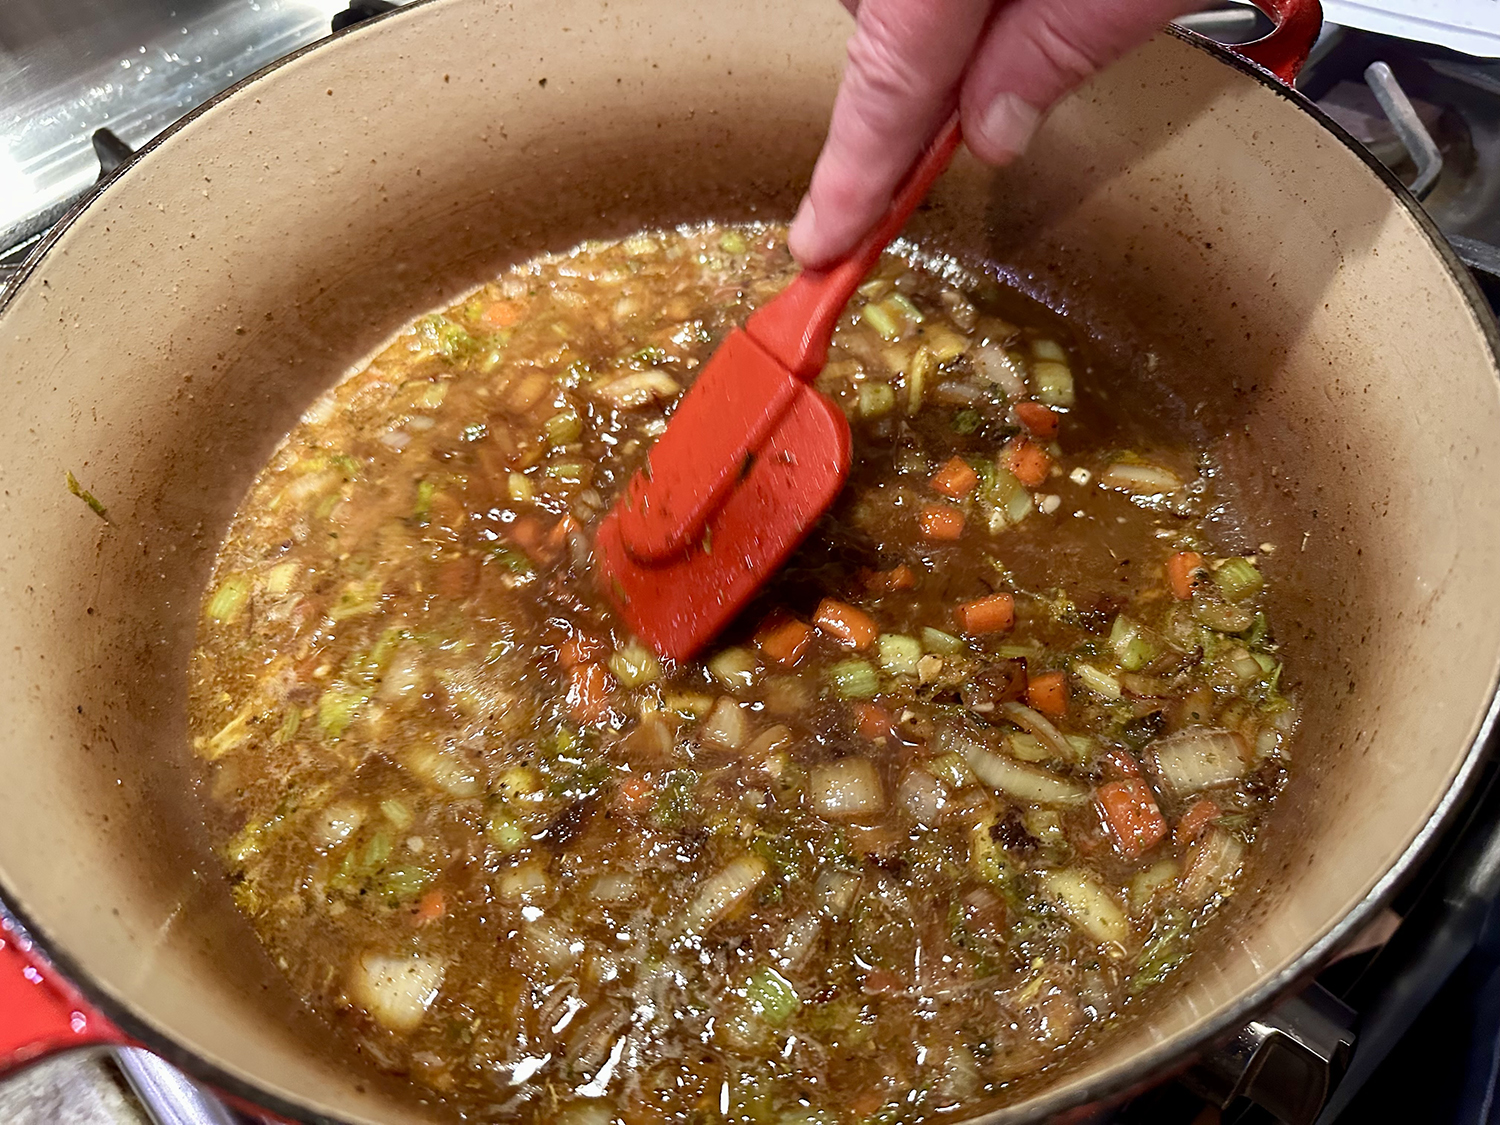
  4. Pour all but 2 tablespoons of the fat from the pot. (If there is not enough, add oil to equal 2 tablespoons) Return the pot to medium heat, then add the onion, celery, and carrot. Season with a pinch of salt and pepper, and cook, stirring often and scraping the bottom of the pot with a wooden spatula, until the vegetables begin to soften, 5 to 6 minutes. Stir in the garlic, chipotles, cumin, and oregano and cook, stirring occasionally, until fragrant, 1 to 2 minutes.
  5. Add the beer, stirring with the wooden spatula to dissolve any browned bits on the bottom of the pot. Raise the heat to medium high and boil to reduce by about half, 5 to 8 minutes. Add the chicken broth and 1-1/2 cups water. Bring to a boil.
  6. Return the pork to the pot along with any accumulated juice. Lower the heat to maintain a simmer.
  7. Crumple a 12×16-inch piece of parchment, then flatten it out. (Crumpling makes for easy handling.) Place the parchment directly on the surface of the stew, allowing the ends to come up the sides of the pot. Cover and put in the oven.
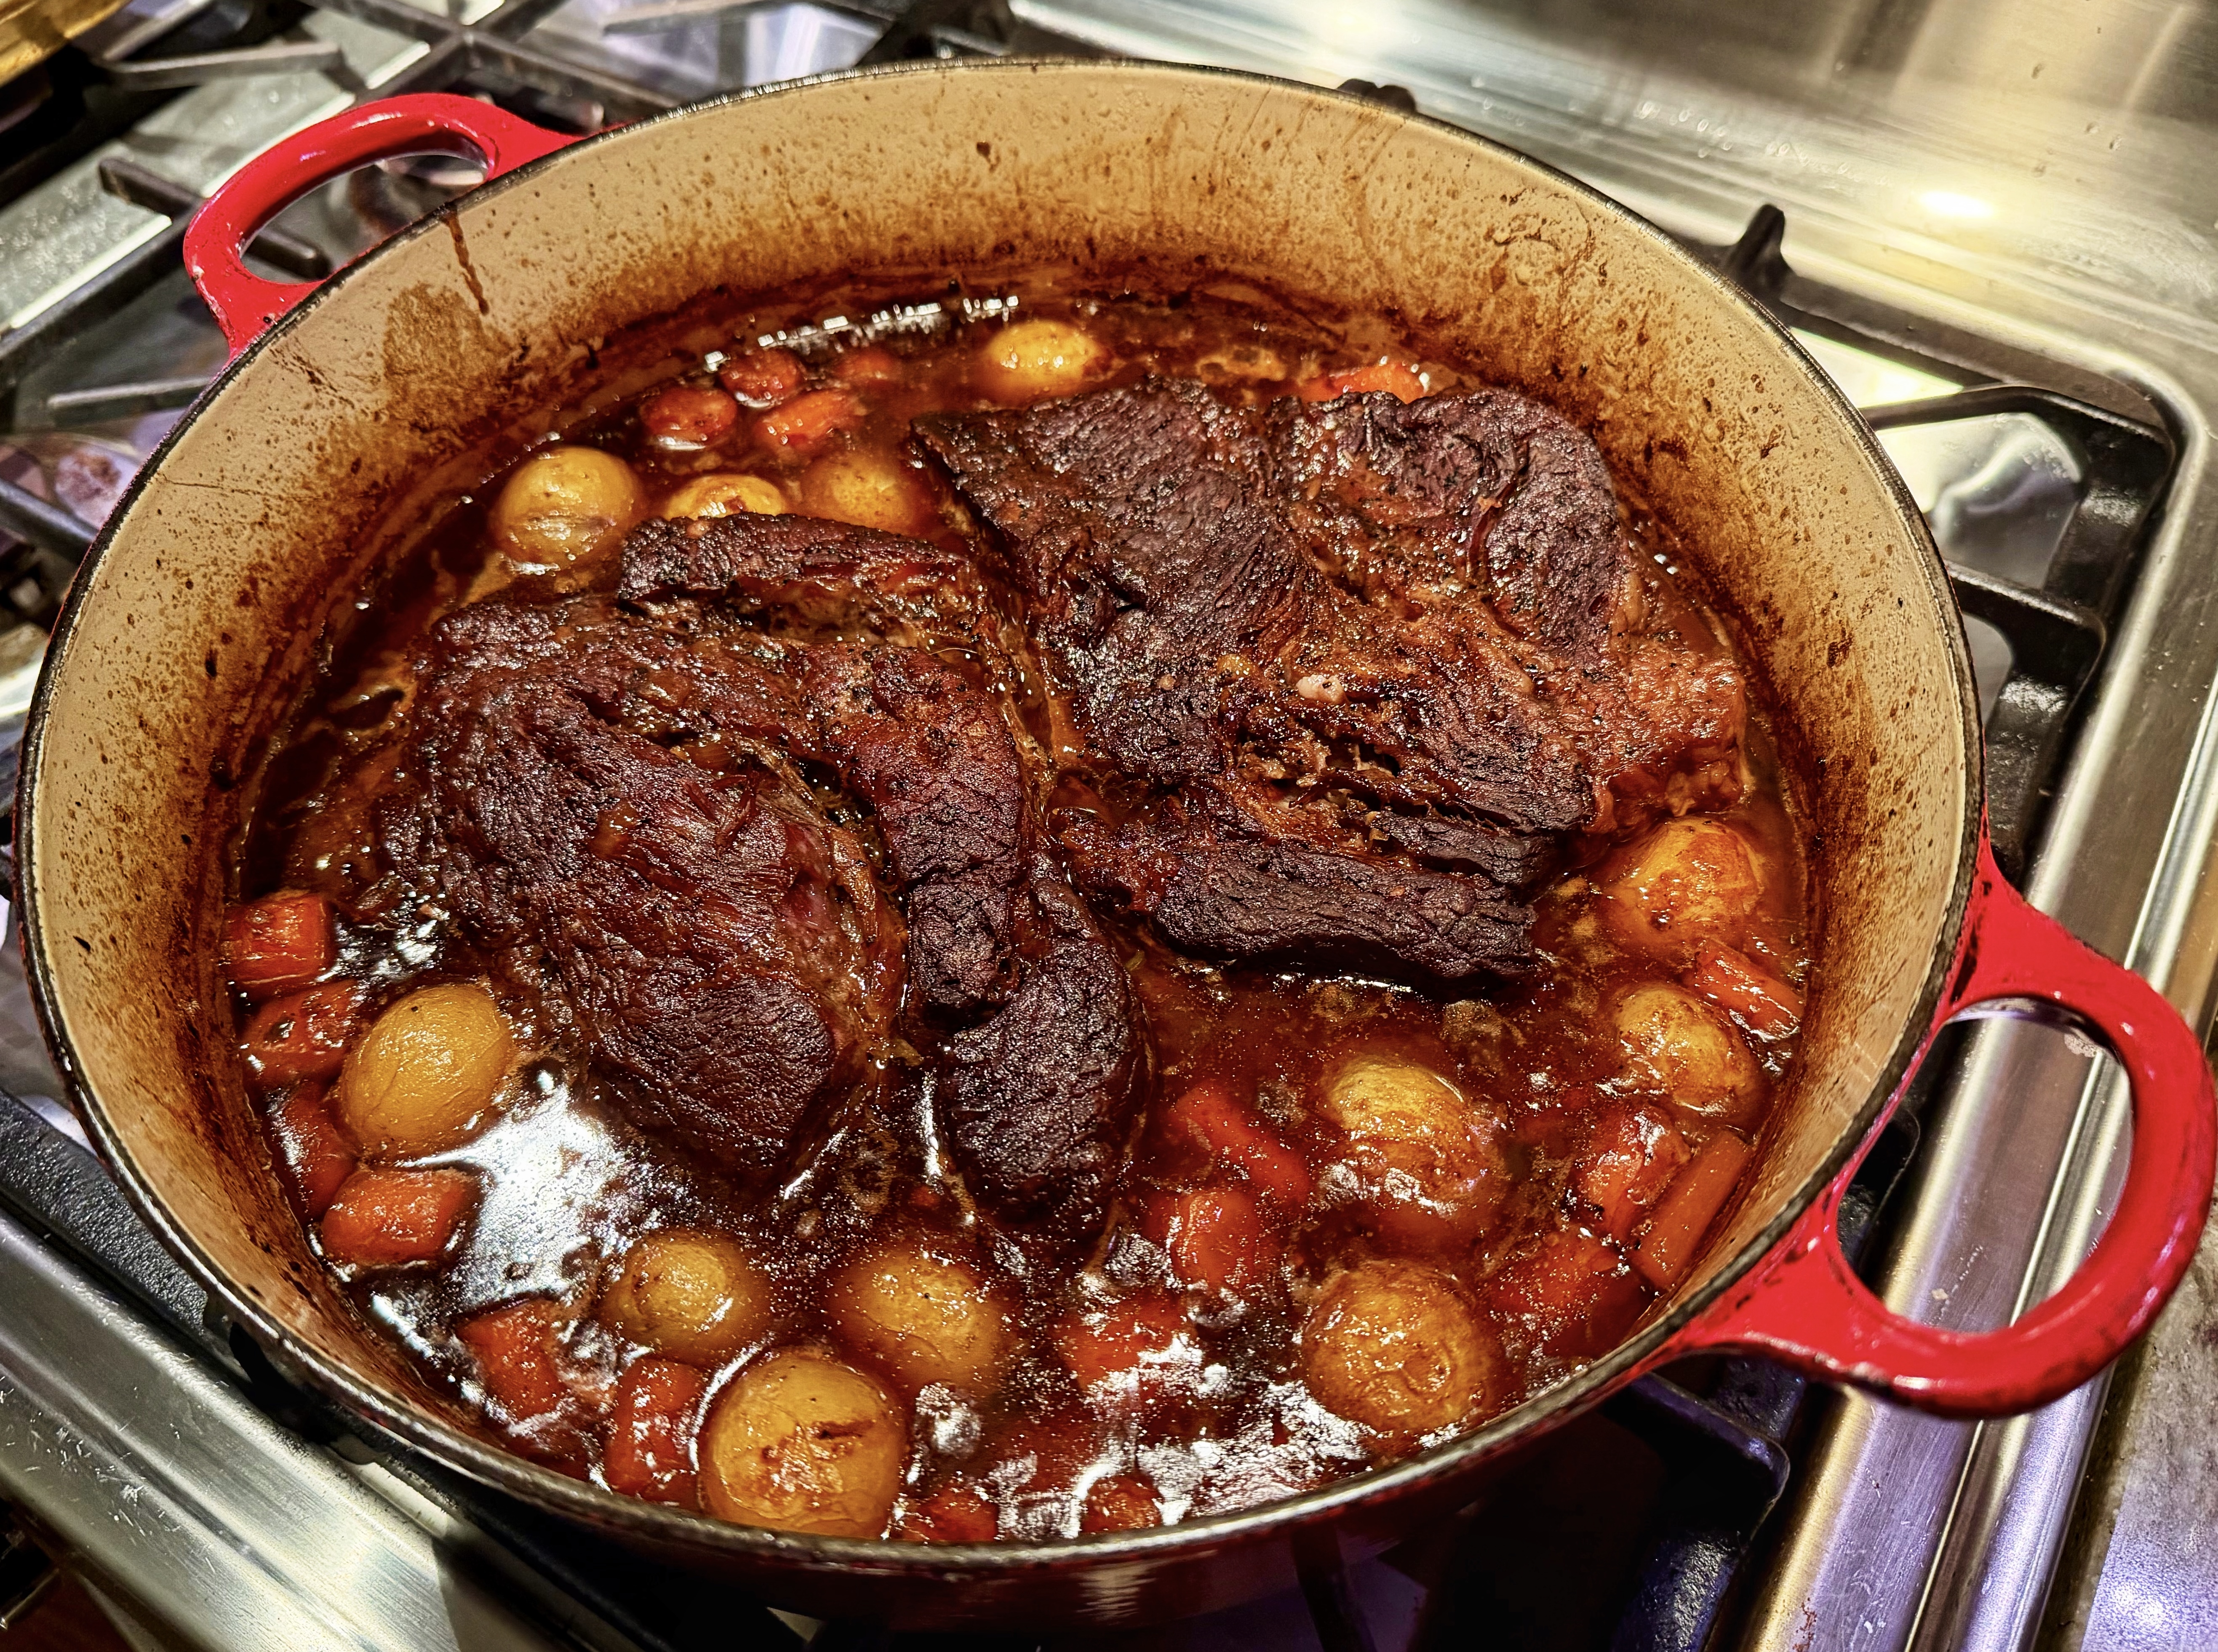
  8. After 30 minutes of stewing, add the potatoes and shallots to the pot. Cover with the parchment and lid, return to the oven. After another 30 minutes, add the peppers. Cover with the parchment and lid, return the pot to the oven, and cook until the pork is fork-tender, 1/2 to 1 hour more.
  9. Degrease the stew by laying a clean paper towel over the surface of the stew and gently pushing it into all the bumps and dips, then quickly peeling it off. Repeat as necessary with more paper towels.
  10. Thicken with a cornstarch slurry if desired. Stir in the cilantro. Season to taste with salt and pepper and serve.

http://www.lynnandruss.com

Original recipe by Molly Stevens

Dry-Rub Chicken Wings with Creamy Gorgonzola Dip

Pair these baked chicken wings coated in a mouth-watering dry rub with a creamy gorgonzola dipping sauce and they’ll be the hit of the party! And indeed they were. Luckily we doubled the recipe. We bought the fresh chicken wings, and The Hubs chopped off the tips (saved for a later batch of chicken stock), and separated the drumettes from the wingettes.

The dry rub is epic and can be used on chicken pork or even veggies to impart full flavor and a decidedly delicious taste. The chicken is crispy on the outside and not greasy like they tend to be when fried. Since there are quite a few ingredients, make a triple batch so that you have some already made for the next time.

I was so excited to serve them that I completely forgot to take a photo of the finished dish… oh well, there will certainly be a next time…

Dry-Rub Chicken Wings with Creamy Gorgonzola Dip

  • Servings: 6
  • Difficulty: easy
  • Print

Ingredients

  • 1/2 Tbsp. ancho chile pepper 
  • 1/2 Tbsp. smoked paprika 
  • 1/2 Tbsp. onion powder 
  • 1/2 Tbsp. kosher salt 
  • 3/4 Tbsp. light brown sugar, packed 
  • 3/4 tsp. chili powder 
  • 3/4 tsp. paprika 
  • 3/4 tsp. cumin 
  • 1/2 tsp. garlic powder 
  • 1/2 tsp. cayenne pepper (less if you’re worried about the heat level) 
  • 1/2 tsp. dried mustard powder 
  • 1/4 tsp. black pepper 
  • 1/4 tsp. dried oregano 
  • 1/4 tsp. dried ground thyme
  • 4 lbs. chicken wings, thawed completely if using a frozen bag 
  • 2 Tbsp. vegetable or canola oil

Directions

  1. Fire up your grill.   
  2. Combine all dry rub ingredients in a small mixing bowl, set aside. In a large mixing bowl, add chicken wings and vegetable oil.  Use a rubber spatula to toss gently to coat. 
  3. Sprinkle in about half to 2/3 of the dry rub mixture and use your hands to massage it into all of the chicken wings, coating evenly. Feel free to use all the dry rub, but for a coating like in the photos, 1/2-2/3 of the mixture does just fine. 
  4. Add chicken wings to the flat cooktop. Cook for ten to fifteen minutes on each side. Until juices are clear when poked with a fork.

MAKE GORGONZOLA SAUCE:

  •  To your food processor or blender, add mayo, buttermilk, sour cream, 1.5 oz of the gorgonzola cheese, garlic, lemon juice, pepper and salt.  Process until smooth.  
  •  Transfer to serving bowl and stir in remaining gorgonzola cheese.  Cover with plastic wrap and refrigerate until ready to use.

http://www.lynnandruss.com

Original recipe from The Chunky Chef

Dark and Stormy–Braised Pot Roast

When I laid eyes upon the full-page photo attached to an article for Boozy Braises in a recent issue of Bon Appétit Magazine, I just knew it had to get on our short list. Here, the humble pot roast gets punched up with the familiar flavors of a Dark and Stormy cocktail. Piqued my interest!

Aged rum and ginger beer form the basis of the braise, with a bit of brown sugar and plenty of chopped fresh ginger playing backup. This potent combination reduces as the chuck cooks to tenderness, creating a complex sauce with just enough kick. And what’s a cocktail without a garnish? Mint and cilantro, along with some lime wedges, give this cozy dish a refreshing finishing touch.

As the article informed, pot roast isn’t a specific cut of meat but rather a method of preparation. And it’s a forgiving dish as long as you choose a cut of meat that can stand up to long cooking without drying out. Cheap, tough cuts are what you’re after, the ones that have a lot of connective tissue and little fat. Think chuck roasts, rounds, and briskets.

These cuts would be chewy if cooked like a steak but are ideal for gentle braising, which allows all those firm muscles and tissues to slowly become tender. A chuck roast is preferred, but rounds and briskets can be used to similar result. If unsure, ask your butcher: Tell them you’re making a pot roast and let them guide you.

We never thought of a pot roast dinner as company-worthy, but this recipe changed our viewpoint. It was hands-down delicious! Our pot roast was only 2 3/4 pounds, less than the 4-pound roast indicated under ingredients. It is often impossible to find one over 3 pounds, so if you are feeding more than four people, you may want to get two smaller chuck roasts. (Make sure they’ll fit in your braising pot.)

A perfect recipe to cook on a long, cold, lazy day in the Winter. Perhaps even enjoy a Dark & Stormy cocktail while the pot roast braises?

Do ahead: Roast can be cooked 3 days ahead. Let cool; cover and chill. Skim fat from surface before reheating, covered, in a 350° oven for at least 30 minutes.

The second time we made this recipe, we had two 2-pound chuck roasts, so we piled them one on top of the other in the braising pot for the first 3 hours of cooking. Then when it was time to remove the cover and brown the meat, we placed them side-by-side (shown above) as the collagen had melted and the size of the roasts had shrunk.

After this second go-around, we changed the amount of the carrots and potatoes from 1 pound to 1 1⁄2 pounds each, which is noted in the Ingredients list below.

Dark and Stormy–Braised Pot Roast

  • Servings: 6-8
  • Difficulty: moderate
  • Print

Ingredients

  • 1 4-lb. boneless beef chuck roast (or 2, 2-lb. roasts)
  • 2 Tbsp. Diamond Crystal or 1 Tbsp. plus ½ tsp. Morton kosher salt, plus more
  • 2 tsp. freshly ground pepper, plus more
  • ¼ cup vegetable oil
  • 2 small onions, finely chopped
  • 2 small celery stalks, finely chopped
  • 10 garlic cloves, finely chopped
  • 1 3″ piece ginger, peeled, finely chopped
  • 2 Tbsp. all-purpose flour
  • ⅔ cup dark rum (such as Goslings)
  • 2½ cups low-sodium beef broth
  • 2 cups ginger beer
  • 3 Tbsp. fresh lime juice
  • 3 Tbsp. Worcestershire sauce
  • 1 Tbsp. light brown sugar
  • 1½ lb. carrots, peeled, cut into 1″ pieces
  • 1½ lb. small yellow potatoes (15–20), scrubbed
  • Mint and/or cilantro leaves with tender stems and/or lime wedges (for serving; optional)

Directions

  1. Place a rack in middle of oven; preheat to 300°. Sprinkle one 4-lb. boneless beef chuck roast all over with 2 tablespoons Diamond Crystal or 1 tablespoon plus ½ teaspoon Morton kosher salt and 2 teaspoons freshly ground pepper. 
  2. Heat ¼ cup vegetable oil in a large ovenproof Dutch oven or other heavy pot over medium-high. Cook roast, turning occasionally, until browned all over, 15–20 minutes. Transfer to a large plate.
  3. Reduce heat to medium and cook 2 small onions, finely chopped, and 2 small celery stalks, finely chopped, in same pot, stirring often and scraping up browned bits stuck to bottom, until golden brown and softened, 9–13 minutes. 
  4. Add 10 garlic cloves, finely chopped, and one 3” piece ginger, peeled, finely chopped, and cook, stirring often, until fragrant, 2–3 minutes. 
  5. Add 2 tablespoons all-purpose flour and cook, stirring constantly, until combined, about 2 minutes. Gradually pour in ⅔ cup dark rum, stirring constantly to prevent clumping, then add 2½ cups low-sodium beef broth, 2 cups ginger beer, 3 tablespoons fresh lime juice, 3 tablespoons Worcestershire sauce, and 1 tablespoon light brown sugar. Increase heat to high and bring to a boil. Cook, stirring occasionally, until sauce is reduced by about one third and thick enough to lightly coat a spoon (it should be the consistency of heavy cream), 15–20 minutes. Taste sauce and season with more salt and pepper if needed.
  6. Remove pot from heat and place roast in center of pot. Arrange 1 pound carrots, peeled, cut into 1” pieces, and 1 pound small yellow potatoes (15–20), scrubbed, around meat, cover, and braise in oven until meat is tender enough to shred in the center without much resistance, 2 1/2 to 3 hours. 
  7. Uncover and turn meat over. Roast until meat is browned on top and sauce thickens slightly, 30–45 minutes. (If roast is browning too quickly, turn over and continue roasting until sauce thickens.) 
  8. Skim as much fat from surface as possible; discard. Top with mint and/or cilantro leaves with tender stems (if using) and serve with lime wedges for squeezing over if desired.

http://www.lynnandruss.com

Recipe by Jesse Szewczyk for Bon Appétit Magazine

Mayo-Roasted Thanksgiving Turkey With Gravy

A turkey dinner with all, or some, of the trimmings is not just for Thanksgiving you know. Growing up, our mother made a turkey dinner several times a year, usually, Christmas, New Years and/or Easter. Our family of seven all loved it, and it is not that complicated. Plus, we loved the leftovers.

Thanksgiving dinner is one of those meals that is revered in our house to this day. There are certain staples that are a must such as, stuffing, mashed potatoes and gravy, cranberry sauce, and of course the star of the show, Mr. Tom Turkey. But we do not hesitate to try out different recipes concerning these staples. For instance, this year we cooked a Mayo-Roasted Thanksgiving Turkey With Gravy recipe from J. Kenji Lopez-Alt.

Some recipes for mayo-roasted turkey promise extra-juicy results with minimal effort. This one does no such thing. The mayonnaise won’t help the turkey stay juicy: Only salting and resting (a light curing process known colloquially as dry-brining) and carefully monitoring its internal temperature as it roasts will. The mayonnaise will, however, produce a turkey with glistening, burnished, golden-brown skin evenly flavored with herbs, no basting required. (Perfect for a photo op!)

The mayo’s viscosity helps it stay in place as it roasts, while the extra protein from egg aids in browning. This recipe will make a little more mayonnaise than you’ll need. Use the excess for leftovers sandwiches, or toss it with roughly chopped vegetables (carrots, broccoli, brussels sprouts, zucchini or squash) before roasting at high heat for 10 to 15 minutes.

To the turkey ingredients we added bay leaves and fresh thyme. These herbs were placed on top of the cubed celery, onion and carrots, with the turkey placed ontop of it all to cook in the sheet pan.

If spatchcocking intimidates, you can cook the turkey whole. Place a baking stone or steel directly on an oven rack set in the lowest position when heating your oven in Step 4. (Let it preheat for at least 45 minutes.) Place the whole turkey, breast-side up on the rimmed baking sheet. Roast as directed in Step 6 for 30 minutes, then reduce heat to 350 degrees, and continue roasting, tenting with aluminum foil if the skin starts brown too quickly, until the breast meat registers 150 degrees at its coolest point and the thigh and leg meat register at least 165 degrees at their coolest point, another 80 to 100 minutes. Remove from oven, transfer turkey to a cutting board as soon as you can handle it, then continue recipe as directed from Step 7. You can make the herb mayo from scratch, if you like. In a tall container just wide enough to fit the head of a hand blender, combine 2 teaspoons Dijon mustard, 3 medium garlic cloves, 1 whole egg, and the zest and juice of 1 lemon. Top with 1 cup neutral oil, such as vegetable, light olive oil or canola, so that the oil forms a distinct layer. Place the head of a hand blender firmly at the bottom of the container. (The garlic cloves should be entirely within the business-end of the blender.) Turn on the blender and, over the course of 15 seconds, slowly pull it up through the oil. A thick, stable mayonnaise should form. Remove the blender, shaking off most of the excess mayonnaise back into the jar. Proceed with the recipe.

Mayo-Roasted Thanksgiving Turkey With Gravy

  • Servings: 10-14
  • Difficulty: moderate
  • Print

Ingredients

For the Turkey:

  • 1 whole turkey, (10- to 14-lb.) backbone removed, neck, giblets and backbone reserved for the gravy (see Notes)
  • 1/2 cup kosher salt, or 6 tablespoons coarse salt
  • 2 celery ribs, diced
  • 1 large onion, diced
  • 1 large carrot, diced
  • 3 bay leaves
  • 6-8 sprigs of fresh thyme

For the Herb Mayo:

  • 1 1/2 cups mayonnaise
  • 1 cup loosely packed fresh parsley leaves, stems reserved
  • 1/2 cup loosely packed fresh sage leaves, stems reserved
  • 2 Tbsp. fresh thyme or oregano leaves, stems reserved
  • 2 scallions, roughly chopped
  • 1 lemon, zested
  • Kosher salt and freshly ground black pepper

For the Gravy:

  • 2 tsp. neutral oil, such as vegetable, light olive oil or canola
  • 2 celery ribs, roughly chopped
  • 1 large onion, diced
  • 1 large carrot, roughly chopped
  • Reserved backbone, and any neck or giblets from the turkey, roughly chopped
  • 1 1/2 quarts homemade chicken or turkey stock
  • Reserved herb stems from the Herb Mayo
  • 2 bay leaves
  • 1/4 cup all-purpose flour
  • 4 Tbsp. unsalted butter
  • 1 Tbsp. soy sauce

Directions

  1. Dry-brine the turkey: Pat the turkey dry with paper towels. Carefully loosen the skin from the breast of the turkey — going in through the neck may be easier here — until you can slide your hand between the skin and the meat. Season each turkey breast with 1 teaspoon salt, spreading it as evenly as possible with your hands. Sprinkle the remaining salt evenly over every surface of the turkey. Place the turkey skin-side up on a rimmed sheet pan, and refrigerate, uncovered, for 12 to 24 hours.
  2. While the turkey dry-brines, make the herb mayo: In a tall container just wide enough to fit the head of a hand blender (or using a regular blender or food processor), combine the mayonnaise with the parsley, sage, thyme, or oregano, scallions, lemon zest, and 1 tablespoon water. Season generously with salt and pepper. Use the hand blender to blend until it all forms a relatively smooth, pale-green sauce. Transfer to a sealed container until ready to use. You should have about 1¾ cups of herb mayo. (You can make the mayo in advance for up to a week and keep it in the fridge.)
  3. Roast the turkey: Take the turkey out of the refrigerator to let it rest as the oven heats. Adjust the oven rack to a lower-middle position and heat the oven to 425 degrees for a 10- to 12-pound bird or 400 degrees for a 12- to 14-pound bird. Line a sheet pan with aluminum foil. Scatter the diced celery, onion, and carrot over it. Place a cooling rack directly on top of the vegetables, then place the turkey on top, skin-side down.
  4. With your hands, slather ½ cup of the herb-mayo mixture over the exposed side of the turkey, making sure to lightly coat every surface. Flip the turkey skin-side up. Spread the legs out to the sides (they should remain skin-side up) and tuck the wing tips behind the breast. With your hands, spread a couple of tablespoons of the herb mayo between the skin and meat of the breast. Generously slather the rest of the turkey with the herb mayo, getting it into every crack and crevice. (Reserve any remaining herb mayo for your day-after-Thanksgiving sandwiches.)
  5. Transfer the turkey to the oven and roast until the breast meat registers 150 degrees at its coolest point (typically the deepest point of the breast next to the breastbone) and the thigh and leg meat register at least 165 degrees at their coolest point (typically the center of the joint between the drumstick and thigh or thigh and hip), 80 to 90 minutes, rotating halfway through. (You may want to start checking the turkey’s internal temperature after about 1 hour.) If any of the skin starts to darken too much during roasting, tent darker areas loosely with aluminum foil. Remove from oven, transfer to a cutting board, and let it rest.
  6. While the turkey cooks, make the gravy: Heat the oil in a large saucepan over high until lightly smoking. Add the celery, onion, carrot, and turkey parts, and cook, stirring occasionally, until lightly browned, about 15 minutes. Add the stock, herb stems and bay leaves. Bring to a simmer and cook gently until reduced by about half, or until the turkey is done.
  7. After removing the turkey from the oven, strain the stock mixture through a fine-mesh strainer into a large bowl. Tilt and strain any collected liquids from the turkey-roasting tray into the same bowl. Discard the vegetables at the bottom of the tray. Skim off and discard most of the excess fat from the liquid.
  8. Heat the flour and butter in a medium saucepan over medium, stirring constantly with a whisk until the mixture is golden brown. Ladle the stock mixture into the saucepan, about a 1/2 cup at a time, whisking until smooth after each addition. Once all the stock is added, bring the gravy to a simmer until your desired consistency, stir in the soy sauce, and season to taste with salt and pepper.
  9. Carve and serve the turkey with the gravy.

http://www.lynnandruss.com

Slightly altered recipe by J. Kenji Lopez-Alt for NYTimes Cooking

Roasted Sweet Vidalia Pork Loin

For quite a fancy spread, this elegant dinner comes together in not much more than an hour. The sweet Vidalia onions break down into luxurious softness, while the apple slices (we used Ruby Frost) and garlic render down and provide additional layers of flavor to the onion mixture.

Served with garlicky mashed potatoes and steamed broccoli, it was a complete and satisfying meal. We had plenty leftover so we plan to get two additional meals from it. One, a pork fried rice dish, and the other we’ll just simply reheat the leftovers as they are, and enjoy the meal all over again!

Roasted Sweet Vidalia Pork Loin

  • Servings: 6-8
  • Difficulty: easy
  • Print

Ingredients

  • 1 center-cut pork loin, (3 lbs.)
  • Kosher salt and freshly cracked black pepper
  • 3 Tbsp. olive oil
  • 3 Vidalia onions, sliced into thin half-moons
  • 1 apple, sliced thick
  • 1 tsp. caraway seeds
  • 1 tsp. dried thyme
  • 4 cloves garlic
  • 3/4 cup chicken stock
  • 1/2 cup hard apple cider, or beer
  • 1 Tbsp. Dijon mustard
  • 1 Tbsp. unsalted butter
  • 1/4 cup fresh flat-leaf parsley, chopped

Directions

  1. Preheat the oven to 375 degrees F.
  2. Generously sprinkle all sides of the pork loin with salt and pepper. Place a braiser or shallow Dutch oven over medium-high heat. Add 2 tablespoons of the oil and heat until shimmering. Carefully put the pork in the pan. Sear until deeply golden on all sides, 1 to 2 minutes per side. Remove from the pan.
  3. Put the onions and apple in a large mixing bowl. Add the caraway seeds, dried thyme, remaining 1 tablespoon oil, 1 teaspoon salt and 1/2 teaspoon pepper and toss to coat. Transfer the mixture to the bottom of the braiser and nestle in the garlic cloves. Pour in 1/4 cup of the chicken stock and place the pork back on top. Put in the oven.
  4. About 20 minutes into the roasting time, turn the apple and onion mixture, leaving the pork loin alone. Continuing cooking the roast until the pork reaches an internal temperature of 145 degrees F, about 30 minutes. (Ours took 40 minutes to come to temperature.)
  5. Transfer the pork to a cutting board to rest while you make a pan sauce. Remove the apple and onion mixture to a platter
  6. Return the braiser to the stove over medium-high heat. Pour in the hard cider and remaining 1/2 cup chicken stock. Cook, scraping with a spatula to remove any brown bits from the bottom of the pan. Whisk in the mustard. Allow the sauce to simmer until reduced slightly, a couple of minutes. Add the butter, whisking until melted. Cook just until the sauce is shiny and slightly thickened, about 5 minutes. Taste and season with more salt and pepper if needed.
  7. Slice the pork and arrange the slices over the onion and apple mixture. Top with sauce and chopped parsley.

http://www.lynnandruss.com

Adapted from a recipe by Trisha Yearwood

Top Sirloin and Veggie Kebabs

When selecting the type of beef to make your kebabs, you have unlimited choices but ultimately you want your beef on the skewer to be tasty, tender and not bust your wallet. For those looking for great flavor on a budget, sirloin tips work well if they are marinated ahead to make them more flavorful. 

Sirloin steaks are usually cut about an inch thick to begin with, have little fat, and have a beefy flavor a little more delicate than other cuts. This allows you to get the full flavor of the marinade with a nice underlying beefiness that isn’t over powering. Top sirloin is the perfect steak for these kebabs.

Therefore, we recommend sticking with top sirlion or New York Strip since it’s more lean than some other steaks leaving you with nice uniform cubes and not a lot of excess fat. It has great flavor and comes out tender when marinated and properly cooked.

Because the meat and the veggies need different amounts of time to cook, we thread them onto to separate skewers. If at all possible, use metal skewers because they contribute to cooking the meat from the center as they pick up heat from the exposed parts and conduct it throughout.

It is a good idea not to crowd your metal skewers with pieces of food to expose more surface area for the food to caramelize. Doing this on a wooden skewer runs the risk of burning the skewers and losing food into the grill.

Want the perfect side dish to compliment your kebabs? Try Toasted Orzo Pasta Recipe with Garlic, Parmesan and Sun-dried Tomatoes.

Top Sirloin and Veggie Kebabs

  • Servings: 4-6
  • Difficulty: easy
  • Print

Ingredients

  • 3⁄4 cup olive oil
  • 3⁄4 cup balsamic vinegar
  • 2 Tbsp. Dijon mustard
  • Kosher salt
  • Freshly ground black pepper
  • 2 Tbsp. minced fresh rosemary
  • 1 1⁄2 lbs. top sirloin steak, cut into 1 1⁄2″ cubes
  • 8 oz. baby bella mushrooms, stems removed
  • 10 cocktail tomatoes
  • 1 each red and yellow pepper, stemmed, seeded and cut into 1 1⁄2 pieces
  • 1 large red onion, root intact, sliced into 12 wedges

Directions

  1. Whisk oil, vinegar, mustard, and rosemary into a large bowl. Season with salt and pepper. Add steak to ziploc bag, pour in half of the marinade, mix to coat. Transfer to the refrigerator to marinate for a minimum of 1 hour and up to 8 hours, turning occasionally.
  2. In another ziploc bag, add all of the vegetables and the remaining half of the marinade. Transfer to the refrigerator to marinate for a minimum of 1 hour and up to 8 hours, turning occasionally.
  3. If using bamboo skewers, soak 16 in water for at least an hour.
  4. To assemble vegetable skewers: Start with a piece of red bell pepper, onion wedge, yellow pepper, mushroom, and so on until the vegetables are used up.
  5. On the meat skewers: Thread 7 pieces of beef onto 4 metal skewers (more if needed).
  6. Preheat the grill on high for 15 minutes. Reduce heat to medium-high and clean and then oil grates. Add vegetable skewers and cook for 4 minutes and then flip skewers.
  7. Add the meat skewers, cook for another 4 minutes, then turn.
  8. Baste all skewers a few times with the leftover marinade as you cook.
  9. Continue cooking for additional 2-3 minutes until an instant thermometer registers 130° on the meat.
  10. Transfer to serving plate. Garnish with fresh rosemary if desired.

http://www.lynnandruss.com

Sweet and Spicy Grilled Flank Steak

With the end of summer holiday on the horizon, a grilled steak is always a fan favorite. While there are some steaks that need nothing more than a little salt and pepper to bring out their beefy goodness, flank steak is not one of them.

This bold marinade is just the sort of seasoning the brawny cut begs for: lime juice and zest add brightness, brown sugar sweetness, and jalapeño and sriracha a complex heat. Just whiz it all together in a food processor and slather it on the meat.

Marinate overnight preferably, or a minimum of 2 hours, before tossing it on the grill. Lastly, always make more flank steak that you think you want. Leftovers are the best part—we used ours as part of a steak salad. For an extra boost of flavor, try adding 1/4 cup of bourbon and a little Worcestershire.

Sweet and Spicy Grilled Flank Steak

  • Servings: 3-4
  • Difficulty: easy
  • Print

Ingredients

  • 3 Tbsp. scallions, coarsely chopped
  • 1 Tbsp. ginger root, peeled and finely chopped
  • 1 fresh jalapeño chile pepper, seeded and chopped
  • 2 cloves garlic, finely chopped
  • 1 Tbsp. light brown sugar
  • 1/2 lime, zested and juiced
  • 2 tsp. lime juice
  • 1 tsp. sriracha, or other hot sauce
  • 2 Tbsp. extra virgin olive oil
  • 1 1/2 tsp. kosher salt
  • 1 1/2 lbs. flank steak

Directions

  1. In a food processor, pulse together scallions, ginger, jalapeno, garlic, sugar, lime zest and juice, and sriracha. With the motor running, pour in oil until smooth
  2. Season steak with salt. Place in a large bowl and pour marinade over meat. Turn to coat well with the mixture. Cover tightly and refrigerate for at least 2 hours or overnight.
  3. When ready to cook the steak, heat the grill to medium-high heat. Transfer the meat to the grill and cook, covered, until it reaches the desired doneness (about 5 minutes per side for medium-rare). Let rest on a cutting board for 5 minutes, then slice thinly.

http://www.lynnandruss.com

Original recipe from NYTimes Cooking

Grilled Corn, Avocado and Chicken Salad With Feta Dressing

With the last gasps of the unofficial summer calendar closing in on us, let the season’s bounty shine on the plate. And to that end, this lively salad of corn, scallions, jalapeño and avocado tossed with a tangy buttermilk-feta dressing is like summer on a plate. The sweetness of peak-summer corn and the richness of creamy avocado balance out the tartness of the dressing.

While this recipe from NYTimes Cooking could be a side dish or a vegetarian main, we opted to add a protein to give it more heft as an entrée. In that vein, we grilled some chicken breasts with a Japanese 7-spice rub, but grilled shrimp or salmon would work wonderfully also. And to save time on dinner day, we grilled the chicken the day before while barbecuing other items.

The directions below are for the full recipe which allows for 4 to 6 portions. But with just the two of us, we cut most of the recipe in half, while altering quantities of other ingredients as we saw fit. After eating two healthy servings, we still had some leftover for lunch the following day.

Grilled Corn, Avocado and Chicken Salad With Feta Dressing

  • Servings: 4-6
  • Difficulty: easy
  • Print

Ingredients

  • 4 boneless, skinless chicken breast halves, rubbed with spices of your choice (optional)
  • 6 ears corn (about 3 lbs.), shucked and silk removed
  • 1 bunch scallions, trimmed
  • 1 jalapeño, stemmed and halved lengthwise
  • 3 Tbsp.olive oil
  •  Kosher salt and black pepper
  • 4 oz. feta cheese, crumbled (about 3/4 cup)
  • ⅓ cup buttermilk
  • 1 tsp. freshly grated lemon zest plus 1 Tbsp. lemon juice
  • 1 small garlic clove, grated
  • ¼ cup sliced fresh chives
  • ¼ cup finely chopped fresh parsley
  • 1 medium head romaine lettuce, torn into bite-size pieces (about 8 cups)
  • 2 avocados, sliced

Directions

  1. If a protein is desired, grill chicken (or shrimp, salmon) until done. This can be done a day ahead and refrigerated until ready to use.
  2. Heat a grill or grill pan over medium-high. Brush corn, scallions and jalapeño with the oil and season with salt and pepper.
  3. Arrange on the grill and cook, turning occasionally, until corn kernels are browned in spots, 6 to 8 minutes, and the scallions and jalapeño are charred all over and tender, 9 to 10 minutes.
  4. Transfer vegetables to a cutting board and let cool slightly.
  5. In a medium bowl, using a whisk (I used a pestle), mash the feta into a coarse paste. Whisk in buttermilk, lemon zest and juice and garlic, then stir in chives and parsley.
  6. Finely chop the charred jalapeño and stir it into the feta dressing; season with salt and pepper.
  7. In a large bowl, toss lettuce with half the feta dressing and arrange on a platter. Cut corn kernels off the cob and slice scallions into bite-size pieces. Arrange avocado slices, corn and scallions on top of the lettuce.
  8. Serve with remaining dressing.

http://www.lynnandruss.com

Adapted from a recipe by Sue Li for NYTimes Cooking

Bean and Vegetable Salad with Potlikker Vinaigrette

This cold-weather salad from chef Carla Hall hits all the notes: sweet, savory, spicy, and salty—with a bit of crunch from the squash seeds. Here, Hall uses her Country Ham Potlikker as an umami-rich base for a spicy vinaigrette that gets its silky texture from blended cannellini beans. 

But the thing is, most people are not going to have this potlikker broth on hand. We had some leftover from our Smothered Pork Chops dinner in which you had to pre-make the Country Ham Potlikker. Our suggestion is to use a mix of oil and vinegar instead, you won’t have that smoky ham flavor, but you will be keeping the meal vegetarian.

*We decided to roast our fennel slices since I didn’t shave them thin enough. Basically, place the fennel on a rimmed baking sheet, drizzle olive oil all over, sprinkle with salt and pepper, rub it all together with your hands, then roast for about 30-35 minutes in a 400° oven. This can be done ahead of time, simply cover the roasted fennel with foil until ready to mix in with the other ingredients.

Bean and Vegetable Salad with Potlikker Vinaigrette

  • Servings: 6
  • Difficulty: easy
  • Print

Ingredients

  • 1/4 cup apple cider vinegar
  • 1/4 cup chilled Country Ham Potlikker
  • 1 tsp. yellow mustard
  • 1 15-oz. can cannellini beans, rinsed, divided
  • 1/3 cup extra virgin olive oil
  • 2 tsp. Diamond Crystal, or 1 1/4 tsp. Morton kosher salt, plus more
  • Freshly ground black pepper
  • 2 medium delicata squash, halved, seeds removed and reserved, sliced crosswise 1/2″ thick
  • 3 extra-virgin olive oil, divided
  • 1/4 tsp. cayenne pepper
  • 1 large sweet-tart apple, (such as Honeycrisp), cored, quartered, sliced 1/4″ thick
  • 1 large fennel bulb, quartered, shaved in very thin slices (*See note above for roasting option)
  • 1 15-oz. can kidney beans, rinsed
  • 1/4 cup chopped parsley

Directions

  1. Blend vinegar, potlikker (or substitute), mustard, and ¼ cup cannellini beans in a blender until smooth. With the motor running, stream in vegetable oil; blend until emulsified. Season vinaigrette with salt and pepper.
  2. Place racks in upper and lower thirds of oven; preheat to 400°. Divide sliced squash between 2 rimmed baking sheets; drizzle 2 Tbsp. olive oil over. Sprinkle with 2 tsp. Diamond Crystal or 1¼ tsp. Morton kosher salt; season with pepper. Roast 15 minutes.
  3. Meanwhile, rinse squash seeds and pat dry. Toss seeds with cayenne and remaining 1 Tbsp. olive oil in a small bowl; season with salt.
  4. Sprinkle seeds over squash. Continue to roast until squash is golden brown and tender, 13–15 minutes more.
  5. Combine squash and seeds, apple, fennel, kidney beans, and remaining cannellini beans in a large bowl. Toss with ½ cup vinaigrette. Taste and add more vinaigrette if needed. Add parsley, season with salt, and toss again.
  6. Transfer salad to a platter; serve any remaining vinaigrette alongside.

http://www.lynnandruss.com

Recipe from Carla Hall for Bon Appétit

Rustic Sausage and Fennel Meatloaf with Gravy

A few years back, Fine Cooking published an article showcasing a variety of meatloaf recipes. It also instructed how to build your own loaf based on items from specific categories. From those, I made this rustic version, which is a blend of the two. It was surprisingly light and not dense as some meatloaves can be.

We also wanted a gravy, so, in lieu of a loaf pan, we cooked the meatloaf in a large, heated cast-iron skillet to facilitate browning on the bottom as well as the top and sides. When finished cooking, this provided some tasty drippings for the base of the gravy.

Of course, since this serves up to eight meals, we sliced one half for two separate dinners, freezing the other half for another time.

Rustic Sausage and Fennel Meatloaf with Gravy

  • Servings: 8-10
  • Difficulty: moderate
  • Print

Ingredients

  • 4 Tbsp. canola or olive oil, divided
  • 1 medium yellow onion, chopped small
  • 1/2 small fennel bulb, core removed and chopped small (save some fronds for garnish, if desired)
  • 3 large cloves garlic, finely chopped
  • 3/4 cup dry white wine
  • 4 oz. medium-coarse white bread, such as Italian or French, cut into 2-inch pieces (about 2-1/2 cups)
  • 1 cup whole milk
  • 2/3 lb. bulk sweet sausage
  • 2/3 lb. ground beef
  • 2/3 lb. ground veal
  • 2 large eggs
  • 1/2 cup finely grated Parmigiano-Reggiano
  • 1/4 cup chopped fresh parsley
  • 1 Tbsp. Worcestershire sauce
  • Kosher Salt
  • Freshly ground black pepper

Gravy

  • Pan drippings from meatloaf
  • 4 Tbsp. butter
  • 3 cups beef broth, heated
  • 1 small shallot, minced
  • 1 garlic clove, minced
  • 3/4 tsp. thyme, minced
  • 6 Tbsp. flour
  • 1/2 tsp. Worcestershire sauce

Directions

  • Heat 2 Tbs. of the oil in a 10- to 12-inch skillet over medium-low heat. Cook the onion, fennel and garlic, stirring frequently, until softened and just beginning to brown, about 8 minutes.
  • Add the white wine, and simmer briskly, until almost dry, 4 to 5 minutes. Transfer to a large bowl and let cool until warm.
  • In a shallow dish that holds it in a single layer, soak the bread in the milk, flipping once, until soggy but not falling apart, 5 to 10 minutes, depending on the coarseness and freshness of the bread. Lightly squeeze a handful of bread at a time to remove some of the milk (it should be wet but not drenched). Finely chop and add to the bowl with the onion mixture.
  • Position a rack in the center of the oven and heat the oven to 375°F.
  • Add the beef, veal, and sausage and eggs to the onion mixture. Scatter the Parmigiano, and parsley over the meat, and then sprinkle with the Worcestershire, 2-1/4 teaspoon salt, and 1/2 teaspoon pepper. Use your hands to gently mix all the ingredients until just combined; try not to compact the mixture as you do this.
  • Heat 2 tablespoons oil in a large cast-iron skillet. Form a rectangular block from the meatloaf mixture that will fit into your skillet. Carefully transfer the meatloaf into the hot skillet and put the skillet into the preheated oven. Bake until an instant-read thermometer registers 160°F in the center of the meatloaf, 40 to 55 minutes. (Ours was done at 45 minutes.) Remove the meatloaf to a platter and cover with foil while you make the gravy.
  • Add enough butter to the pan drippings to equal 6 tablespoons. (We had 2 tablespoons in the pan so we added 4 tablespoons of butter.) Sauté the minced shallot in the fat and drippings until it softens.
  • Add garlic and thyme and sauté another 30 seconds.
  • Stir in flour and cook for 2 minutes. Whisk in hot broth and Worcestershire sauce. Scrape up any browned bits and smooth out lumps.
  • Simmer gravy 10-15 minutes. Taste and adjust seasonings.
  • Arrange 1-inch slabs of meatloaf on the platter, top with gravy. Serve extra gravy at the dinner table.
Serve with mashed potatoes and a side veg.

http://www.lynnandruss.com

Loosely adapted from a recipe by Allison Ehri Kreitler for Fine Cooking

Chili-Rubbed Rib-Eye Steak with Corn & Green Chile Ragoût

Who doesn’t love a fabulous grilled rib-eye? These spice-rubbed steaks get a nice kick from a poblano pepper. Poblanos vary a lot in spiciness, so taste yours before you add it to the pan and hold back a bit if it’s too hot. If you want more heat, add a minced jalapeño along with the poblano.

With company for dinner, we needed four steaks and just happened to have two boneless, and two bone-in which were thinner than the boneless cuts, so the cooking times varied slightly for each thickness. Choose your weapon, but try to keep all rib-eyes a minimum of 1-inch thick. And yes, we did double the corn ragoût also.

Twenty-four hours before dinner prep, we dry-brined the steaks with the spice rub, placed them on a rack in a rimmed baking sheet, and left them uncovered overnight in the refrigerator. A hour before grilling, let them sit a room temperature.

For a timer-saver on dinner night, make the corn ragoût the day prior, up to the point of reducing the cream. Once it is cooled, store the corn mixture in the fridge until ready to use, microwave until hot, then stir in the chopped sun-dried tomatoes and lime juice.

NOTE: If you don’t have a grill you can also pan-sear these steaks: Before making the corn ragoût, heat the 2 tsp. of oil in a 10-inch cast-iron  or heavy-duty skillet over high heat until very hot. Add the steaks, reduce the heat to medium high, and cook until they are well browned and done to your liking, about 3 min. per side for medium rare. Transfer to a plate and cover loosely to keep warm while you make the ragoût in the same pan. You could also use New York strip or skirt steaks, though cooking time will vary.

Chili-Rubbed Rib-Eye Steak with Corn & Green Chile Ragoût

  • Servings: 2
  • Difficulty: easy
  • Print

Ingredients

  • 1 tsp. chili powder
  • 1 tsp. ground coriander
  • 1 tsp. kosher salt; more to taste
  • Two 8-oz. boneless beef rib-eye steaks (about 3/4 inch thick)
  • 2 tsp. canola or other vegetable oil
  • 1 small poblano or other mildly hot fresh chile (Anaheim or Italian frying pepper), seeded and cut into 1/4-inch dice (about 1/2 cup)
  • Freshly ground black pepper
  • 1 generous cup fresh corn kernels (from 2 medium ears)
  • 1/2 cup heavy cream
  • 1 Tbs. minced oil-packed sun-dried tomatoes (from 2 medium tomato halves)
  • 1 Tbs. fresh lime juice

Directions

  1. In a small bowl, mix the chili powder, coriander, and salt. Rub the mixture on the steaks.
  2. Place steaks on a rack in a rimmed baking sheet, and refrigerate uncovered overnight for up to 24 hours.
  3. Remove steaks from refrigerator one hour before placing on a hot grill.
  4. Heat a gas grill to medium high or prepare a medium-hot charcoal fire. Drizzle the steaks with oil and grill, turning once, until medium rare, 3 to 4 minutes per side (perhaps longer depending on thickness of steaks). Transfer to a plate and cover loosely to keep warm.  
  5. Meanwhile, heat the oil in a 10-inch skillet over medium heat. Add the chile, season with salt and pepper, and cook over medium-high heat, stirring frequently, until softened and starting to brown, about 2 minutes. Add the corn and continue to cook until it’s slightly browned, 1 to 2 minutes more. Add the cream and boil until it has reduced and the mixture is thick, 1 to 2 minutes. (This step can be done a day ahead. After cooled, cover and refrigerate, rewarming in microwave when ready for the next step.)
  6. Remove from the heat, stir in the sun-dried tomato, lime juice, and the accumulated juices from the steak. Taste and add more salt and black pepper, if you like. Serve the rib-eyes whole or slice them and arrange on plates. Serve immediately, with the corn ragoût on top or alongside.

http://www.lynnandruss.com

Adapted from a recipe by Martha Holmberg for Fine Cooking

Potato and Poblano Corn Chowder

As corn season ends, we ramp our efforts to utilize those tasty kernels in as many ways as possible. Chowder is a fabulous fallback especially as the summer temps start to wane and crisp, cool nights creep in. This riff from Fine Cooking incorporates a poblano chili, with ours yielding a full cup, once chopped down.

When it comes to the broth, we used homemade chicken stock, which adds oodles of flavor by itself. If you don’t have any homemade on hand, jarred Better Than Bouillon is a decent brand for either chicken or vegetable broth.

While you could make this spicy take on corn chowder with frozen corn, it’s best with fresh. And since we prefer a kick, I added a healthy pinch of cayenne along with a generous squeeze of fresh lemon at the end.

Potato and Poblano Corn Chowder

  • Servings: 4
  • Difficulty: easy
  • Print

Ingredients

  • 3 Tbsp. unsalted butter
  • 1 medium yellow onion, coarsely chopped (about 1 cup)
  • 1 poblano, seeded and coarsely chopped (about 1/2 cup)
  • 1 medium carrot, peeled and coarsely chopped (about 1/3 cup)
  • 1 medium rib celery, thinly sliced (about 1/3 cup)
  • 1/2 tsp. ground coriander
  • 1/2 tsp. ground cumin
  • 1/2 tsp. chopped fresh thyme
  • Kosher salt and freshly ground black pepper
  • 2 Tbsp. all-purpose flour
  • 1 Tbsp. tomato paste
  • 2 cups lower-salt vegetable or chicken broth
  • 1-1/2 cups whole milk
  • 1 medium red potato (about 8 oz.), cut into 1/2-inch chunks
  • 2 cups fresh corn kernels (from about 3 cobs)
  • 1 Tbsp. fresh lemon juice
  • Cayenne, to taste

Directions

  1. Melt the butter in a large Dutch oven or similar pot over medium heat. Add the onion, poblano, carrot, celery, coriander, cumin, thyme, 1 tsp. salt, and 1/4 tsp. pepper, and cook, stirring occasionally, until the onion is translucent, about 6 minutes.
  2. Sprinkle the flour over the vegetables, and cook, stirring constantly, for 30 seconds.
  3. Stir in the tomato paste, and then add the broth and milk. Add the potatoes and corn, and bring to a simmer over medium-low heat. Cover, reduce to a low simmer, and cook, stirring occasionally, until the potato is tender, about 15 minutes.
  4. Using a potato masher, slightly mash the vegetables in the pot to thicken the chowder to your desired consistency.
  5. Add the lemon juice, and season to taste with cayenne, salt, and pepper.

http://www.lynnandruss.com

Recipe by Ivy Manning for Fine Cooking

Grilled Italian Sausages, Onions, Peppers and Potatoes

Simple, easy, delicious, there is no more reliable guest at a cookout than sausage, roasted over the open fire. But before you grill the meat, get some peppers, onions and potato slices soft and dark and fragrant in the heat, and use these as a bed on which to serve the links.

Well, the best laid plans… right? Our grilling hopes were dashed by a torrential day-long tropical storm soaking. I can’t really complain because we were in dire need of some precip for the gardens and lawn. That’s why it’s important to formulate a Plan B, in this case, “grilling” indoors.

To bulk up the meal, we included sliced Yukon gold potatoes. They were a perfect compliment to the roasted onions and peppers, and were crispy on the outside while remaining creamy on the inside.

Grilled Italian Sausages, Onion, Peppers and Potatoes

  • Servings: 3-4
  • Difficulty: easy
  • Print

Ingredients

  • 2 sweet peppers (green, red or yellow) seeded and cut into eighths
  • 1 large yellow onion, peeled and cut into large coins
  • 4 medium Yukon gold potatoes, sliced about 3/8″ thick (we only used 2 potatoes)
  • 2 Tbsp. extra-virgin olive oil, more to taste
  • 1/2 teaspoon salt
  • 2 tsp. dried oregano
  • 4 links (about 1 lb.) sweet/mild Italian sausages

Directions

  1. For a gas grill, turn all burners to high, lower cover and heat for 15 minutes, then turn burners to medium.
  2. Meanwhile, toss peppers, onions and potatoes with oil and dried oregano, and sprinkle with salt. Lightly prick sausages all over so that they do not burst.
  3. Put peppers, onions and potato wedges in a grill basket on the grill, turning occasionally until they are softened and dark at the edges, 10 to 12 minutes. Move them to the cooler side of the grill.
  4. Place the sausages on the hot side of the grill, cover and cook, turning occasionally until they are cooked through, 8 to 10 minutes.
  5. Transfer the vegetables to a platter and top with the sausages. Drizzle with olive oil and serve.
  1. OR PLAN B: if you have to cook indoors, rub a rimmed baking sheet lightly with oil, put the pan in the oven and preheat to 450°.
  2. Once the oven comes to temperature, spread the oiled veggies in a single layer on the hot baking sheet and return to the oven. Cook for 15 minutes.
  3. Remove pan from oven, flip each morsel over, rotate the pan 180° and continue cooking another 15 minutes.
  4. Meanwhile, heat a large cast-iron skillet over medium-high heat until very hot. Add a teaspoon or two of olive oil and place the links in the hot skillet. Cook for 10-12 minutes total, turning a few times to brown all over. You may have to put a lid on the pan for a few minutes to make sure the links reach 155°.
  5. Place roasted veggies on a platter and top with sausage links.

http://www.lynnandruss.com

Lightly based on a recipe by Sam Sifton of the NYTimes