All posts by LynnHoll

Unknown's avatar

About LynnHoll

I have been an artist and designer all my life incorporating graphic design for websites, gardens, publications, fabrics, interior design and cooking. I am now retired from my professional job, but still create artistic visions in all forms on a daily basis.

Dessert To Die For!

Cinnamon Roll Cheesecake. Okay, if I’m honest, no dessert is worth perishing over, especially given the fact that I rarely eat it. But when I first saw this posting on FB, it screamed “try me,” and it seemed many of you agreed. This cheesecake from MyIncredibleEdibles.com is just as incredible as it sounds—a thick creamy cheesecake with cinnamon throughout and drizzled with cream cheese icing.

Now the bad news… It took an additional 45 minutes—that’s 50% longer—to come to 150° in the 200° oven, a total of 2 hours and 15 minutes! So take the timing with a grain of salt. (We think our oven is on the fritz, and we may be replacing it soon.) It is tricky trying to determine exactly when a cheesecake is done. It will still appear jiggly in the middle, but not overly so. Take a look at this quick video:

The secret to testing a cheesecake for doneness: Jiggle it. Gently shake the cheesecake. If the cheesecake looks nearly set and only a small circle in the center wobbles slightly, it’s done. Also, you can tell if a cheesecake is done by checking the internal temperature with a quick-read thermometer. Stick the probe halfway into the cake—a baked cheesecake should read 150ºF.

An underbaked cheesecake will ripple and wobble noticeably. The key to a perfect cheesecake is a subtle wiggle—not a sloshy jiggle. You might worry a runny middle means raw cheesecake, but it’s totally safe and normal. The center will firm up as it cools on a cooling rack, then sets in the fridge overnight.

The filling will reach to the top of the springform pan and might even puff over the sides a bit while in the oven. But after it rests and cools in the fridge, it will settle somewhat. Use a sharp knife to run around the inside edge before removing the pan. Then pipe on your icing creating a design or an abstract effect.

A couple of tips to remember: You are going to want to wrap the cheesecake in plastic wrap and let it chill overnight or a minimum of 8 hours.
When you go to serve the slices, always have a hot washcloth nearby to be able to wipe the knife clean after each cut, it makes for a much more beautiful piece!

Cinnamon Roll Cheesecake

  • Servings: 14
  • Difficulty: moderate
  • Print

Ingredients

Crust:

  • 2 cups graham cracker crumbs
  • 4 Tbsp. brown sugar
  • 1 tsp. ground cinnamon
  • 5 Tbsp. butter- melted

Cinnamon Crumble:

  • 1 cup brown sugar-packed
  • 1 Tbsp. ground cinnamon
  • 6 Tbsp. flour
  • 6 Tbsp. butter-melted

Cheesecake Filling:

  • 4 8-oz. packs of cream cheese-softened
  • 1 cup granulated sugar
  • 3 Tbsp. flour
  • 2 tsp. vanilla extract
  • 5 eggs, room temperature
  • ¾ cup heavy whipping cream

Cream Cheese topping:

  • 1 Tbsp. butter, softened
  • 1 oz. cream cheese, softened
  • ¼ tsp. vanilla extract
  • ¾ cup powdered sugar
  • 1 ½ Tbsp. heavy whipping cream

Directions

  1. Preheat your oven to 350 degrees Fahrenheit and grease a 9” springform pan with non-stick spray and set aside.
  2. Start with the crust by adding about 1 package + 3 sheets of graham crackers into a food processor. Pulse until you get a fine crumb. Add in all remaining crust ingredients and pulse until well combined.
  3. Pour the crust mixture into the bottom of the prepared springform pan and using a clean hand or a spatula, press down to form the crust. Be sure to take some up the sides of the pan as well.
  4. Bake on 350 for about 10 minutes.

Cinnamon Crumble:

  1. Combine all ingredients into a medium size bowl and use a fork to combine them until you have a nice crumble. Set aside.

Cheesecake Filling:

  1. Start by adding your room temperature cream cheese into the bowl of a stand mixer equipped with a paddle attachment. Cream until light and fluffy and you do not see any bumps. Add sugar and flour and mix for about 1 minute.
  2. While the mixture is on low speed, add vanilla extract and each egg one at a time. Allow each egg to combine fully before adding the next.
  3. Once all the eggs are combined, set your mixture to a medium-high speed and mix for 5 minutes. After 5 minutes, add in the heavy whipping cream and mix for an additional 1-2 minutes.
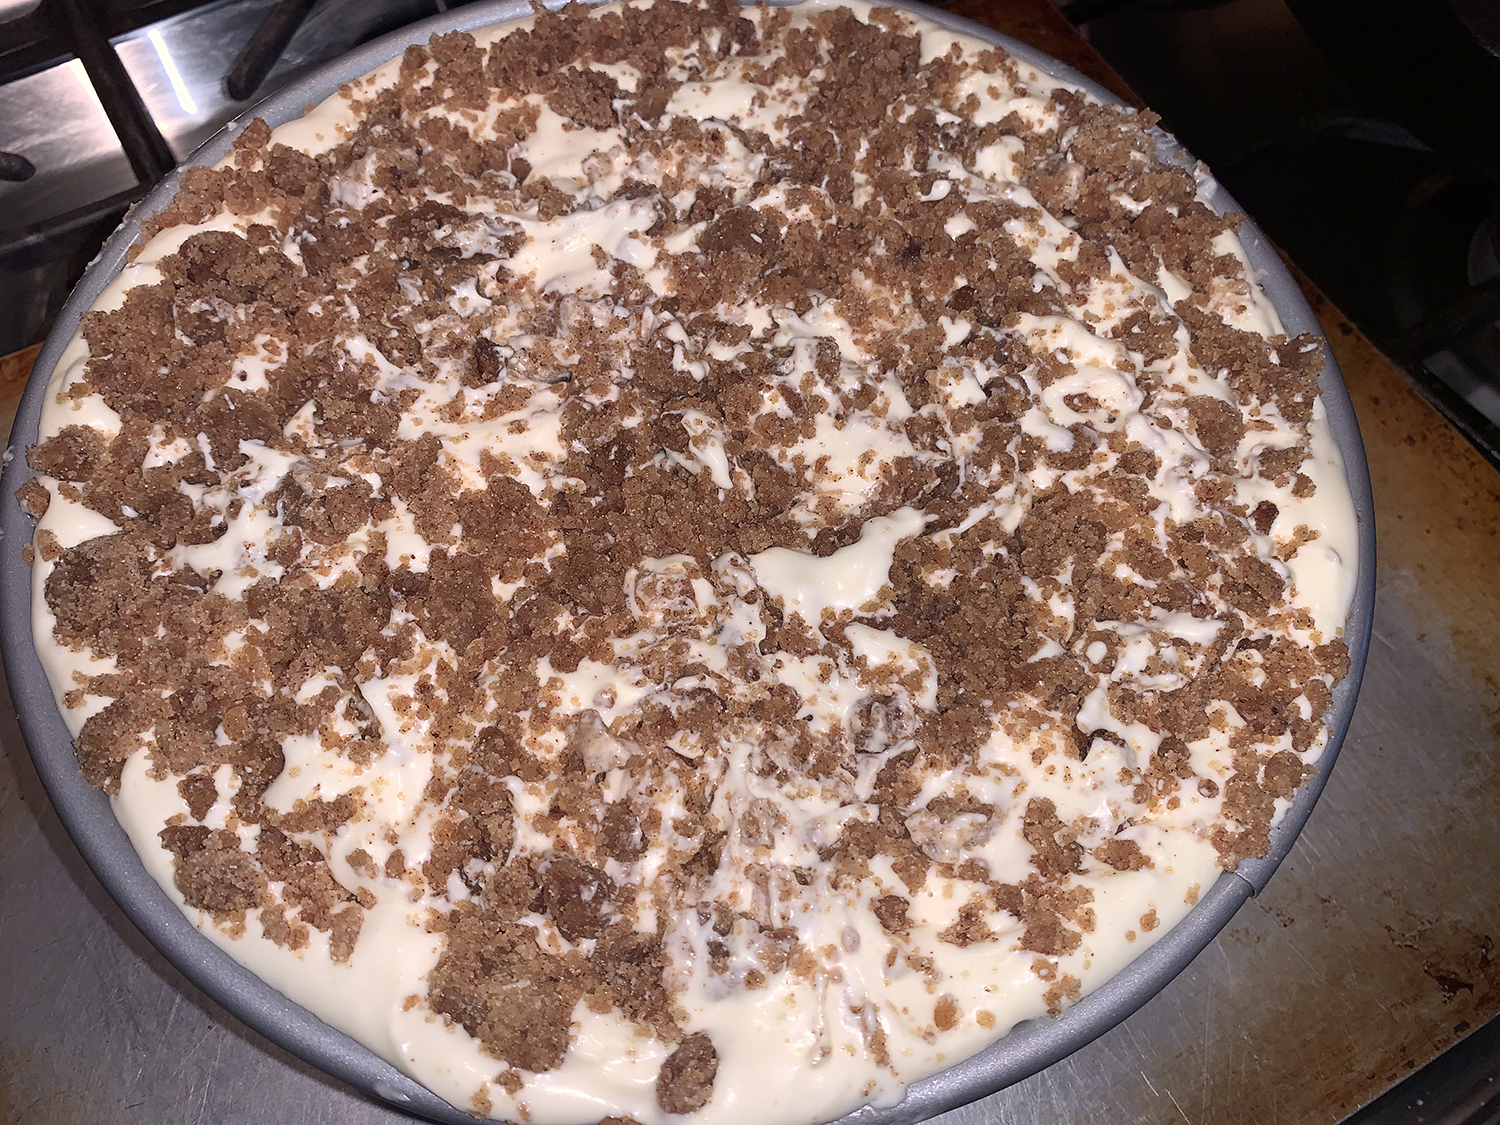
  4. Pour about 1/3 of the cheesecake filling into the prepared crust. Top with about 1/3 of the crumble mixture using your fingers to crumble into small pieces. Add another layer of cheesecake filling and continue for two more layers. Add the remaining crumble to the top of the cheesecake.
  5. Place the cheesecake in the center of your oven and bake at 350 for 15 minutes then reduce the heat to 200 degrees F. and bake for an additional 1 hour and 30 minutes
  6. Once the hour and a half are up, turn off the heat and let the cheesecake sit in the oven for 30 minutes, do not open the oven door.
  7. After 30 minutes, crack the oven door and allow the cheesecake to sit for 5 minutes. Then take out and chill. (Letting it chill overnight is best.)

Cream Cheese Topping:

  1. Once the cheesecake is set, add all ingredients for the cream cheese topping into a medium bowl and use a hand mixer to mix well until light and smooth.
  2. Add into a piping bag or sandwich bag with a small corner hole and pipe a design on the top of the cheesecake.
  3. Use a hot wash cloth to wipe the knife clean after each wedge.

http://www.lynnandruss.com

First found as a posting on Facebook; recipe credited to MyIncredibleEdibles.com

Caramelized Pear and Blue Cheese Quiche

The classic combination of pear and blue cheese comes together in an unusual twist in this decadent deep dish quiche. Like any successful couple, it’s their ability to balance and complement each other’s distinctive qualities—in this case, their flavors and textures.

Choose pears, any variety, that have medium firmness. They should give a little when pressed, but not soft enough to bruise—our Bosc pears were on the firmer side. Unfortunately, the top slices sink into the egg mixture when assembling. Perhaps they could be added after 30-45 minutes of baking when the mixture has firmed up some.

If the thought of spending three or more straight hours preparing the quiche before company arrives, you may want to considering making it the day before. If so doing, once baked, wait until the quiche is completely cooled, leaving it in the springform pan. Cover first with a layer of saran wrap, followed by tin foil and refrigerate.

If you made it the day before, remove quiche from fridge and sit on the counter one hour prior to baking. Preheat the oven to 350°. If the edges are already golden-brown, cover the crust (but not the filling) with foil to prevent a burnt-toast exterior. Start checking for an internal temperature of 165°F after 20 minutes, it may take longer because it is deep dish. Slice up and serve that savory pie as soon as possible.

A couple of hints from one reviewer suggests rolling out the dough after 20-30 minutes of chilling if you plan to bake it another time, otherwise too long in the fridge and it won’t roll out well. Add a lot of pastry over the rim of the springform pan as it may shrink a lot—ours did not. Be sure to prick the sides and bottom as well, or it bubbles. Save a scrap of raw dough to fill any cracks after baking the shell so you don’t have an egg mixture leak.

Caramelized Pear and Blue Cheese Quiche

  • Servings: 10
  • Difficulty: moderately difficult
  • Print

Ingredients

Crust

  • 2 cups all-purpose flour
  • 1 tsp. salt
  • 8 Tbsp. cold unsalted butter, cut into small pieces
  • 1 large egg, lightly beaten
  • ¼ cup cold water

Filling

  • 1 recipe Deep-Dish Pastry Shell (see above)
  • 3 medium firm pears, such as Bosc, D’Anjou, or Bartlett
  • 2 Tbsp. unsalted butter
  • 1 Tbsp. sugar
  • ½ cup crumbled blue cheese 
  • 6 large eggs 
  • 2 cups plain fat-free greek yogurt
  • 1 cup milk
  • ½ tsp. salt
  • ¼ tsp. ground white pepper
  • ⅛ tsp. ground nutmeg
  • Crumbled blue cheese
  • Fresh sage leaves (optional) 

Directions

  1. In the bowl of a food processor combine the flour and salt. Add the butter and pulse until the mixture resembles coarse crumbs. Combine the egg and water in a small bowl; add to the food processor and pulse until the mixture just begins to clump together. Transfer the mixture out onto a sheet of plastic wrap; fold the wrap over and press the crumbs until they hold together; shape into a circle. Wrap and chill at least 30 minutes.
  2. Turn the dough out onto a lightly floured surface and roll it out to a 15-inch circle. Carefully roll the pastry around the rolling pin and transfer to a 9×2 1/2-inch springform pan, pressing it into the sides. Trim the overhanging pastry to 1 inch and press it firmly against the outside of the ring to help prevent it from shrinking. Use the trimmings to fill any cracks. Freeze the shell for 20 minutes. Prick sides and bottom every couple of inches with a fork.
  3. Preheat the oven to 400°F. Place the springform pan on a baking sheet. Line the pastry shell with a double thickness of aluminum foil long enough to overhang the sides. Bake about 20 minutes or until the edge of the dough is lightly browned. Remove the foil and continue baking the pastry shell for 10 to 15 minutes longer, or until lightly browned on the bottom. Transfer the baking sheet to a rack and let the pastry cool.
  4. In the meantime, core and cut 2 of the pears into 1/2- to 3/4-inch cubes. Thinly slice the remaining pear and reserve.
  5. Melt 1 tablespoon of the butter in a large skillet over medium-high heat. Add the cubed pears and sugar; cook, stirring occasionally, for 7 to 8 minutes or until lightly browned. Transfer to the pre-baked pastry shell and top with blue cheese; set aside. Melt the remaining 1 tablespoon butter in the skillet and add the pear slices. Cook, stirring occasionally, for 3 to 4 minutes or until just softened; set aside.
  6. For the custard, in a blender combine the eggs, yogurt, milk, salt, pepper, and nutmeg. Blend until frothy.
  7. Place the springform pan with the pastry shell on a baking sheet. Gently pour in the custard. Arrange the reserved pear slices in a spoke pattern on top of the quiche. Bake 1 hour 20 minutes to 1 hour 30 minutes until the top is lightly browned and the custard is just set (165°F) but still jiggles slightly in the center. Let stand 30 to 40 minutes.
  8. With a serrated knife, cut the pastry shell flush with the top of the pan. Carefully remove the springform pan ring. Top with additional blue cheese and, if desired, sage leaves. Cut into wedges.

http://www.lynnandruss.com

Source: Better Homes and Gardens

Cranberry Sauce. Love It or Leave It?

Growing up, I was never a fan of cranberry sauce, probably because it was the canned jellied version that was plated as one big lump on the festive table. Not too appealing… But of course, as we age, our tastes change, and so hopefully do our desires for something more elegant, especially at holiday time.

For this variation from Serious Eats, spices like cinnamon, allspice, nutmeg, and cloves as well as orange juice and zest are combined, then finished off with a bit of spiced rum. “The end result is incredible: a cranberry sauce that has a multidimensional array of seasonal flavors that fits seamlessly into any Thanksgiving meal,” according to chef Joshua Bousel.

And it couldn’t be any easier. I bet if you still are ambivalent about cranberry sauce, this time around you just might love it!

Spiced Cranberry Sauce

  • Servings: 6
  • Difficulty: easy
  • Print

Ingredients

  • 12 oz. fresh or frozen cranberries
  • 3/4 cup white sugar
  • 1/2 cup water
  • 3 Tbsp. brown sugar
  • 2 Tbsp. orange juice
  • 1 tsp. orange zest
  • 1/2 tsp. ground cinnamon
  • 1/4 tsp. ground allspice
  • 1/4 tsp. Kosher salt
  • 1/8 tsp. freshly grated nutmeg
  • 1/8 tsp. ground cloves
  • 1 Tbsp. spiced rum

Directions

  1. Place all cranberries, white sugar, water, brown sugar, orange juice, orange zest, cinnamon, allspice, Kosher salt, nutmeg, and cloves in a medium sauce pan and bring to a boil over medium heat. Cook, stirring occasionally until berries start to pop, about 10 minutes.
  2. Remove from heat, stir in spiced rum, and let cool for 30 minutes. Adjust consistency with additional water as needed. Serve immediately or place in an airtight container and store in the refrigerator, reheating prior to serving.

http://www.lynnandruss.com

Recipe by Joshua Bousel for Serious Eats

.

Garlic-Miso Butter Mashed Potatoes

In the most recent issue of Bon Appétit Magazine, the minute I saw this recipe I knew we had to make them. Then serendipitously, while deciding our weeks menus, The Hubs came across a Braised Asian-Style Pork Shank entree which we knew would pair well with these potatoes—and we had shanks in our freezer!

But back to those potatoes. The original serves eight, so we cut it in half for just the two of us (with leftovers). After rereading the recipe numerous times, and the fact that I’ve made mashed potatoes for decades—and am pretty darn good at them—I instinctively knew there was WAY too much butter and cream, resulting in potato soup. After I made them my way, I went back to the online comments and sure enough, many disappointed reviewers noted that fact.

For example, the BA recipe called for 1 1/2 cups heavy cream which I cut back by 2/3, to only a 1/2 cup. The butter was listed as two full sticks, cut that by at least 50% and use only one stick, or less, if making the full recipe. And I always like to use ground white pepper in my potatoes, but that’s a personal preference. Ground pepper of any kind is a must.

“A couple of spoonfuls of miso adds a little extra umami and saltiness to these spuds, a subtle bridge between the roasted garlic and dairy that nobody will quite be able to put their finger on. And yes: These potatoes are actually mashed. I’m not going to stop you from pulling out a ricer or food mill if supersmooth is your thing, but I personally like a bit of texture—a few bits of intact potato remind you that you’re actually eating, you know, potatoes.” —Brad Leone

NOTE: You can either make the garlic paste ahead (Steps 1 through 3), or if you already have some in the fridge, you are way ahead of the game. You’ll save an hour and a half on dinner day.

In the end, even with my diminished amounts of butter and cream, I still found the mash too loose, especially the reheated leftovers, so consider scaling back even more… although they were indeed delicious!

The silver dish on the left holds the homemade silky garlic paste.

Garlic-Miso Butter Mashed Potatoes

  • Servings: 8
  • Difficulty: easy
  • Print

Ingredients

  • 2 heads of garlic
  • 1 Tbsp. extra-virgin olive oil
  • Kosher salt
  • 1 stick unsalted butter, room temperature
  • 2 Tbsp. white or yellow miso
  • Freshly ground black pepper
  • 4 lb. medium Yukon Gold potatoes (about 8 spuds)
  • ½ cup heavy cream

Directions

  1. Preheat oven to 350°. Cut ½” off top of each head of garlic to expose just the tops of the cloves inside. Place on a 12″-square piece of parchment paper or foil. Drizzle with oil and season with salt. Drizzle 1 tsp. water over.
  2. Bring edges of parchment up and over garlic and fold together to make a packet and seal. Place on a small rimmed baking sheet and bake until very tender, 60–75 minutes.
  3. Let garlic sit until cool enough to handle, then squeeze out cloves into a medium bowl. Add butter and mash together into a paste with a wooden spoon or stiff rubber spatula. Add miso and mix well. Season garlic-miso butter with salt and pepper; set aside.
  4. Peel and quarter potatoes. Place in a large pot and pour in water to cover by 1″; season generously with salt. Bring water to a boil over medium-high, then reduce heat and simmer gently, stirring occasionally, until potatoes are very tender (a tester or paring knife should easily slide into flesh), about 20 minutes from the time water starts to simmer. Drain potatoes and let sit 5 minutes to dry out; reserve pot.
  5. Bring cream to a simmer in reserved pot over medium-high. Remove from heat and return potatoes to pot. Set aside about 3 Tbsp. garlic-miso butter for serving and add remaining garlic-miso butter to pot. Using a potato masher (or use a potato ricer or food mill if you prefer a silkier texture), smash potatoes until mostly smooth; taste and season mashed potatoes with salt.
  6. Transfer mashed potatoes to a large shallow bowl. Top with reserved garlic-miso butter and season generously with more pepper.

Do ahead: Mashed potatoes can be made 2 days ahead. Cover and chill potatoes and reserved garlic-miso butter separately. Reheat potatoes over medium, stirring often and adding 1 tablespoon milk at a time to thin if needed.

http://www.lynnandruss.com

Recipe loosely adapted from Brad Leone for Bon Appétit

Green Olives Sevilla-Style

From Penelope Casas TAPAS cookbook, comes this typically Andalusian riff on olives. One whiff of these spicy tidbits erases any doubt of their Arab origins. Dried or fresh herbs, or a combination of the two bring on the magic.

With an upcoming holiday finger food party on the horizon, we thought they’d make a wonderful accompaniment to the other appetizers being served. Keep in mind, these olives need several days to marinate, so it is nice to prepare one of the dishes ahead of time, then just plate them as the hot recipes come out of the oven.

Don’t be alarmed if the garlic cloves turn blue. It startled us at first until The Hubs googled the reason and found out they weren’t going bad, it was just a reaction caused between enzymes and sulfur-containing amino acids in the garlic. They are perfectly safe to consume and taste just fine.

The compound responsible for this reaction, isoalliin, is formed when garlic is stored at a cool temperature for several weeks, typically in the winter, when pantries are colder.

Green Olives Sevilla-Style

  • Servings: 1 Pound
  • Difficulty: easy
  • Print

Ingredients

  • 1 lb. pitted Spanish green olives, drained and lightly crushed
  • 1 Tbsp. chopped fresh rosemary, or 1/2 tsp. dried
  • 1 tsp. ground cumin
  • 1 tsp. dried oregano
  • 2 Tbsp. fresh thyme, or 1 tsp. dried
  • 4 bay leaves
  • 1 tsp. fennel seed
  • 8 cloves garlic, lightly crushed and peeled
  • 1/2 cup vinegar
  • 8 anchovy fillets (optional)

Directions

  1. Place the olives in a glass jar in which they just fit.
  2. Add all other ingredients, then fill the jar with water.
  3. Shake well and marinate at room temperature for several days, then refrigerate if necessary.
  4. They will keep in the refrigerator, but do bring them to room temperature before serving.
  5. Strain, discard the anchovies, bay leaves and garlic if desired, and serve in an olive boat with toothpicks.

http://www.lynnandruss.com

Recipe from cookbook Tapas by Penelope Casas

Goat-Cheese Stuffed Mushrooms

These bite-sized appetizers are a perfect addition to your finger food array. The original recipe from Martha Stewart was altered to streamline the process and add more depth of flavor with the addition of bacon, and swapping out rosemary and thyme for the parsley.

Martha instructs to create breadcrumbs using 3 slices of white sandwich bread. We had some already made from focaccia which not only saved time but added even more flavor. It is not recommended to make them ahead of time as the bread will turn gummy.

Goat-Cheese Stuffed Mushrooms

  • Servings: 3 dozen
  • Difficulty: easy
  • Print

Ingredients

  • Olive oil, for baking sheet
  • 1 cup fresh bread crumbs, divided
  • 1 garlic clove, coarsely chopped
  • 1 log (5 oz.) soft goat cheese, crumbled
  • 1 Tbsp. fresh rosemary and thyme, minced
  • 1/4 tsp. red-pepper flakes
  • 4 strips bacon, cooked and roughly chopped
  • Coarse salt
  • 24 oz. white button mushrooms, stems removed

Directions

  1. Preheat oven to 400 degrees. Lightly oil a rimmed baking sheet.
  2. Reserve 1/2 cup of the bread crumbs.
  3. In a food processor, add garlic, goat cheese, bacon, thyme and rosemary, red-pepper flakes and remaining bread crumbs. Season with salt, and pulse filling until combined.
  4. Spoon filling into each mushroom, pressing down with fingers to firm up. Roll filled side in reserved breadcrumbs. Place on prepared baking sheet; bake until mushrooms are tender and lightly browned, 15 to 20 minutes.

http://www.lynnandruss.com

Roughly adapted from a recipe by Martha Stewart

Warm Artichoke-and-Feta Dip

This is one of the easiest appetizers to make, thanks Trisha Yearwood! Instead of canned artichokes, we used the marinated jarred version, and we sprinkled some paprika on top for a touch of color and even more depth of flavor.

To lighten our load on the day of the party, the dish was made and put in a small casserole dish covered with foil, then refrigerated overnight. About an hour before it went into a 350° oven, it sat on the countertop to warm up. Make sure to uncover the dish before popping it in the oven.

Artichoke-and-Feta Dip

  • Servings: 8
  • Difficulty: easy
  • Print

Ingredients

  • One 14-oz. can artichoke hearts, drained and finely chopped
  • 5 oz. feta cheese, crumbled
  • 3/4 cup mayonnaise
  • 1/2 cup grated Parmesan
  • 2-oz. jarred roasted red peppers, drained and diced 
  • 2 cloves garlic, minced 
  • Paprika for topping, optional
  • Sea salt pita chips, for dipping 

Directions

  1. Preheat the oven to 350 degrees F.
  2. In a medium bowl, stir together the artichoke hearts, feta, mayonnaise, Parmesan, red pepper and garlic until thoroughly combined. Sprinkle paprika on top, if desired.
  3. Transfer the mixture to a small casserole or glass pie plate and bake, uncovered, for 20 to 25 minutes, or until lightly browned.
  4. To serve, place the dish on a larger platter and surround with pita chips.

http://www.lynnandruss.com

Adapted from a recipe by Trisha Yearwood

Sausage-Cheddar Balls

Party time! While these look amazingly like mini-meatballs, they are actually biscuits! This reinterpretation of meatballs combines breakfast sausage, cheddar cheese, and onion for a very flavorful holiday appetizer, enough for a crowd of hungry folks.

You can opt to serve them alone or with your choice of dipping sauces, such as mustard or barbecue sauce. Our opinion was that they packed enough flavor by themselves, so a dipping sauce didn’t seem necessary.

The only change we made was using one small onion as opposed to half of a large one. Unfortunately, the balls sat in the oven a bit too long while we tended to other things so the bottoms got a touch crusty—which some guests actually preferred!

Sausage-Cheddar Balls

  • Servings: 60 balls
  • Difficulty: easy
  • Print

Ingredients

  • 1 1/4 cups all-purpose flour
  • 1/2 tsp. coarse salt
  • 1/4 tsp. ground pepper
  • 1/2 tsp. cayenne pepper
  • 1 1/2 tsp. baking powder
  • 2 cups grated sharp cheddar (1/2 lb.)
  • 1 lb. bulk breakfast sausage
  • 1/2 large yellow onion, grated on large holes of a box grater
  • 3 Tbsp. unsalted butter, melted

Directions

  1. Preheat oven to 400 degrees.
  2. In a large bowl, whisk together flour, salt, pepper, cayenne pepper, and baking powder. Add cheddar and toss to coat.
  3. Add sausage, onion, and butter. With your hands, mix until well combined and roll mixture into 1-inch balls.
  4. Place balls, 1/2 inch apart, on a parchment-lined baking sheet. Bake until balls are golden and cooked through, 25 minutes. Serve warm.

http://www.lynnandruss.com

Recipe by Martha Stewart Living

Slow-Cooker Sausage and Kale Minestrone

Here’s a wonderfully warming soup for a cold Winter’s day. Once you’ve prepped the ingredients, there’s not much you have to do for several hours. It’s made even easier if you buy bulk sausage, so that you don’t have to meddle with removing casings. And if spicy is not your thing, go ahead and use mild Italian or turkey sausage.

With lots of super-flavorful turkey stock leftover, we used that as the base, ramping up the overall deliciousness! Serve with a slice of crusty garlic bread toasted under the broiler.

Slow-Cooker Sausage and Kale Minestrone

  • Servings: 6
  • Difficulty: easy
  • Print

Ingredients

  • 12 oz. spicy Italian sausage, casings removed
  • 1 large yellow onion, chopped (2 cups)
  • 1 large carrot, chopped (1 cup)
  • 2 ribs celery, chopped
  • 6 cups chicken or turkey stock
  • 2 14.5 oz. cans fire-roasted diced tomatoes, undrained
  • 1 15 oz. can kidney beans, drained and rinsed
  • 1 tsp. kosher salt
  • 1/2 tsp. black pepper
  • 1 cup uncooked ditalini pasta
  • 5 oz. baby kale leaves, roughly chopped

Directions

  1. Heat a large nonstick skillet over medium-high. Add the sausage to the skillet, and cook, stirring to crumble with a wooden spoon, 4 minutes.
  2. Add the onions, carrots, and celery to the skillet; cook, stirring occasionally, until the sausage is browned and the vegetables are lightly caramelized, about 6 minutes.
  3. Add 1 cup of the stock; cook 1 minute, stirring and scraping to loosen the browned bits from the bottom of the skillet.
  4. Transfer the sausage mixture to a 5- to 6-quart slow cooker. Stir in the tomatoes, beans, salt, 1/4 teaspoon of the pepper, and the remaining 5 cups stock. Cover and cook on LOW until the vegetables are tender, about 2 hours and 30 minutes.
  5. Stir in the pasta; cover and cook on LOW until the pasta is al dente, about 1 hour.
  6. Stir in the kale and remaining 1/4 teaspoon pepper. Ladle the soup into bowls, and serve hot.

http://www.lynnandruss.com

Recipe from Cooking Light

Holiday Cheer Cosmos

An Elderflower Liqueur Cosmo and a White Cranberry Cosmo ran into each other at a bar, both spilling a bit into a third glass which exploded with Holiday Cheer—and a third Cosmo was born, a cross between the two adult libations.

I first saw the White Cranberry Cosmo on a Facebook posting and thought it’d be a great “house” drink for an upcoming Winter Cheer party. Problem was, it seemed everyone else had the same idea. Two weeks prior, thinking I’d be ahead of the game by picking up the white cranberry juice at the supermarket, they were completely out!

A few days later at a big box liquor store, there were endless flavors of vodka, I kid you not. We found jalapeño, pickle, peanut butter, caramel apple, dark roasted espresso and every possible red fruit: watermelon, strawberry, raspberry, cherry, pomegranate (which was going to be my fall back), but no cranberry.

Undeterred, I followed up with a staff worker, who after consulting with the manager, was able to locate a box on the highest shelf, attainable only with a large step ladder just for employees. That guy was persistent, but so was I. St. Germain’s Elderflower Liqueur was a much easier find.

Tasty and sophisticated, these babies are a great way to get the party started!

Holiday Cheer Cosmo

  • Servings: 2
  • Difficulty: easy
  • Print

Ingredients

  • 1/2 cup cranberry vodka
  • 1/4 Elderflower liqueur, such as St. Germain
  • 1/4 cup white cranberry juice
  • 2 Tbsp. fresh lemon juice
  • Fresh sugared cranberries for garnish (see recipe below)
CHEERS!

Directions

  • Fill a cocktail shaker with ice and and all all of the ingredients, except the garnish.
  • Shake vigorously and strain into two martini glasses.
  • Garnish each with a large toothpick containing 3 sugared cranberries.

http://www.lynnandruss.com

Sugared Cranberries

These little gems from Yossy Arefi are a perfect garnish for the Holiday Cheer Cosmos. The recipe can easily be cut in half for a small party.

Ingredients

  • 1 1/4 cups sugar
  • 1 1/2 cups fresh cranberries

Sugared Cranberries

  • Servings: Yields 1 1/2 cups
  • Difficulty: easy
  • Print

Directions

  1. Combine 1/2 cup water and 1/2 cup sugar in a saucepan. Cook over medium-high until the sugar dissolves and the mixture comes to a simmer around the edges. Cool the syrup to room temperature.
  2. When the syrup is cool, add the cranberries and stir to coat, working in batches if necessary. Use a slotted spoon to remove the berries and place them on a cooling rack set over a sheet pan to drain.
  3. Pour the remaining 3/4 cup of sugar into a shallow dish and roll the cranberries, a few at a time, in the sugar until totally coated.
  4. Let them dry completely, then store in an airtight container at room temperature for up to three days.
  5. After a few days they start to soften and weep a bit. Cook them down into a sauce or a quick jam.

http://www.lynnandruss.com

Jalapeño-Turkey Meatballs and Spaghetti

Intrigued with this odd combination found in a recent Fine Cooking Magazine, we were pleasantly surprised at the results. Despite two large jalapeños and some chili powder, it was only slightly spicy. Of course, if you did want to ramp up the heat, don’t discard the jalapeño seeds.

Our meatballs did stick to the foil, so we suggest using parchment or coating the baking sheet with an oil spray such as Pam. Also, to thicken the sauce, we added about 2/3 of the shredded Gouda to the cream cheese/milk mixture, then sprinkled the remainder on top.

If you have leftovers, top with some milk and/or olive oil to add moisture before popping in the microwave.

Jalapeño-Turkey Meatballs and Spaghetti

  • Servings: 6-8
  • Difficulty: easy
  • Print

Ingredients

  • 2 egg whites, lightly beaten 
  • 2 Tbsp.s olive oil 
  • 1 Tbsp. milk
  • 2 tsp. chili powder
  • 2 lbs. uncooked ground turkey breast or ground turkey
  • ⅓ cup finely chopped onion 
  • ¼ cup fine dry bread crumbs
  • 2 jalapeño peppers, seeded and minced
  • 1 tablespoon chopped fresh cilantro
  • 1 14-16 oz. package dried multigrain, whole wheat or regular spaghetti
  • 6 oz. packages cream cheese
  • 2 cups milk
  • Salt (optional)
  • 4 oz. Gouda cheese, shredded
  • Fresh cilantro

Directions

  1. Heat oven to 375 degrees F. In bowl stir together egg whites, oil, milk, chili powder, 1 tsp. black pepper, and 1/2 tsp. salt.
  2. In large bowl combine turkey, onion, bread crumbs, jalapeños, and chopped cilantro. Fold egg white mixture into turkey mixture; mix well. Shape turkey mixture in 1-1/2-inch balls. Place on a foil-lined 15x10x1-inch baking pan. Bake 20 minutes or until no longer pink (170 degrees F).
  3. Meanwhile, cook spaghetti, with 1 tablespoon salt added to water, according to package directions. Drain; keep warm.
  4. In same pan used for pasta melt cream cheese over low heat. Add milk. Cook, stirring, until bubbly. Return spaghetti to pan; toss to coat with cream cheese mixture.
  5. Serve spaghetti with meatballs, cheese, and cilantro.

http://www.lynnandruss.com

Recipe from Fine Cooking

Sausage with Cabbage and Fingerlings

This sheet pan dinner actually uses two sheets, but is quite simple and takes only about 45 minutes. It is finished with a decadent brown butter and crisp sage leaves. Any type of sausage links or bratwurst will work, so choose whatever the family prefers.

Not all of our cabbage wedges ended up with some core to hold them together, so we stuck a toothpick through the centers where needed. The directions indicate to let the excess oil drip off the cabbage back into the bowl for the potatoes, but there was hardly any extra so we just added more olive oil for dredging the fingerlings.

The garlic cloves are slightly smashed but left unpeeled. This prevents them from scorching. Afterward, you can either peel the skins and add to the platter (our choice), or discard the cloves altogether.

Sausage with Cabbage and Fingerlings

  • Servings: 4
  • Difficulty: easy
  • Print

Ingredients

  • 1⁄4 cup olive oil, more if needed
  • 1 small green cabbage, cut into 8 wedges through the core
  • 1 1⁄4 lb. fingerling potatoes, halved lengthwise
  • 6 unpeeled garlic cloves, lightly crushed
  • 4 fresh sage sprigs
  • 1⁄2 tsp. salt
  • 1⁄2 tsp. freshly ground black pepper
  • 4 uncooked bratwurst or sausage links
  • 1⁄4 cup butter
  • 20 small sage leaves

Directions

  1. Preheat the oven to 425°F.
  2. In a large bowl, toss the cabbage wedges in the oil. Lay them on their sides on a foil-lined baking sheet, letting the excess drip back into the bowl.
  3. Toss the potatoes in the remaining oil (if there is any, if not, add more oil to the bowl); again letting the excess drip back into the bowl. Set the bowl aside.
  4. Place the potatoes cut-sides down onto a second foil-lined baking sheet. Nestle three garlic cloves and two sage sprigs in each pan. Cover the pans with foil and roast for 20 minutes.
  5. Remove the foil from the pans. Lightly prick the sausages, toss them in the remaining oil in the bowl, and add to the pan with the cabbage. Roast 15 minutes more.
  6. Turn the cabbage, potatoes and sausage and continue roasting until the vegetables are tender and golden, and the sausages are cooked through (160°F), about 5 minutes more.
  7. Transfer everything to a large platter and tent with foil.
  8. In a small skillet, melt the butter over medium heat until foam just subsides. Add the sage leaves, and cook until the butter is brown and nutty, and the sage is crisp, 30 to 60 seconds.
  9. Spoon the sage butter over contents of platter and serve immediately.

http://www.lynnandruss.com

Recipe from Fine Cooking

Adult Cookies Get a Boozy Spin

Christmas cookies are practically synonymous with kids. Cookies and milk for Santa? Decorating cut-out sugar cookies with mom? Sneaking extra cookies at Grandma’s house—well, because she lets you.

But what about a cookie just for the adults during the holidays? These pretty, festive Campari Shortbread Cookies With Crunchy Orange Sugar, from the new cookbook Cookies by Jesse Szewczyk, prove that Campari isn’t just for Negronis—and cookies aren’t just for kids.

I first saw the recipe in the Sunday newspaper supplement Parade Magazine and thought, these would make a nice addition to the array of cookies I bake every holiday season. Although, I knew instinctively that the dough should be rolled out to a 1/4″ thick and not 1/2″ as indicated (change noted below). They took the entire 19 minutes to perfectly bake at 1/4″ thickness.

Also, having decades worth of experience icing cookies, I decided to scale back on the amount of frosting, it just seemed too much for slightly more than a dozen shortbread wafers. My altered amounts worked out perfectly and are indicated under ingredients.

If gifting, please make a note to the recipient that these cookies contain alcohol.

Campari Shortbread Cookies With Crunchy Orange Sugar

  • Servings: 2+ dozen
  • Difficulty: easy
  • Print

Ingredients

  • 3 sticks unsalted butter, softened
  • 1 cup powdered sugar
  • 1 tsp. kosher salt, plus a pinch
  • 3 cups all-purpose flour, plus more for dusting

Icing and Decoration:

  • 2 Tbsp. coarse white sugar, such as turbinado or sanding sugar
  • 1 tsp. grated orange zest
  • 1 1⁄2 cups powdered sugar
  • 3+ Tbsp. Campari (or Aperol)
  • 1⁄2 tsp. vanilla extract
  • Pinch of kosher salt

Directions

  1. In a small bowl, combine coarse sugar and zest. Use your fingertips to massage zest into sugar until very fragrant. Scatter sugar in a single layer on a plate. Let sit at room temperature (up to overnight), uncovered, to dry while making cookies.
  2. Line 2 baking sheets with parchment paper or nonstick baking mats.
  3. In a large bowl, combine butter, 1 cup confectioners’ sugar and 1 tsp salt. Beat on medium speed 2 minutes or until smooth and fluffy. Turn mixer off; add flour. Beat on low speed 2–3 minutes or until a dry dough forms.
  4. Transfer dough to a piece of parchment paper lightly dusted with flour; press into a ball. Dust dough with flour and top with a second sheet of parchment paper; roll dough to 1⁄4-inch thickness. Remove top piece of parchment paper. Use a 2½-inch round cutter to cut out rounds; place 1½ inches apart on prepared baking sheets. Press dough scraps together into a ball; repeat rolling and cutting process. Freeze cut cookies 20 minutes.
  5. Arrange 2 racks in upper-middle and lower-middle of oven. Preheat oven to 350°F.
  6. Bake both sheets 15–19 minutes, swapping positions halfway through, until tops of cookies are light golden brown. Cool completely on baking sheets.
  7. In a large bowl, whisk remaining 2¼ cups powdered sugar, Campari, vanilla and a pinch of salt until smooth. (If glaze is too thick, add more Campari; if too thin, add more confectioners’ sugar.) Dip tops of cookies in glaze, allowing excess to drip back into bowl. Sprinkle cookies with orange sugar; let set 1 hour. (When glaze is completely dry, cookies can be stored in a single layer up to 1 week in an airtight container.)

http://www.lynnandruss.com

Recipe from the new cookbook Cookies by Jesse Szewczyk

Ginger Roast Chicken and Elbow Macaroni with Tomatoes and Pan Sauce

Chef/author Molly Stevens says of her recipe, “This is what I call a sleeper recipe. At first glance it doesn’t look like much — a whole chicken rubbed with a little fresh ginger, roasted, and served alongside elbow macaroni tossed with diced tomatoes and the roasting juices. Exactly what makes this dish so remarkable is hard to pinpoint, but there’s a wonderful alchemy that occurs when the chicken, ginger, and tomato all come together. It’s comforting, a little exotic, and truly delicious.”

During roasting, the drippings, the wine, and the roasted giblets cook together, creating a savory jus. The chicken also roasts on a rack to encourage the drippings to caramelize a bit as they hit the hot pan, developing even more flavor. It can be made year-round using canned tomatoes; in season, use fresh if you wish.

In the end, the chicken was juicy and delicious! My only criticism was that there were too few tomatoes. Next time, I will double the amount and use two cans of diced. The Hubs thought it was fine as is, but also wouldn’t be adverse to the possibility of additional tomatoes. We completed the meal with a simple side salad.

Plan ahead: For the best flavor, season the chicken 8 to 24 hours ahead of roasting.

Ginger Roast Chicken and Elbow Macaroni with Tomatoes and Pan Sauce

  • Servings: 3-4
  • Difficulty: easy
  • Print

Ingredients

  • 1 Tbsp. plus 2 tsp. peeled and grated fresh ginger, divided
  • 2 Tbsp. extra-virgin olive oil
  • Kosher salt and freshly ground black pepper
  • One 3 1/2- to 4-lb. chicken, preferably with giblets
  • Juice of 1 lemon
  • 3/4 cup dry vermouth or dry white wine
  • 12 oz. dried elbow macaroni
  • 2 to 3 garlic cloves, chopped
  • One 14 1/2-oz. can diced tomatoes, with juices, or 1 scant lb. fresh tomatoes, peeled, seeded, and chopped
  • 1/4 cup chopped fresh basil or flat-leaf parsley, plus sprigs for garnish, if desired

Directions

  1. Season the chicken. In a small bowl, combine 1 tablespoon of the ginger, 2 teaspoons of the olive oil, 1 teaspoon salt, and 3/4 teaspoon pepper.
  2. Over the sink, remove the giblets from the chicken, if there are any (they are usually tucked into the cavity). Reserve all but the liver. (Discard the liver or save it for another use.) Hold the chicken over the drain and let any juice run out. Pat the chicken dry inside and out with paper towels. With your fingers, pull away and discard any large deposits of fat from the neck or body cavity opening. Then, using your fingertips and starting at the cavity opening, gently loosen the skin over the breast and thighs of the chicken. Once the skin is loose, rub about three quarters of the ginger mixture under the skin, over the breast and thighs. Rub the rest inside the cavity. Smear the surface all over with about 1 teaspoon olive oil. Season the breast liberally with more salt and pepper. Tuck the wing tips back so they are secure under the neck bone.
  3. If you are seasoning the bird ahead of time, refrigerate it for at least 8 hours and up to 48 hours, uncovered or lightly covered with plastic wrap. Refrigerate the giblets too, if using. If you are not seasoning that far in advance, let the bird stand at room temperature to allow some of the rub’s flavoring to penetrate; it can safely stay at room temperature for up to 2 hours.
  4. Heat the oven. Position a rack in the center of the oven and heat to 400 degrees (375 degrees convection).
  5. Roast the chicken. If you have giblets, put them in a medium, low-sided roasting pan or gratin or baking dish (about 8 by 12 inches). Set a roasting rack over the giblets and put the chicken breast side up on the rack. Squeeze the lemon juice over the chicken and put it in the oven, with the legs facing the rear wall. After 25 minutes, open the oven door and pour the vermouth or wine over the chicken.
  6. If at any time the liquid in the pan appears to dry up, add 1/4 cup water to the pan. Continue roasting, basting the chicken once or twice by spooning the pan drippings over the breast, until the juices run clear with only a trace of pink when you prick the thigh and an instant-read thermometer inserted in the thickest part of the thigh (without touching bone) registers 170 degrees, another 35 to 55 minutes.
  7. Lift the chicken out of the pan, using a fork or tongs to steady it, and carefully tilt it to pour the juices from the cavity into the roasting pan. Transfer the chicken to a carving board (preferably one with a trough). Discard the giblets, but reserve all the juices in the pan.
  8. Cook the macaroni. About 10 minutes before the chicken is done, bring a large pot of well-salted water to a boil. While the chicken rests, warm a wide, shallow serving dish or bowl big enough for the cooked macaroni; I like to use a 2- to 3-quart gratin or baking dish. A pasta bowl works as well. Cook the macaroni until tender but not mushy, about 7 minutes or according to the package instructions.
  9. Meanwhile, make the sauce. In a medium 10-inch skillet, heat the remaining 1 tablespoon olive oil over medium heat. Add the garlic, the remaining 2 teaspoons ginger, and a pinch of salt. Cook, stirring, until fragrant and just golden, about 1 minute (lower the heat if the garlic threatens to scorch).
  10. Add the tomatoes and their juices and increase the heat to high. Cook, stirring often, evaporating some of the juice, until the tomatoes begin to brown in spots, about 8 minutes. (They won’t get very brown because of the liquid, but you want to see a few caramelized bits.)
  11. Taste for salt and pepper. Remove from the heat and immediately stir in the basil or parsley.

http://www.lynnandruss.com

Recipe from Molly Steven’s cookbook, All About Roasting

Braised Asian-Style Pork Shanks

These braised pork shanks could become an ultimate comfort food for us, with the hybridizing of favorite Asian flavors and techniques. It was hard to fathom how they could have gotten any better than when served, but after a rest overnight in the fridge, just WOW!

Paired with fresh green beans from our garden (that were flash frozen until ready to use), and the decadent Garlic-Miso Butter Mashed Potatoes, we were on Cloud Nine! It is a LOT of ingredients, and will take a large chunk of time, so a slow Sunday afternoon during the chilly months is ideal.

While I tended to spud duty, The Hubs started working his magic on the meat. But first, as he analyzed the recipe, he realized there was WAY too much liquid (mirin, soy, sake, vegetable oil, and chicken stock) and brown sugar for the amount of meat, so all got cut in half. When everything was said and done, we still had a cup of reduced sauce leftover, which we decided would be great for a future stir-fry.

Braised Asian-Style Pork Shanks

  • Servings: 6
  • Difficulty: moderate
  • Print

Ingredients

  • 4 lbs. pork shanks
  • 1/2 cup carrot, chopped
  • 1 cup Spanish onions, chopped
  • 1/2 cup celery, chopped
  • 4 oz. ginger root, minced
  • 1/2 cup brown sugar
  • 1 cup mirin
  • 2 cloves garlic, pressed
  • 3/4 cup soy sauce
  • 3/4 cup chicken stock
  • 1 tsp. crushed red pepper
  • 2 cloves star anise
  • 1 cup sake
  • 2 oz. vegetable oil, for searing shanks

Directions

  1. Dredge shanks in flour seasoned with salt and pepper. Heat oil in large Dutch oven and sear pork shanks on all sides, working in batches if necessary.
  2. Discard oil from pan and add onion, celery, carrots and ginger. Caramelize on medium high heat, stirring frequently, for about 8 minutes. Add garlic and sauté briefly, about 2 minutes.
  3. Deglaze pan with sake, then add soy sauce and mirin. Bring to a simmer, then stir in brown sugar. Add red pepper flakes, star anise and chicken stock. Let simmer for 5 minutes.
  4. Return shanks to the pot. Cover and cook in a 300 degree oven for 2 1/2 to 3 hours, turning once halfway through cooking. When shanks are completely tender, remove to platter and tent with foil. Strain liquid into a saucepan pressing on solids to get all of the juices; discard the solids. Return pot to a burner and bring to a boil.
  5. Lower heat to a simmer and reduce until desired thickness. Can thicken broth with a cornstarch slurry if desired. Serve shanks and pass sauce separately.

http://www.lynnandruss.com

Loosely adapted from a recipe by Yardley Inn