Low-Carb and Quick. Who’s Complaining?

Squash is used like pasta to delicious effect in this low-carb Beef Ragù Over Spaghetti Squash. The recipe came compliments of our weekly “Make It Tonight” series from Fine Cooking. Oval shaped and yellow, spaghetti squash can be considered a summer or winter squash and is conveniently available year-round in most grocery stores.

spaghetti-squash

In the benefits department, spaghetti squash contains a wide range of vitamins and also several minerals that are vital to good health. It has a fair amount of fiber and with only 42 calories and 10 carbs in a 1-cup serving, this vegetable is a safe addition to any diet.

Talking with my younger sister Lolly recently, she told me a humorous story relating to this topic. She admitted cooking what she thought was spaghetti squash several times without ever achieving “spaghetti strands” when she raked a fork through the cooked flesh. Finally, after the third or so time without the desired results, she realized she had been cooking a butternut squash! All ended well when she eventually chose the correct cultivar. Hey, live and learn right?

With a few modifications, I altered the original recipe to fit our tastes. Instead of the ground beef, I used a meat combination of one-third each beef, pork and veal. Another good substitute would be ground turkey.

In Step 5, after draining the fat and adding the crushed tomatoes and basil, I omitted the 1/4 cup water preferring a thicker ragù. And to that end I also included one tablespoon of tomato paste to add substance. (BTW, it’s far more efficient to buy a tube of tomato paste so that when a recipe calls for a small amount, you don’t have to open an entire can.) Finally, for that kick I’m fond of, I incorporated about a half teaspoon of crushed red pepper flakes—optional of course!

img_8268

Ingredients

  • 1 small (2 1/2-3 lb.) spaghetti squash, halved lengthwise and seeded
  • 1 Tbs. extra-virgin olive oil
  • 1 lb. lean ground beef
  • 1 small yellow onion, finely chopped
  • One 15-oz. can crushed tomatoes
  • 1 Tbs. tomato paste
  • 1/2-1 tsp. crushed red pepper flakes (optional)
  • 1/4 cup coarsely chopped fresh basil
  • 1/4 cup freshly grated Parmigiano-Reggiano

img_8273
After the meat, onion and garlic have cooked, add the tomatoes, basil, and tomato paste; stir well and bring to a boil.

img_8274
Reduce the heat to medium low and simmer for 10 minutes (or longer.)

img_8275
Once the squash has cooled enough to handle, rake the squash flesh into strands with a fork.

Directions

  1. Arrange the spaghetti squash in a single layer in the bottom of a large, wide pot. (Don’t worry if the squash halves don’t lie completely flat in the pot.) Add 1/2 inch of water, cover the pot, and bring to a boil. Reduce to a simmer and cook until the squash is tender enough to shred when raked with a fork but still somewhat crisp, 15 to 20 minutes. Transfer the squash to a plate and set aside until cool enough to handle.
  2. While the squash cooks, heat the oil in a 12-inch skillet over medium-high heat. Add the beef, the remaining chopped garlic, onion, 1/2 tsp. salt, and 1/4 tsp. pepper; cook, stirring to break up the meat, until just cooked through, 5 to 6 minutes.
  3. Drain and discard the fat if necessary. Add the tomatoes, basil, and tomato paste; stir well and bring to a boil. Reduce the heat to medium low and simmer for 10 minutes. Season to taste with salt, pepper and if using, crushed red pepper flakes.
  4.  With a fork, rake the squash flesh into strands, transfer to plates, and season to taste with salt. Ladle the beef ragù over the squash and garnish with the grated Parmigiano. If desired, serve with garlic bread and a side salad.

Adapted from a recipe by Liz Pearson from Fine Cooking

img_8279

A New York State of Mind

“Some folks like to get away. Take a holiday from the neighborhood…”

Located on the banks of the scenic Hudson River, Overlook on Hudson is just minutes from West Point and less than one hour from New York City. First owned as a summer retreat by financier JP Morgan, the current structure was built on the original foundation of Morgan’s 1880 mansion with the fireplaces and expansive patios still part of this lovely B&B.

img_8306
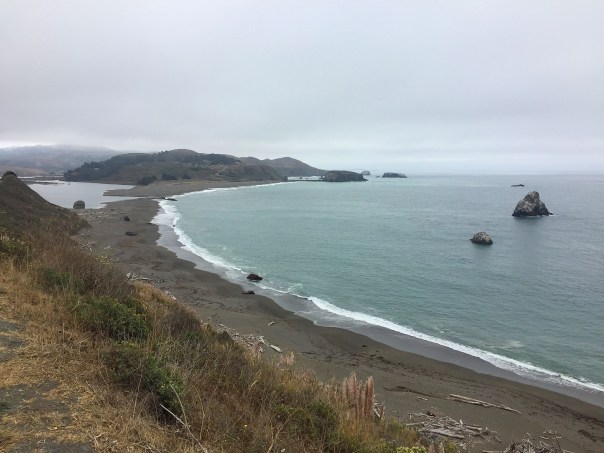
Our view of the Hudson River as we arrived at the B&B during “Leaf Peeping” season.

During the 1970’s, Overlook on Hudson was home to world-renowned recording artist Billy Joel where he composed his popular song, “New York State of Mind.” Inspired by the sweeping views of the Hudson from the large window, “The Piano Man” composed and played a number of songs here, most famously his Songs in the Attic album.

You may recall that we booked this weekend getaway back in early September when visiting Merry Sue and Fred at their “Baum Shelter.” Our initial intentions centered on a long weekend in the Finger Lakes, but because folks are very serious about their Fall foliage “Leaf Peeping” in the Northeast, everything in the area was booked solid through Thanksgiving!

Not wanting to give up on the idea, I suggested looking at places along the Hudson River, and that’s how we discovered Overlook on Hudson. While researching the B&B, we noted every review was rated 5 out of 5—can’t beat that! With only five guest rooms for rent, the atmosphere lends a cozy and tranquil vibe, just what we were looking for.

img_8309
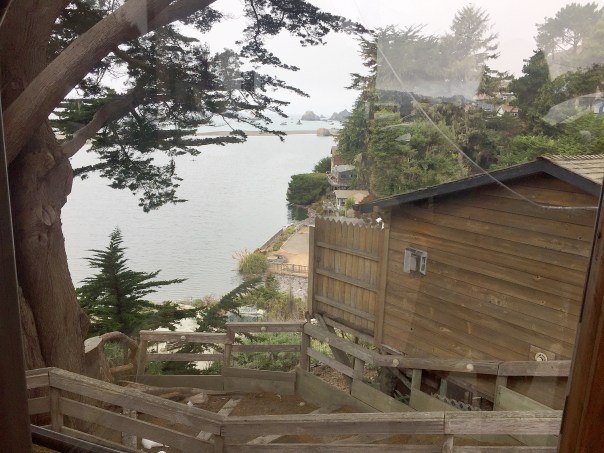
Our room the “Eagles Nest” had a great view of the river.

img_8310

Russ and I booked the “Eagle’s Nest” with spectacular views overlooking the pool and the river valley—although late October is certainly NOT pool-weather in New York. The Baum’s chose the charming “Cadet Room” boasting of historical art works and memorabilia representative of life as a cadet in the United States Military. There are even photos of the Army/Navy “goat stealing,” a tradition dating back to the Fall of 1953.

russ-back-patio
Russ stands on the back patio with a cup of coffee.

Upon our arrival mid-afternoon on a Friday, owner and proprietor of the B&B, Roxanne Donnerly (along with husband Jim) gave us a quick tour of the beautifully appointed rooms, where it was obvious the utmost attention had been paid to every detail, right down to fluffy towels and robes. And we all breathed a sigh of relief when we heard breakfast is served at the humane hour of 9 a.m. (We had visions of having to rise at 6:00, because after all, West Point is only minutes away, and many military families are known to frequent their establishment.)

img_8314
img_8313
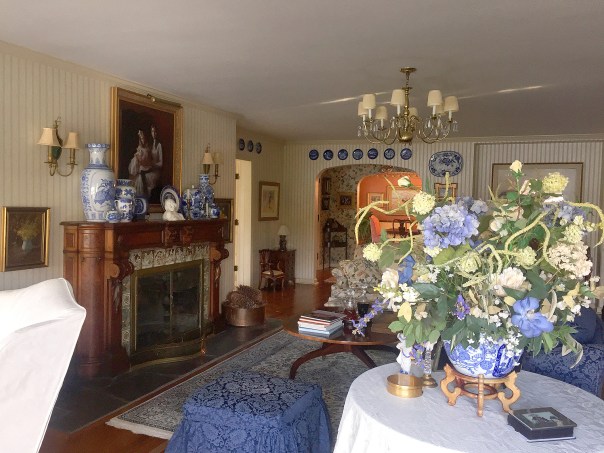
Views of the formal living room showcasing the original JP Morgan fireplace and tiles that survived the 1952 fire because they were in the basement.

img_8506
eggsbenedict
img_8509
img_8510
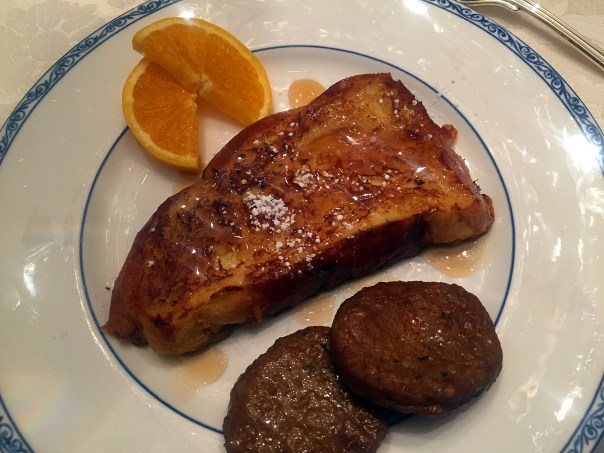
Husband Jim was breakfast chef, while Roxanne graciously served guests several courses on beautiful Ralph Lauren china with sterling silver cutlery. They even made accommodations to the menu based on Russ’s wheat intolerance.

For dinner on our first night we planned a casual feast in Harriman, NY at Angelo’s Sicilian Trattoria, a family-owned and operated BYO. As we pulled up curbside, Merry Sue uttered an audible “Oh no” because we saw absolutely no one in the dining room. But after we disembarked from our vehicle we could see the other half of the restaurant was in fact, jam-packed! Luckily Merry Sue had made reservations and our corner table awaited us.

img_8316

Brightly saturated walls in several different hues, were lined with a chair railing made of split wine corks. The atmosphere was cozy, yet loud, but the waitstaff were all friendly and very attentive. Yes, because everything is made fresh and to order, there is a bit of a wait for your meals—with a few missteps along the way such as forgetting our side salads until asked, an extra cup of ice until asking for twice, and another iced tea. But given the ginormous sizes of all our delicious entrées at reasonable prices, all was forgiven—not to mention a ton of leftovers!

img_8319
img_8318
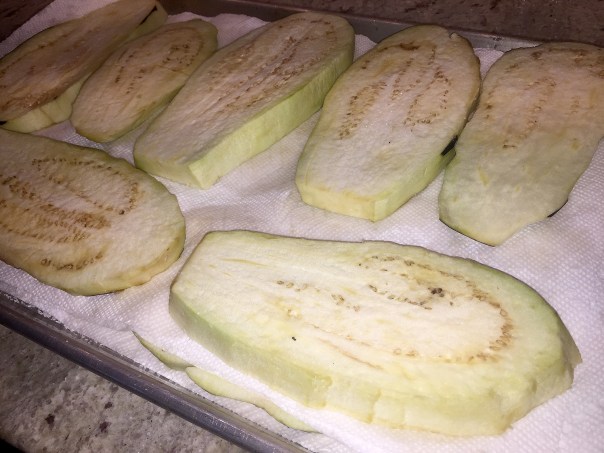
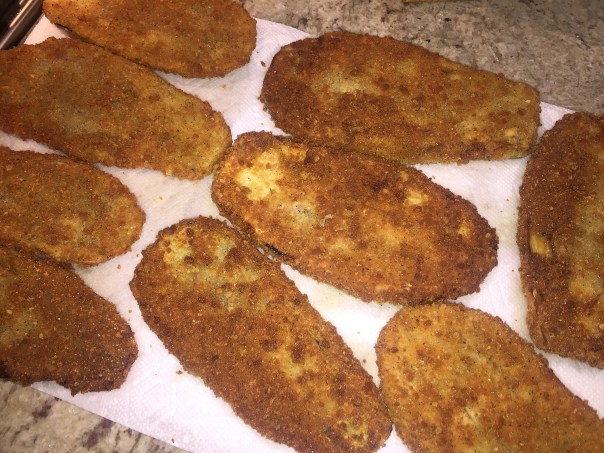
For starters Lynn and Russ shared a fabulous appetizer of Eggplant Rollatini. Merry Sue and Fred made quick work of their Meatballs in Grandma’s Gravy selection.

img_8324
img_8326
img_8329
img_8323
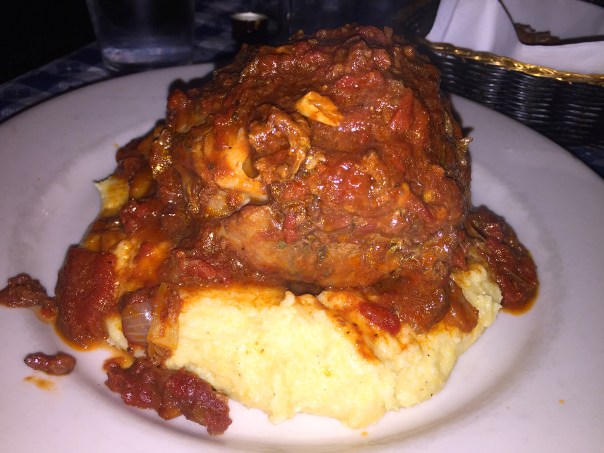
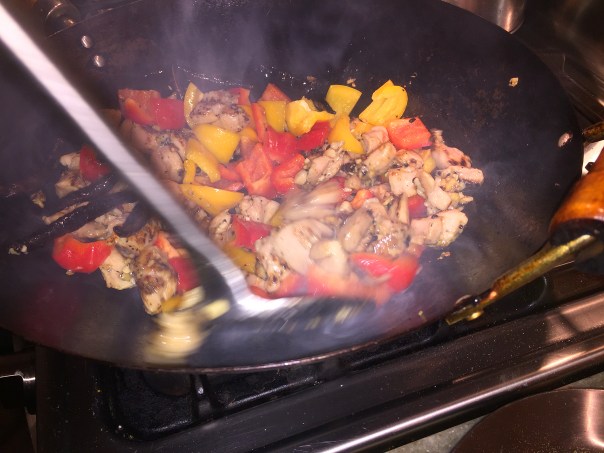
Our entrees were Spaghetti with White Clam Sauce (with extra clams) for Merry Sue, Eggplant Parmigiana for Fred, the Pork Osso Buco with polenta special for Russ, and Chicken Marsala for Lynn.

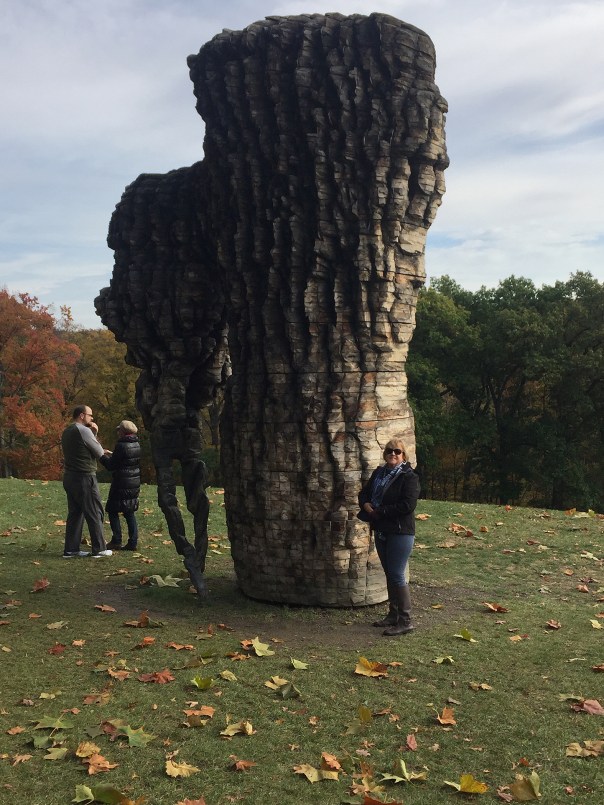
Saturday morning was spent in New Windsor, NY roaming the grounds of the well-known Storm King Arts Center highlighting large sculptural pieces by such acclaimed artists as Alexander Calder, Dennis Oppenheim and Maya Lin. They are sited across 500 acres of fields, hills and woodlands against the backdrop of Storm King Mountain.

img_8383
img_8381
img_8388
img_8374

The Hudson River Valley and Orange County, NY have one of the oldest wine country areas in America. Our Saturday afternoon excursion was to Brotherhood, which has the unique distinction of being “the” oldest winery in the U.S. After our wine tasting and consequent wine purchases, we were ready for lunch at their Vinum Cafe which occupies the ground floor of the original winery building circa 1839. While the food was more than passable, the wait and service left a lot to be desired!

img_8433
img_8473
Fred snaps a photo of the three of us during the wine tasting; then Merry Sue and Fred pose in front of a large wine casket.

img_8480
img_8492
img_8483
img_8485
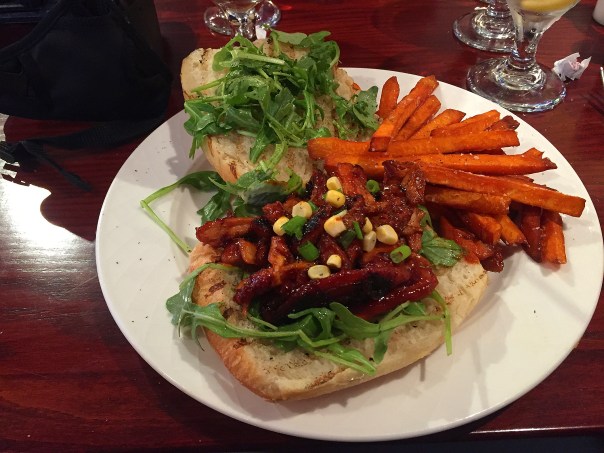
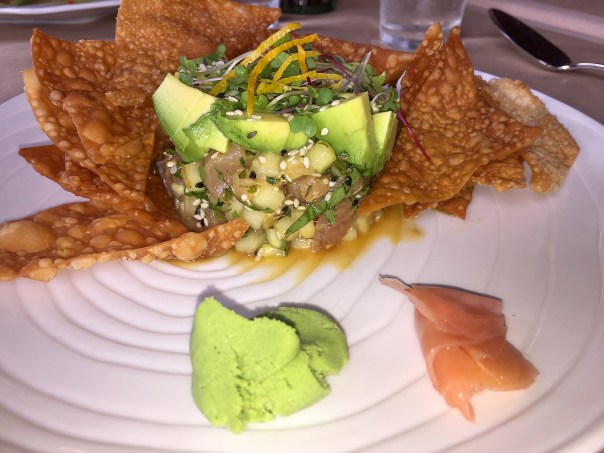
Late lunches at the Vinum Cafe included an Imported Cheese Platter, BBQ Pulled Chicken sandwich on a ciabatta roll with sweet potato fries and arugula, Steak Frites Salad, and a Crab Cake with cajun remoulade, mesclun salad and sliced cucumbers.

We relaxed back at Overlook for several hours with books, naps, and/or a game of scrabble before heading out to dinner at the Hudson House River Inn. Built in 1832 and operated as a hotel since then, it is located on the serene waterfront approximately one hundred feet from the Hudson River in the quaint, antique shopping village of Cold Spring; and is currently on the National Register of Historic Places.

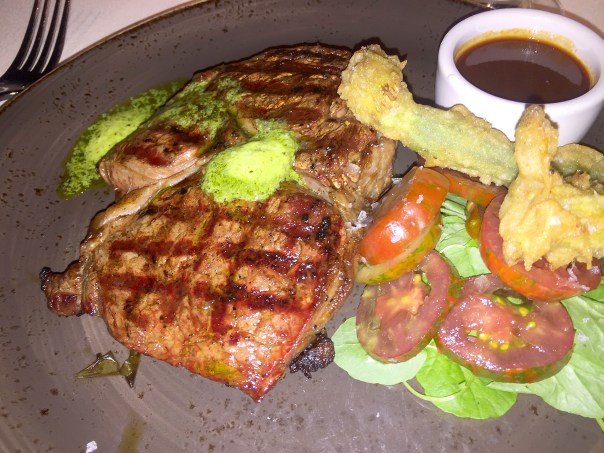
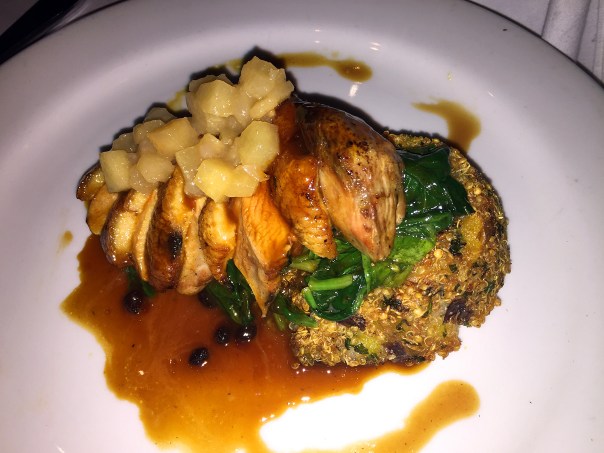
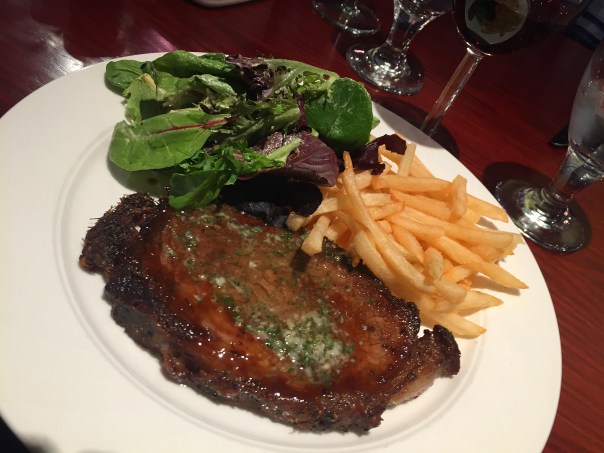
Overall the food was very good with a few exceptions. Russ and Fred loved their Rack of Lamb special, and Merry Sue thought her roasted garlic crusted Diver Sea Scallops dinner was superb. I ordered from the “Price Fixe” menu thinking it would be a better deal than selecting a steak a la carte. And while my Certified Angus Sirloin topped with bordelaise sauce was cooked perfectly medium-rare, the size was underwhelming, especially considering the hefty price tag with a $4 upcharge. At that cost, I would have appreciated taking home some ample leftovers.

img_8502
img_8503
img_8500
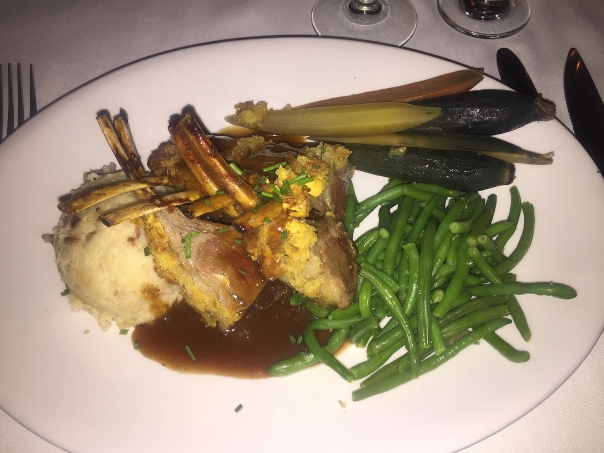
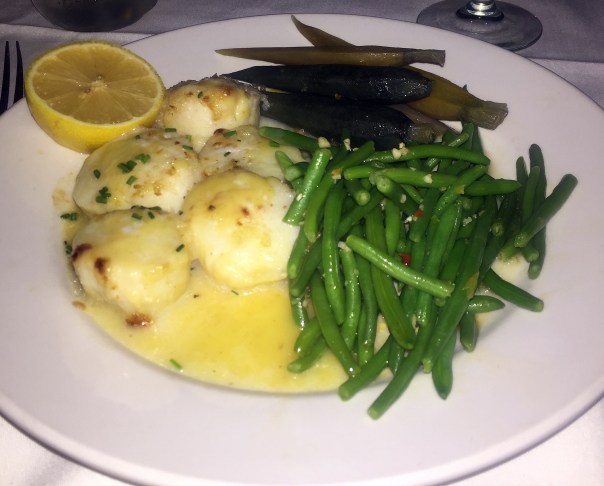
From the top: the Rack of Lamb entrées for Fred and Russ, Diver Sea Scallops for Merry Sue, and my meager, overpriced Certified Angus Sirloin.

But the biggest complaint centered on the totally undercooked, tasteless carrots and rubbery green beans that we all speculated had been frozen prior to reheating. It’s always a telling sign to us—and not necessarily a good one—when every entrée comes paired with the exact same sides. Where is the creativity in that? On the other hand our waitress was extremely friendly…

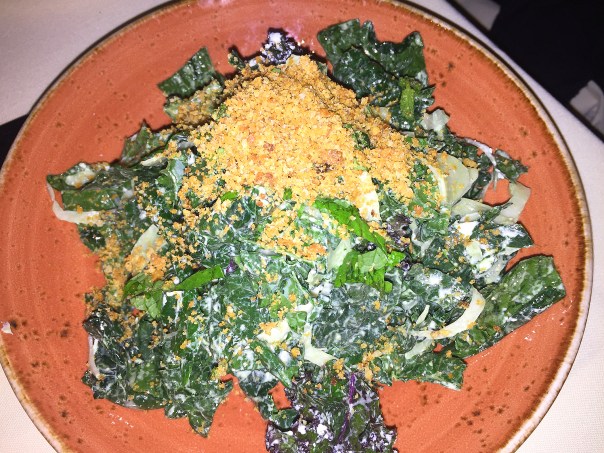
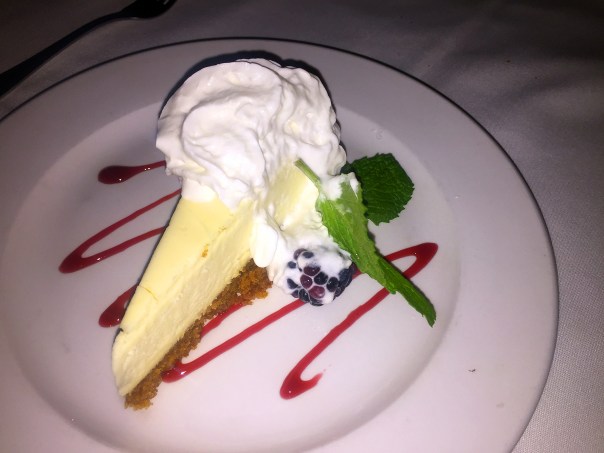
I’d be remiss if I didn’t mention the Lobster Bisque that Fred and Russ enjoyed as appetizers, and a tasty Arugula and Golden Beet Salad I chose as part of my three course offerings. Merry Sue was the lucky recipient of my last course—dessert. Since I don’t indulge in dessert, she was more than happy to oblige and chose the New York Cheesecake with raspberry coulis; savoring every morsel and gave it three thumbs up!

img_8505

A side note: a young couple also staying at the Overlook, and with whom we had shared breakfast that morning, came in and were seated at the table next to us. From our vantage point Russ and I could see—and hear—that they were having a major spat all through dinner.

On the last day of our visit, that aforementioned young couple occupying the top floor were obviously in the throws of a break up and left very early and unexpectedly. Seizing the opportunity, we asked if Roxanne would show us the famous Billy Joel Suite. (The Billy’s Nest with queen bed, is only available when coupled with the Billy Joel Room to become the perfect private suite for family and friends.)

According to Roxanne, back in the 70’s when the Piano Man and his first wife Elizabeth rented the house for two years, Billy had his piano “in the attic” which the Donnerly’s later fixed up into a charmingly outfitted suite decorated with numerous artifacts referencing the legendary rocker. Thus the title of his well-known album “Songs in the Attic” which ranks among his very best work.

img_8512
The panoramic view from the Billy Joel Room upstairs window.

img_8513
A framed Baby Grand hung on musical themed wallpaper.
img_8514
The music theme continues on a tea set.
img_8520
A collection of framed Billy Joel album covers.

img_8518
A planter was crafted from old LPs with titles from various Piano Man songs.

Overlook on Hudson is situated in Highland Falls, NY, and is referenced in lyrics from another song on that album “Summer, Highland Falls.” You may be familiar with “They say that these are not the best of times. But they’re the only times I’ve ever known…”

Well, they were certainly some of the best of times for the four of us. So when visiting the area, don’t “overlook” this gem on the Hudson!

Get Your Mojo Back!

For you food fan lovers of the bold and spicy, this babe’s for you. Paired with the Green Rice side, this Turkey Cutlet and Black Beans with Tangerine-Habanero Mojo dinner is phenomenal! It definitely transports you out of the “same-old-thing” doldrums.

Mojo (pronounced MOE-hoe) is a Caribbean and Latin-American garlic, chile, and fruit sauce that pairs well with meat, poultry, and seafood. Here, it’s made with tangerine and lime, so it’s both sweet and tart. Problem was, the supermarket did not have ANY tangerines! So we used navel oranges instead. I would have substituted blood oranges, but they didn’t have those either—bummer.

IMG_8303.jpg

Nor did the grocery store carry any turkey cutlets, but the butcher offered to slice down a turkey tenderloin into 1″ cutlets—perfect! Turkey tenderloins are the tender long strip of white meat hidden under the turkey breast. Because this strip of meat is an underused muscle of the turkey, it is very tender and excellent for recipes. This part of the bird typically has a low fat content and cooks very quickly.

When it comes to spicy, I’m on the front lines with the heat. So when the recipe called for 1/2 of a habanero, I added the whole pepper. And yes it definitely had a kick to it, so keep that in mind when determining your spicy tolerance.

img_8289
Three sliced cloves of garlic and a whole minced habanero pepper are ready to make mojo.

img_8292
All mojo ingredients reduce down slightly in the skillet.

img_8298
Cooked mojo is poured into a bowl for serving purposes.

Ingredients

  • 5 to 6 Tbs. extra-virgin olive oil
  • 3 medium cloves garlic, thinly sliced
  • 1/2 tsp. plus ₈ tsp. ground cumin
  • 1/2 cup fresh tangerine juice (from 2 tangerines)
  • 2 Tbs. fresh lime juice (from 1 lime)
  • 1/2 tsp. seeded and minced habanero chile
  • Kosher salt and freshly ground black pepper
  • 1 small red onion, chopped
  • One 151/2 -oz. can black beans, rinsed and drained
  • 2 Tbs. chopped fresh cilantro
  • 4 turkey breast cutlets (about 11/4 lb.)

img_8294
After the black beans cook for several minutes in the onion, stir in the cilantro.

img_8300
Turkey cutlets cook in an oiled skillet for 2-3 minutes per side.

Directions

  1. In a 10-inch skillet, heat 2 Tbs. of the oil and the garlic over medium heat until the garlic is golden, about 3 minutes. Stir in 1/₈ tsp. of the cumin. Add the tangerine juice, lime juice, and habanero. Bring to a simmer and cook for about 3 minutes. Season to taste with salt and pepper; set the mojo sauce aside. (The sauce can be served warm or at room temperature.)
  2. Heat 2 Tbs. of the oil in a 12-inch nonstick skillet over medium-high heat. Add the onion and 1/4 tsp. salt and cook, stirring occasionally, until softened, 3 to 5 minutes. Add the beans and the remaining 1/2 tsp. cumin and cook until the beans are heated through, 2 to 3 minutes. Stir in the cilantro and season to taste with salt and pepper. Transfer the beans to a bowl and cover with foil to keep warm.
  3. Wash and dry the skillet. Season the turkey cutlets on both sides with salt and pepper. Heat 1 Tbs. of the oil in the skillet over medium-high heat until very hot. Add as many cutlets as will comfortably fit in a single layer, and cook until browned on both sides and just cooked through, about 2-3 minutes per side. Transfer to a plate and tent with foil to keep warm. Repeat with the remaining cutlets, adding the remaining 1 Tbs. oil if needed.
  4. Divide the cutlets and black beans among individual plates. Spoon the mojo sauce over and serve.

Recipe by Dawn Yanagihara-Mitchell from Fine Cooking

Green Rice

img_8290
After the rice mixture has cooked for 20 minutes, stir it carefully to avoid crushing it, cover, and cook another 5 minutes.

Ingredients

  • 1/2 cup tightly packed fresh cilantro sprigs (about 1/2 oz.)
  • 1 cup tightly packed fresh stemmed spinach leaves (about 1-1/2 oz.)
  • 1-1/4 cups homemade or low-salt chicken broth
  • 1-1/4 cups milk
  • 1 tsp. kosher salt
  • 1 Tbs. olive oil
  • 3 Tbs. unsalted butter
  • 1-1/2 cups long-grain rice
  • 1/4 cup finely minced onion
  • 1 clove garlic, minced

img_8284
The rice will begin to brown in oil and butter after about 4 minutes, then add the onion and garlic.

img_8283Put the cilantro, spinach, and broth in a blender and blend until the vegetables are puréed. Add the milk and salt and blend a bit more until well combined.

img_8287
Add the contents of the blender, stir well, turn the heat to high, and bring to a boil.

Directions

  1. Put the cilantro, spinach, and broth in a blender and blend until the vegetables are puréed. Add the milk and salt and blend a bit more until well combined.
  2. In a medium (3-qt.) heavy-based saucepan (with a good lid) over medium heat, heat the olive oil and butter. When the butter is melted, add the rice and sauté, stirring about every 30 seconds, until it just begins to brown, 3 to 4 minutes.
  3. Add the onion and garlic and cook 1 minute, stirring constantly. Add the contents of the blender, stir well, turn the heat to high, and bring to a boil. Cover the pan, turn the heat to very low, and cook for 20 minutes. Stir the rice carefully to avoid crushing it, cover, and cook another 5 minutes.
  4. Take the pan off the heat and let the rice steam in the covered pot for 10 minutes. Serve hot.

by James Peyton from Fine Cooking

img_8302


Simply Sublime, with a Sensational Side

It’s a weeknight, you’ve had a long day, and don’t want to spend more time in the kitchen than you need to. (OK, maybe I do on occasion.) You don’t want the same ole, same ole chicken recipe that you’ve made over and over to the point of ad nauseam, so give Sear-Roasted Chicken with Orange-Tarragon Sauce a whirl. The tasty, fragrant sauce boosts the flavor of chicken breasts and you only use a single skillet. Got your interest now?

The chicken breasts, cooked according to directions, turned out plump and juicy. This sauce is so freakin’ good I wish I had made more of it! In the end, I had to reduce the shallot mixture an extra 4 minutes in order to get it to a thicker, more syrupy finish, making the total time ten minutes instead of six. And don’t omit the fresh tarragon—it is a key ingredient.

img_8261

As a bonus, I’m including a unique side dish that pairs perfectly with the entrée, a Millet and Chickpea Salad. It incorporates all kinds of interesting flavors with the additions of orange segments, roasted red pepper (we used an open jar of piquillo peppers, a Spanish variety having a sweet taste with no heat, akin to a bell pepper), red onion, honey and sherry vinegar.

Millet – isn’t that a type of birdseed you ask? Well, yes, but it’s not just for parakeets! Millet is a woefully overlooked grain, mildly sweet and nutty and so versatile it can be used in everything from pilafs to desserts. It has a soothing, comforting quality that makes it ideal for fall and winter meals.

bowl-of-millet

There are many varieties of millet; the primary types are called pearl, foxtail, proso, and finger. It’s nutritious – providing fiber, iron, B vitamins, manganese, phosphorus, and magnesium – and highly alkaline, making it easily digestible and soothing to the stomach…. and we just happened to have an unopened bag of Bob’s Red Mill brand in the pantry…

There’s no doubt we will be making this again! But we may do our own rendition of it using a braising method, swapping out thighs for the chicken breasts, adding a bit of garlic, and increasing the liquid to make more of that to-die-for sauce. We figure doing it this way let’s the chicken get happy in the luscious sauce for a period of time and therefore the flavors soak into the meat. I’ll make sure to blog about it after we do…

img_8243

Ingredients

  • 4 boneless, skinless chicken breast halves (about 1-3/4 lb.)
  • Kosher salt and freshly ground black pepper
  • 2 Tbs. olive oil
  • 2 large shallots, peeled and thinly sliced
  • 1/2 cup fresh orange juice
  • 1/2 cup lower-salt chicken broth
  • 2 Tbs. coarsely chopped fresh tarragon
  • 1 Tbs. honey
  • 1 tsp. finely grated orange zest

img_8251
Brown the chicken for 6 minutes on one side and turn before putting the pan into the preheated oven.

img_8252
After 15 minutes in the oven, remove the skillet and place breasts on a plate, then cover with foil.

img_8254
Without wiping the pan clean, add the shallots and some salt and cook for 2-4 minutes until softened.

img_8255
Add the orange juice, broth, tarragon, honey, and zest, and cook until the mixture is reduced by half, about 6-10 minutes.

img_8259
The finished consistency should be more like this, and not watery.

Directions

  1. Position a rack in the center of the oven and heat the oven to 450°F. Pat the chicken dry and sprinkle with 1 tsp. salt and 3/4 tsp. pepper.
  2. Heat the oil in a 12-inch ovenproof skillet over medium-high heat until shimmering hot. Cook the chicken breasts, undisturbed, until browned (they should easily release when you lift a corner), 5 to 6 minutes. Flip and transfer the skillet to the oven. Roast until just cooked through (165°F), about 15 minutes. Transfer the chicken to a plate, cover loosely with foil, and keep warm.
  3. Put the skillet over medium heat (be careful of the hot handle), add the shallots and 1/2 tsp. salt, and cook, stirring and scraping up any browned bits, until softened, about 2 minutes. Add the orange juice, broth, tarragon, honey, and zest, and cook until the mixture is reduced by half, about 6 minutes.
  4. Transfer the chicken to serving plates. Pour any juices that collected on the plate into the sauce and serve the sauce with the chicken.

Chicken recipe by Tony Rosenfeld from Fine Cooking

Millet and Chickpea Salad

This Mediterranean-inflected grain salad is quick enough to make on a weeknight, thanks to quick-cooking millet—making it a perfect side for the Sear-Roasted Chicken with Orange-Tarragon Sauce.

img_8246

Ingredients

  • 3 Tbs. plus 1 tsp. olive oil
  • 1/2 cup millet
  • Kosher salt
  • 1/4 tsp. crumbled saffron threads
  • 1 large orange, peeled and segmented, segments cut into thirds
  • 1 jarred roasted red pepper, chopped
  • 1/2 cup canned chickpeas, drained and rinsed
  • 2 Tbs. finely chopped red onion
  • 2 Tbs. sherry vinegar
  • 1 tsp. honey
  • 1/2 tsp. dried oregano

img_8248
Toast the millet in a hot skillet with a little oil for a minute or two.

img_8249
Add the water, saffron and salt in a small saucepan and bring to a boil.

img_8256
Put the cooked millet into a serving bowl and toss in the remaining ingredients.

img_8258
If necessary, cover with foil to keep warm until the chicken is ready.

Directions

  1. Heat 1 tsp. of the oil in a 10-inch skillet over medium heat. Add the millet and toast, shaking the pan, until one shade darker, about 1 minute.
  2. In a 1-quart saucepan, bring 1 cup water, 1/2 tsp. salt, and the saffron to a boil. Add the millet, cover, reduce the heat to low, and cook until tender, about 18 minutes.
  3. Scrape into a large bowl. Stir the orange segments, peppers, chickpeas, onion, the remaining 3 Tbs. oil, vinegar, honey, and oregano into the millet. Season to taste and serve.

by Mark Scarbrough, Bruce Weinstein from Fine Cooking

img_8263This made a perfect meal, but add a side salad if desired.


Company Worthy

Seared Shrimp with Pimentón and Sherry is an excellent variation on the classic Garlic Shrimp tapa. It is elegant enough to serve for special holidays, or as an appetizer for guests before dinner. Which is what we did recently with company on a Saturday night before heading out to a local trattoria.

Fino sherry is an important ingredient and I urge you to make the minor investment if you don’t already have some. It’s pretty much a staple in our house since Russ likes to imbibe in a glass every now and then—and it is often used in Spanish cooking. Other reviewers admitted using Masala wine as a substitute with poor results.

img_8075
The dish was half gone by the time I remembered to take a photo!

Having whipped up this dish in the past, we made a note to ourselves to double the recipe (if serving eight or more) and serve with baguette pieces to sop up the garlicky sauce. There wasn’t a one left as we headed out the door…

Ingredients

  • 1-1/2 lb. large (31 to 40 count) shrimp, peeled and deveined, patted dry with paper towels
  • Kosher salt
  • 3 Tbs. extra-virgin olive oil
  • 6 medium cloves garlic, very thinly sliced
  • Heaping 1/4 tsp. sweet pimentón (or paprika)
  • Heaping 1/8 tsp. crushed red pepper flakes
  • 3 Tbs. fino sherry
  • 1/4 teaspoon finely grated lemon zest
  • 1-1/2 tablespoons thinly sliced chives
  • Fresh lemon juice to taste

img_8073

Directions

  1. Sprinkle the shrimp with 3/4 tsp. kosher salt, toss, and let sit for 10 minutes (or refrigerate for up to 1 hour).
  2. In a large (12-inch) skillet, heat the olive oil on high heat. Pat the shrimp dry with paper towels and add them to the skillet. Sprinkle with 3/4 tsp. kosher salt and sear until they’re pink and a little golden on one side, about 1 minute.
  3. Sprinkle the garlic, pimentón, and red pepper flakes over the shrimp, and sauté, stirring, until the shrimp are almost completely pink, about 1 minute.
  4. Add the sherry and cook, stirring to deglaze the bottom of the pan, until the shrimp are pink all over (the sherry will evaporate quickly but you should still have some juices in the pan)
  5. Remove from the heat. Toss with the lemon zest and chives. Pour the shrimp and juices into a serving dish, squeeze on lemon juice to taste, and serve.

By Sarah Jay from Fine Cooking

Guests Mike & Paula, and Kim & Jeff at the restaurant after enjoying the shrimp appetizer at our house.

A Marriage of Two Cultures

A fusion BYOB, El Tule brings deliciously exotic and authentic Peruvian and Mexican cuisine to the New Hope-Lambertville area. Family owned and operated by the Engoavil family, El Tule has mastered the cuisine of the their native lands, Peru and Mexico. The restaurant’s name was chosen because the Egoavils have deep roots in their family tree, which are firmly based in both of their cultures.

In the Mexican state of Oaxaca is the world’s largest tree, a cypress called El Árbol del Tule, believed to be between 1,500 and 3,000 years old and often called the tree of life.

Go ahead and spread your culinary wings because your acquaintance with the type of food served here may end at the “almost” perfect house-made guacamole and nachos. We found food is fun at El Tule, where the menu offers some familiar, along with some not so familiar choices. The intriguing list of exotic items, such as carapulcra (stew of pork, potatoes and spices), parihuela (seafood soup), and lomo saltado (stir-fry of beef, onions and tomatoes), could make choosing a challenge. But to keep you from straying too far out of your gastric comfort zone, there is a good description of each item—so you’ll know what’s in it, even if you can’t pronounce it.

el-tule-exterior

We first noticed this quaint restaurant located on North Main Street over the summer when we passed it heading for a destination north of Lambertville. It wasn’t until friend Jeremy made a recent posting in Facebook extolling its virtues that we had an AHA moment, and quickly made reservations for a Saturday night.

They have no parking lot and trying to find a parking spot on a busy weekend night can be exasperating, but after circling a block or two, we found one a short distance away. After a quick, brisk walk we located the side entrance and popped in. Unexpectedly, you are immediately in the one bright orange room with all of the dining tables and a small reception desk. Thank goodness no one else was waiting for a table too, because there’s barely any room to hang out, let alone stay out of the way of the service staff. Outside is a nice looking patio that wraps around the side and back of the restaurant, but it was way too cool and windy to dine al fresco that night.

There was a moment of panic when the host (who I later learned was the patriarch, Mr. Engoavil) indicated our name was crossed off the waiting list. But within seconds one of the daughters said it was an error and they would have accommodations for us shortly—which they did, and we were seated at one end of a long table.

The noise level is almost deafening, partly due to it’s size, high cathedral ceilings, no sound buffers, and several really loud, animated parties of peeps. We struggled to hear the waitress as she explained things to us. Then we got down to business deciphering that menu. One oddity I noticed, the ending of several Peruvian dishes all said Tacu Tacu. So of course I had to inquire.

Unable to hear the waitress’ explanation, I later Googled it and found out that Tacu Tacu is a typical Peruvian recipe that originated as a way to use up left over rice and beans. The leftover rice is mixed with cooked, seasoned Canary beans, and then fried in a skillet to make a large patty.

img_8226

For starters I insisted we get the Guacamole because it looked like mine, had the same ingredients as mine, and other than El Vez in Philly, we have never found a restaurant that makes anything close to as good as mine—until now. We both agreed that had it contained a little bit more of both salt and lime juice, it would have been perfect!

img_8227

As we waited for the guac, we noticed all other diners received a basket of nacho chips with a side of three sauces. After a long several minutes, and before I could complain, they arrived with our pestle of yummy guacamole. The Peruvian Tamale with pork caught Russ’ fancy which came plated with a side of lettuce and pickled onions (which seems to be a Peruvian staple.) He offered me a taste and while it was OK, I wasn’t nearly as enthralled with it as he.

chef-carmen

img_8230

Being very familiar with Mexican food, for entrees we deliberately chose from the Peruvian offerings. My choice? The Red Snapper and Crabmeat Tacu Tacu, one of chef Carmen’s specialties, and special it was! An entire half of a perfectly tender and moist red snapper topped with crabmeat cooked in a light cream sauce of Peruvian Rocoto pepper sauce, served on top of Peruvian canary yellow bean Tacu Tacu. The photo above shows a beaming Carmen, affectionately known as Kiko, holding a platter of the red snapper entree.

img_8232

After agonizing over which entree to get, Russ finally selected the Peruvian Lamb Style Stew with tender pieces of boneless lamb slow cooked for 48 hours in a sauce made of Peruvian Aji escabeche and Chicha de Jora served with canary beans and white rice—and two yucca fries!

While we both immensely enjoyed our meals, their portions are very large and therefore we both had lots of leftovers to take home and enjoy for a second time. Russ swears his was even better the next day; me, I loved mine just as much both days.

We’re thinking the next time we visit—and there will definitely be a next time—we’ll order appetizers and ceviches and graze our way through several different options. It’s too bad that we have to wait many, many months before it will be warm enough to sit outside though. Keep in mind, if you pay in cash, you’ll receive a 5% discount.

Oh, and about that parking. When we made it back to our car, someone (most likely the driver who was parked behind us) had pulled up both windshield wipers and pushed in our sideview mirrors. We’re guessing he was trying to tell us we had parked to close to his precious SUV. A real class act…

Harissa-Rubbed Steak and Carrot Salad

Here’s a recipe using one of the trendiest hot sauces out there. My fave, Sriracha definitely reigns supreme when it comes to trendy hot sauces, but another hot, hot sauce for you to try is Harissa. Add this versatile condiment to your collection and spice up a whole slew of dishes. But let’s start with this one that is low-calorie, low-carb and gluten-free.

Harissa is a fiery and garlicky North African spice paste that’s traditionally served alongside bread, stews and couscous dishes. We made our own which is easy enough, but jarred versions work equally well—it just may not be so easy to locate.

For late October, it was well into the 80’s, so grilling outside was not a bad idea, even though it was totally dark out by the time Russ got home from work. But then, guess who’s grill decided to run out of propane less than a minute into grilling the steaks? Plan B. Turn on the broiler and finish them off—although under a gas broiler it takes just a bit longer.

A blend of cumin, cinnamon and paprika turns an ordinary side of carrots into a spicy-sweet warm salad. While the original recipe didn’t call for brown sugar, I felt the mixture was too intense (really, me??) and added a generous packed half teaspoon to mellow it out.

img_8131

HARISSA RECIPE

Harissa, the basic flavoring agent in Tunisian cuisine, is extremely versatile. Use it as a condiment for grilled meat or fish, add it to roasted vegetables, or stir into stews and soups. It is particularly good with couscous or rice. Adjust the amount of heat by increasing or reducing the number of chiles. We used 4 chiles but they must not have been too hot because we didn’t think the sauce was very fiery.

Ingredients

  • 1 red pepper
  • 1/2 tsp coriander seeds
  • 1/2 tsp cumin seeds
  • 1/2 tsp caraway seeds
  • 1 1/2 tbsp olive oil
  • 1 small red onion, coarsely chopped (scant 2/3 cup / 90 g in total)
  • 3 cloves garlic, coarsely chopped
  • 3 hot red chiles, seeded and coarsely chopped
  • 1 1/2 tsp tomato paste
  • 2 tbsp freshly squeezed lemon juice
  • 1/2 tsp salt

img_8144The charred pepper after it was blackened, cools in a plastic wrap covered bowl.

img_8146
Toast the coriander, cumin, and caraway seeds in a dry frying pan.

img_8148
Instead of a mortar and pestle, we used a mini-spice grinder.

img_8149
The seeds are ground into a fine powder.

img_8150
In a frying pan, fry the onion, garlic, and chiles until a dark smoky color and almost caramelized.

img_8156
The aromatics should have a caramelized look when done.

img_8159
All of the paste ingredients are blended together to finalize the harissa.

Directions

  1. Place the pepper under a very hot broiler, turning occasionally for about 25 minutes, until blackened on the outside and completely soft. Transfer to a bowl, cover with plastic wrap, and allow to cool. Peel the pepper and discard its skin and seeds.
  2. Place a dry frying pan over low heat and lightly toast the coriander, cumin, and caraway seeds for 2 minutes. Remove them to a mortar and use a pestle to grind to a powder.
  3. Heat the olive oil in a frying pan over medium heat, and fry the onion, garlic, and chiles for 10 to 12 minutes, until a dark smoky color and almost caramelized.
  4. Now use a blender or a food processor to blitz together all of the paste ingredients until smooth, adding a little more oil if needed.
  5. Store in a sterilized jar in the fridge for up to 2 weeks or even longer.

STEAK and CARROT RECIPE

img_8177

Ingredients

  • 2 tablespoons lemon juice
  • 1 tablespoon extra-virgin olive oil
  • 2 cloves garlic, minced
  • 1 1/2 teaspoons ground cumin
  • 1/2 teaspoon ground cinnamon
  • 1/2 teaspoon paprika
  • 1/2 teasoon packed light brown sugar (optional)
  • 3/4 teaspoon kosher salt, divided
  • 3 cups thinly sliced carrots, (about 1 pound)
  • 1 to 1 1/4 pounds skirt steak, (see Note), trimmed and cut into 4 portions
  • 4 teaspoons harissa, (see recipe below)
  • 1 tablespoon chopped fresh parsley, or cilantro for garnish

img_8179
Two skirt steaks, cut in half and slathered with harissa (made the night prior) are ready for the grill.

img_8182
Because our grill ran out of propane, we finished off the steaks under the broiler.

img_8186
After the carrots are steamed, toss them with the spice mixture.

Directions

  1. Preheat grill to medium-high. (No grill? Use your Broiler.)
  2. Whisk lemon juice, oil, garlic, cumin, cinnamon, paprika, brown sugar and 1/2 teaspoon salt in a small bowl. Steam carrots over 1 inch of boiling water in a large saucepan fitted with a steamer basket until tender-crisp, 2 to 3 minutes. (For softer carrots, steam 10-12 minutes.) Toss the carrots with the spice mixture.
  3. Rub both sides of steak with harissa and sprinkle with the remaining 1/4 teaspoon salt. Grill the steak 1 1/2 to 3 minutes per side for medium. Transfer to a clean cutting board and let rest for 5 minutes, then thinly slice across the grain. Serve with the spiced carrots, garnished with parsley (or cilantro), if desired.

img_8188
Garnish your meal with some fresh chopped parsley or cilantro.

Another Can of Beans!

Instead of the usual creamy, rich puréed style of butternut squash soup (which I adore), we wanted a heartier version that could stand on its own as a meal, and we found just that in our latest edition of Cooks Illustrated Magazine with Butternut Squash and White Bean Soup with Sage Pesto. They say, adding butter to the stock at the start of its simmering time allows it to fully emulsify, giving the soup base richness and a more velvety texture. A swirl of sage pesto, quickly made in the food processor, lends the right bright, fresh finish.

best

For the best texture, it’s important to remove the fibrous white flesh just below the squash’s skin. Easier said than done. That being the case, we bought it already cubed. My mama didn’t raise no fool! However, you are supposed to cook the unused “neck” of the squash with the leeks and tomato paste in a separate skillet. Personally we don’t think the soup suffered any ill affects without the neck.

For the pesto, roasted pine nuts were used in place of walnuts, because the Mr. despises them. This version of pesto calls for some fresh sage leaves, which we had an abundance of growing in our herb garden. That is, until Russ forgot it was going to be used for one of our weeknight recipes and cut most of it down to dehydrate a few days prior. I was going to substitute some dried, but when I ventured out to the garden, I was able to salvage enough to make it work since we were cutting the pesto recipe in half—which was plenty, by the way.

In a “senior moment” I neglected to add the grated parm to the pesto. When it was done being processed, I got this niggling feeling that something just wasn’t right with it, but let it go to pay attention (or so I thought) to the soup base. Minutes before the soup was to be served, I noticed the 1/4 cup of grated parm sitting on the counter and quickly threw the pesto back into the mini-processor and pulsed it with the cheese. And what good pesto it was!

img_8029Here’s how the pesto looked before I realized it was missing the grated parm.

img_8036Once the cheese was added, the pesto is much more robust!

Oh, and the final faux pas was I only added one can of cannellini beans when the recipe called for three cans. During dinner I commented that the soup would benefit from more than one can of beans, and Russ agreed. Then he said, “Well how many did you put in, because I thought you were supposed to add three cans?” With that, I grabbed the written recipe, and sure enough, it was indeed three!

No sweat, with half the soup still left in the pot, I opened another can of beans and tossed them in. So our leftovers ended up with the right consistency. What can I say, it had been a long stressful workday, and this was NOT one of those 30-minute meals…

img_8027

Butternut Squash and White Bean Soup with Sage Pesto

  • Servings: 4
  • Difficulty: moderate
  • Print

Ingredients

PESTO (we cut this recipe in half)

  • ½ cup walnuts (or pine nuts), toasted
  • garlic cloves, minced
  • cup fresh parsley leaves
  • ½ cup fresh sage leaves
  • ¾ cup extra-virgin olive oil
  • ounce Parmesan cheese, grated (½ cup), plus extra for serving
  • Salt and pepper

SOUP

  • (2- to 2 ½ pound) butternut squash
  • cups chicken broth
  • cups water
  • tablespoons unsalted butter
  • tablespoon soy sauce
  • tablespoon vegetable oil
  • pound leeks, white and light green parts only, halved lengthwise, sliced thin, and washed thoroughly
  • tablespoon tomato paste
  • garlic cloves, minced
  • Salt and pepper
  • (15-ounce) cans cannellini beans
  • teaspoon white wine vinegar
img_8031
Sliced leeks are cooked with a tablespoon of tomato paste.
img_8038
To keep the cover partially open, we insert a wooden spoon.
img_8033
The amount of beans was obviously lacking, and had I consulted with the recipe, I would have seen that three cans were required, duh…
Directions

FOR THE PESTO:

  1. Pulse walnuts and garlic in food processor until coarsely chopped, about 5 pulses. Add parsley and sage; with processor running, slowly add oil and process until smooth, about 1 minute.
  2. Transfer to bowl, stir in Parmesan, and season with salt and pepper to taste. Set aside.

FOR THE SOUP:

  1. Using sharp vegetable peeler or chef’s knife, remove skin and fibrous threads just below skin from squash (peel until squash is completely orange with no white flesh remaining, roughly 1/8 inch deep). Cut round bulb section off squash and cut in half lengthwise. Scoop out and discard seeds; cut each half into 4 wedges.
  2. Bring squash wedges, broth, water, butter, and soy sauce to boil in medium saucepan over high heat. Reduce heat to medium, partially cover, and simmer vigorously until squash is very tender and starting to fall apart, about 20 minutes. Using potato masher, mash squash, still in broth, until completely broken down. Cover to keep warm; set aside.
  3. While broth cooks, cut neck of squash into 1/3-inch pieces. Heat oil in large Dutch oven over medium heat until shimmering. Add leeks and tomato paste and cook, stirring occasionally, until leeks have softened and tomato paste has darkened, about 5 minutes.
  4. Add garlic and cook until fragrant, about 30 seconds. Add squash pieces, 3/4 teaspoon salt, and 1/4 teaspoon pepper and cook, stirring occasionally, for 5 minutes. Add squash broth and bring to simmer. Partially cover and cook for 10 minutes.
  5. Add beans and their liquid, partially cover, and cook, stirring occasionally, until squash is just tender, 15 to 20 minutes. Stir in vinegar and season with salt and pepper to taste. Serve, passing pesto and extra Parmesan separately.

best2

http://www.lynnandruss.com

Pork Chops Agrodolce

Agrodolce is a traditional sweet and sour sauce in Italian cuisine. Its name comes from “agro” (sour) and “dolce” (sweet). This fact alone caught my attention. Then put it together with thick, plump, juicy bone-in pork chops, and you can’t go wrong.

The Italian sweet-and-sour sauce is considered a type of gastrique, a thick sauce made from vinegar, wine, sugar, and fruit. The traditional version is comprised of two parts vinegar to one part wine; balsamic is the most common vinegar, while any quality red or white wine can be used.

img_8114
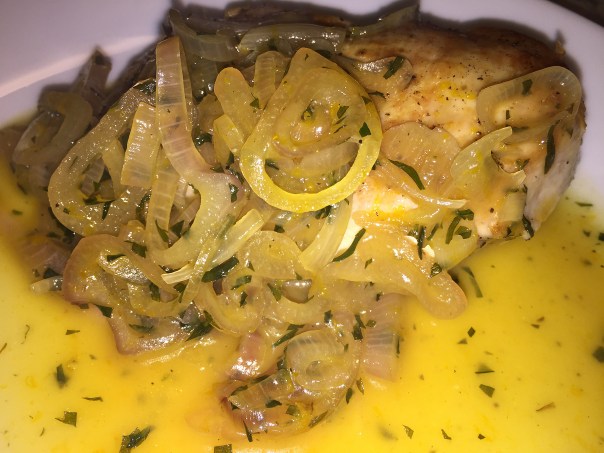
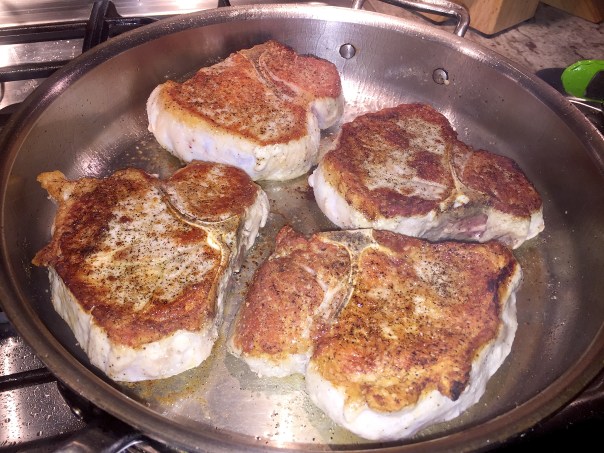
Just look at these golden, mouth-watering chops!

Agrodolce can also be infused with a variety of herbs, adding depth of flavor, and expanding the variety of dishes the sauce can complement. While the base of this sauce is almost always the same, the numerous choices in additions and variations make it versatile enough to suit both savory and sweet foods.

So versatile in fact, it can be used as both a pasta sauce or finishing sauce for a variety of dishes. In Sicily, it is a favorite topping for grilled meats as well as a simple pasta sauce. In mainland Italy, agrodolce is commonly used as a glaze or a dipping sauce for antipasto. In both mainland Italy and Sicily, sautéed pearl onions are tossed in the sweet-and-sour sauce and served as a side dish. It can also make a good addition to cheese boards, often as a dipping sauce for both mild and stronger flavored cheeses.

Our version came courtesy of Giada De Laurentiis, of Food Network fame. We seared the chops in a carbon steel skillet as opposed to using the grill pan—well, because we didn’t have one! Thankfully, you don’t spend too much time prepping or cooking because the entree comes together fairly quickly. Our sides weren’t too time-intensive either as we served baked sweet potatoes and steamed green beans with a drizzle of a flavored olive oil and vinegar.

img_8116
Our dinner guest, son David, was the glad recipient of the dinner—and leftovers.

Ingredients

  • 1/2 cup balsamic vinegar
  • 2 cloves garlic, peeled and smashed
  • 4 sprigs fresh thyme
  • 3 tablespoons honey, such as acacia
  • 3 tablespoons unsalted butter, at room temperature
  • 4 thick, center-cut pork loin chops, bone-in (about 12 ounces each)
  • Kosher salt and freshly ground black pepper
  • 2 tablespoons olive oil

img_8101
Season the pork chops evenly on both sides with salt and pepper.

img_8102
Sear the first side until nicely browned, about 5 minutes.

img_8105
Flip the chops and grill for an additional 5 minutes on the second side.

img_8109
Baste the chops with some of the sauce and then continue basting and flipping until the chops are caramelized and slightly charred.

img_8111
When ready, remove the chops to a platter and allow to rest for 10 minutes.

Directions

  1. Combine the vinegar, garlic and thyme in a small saucepan. Bring to a simmer over medium heat. Continue to simmer until reduced by half, about 5 minutes.
  2. Add the honey and simmer until the mixture has thickened slightly, another 3 to 4 minutes. Stir in the butter and set aside.
  3. Preheat a grill pan over medium-high heat.
  4. Season the pork chops evenly on both sides with 1 teaspoon salt and 1/4 teaspoon pepper. Drizzle with the olive oil and place on the hot grill pan. Grill the first side until nicely browned, about 5 minutes.
  5. Flip the chops and grill for an additional 5 minutes on the second side. Baste the chops with some of the sauce and then continue basting and flipping until the chops are caramelized and slightly charred and the meat registers 150 degrees F on an instant-read thermometer.
  6. Remove the chops to a platter and allow to rest for 10 minutes. Serve drizzled with the remaining sauce.

Who Gives a Fig

Guests are coming and you don’t have much time to prepare, so what do you do? Give a fig—literally. One tasty option: Fig, Goat Cheese and Pecan Appetizers. They’re fashionable, easy to construct, and require no cooking. For a final flourish, drizzle with a balsamic glaze, or perhaps honey, and Voila you just made and elegant and easy appy.

black-mission-fig

Edible figs come in a large variety of choices, both dried and fresh. Among the most esteemed and available is the Black Mission (shown above). This fig is smallish, with dense pink flesh heavily studded with seeds that give a pleasant crunch to the silky flesh. The texture of a perfectly ripe one is sticky and jammy. The fruits of the popular Brown Turkey (shown below) are elongated and pear-shaped, with maple-brown skin. Those with tender skin that bruises easily will be soft and velvety, and heavy, sweet and juicy within.

brown-turkey-fig

Sierra are a green-skinned fig, and their fruits are large and round, ideal for slicing open and serving by the half. Calimyrna, similar looking to the Sierra, is outstanding as a fresh fruit, have a delicate, nut-like flavor; and when dried, they turn golden tan—which is what we used. Its large fruits split with ripeness as sap and sugars erupt from the breaches in the skin. Such figs taste of honey, jam and butterscotch, with a nuttiness from the numerous seeds.

Then there’s the Kadota, the most common green type. The skin is yellowish green, and the flesh particularly smooth and silky. It is among the more commonly seen fresh figs in California.

figs-and-blue

But what did we use for our appetizer? Specifically, dried Calimyrna figs spread with a schmear of Monocacy Silver, Cherry Glenn goat cheese topped with caramelized pecans and a drizzle of Modena balsamic vinegar glaze. Monocacy Silver is a soft-ripened cylindrical shaped cheese with a white mold exterior (which we bought on our trip to Culpeper, VA.) It is more tangy and flavorful than most Brie but ripens to a similar creamy internal consistency.

img_8059
Slice the dried figs in half lengthwise.

img_8061
Once the figs are halved, spread with goat cheese.

img_8069
A caramelized pecan adorns the cheese while a drizzle of balsamic glaze tops off each appetizer.

Other soft cheese and nut combinations include: creamy Gorgonzola topped with earthy walnuts; velvety Brie and toasted almonds; or milky mascarpone with the unmistakeable taste of pistachios and a dollop of honey. Make all four varieties to really impress!

FYI: A bit of warm liquid will soften dried figs, which can be simmered in a fruit compote or chutney. Or, soak the figs in warm water for an hour or so before adding them to stuffings and pilafs, where they add subtle sweetness and texture. Reconstituted figs are very different from fresh figs, and will alter a dish if substituted for fresh.

img_8071
A close-up of the tasty morsels that can be eaten by hand.

Spinach and Leek Soup with Garlic and Cannellini Beans

In cooler months, Sundays often find us making homemade soup, perfect for a quick dinner or for weekday work lunches. It’s important to me that it’s a healthy soup with lots of veggies and not too heavy. So when I spotted chef-author Ronne Day’s Spinach and Leek Soup with Garlic and Cannellini Beans from an issue of Fine Cooking, I knew we had a winner. And yes, it’s extremely simple.

As with any soup, much of the flavor comes from the broth, so use homemade chicken stock if you have it. Creamy, earthy beans and plenty of greens make this delicately lemony soup satisfying enough for a light meal. For a more substantial meal, serve it with some good crusty bread—or a sandwich, if you’re really hungry. Make sure to purchase mature spinach rather than the baby variety which wilts down to nothing when cooked.

We didn’t pick up Gruyère as a topper because we already had a Dutch Maasdam cheese with a slightly sweet and nutty flavor that paired perfectly with the soup. Son David happened to be visiting as the soup was cooling so he was the lucky recipient of the first bowl, and gave it “two thumbs up.”

Ingredients

  • 2 Tbs. olive oil
  • 3 medium leeks, white and light-green parts only, trimmed and sliced 1/4 inch thick
  • 4 large cloves garlic, sliced lengthwise
  • 2 tsp. dried mustard
  • 6 cups chicken broth or stock, preferably homemade
  • 8 oz. spinach, trimmed and cut into 1-inch ribbons (about 8 lightly packed cups)
  • 1 15.5-oz. can cannellini beans, rinsed and drained
  • 2 Tbs. fresh lemon juice
  • Kosher salt and freshly ground black pepper
  • 1 oz. finely grated aged Gruyère (about 1/2 cup)
  • Extra-virgin olive oil, for serving

IMG_5497
The spinach is chopped into ribbons awaiting its turn toward the end of the process.

IMG_5499

Directions

  1. In a 6-quart pot, heat the olive oil over medium-high heat. Add the leeks and cook, stirring often, until tender and browned in spots, about 5 minutes.
  2. Add the garlic and mustard, and cook, stirring, until fragrant, 15 seconds. Raise the heat to high, add the chicken broth, and bring to a boil.
  3. Add the spinach and beans, and cook until the spinach wilts. Stir in the lemon juice, and season to taste with salt and pepper.
  4. Serve topped with the cheese and a drizzle of extra-virgin olive oil.

By Ronne Day from Fine Cooking

IMG_5508
A small glass lock-n-lock containing a lunch portion with the shredded cheese added.

Wok and Roll

Put some spice in your life with this restaurant favorite. This is not your everyday local take-out Kung Pao Chicken—heck no, this is fine dining Kung Pao Chicken my friend. So set your table, pour a glass of wine and invite the guests, because it’s time to impress! Who needs take out when you can make this fantastic recipe at home?

You may initially be overwhelmed by the huge ingredient list, but once you taste the end result where all the flavors meld into total deliciousness, there’ll be no going back. Because we stir-fry a lot, we had all of the ingredients including regular and dark soy sauce, Shao Hsing rice wine, dried red chiles, ground Sichuan pepper corns and sesame oil. If you don’t have them, trust me, it’s worth tracking down all of the fixings because no doubt you’ll want to make it again, and again, and again…

As the Boy Scouts say “Be Prepared” because once you start flinging the spatula around the wok, there’ll be no time to measure or chop, so read the recipe all of the way through first. Then when everything is prepped, heat the wok and perform like a kitchen maestro! I actually stood by Russ and read him directions one at a time as he stir-fried because everything happens in 1 minute or less intervals.

Chicken thigh meat has more flavor than the breast meat so we used that; and with cocktail peanuts already in our pantry, we didn’t bother buying unsalted roasted peanuts. Always looking for ways to increase the vegetable quotient, a yellow pepper was incorporated along with the red, and the scallion amount was nearly doubled. Finally, as you can see by the photo we used 8 dried red chiles and didn’t think it was too spicy—but of course, that’s us…

Kung Pao Chicken

  • Servings: 2-3
  • Difficulty: easy
  • Print

Makes: 2 to 3 servings as a main dish with rice, 4 servings as part of a multicourse meal

img_7525

Ingredients

  • 1 pound of boneless skinless chicken thighs, cut into 1/4 inch cubes
  • 2 Tbsp minced ginger
  • 1 Tbsp minced garlic
  • 2 1/2 tsp cornstarch
  • 1 tsp soy sauce
  • 1 tsp plus 1 Tbsp Shao Hsing rice wine or dry sherry
  • 2 tsp sugar
  • 3/4 tsp salt
  • 1 tsp cold water
  • 2 Tbsp chicken broth
  • 1 Tbsp balsamic vinegar
  • 1 tsp dark soy sauce
  • 1 tsp sesame oil
  • 2 Tbsp peanut or vegetable oil
  • 4 to 8 (depending on your heat tolerance) dried red chiles, stems cut off
  • 1/2 tsp roasted and ground Sichuan pepper corns
  • 1 large red bell pepper cut into 1 inch squares
  • 1/4 C dry roasted unsalted peanuts
  • 1/2 C minced scallions
 img_7526
Combine the chicken, ginger, garlic, cornstarch, soy sauce, rice wine, sugar, salt and cold water, set aside.
img_7527
The dried red chiles and crushed Sichuan peppercorns are stir-fried briefly until fragrant.
img_7532
Move chiles to side of wok, add marinated chicken pieces.
img_7533
Stir-fry chicken with chiles until lightly browned but not cooked through. 
img_7535
Add the bell peppers and stir-fry until the peppers begin to soften.
img_7539
During the last minute, add the peanuts and green onions.

Directions

  1. In a medium bowl combine the chicken, ginger, garlic, cornstarch, soy sauce, 1 teaspoon of the rice wine, 1 teaspoon of the sugar, 1/2 teaspoon of the salt and 1 teaspoon cold water. Stir to combine.
  2. In a small bowl combine the broth, vinegar, dark soy sauce, sesame oil and the remaining 1 tablespoon rice wine.
  3. Heat a 14-inch flat-bottomed wok or 12-inch skillet over high heat until a bead of water vaporizes within 1 to 2 seconds of contact. Swirl in 1 tablespoon peanut oil; add the chilies and ground Sichuan peppercorns.
  4. With a metal spatula, Stir-fry 15 seconds or until the chilies just begin to smoke. Push the chili mixture to the sides of the wok.
  5. Carefully add the chicken; spread it evenly in one layer in the wok. Cook undisturbed, letting the chicken begin to sear, 1 minute. Then stir-fry until the chicken is lightly browned but not cooked through, 1 minute.
  6. Swirl the remaining 1 tablespoon peanut oil into the wok. Add the bell peppers and stir-fry 1 minute or until the peppers begin to soften. Swirl the broth mixture into the wok and stir-fry 1 minute or until the chicken is just cooked through.
  7. Add the peanuts and green onions, sprinkle on the remaining 1 teaspoon sugar and 1/4 teaspoon salt; stir-fry until the green onions are bright green, about 30 seconds.

img_7542
Serve over cooked rice.

Note: Put Sichuan peppercorns in a dry, cold wok or skillet and remove any tiny stems. Stir over medium-low heat until the peppercorns are very fragrant and slightly smoking, 3-5 minutes. Be careful not to let them burn. Once they’re cooled, grind them in a mortar; store any extra in a jar.

http://www.lynnandruss.com

An adaptation of a recipe by Grace Young

A Parm-Athon

Think eggplant has to be stringy, bitter, greasy, or bland? Chances are you’ve just never eaten it when it’s cooked right. Eggplant in and of itself is rather insipid, but it’s a great companion to many other vegetables and spices—think ratatouille, crisp-edged fried eggplant smothered with tahini, the creamiest, richest baba ganoush, or Japanese miso-glazed eggplant burgers…hungry yet?

img_7944

If you have an entire afternoon to kill, then this layered Eggplant Parmesan recipe is for you. Oh, and make sure to have a LOT of paper towels on hand—fair warning. But OMG, is it worth it! You could of course cheat and use a prepared sauce, but then you’d only be cheating yourself, because the sauce is AMAZING! In fact, we’re thinking of making a batch of just the sauce to use for any number of recipes. So as not to spend a marathon in the kitchen in one fell swoop, go ahead and cook up the tomato sauce a day or two ahead of time.

Our chunk of low moisture mozzarella was 8 ounces, but I went ahead and used it all instead of just 6 ounces which the recipe specifies. And because of Russ’s wheat allergy, we utilized gluten-free flour and panko bread crumbs.

Be aware of timing your dinner appropriately because trying to slice into this Eggplant Parmesan while it’s molten hot creates an oozy mess, so let it rest at room temperature for at least 30 minutes to firm up before serving. It’ll serve 8-12, depending on how big you cut your portions. We were thrilled to have leftovers for additional meals (both lunch and dinner) during the week.

img_7939

Ingredients

Marinara

  • ¼ cup olive oil
  • 1 head of garlic, cloves crushed
  • 1 large red onion, chopped
  • 3 oil-packed anchovy fillets (optional)
  • ½ teaspoon crushed red pepper flakes
  • 1 tablespoon tomato paste
  • ¼ cup dry white wine
  • 2 28-ounce cans whole peeled tomatoes
  • ¼ cup torn basil leaves
  • ½ teaspoon dried oregano
  • Kosher salt

img_7949
The crushed garlic cloves get cooked until golden.

img_7951
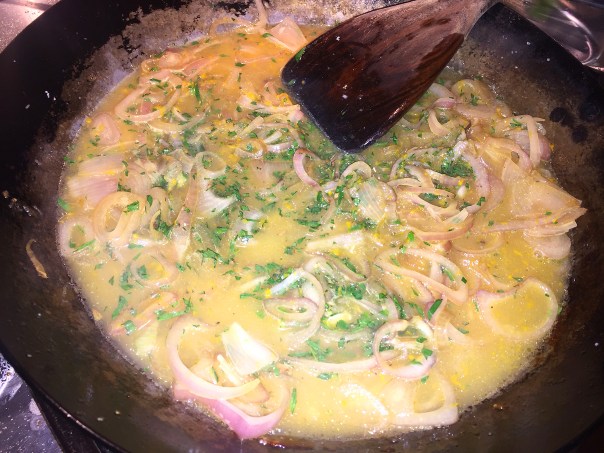
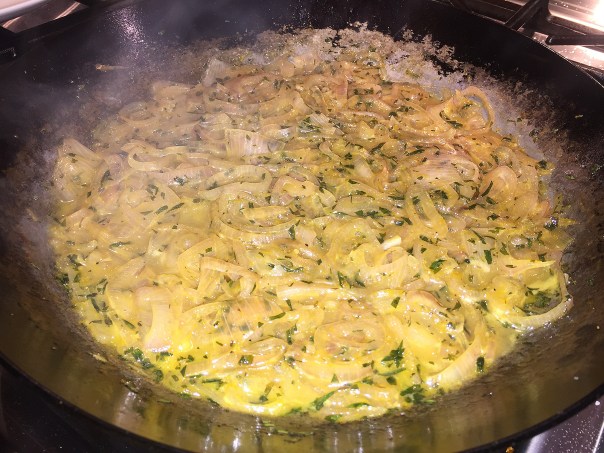
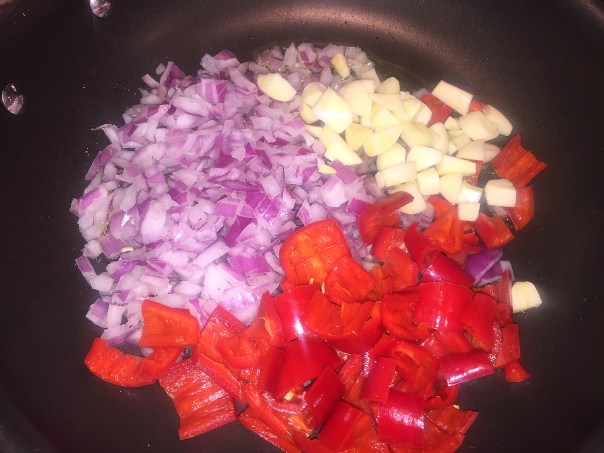
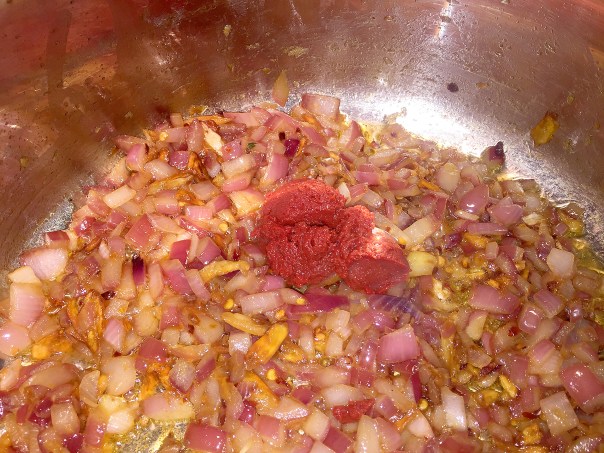
After the red onion becomes translucent, add the tablespoon of tomato paste.

img_7952
Pour in the cans of whole peeled tomatoes and partially crush with hands.

img_7953
Torn basil leaves and dried oregano are added to the crushed tomatoes.

img_7964
After the tomato sauce cooks in the oven for nearly 2 1/2 hours, it is puréed in a food processor until smooth.

Eggplant And Assembly

  • 4 pounds Italian eggplants (about 4 medium), peeled, sliced lengthwise ½–¾ inch thick
  • Kosher salt
  • 3 cups panko (Japanese breadcrumbs)
  • teaspoon dried oregano
  • 1 teaspoon freshly ground black pepper
  • cups finely grated Parmesan, divided
  • cups all-purpose flour
  • 5 large eggs, beaten to blend
  • 1⅓ cups olive oil
  • ½ cup finely chopped basil and parsley, plus basil leaves for serving
  • 6 ounces low-moisture mozzarella, grated (about 1⅓ cups)
  • 8 ounces fresh mozzarella, thinly sliced

Directions

img_7960

Marinara

  1. Preheat oven to 350°. Heat oil in a large heavy ovenproof pot over medium. Cook garlic, stirring often, until golden, about 4 minutes. Add onion, anchovies (if using), and red pepper flakes and cook, stirring often, until onion is translucent, about 5 minutes.
  2. Stir in tomato paste and cook, stirring often, until slightly darkened, about 2 minutes. Add wine, bring to a boil, and cook until almost completely evaporated, about 1 minute. Add tomatoes, breaking up with your hands, and their juices; add basil and oregano and stir to combine.
  3. Swirl 1½ cups water into one tomato can, then the other, to rinse, and add to pot; season with salt. Transfer pot to oven; roast sauce, stirring halfway through, until thick and tomatoes are browned on top and around edges of pot, 2–2½ hours.
  4. Let sauce cool slightly. Pass through the large holes of a food mill or process in a food processor until mostly smooth. Taste and season with salt.
Do Ahead: Sauce can be made 2 days ahead. Cover and chill.
img_7959
Lightly season eggplant slices all over with salt; place in a single layer on several layers of paper towels inside a rimmed baking sheet. Top with another layer of paper towels and more slices; repeat as needed.
img_7963
Pulse panko, oregano, pepper, and half of the Parmesan in a food processor until very finely ground.img_7968
Create an assembly line of flour, beaten eggs and the panko-parm mixture for dipping and coating.
img_7970
Place coated eggplant slices on a rack while oil in frying pan gets hot.
img_7971
About three at a time will fit in the skillet for 2-3 minutes each side. Cook in batches.
img_7975
Place fried eggplant slices on layers of papertowels, and blot the tops with more paper towels.

Eggplant And Assembly

  1. Lightly season eggplant slices all over with salt; place in a single layer on several layers of paper towels inside a rimmed baking sheet. Top with another layer of paper towels and more slices; repeat as needed. Top with a final layer of paper towels, then another rimmed baking sheet; weigh down with a heavy pot.
  2. Let eggplant sit until it has released excess liquid, 45–60 minutes. This step gives the eggplant a creamy texture when baked.
  3. Meanwhile, pulse panko, oregano, pepper, and ¾ cup Parmesan in a food processor until very finely ground. Transfer to a shallow bowl.
  4. Preheat oven to 350°. Place flour in another shallow bowl and eggs in a third shallow bowl. Working one at a time, dredge eggplant slices in flour, then dip in egg, allowing excess to drip off. Coat in breadcrumbs, packing all around, then shaking off excess. Place on wire racks.
  5. Heat ⅔ cup oil in a large skillet, preferably cast iron, over medium-high. Cook as many eggplant slices as will comfortably fit in pan, turning once, until deep golden, about 5 minutes.
  6. Transfer to paper towels and immediately press with more paper towel to absorb oil. Working in batches, repeat with remaining slices, adding remaining ⅔ cup oil and wiping out skillet as needed. Let cool. Taste and season with more salt if needed.
  7. Toss chopped herbs, low-moisture mozzarella, and remaining ¾ cup Parmesan in a medium bowl. Spread 1 cup sauce over the bottom of a 13 x 9″ baking pan; top with a layer of eggplant slices (trim as needed). Drizzle 1 cup sauce over and sprinkle with one-third of cheese mixture.
  8. Add another layer of eggplant, followed by 1 cup sauce and half of remaining cheese mixture. Repeat layers with remaining slices, sauce, and cheese mixture. Cover with foil and bake on a rimmed baking sheet until eggplant is custardy, 45–60 minutes. (I left it in the oven for the full hour.)
  9. Remove from oven and arrange fresh mozzarella over eggplant. Increase oven temperature to 425° and bake, uncovered, until cheese is bubbling and browned in spots, 15–20 minutes longer. Let rest 30 minutes. Top with basil leaves just before slicing.
Do Ahead: The sauce alone, or the entire Eggplant Parmesan can be made 2 days ahead. Let cool; cover with foil and chill. Reheat in a 350° oven, uncovering halfway through, until bubbling gently at edges.
This is part of Bon Appetit’s Best.
img_7974
Toss together chopped herbs, low-moisture mozzarella, and remaining Parmesan in a medium bowl.
img_7977
Starting with the sauce layer the eggplant, and cheese on top, and repeat two more times. 
img_7980
After about an hour, remove the dish from oven and increase the temperature to 425 degrees.
img_7981
Layer the mozzarella slices allover the top and return to oven.
img_7984
After the cheese melts and starts to brown, remove from oven and let sit at least 30 minutes before cutting.
img_7992
Top with a chiffonade of fresh basil. We enjoyed with a side salad for a complete meal.

Marin County

California Bay Area Part 5 of 5—

After finishing a fantastic lunch at River’s End overlooking the Pacific Coast where it was cold and overcast, just one hour south and a bit inland to Marin County, the sun was a gorgeous blue again and the weather was in the mid-70’s with low humidity—in other words perfect! We had arrived at our in-laws Kim and Ken Cochrane’s house in San Rafael.

img_7789
A view from the Cochrane’s front porch.

We found out later that the blond, long-haired female neighbor across the street was a high-level Buddhist monk who had the Dalai Lama himself visit with a stream of secret service limos in tow. I actually did catch a glimpse of her highness as she disembarked from her Mercedes (I had no idea being a monk paid so well) and she looked a lot younger than her years, which were purportedly about the same as mine—bee-otch! Enough about the neighbors…

Our dinner reservations that first evening were at the quintessential Marin County dining mainstay, the Buckeye Roadhouse, a beautiful Aspen lodge-style dining room adorned with vaulted ceilings and a magnificent river-rock fireplace. The menu features delicious traditional American cuisine with a Californian contemporary twist—and as is the case with most restaurants that we have patronized on this trip—utilize fresh, local ingredients.

img_7790

img_7794A large moose head can be seen hanging near the cathedral ceiling between Ken and Kim.

Our table was on the second floor loft overlooking the first floor dining room and fireplace. It was good catching up with each other, because as I mentioned in the previous blog, the last time we visited the Cochrane’s was 11 years ago as Hurricane Katrina barreled down and devastated New Orleans. And as I was writing this, Hurricane Matthew had just pummeled some of the Caribbean and was working on trashing most of Florida and the Carolinas.

And several days after we departed California, guess who went on a trip to the Caribbean via Miami, Florida to celebrate their 25th wedding anniversary? Yes, that would be the Cochrane’s! Just this morning Kim posted on Facebook that they made it to Antigua only one day late. Fingers crossed that they make it back without any issues.

Back to the Buckeye. For starters, the ladies enjoyed salads: I ordered the Kale, Mint, and Goat Cheese that came plated with fennel, toasted bread crumbs, and goat cheese vinaigrette; and Kim chose the Organic Butter Lettuce with spiced walnuts, fuji apple, and Point Reyes blue cheese, which seems to be pretty common in these parts. While Russ opted for the perfectly charred Pan Roasted Artichoke with a creamy tarragon dip and a seared lemon half.

img_7796

img_7795

img_7798

Our entrées ran the gamut from the medium-rare Bacon Wrapped Petit Filet Mignon plated with king oyster mushrooms, a layered potato-fennel gratin, finished with a velvety red wine sauce (the choice for Russ and I both.) While Ken selected the wood grilled Brandt Rib-Eye Steak with herbed garlic butter, fried squash blossoms, and a sliced heirloom tomato salad (which I should have swapped out in place of the potato gratin.)

While I am remiss as to exactly what Kim ordered, I believe it was the pan-seared “Fish of the Day” on a layer of beautiful magenta-hued (beet?) sauce and topped with green olives and charred broccoli. Her dish resembled a surrealistic painting with all of the colorful shapes.

img_7804

img_7803

img_7806

The next day was Friday and Kim had to get up early for work so there was no wild night on the town for us (not that we had any such plans to do so.) We woke up to another absolutely spectacular day, and along with a few food shopping errands, Ken took us on a tour of the Samuel P. Taylor State Park which contains nearly 2,800 acres of wooded countryside in the rolling hills.

img_7809

One memorable stop was the Marin French Cheese Factory. It all started on a dairy farm in 1865 and soon gained renown for their European style cheeses: soft-ripened Brie, Camembert and a simple treat called Breakfast Cheese. Today, more than 150 years later, it is the longest continually operating cheese company in America, still creating the same classic styles of Brie and Camembert using only the freshest milk from neighboring family dairies.

While Ken was disappointed that they no longer provided tours (as were a couple of other guests), we were happy to indulge in a tasting event of numerous flavors and styles. The hard part was deciding which ones to buy because they were all delicious!

img_7811

img_7815

img_7812

Because we were luxuriating in fine dining most evenings, lunch was nonexistent most days, which was more than fine by me. For our second evening in San Rafael, we supped at Insalata’s, a favorite of both Kim and Ken, and for good reason. Since 1996, Insalata’s, a bib gourmand-awarded restaurant has brought the warm spirit of the Mediterranean to Marin County, with menus that strike a balance between familiar flavors and enticing new fare. It was heart warming to learn that they proudly partner with ExtraFood.org to get food donations to vulnerable people in the community.

While waiting for beverages of choice, a basket of freshly baked bread was delivered table side as we pondered the selection of appetizers which were refreshingly different, and our choices reflected that. My starter was the Crispy Eggplant Fries with a side of cilantro-mint chutney. Delicious! Ken enjoyed his sleeve of Marinated Olives with thyme and orange.

Kim’s Syrian Fattoush Salad was made up of romaine, toasted pita, feta cheese, onions, cherry tomatoes, olives, cucumber, cilantro, and mint, in a lemon lemon vinaigrette. But the award goes to Russ’s Moroccan Lamb Kefta consisting of lamb meatballs in spicy tomato shakshuka, manouri cheese, pickled chilies and house made grilled flatbread. I snuck a taste, and OMG was that good! No, that was GREAT!

img_7836

img_7838img_7837

img_7839

Just writing about all this food, I don’t think I could take another bite! However, I didn’t seem to have a problem at the time… So let’s talk entrees. Guess what Russ ordered? Surprise—the Honey Glazed Duck Breast, on a crispy quinoa-potato cake, with wilted spinach, balsamic currants, pine nuts, and an apple ginger chutney.

With red meat on his mind, Ken opted for the Porcini Rubbed and Grilled Wagu Bavette Steak, complimented with braised shallots, marble potatoes, maitake mushrooms, black garlic soubise, red wine jus, and a salsa verde. Did he like? Yes he did!

Great minds think alike, and Kim and I seemed to be on the same wavelength because we ordered the Grilled Swordfish, gorgeously plated with grilled broccolini, zaalouk spiced fregula and corn pilaf, olivada vinaigrette, and a green harissa aioli. Go different, or go home I say… but apparently not before dessert…

img_7842

img_7841

img_7844

A separate dessert menu lists eight or so offerings, and the one chosen was the Lemon Tart, a raspberry-Limoncello coulis with graham cracker crumble. It was almost too pretty to eat, but those that indulged said it was well worth it. I can see why the Cochrane’s consider this one of their favorite go-to restaurants.

img_7847

The following day was our last full day of vacation and we spent the afternoon on Mt. Tamalpais with Ken as our guide. That is one twisty, winding road, let me tell ya—but WOW is it worth it once you reach the top! Then it was time for the “Last Supper” and that’s when Dee and David drove over to the Cochrane’s to enjoy the lamb dinner I blogged about last week. They took us home to Alameda to catch an early flight out the next morning. Thanks to family, we enjoyed a fabulous time on the West Coast!

img_7871
At the summit of Mt. Tam at a 2600-foot elevation. We lucked out because there was no fog shrouding the view.

img_7877
Chillaxin’ on the Cochrane’s patio before the “Last Supper.”

River’s End

California Bay Area Part 4 of 5—

With six spectacular sunshiny days in a row, it was only fitting that the morning we departed boon hotel+spa in Sonoma County, the weather turned gray, cool and overcast; in some ways it only made it easier to leave. Brother-in-law David wanted to make sure we got to see the Pacific Ocean before we left, so we headed 15 miles or so West to the town of Jenner where the Russian River ends and meets the sea.

img_7768
The Russian River, left, empties into the Pacific Ocean in the town of Jenner, CA.

img_7770
As seen from the restaurant’s protected porch, a view of the River’s End rental cottages situated on a cliff overlooking the Pacific.

After a short drive along twisty, winding Highway 1, we stopped to enjoy lunch at River’s End restaurant situated on a bluff with spectacular views overlooking the ocean and the confluence of the Russian River. Even though it was barely noon on a weekday, we apparently got the last window table—the place is that popular. And word has it, the sunset views are spectacular.

Located one hour and 45 minutes north of the Golden Gate Bridge, this haven for lovers of the Sonoma Coast and wine country has been around since 1927. The fabulous food is unique and internationally influenced with a slight Asian sway—yet utilizes local purveyors.

But what I will remember most for the rest of my cognitive days was their Salmon Chowder. It was a harmonious blend of creamy lightness with herbaceous notes, buttery salmon richness and house made croutons. I was so taken with it, that I am on a determined mission (through Bon Appétit’s RSVP department) to get the recipe and make it tout suite. (Russ and Dave also had the chowder.)

img_7777