I have been an artist and designer all my life incorporating graphic design for websites, gardens, publications, fabrics, interior design and cooking. I am now retired from my professional job, but still create artistic visions in all forms on a daily basis.
View all posts by LynnHoll →
Now that the weather is finally getting warm around here in the Northeastern U.S., we start thinking entrée salads for dinner. This dish is perfect for when you want a satisfying dinner but don’t want to dirty a whole lot of pots and pans to get there. It’s easy to prepare and has intense, warming flavors that satisfy the tastebuds, if not the soul.
Fabulous Salad
The main change I made was substituting dried apricots for the dried cherries. One, because we had them on hand, and two, because we both felt their flavor profile better melded with the other ingredients. But if you are a cherry fan, by all means, go ahead and use them.
Wilted Arugula Salad with sautéed Pork, Pear and Blue Cheese
6 oz. baby arugula, washed and spun dry (about 8 loosely packed cups)
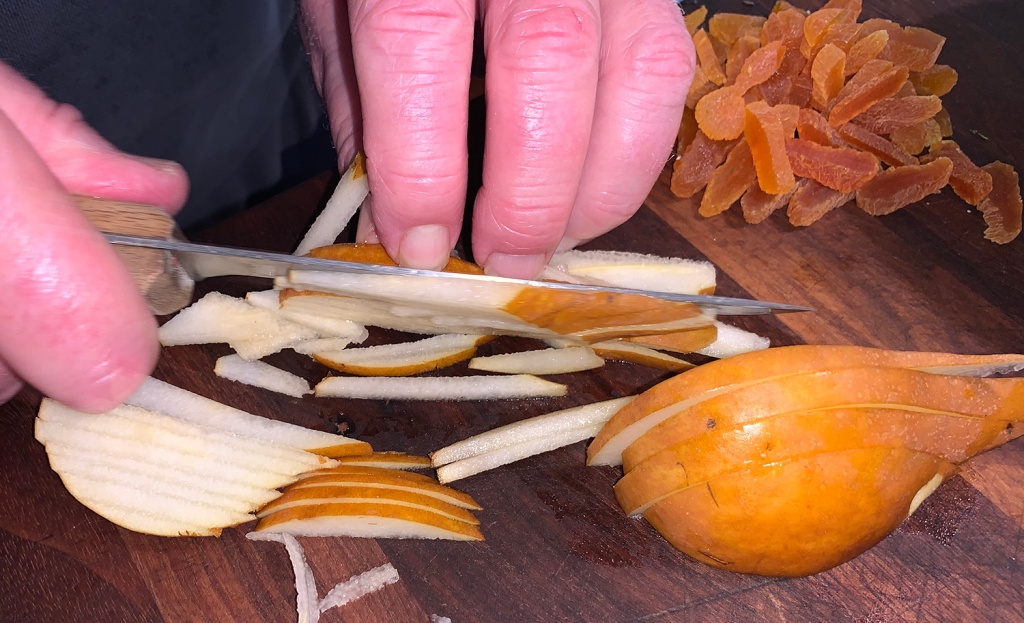
1 firm-ripe Bosc pear
1/2 cup all-purpose flour
1 lb. pork tenderloin, trimmed and sliced 3/8 to 1/2 inch thick
1 Tbs. unsalted butter
1/4 lb. blue cheese, crumbled (about 1 cup)
1/4 cup dried apricots, thinly sliced
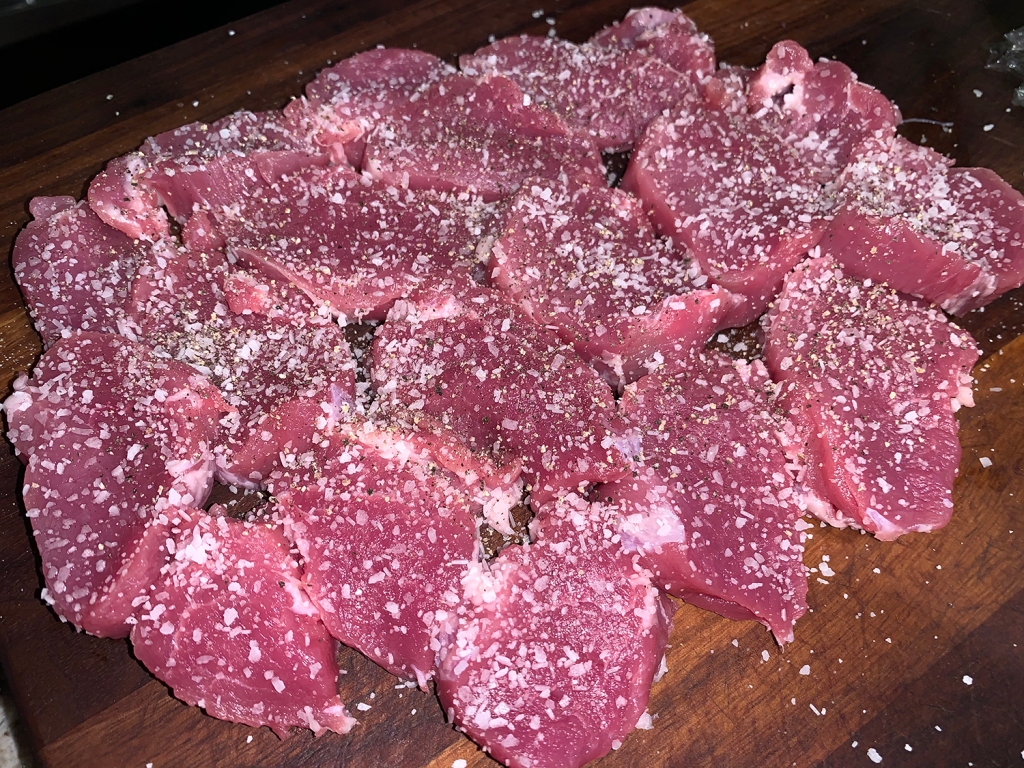
Liberally season the medallions
Dredge the pork slices in flour
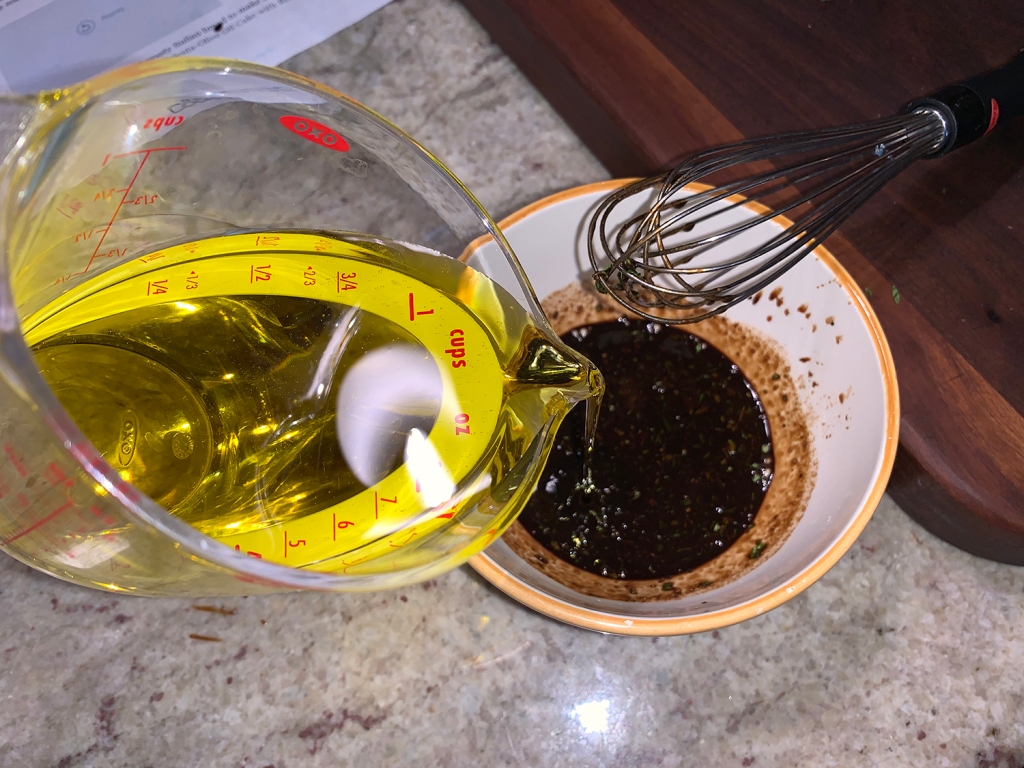
Make the balsamic dressing
Sauté the pork in batches if necessary
Directions
In a medium bowl, whisk together the vinegar and mustard. Slowly whisk in 1/2 cup of the oil. Stir in the shallot and thyme and season with salt and pepper to taste. Put the arugula in a large bowl.
Core the pear and cut it into matchsticks.
Put the flour in a pie pan or large plate. Season the pork liberally with salt and pepper and dredge in the flour.
Set a heavy 12-inch skillet over medium-high heat. Add the remaining 3 Tbs. oil and the butter. When the butter melts and begins to lightly brown, cook the pork (in batches if necessary), flipping after 2 min., until it’s just cooked through, about 3 min. total. Transfer to a large plate. Repeat with the remaining pork.
Discard any fat in the skillet and set over low heat. Add the balsamic-Dijon vinaigrette and cook, stirring to pick up any browned bits on the bottom of the pan, until the sauce is warm, about 1 min.
Pour the vinaigrette back into its bowl and whisk to recombine.
Toss the arugula with half of the warm vinaigrette.
Arrange the arugula on 3-4 plates. Top with the pork, pear, blue cheese, and dried apricot slices, and drizzle with the remaining vinaigrette.
The original recipe by Daniel Gritzer from Serious Eats is finished under a broiler. However, we’ve recently been watching an online class from Milk Street highlighting a simple 3-step method which guarantees your fish will be moist, and decided this approach was the way to go.
Heating a skillet over medium-high, then lowering the temperature once the salmon is in the pan ensures a nice sear without the risk of scorching. And finishing the cooking off heat, using just the pan’s residual heat, ensures the fish stays moist and won’t overcook. Just remember not to place the salmon in the skillet with the skin facing down. Make sure the fish goes in flesh side down, and don’t fuss with it once they’re in. Cooking it undisturbed allows the fish to develop flavorful browning.
Pan-Seared Salmon
The topping coats the fish in a thin layer of flavorful mayonnaise seasoned with harissa chili paste and fresh lime, and works with either individual portions of fish or a large party-size fillet. For just the two of us, we cut the recipe in half. If you do not have harrissa, you could substitute either red curry paste or gochujang. Sriracha would give you heat, but your sauce mixture will be thinner because it’s not as dense as the other options.
It’s very likely you will have leftover chili-lime sauce. Don’t fret, it’s great on a crudité platter for dipping veggies, spreading on sandwiches, or as a salad dressing. We used ours a few days later as a topping for grilled hamburgers.
2 tablespoons harissa chili paste, plus more if desired
Finely grated zest of 2 limes plus 2 teaspoons fresh lime juice
1/2 teaspoon ground coriander seed
2 pounds boneless center-cut salmon fillet, with or without skin and either whole or divided into individual portions
Kosher salt and freshly ground black pepper
Directions
In a small bowl, stir together mayonnaise, harissa, lime zest and juice, and coriander seed. Season with salt and pepper; feel free to adjust flavor and heat level by adding more harissa, if desired.
In a nonstick 12-inch skillet over medium-high, heat the oil until shimmering. Place the salmon flesh side down in the pan, then immediately reduce to medium. Cook, undisturbed, until golden brown, 4 to 6 minutes.
Using a wide metal spatula, carefully flip the fillets, and remove from the heat.
Spread the mayonnaise mixture over the fish fillets and immediately cover. Let stand until the thickest part of the fillets reach 120°F or are nearly opaque when cut into, about another 5 minutes for 1-inch-thick fillets or about 8 minutes if 1¼ inches thick.
There’s been numerous indications, due to the COVID-19 spread and the shutdown of meat processing plants, we’ll likely see meat and poultry shortages in the near future. With foresight, we are starting to compile a reservoir of meatless dishes that could come in handy. For those of you who follow a plant-based diet, you are already ahead of the curve.
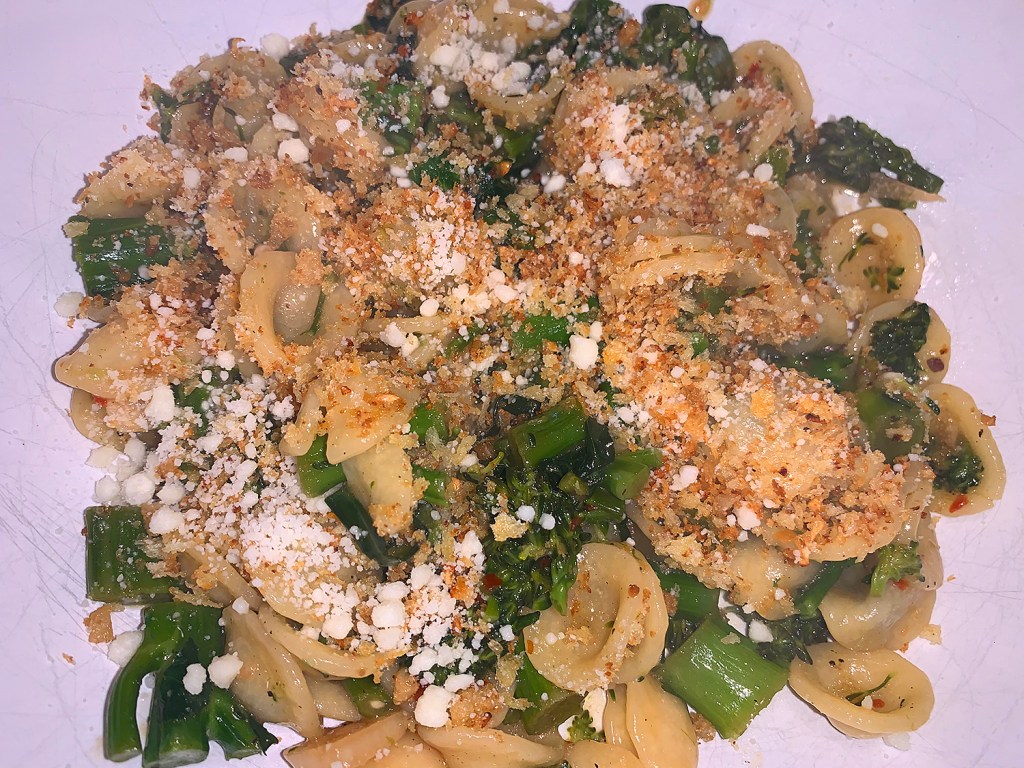
Taken from the MilkStreet.com website, it is noted orecchiette with broccoli rabe (orecchiette con cime di rapa) is a signature pasta dish from the Puglia region of southern Italy. The bitterness of rabe is challenging for some palates, so using sweeter, milder broccolini addresses that. However, if you like the assertiveness of rabe, it can easily be used in place of the broccolini, though rabe will cook a little more quickly.
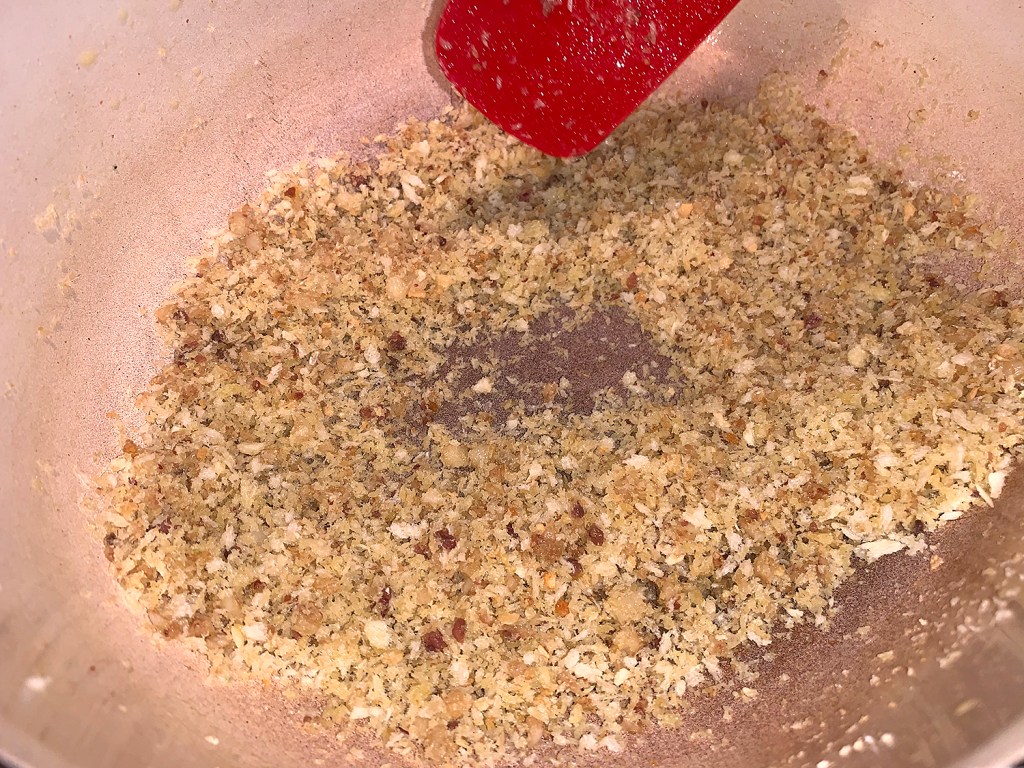
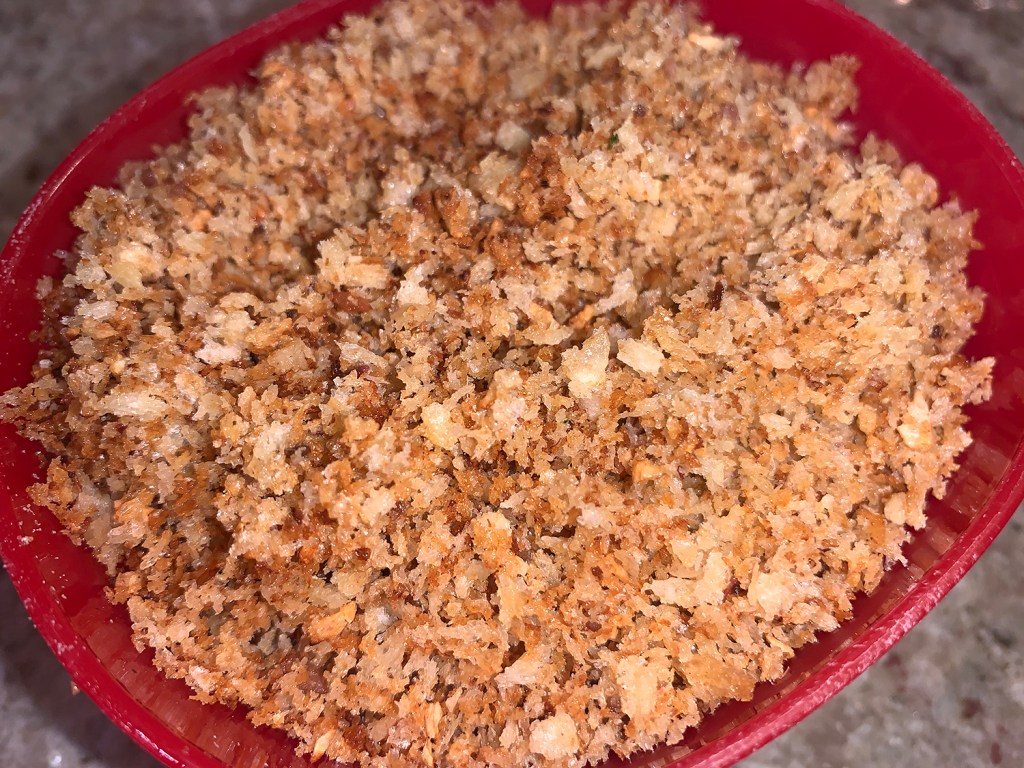
The pasta gets boiled in a minimal amount of water, then the starchy liquid that remains becomes the base for the sauce that marries the orecchiette and broccolini. A finishing sprinkle of toasted seasoned breadcrumbs adds a crisp texture. But don’t use fine dried breadcrumbs in place of panko. Their sandy, powdery texture doesn’t offer the light, delicate crispness of panko.
I decided to adjust the ratio of pasta versus the other ingredients by only using 2/3 the amount of orecchiette, 8 ounces instead of 12. Of course this decision necessitated that the amount of water be reduced also, from 5 cups to 3 cups + 2 ounces. (The original recipe amounts are listed below.) As an additional topper, we sprinkled on some grated Pecorino Romano cheese along with those fabulous bread crumbs. In the end, we loved this dish. There was so much flavor with so few ingredients!
1½ Lbs. broccolini, trimmed and cut crosswise into ¼-inch pieces
½-1 tsp. red pepper flakes
Kosher salt and ground black pepper
12 Oz. orecchiette pasta
5 1/2 cups water
Grated cheese for garnish (optional)
Directions
In a large Dutch oven over medium-high, heat 2 tablespoons of oil until shimmering. Add the minced garlic and half the anchovies, then cook, stirring, until fragrant, about 45 seconds.
Add the panko and cook, stirring, until golden brown, about 3 minutes. Transfer to a bowl and set aside; wipe out the pot.
In the same pot over medium-high, heat 2 tablespoons of the remaining oil until shimmering. Add the broccolini, pepper flakes, sliced garlic, 1½ teaspoons salt and ½ teaspoon black pepper. Cook, stirring occasionally, until the broccolini is crisp-tender and the garlic is golden brown, 6 to 7 minutes.
Add ½ cup water and continue to cook, stirring, until most of the moisture has evaporated and the broccolini is fully tender, about 2 minutes. Transfer to a medium bowl and set aside.
In the same pot over medium-high, boil 5 cups water. Add 2 teaspoons salt and the pasta, then cook, stirring occasionally, until the pasta is al dente.
Stir in the broccolini mixture, the remaining 2 tablespoons oil and the remaining anchovies. Continue to cook over medium-high, stirring constantly, until the liquid has thickened enough to cling lightly to the pasta and broccolini, about 1 minute.
Remove from the heat, then taste and season with salt and pepper. Transfer to a serving bowl and sprinkle with the breadcrumbs and grated parmesan if desired.
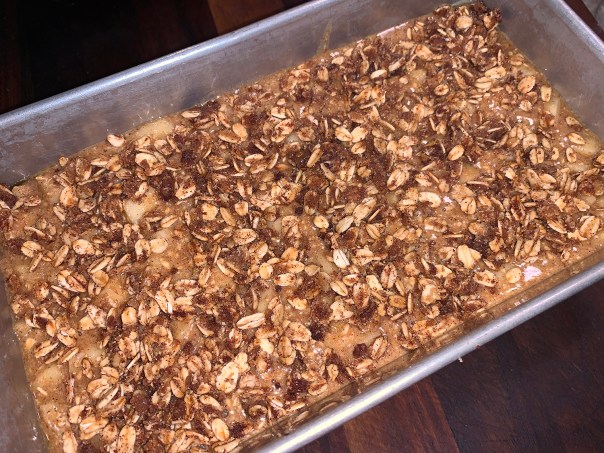
Here’s a change of pace to start your day, Apple Oatmeal Bread. One slice of this easy breakfast bread packs just as much fiber as a bowl of oatmeal. The two starring ingredients, old fashioned oats and apple, pack about 8 grams and 3 grams of fiber, respectively.
Apple Oatmeal Bread
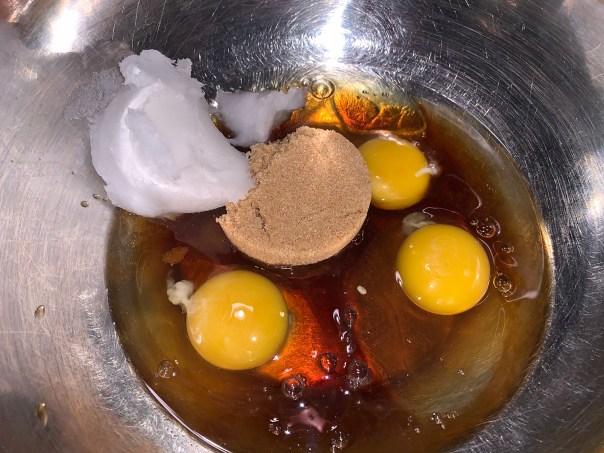
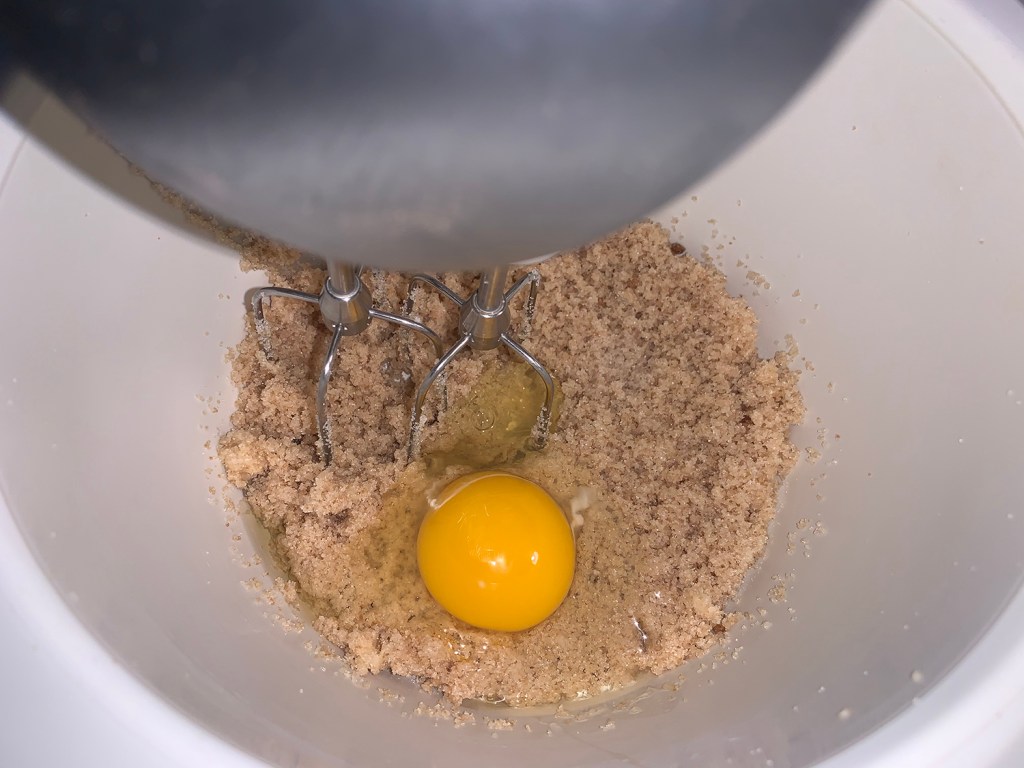
The Hubs couldn’t wait until I made this. In fact, for two weeks I kept saying I would make it the next day, before I finally buckled down and actually did so. As I was preparing the ingredients, he just happened to walk into the kitchen and noticed the egg and coconut oil mixture had lumps and questioned whether I had melted the coconut oil first (it comes in solid form). I replied “the directions didn’t say to”, which of course he immediately scanned the recipe and pointed out the directions did indeed say “coconut oil, melted”—busted!
In lieu of throwing out the wet mixture, he brilliantly thought of putting that bowl into another container of hot water (not boiling, which would cook the eggs) for several minutes, stirring occasionally until the liquid was smooth. It worked. Just giving you a heads up not to forget this important step…
Another word to the wise. Madison’s original recipe indicates to use two large apples, about two cups. Well, our two large apples, once peeled and diced equaled nearly four cups, so that affects the baking time. Make sure to use a large loaf pan, 5 1/2″ x 9 1/2″, and start checking doneness after 45 minutes. Ours took the full hour.
Basically, this loaf features all of the nutritional wins of oatmeal in the form of a thick slice of bread. To make it even more hearty and mouth-watering, why not slather a slice with your choice of nut butter, fruit, or a combination of both?
1 cup whole-wheat flour (can sub white-wheat or all-purpose flour)
1/2 tsp. salt
2 tsp. ground cinnamon
1/2 tsp. baking soda
1/2 tsp. baking powder
3 large eggs
1/4 cup maple syrup
1/3 cup coconut oil, melted
1 tsp vanilla extract
1/3 cup brown sugar
2 cups apples, cored, peeled and diced (about 2 large apples)
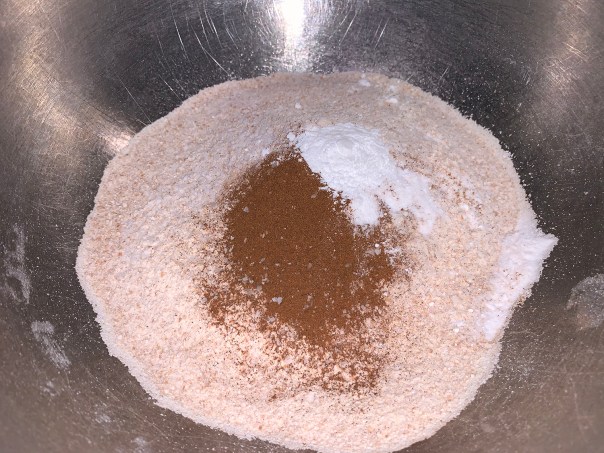
Mix dry ingredients in one bowl
Egg mixture goes in another bowl
Combined wet ingredients
Apple pieces are folded into egg mixture
Apple mixture is folded into dry ingredients
Batter is poured into prepared loaf pan
Crumble topping is added
The cooked bread cools in the pan
Directions
Preheat oven to 350 degrees.
Spray a loaf pan with cooking spray.
Make the crumble. Melt the butter. Mix in the oats, cinnamon and brown sugar. Set aside.
Peel two apples and chop into small pieces. Set aside.
In a food processor, pulse the cup of oats until the mixture is fine and resembles flour. Place the oat flour in a large bowl.
Add in the flour, salt, baking powder, baking soda, and cinnamon and stir to combine.
In a separate bowl, whisk together the eggs, maple syrup, melted coconut oil, vanilla extract, and brown sugar. Fold in the chopped apples.
Add the apple mixture into the flour mixture and stir until just combined.
Pour batter until prepared loaf pan and top with crumble mixture.
Bake in preheated oven. Check doneness at 45 minutes. The loaf is ready when a toothpick inserted into the center comes out clean, which will take close to an hour.
Cool bread in loaf pan for 15 minutes, then move to a wire rack to cool enough to slice, about 15 minutes more.
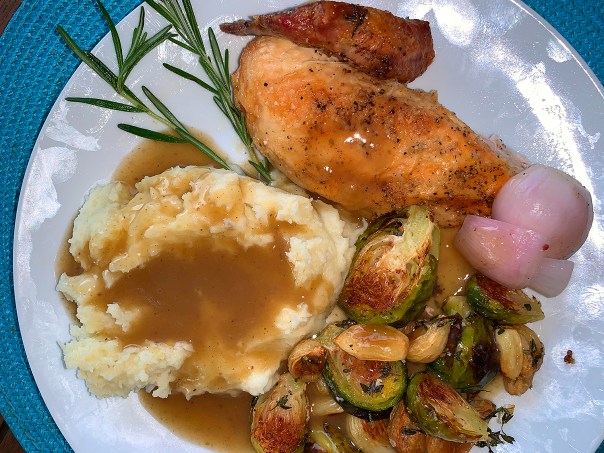
There’s something about roast chicken, mashed potatoes and gravy that screams comfort food to me. And I’ve made many a dinner highlighting these ingredients over the decades. The basis of this recipe hails from Mark Bittman of the NY Times Cooking site. With an ingredient list just four items long (chicken, olive oil, salt, pepper), the genius of this bare-bones roast chicken is in its technique.
To make it, thoroughly preheat a cast-iron skillet before placing a seasoned bird, breast side up, in it. In under an hour you’ll get a stunner of a chicken, with moist, tender white meat, crisp, salty chicken skin, and juicy dark meat all done to perfection. Your mouth watering yet?
If you don’t already have a cast-iron skillet large enough to hold a whole chicken, this recipe is a good enough reason to invest in one.
Mark Bittman
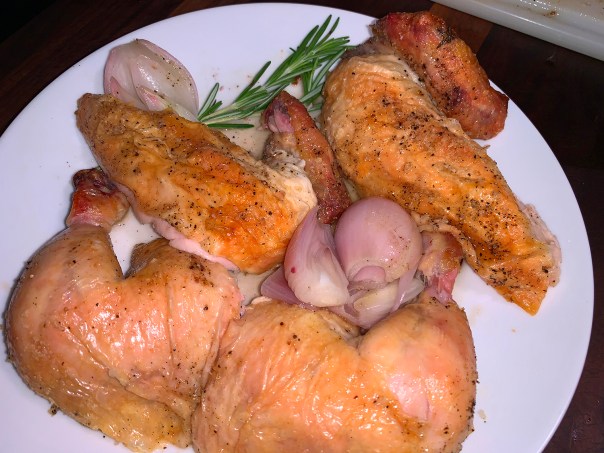
We, of course, had to kick it up a notch. Knowing we wanted to have garlicky mashed potatoes on the side, gravy is a must for the spuds. In order to get more depth of flavor, we stuffed the cavity of the chicken with a Meyer lemon, shallot, and fresh herbs (rosemary, thyme and sage). Not only did the additional ingredients subtly permeate the meat, but they added an amazing amount of flavor to the pan sauce.
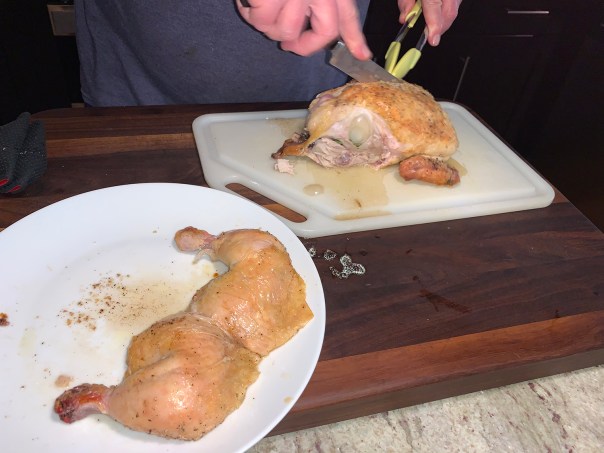
So we’ve taken Mark’s simple recipe and expanded the directions to include our flavor enhancers and gravy. Our chicken—at less than 3 pounds—was probably the tiniest one I’ve ever cooked, so it came to temperature on the quicker side.
Honestly, after just one bite, we oooohed and aaahed all the way through dinner. You can always skip the additional cavity-stuffing ingredients and gravy to simplify things, but with very little additional effort, why would you? Plus we got the bonus of saving the carcass, stuffing and all, for future homemade stock…
The meal also included a side of roasted Brussels sprouts with garlic cloves.
1 whole chicken, 3 to 4 pounds, trimmed of excess fat
Fresh herbs: a few sprigs each of fresh herbs such as rosemary, thyme and sage
1 or 2 shallots, peeled and slice in half lengthwise
1 Meyer lemon or orange, sliced in half or quartered
3 Tbsp. extra-virgin olive oil
Kosher salt and freshly ground black pepper
2 cups chicken stock, preferably homemade
2 Tbsp. cornstarch, make a slurry with 1/4 cup cool water
Stuff, truss, and season the bird
Place stuffed chicken in hot cast-iron skillet
Check the temperature of the meat
When done, drain the cavity juices back into the pan
Make the gravy while the bird rests
The chicken rests on a platter
Directions
Put a cast-iron skillet on a low rack in the oven and heat the oven to 500 degrees.
Insert your stuffing ingredients such as fresh herbs, shallots and citrus. Truss the legs with kitchen twine.
Rub the chicken all over with the oil and sprinkle it generously with salt and pepper.
When the oven and skillet are hot, carefully put the chicken in the skillet, breast side up. Roast for 15 minutes.
Turn the oven temperature down to 350 degrees. Continue to roast until the bird is golden brown and an instant-read thermometer inserted into the meaty part of the thigh reads 155 to 165 degrees.
Tip the pan to let the juices flow from the chicken’s cavity into the pan. Transfer the chicken to a platter and let it rest for at least 5 minutes.
While the chicken is resting, add the stock to the skillet and bring to a rolling simmer. Whisk in the cornstarch slurry, and continue a rolling simmer for a few minutes to let the gravy thicken.
Return any accumulated juices from the chicken into the gravy. Carve the bird and serve.
A cool, rainy Sunday during the COVID-19 lockdown—perfect for us to spend time together cooking in the kitchen. While The Mr. made his homemade chicken stock, I started assembling this wonderful Lasagna Bolognese recipe by Diane Unger, found in an issue of Milk Street Magazine.
A slice of the mouth-watering Lasagna Bolognese after sitting for 30 minutes and topped with a mixture of grated Pecorino Romano and Parmesan cheeses.
Yes, it is time-intensive, but it makes enough ragù for the lasagnawith plenty of leftovers for another night’s pasta dinner. And given all of the statistical data showing most of this country still in lockdown, time is one thing you do have plenty of (unless of course you’re one of the heroes out there keeping this country safe and operational).
The velvety besciamella was simply awesome! You can make it ahead of time and rewarm it when assembling the casserole. It’s amazing how light this lasgana was considering all of the meat. But in retrospect, there’s really not a lot of cheese—just the 3 ounces in the white sauce, along with any you sprinkle on as a garnish.
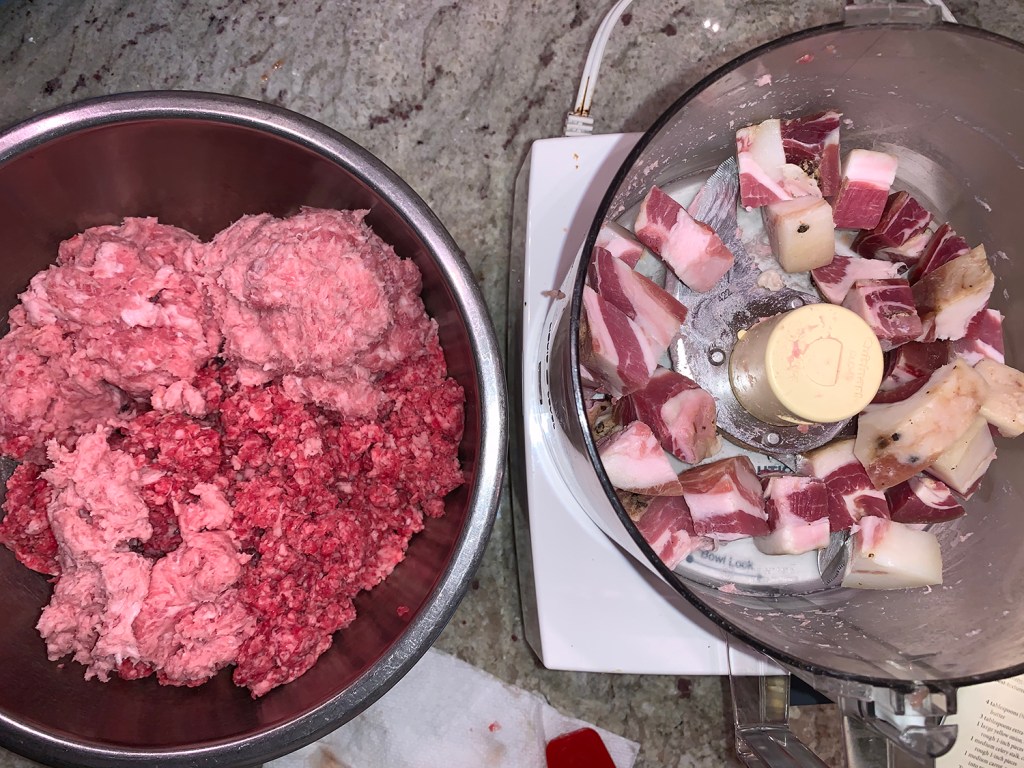
Try to purchase pancetta in a large chunk from the deli counter, and if it comes in casing-like plastic, make sure to remove and discard the wrap before use. The next best option is packaged already diced pancetta; if pre-sliced is the only option, it will work, but will cost a lot more and requires less time in the food processor.
Don’t trim the fat from the beef and pork. The fat makes the ragù rich and supple, and carries the flavors of the other ingredients. Don’t process the beef and pork too finely; a coarse grind yields the best-textured sauce. It may seem a bit thin after the long braise, but don’t fret because a bit of powdered gelatin gives the ragù a rich, velvety body that otherwise would require an even lengthier simmer to achieve.
We went a step further and bought bone-in short-ribs, cutting the meat off the bones, then tossing those bones in with the ground meats to simmer for 3 hours.
You may wonder why not just used already crushed canned tomatoes instead of going through the step of blending canned whole tomatoes in a food processor. The simple answer? Whole tomatoes are generally sold peeled, in either juice or puree. This is usually the highest quality tomato product. Crushed tomatoes are a mixture of diced tomatoes and tomato puree or paste. Furthermore, crushed tomatoes are unpredictable. With some brands they’re crushed almost to a purée, while other brands might still have big chunks.
You’ve probably run into bare shelves at the grocery store during these crazy times. Well, when I was shopping for this recipe, almost the entire selection of pasta was gone! There were two boxes of lasgana, (not the no-bake variety as indicated below), so I grabbed one and made the best of it. If you are fortunate enough to get them, don’t use the noodles without first soaking them. Unsoaked noodles absorb moisture from both the ragù and besciamella, leaving the lasagna too dry. But don’t soak them for longer than 10 minutes.
3 Cups parmesan besciamella, warmed (see recipe below)
Finely grated parmesan and/or Pecorino-Romano cheese, to serve
Directions
Heat the oven to 350°F with a rack in the middle position.
Place the noodles in a 9-by-13-inch baking dish, then add hot water to cover, along with the oil and 1 Tbsp. salt; swish the noodles around to dissolve the salt. Let stand for 10 minutes, moving the noodles around halfway through to ensure they do not stick together.
Remove the noodles from the water and arrange in a single layer on a kitchen towel; pat dry with paper towels. Wipe out the baking dish.
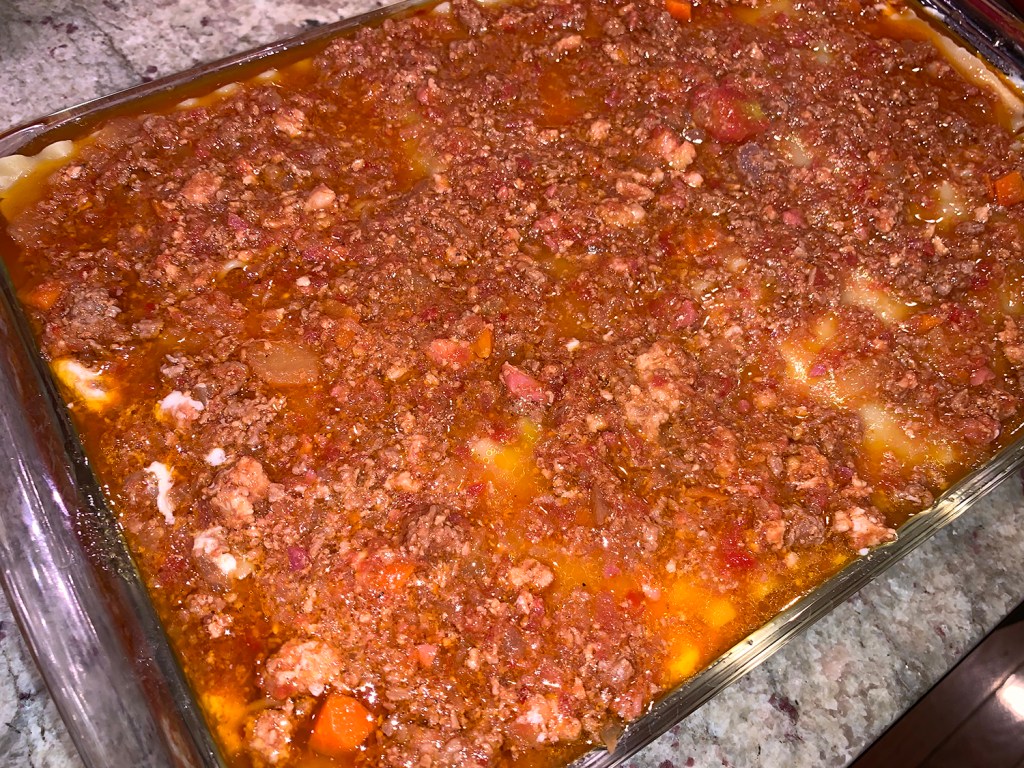
Distribute 2 cups ragù evenly in the baking dish, then place 3 noodles in a single layer on top.
Spread ¼ cup besciamella onto each noodle, all the way to the edges. Pour 1 cup ragù on top and spread evenly.
Repeat the layering 3 more times, using the remaining noodles, besciamella and ragù, then cover the baking dish tightly with foil.
Bake until the edges of the lasagna are bubbling, 45 minutes to 1 hour.
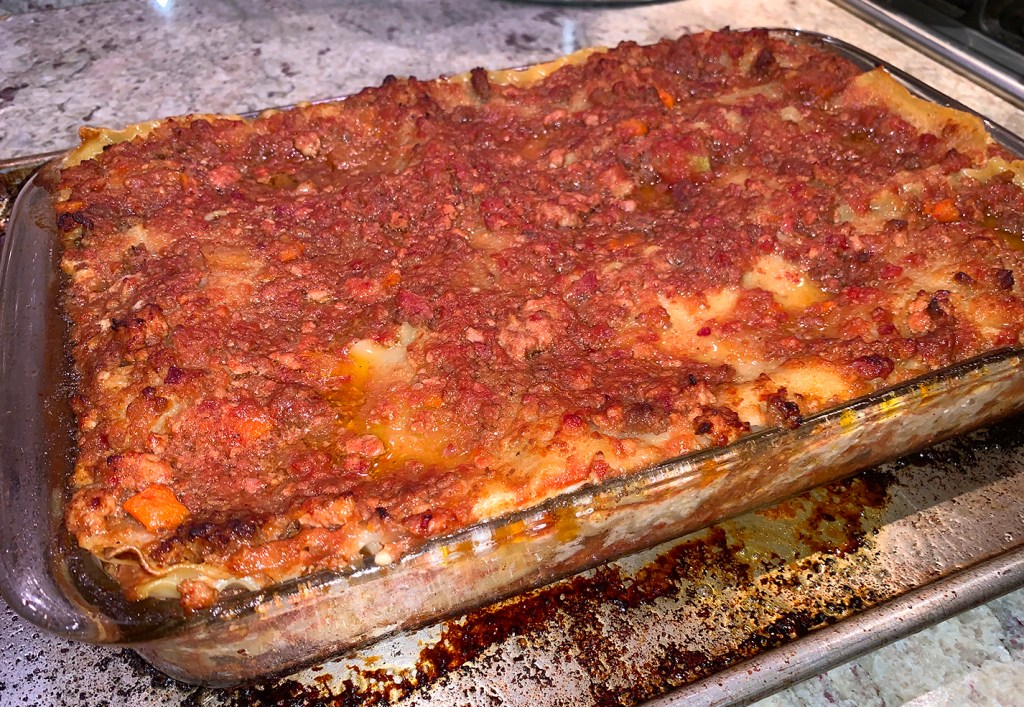
Transfer to a wire rack, uncover and cool for about 30 minutes.
Cut into pieces and serve sprinkled with Parmesan.
Our lasagna pan was filled to the brim and we knew it would probably overflow so we set the casserole dish on a rimmed baking sheet. We also neglected to cover the dish with tinfoil before cooking it in the oven. It was done perfectly after 35 minutes, even without the foil!
This white sauce is packed with flavor from bay, basil and Parmesan and gets a hint of heat from red pepper flakes. The finished besciamella can be refrigerated in an airtight container for up to two days.
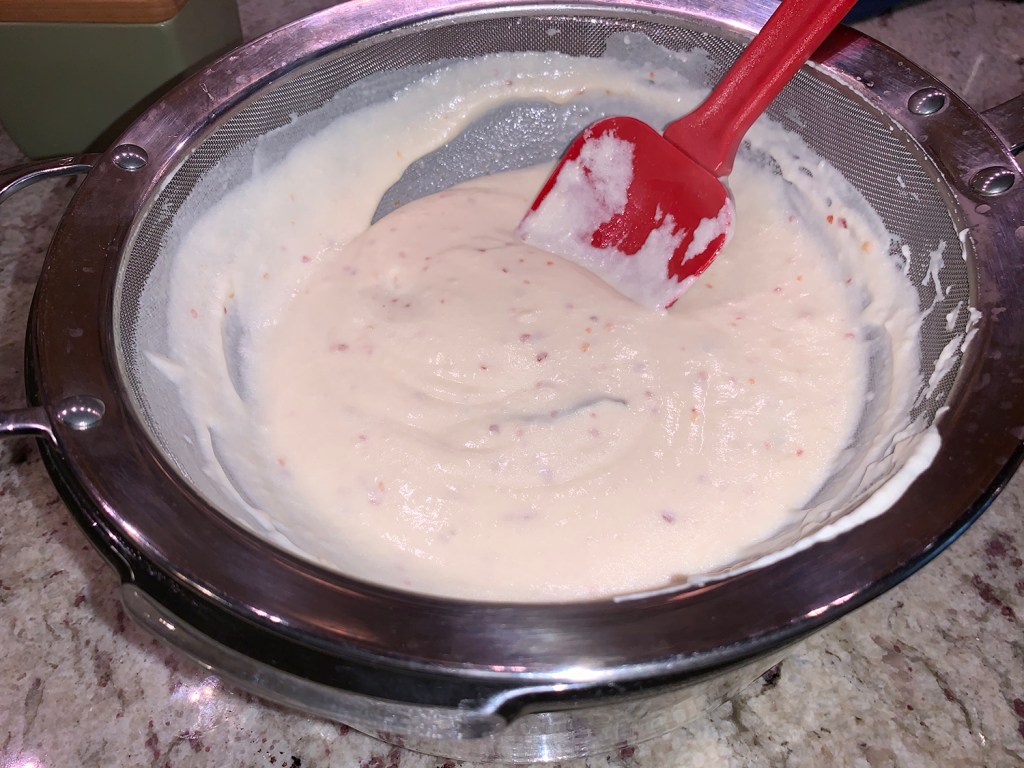
Don’t allow the sauce to cool completely before straining. It flows more easily through the mesh of the strainer when warm and fluid.
6 Tbsp.s (¾ stick) salted butter, cut into 6 pieces
¼ Cup all-purpose flour
1 Quart half-and-half
3 Bay leaves
½ Tsp. red pepper flakes
Kosher salt and ground black pepper
3 Oz. parmesan cheese, finely grated (1½ cups)
6 Large fresh basil leaves
Directions
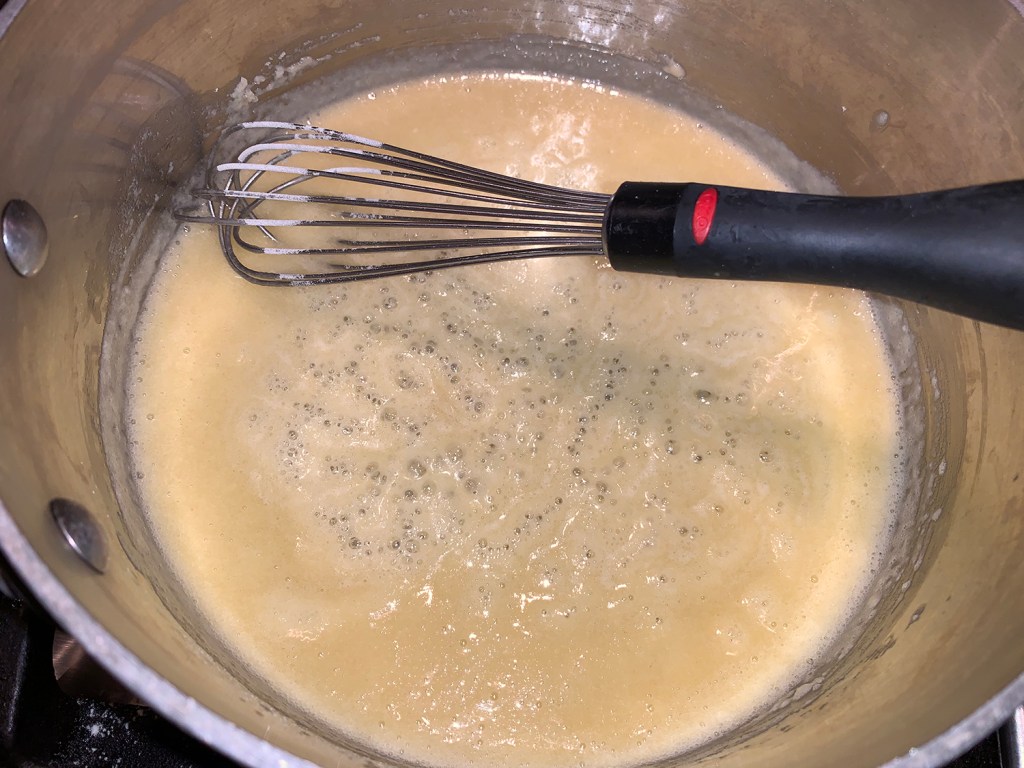
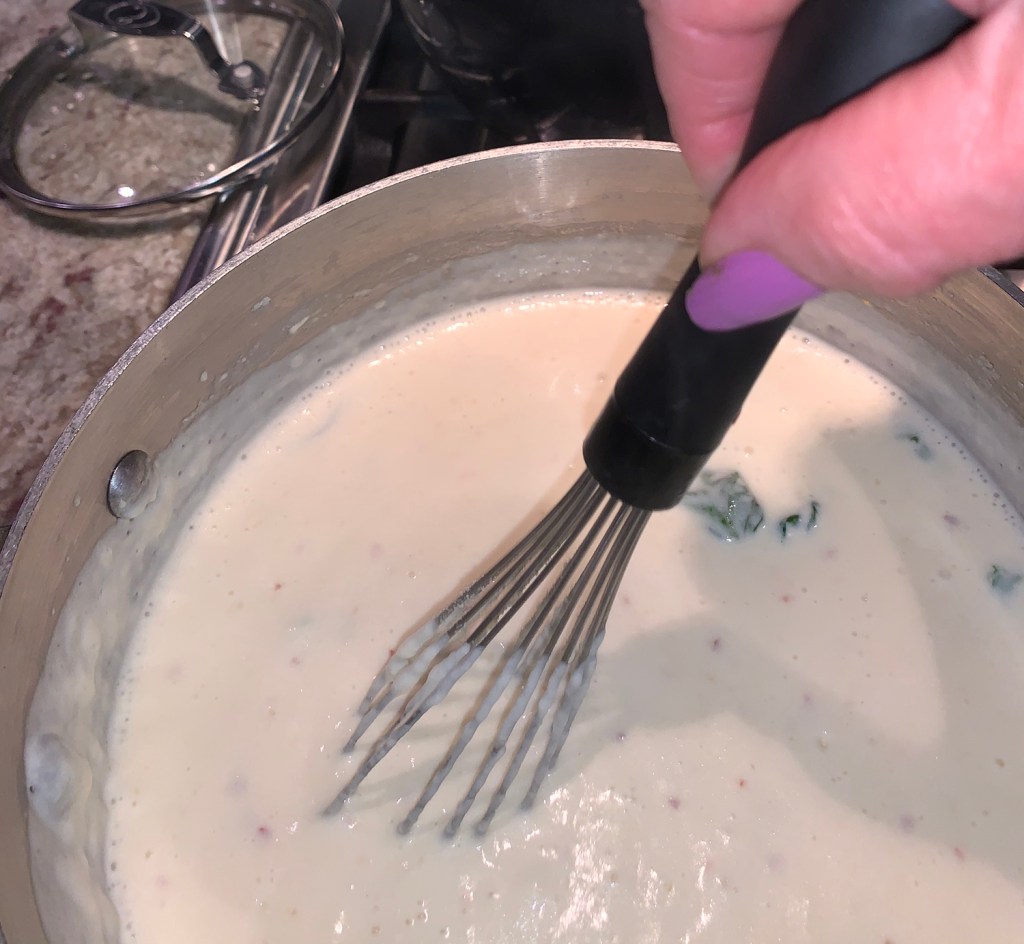
In a large saucepan over medium, melt the butter.
Whisk in the flour, then cook, whisking constantly, for 2 minutes. While whisking, gradually add the half-and-half and bring to a simmer.
Add the bay and pepper flakes, then reduce to low. Cook, whisking often, until thickened and reduced slightly and no longer tastes of raw starch, 10 to 15 minutes.
Off heat, whisk in the Parmesan and basil. Cool for 5 minutes, then set a fine mesh strainer over a medium bowl, pour the sauce into the strainer and press on the solids with a silicone spatula; discard the solids.
This recipe makes enough ragù for lasagna Bolognese with enough leftovers for another night’s pasta dinner. Try to purchase pancetta in a large chunk from the deli counter, and if it comes in casing-like plastic, make sure to remove and discard the wrap before use. The next best option is packaged already diced pancetta; if pre-sliced is the only option, it will work, but will cost a lot more and requires less time in the food processor. We add a bit of powdered gelatin to give the ragù a rich, velvety body that otherwise would require a lengthy simmer to achieve. The finished ragù can be cooled to room temperature and refrigerated for up to three days.
Don’t trim the fat from the beef and pork. The fat makes the ragù rich and supple, and carries the flavors of the other ingredients. Don’t process the beef and pork too finely; a coarse grind yields the best-textured sauce.
1 Large yellow onion, cut into rough 1-inch pieces
1 Medium celery stalk, cut into rough 1-inch pieces
1 Medium carrot, peeled and cut into rough 1-inch pieces
2 28-Ounce cans whole tomatoes
1½ Lbs. boneless beef short ribs, cut into rough 1-inch chunks
1 Lb. boneless pork shoulder, cut into rough 1-inch chunks
8 Oz. piece pancetta, cut into rough 1-inch chunks
¼ Cup tomato paste
½ Cup dry white wine
2 Cups low-sodium beef broth
4 Bay leaves
½ tsp. red pepper flakes
2 Tbsp. unflavored powdered gelatin
Kosher salt and ground black pepper
Directions
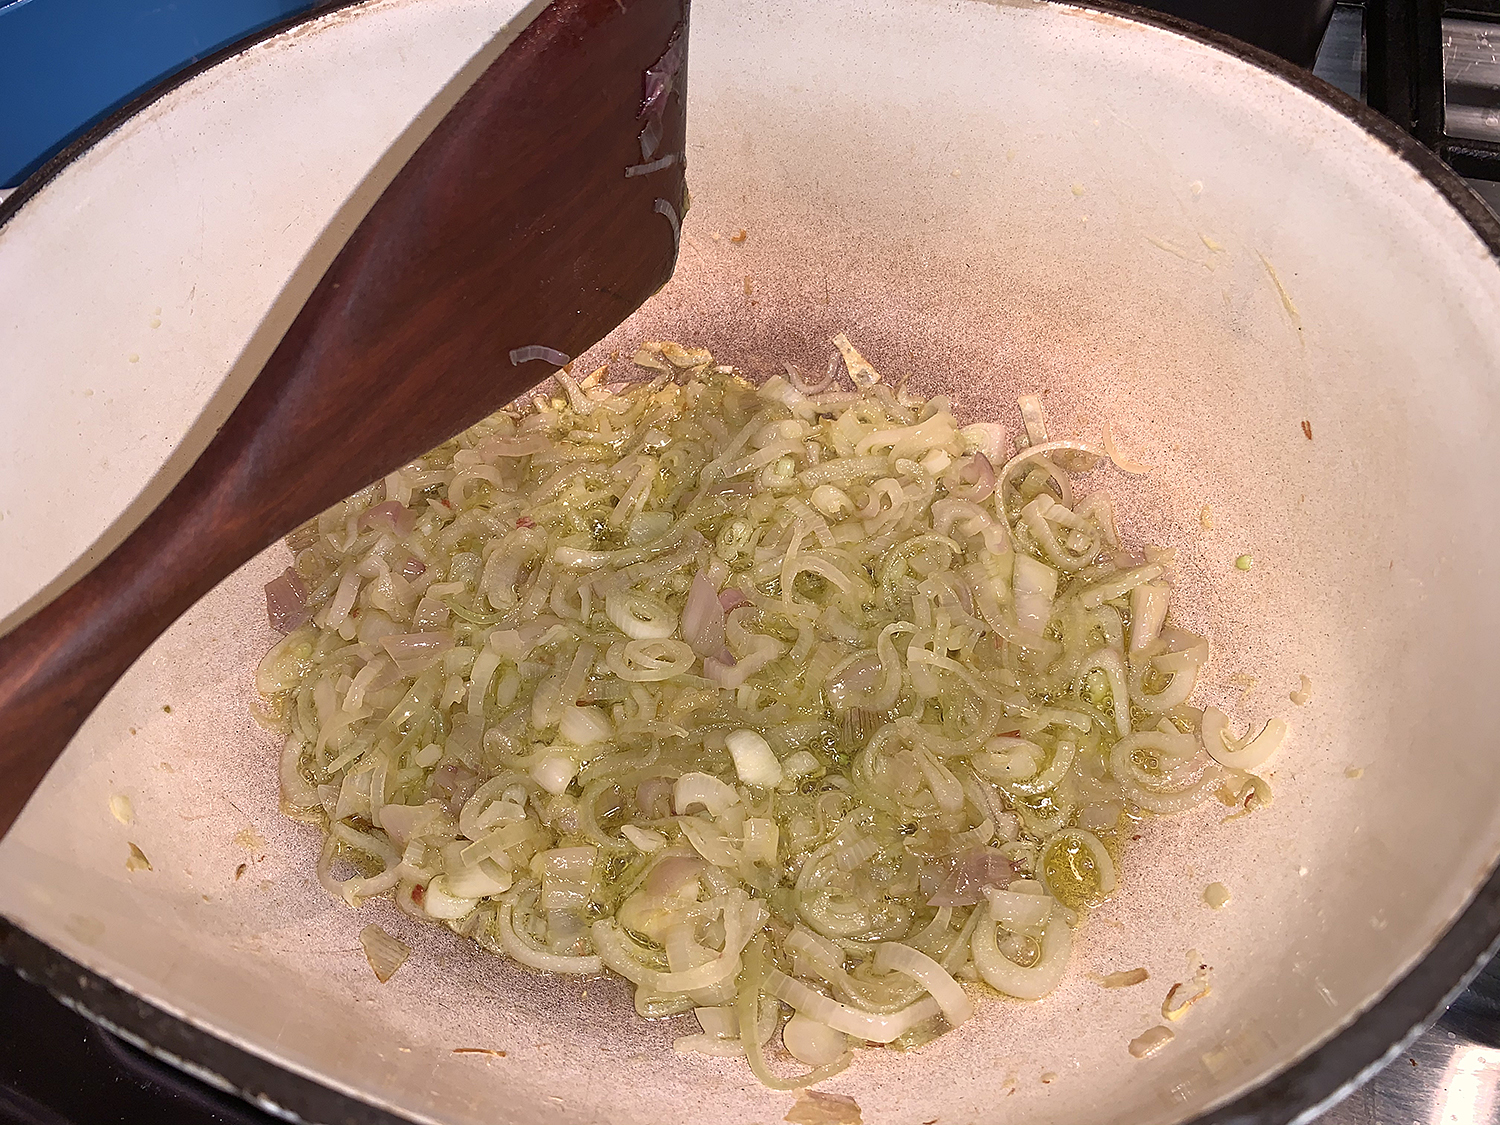
In a large Dutch oven, combine the butter and oil. In a food processor, pulse the onion, celery and carrot until roughly chopped, about 5 pulses. Transfer to the Dutch oven.
One can at a time, add the tomatoes with juices to the food processor and puree until smooth; transfer to a medium bowl.
Add half the beef to the food processor and pulse until coarsely ground, 5 to 10 pulses, then transfer to another medium bowl; repeat with the remaining beef.
Repeat with the pork, in batches, adding it to the beef.
Finally, process the pancetta to a coarse paste, about 30 seconds; add to the other meats.
Set the pot over medium-high and cook, stirring occasionally, until the vegetables are lightly browned, about 5 minutes.
Stir in the tomato paste and cook, stirring, until the paste begins to brown, about 5 minutes.
Add the wine and cook, scraping up any browned bits, until the pot is almost dry, about 1 minute.
Stir in the ground meats, then stir in the broth, tomatoes, bay and pepper flakes. Bring to a simmer, then partially cover, reduce to medium-low and cook, stirring occasionally, until the meat is tender, the sauce is thick and the volume has reduced to about 8 cups, 2½ to 3 hours.
Pour ¼ cup water into a small bowl and sprinkle the gelatin evenly over the top; let stand for 5 minutes to soften.
Meanwhile, taste and season the ragù with salt and pepper, then remove and discard the bay. Stir in the softened gelatin until fully dissolved.
Every now and again, when we take stock of what’s hanging around in our refrigerator(s), we realize there is an overabundance of fresh produce that needs to be cooked up before it becomes compost fodder. With leftover cooked veggies we’ll make a “clean-out-the-fridge frittata… but I’m talking fresh produce here…
I think I was in the hoarding mentality the last time I grocery shopped due to the overwhelming amount of veggies I scarfed up without any real meals planned. When that rare occurrence happens, it’s time for a stir-fry—which of course calls for a sauce to bring it all together and add loads of flavor. I love my veggies, but they can be a bit bland by themselves.
We have this reliable sauce recipe from Sam the Cooking Guy, and it’s simple without any hard-to-source ingredients. When it comes to garlic, we have a predilection to over-indulge, and this time was no exception. But the difference was, while I was mixing the ingredients for the sauce, The Hubs had grabbed the minced garlic and ginger and was flipping them around in the wok before I was able to incorporate them into the sauce. No biggie, it all went into the stir-fry in the end.
The recipe below shows approximate amounts for the veggies and meat because I didn’t weigh anything and just used up what we had on hand. Feel free to alter your choices to address your own preferences. It’s equally good for any protein such as chicken, beef, pork, tofu and seafood. You can also switch out vegetable broth for the chicken broth.
Maybe you have no reason to don your “little black dress” during the COVID-19 lockdown, but why not dress up your stir-fries and make things a bit special at home?
1 1/2 lbs. protein (such as chicken breasts), cut into 1-inch chunks
3+ Tbsp. Peanut oil for stir-frying
6 cloves garlic, minced
1 tablespoon fresh ginger, chopped fine
1 teaspoon sesame oil
2 tablespoons rice vinegar
1/4 cup soy sauce
1/4 cup chicken broth, vegetable broth or even water
1 tablespoon sriracha
2 tablespoons sugar
1 tablespoon cornstarch
Scallion green slices and peanuts for garnish (optional)
2 cups cooked white or brown rice
DIRECTIONS
Combine all ingredients from garlic through cornstarch in a small bowl and mix well.
Add 1 tablespoon of peanut oil to the wok until very hot. Swirl it around the wok and add your less dense veggies first, such as scallions, bell pepper, and mushrooms. Stir-fry for 2 minutes until the veggies get crisp-tender, about 2 minutes. Remove to a large bowl.
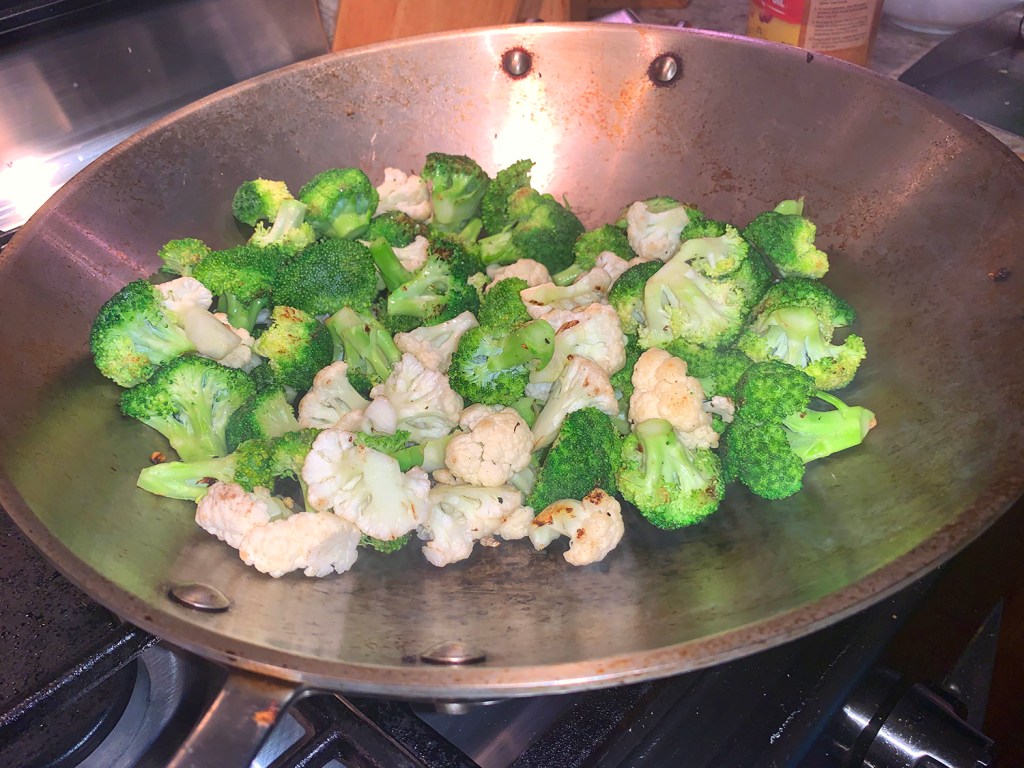
Add another 1 tablespoon of peanut oil and once hot, add the more cruciferous vegetables, such as cauliflower and broccoli florets. Stir fry for 2 minutes until starting to brown on the exterior. Add 1/2 cup water and cover the wok for 2 minutes. Then remove the cover and stir-fry until all of the water dissipates. Remove them to the bowl with the other veggies.
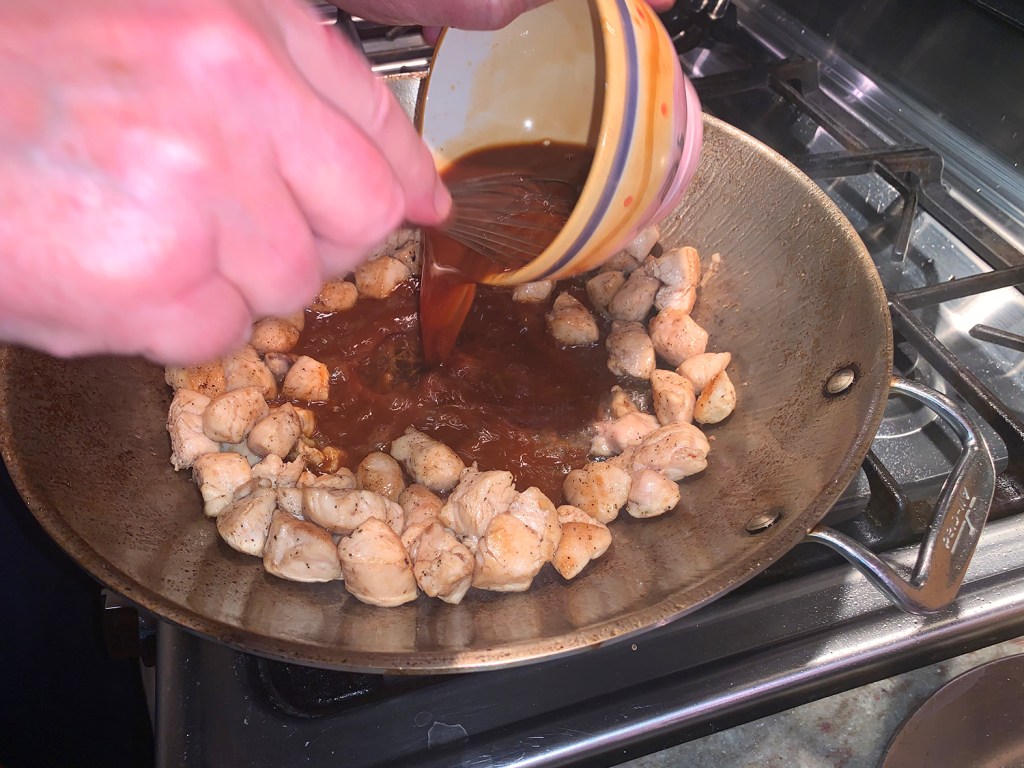
Add the final 1 tablespoon of oil, and when very hot, add your chicken (or other protein), but do not disturb for the first minute. Once the chicken has a nice sear on the one side, stir-fry continuously until the protein is cooked through.
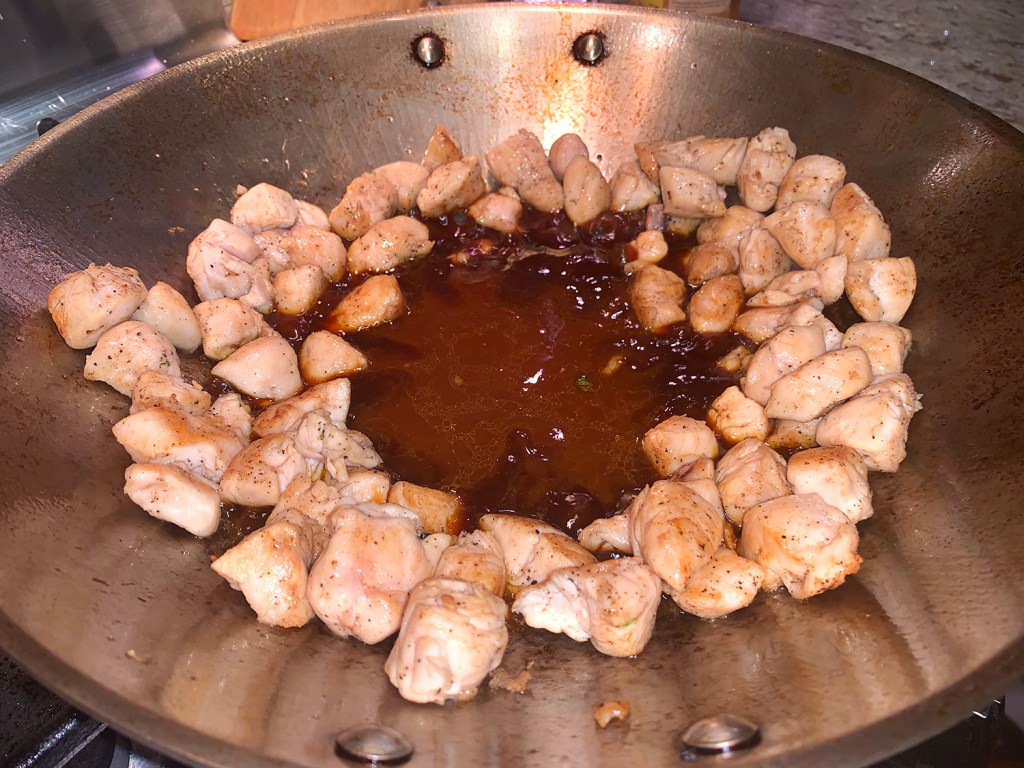
Push the chicken up the sides of the wok to create a “well” for the sauce mixture. Pour in the sauce and swish it around in the well for about 30 seconds to thicken.
Return all of the cooked veggies to the wok and stir-fry another 1 or 2 minutes until everything s mixed well and hot.
Serve over hot cooked rice and garnish with sliced scallion greens and peanuts if desired.
In the Extremadura region of Spain that is home to pimentón de la vera, or Spanish smoked paprika, one is taught that exposure to high heat blunts the spice’s unique earthiness, smokiness and notes of fruit and tobacco. Tobacco?? Not really a term I would use to wax poetic about food, but read on…
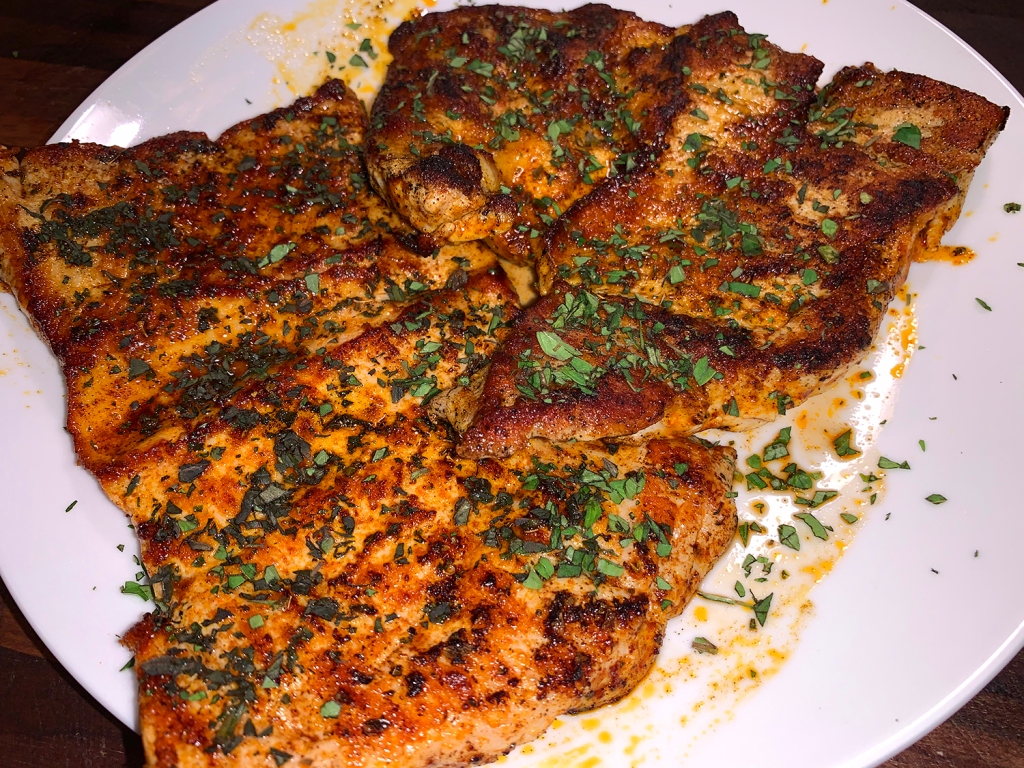
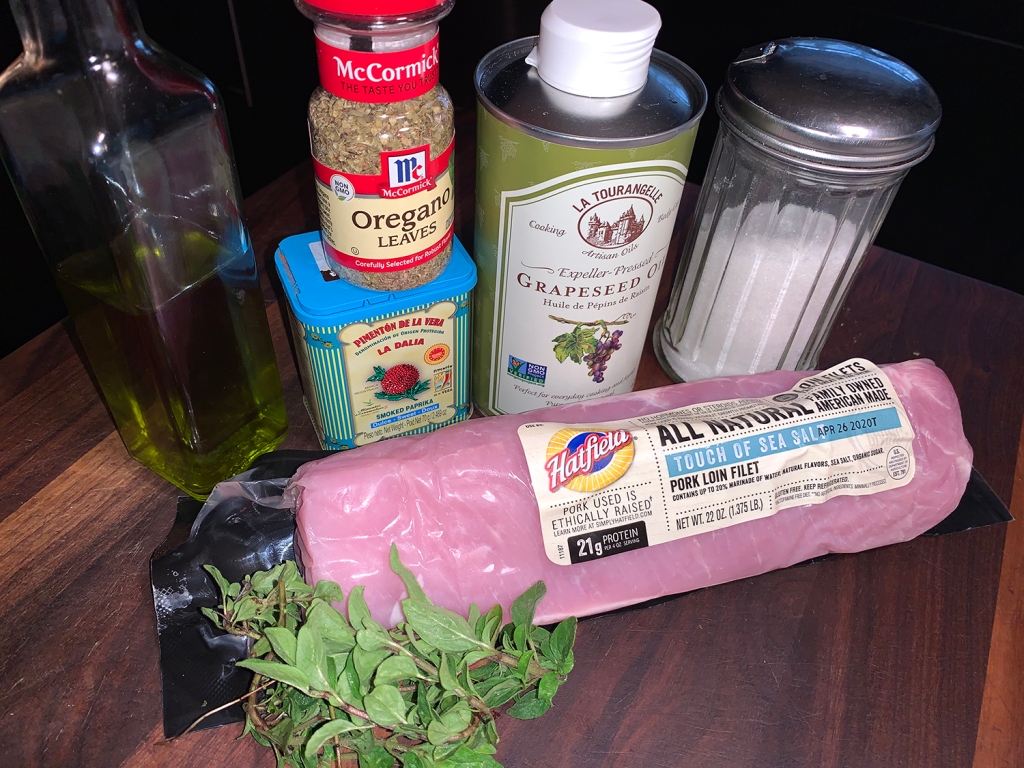
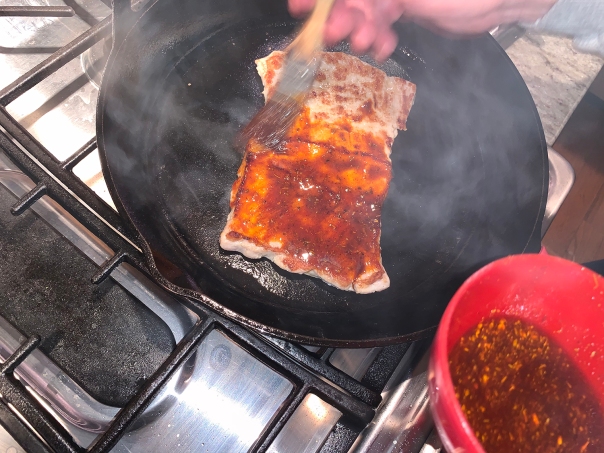
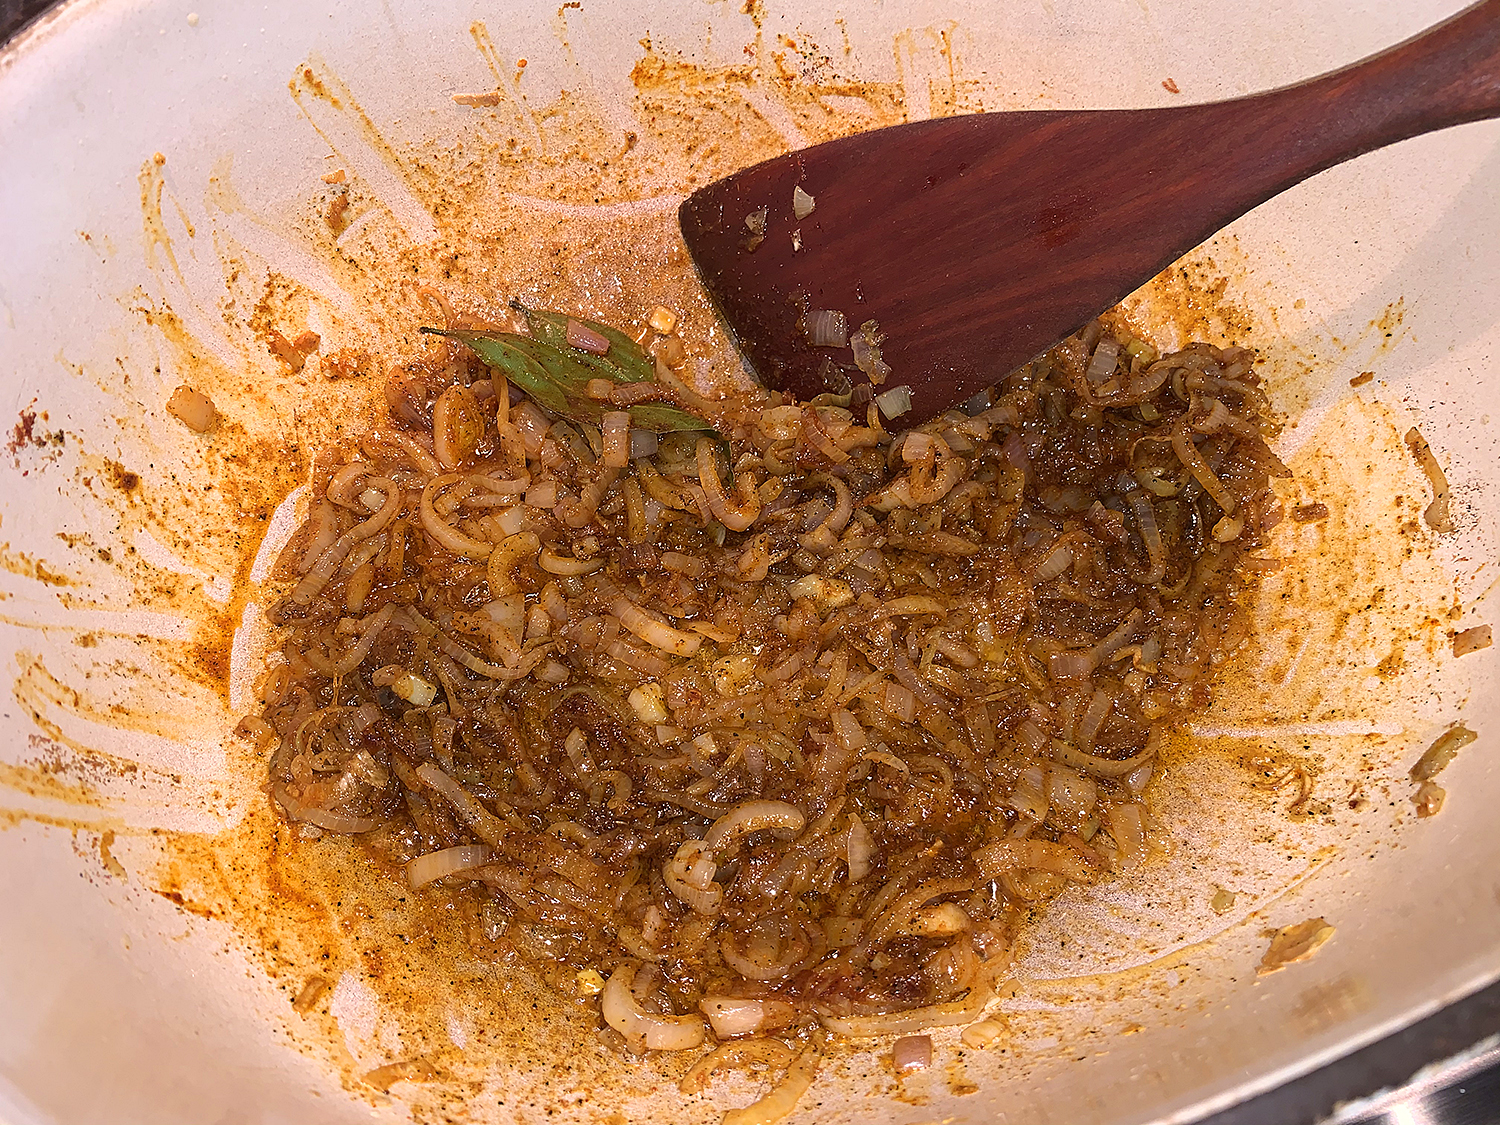
In Extremadura, cooks know that with smoked paprika, timing is everything. This recipe illustrates how to best preserve pimentón’s unique flavors when searing is involved: the paprika is mixed with olive oil and then brushed onto butterflied and pounded pork tenderloin only after the meat has been browned in a hot skillet.
BTW, Spanish smoked paprika is available in different degrees of spiciness. For this dish, if you have the choice, opt for sweet (dulce) or bittersweet (agridulce). With only a handful of ingredients this dish comes together in no time.
One large tenderloin sufficed for just the two of us, plus we still had leftovers. However, we did not scale back on the paprika oil mixture, and used every scrap of it to douse the meat.
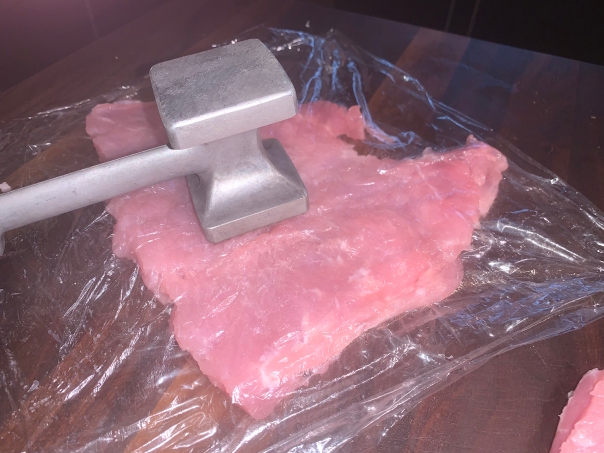
NOTE: Don’t use a heavy hand when pounding the pork, which can result in tears and uneven thickness. And when pounding, work from the center of the piece outward to the edges. We also find it helpful to lodge the meat between plastic wrap, which helps prevent tearing and promotes an even thickness.
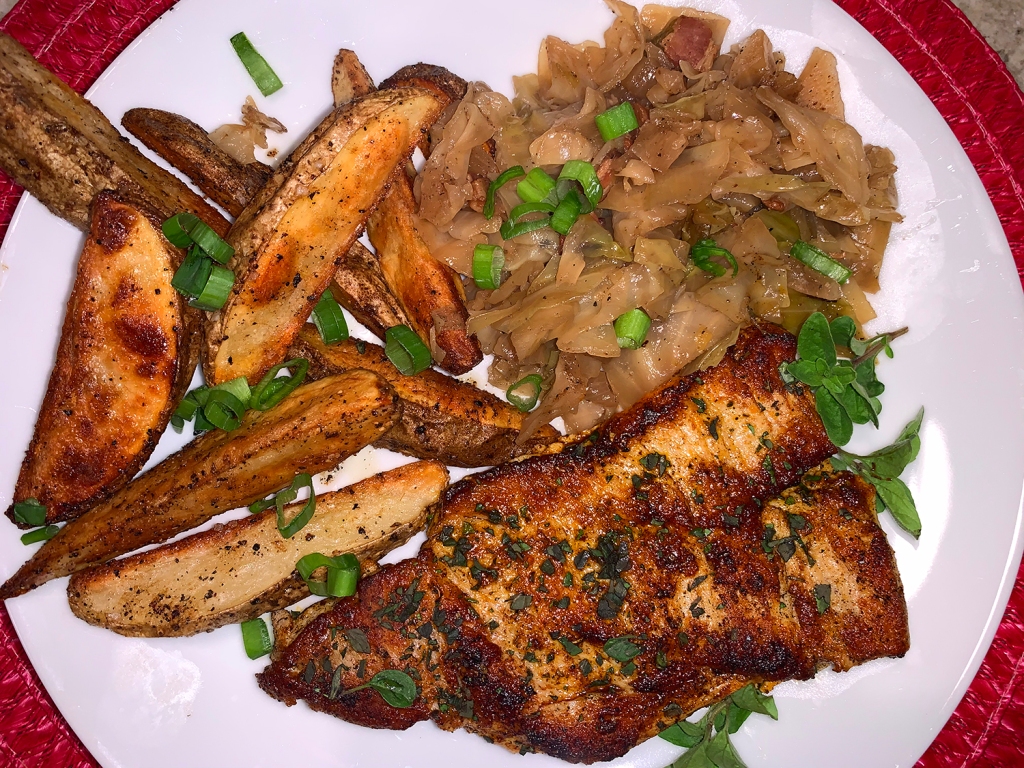
Seared Pork Tenderloin with Smoked Paprika and Oregano
In a small bowl, stir together the olive oil, smoked paprika, dried oregano and sugar; set aside.
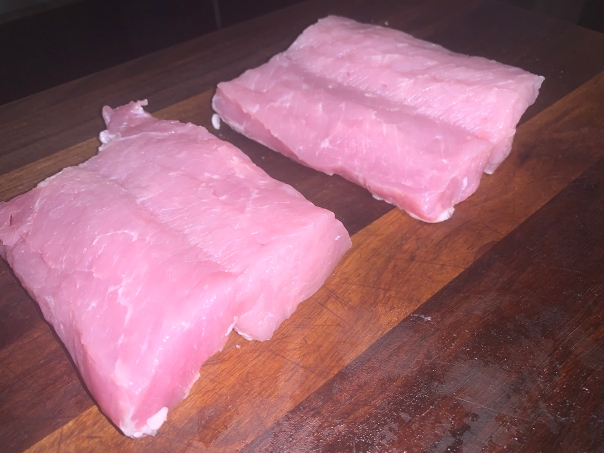
Halve each tenderloin crosswise, then halve each piece lengthwise, stopping about ¼ inch short of cutting all the way through; open the meat like a book. Place meat on top of a long piece of plastic wrap and fold over to cover meat.
Using a meat pounder or mallet, pound the pork to an even ¼-inch thickness, then season each piece all over with ½ teaspoon salt.
In a 12-inch skillet over medium-high, heat 1 tablespoon of neutral oil until shimmering. Place 2 pieces of pork in the pan and cook undisturbed until golden brown, 2 to 3 minutes. Flip and cook until the seconds sides are browned, 1 to 2 minutes.
Lightly brush paprika oil onto each piece, then flip the pork and brush the second sides. Sear each side again for about 30 seconds, then transfer to a platter.
Repeat with the remaining 1 tablespoon grapeseed oil and pork. Brush the remaining paprika oil onto the pork, then let rest for 5 minutes. Sprinkle with the fresh oregano.
Salmon and Meyer lemons are two of my favorite “healthy” foods. And to my delight, this lovely, light preparation is marked by the bright, sweet acidity of Meyer lemon and the earthy note of beets—a specific kind of beets.
Never heard of baby chioggas? Me neither. According to SpecialtyProduce.com “Baby Chioggia beets are entirely edible: roots, stems and leaves. The swollen dusty magenta globular root is topped with variegated pink and pistachio colored mid ribs and broad wavy green leaves. The flesh of the root is distinguished by its concentrated rings of deep pink and translucent white. Cooked Chioggia beets will not retain their brilliant coloring, rather fade to paler versions of their original colors.”
In the end it didn’t matter, we couldn’t find them at the grocery store. If like us, you have trouble finding chioggias, substitute small red beets. (Apparently Chioggias are typically available in the summer and fall, and this was early spring.) Native to Italy, these beets are also called “Candy Stripe” due to their red and white stripes when the beets are cut.
We also struck out with chervil and had to substitute curly parsley. During these days of pandemic uncertainty, you never know what the supermarket will, or will not, be carrying at any specific time. Just go with the flow. The meal was only for the two of us, so I cut back on the quantity of some ingredients (but left the recipe below intact).
In fact, I used only 1 bunch (4 beets total) which ended up being the perfect amount for the two of us. These red beets were larger than chioggas and took about one hour to soften. Roasting brings out their natural sweetness and masks the earthy taste. No need to peel the ones that go in the oven until afterward.
However, the recipe did not indicate to peel the sliced beet first. My gut told me I should have done this, but The Hubster came to the rescue and removed the outer peel from each slice <3!
4 bunches baby chioggia beets, trimmed; 2 peeled for mandoline
1/2 cup extra-virgin olive oil
Kosher salt and freshly ground black pepper
1 cup white wine
1/2 cup vegetable broth
6 6-oz. skinless, boneless Alaskan salmon fillets
2 Tbs. grapeseed oil
2 Meyer lemons, zested and juiced
1/4 cup fresh chervil or curly parsley leaves, plus springs for garnish
3 Tbs. coarsely chopped fresh tarragon
1/4 cup thinly sliced fresh chives
Directions
Position a rack in the center of the oven, and heat the oven to 350°F.
Using a mandoline, thinly slice two of the beets; set aside.
In a large bowl, toss the remaining beets with 2 Tbs. of the olive oil, 1/2 tsp. salt, and 1/4 tsp. pepper.
Put the beets on a large rimmed baking sheet, cover tightly with foil, and bake until tender when pierced with a knife, 30 to 40 minutes. Remove from the oven. When cool enough to handle, peel and halve three of the beets and quarter the remainder; set aside.
Put the wine in a large, wide saucepan over medium-high heat and cook until almost evaporated, 10 to 12 minutes. Add the broth and remove from the heat.
Put a large nonstick skillet over medium-high heat, and heat the pan for about 2 minutes. Season the fish with salt and pepper.
Add the grapeseed oil to the skillet, swirl, and add the fish. Cook until the fish begins to brown on the bottom, about 2 minutes.
Reduce the heat to medium, turn the fish over, and cook for another 2 minutes. Remove the fish from the pan and keep warm.
Return the broth mixture to medium heat. Add the cooked beets and lemon zest, and bring to a boil. Cook until heated through.
Add the lemon juice and remaining 6 Tbs. olive oil, and stir to combine. Add 2 Tbs. of the chervil and 1-1/2 Tbs. of the tarragon, and season to taste with salt and pepper.
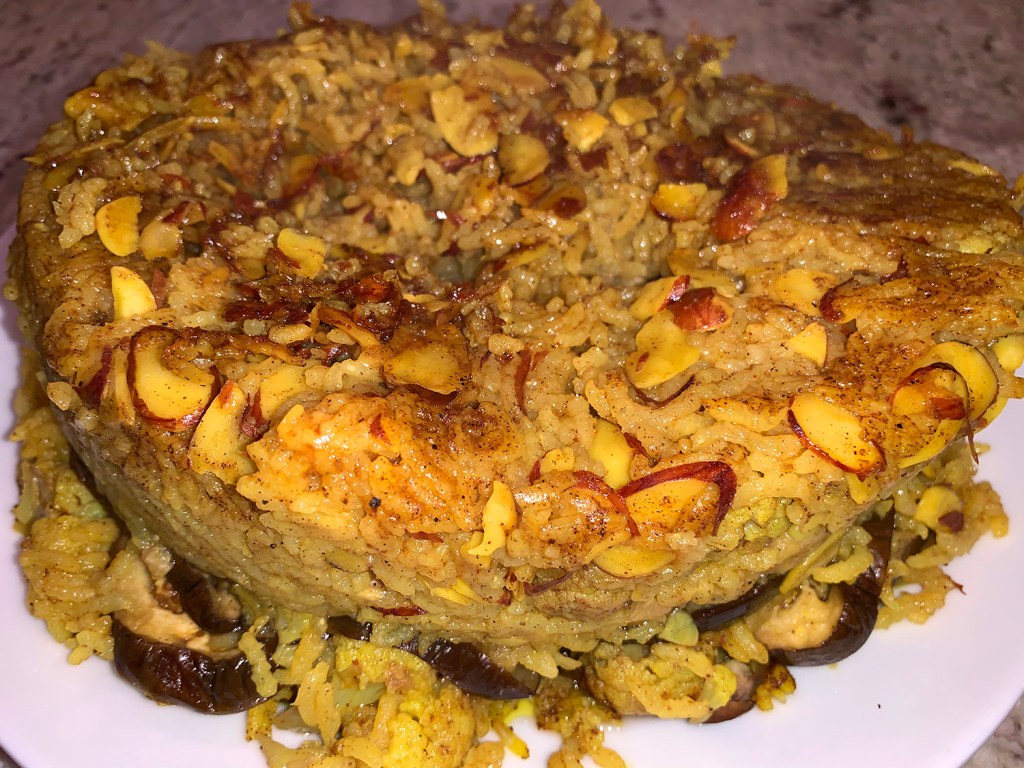
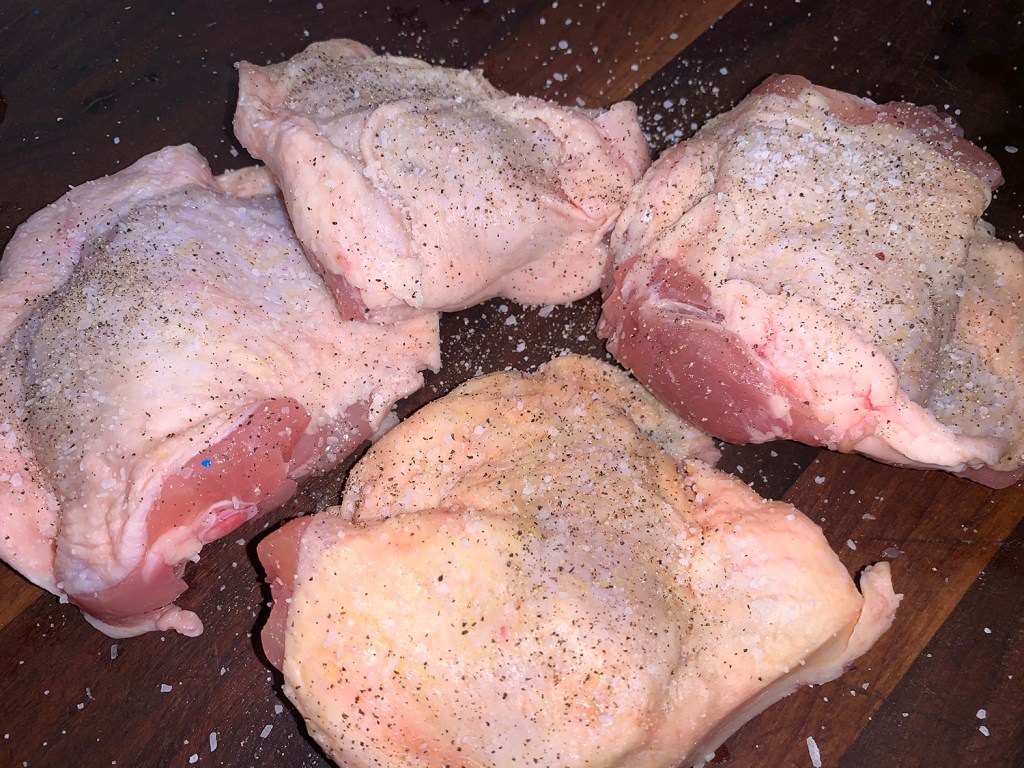
This Palestinian Upside-Down Chicken and Rice (Maqlubeh) was hands-down delicious! Typically a fan of white meat, if I do eat poultry dark meat, it’s usually the skinless, boneless thigh variety. Well this recipe uses thighs with the bones and skins intact, and was probably the best chicken thighs I’ve had in recent memory. Oh and that rice!!
We decided (regrettably now) to make only half a recipe. What’s interesting about this however is the amount of poultry. 50% of 1 1/2 pounds of chicken would be 3/4 pounds right? Well, that equated to about 2 thighs, so I incorporated 4 pieces weighing in at over 1 pound, just enough for the two of us, but with lots of the rice mixture leftover (not that that was a bad thing).
Of course, a ton of flavor came from our homemade chicken stock; and the fact that I still used the full amount of garlic, because that’s just how we roll. The eggplant and cauliflower practically melt into the rice resulting in one harmonious mouthful!
Maqlubeh translates from the Arabic as “upside down,” which describes how this traditional multilayered rice dish is served. Though this streamlined recipe still requires a small investment in ingredients and prep, the work mostly is front-loaded and produces a one-pot dish impressive enough for a special occasion.
For proper cooking, it’s important to use a pot 9½ to 11 inches in diameter and 4 to 6 inches deep—which became another interesting dilemma for us. We were reducing the recipe by half in which case the author indicates to use a 6-7″ wide by 4 ” deep pot. Our pot of choice was 8″ wide (but we included more chicken, remember?), yet the handles rose higher than the sides of the pan which made inverting the mixture onto a platter at the end a little challenging to say the least.
Maqlubeh
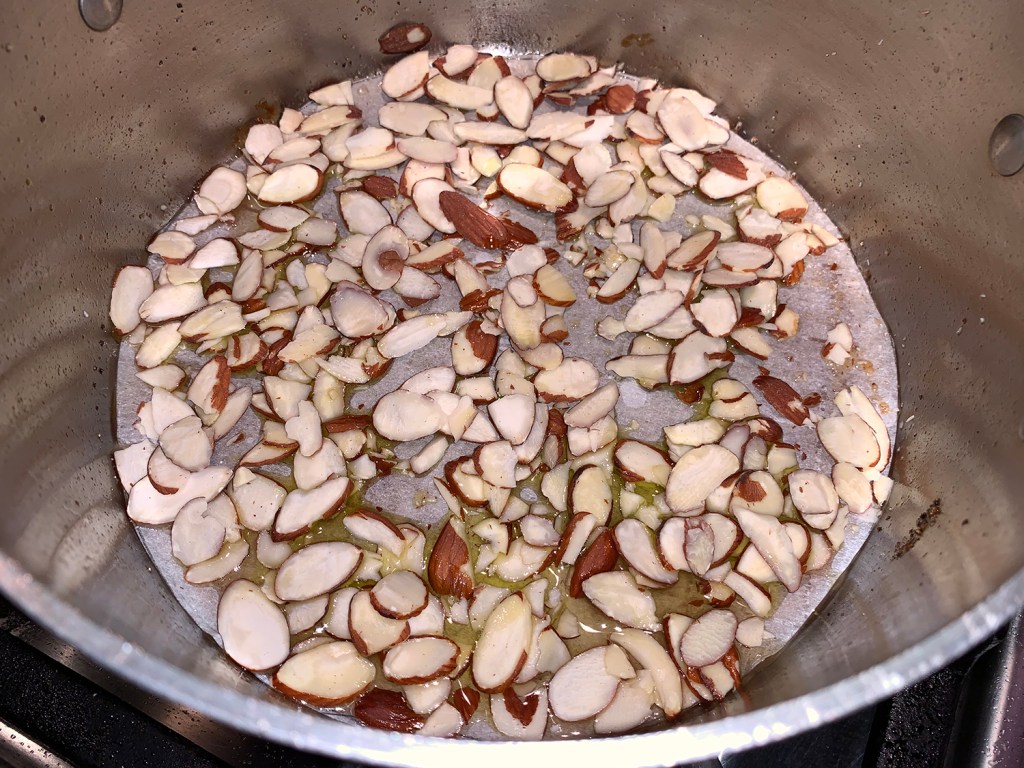
After searing and removing the chicken, you are instructed to line the bottom of the pot with a parchment round to guarantee that the rice forms a crisp, browned bottom layer, and does not stick when the pot is inverted for serving. Truth be told, as many other reviewers reported, our rice did not form a crisp, browned bottom layer. Can’t say I was too upset over that fact. I did garnish with a sprinkle of slivered almonds which provided a crunch factor.
The classic accompaniment for maqlubeh is a tomato, cucumber and yogurt salad.
½ Medium eggplant (about 8 ounces), sliced into ¼-inch-thick rounds
1 Qt. low-sodium chicken broth
Directions
In a large bowl, combine the rice and 2 tablespoons salt. Add water to cover by 1 inch, then set aside. Have ready a lidded pot that measures 9½ to 11 inches in diameter and 4 to 6 inches deep. Cut 2 rounds of kitchen parchment the size of the pot.
Season the chicken all over with salt and pepper. Set the pot over medium and heat 1 tablespoon of the oil until shimmering. Add the chicken skin down and cook until browned, about 10 minutes. Transfer to a plate and set aside. Remove the pot from heat. Place 1 parchment round on the bottom, then turn to coat it with fat.
Add the remaining 3 tablespoons oil to the parchment-lined pot, then sprinkle evenly with the almonds. Drain the rice in a fine mesh strainer, then rinse under cool running water and drain again.
Scatter 1 cup of the rice in a thin, even layer over the almonds. In a medium bowl, mix together the remaining rice with the cauliflower, garlic, butter, cumin, allspice, turmeric, nutmeg and 1¾ teaspoons each salt and pepper.
Reserve ½ cup of this mixture, then distribute the remainder in an even layer in the pot.
Place the chicken in the pot, slightly nestling the pieces into the rice-cauliflower layer; discard any accumulated juices. Shingle the eggplant slices over the chicken in an even layer. Sprinkle with the reserved ½ cup rice mixture.
Pour the broth into the pot (it will not fully cover the eggplant), then bring to a boil over medium-high. Set the second parchment round over the food, then cover the pot with the lid. Cook for 5 minutes, reduce to low and cook, undisturbed, for 35 minutes.
Remove the pot from the heat, uncover and let stand for 15 minutes. Remove the parchment, then invert a serving platter onto the pot.
Holding the platter against the pot, carefully invert the two together; leave the pot overturned on the platter and let rest for about 10 minutes. Slowly lift off the pot and, if needed, remove and discard the parchment.
Tip: Don’t forget to soak and rinse the rice. This helps the grains cook up light and separate.
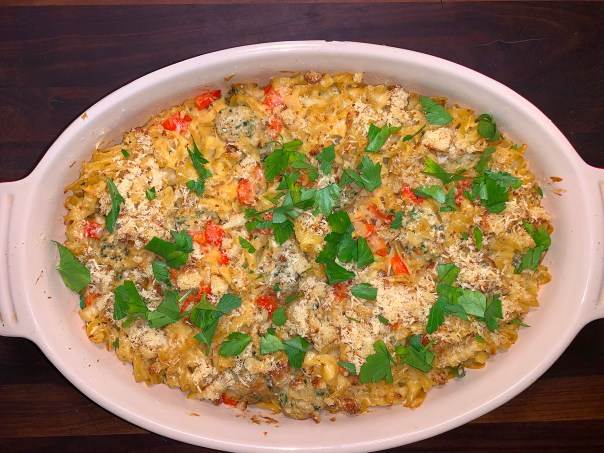
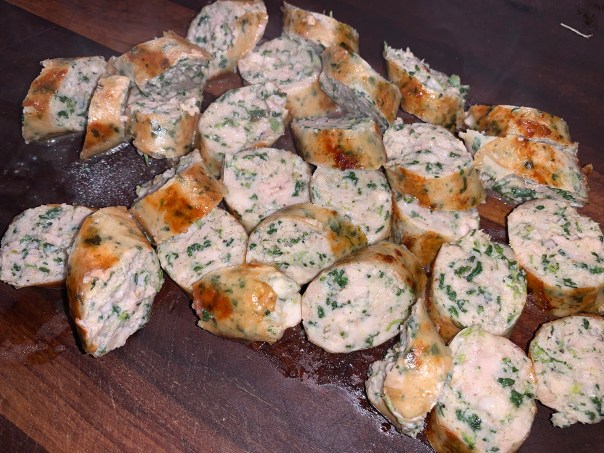
This sausage and noodle casserole is an excellent choice for an everyday weeknight meal with a bit of nostalgia thrown in. With no more than 15 minutes prep time, you’ll have a satisfying family dinner in under an hour. It’s a tasty one-pot meal to serve with steamed vegetables or a salad—our choice. To beef it up even more, include dinner rolls or buttermilk biscuits.
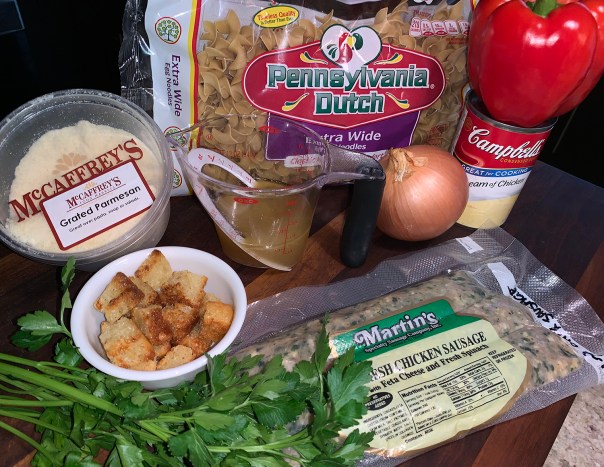
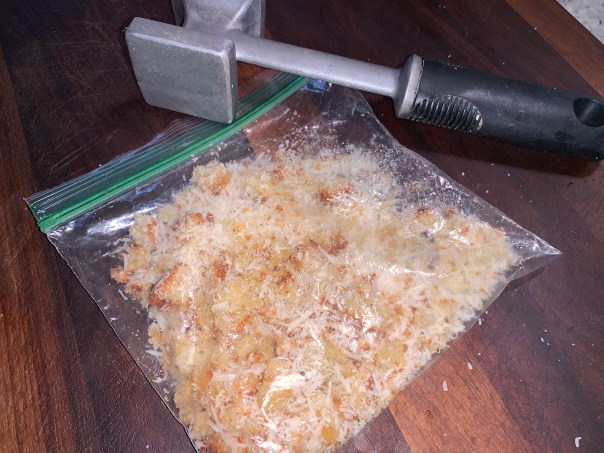
The recipe was predicated on the fact that I wanted to use up a package of Martin’s brand fresh chicken sausages with feta and fresh spinach. So a comfort-food casserole came to mind. And for the crisp crumbly topping, I combined homemade focaccia croutons with some grated parmesan.
Decades ago using Campbell’s Cream-of-whatever soup was a mainstay for many home chefs. My favorite used to be the Golden Cream of Mushroom. Somehow this casserole called out for one of those soups, so I selected the Cream of Chicken (another option would be Cream of Broccoli). And instead of combining it with water, you know my mantra “use homemade stock” if at all possible.
We absolutely loved it! The leftovers didn’t least long…
Heat the oven to 350 F. Lightly butter a shallow 3-quart baking dish or spray it with cooking oil spray.
Cook the noodles in a saucepan of boiling salted water following the package directions.
Drain in a colander and set aside.
Place the sausage links into a large skillet and cook until browned on both sides, about 10 minutes, flipping several times until browned all over. Remove from pan and cut 1/2-inch slices at a diagonal.
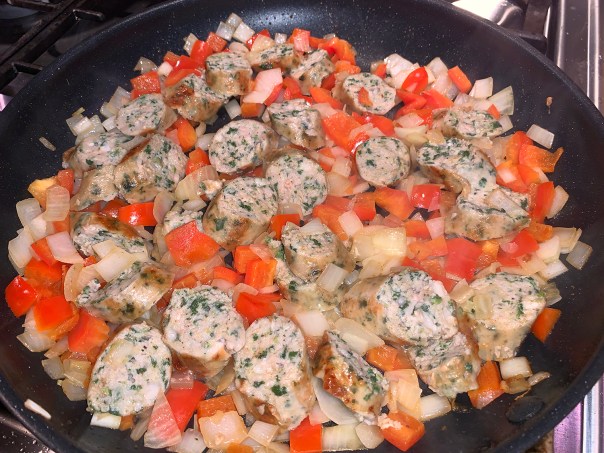
Add the chopped onion and red bell pepper to now empty skillet.
Place the skillet over medium heat and cook, stirring, until the vegetables are tender, about 5-6 minutes. Drain off excess drippings, if any. Return sausage slices to pan and heat for 1 minute.
In a large bowl, combine the sausage/vegetable mixture with the cream of chicken soup, broth, and cooked noodles. Taste and add salt and pepper, as needed.
Spoon the mixture into the prepared baking dish. Sprinkle with crumbled crouton/cheese combination.
Bake in the preheated oven for about 35 minutes, or until hot and bubbly.
Remove from oven and let sit for 5 minutes. Sprinkle with chopped parsley before serving.
This hearty, meat-free soup gets loads of flavor from shallots, cumin, smoked paprika and roasted red peppers. If you’d like to make it vegetarian/vegan, substitute vegetable broth for the chicken broth. If the finished soup is too thick for your taste, thin it with water or additional broth. Serve with hunks of warm crusty bread.
NOTE: Don’t use lentils du Puy for this soup; they hold their shape and remain too firm. Regular green lentils, on the other hand, will soften to a silky texture that lends body to the broth.
In a large saucepan over medium-high, heat the oil until shimmering. Add the shallots and cook, stirring occasionally, until softened, about 5 minutes.
Add the cumin, paprika, bay leaves and 1 teaspoon pepper, then cook, stirring, until fragrant, about 30 seconds.
Add the lentils, roasted peppers and broth, then bring to a boil. Cover, reduce to low and cook, stirring occasionally, until the lentils are softened and just beginning to fall apart, about 35 minutes.
Remove and discard the bay, then add the spinach and stir until wilted.
Taste and season with salt and pepper. Serve drizzled with additional oil.
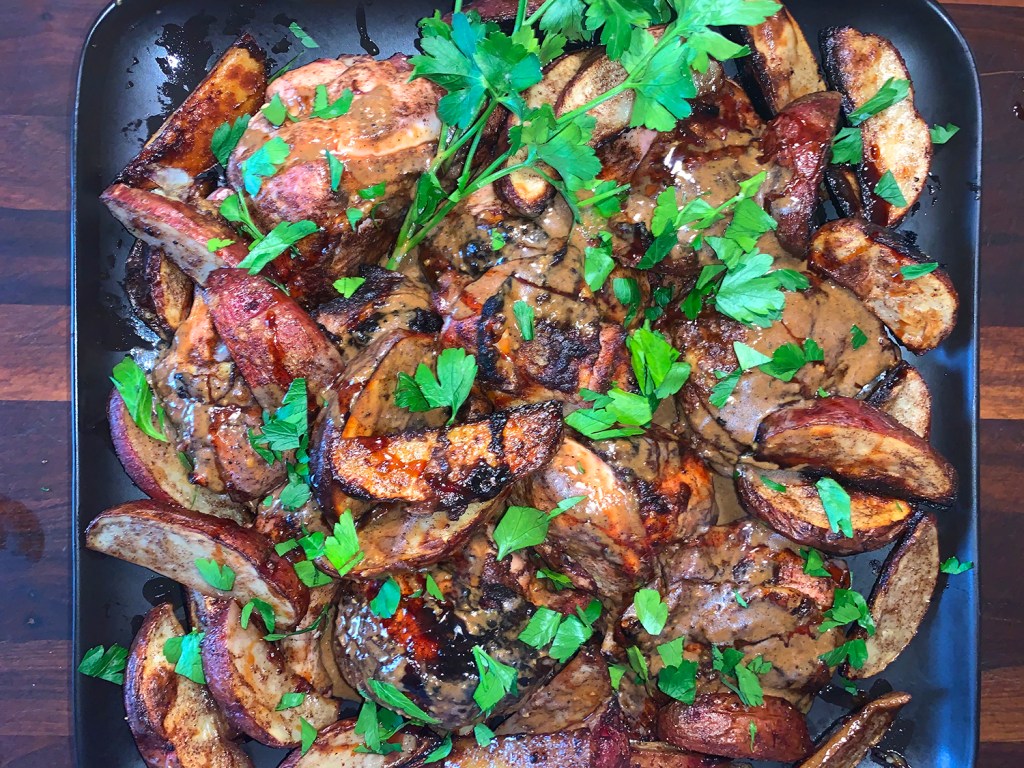
Most home chefs I know love a good traybake. They’re easy, typically don’t require much prep, and all of the ingredients go on one baking sheet. Plus it’s pretty much hands off until the cooking is done. And unless you don’t eat poultry, there’s not many folks I know that don’t appreciate a good roast chicken and potato dinner. Trust me on this one.
Found in our latest edition of Milk Street Magazine, this meal-in-one is an adaptation of a recipe in “The Palestinian Table” by Reem Kassis. In lieu of seasoning the chicken and potatoes with the Kassis family’s nine-spice blend, they make a simpler mixture from a few select ground spices.
And to make a simple but flavorful sauce, roast a handful of garlic cloves with the chicken and potatoes, then mash the softened cloves with pan drippings and deglaze with water (or homemade chicken stock).
Dark, syrupy pomegranate molasses, which we’ve been using a lot lately, has a fruity, floral, tart-sweet taste that complements the fragrant spices, as well as the caramelization that results from roasting. It was easy enough to find the molasses in the international aisle of our supermarket. You could also try a Middle Eastern grocery store, or online. (If not available, substitute with 1 teaspoon each lemon juice and honey in the seasoning mixture and serve with lemon wedges.)
Don’t use boneless, skinless chicken parts, as they will overcook. Also, make sure to put the garlic cloves at the center of the baking sheet, where they’re protected from the oven’s high heat, so they don’t wind up scorched.
You’ll notice we made two trays full. One, because I had five pounds of chicken pieces to use up, plus we wanted leftovers for another meal. Because we LOVE garlic, I increased the amount substantially. But in the end, the garlic was not quite as soft as anticipated so we used an immersion blender, doubling the amount of liquid, (using our homemade chicken broth instead of water) to make the sauce. Dang glad we did, because everything was delicious!
It didn’t mention to, but you should turn the potato wedges halfway through the cooking time. Ours got a bit too charred so I made a notation in the directions below as a reminder.
Garlicky Chicken and Potato Traybake with Pomegranate Molasses
2 tsp. pomegranate molasses (see note), plus more to serve
1 Tbsp. ground allspice
1 tsp. ground coriander
¾ tsp. ground cinnamon
⅛ tsp. ground cardamom Kosher salt and ground black pepper
3 Lbs. bone-in, skin-on chicken parts, trimmed and patted dry
1½ Lbs. medium to large red potatoes, unpeeled, cut into 1½-inch-thick wedges
8 Medium garlic cloves, peeled (more to preference)
Fresh flat-leaf parsley, to serve
Directions
In a large bowl, stir together the oil, molasses, allspice, coriander, cinnamon, cardamom, 4 teaspoons salt and ¼ teaspoon pepper. Add the chicken and potatoes, then toss to coat. Set aside at room temperature while the oven heats.
Heat the oven to 450°F with a rack in the middle position.
Place the garlic cloves in the center of a rimmed baking sheet. Arrange the chicken parts, skin up, around the garlic; this prevents the garlic from scorching during roasting.
Arrange the potatoes evenly around the chicken. Roast until the thickest part of the breast (if using) reaches about 160°F and the thickest part of the largest thigh/leg (if using) reaches about 175°F, 30 to 40 minutes. (It’s a very hot oven, so check the temperature after 25 minutes.)
Halfway through (about 15 minutes), turn the potato wedges so that they get equally crisp on both sides and not overly charred on one side.
Using tongs, transfer the chicken and potatoes to a platter, leaving the garlic on the baking sheet. With a fork, mash the garlic until relatively smooth.
Carefully pour ¼ cup water (we doubled the amount of liquid using homemade stock) onto the baking sheet, then use a wooden spoon to scrape up the browned bits. Taste the sauce and season with salt and pepper, then pour over the chicken and potatoes. (Like us, you may want to use an immersion blender to make a more unified sauce.)
Drizzle with additional pomegranate molasses and sprinkle with parsley.
Running out of meal ideas and tired of spending time in the kitchen? As I was penning this post, the worst week (so far) of the coronavirus pandemic was in full bloom, with dire warnings to stay at home if at all possible. With consternation about navigating the perils of the grocery store, we took preventative measures and revamped our weekly meal plan around the food we already had in stock and did an inventory on what our cupboards were harboring. Aha, a couple of large cans of tuna!
Take that can of tuna—(no, don’t shove it anywhere)—and raise it up a couple of notches. Here, pesto, olive, and artichokes turn a simple tuna salad mixture into a delightful surprise. You could even develop it into a tuna melt sandwich with the addition of your cheese of choice on top. Whatever floats your boat, amigo.
In fact, the very next day for lunch using the leftover mixture, I made an open-faced, toasted Ezekiel bread sandwich with melted cheddar.
Of course, these amounts are flexible. Adjust the quantity to suit your own preferences, or what you may have on hand. Perhaps you have green olives instead of black kalamatas? No pesto? Create your own version with fresh herbs, nuts and olive oil and some grated parm.
TIP: For future use, harvest fresh basil from your garden or local farmer’s market during the summer months. Wash, dry and blend with a good olive oil. Pack into silicon ice cube trays and freeze until solid. Store cubes in a freezer ziploc until ready to use in individual servings for soups, pastas, dips, etc.
Once plated over a bed of greens, tomatoes and carrots strips, drizzle your favorite dressing over the greens. I personally didn’t feel it needed anything more, but The Mr. dressed his greens with a homemade salad dressing. Alas, we forgot to top with some garlicky croutons we made the night before from leftover focaccia bead… There’s always tomorrow’s salad…
As you are all too aware by now, one has to get creative in how to pass time constructively during this stay-at-home lockdown period. So I decided to treat us to something decadent like these Salted Double-Chocolate Olive Oil Cookies. The Hubster, an olive oil fanatic, actually discovered this recipe online weeks ago and it was the perfect foil to pass some time over the weekend.
They were inspired by a recipe for Olive Oil and Sea Salt Brownie Cookies that Phyllis Grant found all over the Internet. She traced it back to Ashton Epps Swank from the blog Something Swanky. Phyllis removed the brownie component by taking out the baking soda and one egg. Less sugar, flour, and cocoa were included; but more salt and vanilla were added. Then Phyllis snuck in a bit of butter (because even though these are olive oil cookies, she claims butter makes everything better). Who’s going to disagree?
Fudgy Goodness!
Once upon a time, salt was just salt. Not so in this case. It’s important that you use Maldon Sea Salt as the topping. Maldon is, first, a place—a town in the county Essex on the River Blackwater, an estuary in the east of England. As for the ingredient, it is loved by chefs and shoppers the world over because the soft flaky texture of the sea salt crystals and the cleanness of the salt flavor they deliver make all the difference.
As for the taste, Maldon is considered less bitter, less salty than other salts. There’s a quick savory zing that doesn’t overpower or overstay, it’s almost sweet. Plus, it’s a good finishing salt on almost anything—I use it nearly everyday. Many grocers do not carry it, but you can order it online pretty easily.
And to make sure the cookies were the best, I used and entire 10-ounce bag of the large Ghirardelli premium baking bittersweet chips. End result? They were friggin’ amazing and some of the richest and most flavorful chocolate nuggets we’d ever eaten! After one bite, Hubby labeled them “little chocolate bombs.” I dare you to eat just one…
Use an olive oil that is mild and affordable. Save your fancy herbaceous olive oil for drizzling.
1 tablespoon Maldon sea salt (to sprinkle on top before baking)
Directions
Sift together the cocoa, flour, and salt. Sift again. Set aside.
In a standing mixer (or by hand) beat the sugars, olive oil, and butter on high speed for 2 minutes. Scrape down the sides.
Add your egg. Beat at medium speed for 8 seconds. Scrape down the sides.
Add your vanilla extract. Beat on medium speed for 5 seconds. Scrape down the sides.
Add 1/3 of the dry ingredients and beat for 8 seconds on low speed. Scrape down the sides. Add the second 1/3 of the dries, beat for 8 seconds on low. Scrape down the sides. Add your final 1/3 of the dries, beat on low for 5 seconds.
Add the chocolate chips and stir with wooden spoon until incorporated. If there are any pockets of flour remaining, mix them in by hand. Refrigerate the dough for about an hour (it will be easier to handle).
Heat the oven to 350° F.
Line a sheet pan with parchment or a Silpat. Scoop the dough into half spheres. Or you can scoop with a spoon and quickly roll with your hands. They will spread a bit so leave a few inches between the cookies.
Sprinkle each cookie with sea salt (amount is up to you). Bake them for 4 minutes. Spin the tray around 180 degrees (to cook evenly) and bake for another 3 to 4 minutes. You want the centers to still be glistening. Don’t worry—they will firm up quite a bit as they cool. (I must admit, I was very concerned with this, but after a few hours, they did indeed get firm.)
Remove from the oven and allow them to cool on the sheet pan for at least 15 minutes.
Being very careful, remove them to a cooling rack for at least an hour to firm up.
Eat right away, or store in an air tight container. You could also freeze for a few months.