Tag Archives: quiche

Mushroom and Cheese Quiche

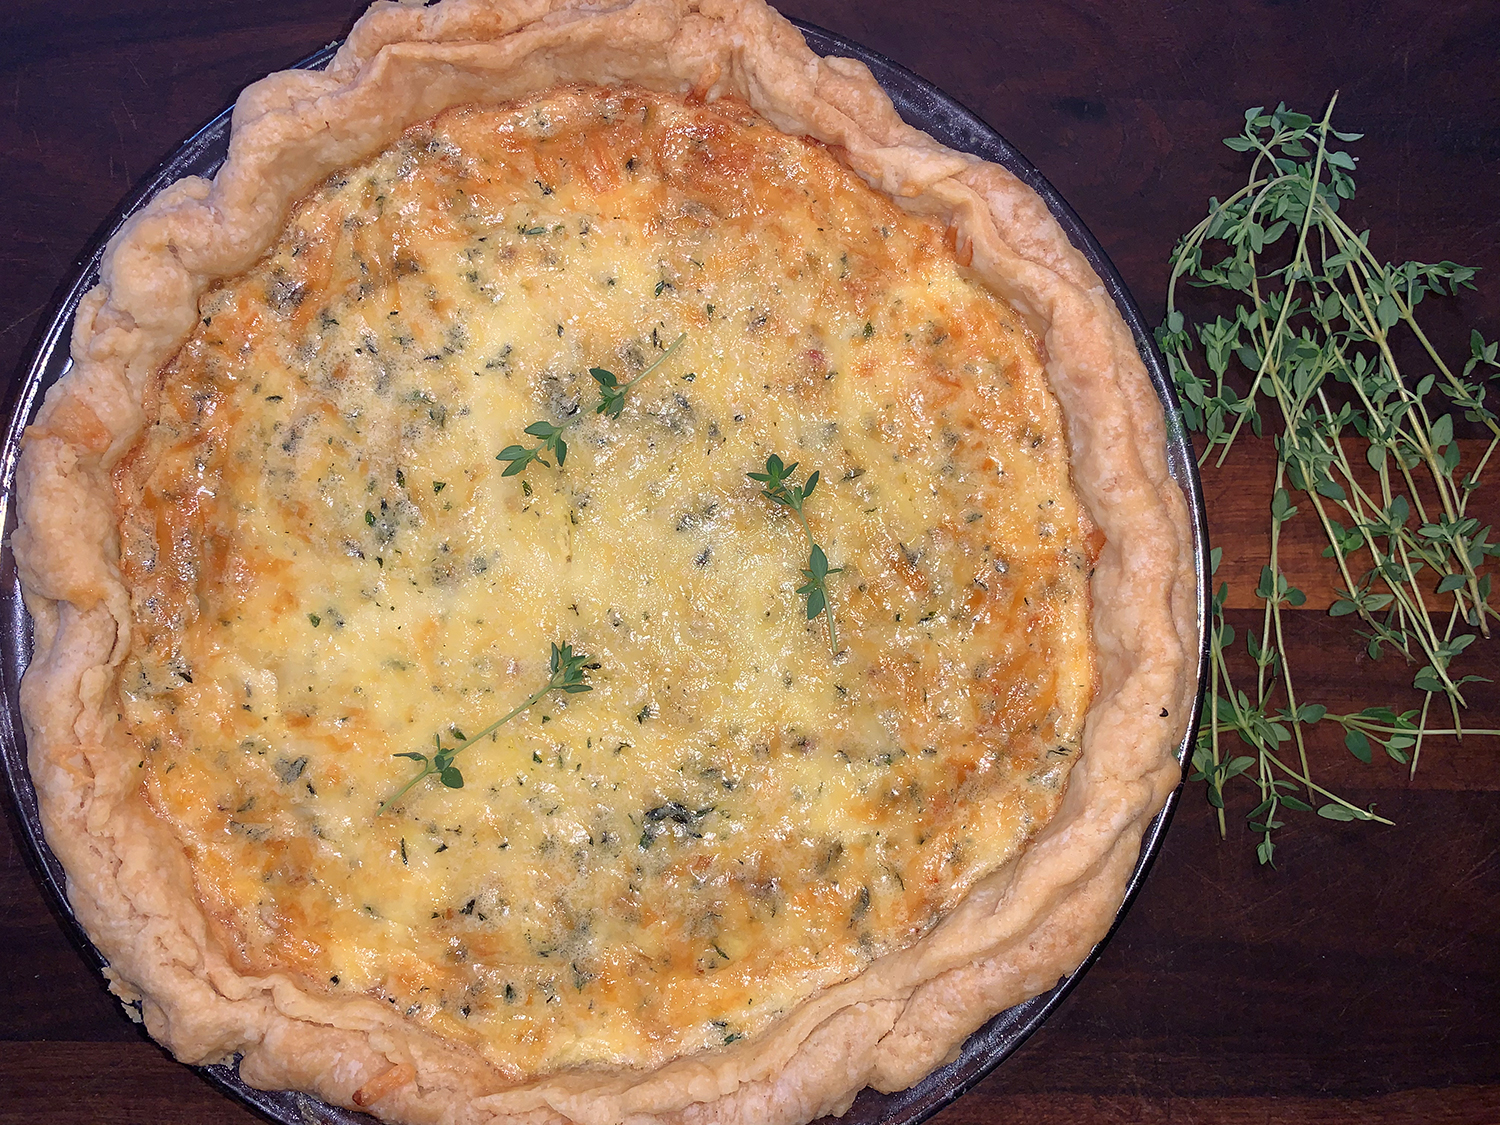
Some days you just want to have breakfast for dinner—and this quiche makes it more than all right. The making of this mushroom and cheese quiche is a labor of love, but it really is a treat well worth the effort, no matter what time of day you choose to eat it.

The smoky cumin-flavored caramelized onions enfolded in a delicately textured custard set in buttery, tender, and crisp crust may tempt you into eating far more than you should. Serve with a side salad and call it a day (or night)!

Making a quiche can be a longish process, although it doesn’t ask for fancy techniques or equipment. With a little patience, you’ll have a 9-inch pie that is one hundred percent worth the bake. To streamline the process further, you could purchase a pre-made pie crust, but this blog instructs you from start to finish.

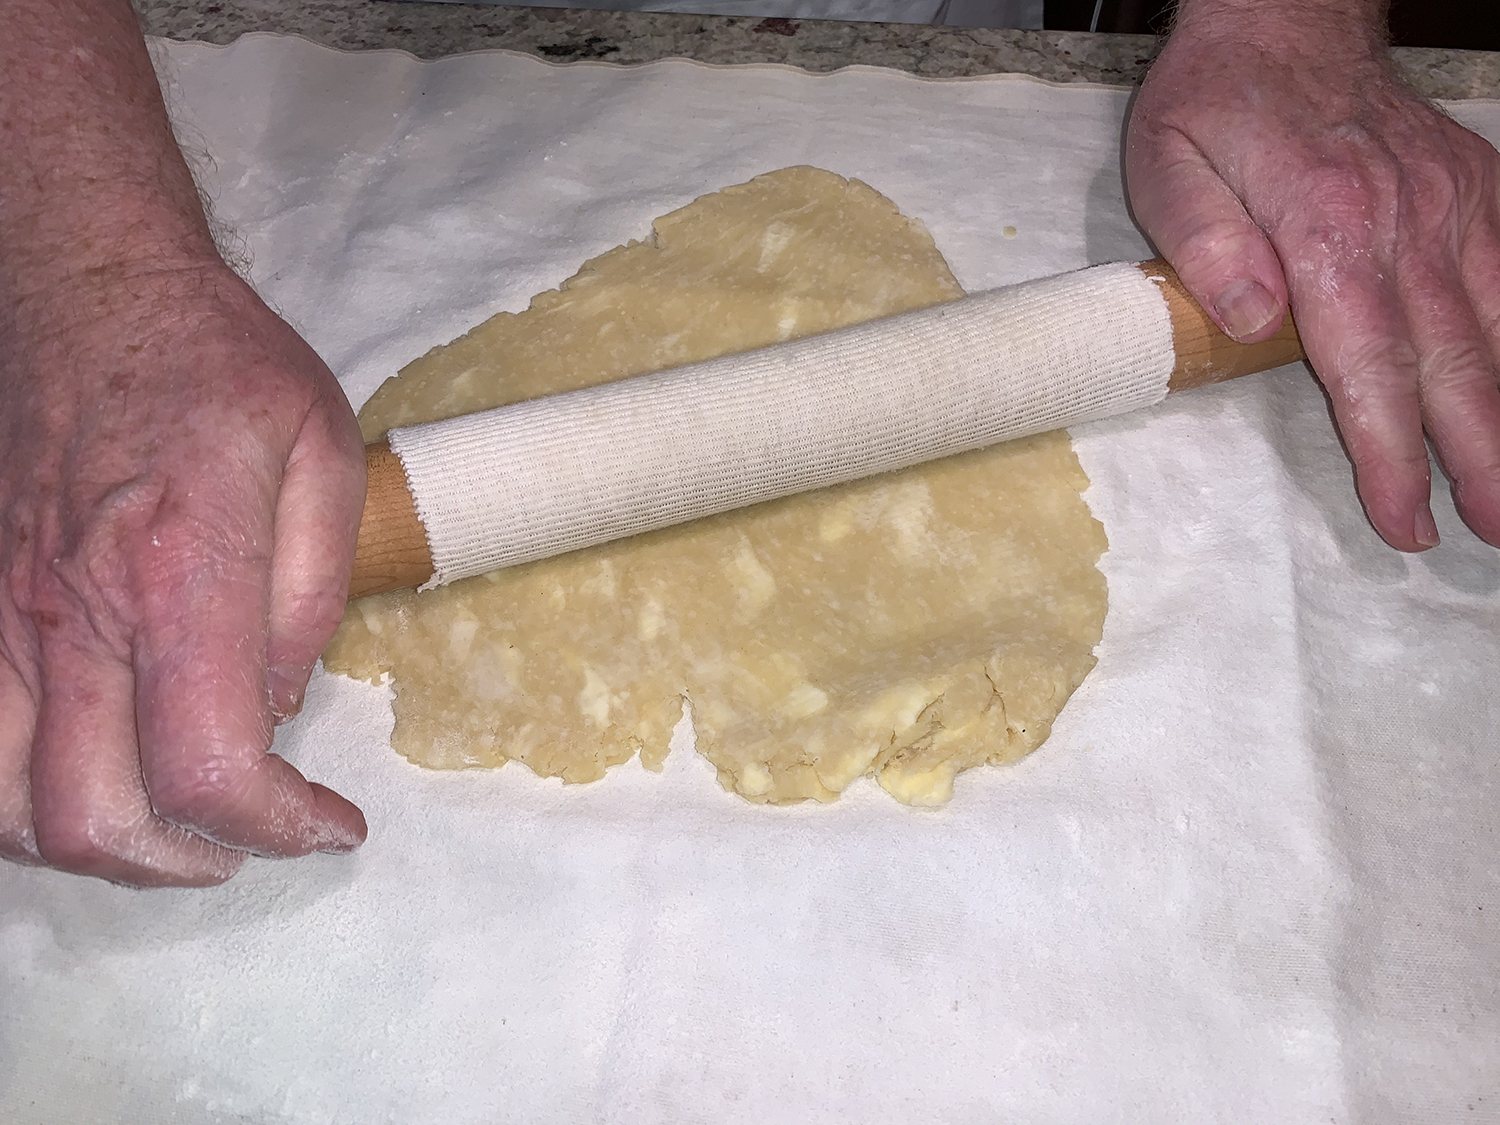
NOTE: Keep your dough cold. It’s the golden rule for making a flaky crust. So, if the butter is melting when you’re cutting the flour, slide the whole thing in the refrigerator for 10 minutes. 

Mushroom and Cheese Quiche

  • Servings: 4-6
  • Difficulty: moderately easy
  • Print

Ingredients

Pastry Crust

  • 1 cup all-purpose flour (127 grams)
  • 1⁄2 cup salted butter (113grams), chilled, cut into small cubes.
  • 3-4 Tbsp. water, ice cold

Mushroom Filling

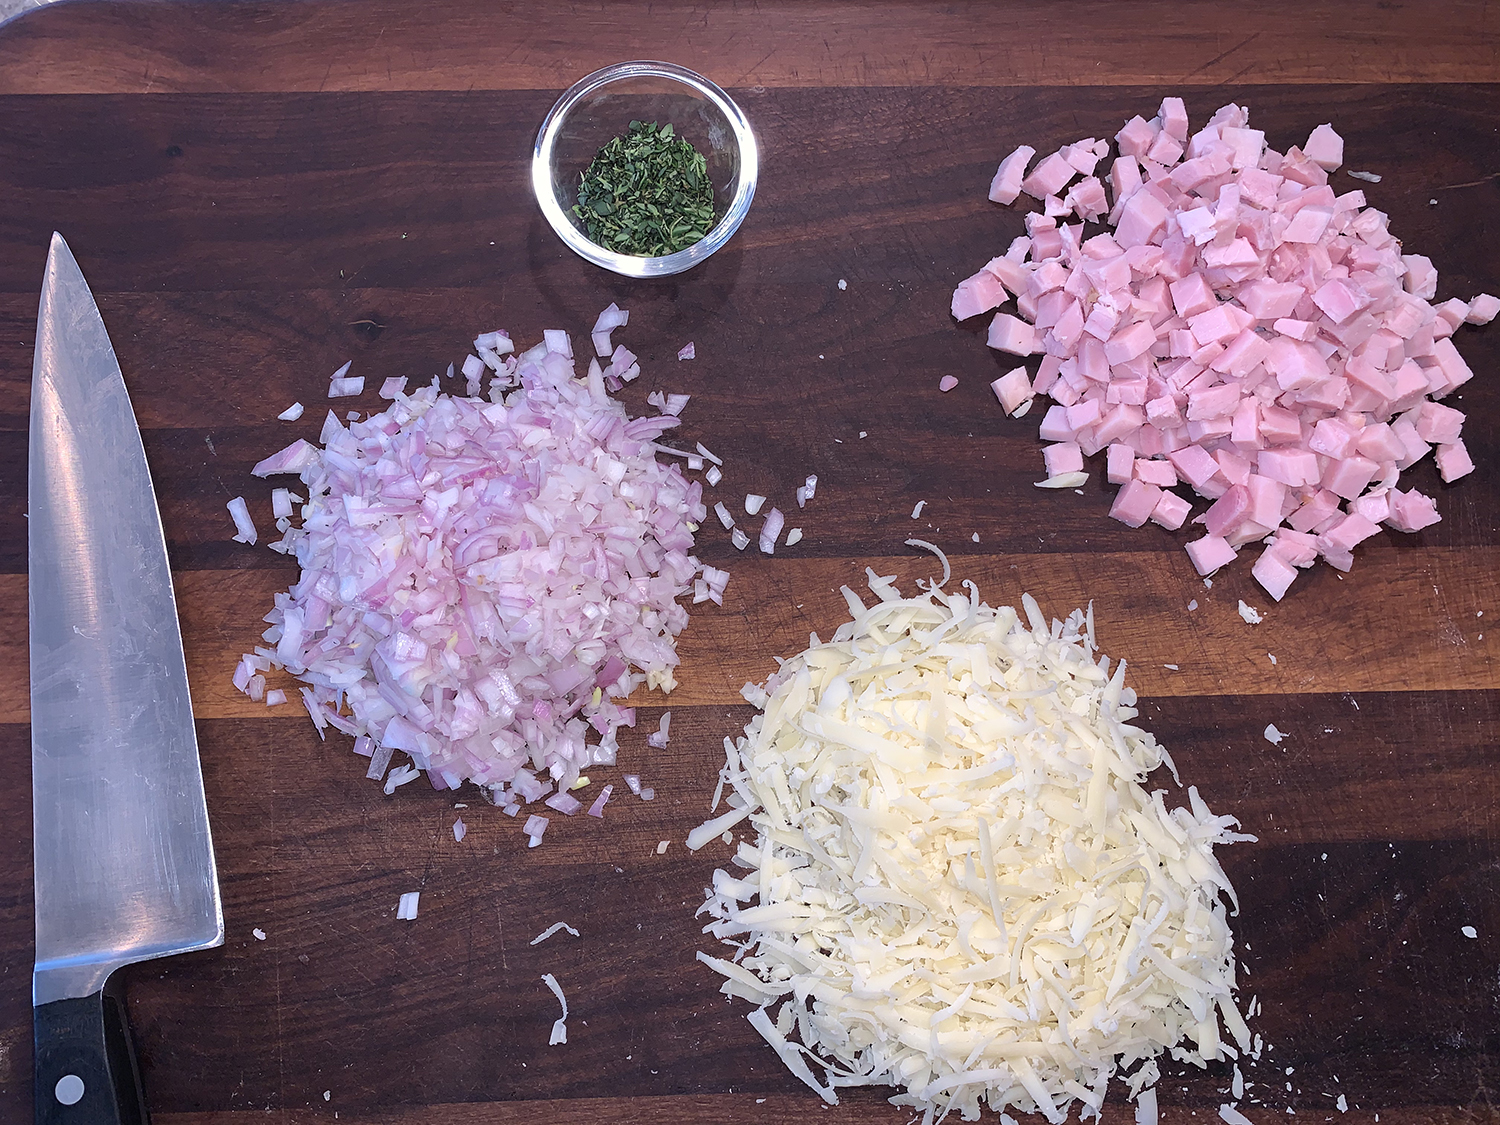
  • 2 large onions, thinly sliced
  • 1 1⁄2 tsp. cumin powder
  • 2 Tbsp. olive oil or butter
  • 1 Tbsp. balsamic vinegar
  • 1-2 sprigs fresh thyme
  • Salt to taste
  • 10 oz. cremini mushrooms, thinly sliced

Custard Filling

  • 4 eggs
  • 1⁄2 cup heavy cream
  • 1 tsp. fresh/dried thyme
  • Salt and pepper to taste
  • 6 oz. grated Gruyere OR Fontina cheese OR a mix of both, divided
  • 1-2 Tbsp. scallion, only the green part, finely chopped (save the whites for your side salad)

Instructions

Pastry Crust

  1. Start by cutting chilled, cubed pieces of butter into the flour using just your fingertips (this prevents the heat from the rest of the hand from melting the butter). You can also use a pastry cutter or two knives.
  2. When you have a coarse bread-crumb-like texture add ice-cold water one tablespoon at a time and bring the dough together.
  3. You don’t have to knead it. Using only the heel of your hand push the dough away from you. Then bring it back with your fingertips till smooth.
  4. If the dough feels dry add in more chilled water. 
  5. Shape the dough into a ball, flatten it slightly, cover in cling wrap and then refrigerate until it is firm and easy to handle, about 15 minutes.

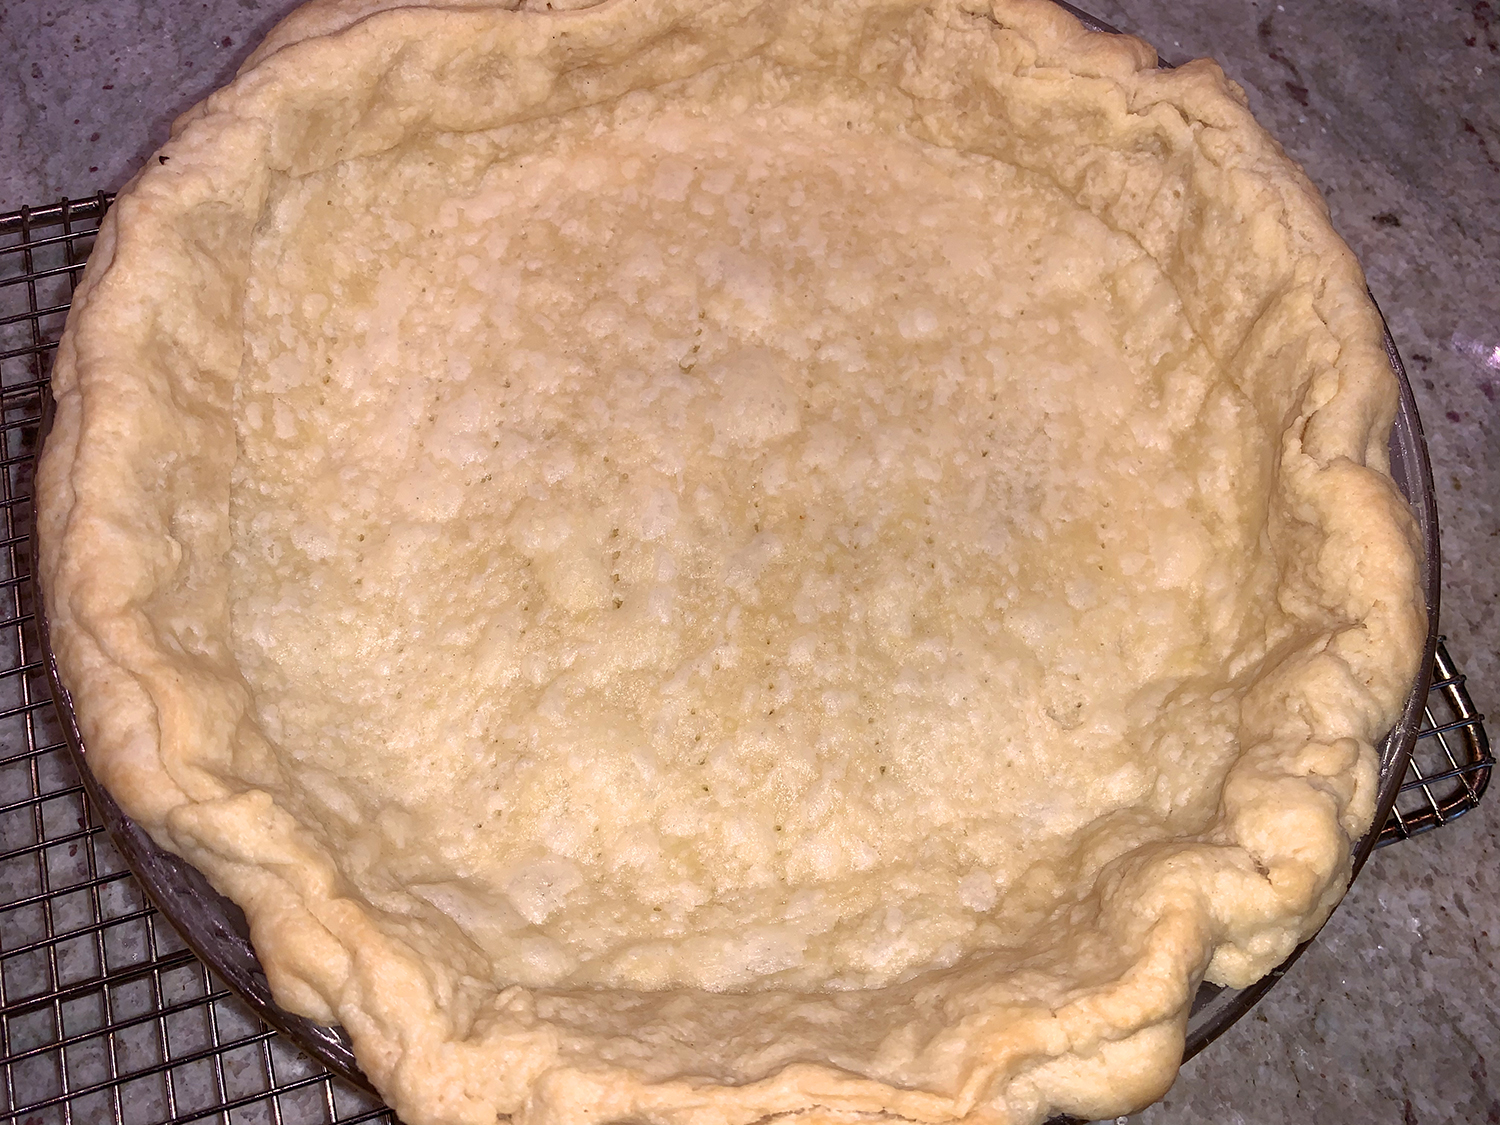
Blind Baking The Pastry Crust

  1. Preheat your oven to 375°. Keep a 9″ pie dish handy.
  2. On a very lightly floured surface (you don’t want excess dry flour), roll out the dough to an approximately 12″ circle. 
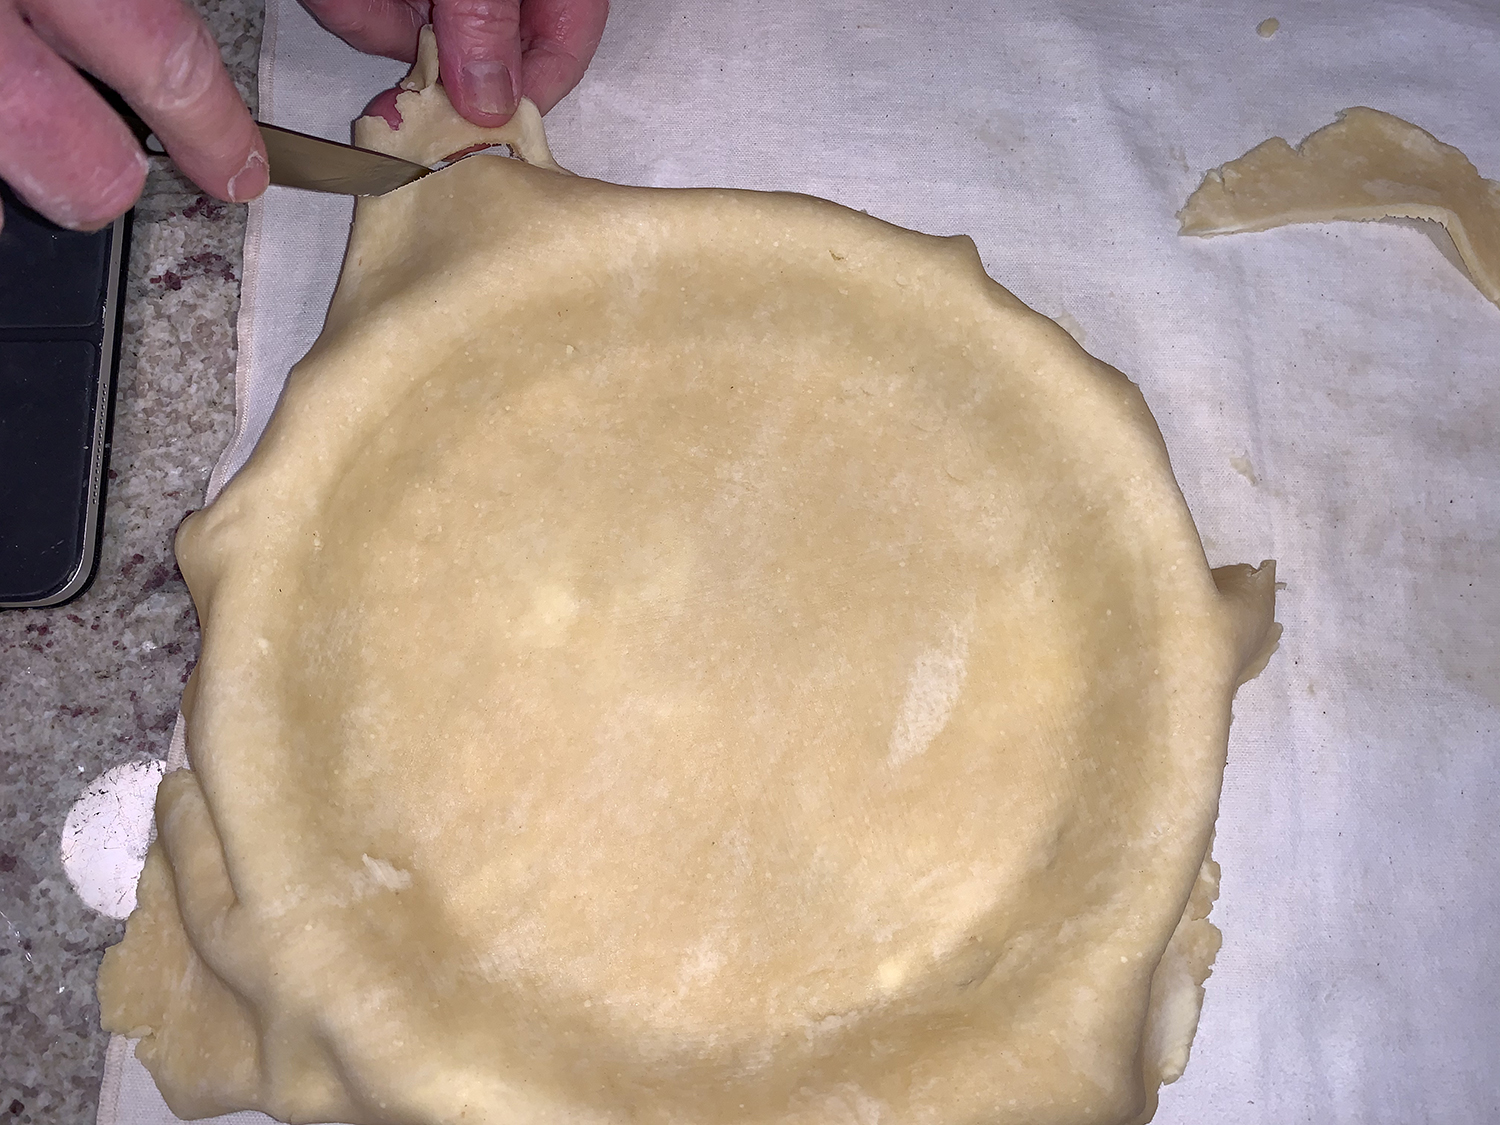
  3. Pick it up gently and place it in your pie dish. Push the dough inwards along the edges and the base with a very firm hand. You can also wrap the dough around your rolling pin and then transfer it to your pie dish.
  4. After you’ve made sure the dough fits the pan well, trim the dough that’s hanging over with a sharp knife and chill for another 20 minutes.
    The Hubs used the extra dough and added it around the perimeter and notched it with the end of a knife to crimp the edges. This helps the crust from shrinking.
  5. Prick the bottom of the chilled pie shell with a fork.  
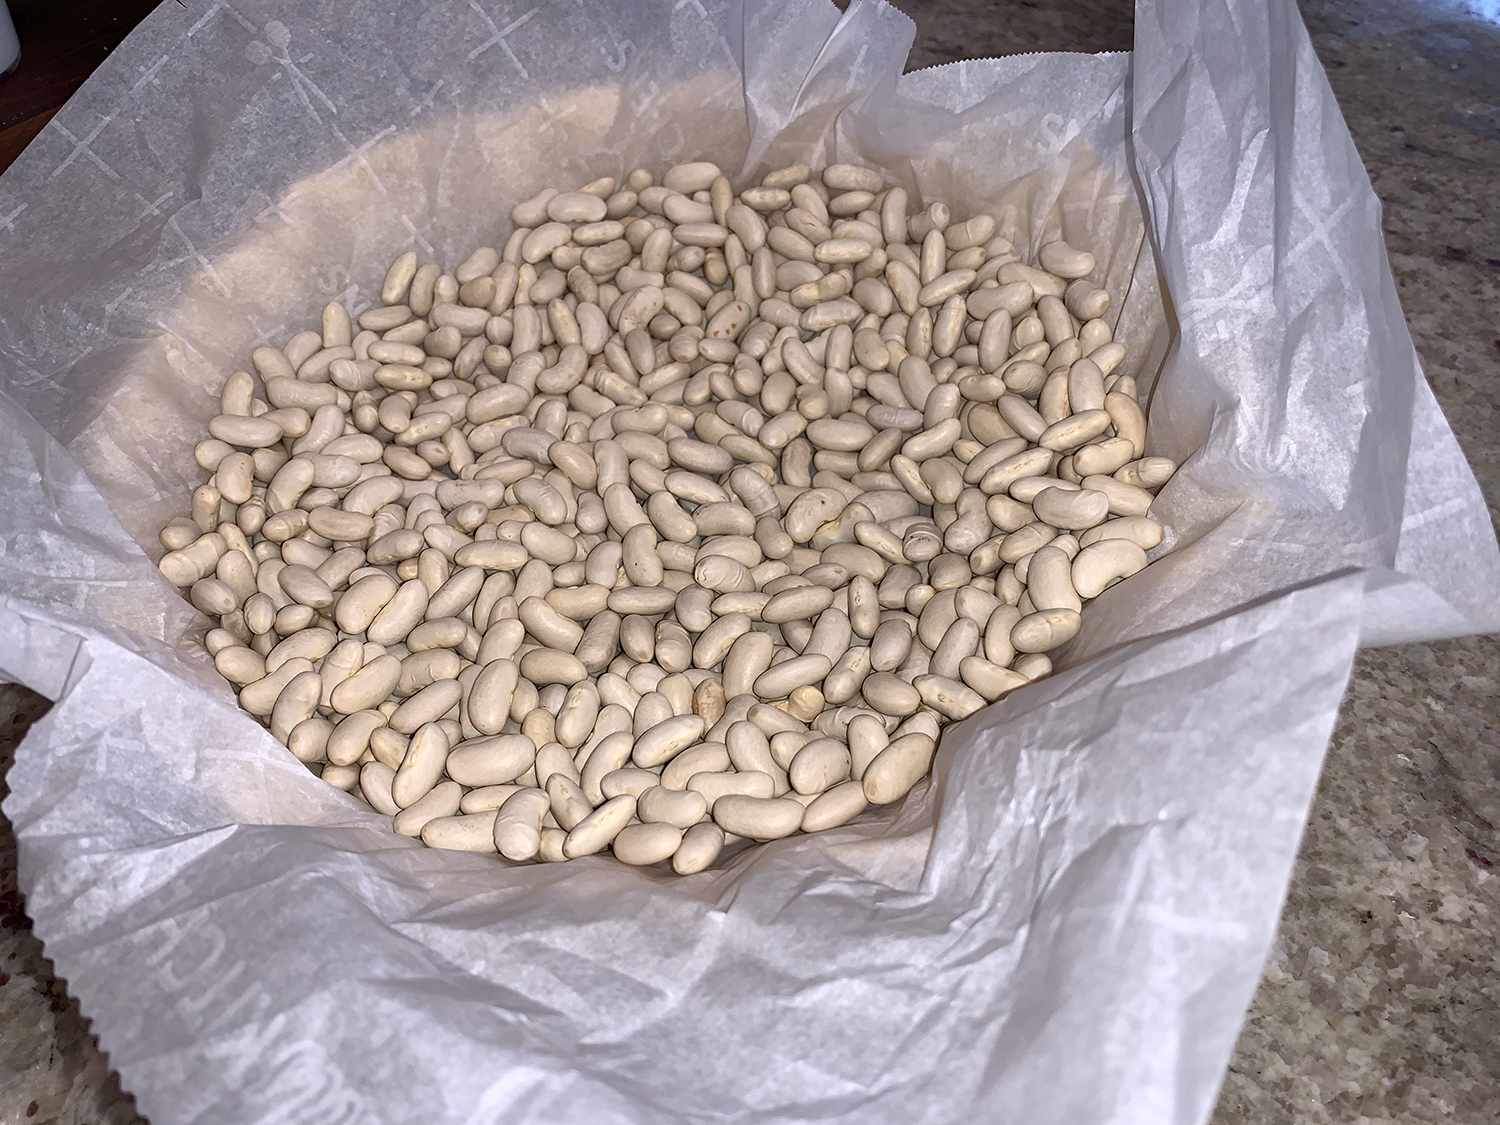
  6. Line the shell with parchment paper and weigh it down with baking beans, dry red kidney beans, or chickpeas.
  7. Bake the crust for 15-16 minutes in the preheated oven. 
  8. Remove the parchment paper and the beans and return the pie to the oven for another 7-8 minutes. Remove from oven and cool on a rack for 15 minutes.

Mushroom Quiche Filling

  1. While the crust is baking, prepare the filling.
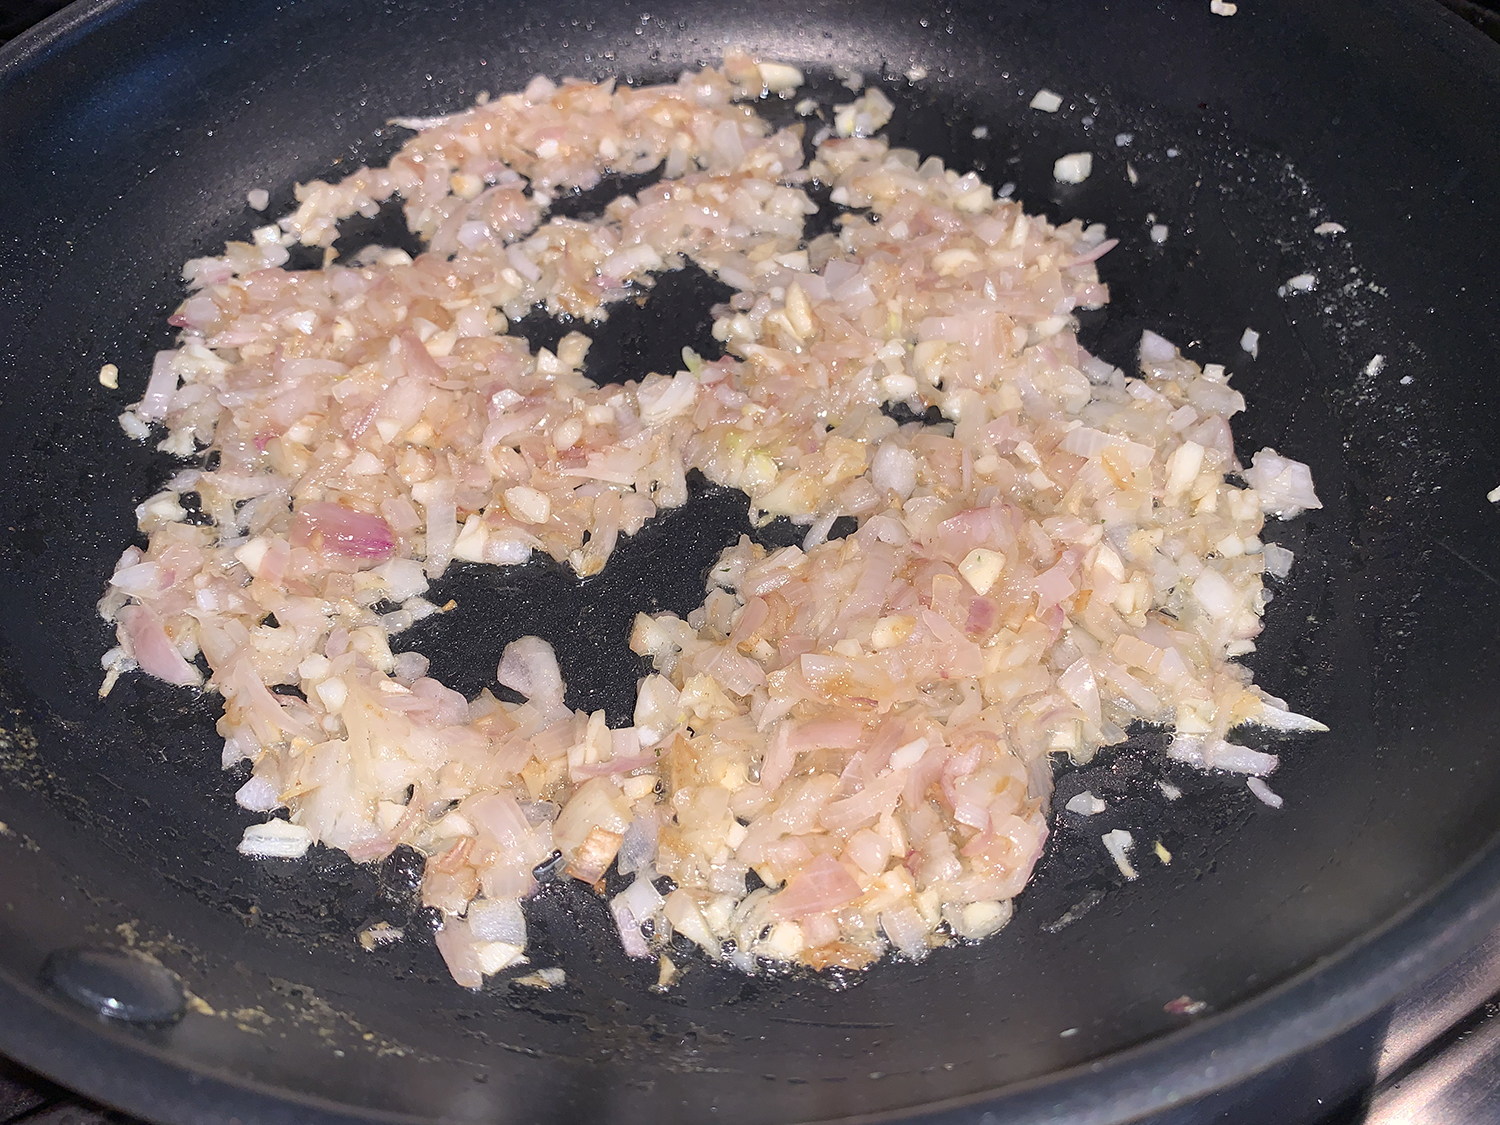
  2. Thinly slice the onions and cook them in 1 tablespoon olive oil or butter on low heat along with a sprig of fresh thyme and cumin powder. 
  3. As the onions are softening, after 5 minutes, add the balsamic vinegar.
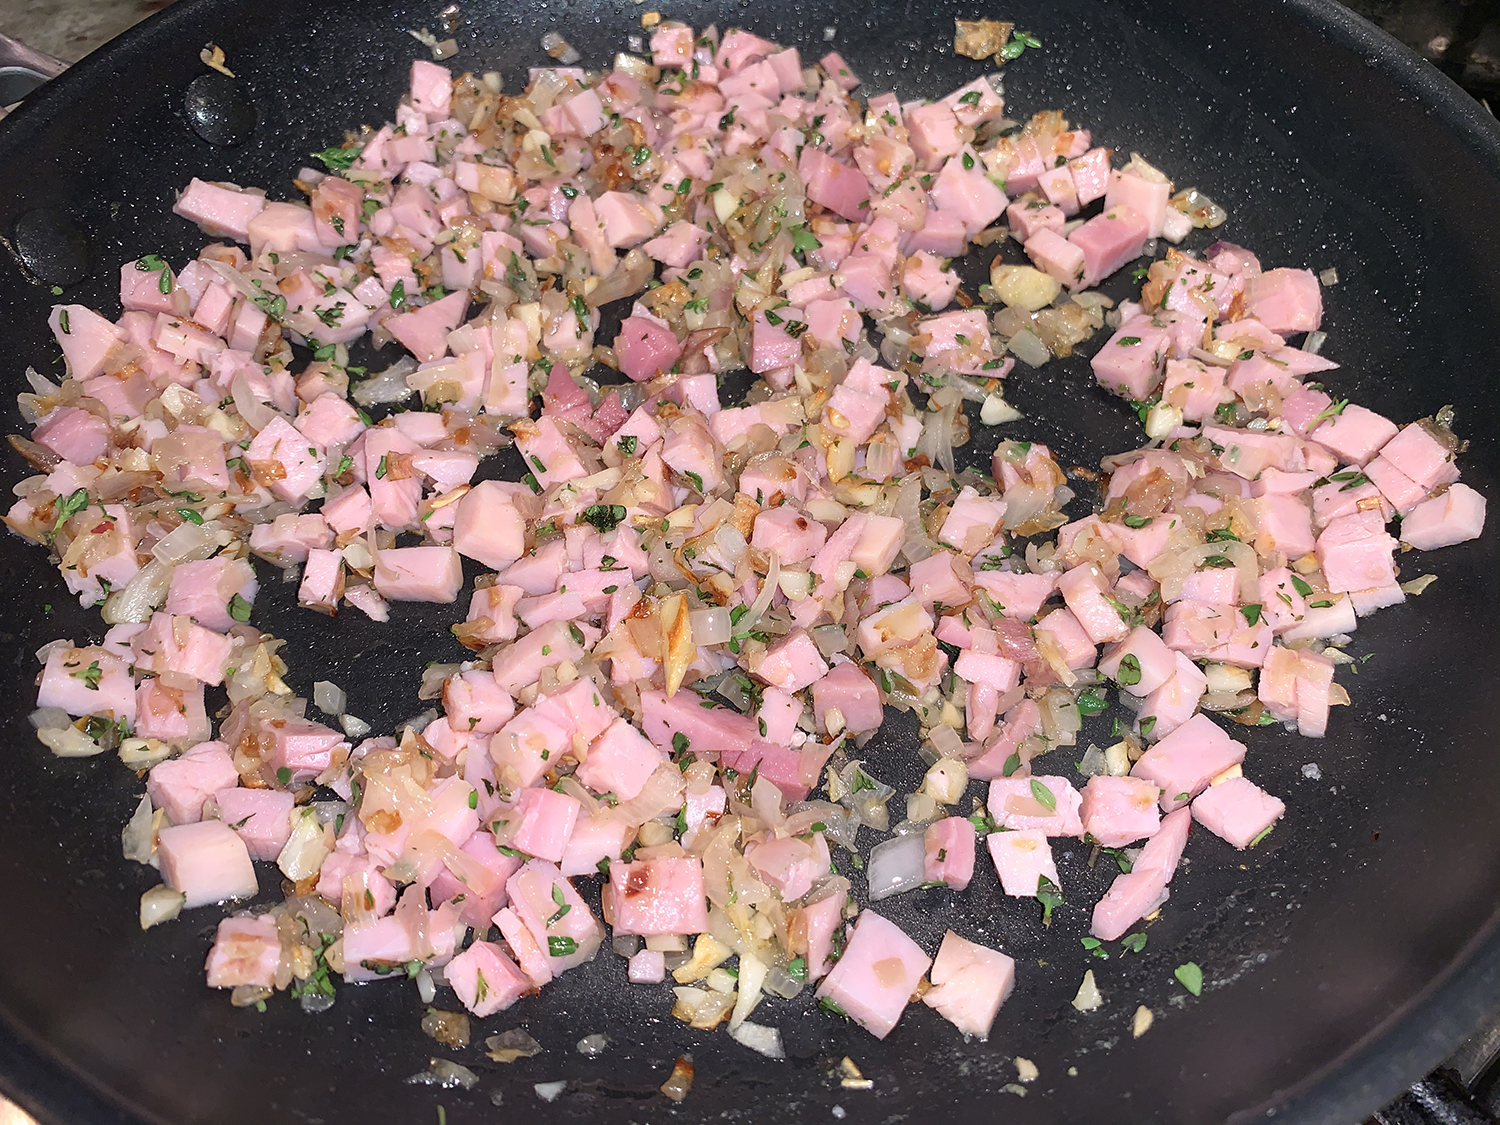
  4. Stir occasionally, and sauté the onions until they are soft and brown, 8-10 minutes total. Add salt to taste right at the end. Discard thyme sprigs and transfer to a bowl and keep aside.
  5. Add a tablespoon of olive oil and sauté the mushrooms in the same pan, until they are softened and cooked, about 8 minutes.
  6. In a separate bowl, whisk together the eggs, cream, fresh/dried thyme, salt, and pepper. You can use any seasoning you prefer.

Assembly

  1. Spread the caramelized onions on the pie crust.
  2. Top this with most of the sautéed mushrooms (save 8-10 for the top) and some green onion.
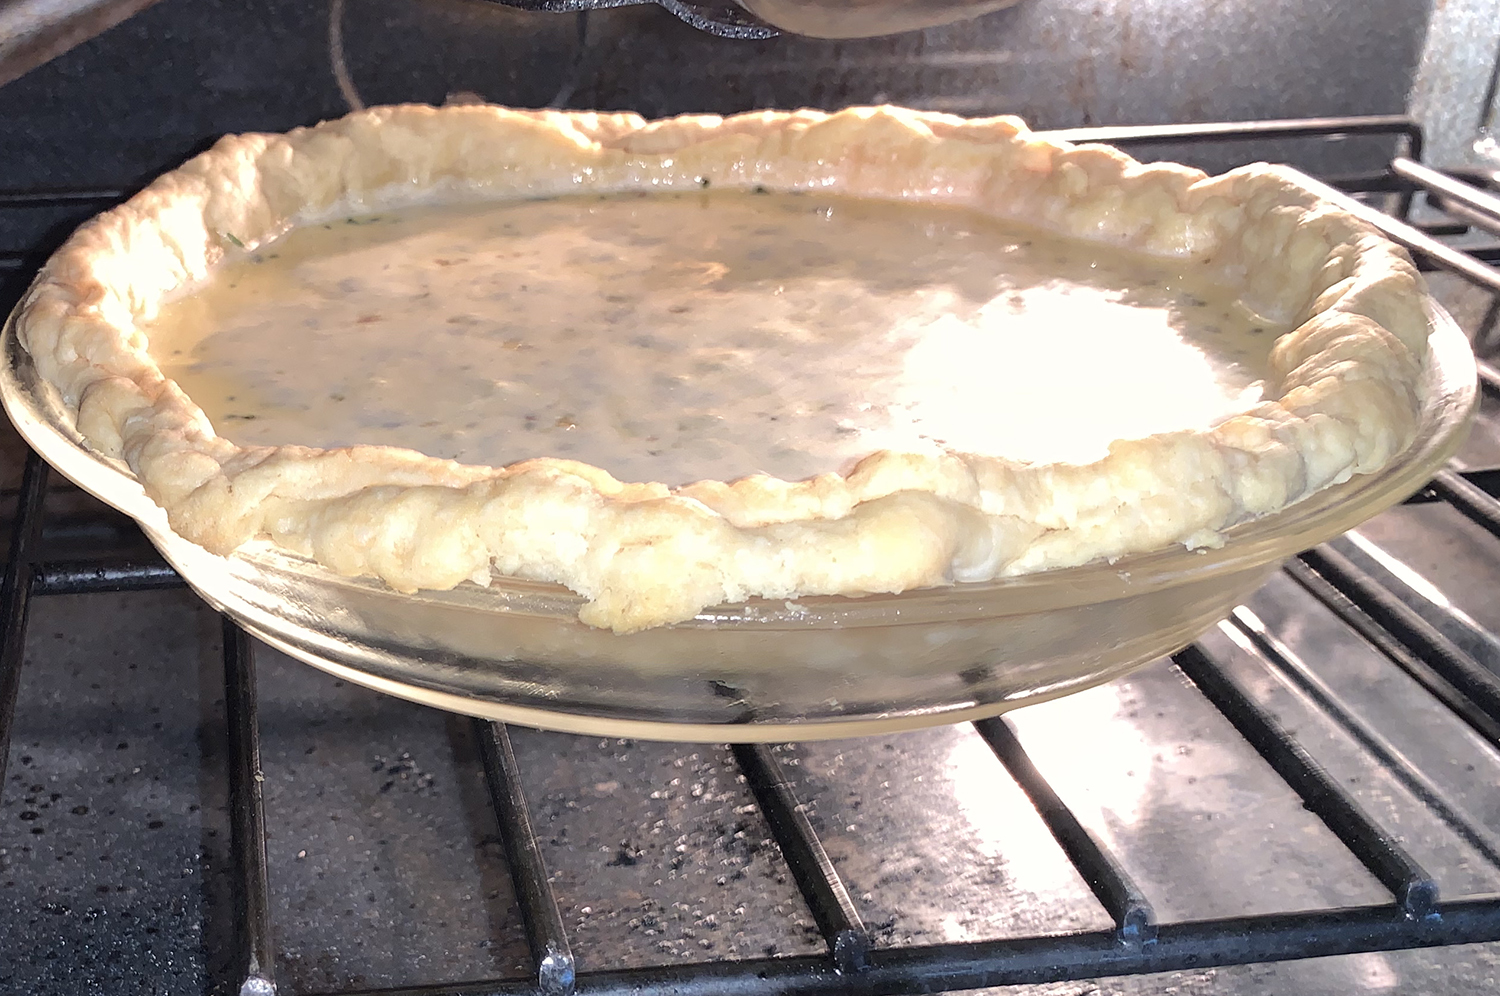
  3. Sprinkle 2/3 of the grated cheese and pour over the egg cream mixture. Top with remaining 1/3 grated cheese and the remaining mushrooms.
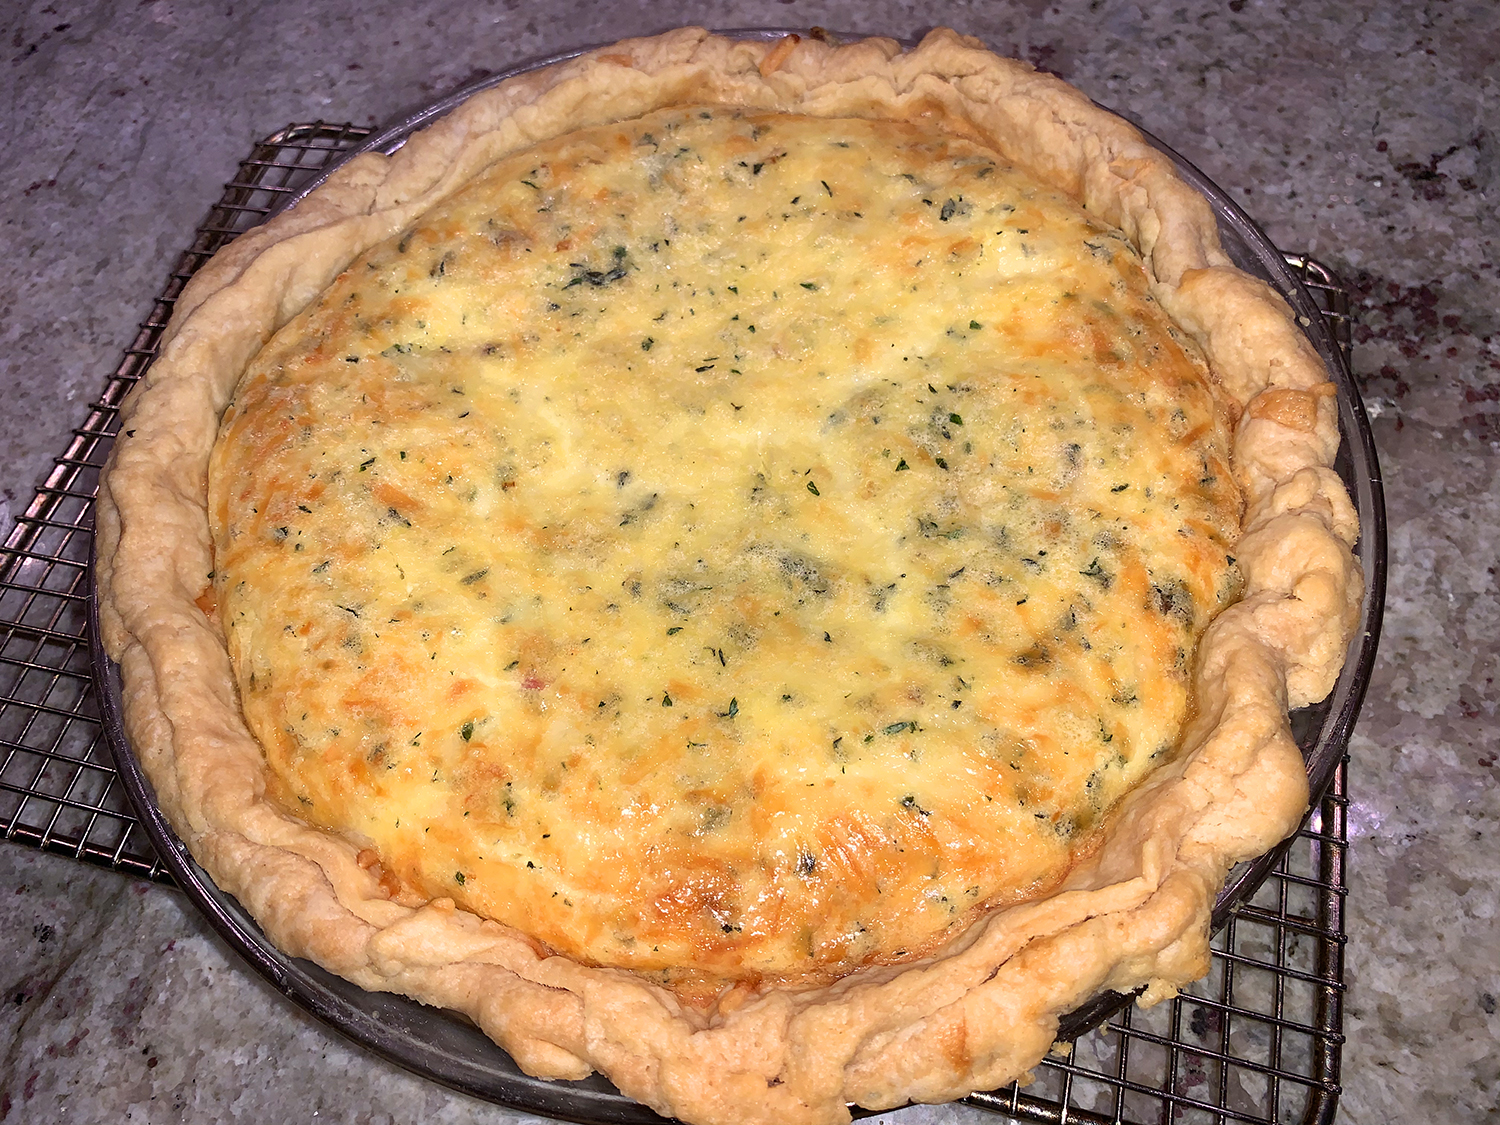
  4. Bake this at 350° for 40-45 minutes until the center is set and the quiche, golden.
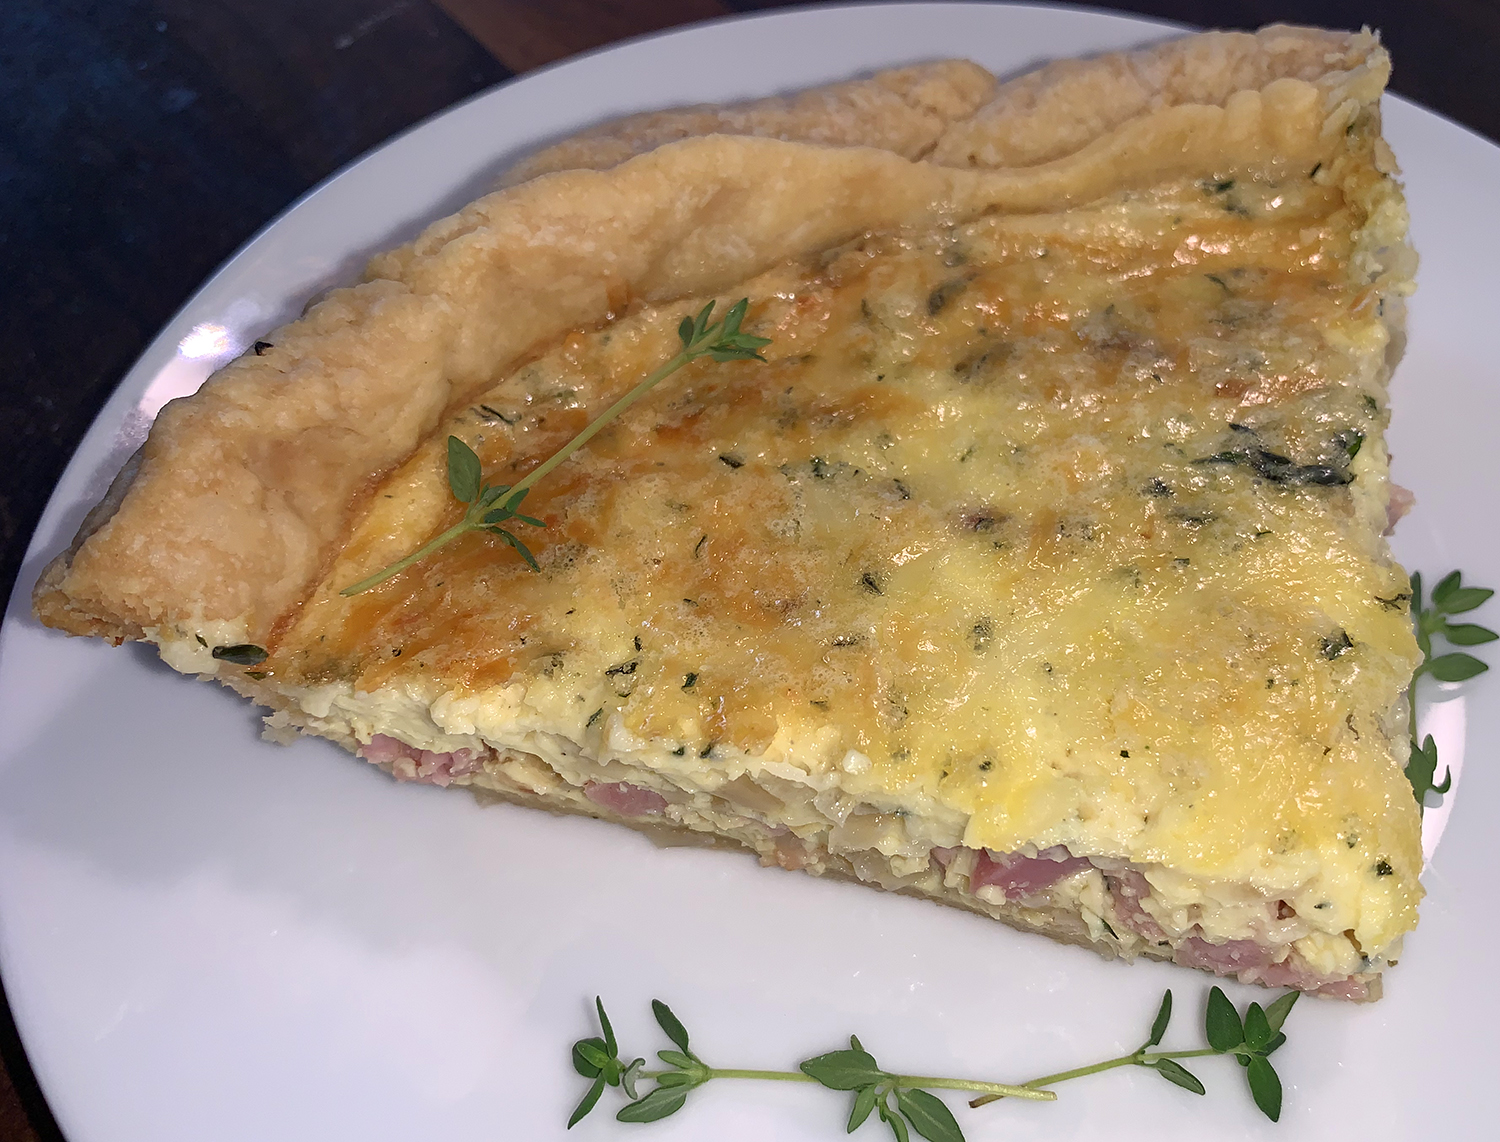
  5. Let it rest for about 15 minutes before slicing and serving.

http://www.lynnandruss.com

Very loosely adapted from a recipe by Natasha Minocha

Ham and Gruyere Quiche

Quiche is one of those versatile dishes that can be served at any meal, be it breakfast, brunch, lunch or dinner. Once baked and cooled slightly, it can be eaten right away, or refrigerated for another time. Using a combination of milk and heavy cream, it yields the richest, creamiest filling ever.

With a large amount leftover from a recent dinner party featuring Ham Braised in Madeira with Rosemary & Peppercorns, and a block of gruyere that never got used, we had the starter ingredients for our filling. To that we included some diced shallot and chopped fresh thyme.

We are “those” people that thrive on culinary challenges, but if you don’t have the time, or the stamina to create your own crust, by all means purchase a pre-made store bought variety. But be forewarned, this crust recipe is fabulous, and according to The Hubs, the best he’s ever made! He really liked the trick of adding the leftover dough to the edges for crimping and fluting. This also helped prevent the crust from sinking down.

Ham and Gruyere Quiche

  • Servings: 4-6
  • Difficulty: easy
  • Print

Homemade Buttery Flaky Pie Crust

Ingredients

  • 2 1/2 cups all-purpose flour (spoon & leveled)
  • 1 tsp. salt
  • 6 Tbsp. unsalted butter, chilled and cubed
  • 3/4 cup vegetable shortening, chilled
  • 1/2 cup ice water

NOTE: This recipe is enough for a double crust pie. If you only need 1 crust for your pie, cut this recipe in half OR freeze the other half.

Directions

  1. Transfer the dough to a floured work surface.
  2. Using floured hands, fold the dough into itself until the flour is fully incorporated into the fats.
  3. Form it into a ball. The dough should come together easily and should not feel overly sticky.
  4. Cut the dough in half. Flatten each half into 1-inch thick discs using your hands. Wrap each tightly in plastic wrap.
  5. Refrigerate for at least 2 hours or up to 5 days. Or freeze.
  6. When rolling out the chilled pie dough discs to use in your pie, always use gentle force with your rolling pin. Start from the center of the disc and work your way out in all directions, turning the dough with your hands as you go. Visible specks of butter and fat in the dough are perfectly normal and expected.
  7. Roll the dough into a 12-inch circle so that there is enough crust to go up the edges of the glass pie dish. Cut away extra dough but leave about an inch overhang.
  8. Gather all of the extra dough pieces, mush together and roll out into a thin rectangle. Cut 1-inch strips and add them to the top edge of the pie crust. Crimp or flute the edges.
  9. Chill the shaped pie crust for at least 30 minutes. This prevents shrinking. Remember that pie dough must be cold.
  10. Fill with pie weights (or dried beans). As the pie dough bakes, its fat will melt. The melting fat causes the pie crust to shrink down the sides of the pie dish. To prevent the pie dough from completely losing its shape, weigh it down with pie weights. Carefully line the pie dough with parchment paper first, then pour in pie weights/dry beans.
  11. Bake until the edges are lightly brown, about 15 minutes.
  12. Remove pie weights, then prick the crust with a fork.
  13. Bake crust for about 8 more minutes.

The Perfect Quiche

Ingredients

  • 1 unbaked flaky pie crust (recipe above)
  • 4 large eggs
  • 1/2 cup whole milk
  • 1/2 cup heavy cream or heavy whipping cream
  • 1/4 tsp. each salt and pepper
  • 1 cup shredded Gruyere cheese
  • 1 cup cubed ham
  • 1 Tbsp. butter
  • 1 cup minced shallot
  • 1 1/2 tsp. chopped fresh thyme

Directions

  1. Preheat oven to 375°F. 
  2. Partially blind bake your pie crust as indicated above. Crust can still be warm when you pour in the filling. (You can partially pre-bake the crust up to 3 days ahead of time. Cover cooled crust tightly and refrigerate until ready to fill.)
  3. Reduce oven temperature to 350°F.
  4. Heat 1 tablespoon of butter in a nonstick skillet over medium heat. When melted, add shallot pieces and cook, stirring occasionally until translucent, about 4-5 minutes.
  5. In a large bowl with a handheld or stand mixer fitted with a whisk attachment, beat the eggs, whole milk, heavy cream, salt, and pepper together on high speed until completely combined, about 1 minute. Whisk in ham, cheese, shallot and thyme.
  6. Bake the quiche until the center is just about set, about 45-55 minutes. Don’t over-bake. Use a pie crust shield to prevent the pie crust edges from over-browning. Allow to cool for 15 minutes.
  7. Top with optional toppings before slicing and serving, if desired. Or you can cool the quiche completely before serving– it’s fantastic at room temperature!
  8. This quiche makes great leftovers! Cover tightly and store in the refrigerator for up to 4 days.

Make Ahead Freezing Instructions: The pie dough can be prepared ahead of time and stored in the refrigerator for up to 5 days or in the freezer for up to 3 months. You can pre-bake the crust ahead of time too. To freeze, cool baked quiche completely, then cover tightly with a couple sheets of aluminum foil and freeze for up to 3 months. Thaw in the refrigerator or on the counter, then bake at 350°F for 20-25 minutes.

http://www.lynnandruss.com

Recipes adapted from sallysbakingaddiction.com