Tag Archives: main meal

Bangers with Onion Gravy

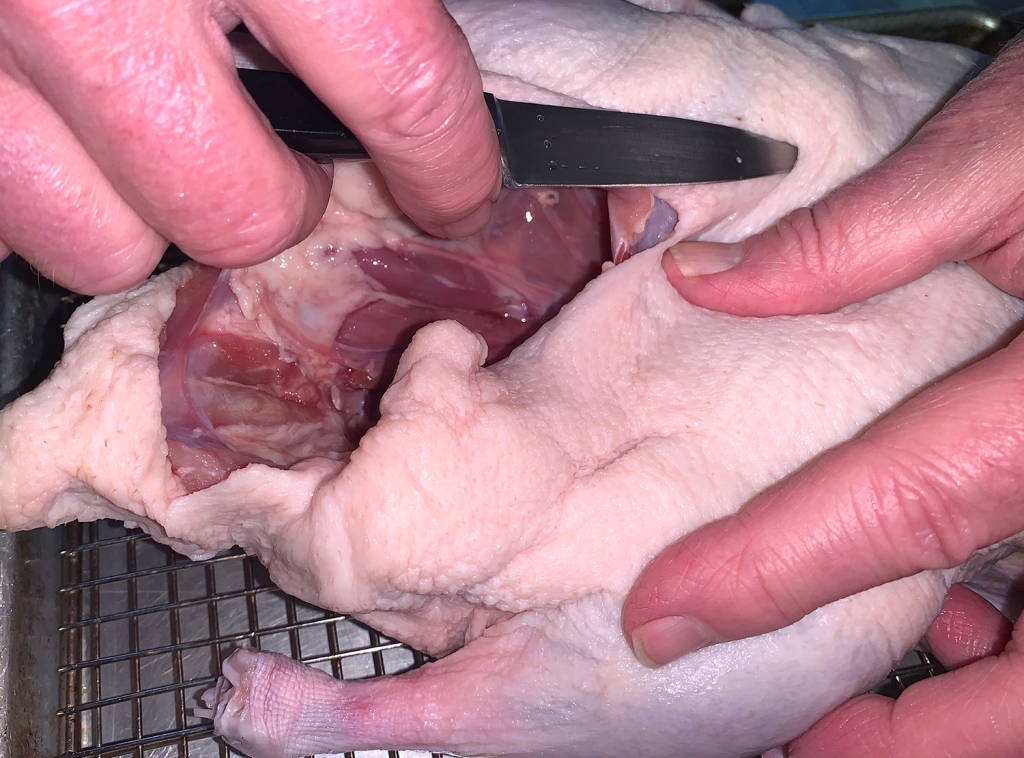
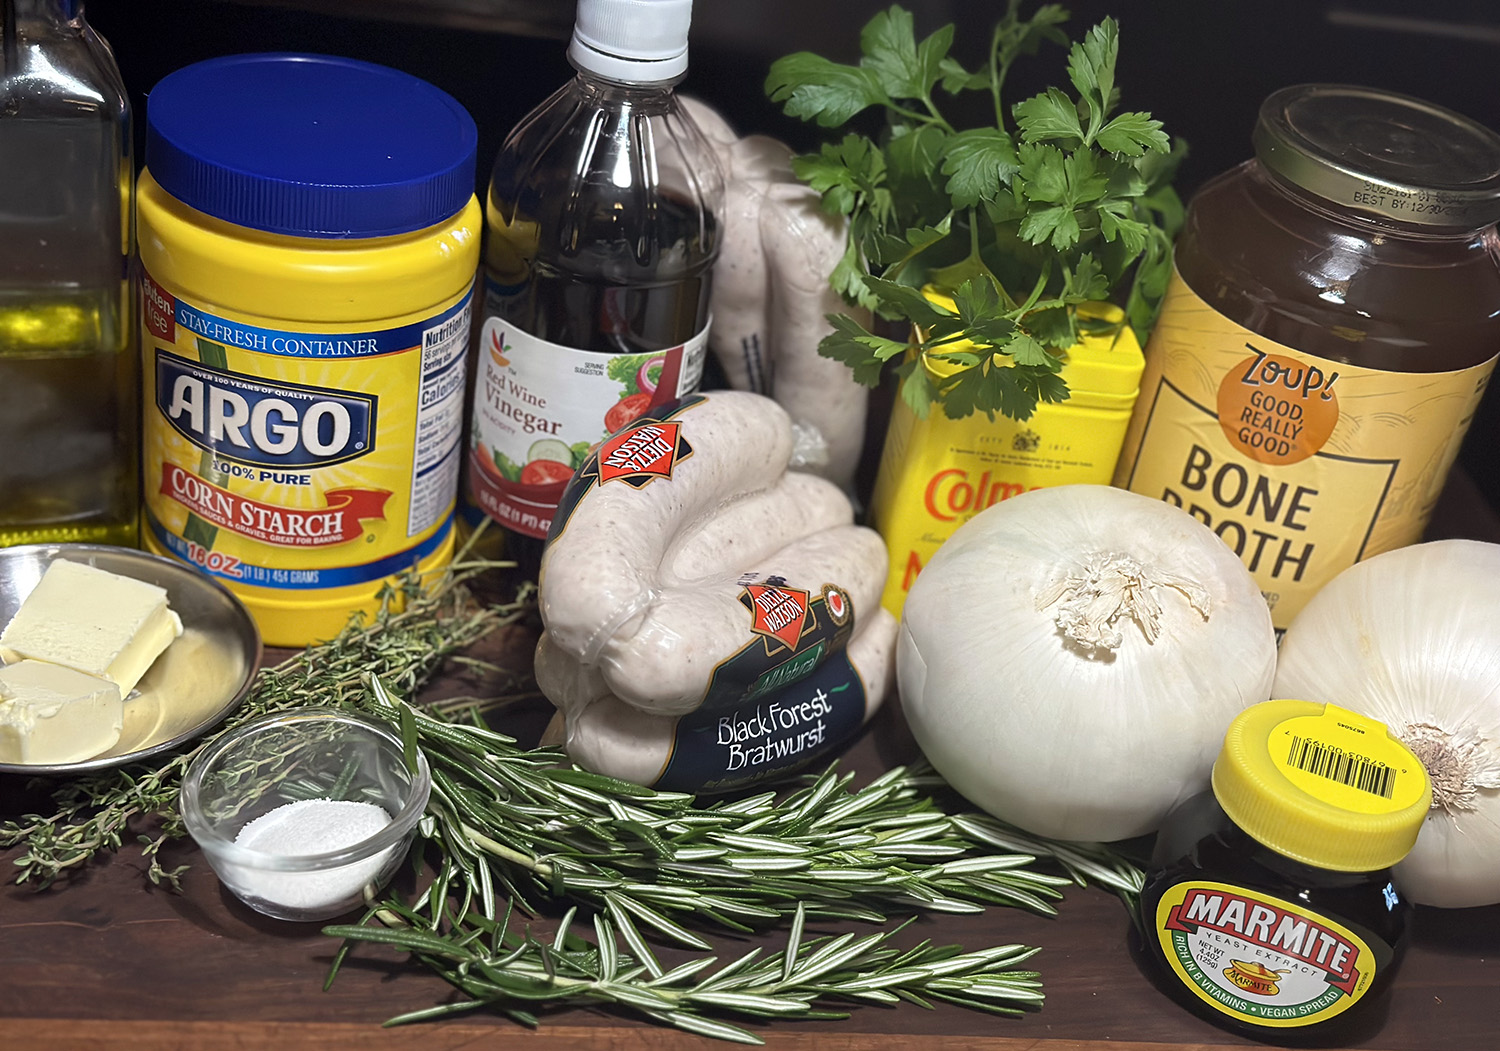
Ever eat Bangers and Mash that left you underwhelmed? So this version found in Milk Street Magazine, enticed us to want to try making it on our own. It’s clearly not a complicated recipe, and the flavor profile looked downright yummy. So after ordering the Marmite online, and receiving it a few days later, we took the plunge.

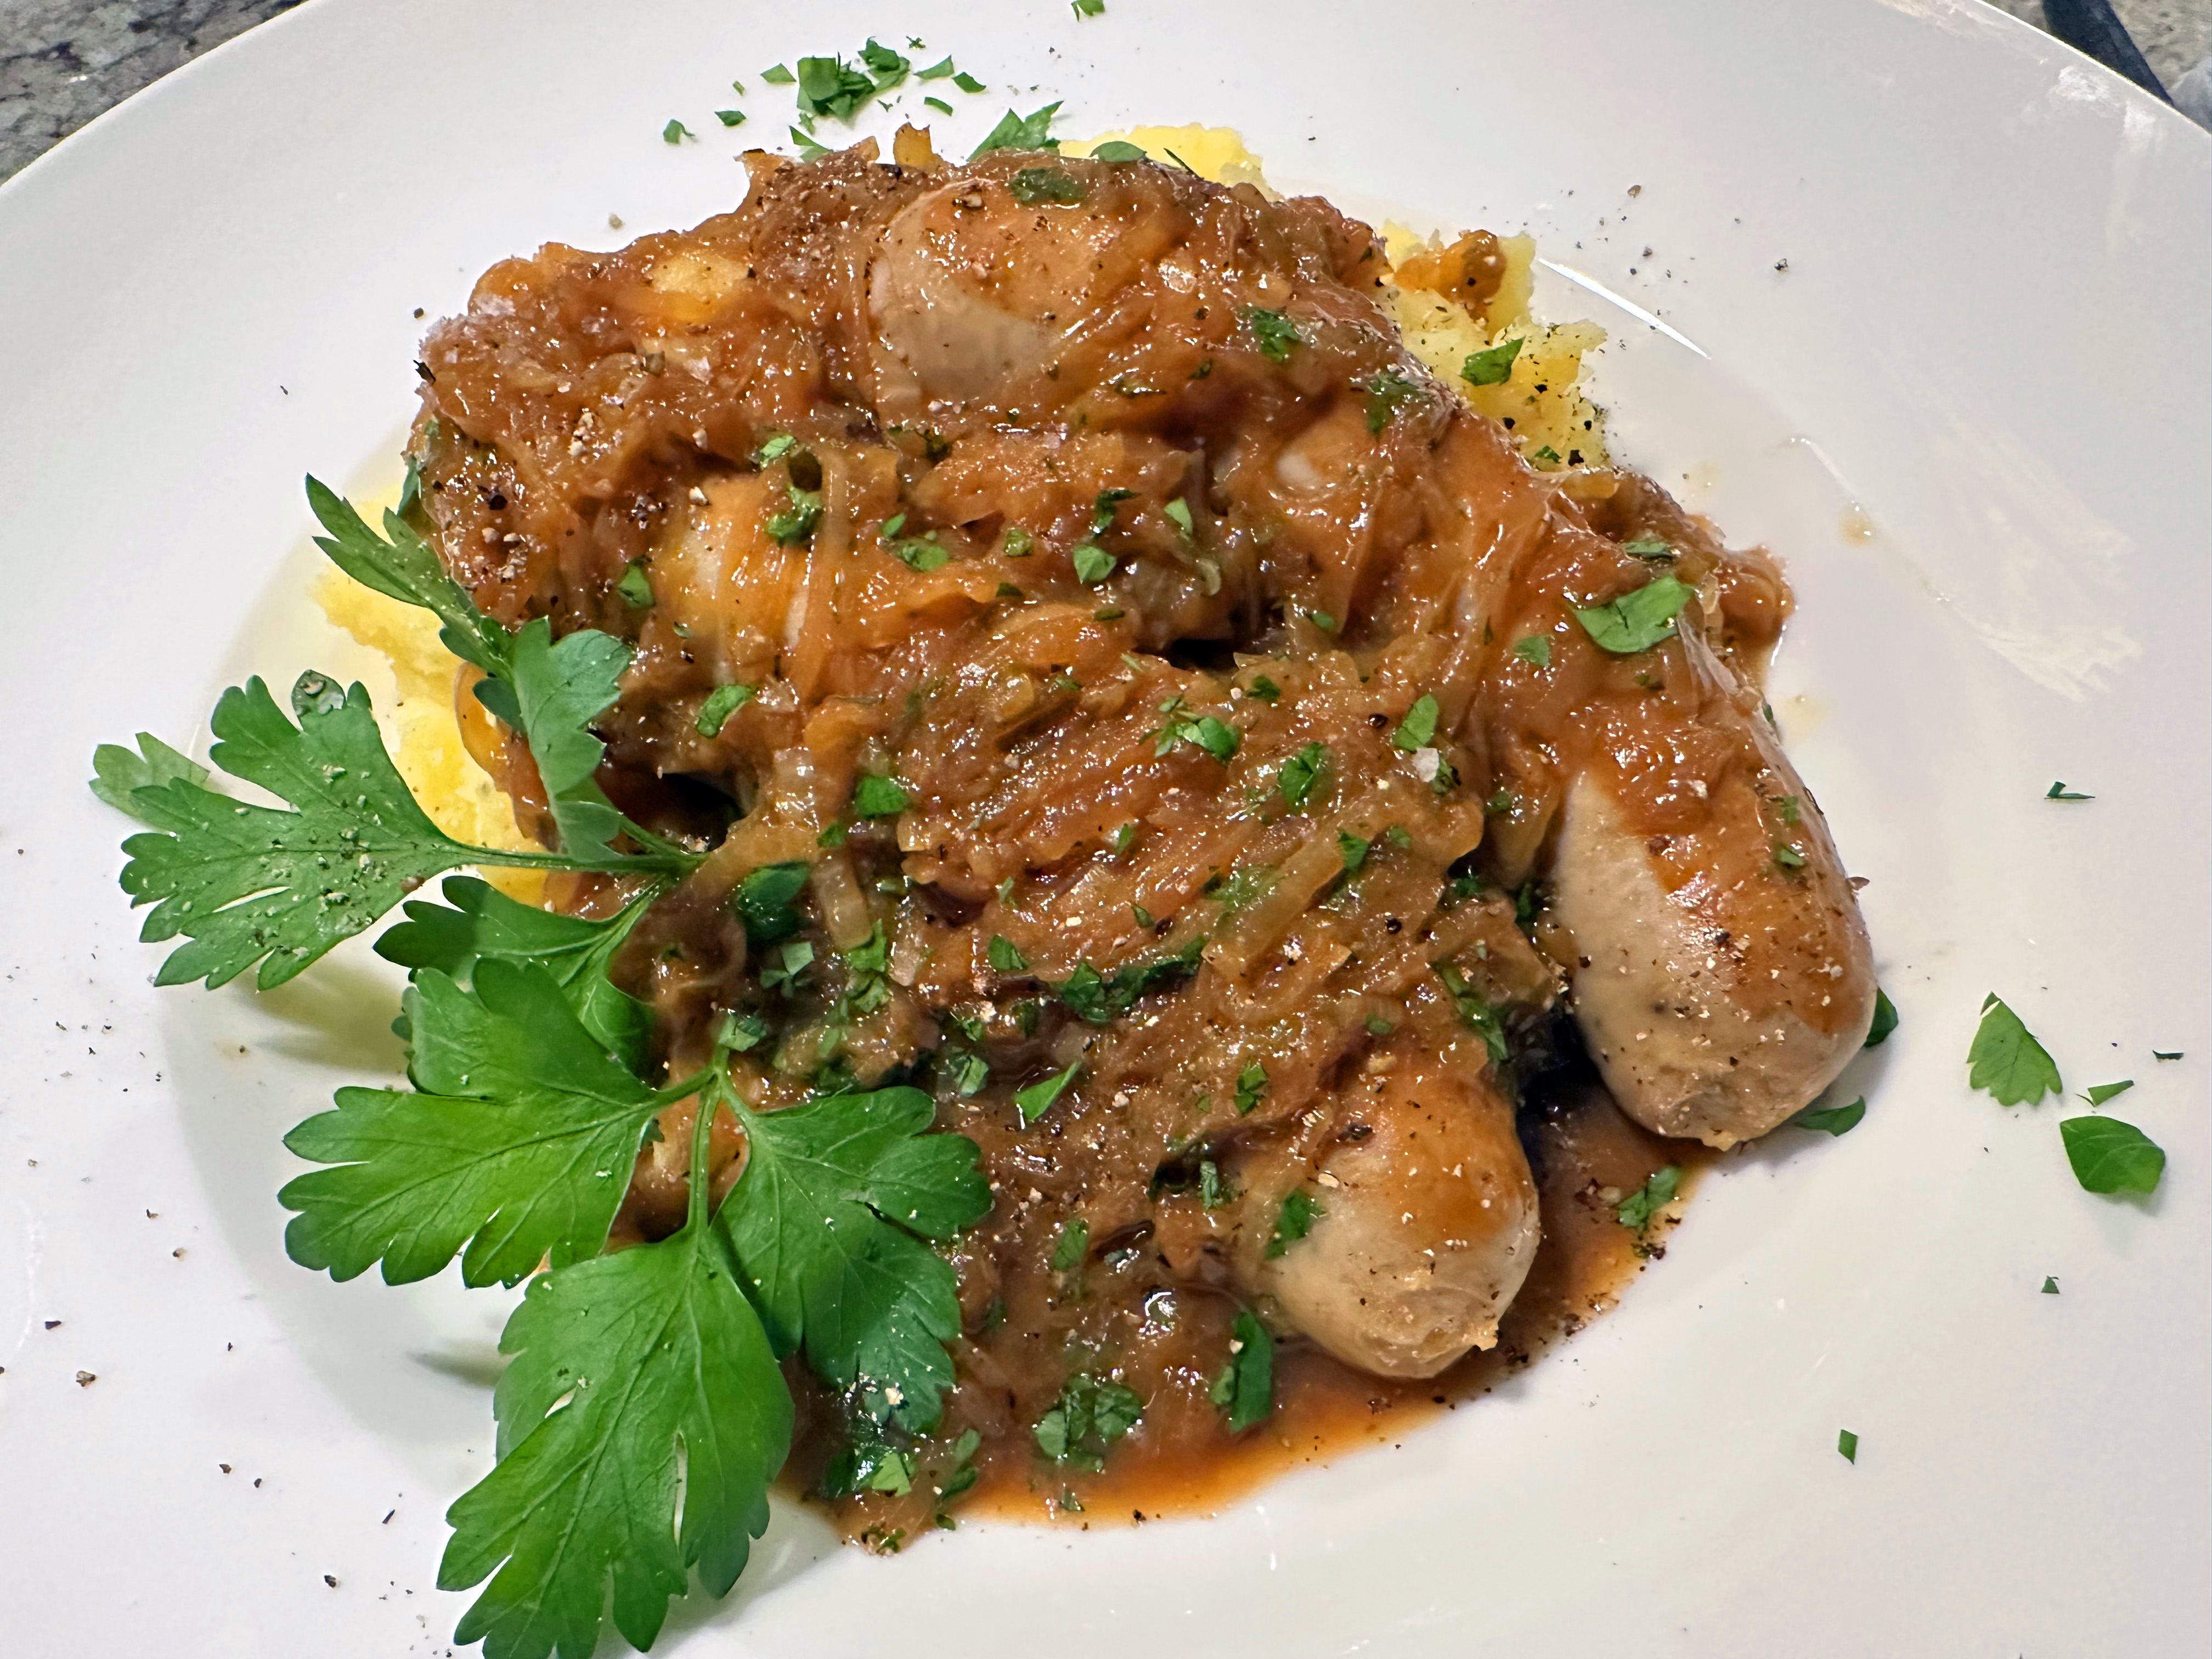
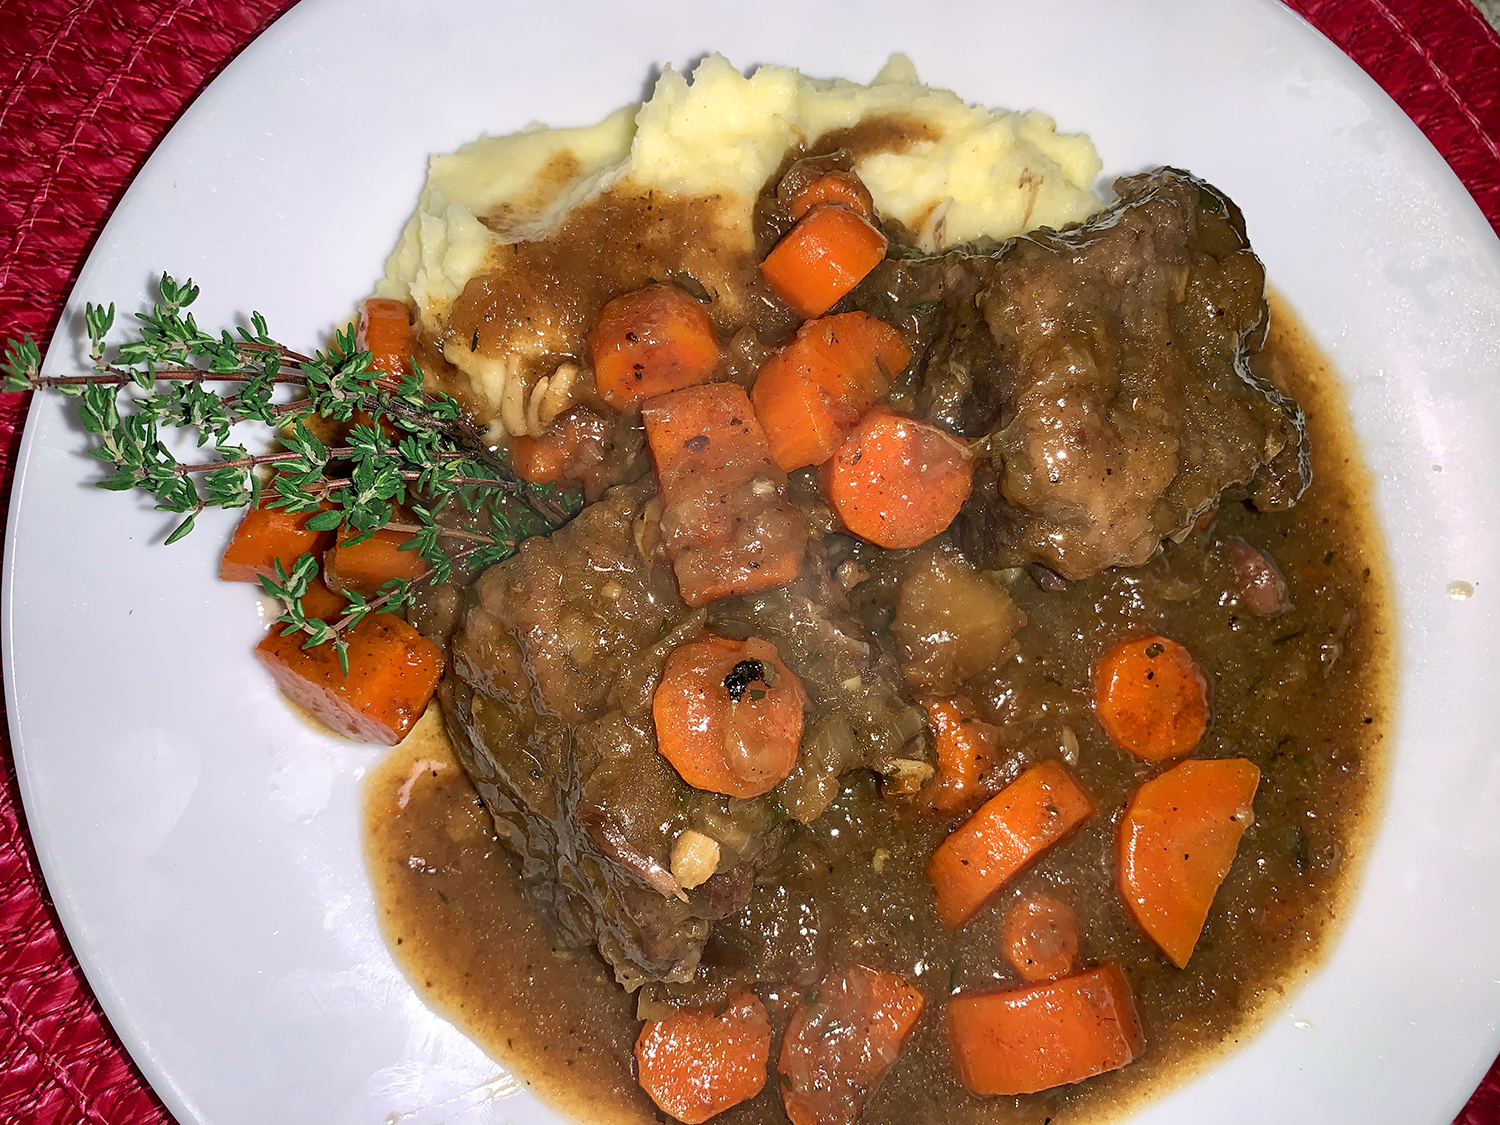
Great bangers and mash with onion gravy, the iconic British pub staple, revolves around plump, well-browned links napped with an ultrasavory sauce. Searing the sausages ensures that the links develop attractive, flavorful browning; steaming cooks them through gently so that they are plump and juicy.

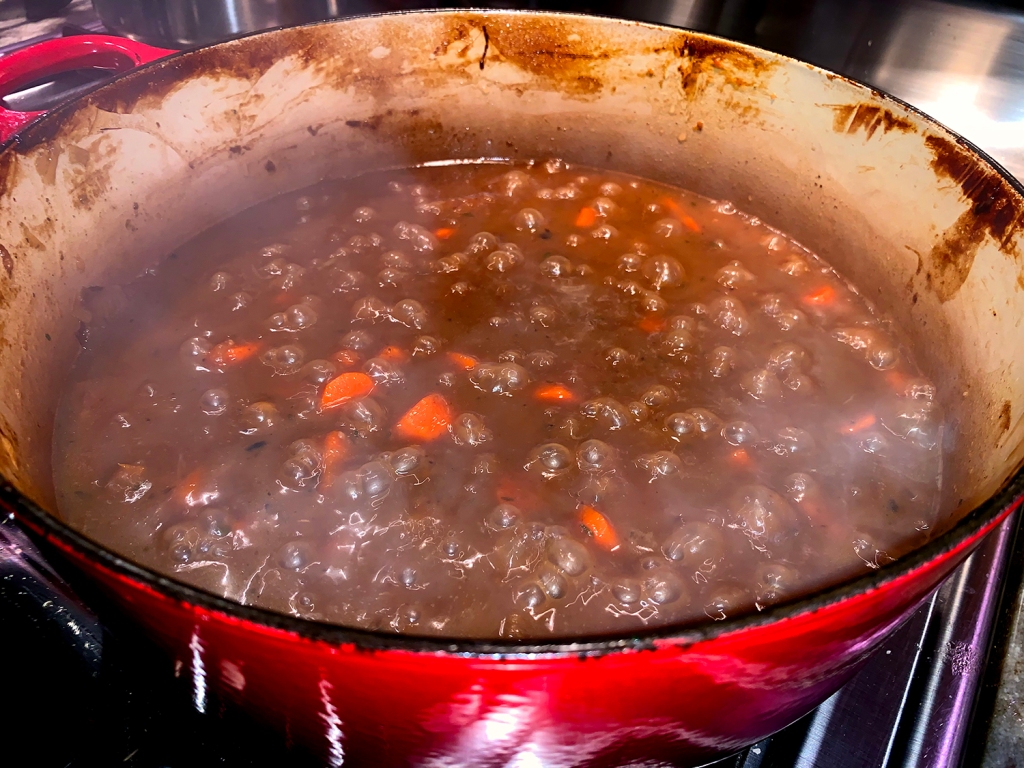
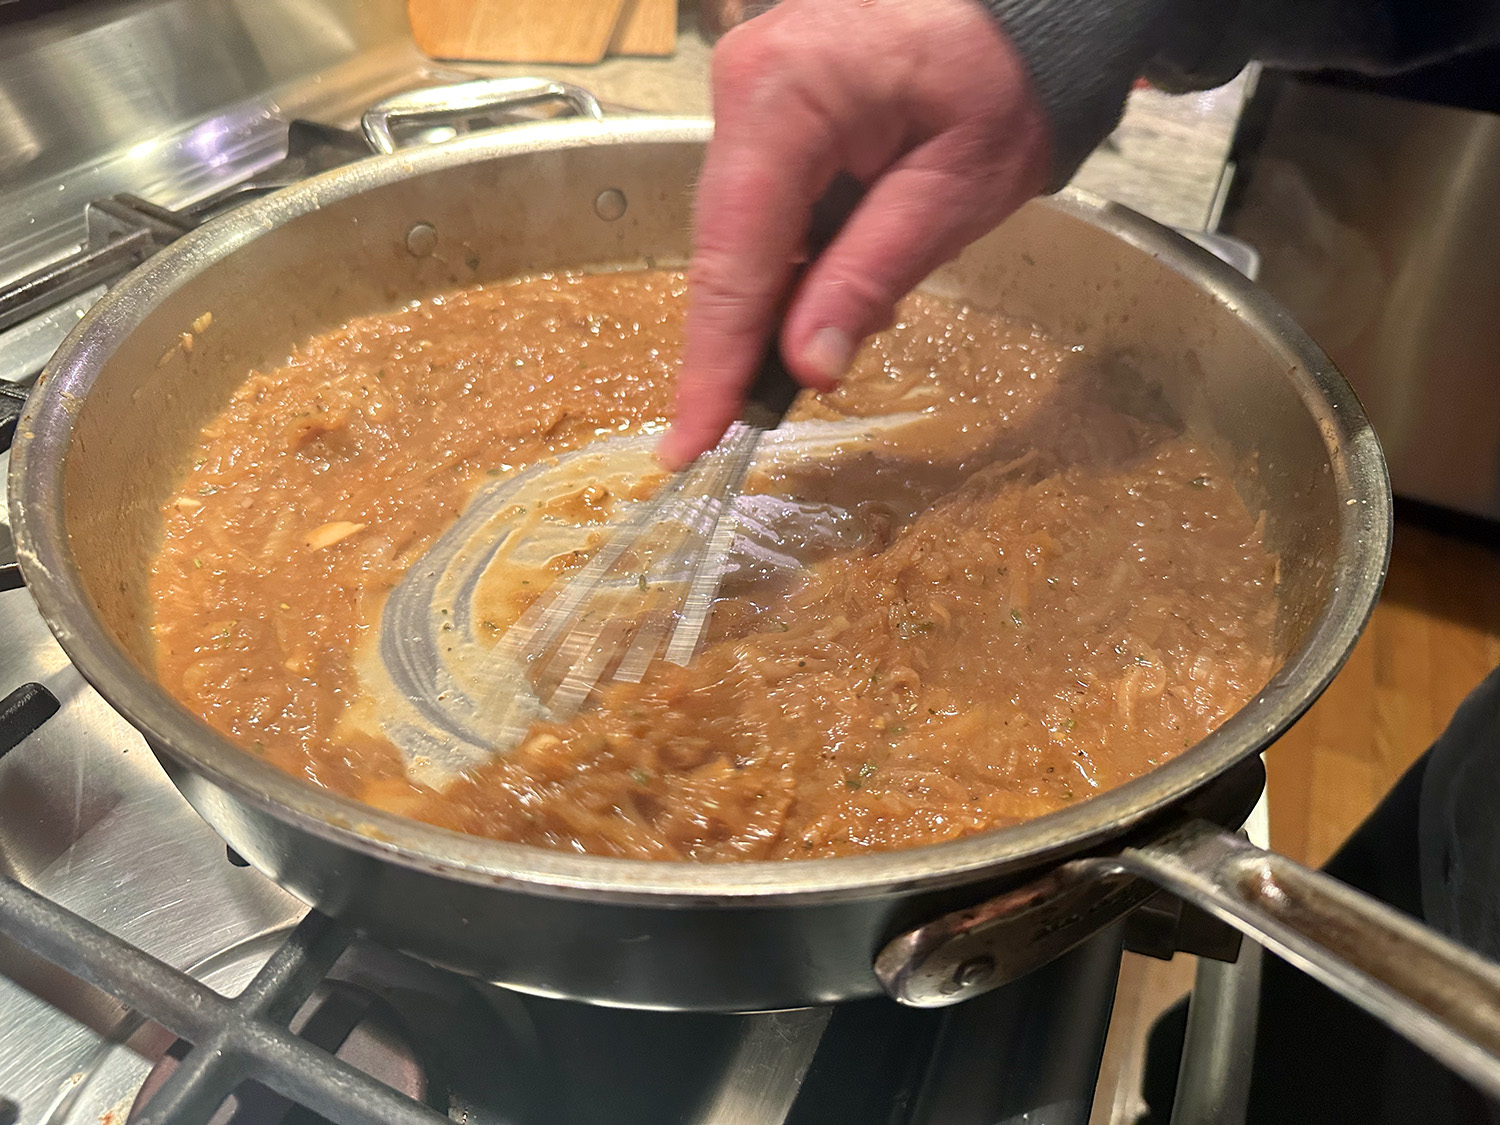
Adding the onions (thin-sliced so that they softened quickly) to the pan to steam with the sausages jump-starts their cooking. Continuing to sauté them after the sausage comes out further softens them and caramelizes their sugars; doing so also develops a deep, flavor-packed fond on the bottom of the skillet.

Deglazing the pan with a highly seasoned beef broth captures the fond, and simmering the onions in the broth tenderizes them more and concentrates the flavor of the gravy. A cornstarch slurry and butter, whisked in just before serving, gives the gravy the requisite viscosity, shine, and richness.

To capture every bit of that savory flavor base, deglaze the pan with beef broth that is seasoned with dry mustard, rosemary, thyme, and Marmite the glutamate-rich British yeast extract that infuses the gravy with meaty fussed-over flavor. Marmite is sold at most grocery stores or easliy accessible online.

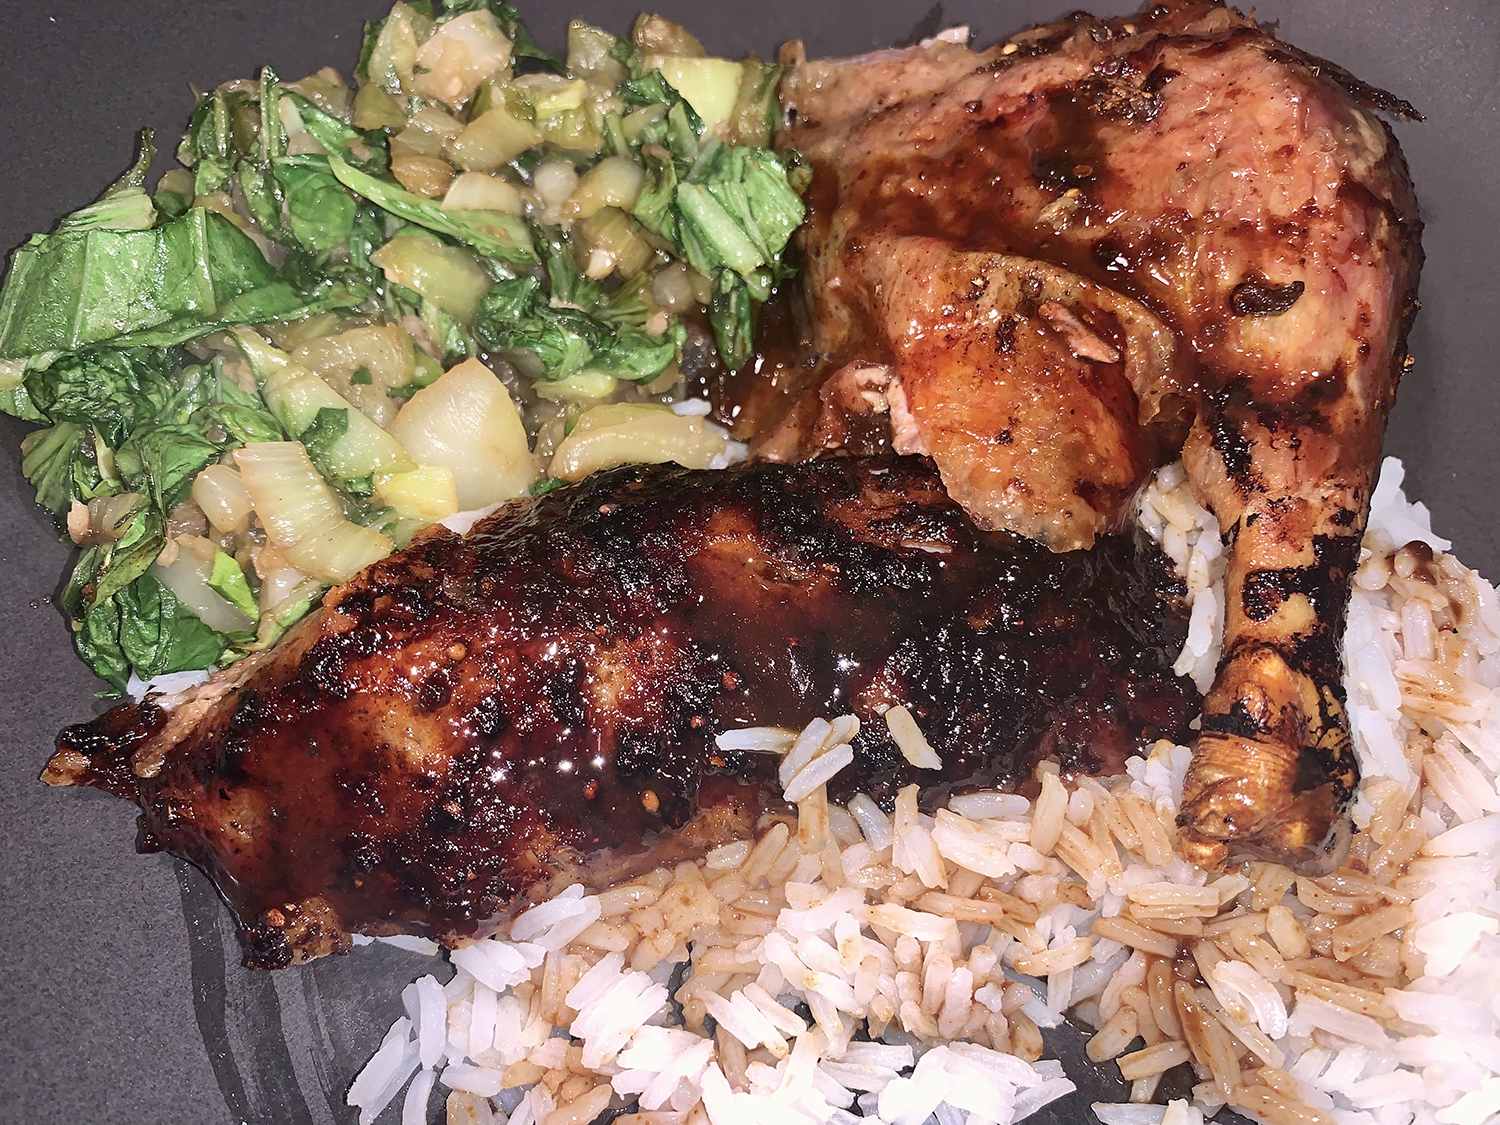
If Cumberland sausage is unavailable, you can substitute bratwurst or any mildly spiced fresh pork sausage. For the best-tasting gravy, cook the onions until a dark fond forms in the skillet. Serve the sausages and gravy over your favorite mashed potato recipe.

Bangers with Onion Gravy

  • Servings: 4-6
  • Difficulty: easy
  • Print

Ingredients

  • 1 Tbsp. vegetable oil
  • 1½ lbs. Cumberland sausage (6 links)
  • 2 onions, halved and sliced thin (3 cups)
  • ½ cup water plus 1 Tbsp., divided
  • 2½ cups beef broth
  • 1 tsp. dry mustard
  • 1 tsp. minced fresh thyme
  • ½ tsp. minced fresh rosemary
  • 1¼ tsp. sugar
  • 1 Tbsp. Marmite
  • ½ tsp. pepper
  • ¼ tsp. table salt
  • 1 Tbsp. cornstarch
  • 2 Tbsp. unsalted butter, cut into 2 pieces
  • 1 tsp. red wine vinegar
  • 1 Tbsp. minced fresh parsley

Directions

  1. Heat oil in 12-inch skillet over medium heat until shimmering. Arrange sausages in pan and cook, turning once, until browned on 2 sides, about 5 minutes. Move sausages to 1 side of skillet. Add onions, evenly distributing around bottom of pan, and nestle sausages on top. Add ½ cup water and immediately cover. Cook, turning sausages once until they register between 160 and 165 degrees and onions have softened, about 10 minutes.
  2. While sausages cook, whisk broth, Marmite, mustard, thyme, and rosemary in 4-cup liquid measuring cup until Marmite dissolves.
  3. Transfer sausages to plate and tent with aluminum foil. Make sure onions are spread evenly; cook without stirring until beginning to brown, about 5 minutes (if onions have not browned, increase heat to medium-high). Continue to cook, stirring occasionally, until onions are tender and well browned, and dark fond forms on bottom of skillet, 3 to 5 minutes longer. Stir in sugar, pepper, and salt and cook for 1 minute.
  4. Add broth mixture, increase heat to medium-high, and bring to boil. Cook, scraping up any browned bits from bottom and sides of skillet and stirring back into sauce, until sauce is slightly reduced, about 5 minutes. Combine cornstarch and remaining 1 tablespoon water in small bowl. Whisk cornstarch mixture into sauce and cook until sauce is glossy and has consistency of heavy cream, about 2 minutes.
  5. Off heat, whisk in butter, 1 piece at a time. Stir in vinegar and season with salt and pepper to taste. Sprinkle with parsley and serve.

http://www.lynnandruss.com

Adapted from a recipe by Steve Dunn for Cook’s Illustrated

Leftover Turkey? How About with Pasta!

Besides soup and sandwiches, here’s another option for leftover turkey: Creamy Pasta with Turkey and Crispy Crumbs. This pasta recipe features an Alfredo-like sauce dressed up with leftover shredded (or cubed) turkey, crispy bread crumbs, and salty capers and is ready to eat in just over a half hour.

The original recipe, found in a past issue of Fine Cooking Magazine, used linguine as the pasta. We substituted whole wheat spaghetti since we already had it in our pantry. Any long pasta such as fettuccine, bucatini or linguine will work, just cook according to package directions for al dente.

Creamy Pasta with Turkey and Crispy Crumbs

  • Servings: 3-4
  • Difficulty: easy
  • Print

Ingredients

  • 2 Tbsp. unsalted butter
  • 3 garlic cloves, minced
  • ⅓ cup coarse fresh bread crumbs
  • Coarse salt and freshly ground pepper
  • 2 Tbsp. coarsely chopped fresh Italian parsley
  • ¾ cup chopped celery
  • 1 cup heavy cream
  • 3 cups cooked turkey, shredded
  • 1 Tbsp. chopped fresh thyme and/or sage leaves
  • 8 oz. whole wheat spaghetti (or other long stranded pasta)
  • ½ cup grated Parmesan cheese
  • 2 – 3 Tbsp. capers, drained

Directions

  1. In a large skillet heat 1 tablespoon butter over medium. Add half the garlic; cook 30 seconds. Add bread crumbs and a pinch of salt. Cook and stir 2 minutes or until bread crumbs are golden brown and aromatic. Transfer to a small bowl. Wipe out pan. Stir parsley into bread crumbs.
  2. Bring a large pot of salted water to boiling.
  3. Meanwhile, melt 1 tablespoon butter in the skillet. Add celery and remaining garlic; cook and stir over medium 5 minutes.
  4. Stir in cream; simmer, uncovered, 3 minutes. Add turkey and thyme; cook and stir until heated through.
  5. Cook spaghetti according to package directions. Drain, reserving 1/4 cup cooking liquid. Stir cooking liquid into turkey mixture then toss with pasta.
  6. Stir in cheese, capers, 1/2 teaspoon salt, and 1/4 teaspoon black pepper. Divide among 4 plates; top each with bread crumbs.

http://www.lynnandruss.com

Recipe compliments of Fine Cooking Magazine

Lazy Person’s Peking Duck

We are not particularly lazy cooks in the kitchen, in fact, quite the opposite. But the Molly Stevens Whole Roast Duck with Hoisin Sauce recipe—also dubbed Lazy Person’s Peking Duck—from her All About Roasting cookbook, caught our eye because of that description. We’ve had a duck in the auxiliary freezer for a few months and our mouths were watering for a super-crispy skinned duck feast.

Typically, authentic Peking duck requires a lengthy preparation process. In order to replicate that without putting yourself through the wringer, Molly recreated this version with crackly, crisp skin and the sweet Asian accent of hoisin sauce. However, keep in mind, the seasoned duck will need 24 to 48 hours in the refrigerator (so you’ll have plenty of time to be lazy whilst it refrigerates). Well, our duck marinated nearly 54 hours because we had to push the meal off by a day.

The duck slow roasts to render its fat, but prodigious pricking of the skin with a sharp knife also helps release the fat as it melts. Growing up, Mom cooked duck for Sunday supper a few times per year, and I distinctly remember her pricking the duck skin often—I couldn’t wait to enjoy the succulent meat and crispy skin! And that anticipation hasn’t waned a bit all these decades later.

Once done, the meat will almost be falling off the bone, and it will be moist and tender thanks to the natural basting from the bird’s own fat. It’s wise to keep an empty can nearby as you remove the excess fat over the course of the roasting process.

The recipe calls for a 5-6 pound duck to feed four. Ours was much smaller than that at only 3 1⁄2 pounds, yielding about 2 1⁄2 servings. Keep size in mind when planning dinner.

Whole Roast Duck with Hoisin Sauce

  • Servings: 4
  • Difficulty: moderate
  • Print

Ingredients

For the Spice Rub and Duck

  • 1 Tbsp. kosher salt
  • 2 garlic cloves, minced
  • 2 tsp. finely grated orange zest
  • 1 1⁄4 tsp. coriander seed, lightly toasted
  • 1 1⁄4 tsp. Chinese five-spice powder
  • 1⁄2 tsp. ground white pepper
  • 1 Pekin (Long Island) duck, 5-6 lbs., giblets removed

For the Glaze

  • 3 Tbsp. Hoisin sauce
  • 2 Tbsp. orange liqueur, such as Triple Sec or Grand Marnier
  • 1 Tbsp. honey
  • 1 tsp. sesame oil

Directions

  1. Trim and season the duck: In a mortar or spice grinder, grind the salt, garlic, zest, coriander seeds, five-spice powder, and pepper into a coarse paste.
  2. Make 20 to 30 small slits in the duck skin, using a sharp paring knife held parallel to the surface so that you pierce the skin and fat without cutting into the meat. Be sure to make slits on the back and thighs as well as the breast. Rub about two thirds of the spice mixture into the duck cavity and then rub what remains all over the skin. Set the duck on a rack set over a baking sheet and allow to air-dry in the refrigerator for at least 24 hours and up to 48 hours.
  3. Heat the oven: Position a rack in the center of the oven and heat to 325 degrees F (300 degrees F convection). Let the duck sit at room temperature as the oven heats.
  4. Roast the duck: Arrange the duck breast down on a roasting rack in a roasting pan (about 12 by 14 inches) and roast for 1¼ hours. Remove the pan from the oven and spoon or pour off most of the fat. (A turkey baster can make this job easier.) Using sturdy tongs inserted in the duck’s cavity, flip the duck over. Pierce the skin again all over the breast and legs with a knife. Return the duck to the oven to continue roasting until the meat around the thighs feels tender when prodded (a skewer should penetrate the thigh with no resistance), the legs feel loose in their joints, and an instant-read thermometer inserted into the thickest part of the thigh (without touching bone) registers 175 degrees F, another 1 to 1¼ hours. (You can roast the duck a day ahead to this point.)
  5. Glaze and blast the duck: Remove the duck from the oven and increase the oven temperature, preferably to 500 degrees F convection, if you have it, or to 525 degrees F standard. In a small bowl, whisk together the hoisin sauce, orange liqueur, honey, and sesame oil. Carefully transfer the duck (on the roasting rack) to a rimmed baking sheet. Paint the breast and legs with about half the glaze and return the duck to the hot oven. Paint again after 5 minutes, and continue roasting until crispy and mahogany-colored, about 3 minutes in a convection oven, 5 minutes in a standard oven.
  6. Let rest and carve: Transfer the duck to a carving board, ideally one with a trough, and let it rest for 5 to 10 minutes before carving. Carving a duck is much like carving a small version of a goose. Be sure each person gets both breast meat and a thigh or leg.
  7. You can use the pre-seasoning and slow roasting method from the Whole Roast Duck with Hoisin Sauce recipe with just about any flavors you like, including just simple salt and pepper. Just be sure to use at least 1 tablespoon of salt per bird in the pre-salting step. Follow the trimming and roasting instructions (steps 1-3). Omit the glaze, but do give the duck that final blast of heat to brown it beautifully.

http://www.lynnandruss.com

Recipe compliments of Molly Stevens from her All About Roasting cookbook

Cider Braised Short Ribs with Caramelized Onions

Warm temperature season is behind us which signals it’s time for braised dishes. If there’s one cozy cool weather meal you need to be making, it’s these braised short ribs which are slow-cooked in apple cider with fresh herbs and sweet caramelized onions. It’s simple to put together and unbelievably scrumptious. Serve over a bed of creamy, garlicky mashed potatoes and you’ll have the perfect dinner for a cold night in.

The pairing of sweet apple cider and tangy caramelized onions is a combo with beefy short ribs that can’t be beat. Your kitchen will smell incredible as this slow cooks for hours. Those jammy onions practically melt into the sauce.

Now there were two major changes we made to the directions. First, we saw no reason to wipe out the pan after browning the ribs. Why would you discard that wonderful flavor? Then, at the end, after removing the bay leaves, also remove the ribs and place them onto a platter tightly covered with foil. Keep the pot on the burner and bring contents to a rolling simmer, stirring often. Mash the apple quarters so that they release their pectin and thicken the gravy, then continue to reduce down the sauce for another 10 to 15 minutes.

About 45 minutes before the dish is done, don’t forget to start your creamy mashed potatoes!

Cider Braised Short Ribs with Caramelized Onions

  • Servings: 6
  • Difficulty: easy
  • Print

Ingredients

  • 5 lbs. bone in beef short ribs
  • 3 Tbsp. all-purpose flour
  • Kosher salt and black pepper
  • 1 Tbsp. salted butter
  • 4 yellow onions, thinly sliced
  • 2 cups apple cider
  • 2 cups chicken broth or dry white wine
  • 6 carrots, chopped
  • 6 cloves garlic, smashed
  • 2 Tbsp. chopped fresh thyme
  • 1 apple, quartered (optional)
  • 2 bay leaves

Directions

  1. Preheat the oven to 325° F.
  2. Season the short ribs with salt and pepper, then rub with flour to coat. Heat a large oven-safe Dutch Oven over high heat, sear the ribs on both sides. Remove the ribs to a plate. Do this in two batches.
  3. Add the butter and onions and cook 5 minutes, until softened. Add a 1/2 cup apple cider, season with salt and pepper, and continue cooking another 5-8 minutes, until the cider has evaporated and the onions are lightly golden.
  4. Add the thyme, then add the short ribs back to the pot. Add the remaining 1 1/2 cups cider, broth or wine, carrots, garlic, and bay leaves. Arrange the apples around the meat. Cover and roast in the oven for 2 1/2 to 3 hours or until the short ribs are tender and falling off the bone.
  5. Remove the bay leaves. Place the ribs onto a clean platter and cover tightly with foil.
  6. Put the pot on a burner over medium heat and bring to a rolling simmer, adjusting heat as needed. With a rubber spatula mash the apple quarters; the pectin in them helps to thicken the sauce. Reduce down for about 10-15 minutes more.
  7. Serve the ribs over a bed of mashed potatoes. Drizzle with the pan sauce and onions.

http://www.lynnandruss.com

Adapted from an online recipe from Half-Baked Harvest

Kung Pao Chicken

In this Kung Pao Chicken recipe, the dark, rich sauce clings to the chicken and veggies, with just an undertone of heat and aromatic flavor from the chiles and Sichuan peppercorns. I’m typically a white meat fan, but here we used boneless, skinless dark thigh meat which imparts more flavor. Use whatever suits your preference.

Have you been confused before on the difference between Kung Pao and General Tso’s chicken recipes? The main difference between the two is how the meat is cooked. General Tso is fried in a crispy coating, however Kung Pao Chicken is seared in the wok. Both are coated in a similar sauce, but Kung Pao typically always has veggies and peanuts mixed in.

Plus, Kung Pao Chicken is a healthy choice for most people, containing a range of vitamins and minerals, as well as complete protein. It is also low in saturated fat and calories. To up the ante in nutrition, fiber and color, I added a yellow bell pepper and some snow peas.

Because of these extra ingredients, I altered the directions to accommodate them. Instead of adding the veggies with the chicken still in the wok, we moved the poultry to a bowl while we stir-fried the peppers and snow peas, then added the chicken back to the wok before stirring in the broth mixture.

As with most stir-fries, this process goes very quickly so make sure to prep everything BEFORE you start cooking. Keep in mind, rice typically takes about 20 minutes total, so it’s best you start that process first. And don’t omit those roasted and ground Sichuan peppercorns. A half teaspoon may seem like a minor nuisance, but they add a necessary flavor component. Serve with steamed rice, preferably cooked in homemade chicken stock.

Kung Pao Chicken

  • Servings: 3
  • Difficulty: easy
  • Print

Ingredients

  • 1 lb. boneless, skinless chicken thigh or breast, cut into 3/4-inch cubes
  • 2 Tbsp. minced ginger
  • 1 Tbsp. minced garlic
  • 2-1/2 tsp. cornstarch
  • 1 tsp. soy sauce
  • 1 tsp. plus 1 Tbsp. Shao Hsing rice wine or dry sherry
  • 2 tsp. sugar
  • 3/4 tsp. salt
  • 2 Tbsp. chicken broth
  • 1 Tbsp. Chinkiang or balsamic vinegar
  • 1 tsp. dark soy sauce
  • 1 tsp. sesame oil
  • 2 Tbsp. peanut oil or vegetable oil
  • 4 to 8 dried red chili peppers, snipped on one end
  • 1/2 tsp. roasted and ground Sichuan peppercorns
  • 1 large red bell pepper, cut into 1-inch squares
  • 1 large yellow bell pepper, cut into 1-inch squares
  • 6 0z. snow peas, strings removed, cut in half on a diagonal if large
  • 3/4 cup unsalted roasted peanuts
  • 1/2 cup minced scallions
  • Steamed white or brown rice for serving
Add the peanuts and scallions.

Directions

  1. Before you begin prepping the stir-fry ingredients, start the rice according to package directions, preferably using homemade chicken stock as the liquid.
  2. In a medium bowl combine the chicken, ginger, garlic, cornstarch, soy sauce, 1 teaspoon of the rice wine, 1 teaspoon of the sugar, 1/2 teaspoon of the salt, and 1 teaspoon cold water. Stir to combine. In a small bowl combine the broth, vinegar, dark soy sauce, sesame oil, and the remaining 1 tablespoon rice wine.
  3. Heat a 14-inch flat-bottomed wok or 12-inch skillet over high heat until a bead of water vaporizes within 1 to 2 seconds of contact. Swirl in 1 tablespoon of the peanut oil, add the chillies and ground Sichuan peppercorns, then, using a metal spatula, stir-fry 15 seconds or until the chillies just begin to smoke.
  4. Push the chili mixture to the sides of the wok, carefully add the chicken, and spread it evenly in one layer in the wok. Cook undisturbed 1 minute, letting the chicken begin to sear. Then stir-fry 1 minute or until the chicken is lightly browned but not cooked through. Move to a bowl.
  5. Swirl the remaining 1 tablespoon peanut oil into the wok. Add the bell peppers and snow peas then stir-fry 1-2 minutes or until the peppers begin to soften. Add the chicken back to the wok. Swirl the broth mixture into the wok and stir-fry 1 minute or until the chicken is just cooked through.
  6. Add the peanuts and scallions, sprinkle on the remaining 1 teaspoon sugar and 1/4 teaspoon salt, and stir-fry 30 seconds or until the scallions are bright green.
  7. Serve over white or brown steamed rice.

http://www.lynnandruss.com