All posts by LynnHoll

Unknown's avatar

About LynnHoll

I have been an artist and designer all my life incorporating graphic design for websites, gardens, publications, fabrics, interior design and cooking. I am now retired from my professional job, but still create artistic visions in all forms on a daily basis.

Healthy Winter Side Dish

Looking for some inspiration when it comes to your vegetable accompaniments? A side of broccoli rabe makes a good counterpoint to rich hearty dishes in the Winter. And with leeks, you can never go wrong, so make sure to get this Sautéed Broccoli Rabe with Leeks on your radar for an upcoming meal. Here, bitter broccoli rabe is mellowed by the softened leeks and empowered by a hit of garlic and red pepper.

A limited number of ingredients and little in the way of prep or cooking, make this an ideal weeknight side dish. Initially what may seem like a lot of greens, actually cooks down to only about four servings so don’t cut back. The evening I made it, it was paired with two thick, bone-in pork chops that were sprinkled with adobo seasoning, pan-seared and finished in a 400 degree oven for about 15 minutes.

img_9847
Add the sliced leeks and some red pepper in hot oil until softened.

img_9848
It took closer to 7 minutes for the leeks to soften and begin to brown.

Ingredients

  • 2 Tbs. olive oil
  • 1 large, or 2 medium leeks, white and light green parts only, very thinly sliced and thoroughly rinsed
  • 1 1/2 tsp. Aleppo pepper or red pepper flakes
  • 1 lb. broccoli rabe, trimmed and cut into 1/2-inch pieces (about 14 cups), rinsed and left slightly damp
  • 1 Tbs. finely chopped garlic
  • 1 Tbs. unsalted butter, softened
  • Kosher salt to taste

img_9849
After the broccoli rabe leaves have started to wilt, add the garlic and remaining red pepper, then cover and cook for another 15 minutes.

Directions

  1. In an 8-quart pot, heat the olive oil over medium heat.
  2. Add the leek and 1/2 teaspoon pepper, and cook, stirring often, until the leek is tender and beginning to brown, 3 to 5 minutes.
  3. Add the broccoli rabe, toss, and cook until the leaves have wilted, about 1 minute.
  4. Reduce the heat to low, and add the garlic and remaining pepper.
  5. Cover and cook, stirring occasionally, until the stalks are tender, 12 to 15 minutes.
  6. Stir in the butter until melted, season with salt to taste, and serve.

img_9855

Dusting Off an Oldie but a Goodie!

I’m gonna save you a few bucks here—you can thank me later. Classically made with filet mignon, this version of Steak Diane uses less pricey flank steak. The beefier nature of the cut holds its own against a bold sauce featuring sherry, Cognac, Worcestershire sauce, and herbs. What’s not to like here?

It’s been widely agreed that New York City appears to be the source of Steak Diane’s genesis. But when and where it actually evolved has as many viewpoints as it does recipe variations. One thing is for sure, in it’s infancy, Steak Diane was flambéed table-side making it all the rage at NYC high-style establishments in the 50’s and early 60’s; but went out of fashion and was considered a has-been by the 1980’s.

img_9957

Steak Diane is similar to steak au poivre, because it is either cut thinly, or pounded thin so that it cooks rapidly with seasonings, then sautéed in butter. A sauce is prepared from the pan juices. The ingredients vary from recipe to recipe but may include butter, mushrooms, mustard, shallots, cream, truffles (another pricey item), meat stock, and Worcestershire sauce. Another money-saving step is to use brandy in place of the more expensive Cognac.

I’ve always thought it odd that when you’re cooking a beef dish, the ingredients list chicken broth rather than beef. What I learned was, even if your dish calls for beef broth, you’ll get a much better flavor if you use chicken broth instead. This is because, despite the fact that there is no minimum protein requirement set by the USDA, most boxed or canned chicken broth contains around 60 parts liquid to 1 part protein, twice as much as in beef broth. Homemade beef broth is plenty flavorful, so this only pertains to the store-bought variety.

img_9934
One accompaniment was Roasted Carrots with Blood Orange and Rosemary.

img_9951
Our other low-carb side was a cauliflower mash garnished with chives.

This easy meal was not only fabulous tasting, it was also all around low-carb because our accompaniments were Roasted Carrots with Blood Orange and Rosemary, and Cauliflower Mash (both shown above and both of which I will be posting soon.)

While there is no show-stopping flambéing going on with this version of Steak Diane, it is an ideal dinner for two—romantically luxurious and indulgent. Valentine’s Day is just around the corner… just sayin’…

img_9921

Ingredients

  • 1 1-1/2-lb. flank steak
  • Kosher salt and freshly ground black pepper
  • 2 tsp. peanut or vegetable oil
  • 3 Tbs. finely chopped shallot
  • 3 Tbs. medium sherry, such as amontillado
  • 2 Tbs. Cognac
  • 2 tsp. Worcestershire sauce
  • 2 Tbs. lower-salt chicken broth
  • 2 oz. (4 Tbs.) cold unsalted butter, cut into 4 pieces
  • 3 Tbs. thinly sliced fresh chives
  • 2 Tbs. finely chopped flat-leaf parsley
  • 1/2 tsp. fresh lemon juice, more to taste

img_9937
Our flank steak weighed in at two pounds and almost didn’t fit the carbon steel skillet.

img_9939
After 7 minutes in the 400 degree oven, the steak then rests for 10 minutes before cutting into.

img_9942
There was no fat to wipe out before we added the shallots, sherry, Cognac, and Worcestershire sauce to the pan.

Directions

  1. Position a rack in the center of the oven and heat the oven to 400°F.
  2. Pat the steak dry and season generously with salt and pepper. In an ovenproof heavy-duty 12-inch skillet (preferably cast iron or carbon steel), heat the oil over high heat until shimmering hot, about 2 minutes.
  3. Brown the steak on both sides, about 4 minutes total. Transfer the skillet to the oven and continue to cook until an instant-read thermometer inserted in the thickest part of the meat reads 135°F, about 5 minutes. Transfer the steak to a platter, cover loosely with foil, and let rest for 5 to 10 minutes.
  4. Meanwhile, pour off the fat in the skillet (be careful of the hot handle). Set the skillet over medium heat, add the shallot, sherry, Cognac, and Worcestershire sauce.
  5. Simmer, stirring and scraping the bottom of the pan with a wooden spatula to release any browned bits, until the sauce is reduced by half, 2 to 3 minutes.
  6. Lower the heat to low, add the chicken broth, butter, chives, and parsley and whisk, swirling the pan occasionally, to emulsify the butter; the sauce should look creamy.
  7. Remove from the heat, whisk in the lemon juice and season to taste with salt, pepper, and more lemon juice.
  8. Cut the steak in half with the grain, then slice the meat on the diagonal across the grain into 1/8-inch slices. Serve with the sauce.

Steak recipe by Arlene Jacobs from Fine Cooking

img_9943
Lower the heat to low, add the chicken broth, butter, chives, and parsley.

img_9944
Whisk the sauce, swirling the pan occasionally to emulsify the butter.

img_9945
Remove from the heat, whisk in the lemon juice and season to taste with salt, pepper.

img_9947
Cut the steak in half with the grain, then slice the meat on the diagonal across the grain into 1/8-inch slices.

img_9955Arrange the meat on a platter, pour over the juices from the carving board and then spoon on some of the shallot mixture.

img_9960
Put the remaining shallot mixture in a small bowl for diners to add more if desired.

Umbrian-Style Chicken alla Cacciatora

Chicken alla cacciatora, or hunter’s style, can be found all over Italy—but tomatoes were scarce for quite some time. Most Americans, including us, are more familiar with the southern Italian version with tomatoes, but this one is from Umbria, in the country’s center, and it’s made savory with lemon, vinegar, olives and rosemary instead of tomatoes. It’s lovely served with steamed greens dressed with a fruity olive oil, over homemade mashed potatoes or polenta. You really have to try it!

img_9913
This meal is comfort food all the way!

We can’t say enough about this fabulous dish! Absolutely divine, with so much flavor we kept oohing and ahhing all through dinner. The cooking vehicle of choice was our smaller Le Creuset pan “Baby Blue,” which was just the right size to hold all of the ingredients. Our sides included creamy garlicky mashed potatoes and sautéed spinach in olive oil and roasted garlic paste—thank goodness we’re both fans of garlic. Upon completion, there is enough luscious sauce to spoon over every item on your plate if desired—and desire we did!

Step 1 instructs you to remove the browned chicken pieces and wipe the pan clean before returning the chicken and adding the sliced onions. Why in heck would you do that? Those browned bits contain a lot of seasoning and will flavor the onions as you caramelize them. And buy brined olives with the pits because they also lend another layer of flavor, and the meat almost melts off the pit into your mouth.

img_9872

img_9873

While you can buy already cut-up chicken parts, we purchased a 5-pounder because Russ likes to hack up the chicken with his heavy-duty meat cleaver to get the extra bony parts for making stock. I secretly think it’s his inner Neanderthal making an appearance…

img_9882

Umbrian-Style Chicken alla Cacciatora

  • Servings: 4
  • Difficulty: easy
  • Print

Ingredients

  • 1 tablespoon plus 1 teaspoon olive oil
  • 1 small chicken (about 2 1/2 pounds), cut into serving pieces, or use bone-in, skin-on thighs and drumsticks
  • 1 onion, sliced
  • 3 cloves garlic, very finely minced
  • 1 tablespoon capers
  • 1/4 cup good-quality brine-cured olives, black or green, with pits (we used a 1/2 cup)
  • 1 large sprig rosemary
  • 1 handful sage leaves, rough chop if leaves are large
  • Salt and black pepper
  • 1 cup dry white wine
  • Zest and juice of 1/2 lemon
  • 1 tablespoon balsamic vinegar

img_9888
Chicken pieces are heated in olive oil in a large braising pan and seared over medium heat until golden on all sides, about 15 minutes.

img_9890
Turn heat to low, add the onions and stir frequently until caramelized.

img_9894
The onions caramelize with the chicken in about 20 minutes.

img_9899
After the onions have caramelized, add minced garlic, capers, olives, rosemary sprig and sage leaves.

img_9903
When everything smells fragrant, add the wine, cover and simmer very slowly until the chicken is tender and cooked through, only about another 15 to 20 minutes.

Directions

  1. Heat 1 tablespoon olive oil in a large non-stick pan. Add chicken pieces and sear over medium heat until golden on all sides, about 15 minutes. Transfer to a plate and wipe the pan clean before proceeding. (We absolutely did NOT wipe the pan clean!)
  2. Turn heat to low, add remaining 1 teaspoon oil, and return the chicken to the pan. Add onions and stir frequently until caramelized, about 18 minutes. Add minced garlic, capers, olives, rosemary sprig and sage leaves. Season with just a sprinkle of salt and black pepper.
  3. After a couple of minutes, when everything smells fragrant, add wine. Cover and simmer very slowly until the chicken is tender and cooked through (165 degrees). Start checking the temperature of the chicken after 15 minutes to avoid overcooking. Add some water if the sauce gets too dry while simmering.
  4. When ready to serve, reheat if necessary, then add lemon juice and zest and balsamic vinegar. Taste and add more lemon if desired. Remove the rosemary sprig and serve.

http://www.lynnandruss.com

Recipe by Letizia Mattiacci, author of the cookbook “A Kitchen with a View“

img_9910
There is no doubt we will be repeating this dinner over and over!


Lemony Carrot and Cauliflower Soup

Here’s the perfect antidote to brighten up a short, cold, Winter’s Day. Most Sunday’s when we have the opportunity, Russ likes to throw together a soup that incorporates any one of our homemade stocks. When we came upon this Lemony Carrot and Cauliflower Soup by New York Times chef/author Melissa Clark, we knew it was “the one” for the upcoming week.

img_9873
Russ chops parts of a whole chicken, the bony parts of which he’ll add to his collection of other chicken parts to make stock. The main chicken parts we used in our Umbrian-Style Chicken dinner…

img_9883
The finished stock cools in the pressure cooker.

img_9885
The stock is strained into a colander lined with cheese cloth.

Since we were out of chicken stock, it prompted us to make another batch, now quite simple and less time consuming since we own a pressure cooker. While the stock was cooking, we prepped the soup ingredients, knowing that we’d include 4 cups of the homemade stock in place of water.

img_9918

Even though there’s not a drop of dairy, it is super creamy and luscious! The addition of miso paste and crushed coriander to the broth zips things up without negating the comfort factor. The flavors all come together in the end with the final lemon juice, sea salt, cilantro, and smoky chili powder, so I highly recommend you don’t omit these ingredients.

The beauty of a soup like this—other than its bone-warming properties—is that you don’t need a recipe. You can pretty much simmer together any combination of vegetables with a little water or broth, purée it, top it with good olive oil and salt, and end up with something good to eat.

img_9879
While the stock was cooking, we prepped the soup ingredients.

Lemony Carrot Soup

  • Servings: 6
  • Difficulty: easy
  • Print

Ingredients

  • 1 tablespoon coriander seeds
  • 2 tablespoons extra-virgin olive oil, more for serving
  • 1 large white onion, peeled and diced (2 cups)
  • 2 large garlic cloves, finely chopped
  • 5 medium carrots (1 pound), peeled and cut into 1/2-inch pieces (2 cups)
  • 1 ½ teaspoons kosher salt, more as needed
  • 3 tablespoons white miso
  • 1 small (or half of a large) head cauliflower, trimmed and cut into florets
  • ½ teaspoon lemon zest
  • 2 tablespoons lemon juice, more to taste
  • Smoky chile powder, for serving
  • Coarse sea salt, for serving
  • Cilantro leaves, for serving

Directions

  1. In a large, dry pot over medium heat, toast coriander seeds until fragrant and dark golden-brown, 2 to 3 minutes. Transfer to a mortar and pestle and coarsely crush.
  2. Return the pot to medium heat. Add the oil and heat until warm. Stir in onion; cook, stirring occasionally, until soft and lightly colored, 7 to 10 minutes. Stir in garlic and cook 1 minute.
  3. Add carrots, crushed coriander, salt and 6 cups water to the pot (we used 4 cups stock and 2 cups water). Stir in the miso until it dissolves. Bring mixture to a simmer and cook, uncovered, 5 minutes. Stir in cauliflower and cook, covered, over medium-low heat until the vegetables are very tender, about 10 minutes.
  4. Remove the soup from the heat. Using an immersion blender, purée the soup until smooth. (Alternatively, you can let soup cool slightly then purée it in batches in a food processor or blender.) If necessary, return the puréed soup to the heat to warm through. Stir in the lemon zest and juice just before serving. Drizzle with oil and sprinkle with chile, sea salt and cilantro leaves.

img_9889
In a large, dry pot over medium heat, toast coriander seeds until fragrant and dark golden-brown, 2 to 3 minutes.

img_9895
Add the carrots and crushed coriander to the pot of cooked onions and garlic.

img_9901
Five minutes after the broth is added, stir in cauliflower and cook, covered, over medium-low heat until the vegetables are very tender, about 10 minutes.

img_9907
Using an immersion blender, purée the soup until smooth.

img_9917
As a topper, drizzle with oil and sprinkle with chile, sea salt and cilantro leaves.


Choose Your Weapon: The Tortoise or The Hare

I’m sure you’ve heard the old Aesop’s fable “The Tortoise and The Hare,” an account of a race between unequal partners. It’s a common folktale theme in which ingenuity and trickery are employed to overcome a stronger opponent. Well, in this recipe of slow versus fast, there is no clear winner.

Salmon with Lentil Hash and Bacon turns out great whether you take it slow with a hands-off approach or hit the fast-forward button and crank it out in mere minutes. How’s that? Choose to utilize a slow cooker versus a pressure cooker, but end up with the same luscious results.

In the January 2017 Better Homes & Gardens Magazine, there was an article “Slow vs. Fast” that highlighted several meals that could be cooked using either method, and this intrigued me. Keep in mind the techniques are not the same, and the instructions matter.

I would have initially chosen the pressure cooker if it had been a work night. But since I was off between the Winter holidays, I had time on my hands and decided to use our slow cooker. With this method you slow cook the lentils and vegetables on low for 5 to 6 hours (or 2 1/2 to 3 hours on high) and then place the salmon on top for another 25 minutes on high.

If using the pressure cooker, the salmon, spiced lentils, potatoes and cauliflower literally cook in 60 seconds of high pressure to give you a one-pot, one-step wonder in a snap! Next time we plan to use the fast method and see if there are any differences… stay tuned…

“Don’t brag about your lightning pace, for slow and steady won the race!” Not so in this case… for both methods you’ll want to embrace!

Makes: 4 servings
Total Time—includes hands on prep
Slow Cook:
 5 hrs 45 mins to 6 hrs 45 mins (low); or 3 hr 15 min to 3 hr 45 min (high)
Pressure Cook: 21 min, plus time to build and release pressure

img_9559

Ingredients

  • cups chicken broth (preferably homemade)
  • pound baby yellow potatoes, quartered
  • small head cauliflower (1 1/2 pounds), cut into large florets
  • cup brown lentils, rinsed and drained
  • large onion, cut into quarters
  • cloves garlic, minced
  • tablespoon curry powder
  • 1/2 teaspoon kosher salt
  • 1/2 teaspoon ground cumin
  • 1/2 teaspoon ground coriander
  • 1/4 teaspoon cayenne pepper
  • 1 1/2 pound salmon fillet, skinned
  • slices bacon, crisp-cooked, drained, and crumbled
  • Fresh mint leaves

img_9562
Fry up the bacon and when cool, crumble and set aside.

img_9563
In a slow cooker, stir together the broth, potatoes, cauliflower, lentils, onion, garlic, curry powder, salt, the cumin, coriander, and cayenne.

img_9565
After the requisite amount of time for the veggies to cook, open the lid for the salmon.

img_9568
Cut salmon fillet in half crosswise; season with salt and black pepper.

img_9570
Place salmon on top of vegetable mixture and cover.

img_9572
Cook about 25 minutes more, then divide salmon and vegetable mixture among serving bowls.

Directions

  1. SLOW COOKER: In a 6-qt. slow cooker stir together the broth, potatoes, cauliflower, lentils, onion, garlic, curry powder, salt, the cumin, coriander, and cayenne. Cover; cook on low 5 to 6 hours or high 2 1/2 to 3 hours.
  2. Cut salmon fillet in half crosswise; season with salt and black pepper. Place salmon on top of vegetable mixture. If cooking on low, turn to high.
  3. Cover and cook about 25 minutes more or until salmon just flakes when tested with a fork. Divide salmon and vegetable mixture among four serving bowls. Top with crumbled bacon and fresh mint.
  1. PRESSURE COOKER: In a 6-qt. electric or stove-top pressure cooker stir together the broth, potatoes, cauliflower, lentils, onion, garlic, curry powder, salt, the cumin, coriander, and cayenne.
  2. Cut the salmon fillet in half crosswise and place on top of the lentil mixture; season with some salt and black pepper. Lock the lid in place. Set electric cooker on high pressure to cook 1 minute to start the cooker.
  3. When cooker reaches that pressure, immediately release the pressure according to manufacturer’s directions. For stove-top pressure cooker, bring up to pressure over medium-high heat according to manufacturer’s directions.
  4. Remove from heat once it reaches that pressure. Quickly release the pressure according to the manufacturer’s directions. Open lid carefully.
  5. Divide the salmon and vegetable mixture among four serving bowls. Top with crumbled bacon and fresh mint.

img_9575
Top with crumbled bacon and fresh mint.

Dinner: It’s A Wrap

Need something to pick you up and dust you off during the January Winter doldrums? This brightly colored meal option wraps it up and delivers.

Lettuce wraps have been a “thing” for a few years now, popular at Asian restaurants as well as other ethnic establishments, including American. And I have to say, we love ’em not only because they are low-carb, but they’re very versatile, so tasty, and so fun to assemble (just make sure to have a few extra napkins on hand.) The zesty flavors in these Korean-Style Spicy Steak Lettuce Wraps make them a standout—at least in our humble opinion.

img_9839
Place as much, or as little, of each ingredient in the lettuce leaf, then roll and eat.

Most high-end supermarkets will now carry gochujang, which can be found in the ethnic food aisle. It is a savory, spicy, and pungent fermented Korean condiment made from red chili, glutinous rice, fermented soybeans, and salt. Now that may not sound too appealing to some of you, but we really like it. The finished product is a dark, reddish paste with a rich, piquant flavor.

Think of gochujang as similar to miso paste — a little goes a long way, and it’s just as versatile. It can be used in marinades for meat dishes like Korean bulgogi (another favorite of ours), stirred into dipping sauces, or used to punch up stews or soups. And like miso, once opened, it should be stored in the refrigerator, with just as a long shelf life. Best of all, gochujang is considered a diet-friendly superfood because it’s rich in protein, antioxidants and vitamins, but low in fat and calorie content.

Kimchi on the other hand will be located in the refrigerated section of a grocery store or Asian market. The reddish fermented cabbage (and sometimes radish) dish, is made with a mix of garlic, salt, vinegar, chile peppers, and other spices. It is another superfood chockfull of many health benefits. I’ve read that Koreans eat so much of this super-spicy condiment (40 pounds of it per person each year) that natives say “kimchi” instead of “cheese” when getting their pictures taken.

We were definitely smiling after eating these fun and tasty wraps!

img_9825

Ingredients

  • 1-1/2 lb. skirt steak
  • 1/4 cup gochujang (Korean red chile-bean sauce)
  • 2 Tbs. Asian sesame oil
  • 2 Tbs. soy sauce
  • 2 medium cloves garlic, minced
  • 1 Tbs. rice vinegar
  • 4 medium scallions, thinly sliced
  • 2 medium carrots, grated
  • 1 large head Boston or butter lettuce, leaves separated
  • 1-1/4 cups prepared cabbage kimchi, coarsely chopped
  • Kosher salt

img_9826
Mix gochujang, sesame oil, soy sauce and minced garlic to create a paste.

img_9827
Rub the paste all over both sides of the skirt steak and let sit for 10-30 minutes before broiling.

img_9831
After broiling, the meat rests for 5 minutes before slicing.

img_9832
Cut thin slices against the grain, collect the juices and pour into the remaining paste mixture.

img_9828
There are usually large chunks of cabbage in the kimchi, so give it a coarse chop.

img_9836
Plate all of the ingredients and let each diner assemble their own. You can add the gochujang mixture to the pile of meat, or let each person add some directly to their wraps—or both.

Directions

  1. Position a rack 6 inches from the broiler and heat the broiler on high. Line a large heavy-duty rimmed baking sheet or broiler pan with foil and put the steak on it.
  2. Whisk the gochujang, sesame oil, soy sauce, and garlic in a small bowl. Rub 3 tablespoons of the mixture all over the steak and let marinate at room temperature for 10 minutes. Whisk the vinegar into the remaining gochujang mixture and set aside in a small serving bowl.
  3. Arrange the scallions, carrots, and lettuce on a large serving platter in individual mounds. Place the kimchi in a serving bowl.
  4. Broil the steak, flipping once, until medium rare (125°F), 3 to 4 minutes per side. Let rest for 5 minutes, then slice thinly against the grain. Season to taste with salt and mound on the serving platter. Bring all the components to the table for everyone to assemble their wraps as they like.

By Ivy Manning from Fine Cooking

French Onion Roast Chicken

Are you kidding me?? This was my initial reaction when I saw how easy this French Onion Roast Chicken recipe was. Just a few ingredients, with just as few steps, and the rest is literally hands off! I must admit, few dishes are as simple to make as this one—juicy roast chicken with caramelized onions made right in the roasting pan.

It seemed almost too simple, so I was half tempted to rub some olive oil over the bird and/or into the roaster and insert some herbs in it’s cavity, but I refrained because I wanted to see if the meal would come out as spectacular as advertised—and by jove, it did. Look at that perfectly browned crispy skin!

img_9807

Cooking-wise, our 4-pound chicken took the full hour, and probably because I sliced up three large onions as opposed to two medium, they weren’t as caramelized as they should have been when the chicken was done. So I moved the chicken to a cutting board, tented with foil, then stirred the onions and put them back in the oven for another 20 minutes—which did the trick.

img_9801
A bed of sliced onions line the bottom of the roasting pan.

img_9816
The onions took longer to caramelize once I removed the chicken, probably because I sliced three large as opposed to two medium onions. But as you can see, they shrink quite a bit.

A lot of juices released from the bird while it was being carved, so I poured those into the roasting pan with the onions and added the minced herbs, stirring it all together before plating. Wowser, they were heavenly, I’m so glad I made more than called for.

The rest of the meal was a breeze too because I just reheated a cheesy potato gratin and roasted a medley of brussels sprouts, butternut squash chunks and parsnip pieces tossed in oil, salt and pepper. Meal done!

NOTE: For a wine pairing, try a white Burgundy because both French onion soup and roast chicken are classic with Chardonnay, the same grape used in white Burgundy.

Ingredients

  • 1, 4 to 5 lb. whole chicken, giblets removed, patted dry inside and out
  • 2 medium yellow onions (I used 3 large onions)
  • 1 tsp. finely chopped fresh herbs, such as thyme, rosemary, tarragon or parsley

img_9799
The onions are sliced in half through the root end; then each half is thinly sliced crosswise.

img_9803
Place the seasoned chicken, breast side up, on top of the sliced onions.

img_9805
After about 30 minutes, stir the onions. As you can see, neither the bird nor the onions are very brown at this point.

img_9811
After the chicken rested, Russ started carving it on a cutting board with a moat to catch the released juices.

img_9818
We poured those pan juices, along with the minced herbs, into the caramelized onions before plating. 

Directions

  1. Position a rack  in the center of the oven and heat to 425 degrees.
  2. Season the chicken inside and out with 1 1/2 tablespoons salt and 1/2 teaspoon pepper.
  3. Slice the onions in half through the root, then thinly slice crosswise. Transfer to a roasting pan, toss with a 1/4 teaspoon salt, and spread evenly in the pan.
  4. Put the chicken, breast side up, on the onions. Roast, stirring the onions halfway through, until the meaty part of the thighs registers 165 degrees on an instant read thermometer, 45-60 minutes.
  5. Transfer the chicken to a carving board and let rest for 10-15 minutes.
  6. Remove the onions from the roasting pan (they will range in color from light to dark brown) and toss with the herbs if using.
  7. Carve the chicken and serve with the onions.

Found in Fine Cooking Magazine

img_9819
Not usually one to eat the skin, it was so crispy and tasty, I couldn’t help myself.

Soup with Gut-Healing Benefits

Turkey and Vegetable Soup calls for “riced” cauliflower, which just means finely grated until the cauliflower is in pieces basically the size of rice. It gives the soup a nice hearty texture—a great trick for any vegetable-based soup that needs to be a little more filling. And many grocery stores sell it already packaged in the produce section so you don’t have to spend time ricing it yourself.

img_9744

Depending on what vegetables you have lying around, this dish can absorb almost anything. Throw in whatever’s in the fridge, and if it starts getting too dense, well, just add more stock! And you know how I always sing the praises of homemade stock (which can be done in a pressure cooker for fast gratification.) Our last batch came compliments of a huge turkey carcass (with quite a bit of meat left on it) from our good friends Rosanne and Gary. Thanks guys!

They removed it from their freezer where it had been residing since Thanksgiving. Several weeks later we were the lucky recipients and we threw it into our freezer until such time it was convenient to make the stock—which happened to be in early January. And a week after that, Russ got around to making the soup. If you don’t have access to an entire carcass, get some bony turkey parts: necks, backs, and/or wings. You can usually ask a butcher to save them for you, or try purchasing them at a local Asian market.

Homemade turkey stock adds flavor—and other good stuff—to the broth, and also ekes every last bit of flavor out of the bird bones. The gut-healing benefits of the stock also make this one a great option if your holiday feasting was a little bit hard on your digestion. Cooking the vegetables provides most of the nutrients in a form that’s easier on the stomach, and soup in general is a nice light meal to follow up a day of impressive eating—and makes for great workday lunches too!

img_9748

Soup Ingredients

  • 2 cups leftover turkey, chopped;
  • 1 onion, diced;
  • 3 to 4 carrots, diced;
  • 2 parsnips, diced;
  • 2 celery stalks, diced;
  • 1 cup cauliflower, riced;
  • 1 ½ cups cabbage, shredded;
  • 2 bay leaves;
  • 2 garlic cloves, minced;
  • 2 tsp. ground sage;
  • 1 tsp. thyme;
  • Sea salt and freshly ground black pepper;
  • Turkey stock

Stock Ingredients

  • 1 turkey carcass or 5 lbs. turkey parts (preferably bony parts, like necks and backs);
  • 2 yellow onions, quartered;
  • 2 celery ribs, cut into big chunks;
  • 2 carrots, cut into big chunks;
  • 4 garlic cloves;
  • 4 sprigs fresh thyme;
  • 1 bay leave;
  • 4 quarts cold water;
  • Freshly ground black pepper

img_9762

Directions

  1. Place the turkey carcass or parts in a saucepan, add all the remaining ingredients for the stock, and season to taste with pepper.
  2. Fill the saucepan with water and bring to a boil.
  3. Lower heat to a light simmer, and simmer 4 to 8 hours. (adding water if necessary).
  4. Strain the stock with a fine mesh sieve, throwing away all the remaining ingredients. Set aside the stock for now.
  5. Pick through the carcass. Remove any meat you find, and add it to the meat for the soup.
  6. Add all the ingredients for the soup in a large saucepan. Fill the pan with the turkey stock, and season to taste.
  7. Bring to a simmer, and simmer 45 minutes to 1 hour.

Recipe adapted from PaleoLeap.com

img_9761

Party Hearty with Luscious Lasagna

Mother Nature threw one of her curve balls the day of our intended party for members of Russ’s “Men’s Group” and their spouses. What was supposed to be a dusting of snow in our area turned into 4 or 5 inches (laughable by Michigan standards), and with the temps hovering in the teens to low 20’s, hazardous roads were a given.

Understandably, several of the attendees called to say they didn’t want to be out driving at night in those conditions; and with that Russ made an executive decision to postpone until the following day. Isn’t it amazing how in our 20’s, we wouldn’t have even thought about NOT going to a party over a little snow? Yes, I guess maturity and wisdom are the voice of reason in our later years…

img_9746
Here’s the “dusting” of snow—and a few more inches fell after this!

Since we were hosting, we decided to make a large lasagna, however I was halfway through the prep when I learned the party was postponed. No biggie, I just finished assembling it, covered with foil and into the downstairs fridge it went. (The question then became, what were we going to do about dinner that night?)

Back to the lasagna. We wanted to use our gluten-free, no-boil noodles to eliminate the process of boiling and draining. Russ found just the ticket on Cook’s Illustrated’s website. The 12-minute tomato meat sauce is cooked using onions, garlic, and meatloaf mixture (ground beef, pork, and veal) and then adding cream and tomatoes. That was new to me—cream in the meat sauce?

img_9728

To create a classic cheese layer quickly, we incorporated ricotta, mozzarella, Parmesan, fresh basil, and an egg to help thicken and bind the mixture. Covering the lasagna with foil before baking helped soften the noodles; removing the foil during the last 25 minutes of baking allowed the cheeses to brown properly. Of course, since ours was refrigerated over night, we put it on the kitchen counter about an hour before sliding into the preheated oven, and then also extended the cooking time.

If you can’t find meatloaf mixture for the sauce, or if you choose not to eat veal, substitute 1/2 pound ground beef and 1/2 pound sweet Italian sausage, casings removed, for the meatloaf mixture.

The assembled, unbaked lasagna, if wrapped tightly in plastic wrap and then in foil, will keep in the freezer for up to 2 months. To bake, defrost it in the refrigerator for a day or two and bake as directed, extending the baking time by about 5 minutes.

Our lasagna casserole dish is somewhat larger than most so we increased the amounts of meat and cheeses, and cooked 15 minutes longer to compensate—but the recipe below is the original.

Ingredients

img_9719

TOMATO-MEAT SAUCE

  • 1 tablespoon olive oil
  • 1 medium onion, chopped fine (about 1 cup)
  • 6 medium cloves garlic, pressed through garlic press or minced (about 2 tablespoons)
  • 1 pound meatloaf mix or ⅓ pound each ground beef chuck, ground veal, and ground pork
  • ½ teaspoon table salt
  • ½ teaspoon ground black pepper
  • ¼ cup heavy cream
  • 1 can (28 ounces) tomato puree
  • 1 (28-ounce) can diced tomatoes, drained

img_9722
This old fashioned Italian ricotta was so light and tasty, it’s a winner if you can find it.

img_9726
Fresh basil leaves are waiting to be chopped up.

img_9733
Parmesan, ricotta, egg, basil, salt and pepper are all put into a mixing bowl.

img_9735
The mixture is stirred with a fork until well-combined and creamy.

RICOTTA, MOZZARELLA, AND PASTA LAYERS

  • 15 ounces ricotta cheese (whole milk or part skim, 1 ¾ cups)
  • 2 ½ ounces grated Parmesan cheese (1 ¼ cups)
  • ½ cup chopped fresh basil
  • 1 large egg, lightly beaten
  • ½ teaspoon table salt
  • ½ teaspoon ground black pepper
  • 12 no-boil lasagna noodles from one 8- or 9-ounce package
  • 16 ounces whole milk mozzarella, shredded (4 cups)

img_9731
Smear the entire bottom of your baking dish with 1/4 cup meat sauce.

img_9732No-cook lasagna noodles are placed on top of the bottom meat sauce.

img_9738
Drop 3 tablespoons ricotta mixture down the center of each noodle, then level by pressing flat with back of measuring spoon. 

img_9742
For the top layer, sprinkle with remaining cup mozzarella, then with remaining 1/4 cup Parmesan.

Directions

  1. Adjust oven rack to middle position and heat oven to 375 degrees
  2. Heat oil in large, heavy-bottomed Dutch oven over medium heat until shimmering but not smoking, about 2 minutes; add onion and cook, stirring occasionally, until softened but not browned, about 2 minutes.
  3. Add garlic and cook until fragrant, about 2 minutes. Increase heat to medium-high and add ground meats, salt, and pepper; cook, breaking meat into small pieces with wooden spoon, until meat loses its raw color but has not browned, about 4 minutes.
  4. Add cream and simmer, stirring occasionally, until liquid evaporates and only fat remains, about 4 minutes. Add pureed and drained diced tomatoes and bring to simmer; reduce heat to low and simmer slowly until flavors are blended, about 3 minutes; set sauce aside. (Sauce can be cooled, covered, and refrigerated for up to 2 days; reheat before assembling lasagna.)
  5. Mix ricotta, 1 cup Parmesan, basil, egg, salt, and pepper in medium bowl with fork until well-combined and creamy; set aside.
  6. Smear entire bottom of 9- by 13-inch baking dish with 1/4 cup meat sauce. Place 3 noodles on top of sauce. Drop 3 tablespoons ricotta mixture down center of each noodle. Level by pressing flat with back of measuring spoon. Sprinkle evenly with 1 cup shredded mozzarella. Spoon 1 1/2 cups meat sauce evenly over cheese.
  7. Repeat layering of noodles, ricotta, mozzarella, and sauce two more times.
  8. Place 3 remaining noodles on top of sauce, spread remaining sauce over noodles, sprinkle with remaining cup mozzarella, then with remaining 1/4 cup Parmesan. Lightly spray a large sheet of foil with nonstick cooking spray and cover lasagna.
  9. Bake 15 minutes, then remove foil. Return lasagna to oven and continue to bake until cheese is spotty brown and sauce is bubbling, about 25 minutes longer.
  10. Cool lasagna about 10 minutes; cut into pieces and serve.

img_9786An edible work of art!

img_9797
The “Men’s Group” has been together for 30 years! Some of the members from left: Steve, Joe, Charlie, Pete, Bill and Russ.

Meatballs with an Asian Profile

Asian flavors are a particular favorite of ours, and this recipe was calling our names. For Ginger-Chicken Meatballs with Chinese Broccoli, we used ground chicken which is leaner than other meats. But less fat doesn’t mean you have to sacrifice flavor—these meatballs are loaded with aromatics like scallions, ginger and garlic, and served intertwined with delicious Chinese broccoli.

chinese-broccoli

Chinese broccoli, shown above, is a leafy green vegetable closely related to thick-stemmed broccoli, cabbage, and Brussels sprouts. It has flat leaves, thick stems, and tiny florets with a slightly bitter and earthy taste. It may prove tough to find Chinese broccoli in large grocery stores, so check your local Asian market, which is more likely to carry it. But in a pinch, you can use broccoli, broccolini (our fallback) or broccoli rabe. Do keep in mind that you may have to adjust the cooking time to account for the swap.

I recently blogged about meatballs with different ethnic origins (Italian Wedding Soup and Swedish Meatballs) in two previous posts, and in them I advise about keeping your hands moist so that the meat mixture doesn’t stick to them. I made this recipe prior to the other two, and as you can decipher by my misshapen balls—some almost triangular in shape—I neglected to incorporate this step into the process, luckily it didn’t affect the taste!

img_9511
The meat mixture was very sticky and hard to form round balls. If you keep your hands moist with water, it will be easier.

Ingredients

  • 1 garlic clove, finely grated
  • 1 lb ground chicken
  • 1 tablespoon reduced-sodium soy sauce
  • 2 teaspoons finely grated ginger
  • 4 scallions, thinly sliced, plus more for serving
  • 2 cups low-sodium chicken broth, divided
  • 2 tablespoons vegetable oil
  • 1/2 bunch Chinese broccoli, chopped (broccolini)
  • 1/2 teaspoon crushed red pepper flakes
  • Kosher salt, freshly ground pepper

img_9512
Turn the meatballs as they start to brown.

img_9514
When browned on all sides, place meatballs on paper towels. Mine obviously didn’t stay round because they weren’t in ball shapes from the start.

img_9526
Combine broccoli and red pepper flakes in same skillet after meatballs are removed.

img_9529
After the broccoli cooks for 5 minutes, add meatballs and remaining 1½ cups broth.

Directions

  1. Using your hands or a rubber spatula, gently mix garlic, chicken, soy sauce, ginger, 4 scallions, and ½ cup broth in a medium bowl just to combine. Scooping out by the tablespoonful, form mixture into 1”-diameter meatballs. (As mentioned, keep your hands moist between rolling the meatballs.)
  2. Heat oil in a large skillet over medium-high heat. Add meatballs and cook, turning occasionally, until golden brown all over, 8–10 minutes. Transfer to a plate.
  3. Combine broccoli and red pepper flakes in same skillet, season with salt and pepper, and cook over medium-high heat until broccoli is bright green and crisp-tender, about 5 minutes. Add meatballs and remaining 1½ cups broth.
  4. Bring broth to a boil, reduce heat, and simmer until meatballs are cooked through and broccoli is tender, 5–8 minutes. Serve sprinkled with more scallions.

Recipe by The Bon Appétit Test Kitchen

img_9532
Ladle into shallow bowls and top with sliced scallions.


Swedish Meatballs, Delicate and Juicy

This isn’t your grandma’s recipe, but an interesting twist on an old stand-by. My first recollection of Swedish Meatballs came by way of an occasional outing to a family-style smörgåsbord in Michigan when we were kids. Their’s (and most others I’ve tried since then) had more of a sweet note, which as a youngster with a sweet-tooth suited me just fine—certainly not my preference today.

If properly and traditionally prepared, they are considered part of an authentic Swedish meal. But we weren’t going for authentic. The impetus for this recipe came via a house party invite with a request to contribute an hors d’oeuvre. Russ remembered Cook’s Illustrated ran a recent article on holiday appetizers, and he had an “ah-ha” moment when he happened upon their Swedish Meatballs recipe.

Usually when making meatballs, or meatloaf, one is instructed not to over-handle the meat. But in this recipe, along with the ones we recently made for the Italian Wedding Soup, the meats and spices are to be ground vigorously in a stand mixer producing substantial yet delicate meatballs with a sausage-like springiness.

pan-of-swedish-meatballs

To achieve the right texture, we followed their technique that combines beef, pork, bread, cream—and a surprise ingredient—baking powder, which keeps the meatballs delicate and juicy. Although to make them less sweet, we eliminated the brown sugar from the meatball ingredients altogether, and reduced the amount called for in the sauce. (The following ingredients reflect these changes.)

For the meatball gravy recipe, we emulated their light cream sauce instead of the traditional heavy brown gravy. To get this, you add a bit of cream to the stock to lighten it up and a splash of lemon juice for some bright flavor.

img_9601
Keep your fingers and palms moist so that the mixture doesn’t stick to your hands.

img_9603
Wait until all of your meatballs are formed before starting to cook them.

Keep a bowl of water nearby and dip your fingers after every two or three meatballs to prevent the meat from sticking as you form the balls. Another trick, when ready to start cooking, is to start near the skillet handle, arrange the meatballs in a clockwise spiral to keep track of the order in which they need to be flipped.

A 12-inch slope-sided skillet can be used in place of the sauté pan (use 1 1/2 cups of oil to fry instead of 1 1/4 cups.) The meatballs can be fried and then frozen for up to 2 weeks. To continue with the recipe, thaw the meatballs in the refrigerator overnight and proceed from step 3, using a clean pan. Serve the meatballs with mashed potatoes, boiled red potatoes, or egg noodles, or simply as an hors d’oeuvre like we did.

BTW, “köttbullar” is the Swedish word for meatballs.

Ingredients

MEATBALLS

  • 1 large egg
  • ¼ cup heavy cream
  • 1 large slice high-quality white sandwich bread, crusts removed and bread torn into 1-inch pieces
  • 8 ounces ground pork
  • 1 small onion, grated on large holes of box grater (about ¼ cup)
  • ⅛ teaspoon freshly grated nutmeg
  • ⅛ teaspoon ground allspice
  • ⅛ teaspoon ground black pepper
  • 1 ½ teaspoons table salt
  • 1 teaspoon baking powder
  • 8 ounces 85 percent lean ground beef
  • 1 ¼ cups vegetable oil

SAUCE

  • 1 tablespoon unsalted butter
  • 1 tablespoon unbleached all-purpose flour
  • 1 ½ cups low-sodium chicken broth
  • 2 teaspoons packed brown sugar
  • ½ cup heavy cream
  • 2 teaspoons juice from 1 lemon
  • Salt and ground black pepper

Directions

img_9589
Instead of buying an entire loaf of gluten-free bread for just one slice (which we wouldn’t use the rest of) we thawed a roll from the freezer and removed the crust. The scraps went to the birdies.

img_9591
After combining the bread and cream, use a fork to mash it until no large dry bread chunks remain.

img_9592
An onion is grated on the large holes of a box grater.

img_9593
In a stand mixer fitted with paddle attachment, beat pork (and other meats, if using), onion, nutmeg, allspice, pepper, salt, and baking powder on high speed until smooth and pale.

img_9595
Add bread mixture with ground meat and beat on high speed until smooth and homogeneous.

For the Meatballs:

  1. Whisk egg and cream together in medium bowl. Stir in bread and set aside.
  2. Meanwhile, in stand mixer fitted with paddle attachment, beat pork, onion, nutmeg, allspice, pepper, salt, and baking powder on high speed until smooth and pale, about 2 minutes, scraping bowl as necessary.
  3. Using a fork, mash bread mixture until no large dry bread chunks remain; add mixture to mixer bowl and beat on high speed until smooth and homogeneous, about 1 minute, scraping bowl as necessary. Add beef and mix on medium-low speed until just incorporated, about 30 seconds, scraping bowl as necessary.
  4. Using moistened hands, form generous tablespoon of meat mixture into 1-inch round meatball; repeat with remaining mixture to form 25 to 30 meatballs.
  5. Heat oil in 10-inch straight-sided sauté pan over medium-high heat until edge of meatball dipped in oil sizzles (oil should register 350 degrees on instant-read thermometer), 3 to 5 minutes.
  6. Add meatballs in single layer and fry, flipping once halfway through cooking, until lightly browned all over and cooked through, 7 to 10 minutes. (Adjust heat as needed to keep oil sizzling but not smoking.) Using slotted spoon, transfer browned meatballs to paper towel-lined plate.
img_9607
Arrange meatballs in hot oil in a spiral starting at the handle.
img_9610
After a few minutes, start turning the meatballs over beginning with the one closest to the handle.
img_9614
Remove all the meatballs from the pan to a paper towel lined platter.
img_9616
When the foaming from the butter subsides, add flour and cook, whisking constantly, until flour is light brown.
img_9618
Once the sauce is reduced to about one cup, stir in cream and return to simmer.
img_9620
Finally, add meatballs to sauce and simmer, turning occasionally, until heated through.

For the Sauce:

  1. Pour off and discard oil in pan, leaving any fond (browned bits) behind. Return pan to medium-high heat and add butter. When foaming subsides, add flour and cook, whisking constantly, until flour is light brown, about 30 seconds.
  2. Slowly whisk in broth, scraping pan bottom to loosen browned bits. Add brown sugar and bring to simmer. Reduce heat to medium and cook until sauce is reduced to about 1 cup, about 5 minutes. (We think it should have been reduced longer to thicken the sauce.) Stir in cream and return to simmer.
  3. Add meatballs to sauce and simmer, turning occasionally, until heated through, about 5 minutes. Stir in lemon juice, season with salt and pepper, and serve.

Thanks to IKEA, Swedish meatballs are arguably the most well-known meatballs in the world. Initially they were only enjoyed by upper class Swedes but by the 1850s they were accessible to the middle classes as well. There are endless varieties with numerous sauces from white to dark brown and everything in between. So go ahead and try your (wet) hand at making this recipe!

lid-of-meatballs

Goodful For Ya

Feeling a little bloated from a food hangover? Or just want to eat a little healthier in the New Year? I first saw this recipe when my sister Lolly posted the link on Facebook during Winter break. And I thought after all of the heavy, caloric food that’s been offered the past several weeks, this Lemon Chicken and Spaghetti Squash looked like a quick, healthy and delicious alternative. Had to get it on our upcoming meal repertoire ASAP!

Eager to try it, I got around to making it immediately after the holidays ended. In so doing, we incorporated our homemade turkey stock (we were out of homemade chicken stock) in place of commercial chicken stock. My guess is the dish may be too bland if you use packaged broth, but if you do, think about including some other spices and/or herbs of your choice to amp up the flavor.

A few other changes included adding some fresh cremini mushrooms, increasing the cherry tomatoes by about another cup, and decreased the baby spinach—only because our package weighed five ounces, not eight as the ingredients called for. Our two chicken breasts weighed in at 3/4 pound, which was plenty for two, with leftovers.

Cooked as instructed, the roasted squash came out perfectly! What a clever idea to “fork” the squash around the perimeter and then microwave for 5 minutes before you cut it in half. How come I never heard of this technique before?? I’m going to try this next time I roast an acorn squash too because they can be such buggers to try and slice open.

img_9663
In a straight line around the perimeter, use a fork to make holes.

img_9667
After microwaving for five minutes, cut the squash in half along the “forked” line.

img_9668
Scoop out the seeds and fibers and place on a rimmed baking sheet.

img_9671
Spread a little olive oil all over the cut side and season with salt and pepper. Make sure to turn the cut side down before roasting.

In addition, as toppers we sprinkled on some red pepper flakes (shocked, right?) and a tad of shredded parmesan cheese. I’m thinking some rendition of this will become a monthly dinner staple during the cooler months.

NOTE: To make it a vegetarian dish, use vegetable broth and tofu chunks in place of the chicken.

img_9659

INGREDIENTS

  • 1 spaghetti squash
  • Olive oil
  • Sea salt, to taste
  • Black pepper, to taste
  • 2 chicken breast, cut into 1-2 in pieces

For the sauce:

  • 1 medium yellow onion, diced
  • 4 cloves garlic, minced
  • 3 cups cherry tomatoes, halved
  • ½ teaspoon sea salt
  • ¼ teaspoon black pepper
  • ½ lemon, juiced
  • 1 cup chicken broth (homemade if at all possible)
  • 8 ounces baby spinach

img_9673
Sear the chicken pieces in hot oil for several minutes.

img_9674
After the chicken is removed from the skillet, add onions (and mushrooms if using) and sauté for a few minutes.

img_9676
Broth and lemon juice are added after the tomatoes and garlic and will simmer for 20 minutes.

img_9677
The chicken is added back after the sauce has reduced down for 20 minutes.

img_9682
The final step is folding in the baby spinach until it wilts.

DIRECTIONS

  1. Preheat oven to 375˚F.
  2. With a fork, poke several holes into the spaghetti squash along a straight line from end to end. Microwave on high for 5 minutes.
  3. Cut squash in half along the holes. Remove seeds with a spoon. Drizzle squash interior with olive oil, and season with salt and pepper.
  4. Place squash cut-side down on baking tray and bake for 40 minutes until soft. Let cool.
  5. While squash is roasting, using a skillet, cook the chicken breast on medium-high heat with a little olive oil for 6-8 minutes until the chicken is golden brown and cooked through. Remove chicken from the pan and set aside.
  6. Sauté onion for a few minutes. Add garlic and cook for a minute. Add tomatoes and cook for a couple minutes. Cook until onions are translucent.
  7. Add lemon juice and chicken broth, and cook until the liquid partially reduces, about 20 minutes. Add chicken and cook for 2 minutes. Add spinach and cook for 2 minutes.
  8. Using a fork, shred the inside of the squash.
  9. Pour sauce over the squash. Serve immediately.

img_9684
After roasting for 40 minutes, let the squash cool slightly then shred the inside with a fork and add to dinner plates.

img_9685
Over your shredded squash, ladle the chicken and veggie mixture adding any other toppings last.

Posted on Goodful Facebook page

A Hartman Riff on an Italian Classic

Everyone loves Italian Wedding Soup including us, but when we stumbled upon this recipe from Cook’s Illustrated we were intrigued by the atypical aromatics of anise and fennel as opposed to the standard celery and carrots. And according to the original directions, the broth gets simmered with ground pork and beef for a savory note. Although our grocery store didn’t have ground pork so Russ picked up meatloaf mix which included veal, beef and pork.

Skipping the fuss of a typical brodo doesn’t have to mean sacrificing flavor. By doctoring commercial chicken broth, you get comparably rich-tasting results in under an hour. HOWEVER, after reading the instructions, we could not fathom the thought of throwing away the meat once the broth was done! Instead we used our own homemade chicken stock which added plenty of flavor on its own, along with some prepackaged beef stock.

img_9647

For the meatballs, beating the ground meat in a stand mixer distributes fat and moisture evenly so they have a springy bite. Plus, a few umami-packed ­porcini mushrooms and Worcestershire sauce amp up the broth’s meaty flavor. Substituting kale for the usual escarole was a “feel-good-about-yourself” swap—and a tasty one at that.

Without any fresh oregano on hand, we incorporated the dried herb, which had been picked directly from our garden in the fall and dehydrated, so it was “fresh” dried. Since Russ ordered about 30 packages of gluten-free pasta shapes a few months ago through Amazon.com, we have quite a selection and one of them was ditalini!

NOTES:
It’s best to use a rasp-style grater to process the onion and garlic for the meatballs.
Tubettini or orzo can be used in place of the ditalini.
If you don’t eat, beef, veal or pork, make ground chicken or turkey meatballs.

Ingredients

BROTH

  • onion, chopped
  • fennel bulb, stalks discarded, bulb halved, cored, and chopped
  • garlic cloves, peeled and smashed
  • ¼ ounce dried porcini mushrooms, rinsed
  • ounces ground pork (we did NOT incorporate meat into our broth)
  • ounces 85 percent lean ground beef
  • bay leaf
  • ½ cup dry white wine
  • tablespoon Worcestershire sauce
  • cups low-sodium chicken broth
  • cups beef broth
  • cups water

MEATBALLS

  • slice hearty white sandwich bread, crusts removed, torn into 1-inch pieces
  • tablespoons heavy cream
  • ¼ cup grated Parmesan cheese
  • teaspoons finely grated onion
  • ½ teaspoon finely grated garlic
  • Salt and pepper
  • ounces ground pork
  • teaspoon baking powder
  • ounces 85 percent lean ground beef (we used a little over a pound of meatloaf mix in place of the beef and pork)
  • teaspoons minced fresh oregano
  • cup ditalini pasta
  • ½ pound kale, stemmed and cut into ½-inch pieces (6 cups)

Directions

img_9649
The chopped fennel, onion, dried porcini mushrooms and bay leaf (we did not add meat to this step) are cooked for about 5 minutes.

img_9650
Kale is sliced down into strips.

img_9653
After all of the strained liquids are added to the pot and simmered for a half hour, the kale and pasta are added.

FOR THE BROTH:
  1. Heat onion, fennel, garlic, porcini, pork, beef, (we did not add meat in this step) and bay leaf in Dutch oven over medium-high heat; cook, stirring frequently, until meats are no longer pink, about 5 minutes.
  2. Add wine and Worcestershire; cook for 1 minute. Add chicken broth (homemade if possible), beef broth, and water; bring to simmer. Reduce heat to low, cover, and simmer for 30 minutes.
img_9601
When forming the meatballs, it’s best if you keep your hands wet, so keep dipping your fingertips into a bowl of water and touch your palms with the wet fingers after every two or three balls.
img_9652
We made the meatballs earlier in the day and placed them on a wax paper lined baking sheet, covered with saran wrap and refrigerated until ready to use.
img_9655
Without searing the meatballs beforehand, they are added at the end until heated through.
FOR THE MEATBALLS:
  1. While broth simmers, combine bread, cream, Parmesan, onion, garlic, and pepper to taste in bowl; using fork, mash mixture to uniform paste.
  2. Using stand mixer fitted with paddle, beat pork, baking powder, and ½ teaspoon salt on high speed until smooth and pale, 1 to 2 minutes, scraping down bowl as needed.
  3. Add bread mixture, beef, and oregano; mix on medium-low speed until just incorporated, 1 to 2 minutes, scraping down bowl as needed. Using moistened hands, form heaping teaspoons of meat mixture into smooth, round meatballs; you should have 30 to 35 meatballs. Cover and refrigerate for up to 1 day.
  4. Strain broth through fine-mesh strainer set over large bowl or container, pressing on solids to extract as much liquid as possible. Wipe out Dutch oven and return broth to pot. (Broth can be refrigerated for up to 3 days. Skim off fat before reheating.)
  5. Return broth to simmer over medium-high heat. Add pasta and kale; cook, stirring occasionally, for 5 minutes. Add meatballs; return to simmer and cook, stirring occasionally, until meatballs are cooked through and pasta is tender, 3 to 5 minutes. Season with salt and pepper to taste, and serve.

img_9657
The soup made for great lunches at work.

Adapted from Cook’s Illustrated Italian Wedding Soup

A Grand Finale of Flavors and Textures

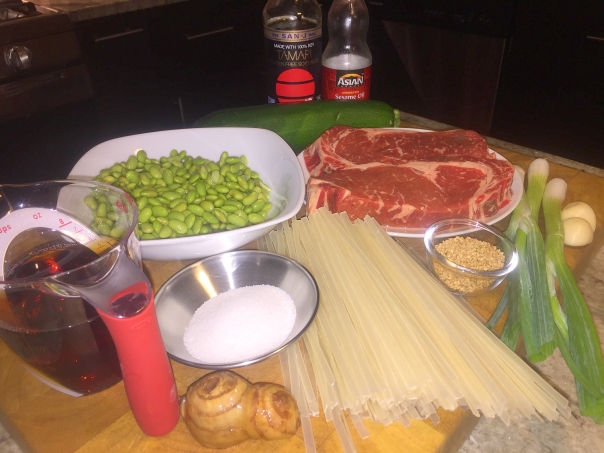
In the dreary doldrums of Winter we need a bit of sunshine, enter the deep flavor of flat iron steak which works really well with the umami-rich soy sauce and sesame oil featured in Flat Iron Steak with Zucchini, Edamame, and Soba Noodles. Unfortunately our supermarket butcher told us they rarely carry flat iron steak, only if notified ahead of time. So, if you can’t find flat iron, substitute rib-eye like we did.

img_9089

We had to make a few other alterations to the ingredients. The first was using rice noodles instead of soba noodles which contain wheat. The zucchini only came in large sizes so we just incorporated one, after all, it was just the two of us. Then, we opted for fresh edamame instead of frozen, but it was only an 8 ounce package, so next time I’ll make sure to add more because they not only taste good, they are rich in protein, dietary fiber, and micronutrients.

Finally, I cut back the amount of sugar from a 1/4 cup to just one tablespoon because the original amount just seemed like it would make a savory dish way too sweet. (And comments from reviewers verified that fact.) The recipe also calls for 3/4 cup of Mirin, an essential Japanese condiment similar to sake, but with a lower alcohol content and higher sugar content. The sugar content is a complex carbohydrate that forms naturally during the fermentation process (with no sugars added) but increases the sweetness of the dish.

As you know by now, we are way more into spicy and savory than sweet so when we make this again, we are going to add a couple of hot chiles during step two to add that spicy note and to counterbalance the sweetness.

As far as the meat, I was skeptical about poaching steak—who wouldn’t be? But by jove, it came out perfectly medium-rare after 12 minutes and was incredibly tender. Make sure you slice it thin and against the grain to preserve the suppleness.

Pickled ginger, scallions and toasted sesame seeds are all optional ingredients. I originally planned to incorporate all three of them to develop more layers of flavor, but had a senior moment and forgot the pickled ginger. However, Russ added the garlic cloves and ginger slices back into the sauce as he reduced it (Step 4) which we believe intensified the piquancy of the liquid.

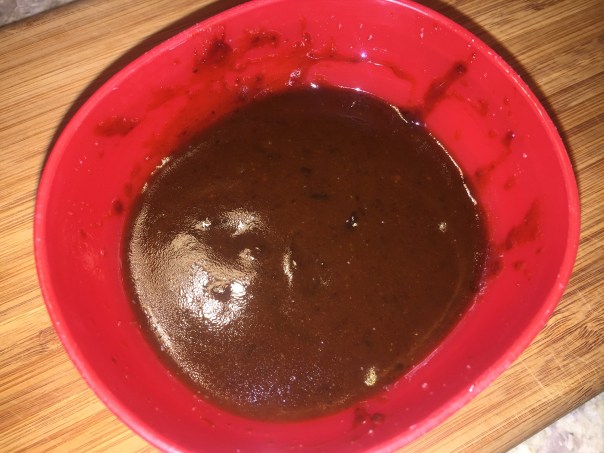
Our reduced sauce thickened to a molasses-like consistency, so I can image if we had used the entire 1/4 cup of sugar, how thick it would have ended up! So based on your own penchant for sweet or spicy, you can adjust the aromatics, spices and sweetners to suit your own taste.

img_9069

img_9071
Two cloves of garlic are lightly smashed, ginger is sliced into three 1/4″ rounds, zuchinni is cut into match sticks, and the scallions are thinly sliced on the diagonal.

Ingredients

  • Kosher salt
  • 8 oz. dried soba noodles
  • 1 Tbs. Asian sesame oil
  • 3/4 cup soy sauce
  • 3/4 cup mirin
  • 1/4 cup granulated sugar (suggested you cut back to 1 Tbsp.)
  • 3 1/4-inch-thick slices peeled fresh ginger
  • 2 medium cloves garlic, peeled
  • 2 flat iron steaks (8 to 10 oz. each)
  • 1 lb. zucchini (2 medium), cut into 2-inch matchsticks
  • 1 12-oz. bag frozen shelled edamame, thawed (about 2 cups)
  • 1 Tbs. chopped pickled ginger (optional)
  • 2 small scallions, white and light-green parts, thinly sliced (optional)
  • 1 Tbs. toasted sesame seeds (optional)

img_9074
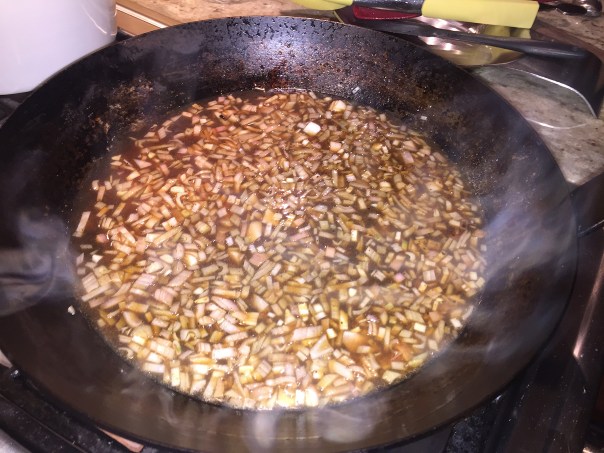
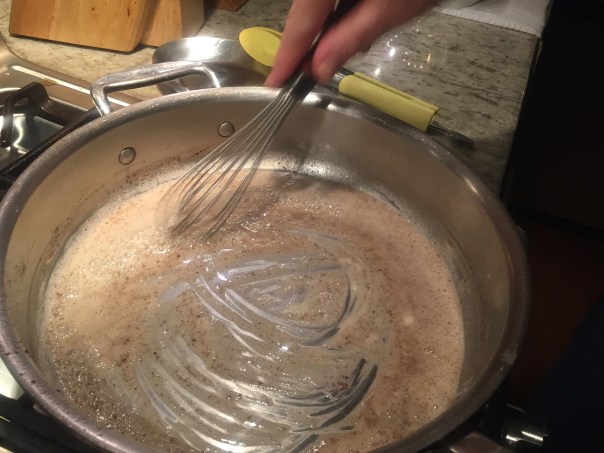
The steak is added to a combination of soy sauce, mirin, sugar, ginger, garlic, and water in a 10-inch straight sided sauté pan.

img_9076
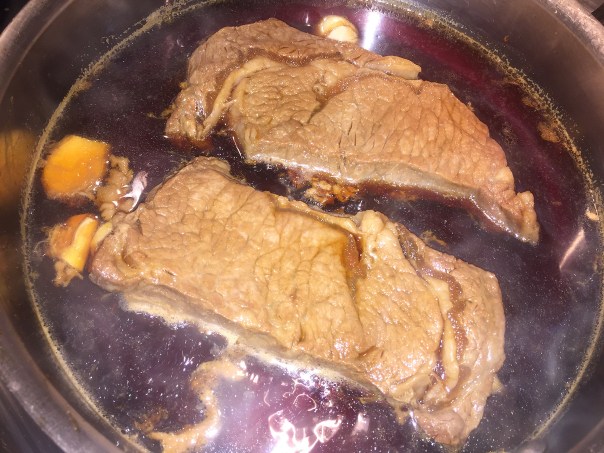
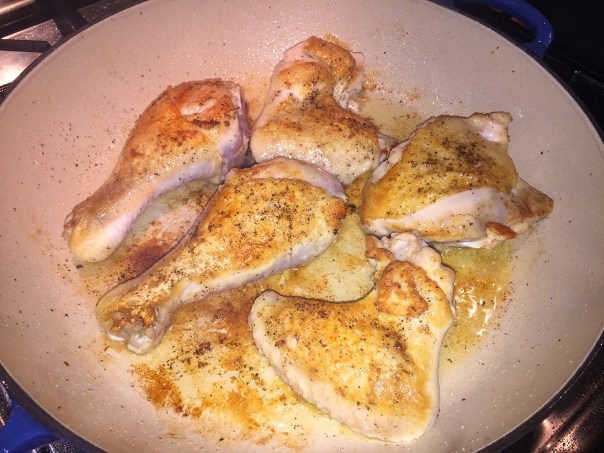
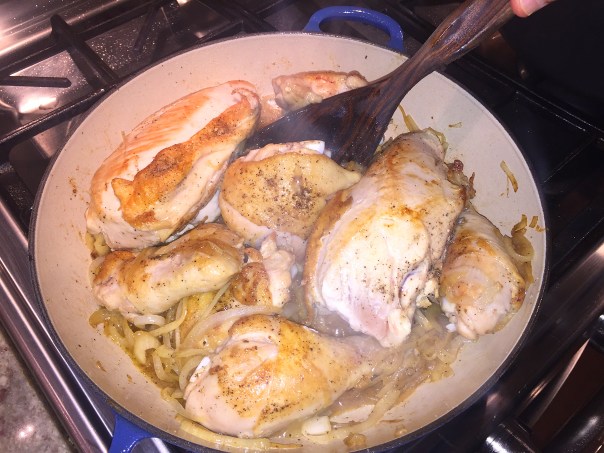
After 6 minutes simmering, the steaks are flipped and simmered for another 6 minutes.

img_9077
Once the steaks are removed from the cooking liquid, the zucchini and edamame are simmered for a couple of minutes.

img_9080
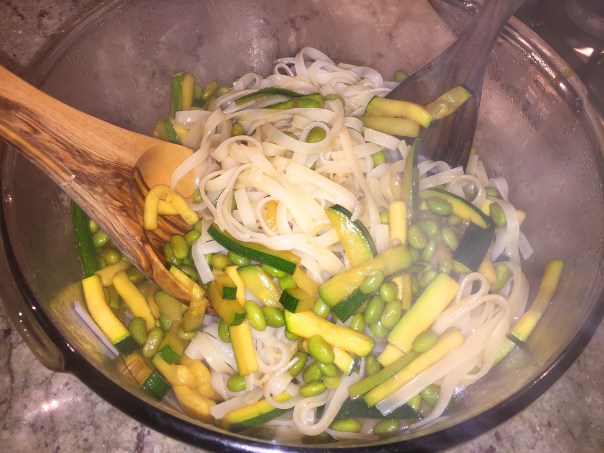
The cooked veggies are added to the noodles which were combined with sesame oil and kept warm.

img_9082
To intensify flavors, Russ put the garlic and ginger back into the liquid as it reduced, but took them back out when reached to the correct consistency.

img_9083
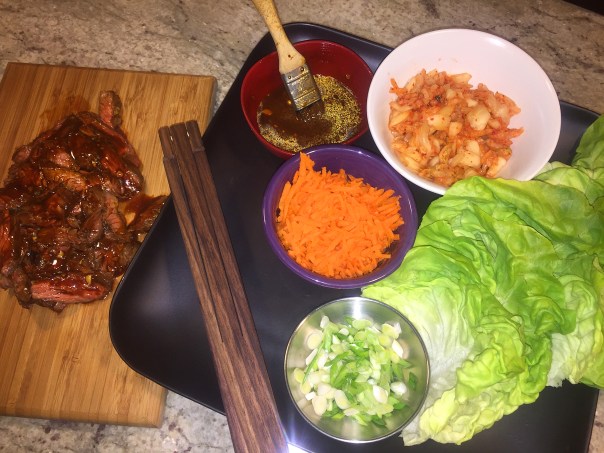
Once everything else was ready, Russ sliced the steak into thin strips against the grain.

img_9088
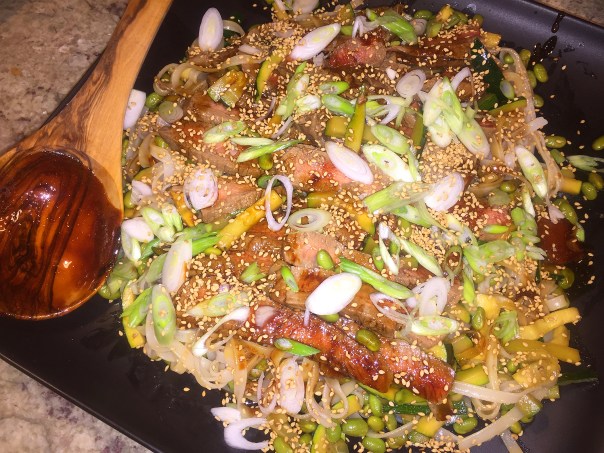
The sauce reduction is partially spooned over the platter, while the rest was served for passing at the table.

img_9091
Finally, sliced scallions and toasted sesame seeds are tossed on top of the entire ensemble.

Directions

  1. Bring a large pot of well-salted water to a boil and cook the noodles until tender, about 4 minutes. Drain well, transfer to a large bowl, toss with the sesame oil, cover, and keep warm.
  2. Meanwhile, combine the soy sauce, mirin, sugar, ginger, garlic, and 1 cup water in a 10-inch straight sided sauté pan. Bring to a boil, and then add the steaks. Turn the heat down and simmer gently, flipping once, until medium rare (130°F), 12 to 16 minutes. Transfer the steaks to a cutting board, reserving the liquid in the pan. Discard the garlic and ginger.
  3. Return the liquid to a boil. Add the zucchini and edamame, return to a boil, and then lower to a simmer. Cook until the vegetables are just tender, about 2 minutes. Using a slotted spoon, transfer the vegetables to the bowl of noodles. Toss well, cover, and keep warm.
  4. Boil the cooking liquid until reduced by half, about 5 minutes.
  5. Thinly slice the steaks across the grain. Arrange the noodle mixture on a platter or divide it among 6 shallow bowls. Top with the beef and the pickled ginger, if using. Drizzle some of the sauce over the beef and garnish with the scallions and sesame seeds, if using. Serve, passing the rest of the sauce at the table.

img_9093
After plating into individual bowls, more sauce is spooned on top.

Adapted from Lynne Curry of Fine Cooking
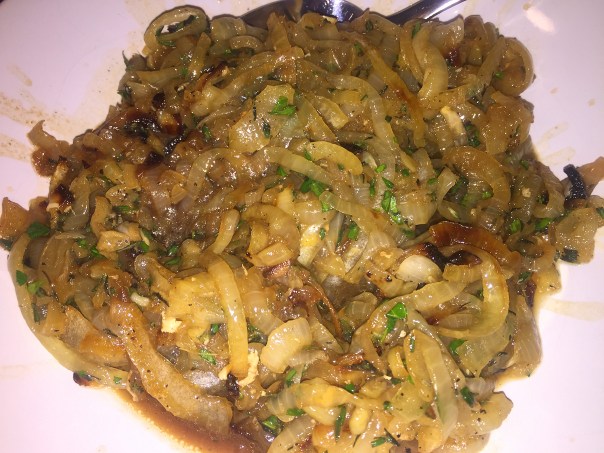
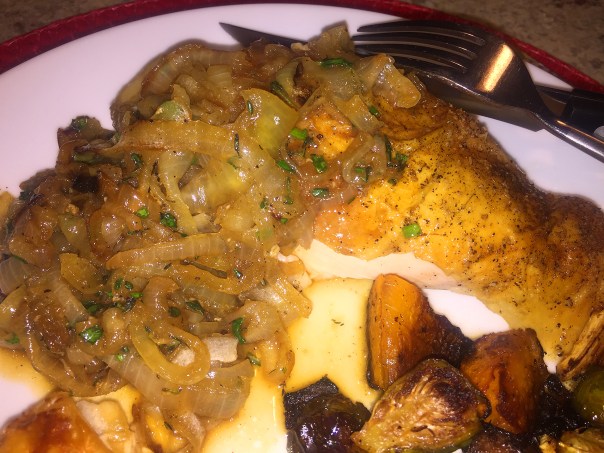
 

Lip-Smackin’ Good

To all my shrimp loving friends, you’re gonna love Garlicky Shrimp and Tomatoes! The essence of the sauce is amazingly rich and delicious in this dish, and it ticks all of the boxes: tasty, healthy, easy, relatively quick, and company-worthy.

The combination of flavors in this robust dish is reminiscent of cioppino, San Francisco’s popular seafood stew. Unusual, but it’s not a mistake that raw garlic gets stirred into the sauce at the end of cooking—it provides a jolt of fresh flavor.

img_9258

What a fabulous marriage it made with our side dish, Orange-Scented Rice Pilaf with Fennel, which was so light, fluffy and full of flavor. And since it can sit to up to 30 minutes, go ahead and make it first.

Russ happened to come home from work early (for him) that evening and inquired if I had opened the jar of clam juice yet. Since I had not, he suggested we use a couple cubes of our frozen shellfish stock, which I thought was brillaint and would add an additional depth of flavor.

I’m going to digress a minute here. When Russ makes homemade stock, of any kind, we’ve gotten into the practice of freezing some in our large ice cube trays. After they are frozen we pop them into a labeled ziploc and the individual cubes come in real handy when a recipe calls for a small amount.

Back to the regular blogcast… We thickened the sauce an additional 3-4 minutes past the recommended 12 minute time frame. However you don’t want to go overboard on this step, especially if, like us, you prefer saucier dishes. Neither dish is spicy at all but rather brimming with lots of subtle flavors.

img_9228

Ingredients

  • 30 jumbo shrimp (21 to 25 per lb.), peeled, deveined, and patted dry
  • Kosher salt and freshly ground black pepper
  • 5 Tbs. olive oil; more as needed
  • 3 large cloves garlic, pressed or minced
  • 1-1/2 tsp. fennel seeds, coarsely crushed
  • 1-1/2 cups canned crushed tomatoes with purée (from a 15-oz. can)
  • 6 oz. (3/4 cup) bottled clam juice (or shellfish stock)
  • 3/4 cup dry white vermouth
  • 1/4 cup chopped fresh flat-leaf parsley

img_9235
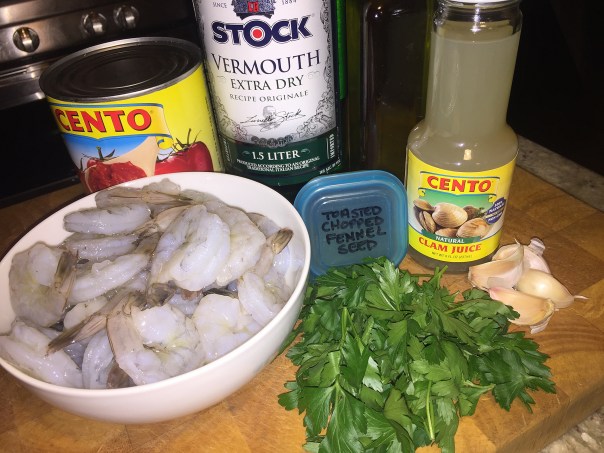
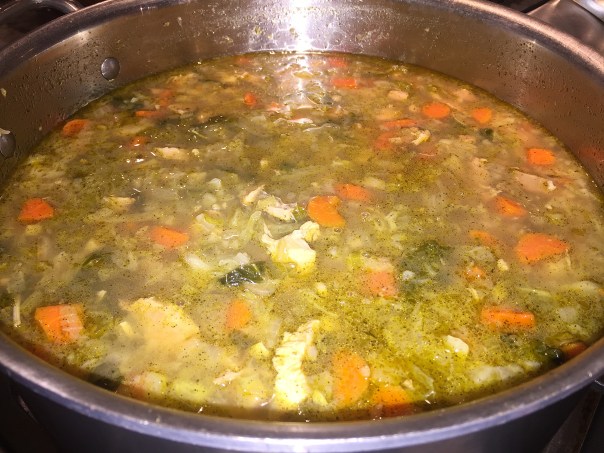
Two large frozen cubes of shellfish stock were unthawed in the microwave and used in place of bottled clam juice.

img_9238
Partially cook the shrimp over medium-high heat in an oiled skillet.

img_9240
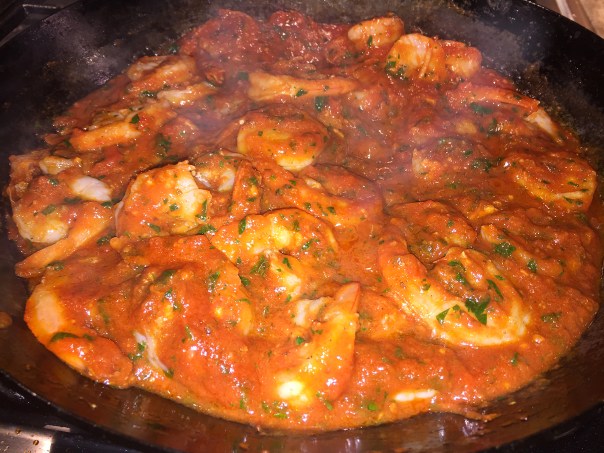
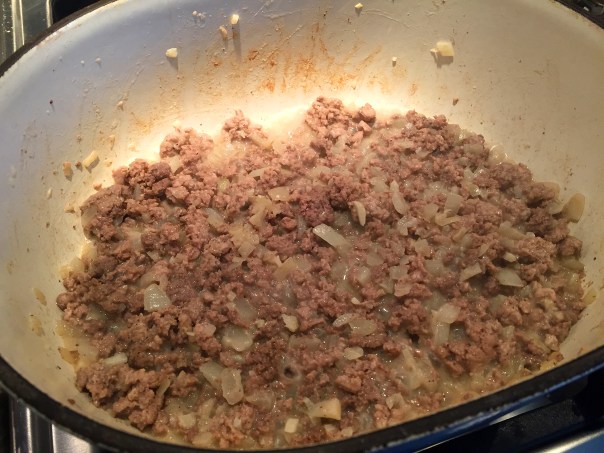
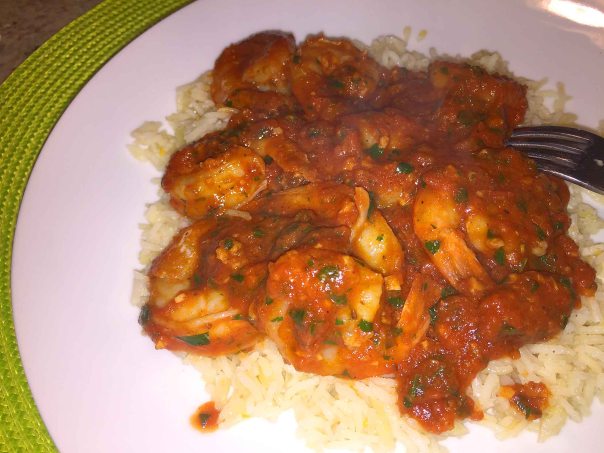
After the shrimp are transferred to a bowl, add the remaining oil and about two-thirds of the garlic and all of the fennel seeds and cook, stirring, until fragrant.

img_9242
Stir in the tomatoes, clam juice, and vermouth. Bring to a boil and cook until the sauce is reduced to about 2/3 cup, about 12-15 minutes.

img_9243
Turn the heat down to medium and stir in the remaining garlic and the parsley.

img_9247
Add the shrimp and accumulated juices and cook until the shrimp are cooked through, about 2 minutes.

img_9251
After the shrimp has fully cooked, season with salt and pepper to taste.

Directions

  1. Season the shrimp with 1/4 tsp. each salt and pepper. Heat 3 Tbs. of the oil in a 12-inch skillet over medium-high heat until shimmering hot. Add the shrimp and cook, stirring, until partially cooked, 3 minutes. Transfer the shrimp to a large bowl.
  2. Add the remaining 2 Tbs. oil to the skillet. Add about two-thirds of the garlic and all of the fennel seeds and cook, stirring, until fragrant, about 1 minute. Stir in the tomatoes, clam juice, and vermouth. Bring to a boil. Cook, stirring occasionally, until the sauce is reduced to about 2/3 cup, about 12 minutes.
  3. Turn the heat down to medium and stir in the remaining garlic and the parsley. Add the shrimp and accumulated juice and cook, stirring occasionally, until the shrimp are cooked through, about 2 minutes. Season to taste with salt and pepper and serve.

by Selma Brown Morrow from Fine Cooking

Orange-Scented Rice Pilaf with Fennel

img_9252

img_9231

Ingredients

  • 3 Tbs. unsalted butter
  • 3/4 cup finely chopped fennel (1/2 small bulb)
  • 1/2 cup finely chopped onion (1 small onion)
  • 1-1/2 cups long-grain rice, preferably basmati
  • 2-3/4 cups low-salt chicken broth
  • 2 strips orange zest
  • 1 bay leaf
  • 3/4 tsp. kosher salt
TIP: The rice can sit, covered, for up to 30 minutes before serving.
img_9237
Lay a kitchen towel over the pot after the rice absorbs the liquid, replace the lid, and let sit for anywhere from 5 to 30 minutes.
Directions
  1. Melt the butter over medium heat in a medium (3-qt.) saucepan. Add the fennel and onion and cook, stirring often, until softened, about 6 minutes.
  2. Add the rice and cook, stirring, until the grains are glossy and beginning to crackle, about 2 minutes.
  3. Add the broth, orange zest, bay leaf, and salt. Bring to a boil, cover, and lower the heat to a simmer. Simmer until the rice is tender and all the liquid has been absorbed, about 17 minutes.
  4. Off the heat, remove the lid, lay a kitchen towel over the pot, replace the lid, and let sit for 5 to 10 minutes. Fluff the rice with a fork and serve.

By Molly Stevens, one of our favorite chef-authors