All posts by LynnHoll

Unknown's avatar

About LynnHoll

I have been an artist and designer all my life incorporating graphic design for websites, gardens, publications, fabrics, interior design and cooking. I am now retired from my professional job, but still create artistic visions in all forms on a daily basis.

Pepita Power

If you’re in the mood for a tasty snack that doubles as a phenomenal health food, look no further than pumpkin seeds. We especially like them roasted with spices. Sometimes we just toss together any combination of spices, or as in this case, we used Emeril’s Southwest Seasoning (recipe follows) to make our Roasted Spiced Pepitas.

With a wide variety of nutrients ranging from magnesium to copper, protein and zinc, pumpkin seeds are nutritional powerhouses wrapped up in a very small package. They also contain plant compounds known as phytosterols and free-radical scavenging antioxidants, which can give your health an added boost.

Best of all, because pumpkin seeds are highly portable and require no refrigeration, they make an excellent snack to keep with you whenever you’re on the go, or they can be used as a quick anytime snack at home, too. So go ahead an make yourself a batch!

IMG_4257
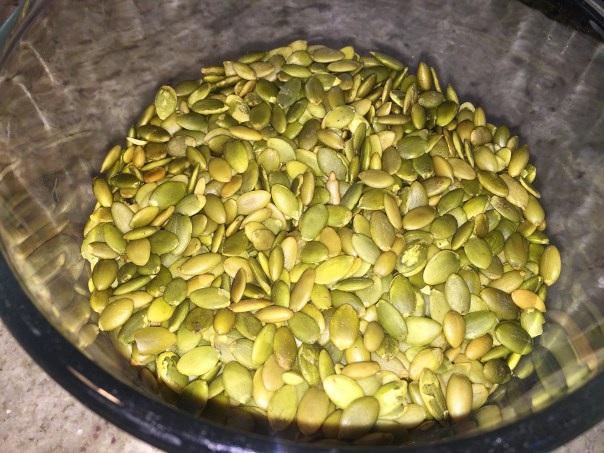
Place raw pepitas into a medium bowl.

IMG_4258
Mix olive oil into seeds, followed by most of the dry seasoning.

IMG_4261
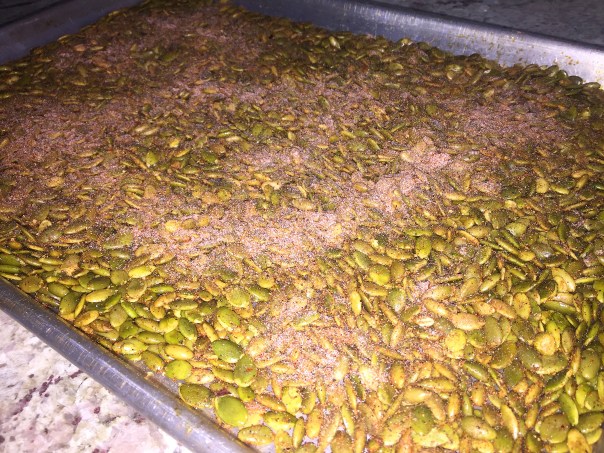
Layer onto a rimmed baking sheet and sprinkle on remaining seasonings.

IMG_4263
Every 4-5 minutes turn pepitas with a spatula.

IMG_4266
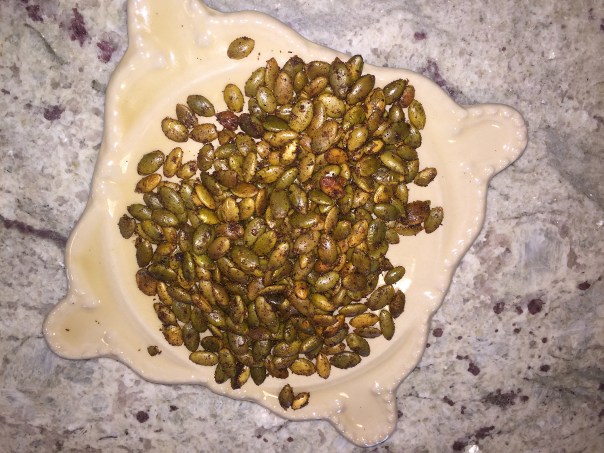
Let tray of seeds cool to room temperature, then store in an airtight container.

FYI Men: Pumpkin seeds have long been valued as an important natural food for men’s health. This is in part because of their high zinc content, which is important for prostate health.

FYI WOMEN: Pumpkin seed oil is rich in natural phytoestrogens and studies suggest it may lead to a significant increase in good “HDL” cholesterol along with decreases in blood pressure, hot flashes, headaches, joint pains and other menopausal symptoms in postmenopausal women.

FYI INSOMNIACS (like me): Pumpkin seeds are a rich source of tryptophan, an amino acid (protein building block) that your body converts into serotonin, which in turn is converted into melatonin, the “sleep hormone.” Eating pumpkin seeds a few hours before bed, along with a carbohydrate like a small piece of fruit, may be especially beneficial for providing your body the tryptophan needed for your melatonin and serotonin production to help promote a restful night’s sleep. Zzzzzzzzzzz

Directions

  1. Preheat your oven to 400 degrees, or 375 on convection.
  2. Mix one pound of raw pepitas with one tablespoon of olive oil in a medium bowl.
  3. Mix together two tablespoons of Emeril’s Southwest Seasoning* (or your own combination) with one tablespoon of fine popcorn salt.
  4. Toss most of this mixture in with the oiled seeds until well distributed and then layer onto a rimmed baking sheet. Sprinkle remaining spices over the top.
  5. Roast for 20 minutes, turning with a spatula every 4 to 5 minutes. Let cool before eating or storing.

*Emeril’s Southwest Seasoning

  • 2 tablespoons chili powder
  • 2 teaspoons ground cumin
  • 2 tablespoons paprika
  • 1 teaspoon black pepper
  • 1 tablespoon ground coriander
  • 1 teaspoon cayenne pepper
  • 1 tablespoon garlic powder
  • 1 teaspoon crushed red pepper flakes
  • 1 tablespoon salt
  • 1 tablespoon dried oregano

Mix all together thoroughly and store in an airtight container.

IMG_4268
Totally addicting!!

Crispy Flounder with Pears, Endive and Meyer Lemon

IMG_4321

Intrigued by the unusual pairings in Crispy Flounder with Pears, Endive and Meyer Lemon, we were motivated to give it a go. Because it was one of Fine Cooking’s “Make It Tonight” easy dinner downloads, we thought it would be perfect for a meatless Monday repast.

Smoother, rounder, and deeper in color than standard lemons, Meyer lemons are less acidic, with orange and floral flavor notes. You can use regular lemons in place of the Meyers, but the dish will taste more tart, so you should add some orange to counter-balance the tartness.

The day we purchased the flounder fillets, they were on sale. Problem was, they only had three left. The fish monger explained that a restaurant owner bought most of his stock, so, feeling bad for us, he threw in a grouper fillet (which was actually almost double the price!) Of course, for the two of us, three fillets were more than plenty, so we froze the grouper for a future meal. Now that’s what I call added-value.

The sautéed pear (we used Bosc) and endive combination was magnificent! Be forewarned—you’ll need to cook them a LOT longer once the lid is removed. Instead of the two minutes the recipe indicates, it took around 15 minutes or more to get a caramelization going. But it was way worth it…

Visually the meal needed color, so we steamed some broccolini and made a couple of side salads. In the end, I’m not sure I would exactly call the cooked fish “crispy,” (as many other reviewers also acknowledged), the end result was more of a light golden topping, and I prefer that over crispy.

After the meal we discussed if any alterations were needed. Not finding fault, we then began to imagine a similar meal replacing the fish with duck breast, and using blood oranges instead of Meyer lemons… Hmmm food for thought…

IMG_4295

Ingredients

  • 2 small Meyer lemons
  • 6 Tbs. unsalted butter
  • 3 medium Belgian endives, trimmed and quartered lengthwise
  • 3 medium firm-ripe pears, peeled, cored, and sliced lengthwise 1/2 inch thick
  • Kosher salt
  • 1/2 Tbs. thinly sliced chives; more for garnish
  • 1/2 cup unbleached all-purpose flour
  • 1/2 cup fine-ground cornmeal
  • 4 small flounder or sole fillets (about 1-1/2 lb.)
  • Freshly ground black pepper
  • 2 Tbs. olive oil
  • 1/2 cup dry white wine

IMG_4301
The pear slices, endive quarters and lemon are added to the skillet.

IMG_4304
Flounder fillets get dredged in a mixture of flour and cornmeal.

IMG_4310
The fish is cooked in butter and oil until golden brown.

IMG_4313
After the fillets are done, reduce butter, lemon and wine by half.

IMG_4317
It took 15 minutes or more to get this caramelization on the pears and endive.

IMG_4319
Once plated, the meal gets a smattering of minced chives.

Directions

  1. Finely grate 2 tsp. zest from one of the lemons. Squeeze 1-1/2 lemons to yield 2 Tbs. of juice. Thinly slice the remaining half and cut each slice into quarters; set aside.
  2. In a 10- to 11-inch straight-sided sauté pan, melt 3 Tbs. of the butter over medium heat until foamy. Add the endives, pears, lemon juice, lemon zest, and 1/2 tsp. salt; stir to combine. Cover, reduce the heat to medium low, and cook, stirring occasionally until tender, 15 to 20 minutes. Remove the lid and cook until the endives and pears are lightly browned in places, about 2 minutes. (We found it took 15 or more minutes for the browning to occur.) Remove from the heat and stir in the chives.
  3. While the endives and pears cook, combine the flour and cornmeal in a shallow dish. Season the fish lightly with salt and pepper and then dredge it in the cornmeal mixture. Heat 1/2 Tbs. of the butter with 1 Tbs. of the oil in a 12-inch skillet over medium-high heat.
  4. Cook 2 of the fillets, flipping once, until golden-brown and cooked through, 2 to 3 minutes per side. Transfer to a clean plate. Wipe out the skillet and repeat with another 1/2 Tbs. butter and the remaining 1 Tbs. oil and fillets. Transfer to the plate with the other fish. Wipe out the skillet again.
  5. Heat the remaining 2 Tbs. butter in the pan until melted and browned and then stir in the lemon slices and a pinch of salt. Add the wine, bring to a simmer, and reduce by half, 1 to 2 minutes. Season to taste with salt and pepper.
  6. Divide the pear mixture among 4 dinner plates and top with a fillet. Spoon the lemon pan sauce over the fish, garnish with chives, and serve.

by Melissa Pellegrino from Fine Cooking

IMG_4322

They Say Cassola, We say Cazuela

By now you know we have a penchant for lamb dishes—and for Spanish recipes—so this Catalan Stewed Lamb with Potatoes and Green Olives was calling our name loud and clear when we ran across it in Fine Cooking magazine.

IMG_4194

We do own a cazuela, but if you don’t, you can use a dutch oven or straight-sided skillet instead. And we always use a heat diffuser when we cook with it to prevent cracking.

TIP: A cassola is a traditional Catalan shallow terra-cotta casserole dish. When shopping for one anywhere outside of Catalonia, you’ll most likely see it called by its Spanish name, cazuela.  Some manufacturers recommend using a heat diffuser to protect the cassola from direct flame and help the food cook more evenly. If you don’t have a cassola, you can use a 12-inch-wide heavy-duty Dutch oven or straight-sided skillet instead.

Olives offer a salty contrast—and a pop of color—to rich, tender pieces of lamb in this hearty dish with the starch from the potatoes thickening the stew. Bone-in lamb pieces are traditional, but boneless lamb makes for easier eating, so we chose boneless lamb top—partly because we couldn’t find any lamb shoulder.

By using our own rich homemade chicken stock, incorporating a healthy pinch of saffron and a dose of pimenton, we added a lot more depth of flavor, and highly recommend you do the same.

Step 5 indicates “Cover with a large pot lid or foil… and cook, stirring occasionally, for 10 minutes if using bone-in lamb or 30 minutes if using boneless.” We think this is a typo and the allotted times should be reversed because meat with bones usually takes longer. Since we were cooking boneless lamb, we did so for only 10 minutes before moving on to Step 6.

To round out our meal, we added a tossed salad and a bottle of Garnacha.

IMG_4171
The halved tomatoes without seeds, before and after grating.

IMG_4173
Grating the tomato halves into a bowl to catch all of the juices.

IMG_4175
Slicing the lamb down into approximately 2-inch cubes.

IMG_4179
Browning the lamb cubes in the cazuela.

IMG_4185
The seared meat is removed from the cooking vessel and put on a platter that will be covered with foil.

Ingredients

  • 2-1/2 lb. boneless lamb shoulder, cut into 1-inch pieces, or bone-in lamb, such as shoulder, shank, or neck, cut into 1-1/2- to 2-oz. pieces (ask your butcher to do this)
  • Kosher salt and freshly ground black pepper
  • 3 Tbs. olive oil; more as needed
  • 1 medium yellow or red onion, finely chopped
  • 3 medium tomatoes, halved, seeded, and grated
  • 1/2 cup dry white wine or 1/4 cup brandy
  • 1-1/2 cups unsalted chicken or beef stock; more as needed
  • 1 dried bay leaf
  • 2-1/2 lb. Yukon Gold potatoes (about 4 large), peeled and cut into 1-inch pieces
  • 3/4 cup unpitted green olives, such as manzanilla, Cerignola, or Castelvetrano, rinsed
  • Crusty bread, for serving

IMG_4186
After the lamb is removed from the cazuela, the chopped onion is cooked with the browned bits.

IMG_4187
The tomato and pimenton are added to the onion until the mixture darkens in color.

IMG_4197
If using a cazuela, you can bring it directly to the table and let people serve themselves.

Directions

  1. Pat the lamb dry with paper towels and season generously with salt and pepper.
  2. Heat the oil in a 12-1/2-inch cassola (on a heat diffuser if recommended by the manufacturer) over medium-high heat. Working in batches so as not to crowd the cassola, brown the lamb on all sides, 8 to 10 minutes per batch, adding more oil as needed. Transfer each batch to a platter and cover with foil to keep warm.
  3. Reduce the heat to medium, add the onion, and cook, stirring frequently, until translucent, 3 to 4 minutes. Add the tomatoes, reduce the heat to low, and cook, uncovered, stirring frequently and then tapping down the mixture with the back of a wooden spoon until thickened and darker, 10 to 15 minutes, adding a little water as necessary to keep it from drying out and sticking.
  4. Return the lamb to the cassola and turn to coat well. Drizzle with the wine, stir, and cook for 1 minute. Add the stock and bay leaf, increase the heat to medium high, bring to a boil, and then reduce to a simmer.
  5. Cover with a large pot lid or foil, leaving it slightly ajar, and cook, stirring occasionally, for 10 minutes if using bone-in lamb or 30 minutes if using boneless.
  6. Add the potatoes and olives, replace the lid slightly ajar, and cook over low heat until the lamb and potatoes are fork-tender, 45 minutes to 1 hour, adding more stock if needed to keep the sauce moist. Season to taste with salt and pepper.
  7. Serve from the cassola with the bread, and be sure to warn everyone about the olive pits.

by Jeff Koehler from Fine Cooking

OUR NOTES: Crumble the saffron and add to the dish along with the stock. Add a tablespoon or two of pimenton with the tomatoes; and use homemade beef or chicken stock if at all possible.

IMG_4195
A nice bottle of Spanish Garnacha pairs well with the meal.


A No-Go at Arosso

Prompted by a GroupOn and the promise of “…an established reputation for providing highest quality food, excellent customer service and speedy delivery to customers in the Fairless Hills area …” we made the decision on a recent Saturday evening to try Arosso, a newish Italian restaurant. Enticing us further, the online menu also emphasized their large gluten-free offerings.

Immediately upon entering, we were dismayed at the overall unappealing drab decor and an overwhelming antiseptic smell of cleaning products. Mind you, we had enjoyed brunch at this establishment several times in year’s past when it was called Adelphia. Back then it was always crowded and with brighter, more spacious furnishings, and the food was more than passable.

Not so this time. Prior to driving over, we read some reviews which claimed “Eggplant parm to die for, and calamari is also terrific too…” but other patrons complained bitterly about the wait. In our case, we were promptly waited on—and so we should have been because the restaurant was at most only 30% occupied—on a Saturday night, that’s a red flag!

IMG_3972

I ordered a wood-burning style pizza, the Siciliana: eggplant, capers, fresh garlic, kalamata olives, plum tomatoes, mozzarella and sharp provolone on whole wheat crust. It was actually quite good and I ended getting 3 more meals from it.

IMG_3974

Russ on the other hand had one of the worst food experiences ever! His choice of Chicken Parmigiana with gluten-free pasta looked appetizing enough when delivered to the table, but one bite into it and he was sorely disappointed. He claimed the “sauce” tasted like it was dumped from a can of condensed tomato soup with absolutely no enhancing spices or herbs. He didn’t finish the meal, nor did he doggie-bag the leftovers.

About a week after our episode, good friends of ours said they also patronized the place because of a GroupOn incentive. And they pretty much rubber stamped our dismal experience. Right then and there we all decided it’s a “no-go” for any more trips to Arosso! Without a major overhaul, can’t imagine they’ll be long for this world…

Thai One On

IMG_4223

Multidimensional Thai Curry with Vegetables and Tofu—Bursting with a rainbow of colorful vegetables, this meatless curry has a range of textures, from crunchy bell peppers to soft tofu. Fast, easy, tasty and perfect for a weeknight meal—what more could you ask for?

Tending to err on the side of more veggies, we nearly doubled the amount of green beans and bell peppers. We only had “lite” coconut milk on hand, but if you use the regular version, the end product would be a bit thicker. And we ladled ours over wide rice noodles, but steamed rice would also be a suitable accompaniment.

While you can buy lemongrass paste in a tube, you need the real McCoy for this dish. Make sure to cut off a few inches from the top woody stems and chop off the bottom portion, then remove the tough outer layers. Bruise the rest of the stalk with a mallet to open up the fragrance, then cut into 3-4″ pieces.

In the end, while it was fabulous the first time around, the dish didn’t really hold up too well as leftovers.

IMG_4200
Most of the ingredients are already prepped.

Ingredients

  • 1 (13.5- to 14-oz.) can coconut milk
  • 1/4 cup red or yellow curry paste
  • 1 cup chicken or vegetable broth, preferrably homemade
  • 2 Tbs. light brown sugar or light brown palm sugar; more as needed
  • 1 tsp. fish sauce; more as needed
  • 3/4 cup bite-size green bean pieces
  • 3/4 cup sliced onions (1/2-inch-thick slices)
  • 3 stalks fresh lemongrass, trimmed, bruised, and cut into 3- to 4-inch pieces
  • 6 whole fresh or thawed frozen wild lime leaves (or substitute 1 tsp. finely grated lime zest)
  • 14 oz. extra-firm tofu, drained and cut into bite-size pieces
  • 3/4 cup diced bell peppers (red, orange, or yellow)
  • 3/4 cup oyster mushrooms, pulled apart into bite-size pieces
  • 3/4 cup loosely packed fresh Italian or Thai basil leaves
  • Lime wedges, for garnish

IMG_4208
After draining the liquid, the block of extra firm tofu is cut into bite size cubes.

IMG_4205
Three stalks of lemongrass are bruised and cut into appropriate lengths.

IMG_4210
A portion of the coconut milk is reduced by half.

IMG_4213
The curry paste is whisked into the reduced coconut milk.

IMG_4215
Next, the brown sugar, fish sauce and broth are added.

IMG_4218
Green beans, onions and lemongrass are incorporated.

IMG_4220
Finally the tofu, bell peppers and oyster mushrooms simmer for several more minutes.

IMG_4221
Line your bowl with rice or noodles before ladling in the curry.

Directions

  1. Shake the can of coconut milk or stir it well (this creates a consistent thickness, since the fat often solidifies at the top of the can).
  2. In a 3- to 4-quart saucepan or wok over medium heat, simmer 1/2 cup of the coconut milk, stirring occasionally, until reduced by about half, 3 to 5 minutes. It will get very thick and shiny and may or may not separate; either is fine.
  3. Add the curry paste, whisk well, and cook, continuing to whisk, for 1 minute. Whisk in the broth, sugar, fish sauce, and remaining coconut milk. Bring to a simmer over medium-high heat.
  4. Add the green beans, onions, lemongrass, and lime leaves and continue to simmer, adjusting the heat as necessary.
  5. After 2 minutes, add the tofu, bell peppers, and oyster mushrooms and continue to simmer until everything is tender and cooked through, about 3 more minutes.
  6. Remove the curry from the heat. Season to taste with more sugar and fish sauce and stir in the basil. Transfer to a serving bowl (or serve right out of the pot). Remove the lemongrass and lime leaves or tell your guests to eat around them. Garnish with the lime wedges.

by Robert Danhi from Fine Cooking

IMG_4224

Size Matters.

IMG_4183

OMG, this Chicken Meatball and Escarole Soup is beyond amazing! The recipe calls for 3/4″ meatballs and when Russ started rolling them his were twice that size! I had to bring out a ruler and show him what 3/4″ actually looks like—I guess that’s a man thing 😉

Don’t wait until you’re sick to try this soup… Served with crusty bread, this quick spin on Italian wedding soup makes a satisfying dinner. Check out the recipe under the Soups tab…

Wham-Bam, Thank You Lamb!

In January, while shopping at a neighborhood Asian market, we purchased 1 1/2 pounds of sliced lamb and vacuum bagged it for the freezer with the intent to use in a future stir-fry.
About a month later, we were enticed by the Stir-Fried Mongolian Lamb with Scallions recipe found in our cookbook Stir-Frying to the Sky’s Edge by Grace Young. Not only did it look delicious, it looked super easy to make—and it was. I swear, the dinner was almost stir-fried in the time it takes to press the EASY button!
IMG_4062
We cook a lot of Asian meals, so it’s not unusual to have most of the ingredients on hand, and such was the case for this meal—right down to the Shaoxing rice wine and ground Sichuan peppercorns. In fact, at the suggestion of chef-author Grace Young, we purchased the Negi Cutter and Kinpari Knife, inexpensive, yet impressive tools for shredding and making matchstick-sized vegetables.
IMG_4055
Using the Kinpari knife to make uniform-sized carrot matchsticks.
IMG_4047
The Negi cutter makes quick work of shredding scallions.
IMG_4050
What didn’t sit right with us was the lack of fresh vegetables so we added 3 shredded carrots worth—adding a necessary pop of color in my artistic opinion! The carrots were stir-fried for a few minutes, then removed from the wok, prior to cooking the lamb. And because our lamb was already presliced into about 1/8″ thick pieces, we didn’t even have to do that prep work. Making it even easier (is it possible?) we had some preground and toasted Sichuan peppercorns leftover from a previous stir-fry.
IMG_4053
Making sure all of the ingredients are ready.
IMG_4059
The sliced lamb marinates while you prep the other ingredients.
Before prepping the ingredients, we started to cook the jasmine rice which takes 20 minutes in total. There are quite a number of spices and liquids to chop or measure so make sure you do all of that before you begin cooking. The recipe only calls for 3/4 lbs. of lamb, and since we had twice that much, we doubled all of the other elements. Then, after only 3-4 minutes total stir-frying time, dinner was ready—and so were we!
INGREDIENTS:
  • 12 oz lean boneless leg of lamb, cut into 1/4-inch-thick, bite sized slices
  • 1 tbsp minced garlic
  • 2 tbsp Shaoxing rice wine, separated
  • 1 tsp dark soy sauce
  • 3/4 tsp roasted and ground Sichuan peppercorns
  • 1/2 tsp cornstarch
  • 1/4 tsp salt
  • 1/4 tsp sugar
  • 1 tsp sesame oil
  • 1 tbsp hoisin sauce
  • 1 tbsp rice vinegar
  • 1 tbsp soy sauce
  • 2 tbsp peanut or vegetable oil
  • 1 bunch scallions, finely shredded

IMG_4065
Carrots weren’t originally part of this recipe, but we added for health and color.

IMG_4067
The marinated lamb is spread in a single layer in the wok to sear for a minute.

IMG_4073
As a final step, the hoisin mixture is added and quickly stir-fried for a minute or less.

DIRECTIONS:

  1. In a medium bowl combine the lamb, garlic, 1 tbsp of Shaoxing rice wine, dark soy, ground Sichuan peppercorns, cornstarch, salt and sugar.  Stir to combine.  Stir in the sesame oil.
  2. In a small bowl combine the hoisin sauce, rice vinegar, soy sauce, and the remaining tbsp Shaoxing rice wine.
  3. Heat a 14-inch wok or 12-inch skillet over high head until a bead of water vaporizes within 1-2 seconds of contact.
  4. If adding carrots, stir-fry them first for a few minutes, then move to a bowl before following the next steps.
  5. Swirl in peanut oil, carefully add lamb, and spread evenly in one layer in the wok.  Cook undisturbed for 1 minute, letting the lamb begin to sear on one side.  Using a metal spatula, stir-fry 1 minute, or until the lamb begins to brown on all sides, but is not cooked through.
  6. Add the scallions and stir-fry about 10 seconds or until just combined.  Swirl the hoisin sauce mixture into the wok and stir-fry 30 seconds to 1 minute, or until the lamb is just cooked through.
  7. Serve with rice.
 IMG_4076

Let the Dinner Times Roll!

IMG_4028

Fish is the ultimate fast food, but that doesn’t mean it has to taste like fast food. Broiled Flounder with Parmesan “Caesar” Glaze is bright and fresh tasting, especially with the “burst” grape tomatoes as a side. Not only does rolling the fillets help keep the flounder from drying out, it makes for a classy presentation.

Only cooking for the two of us, we halved the amount of fish to 4 fillets, but didn’t scale back on the topping. And using light mayo instead of regular didn’t seem to faze the outcome at all (and I was a bit worried about that.) To round out the meal, we had a “salad” of some romaine leaves, ripe avocado chunks, and crumbled blue cheese.

This dinner was prepared in mid-February, but given how light the meal was, it would be just as, or more so, popular in warmer months.

Ingredients

  • 8 skinless flounder fillets, 4 to 5 oz. each
  • Kosher salt and freshly ground black pepper
  • Nonstick cooking spray
  • 1/3 cup good-quality mayonnaise
  • 11/2 oz. (1/2 cup) freshly grated Parmigiano Reggiano, grated on the small holes of a box grater
  • 11/2 Tbs. loosely packed finely grated lemon zest (from 1 large lemon)
  • 1 Tbs. fresh lemon juice
  • 1/2 tsp. Worcestershire sauce
  • 1 small clove garlic, minced
  • 2 Tbs. coarsely chopped fresh flat-leaf parsley

IMG_4022
Start with flounder fillets patted dry and sprinkled with salt and pepper.

IMG_4023
Starting with the small end, roll the flounder and place seam side down in broiler pan.

IMG_4025
After the fish has browned (notice far right), start layering on the mayo-parm topping.

IMG_4026
Another two minutes under the broiler and your fish should have this wonderful golden brown crust.

Directions

NOTE: If you are going to cook the tomato side dish, please refer to the instructions below BEFORE cooking the fish.

  1. Position a rack 4 inches from the heat element and heat the broiler on high. Lightly season both sides of the fillets with salt and pepper. Set a fillet before you, skinned side up, and starting at the narrow end, roll up the fillet. Repeat with the remaining fillets.
  2. Spray a broiler pan with cooking spray. Arrange the flounder rolls, seam side down, in the pan. Broil until the tops are lightly browned, 7 to 8 minutes. (Ours took a few minutes longer.)
  3. Meanwhile, whisk the mayonnaise, Parmesan, lemon zest and juice, Worcestershire, and garlic in a small bowl. Season with pepper to taste.
  4. When the tops of the fillets are lightly browned, remove the fish from the broiler. Spread equal amounts of the mayonnaise mixture over the top of each fillet. Return to the broiler until the topping is golden brown and bubbling, 11/2 to 2 minutes.
  5. Transfer the fillets to four dinner plates and sprinkle with the parsley. Serve immediately.

ON THE SIDE: BROILED TOMATOES

IMG_4020
The grape tomatoes are tossed in olive oil, salt and pepper.

IMG_4027
After 5 minutes under the broiler your grape tomatoes should look like this. 

Put a rimmed baking sheet in the oven while heating the broiler for the fish. Toss whole grape tomatoes (about 30 for two people) with some olive oil, salt, and pepper. Before cooking the fish, pour the tomatoes onto the heated baking sheet and return to the oven. Broil, stirring occasionally, until the skins are cracked and blistered and the flesh is warmed through, 4 to 5 minutes. Move the baking sheet to a lower rack in the oven to keep the tomatoes warm while you cook the fish.

—Rick Rodgers, Fine Cooking

IMG_4029

Celebrando el Amor al Estilo Mexicano

Love is in the air—at least love of good food that is! Valentine’s Day found the Ethnic Dining Group trekking to Los Sarapes for authentic Mexican cuisine.

Find out more about the this culinary adventure under the “Ethnic Dining” tab…

2.hearts.with.people.and.graphics

Wild Rice and Mushroom Soup

IMG_3951

Wild rice, a highly nutritious grain is actually a semi-aquatic grass that historically has grown in lakes, tidal rivers and bays. Add fresh cremini mushrooms and ground dried shiitakes to provide a winning combination of meaty texture and flavor.

Some health benefits of wild rice:

  • Wild rice is a gluten free food.
  • It does not contain sodium: good news for your blood pressure and your heart.
  • It does take about an hour to cook, but rewards you with a lovely nutty flavor.
  • It contains twice as much protein as brown rice.
  • Wild rice can be eaten by diabetics, since it is actually a grass, and the grains are not polished or refined.  Of course, small quantities are recommended.
  • It is very rich in antioxidants—containing up to 30 times more than white rice! Which means regular consumption of wild rice protects you from disease and ageing.
  • Because of its high fiber content, wild rice keeps your digestion smooth and helps lower cholesterol.

Check out this heart-healthy yummy soup under the Soups tab…


Mangia La Tua Cena

The last two times we dined at Carlucci’s Yardley Grill, we were more than satisfied—indeed, pleasantly satiated you might say. As of late, it seems to be our “go-to” neighborhood restaurant for good Italian food.

I first blogged about this establishment in January 2015. Located in the Big Oak Shopping Center near Kohl’s, it is one from a family of six restaurants (four of the other five are in NJ.) It’s a BYO with a rather extensive menu that includes Classic Entrees, Favorite Selections, Italian Classics, Pasta Selections, and wood fired pizza; including gluten-free offerings—now an important consideration due to Russ’s wheat intolerance.

IMG_3896
Brad eyeballs the second loaf of bread brought to the table.

Joining us for dinner on our most recent trip were good friends Barb and Brad. Unfortunately Carlucci’s does not take reservations for parties smaller than six people, so we had a bit of a wait, nothing horrendous, maybe 15 minutes. Somehow we ended up seated in the center “room” at a large folding table, the only one with a tablecloth. No complaints from us as we had elbow room to spare.

Every time we dine there, I’m flabbergasted that, compliments of the house, they serve you squares of bread smothered with a fabulous fresh tomato sauce, THEN deliver a round bread loaf with garlic and spices—and that’s even if you order pizza and/or pasta!! Carb overload indeed…

The impression from the waitstaff is that they’re directly off the boat from Italy, or so it seems because they speak in heavily accented English. To me, that’s a good sign!

A generation ago, in the town of Pozzuoli, in the province of Naples (birthplace of Sophia Loren), Carlo Capuano first began his long standing tradition of serving time honored family recipes to the public. This continues today with sons Vincenzo, Aniello, Giuliano and Floriano. Since coming to America in 1983, the Capuano family upholds the long family tradition of making exceptional dishes with the style and flair that have won the hearts of Italy.

IMG_3921

Well lets get down to the business of what we ordered. Weeks prior, having fallen head-over-heels for the Chicken Alla Sal, I selected it again (shown above). A lavish plate of chicken breast sautéed with asparagus, fresh tomatoes, sun dried tomatoes and roasted peppers in a white wine garlic saffron sauce garnished with jumbo shrimp, it’s served with house vegetables and potatoes, all cooked to perfection!

IMG_3925
Russ chose the Veal Rollatini Alla Bergamasca.

IMG_3922
Eggplant Arnaud for Barb.

IMG_3923
Ziti and meatballs for Brad.

Russ chose the Veal Rollatini Alla Bergamasca—thinly sliced veal rolled around prosciutto, spinach and fontina cheese, served in a flamed vodka blush cream sauce served with vegetables and potatoes, which he declared a winner!

Barb’s selection was Eggplant Arnaud—thinly sliced, lightly battered, rolled and stuffed with fresh mozzarella and ricotta, then baked in marinara sauce, and served with sautéed spinach. While Brad ordered more typical Italian fare of Pasta and Meatballs, requesting ziti instead of linguine. Ample portions abound here, so you’ll likely end up with a hefty doggie bag.

None of us regularly order dessert, and that night was no exception. But looking around at what other patrons ordered, if dessert is your thing, I’m sure you won’t be disappointed.

IMG_3918

Addio Per Ora!

Dinner is Calling, So Wrap It Up

Meatless Monday—we try to adhere to this dinner principal as often as we can, and we enjoy the challenge of discovering new meatless dishes, so when we came across this baby, Cod Baked in Foil with Leeks and Carrots from Cooks Illustrated, we were intrigued. Can’t tell you how wonderful this simple wrapped dinner was!

IMG_3815

For a foil-baked fish recipe with flaky fish and tender but firm vegetables flavored by the aromatic goodness of their mingled juices, choose mild haddock or cod over more assertive salmon or tuna, which can overpower vegetables. Placing the packets on the lower-middle rack of the oven close to the heat source concentrates the exuded liquid and deepens its flavor.

Vegetable selection is important, potatoes fail to cook evenly in the packets, and eggplant turns to mush, so carrots and leeks ended up being a perfect choice. Adding a final flavoring touch—a compound butter—contributes to a full-flavored sauce that perfectly complements the fish.

I unwittingly used 4 tablespoons of extra dry sherry instead of the dry vermouth, but didn’t notice the error until after we finished eating. And much to my chagrin, the Russman used up the parsley the night before, so I used extra thyme in the topping mixture. However, neither one of these swaps seemed to degrade the dish in any discernible manner.

Immediately after dinner, Russ went to save into his recipe database and found there were two other versions on this same concept, incorporating cod but using *different ingredients such as fennel, shallots and oranges. Yes, we will be trying another version in the very near future. Stay tuned…

IMG_3802

Cod Baked in Foil with Leeks and Carrots

  • Servings: 4
  • Difficulty: easy
  • Print

Ingredients

  • 4 tablespoons unsalted butter, softened
  • 1 ¼ teaspoons finely grated zest from 1 lemon; then cut lemon cut into wedges
  • 2 medium garlic cloves, minced or pressed through a garlic press (about 2 teaspoons)
  • 1 teaspoon minced fresh thyme leaves
  • Salt and ground black pepper
  • 2 tablespoons minced fresh parsley leaves
  • 2 medium carrots, peeled and cut into matchsticks (about 1 ½ cups) (see note)
  • 2 medium leeks, white and light green parts halved lengthwise, washed, and cut into matchsticks (about 2 cups) (see note)
  • 4 tablespoons vermouth or dry white wine
  • 4 skinless cod fillets, 1 to 1 ¼ inches thick (about 6 ounces each)

Directions

  1. Combine butter, ¼ teaspoon zest, 1 teaspoon garlic, thyme, ¼ teaspoon salt, and 1/8 teaspoon pepper in small bowl. Combine parsley, remaining teaspoon zest, and remaining teaspoon garlic in another small bowl; set aside. Place carrots and leeks in medium bowl, season with salt and pepper, and toss together.
  2. Adjust oven rack to lower-middle position and heat oven to 450°F. Cut eight 12-inch sheets of foil; arrange four flat on counter.
  3. Divide carrot and leek mixture among foil sheets, mounding in center of each. Pour 1 tablespoon vermouth over each mound of vegetables.
  4. Pat fish dry with paper towels; season with salt and pepper and place one fillet on top of each vegetable mound. Spread quarter of butter mixture on top of each fillet.
  5. Place second square of foil on top of fish; crimp edges together in ½-inch fold, then fold over three more times to create a packet about 7 inches square (see illustrations, above). Place packets on rimmed baking sheet (overlapping slightly if necessary).
  6. Bake packets 15 minutes. Carefully open foil, allowing steam to escape away from you. Using thin metal spatula, gently slide fish and vegetables onto plate with any accumulated juices; sprinkle with parsley mixture. Serve immediately, passing lemon wedges separately.

IMG_3807
Arrange carrot and leek mixture in center of foil.

IMG_3805
For the compound butter: combine butter, zest, garlic, thyme, salt and pepper in small bowl.

IMG_3809
Spread butter mixture on top of each fillet.

IMG_3812
Place second square of foil on top of fish and crimp and fold edges together.

IMG_3814

NOTES: The packets may be assembled several hours ahead of time and refrigerated until ready to cook. If the packets have been refrigerated for more than 30 minutes, increase the cooking time by 2 minutes. Open each packet promptly after baking to prevent overcooking.

If your fish has a thin tailpiece, tuck it under so it cooks at the same rate as the rest of the fillet: Cut halfway through the flesh crosswise, 2 to 3 inches from the tail end, then fold the tail end under the cut seam to create a fillet of even thickness.

http://www.lynnandruss.com

Go Ahead, Bring Out Your Inner Child

Who says you shouldn’t play with your food? Delicious and bursting with flavor, these Asian Lettuce Wraps are our rendition of a food fad currently offered in Asian and other ethnic restaurants. You can mix and match any variety of vegetables and protein that suit your fancy. So go ahead and get creative!

IMG_3824

We used spicy pork bought at a local Asian market. But if you don’t eat pork, you can always use any number of other options (see below) and rice noodles or bean threads to fill these imaginative lettuce wraps for a weeknight meal with little cooking involved. For a vegetarian repast, use tofu.

Below are two different sauce recipes, or go ahead and create your own. Just be sure to have plates and napkins available since the mixture can sometimes drip a little—or a lot…

IMG_3766

I’d be remiss if I didn’t mention our two new kitchen toys. Author-chef Grace Young highlighted these Asian cutting utensils, the Kinpari Peeler and the Negi Cutter (shown above) in her most recent stir-fry cookbook. Receiving them within days of our online order, we made quick use of their potential when making matchstick carrots and scallions for a variety of dishes. Brilliant!

IMG_3759
Using the Kinpari Peeler to julienne carrot matchsticks.
IMG_3764
A close-up of the carrot matchsticks.

SAUCE #1:

  • 1 teaspoon canola oil
  • 1 tablespoon minced shallot
  • 1/3 cup water
  • 2 tablespoons creamy peanut butter
  • 4 teaspoons hoisin sauce
  • 1/8 teaspoon crushed red pepper
  • 1 tablespoon fresh lime juice
To prepare sauce, heat a small saucepan over medium heat. Add canola oil to pan; swirl to coat. Add shallot, and sauté for 2 minutes. Add 1/3 cup water and next 3 ingredients (through red pepper), and stir with a whisk. Bring to a boil; cook 1 minute. Remove from heat; stir in lime juice.
SAUCE #2:
  • 1/4 cup hoisin sauce
  • 2 cloves fresh garlic, minced
  • 1 tablespoon soy sauce
  • 1 tablespoon rice wine vinegar
  • 2 teaspoons minced pickled ginger
  • 1 dash Asian chile pepper sauce, or to taste (optional)
Cook and stir 1 large chopped onion in a skillet for 10 minutes. Stir hoisin sauce, garlic, soy sauce, vinegar, ginger, and chile pepper sauce into onions. Spread on lettuce leaves and add other ingredients as desired.
IMG_3820
We used pork slices marinated in a Korean sweet and spicy sauce.

IMG_3823
Arrange all ingredients on a large platter so that everyone can access all of the fixin’s.

FILLING FOR LETTUCE WRAPS:
  1. 1 lb. cooked pork or chicken; or (14-ounce) package extra-firm tofu, drained and crumbled
  2. 1/4 cup cilantro leaves
  3. 6 thinly sliced green onions (about 2/3 cup), divided; greens sliced in thin diagonals
  4. 1 cup matchstick-cut carrots
  5. 2 cups cooked bean thread noodles
  6. 8 or more Bibb lettuce leaves
Additional fillers: Vegetables: water chestnuts, bamboo shoots, cucumber matchsticks, bean sprouts. Protein: Ground pork, beef, chicken or turkey.
IMG_3825

Attention, class: Buttercup 101 is now in session.

IMG_3892

We luh-luh-loved this Curried Chicken Stew with Squash and Cashews! Quick, easy and oh so delicious. Sweet, deeply colored buttercup and kabocha squash are the top choices for this aromatic stew. Or as in our case, use a sweet potato (as suggested) if you can’t find either of these squashes.

I thought “buttercup” might have been a typo, because I’ve cooked with butternut many times, but have never heard of, or seen, a buttercup squash. So I asked Russ to Google it while we were in the grocery store, and sure enough, it’s the real deal. Live and learn, right?

Buttercup squash is a winter squash belonging to the family Cucurbitaceae (how’s that for a word??) Not to be confused with its cousin, the butternut squash, the squat green buttercup takes its name from its shape, which some say resembles an upside-down acorn with an undersized cap. The flavor of the buttercup squash’s flesh is sweet and nutty, with a creamy consistency more in line with that of a baked sweet potato than a pumpkin.

I usually buy the “lite” version of coconut milk for my recipes, but in this case make sure you get the regular and not the lite version, which will not have the necessary thickened cream at the top of the can.

Fine Cooking suggests serving with jasmine rice, but we had some leftover bean thread noodles which made a perfect bed to ladle the stew over.

IMG_3875

IMG_3879
Chicken cut into 1/4″ slices, 1/2″ onion wedges, and 3/4″ sweet potato are prepped for cooking.

Ingredients

  • 1 13-1/2-oz. can coconut milk, unstirred
  • 2 Tbs. Thai red curry paste
  • 3 Tbs. fish sauce
  • 2 Tbs. packed light brown sugar
  • 1 lb. peeled buttercup or unpeeled kabocha squash, seeded and cut into 1-1/4-inch pieces
  • 1/2 cup salted cashews
  • 1 lb. boneless, skinless chicken breast halves, cut crosswise into 1/4-inch-thick slices
  • Kosher salt
  • 1 small yellow onion, cut into 1/2-inch wedges
  • 2/3 cup torn fresh basil leaves

IMG_3880
The Thai red curry paste and coconut cream are added to the sauce pan.

IMG_3883
The curry paste and coconut cream are whisked together.

IMG_3884
After about 5 minutes, the curry paste and coconut cream start to darken.

IMG_3887
The squash (or sweet potato) are added to the curry mixture with fish sauce, brown sugar, and water.

IMG_3888
Finally the onion wedges and chicken slices get added to the pot.

Directions

  1. Measure 3 Tbs. of the thickened cream from the coconut milk and put it in a 6-quart pot. Whisk in the curry paste and cook over medium-high heat, whisking frequently, until the mixture is fragrant and slightly darker, about 5 minutes.
  2. Stir the coconut cream and milk remaining in the can until well combined and add to the pot along with the fish sauce, brown sugar, and 1 cup water; whisk until combined. Bring to a simmer and add the squash.
  3. Partially cover, turn the heat down to medium, and continue simmering, stirring occasionally, until the squash is almost tender, 8 to 12 minutes.
  4. Meanwhile, toast the cashews in a small skillet over medium-high heat, stirring frequently, until dark in spots, about 4 minutes. Set aside.
  5. Season the chicken with salt and add it and the onion to the pot, stirring gently to separate the chicken pieces. Return to a simmer, partially cover, and cook, stirring occasionally, until the chicken is cooked through and the squash is tender, about 5 minutes. Stir in the cashews and basil and serve.

IMG_3890

By Dawn Yanagihara-Mitchell from Fine Cooking

“Chopped” Not

pan-roasted-brined-pork-chop-940x560

At any given time I have a bevy of 50-75 blogs in the bank. While wading through them recently, I found this one which I wrote some time ago, so I thought I’d dust it off and put it out there…

Russ came flying into the house after a work appointment with a bag of groceries—and less than an hour to prepare, cook and eat dinner before he had to leave for another commitment. The night prior he had taken 2 thick bone-in pork chops out of the freezer (the bones add valuable flavor to the meat and prevents it from drying out) with the intention of adding a veggie and other side dish to round out the meal—thus the contents of the grocery bag.

While he chopped, diced, sautéed and baked, I was upstairs (probably writing another blog) and I could hear him blazing trails down in the kitchen. The end result? Perfectly done pork chops with an impromptu, super-delicious pan sauce, tender-crisp asparagus, and mushroom rice pilaf. Mentally, I didn’t think this meal would be blog-worthy. But boy, was I ever wrong! The chops with pan sauce were outstanding. Although I didn’t take any photos (those shown here are stock photos), it certainly deserved a blog about Russ’ talents as a chef.

After dinner, I offered to do KP duty while he ran off to his next meeting. The Food Network station was on TV (surprised??) airing a segment of Chopped. Whenever I watch this show, I’m always amazed at how quickly the chefs throw together an odd assortment of ingredients with astonishing results in record time. Thus the connection to what just transpired in our kitchen. Perhaps I should sign Russ up? Well, that’s another blog…

Anyway, I’ll let Russ tell you in his own words how he prepared those succulent chops:

My favorite way to prepare thick-cut pork or veal chops and steaks is pan roasting. Simply put, pan roasting involves searing the room-temperature meat that has been seasoned with salt and pepper (or my favorite, adobo seco) in a heavy, preferably cast iron, (or carbon steel) skillet over medium-high to high heat until nicely browned on both sides—about 2 minutes each side—and then putting the skillet in a pre-heated 425 degree oven and roast until the meat is 5 degrees lower than your desired internal temperature. This is usually about 10-12 minutes in the oven depending on the thickness of the meat. Here’s a good resource that shows the technique: http://www.reluctantgourmet.com/pan-roasting-technique/.

images-1

images-2

Once the chops were done, I covered them lightly with foil on a plate and then set about making a simple Dijon mustard and cream pan sauce. I drained the fat through a fine strainer and returned any of the browned bits to the skillet, then set the skillet over a medium burner. I deglazed the pan with about a ½ cup of dry vermouth (you can use dry white wine, too) and scraped up the fond in the pan. After allowing the vermouth to reduce by half, I added a ½ cup of chicken broth and a teaspoon of dried thyme, allowing the mixture to reduce slightly before whisking in a heaping tablespoon of Dijon mustard and 2 tablespoons of heavy cream. Once the mixture was simmering happily, I removed the pan from the heat and whisked in two tablespoons of unsalted butter (always a good finish for a pan sauce) and adjusted the sauce to taste with salt and pepper.

Well there you have it! Thanks Russ for the step-by-step directions to fabulous pan roasted pork chops!

images-3