The Grey Stone

It was a beautiful summer night—mercifully without rain or high humidity—so we were mulling over places to dine al fresco when Russ suggested the “new place” in Newtown. Recently opened in mid-April of 2018, The Grey Stone, (formerly known as Lavender Hall or 552 Restaurant), has been renovated with a redesigned interior to give it a modern look that maintains the historic charm and presents an upscale casual dining experience.

Screen Shot 2018-08-07 at 8.38.51 PM

Screen Shot 2018-08-07 at 8.39.48 PM

The 300-seat, full-service restaurant includes a reception area with a grand staircase, the main dining room with 70 seats, a bar and lounge area with fireplace and comfortable seating, a second smaller bar area and two private dining rooms, one on the main floor and an 80-seat room upstairs. Not to mention a ginormous outdoor patio with untold capacity for seating.

Before we left the house, I googled The Grey Stone to read reviewers comments on their experiences. The responses ran the gamut, from “the food is great,” “it took forever to get our meal” to “don’t bother wasting your time or money.” So we did harbor some concern but figured maybe they had worked the kinks out since the opening over three months prior.

When we pulled into the large circular driveway with valet parking, it was packed (a good sign) and cars were spilling out onto the main road giving us hesitation, but one glance at the half-filled patio made us think we had a chance of getting seated. Once inside, the hostess asked if we had reservations and when we responded “no, but we want to sit outside” she looked doubtful (a bad sign) and commented that she’d have to see if there was any availability. What? There were clearly at least 20 available tables out there

Screen Shot 2018-08-07 at 8.39.08 PM
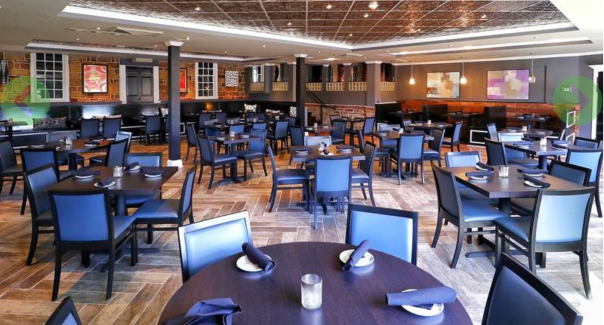
Stock photo of the unoccupied inner dining area.

IMG_6732
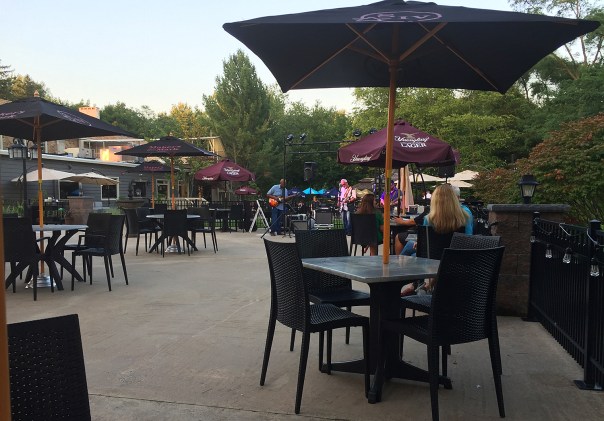
The band, center, plays some bluesy music in the large patio area.

But the crisis was averted when a younger hostess guided us through the filled-to-capacity inner dining room to a pleasant outdoor four-top along a wrought-iron fence far enough away from the live band for quiet conversation, yet close enough to see them perform. And I have to commend them on table placement, at least outside, where the tables are very generously spaced apart giving patrons breathing room and waitstaff plenty of serving room.

At its bar, The Grey Stone features 33 taps for craft beer, wine and mixed cocktails. In addition, they have cold brew coffee and cold brew latte on draft. We ordered a bottle of red from a semi-lengthy list of varying-priced wines, while perusing the fixed and specials menus.

Their offerings are an eclectic mix of comfort foods featuring modern and classic dishes that seem to highlight every American ethnicity. Selections include everything from chicken, fish and seafood to veal, pork, beef and vegan dishes. Apparently they start you with a bread basket, but we never experienced one. The “bread-women” came by three times, the first to ask if we wanted bread, and then twice more to say she’ll be right out with it—but it never happened. Not that we needed the carbs, but we feared it set the tone for the evening.

Uncharacteristically, I was in the mood to try one of their burgers (something I rarely choose when eating out); while Russ had a similar mind-bent and went for a pork sandwich, both of which came with a choice of homemade potato chips, hand-cut fries, or you could substitute a cup of soup for a nominal fee. Since the soup-of-the-day was a Manhattan Crab Chowder, that’s what we intended on getting. But wouldn’t you know it, they were already out of it by the time we ordered, so we both went with the hand-cut fries.

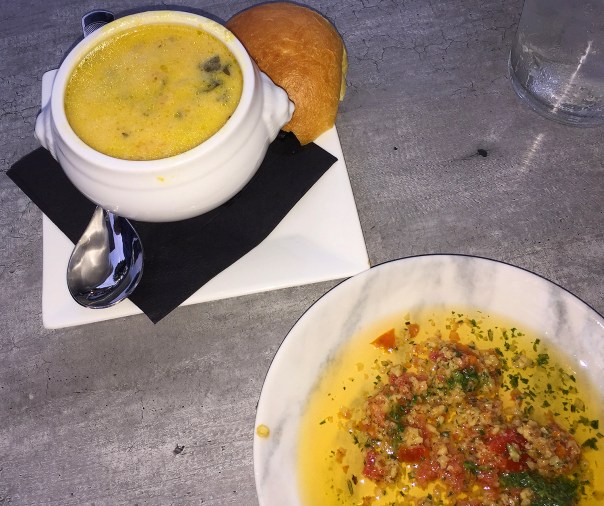
The band (I think they were called Two Plus One) was off to a good start, playing some bluesy Eric Clapton among other artists. But as the evening wore on, many of the tunes sounded the same and it got a bit monotonous. The evening did wear on indeed because it took nearly one hour and fifteen minutes to get our sandwiches! Although Russ did get his cup of Heirloom Tomato Gazpacho, shown below, in a timely manner.

IMG_6744

And as suspected, my burger was more well-done than I had ordered… but I wasn’t about to send it back and wait for another… For some reason bacon does not agree with me and I should have asked them to put it on the side. As it was, I gave most of it to Russ, but because it was quite dark out, I unknowingly ate some of it and suffered later on that night. I also pretty much tossed the bun aside because it was too much bread for me. (Probably a good thing “bread-women” forgot us.)

IMG_6747

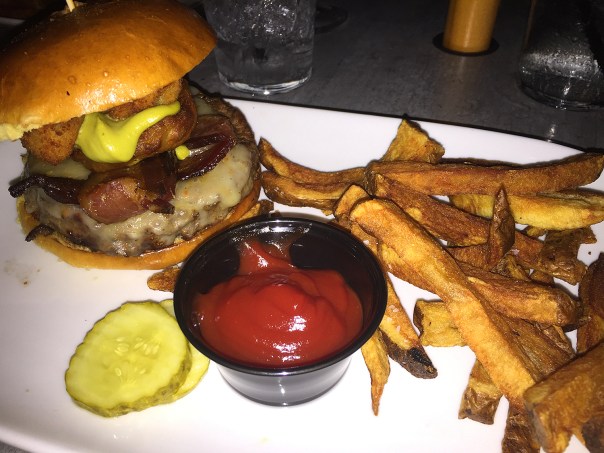
Lynn’s loaded Fireball Burger was made with certified Angus beef and topped with ghost pepper cheese, two cream cheese stuffed jalapeño poppers, jalapeño bacon, a guacamole-stuffed onion ring, with a schmear of sriracha aioli on a brioche bun. Yes, it was good, but I probably wouldn’t get it again. And those fries were delicious at first, but not so much as they cooled down—like most fries, I guess.

IMG_6750

There definitely were some missteps that night, but we’re willing to give it another shot, mainly because it’s close to home and we really love the outdoor dining area. Next visit, we’ll concentrate on some of the entrées and keep our fingers crossed that the food is not only well-prepared, but served in a timely manner to boot!

Fast forward several weeks, we again dine at The Grey Stone, this time on Sunday night of Labor Day weekend. It was decidedly much less crowded, and again we opted to eat out on the expansive patio—us and only two other couples, and no band. Thank goodness the service was much more attentive, although there were still some missteps.

We put in a food order at the same time as our beverage choice, a dry rosé, just in case there was going to be a long lag time, which mercifully there wasn’t. We even got bread right away—and the seasoned dipping oil was fantastic! The bread however was more like a warm hamburger bun, instead of a chewy crusty loaf, which would have been preferable.

IMG_7236

Russ started with a small bowl of their homemade Broccoli and Cheddar Soup. I commented that it looked a bit “thin” but he said that’s how he likes it, and when I took a small taste, it was full of flavor.

IMG_7234

The night’s special menu contained three additional appetizers and three more entrées, one of which, the Grilled NY Strip Steak Chimichurri accompanied with roasted potatoes and Mexican street corn was my first choice. But then I was told that they were already out of it. How could that be when it was still relatively early and there were many empty tables (at least outside)?

IMG_7237

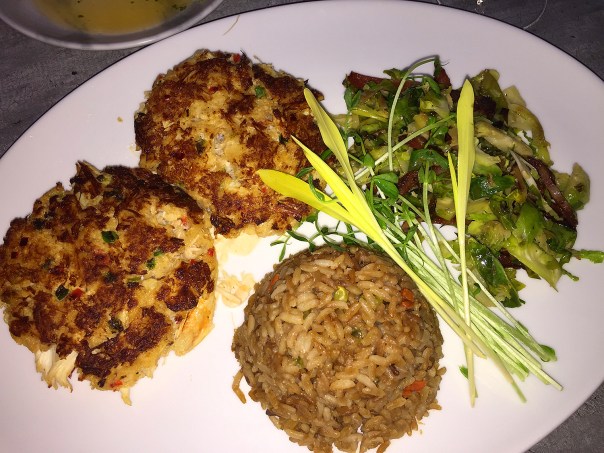
Oh well, always have a Plan B, which was the Cayo Hueso Crab Cakes, the very same meal that Russ decided to order. Our dinners came within minutes of Russ finishing his soup. Two good-sized cakes came plated sitting atop a schmear of key lime remoulade (we asked for more) with sides of Spanish rice and jalapeño bacon Brussels sprouts adorned with sweet baby corn shoots and micro-greens.

All components of the meal were quite tasty and the patties were filled with a lot of lump crab, although I would have preferred that they weren’t so crisp on the exterior. Russ was the recipient of my bacon pieces from the sprouts because it usually doesn’t sit well with me for some reason, and I had not-so-fond memories of the bacon reaction from my past burger. With no room for dessert, and a doggie bag for me, we sauntered out into the night to retrieve our car from their free valet service.

IMG_7240

The Grey Stone is conveniently located on Route 532 between Newtown and Washington Crossing and within easy access to Interstate 95.


Seared Tuna Steak & Shrimp Kebabs

Here’s an intimate, yet quick dinner that’s sure to impress your seafood-loving significant other—especially one who appreciates bold flavors. Try this fragrant, easy-to-make rub for fresh shrimp and tuna steak kebabs. You can grill them outdoors or on a grill pan inside, depending on your preference—or the weather.

IMG_7285

A side of jasmine rice cooked according to package directions but with homemade shellfish stock (instead of water) and sprinkled with sliced scallions made a perfect bed for the fish. Add lemon wedges for garnish and a few ripe tomatoes mixed with fresh basil chiffonade to complete. Then light a few candles, play some soft background music and game on!

Truth be told, this ended being a lot more filling than I expected. One skewer each containing 3 tuna cubes and 2 jumbo shrimp was more than enough for dinner with all of our sides (we also added roasted Brussels sprouts). But it worked out nicely that we had some leftover for lunches the next day (shown below).

IMG_7291

If you want to make this for four people, increase the tuna to a full pound and buy 8 jumbo shrimp. Keep in mind, if you like your tuna more well done, skewer the tuna and shrimp separately and cook the tuna several minutes longer than the shrimp. Try to cube your tuna into as uniform pieces as possible to cook evenly.

IMG_7272

Seared Tuna Steak & Shrimp Kebabs

  • Servings: 2-3
  • Difficulty: easy
  • Print

Ingredients

  • 1 12-oz. tuna steak, about 1 1/2-inch thick, cut into 9-10 cubes
  • 6 jumbo shrimp, shelled and deveined, (tails intact optional)
  • 3 Tbsp. olive oil, divided
  • 2 tsp. ground coriander
  • 1 1/4 tsp. ground black pepper
  • 1 1/2 tsp. ground ginger
  • 1 tsp. salt
  • 1/2 tsp. ground cinnamon
  • 2 Tbsp. grated lemon zest, cut down the lemon to use as wedges for garnish
  • 4 wooden skewers, soaked for at least 30 minutes

Directions

  1. Whisk 2 tablespoons olive oil, lemon zest, coriander, black pepper, ginger, salt, and cinnamon in a small bowl.
    IMG_7273
  2. Place fish in ziploc with marinade and rub together to coat. Place in fridge for 20-30 minutes.
    IMG_7275
  3. Remove fish from bag and alternate onto skewers. (If using wooden skewers, soak in water for at least 30 minutes.)
    IMG_7276
  4. Heat 1 tablespoon olive oil in a large skillet (or spray a grill pan with olive oil coating) over medium-high heat. Sear kebabs until browned but still pink in the center, about 4 minutes on each side.
    IMG_7278
    IMG_7281
  5. Mound the rice on each dish, place two kebabs over rice, garnish with lemon wedges and add any side veggies as desired.
    IMG_7282
    IMG_7290

http://www.lynnandruss.com

Lend Me Your Ear, or Six

Yes, there are a host of corn salads out there (including on this blog site) that provide recipes for fresh, uncooked ears of corn. But what about those leftover cobs that were already cooked but not eaten? For goodness sake, don’t toss them in the compost bin just yet—make this riff on Cooked Corn Sauté with Peppers and Shallot.

IMG_7268

For starters, slice the kernels off the cob in a rimmed baking sheet. This ensures that they don’t go flying every which way off the counter. Then you can package and refrigerate for another day, or proceed with something close to the outline below. The idea here is to use up whatever produce you might have leftover or in your herb bed.

IMG_7241

Once in the hot skillet, it is important not to stir the corn for a few minutes to give it a chance to brown. This caramelization enhances the sweetness. The lemon juice at the end will deglaze the pan and loosen all of the brown bits adding more flavor.

IMG_7260

Cooked Corn Sauté with Peppers and Shallot

  • Servings: 4-6
  • Difficulty: easy
  • Print

Ingredients

  • 2 tablespoons vegetable oil
  • ¼ cup red pepper, cut into small dice
  • ¼ cup green long hot pepper, finely diced
  • 1 shallot, finely diced
  • 3 garlic cloves, sliced thin
  • 5-6 ears corn, kernels cut from cobs
  • Salt and pepper
  • ¼ cup cherry tomatoes, halved
  • ¼ cup shredded fresh basil
  • 1 – 2 tablespoons lemon juice
  • 1 – 2 tablespoons butter, optional

Directions

  1. Heat 1 Tbsp. oil in 12-inch skillet until hot. Over medium heat, cook shallot and red and green peppers until tender, about 4-5 minutes. Remove to side dish.
    IMG_7261
  2. Add another Tbsp. oil until hot and add garlic slices. Cook, stirring frequently, until garlic is light golden brown and fragrant, 1 to 2 minutes. Using slotted spoon, transfer garlic to bowl with peppers and shallot, leaving oil in skillet.
    IMG_7263
  3. Return skillet to medium-high heat and heat until oil is shimmering. Add corn and sprinkle with 1/2 teaspoon salt. Cook, without stirring, until corn is browned on bottom and beginning to pop, about 3-4 minutes. Stir and continue to cook, stirring once or twice, until corn is spotty brown all over, 2 to 3 minutes longer.
    IMG_7265
  4. Transfer red pepper mixture into skillet with corn.
  5. Stir in tomatoes, basil, 1 tablespoon lemon juice, and 1/4 teaspoon pepper. Stir to loosen browned bits.
    IMG_7267
  6. Season with salt, pepper, and remaining lemon juice to taste. Add in a pat or two of butter, if desired. Sprinkle with remaining extra basil and serve.

http://www.lynnandruss.com

IMG_7270
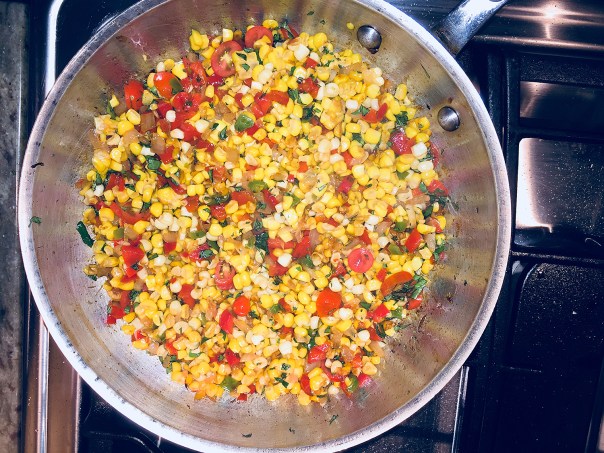
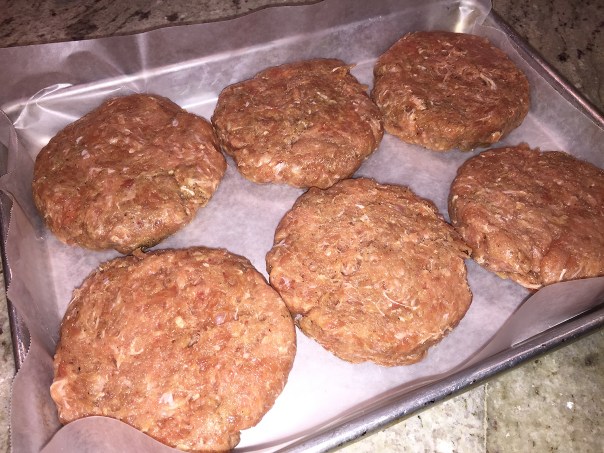
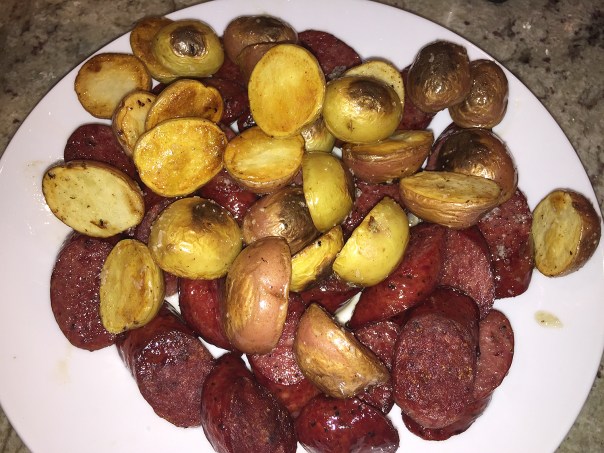
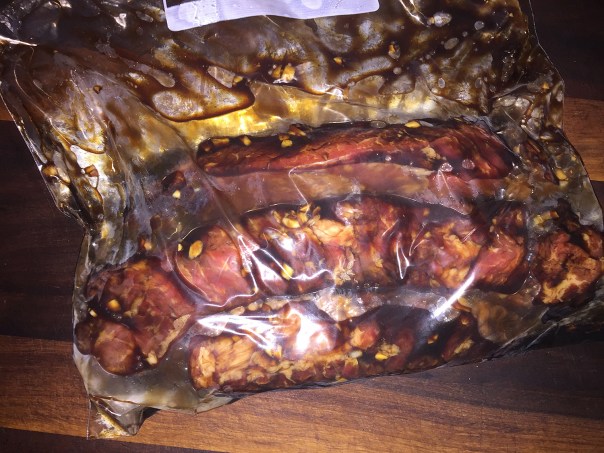
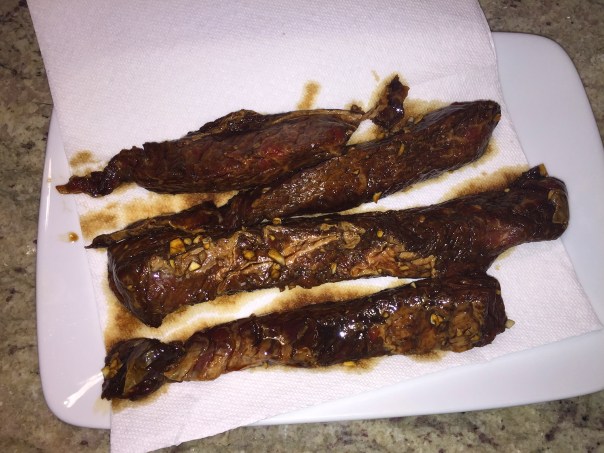
We plated ours with some leftover baby back ribs reheated in the oven. Simple dinner.

Mushroom & Spinach Frittata

Akin to a crustless quiche, frittatas can hold their own as a brunch item, a light dinner entrée or paired with soup or salad for lunch. Whatever the occasion, just make sure you use a full-fat diary like heavy cream, crème fraîche or cream cheese to mix with the eggs.

IMG_7253

Husband Russ is known to often whip together a weekend frittata with whatever might be on hand leftover in the fridge veggie- and cheese-wise. This particular time, we actually thought ahead and purposely bought the spinach and mushrooms while grocery shopping. The other ingredients we had on hand, and the fresh herbs came from our raised garden bed.

About the cheese. Raclette is a semi-hard cheese made on both sides of the French and Swiss Alps. While you can use whatever cheese you want, try to make an effort to include it in this frittata. The cheese itself is firm with a fairly unremarkable flavor when cool, but the magic happens when melted, Raclette develops a nutty, full sweet flavor with a crisp, delightfully chewy crust.

IMG_7244

The cheese has got a thin, brownish-orange colored rind and a pale yellow pate with a few scattered open holes. It is has a very distinctive pleasant, aromatic smell with a creamy texture, similar to Gruyere cheeses, and does not separate even when melted.  While Switzerland supplies 80% of Raclettes, French Raclettes are slightly softer with a smooth and creamy flavor.

IMG_7243
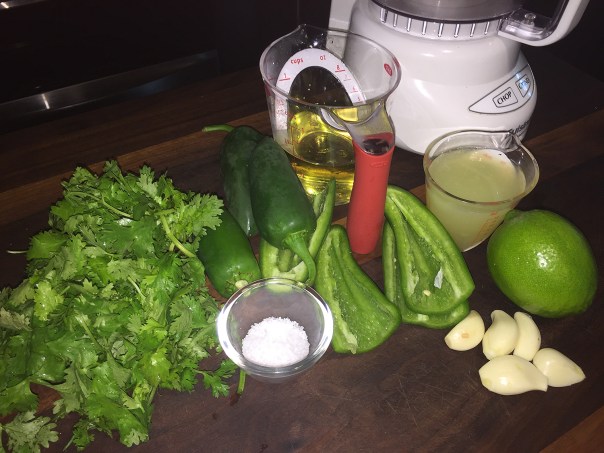
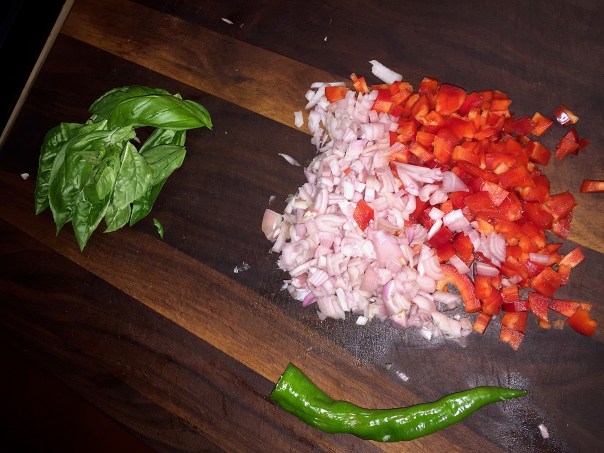
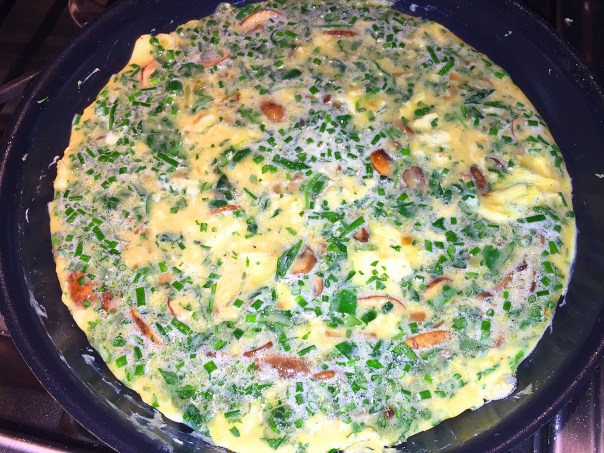
The fresh tender herbs are finely chopped before adding to the egg mixture.

Mushroom & Spinach Frittata

  • Servings: 6
  • Difficulty: easy
  • Print

Ingredients

  • 8 large eggs*
  • 3 oz. heavy cream
  • 1/4 cup onion, finely chopped
  • 10-12 cremini mushrooms, sliced
  • 3 oz. baby spinach
  • 1/4 cup mixed fresh tender herbs, chopped (such as chives, parsley and sage)
  • 1/2 cup Raclette cheese, grated and divided
  • 2 Tbsp. olive oil, divided
  • Salt and Pepper to taste

Directions

  1. Preheat oven to 350°.
  2. Crack the eggs into a medium bowl, add heavy cream and mix well.
  3. Chop fresh herbs, add to egg mixture and set aside.
    IMG_7245
  4. Heat 1 Tbsp. of the olive oil in a 10″ non-stick skillet. When hot, add the onion and cook until tender, about 3-4 minutes.
  5. Add the mushroom slices in with onion and sauté for about 5 minutes more, until just starting to brown. Move to a side dish.
    IMG_7242
  6. Add the other Tbsp. of oil into pan and when hot, toss in the spinach. Cook until wilted, 1-2 minutes.
  7. Add mushrooms and onion back into skillet, stir to mix then pour egg mixture over, and cook on stovetop for 5 minutes to set the bottom.
    IMG_7247
    IMG_7248
  8. Top with all but 2 Tbsp. of the grated cheese and slide into preheated oven for 16-20 minutes. Check with knife to see if it is set, top with remaining cheese, and heat for 1 more minute.
    IMG_7250
    IMG_7251
  9. Loosen edges and bottom with a rubber spatula and slide onto serving dish.
    IMG_7252

*Frittata for 8: Increase ingredients to one dozen large eggs, 1/4 cup heavy cream, and 3/4 cup grated cheese. Cook in a 12″ nonstick skillet.

http://www.lynnandruss.com

IMG_7259
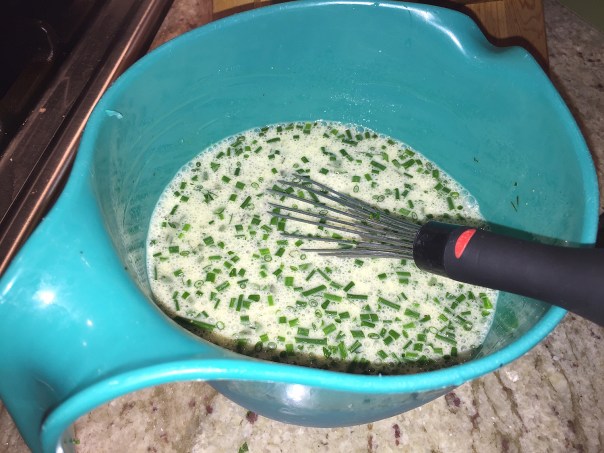
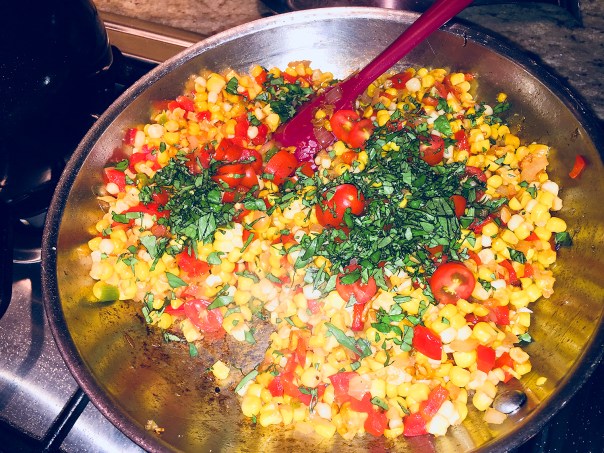
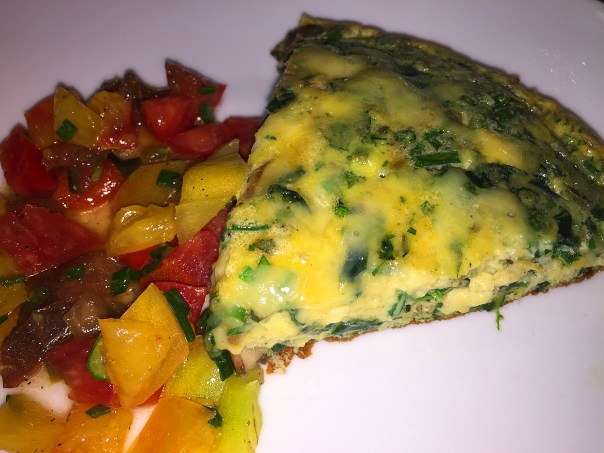
For brunch one Sunday, we served ours with a small chopped heirloom tomato and fresh chive salad.

Sake, Garlic and Ginger Chicken with Broccolini

Boneless chicken thighs get treated to sweet, salty, and gingery flavors. Sake, a Japanese rice wine, balances the bold flavors of garlic and soy sauce with its subtle savory-sweet notes. The smaller florets on broccolini are great for mopping up the vibrant sauce, though broccoli works well, too.

IMG_4652

In case you have never imbibed, sake—also spelled saki—is a Japanese alcoholic beverage made from fermented rice. There are many varieties of this light colored, non-carbonated beverage, which has a sweet flavor, and contains up to 18 percent alcohol. Sake is often mistakenly called a wine because of its appearance and alcoholic content; however, it is made in a two-step process similar to that for brewing beer.

As with any ingredient, the higher the quality, the better the outcome and taste. So don’t purchase a bottom-of-the-barrel brand, although no need to buy the most expensive sake either—unless of course that’s what you happen to have in stock 😉

What I love about this meal is not only the ease of making it and the memorable flavors, but the fact that pretty much everything is done in one pan, (except for the rice if you’re serving it). So get your Japanese on, and make some Sake, Garlic and Ginger Chicken with Broccolini real soon!

Sayōnara

IMG_4639

Sake, Garlic and Ginger Chicken with Broccolini

  • Servings: 4
  • Difficulty: easy
  • Print

Ingredients

  • 6 Tbs. sake
  • 6 Tbs. reduced-sodium soy sauce
  • 1/4 cup granulated sugar
  • 2 Tbs. vegetable or canola oil
  • 1-1/2 lb. boneless, skinless chicken thighs
  • Kosher salt and freshly ground black pepper
  • 1 lb. broccolini or broccoli crowns, cut into 3-inch-long pieces
  • 3 medium scallions, thinly sliced, white and green parts separated
  • 3 medium cloves garlic, very thinly sliced
  • 1 3-inch piece fresh ginger, peeled and sliced lengthwise into 4 slabs

Directions

  1. Combine the sake, soy sauce, and sugar in a small bowl, and stir until the sugar dissolves; set aside.
  2. Heat the oil in a 12-inch skillet over medium-high heat until shimmering hot.
  3. Season the chicken with salt and pepper, and cook, flipping once, until golden brown on both sides, 2 to 4 minutes per side. Transfer to a plate.
    IMG_4644
  4. Add the sake mixture, broccolini, scallion whites, garlic, and ginger to the skillet. Bring to a simmer.
    IMG_4645
  5. Arrange the chicken on top of the broccolini. Cover and cook over medium heat until the broccolini is tender and the chicken is fully cooked, about 5 minutes.
    IMG_4648
  6. Discard the ginger. Season to taste with salt and pepper, and serve sprinkled with the scallion greens.
  7. Serve with hot steamed white or brown rice.
    IMG_4659

http://www.lynnandruss.com

Recipe adapted from Abby Simchak Donovan

IMG_4657

Getting Our Greek On

Voted again in 2017 as one of the best restaurants by the Bucks County Courier Times, the Canal Street Grille has been an endeared dining establishment for decades. Nestled in a back alley in historic quaint downtown Yardley, this casual BYOB offers great Greek and American comfort food, with tranquil views overlooking the Delaware Canal—not far from where I used to reside for 25 years.

It’d been well over a decade since we patronized this little gem, and I had heard through the grapevine that the former owners recently bought it back and totally redid the interior. Gone are the old-world spindle chairs, dark paint and checkered tablecloths (if my memory serves me correctly.) Now, it’s a bright, airy dining space with soaring ceilings, swathed in a muted color palette with sparse modern touches such as the stacked stone feature wall lit with twinkling sconces. And love all those windows!

IMG_7120We were seated at a four-top next to a window overlooking the canal.

IMG_7117Our dining companions were Brad and Barb (The B’s), former Yardley neighbors and the folks we were with the last time we ate here prior to the renovation.

Canal Street offers many homemade specialties, from soups, colorful salads, pita sandwiches and burgers, to fresh seafood, grilled meats and, I’ve heard, some of the best wings in town—although we didn’t try any this time around. They also offer daily lunch and dinner specials, as well as various vegetarian and gluten-free options.

While sipping our adult beverages, we got down to the serious business of making dinner choices. When ordering entrées, for an additional $4 fee (over which we were a bit perplexed), you can get a Greek Side Salad which Lynn and Russ chose, or a cup of soup offered in two options that night, either Manhattan Clam Chowder which Barb selected, or Chicken Orzo. Brad refrained altogether.

IMG_7127

For starters, Russ and I shared an appetizer (orektika) of their Greek Meatballs that came plated with five golf-balled sized, ground beef orbs. They were made with Mediterranean seasonings, drenched in a marinara sauce and drizzled with a feta cheese fondue, and were served along with two warm pita wedges. OMG, they were good!!

IMG_7124

The B’s opted to share the Spanakopita, a classic greek spinach pie in a crusty phyllo. Nary a crumb was left on that plate!

IMG_7121

When it came to the entrées (kuria piata), I was intrigued enough to order the Autumn Chicken, two large breasts pounded down and sautéed in a fabulous orange, dried cranberry and sage sauce, then garnished with toasted walnuts and served over an ample portion of rice with a side of perfectly cooked fresh green beans enhanced with pieces of red bell pepper. Delicious!

IMG_7208

My other three dining companions were all on the same page as they each chose the Greek dish of Classic Meat Moussaka, comprised of layers of ground beef, eggplant, potato, and topped with a parmesan béchamel sauce; also served with a side of those tasty green beans. While they all thoroughly enjoyed it, they said it was very filling.

IMG_7205

I am all-to-happy to add another local ethnic BYO to our list of dining establishments. Keep in mind that they only take reservations for parties of six or more, but apparently their rush is over by about 7:00 p.m. so getting seated after that time (which is more typical for us) is not an issue. Yup, we will be back…

Lime-Miso Marinated Grilled Asparagus

Grilled veggies, you gotta love ’em. And if you don’t, maybe you need to try these delicious Lime-Miso Marinated Grilled Asparagus. A few months ago, the recipe was printed in the Sunday newspaper supplement Parade, and it caught my eye immediately. BTW, the ingredients list using 1/2 teaspoon of white miso, but we felt a full teaspoon was in order because we really enjoy the taste of the paste.

I thought it was a bit odd that the printed recipe said to use lemon zest, but didn’t include the amount, plus incorporate the juice of one lime. When it was time to write this blog, I Googled the recipe online and noted there it said to use the zest and juice of one lime, no lemons mentioned! Should have paid attention to my culinary instincts.

IMG_4874

The grilled asparagus was part of a Grilled Rack of Lamb dinner that also included reheated leftover Twice-Baked Potatoes. Now mind you, rack of lamb is a rare treat for us due to the high cost, but our favorite supermarket happen to have it on sale so we snatched up the last rack. It was already seasoned necessitating all we had to do was sear and grill it for the recommended amount of time. Dinner done.

IMG_4878

IMG_4867

Lime-Miso Marinated Grilled Asparagus

  • Servings: 4
  • Difficulty: easy
  • Print

Ingredients

  • 2 Tbsp toasted sesame oil
  • 1 tsp grated peeled ginger
  • 1/2 tsp white miso paste
  • 1 garlic clove grated
  • Zest and juice of 1 lime
  • Salt and freshly ground black pepper, to taste
  • (1-lb) bunch thick asparagus, trimmed
  • Flake sea salt 

Directions

  1. Combine first 6 ingredients in a shallow dish. Add asparagus. Toss to coat; let stand 20 minutes at room temperature.
    IMG_4869
  2. Preheat grill to medium-high.
  3. Thread asparagus evenly on 4 double-pronged skewers, leaving space in between to allow air to circulate; or toss in a shallow grill basket like we did.
  4. Grill 7-10 minutes over indirect heat, turning once, or until asparagus are tender and charred in spots. Sprinkle with flaky sea salt, if desired.
    IMG_4873

Genderless—but Literally “Bursting” with Flavor

Our potted grape tomato plant was teeming with ripe fruit and we wanted to use them in a more unique way than just adding to salads. The answer? My concoction Burst Grape Tomatoes with Eggplant and Whole Wheat Linguine. In the past, I’ve successfully roasted plum and heirloom varieties and thought the same could be done with this garden bonanza of little guys. If you don’t have any of your own, small tomatoes can now be found in any supermarket throughout the year—you could even buy different colors. Nothing equals fresh local tomatoes, right?

IMG_7063

You should leave all tomatoes out at room temperature, but store-bought fruit especially benefit from a few days of ripening to deepen their flavor and bring out their sweetness. Keep in mind, these roasted tomatoes can be kept at room temperature for several hours, or for a day or two in advance and refrigerated until needed, which is what I did. Additionally, the eggplant slices can be salted in advance and stored  in a paper towel lined lock-n-lock up to one day ahead. Both great time savers when it’s time to throw the meal together.

The afternoon I planned on making this for dinner, I fell into a conversation with one of my pool pals regarding the gender of eggplants. She told me there are both male and female types, which I had never heard of before so I had to do some investigation. What I found out was that eggplants do not have a gender, but they are endowed with cross-pollinating male and female flowers on each plant. Even though we may  think of the eggplant as a vegetable, like the tomato, it is classified as a fruit. Fruit or veggie, eggplants are not male or female.

Two types of eggplant may develop on one plant, and that is likely the reason the myth of gender got started. One type has a roundish dimpled area at the blossom end, and the other type has a more oval-shaped dimpled area. The oval-dimpled eggplants are said to have more seeds and be less meaty than the roundish dimpled eggplants—that explanation was another detail forthcoming from my pool pal.

Now that the controversy is cleared up, the (politically correct “fluid” 🙂 ) eggplants do love hot weather and grow well where more tender, leafy vegetables may wilt. They like growing conditions similar to tomatoes; and both are from the same nightshade family of plants. So, in late August, they make a perfect pairing for the Burst Grape Tomatoes with Eggplant and Whole Wheat Linguine.

Gilbert’s Caprese Chicken Sausage was a great match for this recipe because they contain basil, sun-dried tomatoes and mozzarella. I liked the fact that they contain no artificial ingredients, are minimally processed and the chickens are raised without antibiotics—and they taste great to boot. While shopping at Costco recently they were handing out samples, and after one bite, we snatched a package of 16 fully cooked, individually wrapped links.

Back to what incentivized this recipe in the first place. The roasted tomatoes are soooo friggin’ good, you could eat them alone with a spoon! And if you’re really in a hurry, forget all of the extras and just toss the roasted tomatoes with a cooked pasta of choice, a drizzle of really good EVOO, sprinkle in some chopped fresh basil and grated parm and call it a day. But I have to be honest, this dish was definitely “bursting” with flavor with all of the other ingredients. Hubby was very impressed!

IMG_7044

Burst Grape Tomatoes with Eggplant and Whole Wheat Linguine

  • Servings: 3-4
  • Difficulty: fairly easy
  • Print

Ingredients

  • 8-10 cups grape tomatoes (about 100 tomatoes)
  • 4 tablespoons olive oil, divided
  • Salt
  • 1 tsp. granulated sugar
  • 2 small eggplant, trimmed, cut into 1/4″ rounds
  • 4 links (10 ounces) chicken sausages such as Gilbert’s Caprese, cut in 1/2″ diagonal slices
  • 1 Tbsp. roasted garlic, or 3 garlic cloves, pressed
  • 2 Tbsp. chopped fresh basil, more garnish
  • 1/4 cup dry white wine
  • 1/2 pound whole wheat linguine, cooked
  • Freshly ground pepper
  • 1 1/2 Tbsp. herbed pesto (optional)
  • 1/2 cup grated Parmigiano-Reggiano, more for garnish

Directions

  1. Heat the oven to 400 degrees. Rinse the grape tomatoes and put them, 2 tablespoons of the olive oil, a big pinch of salt, and the sugar in a large bowl and toss to coat the tomatoes well.
    IMG_7035
  2. Line a rimmed baking sheet with a piece of parchment paper and pour the tomatoes onto the baking sheet.
    IMG_7037
  3. Place them in the oven, and roast for 35 minutes, or until they collapse, or burst, and their skins begin to char.
    IMG_7043
  4. Remove the tomatoes from the oven and let them cool slightly. Carefully lift the paper and pour the tomatoes and all their roasting juices back into the bowl.
  5. Meanwhile, slice the eggplant, place on a wire rack in a rimmed baking sheet, salt one side and let sit 20 minutes, turn the slices and repeat. Wick away any extra moisture with paper towels. Cut down to 3/4″ cubes.
    IMG_7039
  6. Bring a large pot of water to a boil over high heat for the pasta and cook according to directions for al dente.
  7. Heat another 1 tablespoon oil in a large skillet over medium heat. Add the roasted garlic and cubed eggplant and sauté for about 5 minutes, stirring occasionally.
    IMG_7046
  8. Add the final tablespoon of olive oil and place the sausage slices in with the eggplant, cook for another 5 minutes, stirring occasionally.
    IMG_7049
  9. Add the white wine to deglaze the pan using a wooden spatula to loosen the brown bits, about 1 minute.
    IMG_7051
  10. Add the roasted tomatoes with their juices. Cover the pan to retain the moisture.
    IMG_7053
  11. Remove and reserve about 1/4 cup of the pasta cooking water, then drain the pasta.
  12. Add the pasta, about 1 tablespoon of the reserved cooking water, and the chopped basil to the tomato sauce. Stir and toss to thoroughly coat the spaghetti.
  13. Add a tablespoon or so of the remaining pasta water if the sauce is too dry or thick; drizzle with olive oil and season with salt and pepper to taste.
  14. Stir in the grated parm (and herbed pesto if using) and gently toss to coat.
    IMG_7058
  15. Turn the pasta into a serving bowl or individual bowls and pass the cheese, if using, at the table.
    IMG_7063

http://www.lynnandruss.com

Spiced Lamb Patties with Apricot Couscous. No Bun Necessary.

When I blogged on this Spiced Lamb Patties with Apricot Couscous recipe well over a year ago, I paired the meal with Green Beans with Tahini, which was a perfect accompaniment at the time. If you’ve followed our blog in the past, you may know that Russ and I are avid lamb fans, and so making this Middle Eastern-style meal again—this time with tri-colored pearl couscous and a side of spiced carrots and cauliflower—was not a hard choice to make.

IMG_6886
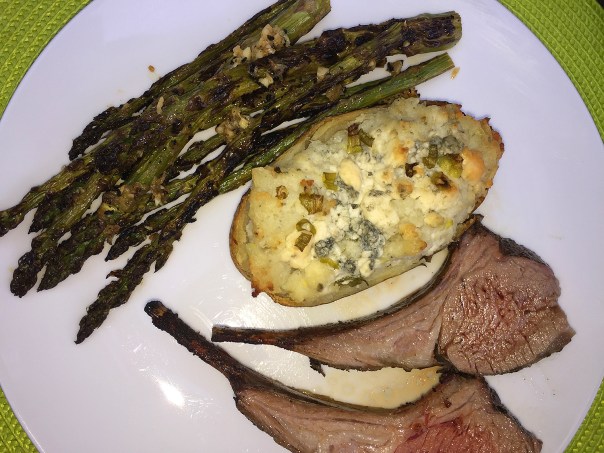
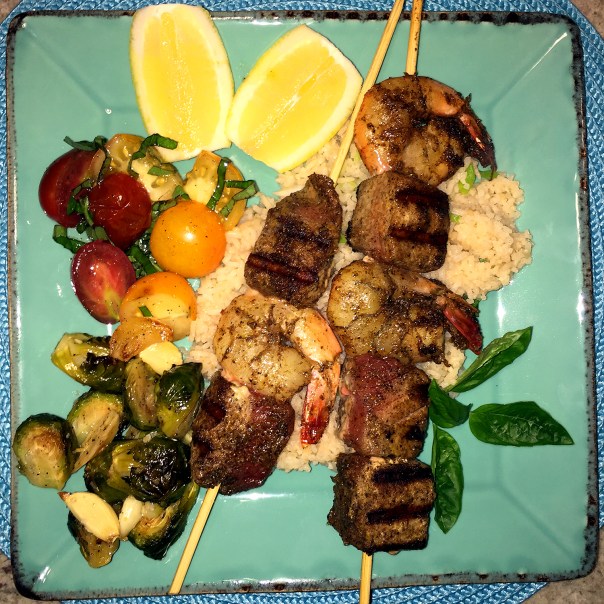
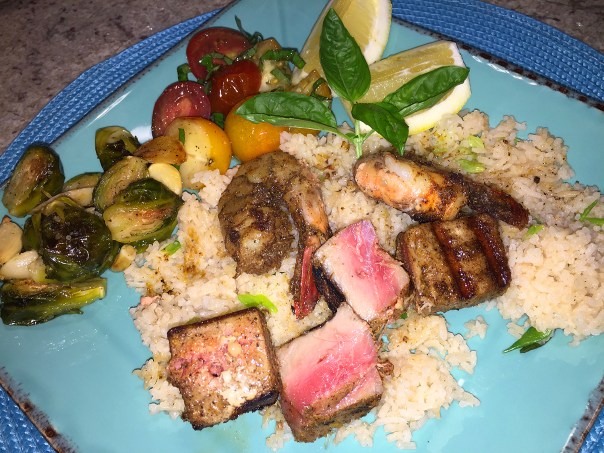
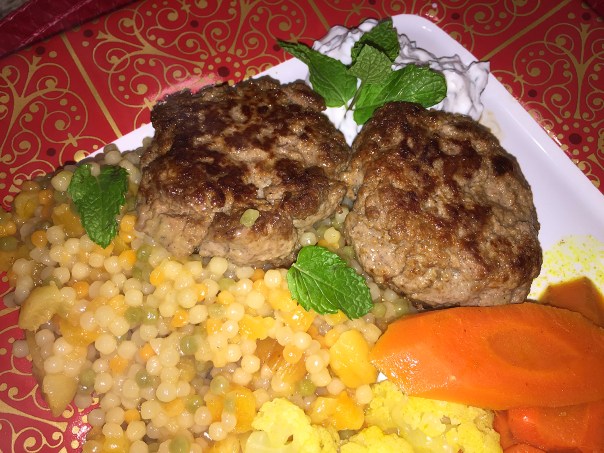
The steamed cauliflower and carrots were seasoned with pinches of the same spices used in the lamb with a drizzle of honey.

Keep in mind, if you do use the pearl couscous variety, it does take longer to cook, so follow the package directions. Another change I made was forming only six patties as opposed to eight. This way we each enjoyed two for dinner, and one per person leftover with couscous for lunch the next day.

As I mentioned the first time around, a touch of plain yogurt in these lamb patties helps keep them wonderfully succulent, and a dollop of mint-flavored yogurt on the side balances their richness. But what I didn’t mention in the first blog, it’s not necessary to add as much oil to the pan as indicated because there’s enough fat in ground lamb to render most of what’s needed, although do include a small amount.

I adapted this from a recipe by Nadia Arumugam found on the Fine Cooking “Make It Tonight” series, and we like the meal enough to keep it in our weeknight repertoire. You might want to consider doubling the side of mint and yogurt as we did…

IMG_6864

Spiced Lamb Patties with Apricot Couscous

  • Servings: 3-4
  • Difficulty: easy
  • Print

Ingredients

  • 2 cups chicken broth, preferably homemade
  • 3-1/2 oz. dried apricots, cut into medium dice (about 1/2 cup)
  • Kosher salt
  • 1 tsp. ground cumin
  • 1-1/3 cups couscous, or pearl variety
  • 1-1/4 lb. ground lamb
  • 5 Tbs. plain Greek yogurt
  • 2 large cloves garlic, mashed to a paste with a pinch of salt
  • 1 tsp. ground coriander
  • Freshly ground black pepper
  • 3 Tbs. extra-virgin olive oil
  • 2 Tbs. finely chopped fresh mint; more for garnish

Directions

  1. In a 3-quart saucepan, combine the chicken broth, apricots, 1/2 tsp. salt, and 1/4 tsp. of the cumin; bring to a boil over high heat.
    IMG_6870
  2. Stir in the couscous, remove from the heat, and cover. Let sit until all of the liquid has been absorbed, about 5 minutes.
    IMG_6883
  3. Meanwhile, in a large bowl, combine the lamb, 1 Tbs. of the yogurt, the garlic, coriander, the remaining 3/4 tsp. of the cumin, 1 tsp. salt, and 1/2 tsp. pepper. Mix by hand, taking care not to overwork the mixture.
    IMG_6866
  4. Shape into eight 1/2-inch-thick patties.
    IMG_6869
  5. Heat 2 Tbs. of the oil in a heavy-duty 12-inch skillet over medium-high heat until shimmering hot. Add the patties and cook, flipping once, until browned on the outside and barely light pink in the center, 5 to 7 minutes. Transfer the patties to a paper towel lined plate to suck up some of the oil.
    IMG_6882
  6. Meanwhile, in a small bowl, combine the remaining 4 Tbs. yogurt and the mint.
    IMG_6877
  7. Fluff the couscous with a fork. Mix in the remaining 1 Tbs. oil and season with salt and pepper. Divide the couscous and patties among 4 plates. Add a dollop of the minted yogurt on the side and garnish with additional mint.
    IMG_6885

Another Flippin’ Marinade for Flap

I really can’t say enough about flap steak and the beefy flavor that goes with it. In a recent blog titled “Who Gives A Flap?”, we highlighted another version with a delicious Mojo Marinade and an accompaniment of Chimichurri Salsa. I’m often confused by people’s comments on how tough flap steak can be. Every time we’ve ever grilled it, it came out very tender. You just have to make sure you slice it against the grain.

grilled flap steaks

This blog features a super-easy, super-tasty bold combination of soy sauce, balsamic, and maple syrup that works its magic on the meat quickly, so it only needs to marinate for as long as it takes to get your grill fired up. But, we wanted a more pronounced flavor and let our meat get happy in the sauce for nearly seven hours. (Steaks can marinate anywhere from 15 minutes to eight hours.)

IMG_6164

We hadn’t planned our Sunday evening meal ahead of time but knew we had some leftover flap steaks in the freezer. Out they came to thaw, prompting Russ to quickly Google a marinade and he found this one on Epicurious.com. If you prefer a tang as opposed to sweet (which normally we do), substitute Worcestershire sauce instead of maple syrup.

We decided to go ahead with the sweeter version this time around. Thanks to Wendy, a past coworker of mine, we used some pure Vermont maple syrup she gifted us, which I think makes a huge difference from the cheaper store-bought stuff.

One reviewer gave this tip: Make extra marinade, and after you take the steak out of it put it into a saucepan and bring to a boil. Then brush a few layers on the steak about halfway through grill time to the end. It’ll caramelize up and make a nice glaze.

And what goes better with steak than a good baked potato? How about a baked potato with avocado butter? We had some leftover from a recent dinner of Grilled Chili-Garlic Flank Steak with Avocado Butter, and the chef/author Ronne Day suggested using leftovers with chicken, fish or, yes, baked potatoes. Great idea!

baked.potato.avocado.butter

In the end, although we liked this soy version, we both agreed that we preferred the Mojo Marinade’s flavor profile better. But everyone’s tastes are different, so go ahead and give them both a try.

Grilled Marinated Sirloin Flap Steaks

  • Servings: 4-6
  • Difficulty: very easy
  • Print

Ingredients

  • 3 tablespoons soy sauce
  • 3 tablespoons balsamic vinegar
  • 3 tablespoons pure maple syrup
  • 4 garlic cloves, chopped
  • 2 pounds sirloin flap steaks

Directions

  1. Blend soy sauce, vinegar, syrup, garlic, 1/2 teaspoon salt, and 1/2 teaspoon pepper in a blender until smooth. Toss steaks with mixture. Marinate at room temperature about 15 minutes (or in refrigerator up to 8 hours.)
  2. Prepare a grill for direct-heat cooking over hot charcoal (high heat for gas); or a gas grill.
    IMG_6165
  3. Discard marinade and pat steaks as dry as possible.
  4. Oil grill rack, then grill steaks, covered only if using a gas grill, turning occasionally, 6 to 8 minutes total for medium-rare. Let rest on a plate, uncovered, 5-10 minutes.

http://www.lynnandruss.com

IMG_6183

IMG_6174Along with some leftover roasted Brussels sprouts and baked potatoes with avocado butter, our simple salads made of Bibb lettuce, heirloom tomato and avocado slices were a perfect side.

Moist Grilled Turkey Burgers

There’s probably nothing more synonymous with summer than a grilled hamburger, but I enjoy switching things up every now and again. So how about a grilled turkey burger for a change?

I hear you groaning… yes, often turkey burgers are dry and tasteless and leave you yearning for the real deal. Not these! Add in Italian turkey sausage to amp up the flavor—a trick often used with meatballs—and keep them incredibly juicy. The best part is that you can throw the patties together in a matter of minutes; only five ingredients and no chopping, slicing or dicing required—except for maybe the toppings.

Since turkey is such a lean meat and so susceptible to drying out, it’s important to pull them from the grill as soon as they reach their doneness temperature to avoid drying out the meat, although the sausage will help on this issue. Every degree counts when you’re grilling ground turkey. Keep in mind, ground turkey needs to be cooked to an internal temperature of 165° F. Use a meat thermometer to ensure accuracy.  The key to minimizing moisture loss and maximizing juiciness in burgers is through careful temperature tracking.

The unofficial end-of-the-summer holiday is fast approaching and this recipe would be perfect for those who no longer eat red meat or are trying to cut back—and they won’t feel deprived! What are you waiting for?

IMG_7010

Moist Grilled Turkey Burgers

  • Servings: 6
  • Difficulty: easy
  • Print

Ingredients

  • 1.3 lbs. ground turkey (93/7 lean)
  • 1 lb. Italian turkey sausage, casings removed if in links
  • 1/2 tsp. ground black pepper
  • 1 Tbsp. Dijon mustard
  • 1 Tbsp. Worcestershire sauce
  • 6 whole wheat hamburger buns
  • 6-12 slices sharp cheddar cheese (optional)

Directions

  1. Remove the sausage meat from the casings if necessary.
  2. Place the sausage meat in a large bowl along with the ground turkey, pepper, Worcestershire sauce and Dijon mustard. Use your hand to mix together until well combined.
    IMG_6995
  3. Form the meat into 6 even patties about 3/4″ thick, weighing approximately 6 ounces each. Place on a foil-lined (or wax paper) baking sheet and cover until ready to cook.
    IMG_6997
    IMG_7001
  4. Preheat the grill (or grill pan) to high. Clean the grates then grease the grill with a folded paper towel dipped in vegetable oil. Using tongs, carefully rub over the grates several times until glossy and coated.
  5. Place the turkey burgers on the grill and cook for five minutes, covered, until nice grill marks form.
    IMG_7004
  6. Flip and continue to cook, covered, for 5+ minutes more. Grill for a total of about 10-12 minutes, flipping once. Use a meat thermometer to check for the 165° doneness temperature.
    IMG_7008
    Optional: During the last minutes of cooking, add 1-2 slices of cheese to each burger, cover the grill and let the cheese soften slightly, about 1 minute.
  7. Heat the buns on the grill if desiresd, assemble burgers and serve.

http://www.lynnandruss.com


Shrimp, Chickpeas and Spinach with Ginger and Cumin

This savory dish has the essence of a long-cooked soup or stew, but luckily takes only a fraction of the time to make. Onion, garlic, ginger, cumin, cilantro, and a pinch of cayenne punch up the flavor. If you don’t have shellfish stock on hand, you can swap out and use chicken broth, homemade is always preferable.

IMG_6854

Found on FineCooking.com by a recipe from Joanne Smart, based on several of the reviewers comments who thought the dish was a bit bland as is, I made a few changes, most notably substituting homemade shellfish stock in place of the 1 1/2 cups water. My can of chickpeas was also larger at 19 ounces, I incorporated an entire lemon instead of a half, and I increased the amount of garlic, cumin and cayenne. And just because I felt like it, I used a full pound of shrimp as opposed to 3/4-pound. All of these “upgrades” are noted in the list below.

You may want to serve some crusty bread or pita pieces to mop up the tasty broth—I just used a spoon to capture all of the goodness. This is definitely a keeper, especially with the upgrades that I made. On top of tasting wonderful, it is chock full of healthy benefits and takes only about 25 minutes once prep is done. Bring it on!

IMG_6832

Shrimp, Chickpeas and Spinach with Ginger and Cumin

  • Servings: 3-4
  • Difficulty: easy
  • Print

Ingredients

  • 1 lb. large shrimp, peeled and deveined
  • Kosher salt
  • 2 Tbs. extra-virgin olive oil
  • 1 large lemon, cut into 6 wedges
  • 1 small onion (about 4 oz.), chopped
  • 1-1/2 Tbs. finely chopped fresh ginger
  • 3 large cloves garlic, minced
  • 2 tsp. ground cumin
  • Large pinch cayenne
  • 1 19-oz. can chickpeas, rinsed and drained
  • 2 bunches mature spinach, well washed, stemmed, and coarsely chopped
  • 1 1/2 cups shellfish stock, preferably homemade (chicken broth can also be used)
  • 1/4 cup chopped fresh cilantro

Directions

  1. In a small bowl, toss the shrimp with 1/2 tsp. salt. Heat 1 Tbs. of the oil in a 12-inch nonstick skillet over medium-high heat until hot.
  2. Add the shrimp and cook until one side is pink, about 2 minutes. Turn the shrimp over and continue to cook until pink all over, still a bit translucent in the center, 1 to 2 minutes.
    IMG_6836
  3. Take the skillet off the heat and transfer the shrimp to a plate. Squeeze two of the lemon wedges over the shrimp.
    IMG_6838
  4. Put the skillet over medium heat. Pour the remaining 1 Tbs. oil into the skillet, then add the onion. Sprinkle with a big pinch of salt and cook until the edges of the onions begin to brown, about 5 minutes.
  5. Add the ginger and garlic and cook, stirring, until fragrant, 1 minute.
  6. Add the cumin and cayenne and cook, stirring, until fragrant, about 20 seconds.
    IMG_6839
  7. Add 1-1/2 cups water, the chickpeas, and 1/2 tsp. salt. Simmer over medium-high heat for 5 minutes to develop the flavors.
  8. Using a potato masher, mash about half of the chickpeas right in the pan.
    IMG_6842
  9. Add the spinach and cilantro. Using tongs, carefully toss the greens to help them cook evenly and wilt, about 2 minutes.
    IMG_6844
  10. Add the reserved shrimp and any juices that have accumulated on the plate. Cook for another 1 or 2 minutes to reheat the shrimp and cook them fully (be careful not to overcook them).
    IMG_6848
  11. Season with salt to taste. Portion into warm bowls and serve with the remaining lemon wedges on the side.

http://www.lynnandruss.com

IMG_6853

A Polish Twist to an Italian Dish

I’m sure you’ve indulged in sausage, peppers and onions at some point in your life, right? Well, while recently shopping at Costco, we picked up some Polish sausage, figuring we could do a similar rendition of the Italian classic with an ethnic twist and it would make for an easy weeknight dinner.

IMG_6934

Sausage and peppers is a dish in Italian-American cuisine prepared using Italian sausage and bell peppers as primary ingredients. It is served as a dish on its own, sometimes with the use of additional ingredients such as tomato sauce, onions and potatoes or pasta. You will often find it served at Italian street festivals.

As I gathered our ingredients, I was momentarily taken aback when I realized what we bought was Kiolbassa Smoked Beef Sausage, a product out of San Antonio, Texas. It’s an organic, 100% grass-fed family recipe hailing from, you guessed it, Mike Kiolbassa. Come to find out, it’s just another way of spelling what I knew as Kielbasa. You say “toe-may-toe” I say “ta-mah-toh”…

Not to be deterred, I went ahead with the plans, because to be honest, this one-skillet dish is as easy (and delicious) as a weeknight dinner gets. Having stayed all afternoon at the country-club pool chatting it up with the gal pals, I didn’t have much time to fuss over making dinner once I got home. (Yes, I know, retirement’s tough.)

A staple of Polish cuisine, Kielbasa comes in dozens of varieties, be it smoked or fresh, made with beef, turkey, lamb, chicken, pork or veal—with every region having its own speciality. My mom’s Polish family made their own, so growing up, even though I was an extremely picky eater, I always remember liking Kielbasa.

All ingredients are chopped to bite-sized pieces so the prep takes mere minutes, while the actual cooking takes a bit longer because you have to sauté in steps, starting with the sausage, then the potatoes, next is peppers and onions, and finally everything together. The finale of a generous splash of vinegar brightens the entire dish, while if you’re so inclined, a pinch of red pepper flakes provides a bit of heat. And of course, the chopped chives for a pop of green.

…It’s great as leftovers too…

IMG_6919

Polish Sausage, Peppers and Onions

  • Servings: 4
  • Difficulty: easy
  • Print

Ingredients

  • Tbsp. olive oil, divided
  • 4 Polish sausage links, such as Kiolbassa, cut diagonally into 1″” slices
  • lb. small baby potatoes, any color(s), halved
  • 1/2 tsp. kosher salt, plus more to taste
  • bell peppers, preferably 2 different colors, roughly 1″ chop
  • large red onion, roughly 1″ chop
  • 1 Tbsp. red wine vinegar
  • 1 Tbsp. fresh chives, chopped, as garnish
  • Pinch red pepper flakes (optional)
  • 1/3 cup water

Directions

  1. Set a large cast-iron skillet over medium-high heat. After it gets good and hot, add the olive oil, then the sausage pieces. Brown all over—about 2 minutes per side—then remove to a waiting plate.
    IMG_6922
  2. Add another tablespoon olive oil to the skillet, followed by the potatoes, cut side facing down. Season with a big pinch of salt. Cook these for 5 minutes until browned, then flip and cook another 5 minutes. Transfer these to the plate with the sausage.
    IMG_6924
    IMG_6925
    IMG_6927
  3. Add the remaining tablespoon olive oil, then the peppers and onion. Season with a big pinch of salt and red pepper flakes. Sauté, stirring occasionally, until tender—about 10 minutes.
    IMG_6928
  4. Add the sausage slices and potatoes back to the skillet. Pour 1/3 cup water evenly over the top and cover the pan with a lid.
    IMG_6930
  5. Cook for 10 to 15 minutes until the sausage is cooked through and the potatoes are tender, lifting the lid for the last few minutes. remove from heat and add a splash of red wine vinegar and a the chopped chives.
    IMG_6932

http://www.lynnandruss.com

Healthy Tex-Mex Grain Bowl

Found on Epicurious, this Tex-Mex-inspired Grain Bowl with Grilled Corn, Steak and Avocado can be assembled in just 10 minutes. The key to a quick meal here is to prep over the weekend and store the elements in the refrigerator. It’s a great, healthy dish, but don’t think of making this without the creamy jalapeño sauce—that is key. If you don’t have a grill for the corn, you can roast it in the oven.

The farro (our grain of choice) and corn mixture could be a meal in itself, it is so good! But then combine it with the steak, corn, avocado and jalapeño sauce, and WOW all of the textures and flavors fuse together in a well-orchestrated dance on your palette. Keep in mind, grilling the corn will take longer than the steak, so plan accordingly. In fact, my cobs took 50% longer than the recipe called for, 15 minutes as opposed to 10, so I indicated that in the directions.

IMG_6900

About that sauce, this version is full of fresh jalapeño heat and bright lime, emulsified using only neutral vegetable oil. You might think 5-6 jalapeños is going to be off-the-charts spicy, but it’s really not. The spicy condiment is ubiquitous at Tex-Mex restaurants and taco trucks all over Texas. Most people, including myself, are shocked when they learn the light green, creamy sauce is made without avocado or dairy. Any leftovers would be great with nacho chips, grilled chicken or as a sandwich spread.

IMG_6906

Grain Bowl with Grilled Corn, Steak and Avocado

  • Servings: 1 1/4 cups
  • Difficulty: easy
  • Print

Ingredients

  • 1 lb. skirt or flank steak
  • 1 1/2 tsp. kosher salt, divided, plus more
  • 1 tsp. freshly ground black pepper, plus more
  • 3 large or 4 small ears of corn, shucked
  • 2 cups cooked whole grains, such as quinoa, farro, rice, or barley
  • 3 oz. crumbled feta or Cotija cheese (about 1/2 cup)
  • 4 scallions, thinly sliced
  • 1/4 cup extra-virgin olive oil
  • 2 Tbsp. fresh lime juice
  • 1 avocado, peeled, thinly sliced
  • Creamy Jalapeño Sauce, see recipe below (for serving)

Directions

  1. Season steak with 1 tsp. salt and 1 tsp. pepper. Let sit at room temperature 30 minutes.
  2. Prepare a grill for medium-high heat or heat grill pan over medium-high. Grill steak, turning occasionally, until an instant-read thermometer inserted into the center of steak registers 120–125°F for medium-rare (2–3 minutes per side for skirt; 3–4 minutes per side for flank). Transfer to a cutting board and let rest at least 10 minutes or until cool.
    IMG_6892
  3. Meanwhile, grill corn until charred on all sides, about 10-15 minutes. Transfer to cutting board and let cool.
    IMG_6894
  4. Slice corn off cobs into a large bowl. Add grains, feta, scallions, oil, lime juice, and 1/2 tsp. salt and stir to combine. Divide corn mixture among bowls.
    IMG_6902
    IMG_6907
  5. Thinly slice steak against the grain (to make slicing easier for skirt steak, cut into 5″–6″ segments, then slice against the grain).
  6. Top bowls with steak and avocado. Drizzle jalapeño sauce over; season with salt and pepper.
    IMG_6915

Do Ahead: Steak and corn can be grilled 3 days ahead. Transfer to separate airtight containers and chill.

http://www.lynnandruss.com

Creamy Jalapeño Sauce

IMG_6895

Creamy Jalapeño Sauce

  • Servings: 1 1/4 cups
  • Difficulty: easy
  • Print

Ingredients

  • 5-6 jalapeños (depending on heat and personal preference), stemmed, seeded, coarsely chopped
  • 4 garlic cloves, peeled
  • 5 tablespoons fresh lime juice (about 2 whole limes)
  • 1 teaspoon kosher salt
  • 1/2 cup neutral vegetable oil (such as grapeseed)
  • 3/4 cup (packed) fresh cilantro leaves with tender stems

Directions

  1. Pulse jalapeños, garlic, lime juice, and salt in a blender or food processor until puréed. With motor running, slowly drizzle in oil until a thick sauce forms.
    IMG_6897
  2. Add cilantro and pulse a few times until chopped and incorporated. Taste and add more jalapeño, if necessary.

Do Ahead: Sauce can be made up to 3 days in advance and refrigerated.

http://www.lynnandruss.com

IMG_6914

Watercress Salad with Steak, Sautéed Shallots & Stilton

Delicious, simple, sophisticated and very easy to throw together with it’s short list of ingredients. This salad is heavier on greens than on steak, making it a light but filling meal. With only one steak to be divvied up between 2-4 people, make sure you buy a top-notch thick ribeye. Often the crown jewel of the steakhouse menu, a well-prepared ribeye steak is a beautiful thing.

The ribeye’s high-fat content offers generous marbling, and therefore, the meat has more moisture to cook with. Where the flavor comes from in a good piece of meat is from the fat, and no other cut of meat has the amount of fat that a ribeye does. So unless you are a “fat-o-phobe” this Watercress Salad with Steak, Sautéed Shallots & Stilton recipe could be your next “save-the-day” weeknight meal.

IMG_3737

You may see ribeye referred to in several ways, like ribeye or rib eye and rib steak. Don’t get too hung up on the names; the ribeye has many but they all generally refer to the same cut. The cut is from the rib roast, which usually includes rib bone. But, to become a ribeye cut, the bone is usually removed before cooking, leaving the tender, flavorful part to enjoy.

First, regardless of technique being used, pull your ribeye out of the refrigerator and let it sit out for fifteen minutes. Then after cooking, once your desired temperature is achieved (130–135º for medium rare, 135–140º for medium), let the steak rest ten minutes before you cut into it as this allows the meat to retain the juices and prevents drying out the meat.

This type of salad I usually reserve for warmer weather, but we’ve also served it on cool temperature days, so it can be part of your weeknight dinner rotation in the early Spring or even mid-Autumn—I like that flexibility.

IMG_3723

Watercress Salad with Steak, Sautéed Shallots and Stilton

  • Servings: 3-4
  • Difficulty: easy
  • Print

Ingredients

  • 3 Tbs. extra-virgin olive oil
  • 1 Tbs. fresh lemon juice
  • 1/2 tsp. Worcestershire sauce
  • 1/2 tsp. Dijon mustard
  • Kosher salt
  • 14- to 16-oz. ribeye (1-inch thick)
  • Freshly ground black pepper
  • 4 large shallots, sliced 1/4 inch thick (about 1-1/2 cups)
  • 6 cups (lightly packed) small watercress sprigs (about 2 bunches trimmed of lower stems), torn into bite-size pieces
  • 2 oz. Stilton, crumbled (about 1/2 cup)

Directions

  1. In a small bowl, whisk 2 Tbs. of the olive oil, the lemon juice, Worcestershire sauce, mustard, and a generous pinch of salt. Season both sides of the steak with 1/2 tsp. salt and 1/4 tsp. pepper.
  2. In a 10-inch straight-sided sauté pan, heat the remaining 1 Tbs. oil over medium-high heat until hot. Cook the steak, without disturbing, swirling the oil in the pan occasionally, until the bottom of the steak is deeply browned, about 5 minutes.
    IMG_3727
  3. Flip and cook until the other side is nicely browned, about 3 minutes more. Transfer the steak to a cutting board.
  4. Turn the heat to low and cook the shallots, stirring frequently, until softened and lightly browned, 5 to 8 minutes. (Use a spatula or spoon to break apart the shallot slices and to incorporate some of the browned bits from the pan.) Remove from the heat and let cool slightly.
    IMG_3731
  5. Slice the beef thinly. Fan an equal number of slices on each dinner plate. Rewhisk the dressing if necessary.
    IMG_3732
  6. In a large bowl, toss the shallots, watercress, and Stilton with a generous pinch of salt and just enough of the dressing to coat.
    IMG_3734
  7. Season with more salt and pepper and arrange the salad over the beef slices.

IMG_3742

Adapted by a recipe by Susie Middleton from Fine Cooking