All posts by LynnHoll

Unknown's avatar

About LynnHoll

I have been an artist and designer all my life incorporating graphic design for websites, gardens, publications, fabrics, interior design and cooking. I am now retired from my professional job, but still create artistic visions in all forms on a daily basis.

Richboro Road Trip Let Down

For several weeks we’d been trying to make dinner reservations at DeNicola’s Ristorante in Richboro, about 20 minutes from home. Due to an odd assortment of reasons, it wasn’t until this past Friday evening we finally made the trek for dinner with friends Barb and Brad.

It’s an Italian BYO restaurant located in the Mallard Creek Shopping Center. Barb swears we use to frequent this place decades ago when it was under a different name and when we lived as next door neighbors in Yardley. Me, I have absolutely no recollection of the place whatsoever.

When we arrived the place was packed, mostly with an engagement party with several guests decked out in Irish attire, after all, it was St. Patty’s Day. But we were seated promptly (thank goodness I had made reservations) and what looked like a couple of 12-year-old boys began filling our water glasses and served the bread basket. However Brad had to chase someone down to bring wine glasses and open our bottles.

In advance, I had looked at their offerings online which were limited compared to their much more extensive listings on the printed menus. Reasonably priced choices feature an array of fresh pasta, chicken, veal, beef, pizza and seafood; all of which is prepared and cooked to order by chef/owner Angelo De Nicola. And, they do offer gluten-free pastas upon request.

IMG_0864

While deciding on what to order, one of the young lads delivered a small, complimentary pizza to our table. Then without too much hesitation we put in our selections. Brad opted for the Pasta Primavera which he didn’t end up liking too much; Barb had the Lasagna Abbruzzese which was OK; Russ wasn’t overly thrilled with his pasta dish (gluten-free) that came with chicken, asparagus, and porcini mushrooms topped with mozzarella cheese—although it looked delicious; and I got Blackened Tilipia which was par for the course. All entrees such as mine come with a choice of roasted potatoes and the chef’s vegetable of the day or a side of pasta with red sauce.

IMG_0866
Brad’s less than stellar Pasta Primavera

IMG_0868
Barb’s Lasagna Abbruzzese

IMG_0865
Russ had the (can’t remember the name) chicken and pasta dish

IMG_0871Lyn’s Blackened Tilapia with assorted vegetables

Would we go again? With a plethora of excellent Italian BYOs blanketing our area, there was nothing extraordinary about DeNicola’s that would make us go running back anytime soon. The food was OK (for most of us) and the portions large, but the service was somewhat spotty—one could reason that this was because of the large party, but they were dining off of a buffet and had all of their drinks in buckets, so they didn’t seem to require a lot of attention.

Anywho, it’s always fun to try new places (even though I had apparently eaten there over 20 years ago!) But it’s unlikely we’ll make a return visit. Chalk it up under “been there, done that.”


Pardina My Spanish

You know Russ’s passion for anything Spanish, and with chorizo being a favorite ingredient, this Spanish Pardina Lentil and Chorizo Stew was screaming his name. Despite its humble looks, this stew is full of bold flavors and is super satisfying. A little goes a long way and is packed with fiber.

spanish padrina lentil stew extra

Spanish pardina lentils are a a bit smaller than other lentils. They have thin greenish-brown or greyish skin on them, and are yellow inside. They hold their shape when cooked and have a nutty taste. Rarely found on the shelves in North America, they are the lentil of choice in Spain and the Mediterranean.

If you can’t find them, substitute brown lentils. Our pantry was brimming with at least five different kind of lentils, so we didn’t even bother trying to locate the Padrina variety. Another swap we made was the choice of chorizo. Our local grocery store did not have cured chorizo in stock, so Russ bought the fresh links. I just treated it like fresh sausage links, removed the casings, cut it into 1/2-inch chunks and added them to the stew a few minutes before the potatoes.

My ginormous carrots must have been on steroids they were so thick! To have them cook in the same amount of time as the potatoes, I halved them lengthwise first before cutting into 1/4-inch slices. After 20 minutes, the lentils, carrots and potatoes were tender. Keep an eye on that because if you let them cook too long, you’ll end with more of a mush than a stew—like the consistency of baby food—not exactly appealing to an adult!

Disfruta de tu estofado!

IMG_0812

Ingredients

  • 1 Tbs. olive oil
  • 1 medium yellow onion, chopped (about 1-1/2 cups)
  • 1 cup sliced carrots (1/4 inch thick)
  • 3/4 cup chopped celery
  • 1-1/2 tsp. finely chopped garlic
  • 1-1/2 lb. Yukon Gold potatoes, peeled and cut into 1-inch pieces
  • 7 oz. cured chorizo, halved lengthwise, then sliced crosswise 1/2 inch thick (about 1-1/2 cups)
  • 4 cups water
  • 1/2 tsp. dried oregano
  • 1/2 tsp. smoked paprika
  • 1-1/2 cups pardina lentils, rinsed
  • 1 14.5-oz. can diced tomatoes with their juice
  • Fine sea salt
  • 1/2 cup chopped fresh cilantro; more for garnish
  • Freshly ground black pepper

IMG_0819
Everything is cut to size and measured before starting to cook.

Directions

  1. Heat the oil in a 5-quart Dutch oven or other heavy-duty pot over medium-high heat. Add the onion, carrots, celery, and garlic, and cook, stirring occasionally, until the vegetables begin to soften, about 4 minutes.
    IMG_0820
  2. Stir in the potato, chorizo, oregano, and paprika, and cook, stirring occasionally, for 1 minute. Add the lentils and 4 cups water. Bring to a boil, reduce to a simmer, and cook until the lentils are just tender, 20 to 25 minutes.
    IMG_0822
    IMG_0824
  3. Stir in the tomatoes and their juice, and 1/2 tsp. salt, and cook for another 5 minutes.
    IMG_0826
  4. Stir in the cilantro, season to taste with salt and pepper, and serve.
    IMG_0829IMG_0834

By Marge Perry from Fine Cooking

A Little Black Magic

A fragrant mix of fennel seeds, orange zest, and fresh rosemary gives this quick-to-prep dish a French accent. The basis for this Pork Tenderloin Provençal recipe was adapted from Fine Cooking’s Erica Clark, although I made numerous changes while still maintaining the integrity of the dish.

My twists? For one, incorporating black garlic with it’s perfect mix of sweet and savory, producing a molassesy richness with tangy garlic undertones, yum! I had never cooked with black garlic before (nor have I eaten it that I’m aware of) but found the tender texture with a melt-in-your-mouth consistency similar to that of a soft dried fruit. Black magic, indeed!

IMG_0841
I used four large black garlic cloves along with three regular cloves in my rub.

Secondly, to further enhance the meal, I made a pan sauce using the 1/2 cup fresh juice squeezed from the orange after zesting, along with one large cube of our homemade chicken stock, about 1/3 cup. After the meat rested, we poured the pork drippings through a sieve into the skillet with the orange juice and broth and let it reduce down by half, then swirled in two tablespoons of butter. This sauce was sooo good, we both wanted more!

Our package of two pork tenderloins weighed in at a whopping 4.75 pounds, so I tripled the other ingredients (except the olive oil, which I doubled) to make sure there was enough to cover all of the meat. And due to the larger size, the tenderloins took an additional five minutes to come to temperature. These changes are indicated in the directions below.

Luckily we had enough leftovers for two more meals. One we just reheated, the other we made a pork fried rice dish, but knocked off the outer seasonings first.

IMG_0862

Ingredients (Lynn’s revised version)

  • 2, 2 to 2 1/2-lb. pork tenderloins
  • Kosher salt and freshly ground black pepper
  • 2 Tbs. olive oil
  • 6 cloves garlic, minced, preferably half black garlic cloves)
  • 3 Tbs. whole fennel seeds, coarsely ground in a mortar and pestle
  • 3 Tbs. minced fresh rosemary
  • 1 Tbs. finely grated orange zest
  • 1/2 cup juice from zested orange
  • 1/2-1/3 cup chicken stock, preferably homemade
  • 2 Tbs. unsalted butter

Directions

  1. Position a rack in the center of the oven and heat the oven to 450°F. Brush the pork all over with the olive oil, and season generously all over with salt and pepper.
    IMG_0842
    IMG_0843
  2. Combine the garlic, fennel seeds, rosemary, and orange zest, and press the mixture all over the pork. Transfer to a small rimmed baking sheet lined with parchment paper, and roast until an instant-read thermometer inserted in the thickest part of the pork registers 135°F, about 25 minutes.
    IMG_0845
    IMG_0846
  3. Let rest on a cutting board for 5 minutes before slicing and transferring to a platter.
    IMG_0854
  4. While meat is resting, bring the orange juice and chicken stock to a boil and reduce down by half. After the meat has rested and is sliced, pour the juice from the cutting board into the reduction through a strainer, and cook for another minute.
    IMG_0855
  5. Take the sauce off the heat and swirl in the two pats of butter. Pour over the platter of sliced meat, and serve.

IMG_0859

A Wintertime Pasta Caper

Sweet caramelized onion and creamy cheese tame radicchio’s bitter nature in this wintertime pasta of Penne with Ricotta, Caramelized Onion, and Radicchio from Fine Cooking’s Make It Tonight series. The impetus of this dish was we had about one cup of some really good fresh ricotta leftover from another meal a few weeks back, and we wanted to use it up before it went bad. The directions state that it takes less than a half hour to make, perfect for a quick weeknight meal.

However, and this is important, you can’t caramelize onions in six to eight minutes! They usually take 45-60 minutes over a low heat to render sweet, tender, golden onions that are not crispy. I made mine the night before while tending to other things, then threw them in the skillet the next evening toward the end of cooking the radicchio. So, just in case it didn’t sink in: Caramelization takes time. Don’t take them off too early—then, you’re “blonding” them instead of actually caramelizing them. They should be a rich brown, much reduced from where you started, and very soft but not quite mushy.

img_0576
This was about 40 minutes into cooking the onions for an hour the previous evening.

Another real treat in this dish was the fried capers, which also make a great garnish for soups and salads. They added a crisp jolt of brightness to just about every bite. The ingredients called for “large capers” so that’s exactly what we bought—according to the label on the jar. We’re pretty sure though, based on their photo, that what FC meant was large “caper buds” as opposed to the larger “caper berries.”

buds-on-caper-bush

The plant is a spiny, trailing, deciduous shrub native to the Mediterranean. It prefers warm, humid climate and grows in abundance all over the Cyprus, Italy, Greece, North African and some Asia Minor regions. The shrub begins producing flower (caper) buds from the third year of plantation.

Caper berries look like an olive; and are oblong. They’re much bigger than a caper bud, and have a similar taste and are treated in a similar way. Not quite as intense-tasting as the caper bud, they have a very similar flavor that is really quite delicious. In the commercial practice, capers are categorized and sold by their size in the markets. Smaller sized buds fetch more value than large ones.

capers-berries-and-buds
The difference in size between caper buds and berries.

Capers usually come in three sizes: small, medium and large. The downside with the larger ones is these are closer to springing open and becoming flowers. They are not quite as tight in texture, they’re not quite as firm, they have a flower inside them waiting to burst open. However, they have developed to the most gorgeous flavor. So I don’t think it really matters too much what size you use, it’s strictly a preference thing.

img_0578

Ingredients

  • 1/4 cup olive oil
  • 1/2 cup large capers, rinsed and patted dry
  • 1 Tbs. fresh thyme leaves
  • Kosher salt
  • 1 lb. penne pasta (we used 8.8 oz. of farfalle)
  • 1 medium yellow onion, halved and thinly sliced
  • 1 medium head radicchio, halved through the stem, cored, and thinly sliced (about 5 cups)
  • 1/4 tsp. crushed red pepper flakes; more to taste (of course we used more!)
  • 1-1/2 cups fresh whole-milk ricotta

img_0582
Slice each radicchio half into thin ribbons.

img_0586
Fry your capers in oil with fresh time. We suggest NOT wiping out the skillet.

img_0587
The capers and some of the thyme are moved onto a paper towel-lined plate.

img_0590
Near the end of cooking the radicchio, we added the already caramelized onions to heat through.

img_0591
Because we were shy about a half cup of ricotta, I added nearly a 1/4 cup of grated Parm with the reserved pasta water to thicken the sauce.

Directions

  1. Bring a large pot of well-salted water to a boil.
  2. Heat 2 Tbs. of the oil in a 12-inch skillet over medium-high heat. Add the capers and thyme, cover with a splatter shield (if you have one), and fry, stirring occasionally, until the capers are golden and puffed, 2 to 3 minutes. Using a slotted spoon, transfer the capers and thyme to a paper towel-lined plate. Wipe out the skillet. (We do not suggest wiping out the skillet which would remove all of the flavored oil seeped with thyme.)
  3. Boil the pasta to al dente according to package directions. Reserve 1/2 cup of the cooking water, then drain the pasta.
  4. Meanwhile, heat the remaining 2 Tbs. oil in the skillet over medium heat. Add the onion and cook, stirring occasionally, until golden, 6 to 8 minutes. (As I mentioned in the blog, to truly caramelize onions, you need to cook them over low heat for 45-60 minutes. Do it the night before if possible.)
  5. Add the radicchio, pepper flakes, and 1 tsp. salt. Cook, stirring occasionally, until the radicchio and onion are soft and tender, about 4 minutes.
  6. Put 1/2 cup of the ricotta in a large bowl and whisk in the reserved pasta cooking water. Add the pasta and toss to coat. Add the onion and radicchio and toss to combine.
  7. Stir in half of the capers and season to taste with salt. Serve dolloped with the remaining 1 cup ricotta and topped with the remaining capers.

Adapted from Erica Clark of Fine Cooking

img_0594
Instead of penne, we used a gluten-free farafalle pasta.

img_0584
We paired our pasta with a side Caprese salad using heirloom tomatoes and fresh basil, a real treat in the wintertime!

Interpretive-American Fare

Last May for Russ’ birthday he chose “elements” in Princeton, NJ, which was situated above the innovative restaurant Mistral, an establishment we hoped to patronize in the future. Serendipitously, local food activist Scott Anderson broke into the Philadelphia market in early 2017, with another seasonally fared Mistral restaurant in the King of Prussia Mall (KoP). So less than a year later we were fortunate enough to dine with a group of friends at the new location.

But before our reservations, the eight of us all gathered at Kim and Jeff’s beautifully decorated townhome in Collegeville, conveniently located about 8 miles from the KoP Mall. The last time we were all together was six months ago down in Culpeper, VA for Paula and Mike Graham’s daughter Kelsey’s wedding back in September. It was time for some catching up…

IMG_0777

What I didn’t know was that Jeff and Kim, above, are as enthusiastic chefs as me and Russ, and find pleasure in cooking as a team. After greetings and choices of wine in hand, we were treated to a tour of the home they moved into three years ago. Jeff proudly announced that Kim was the interior decorator and picked all of the choices, from flooring, to cabinets, countertops and light fixtures. However they are still waiting for the painter to come and give it that finishing touch with their already chosen color palette.

IMG_0781

IMG_0782

IMG_0783

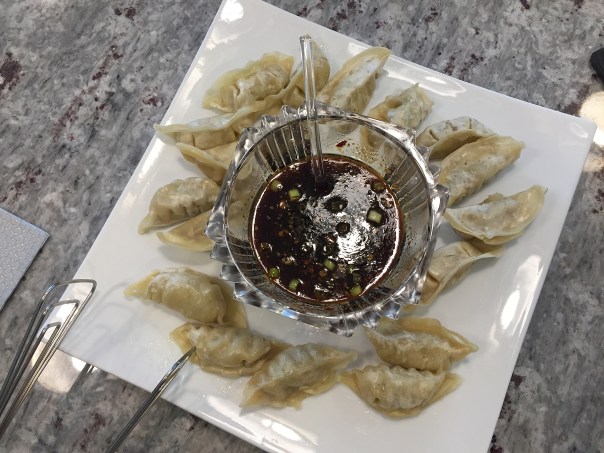
It was almost ludicrous to plan on dining out after the wonderful, and plentiful, appetizers prepared by Kim and Jeff. The ramekins of seafood salad were plump full of crab, lobster and shrimp with a slight kick from the vinaigrette. And those crab-stuffed cooked mushrooms were divine! Kim admitted the dumplings were store bought, but she did make the accompanying tasty soy-scallion dipping sauce.

IMG_0778
Denise, Dan and Russ sip some wine while enjoying each other’s company.

IMG_0779
Paula and Mike on the other side of the large kitchen island.

Satiated from all of the wonderful appetizers and Jeff’s wine cellar bursting with a fine selection of reds, we had second thoughts about leaving—but go we did, since we had reservations and we all were excited about checking the place out.

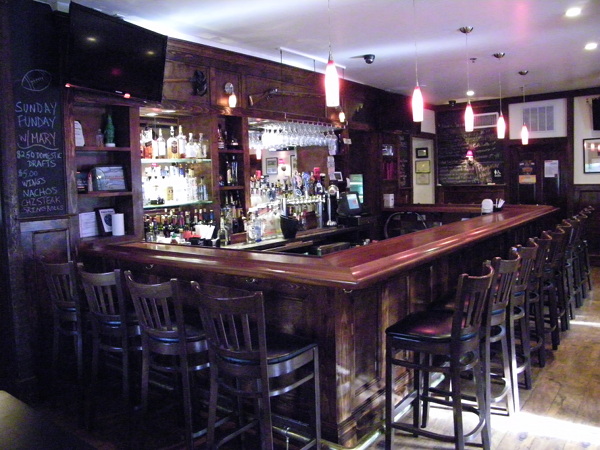
After the short ride over, we were seated immediately at a long table with a view into the open kitchen. Our one complaint was the proximation to the front door. It being a bitterly cold night, as other diners entered, we were occasionally hit with a cold breeze. But we soldiered on. Jeff chose a bottle of red which five of us shared, while three others imbibed on a selection of beers. Now it was time to make the hard decisions and narrow down our choices on what to eat…

IMG_0789
The ladies, Kim, Denise, Lynn and Paula line one side of the table…

IMG_0788
…while our other halves, Mike (not pictured), Russ, Dan and Jeff line the other.

IMG_0791
All together here…

Mistral’s menu is a vanguard of modern-global cuisine. As their website states “culinary pioneer’s chef Scott Anderson and chef de cuisine Ben Nerenhausen place a superlative emphasis on fresh, local ingredients, ultimately creating a progressive menu of seasonally curated small plates for guests to savor and share.” Both Scott and Ben were named as 2014 James Beard Foundation Award Semi-Finalists — Scott for Best Chef Mid-Atlantic, and Ben for Rising Star Chef of the Year. Impressive!

mistral.chefs

The word Mistral derives from a strong Mediterranean wind that sweeps through, bringing fresh air and clearing weather. We are excited for Mistral KOP to bring that same sense of fresh air to the Montgomery County dining scene.
— Chef Scott Anderson

our-menu-at-mistral-restaurant-in-princeton-nj-1030x772

Menu items differ from Mistral Princeton to reflect the highest quality ingredients that Montgomery County PA’s local farms, aquaculturists and butchers have to offer. A good portion of their menu is geared towards sharing, with plates a little smaller although not to be mistaken as tapas.

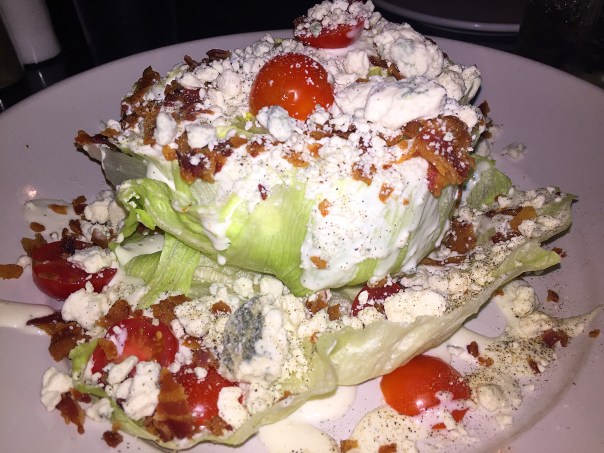
To begin, we ordered an assortment of Snacks, Small Bites and Salads. Wings with tamarind glaze and sesame; Hush Puppies with bacon, horseradish and dill dipping cream; Market Greens Salad with roasted vegetable puree, shaved gouda, pumpkin seed tossed in a  vinaigrette; Bucatini Cacio y Pepe with parmesan and uni; Pork Riblets on scallion pancakes with pickled cucumber; Crispy Maitake Mushrooms with broccoli, grilled onion, and topped with a creme fraiche; and last but not least Grilled Calamari with papaya salad, peanuts, and brown butter.

IMG_0792
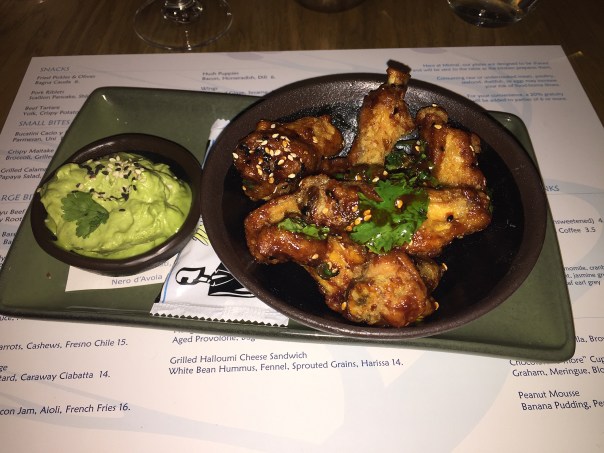
Chicken Wings for Dan

hush.puppies
Hush Puppies for Denise and Kim who loved them so much she intends on going back for some take out orders

IMG_0799
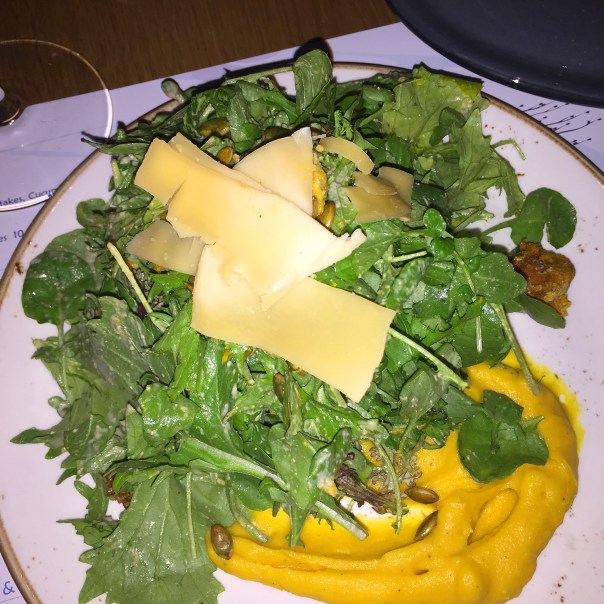
The ginormous salad for Lynn

IMG_0798
Buccatini for Jeff

IMG_0794
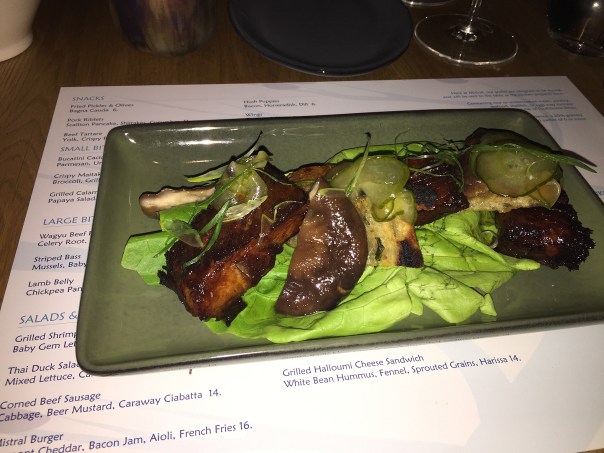
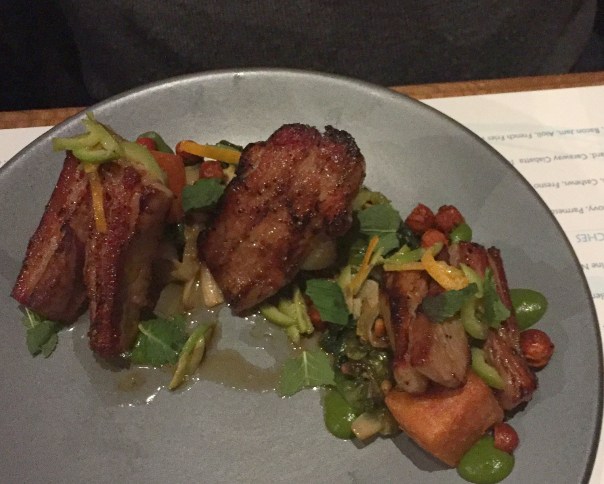
Mike had the Pork Riblets

IMG_0793
A bowl of Crispy Maitake Mushrooms for Russ

IMG_0795
And Paula had the interesting plate of Grilled Calamari

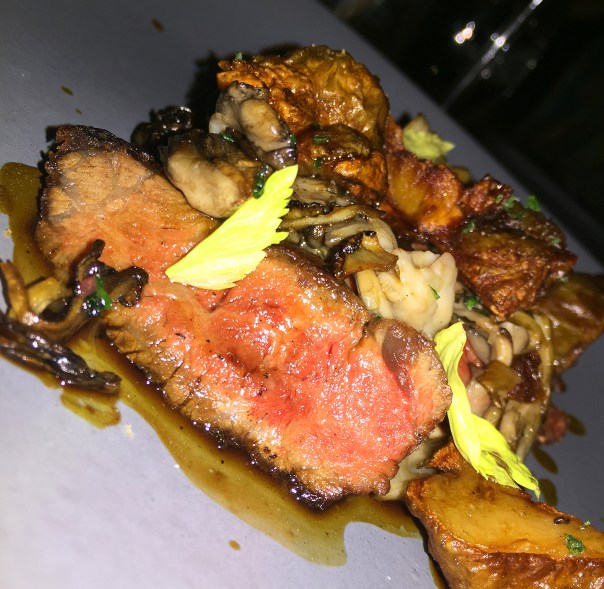
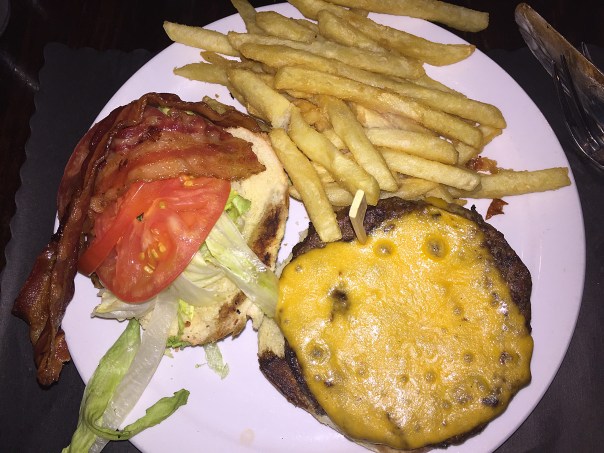
For our main dishes, the most popular choice was the Wagyu Beef, which Russ, Mike, and Denise all opted for. The steak was accompanied by a celery root purée, maitake mushrooms and sunchokes. Russ gave me a taste and it was definitely drool-worthy!

IMG_0809

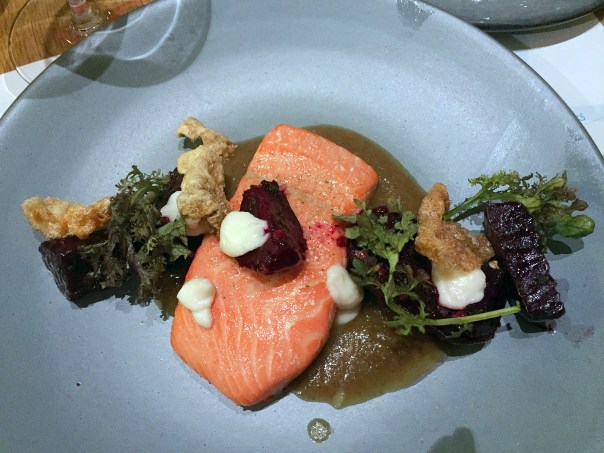
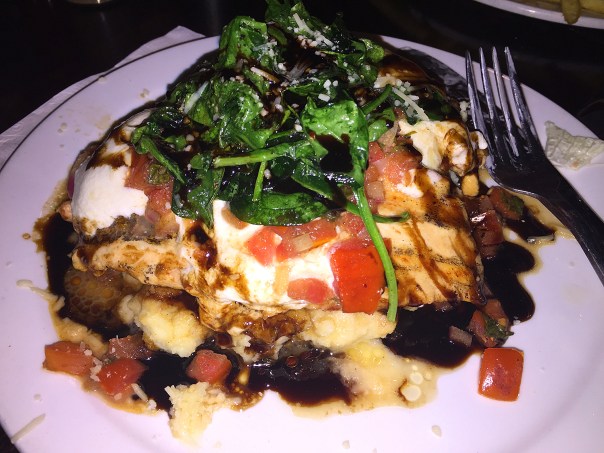
Paula and I chose the Olive Oil-Poached Organic Salmon with onion soubise, roasted red baby beets, mustard, and buttermilk. The salmon was exquisite and melted in your mouth!

IMG_0804

Jeff decided on the Lamb Belly with chickpea panisse, anchovy, and green olives and loved it. While Dan enjoyed his Grilled Shrimp Caesar with baby gem lettuce, anchovies and Parmesan as an entrée.

IMG_0802

IMG_0803

Finally for dessert, a few of the couples split some Peanut Mousse with banana pudding, peanut crunch and apricot. While they agreed it was good, they weren’t over the top with it.

For our next get together we talked about the possibility of doing one of those Amazing Escape Rooms, a recent worldwide trend. The idea is to challenge your mind and ability to collaborate with others in an interactive, team-building environment in your choice of a variety of themed rooms. Paula and Mike, along with several of their kids, recently had a great time busting out of one in Philly.

Here’s how it works—Groups of up to 10-12 will work together to solve problems, uncover clues, and crack codes in order to progress as a team. You and your team have 60 minutes to escape the room. Each room has a storyline that you’ll be introduced to upon entering, along with basic instructions on what you’ll need to uncover to escape.

I’m hoping they have a Culinary-themed room, which would be just the ticket for this group!
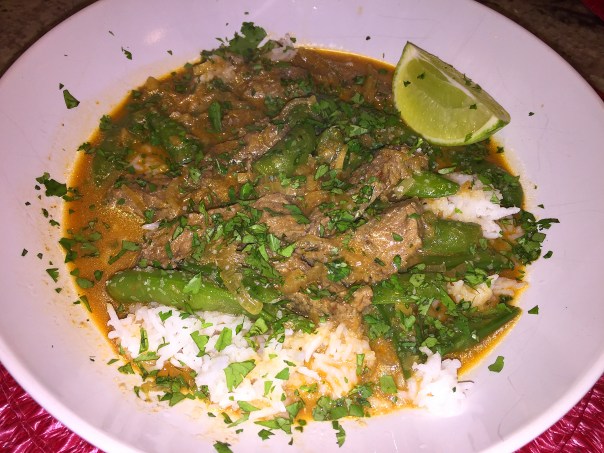
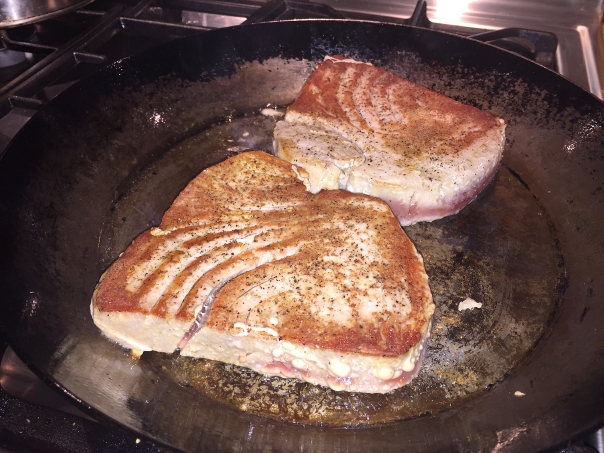
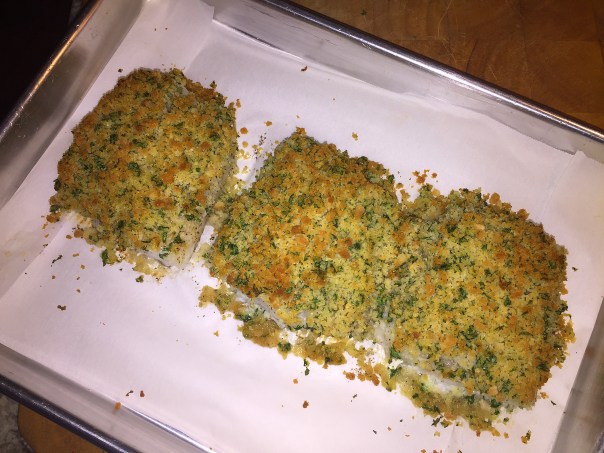
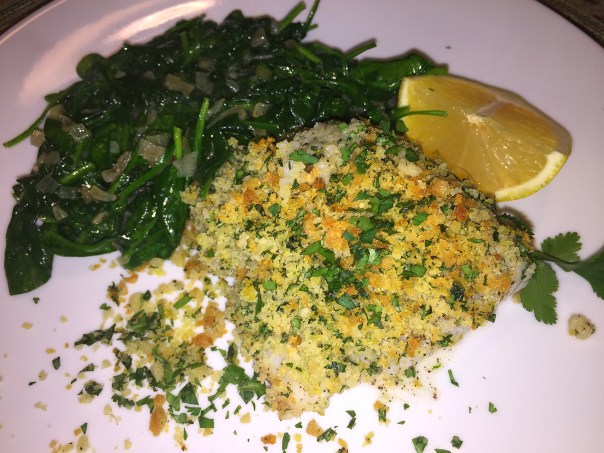
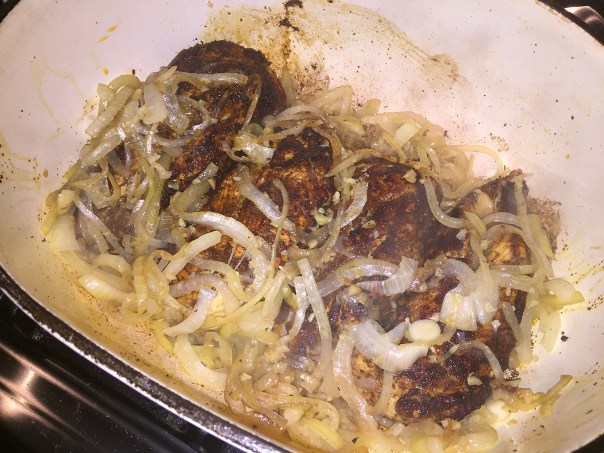
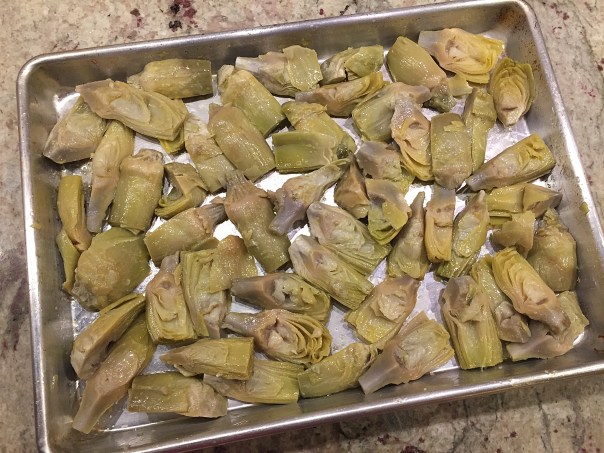
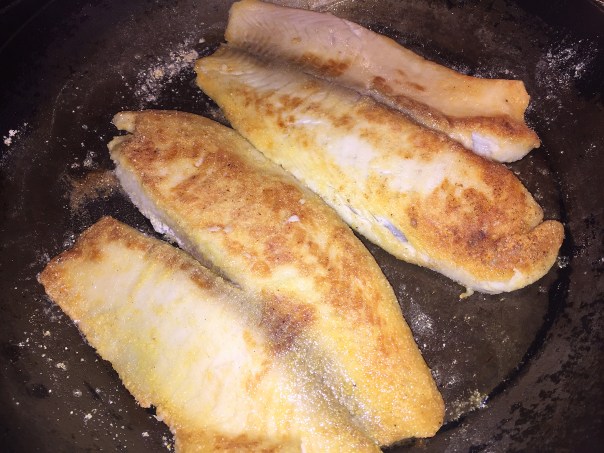
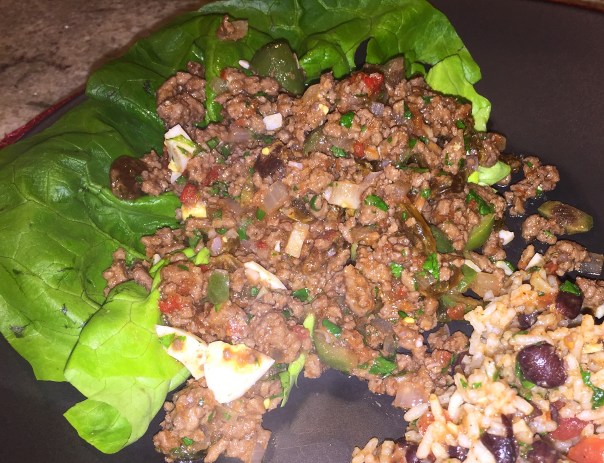
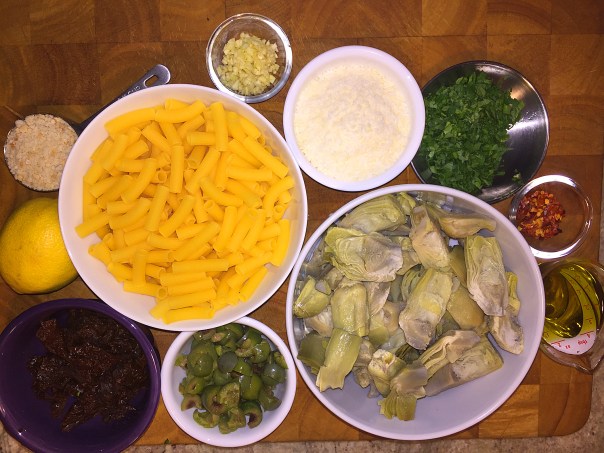
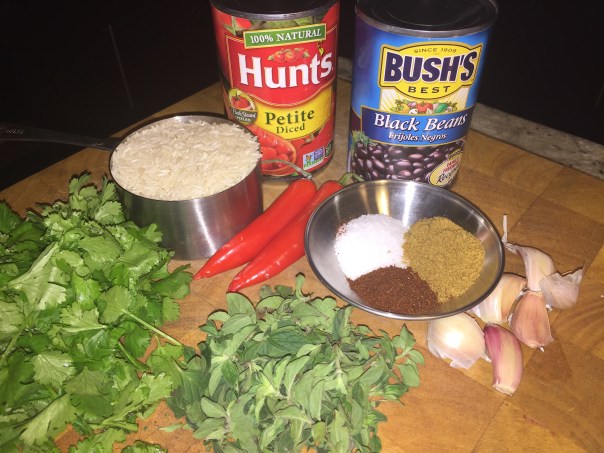
Winging It

Occasionally I’m asked if I ever whip up my own meals without the aid of a recipe. The answer is, yes, absolutely! The impetus behind it is usually we don’t have anything planned for dinner and/or more likely, I need to use up some ingredients that are about to spoil. This Seared Tuna Steaks with Shallots and Mustard Lemon Butter Sauce is but one of many meals thrown together on the fly.

IMG_0758

The supermarket was having a great sale on some gorgeous tuna steaks, tempting me to buy two. With no recipe in mind, I knew the steaks would cook up quickly with little to no fuss. Before shopping, I did a quick inventory and made a mental note of provisions on hand including lemons, parsley, shallots and a large package of baby spinach about to expire. With the addition of some staples of olive oil, butter, dijon mustard, and a smattering of salt and pepper, it would only be a short prep away from preparing a quick tasty tuna dinner.

Let’s dig into tuna’s health benefits. For one, it has omega-3 fatty acid, which helps prevent high blood pressure. Plus it is a good source of selenium, an antioxidant that helps improve the body’s immune system. The immune system is a vital part of the body that is integral for fighting off sickness, diseases and infections. I mean, who doesn’t want to be healthy?

So make tuna your next meal choice. It is loaded with vitamins and nutrients, low in saturated fat and is an excellent source of protein. When eaten in moderation, you can reap the healthy benefits of this tasty fish, while avoiding the negative effects of high levels of mercury in your food.

When looking for a source of lean protein, tuna is an excellent choice. The fact that it is low in both fat and calories makes it an excellent substitute for dairy products and meats that have a higher fat content. So with all of this good-for-you-knowledge, start winging it today and see where your culinary adventures will take you…

IMG_0748

Seared Tuna Steaks with Shallots and Mustard Lemon Butter Sauce

  • Servings: 2
  • Difficulty: very easy
  • Print

Ingredients (for two)

  • 2 thick tuna steaks
  • 3 tablespoons olive oil
  • Salt and pepper to taste
  • 1 small lemon zested, than juiced and divided
  • 2 medium shallots, minced and divided
  • 1 teaspoon dijon mustard
  • 4 tablespoons unsalted butter
  • 2 tablespoons chopped fresh parsley
  • 1/2 teaspoon dry mustard (optional)

Directions

IMG_0746

  1. Have two skillets at the ready. Heat 2 tablespoons of the oil in a large carbon steel or cast iron skillet over medium high heat. Season the tuna steaks on both sides with salt and pepper.
    IMG_0751
  2. Add the tuna to the hot skillet and sear well, about 4 minutes per side, depending on the thickness and desired doneness. Remove from pan to platter and tent with foil.
    IMG_0749
    IMG_0754
  3. While the tuna is searing, add 3 tablespoons of the butter to the other skillet over medium heat. Add half of the minced shallots and sauté for several minutes until softened. Turn the heat down to low, swirl in the mustard then toss in the lemon juice and half of the lemon zest, mixing until well incorporated and slightly reduced. Add the parsley at the very end before plating.
    IMG_0753
  4. After the tuna is removed from the first pan, turn the heat down to medium and add the last tablespoon of butter and olive oil and the other half of the minced shallots. After a few minutes add the baby spinach in batches as it wilts down. At this point I also incorporated a half teaspoon of dry mustard, threw in the rest of the lemon zest and seasoned with salt and pepper.
    IMG_0755
  5. Place a tuna steak on each dinner plate and drizzle the lemon shallot mixture over each. Split the spinach, which will have cooked down considerably, between both plates and serve immediately.


Get Your Stir-Fry On

This wonderfully fragrant and spicy dish of Stir-Fried Chili Beef with Peppers gets its deep, nuanced flavor from Asian hot bean sauce, which contains soybeans in addition to chiles. It’s a rich, complex flavor worth seeking out, but if you can’t find it in an Asian market or your supermarket, you can use chili garlic sauce or Sriracha instead.

img_0692

As with many recipes from one of our favorite Asian chef-authors, Grace Young, make sure you prep everything ahead of time because you won’t have the luxury to do so once you start the stir-frying process. The actual total cooking time is only about five minutes.

For both additional color and health reasons, I increased the portions for the snow peas and bell pepper strips. Chili bean sauce (Toban Djan), made from a special blend of chilies and fermented beans was already a staple in our fridge, and it adds a bit of spice to the dish, but not overwhelmingly so. We served the stir-fry over some fluffy jasmine rice, but it could stand alone on its own too.

img_0680

Ingredients

  • 12 oz. flank steak
  • 3 Tbs. Shaoxing rice wine or dry sherry
  • 1 Tbs. minced fresh ginger
  • 2 tsp. soy sauce
  • 1-1/2 tsp. cornstarch
  • Kosher salt and freshly ground white pepper
  • 1 tsp. plus 2 Tbs. peanut or vegetable oil
  • 2 Tbs. hot bean sauce (also called chili bean sauce), chili garlic sauce, or Sriracha
  • 2 Tbs. hoisin sauce (preferably Koon Chun)
  • 1 Tbs. minced garlic (from 3 medium cloves)
  • 6 oz. snow peas, strings removed (about 2 cups)
  • 1 medium red bell pepper, stemmed, seeded, and cut into 1/2 x 2-inch strips
  • 8 medium scallions, thinly sliced on the diagonal (about 1 cup)

Directions

  1. Cut the beef with the grain into 2-inch-wide strips, and then cut each strip across the grain into 1/4-inch-thick slices. Transfer to a medium bowl.
    img_0677
  2. Add 1 Tbs. of the rice wine, the ginger, soy sauce, cornstarch, 1/4 tsp. salt, and 1/8 tsp. pepper to the beef. Stir until the cornstarch is no longer visible. Add 1 tsp. of the oil and stir until the beef is lightly coated.
    img_0682
  3. In a small bowl, stir the hot bean sauce, hoisin sauce, and the remaining 2 Tbs. rice wine. Heat a 14-inch flat-bottom wok (preferably seasoned carbon steel) over high heat until a bead of water vaporizes within 1 to 2 seconds of contact.
  4. Add 1 Tbs. of the remaining oil, swirl to coat, add the garlic, and stir-fry with a metal wok spatula until fragrant and light golden, about 10 seconds. Push the garlic to the sides of the wok and carefully add the beef, spreading it evenly over the bottom and sides of the wok in a single layer.
  5. Cook, undisturbed, for 1 minute, letting the beef begin to sear, then stir-fry with the garlic until the beef is lightly browned but not yet cooked through, about 1 minute. Transfer the beef and garlic to a plate.
    img_0686
  6. Add the remaining 1 Tbs. oil to the wok and swirl to coat. Add the snow peas, bell pepper, and scallions, sprinkle with 1/2 tsp. salt, and stir-fry until the snow peas are bright green, about 1 minute.
  7. Return the beef with any accumulated juice to the wok. Add the hot bean sauce mixture by swirling it down and around the sides of the wok; if you pour the sauce directly into the center of the pan, the temperature of the wok will drop.
    img_0690
  8. Stir-fry until the beef is just cooked through and the vegetables are crisp-tender, 30 seconds to 1 minute more. Serve immediately.

By Grace Young

Good COD Almighty!

Cod have been an important economic food since the Viking period (around 800 AD). They have a lean, mild flavor profile with a dense, flaky, white flesh and a tender-firm texture. And they are not fishy tasting at all, making them appealing to folks who are not necessarily fond of fish. You can manipulate the flavor profile by whatever ingredients you are cooking with—a big plus for the variety of personal preferences.

The two most common species of cod are the Atlantic cod, which lives in the colder waters and deeper sea regions throughout the North Atlantic, and the Pacific cod, found in both eastern and western regions of the northern Pacific. Luckily, cod is available throughout the year and is a wonderful substitute for meat protein with its versatility making it easily adaptable to all methods of cooking.

Studies show that people who eat fish regularly have a much lower risk of heart disease and heart attack than people who don’t consume fish. For numerous reasons, we try to have fish a minimum of at least one night per week. This quick Roasted Cod with Lemon-Parsley Crumbs by one of our favorite chef/authors Molly Stevens, immediately piqued our interest due to the short ingredients list and quick turnaround time.

img_0705

Besides being an excellent low-calorie source of protein, cod contains a variety of very important nutrients and has also been shown to be useful in a number of different health conditions—as little as a weekly serving of fish lowers risk of ischemic stroke, for instance. And not for nothing, fish consumption is also correlated with a reduced incidence of colon cancer.

For an additional wholesome boost, we paired our cod with some sautéed baby spinach, another powerhouse in the health benefits department, and a quick cooker to boot. Recent studies continue to underscore the amazing versatility of spinach. This leafy vegetable is rich in water-soluble and fat-soluble vitamins, minerals, and a wide variety of phytonutrients. So if you’re craving a healthy meal, this one is a good bet!

NOTE: If you have some fillets with the tapered narrow end, tuck under as shown in the photo below, so that it won’t dry out.

Ingredients

  • 1 cup panko breadcrumbs
  • 3 Tbs. melted unsalted butter
  • 3 Tbs. finely chopped fresh flat-leaf parsley
  • 2 tsp. finely grated lemon zest
  • Kosher salt and freshly ground black pepper
  • Six 1- to 1-1/2-inch-thick cod fillets (about 6 oz. each)

Directions

  1. Position a rack in the center of the oven and heat the oven to 425°F.
  2. In a medium bowl, combine the panko, butter, parsley, and lemon zest. Add a pinch of salt and a grind of pepper and stir to evenly distribute the ingredients.
    img_0697
  3. Line a heavy-duty rimmed baking sheet with parchment. Arrange the cod fillets on the baking sheet and season both sides with salt and pepper. Divide the panko topping among the fillets, pressing lightly so it adheres.
    img_0700
  4. Roast until the breadcrumbs are browned and the fish is mostly opaque (just cooked through), with a trace of translucence in the center (cut into a piece to check), 10 to 12 minutes, depending on the thickness of the fillets. Serve immediately.
    img_0701

img_0708
We paired our cod with a side of sautéed baby spinach in a seasoning of shallots and dry mustard.

By Molly Stevens

The Pot Roast Bar is Raised

February in the Northeast was way above average this season with many days hovering in the hi-60’s and even 70’s, but March came roaring in like a lion, cold and windy—perfect for a long afternoon braise. And who’s recipe is better to follow than our favorite braising cookbook author, Molly Stevens. She raises the bar for the lowly chuck roast, a humble cut of meat made company-worthy in this Red Wine-Braised Pot Roast recipe.

img_0734

All kinds of yummy ingredients meld together in perfect harmony after a long, slow, three-hour braise. The tantalizing aromas will drive you insane with anticipation until you plate the star of the show on the dinner table. In fact, after the roast was removed from the pot, I couldn’t contain myself any longer, I just had to have a taste while the sauce was being made.

The largest chuck roast available at the supermarket was only 2.75 pounds, smaller than the 4-pounder listed, but plenty big for the two of us. As is our custom, I increased the veggie amounts and also added some halved shallots. But just as I voiced out loud to Russ, asking him to help me remember adding the frozen pearl onions when needed, I totally forgot (apparently so did he) until 3 minutes before the pot roast was supposed to be pulled from the oven 😦 So I threw them in, and let everything cook an additional half hour—our stomach’s were really growling by this point.

At the end as you make the sauce, I knew Russ would not be keen on discarding the spent onion, fennel, and pancetta. Instead, we strained the liquid in order to make the “gravy,” but kept those other ingredients, mixing them in with the carrots, pearl onions and celery root. Why would you waste such lusciousnesss? Plus, it would have been almost impossible to separate them.

NOTES: If your pot doesn’t have a tight lid, cover the pot tightly with heavy-duty foil, crimping it well over the edges. Chuck roast comprises several different muscles, so you may want to pull apart the various pieces with your hands before carving, then slice each piece across its grain.

Yes, it is somewhat labor-intensive, but every bit worth it. There is some “make-ahead” directions following the recipe, and like most braises, it tastes even better when made ahead and left to sit for a day or three; so that might be the path to take next time. We were definitely glad there were leftovers!

Ingredients

  • 2 garlic cloves, smashed
  • 2 sprigs fresh rosemary
  • 5 whole black peppercorns
  • 2 wide strips orange zest
  • 1 4-lb. boneless beef chuck pot roast
  • Kosher salt and freshly ground black pepper
  • 2 Tbs. olive oil
  • 5 oz. thick-sliced (1/4 inch) pancetta, cut into 1/2-inch squares (to yield 1 cup)
  • 1 cup finely chopped onions
  • 1/2 cup finely chopped fennel bulb
  • 1/4 cup tomato paste
  • 1/4 cup brandy
  • 1-1/2 cups dry red wine
  • 1-1/2 cups homemade or low-salt chicken or beef broth
  • 2 cups peeled, diced carrots (3/4-inch chunks)
  • 2 cups peeled, diced celery root (3/4-inch chunks)
  • 2 cups frozen pearl onions (leave whole, add frozen)
  • 1/4 cup chopped fresh flat-leaf parsley
  • 2 Tbs. chopped capers
Directions
Brown the meat and aromatics:
  1. Set a rack on the lower third of the oven and heat the oven to 300°F. Select a 5- to 6-quart Dutch oven with a tight-fitting lid. Cut a large single-layer square of cheesecloth, and rinse it to remove any loose fibers. Spread the cheesecloth flat and pile the garlic, rosemary, peppercorns, and orange zest in the center. Gather the edges to form a pouch and tie tightly with kitchen twine. Set aside.
    img_0716
  2. Tie the roast into a snug shape with twine, pat it dry with paper towels, and season with salt and pepper. In the Dutch oven, heat the olive oil over medium-high heat. Brown the meat thoroughly on all sides, turning with tongs, about 5 minutes per side. The meat should sizzle but not scorch; adjust the heat accordingly. Transfer the meat to a large plate.
    img_0719
    img_0721
  3. Lower the heat to medium, add the pancetta, and cook until just browned and beginning to crisp, 5 to 8 minutes. Remove the pot from the heat. With a slotted spoon, transfer the pancetta to the plate with the beef. Spoon 2 Tbs. of the fat from the pan into a small dish and discard the rest.
    img_0722
    img_0723
  4. Evaluate the drippings on the bottom of the pot. They may be very dark, almost black, but if there are any scorched bits, wipe these out with a wadded paper towel (if in doubt, taste a fleck; as long as it doesn’t taste acrid, it’s fine). Return the pot to medium heat and add the 2 Tbs. reserved fat. Add the onions and fennel, season with salt and pepper, and cook until they start to soften, about 5 minutes. Add the tomato paste and cook, stirring, until darkened slightly, 2 to 3 minutes.
Deglaze and braise:
  1. Add the brandy, stirring with a wooden spoon to scrape up any remaining drippings on the bottom of the pot if necessary. Bring to a boil over high heat, and cook until the liquid has reduced to about 2 Tbs.
  2. Add the red wine, beef or chicken broth, and the cheesecloth pouch of flavorings to the pot. Bring the liquid to a simmer. There should be at least 1 inch of liquid in the pot. Add more broth if needed.
    img_0726
  3. Return the meat to the pot, along with the pancetta and any juices that have accumulated. Return the liquid to a simmer, and cover the pot with a sheet of parchment, pushing down so the paper touches the meat. Set the lid in place. Slide the pot into the oven and cook for 2 hours, turning the roast with tongs after 1 hour.
    img_0730
  4. Turn the roast over once more and then scatter the carrots, celery root and pearl onions into the liquid around the roast. Continue braising, covered with the parchment and the lid, until the meat is fork-tender, about an hour longer. Test for doneness by spearing the meat toward the center with a carving fork. Pull out the fork carefully: If it lifts the meat along with it, continue cooking for another 20 to 30 minutes.
    img_0732
Make a sauce from the braising liquid:
  1. Transfer the pot roast and vegetables to a shallow platter; tent with foil. Strain the remaining liquid into a measuring cup, discarding the spent onion, fennel, and pancetta and the cheesecloth sachet of flavorings (we did not discard anything but the sachet.) Let the fat rise to the surface and spoon it off. Wipe out the braising pot with a paper towel.
  2. Return the strained juices to the pot  and bring to a simmer over medium heat. Taste and evaluate. If the flavor seems weak, simmer vigorously over medium-high heat to reduce the volume and concentrate the flavor, 5 to 15 minutes; season to taste with salt and pepper. Whisk in parsley and capers.
    img_0739
    img_0740
  3. Snip the strings from the pot roast and carve the meat across the grain into 1/4- to 1/2-inch-thick slices. Arrange the meat on a serving platter. Ladle about half the sauce over all, garnish with the vegetables, and serve, passing the remaining sauce at the table.
img_0741
Make Ahead Tips

Follow the method through the oven-braising, and transfer the meat and vegetables to a platter. Strain and degrease the juices as directed, wipe out the pot, and then return the meat and vegetables to the pot and pour the strained juices over all. Let cool to room temperature, then cover and refrigerate for up to three days. To serve, gently reheat the roast in the pot until the juices are once again liquified. Transfer the meat and vegetables to a baking dish, moisten with some of the juices, cover, and heat in a 325°F oven until warmed through. While the meat and vegetables are warming, proceed with the recipe as directed to make a sauce from the juices.

Hominy Harmony

Posole, the savory and hearty, rather soupy stew made from dried large white corn kernels simmered for hours, is traditional and easy to prepare. But here’s a speedy version of the classic Mexican chicken and hominy stew that hits all the right notes. Posole can be prepared in many ways. All variations include a base of cooked hominy in broth.

Hominy is made from whole corn kernels that have been soaked in an alkaline solution to soften the tough outer hulls. The kernels are then washed to remove the excess solution, the hull, and often the germ. Once you’ve had hominy, you’re not likely to forget it! These big kernels of corn are puffy and chewy with a very unique flavor owing to a special processing technique.

img_0674
Along with extra chopped cilantro, we garnished our bowls of posole with julienned radishes and cubed avocado.

Cooked hominy is about triple the size of a raw sweet-corn kernel, but has an unmistakably nutty-sweet “corn” flavor. Canned hominy is widely available, both at Mexican markets and many national supermarket chains. Look for it in the canned bean aisle, where it will be labeled “white hominy” or “mote blanco.” Use canned hominy like you would use beans in a stew. Unlike beans, which mainly absorb the flavor of whatever liquid they’re cooked in or added to, hominy retains its distinct corn flavor even in the meatiest, chile-rich posoles.

As with other corn products, hominy is rich in carbohydrates and low in fat, so it can be a healthy addition to your diet. One cup of hominy contains just 119 calories. Another benefit of hominy is that it is high in fiber with each cup of hominy providing 4 grams, a nutrient that can help you lose weight because it stimulates satiety. Plus it’s low in sugar.

Neither of us ever remember eating or cooking with hominy before so we were intrigued by this quick weeknight version of the Mexican classic found in the Fine Cooking “Make It Tonight” series. When I first opened the can of hominy I expected to find lose kernels in a liquid, but the contents were one solid mass that needed to be rinsed and separated, a simple task.

We did not have ancho chile powder in stock, so a quick substitute is chile powder with a pinch of red pepper flakes (and you just know I added one heck of a healthy pinch!) And, unusual for us, we had no fresh limes on hand, so we added a squirt of key lime juice with the other garnishes. In the end, we were amazed at how much we really liked this dish—and will definitely be making it again… glad to have met you Hominy!

Quick Mexican Posole

img_0645

Ingredients

  • 1 Tbs. ancho chile powder
  • 1 tsp. ground cumin
  • 1/4 tsp. smoked paprika
  • 1/4 tsp. dried oregano
  • Kosher salt and freshly ground black pepper
  • 1-1/2 lb. boneless, skinless chicken breasts
  • 2 Tbs. vegetable oil
  • 1 medium yellow onion, halved and thinly sliced lengthwise
  • 2 tsp. finely chopped garlic
  • 2 15-oz. cans white or yellow hominy, drained and rinsed
  • 6 cups homemade or lower-salt chicken broth
  • 1/4 cup chopped fresh cilantro; more for serving
  • Your choice of the following garnishes: shredded green cabbage, thinly sliced or julienned radishes, diced avocado
  • 1 medium lime, cut into wedges

img_0651
Pat the chicken dry and season generously with the spice mixture of chile powder, cumin, paprika, oregano, salt, and black pepper. 

img_0657
Over medium-high heat brown the chicken well on both sides for 3 to 4 minutes per side.

img_0655
Because I didn’t have any room in the bottom of the pot, I cooked the onion and garlic in a separate skillet for a few minutes.

img_0659
The cooked onions are thrown into the pot with the browned chicken breasts.

img_0661
Stir in the hominy and chicken broth and bring to a boil. 

Directions

  1. Mix the chile powder, cumin, paprika, oregano, 1/2 tsp. salt, and 1/4 tsp. black pepper in a small bowl. Pat the chicken dry and season generously with the spice mixture.
  2. In a heavy-duty 5-quart pot, heat the oil over medium-high heat. Add the chicken and brown well on both sides, 3 to 4 minutes per side.
  3. Add the onion and garlic and cook, stirring, until fragrant, about 30 seconds. Stir in the hominy and chicken broth and bring to a boil. Turn the heat down, cover, and simmer until the chicken is cooked through, about 10 minutes.
  4. Remove the chicken and shred it or cut it into chunks. Return it to the pot, stir in the cilantro, and season to taste with salt.
  5. Divide the posole among bowls and top with the garnishes and additional cilantro. Serve with the lime wedges.

img_0664
Once the pot starts boiling, turn the heat down, cover, and simmer until the chicken is cooked through, about 10 minutes.

img_0667
Remove the chicken and shred it or cut it into chunks. We used our shredding claws, but forks work just as well.

img_0669
Return the shredded chicken to the pot, stir in the cilantro, and season to taste with salt.

img_0672
You can let it sit for awhile over very low heat before you divide among bowls.

By Barb Freda from Fine Cooking

Have a Heart, or Three, or More…

Tender roasted artichoke hearts and crispy panko add nutty, toasted flavors to this Pasta with Garlicky Roasted Artichokes recipe that brims with briny olives and sweet sun-dried tomatoes.

img_0555

Our pasta-to-veggie ratio was a bit skewed, but in a good way because the box of gluten-free pasta was only 8.8 ounces, and we incorporated two 9-ounce packages of frozen artichokes, 50% more than called for. You might not be aware of the humble artichoke’s position as a nutrient powerhouse and the amazing health benefits you can have simply by adding this veggie to your diet.

A serving of artichokes provides greater antioxidant benefits per serving than many other foods traditionally considered to be antioxidant-rich such as dark chocolate, blueberries and red wine—all three of which I love! Plus, just one artichoke provides over 10 grams of dietary fiber, making them a powerful tool for helping to not just keep you regular but also to improve your digestive health overall.

The recipe didn’t specify, but we used dried (more like a half cup) as opposed to oil-packed sun-dried tomatoes. I’d be remiss if I also didn’t mention the health benefits of this fruit. These intensely flavored, sun-kissed beauties are a concentrated source of nutrients. They provide vitamins C and K, iron, and lycopene, an antioxidant associated with lower risk of certain cancers.

As with all vegetables, roasting intensifies the flavors and preserves the sweetness while creating hard-to-resist crispy edges; and it’s an easy and relatively hands-off process. In fact, it’s so easy you may want to double the artichoke recipe so that you can also serve the veggie as a side dish for another meal.

img_0540

Ingredients

  • Kosher salt
  • 12 oz. penne, mezze rigatoni, or similar short pasta
  • 1/4 cup finely chopped fresh flat-leaf parsley
  • 1 tsp. finely grated lemon zest
  • Garlicky Roasted Artichoke Hearts (recipe follows)
  • 1/3 cup coarsely chopped sun-dried tomatoes
  • 1/3 cup coarsely chopped pitted Castelvetrano or Cerignola olives
  • 1/4 cup extra-virgin olive oil; more for drizzling
  • 1/2 oz. Grana Padano or Parmigiano-Reggiano, finely grated (about 1/4 cup); more for serving
  • Lemon wedges, for serving (optional)

img_0551
Add the panko and a pinch of salt to the garlic, and stir until the oil is absorbed and the panko turns golden brown. Although adding bread to a pasta dish is odd, the small amount of toasted panko adds a wonderful crunch and texture.

img_0549
In a large bowl, combine the parsley and lemon zest. I also added the red pepper flakes (extra of course), tomatoes, and olives at this point.

img_0552
Then I added the pasta, panko, roasted artichokes, oil, and cheese, and tossed until well combined.

Directions

  1. Bring a large pot of well-salted water to a boil. Cook the pasta according to package directions until al dente.
  2. Meanwhile, in a large bowl, combine the parsley and lemon zest. Add the pasta, artichokes, tomatoes, olives, oil, and cheese, and toss until well combined.
  3. Drizzle with more oil, top with additional cheese, and serve with lemon wedges, if you like.

Roasted Artichokes

img_0543
Thawed frozen artichoke hearts are tossed in oil, sprinkled with salt, and spread out in a single layer on a rimmed baking sheet.

img_0556

Ingredients

  • 12 oz. thawed frozen artichoke hearts, drained and patted dry
  • 4 Tbs. extra-virgin olive oil
  • Kosher salt
  • 1 tsp. minced garlic
  • 1/4 cup panko
  • 1/2 tsp. crushed red pepper flakes; more to taste
  • 1 Tbs. finely chopped fresh flat-leaf parsley
  • Lemon wedges, for serving (optional)

Directions

  1. Position a rack in the center of the oven and heat to 425°F.
  2. On a rimmed baking sheet, toss the artichokes with 2 Tbs. oil and 1/2 tsp. salt, spread in a single layer, and roast until the artichokes are golden on the bottom, about 20 minutes. Flip and roast until golden brown in places, 5 to 7 minutes.
  3. In an 8-inch nonstick skillet, heat 1 Tbs. oil on medium-low heat. Add the garlic and stir with a wooden spoon until fragrant, about 30 seconds. Add the panko and a pinch of salt, and stir until the oil is absorbed and the panko turns golden brown, 2 to 3 minutes.
  4. In a large bowl, toss the artichokes with the panko, pepper flakes, and remaining 1 Tbs. oil. Serve sprinkled with the parsley and lemon wedges on the side, if you like.

Recipes by Diana Andrews from Fine Cooking

Meyer’d in Lemony Love

We are head over heels with this recent recipe Crispy Flounder with Pears, Endive, and Meyer Lemon, another from Fine Cooking’s Make It Tonight series. The flavors all melded together wonderfully to create an almost sensual sauce with a sweet lemony note, soft buttery pears and tender endive… perhaps a new holy trinity in cooking…

Smoother, rounder, and deeper in color than standard lemons, Meyer lemons are less acidic, with orange and floral flavor notes. They are plenty juicy too, because I squeezed over three whole tablespoons from just one piece of fruit. It is critical that you use Meyer lemons because regular ones are too tart and will sour you on the results. If your local supermarket doesn’t have them in stock, substitute a regular lemon but add some fresh squeezed orange juice to mellow the flavor.

img_0613

When food shopping, we found that tilapia fillets were less than half the cost of flounder due to a sale at the seafood counter. Knowing that both fish are white, firm-fleshed, mild tasting, lean and flaky, we saved ourselves a few bucks and bought the tilapia. A few other tweaks included using scallion greens instead of chives (because I forgot to put them on the grocery list), and scaling back on the total amount of butter by about 20 percent.

One thing to note, after you remove the lid from cooking the pears and endive, the directions indicate the produce should start browning in places after two minutes. Well that didn’t happen for me until nearly 10 minutes, and by that time, some of the luscious juices had evaporated. It would be nice to have the best of both worlds, but if it means sacrificing that heavenly sauce for a few brown spots, I’d prefer the extra liquid in this case.

You’ll likely have a good bit of the cornmeal and flour leftover after dredging the fillets because not much sticks to the fish, which is a good thing in my opinion. Plus, I think the recipe title of “Crispy Flounder” is a bit of a misnomer on the grounds that you are  sautéing the fillets as opposed to frying them, which result in browned exteriors that are not necessarily crispy. But all said and done, the dish was divine!

img_0596Ingredients

  • 2 small Meyer lemons
  • 6 Tbs. unsalted butter
  • 3 medium Belgian endives, trimmed and quartered lengthwise
  • 3 medium firm-ripe pears, peeled, cored, and sliced lengthwise 1/2 inch thick
  • Kosher salt
  • 1/2 Tbs. thinly sliced chives; more for garnish
  • 1/2 cup unbleached all-purpose flour
  • 1/2 cup fine-ground cornmeal
  • 4 small flounder or sole fillets (about 1-1/2 lb.)
  • Freshly ground black pepper
  • 2 Tbs. olive oil
  • 1/2 cup dry white wine

img_0600
Pears, endive and Meyer lemons get prepped.

img_0601
The endives, pears, lemon juice, lemon zest, and salt are added to hot sauté pan.

img_0603
Combine the flour and cornmeal in a shallow bowl, season the fish lightly with salt and pepper and then dredge it in the mixture.

img_0605
Cook 2 of the fillets at a time, flipping once, until golden-brown and cooked through, 2 to 3 minutes per side.

img_0609
Heat the remaining two tablespoons of butter in the pan until melted and browned and then stir in the lemon slices and a pinch of salt.

img_0612
Add the wine, bring to a simmer, and reduce by half.

Directions

  1. Finely grate 2 tsp. zest from one of the lemons. Squeeze 1-1/2 lemons to yield 2 Tbs. of juice. Thinly slice the remaining half and cut each slice into quarters; set aside.
  2. In a 10- to 11-inch straight-sided sauté pan, melt 3 Tbs. of the butter over medium heat until foamy. Add the endives, pears, lemon juice, lemon zest, and 1/2 tsp. salt; stir to combine. Cover, reduce the heat to medium low, and cook, stirring occasionally until tender, 15 to 20 minutes.
  3. Remove the lid and cook until the endives and pears are lightly browned in places, about 2 minutes. Remove from the heat and stir in the chives.
  4. While the endives and pears cook, combine the flour and cornmeal in a shallow dish. Season the fish lightly with salt and pepper and then dredge it in the cornmeal mixture.
  5. Heat 1/2 Tbs. of the butter with 1 Tbs. of the oil in a 12-inch skillet over medium-high heat.
  6. Cook 2 of the fillets, flipping once, until golden-brown and cooked through, 2 to 3 minutes per side. Transfer to a clean plate. Wipe out the skillet and repeat with another 1/2 Tbs. butter and the remaining 1 Tbs. oil and fillets. Transfer to the plate with the other fish. Wipe out the skillet again.
  7. Heat the remaining 2 Tbs. butter in the pan until melted and browned and then stir in the lemon slices and a pinch of salt. Add the wine, bring to a simmer, and reduce by half, 1 to 2 minutes. Season to taste with salt and pepper.
  8. Divide the pear mixture among 4 dinner plates and top with a fillet. Spoon the lemon pan sauce over the fish, garnish with chives, and serve.

By Melissa Pellegrino from Fine Cooking

img_0618

Bucks County’s “Cheers”

When I moved to Yardley, PA way back in 1984, about the only dining options in the area other than the more upscale Yardley Inn, was the Continental Tavern on Main at the intersection of Afton. Located in the heart of Yardley’s Historic District and just two blocks from the Delaware River, the Continental Tavern offers an “atmosphere that is comfortable, inviting and reminiscent of bygone days when hospitality was paramount.”

My ex-husband and I dined there frequently during our tenure together, and especially when my parents came to visit, because my mom just loved their hamburgers! This would be one instance where she’d allow herself to ignore her otherwise strict diet. The tavern was pretty dated back then and looks completely different now, but their burgers are still the bomb.

continental-tavern-front
The Continental Tavern as it looks today.

From the mid 1800’s through the Civil War the building served as a way station on the Underground Railroad, an escape route for slaves. Known hiding places were under the eaves of the Continental and during the recent renovation, parts of the underground railroad were revealed and glassed over. It was also the scene of two murders over the course of its long operation.

continental-tavern-old
The Continental Hotel back in the 1800’s.

Current owner Frank Lyons is a revolutionary war re-enacter and participates in the yearly Christmas crossing of the Delaware River in Washington’s Crossing. He began renovation in 2007, and it now boasts a restored outdoor porch, a semi-Victorian façade, and a second floor library now known as the Parlor Room. The tavern is commonly known as Bucks County’s “Cheers” where everyone knows your name—yet also has the moniker of the most haunted building in the county.

The spacious outdoor porch overlooking picturesque Lake Afton offers outdoor dining when the weather cooperates. Which on our most recent visit in mid-February with Rosanne and Gary, it was in the balmy mid-60’s earlier in the day, and the porch was packed with diners when we arrived—luckily we had reservations inside.

bar
The bar is always hopping (although not in this stock photo), and there is live entertainment on weekends.

While excavating for the Underground Railroad during construction, 10,000 whiskey bottles were found from the Prohibition Era as noted on dated newspapers found in the dig—no doubt a Speak Easy during that alcohol-free time period.

The tavern boasts nine great draught beers, a hefty selection of bottled beers and nine large LCD screens on two floors for all sports—not necessarily a plus for some patrons. They feature a daily entrée, soup and appetizer specials which are listed on the large chalk boards in the dining room and the bar. Also highlighted is a weekly bottled craft beer special.

img_0557

img_0561

After putting in drink orders, we zeroed in on the menu finally deciding to split salads with our partners. Gary and Rosanne chose the beautiful Roasted Beet Salad on a bed of baby greens and topped with chunks of feta cheese and a balsamic glaze. Hubby and I shared the ginormous Wedge Salad made up of a half head of iceburg lettuce showered with more than ample blue cheese, grape tomatoes and crumbled bacon. Both salads were plenty big enough to divide or order as an entrée.

img_0563

img_0564

Speaking of entrées, I was the odd man out because, instead of getting a burger, I ordered the Chicken Bruschetta which came plated over a bed of roasted garlic whipped potatoes, and was smothered with mozzarella cheese, tomato bruschetta and sautéed spinach, all bathed in a wonderful drizzle of balsamic reduction. After consuming a good-sized portion of the wedge salad, I had plenty of my entrée leftover to take home.

img_0568

My other three dining companions all opted for one of their famous burgers, with our friends both ordering the Classic Burger made with certified angus beef, choice of cheese and lettuce and tomato. Rosanne wanted to pair hers with the zucchini fries (which I was also hoping to do instead of mashed potatoes) but our waiter Chris informed us they no longer carry them.

img_0569

So regular fries it was, although they also offer curly fries, Con Tav fries dusted with Old Bay seasoning served with a cheese dip, and sweet potato fries with maple syrup. Mr. Russ settled on the Continental Tavern Burger with sautéed mushrooms, caramelized onions and Swiss cheese. He was pleased that he could order a gluten-free bun, but ended up not eating most of it.

img_0571

Maybe halfway through our meal, a guitarist started playing in the bar area singing tunes from the 70’s and 80’s, prompting us and nearby patrons to start singing or humming along. I was hoping to talk with the proprietor Frank about the underground railroad excavation but because the place was so busy, he was unavailable yet gave me his card in case I wanted to follow up at a later date.

After spending a relaxing 2 1/2 hours over dinner, it was time to bid farewell. But not before we made plans to do a NYC foodie tour in late April. Stay tuned for the details…

Comforting and Versatile

Beef Picadillo is a traditional dish in Spain and many Latin American countries that is similar to hash. A Latin American and Caribbean favorite with many variations, picadillo has a savory-sweet ground beef and tomato filling that’s delicious wrapped in lettuce leaves. It is often served with rice or used as a filling in dishes such as tacos, savory pastries or croquettes. The name comes from the Spanish word picar, which means “to mince” or “to chop.”

Raisins are added toward the end, and they plump up beautifully in the sauce. For the olives, you may experiment with fancy and plain, but most chefs agree that pimento-stuffed green olives are best. To compensate for the fact that we had pitted green olives without the pimento, we added a chopped piquillo pepper to add a similar taste and color component.

The result is crazily comforting: an island dish that is warm though hardly spicy, at once slightly sweet and savory. It will fill your home with a mouthwatering aroma. Once you have your ingredients chopped, the whole meal comes together pretty fast.

Picadillo is also very versatile—you can eat the savory meat and vegetable mixture in burritos, tacos, empanadas, over spaghetti noodles, or stuffed in a bell pepper, the possibilities are endless. We thought it went well with the Mexican Rice and Beans side dish that follows.

img_0407

Ingredients

  • 3 Tbs. extra-virgin olive oil
  • 1-1/2 lb. lean ground beef
  • 1/3 cup dry red wine
  • 1 small yellow onion, minced
  • 3 cloves garlic, minced
  • 1 cup canned crushed tomatoes
  • 1/2 cup golden raisins
  • Kosher salt and freshly ground black pepper
  • 2 large hard-cooked eggs, finely chopped
  • 6 Tbs. chopped pimiento-stuffed green olives
  • 1/4 cup minced fresh cilantro
  • 1 small head Boston lettuce, cored and leaves separated

img_0413
Heat the oil in a large skillet and add the ground beef; then add the wine, onion, and garlic.

img_0416
Siphon off any extra fat then add the tomatoes and raisins and simmer until the liquid has almost evaporated.

img_0420
Remove the skillet from the heat and stir in the chopped eggs, olives, and cilantro.

img_0423
Mix everything together until well blended.

img_0428
Serve hot with the lettuce leaves for wrapping.

Directions

  1. Heat the oil in a large skillet over medium heat. Add the ground beef and cook, stirring occasionally and breaking up the meat with the edge of a spoon, until done, about 5 minutes.
  2. Add the wine, onion, and garlic and cook, stirring occasionally, until the wine is almost evaporated, about 5 minutes.
  3. Add the tomatoes and raisins and simmer, stirring occasionally, until the liquid has almost evaporated, 2 to 3 minutes. Season with 1-1/2 tsp. salt and a few grinds of pepper.
  4. Remove the skillet from the heat and stir in the chopped eggs, olives, and cilantro. Serve hot with the lettuce leaves for wrapping.

By Mark Scarbrough, Bruce Weinstein from Fine Cooking

Mexican Rice and Beans

img_0402

When cooked using the absorption method, medium-grain rice yields a tender, starchy, slightly creamy kernel that’s ideal for saucy rice dishes like this one.

Ingredients

  • 1 cup uncooked medium-grain white rice
  • 1 14-1/2-ounce can diced tomatoes (preferably “petite-cut”)
  • 2 Tbs. extra-virgin olive oil
  • 6 medium cloves garlic, finely chopped
  • 1 medium fresh jalapeño, cored and finely chopped (if you like spicy foods, leave in the ribs and seeds; if not, remove them)
  • 1 15-oz. can black beans, drained and rinsed
  • 2 tsp. kosher or fine sea salt
  • 2 tsp. ground cumin
  • 1 tsp. chili powder
  • 1/4 cup finely chopped fresh oregano leaves and tender stems
  • 1/4 cup finely chopped fresh cilantro leaves and tender stems

img_0404
I found it easiest to drain the tomatoes directly over a 2-cup measuring cup.

img_0409
Stir-fry the garlic and jalapeño until the garlic browns and the jalapeño smells pungent.

img_0411
Next add the black beans, salt, cumin, and chili powder.

img_0417
Stir in the tomato juice and water mixture, bring to a boil and adjust the heat to maintain a gentle boil and cook the beans until they absorb much of the liquid.

img_0418
Add the tomatoes, oregano, cilantro.

img_0421
The skillet was too small to effectively mix all of the ingredients so I tossed it all into a large bowl.

Directions

  1. In a 1-quart saucepan, combine the rice with 2 cups cold water. Bring to a boil over medium-high heat, cover, reduce the heat to low, and cook for 20 minutes. Remove from the heat and let the pan stand, covered, for another 5 minutes.
  2. While the rice steams, set a fine sieve in a bowl and drain the can of tomatoes. Pour the tomato juices into a 1-cup liquid measure. Add enough water to the tomato juices to equal 1 cup.
  3. Heat a 10- to 12-inch skillet over medium-high heat. Pour in the oil and stir-fry the garlic and jalapeño until the garlic browns and the jalapeño smells pungent, about 1 minute.
  4. Add the black beans, salt, cumin, and chili powder; stir two to three times to incorporate the mixture and cook the spices, about 30 seconds. Stir in the tomato juice and water mixture and bring to a boil.
  5. Adjust the heat to maintain a gentle boil and cook, stirring occasionally, until the beans absorb much of the liquid, 5 to 7 minutes.
  6. Add the tomatoes, oregano, cilantro, and cooked rice and cook, stirring occasionally, until the rice is warm, 1 to 2 minutes. Serve immediately.

By Raghavan Iyer from Fine Cooking

img_0430

Curry-ious About Another Thai Dish?

Yes, another Thai dish. If you are also a fan of bold, flavorful Asian dishes, this delicious Spicy Thai Beef Curry over a bed of steamed jasmine rice is a good one to try. While the word “curry” might first bring about thoughts of Indian food, different types of curry can be found all over the world.

Curries contain a complex mix of spices, fresh herbs and chilies and the proportions of these ingredients vary depending on national, regional, religious or family traditions. While Indian dishes tend to use more dry spices, Thai cuisine often uses curry paste and fresh herbs instead. Thai curries are cooked for a shorter period of time and typically include vegetables, chicken, seafood accented with fresh herbs like mint, cilantro and basil. They also tend to be soupier, thanks to the addition of coconut milk or water.

Unlike Indian curries, where the spice lingers on the palate, Thai curries deliver the heat upfront because of their fresh ingredients. Thai curry paste usually is made of fresh chilies, lemon grass, galangal (ginger), garlic, shallot, kefir lime leaves, cilantro roots and shrimp paste, with spices like cumin seeds, coriander seeds and turmeric. The red chilies that make red curry paste are moderate in heat.

Not only are curries delicious, but there are some great health benefits too! Recent research has shown that curry can actually be good for you, even protecting you from Alzheimer’s. Plus, ginger acts as an effective pain reliever from the agony of arthritis; onions contain an agent called diallyl sulfide, which prompts the body to make more of a cancer-fighting molecule; and garlic, as you know, has been found to have a wide range of health benefits, from protecting the heart by lowering cholesterol to helping to purify the blood. Time for a curry craze!

img_0537

As far as more medicinal pluses, most curries contain spices with strong anti-bacterial properties. That’s why they’re found in dishes from hot countries, where meat needs to be preserved. Studies have found that garlic, cinnamon and cumin can destroy up to 80 per cent of meat-borne bacteria, while ginger can slow bacterial growth by 25 per cent.

A few principles to follow when making curry. Be generous with your spices, they not only bring flavor but texture to dishes. Decide what is going to give your curry sauce its body. This will normally be one, or a combination, of the following: tomatoes; pureed peppers or chilis; yogurt or cream; coconut milk (as in this recipe); spinach, or finely diced or pureed onion. And the holy trinity of onion, ginger, and garlic provide the deep base flavor of most curries—equivalent to onion, carrot and celery in the French tradition.

Note to the wise, not all curries are healthy. Avoid kormas, masalas and pasandras, which contain frightening amounts of cream. This recipe does use a lot of coconut milk, and you could use a “lite” version to cut back on calories, it just won’t be as thick or creamy.

Our supermarket was not carrying beef sirloin tips so we bought a sirloin steak and cut it into large chunks for the initial searing step. And when it comes to red curry paste, I tend to err on the “more-is-better” principle, which was confirmed by many reviewers who had already made the dish. In fact, one woman who said she likes things “medium-spicy” added 4 tablespoons and didn’t think it ended up too zesty at all.

img_0526

Ingredients

  • 1 Tbs. vegetable oil
  • 1-1/2 lb. beef sirloin tips
  • Kosher salt and freshly ground black pepper
  • 1/2 cup thinly sliced shallots (about 2 medium-large)
  • 1/4 cup finely chopped fresh ginger
  • 1 tsp. to 1 Tbsp. Thai red curry paste (or even more to taste)
  • 1/2 cup low-salt canned chicken broth
  • 1 13-1/2-oz. can unsweetened coconut milk
  • 1 Tbs. fish sauce
  • 1-1/2 cups frozen sugar snap peas
  • 1 large lime, zest finely grated and fruit cut into wedges
  • 1/3 cup chopped fresh cilantro

img_0528
Season the meat with salt and pepper and sear the meat in batches until nicely browned on two sides.

img_0529
Add the shallots to the pan and cook until just tender and lightly browned.

img_0531
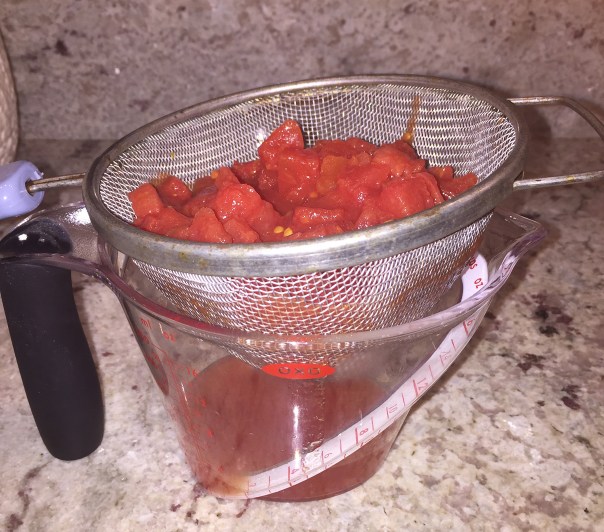
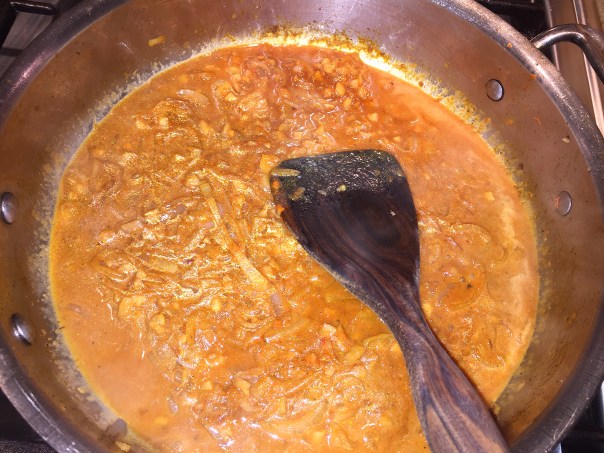
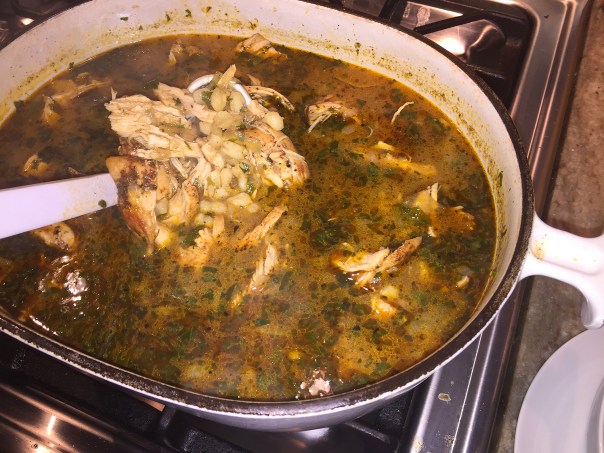
After the ginger and curry paste, stir in 1/4 cup of the broth, scraping up any bits that are stuck to the pan, then add 1/3 cup of the coconut milk.

img_0532
Stir until the curry paste has blended in completely.

img_0533
After the meat rests, slice it thinly across the grain and return it to the pan along with the lime zest.

Directions

  1. Heat the oil in a 10-inch straight-sided sauté pan over medium-high heat. Season the sirloin tips with salt and pepper and sear the meat in batches until nicely browned on two sides, 1 to 2 minutes per side. Transfer to a plate.
  2. Reduce the heat to medium. Add the shallots to the pan and cook until just tender and lightly browned, 2 to 4 min. Add the ginger and cook, stirring, until fragrant, about 1 min. Add the curry paste and cook, stirring, about 30 seconds. Stir in 1/4 cup of the broth, scraping up any bits that are stuck to the pan. Add 1/3 cup of the coconut milk, stirring until the curry paste has blended in completely. Stir in the remaining coconut milk and broth. Add the fish sauce.
  3. Increase the heat to medium high. Return the beef to the pan (along with any juices), stir, and simmer until the meat is just cooked through, 8 to 12 min.
  4. Take the pan off the heat. Remove the meat and transfer to a cutting board. Stir the sugar snap peas into the sauce and cover the pan. Let the meat rest for 1 min., then slice it thinly across the grain; return it to the pan along with the lime zest. If necessary, return the pan to medium heat until the peas are thawed and  heated through.
  5. Portion the curry into four warm bowls, sprinkle with the cilantro, and serve with the lime wedges.

By Joanne Smart from Fine Cooking

img_0538