All posts by LynnHoll

Unknown's avatar

About LynnHoll

I have been an artist and designer all my life incorporating graphic design for websites, gardens, publications, fabrics, interior design and cooking. I am now retired from my professional job, but still create artistic visions in all forms on a daily basis.

Mini Herbed Pommes Anna

The lowly, humble potato—that often misshapen, boring brown lump—transforms itself into opulent, glistening, tastefully elegant jewels called Mini Herbed Pommes Anna. If you never heard of Pommes Anna, they are a classic French dish of sliced, layered potatoes cooked in melted butter and baked until they form a cake.

pommes.anna.large.cale
An example of the original Pommes Anna as one large potato cake that gets sliced into wedges.

This buttery golden potato cake known as pommes Anna originated in 19th-century Paris when Adolphe Dugléré, chef of the Café Anglais, created it for his favorite customer – the celebrated courtesan Anna Deslions. Here, one of our favorite cookbook authors, Molly Stevens, minimizes the large cake into small individual muffin-sized stacks with a single-serve attitude.

It is essential that you slice the spuds uniformly very thin using a food processor fitted with the slicing blade or a mandoline. Given that the potatoes were small, I used my mini-mandoline instead of breaking out our industrial strength appliance. After tossing with melted butter and chopped fresh thyme, arrange slices in overlapping, concentric circles in the bottoms of the parchment-lined and buttered muffin rounds. It conveniently works out that 6 small potatoes fills 12 cups.

Definitely more time-intensive than baked or mashed potatoes, these gems are worth the effort. Time to impress your guests!

IMG_1537

Ingredients

  • 1/2 cup (1 stick) unsalted butter
  • 12-24 small tender thyme sprigs plus 2 teaspoons coarsely chopped leaves
  • 1 garlic clove, minced
  • 1 3/4 pounds small waxy potatoes (such as Yukon Gold or German Butterball), each slightly larger than a golf ball
  • 2 teaspoons kosher salt
  • Freshly ground black pepper

Directions

  1. Preheat oven to 350°. Melt butter in a small saucepan over medium heat. Brush muffin cups all over with butter. Line bottoms with parchment-paper rounds. Arrange 1-2 small thyme sprigs in center of each round. Drizzle 1/2 teaspoon butter into bottom of each cup.
    IMG_1538
    IMG_1539
  2. Add chopped thyme and garlic to remaining butter in saucepan. Stir over medium-low heat until fragrant, about 2 minutes. Remove from heat.
  3. Using mandoline, slice potatoes crosswise into very thin rounds (about 1/16-inch thick), placing them in a large bowl as you work. Pour herb butter over and season with salt and pepper; toss to coat well.
  4. Divide potato slices among muffin cups, layering overlapping slices to create a circular pattern. Lightly press center of each to make compact. Drizzle any remaining butter and seasoning from bowl over the tops.
    IMG_1541
  5. Cover muffin pan tightly with foil and place on a baking sheet. Bake until potatoes can be pierced easily with the tip of a knife, about 35 minutes. Remove foil; invert a rimmed baking sheet over pan.
  6. Turn, lightly tapping on counter, releasing potatoes onto sheet. Rearrange any slices that may have fallen out. Using a metal spatula, carefully turn cakes, thyme sprigs facing down. Discard parchment.
    DO AHEAD Potatoes can be made 1 day ahead. Cover; chill.
    IMG_1544
  7. Increase heat to 425°. Uncover cakes if needed. Bake until bottoms and edges are golden and crispy, 25-30 minutes. Carefully turn cakes, thyme sprigs facing up.

IMG_1565
These glistening jewels were served along with a roasted leg of lamb for Easter dinner, and company adored them.

Recipe by Molly Stevens

Shrimp and Asparagus say “I Do”

Fresh asparagus is synonymous with Spring and those spear-like green stalks lend a crisp contrast to shrimp’s juicy flesh. We love the delicate, briny flavor that shrimp brings to a stir-fry, especially in Stir-Fried Shrimp and Asparagus in Garlic Sauce—a perfect recipe that marries the two in a harmonious union.

If you use shelled, deveined shrimp, few dishes can be faster. In most cases, we buy the shrimp with their shells intact because we like to save them for making homemade seafood stock. Although I must admit, shelling and deveining the little critters are near the least favorite of culinary tasks.

The technique used here is atypical. Instead of a searing-hot skillet to cook all of the components, cook the vegetables on high but turn down the heat before adding the shrimp, which are then shallow-poached in sauce to keep them moist and tender. The sauce is built on a flavorful base of soy sauce, sherry, and sherry vinegar. A little cornstarch ensures that the sauce thickens to just the right shrimp- and vegetable-coating consistency.

IMG_1527

Start the shrimp stir-fry by tossing the shrimp with a little salt and sugar, which adds complexity without noticeable sweetness, and let them sit for 30 minutes. This not only seasons the shrimp but also helps them retain moisture during cooking. The rest of the meal doesn’t take long to prep, and just mere minutes to stir-fry making the recipe an ideal candidate for a weeknight dinner.

NOTE: Asian broad bean chili paste or sauce is also known as toban djan. Check out our other blog on this sauce, An Avid Fan of Toban Djan, with a very tasty recipe of Chicken, Shiitake and Watercress Stir-Fry.

IMG_1510

Ingredients

  • 1 teaspoon sugar
  • ½ teaspoon salt
  • ⅓ cup plus 2 tablespoons dry sherry
  • 2 tablespoons soy sauce
  • 1 tablespoon Asian broad bean chili paste
  • 1 teaspoon sherry vinegar
  • 2 teaspoons cornstarch
  • 2 tablespoons vegetable oil
  • 6 garlic cloves, sliced thin
  • 3 large scallions, white parts chopped fine, green parts cut into 1-inch pieces
  • 2 tablespoons grated fresh ginger
  • 1 ½ pounds asparagus, trimmed and cut on bias into 2-inch lengths

Directions

  1. Combine shrimp, sugar, and salt in medium bowl. Let stand at room temperature for 30 minutes.
    IMG_1508
  2. Whisk 1/3 cup sherry, soy sauce, chili paste, and vinegar together in bowl. Whisk cornstarch and remaining 2 tablespoons sherry together in second bowl.
    IMG_1512
  3. Heat oil and garlic in 12-inch nonstick skillet over medium heat until garlic is just beginning to brown at edges, 3 to 4 minutes. Increase heat to high, add scallion whites and ginger, and cook until fragrant, about 1 minute. Add asparagus and scallion greens, cover, and cook, stirring occasionally, until asparagus is crisp-tender, 2 to 4 minutes. Transfer vegetable mixture to bowl.
    IMG_1514
    IMG_1517
    IMG_1519
  4. Add sherry–soy sauce mixture and shrimp to skillet and bring to simmer. Reduce heat to medium-low, cover, and cook, stirring occasionally, until shrimp are just cooked through, 3 to 5 minutes.
    IMG_1525
  5. Whisk sherry-cornstarch mixture to recombine and add to skillet; increase heat to high and cook, stirring constantly, until sauce is thickened, 1 to 2 minutes. Return vegetable mixture to skillet and toss to combine. Transfer to serving dish and serve.
    IMG_1526

IMG_1531We served ours over a bed of jasmine rice steamed in homemade seafood stock.

Found on Cooks Illustrated

We Put the Tang in Panang

Curry in a hurry? Relatively speaking. With a few tweaks to jarred curry paste, this rich, savory-sweet, deeply fragrant Thai classic, Panang Beef Curry can be as easy to make as a stir-fry, but don’t try to shortcut it further by using a quick-cooking cut of beef such as sirloin or flank steak. Use boneless short ribs instead. They become at least as silky as chuck does after just one hour, and they require almost no knife work. (Use my shortcut and cook the meat a day ahead—while you’re doing something else—to make an even quicker meal the following night.)

IMG_1507

For a cook who has time, making panang curry from scratch can be a labor of love, but most of us don’t have that luxury, especially during the week. Hey, even in Thailand, many cooks start with store-bought paste, which can make this dish easier to pull together than a typical stir-fry. By using store-bought red curry paste, you can skip the laundry list of ingredients and focus instead on a few additional key items.

Savory Thai curries are often categorized by the color of the spice paste used to flavor and thicken them. Green is hot and pungent, mild yellow is sweet-spiced, orange is pleasantly sour, and salty-sweet red, my fave, features a lingering burn. And then there is panang—a sweeter, more unctuous derivative of red curry that’s enriched in this recipe with ground peanuts and seasoned with sugar, fish sauce, deeply fragrant kaffir lime leaves, and a touch of fiery Thai chile.

Boiling the beef in water and combining it with the curry during the last few minutes of cooking doesn’t infuse the dish with deeply meaty flavor—and that’s the point. Unlike Western beef stews, which are meant to taste ultrabeefy, traditional versions of panang curry cook the beef separately so as not to muddy the flavors of the spice paste. So if you try the beef right after it’s cooked, don’t be alarmed by the bland taste or looks.

IMG_1490
Beef slices are added to a large saucepan and covered with water.

IMG_1492
The beef looks almost unappealing after simmering for over an hour in a covered pan.

Red curry pastes from different brands vary in spiciness, so start by adding two tablespoons and then taste the sauce and add up to two tablespoons more—not surprisingly I added four. Another ingredient, silky kaffir lime leaves are well worth seeking out. The leaves boast a tangy, floral aroma that perfumes many Southeast Asian dishes. They’re available in Asian markets and freeze well. If you can’t find them, a combination of lemon zest and lime zest will approximate their flavor. (Note: These leaves are also called “makrut lime leaves,” as “kaffir” is an offensive term in some cultures.) 

Years ago Russ and I needed to purchase kaffir lime leaves for some Asian dish we were making and easily located them in the produce section at Wegman’s. Our initial shock of the $39.99 per-pound-price wore off quickly when we weighed them and one ounce was plenty more than we needed. Over the years, the extras kept well in the freezer until we needed to use more.

This was one of those dishes that I instinctively knew I would like, but wasn’t prepared for how fabulous it actually was. Love, love, loved it! In addition to chopped peanuts, our other toppers included thinly sliced scallions cut on a diagonal and a sprinkling of more Thia red chile slices. To complete the meal, we served it with jasmine rice steamed in chicken broth and paired with a side of baby bok choy stir-fried in some minced fresh garlic and ginger with a splash of fish sauce.

IMG_1494

Ingredients

  • 2 lbs. boneless beef short ribs, trimmed
  • 2 Tbsp. vegetable oil
  • 2-4 Tbsp. Thai red curry paste
  • 1, 14-oz. can unsweetened coconut milk, do not substitute light coconut milk.
  • 4 tsp. fish sauce
  • 2 tsp. sugar
  • 1 thai red chile, halved lengthwise (another thinly sliced for topping, optional)
  • 1/3 cup unsalted dry-roasted peanuts, finely chopped
  • 6 kaffir lime leaves, center stem removed and then thinly sliced

Directions

  1. Cut each rib crosswise with grain into 3 equal pieces. Slice each piece against grain 1/4 inch thick. Place beef in large saucepan and add water to cover. Bring to boil over high heat. Cover, reduce heat to low, and cook until beef is fork-tender, 1 to 1 1/4 hours.
    IMG_1487
  2. Using slotted spoon, transfer beef to bowl; discard water. (Beef can refrigerated for up to 24 hours; when ready to use, add it to curry as directed in step 2.)
  3. Heat oil in 12-inch nonstick skillet over medium heat until shimmering. Add 2 tablespoons curry paste and cook, stirring frequently, until paste is fragrant and darkens in color to brick red, 5 to 8 minutes.
    IMG_1498
    IMG_1499
  4. Add coconut milk, fish sauce, sugar, and chile, if using; stir to combine and dissolve sugar. Taste sauce and add up to 2 tablespoons more curry paste to achieve desired spiciness. Add beef, stir to coat with sauce, and bring to simmer.
    IMG_1500
    After the coconut milk was stirred in, I added an additional two tablespoons of Thai red curry paste.
    IMG_1502
  5. Rapidly simmer, stirring occasionally, until sauce is thickened (see below) and reduced by half and coats beef, 12 to 15 minutes. (Sauce should be quite thick, and streaks of oil will appear. Sauce will continue to thicken as it cools.)
    IMG_1504
  6. Add kaffir lime leaves and simmer until fragrant, about 2 minutes. Remove the chile halves, transfer to a serving platter, sprinkle with peanuts, and serve.
    IMG_1496
    Slice out the center stem of each lime leaf and discard, then make thin slices from the leaf halves.
    IMG_1497

IMG_1507
Steamed jasmine rice makes a perfect bed on which to ladle over the panang curry.

By Annie Petito from Cook’s Illustrated

six/seven Seattle

Our first evening in Seattle we dined at six/seven, a signature restaurant that offers Pacific Northwest cuisine and breathtaking views. Located inside The Edgewater, six/seven, features seasonally inspired cuisine crafted with the freshest and finest organic and naturally raised ingredients. To complement the chef special preparations, their ever-evolving wine selections highlight the finest artisan, boutique and hard to find Washington, Oregon and Northern California wineries.

All day we had been walking around the city taking in numerous tourist attractions, so by the time dinner rolled around, and the fact that six/seven was a good trek away over some pretty steep inclines, we decided to hail a taxi. Upon arriving, we were greeted outside by a massive rustic riverstone fireplace ablaze with a flickering fire, a theme that continued with the inside decor.

IMG_1190

IMG_1195
Russ peruses the backlit menus, which I think all upscale restaurants should adopt!

IMG_1191
This cool light fixture intrigued us in its simplicity and innovative design.

IMG_1192

In more typical Seattle fashion, the day had turned overcast and gray, so our window seats overlooking Elliot Bay were a bit dreary, however not enough to dampen our spirits. Speaking of spirits, it was time to order some wine… Unlike in the Philadelphia area, Seattle does not appear to cater to BYOBs, but almost every dining establishment is flush with a long list of local and European wines (which were actually cheaper, go figure!)

Seafood was going to be my focus while in the Emerald City, and six/seven was not about to disappoint. The menu was not extensive, but everything looked delicious so it took ample time for both of us to zero in on our choices. For First Tastes, Russ selected a plump Dungeness Crab & Shrimp Cake nestled in a lemongrass reduction with tomato jams, which arrived like an island oasis on a sea blue ceramic plate. He generously offered me a taste, and wowser, it was the bomb!

IMG_1198

I almost got the same thing but opted instead for the delicious Arugula & Endive Salad artfully arranged in triangular fashion with a medley of Washington pear, medjool dates, candied pecans, rogue smoked blue cheese all drizzled with a white vinaigrette. Very good, but I wished I had ordered that crab cake…

IMG_1197

For our entree we both did select the same thing from the Simply Put menu, the incredible Seared Diver Scallops bathed in a browned butter vinaigrette and plated with an awesome bright green chimichurri purée, a microgreens salad, grill roasted tomatoes and lemon. The dish was dancing with color and the scallops were plump, juicy and seared to perfection.

IMG_1203

Because we couldn’t resist and they sounded divine, we split a Shareable, the Foraged & Cultivated Mushroom Ragout which arrived steaming hot in a small cast iron skillet brimming with succulent mushrooms in a velvety brown sauce and garnished with a smattering of chives.

IMG_1201

Although on the pricier side, daughter Julia’s Xmas gift card put a nice dent in the total tab. Thanks Jules and Byron! If you ever have the opportunity to visit Seattle, you may want to put this restaurant on your agenda…

Awards include: Seattle Magazine 2016 Best Restaurants; Reader’s Choice Best Brunch; Best Hotel Bar by Food & Wine Magazine; Open Table Diners’ Choice Top 10 Best Outdoor Dining Restaurants and Best Seafood.

Meatless “Meat” Sauce

You want it quick. You want it easy. Most of all, you want it to be as hearty and satisfying as a beefy red sauce. Do you really need meat to achieve the look, feel and savoriness of a good meat sauce? No, you can create this vegetarian version. Start with cremini mushrooms and tomato paste—both rich sources of savory flavor. Extra-virgin olive oil does double duty, enriching the sauce and helping toast the classic Italian aromatics: garlic, dried oregano, and red pepper flakes.

IMG_1485

A popular meat alternative, earthy, neutral-tasting cremini mushrooms become a savory stand-in for ground beef as long as it is balanced with other components. Quickly chop them into ground meat–size bits by blitzing them in a food processor. From there, sauté them in extra-virgin olive oil with a bit of salt. Once the mushrooms have developed some color, add an onion (also chopped in the food processor) and a healthy scoop of tomato paste, another umami booster.

When the onions are translucent and the paste has darkened to a deep rust red (a sign that its sugar had caramelized and its flavor had intensified), add garlic, dried oregano, and red pepper flakes; stir in the tomatoes; and simmer the sauce for about 20 minutes. And here’s the interesting clincher, bulk up the sauce with chopped chickpeas! Just make sure to rinse them of their excess starch after pulsing in the food processor. Finally, to thin the sauce without watering down its taste, add vegetable broth which loosens the sauce without diluting the flavor. For an authentic finish, stir in chopped fresh basil.

To finish, we added some grated parm, a bit of chopped fresh basil, and of course in my case, another sprinkle of red pepper flakes. Any type of pasta will work. We chose gluten-free rigatoni with ridges to help capture the sauce into all of the nooks and crannies. Result? Very satisfying and just as filling as a meat sauce. Now officially in our bank of “will make again” recipes is Meatless “Meat” Sauce.

IMG_1465

Meatless Meat Sauce

  • Servings: 4-
  • Difficulty: moderate
  • Print

Ingredients

  • 10 ounces cremini mushrooms, cleaned
  • 6 Tbsp. extra virgin olive oil
  • salt and pepper
  • 1 onion chopped
  • 5 garlic cloves, minced
  • 1 1/4 tsp. dried oregano
  • 1/4 tsp. red pepper flakes
  • 1/4 cup tomato paste
  • 1, 28-oz. can crushed tomatoes
  • 2 cups vegetable broth
  • 1, 15-oz. can chickpeas, drained and rinsed
  • 2 Tbsp. chopped fresh basil, more to garnish

Directions

  1. Pulse mushrooms in two batches in food processor until chopped into 1/8- to 1/4-inch pieces, 7 to 10 pulses, scraping down sides of bowl as needed. (Do not clean work bowl.)
    IMG_1466
    IMG_1469
  2. Heat 5 tablespoons oil in Dutch oven over medium-high heat until shimmering. Add mushrooms and 1 teaspoon salt and cook, stirring occasionally, until mushrooms are browned and fond has formed on bottom of pot, about 8 minutes.
    IMG_1474
  3. While mushrooms cook, pulse onion in food processor until finely chopped, 7 to 10 pulses, scraping down sides of bowl as needed. (Do not clean work bowl.) Transfer onion to pot with mushrooms and cook, stirring occasionally, until onion is soft and translucent, about 5 minutes.
  4. Combine remaining 1 tablespoon oil, garlic, oregano, and pepper flakes in bowl.
    IMG_1471
  5. Add tomato paste to pot and cook, stirring constantly, until mixture is rust-colored, 1 to 2 minutes. Reduce heat to medium and push vegetables to sides of pot. Add garlic mixture to center and cook, stirring constantly, until fragrant, about 30 seconds. Stir in tomatoes and broth; bring to simmer over high heat. Reduce heat to low and simmer sauce for 5 minutes, stirring occasionally.IMG_1477
  6. While sauce simmers, pulse chickpeas in food processor until chopped into 1/4-inch pieces, 7 to 10 pulses. Transfer chickpeas to fine-mesh strainer and rinse under cold running water until water runs clear; drain well (don’t omit this step). Add chickpeas to pot and simmer until sauce is slightly thickened, about 15 minutes. Stir in basil and season with salt and pepper to taste. (Sauce can be refrigerated for up to 2 days or frozen for up to 1 month.)

http://www.lynnandruss.com


IMG_1480
IMG_1482

IMG_1484
In the end, it resembles authentic meat sauce, and pretty much tastes like it too!

From Lan Lam of Cook’s Illustrated

One Fish. Two Fish. Blackfish. DeeLish!

With over-the-top enthusiastic praise from our friends Paula and Mike Graham who recently patronized Blackfish, we were thrilled to get the Mistral group of eight of us back together for another dining experience. As soon as we all agreed on a date, Paula arranged a five-course tasting menu that was designed to fit our own personal preferences. I could hardly contain myself in anticipation of imbibing at this top-end, Zagat-rated establishment!

IMG_1432
Kim Tomlin and I also became Facebook friends that same day.

IMG_1428
Russ and Paula Graham are friends from way back.

According to famous Philly area restaurant critic Craig LaBan, Blackfish is anything but the next run-of-the-mill BYOB. It is a simple space, with white walls, contemporary pine-cone paper lights, and a frosted-glass porthole in the kitchen door that lends a vaguely nautical air. Located in downtown Conshohocken, PA, it is filled with appealing details, like the well-used cookbooks conspicuously stacked on shelves near the front, or the olive servers from bent spoons.

Caterer-turned-restaurateur Chip Roman was trained at Drexel and worked at both upper-crust restaurants Vetri (it took years for us to finally get a res in May a few years ago to celebrate Russ’s birthday at Vetri) and Le Bec-Fin. With a keen sense of serving the very freshest, he is known to drive to Cape May to fish for much of the blackfish (a.k.a. tautog) and black bass that serve as the restaurant’s signature dish—thus the name.

IMG_1429
Jeff Boily and Mike Graham looking studdly!

IMG_1431
Good friends and neighbors of the Grahams are Denise and Dan Marcalena.

First to arrive, Russ and I secured our table for eight in the back room. The reservation was for 5:30, way early for us, but they only do large table tastings early or late, like 9:00 which is really pushing the envelope. After we were all settled in and wine was poured, the waitstaff brought around a basket of homemade bread and chunks of foccacia, your selection being served with silver tongs. There was no menu to review since we were all having the same five-course tasting dinner (with one small exception.)

Mind you, I was not at all that thrilled when the amuse-bouche—a single, bite-sized hors d’œuvre—was an oyster, one of my least favorite food items. However, I became a quick convert because this was an amazingly tasty little mollusk. Amuse-bouches are different from appetizers in that they are not ordered from a menu by patrons, but are served gratis and according to the chef’s selection alone. So thank you chef!

Amuse-Bouche: Starting off the dining session was a complimentary oyster with a refreshing, velvety Persian cucumber and Meyer lemon foam on a bed of seaweed (which was just for looks and not necessarily edible.) 

IMG_1427

First Course: Sushi grade Hamachi Tuna Crudo with shoestring watermelon radish, daikon, wasabi and micro cilantro. The yellowfin tuna (Hamachi) is a species of tuna that is found in subtropical and tropical waters around the world. It is frequently marketed as ahi tuna due to their similar features; however, they are two different species.

course.two

Second Course: Flash-fried quail egg surrounded by gently smoked Scottish salmon and topped with an Idaho potato chip and micro-mizuna, a piquant, mild peppery flavor that is slightly spicy. Here it is shown both plated and deconstructed with the egg yolk oozing out. That singular, provocative potato chip was crisp and salty with a flavorful zesty kick.

IMG_1433

IMG_1434

Third Course: Blue crab risotto topped with baby tarragon that really popped against the bright red plate. This was Russ and my least favorite because risotto should be thick and creamy and this was a bit watery and rather bland. But that’s just our opinion…

IMG_1436

Fourth Course: Roasted rabbit loin (both medallions and rib), white asparagus, and morel mushrooms. Rabbit meat is a little more “meaty” than chicken but like chicken it tends to take on the flavor of whatever you put on it. As picky as I was when younger, I do remember liking rabbit. Denise just adored the morel mushrooms.

Out of eight, Kim was the only one who did not eat rabbit so they gladly substituted hers with a braised beef short rib and a scallop with the same sides. Kim graciously offered Russ and I a taste of both her items (not so appealing in the photo below) and we concurred that the short rib and scallop were off-the-charts flippin’ good!

IMG_1439

IMG_1438

Final Dessert Courses: We actually were served two desserts—cinnamon sugar, berry-filled beignet over a crème anglaise; and a molten chocolate lava cake, the aroma of which was heady and decadent. Not a dessert eater, I offered mine to the others but most were too full to finish them off.

IMG_1442

IMG_1443

While none of the portions were what one would call large, we were all more than satisfied, in fact full, once the last course was delivered. Blackfish also offers a 7-course tasting if you are interested…

Blackfish opened in 2006 and has since been named “Best Restaurant” in Philadelphia Magazine’s 2011 “50 Best Restaurants” issue. It has earned a coveted “Three Bells: Excellent” review from The Philadelphia Inquirer’s food critic, Craig LaBan, who most recently named Blackfish among the area’s top five BYOBs for 2012, noting that “there’s a reason the white rooms of this contemporary storefront are perpetually filled with fine-wine-toting Main Line devotees…

Gourmet Seattle Walking Tour

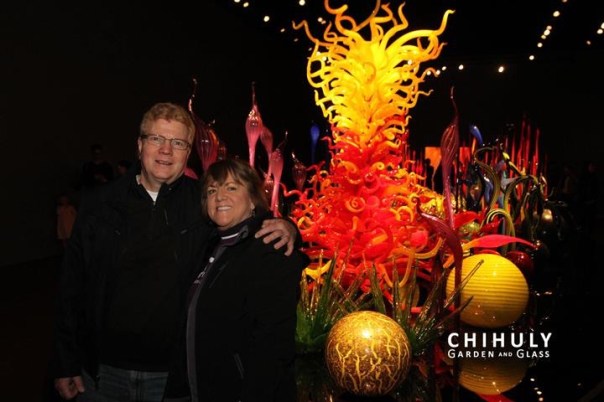
A Seattle virgin, I was so excited to be visiting this cosmopolitan, yet unpretentious low-key city, tagging along with Russ for his National Behavioral Health Conference—nearly 6,000 attendees strong! It was the first week of April, and I was going to be flying solo during the day for the better part of our stay. But on our first full day, we got to sightsee together at some of Seattle’s most iconic landmarks such as the Space Needle, the Chihuly Glass Museum and of course Pike Place Market.

seattle.space.needle.portrait

Chihuly Garden and Glass

IMG_1168
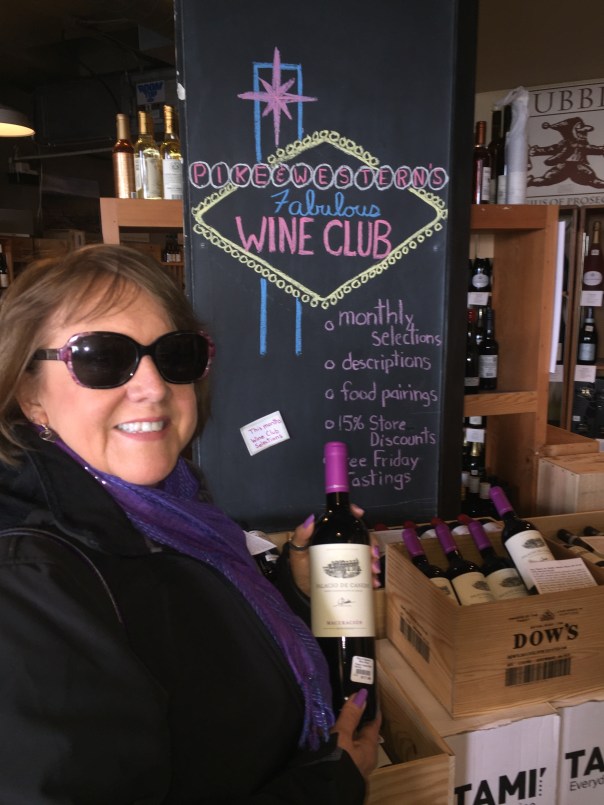
Selecting a local bottle of wine at a shop in Pike Place Market on Main Street.

IMG_1169
One of the many fresh seafood stalls inside the Market.

Given its location near the Puget Sound and its soaring views of Mt. Rainier and the Olympic Mountains, Seattle is generally quite temperate—except for the fact that the weather tends to put a damper on things. The city’s climate is ever-changing, but if you expect rain, you likely won’t be disappointed. Although our trip began and ended with precipitation, we lucked out and had a stretch of three wonderful, mostly clear and sunny days, something the Seattleites hadn’t seen in months! (One is advised not to plan on any elaborate hairstyles due to the climate, but I can’t plan on that no matter where I am!)

A few weeks prior to our trip I googled tours and excursions to pass the time while poor hubby would be attending the conference, and one of the first that caught my eye was the Gourmet Walking Tour. It’s billed as a three-hour tour (uh-oh, shades of Gilligan’s Island?) around the city’s finest restaurants and hot spots, visiting seven tasting locations in Belltown, downtown Seattle, and Pike Place Market. From appetizer to dessert, we were to enjoy a relaxed pace and an introduction to some of Seattle’s most popular restaurants. Need I say more? Although I was concerned it would be too much food, I booked the only available time slot left during our visit.

Hey, there’s got to be something said for folks who wear jeans to work, and prefer backpacks to briefcases, appreciate some of the finer things in life, and are open to new influences in food and art. I was ready to walk the walk, even though Seattleites have a rep for being cold and standoffish. Their cloudy disposition has become so well-known, it’s been branded as “The Seattle Freeze.” In reality, it wasn’t at all as mean-spirited as people make it out to be.

IMG_1208

IMG_1209

Now about that food tour. It began at 2:00 starting at the Orfeo Restaurant on 3rd Ave., only a short walking distance from our hotel. The restaurant was closed for the day due to a private party later that evening but was open to our group of 12. After our guide Heather led us up to the second floor table, we began introductions. We all agreed the 60-ish couple from Belgium came the furthest! Others included four female friends from Missouri, a woman from Tulsa, Oklahoma celebrating her 54th birthday, a mother and her daughter and friend from my home state of Michigan (the mother also an alum from U of M), and a guide-in-training Carla, originally hailing from New Orleans—itself a gastronomic epicenter.

Sometimes the best way to experience a new place is through its cuisine, which suited me just fine. Heather, a vivacious young women and original Seattleite who trained to be an actress in NYC for a spell, was completely passionate about healthy, organic, locally-sourced food and wine—the highlight of the Washington State culinary scene. In fact, the state has grown from 4 to 400 wineries in just 20 years!

IMG_1211

For starters we enjoyed a Polenta Cake with Pork Bolognese sauce topped with grated parm and microgreens. Orfeo’s owner, straight off the boat from Italy, explained in accented English, their passion for using the best ingredients and making everything from scratch. He also poured us each a glass of the delectable Tattinger’s Champagne. We were off to a titillating start…

IMG_1212
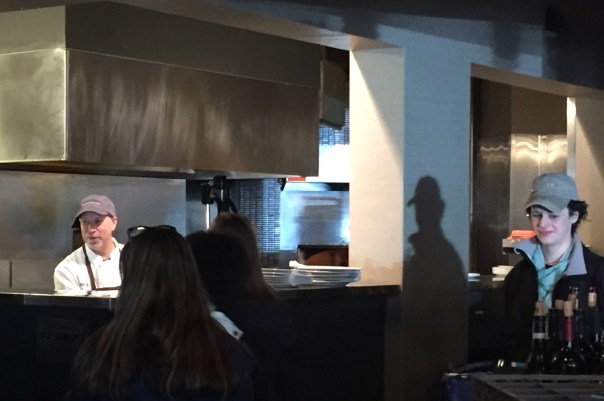
Executive Chef Kevin Davis, left, and our guide Heather off to the right.

Before we embarked on the rest of the tour, we went to the open-faced kitchen and met head chef Kevin Davis. He passionately described the custom Woodstone Josper: a charcoal burning oven with a natural convection that circulates smoke around the food cooking inside of it. Spanish by design, these ovens burn 60% less fuel than a regular wood burning grill and are popping up everywhere in European kitchens. Orfeo’s also has a strong focus on their traditional wood burning oven which turns out pizzas, and roasted meats and vegetables.

Chef Kevin Davis: I grew up cooking and eating Cajun food but I really wanted to cook the classics: French and Italian. Kind of like a blues musician who wants to sing opera.

Our second stop was at Serious Pies—at this small place alone they spend $30,000 per month on imported Italian cheese! Chef-owner Tom Douglas is an American executive chef, restaurateur, author, and radio talk show host. Impressively, he is known for winning the 1994 James Beard Award for Best Northwest Chef. And in 2005, he appeared on an episode of the Food Network’s Iron Chef America, where he defeated Chef Masaharu Morimoto. Now that’s talent!

IMG_1217

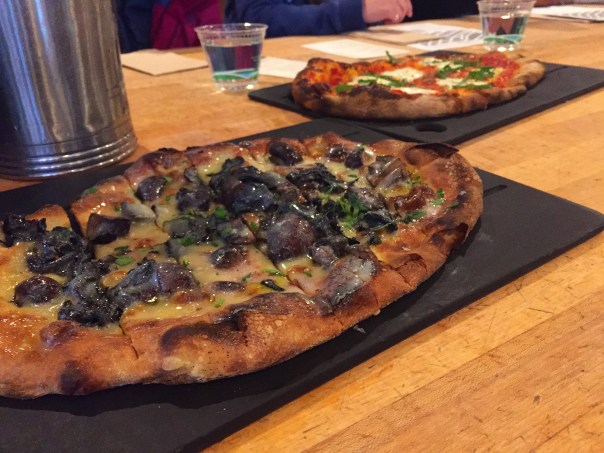
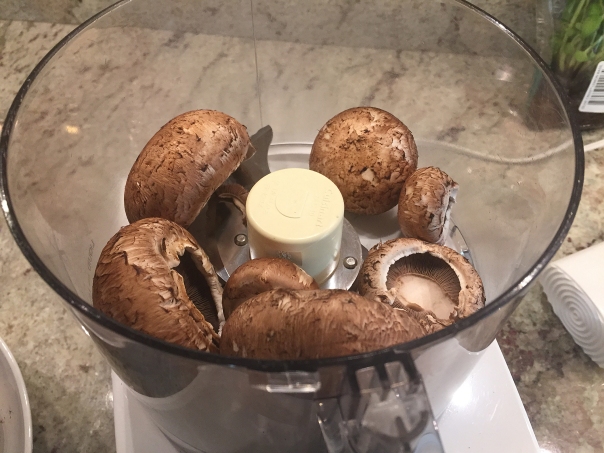
Here we tasted two pizzas where the dough raises for three days breaking down the carbohydrates culminating in thin, crispy crust. My favorite of the two was the mushroom pizza with black trumpet and cremini ‘shrooms. The other was a Margherita pie, but I was the last one to get a slice and it contained no cheese 😦

IMG_1218

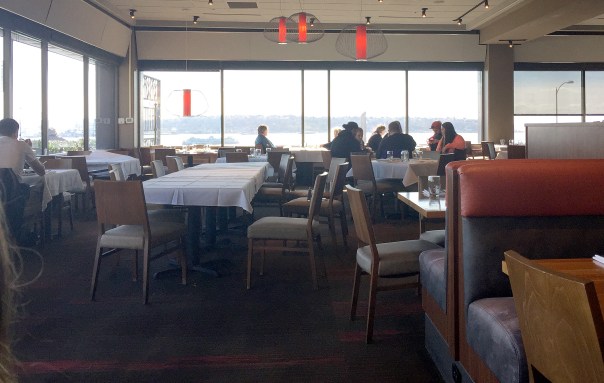
Next up was the large establishment Cutters Crabhouse, a landmark restaurant located next to Seattle’s Pike Place Market and situated right on the banks of Elliot Bay with panoramic views including Mt. Rainier. They are an upscale restaurant offering NW seafood in a refined, understated space. Here, we enjoyed a Dungeness Crab-Stuffed Tiger Prawn plated with a small side salad, and a glass of Cedergreen Sauvignon Blanc.

IMG_1221

Winding our way along the tree-lined streets of Belltown, downtown Seattle and Pike Place Market, we met more top chefs and food artisans who shared some of their cooking secrets and tricks of the trade. Even though it was bright blue and sunny out, Heather held high a neon pink umbrella so that we could see her in case of crowds.

IMG_1224

A short walk away was La Buona Tavola-Truffle Café (The Good Table) known for their wine tastings, truffle salt and specialty food sample tables. They also specialize in products for those who have to refrain from gluten and excess sodium. In addition to explanations of the differences in white truffle (mostly used on white or light-colored foods) and black truffle oil (for pretty much everything else), our treats here included a sample of real truffle salt, two mini-toasts with truffle spreads, and a small portion of creamy potato soup dotted with white truffle oil, one of the most salacious soups I have ever tried!

IMG_1230
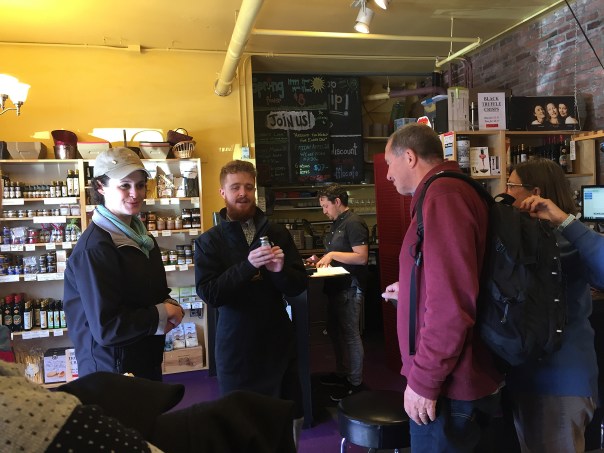
A staff employee teaches us about truffle salt while the Belgian couple, to the right, looks on.

IMG_1231
It may not look like much, but this potato soup with white truffle oil was to die for!

IMG_1227
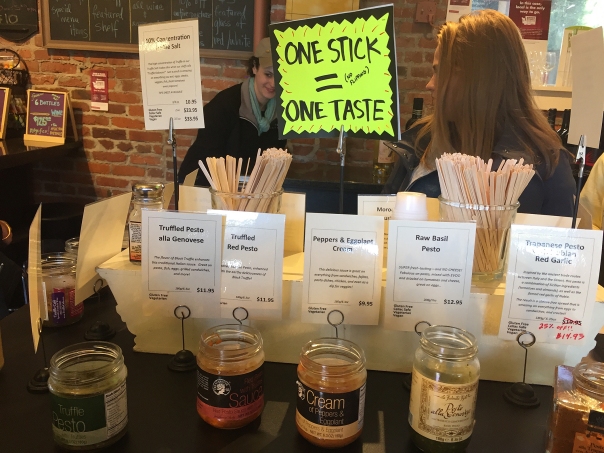
All around the store you are encouraged to try samples of everything.

After networking the room sampling all of La Buona Tavola’s other goodies, we headed to the Steelhead Diner, with its Southern-influenced seafood-focused menu. Here, food concerns concentrate on our planet and support groups that practice sustainability and good-for-the-earth activities: fisheries, local growers, bread makers, cheese makers; organic and natural beef producers.

Remember Executive Chef Kevin Davis from Orfeo’s? Yep, this is one of his places too. With a glass of Wysling Wine from Columbia Valley, we enjoyed a bowl of a fabulous Razor Clam Chowder loaded with tons of flavor, some from a bit of bacon, and topped off with a drizzle of white truffle oil. Usually I am not a fan of clams, but in the end I think this was my favorite dish from the tour. For the three guests in attendance that did not eat meat, they offered a vegetarian chili which garnered two thumbs up.

IMG_1235
A group shot at Steelhead Diner with Heather standing over us.

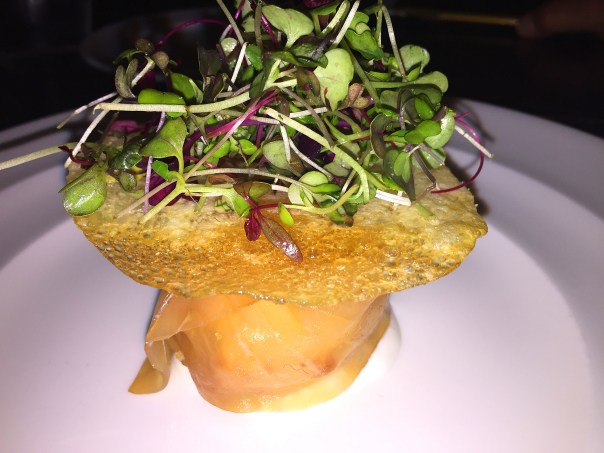
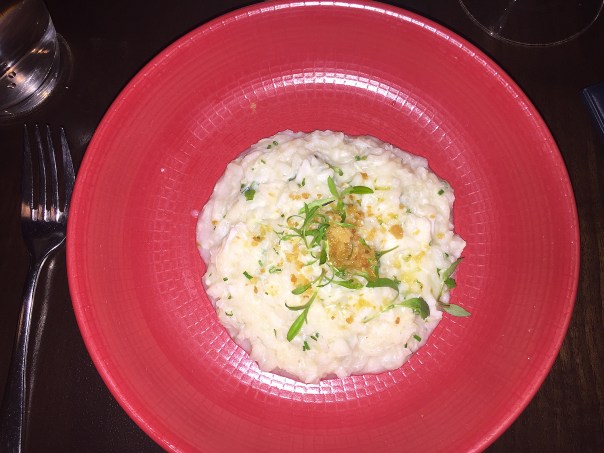
A few more stops to go… and next on the agenda, thankfully a little further away so that we could walk off a few calories, was Von’s GustoBistro, or, Von’s 1000 Spirits, a 100% sourdough scratch kitchen. Our delicacy here, along with a glass of French Rhone Valley Rosé, was a small plate of homemade Sourdough Pasta with an Asiago cream sauce, salmon and mushrooms—OMG, heavenly!

IMG_1239

Their chefs only purchase frigid water wild salmon caught in the Pacific Northwest, so it just killed me when the women seated next to me picked out all of her salmon pieces and pushed them to the side of her plate. I mean, salmon at its best, is synonymous with the Pacific Northwest, so how could anyone push it aside?? With only a few small pieces on my plate, I had to refrain myself from picking it off of her dish…

IMG_1238Walking into Von’s you are overwhelmed with thousands of liquor bottles and kegs.

Alchemy is the soul of their bar, and the Von alchemist is a dedicated bar scientist whose calling is to create and refine house-crafted small batch bespoke liquors. Legend has it, that at the end of one day long ago when they did not make their $8,000 daily allotment, a (very rich) gentleman bought three of the $1000-a-shot scotches to meet the necessary quota. One of his drinking companions declined the offer, so it was left as an open tab for another of his friends… although no one seems to know what happened to that open tab…

IMG_1243
The BarBible is a tome listing thousands of scotch, bourbon, gin, vodka, etc. choices.

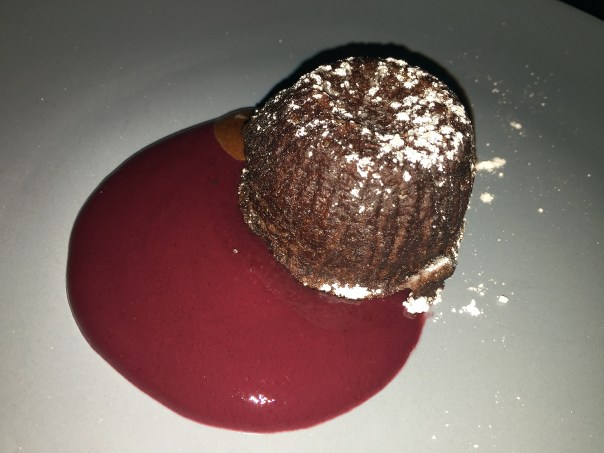
Nearly three hours later we arrive at our final destination Fran’s Chocolates, since 1982 a family-owned confectioner hand crafting truffles, salted caramels, gold bars, chocolate-covered fruits and nuts. A few of them have the distinction of being the designated official White House Presidential chocolate during the Obama administration.

IMG_1245

With Easter less than two weeks away, they were showcasing a luxurious treasure trove of delicious treats for the holiday. As with most eateries in Seattle, Fran’s offers a selection of items created with the finest, all-natural, local and organic ingredients. Company founder Fran Bigelow is considered one of the best chocolatiers in the country and has been credited for sparking the artisan chocolate renaissance in the United States. Her Gold Bars are considered the gold standard for sophisticated candy bars and are sold in specialty markets from coast to coast.

IMG_1246
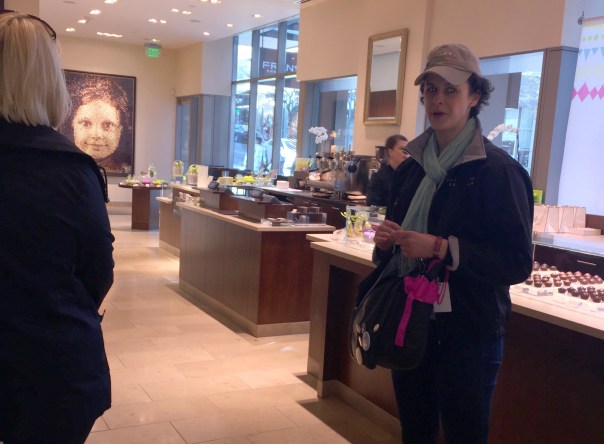
In the far background, the framed artwork of Fran’s daughter is actually made up of over 15,000 individual pieces of chocolate.

Fran Bigelow has studied in Paris and California, and says she fueled her early interest in the culinary arts by cooking through Julia Child’s books. While hearing the history behind Fran’s we feasted on three samples: an Oolong Dark Chocolate Truffle, my personal favorite; an Orange Peel Confit covered in 70% IP Belgian chocolate; and a Milk Chocolate Carmel with Welsh-smoked sea salt.

Time to bid adieu but as parting gifts, Heather gave us all a 10% off card to a huge number of participating restaurants and told us we were entitled to five free truffles from a certain shop at Pike Place Market—both of which I put to good use. Luckily my trek back was further away then when I started—after all, dinner was only 2 1/2 hours away!

Sidebar: To counterbalance all of the wonderful meals and wine over the course of six days (two spent traveling from coast-to-coast and you know they don’t feed you on airplanes), I made sure to not only work out in the hotel fitness center every morning, but to also walk around town as much as possible. With breakfast just a fruit cup, and lunch a salad or nothing at all (except of course on this walking tour), I managed to actually lose a pound!
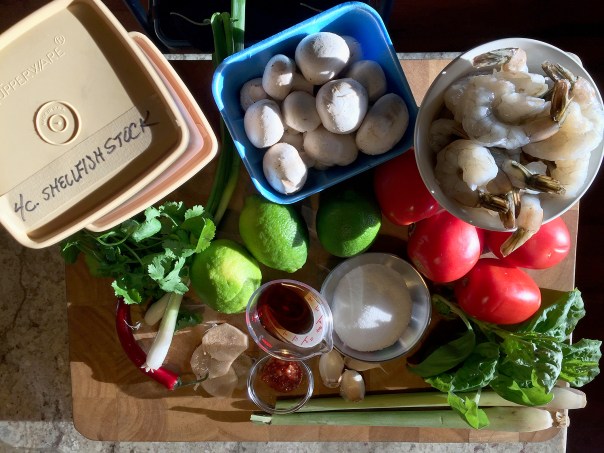
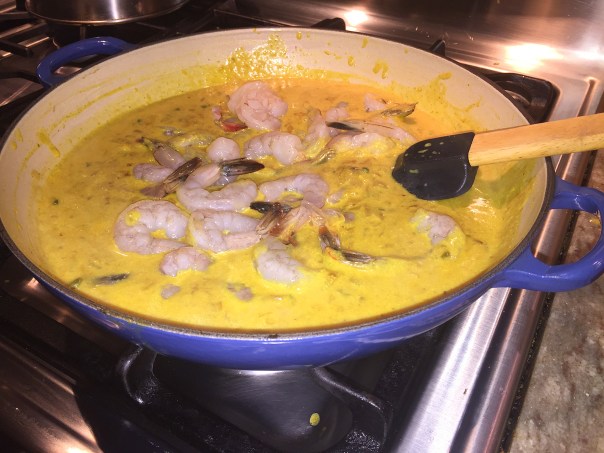
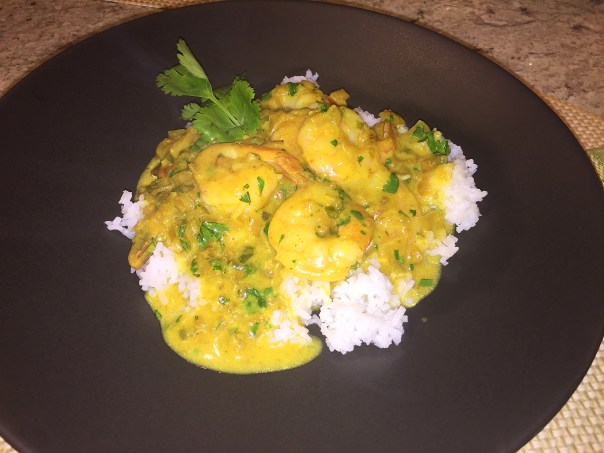
 

A Penchant for Purple

The diagnosis? OCD—Obsessive Color Disorder: When the basis of your every choice is contingent upon the fact that your selection be from a singular color family. In my case, PURPLE. Russ maintains it wouldn’t matter what he bought me as long as it had the proper pigmentation, meaning that he could buy me a cow chip and I’d be happy—as long as it was purple! Now, even I must say, that’s taking it a bit too far (honestly however, there may be a kernel of truth to that…)

I swear, when viewing that color, it’s practically an aphrodisiac. As far back as the age of 15 I’ve been addicted, when everything I wore from underwear, eyeshadow, and jewelry to the bow in my hair had to be a purpuraceous hue. In the early 70’s, I recall bustin-a-move to songs from the rock group Deep Purple, and chillaxin’ to Purple Haze by Jimi Hendrix. In my early 20’s while on a women’s softball team in North Jersey, my nickname “The Grape” was stitched on my team t-shirt.

Over the ensuing decades and to this day, I am impulsively drawn to any shade in that beloved spectrum—be it amethyst, lilac, lavendar, plum, aubergine, orchid or fuschia. I own 7 purple coats; a collection of footwear including shoes, boots, sneakers and sandals; a hairdryer; gloves of every shade; my signature nail polish color; pocketbooks, wallets and other accessories; and a wardrobe all dominated by purple. Even my flippin’ kindle and luggage!

purple.sloggers
I purchased a pair of purple Sloggers specifically to schlepp around the rainy Seattle terrain. However, they had an unusually sunny stretch of days while we were there and they weren’t needed for the most part.

And it’s not just at home. At work, my pens, Franklin Planner, coffee mug and coaster, sticky note pads, and folders are all in my obsessive color palette. One of the perks though, if I ever leave one of those objects in another office or the ladies room, my coworkers immediately know who to give it to! Albeit, one consumer product that I never had in my favorite tone was an automobile, much to Russ’s relief—although don’t think that I haven’t contemplated it.

Which brings me to one of the restaurants we patronized while in Seattle. While researching where to dine on our recent visit to the Emerald City, the Purple Cafe and Wine Bar popped up, thus prompting an audible groan from Russ. And if you know me at all, you just know I insisted we make a reservation. Because he loves me, Russ did just that…

front door

And joining us that evening was David Greenspan, Chair of Psychiatry at Einstein Medical Center and coworker of Russ who was also in Seattle attending the NatCon Conference. When he found out my penchant for purple, to Russ he quipped “Oh so that’s the reason you came to work at Einstein!” (Their brand colors are purple and gray.) And yes, I did wear my choice color to the restaurant, but refrained from taking any photos of such attire.

IMG_1250

Upon entering through the massive steel door highlighted with a backlit namesake, one is immediately struck by the immense wine tower. Once seated, our very knowledgeable French waitress explained the establishment was opened in 2007 in what was once the University of Washington bookstore—and it took some imagination to picture how that could have been.

What we did not know ahead of time, was that it was Restaurant Week in Seattle, BINGO! Which means you can choose three courses from a predetermined select menu for only $32 at any number of participating restaurants—and Purple happened to be one of them. The regular menu features an expansive list ranging from artisan cheeses, starters, soups, salads, sandwiches and pizzas to pasta; and puts serious emphasis on wine pairings—but instead we opted for a bottle of Veña Cerrada Reserva, a Spanish Red Rioja.

IMG_1255

In the end, I was the only one of us to take advantage of the special menu. For my first course, I chose the Grilled Cauliflower which came beautifully plated with toasted almonds, golden raisins, Greek yogurt, Calabrian chiles, browned butter topped with a sprinkle of fresh cilantro. It was beyond good and I have to figure out a way to reproduce this delectable dish in the very near future.

IMG_1252

IMG_1256

The guys both ordered from the regular menu with David opting for the Baked Brie appetizer that came oozing with cheese and infused with apricot preserves, caramelized onions, candied walnuts, and grapes accompanied by long housemade crackers plated on a slab of wood. Russ, God bless him, ordered the Purple Chopped Salad consisting of romaine lettuce, bacon, avocado, hard-boiled egg, tomato, blue cheese, and red onion (the only purplish thing about it) dressed in a balsamic vinaigrette.

IMG_1262

For our main dishes we ordered a pretty eclectic assortment of entrees. With seafood reigning supreme in Washington State, I zeroed in on the Pan-Roasted Cod on a bed of piquillo peppers, chickpeas and wilted spinach bathed in a warm chorizo vinaigrette. The Anderson Ranch Lamb Burger was calling David’s number and it arrived with marinated cucumber, olive tapenade, pomodoraccio tomatoes and a feta yogurt spread with a side of house-cut fries.

IMG_1258

Not at all shockingly, Russ got the Cassoulet that came in a gorgeous, bright orange mini Le Crueset braising pot brimming with cannellini beans, pork shoulder, duck confit, pancetta lardon, pork sausage and duck fat breadcrumbs. He loved every morsel, but in the end it was even too much for Russ.

IMG_1259

Nobody had room for dessert, but the Restaurant Week Special came with mine, so I opted for the Sea-Salt Caramels. They packaged them up in a cute little box for future enjoyment—which so far has been unopened…

IMG_1264

Back home, one would think that our house might resemble an amethyst-hewn bordello, but far from it. Only one guest bedroom has bed linens, a few accessories and one wall sporting the notable shade. But I must confess, I did make one purple purchase at Sur La Table in Seattle, and that was a large microplane zester.

microplane

A penchant for purple? A sickness perhaps, but ironically, one that makes me feel better…

Lemony Light Spaghetti

Delicate yet filling, this Spaghetti with Shrimp, Lemon, and Chard came together super fast and easily. A generous amount of lemon, in zest and juice forms, keeps things bright, while a bit of cream ties everything together—just don’t expect a thick sauce. Silken Swiss chard replaces spinach in this delicious riff on shrimp Florentine.

My only complaint would be the amount of chard. By the time you cut out the thick stems and wilt down the leaves, there’s not much left! Do your self a favor and double the amount. Another option is to chop down the thick stems and sauté them with some shallots before you add the tender leaves. Just be aware that the red color from the stems will bleed and turn your bright yellow sauce a different color.

And you just know we increased our quota of red pepper flakes! This was so good as leftovers for lunch the next day too.

img_9688

Ingredients

  • 10 oz. Swiss chard, tough stems removed, remaining stems and leaves cut crosswise 1/2 inch thick
  • 1/4 cup plus 2 Tbs. extra-virgin olive oil
  • Kosher salt
  • 1 lb. large shrimp (31 to 35 per lb.), peeled and deveined
  • 1/4 tsp. crushed red pepper flakes
  • 12 oz. spaghetti
  • 1 Tbs. finely grated lemon zest plus
  • 1/4 cup lemon juice (from about 1 large, or 2 small lemons)
  • 1/4 cup heavy cream
  • Freshly ground black pepper

img_9691
Remove tough stems from tender leaves. If desired, chop the stems and sauté with some shallots before adding leaf strips. 

img_9692
Washed chard strips are added to a hot skillet.

img_9695
The chard wilts down dramatically so you may want to increase the amount.

img_9696
After the spaghetti is al dente, add the remaining oil, lemon zest, and cream to the reserved pasta water. Bring to a boil, and cook until slightly thickened.

img_9699
Mix all ingredients together and let sit for a couple of minutes before plating.

Directions

  1. Rinse and drain the chard, but don’t spin dry.
  2. Bring a large pot of well-salted water to a boil.
  3. Meanwhile, in a large skillet, heat 2 Tbs. of the oil over medium-high heat. Add the chard, 3 Tbs. water, and a generous pinch of salt. Cook, stirring occasionally, until wilted, about 5 minutes.
  4. Add the shrimp and pepper flakes; cook, stirring occasionally, until the shrimp is just cooked through, 3 to 4 minutes more. Remove from the heat and set aside.
  5. Boil the pasta according to package directions until al dente. Reserve 1 cup of the cooking water, then drain the pasta. Return the reserved cooking water to the pot.
  6. Add the remaining 1/4 cup oil, lemon zest, and cream. Bring to a boil, and cook until slightly thickened, about 2 minutes.
  7. Add the pasta, lemon juice, and 1/4 tsp. salt. Toss together and remove from the heat.
  8. Add the chard mixture and toss for about 1 minute to allow the pasta to absorb some of the sauce. Season to taste with salt and pepper, and serve.

by Mindy Fox from Fine Cooking

img_9706
Top with shredded parmesan cheese if desired.

Yippee for Yerra Moolee!

No matter what food is cooked in it or what spices are added, coconut milk never loses its distinct sweet flavor. Instead, it enriches all the other flavors. In this dish from Kerala, a state on the southwestern coast of India, Shrimp Poached in Coconut Milk with Fresh Herbs (Yerra Moolee), fresh juicy shrimp are gently poached in herb-laced coconut milk.

IMG_1041

Russ happened across this recipe from Epicurious by Julie Sahni, an award-winning cooking teacher, cookbook author and former executive chef of two Indian restaurants in New York City. Ms. Sahni is the author of the seminal Classic Indian Cooking, winner of the André Simon commendation, now in its 42nd printing, and where this recipe hails from. We’re glad she is now on our culinary radar.

The spicing here is intentionally kept very subtle, so that the natural flavors of the shrimp and the coconut milk can take center stage and be relished to their fullest. Yerra Moolee, with its shimmering light golden sauce, can be made to taste much hotter than this recipe by increasing the quantity of green chilies. That being said…

The type of green chilies is not specified in the list of ingredients and could range anywhere from mild anahiem peppers to hot habaneros. As heat-loving aficionados, we used two serrano chiles which are similar to the jalapeño in its look, but are much hotter. On the Scoville heat index, the serrano pepper can be between 10,000 and 25,000 (whereas a habanero can be 100,000 to 350,000!) So bear in mind when choosing your weapon, er, I mean chilies.

This dish has a lot of gravy and needs to be served with rice. Best, of course, is plain cooked rice; then all the flavors can be enjoyed without any interference from the pilaf spices. With just the two of us eating, I cut the volume of shrimp in half to only one pound, and reduced the quantity of most of the other ingredients by 25%—except, the green chilies—we like it spicy! In the end, it wasn’t real spicy at all with the coconut milk balancing the heat of the peppers.

To make ahead like I did, follow Steps 2 and 3, let the sauce cool before refrigerating overnight. The next day, reheat the sauce, prepare the shrimp and follow Step 4.

Ingredients

  • 2 pounds shrimp, preferably large to medium (about 28–32 shrimp per pound)
  • 7 tablespoons light vegetable oil
  • 2 cups finely chopped onions
  • 2 teaspoons minced garlic
  • 1 1/2 tablespoons crushed fresh ginger root
  • 2 green chilies, or more, to taste, seeded and minced
  • 1/4 teaspoon turmeric
  • 2 tablespoons ground coriander
  • 3 cups coconut milk (do not use lite)
  • 1 1/2 teaspoons Kosher salt
  • 2 tablespoons minced fresh cilantro

Directions

  1. Shell and devein shrimp. Wash them thoroughly, and set aside. (Or buy already cleaned and deveined.)
    IMG_1023
  2. Heat the oil in a large heavy-bottomed pan, and add onions. Over high heat, fry the onions until they turn golden brown (about 10 minutes), stirring constantly to prevent burning. Reduce heat to medium, add garlic, ginger, and chilies, and fry for an additional 2 minutes.
    IMG_1024
    IMG_1025
  3. Add turmeric and coriander, stir rapidly for 15 seconds, and add coconut milk and salt. Cook the sauce, uncovered, until it thickens (about 10 minutes). Stir frequently to ensure that the sauce does not stick and burn.
    IMG_1027
    IMG_1031
  4. Add shrimp, mix, reduce heat to medium-low, and simmer, covered, for 5–7 minutes, or until the shrimp is cooked through. Do not overcook the shrimp, or they will become tough and chewy. Check for salt, stir in minced cilantro leaves, and serve.
    IMG_1032

IMG_1036
Ladle over steamed rice and garnish with a bit more chopped cilantro.


Lynnie Had a Little Lamb

All of the ingredients come together quickly in Spiced Lamb Patties and Green Beans with Tahini and make a fantastic, out-of-the-ordinary weeknight meal. A touch of plain yogurt in these Middle Eastern-style lamb patties helps keep them wonderfully succulent, and a dollop of mint-flavored yogurt on the side balances their richness—which next time we’ll double because we used it all up before they were halfway gone!

It’s not always an easy task to find bulk ground lamb sold separately. And of course the day we were food shopping, the store only carried lamb patties. But that worked, I just crumbled them into a bowl and added the necessary ingredients without overworking the mixture, then reformed them loosely into eight thicker patties.

IMG_0981

Our couscous was tricolored, one because we had it in stock, and also because I like the colorful aspect. In addition to the chicken broth, cumin and chopped apricots, I included a couple of tablespoons of pinenuts when I added the couscous to the boiling water. Somehow the buttery flavor just goes so well and adds that surprising little bit of texture.

Our veggie side dish, Green Beans with Tahini, is off the charts good! Very simple to make and cooks in the same amount of time as the lamb patties and couscous. But what is Tahini? Tahini is made from sesame seeds, with a little bit of oil mixed in to make it the right consistency, and usually nothing else. It is a ground sesame seed paste, similar to peanut butter and is a creamy, oily, and smooth nut butter rich in calcium.

Like natural peanut butter, the naturally occurring oils in tahini will separate, from the solids so plan on stirring your tahini quite a bit when you first open it, since all of the oil will be on top. Even though it’s a bit of a pain, this is a good thing actually. It means that there’s no additives or chemicals added to prevent it from separating. Tahini is a brilliant pantry ingredient to keep on hand for a creamy yet no-cook sauce.

While it might be a high-calorie food based on volume, a small amount of tahini (you are only using two tablespoons here) goes a long way. It has a rich, nutty flavor that comes through strongly in recipes, plus tahini can benefit your heart, hormonal and skin health even when you use just a small amount. Plus, sesame seeds are a good source of amino acids, vitamin E, B vitamins, trace minerals and fatty acids that all help with skin cell rejuvenation and preventing early signs of aging… I’m listening!

IMG_0977

Ingredients

  • 2 cups lower-salt chicken broth
  • 3-1/2 oz. dried apricots, cut into medium dice (about 1/2 cup)
  • Kosher salt
  • 1 tsp. ground cumin
  • 1-1/3 cups couscous
  • 1-1/4 lb. ground lamb
  • 5 Tbs. plain Greek yogurt
  • 2 large cloves garlic, mashed to a paste with a pinch of salt
  • 1 tsp. ground coriander
  • Freshly ground black pepper
  • 3 Tbs. extra-virgin olive oil
  • 2 Tbs. finely chopped fresh mint; more for garnish

Directions

  1. In a 3-quart saucepan, combine the chicken broth, apricots, 1/2 tsp. salt, and 1/4 tsp. of the cumin; bring to a boil over high heat. Stir in the couscous, remove from the heat, and cover. Let sit until all of the liquid has been absorbed, about 5 minutes.
  2. Meanwhile, in a large bowl, combine the lamb, 1 Tbs. of the yogurt, the garlic, coriander, the remaining 3/4 tsp. of the cumin, 1 tsp. salt, and 1/2 tsp. pepper. Mix by hand, taking care not to overwork the mixture. Shape into eight 1/2-inch-thick patties.
  3. Heat 2 Tbs. of the oil in a heavy-duty 12-inch skillet over medium-high heat until shimmering hot. Add the patties and cook, flipping once, until browned on the outside and barely light pink in the center, 5 to 7 minutes.
  4. Meanwhile, in a small bowl, combine the remaining 4 Tbs. yogurt and the mint.
  5. Fluff the couscous with a fork. Mix in the remaining 1 Tbs. oil and season with salt and pepper. Divide the couscous and patties among 4 plates. Add a dollop of the minted yogurt on the side and garnish with additional mint.

IMG_0983
Only six patties fit in the skillet initially, so I plated them when done, covered with tinfoil then cooked the remaining two.

IMG_0985
The cooked patties have a nice crust on the outside while retaining a partially light pink interior.

By Nadia Arumugam from Fine Cooking

Green Beans with Tahini

IMG_0986

Ingredients

  • 1-1/2 lb. green beans, ends trimmed
  • Kosher salt
  • 2 Tbs. extra-virgin olive oil
  • 2 Tbs. tahini
  • 1 Tbs. fresh lemon juice
  • 1 tsp. finely grated lemon zest
  • 2 Tbs. coarsely chopped fresh mint leaves
  • Pinch of Aleppo pepper or crushed red pepper flakes

Directions

  1. In a pot fit with a steamer insert, bring an inch of water to a boil over high heat. Put the green beans in the steamer, sprinkle with kosher salt, cover tightly, and steam until just tender, about 3 to 5 minutes.
    IMG_0978
  2. Meanwhile, in a large bowl, whisk together the oil, tahini, lemon juice and zest, 1 tsp. salt, and 2 Tbs. water until combined.
  3. Add the green beans and toss well to coat. Toss with the mint and Aleppo pepper. Season to taste with salt.

IMG_0989

Bean recipe by William Mickelsen from Fine Cooking

Date-Worthy Chops

Elevate your pork chops to a whole new level with a Ricotta stuffing and impress your significant other. The filling is mixed with garlic and roasted red pepper and flavors these Ricotta-Stuffed Pork Chops from the inside out. When some oozes into the pan and mixes with the juices, it becomes even tastier. Make sure you choose thick, bone-in chops. Ours were gigundo at about 2” thick and therefore took longer to cook, about 20 minutes in the oven after searing for a medium doneness.

IMG_1011
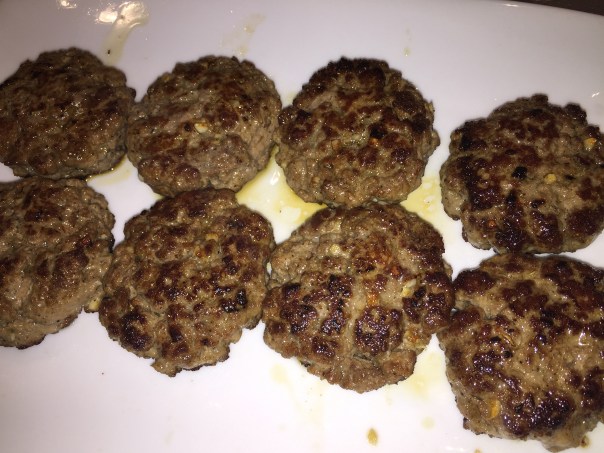
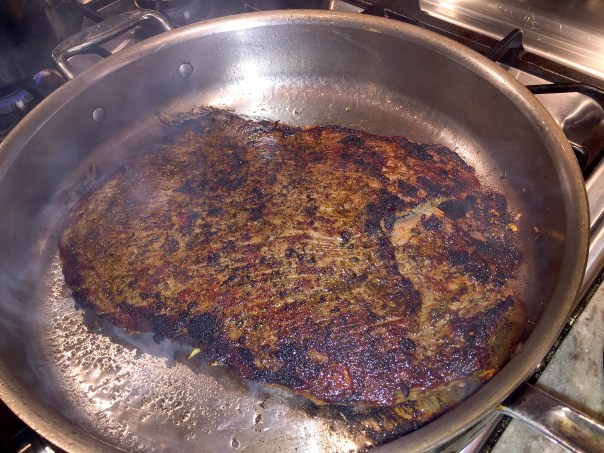
We had already heated the oil in the cast iron skillet when we realized all four chops would not fit at once. Therefore we seared two at a time, then transferred all four to a larger pan that had been heating in the oven. Russ drained and strained the juices from the cast iron skillet and made the pan sauce in the larger pan while the meat rested. Moral of this caption? Just use a very large skillet to begin with!

If you’ve never had it, Ricotta is a creamy white, mild, fresh cheese with a soft texture and a slightly sweet flavor. Traditional Italian cheese-makers originally produced Ricotta from whey left behind in the making of Mozzarella and Provolone (Ricotta translates to “re-cooked”). The good stuff is firm but not solid, and consists of a mass of fine, moist, delicate granules. Ounce for ounce, Ricotta has five times more calcium than the cottage cheese it closely resembles.

As a dessert cheese, Ricotta works well with honey, flavoring, fruit, or chocolate as in Cannoli, and makes an excellent low-fat addition to cheesecake recipes. But we’re sticking with dinner in this case. Excellent accompaniments for Ricotta include berries, tangerines, melon, bagels, sweet rolls, and crusty Italian bread.

This type of cheese is a mixed bag as far as its healthfulness goes. It is quite fattening and high in calories; however, it has much nutritional value from the vitamins and minerals it contains. In this recipe the amount used is minimal, about an 1/8 of a cup per chop.

Our two sides consisted of Brussels Sprouts with shallots and thyme and some luscious, creamy mashed potatoes (recipe follows.) Potatoes and leeks are a classic flavor pairing and one of our faves. This recipe doubles or triples easily, but add the milk in increments, as you may not need it all, and we certainly didn’t. In fact, we doubled the amount of potatoes (to make sure we had lots of leftovers), added 50% more sour cream and butter, but used less than half the milk. Not a dieters dream, but you don’t need to slap a huge mound of them on your plate, as a small amount more than satisfies.

IMG_1014

IMG_1020

While the chops rested under foil, Russ made a pan sauce from the browned bits in the skillet. First he deglazed the pan with a half cup of white wine, then added 1 1/4 cup meat stock, two tablespoons of corn starch mixed into cold water, salt and pepper to taste, and a couple pats of butter swirled in at the end. Not super thick, it was delicious over all three items on our plate. As good as my chop was, I surrendered after eating less than half of it because I was too full. No problem there, for it would be my dinner the following night when Russ was going to be away.

So go ahead and make a date to get these puppies on your menu plan…

Ingredients

  • 3 Tbs. olive oil
  • 1/3 cup chopped red onion (from 1/2 small)
  • 1/3 cup coarsely chopped roasted red pepper
  • 3/4 tsp. chopped fresh rosemary
  • 1 medium clove garlic, minced
  • Pinch crushed red pepper flakes
  • 1/2 cup good quality purchased ricotta
  • Kosher salt and freshly ground black pepper
  • 4 1-1/2-inch-thick bone-in pork loin chops

Directions

  1. Heat 1 Tbs. of the oil in a 10-inch skillet over medium-high heat. Add the onion and cook, stirring, until soft, about 2 minutes. Add the roasted pepper, rosemary, garlic, and red pepper flakes and cook, stirring, until the garlic begins to brown slightly, about 2 minutes.
    IMG_1003
  2. Transfer to a medium bowl and cool. Add the ricotta, mix well, and season to taste with salt and pepper.
    IMG_1004
    IMG_1006
  3. Position a rack in the center of the oven and heat the oven to 325°F.
  4. Cut a 2-inch opening in the middle of each pork chop, to make a pocket. Season the chops inside and out with salt and pepper. Spoon the ricotta mixture into the pockets, press the openings closed, and use toothpicks to hold them together, preferably 3 to 4 each.
    IMG_0998
    IMG_1007
  5. Heat the remaining 2 Tbs. oil in a 12-inch ovenproof skillet over medium-high heat. Sear the pork chops on both sides until well browned, about 3 minutes per side.
  6. Transfer the skillet to the oven and roast until an instant-read thermometer inserted near but not touching the bone registers 135°F, about 12 minutes. Remove and discard the toothpicks. Let rest for at least 5 minutes, and serve.
    IMG_1010

By Cathy Whims from Fine Cooking

Sour Cream and Leek Mashed Potatoes

Ingredients

  • 1-1/2 lb. Yukon Gold potatoes, peeled and cut into 1-inch pieces
  • Kosher salt
  • 2 Tbs. unsalted butter
  • 2 medium leeks (white and light-green parts only), quartered lengthwise, washed, and sliced crosswise into 1/4-inch-wide pieces or smaller (about 1 cup)
  • 1/2 cup sour cream, at room temperature
  • 1/2 cup whole milk, heated; more as needed
  • Freshly ground white or black pepper

IMG_0991
We learned this clever stepped way to cut the dark greens off of the leek preserving more of the light green.

IMG_1012
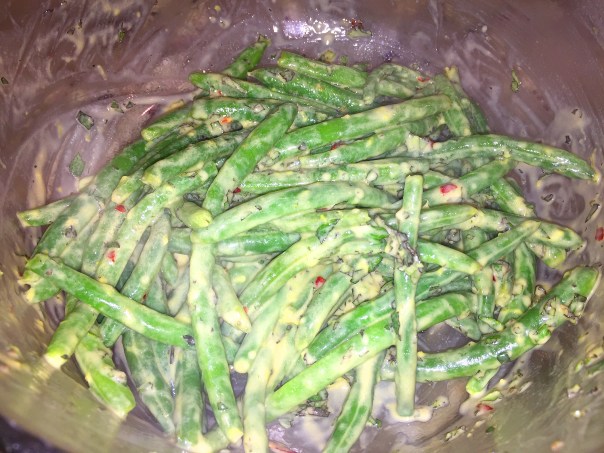
Sauté the cut leeks over medium heat being careful not to brown.

IMG_1018

Directions

  1. Put the potatoes in a large saucepan and cover with cold water by at least 1 inch. Bring to a boil over high heat, add a generous 1/2 tsp. salt, and lower the heat to a steady simmer. Cover the pot partially and cook until the potatoes are just tender when pierced with a fork, 10 to 12 minutes.
  2. Meanwhile, melt the butter in a 10-inch skillet over medium heat. Add the leeks and sauté, stirring often, until tender but not browned, about 6 minutes.
  3. Drain the potatoes and return to the pan. Steam-dry over low heat, shaking the pan until the potatoes leave a light film on the bottom, about 3 minutes.
  4. Mash the potatoes with a potato masher. Stir in the leeks, sour cream, and milk, adding more milk as needed to reach your desired consistency. Season to taste with salt and pepper. Serve.
Variations

Steam-drying the potatoes after they’re cooked allows excess moisture to evaporate, so they’re more intensely flavored and have a denser, more luxurious texture.

By Laraine Perri from Fine Cooking

Soothing to the Soul, and Oh So Good!

Are you in the mood for something soothing to the soul that is flavorful and spicy but not overpowering; light but packs a punch? This Thai Hot and Sour Shrimp Soup (Tom Yam Kung), fits the bill and is absolutely delightful! On cold days it’s hard to resist this warms-you-to-the-bone soup, filled with juicy shrimp, fiery chiles, bright lemongrass and spicy ginger. Just the antidote for a very cold month of March here in the Northeast.

IMG_0967

It’s is an easy dish to make and has complex flavors that blend together perfectly, so no need to change a thing. But keep in mind if you plan to reheat at a later date, although the taste is still delicious, the shrimp texture changes and the fresh basil and cilantro get quite soggy. If you know there will be leftovers, purposely put aside some of the shrimp, basil and cilantro then add it to the soup when reheating for another meal. That’s what we did for lunches the following day and it worked out perfectly.

One of the ingredients is lemongrass, which I adore! The herb’s bright flavor exemplifies the fresh, vibrant character of Southeast Asian cuisine. While the leaves of the long, slender plant aren’t particularly eye-catching, the stalk, which looks like a large, woody scallion, possesses a complexity of flavors that isn’t easy to put into words. Some describe it as citrusy, perhaps a little gingery. Its lemon flavor isn’t nearly as overt as lemon juice or zest; it’s more delicate, with a slight floral flavor that gives a dish a refreshing, lingering lift.

IMG_0952Cut off the top green blades of the lemongrass, remove several outer tough layers, slice the tender core into pieces at an angle, and smash the plant with flat blade of a knife to release the oils.

Avoid stalks that are dry and yellow—that’s a signal that they’re old and have lost moisture, flavor, and fragrance. Lemongrass keeps for weeks wrapped in plastic and refrigerated. If you know that you won’t be using it within a couple of weeks, store it in a plastic bag in the freezer, where it will keep for months with just a slight loss of flavor.

For a more intense seafood taste, we replaced the chicken broth with eight cups of our homemade shellfish stock. And for a little more color and heat, I included one thinly sliced red Thai chile in Step 1. And of course when red pepper flakes are an ingredient, I can’t help but add an extra dose!

It does not indicate in the directions to discard the ginger slices or lemongrass pieces before plating. Some people might find them hard to chew, so just set the table with a small bowl for those unwanted pieces and shrimp tails if diners care to remove them from their portions. We ladled ours over hot, brown Jasmati rice, which I intended to cook with some coconut milk in addition to the water, but just plum forgot—however, Russ noted the omission at dinner, mea culpa. There’s always next time!

IMG_0948

Ingredients

  • 1 Tbs. vegetable oil
  • 2 tsp. finely chopped garlic
  • 1 tsp. chile paste
  • 1/2 tsp. crushed red pepper flakes, or more to taste
  • 4 thin slices fresh, peeled ginger
  • 2 stalks lemongrass, bruised with the side of a knife and cut into 1-inch pieces on the diagonal
  • 8 to 10 cups homemade or low-salt chicken broth (or shellfish broth)
  • 3 Tbs. fish sauce
  • 3 Tbs. granulated sugar
  • 8 oz. white mushrooms, quartered
  • 4 plum tomatoes, seeded and chopped
  • 1 lb. raw shrimp, shelled and deveined
  • 1/2 cup fresh lime juice
  • 2 scallions (white and green parts), coarsely chopped
  • 10 fresh basil leaves, chopped
  • 10 fresh cilantro sprigs, chopped

Directions

  1. In a saucepan, heat the oil over moderate heat. Add the garlic, chile paste, and red pepper flakes. Stir until fragrant, about 1 minute.
    IMG_0954
  2. Add the ginger and lemongrass; stir until the ingredients are lightly browned, about 2 minutes. Add the chicken broth and simmer for 15 to 20 minutes.
    IMG_0955
  3. Bring the soup to a boil. Add the fish sauce, sugar, mushrooms, and tomatoes. Add the shrimp and cook until they just turn pink, about 2 minutes. (The shrimp will continue to cook in the hot broth.)
    IMG_0959
  4. Remove the pan from the heat and add the lime juice, scallion, basil, and cilantro. Serve immediately, over rice if desired.
    IMG_0960

By Mai Pham from Fine Cooking

Intensely Flavorful!

Chimichurri is the star salsa of the Argentine grill, but the lesser known salsa criolla is as good, or better. Full of onions, red peppers, and herbs, the mixture is a light but intensely flavorful condiment for grilled steak. Salsa criolla is probably the most important and most popular side dish/sauce in Peru.

The original plan was to cook the Argentine Spiced-Rubbed Flank Steak with Salsa Criolla on a Wednesday evening. But Mother Nature played a cruel joke on us in Mid-March with the biggest snowstorm of the season the day prior, making it all but impossible to grill. I intended to rub the meat and make the salsa a day ahead, which would’ve worked perfectly because my place of business was closed. But then Russ and I took inventory of all our leftovers that needed to be consumed over the next few days… Not to be deterred, we just added it to the following week’s menu plan.

IMG_0938

OMG, this was delicious! Our steak was one piece and weighed in at 2 pounds. With our revised plans to have it for dinner on a Monday, I made the rub adding a tablespoon of olive oil (which is noted in the directions below) to make sure it stuck to the meat, and whipped together the criolla on Sunday afternoon. Note, I did not add the 1/4 cup of water to the criolla as noted in Step 2, and I’m glad I didn’t. In the end the salsa was liquidy enough with the oil, vinegar and juices from the tomato.

Once rubbed, I put the steak on a platter and wrapped it in saran wrap then put both it and the salsa in the fridge for 27 hours, making sure to take them out and come to room temperature an hour before I started cooking. Still with plenty of snow on the ground, I planned on searing the meat in a very hot skillet as opposed to grilling. Thank goodness we had one big enough to accommodate the large steak. After 5 minutes on side one, I flipped it and seared the other side for 4 minutes, then took it out of the pan and let it rest tented with foil for another 5 minutes.

IMG_0884
The ingredients for the rub are added to a small bowl and then mixed together.

IMG_0894
After the meat was spread with the rub on both sides, it was covered in plastic wrap and refrigerated.

When carving flank steak, it’s best to do so at an angle against the grain in thin slices. We plated the sliced meat and its juices on a platter with a swath of the criolla strewn across the top. Our side was steamed asparagus which also benefited from getting chummy with the salsa. And rounding out the meal was a simple side salad— a perfect low-carb, high protein, colorful dinner that was packed with flavor! I can’t wait until the weather warms and we can make this meal again for company using our grill…

IMG_0886
The garlic paste is made, and the other ingredients for the criolla are assembled.

IMG_0888
The finished salsa is put in an air tight container and refrigerated over night.

Ingredients

  • 3 cloves garlic, minced and mashed to a paste with a pinch of salt
  • 2 Tbs. chopped fresh thyme
  • 1 Tbs. freshly ground black pepper
  • 1 Tbs. chili powder
  • 2 tsp. brown sugar
  • 1-1/2 Tbs. plus 2 tsp. kosher salt
  • 1 Tbs. olive oil
  • 4-1/2 lb. flank steak (about 3 medium steaks), trimmed of excess fat
  • 1 large ripe tomato, cored, seeded, and fi nely diced (about 1-1/4 cup)
  • 1 medium yellow onion, minced (about 1-1/3 cups)
  • 1/2 red bell pepper, cored, seeded, and minced (about 1/2 cup)
  • 1/2 cup extra-virgin olive oil
  • 1/3 cup white-wine vinegar

IMG_0933
The flank steak sears in hot oil in a large skillet for 4-5 minutes per side.

IMG_0935
After resting for 5 minutes, the meat is carved at an angle against the grain.

IMG_0940
Salsa criolla tops both the meat and our side of asparagus.

Directions

  1. In a small bowl, mix about two-thirds of the garlic paste with 1 Tbs. of the thyme, 2 tsp. of the black pepper, the chili powder, brown sugar, olive oil and 1-1/2 Tbs. of the salt. Arrange the steaks on a rimmed baking sheet and pat the spice rub all over them. Cover and let sit for at least 4 hours and up to 1 day in the refrigerator.
  2. In a 1-qt. sealable container, combine the tomato, onion, red pepper, oil, and vinegar with 1/4 cup water (I omitted the 1/4 cup water), and the remaining garlic paste, 1 Tbs. thyme, 2 tsp. salt, and 1 tsp. black pepper. Shake well. Refrigerate for up to 1 day before serving.
  3. Heat a gas grill to medium high or prepare a hot charcoal fire.* Grill the steak (covered on a gas grill) until it has good grill marks on the first side, 4 to 5 minutes. Flip the steak; if using a gas grill, reduce the heat to medium  and cover the grill. Continue to cook until done to your liking (make a slit in the steak to take a peek), 4 to 5 minutes more for medium rare; 6 to 7 minutes more for medium.
  4. Let the steak rest on a cutting board for 5 minutes and then slice thinly across the grain. Stir or shake the salsa criolla and serve with the steak.

*If unable to grill, on high heat for about 4-5 minutes per side, pan sear the steaks in a heavy skillet large enough to accommodate the meat.

Adapted from Tony Rosenfeld of Fine Cooking

A French Twist to an Irish Staple

At first, it may seem like the French and the Irish have little in common, but the two peoples have been allies for centuries. So it’s no wonder they share the passion for food and drink, and no wonder their cuisines pair splendidly. This recipe is a celebration of Franco-Irish relations: Daniel Boulud’s Corned Beef and Cabbage.

Our most recent culinary acquisition was Mr. Boulud’s “Braise” cookbook and this was the first recipe we tried. The timing couldn’t have been more perfect as it was St. Patty’s day weekend—when corned beef and cabbage reign supreme. It cooks for several hours so it’s not quick weeknight fodder, but you’ll be hoping there are leftovers.

IMG_0929

At the grocery store there were only three rutabagas available, all about the size of bowling balls! Needless to say, they were too big, so we bought an extra turnip in its place. And one small parsnip just doesn’t cut the mustard. By the time you peel it, do away with the very narrow end and remove the woody core, you won’t have but a scant few pieces, so we included three parsnips. Not to question an international chef, but just sayin’…

IMG_0883

And alas, after trying to locate pink peppercorns at three different stores, we came away empty handed. We’ll order some online for future use, but in the meantime we used mixed peppercorns which appeared to have some pink ones in it, above. As lucky charms would have it, we had a hunk of fresh horseradish in the vegetable bin for the cream sauce, although I think it may lost some of it’s oomph because we felt we needed to add some prepared horseradish to give it the kick we wanted.

IMG_0907
IMG_0916
The top photo shows the ingredients before the horseradish cream sauce is mixed together, bottom.

Russ planned on making homemade chicken stock the same afternoon for some upcoming meals, and when he realized we needed beef broth for the corned beef recipe, he picked up some leg and neck bones and whipped together that broth too—easy to do with a pressure cooker—and what a difference it makes compared to bland boxed or canned. It’s a double strength recipe that you dilute by half when measuring so it goes a long way and is worth the effort.

IMG_0876
IMG_0878
IMG_0880
These three pics show some of the ingredients to make homemade meat broth, although it’s not necessary to make it for this recipe.

Once we had all of the cut veggies, cabbage-wrapped meat and broth all in the pot, there was nary an inch of room left. Russ actually added a sheet of parchment then put a large cast iron skillet on top of the lid to make a tight seal. After one hour we took it out of the oven to baste it, and it hardly seemed like it cooked at all, although things were hot.

After 3 hours I removed most of the liquid from the pot into a smaller pan, covered the meat pot back up and returned it to the oven while I reduced the sauce. Even after reducing by over half at a vigorous boil for 25 minutes, the sauce remains thin, but it is much more intensely flavored.

An Irish Blessing: “May your home always be too small to hold all your friends.”

IMG_0882

Ingredients

  • 1 savoy cabbage, outer leaves discarded, remaining leaves separated
  • 3 1/2 pounds corned beef, not too lean, not too fat
  • 2 Yukon Gold potatoes
  • 1 small rutabaga, peeled and cut into large chunks
  • 1 medium carrot, peeled and cut into large chunks
  • 1 medium turnip, peeled and cut into large chunks
  • 1 small red onion, peeled and roughly chopped
  • 1 small parsnip, peeled and cut into large chunks
  • 2 bay leaves
  • 3 sprigs fresh thyme
  • Spice sachet: 1 teaspoon black peppercorns, 1 teaspoon pink peppercorns*, and 10 whole allspice, tied in cheesecloth
  • 3 cups beef stock, low-sodium canned beef broth, or water
  • 1/2 cup sour cream
  • 1 (2-inch) piece of fresh horseradish, peeled and grated
  • 1 tablespoon Dijon mustard
  • 1/2 teaspoon paprika

IMG_0891
Russ starts separating the cabbage leaves from the head. Once he got to the inner leaves, Russ just cut them down into wedges to place around the meat with the other veggies.
IMG_0896
The individual cabbage leaves are added to boiling water for 4 minutes.
IMG_0897
After boiling, the leaves are added to an ice bath.
IMG_0900
Put the corned beef in the center of the leaves, then top with the remaining half.
IMG_0902
Wrap the cabbage leaves around the corned beef and tie securely with kitchen string, or do the alternative method in Step 4.

Directions

  1. Preheat oven to 300 degrees Fahrenheit
  2. Bring a large pot of water to a boil, and fill a large bowl halfway with ice cubes and cold water. Add the cabbage leaves to the boiling water and blanch just until the leaves are tender, 3 to 5 minutes. Using strainer, transfer the cabbage leaves to the ice water bath and let cool completely. Drain the cabbage leaves and pat them dry with a paper towel.
  3. Using half of the cabbage leaves, make a circle of overlapping leaves one-third larger in diameter than the corned beef. Put the corned beef in the center of the leaves and cover it with the remaining cabbage leaves. Wrap the cabbage leaves around the corned beef and tie securely with kitchen string.
  4. Put the potatoes, rutabaga, carrot, turnip, onion, parsnip, bay leaves, and thyme on the bottom of a medium cast-iron pot or Dutch oven. Place the wrapped corned beef on top of the vegetables. (Alternatively, make a circle of overlapping leaves one-third larger in diameter than the corned beef on the bottom of the pot, put the corned beef in the center of the leaves, cover with the remaining cabbage leaves, and scatter the vegetables and herbs around). Add the spice sachet and pour the stock into the pot.
  5. Cover the pot and transfer it to the oven. Braise, basting the corned beef every 45 minutes, until the beef is very tender, about 3 hours. If the sauce is too thin or is not flavored intensely enough, ladle most of it off into another pot and simmer it until it thickens and intensifies. Then add it back to the first pot.
  6. To serve: mix together the sour cream, horseradish, mustard, and paprika. Remove the string from the corned beef and discard. Cut the corned beef into slices. Serve the beef and vegetables with the seasoned sour-cream on the side.

IMG_0904
The braising pot is completely full before we put parchment and a lid on it.
IMG_0914
We only basted twice during the 3 1/2 hours of cooking.
IMG_0917
Once the meat packet is removed from the pot, cut away the strings.
IMG_0919
Russ sliced the moist meat right through the cabbage covering.
IMG_0923
The sliced meat and veggies are arranged on a platter before bringing to the table.

Originally from Lyon France, Chef Daniel Boulud is widely celebrated as one of America’s leading culinary authorities. Since arriving in New York City in 1982, he has continually evolved his cuisine and expanded his reach to properties across the U.S., as well as London, Toronto, Montreal and Singapore.

His culinary empire has brought him many accolades, yet his inspiration remains grounded in the rhythm of the seasons. From his Michelin-starred flagship, Daniel, to his properties across the globe, Boulud’s signature remains the contemporary appeal he brings to soulful dishes rooted in the French tradition.

*PINK PEPPERCORNS: Peppercorns come in different colors and tastes. Pink peppercorns are not true peppercorns, but are the ripe berries of the Brazilian pepper tree. They are used as a spice and have a lighter pepper-like taste, with a pungent, piney, sweet flavor.

“Sláinte!”