All posts by LynnHoll

Unknown's avatar

About LynnHoll

I have been an artist and designer all my life incorporating graphic design for websites, gardens, publications, fabrics, interior design and cooking. I am now retired from my professional job, but still create artistic visions in all forms on a daily basis.

The Leftover Apple Cider Dilemma

If like us you find yourself with some leftover apple cider after making a recipe that called for only a portion of the container, try some of these easy, novel ideas instead of throwing it out. Yes, go ahead and drink it if you’re so inclined, but if not, these nifty recipes enhance an entire spectrum of food items, and are simple to boot.

shutterstock_111918245

For a Tangy Homemade Vinaigrette to toss over salads or in with pasta dishes, first grab 1 lemon. Finely grate the zest into a bowl and squeeze in the juice. Whisk in a 1/3 cup apple cider, 1 tablespoon dijon mustard, 1 tablespoon honey and 1 finely grated garlic clove. Whisking constantly, slowly drizzle in 1/3 cup extra virgin olive oil and salt and pepper to taste.

shutterstock_137668649

Here’s an Easy Autumnal Glaze for meat and veggies. In a medium saucepan combine 1 cup apple cider, 2 tablespoons cider vinegar, 1 finely grated garlic clove and 2 tablespoons whole-grain mustard. Bring to a boil and cook until reduced to about 1/4 cup and coats the back of a spoon, 5 to 7 minutes. remove from heat and stir in 2 tablespoons butter, and salt and pepper to taste.

shutterstock_554841658

And what about dessert? Who couldn’t resist a Cider Caramel Sauce to drizzle over almost anything? (OK, so maybe this one is a little more labor-intensive.) In a medium sauce pan, bring 2 cups apple cider to a boil and cook until reduced to a 1/2 cup, nearly 20 minutes. Next, reduce the heat to medium-low and add 1/2 cup white sugar and a 1/2 cup light brown sugar with 5 tablespoons heavy cream, 1/2 teaspoon kosher salt,1/2 teaspoon ground cinnamon, and 1/4 teaspoon ground nutmeg, mix to combine.

shutterstock_604170194

Simmer until the caramel thickens and becomes rich brown in color, 12 to 15 minutes. Remove from the heat and stir in 1/2 teaspoon pure vanilla. Let cool to room temperature. Use or refrigerate for up to one week. Makes 1 1/2 cups. To reheat, microwave in 30-second increments, stirring after each, until desired consistency is achieved.

shutterstock_684839422Finally, an apple cider cocktail goes perfect with the season, and a few simple ingredients will transform a classic fall drink into a festive treat. While there are endless possibilities, how about a Cider-Bourbon Cocktail? Fill a cocktail shaker with ice. Add 3/4 cup apple cider, 1/3 cup bourbon2 tablespoons freshly squeezed lemon juice, and 2 (2 1/2-inch-long) thin slices fresh peeled ginger; shake to combine. Strain cocktail into 2 cups. Garnish with thin apple or orange slices. Get a cozy fire going, and sit back and relax…

shutterstock_117490048


Resort-Style Dining South of the Border

From year one, when Russ and I started dating, we took an annual vacation to the Cancun / Riviera Maya area of Mexico. Our last trip there was around 2009, and we excitedly had the opportunity to return this Fall. Each time we chose a different all-inclusive through Apple Vacations, and this trip was no different. You really can’t beat the prices! (This blog may look lengthy, but it’s mostly photos.)

A six golden-apple resort, NOW Jade Cancun is situated directly on the Caribbean just south of Puerto Morelos, less than a half hour’s ride from the Cancun international airport. Nearly everything (excluding motorized sports and excursions) is included: airfare, transport, all the food and drinks you could possibly consume, a fullscale spa and fitness center, and endless entertainment for adults and kids… all wristband-free! Spacious rooms and suites are graciously appointed and luxuriously equipped with amenities.

beach.view.huts
An expansive view of the beach from Carnival’s veranda. The colors are so vivid!

bedroom
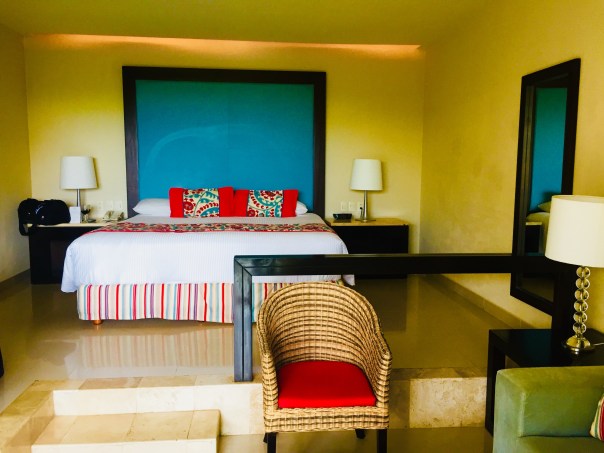
Our room included a step-down living area and balcony. The bathroom was fabulous too! BTW, maid service comes twice a day: in the morning to do a thorough cleaning, and in the evening while you’re dining to turn down the bed and leave chocolates.

lobby
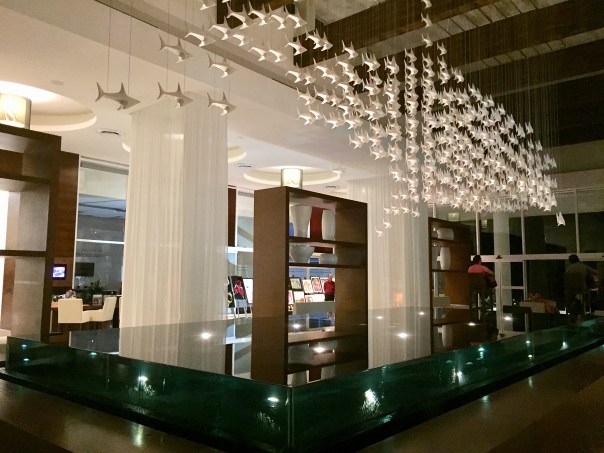
The main entrance lobby at night where live guitarists occasionally played serenating music.

About the food. 24-hour service is available at the Cocoa Cafe, or delivered directly to your room. But half the fun is meeting folks from all over the world, and/or just people-watching. Breakfast for us usually started with an expansive view overlooking the Caribbean at the Carnival International Buffet, with endless culinary options that address anyone’s preferences or diet restrictions.

carnival.veranda
Our view every morning as we ate breakfast.

bag.carousel
Most of their restaurants will give you a bag carousel so you don’t have to plop them on the floor. The first day when our room wasn’t ready, we had our carry-ons with us, so the carousel was very convenient. 

A late lunch could be as casual as getting nachos or burgers at the Poolside or Barefoot Grills without having to wear a cover-up; or a bit more upscale and out of the sun at Castaways with a larger than life menu delivered to your table on an easel with a Spanish menu on one side, or for us gringos, in English on the other side.

castaways
Castaways offers a more extensive menu than the poolside grills, along with shade.

castaway.menu
The ginormous menu at Castaways.

castaway.fajitas
One afternoon our lunch of choice was a Chicken Fajita.

On top of the five gourmet restaurants that serve dinner (other than the Carnival Buffet), there are seven bars and lounges where you can swim up for a cocktail or get down on the dance floor. But this blog will concentrate on their featured ethnic restaurants—at which BTW, you don’t have to make reservations, as many other all-inclusives require. (Although we found that this feature also had its drawbacks…) They were all wonderfully and artistically appointed, much to my delight!

Our first night we decided to dine at Spice, featuring Asian-style cuisine in an open-air romantic setting surrounded by water and mango groves, with a choice of hibachi-style dining, or a regular sit-down option with full menu—our choice. After speaking with the hostess, we learned it would be awhile before a table would open up, so they gave us a neon beeper to contact us, apparently a common practice.

Fine with us, there’s lots to explore in the meantime such as international shopping, vendors displaying their wares in the open-air courtyard, live performers, or enjoying an upscale cocktail in the Moments lounge where people-watching is at its finest, and a larger-than-life TV screen broadcasts current world sports events. With Russ being a die-hard Pittsburgh fan, we got to see a good bit of the Sunday night football game when the Steelers beat the Lions. (An Eagles fan, I was glad to see that they also won earlier in the day.)

IMG_E0897
We had our waiter open the window shade so that we had a view onto the water surrounding the restaurant—and wondered why the other diners didn’t ask for the same?

IMG_0902
The Thai Salad was interestingly presented and included steamed veggies with shrimp and a Thai dressing.

IMG_0903
One appetizer was the Nem of Saigon, two crispy rolls with vegetables, beef, shrimp and a sweet-spicy sauce. 

IMG_0904
Russ chose a spicy tuna sushi roll to nibble on.

IMG_0906
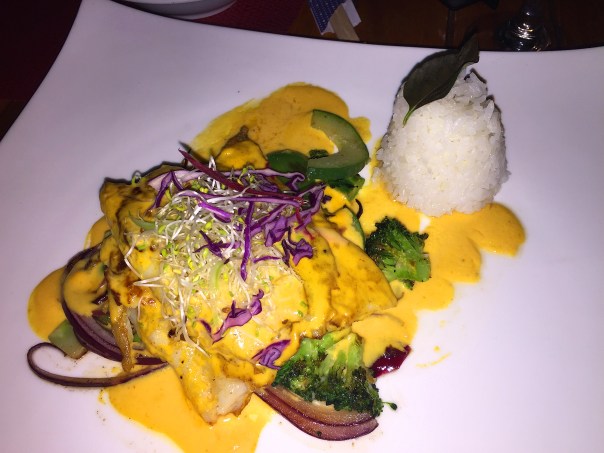
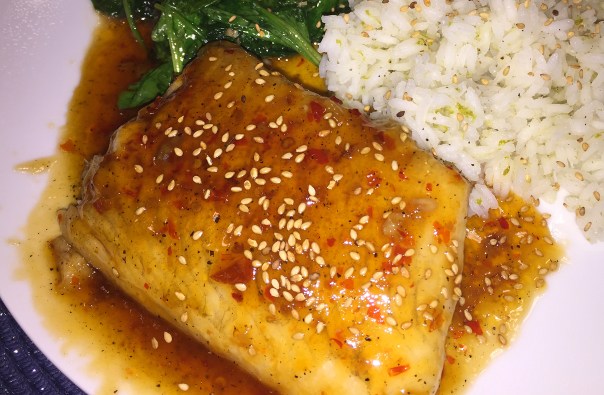
Years ago I feasted on a King Fish dinner on the beach in St. Thomas and never forgot how fabulous it was. This King Fish version with marinated ginger and lime juice came with sautéed vegetables and a delicious spicy coconut sauce, and was perhaps a bit more upscale than in St. Thomas.

IMG_0908
Russ had the Crispy Pork with sweet and sour, ginger and pineapple. While his was good, we both thought mine was a better match for our palettes. 

We enjoyed Spice so much, we patronized the restaurant again on our fifth night, this time with a view overlooking one of the hibachi tables where the master chef performed his jaw-dropping knife skills for a crowd of eight. We both agreed, he was the most skilled artist we ever saw, although the picture below doesn’t show the knives flying in the air.

IMG_0996

Before reporting on the other ethnic restaurants, here are pics of what we ate on our second night at Spice:

IMG_0985
The fantastic Curry Shrimp was plated with a yellow curry and coconut sauce surrounded by a vegetable stack topped with shredded carrots.

IMG_0986
We split the Malaysian-Style Chicken Satay with peanut sauce.

IMG_0987
A hot little skillet brimming with just the right amount of Pad Thai with rice noodles, egg, peanuts, chicken and vegetables.

IMG_0989
The Curry Shrimp entrée was artistically plated in a yellow curry sauce with coconut milk and a side of white rice.

IMG_0993
Dessert was a Trio of Chocolate Truffles with gilded touches and fresh berries.

Our second evening’s choice for dinner was the authentic Mexican establishment Tamarindo. Again, we were given a beeper because they said there would be around an hours wait (that’s why we ate late lunches.) The crazy thing about it though, when we were called back and seated, the vast majority of the tables were empty!?

IMG_0922
Russ wonders where the heck everyone is since we had to wait an hour to be seated!

IMG_0920
While waiting for a glass of wine and reviewing the menus, they delivered a sconc           e of nacho chips and some very good guacamole and salsa.

IMG_0924
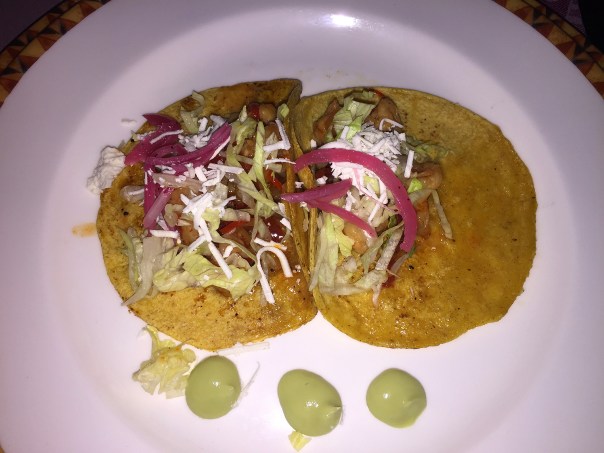
Lynn enjoyed the appetizer Tacos de Camaron al Ajillo: garlic-roasted shrimp, avocado salsa, fresh cheese and shredded lettuce.

IMG_0926
Russ drooled over his amazing tasting Salbutes de Cochinita Pibil stuffed with pork shoulder with pickled onion, radishes, tomato, avocado, a toasted pumpkin seed sauce and hot pepper with lemon. 

IMG_0928
We chose to spilt the Parrillada for Two as our entree. WOW, was it good, and just the right amount without going overboard.

IMG_0931Russ just can’t pass up a good Churro and these were dressed with melted chocolate and a side of vanilla ice cream.

The most upscale restaurant was touted to be the French Mercure and we decided to enjoy our third dinner there. Of the five ethnic options, both Mercure and Cin-Cin, the Mediterranean spot (closed for a couple of nights), require more formal dress and men have to wear long pants.

Again knowing we would probably have to wait, we sought out the host and got our names on the list, but did not get the aforementioned beeper this time. When we inquired how we were supposed to know when our table would be ready, they told us to check back in an hour! Not a very expedient system in our opinions, and not a very good first impression.

There did indeed happen to be a bit of a mix up when we checked back, along with several other irritated customers, but before long we were seated. All-in-all our food was good, but not the top-notch place Mercure was lauded to be.

IMG_0947
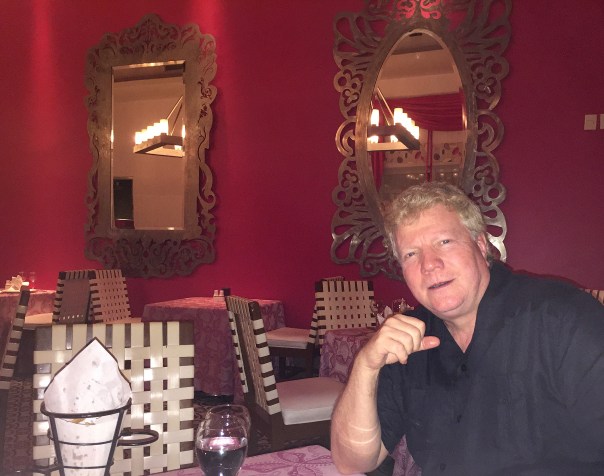
Russ looks at the menu while I take in the interesting decor.

IMG_0957
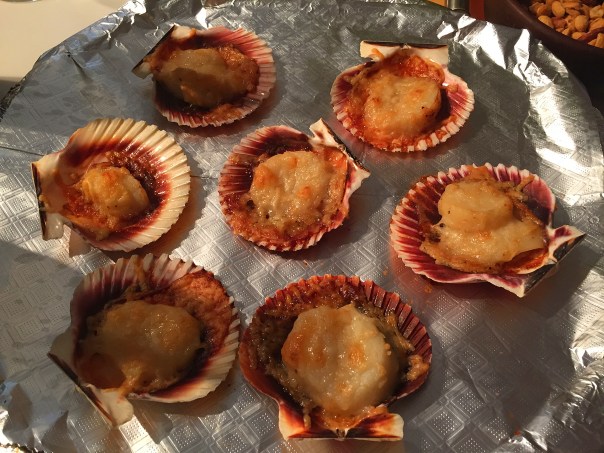
My Scallops Au Gratin with Gruyere Cheese appetizer while attractive, was way too chewy. Not a good omen…

IMG_0958
However, my Endive Salad with nuts and roquefort cheese made up for the disastrous scallops and was perfectly plated.

Russ’s appetizer, the Le Foie Gras duck liver was served on lettuce and fresh brioche bread, was sooo small, he swallowed it before I could even take a picture of it!

IMG_0959
We both opted for the Grilled Fillet Mignon with Béarnaise Sauce accompanied by sautéed vegetables on whipped potatoes as our main entree. Unfortunately my steak was sooo rare I had to send it back. They did bring me an entire new portion which was done to my liking.

IMG_0962
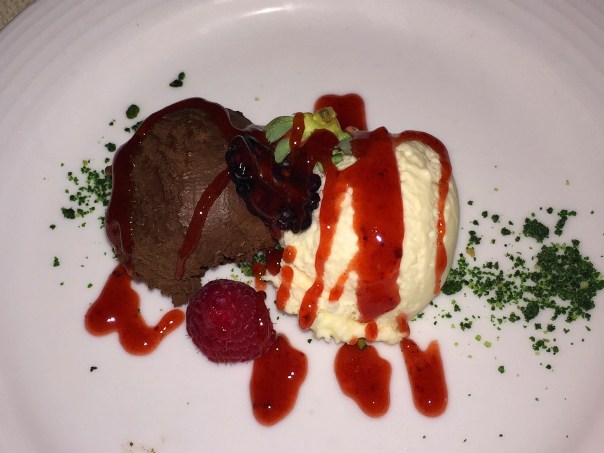
The dessert course for Russ was the beautifully plated White and Dark Chocolate Mousse served with raspberry sauce.

Dinner on the fourth evening was at the Italian trattoria Capers. Expecting a long wait as had been the case the other few nights, we stopped at the hostess station at 7:00 and were stunned when they seated us immediately! Go figure…

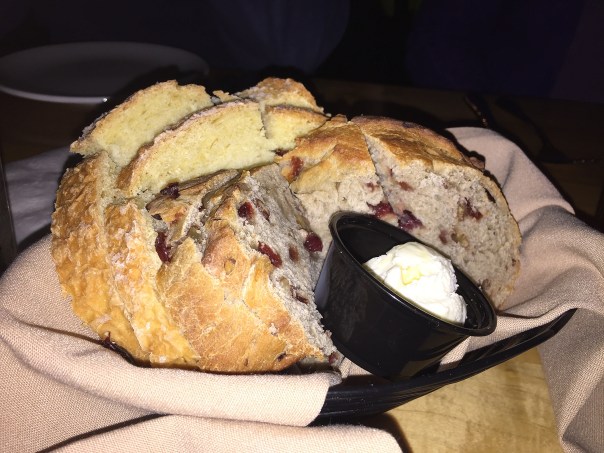
It was a good beginning when they delivered an eclectic basket of bread and a small amuse-bouche to get the party started…

IMG_0969

IMG_0970
We each received an Amuse Bouché of papaya, cheese spread topped with kiwi and a blackberry.

IMG_0971
The Portobello Mushroom with provolone cheese called my name for the appetizer round.

IMG_0974
Russ had the Carpaccio appetizer with thin slices of raw beef, parmesan reggiano, arugula and white truffle oil.

IMG_0975
As the main entree Lynn opted for the Baked Salmon Fillet in fine herbs served with grilled onions, asparagus peppers in a white wine sauce.

IMG_0979
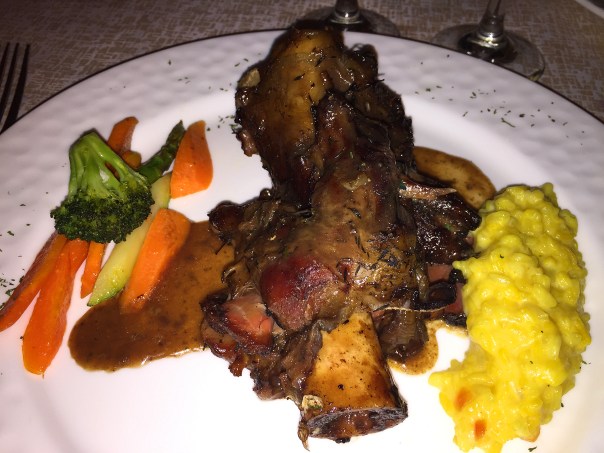
For Russ it was all about the Veal Osso Buco braised in Barolo wine sauce over risotto Milanese and a side of steamed veggies.

IMG_0980
Russ ended with a Gelato Duo with a scoop each of vanilla and chocolate topped with an amaretto chocolate drizzle. 

Often after dinner, we’d go to the beach bar where Russ would practice his already fluent Spanish with the bartender Oskar. It is here that we first met a couple from St. Louis, Bobby and Michelle, who were at NOW Jade for a family wedding. In fact, there were at least one or two destination weddings on the grounds per day!

lynn.russ.on.swings
At the beach bar on swing seats.

IMG_4010
Michelle and Bobby were also fellow foodies.

IMG_2065

IMG_2064

Our final two nights we dined at Cin-Cin, the upscale Mediterranean restaurant that had been closed the past two evenings. The first time we sat inside and enjoyed the meal so much, we asked Bobby and Michelle to join us again on our last night. They had actually already eaten there twice previously, but had no qualms eating there again. We all agreed, Cin-Cin was our favorite (interior shown below.)

IMG_1008

In no particular order, here are some of the options we chose for appetizers, mains and dessert over the course of two nights:

IMG_1010
Serrano Ham Falafel with crispy chickpeas and a warm honey, lemon and mint sauce.

IMG_1021
Spanakopita, a Greek Pie filled with spinach, feta cheese and served with sundried tomato sauce.

IMG_1011
A to-die-for soup, Fassolada, a typical white bean soup with pancetta slices.

IMG_1012
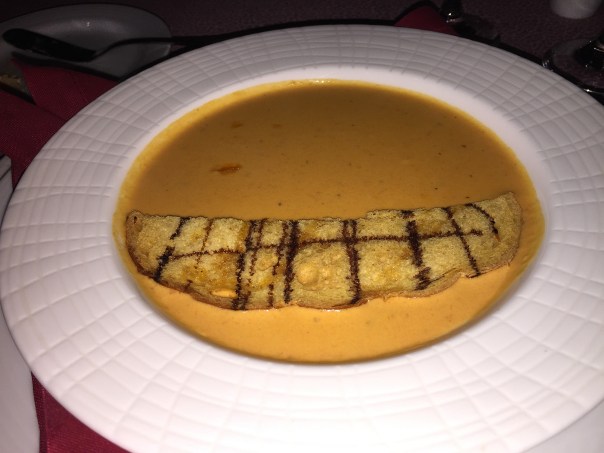
Another winning soup, Garlic & Tomato Cream served with a crusty bread drizzled with au balsamic oil.

IMG_1013
Tapenade Salmon came plated with creamy olive sauce, roasted eggplant and oregano.

IMG_1015
The Grouper Fillet was a fave and was candied in olive oil and served with steamed vegetables and potato slices.

IMG_1023
A take on traditional Greek salad, this Horiatiki Salata was sprinkled with feta cheese.

IMG_1025
Perhaps everyone’s favorite entrée was the Cilantro Shrimp Risotto with thyme over creamy cilantro risotto served with leek oil.

IMG_1028
I tried a smidgen of Russ’ Basil Mousse dessert and it was exquisite.

IMG_1029
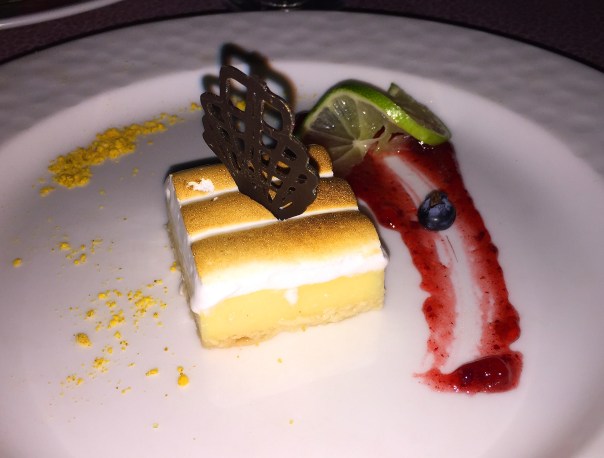
This lovely dessert was the Margarita Pie with a swipe of rum sauce topped with a chocolate confection.

IMG_1030
This Lemon Pie served with berries was very well-liked by those who indulged.

Just imagine if you had to pay for all of these meals and drinks plus add a tip? It would have cost a fortune! And if you didn’t like an entrée, you’d simply send it back and choose something else. So for one very reasonable price, you can get it all and indulge yourselves for as little, or as long as you want.

IMG_1031

We made one final pit stop at the beach bar to say good-bye to Oskar, Bobby and Michelle with promises to meet up sometime in the future. Until then, Adios Amigos!
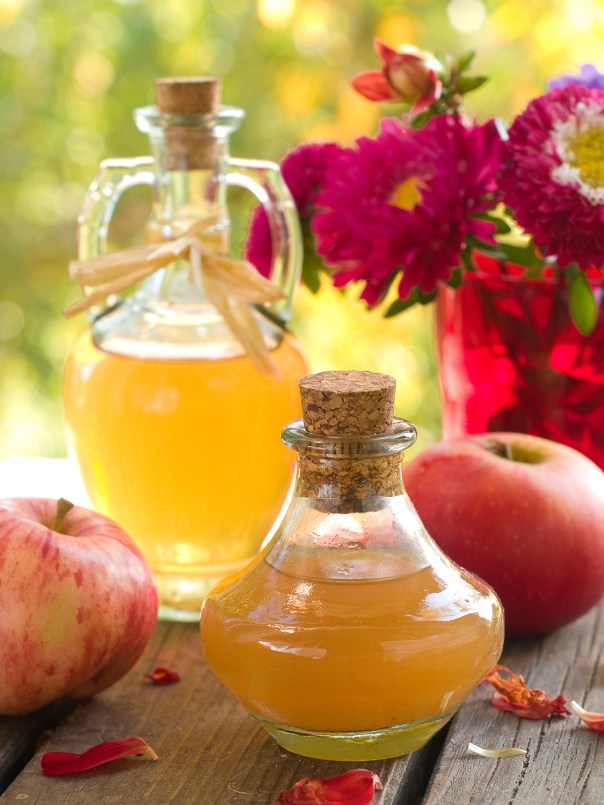
Better Than the BEST? You Take the Test.

Remember my recent blog titled “Simply the BEST Roasted Chicken” (shown below) from a few weeks ago? Well, here’s a sister recipe that’s just as simple and perhaps even a bit tastier—if that’s possible, and to Russ it was. Me? I may have to grudgingly admit this one may have been a skooch tastier.

IMG_0789

The process is the same, but the dry rub and surrounding vegetable ingredients are different. This time I didn’t have the luxury to let the salted chicken sit uncovered in the fridge overnight, but it did get 4 hours (the minimum is one hour.) AND, being huge fans of the allium family, a major addition I made was include 4 large shallots to the fennel and baby carrots.

IMG_1049

Two other minor changes that I did was roast the bird for 1 1/2 hours total because it weighed a bit over 4 pounds, then let it rest for 45 minutes to recirculate and release the juices. Which BTW, make sure to spoon over your meat and veggies. OMG, it was super tasty and succulent. The veggies practically melted in my mouth! Afterward, we were both enthusiastically holding two thumbs up and purring…

IMG_1057

TIP: You may want to save some of the fennel fronds to add as garnish on your meat and/or veggie platters for a bright pop of color.

IMG_1038

Ingredients
  • 1 3½–4-pound whole chicken
  • Kosher salt
  • 3 tablespoons olive oil, divided
  • 2 small fennel bulbs, trimmed, cut into 6 wedges each; saving fronds for garnish if desired
  • 1 pound small baby carrots, scrubbed and diagonally cut into 4″-long pieces
  • 4 large shallots, halved (optional)
  • Kosher salt and freshly ground black pepper

Dry Rub:

  1. 1 Tbsp. fennel seeds
  2. 1 tsp. black peppercorns

Directions

  1. Pat chicken dry with paper towels and season generously with salt, inside and out. (Use 1 tsp. Diamond Crystal or ½ tsp. Morton kosher salt per lb.) Tie legs together with kitchen twine. Let sit 1 hour to allow salt to penetrate, or chill, uncovered, up to 1 day ahead.
  2. Place a rack in upper third of oven and set a 12″ cast-iron skillet (or 3-qt. enameled cast-iron baking dish) on rack. Preheat oven to 425°.
    IMG_0776
  3. Take chicken out of fridge.
  4. Meanwhile, grind dry rub ingredients in a spice grinder.
    IMG_1036
    IMG_1037
  5. Toss fennel wedges, carrots and shallots (if using), and 2 Tbsp. oil in a large bowl to coat; season with salt and pepper.
  6. Once oven reaches temperature, pat chicken dry with paper towels (especially the underside) and lightly coat with half of remaining 1 tablespoon oil; sprinkle with dry rub.
    IMG_1041
  7. Drizzle remaining oil into hot skillet (this helps keep the chicken from sticking and tearing the skin.) Place chicken in the center of skillet and arrange fennel mixture around.
    IMG_1042
  8. Roast until vegetables are golden brown and tender and an instant-read thermometer inserted into the thickest part of breasts registers 155°, 50–60 minutes (temperature will climb to 165° as chicken rests.) Let chicken rest in skillet at least 20 minutes and up to 45 minutes. Baste some of the juices over the chicken and veggies while it rests.
    IMG_1047
  9. Transfer chicken to a cutting board and carve. Serve with vegetables.
    Do not carve until the bird has rested for at least 20 minutes.
    IMG_1057

Adapted recipe from Chris Morocco from Bon Appétit

A Matter of Taste

Spicy sausage paired with summer squash gives this quick Rigatoni with Summer Squash, Spicy Sausage and Goat Cheese pasta dish a mild kick, and the goat cheese brings the flavors of the pasta together while adding its own rich nuance. Not into spicy? Switch out the hot sausage for mild and sweet or turkey sausage.

But just looking at the ingredients I knew I had to increase the quantities of some to forge a better balance with the amount of pasta. Unfortunately we couldn’t locate gluten-free rigatoni so we substituted penne, a barely noticeable switch.

IMG_4047
The supermarket wasn’t carrying bulk sausage so I bought the links, removed the casings, and browned the exteriors before breaking into pieces with a spatula.

In addition to increasing the sausage to 1 pound, the goat cheese to 4 ounces, the shallots to more than a 1/2 cup; I also minced up a small banana pepper that I had wallowing in the fridge, adding another pleasant flavor component. Once the yellow summer squash and zucchini were diced, they measured somewhere in the range between 3 and 4 cups as opposed to 2 cups; and the chopped parsley registered closer to 3 tablespoons, both amping up the veggie quotient.

The trick is in how much pasta water to add at the end. Too little and the dish can be a bit dry, too much and it could end up watery. In that case, a hefty sprinkle of grated Parm would help tighten the dish.

It’s all a matter of taste and preference, so don’t be afraid to adjust to your own liking.

IMG_4045

Ingredients

  • Kosher salt
  • 1 lb. dried rigatoni
  • 3 Tbs. extra-virgin olive oil
  • 3/4 lb. bulk hot Italian sausage (or links, casings removed)
  • 1/3 cup finely chopped shallots (about 3 medium)
  • 2 cups 3/4-inch-diced yellow and green summer squash
  • 3 oz. fresh goat cheese, crumbled (about 3/4 cup)
  • 2 tsp. finely chopped fresh flat-leaf parsley
  • Freshly ground black pepper
  • 1/4 cup grated Parmigiano-Reggiano (optional)

Directions

  • Bring a large pot of well-salted water to a boil over high heat. Put the rigatoni in the boiling water and cook until just shy of al dente, about 10 minutes.
  • While the pasta cooks, heat 1/2 Tbs. of the oil in a 12-inch skillet over medium-high heat. Add the sausage and cook, breaking it into pieces with a spatula or spoon, until it’s almost cooked through, 3 to 5 minutes. Using a slotted spoon, transfer the sausage to a bowl. Pour the fat out of the skillet but do not wipe it clean.
    IMG_4048
  • Heat the remaining 2-1/2 Tbs. oil in the skillet over medium heat and cook the shallots (I also added the minced banana pepper here) until they begin to soften, about 1 minute.
    IMG_4049
  • Raise the heat to medium high and add the squash. Cook, stirring frequently, until the squash is barely tender, 3 to 5 minutes.
    IMG_4050
  • Reserve 1/2 cup of the pasta-cooking water and drain the rigatoni. Return the rigatoni to its cooking pot and add the sausage, the squash mixture, and 2 Tbs. of the reserved pasta water. Toss over medium heat until the sausage is cooked through and the rigatoni is perfectly al dente, about 3 minutes. Add more of the pasta water as necessary to keep the dish moist.
    IMG_4052
    IMG_4054
  • Remove from the heat, add the goat cheese and parsley, and toss until the cheese melts and coats the pasta. Season to taste with salt and pepper, transfer to warm shallow bowls, and top each serving with some of the grated Parmigiano, if using.
    IMG_4057

Adapted by a recipe from Steve Conant of Fine Cooking

Easy Sweet & Spicy Fish Glaze with Wilted Spinach

Tilapia has been getting a bad rap lately. There are some disturbing allegations about the fish, and one is particularly surprising: Some nutritionists have been touting a study that implies that eating tilapia is worse than eating bacon.

The truth is, tilapia has as much omega-3 as other popular seafood, including lobster, mahi-mahi and yellowfin tuna—AND is also very low in fat. A 4-ounce serving of tilapia has about 1 gram of saturated fat, 29 grams of protein and around 200 mg of omega-3.  By comparison, a 1-ounce serving of bacon (about 4 strips) contains 4 grams of saturated fat, 10 grams of protein and 52 mg of omega-3.

IMG_3827

So people may not want to eat tilapia every day, but that doesn’t mean it has to be avoided altogether, nutritionists say. And if you’re still not convinced, switch out tilapia for another meaty white fish. (The original recipe calls for catfish.)

This easy sweet-and-spicy glaze would also taste great on other fish fillets so try experimenting on the fish of your choice.

IMG_3817

Ingredients

  • 2 oz. (4 Tbs.) unsalted butter
  • 1/3 cup orange marmalade
  • 1 Tbs. Chinese chili garlic sauce (such as Lee Kum Kee brand)
  • 20 oz. skinless tilapia fillets
  • Kosher salt and freshly ground black pepper
  • 2 Tbs. Asian sesame oil
  • 2 medium cloves garlic, crushed through a garlic press
  • 1 lb. baby spinach (about 16 lightly packed cups)
  • 1 tsp. soy sauce
  • 1 Tbs. toasted sesame seeds

Directions

  • Melt 2 Tbs. of the butter in an 8-inch skillet over medium-low heat. Whisk in the orange marmalade and the chili garlic sauce, mashing the larger pieces of fruit with the back of a spoon, until the jam is melted. Set aside off the heat.
    IMG_3821
  • Pat the fish dry, season the flesh side of each fillet with a large pinch each of salt and pepper, and spread each fillet with 1 Tbs. of the glaze, using the back of the spoon (leave any remaining glaze in the pan).
    IMG_3822
  • Melt 1 Tbs. of the butter with 1 Tbs. of the sesame oil in a 12-inch nonstick skillet over medium-high heat. Add the fish, glazed side down, and cook for 2 minutes. Using a large spatula, flip the fillets and cook until opaque in the center and just firm to the touch, about 3 minutes. Transfer the fish to 4 dinner plates.
    IMG_3824
  • Melt the remaining 1 Tbs. butter with the remaining 1 Tbs. sesame oil in a wide heavy-duty 5- to 6 quart pot over high heat. Add the garlic and stir until fragrant, about 30 seconds. Add the spinach, sprinkle with the soy sauce, 1/2 tsp. salt, and 1/2 tsp. pepper and then toss until the spinach is just wilted but not yet releasing water, about 2 minutes. Remove from the heat. Divide the spinach among the plates.
    IMG_3826
  • Heat the remaining glaze over low heat if very thick, and drizzle over the tilpapia. Sprinkle with the sesame seeds and serve.

IMG_3835

Adapted from a recipe by Selma Brown Morrow

Autumnal Awesomeness

What classic Autumn pairing comforts the soul and warms the heart as much as braised pork with apples? Basically impossible to mess up, your family and friends will go wild for this sweet-salty, fall-apart-tender Pork Shoulder Braised with Apples. Additionally, the ingredient list is relatively short and cheap, and the skill set needed is minimal; but you’ll need several hours for prep and braise.

Cooking a pork shoulder into heavenly succulence is practically fool-proof, but it does require time. Put the meat in a Dutch oven or other heavy pot, pour in just enough liquid so the meat is partially submerged, then cover it and let the pork cook slowly in a low oven for a few hours. This is entirely hands-off time. The pork is done when it’s so tender that it literally flakes apart when you poke it with a fork and falls off the bone—if there was one.

IMG_0879

Look for pork shoulder or pork butt. Even though it’s called a “butt,” it’s actually part of the shoulder meat. (The actual rear end is called the ham!) Not able to purchase a boneless cut, it was easy enough to remove the meat from the bone. Plus, now we had extra fodder for the next time we make homemade meat stock.

IMG_0803

Some varieties of apples fall apart while cooking; here you want the apples to hold their shape. Pink Lady and Honeycrisp are good choices and are widely available. The directions indicate to peel the fruit, but I left the skin on for the extra nutrients it offers. Serve with cheesy grits. Both the meat and grits recipes are from one of our all-time braising chefs, Molly Stevens, so we knew we’d be in for a treat—and we certainly were! The dinner was fabulously feast-worthy, especially accompanied by late-season braised green beans, also by Molly…

DO AHEAD: Bacon and pork shoulder can be cooked 2 days ahead through Step 5. (Which is what we did because we were going to be away for the weekend.) Let cool in braising liquid, uncovered. Chill, uncovered, until cold; cover and keep chilled. Rewarm before continuing.

IMG_0801

Pork Shoulder Braised with Apples

  • Servings: 8
  • Difficulty: moderate
  • Print

Ingredients

  • 1 tablespoon vegetable oil
  • 4 ounces thick-cut bacon, cut into 1/2-inch pieces
  • 1 tablespoon unsalted butter
  • 5 pounds boneless pork shoulder, cut into 6 pieces
  • Kosher salt and freshly ground black pepper
  • 3 medium shallots, thinly sliced
  • 1/3 cup Calvados or other apple-flavored brandy
  • 1 1/4 cups apple cider, preferably fresh
  • 2 tablespoons (or more) apple cider vinegar
  • 3 tart, firm apples (such as Pink Lady or Honeycrisp), peeled, cut into 1/2-inch wedges (about 4 cups)
  • 1/2 teaspoon Dijon mustard
  • Chopped fresh chives

Directions

  1. Place a rack in lower third of oven; preheat to 325°. Heat oil in a large heavy pot over medium heat. Add bacon and cook, stirring often, until browned and crisp, 6-8 minutes. Using a slotted spoon, transfer bacon to a paper towel-lined plate and set aside.
    IMG_0804
  2. Increase heat to medium-high. Add butter to pot with drippings. Season pork shoulder with salt and pepper. Working in batches if needed, cook pork shoulder, reducing heat as needed to prevent overbrowning, until brown on all sides, 8-10 minutes per batch. Transfer pork shoulder to a plate.
    IMG_0805
    IMG_0806
    IMG_0809
  3. Add shallots to pot and cook, stirring often, until shallots begin to soften, about 4 minutes.
    IMG_0811
  4. Remove pot from heat; add Calvados and stir, scraping up any browned bits from bottom of pot. Return to heat and simmer for 1 minute. Add apple cider and 2 tablespoons vinegar. Bring to a simmer, then return pork shoulder to pot, placing in a single layer on bottom of pot (the meat should not be completely covered).
    IMG_0813
    IMG_0814
  5. Cover pot and transfer to oven. Braise pork shoulder, turning after 1 hour, until fork-tender, about 2 hours. Stir in reserved bacon.
    IMG_0817
    IMG_0823
  6. Using tongs, transfer pork to a deep platter. Skim fat from cooking liquid. Place pot over medium heat and bring liquid to a simmer. Add apples and cook until apples are just tender and sauce is slightly reduced, 8-10 minutes.
    IMG_0868
    IMG_0869
  7. Stir Dijon mustard into sauce; season with salt, pepper, and more vinegar, if desired. Pour sauce with apples over pork on platter. Sprinkle with chives.
    IMG_0875
    I was so excited to try the meal, I completely forgot to add a sprinkle of chives!

http://www.lynnandruss.com

All three recipes by Molly Stevens

IMG_0876

Serve with Cheesy Grits

  • 3 cups whole milk
  • 1 cup water
  • Kosher salt
  • 1 cup polenta (cornmeal)
  • 3 oz. real good sharp Cheddar, coarsely grated (about 1 cup)

Directions

  1. In a 3-quart saucepan, bring the milk and a large pinch of salt to a simmer over medium heat. Slowly whisk in the polenta, reduce the heat to medium low, and cook, stirring often, for about 5 minutes.
  2. Stir in 1 cup water and cook, stirring occasionally, until the polenta is thick and creamy, 10 to 12 minutes. Remove from the heat, stir in the cheese, and season to taste with salt and pepper.

Sambal Short Rib Stir-Fry

Skeptical at first, we were gastronomically impressed over the outcome of this Sambal Short Rib Stir-Fry. Typically, short ribs take hours in a slow braise, so when we saw this stir-fry method, we definitely had our doubts that the meat would be tender after less than a half hour. Here, thin-sliced short ribs become a quick cook MVP in this seriously flavorful weeknight meal.

IMG_0767

Since the supermarket was only carrying bone-in short ribs, we had to cut the meat off the bone before slicing into thin strips. However, we considered it a bonus because we’ll freeze the bones until such time Russ makes another batch of homemade meat broth. Keep in mind, you can partially freeze the short ribs before you slice to get really thin cuts.

IMG_0684
Russ slices the meat off of the bones which he saves to make meat stock at a later date.

IMG_0743
To make it easier to cut the ribs into thin slices, freeze the meat for about 30 minutes.

Be forewarned, there is a fair amount of prep and you really need to do it all prior to the beginning of tossing ingredients into your wok. You’ll be tossing and stirring often during each step.

In case you are not familiar with sambal oelek, it is a fiery Indonesian ground chile paste typically made from a mixture of a variety of chili peppers with secondary ingredients such as shrimp paste, fish sauce, garlic, ginger, shallot, scallion, palm sugar, lime juice, and rice vinegar or other vinegars. (Sriracha would be a decent substitute.) The spiciness will be somewhat counterbalanced by the sweet mirin.

Instead of making a new batch of rice, we had some leftover green rice that I reheated with a touch of added chicken broth, and it actually went quite well with the stir-fry.

IMG_0746

Ingredients

  • 1 pound boneless beef short ribs, thinly sliced against the grain
  • 2 small onions, thinly sliced
  • 8 ounces shiitake mushrooms, stems removed, caps thinly sliced
  • 1 bunch scallions, cut into 1-inch pieces
  • 1 2-inch piece ginger, peeled, finely grated
  • 4 garlic cloves, finely grated
  • ¼ cup sambal oelek
  • 1 tablespoon mirin
  • 6 medium radishes, trimmed, quartered
  • 6 ounces snow peas, strings removed
  • 1 cup chicken broth, preferably homemade
  • 1 cup torn basil leaves
  • 3 tablespoons toasted sesame oil

Directions

  1. Heat oil in a wok or large cast-iron skillet over high. Season beef with salt and pepper and cook, tossing and stirring often, until deeply browned, 8–10 minutes.
    IMG_0750
    IMG_0751
  2. At first, the meat might seem wet but it will eventually take on color and look shiny. Add onions and mushrooms and cook, tossing around, until they soften and start to take on a little color, 6–8 minutes.
    IMG_0754
  3. Add scallions, ginger, and garlic and cook, tossing constantly, until slightly wilted, about 2 minutes.
    IMG_0756
  4. Add sambal oelek and mirin and cook, tossing to coat, about 1 minute.
    IMG_0757
  5. Add radishes, snow peas, and broth and bring to a boil. Cook until liquid is reduced by half and meat and vegetables are glossy and saucy, about 5 minutes.
    IMG_0759
  6. Season with salt and pepper. Serve stir-fry over rice topped with basil.

IMG_0765

Recipe by Brad Leone from Bon Appétit

Simply the BEST Roasted Chicken

Do y’all really need another roast chicken recipe?? Well, if you ask me, you absolutely need this one because the Bon Appétit Cast-Iron Roast Chicken has been timelessly tested and optimized to cut out all of those annoying steps that folks (including myself at times) swear are crucial. No overnight salting (although you can, and I did), no brining, air-drying, temperature changes, or complicated trussing, just a simple roasted chicken.

And let’s face it, nothing compares to cast iron! The material’s heat-retention qualities can’t be matched by any tempered glass or even stainless-steel vessels. Heating the skillet in the oven first means the bottom of your bird starts to sizzle and brown as soon as it goes in—no flipping required and no unappealing pale, flabby underside. (Just make sure to pat dry the underside thoroughly before placing in the hot skillet.)

Another brilliant aspect of this technique is making a built-in side dish. Why wouldn’t you throw some veggies around your bird while it roasts? You’ve got a hot pan that’s about to be full of sizzling schmaltz just begging to bathe a mosaic of squash and onions with tons of chicken-y flavor. While Bon Appétit offered several options, we made the Cast-Iron Roast Chicken with Winter Squash, Red Onions, and Pancetta.

IMG_0793

Ahem, size does matter. Now is not the time for a behemoth oven stuffer, nor do you want a petite poussin. A 3 1/2- to 4-pounder will roast the breasts to perfection and all of the dark meat will be mouth-wateringly done too.

I liken a roast chicken to an artist’s blank canvas. As with color to a plain background, nothing changes the flavor of a roasted bird as quickly and dramatically as a throw-together dry rub*. Mix together spices. Rub on chicken. Done. And just wait for the heady aroma of toasty spices and crispy skin to start wafting out of the oven… You will be drooling…

IMG_0778

We’ve all heard endless theories about how to season a chicken: submerge in a brine, salt 24 hours ahead and let it dry, wrap in seaweed, etc. But the only true non-negotiables are (a) being generous with the kosher salt inside and out, and (b) letting the chicken sit out for at least an hour before cooking, which gives the seasoning time to work it’s magic deep into the meat. Although not necessary, I salted ours the night prior and let it sit in the fridge uncovered, taking it out an hour prior to cooking, then oiled it and added the dry rub.

Any poultry recipe worth it’s drumstick will note that a chicken needs to rest post-roast, pre-carving. So sit back with a glass of wine and wait a full 20 to 45 minutes to yield a bird that reabsorbs it’s juices. No, it won’t get cold, it will just be the juiciest bird you’ve ever tasted. Don’t believe me? Go ahead and just simply roast the chicken in a cast-iron skillet…

Now just a mention on the differences between delicata and kabocha squash—both of which are an option here.

KABOCHA SQUASH

kabocha-squash

Aliases: Japanese Pumpkin, Kent Pumpkin  Characteristics: The squat, green kabocha—the Japanese word for squash—has a nutty, earthy flavor with just a touch of sweetness. It’s similar in shape and size to a buttercup squash, but the base points out and not in. (There is also a red kabocha.)

DELICATA SQUASH

delicata-squash

Aliases: Sweet Potato Squash, Bohemian Squash  Characteristics: This particular winter squash, with its pale yellow shading, most closely resembles its summer squash cousins. The thin skin is edible (really!), but also more susceptible to bruises and rot. When cooked, the delicata has a consistency similar to that of a sweet potato—creamy and soft—although the flavoring is a bit more earthy.

Cast-Iron Roast Chicken with Winter Squash, Red Onions and Pancetta

  • Servings: 4-6
  • Difficulty: easy
  • Print

Cast-Iron Roast Chicken with Winter Squash, Red Onions, and Pancetta

IMG_0780
Ingredients
  • 1 3½–4-pound whole chicken
  • Kosher salt
  • 3 tablespoons olive oil, divided
  • 2 red onions, cut into wedges through root end
  • 2 pounds winter squash (such as delicata or kabocha), cut into 1½-inch-thick wedges or 1/2″ rounds, seeds removed, and each round cut in half
  • 1½ ounces pancetta, chopped into ¼-inch pieces
  • Freshly ground black pepper

*Optional Dry Rub: Coarsely grind 1 tablespoon coriander seeds with 1/2 teaspoon crushed red pepper flakes in a spice mill or with a mortar and pestle. Transfer to a small bowl and mix in 1 teaspoon mustard powder.

IMG_0748

IMG_0749

Two other dry rub possibilities are:

  1. 1 Tbsp. fennel seed ground with 1 tsp. black peppercorns
  2. 2 Tbsp. curry powder mixed with 1 tsp. garlic powder

Directions

  1. Pat chicken dry with paper towels and season generously with salt, inside and out. (Use 1 tsp. Diamond Crystal or ½ tsp. Morton kosher salt per lb.) Tie legs together with kitchen twine. Let sit 1 hour to allow salt to penetrate, or chill, uncovered, up to 1 day ahead.
    IMG_0741
  2. Place a rack in upper third of oven and set a 12″ cast-iron skillet (or 3-qt. enameled cast-iron baking dish) on rack. Preheat oven to 425°.
  3. Take chicken out of fridge.
    IMG_0776
  4. Meanwhile, toss onions, squash, pancetta, and 2 Tbsp. oil in a large bowl to coat; season with salt and pepper.
    IMG_0781
    I sliced rounds to a thinner 1/2″, then scooped out the seeds, and cut the rounds in half to better fit the skillet.
    IMG_0783
  5. Once oven reaches temperature, pat chicken dry with paper towels (especially the underside) and lightly coat with half of remaining 1 tablespoon oil; sprinkle with dry rub, if using. Drizzle remaining oil into hot skillet (this helps keep the chicken from sticking and tearing the skin.) Place chicken in the center of skillet and arrange squash mixture around.
    IMG_0785
    IMG_0788
  6. Roast until vegetables are golden brown and tender and an instant-read thermometer inserted into the thickest part of breasts registers 155°, 50–60 minutes (temperature will climb to 165° as chicken rests.) Let chicken rest in skillet at least 20 minutes and up to 45 minutes. If desired, baste some of the juices over the chicken and veggies while it rests.
    IMG_0793
  7. Transfer chicken to a cutting board and carve. Serve with vegetables.
    IMG_0796
    Do not carve until the bird has rested for at least 20 minutes.
    IMG_0800

http://www.lynnandruss.com

Adapted recipe from Chris Morocco from Bon Appétit

I can’t wait to hear how yours turns out…

My Mojo Revisited

If you’re relatively new to this blog, then you won’t recall our Caribbean-inspired meal which I posted a few years ago, and now feel it’s worth revisiting. At that point in time, we couldn’t locate tangerines, nor could we this time around, BUT, I was able to purchase a small container of 100% tangerine juice. It must be the time of year…

IMG_0738

Mojo—pronounced MOE-hoe, although most of us often pronounce it with a “J” sound—is a Caribbean and Latin-American garlic, chile, and fruit sauce that pairs well with meat, poultry, and seafood. Here, in Turkey Cutlets and Black Beans with Tangerine-Habanero Mojo Sauce it’s made with tangerine and lime, lending both sweet and tart notes. BTW, if habaneros are unattainable, try a Scotch bonnet, jalapeño, or serrano chile instead, or as in our case, Thai red chile peppers which we had on hand. I used two whole Thai chiles and it was not over-the-top spicy at all!

For our sides, we again served a lovely, nutritious and refined Green Rice dish (recipe below) full of nutrient-rich spinach and cilantro. This time around though, we replaced the milk with coconut milk making the rice even more delicious! It did seem to take about 10 minutes longer to cook than directed, plus I let it sit off of the heat, tightly covered for 20 minutes while I made dinner.

To add even more turkey flavor, once the cutlets are done cooking, deglaze the same skillet with the mojo. We give this meal two thumbs up and enjoyed leftovers for lunch the next day.

IMG_0713

Ingredients

  • 5 to 6 Tbs. olive oil
  • 3 medium cloves garlic, thinly sliced
  • 1/2 plus 1/8 tsp. ground cumin
  • 1/2 cup fresh tangerine juice (from 2 tangerines)
  • 2 Tbs. fresh lime juice (from 1 lime)
  • 1/2 tsp. seeded and minced habanero chile
  • Kosher salt and freshly ground black pepper
  • 1 small red onion, chopped
  • One 15-1/2-oz. can black beans, rinsed and drained
  • 2 Tbs. chopped fresh cilantro
  • 4 turkey breast cutlets (about 1-1/4 lb.)

Directions

  1. In a 10-inch skillet, heat 2 Tbs. of the oil and the garlic over medium heat until the garlic is golden, about 3 minutes. Stir in 1/8 tsp. of the cumin.
    IMG_0719
  2. Add the tangerine juice, lime juice, and habanero (or other chile pepper). Bring to a simmer and cook for about 3 minutes. Season to taste with salt and pepper; set the mojo sauce aside. (The sauce can be served warm or at room temperature.)
    IMG_0720
  3. Heat 2 Tbs. of the oil in a 12-inch nonstick skillet over medium-high heat. Add the onion and ¼ tsp. salt and cook, stirring occasionally, until softened, 3 to 5 minutes.
  4. Add the beans and the remaining ½ tsp. cumin and cook until the beans are heated through, 2 to 3 minutes. Stir in the cilantro and season to taste with salt and pepper. Transfer the beans to a bowl and cover with foil to keep warm.
    IMG_0722
    IMG_0725
  5. Wash and dry the skillet. Season the turkey cutlets on both sides with salt and pepper. Heat 1 Tbs. of the oil in the skillet over medium-high heat until very hot.
    IMG_0726
  6. Add as many cutlets as will comfortably fit in a single layer and cook until browned on both sides and just cooked through, about 2 minutes per side.
    IMG_0730
  7. Transfer to a plate and tent with foil to keep warm. Repeat with the remaining cutlets, adding the remaining 1 Tbs. oil if needed.
  8. Divide the cutlets and black beans among individual plates. Spoon the mojo sauce over and serve.
    IMG_0739

Mojo recipe by Dawn Yanagihara-Mitchell 

Arroz Verde (Green Rice)

IMG_0710

Ingredients

  • 1/2 cup tightly packed fresh cilantro sprigs (about 1/2 oz.)
  • 1 cup tightly packed fresh stemmed spinach leaves (about 1-1/2 oz.)
  • 1-1/4 cups homemade or low-salt chicken broth
  • 1-1/4 cups milk
  • 1 tsp. kosher salt
  • 1 Tbs. olive oil
  • 3 Tbs. unsalted butter
  • 1-1/2 cups long-grain rice
  • 1/4 cup finely minced onion
  • 1 clove garlic, minced

Directions

  1. Put the cilantro, spinach, and broth in a blender and blend until the vegetables are puréed. Add the milk and salt and blend a bit more until well combined.
    IMG_0714
    IMG_0715
  2. In a medium (3-qt.) heavy-based saucepan (with a good lid) over medium heat, heat the olive oil and butter. When the butter is melted, add the rice and sauté, stirring about every 30 seconds, until it just begins to brown, 3 to 4 minutes.
  3. Add the onion and garlic and cook 1 minute, stirring constantly. Add the contents of the blender, stir well, turn the heat to high, and bring to a boil.
    IMG_0717
  4. Cover the pan, turn the heat to very low, and cook for 20 minutes. Stir the rice carefully to avoid crushing it, cover, and cook another 5 minutes.
    IMG_0718
  5. Take the pan off the heat and let the rice steam in the covered pot for 10 minutes. Serve hot.
    IMG_0735

Rice adapted from James Peyton

59 Almshouse

In early October I started my Master Gardener Certification course with weekly classes about 20 miles from home. The trek, most of which runs by way of Almshouse Road, brings me through several Bucks County towns, including Richboro. Along the way, I had noticed an old restaurant haunt, Patagonia Bar & Grille, now closed and breathing new life as 59 Almshouse, which looked busy every time I passed it. Time for a culinary road trip…

Tagging along with us were fellow diners Brad and Barb. Upon arrival we noticed the parking lot was packed—a good sign—we mentally patted ourselves on the back for making reservations ahead of time! One enters into a large rustic foyer with a busy receptionist’s desk, and off to the right is a beautiful showpiece bar area featuring a 24-foot ceiling and gorgeous natural wood trusses (also packed.) Dining areas are down a few steps to the left.

IMG_0653

Once seated, we started discussing the earthy-toned urban decor which showcased lots of wood and brick elements, and Edison lightbulbs in a variety of drum-fashion metal “cages.” While they worked exceedingly well as rustic elements within the restaurant, Barb and I agreed the light fixtures were not to our particular personal tastes.

The restaurant menu, which changes often, stars a wood-burning grill and a variety of unique menu items using locally-grown, fresh farm products. It is conveniently located within 25 miles of over 70 farms—growing produce from asparagus to zucchini, and raising poultry and beef—perfect fodder for Chef Norm’s locally-sourced creations.

IMG_0661
A blurry photo, but at least it masks our wrinkles 😉   

IMG_0667

Presented with large menus and an additional “dinner specials” sheet, we diligently scanned our options, featuring an assortment of soups, salads, flatbreads, appetizers, burgers, sandwiches, pastas and entrées. While deciding, a basket of fresh bread was brought to our table containing two types of fresh crusty bread. Not one to often indulge, I chose a slice of the whole grain bread with walnuts and dried cranberries. Very good indeed!

IMG_0665

For starters Russ and I chose to split the “special” appetizer Grilled Lamb Meatball Skewers threaded with onions and peppers, with sides of hummus, tzatziki and grilled pita, shown above. We were so psyched to start eating them that it was half gone before Brad reminded me I hadn’t yet taken a photo!

IMG_0671

Speaking of Brad, he jumped right into an entrée salad choosing the Cobb Salad—a common choice for him—plated with a bed of romaine, bacon lardon, avocado, hard boiled egg, cherry tomatoes, black olives, and bleu cheese crumbles topped with a peppercorn ranch dressing. He amped it up by adding the grilled chicken breast option.

IMG_0673

While I haven’t had fajitas in ages, it is one of Barb’s go-to choices, so without much hesitation we both selected Chicken Fajitas as our entrées. They came plated in a hot cast-iron skillet with onions and peppers and many sides including pico de gallo, queso, olives, avocado, sour cream, and of course, jalapeños. With such ample portions, a take-home bag was an added bonus.

IMG_0676

Russ was the most adventurous of the group ordering the Duck Pot Pie, new to the Fall menu. It consisted of an oblong crusted pie stuffed duck confit, wild mushrooms, carrots, peas and potatoes along with a small caesar salad. Needless to say, he loved it!

IMG_0662

Most weekday evenings they offer certain specials such as “Sunday Gravy,” “Monday Burgers,” and “Tuesday Chicken and Ribs.” On Friday and Saturdays they provide live music and as we headed out to the parking lot, the band was on their way in with instruments in hand—the party was just getting started…

Oooo Mommy, You’ll Love These Umami Lamb Loin Chops

Umami (pronounced oo-mah-mee) is one of the five basic tastes, and is described as brothy or meaty. Our predilection for umami—the only recently recognized (by western scientists) “fifth taste,” after salt, sweet, sour and bitter—is a captivating piece in the jigsaw of our gastronomic evolution. Umami is why the Romans loved liquamen, the fermented anchovy sauce that they sloshed as liberally as we do soy sauce on Asian cuisine. It is an essential component to the heart-warming joy of gravy made from good stock, meat juices and caramelized meat and veggies.

IMG_0620

And it is why you’ll love these lamb loin chops! With very few ingredients, the Porcini and Rosemary Crusted Lamb Loin Chops recipe is a cinch to make, and a joy to eat. To keep the meal uncomplicated, roast some baby fingerling potatoes in a bit of olive oil, minced rosemary and sea salt; and a side of sautéed spinach in garlic. Dinner done.

As the skillet of chops was in the oven getting happy, I thought it might be a good idea to make a pan sauce while the cops rested, even though the recipe didn’t specify one. So if you want to up your game, first remove the cooked lamb loins to a platter and tent with foil; drain off any fat, and put the skillet on a medium burner. Add about 1/3 cup of white wine to deglaze the pan and loosen any brown bits, stirring often for two minutes.

IMG_0614

You’ll need some of the porcini dust, so make sure to reserve a tablespoon or two. To the deglazed pan, add 1/3 cup chicken broth and stir until reduced by about half. Add the reserved ground mushrooms, pour in any meat juices that have accumulated on the platter, and a sprinkling of sea salt, cooking for another minute or two. Finally, swirl in a tablespoon of butter until fully incorporated. Put the sauce in a small bowl and serve so diners can ladle over their food.

IMG_0615

You can use a food processor to blitz the mushrooms before continuing to chop them by hand with the rosemary, resulting in a coarser rub. A spice grinder, which is what I used, created a finer crust. This recipe is also delicious prepared on the grill. The recipe is for 8 chops, we only had 5, but otherwise used the same proportions for the remaining ingredients. We loved the results and plan on doing a similar treatment to a couple of good steaks…

IMG_0599

Ingredients

  • tablespoons olive oil, divided
  • 1 large garlic clove, minced
  • Sea salt
  • Freshly ground black pepper
  • 8 lamb loin chops
  • 1/4 cup finely ground dried porcini mushrooms
  • 1 tablespoon finely chopped rosemary leaves

Directions

  1. Combine 2 tablespoons oil and garlic in a bowl. Smear over both sides of the lamb. Sprinkle with salt and black pepper. Refrigerate 1-2 hours.
    IMG_0602
  2. Combine mushrooms and rosemary in a small bowl. Remove lamb from refrigerator. Coat both sides of lamb with mushrooms. Let sit at room temperature, 30 minutes.
    IMG_0605
    IMG_0607
  3. Preheat oven to 375 F. (190 C.) Heat 1 tablespoon oil in a large skillet.
  4. Add lamb without overcrowding. Cook until brown on both sides, turning once, 3-4 minutes per side.
  5. Transfer skillet to oven. Bake until cooked to desired doneness, 10 – 15 minutes for medium-rare.
    IMG_0608
  6. Remove from oven, tent with foil and let rest 15 minutes before serving.
    IMG_0610

IMG_0618
If you make the pan sauce, drizzle some over the chops and your side dishes.

Found on TasteFoodBlog.com

Meatloaf, Be It Ever So Humble

Growing up, I was never thrilled to hear meatloaf—the humble staple of 1950s and 60s American dinner tables—was being served for dinner. I’d practically run the other way; whereas Russ was one of those odd kids that actually liked meat loaf and things like stuffed peppers! However, as my tastebuds have matured over the ensuing decades, I now look forward to the cooler months when the occasional oblong loaf can grace our dinner table once again—and we both can enjoy it.

IMG_4253

You may have wondered where the American culinary classic meatloaf really came from. Apparently the dish can be traced back for centuries: to an ancient Roman cookbook featuring a budding meatloaf combination, as well as 17th-century French cooking and the culinary works of the 18th century Pennsylvanian Dutch. But key to meatloaf’s longstanding place in our cuisine was the Industrial Revolution, along with the invention of the mechanical meat grinder. The dish then thrived through the Depression and other economically difficult times.

In Ina Garten’s recipe below, she suggests topping the loaf with ketchup. However, both hubby and I prefer tomato sauce, as it is less sweet and, once heated, can be used as a topping for a side of garlic mashed potatoes. We also like to add more sauce to our slabs, once plated.

Over the years, we’ve concocted an assortment of meat loaves from Mini-Meatloaves with Chili Sauce to southwestern varieties and pretty much everything in between—many of which I made prior to the launching of this blog. Often they are comprised of the “meatloaf mix,” a combination of ground beef, pork and veal, although ground turkey is another option. For a more rustic presentation of this one, the onions were given a larger chop.

Here, it is suggested to put a pan of water under the sheet pan to help avoid the loaf top from cracking. In the directions, it mentions to mix lightly with a fork. Well, to be honest, I found that to be nearly impossible, so I gently used my hands without over mixing resulting in a loaf that was slightly loose, not at all dense, very moist and easily fell apart when “forked.”

When Russ got home from work he commented “I’ve been thinking about the meatloaf all day, I can’t wait for dinner.” Luckily he only had about a 20 minute wait before he could indulge…

IMG_4237
When staging the ingredients, I accidentally propped up gluten-free panko, but actually used the GF breadcrumbs when assembling.

Ina Garten's Meatloaf

  • Servings: 4
  • Difficulty: easy
  • Print

Ingredients

  • 1 tablespoon good olive oil
  • 3 cups chopped yellow onions (3 onions)
  • 1 teaspoon chopped fresh thyme leaves
  • 2 teaspoons kosher salt
  • 1 teaspoon freshly ground black pepper
  • 3 tablespoons Worcestershire sauce
  • 1/3 cup canned chicken stock or broth
  • 1 tablespoon tomato paste
  • 2 1/2 pounds ground chuck (80 percent lean)
  • 1/2 cup plain dry bread crumbs (recommended: Progresso; we used gluten-free)
  • 2 extra-large eggs, beaten
  • 1/2 cup ketchup (recommended: Heinz)

Directions

  1. Preheat the oven to 325 degrees F.
  2. Heat the olive oil in a medium sauté pan. Add the onions, thyme, salt, and pepper and cook over medium-low heat, stirring occasionally, for 8 to 10 minutes, until the onions are translucent but not brown.
    IMG_4239
  3. Off the heat, add the Worcestershire sauce, chicken stock, and tomato paste. Allow to cool slightly.
    IMG_4241
  4. In a large bowl, combine the ground chuck, onion mixture, bread crumbs, and eggs, and mix lightly with a fork (or your hands). Don’t mash or the meat loaf will be dense.
    IMG_4242
  5. Shape the mixture into a rectangular loaf on a sheet pan covered with parchment paper. Spread the ketchup evenly on top. Bake for 1 to 1 1/4 hours, until the internal temperature is 160 degrees F and the meat loaf is cooked through. (A pan of hot water in the oven, under the meat loaf, will keep the top from cracking.) Serve hot.
    IMG_4247

http://www.lynnandruss.com

IMG_4248

2010, Ina Garten

Peruvian Hospitality, with a Taste of Pisco

Back in June, we were invited to the home of Peruvian-born and raised Giuliana and Miguel, both of whom met at medical university, after which they relocated to the states. Our first encounter with Giuliana was at friends Paula and Mike Graham’s house for their respective sons high school graduation party. With Russ’s command of the Spanish language, we hit it off pretty quickly.

She extended an invitation to us in June to dine at her house for an authentic Peruvian-style dinner, but unfortunately, Giuliana had to fly to Peru for a family emergency the night of the scheduled event. Nearly 3 months later we received another offer to host us for dinner, which we quickly accepted. With their proximity near the Graham’s, Paula invited us to enjoy cocktail hour first in their backyard over some select cheeses, nuts and olives on an unusually balmy October evening.

IMG_0566
The “pre”cocktail hour at the Graham’s.

You see, even though the invitation was for 7:30, it is considered impolite to arrive on time—a formality I find hard to adjust to (not so much Russ 😉 ). According to Peruvian custom, being an hour late is “fashionable,” though we kind of split the difference pulling into their driveway around 8:00 p.m. with bottles of wine and fresh flowers in hand.

IMG_0570
Giuliana selects a vase for the flowers while Miguel uncorks the wine.

As soon as one enters, you can’t help but notice their comfortable home is full of bright colors and paintings from their native country. So without hesitation, the couple got the party started with some heavenly scallop appetizers, and a frothy glass of a pisco drink. What is pisco—other than very good? The story is an intriguing one…

IMG_0576

Pisco Portón is a super premium pisco, which is a Peruvian grape-based white spirit. It is crafted at Hacieda La Caraved, established in 1684 in Ica, Peru. Like all good things, pisco began as an act of rebellion. In 1641, the King of Spain—Philip IV—imposed heavy taxes on all wine produced in Peru. In response, his new world subjects dodged the onerous tax by distilling the year’s grape harvest. In hand-forged copper vats nearly four centuries ago, a new white spirit was born and christened pisco, a reference to the Port of Pisco from where this new spirit was exported. Pisco means ‘bird’ in the indigenous Quechua language. To this day, Peruvians call it their native spirit.

IMG_0575

While sipping our pisco-based drinks, Giuliana retrieved a few trays of cooked scallops with parmesan cheese from the oven that were baked right on sea shells for an artistic presentation.

IMG_0567

Dogs of the smaller variety always seem to gravitate to Russ, and their little collie, Rosa, was no exception. She found a very comfortable little nook at Russ’s feet by the bar stool.

IMG_0573

After some laughter and getting to know each other, it was time to move into the dining room for the Peruvian feast. The main attraction, for me at least, was the beautifully colored, and formed, mound of saffron rice and the shrimp, clam and squid stew with peas, along with a side of catfish fillets. The sauté was reminiscent of a Zarzuela. Other accompaniments included sides of corn, and an interesting salad composed of lettuce, hard boiled eggs, olives and cooked potato slices in a spicy pepper and cheese sauce.

IMG_0578

IMG_0582

IMG_0585

And even though I’m not a dessert eater, the crowning star of the show was the gorgeous homemade flan! There were also two citrus-based desserts, one with a lemon foam, and the other with an orange foam topping. (You can see I have no idea what they are called!)

IMG_0589

IMG_0588

We had an absolutely lovely evening, one we finally had to end because it was getting late and we still had a hike to get home. So before we said our goodbyes, I made sure to take a few snapshots of the ladies and then the gentlemen.

IMG_0592

IMG_0596

Until we pisco again, Chau…

The Sauce is Downright Sinful…

With a chill in the air and daytime highs in the 60’s, and night temps in the 40’s and 50’s, it was perfect weather to jump back into a braise-craze frenzy. And what better way then to showcase lovely farmer’s market veal shanks. By no means cheap, sometimes you have to cut loose a little and treat yourself, right?

Thumbing through one of our culinary magazines I happened across an advertisement for Wolf Gourmet’s Multi-Function Cooker that featured this Slow-Cooked Osso Buco with Mustard & Horseradish Gravy recipe. Need I say more? Osso Bucco is one of the more decadent gustatory pleasures, as the slow braise produces the most tender, succulent results accompanied by a rich, deeply flavored au jus… almost sinfully so… yet with no butter or cream.

IMG_4176

Making this braised classic in the Wolfe multi-function cooker lets you sear, slow-cook, and simmer the sauce all in the same pan. But in lieu of owning said cooker, we made the dish in our beloved Big Red—an enameled cast iron pot—which also allows the same functions (the directions below are based on using our pot.) No need to purchase a fancy cooker that you’ll have to try and find space for…

One huge positive about using Big Red instead of the Wolfe gadget was the shanks were fall-apart tender in half the time, only two hours as opposed to four! But God forbid you “discard the solids” in Step 4. Not in our house—that’s some mighty fine vittles you’d be tossing away. Instead, fish out the garlic cloves (which are brimming with healthy nutrients), mash them and add to the gravy fixin’s; and save the onions and carrots to serve with dinner or with any leftovers.

IMG_4146
We did not discard the onion, carrots or garlic cloves, they were just way to succulent too dispose of.

Yes, you will need a good portion of an afternoon to prep and cook this feast, but your family and friends will be duly impressed. During the cooking phase, you’ll have a few hours to attend to other pleasures. But trust me, the savory aromas wafting through the house will drive you crazy with anticipation.

For those of you a bit skittish about veal, the meat is tender, leaner than poultry, has just as much protein as beef, and is every bit as easy to cook at home as a steak or pork chop. Because of the stigma of raising caged animals, many customers shy away from veal. Happily, these days there are more humane options for raising veal—the calves are no longer chained to individual cages. Some are even raised free-range, on pasture—like the ones we got from the Amish farmer’s market.

Serve over creamy garlic mashed potatoes along with roasted root vegetables, or as in our case, roasted Brussels sprouts. With all it’s layers of flavor, the gravy was out-of-this world fabulous—we just wish there had been more of it. The recipe is sooo good, it’ll render you “Slap your Pappy” happy!

IMG_4127

Ingredients

  • 2 Tbs. olive oil
  • 4 veal shanks (about 4 lb.)
  • Kosher salt and freshly ground black pepper
  • 1 cup homemade or lower-salt canned chicken broth
  • 1 cup dry white wine (such as Sauvignon Blanc)
  • 2 Tbs. tomato paste
  • 2 carrots, peeled and cut in quarters crosswise
  • 1 medium yellow onion, peeled, root trimmed but left intact, and quartered lengthwise
  • 3 cloves garlic, smashed
  • 3 sprigs fresh thyme
  • 1 large bay leaf
  • 3 allspice berries
  • 2 Tbs. brandy
  • 1/2 tsp. prepared horseradish
  • 1/2 tsp. grainy prepared mustard
  • 1 tsp. all-purpose flour
  • 2 Tbs. sour cream
  •  2 Tbs. minced fresh flat-leaf parsley

Directions

  1. Set a stove-top burner to high and heat the olive oil until shimmering. Pat the shanks dry with paper towels, and sprinkle generously with salt and pepper.
    IMG_4128
  2. Sear the shanks in the pot until deep golden brown on one side, about 5 minutes. Turn and sear the other side, about 5 minutes. Reduce the heat to medium, remove, and set aside the shanks.
    IMG_4132
  3. Whisk the broth, wine, and tomato paste and add to the pot. Bring the broth mixture to a simmer, scraping the bottom to loosen any browned bits.
    IMG_4136
    IMG_4137
  4. Turn the burner to low and add the carrots, onion, garlic, thyme, bay leaf, and allspice.
    IMG_4138
  5. Nestle the shanks on top of the vegetables, cover, and cook until fall-apart tender, about 2 hours (4 hours if using the multi-function cooker.)
    IMG_4139
  6. Transfer the shanks to a cutting board and tent with foil to keep warm. Strain the contents of the vessel through a sieve into a heatproof bowl and discard the solids. Skim any fat from the top of the strained liquid (or use a fat separator).
    IMG_4145
  7. Return the liquid to the pot, and turn to medium-high. Bring to a boil and then simmer rapidly until reduced by half, about 10 minutes.
    IMG_4148
  8. Whisk in the brandy, horseradish, and mustard. In a small bowl, mix the flour into the sour cream, stir in a few tablespoons of the sauce, and then pour the sour cream mixture into the sauce, whisking vigorously to blend.
    IMG_4140
    IMG_4172
  9. Cook over low, stirring occasionally, for 5 minutes to blend the flavors. Meanwhile, transfer the shanks to 4 plates. Serve with the gravy and a sprinkling of parsley.
    IMG_4173

IMG_4177

Presented by Wolf Gourmet

Crusty Cleverness

Perfect for those friends or family that abide by a gluten-free diet (or don’t), this Asparagus and Two-Cheese Quiche with Hash-Brown Crust with fresh green asparagus and tarragon, is perfect for a Sunday brunch, anytime lunch, or light dinner. Get all the goodness of hash browns and a rich Fontina and goat cheese egg custard in this unexpected quiche.

IMG_4203

You’ll need a 10″ cast iron skillet or an oven-proof carbon steel pan for best results. Make sure to take your eggs out of the fridge ahead of time to come to room temperature because they whip up to a greater volume when they’ve had a chance to warm up a bit. Remove the eggs from the refrigerator about 30 minutes before use, or put them in a bowl of warm water while assembling the other ingredients.

Even though the original directions did not indicate to soak the potatoes in water after shredding, based on some reviewer’s comments it made sense because the process will prevent the potatoes from turning gray due to the oxidation of the starch in the spuds. After a few minutes in the cold bath, drain thoroughly and add a 1/2 teaspoon of lemon juice before squeezing out the excess water. Next time I may even use a second towel and repeat the squeezing process to ensure very dry potatoes.

Some reviewers wrote that they substituted frozen hash browns which would save several steps, but I’m a purist at heart (for the most part) and wanted to use the real McCoy. The biggest difference is the flavor. Frozen potatoes never taste nearly as good as fresh ones, although I’m sure to hear from detractors of that statement.

Also, I placed the pan of potatoes in the oven after the stove top method to brown more evenly thus creating a light brown crust on top, again vis-a-vis a reviewer’s comment and not part of the author’s directions. (These steps are included below.) Another oft remarked comment was the overwhelming taste of the tarragon. I happen to love that herb, but we barely had enough left at the end of the season in our garden to cobble together about 1 1/2 teaspoons worth, so keep that in mind when assembling yours.

Now let’s talk time and temperature. After browning the crust in the 400 degree oven, I lowered the temp to 350°F and baked the quiche for 35 minutes as per the instructions. It was no where near set, so I let it go another 15 minutes before I took it out, total time = 50 minutes. And the center was STILL a bit undercooked and could have stood another 5 minutes in the oven. In hind sight, I think I may have accidentally added 1/4 cup more half-and-half than the recipe calls for, which of course made the custard looser…

Every oven is different and our top bay needs a professional adjustment. Knowing that, I should have left the temp at 400°F. So it’s up to you what temperature you want to cook at, but just start keeping an eyeball on doneness after about 40 minutes. Just remember to pull the skillet out with a towel or hot pad because the handle will be scorching hot!

In the end, the quiche was quite good and quite large! We will be eating it for days, so it’s probably best to serve when you have company, or more family members at the table.

Do Ahead
Quiche can be made up to 1 day in advance. Cool to room temperature, then wrap with plastic and refrigerate. To reheat, bake at 325°F until warmed through, 15 to 20 minutes.

IMG_4178

Ingredients

  • 4 medium russet potatoes (about 2 pounds), peeled
  • 1 1/2 teaspoons kosher salt, divided
  • 3/4 teaspoon freshly ground black pepper, divided
  • 1/2 teaspoon fresh lemon juice
  • 2 tablespoons vegetable oil
  • 3 tablespoons unsalted butter, divided
  • 4 medium shallots, thinly sliced
  • 6 large eggs, room temperature
  • 1 1/4 cups half-and-half
  • 1 teaspoon mustard powder
  • Pinch of grated nutmeg
  • 1 tablespoon finely chopped tarragon (or less, depending on preference)
  • 5 ounces Fontina cheese, grated (about 1 1/2 cups)
  • 4 ounces fresh goat cheese, crumbled (about 3/4 cup)
  • 1/2 to 3/4 bunch asparagus, ends trimmed, cut into pieces. (I suggest thin asparagus.)

Directions

  1. Preheat oven to 400°F. Using the coarse grater disk on a food processor (best option) or the largest holes on a box grater, shred potatoes.
    IMG_4180
  2. Place hash browns in a large bowl of very cold water to remove some of the starch and to avoid discolorization. Drain, add lemon juice and transfer to a clean dishtowel. Gather together ends of towel, and thoroughly wring out excess liquid over the sink—repeating with another dry towel if necessary.
    IMG_4183
  3. Place potatoes in large bowl, toss with 1 tsp. salt and 1/2 tsp. pepper and set aside.
    IMG_4185
  4. Heat oil and 2 Tbsp. butter in a 10″ cast-iron skillet over medium-high until butter is melted. Add potatoes and immediately start forming into a crust by pushing potatoes flat against bottom and sides of pan with a 1/2-cup dry measuring cup. Continue cooking, pressing potatoes up sides of pan if they start shrinking, until potatoes are bound together and bottom of crust is starting to brown, about 10 minutes.
    IMG_4187
  5. Remove pan from burner and put into oven for 15 minutes to lightly brown the crust on the top side.
    IMG_4190
  6. Meanwhile, melt remaining 1 Tbsp. butter in a small skillet over medium heat. Add shallots and sauté until translucent, 5-6 minutes; set aside.
    IMG_4189
  7. Whisk eggs, half-and-half, mustard powder, nutmeg, remaining 1/2 teaspoon salt, and remaining 1/4 teaspoon pepper in another large bowl. Whisk in tarragon and set aside.
    IMG_4196
  8. Sprinkle Fontina cheese, goat cheese, and sautéed shallots evenly over bottom of crust, then pour in egg mixture.
    IMG_4192
    IMG_4193
    IMG_4194
    IMG_4197
  9. Arrange asparagus decoratively on top. (Next time I’ll get a bit more artistic and arrange in a star or circular pattern.) Bake until quiche is set and crust is well browned, 45-55 minutes. Let cool to room temperature before cutting into wedges and serving from the pan.
    IMG_4208
    The entire skillet can be placed on a trivet at the table for a rustic presentation.

IMG_4215Serve with a side salad or fresh fruit to complete your meal.

Adapted from a recipe by Anna Stockwell, Epicurious