All posts by LynnHoll

Unknown's avatar

About LynnHoll

I have been an artist and designer all my life incorporating graphic design for websites, gardens, publications, fabrics, interior design and cooking. I am now retired from my professional job, but still create artistic visions in all forms on a daily basis.

Crispy Skin, Juicy Meat, Happy Diners

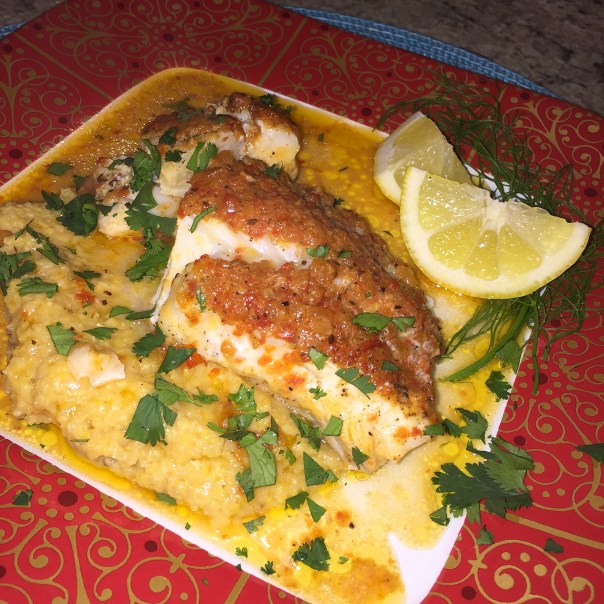
Does moist, flavorful chicken with crispy skin float your boat? Then look no further. This recipe is very similar to one we often cook using the whole bird. You can vary the herbs as you like, but stick to the hardy ones—thyme, rosemary, sage, and oregano. They’ll roast without burning and have a stronger flavor.

While the Baked Chicken with Herbs, Garlic & Shallots takes longer overall than most of my weeknight recipes, the process is largely hands off and the oven does the lion’s share of the work.

IMG_4940

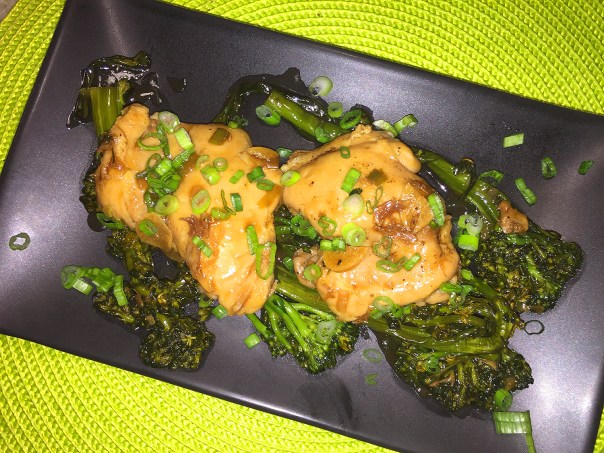
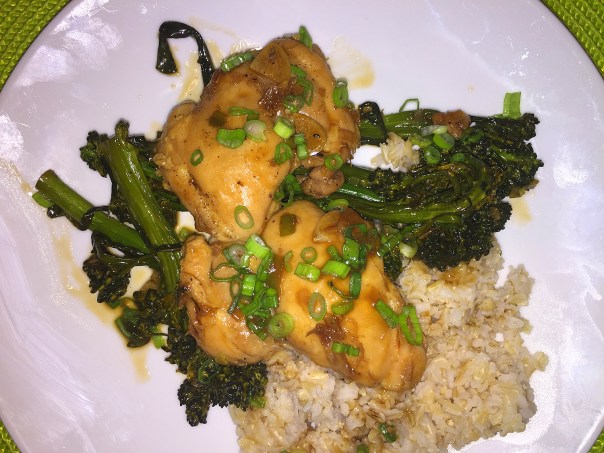
Because we are extremely partial to the allium family, we increased the number of shallots and garlic cloves, which is noted in the list of ingredients below. And while it’s optional, we definitely made the au jus, but for more flavor, we incorporated homemade chicken stock and white wine in place of one cup of water, and it was mighty tasty!

IMG_4945

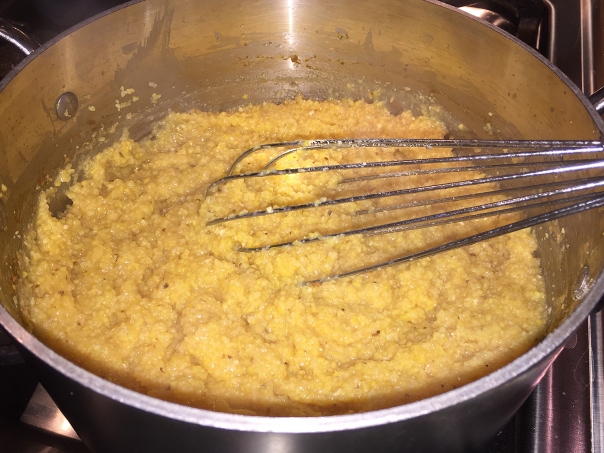
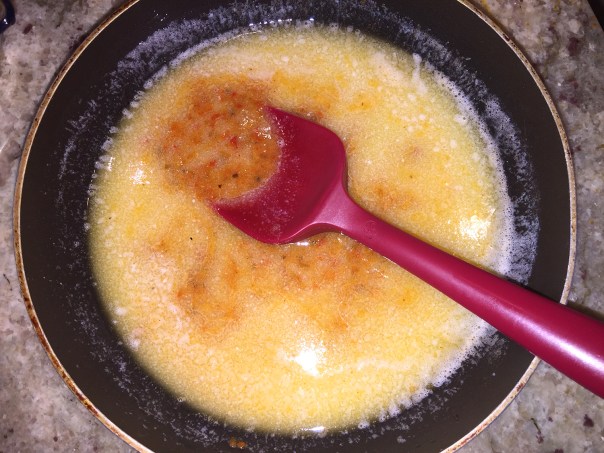
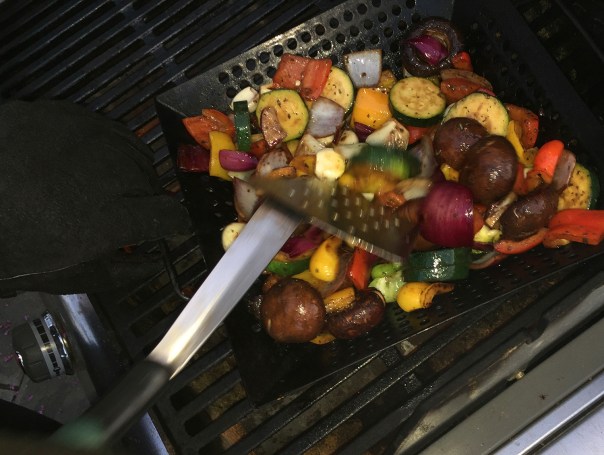
Our side of Roasted Vegetables was a perfect companion to the baked poultry and the meal was complete with some leftover reheated spiced polenta. Take the easy way and use frozen pearl onions. Fresh are great, but they are no picnic to peel.

Baked Chicken with Herbs, Garlic and Shallots

  • Servings: 4
  • Difficulty: easy
  • Print

IMG_4922

Ingredients

  • 1 4-lb. chicken, cut into quarters
  • 3 Tbs. unsalted butter
  • 8 medium shallots, cut in half and peeled
  • 12 large garlic cloves, peeled
  • Leaves stripped from 10 sprigs fresh thyme
  • Leaves stripped from 8 sprigs fresh rosemary
  • Leaves stripped from 6 sprigs fresh oregano
  • 1-1/2 tsp. coarse salt
  • Freshly ground black pepper

IMG_4926

For the roasted vegetables

  • 1 lb. cremini (baby bella) mushrooms, trimmed and halved if medium, quartered if large
  • 1 lb. fresh pearl onions, peeled; or frozen pearl onions, thawed
  • 1 lb. Brussels sprouts, trimmed and halved
  • 4 Tbs. extra-virgin olive oil
  • 4 medium cloves garlic, minced
  • 2 tsp. fresh thyme leaves
  • Sea salt and freshly ground black pepper
  • 1 Tbs. sherry vinegar

Directions

  1. Heat the oven to 425°F. Rinse the chicken and pat it dry with paper towels. Cut away any excess fat and tuck the wings behind each breast.
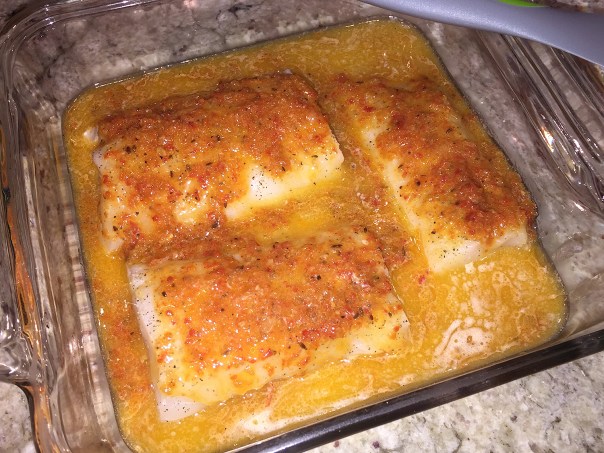
  2. Put the butter into a large, shallow rectangular baking pan. Put the pan into the oven while it’s heating. When the butter is melted (about 10 minutes), remove the pan and set it on a heatproof surface or on a couple of potholders.
  3. Add the shallots, garlic, thyme, and rosemary, and swirl the pan to coat the ingredients in the butter.
    IMG_4932
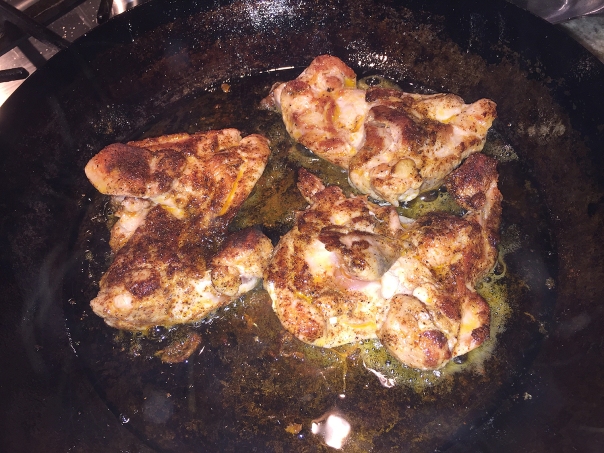
  4. Dredge the chicken, skin side down, in the butter and herb mixture, and arrange, skin side up, in the pan. Sprinkle the chicken generously with the salt and pepper.
    IMG_4934
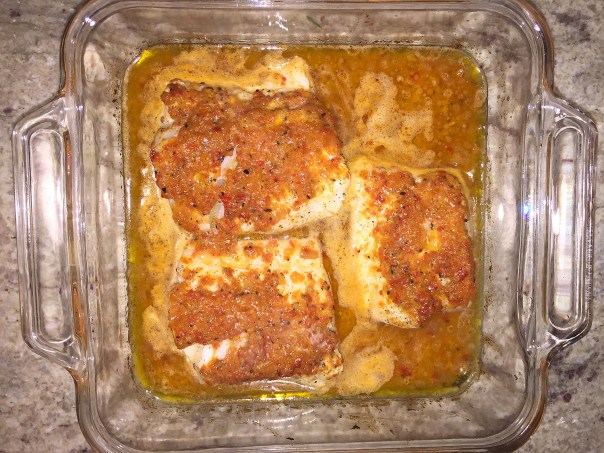
  5. Bake until the chicken is browned and cooked through, 50 to 60 minutes. Serve with the shallots and garlic along with a drizzle of the pan drippings.
    IMG_4940

Optional Au Jus: After chicken and shallots are done, remove them to a platter and cover loosely with foil. Stir in 1/2 chicken stock and 1/2 cup wine to make a jus with the drippings, loosening any browned bits. Strain through a fine mesh sieve and serve on the side.
IMG_4942

For the roasted vegetables

  1. Position a rack in the top third of the oven and heat the oven to 450°F.
  2. In a large bowl, toss the mushrooms, onions, and Brussels sprouts with 2 Tbs. of the oil, the garlic, thyme, 1-1/2 tsp. salt, and a few grinds of pepper.
    IMG_4928
  3. Spread on a large rimmed baking sheet. Roast for 20 minutes, stir the vegetables, and continue roasting until tender and browned, about 35 minutes total.
    IMG_4929
  4. Transfer to a serving bowl and toss with the remaining 2 Tbs. oil and the vinegar.

http://www.lynnandruss.com

Chicken recipe adapted from Abigail Johnson Dodge of Fine Cooking

Healthiest and Tastiest Summer Salad Ever!

I’m throwing you a lifeline to rescue you from those dull, bland salads that we all tend to throw together at home. Instead, try this super-healthy and fabulously delicious Red Pepper, Shrimp and Papaya Salad. It’s chockfull of nutrients that boost your immunity, vision, heart and brain health. Got your attention now?

IMG_5050

While oranges are perennial favorites as an immune booster, it’s time to shine the light on papayas. They boast slightly more vitamin C than the all-star orange and are loaded with betacarotene, an antioxidant that helps protect tissues from cellular damage. Plus, eating antioxidant-rich food can help you feel less sluggish and decrease your risk of chronic disease.

Additionally, the sweet red peppers add color, crunch and lots of vitamins, boost heart health, and strengthen immunity such as ferulic acid, an anti-aging skin phytonutrient. And who doesn’t need a little help in that arena—especially after a certain age…

IMG_5037
A papaya as it looks once cut in half.

The bonus on papaya? It’s high in fiber that feeds the good bacteria in your gut! You’ll feel like a million dollars when you’re done eating. My papaya was a bit large so I only used half of it. But the remainder was perfect in a morning fruit salad containing sliced bananas and watermelon chunks.

IMG_5053

Bring on the summer!

IMG_5029

Red Pepper, Shrimp & Papaya Salad

  • Servings: 4
  • Difficulty: easy
  • Print

Ingredients

Dressing

  • Juice of 1 lime
  • 2 Tbsp. honey
  • 2 Tbsp. fish sauce
  • 3 Tbsp. sesame oil
  • 1 garlic clove, minced
  • 1 small red chili pepper, finely minced (more or less to taste)
  • Salt and pepper to taste
    IMG_5034

Salad

  • 1 Tbsp. coconut oil
  • 3/4 lb. raw shrimp, peeled and deveined
  • 1 tsp. chili flakes
  • 1 small papaya, cut in half lengthwise, seeded, peeled, then sliced horizontally into 1/4″ thick C-shaped slices
  • 1/2 cup raw cashews or almonds; roughly chopped
  • 3-4 oz. baby arugla
  • 1/2 red onion, thinly sliced
  • 1/2 red pepper, thinly sliced
  • 1 small cucumber, thinly sliced on a diagonal
  • 1/2 cup fresh basil, chopped

Directions

  1. Whisk dressing ingredients together and set aside.
  2. Place a large frying pan over high heat and add the coconut oil.
  3. Add the shrimp and chili flakes and cook lightly, flipping the shrimp to cook all sides. for about 5 minutes, until the shrimp are just opaque.
    IMG_5045
  4. Divide and arrange the salad ingredients between 2 plates and top each with shrimp and chopped nuts. Lightly dress and serve immediately.

http://www.lynnandruss.com

IMG_5038
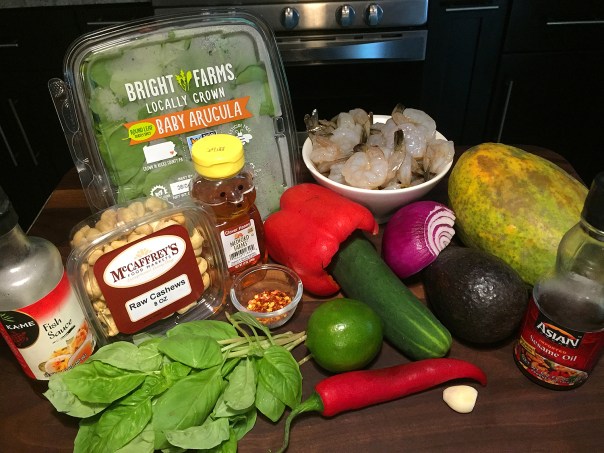
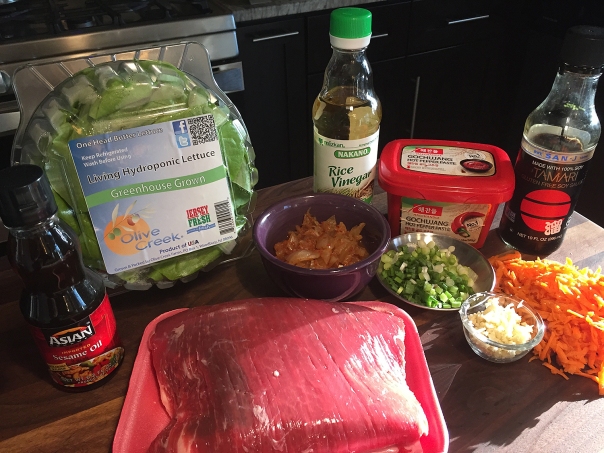
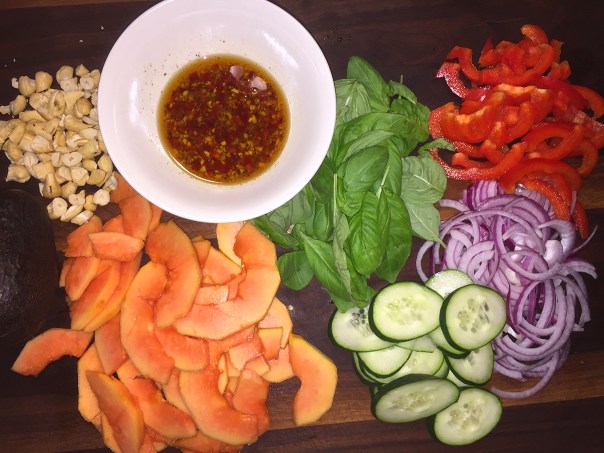
After making the dressing, prep all of the veggies and chop the nuts.

IMG_5041
Assemble all of the salad ingredients on a couple of plates, then top with shrimp, nuts and dressing.
IMG_5051

Recipe adapted from one found in Bottom Line Health

Flat Iron Steak with Zucchini, Edamame, and Soba Noodles

Let’s just say I was more than a bit skeptical about poaching steak, especially a rib-eye, which is what we substituted for the flat iron steak. First of all, it’s difficult to even find flat iron in our area, and secondly, it’s not the best cut of meat if cooked incorrectly, whereas rib-eye is a sure bet. But if you do use it, the deep flavor of flat iron steak works really well with the umami-rich soy sauce and sesame oil featured in this dish.

IMG_4634

Unless you prefer an obvious sweet note, you may want to cut back on the amount of granulated sugar seeing as how mirin is a subtly sweet Japanese rice wine. It is similar to sake, but has more sugar and a lower alcohol content (14% to be precise). If you don’t have mirin, you can sub in a dry sherry or a sweet marsala wine.

I was disappointed that the grocery store wasn’t carrying fresh edamame, but the frozen kind worked out just as well. Be sure to let it thaw for a spell before you begin cooking.

IMG_4619

Flat-Iron Steak with Zucchini, Edamame and Soba Noodles

  • Servings: 6
  • Difficulty: easy
  • Print

Ingredients

  • Kosher salt
  • 8 oz. dried soba noodles
  • 1 Tbs. Asian sesame oil
  • 3/4 cup soy sauce
  • 3/4 cup mirin
  • 1/4 cup granulated sugar
  • 3 1/4-inch-thick slices peeled fresh ginger
  • 2 medium cloves garlic, peeled
  • 2 flat iron steaks (8 to 10 oz. each), or about 1 lb. rib-eye
  • 1 lb. zucchini (2 medium), cut into 2-inch matchsticks
  • 1 12-oz. bag frozen shelled edamame, thawed (about 2 cups)
  • 1 Tbs. chopped pickled ginger
  • 2 small scallions, white and light-green parts, thinly sliced
  • 1 Tbs. toasted sesame seeds (optional)

Directions

  1. Bring a large pot of well-salted water to a boil and cook the noodles until tender, about 4 minutes. Drain well, transfer to a large bowl, toss with the sesame oil, cover, and keep warm.
  2. Meanwhile, combine the soy sauce, mirin, sugar, ginger, garlic, and 1 cup water in a 10-inch straight sided sauté pan. Bring to a boil, and then add the steaks. Turn the heat down and simmer gently, flipping once, until medium rare (130°F), 12 to 16 minutes. Transfer the steaks to a cutting board, reserving the liquid in the pan. Discard the garlic and ginger.
    IMG_4626
  3. Return the liquid to a boil. Add the zucchini and edamame, return to a boil, and then lower to a simmer. Cook until the vegetables are just tender, about 2 minutes.
    IMG_4628
  4. Using a slotted spoon, transfer the vegetables to the bowl of noodles. Toss well, cover, and keep warm.
    IMG_4630
  5. Boil the cooking liquid until reduced by half, about 5 minutes.
    IMG_4631
  6. Thinly slice the steaks across the grain. Arrange the noodle mixture on a platter or divide it among 6 shallow bowls. Top with the beef and the pickled ginger, if using.
    IMG_4633
  7. Drizzle some of the sauce over the beef and garnish with the scallions and sesame seeds, if using. Serve, passing the rest of the sauce at the table.

http://www.lynnandruss.com

IMG_4638

By Lynne Curry from Fine Cooking

Chicken Fajitas with Red Pepper, Onion & Lime

Fajitas, a fast and fun answer to “what’s for dinner?” Adults and kids alike will enjoy assembling their own version of the perfect fajita. Figure on three per person—we each built two, with a third sans the tortilla, more like a small side salad.

For more color, choices and additional flavor, I added Trader Joe’s Autentica salsa and chopped Bibb lettuce as ingredients. And why not include a mix of bell peppers with the yellow, orange and/or green varieties? A lime wedge as garnish enables you to add an extra squirt of lime if desired.

IMG_4739

While chicken breasts are fine cuts, and always popular, there are a few other cuts from the poultry aisle worth buying and exploring. The rich, dark meat of boneless, skinless chicken thighs stands up well to intense flavors like the cumin, red pepper, and lime in this quick and easy dish. Though I’m still mostly a white meat fan, boneless chicken thighs in particular have been gaining in popularity with me.

Cooking the peppers and onions in the same pan that you seared the chicken amps up the flavor of the veggies from the browned bits stuck to the skillet. And be sure to drizzle any juices from the resting thighs over the sliced meat for another boost of tastiness.

IMG_4729

Chicken Fajitas with Red Pepper, Onion & Lime

  • Servings: 4
  • Difficulty: easy
  • Print

Ingredients

  • 1-1/2 tsp. chili powder
  • 1-1/4 tsp. ground cumin
  • Kosher salt and freshly ground black pepper
  • 6 to 8 boneless, skinless chicken thighs (1-1/2 to 2 lb.), trimmed of excess fat
  • 2 Tbs. canola, vegetable, or corn oil
  • 1 very large or 2 medium yellow onions, quartered and thinly sliced crosswise (about 4 cups)
  • 1 large red bell pepper, cored, seeded, and cut into strips about 1/4 inch wide and 2 inches long
  • 3 medium cloves garlic, minced
  • 1 Tbs. fresh lime juice
  • 10-12, 6-inch corn tortillas
  • 1-1/2 cups crumbled queso fresco or grated Monterey Jack cheese
  • Salsa and chopped lettuce, optional

Directions

  1. Mix 1 tsp. of the chili powder, 1/2 tsp. of the cumin, 3/4 tsp. salt, and 1/2 tsp. pepper in a small bowl. Season the chicken on both sides with the spice rub.
  2. Heat 1 Tbs. of the oil in a 12-inch skillet over medium-high heat until hot. Cook the chicken without disturbing, except to flip, until both sides are browned and the chicken is firm to the touch, 3 to 4 minutes per side. If it browns too quickly, reduce the heat to medium. (You may have to brown in two batches so as not to crowd the pan.) Transfer the thighs to a cutting board and let them cool slightly.
    IMG_4732
    IMG_4735
  3. Meanwhile, heat the remaining 1 Tbs. oil in the skillet over medium-high heat. Add the onion, bell pepper, and 1/2 tsp. each salt and pepper and cook, stirring occasionally, just until the vegetables begin to soften, 3 to 4 minutes.
  4. Stir in the garlic and the remaining 3/4 tsp. cumin and 1/2 tsp. chili powder and cook until fragrant, about 30 seconds.
    IMG_4738
  5. Stir in the lime juice. Transfer to a bowl, cover loosely with foil, and keep warm.
  6. Cut the thighs on the diagonal into thin slices, transfer to a plate, cover, and keep warm.
  7. Heat the tortillas according to package directions. Fill each one with a few slices of the chicken and some of the onion mixture and cheese. Fold the filled tortillas and serve.
    IMG_4741

http://www.lynnandruss.com

By Adam Ried from Fine Cooking


Birthday Brunch for Both at the Brick

And the birthday celebration continued into another day…

The Brick Hotel was a Newtown Borough, PA icon for many decades but fell on bad times for a few years to the point of Gordon Ramsey of Hell’s Kitchen fame coming in and trying to resurrect it’s glory days. Didn’t happen. After Gordon’s revamp and prompted by GroupOns, we dined there on a few Saturday nights only to find it pretty much deserted of patrons.

Roccos.facade.pic

Not the case anymore. Now known mostly as a steak house, Rocco’s at The Brick, the reincarnated restaurant occupying the main floor of the historic Brick Hotel, reopened in late January, 2018. And every time we drove by it, it was packed, no matter the time of day. And no matter how far in advance we’d try, we failed to secure dinner reservations but were finally able to score for a Sunday brunch. It was to celebrate Russ and his son Dan’s mutual birthdays while Dan was in town visiting with his girlfriend Tina.

IMG_4856

Our foursome table was positioned in the large enclosed spacious porch with floor-to-ceiling windows overlooking the outside patio and gardens. In a nod to the dual birthday celebration brunch, we ordered a carafe of Mimosas to get us started. Then we set about the task of narrowing down our choices which included the regular menu along with an additional brunch addendum, from which both Dan and Dad chose their meals.

The pace was somewhat slow because, according to our waiter Frank, the kitchen was a bit backed up. This suited us just fine because it gave us an opportunity to chat, enjoy our drinks and peruse the menus. Looking out the wall of windows, I was shocked to see a Philadelphia Trolley Car packed full of sightseers roaming the town making several trips past the restaurant. Is this a new offering in Newtown?

Up first, Tina opted for a House Special, the Filet Mignon French Dip composed of a crusty baguette packed full of moist, sliced beef tenderloin with a side of au jus and sharp cheddar fries. She managed to consume all of the crunchy fries, but had to doggie-bag half of the sandwich.

IMG_4858

The Twin Maryland Crabcakes, also a House Special, were calling my name. They came plated over a bed of tasty remoulade with a side salad and grilled asparagus. I didn’t leave as much as a crumb. Although they were not on par with the very best crab cakes I’ve ever had (at Brian’s in Lambertville, NJ), they were certainly up there at the top of the list.

IMG_4866

Now the guys decided on heartier fare with Russ selecting the brunch item Crab Cakes Benny. He loved the extremely thick slabs of bacon nestled between the Maryland crab cakes and two poached eggs slathered with a generous helping of hollandaise sauce.

IMG_4863

Daniel went all out with the Kansas City Steak & Eggs entrée. The 22-ounce, medium-rare, bone-in NY Strip came topped with fried eggs and was loaded with truffled potatoes and a side of grilled asparagus. Dan managed to finish all but a few veggie spears and a bit of meat around the bone, which Russ had them bag up for a later gnaw.

IMG_4861

Shortly before we finished eating, the skies opened up and there was an unexpected downpour which made for an interesting show as patrons ran out of the building without umbrellas trying hopelessly to dodge the raindrops. We pretty much waited for the showers to dispense before we said our goodbyes and then Dan and Tina started their journey back to Massachusetts—and us to the grocery store… We’re looking forward to one day getting a dinner reservation…

A Quick Trip to Barcelona

For Russ’ birthday dinner celebration (other than the porterhouse steak feast enjoyed at home a few days prior), we took a quick trip to Barcelona—no, not in Spain, but the Barcelona Wine Bar nestled among the destination restaurants on Philly’s hottest food strip. Located on a triangular corner on East Passyunk Ave, it’s a very hip dining spot with an industrial, eclectic décor vibe that includes a dressmaker’s dummy in a glass case.

It’s a raw, fun space with cinder block walls and concrete floors. I read that some of the lights were recovered out of a warehouse and some are actually chicken feeders! There’s a “jigsaw puzzle” wall made of wood slabs with spaces between them which breaks up the large room, loosely dividing the dining area from a big white marble U-shaped bar lined with high stools.

o

IMG_4829

After following the crazy directions given by the car GPS system, we were thrilled when we found a parking spot just a few short steps from the front entrance. It had been raining on and off all day, and the humidity was through the roof so we opted to dine inside as opposed to their spacious outdoor patio—which BTW, was packed by the time we departed a few hours later.

o-1

Thank goodness we’d snuck a peek at their extensive wine list ahead of time, because it is pages and pages long (over 450 bottles strong) and would’ve taken forever to make a decision if we’d come in unknowingly. As one of the largest Spanish wine programs in the US, they offer an extensive selection from Spain and South America, and Russ had narrowed it down to several, finally deciding on the Azul Temperanillo.

As you know, I rarely eat bread but when the basket arrived with thick, still-warm-from-the-oven crusty slices and a pour of really good extra virgin olive oil, I knew I’d have to sample it. WOW, what a perfect start! Now to make some savory selections…

IMG_4831

Starters were from the Charcuterie & Cheese menu with a selection of three for only $17.50. Our choices included Idiazábal, a smoked raw sheep’s milk cheese from the Basque Country served with a small dollop of quince paste which perfectly paired with the nutty and robust flavors. The Valdeón was a tangy and spicy goat and cow’s milk blue cheese from the Castilla-León region and made a perfect counterpoint to the mound of paper-thin slices of Segovia-raised Jamón Serrano, a dry-cured Spanish ham, and an all-time favorite for Russ.

Of the more than 30 different Tapas listed, we selected five with a variety of vegetables and meats, some priced as low as $4.50 per plate. (There are also vegetarian and vegan options.) We asked our waitress Randi to bring out the dishes slowly starting with our choices of two veggie tapas, the very tasty Piquillo Peppers in a garlic confit with thyme, and the Champiñones, succulent mushrooms marinated in garlic and scallions.

IMG_4843

Next up were the Albondigas, a quintet of delicious spiced meatballs bathed in a ham-tomato sauce. The last arrivals were the Patatas Bravas wedges plated with wooden spears into a salsa brava and yummy garlic aioli; and four perfectly round and delicately fried Jamón & Manchego Croquettes lined up over a swath of that same garlic aioli. These were almost a little too rich for my taste.

IMG_4846

IMG_4844

When Randi came back to check on us, she saw one potato wedge left and refused to clear the plate until Russ popped it in his mouth. By this time I couldn’t eat another bite, but Russ felt compelled to finish his birthday celebration with a sweet treat and landed on the Crema Catalan Flan and a cup of Café Con Leché. BTW, in case you’re not in a tapas mood, the menu includes several Ensaladas, a few meat entrees and a handful of Paellas to share.

IMG_4851

As we were leaving, Russ received a token for his birthday and we also got another at our departure for having filled out the short survey when we got our tab. One was for a complimentary drink and another for a free tapa. Aw shucks, I guess we’ll have to make another short trip to Barcelona soon…

free.tokens

Up, Up and Away…

…In my beautiful, my beautiful, hot air balloon… cookies for Maddie’s 1st birthday. Who’s Maddie? I’ve never met the adorable little bundle of joy, but Russ works with her mom Shin. It so happens whenever I make my decorated sugar cookies, Russ’ coworkers are the happy recipients of the “extra” cookies which he dutifully totes into the office. And Shin LOVES them! She admitted to having five the last time Russ brought some in.

So apparently Shin got to thinking they would make a great addition to her pastel-palette, hot air balloon-themed daughter’s 1st birthday party (for 100 people no less!) I received a text from her one week before deadline, which would necessitate Russ to deliver them via a work transfer toward the end of the week (because Shin and her family live nowhere near us.) Not a lot of time to plan, purchase, bake and decorate—but I sometimes work better “under pressure” (the melody to Queen’s song playing in my head.)

IMG_4691

Knowing from past experience that each batch makes 2-3 dozen—depending on size of the cookie cutter—I made three batches of dough. But I had to wait a day to cut out and bake them until the cookie cutters that I ordered through Amazon were delivered (to add variety, I decided to also make some “1” cookies.) After all were cut out and baked, it made just over 6 dozen, with the leftover two cookies going to Russ for taste-testing purposes 😉

Shin’s color scheme included touches of gold so I dabbed on a bit of gold powder on the basket portion of the cookies and added two edible gold stars on the chute portion. The number “1” treats also each contained a gold star as part of the decor.

While the cookie dough itself is easy-peasy, if you’ve never worked with Royal Icing, it can be a bit tricky and takes patience and practice to get the feel of the consistency and technique for both the piping (which is stiffer) and flooding (which is thinner). And, if like me, you start getting elaborate with the designs, it can take hours, even days, to complete the task of icing. So you might want to start with a single batch, just sayin’…

IMG_4680

I incorporate an “assembly-line” technique to create my designs, knowing when to pipe and flood, then add flourishes and final embellishments. Often, one layer of the icing will need to dry before you can begin the next step, so plan on blocking out large chunks of time to complete your designs.

wrapped.cookies

PS—Shin actually took the time to individually wrap each cookie for the guests. As I understand it, the poor mom and Maddie were both under the weather for the party, but they “rose” to the occasion and were party troopers instead of party poopers…

Staying-in-Shape Sugar Cookies

  • Servings: 3-6 dozen
  • Difficulty: cookie is easy; icing takes practice
  • Print

Ingredients

  • 2 sticks (1 cup), room temperature
  • 1 cup sugar
  • 1 egg
  • Zest from ½ a lemon (about 1 teaspoon)
  • 1 tsp baking powder
  • 1 tsp vanilla extract
  • 3 cups unsifted flour (plus more for rolling cookies out)
  • ½ tsp salt

Directions

  1. Preheat oven to 350 degrees.
  2. Add the butter sticks and the sugar and cream together in a stand mixer, about 3 minutes.
  3. Scrape down the sides of the bowl and add the egg, lemon zest, baking powder and vanilla extract, then beat again for 2 minutes until a creamy.
  4. Add 3 cups flour and ½ teaspoon salt and mix on low speed to combine about 2 minutes.
  5. When done, form the dough into a ball.
  6. On a floured surface or pastry cloth, roll out the cookie dough ball to desired thickness level, about an 1/8″ or a little thicker. Cut out shapes and place on an unrimmed baking sheet.
  7. Reform any leftover dough into another ball and repeat the process.
  8. Put baking sheet(s) in the freezer for 10 minutes.
  9. After 10 minutes take the baking sheet out of the freezer and bake for 10-12 minutes, or until edges just start to turn a light brown. (Mine took the full 12 minutes.)
    IMG_4678
  10. Remove cookies from oven, allow to cool for a few minutes, then transfer them to a wire rack to cool completely before frosting. Decorate—or not—with Royal Icing.

ROYAL ICING

Ingredients

  • 1 lb. confectioners sugar
  • 3 Tbsp. meringue powder
  • 1 tsp. vanilla extract
  • 1/2 cup warm water

Directions

  1. In a stand mixer, beat the meringue powder and water for about 30 seconds on med-high speed.
  2. Stop the mixer, add the confectioners sugar and beat on low until incorporated. turn the speed up to high and beat for 7 minutes. Stiff peaks will form.
  3. Divide the frosting into bowls based on the number of colors you are using, remember white is a color too.
  4. Add your food coloring and mix each bowl thoroughly, adding a few drops of water as necessary.
  5. Put about 1/3 of each color in separate pastry bags for piping. Thin out the remainder with more water (a 1/2 teaspoon at a time) to achieve a flooding consistency and add that to squeezable bottles as shown.
    IMG_4661
  6. Add finishing touches as desired.

http://www.lynnandruss.com

Meatball Marsala

An interesting twist on a Marsala dish, this recipe will surely make a comeback in our household. The initial instructions directed you to brown the meatballs under a broiler, but our broiler is often times less-than-satisfactory; plus you don’t get the advantage of having the browned bits left in the skillet which add a wonderful depth of flavor to the mushroom sauce.

IMG_4721

Speaking of mushrooms, we selected a mix of portobellos, creminis and shiitakes and they were fabulous! And being connoisseurs of everything mushroom, we upped the ante by incorporating a full pound as opposed to 12 ounces.

My other changes included increasing the amount of ground meat to one pound each of the beef and sweet sausage (therefore requiring a slight bump in the bread crumbs to a 1/2 cup), adding minced garlic, and reducing the chopped parsley down to 3/4 cup, (all noted below.) For those suffering from a gluten intolerance, the meatballs are easily made with GF breadcrumbs and flour.

You know I always harp on incorporating homemade broth whenever possible and I’m advocating that here too because of the tasty intensity it adds to both the mushroom sauce and the mashed potatoes. It’s quite filling, so even though your tastebuds may want a second helping, your stomach will probably have to settle for leftovers on another day—all dependent of course on the fact that there is any left!

IMG_4706

Meatball Marsala

  • Servings: 4-5
  • Difficulty: easy
  • Print

Ingredients

  • 1 1/2 pounds Yukon Gold potatoes, cut into 1-inch chunks
  • Kosher salt
  • 1 lb. ground beef chuck
  • 1 lb. sweet Italian sausage meat
  • 1/2 cup breadcrumbs
  • 1 large egg, lightly beaten
  • 4 medium garlic cloves, finely minced
  • 2 cups chicken broth, preferably homemade
  • Freshly ground pepper
  • 6 tablespoons unsalted butter, cut into pieces
  • 12-16 ounces sliced mixed mushrooms
  • 1 tablespoon all-purpose flour
  • 1 cup dry Marsala wine
  • 3/4 cup fresh parsley, chopped

Directions

  1. Put the potatoes in a saucepan and cover with water by 1 inch; season with salt. Bring to a boil, then reduce to a simmer; cook until tender, 20 minutes. Drain and return to the saucepan.
  2. Combine the beef, sausage, breadcrumbs, egg, 1/2 cup chicken broth, garlic, 1/2 teaspoon salt and a few grinds of pepper in a medium bowl; mix with your hands until combined.
    IMG_4708
  3. Form into 18 meatballs (about 2 inches) and arrange in a large dutch oven or heavy-duty skillet over medium heat. Brown on all sides for about 15 minutes, turning every 4-5 minutes. Remove to a platter.
    IMG_4711
  4. Pour the grease out of the skillet but leave the browned bits.
  5. Melt 1 tablespoon butter in the same large skillet over high heat. Add the mushrooms, 1/2 teaspoon salt and a few grinds of pepper. Cook, stirring, until the mushrooms are softened, about 8 minutes.
    IMG_4713
  6. Sprinkle in the flour and stir to coat. Stir in the wine and bring to a boil. Add 1 cup chicken broth and return to a boil, then reduce the heat to medium high and add the meatballs. Cover and simmer, stirring occasionally, while you mash the potatoes.
    IMG_4716
  7. Add the remaining 5 tablespoons butter and 1/2 cup chicken broth to the potatoes and mash. Season with salt and pepper.
  8. Stir the parsley into the meatball mixture. Serve with the potatoes.
    IMG_4717

Adapted from a recipe by the Food Network Kitchen

Sake, Garlic and Ginger Chicken with Broccolini

We’ve been fans of Fine Cooking’s “Make-It-Tonite” series for a couple of years now. Their recipes generally take only 25-45 minutes to prep and cook, yet produce lots of flavor. Here, boneless chicken thighs get treated to sweet, salty, and gingery flavors. Sake, a Japanese rice wine, balances the bold flavors of garlic and soy sauce with its subtle savory-sweet notes. The smaller florets on broccolini are great for mopping up the vibrant sauce, though broccoli works well, too.

IMG_4655

Unfortunately we were plum out of sake, so I had to make a special trip to the liquor store. Now I can say with some confidence, while I’ve imbibed in sake in the past (like my 20’s), I don’t know a heck of a lot about the different brands. So when faced with a choice, I decided to buy the small black bottle that was twice as expensive as the large cheaper stuff figuring it would be a lot smoother. I convinced myself we were worth the extra cost.

Well, I got to tell you, the meal was great! Can’t definitively say it was because of the more costly sake, but I’m sure it didn’t hurt the flavor profile. And because it tore at my heart strings to discard the ginger planks, I sliced them down and mixed it in, which added a nice bite.

Because of the sugar, the sauce got quite thick and sticky after it was reduced down. If you prefer it thinner, keep an eyeball on it while it reduces. Serve with white or brown rice.

IMG_4639

Sake, Garlic and Ginger Chicken with Broccolini

  • Servings: 4
  • Difficulty: easy
  • Print

Ingredients

  • 6 Tbs. sake
  • 6 Tbs. reduced-sodium soy sauce
  • 1/4 cup granulated sugar
  • 2 Tbs. vegetable or canola oil
  • 1-1/2 lb. boneless, skinless chicken thighs
  • Kosher salt and freshly ground black pepper
  • 1 lb. broccolini or broccoli crowns, cut into 3-inch-long pieces
  • 3 medium scallions, thinly sliced, white and green parts separated
  • 3 medium cloves garlic, very thinly sliced
  • 1 3-inch piece fresh ginger, peeled and sliced lengthwise into 4 slabs

Directions

  1. Combine the sake, soy sauce, and sugar in a small bowl, and stir until the sugar dissolves; set aside.
  2. Heat the oil in a 12-inch skillet over medium-high heat until shimmering hot. Season the chicken with salt and pepper, and cook, flipping once, until golden brown on both sides, 2 to 4 minutes per side. Transfer to a plate.
    IMG_4644
  3. Add the sake mixture, Broccolini, scallion whites, garlic, and ginger to the skillet. Bring to a simmer. Arrange the chicken on top of the Broccolini.
    IMG_4645
    IMG_4648
  4. Cover and cook over medium heat until the broccolini is tender and the chicken is fully cooked, about 5 minutes.
  5. Discard the ginger. Season to taste with salt and pepper, and serve sprinkled with the scallion greens.
    IMG_4657

http://www.lynnandruss.com

IMG_4659

By Abby Simchak Donovan from Fine Cooking

Butter-Basted Spiced Cod with Polenta

Mondays have never been my most favorite day of the week (especially when I was working full time), but having a meal plan in place makes it just a smidge more accommodating. And while we’re not strict advocates of “Meatless Monday,” we tend to keep it in the weekly rotation as often as possible.

IMG_4537

This Butter-Basted Spiced Cod with Polenta recipe found in Fine Cooking’s “Make-It-Tonight” series looked like a fine contender, especially given the fact that we conveniently had some homemade harissa on hand. Harissa is a North African paste made of ground dried chile peppers, garlic, olive oil, and spices; and is not the easiest condiment to find. You can make your own following this recipe from an earlier blog (scroll down toward the bottom of the post.)

Baking the cod in melted butter added a richness to the fish that nicely balanced the heat from the harissa. Nestling the fish over the polenta topped with the melted butter brought the dish together; with the green herb garnish adding a pleasant pop of color and earthy finishing touch.

We made a few minimal changes to the original recipe by Ronne Day. For starters we purchased a one-pound piece of cod loin and cut it down into 3 equal pieces. Therefore our baking dish was smaller, measuring 8 x 8 square; but I kept the amounts of the other ingredients as listed since we like saucier finishes.

To add dimension to the polenta, I used 3 cups of homemade seafood stock as opposed to water, and WOW, did it make a difference not only in taste but the gorgeous goldenrod color.

As a side, we made Fennel-Orange Salad with Red Onion and Olives, a really nice change from lettuce and spinach salads. This popular Sicilian salad is made with blood oranges when they are in season, but navel oranges work just as well. This salad is sure to cheer you up with its soft bright colors and zingy flavors.

Butter-Basted Spiced Cod with Polenta

  • Servings: 4
  • Difficulty: easy
  • Print

Ingredients

  • 1-1/2 tsp. crushed whole coriander seeds or ground coriander
  • 2 medium lemons, 1 finely grated to yield 1/2 tsp. zest and squeezed for 2 Tbs. juice, the other cut into wedges
  • Kosher salt
  • 1 cup cornmeal
  • 3 oz. (6 Tbs.) unsalted butter
  • 4 6-oz. pieces cod loin
  • Freshly ground black pepper
  • 2 Tbs. harissa paste
  • 2 tsp. coarsely chopped cilantro or parsley

Directions

  1. Position a rack in the center of the oven and heat the oven to 400°F.
  2. Heat a 3-quart saucepan over medium heat. Add the coriander and stir until fragrant, about 30 seconds. Add 3 cups of water, the lemon zest, and 1 tsp. salt; turn the heat up to medium high.
  3. Whisk in the cornmeal and cook, stirring often, until thick and creamy, about 20 minutes. (If the polenta gets too thick, loosen with a little hot water.)
    IMG_4525
  4. Meanwhile, melt the butter in a small saucepan. Season the fish lightly with salt and pepper and arrange in a 9×13 baking dish with space between each piece. Remove the butter from the heat, stir in the harissa and lemon juice, and pour it over the fish.
    IMG_4519
    IMG_4521
  5. Bake, basting every 5 minutes or so, until cooked through (the fish will flake easily), about 15 minutes. If necessary, cover with foil to keep warm.
    IMG_4530
  6. Divide the polenta among 4 shallow bowls or plates. Top with the fish and spoon the butter over the fish. Top with the cilantro or parsley and serve with the lemon wedges.

IMG_4535

Fennel-Orange Salad with Red Onion and Olives

IMG_4528

Fennel-Orange Salad with Red Onions and Olives

  • Servings: 4-6
  • Difficulty: easy
  • Print

Ingredients

  • 1/2 small red onion, thinly sliced
  • 3 blood oranges (if unavailable, substitute naval oranges)
  • 1 large fennel bulb, trimmed (about 1 lb. total after trimming)
  • 1/2 cup pitted kalamata olives
  • 3 Tbs. extra-virgin olive oil
  • 1-1/2 Tbs. fresh lemon juice
  • 3/4 tsp. kosher salt
  • 2 tsp. chopped fresh mint
  • Freshly ground black pepper

Directions

  1. Slice the onion half lengthwise as thinly as you can. Put the sliced onion in a bowl and cover with cold water to mellow its flavor and keep it crisp. Refrigerate for at least 15 minutes.
  2. Working with one orange at a time, slice off both ends. Set the orange on a cutting board, one cut side down. With a sharp knife, cut away the peel (the zest and white pith) by slicing from top to bottom, following the contour of the orange. Working over a bowl to collect any juice, release the orange segments by carefully cutting them away from the membrane that separates them. Remove any seeds and put the orange segments in another bowl, separate from the juice. Squeeze the membranes over the juice bowl.
  3. Cut the fennel in quarters lengthwise and then trim away most of the core, leaving just enough intact to keep the layers together. Slice the quarters lengthwise as thinly as you can.
  4. In a small bowl, whisk together the extra-virgin olive oil, lemon juice, and salt. (The recipe can be prepared up to this point several hours in advance. If working ahead, wrap and refrigerate the fennel; don’t chop the mint until just before serving.)
  5. Drain the sliced onion and toss it with the fennel. Put the fennel and onion in a shallow salad bowl or on a rimmed serving platter. Drizzle with the reserved orange juice. Arrange the orange segments on top and sprinkle with the olives and mint.
  6. Drizzle the dressing evenly over the salad. Add several grinds of black pepper and serve immediately.

Adapted from a recipe by Janet Fletcher, Rosetta Costantino from Fine Cooking

Korean-Style Spicy Steak Lettuce Wraps

We love lettuce wraps: so tasty and so fun to assemble. The zesty flavors in these Korean-Style Spicy Steak Lettuce Wraps make them an interactive standout—but you have to like a kick to your food, mostly from gochujang.

More and more recipes call for gochujang, the popular Korean chili paste with the spicy and bold miso-like flavor. But as popular as it has become, it can still be tough to track down. The good news is there are many ways to substitute for gochujang. The bad news: none will have the same complexity of flavor. Authentic versions of this Korean chili paste ferment for months to get that sweet and sharp miso bite.

You’re best bet is to check out an Asian Mart, that’s where we find it every time. But if you seriously can’t find any locally, try ordering it over the Internet before trying to replicate your own. In desperation, the grocery store alternatives are Sriracha chili sauce or a Thai chili paste, but neither are truly viable alternatives.

IMG_3464

Korean-Style Spicy Steak Lettuce Wraps

  • Servings: 4
  • Difficulty: easy
  • Print

Ingredients

  • 1-1/2 lb. skirt steak
  • 1/4 cup gochujang (Korean red chile-bean sauce)
  • 2 Tbs. Asian sesame oil
  • 2 Tbs. soy sauce
  • 2 medium cloves garlic, minced
  • 1 Tbs. rice vinegar
  • 4 medium scallions, thinly sliced
  • 2 medium carrots, grated
  • 1 large head Boston or butter lettuce, leaves separated
  • 1-1/4 cups prepared cabbage kimchi, coarsely chopped
  • Kosher salt

Directions

  1. Position a rack 6 inches from the broiler and heat the broiler on high. Line a large heavy-duty rimmed baking sheet or broiler pan with foil and put the steak on it.
  2. Whisk the gochujang, sesame oil, soy sauce, and garlic in a small bowl.
    IMG_3470
  3. Rub 3 Tbs. of the mixture all over the steak and let marinate at room temperature for 10 minutes.
    IMG_3472
  4. Whisk the vinegar into the remaining gochujang mixture and set aside in a small serving bowl.
  5. Arrange the scallions, carrots, and lettuce on a large serving platter in individual mounds. Place the kimchi in a serving bowl.
    IMG_3473
  6. Broil the steak, flipping once, until medium rare (125°F), 3 to 4 minutes per side. Let rest for 5 minutes, then slice as thinly as possible against the grain.
    IMG_3476
    IMG_3480
  7. Season to taste with salt and mound on the serving platter. Bring all the components to the table for everyone to assemble their wraps as they like.

http://www.lynnandruss.com

IMG_3483
IMG_3487

By Ivy Manning from Fine Cooking

There’s Shrimp. Then There’s This Shrimp—With a Perfect Side of Rice.

OMG, both the main entrée, Garlicky Shrimp and Tomatoes, and the accompanying Orange-Scented Rice Pilaf with Fennel are an amazing duo that’ll win a spot in your rotation for sure! The combination of flavors in this memorable shrimp dish is reminiscent of cioppino, San Francisco’s popular seafood stew. A jolt of fresh flavor with raw garlic gets stirred into the tomato sauce at the end of cooking, unusual in that it is also an ingredient in the initial stages.

Of course you know I am a strong proponent of using homemade stock because the flavor impact is so much more pronounced than the bland contents of canned or boxed. In place of the clam juice, you could use homemade seafood stock if you’re lucky enough to have some on hand. Otherwise, use a good brand of clam juice.

Although the ingredients list instructs you to get peeled shrimp, buy unpeeled jumbos, the shells will be a perfect addition to your body bag (kept in the freezer.) Accumulate enough over time to make a batch of homemade seafood stock for future recipes. Remember, a pressure cooker shortens the process of making stock down to mere minutes.

The rice pilaf, by one of our all-time favorite chef/authors Molly Stevens, is subtly perfumed, light and fluffy, and compliments the shrimp dish perfectly—especially with fennel as an ingredient in both. In this side dish, you’ll want to incorporate homemade chicken stock (or vegetable for vegetarians.) 

IMG_3571

Garlicky Shrimp and Tomatoes

  • Servings: 3-4
  • Difficulty: easy
  • Print

Ingredients

  • 1 1/4 lbs. jumbo shrimp, peeled, deveined, and patted dry
  • Kosher salt and freshly ground black pepper
  • 5 Tbs. olive oil; more as needed
  • 3 large cloves garlic, pressed or minced
  • 1-1/2 tsp. fennel seeds, coarsely crushed
  • 1-1/2 cups canned crushed tomatoes with purée (from a 15-oz. can)
  • 6 oz. (3/4 cup) bottled clam juice
  • 3/4 cup dry white vermouth
  • 1/4 cup chopped fresh flat-leaf parsley

Directions

  • Season the shrimp with 1/4 tsp. each salt and pepper. Heat 3 Tbs. of the oil in a 12-inch skillet over medium-high heat until shimmering hot. Add the shrimp and cook, stirring, until partially cooked, 3 minutes. Transfer the shrimp to a large bowl.
    IMG_3577
  • Add the remaining 2 Tbs. oil to the skillet. Add about two-thirds of the garlic and all of the fennel seeds and cook, stirring, until fragrant, about 1 minute.
    IMG_3579
  • Stir in the tomatoes, clam juice, and vermouth. Bring to a boil. Cook, stirring occasionally, until the sauce is reduced to about 2/3 cup, about 12 minutes.
    IMG_3581
  • Turn the heat down to medium and stir in the remaining garlic and the parsley. Add the shrimp and accumulated juice and cook, stirring occasionally, until the shrimp are cooked through, about 2 minutes. Season to taste with salt and pepper and serve over the Orange-Scented Rice Pilaf, recipe below…
    IMG_3582

http://www.lynnandruss.com

IMG_3585

By Selma Brown Morrow from Fine Cooking

Orange-Scented Rice Pilaf with Fennel

Once finished, the rice can sit, covered, for up to 30 minutes before serving.

Orange-Scented Rice Pilaf with Fennel

  • Servings: 6-8
  • Difficulty: easy
  • Print

Ingredients

  • 3 Tbs. unsalted butter
  • 3/4 cup finely chopped fennel (1/2 small bulb)
  • 1/2 cup finely chopped onion (1 small onion)
  • 1-1/2 cups long-grain rice, preferably basmati
  • 2-3/4 cups low-salt chicken broth
  • 2 strips orange zest
  • 1 bay leaf
  • 3/4 tsp. kosher salt

Directions

  1. Melt the butter over medium heat in a medium (3-qt.) saucepan. Add the fennel and onion and cook, stirring often, until softened, about 6 minutes.
    IMG_3574
  2. Add the rice and cook, stirring, until the grains are glossy and beginning to crackle, about 2 minutes.
  3. Add the broth, orange zest, bay leaf, and salt. Bring to a boil, cover, and lower the heat to a simmer. Simmer until the rice is tender and all the liquid has been absorbed, about 17 minutes.
    IMG_3576
  4. Off the heat, remove the lid, lay a kitchen towel over the pot, replace the lid, and let sit for 5 to 10 minutes. Fluff the rice with a fork and serve.
    IMG_3583

http://www.lynnandruss.com


Penne with Smoked Ham, Peas, and Mint

Refreshingly Spring! Fresh mint, a classic pairing with peas, brightens this creamy pasta dish. This melodious and quick meal came from Fine Cooking’s Make It Tonight series by Jessica Bard. Many of our recipes tend toward the spicy side of life, but this one exudes a mellower composite of flavors without being bland.

IMG_4373

The little mezze penne size made for a perfect mouthful without screaming pasta. And our ham was not smoked and weighed in at closer to over a half pound. No leftover ham? The recipe would work fine with one (or two) of those prepackaged slices. Or try a thick slice of pancetta to amp up the flavor.

Disappointingly the grocery stores weren’t carrying fresh peas, even though it was the height of Spring 😦 But the frozen variety worked quite nicely, just make sure to thaw them ahead of time. And I made a birdbrain move while shopping when I grabbed the feta cheese because I unknowingly picked up fat free, so to compensate, we also included some grated parm. All-in-all, we really liked this dish.

IMG_4367

Penne with Smoked Ham, Peas and Mint

  • Servings: 3-4
  • Difficulty: easy
  • Print

Ingredients

  • Kosher salt
  • 2 Tbs. extra-virgin olive oil
  • 1/2 medium yellow onion, thinly sliced lengthwise
  • 1/4 lb. sliced smoked ham, cut crosswise into 1-inch strips
  • 1/2 cup heavy cream
  • 1/8 tsp. freshly grated nutmeg
  • 1-1/2 cups fresh green peas (from 1-1/2 lb. peas in the pod) or thawed frozen peas
  • 1/2 lb. dried mini penne
  • 2-1/2 oz. feta, crumbled (about 1/2 cup)
  • 1/3 cup chopped fresh mint

Directions

  1. Bring a large pot of well-salted water to a boil.
  2. Meanwhile, heat the oil in a 12-inch skillet over medium-high heat. Add the onion and cook, stirring, until browned, about 3 minutes. Add the ham and cook, stirring, until heated through, about 1 minute.
  3. Add the heavy cream and nutmeg and bring to a boil. Add the peas, turn the heat down to medium, and simmer, stirring often, until the peas are cooked through, about 4 minutes. Remove from the heat.
    IMG_4371
  4. Cook the pasta according to package directions until al dente. Reserve 1/2 cup of the pasta cooking water, drain the pasta, and return it to the pot.
  5. Toss with the sauce, half of the cheese, and half of the mint, adding some of the reserved pasta water, if needed, to make a creamy sauce. Put all into a large pasta platter bowl or divide among 4 plates and top with the remaining cheese and mint.
    IMG_4372

IMG_4375

Deconstructed Chicken, Sausage and Veggie Kebabs

Woohoo! It is FINALLY grilling weather here in the Northeast U.S. After what seemed like an endless winter, the month of May blossomed with above average temps, low humidity, a soothing breeze, and a break from the wetness. Everywhere you look, people are smiling and I’m feeling human again…

Time to bust out the “ole barbie.” And while you can grill just about anything, we were in the mood for our tasty Deconstructed Chicken, Sausage and Veggie Kebabs. What’s nice about these puppies is you don’t have to thread every single morsel unto a skewer. The veggies all get dumped into a heated grill basket and only the meat pieces are speared. (Since the sausage cooks quicker than the chicken, they need to be on separate spikes.) Portioning the ingredients this way allows diners to eat as little or as much meat and vegetables as they prefer.

IMG_4400

Speaking of the meat, if you’re not a dark meat fan (white meat is usually my preference), go ahead and use chicken breasts instead. And while we opted for some Iberico Buttifara Spanish sausage, go wild and crazy with whatever brand your little heart desires—just make sure to choose fat links.

IMG_4387

And BTW, we prefer the flat metal skewers as opposed to the round wooden ones. Reasons being, you don’t have to soak them so they won’t catch fire, and because they’re flat the morsels stays in place; plus they are reusable—waste not, want not. An added grain such as couscous, rice, orzo or quinoa rounds out the meal.

NOTE: The spelling kabob is mostly used by North Americans as they try to transliterate the sound for the dish, kebab, that is made with grilled meat in Arab countries.

IMG_4389

Deconstructed Chicken, Sausage and Veggie Kebabs

  • Servings: 4
  • Difficulty: simple
  • Print

Ingredients

  • 1¼ lbs. boneless skinless chicken thighs, cut into 1½” pieces
  • 12 oz. (3) fat sausage links, cut into 18, 1″ pieces
  • 1 red pepper, cut into cubes
  • 1 yellow pepper, cut into cubes
  • 1 onion, cut into wedges
  • 12 mushroom caps
  • 1 zucchini, ½” slices
  • 8-10 whole, peeled garlic cloves, lightly smashed, large cloves cut in half

Balsamic Marinade: (makes 1¼ cups)

  • ½ cup balsamic vinegar
  • ½ cup canola oil
  • 2 Tbsp. dijon mustard
  • 2 Tbsp. honey
  • 1½ tsp. dried, crushed rosemary
  • 1 tsp. salt
  • ½ tsp. pepper

Directions

  1. To a small bowl add balsamic vinegar, dijon mustard, honey, crushed rosemary, salt, and pepper. Whisk together and slowly add in the canola oil whisking the entire time.
  2. In 2 quart-size ziplocs, add chicken to one bag and sausage pieces to the other with and ¼ cup of the balsamic mixture to each bag.
  3. Add the cut veggies to a jumbo ziploc with a ½ cup of the marinade and reserve the remaining ¼ cup mixture. Seal and shake to make sure all the veggies are coated.
    IMG_4391
  4. Place all 3 bags in the refrigerator for at least 30 minutes or up to 4 hours to marinate.
  5. Preheat grill to high heat (600-700 degrees F). Place the oiled veggie basket onto the grill to heat up for at 10 minutes.
  6. Remove the ziplocs from the refrigerator and start to assemble the meat onto skewers. Keep the chicken and sausage on separate skewers.
  7. Pour the veggies into the hot basket and turn them with a spatula every couple of minutes until crisp-tender, about 15 minutes total.
    IMG_4395
  8. Lower the heat to medium hot (about 400 degrees). Oil the grates and place kebabs on the grill.
  9. Turn each skewer a few times to char on all sides. The sausage will be done in about 4-5 minutes, so place those on top of the basket to keep warm while the chicken cooks another 3-4 minutes.
    IMG_4396
  10. Brush the remaining marinade on the chicken for one last flavor burst. Grill for 30 seconds more.
  11. Remove from grill. Place the veggies in a serving bowl and slide the meat off of the skewers onto a platter or individual plates.
    IMG_4398
  12. Serve over couscous, rice, or orzo.
    IMG_4403

http://www.lynnandruss.com

Glazed Apple Crumb Muffins—Sure To Impress

99.9% of the time I do not eat sweets or baked goods, especially for breakfast. But I volunteered for a Master Gardner event that took place starting early on a Saturday morning, and they requested donations of homemade breakfast items to help feed the crew.

Yeah, I could’ve bought a dozen bagels from a local bakery, but that’s just not the way I roll (pun intended). So after a bit of nosing around on the Internet, I found a tempting Glazed Apple Crumb Muffin recipe (thanks to sallysbakingaddiction) that I altered a bit. I particularly liked the fact that I had all of the ingredients on hand and didn’t have to make a special trip to the supermarket.

IMG_4447

Well, of course I had to try one before I submitted the muffins to the event, right? Wouldn’t want to put something out there that was inedible, you follow? While still warm, I sliced one in half and took a bite… then another bite… and another, until it was all gone! It literally melted in my mouth. Nobody was more shocked than me…

A dozen of these were earmarked for the event, one I ate, and one was saved for Hubby. Knowing his abhorrence of walnuts, I left that muffin sans nuts. Sometimes you feel like a nut, sometimes you don’t 😉 BTW, Russ ate his the next morning before heading to work, and he agreed, it was truly yummy.

How did they fare with the volunteer crew? I’m not totally sure, but several of my mates grabbed one during our lunch period and planned to nosh on it later…

IMG_4489
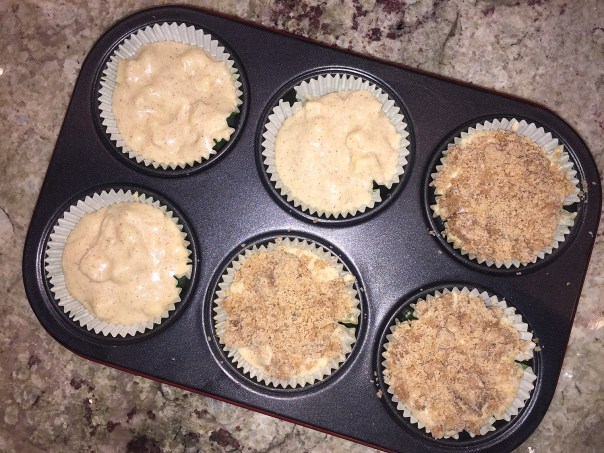
Above, Chris holds one of the muffins as does Terri (can only see her arms in the lower right); while George gives us a radiant smile.

Glazed Apple Crumb Muffins

  • Servings: 14 muffins
  • Difficulty: moderately simple
  • Print

Ingredients:

CRUMB TOPPING

  • 1/3 cup packed light or dark brown sugar
  • 1 Tablespoon granulated sugar
  • 1 teaspoon ground cinnamon
  • 1/4 cup unsalted butter, melted
  • 2/3 cup all-purpose flour
  • 1/2 chopped walnuts or pecans (optional)

MUFFINS

  • 1/2 cup unsalted butter, softened to room temperature
  • 1/2 cup packed light brown sugar
  • 1/4 cup granulated sugar
  • 2 large eggs, at room temperature
  • 1/2 cup whole milk yogurt, at room temperature
  • 2 teaspoons vanilla extract
  • 1 3/4 cups all-purpose flour
  • 1 teaspoon baking soda
  • 1 teaspoon baking powder
  • 1 teaspoon ground cinnamon
  • 1/2 teaspoon salt
  • 1/4 cup milk (I used 2%), at room temperature
  • 1 1/2 cups peeled apple, 1/4″ dice (2 small apples)

GLAZE

  • 1 cup confectioners’ sugar
  • 3 Tablespoons heavy cream
  • 1/2 teaspoon vanilla extract

Directions:

  1. Make the crumb topping: In a medium bowl, combine both sugars, the cinnamon, and melted butter. Using a rubber spatula, stir in the flour. The crumb topping will be thick and crumbly. Set aside.
    IMG_4432
  2. Preheat oven to 425°F. Line a 12-count (or two 6-count) muffin pan(s) with cupcake liners. You may need a 2nd pan as this recipe makes up to 14 muffins, though you can always bake in batches using 1 pan. Set aside.
  3. Make the muffins: Using a stand mixer fitted with a paddle attachment, beat the butter and both sugars together on high speed until smooth and creamy, about 2 minutes. Scrape down the sides and bottom of the bowl as needed. Add the eggs, yogurt, and vanilla extract. Beat on medium speed for 1 minute, then turn up to high speed until the mixture is combined and uniform in texture. Scrape down the sides and bottom of the bowl as needed.
  4. With the mixer on off, add in flour, baking soda, baking powder, cinnamon, and salt. Mix on medium-low for a couple minutes to combine everything, scraping down sides as needed.
  5. Add the milk and apple, and mix on low speed until everything is combined.
  6. Spoon the batter evenly into each cup or liner, filling each almost to the top. Press a handful of the crumb topping into the top of each.
    IMG_4436
  7. Bake for 5 minutes at 425°F degrees, then keeping the muffins in the oven, lower the oven temperature to 350°F and bake for 15-17 more minutes or until a toothpick inserted in the center comes out clean. The total time these muffins take in the oven is about 20-22 minutes. Let cool for about 15 minutes before adding the glaze.
    IMG_4439
  8. Make the glaze: Whisk all of the ingredients together and drizzle over slightly warm muffins. Top with chopped nuts if using.
    IMG_4452

http://www.lynnandruss.com

Muffins stay fresh stored at room temperature for a few days– then transfer to the fridge for up to 1 week.

Make ahead tip: For longer storage, freeze glazed or unglazed muffins for up to 3 months. Allow to thaw overnight in the refrigerator, then bring to room temperature or warm up in the microwave if desired.