All posts by LynnHoll

Unknown's avatar

About LynnHoll

I have been an artist and designer all my life incorporating graphic design for websites, gardens, publications, fabrics, interior design and cooking. I am now retired from my professional job, but still create artistic visions in all forms on a daily basis.

Steamed Fish with Shiitake Mushrooms

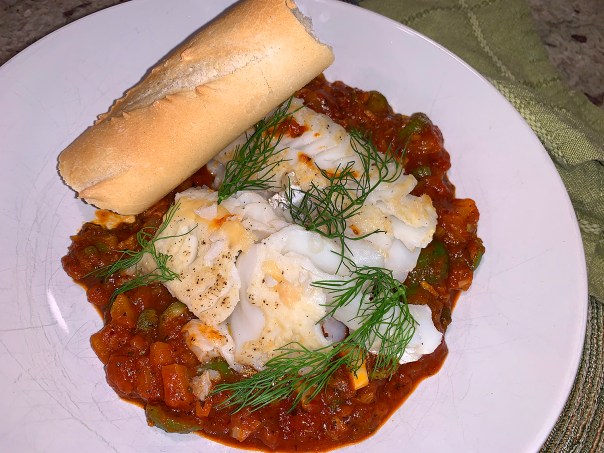
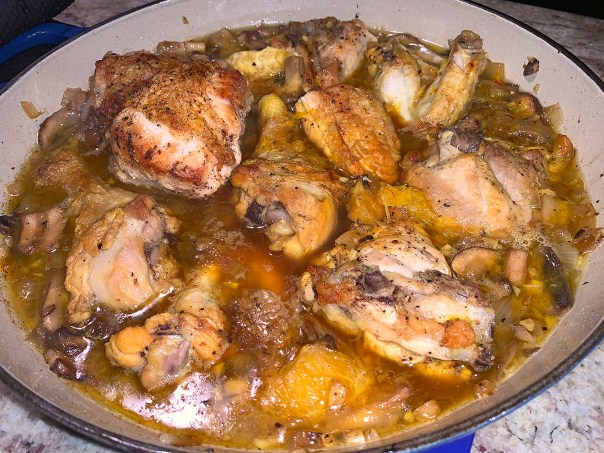
A very satisfying fish dinner indeed! Meatless Monday for us typically centers around seafood and we’re always game to try new recipes, especially those that promise lots of taste and nutritional value. So when I spotted this gem in Milk Street’s “The New Rules” cookbook, I knew it had to make the short list.

Since lean white fish is mild in flavor, before steaming the fillets, season them boldly with garlic, ginger, oyster sauce and fiery-sweet Sriracha. A gentle even heat is best for keeping the delicate flesh of fish moist and tender. Steaming is ideal because the heat  surrounds the fish, cooking it from all sides without movement. Any fleshy white fish, such as cod (our choice), haddock, halibut or sea bass will work nicely here.

IMG_4430

For a little spice, drizzle the plated fish fillets with a little chili oil before sprinkling with the scallions. Or sprinkle with toasted sesame seeds. We served jasmine rice steamed with homemade fish stock, which not only added color, it boosted the flavor profile. Our other side was chopped bok choy stir-fried with garlic and ginger and a bit of that fish stock.

NOTE: Don’t uncover the pot before 8 minutes of steaming has elapsed. Opening the lid releases steam and cools the pot. If your fillets are thicker than 1″, don’t uncover the pot until at least 15 minutes. Ours took an entire 20 minutes to come to the recommended temperature of 130°.

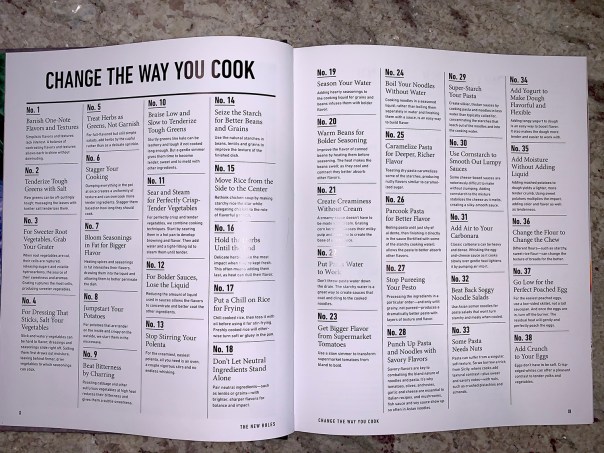
RULE NO. 43: Cook Gentle, Season Strong

IMG_4418

Steamed Cod with Shiitake Mushrooms

  • Servings: 4
  • Difficulty: easy
  • Print

Ingredients

  • 3 Tbsp. oyster sauce
  • 1 Tbsp. sriracha
  • 1 Tbsp. grapeseed or other neutral oil
  • 8 medium garlic cloves, finely grated
  • 1 Tbsp. finely grated fresh ginger
  • 3 Tbsp. soy sauce, divided
  • Kosher salt and ground black pepper
  • 4 6-ounce skinless cod, haddock or halibut fillets (each about 1 inch thick)
  • 8 ounces shiitake mushrooms, stemmed and thinly sliced
  • 2 Tbsp. unseasoned rice vinegar
  • 1 Tbsp. packed light or dark brown sugar
  • ¼ cup water
  • 2 scallions, thinly sliced

Directions

  1. In a shallow bowl or pie plate, whisk together the oyster sauce, Sriracha sauce, oil, garlic, ginger, 2 tablespoons of soy sauce and ½ teaspoon each salt and pepper. Add the fillets and turn to coat, gently rubbing in the sauce.
    IMG_4421
  2. Add the mushrooms and toss until evenly coated. Marinate at room temperature for about 10 minutes.
    IMG_4422
  3. Place a steamer basket in a large Dutch oven. Add enough water to fill the bottom of pot without touching the basket. Remove the basket. Cover the pot and bring to a simmer over medium-high.
  4. Meanwhile, mist the steamer basket with cooking spray. Arrange the fish in an even layer in the basket and top the fillets with the mushrooms, evenly arranging them.
  5. Return the basket to the pot, cover and steam over medium until the fish flakes easily, 8 to 12 minutes. (Ours took 20 minutes to reach 130°.)
    IMG_4423
  6. Meanwhile, in a small bowl, stir together the vinegar, sugar, the remaining 1 tablespoon soy sauce and ¼ cup water.
    IMG_4420
  7. When the fish is done, use a thin metal spatula to transfer the fillets and mushrooms to a platter. Sprinkle with the scallions and serve with the sauce on the side.
    IMG_4429

http://www.lynnandruss.com


Toasted Pearl Couscous with Chicken and Chickpeas

WOW, was this good! According to Milk Street where we found this recipe, Palestinian maftoul, a pasta similar to pearl couscous, inspired this quick and easy one-pot meal. The wheaty flavor and aroma of the couscous is greatly enhanced by toasting until the seed-sized bits are richly browned before they’re cooked pilaf-style.

IMG_4350

RULE No. 25: Caramelize Pasta For Deeper, Richer Flavor.

A sauté of onions, allspice and cumin creates a flavorful base for simultaneously poaching boneless chicken thighs and steaming the toasted couscous. Our homemade chicken stock, in place of the 2 cups of water, also added an enriching depth of flavor. (I noticed the online version included cinnamon instead of cumin and added tomato paste.)

Oh, and that pomegranate molasses adds a perky brightness and pop of “yummy” so don’t omit it at the end, and as a drizzled garnish. My one little complaint would be to increase the amount of chicken by about 50% to 1 1/2 pounds of thighs.

IMG_4335

Toasted Pearl Couscous with Chicken and Chickpeas

  • Servings: 4
  • Difficulty: easy
  • Print

Ingredients

  • 3 Tbsp. extra-virgin olive oil, divided
  • 1 cup pearl couscous
  • 1 med. yellow onion, halved and thinly sliced
  • 4 med. garlic cloves, chopped
  • 3 large carrots, peeled, quartered lengthwise and cut into 1/2-inch pieces
  • Kosher salt and ground black pepper
  • 1/2 tsp. ground allspice
  • 1 Tbsp. ground cumin
  • 1 lb. boneless, skinless chicken thighs, trimmed and halved
  • 2 cups chicken broth, preferably homemade
  • 2 bay leaves
  • 15 ½-oz. can chickpeas, rinsed and drained
  • 1 tsp. pomegranate molasses
  • 1 cup lightly packed fresh flat-leaf parsley, roughly chopped

Directions

  1. In a large Dutch oven over medium-high, heat 1 tablespoon of oil until shimmering. Add the couscous and cook, stirring, until golden brown, about 3 minutes. Transfer to a small bowl.
    IMG_4337
  2. In the same pot over medium-high, heat the remaining 2 tablespoons oil until shimmering. Add the garlic and cook, stirring until beginning to brown, about 30 seconds.
  3. Add the onion, carrots, 2 teaspoons salt and 1 teaspoon pepper, then cook, stirring occasionally, until the onions are well-browned, 3 to 5 minutes.
    IMG_4338
  4. Add the cumin and allspice, then cook, stirring, until fragrant, about 30 seconds.
  5. Stir in the chicken, bay leaves, and 2 cups broth (or water). Bring to a boil, then cover, reduce to medium-low and simmer for 5 minutes.
    IMG_4339
  6. Stir in the couscous, cover and simmer until the chicken is opaque when cut into and the couscous is tender but not mushy, about 8 minutes.
    IMG_4340
  7. Off heat, stir in the chickpeas, pomegranate molasses and half the parsley. Remove and discard the bay leaves. Taste and season with salt and pepper.
    IMG_4342
  8. Transfer to a serving bowl, then sprinkle with the remaining parsley. Serve with additional pomegranate molasses for drizzling.
    IMG_4345

Tip: Don’t stir the onion too often as it cooks. Infrequent stirring allows the slices to brown deeply; this caramelization is essential for developing rich flavor in the dish.

http://www.lynnandruss.com

Adapted from a recipe by Milk Street “The New Rules” cookbook

Chinese Trinidadian Delight

Chef/author Grace Lee says this is one of the easiest dishes to stir-fry and guaranteed to satisfy. And Satisfy it did, with a capital “S”. It is said, with an easily accessible street-food culture and a fresh selection of fruits and vegetables year-round, it’s impossible to go hungry in the island paradise of Trinidad.

IMG_4327

This delicious Chinese Trinidadian Stir-Fried Shrimp with Rum recipe from Milk Street comes together super-quick, especially if you buy the shrimp already peeled and cleaned. Now I know the directions indicate to leave the shells on, and we usually buy them that way making use of the peeled shells in homemade shellfish stock. (Which we used BTW, in place of water for the steamed jasmine rice.) But truth be told, they had a sale on cleaned extra-large shrimp and we couldn’t pass it up—we did leave the tails on however.

A Trinidadian cooking practice said to remove the “fishy” taste is, before cooking, rinse the shrimp in lime juice. I never heard of this, but decided to go with it—in the end, not sure if I could tell much of a difference.

A couple of notations in the procedures. Grace always directs you to push the minced garlic (and in this case, ginger) to the side after it becomes fragrant. We have found that doing so, especially on such high heat, burns the aromatics so we remove them, reintroducing them to the wok after the shrimp and veggies have been stir-fried.

And about those veggies, we substituted a red bell pepper in place of the green because that’s what we had on hand. I think the dish would work with whatever color bell pepper suits your fancy. The sauce, which we loved, was just fine as is, but if “saucy” is your thing, it wouldn’t hurt to double it. We plan on doing so next time…

IMG_4314

Chinese Trinidadian Stir-Fried Shrimp with Rum

  • Servings: 3-4
  • Difficulty: easy
  • Print

Ingredients

  • 1 lb. large shrimp
  • Juice of 1/2 lime
  • 3 Tbsp. ketchup
  • 3 Tbsp. dark Jamaican rum
  • 2 tsp. soy sauce
  • 1/4 tsp. ground white pepper
  • 2 Tbsp. peanut or vegetable oil
  • 1 Tbsp. minced garlic
  • 1 Tbsp. minced ginger
  • 1/2 tsp. salt
  • 1 medium ripe tomato, cut into thin wedges
  • 1 large green bell pepper, cut into thin strips
  • 1 small onion, cut into thin wedges
  • 1 Tbsp. finely chopped cilantro

Directions

  1. Using kitchen shears, cut through the shrimp shells two-thirds of the length down the back of the shrimp. Remove the legs and devein the shrimp, leaving the shells and tails on.
  2. In a medium bowl toss the shrimp with the lime juice for a few seconds. Rinse the shrimp, drain, and set on a plate lined with paper towels. With more paper towels pat the shrimp dry.
    IMG_4317
  3. In a small bowl combine the ketchup, rum, soy sauce, and ground white pepper.
    IMG_4316
  4. Heat a 14-inch flat-bottomed wok or 12-inch skillet over high heat until a bead of water vaporizes within 1 to 2 seconds of contact.
  5. Swirl in the oil, add the garlic and ginger, then, using a metal spatula, stir-fry 10 seconds or until the aromatics are fragrant.
  6. Push the aromatics to the sides of the wok, carefully add the shrimp and spread them evenly in one layer in the wok. Cook undisturbed 1 minute, letting the shrimp begin to sear.
  7. Sprinkle on the salt and stir-fry 30 seconds or until the shrimp begin to turn orange.
    IMG_4319
  8. Add the tomatoes, bell peppers, and onions and stir-fry 1 minute or until the shrimp have turned almost totally orange. (Return the aromatics of garlic and ginger if you removed them earlier.)
    IMG_4321
  9. Swirl the ketchup mixture into the wok and stir-fry 1 minute or until the shrimp are just cooked through and the sauce coats the shrimp. Stir in the cilantro.

http://www.lynnandruss.com

Whole-Grain Farfalle with Spicy Shrimp and Roasted Peppers

Confession. Our go-to supermarket had varying types of whole grain pasta, but not the farfalle. BUT, they did carry Barilla “Protein +” which is a 100% plant-based protein containing among other flours, lentil, chick pea, barley and pea protein. AND, it contains 5 grams of fiber! Seemed like a good substitution to us…

Here, the rustic whole-grain (or plant protein) pasta is enhanced with the mild sweetness of roasted peppers and shrimp, and the kick of a spicy garlic marinade. You can use jarred roasted peppers, if you like, but roasting your own will make the pasta tastier, especially if you make them a day ahead—which will save you a chunk of time.

IMG_3883
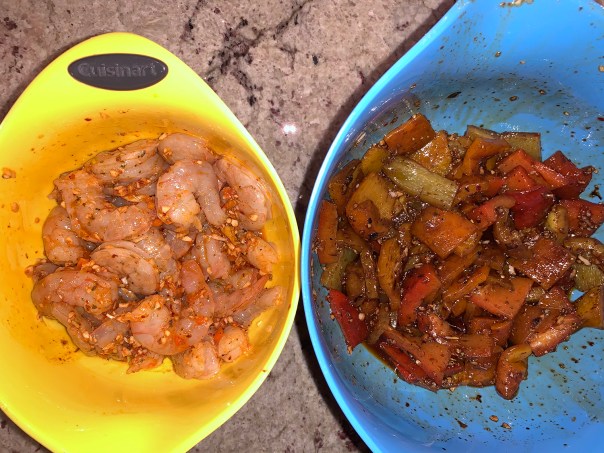
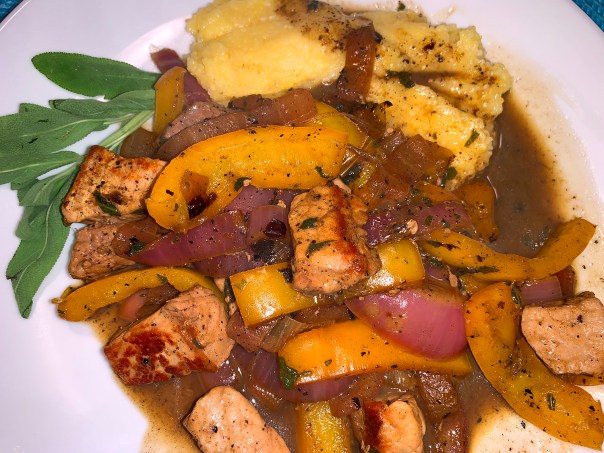
I make mine right on top of a gas burner, making sure to char all over, including the tops and bottoms. Seal them in a plastic bag for 15-20 minutes which will help in removing the burnt skin. Keep in mind, if you have to char your own peppers, it will add to the total time. You can always do this a day ahead.

Our gas oven broiler is sub par (that’s about the only advantage credited to an electric stove). So instead of arranging the marinated shrimp on a greased rimmed baking sheet, we did NOT pat the shrimp dry. Instead, on a gas burner, we heated a large cast iron skillet until smoking hot (with no additional oil), and arranged the shrimp in one layer for about 90 seconds. Then with a wooden spatula, we stir-fried them another minute and a half until just done, scraping them into a bowl covered with tinfoil until ready to use.

IMG_3891

Now about those Fresno chilis. As luck would have it, the grocery store was not carrying them the day we shopped. A good substitute? The Fresno pepper looks and tastes almost like the world’s most popular chili pepper, the jalapeño, but it can be slightly hotter. At its hottest, it reaches the heat level of a mild serrano pepper, which can be somewhat spicy for some. So we bought serrano chilis!

And, because it’s the way we roll, we added 1 teaspoon of smoked paprika—which is typically not a hot spice—in actuality, the spice itself is quite mild and sweet. Smoked paprika is a Spanish cousin to the more widely used sweet Hungarian paprika. It’s made from pimiento peppers that have been dried and smoked over an oak fire, then ground into a fine powder. You’ll sometimes see it called pimenton, smoked pimenton, sweet paprika, Spanish paprika, or any variation of those names, but you can always recognize this spice by its deep red color and powerful smoky aroma. 

IMG_3876

Whole-Grain Farfalle with Spicy Shrimp and Roasted Peppers

  • Servings: 4-5
  • Difficulty: easy
  • Print

Ingredients

  • 5 medium cloves garlic, peeled and crushed
  • 2 Fresno or other small fresh red chiles, cut into a few pieces (remove seeds and ribs for less heat)
  • 1/2 cup extra-virgin olive oil; more as needed
  • 2 tsp. crumbled dried oregano
  • 2 tsp. Aleppo pepper or 1/2 tsp. red pepper flakes; more to taste
  • 3/4 tsp. ground cumin
  • Fine sea salt
  • 3 rred bell peppers or a mixture of red, yellow or orange, roasted, peeled, seeded, and cut into 1-inch pieces
  • 1 tsp. smoked paprika
  • 1 Tbs. balsamic vinegar
  • 1 lb. extra-large shrimp, peeled and deveined
  • 12 oz. whole-grain farfalle
  • 4 oz. (1 cup) crumbled mild feta, preferably sheep’s milk
  • 1/2 cup lightly packed chopped fresh flat-leaf parsley
  • Finely grated Parmigiano-Reggiano for garnish

Directions

  1. In a food processor, pulse the garlic and chiles until finely chopped. Transfer to a medium bowl, and add the oil, oregano, Aleppo, cumin, and 1/2 tsp. salt; stir well with a fork to combine.
  2. Transfer half of the mixture to another medium bowl stir in the roasted peppers, smoked paprika and vinegar.
  3. Add the shrimp  to taste to the remaining marinade, gently toss to coat, and set aside to marinate for 15 minutes.
    IMG_3884
  4. Meanwhile, position a rack 4 inches from the broiler element, and heat the broiler on high. Bring a large pot of well-salted water to a boil, and cook the pasta according to package directions until al dente.
  5. While the pasta cooks, heat a cast-iron skillet (without any extra oil) until smoking hot. Place the marinated shrimp into the hot pan, flipping once, until opaque throughout, 3 minutes total. Move into a separate bowl covered with tinfoil until ready to use.
    IMG_3887
  6. Reserve 1/2 cup of the pasta cooking water. Drain the pasta and transfer to a large heated serving bowl.
  7. Add the peppers with the marinade, feta, parsley, and 1/4 cup of the pasta water. Gently toss with a large serving spoon for 1 minute to warm the feta, adding a bit more pasta water as needed to loosen the sauce. Season to taste with salt.
    IMG_3889
  8. Place pasta into a large shallow heated serving bowl. Sprinkle generously with the Parmigiano, and place shrimp on top. Serve, passing more cheese at the table.
    IMG_3893

http://www.lynnandruss.com

Adapted from a recipe by Maria Speck from Fine Cooking

Slow-Cooker Italian Pot Roast

Fast or slow? That was our dilemma for a Sunday dinner recently due to an early afternoon date at the movies. We realized that by the time we arrived back home, it would have been too late to start a pot roast dinner, so our options were to cook it fast in a pressure cooker afterward, or start it in a slow-cooker before heading out. As you can see, the slow-cooker method won…

IMG_4310

This Italian spin on pot roast from America’s Test Kitchen (ATK) adds red wine, oregano, tomatoes, red pepper flakes, and dried porcini mushrooms. To get loads of flavor, you first brown the meat to get a nice crust, then sauté some bacon and aromatics. Deglazing the skillet with wine helps capture all the flavorful browned bits. And finally, pair with some creamy smooth, garlicky mashed potatoes and a side salad for a win.

Interestingly, I usually do not eat bacon because of its adverse effects on my digestive system, but there didn’t seem to be any residual issues afterward. It may be that with a long, slow run in the crockpot, the sautéed bacon pieces basically dissolved and fused into the other ingredients.

We did alter the end game. It’s not a particularly easy chore to skim the fat with a spoon in the crock with the roasts and veggies all there. Instead, we removed the meat to a platter and covered with foil, and discarded the bay leaves. The we poured the sauce into a large strainer over a large bowl, put the liquids into a fat separator and the solids back into the crockpot. Once the fat had separated, we added the defatted sauce back into the slow-cooker and used an immersion blender to make a more uniform “gravy”.

Since this meal serves 8-10, we had ooo-gobs leftover. Not a problem because we planned on having leftovers a few days later, and then freezing the remainder until a day next month when we would be short on time. I bet if you weren’t a pot roast fan beforehand, you would be after enjoying this repast…

IMG_4282

Slow-Cooker Italian Pot Roast

  • Servings: 8-10
  • Difficulty: easy
  • Print

Ingredients

  • 1 (4- to 5-pound) boneless beef chuck-eye roast, pulled into 2 pieces at natural seam and trimmed (or 2 smaller, 2- to 2 1/2-pound roasts) 
  • Salt and pepper
  • 2 Tbsp. extra-virgin olive oil
  • 8 slices bacon, chopped
  • 2 onions, chopped
  • 4 carrots, peeled and cut into 1-inch pieces
  • 6 garlic cloves, minced
  • ½ ounce dried porcini mushroom, rinsed and minced
  • 2 Tbsp. minced fresh oregano or 2 teaspoons dried
  • 2 Tbsp. tomato paste
  • ½ tsp. red pepper flakes
  • ½ cup dry red wine
  • 1 (28-ounce) can crushed tomatoes
  • 1 cup chicken broth
  • 2 bay leaves
  • ¼ cup minced fresh parsley

Directions

  1. Pat beef dry with paper towels and season with salt and pepper. Tie 3 pieces of kitchen twine around each piece of beef to create 2 evenly shaped roasts.
    IMG_4285
  2. Heat oil in 12-inch skillet over medium-high heat until just smoking. Brown roasts on all sides, 7 to 10 minutes; transfer to plate. (It’s essential to get a nice crust on the meat.)
  3. Add bacon to now-empty skillet and cook over medium heat until crisp, 5 to 7 minutes. Using slotted spoon, transfer bacon to slow cooker. Pour off all but 2 tablespoons fat from skillet.
    IMG_4288
  4. Add onions and carrots to fat left in skillet and cook over medium heat until softened and lightly browned, 8 to 10 minutes. Stir in garlic, mushrooms, oregano, tomato paste, and pepper flakes and cook until fragrant, about 30 seconds. Stir in wine, scraping up any browned bits; transfer to slow cooker.
  5. Stir tomatoes, broth, and bay leaves into slow cooker. Nestle roasts into slow cooker, adding any accumulated juices. Cover and cook until beef is tender and fork slips easily in and out of meat, 9 to 10 hours on low or 6 to 7 hours on high.
    IMG_4297
    IMG_4300
  6. Transfer roasts to carving board, tent loosely with aluminum foil, and let rest for 20 minutes.
  7. Discard bay leaves. Using large spoon, skim fat from surface of sauce. Stir in parsley and season with salt and pepper to taste.
    Alternatively: Discard bay leaves. Pour the sauce into a large strainer over a large bowl. Place the strained carrot mixture back into the crockpot, and the separated liquid into a defatter. Now pour the defatted sauce back into the slow-cooker and using an immersion blender, puree until most of the sauce is well combined. It will leave the big chunks of carrots intact.
  8. Remove twine from roasts, slice meat against grain into ½-inch-thick slices, and arrange on serving dish. Spoon 1 cup sauce over meat and serve, passing remaining sauce separately.

IMG_4301
IMG_4309
IMG_4313

http://www.lynnandruss.com

Adapted from a recipe by America’s Test Kithchen

Cellentani with Turkey Meatballs and Homemade Tomato Sauce

Sometimes the ingredients you have on hand determine what you’re making for dinner. In our case, it was some ground turkey meat I took out of the freezer and a box of Cellentani, a curly-cued pasta that caught my eye at the supermarket and that I thought would provide a great clinging vehicle for the sauce. (I was right, BTW.)

Fun Fact: Cellentani was named in honor of a famous and much loved pop singer in Italy in the 1960s, when it was introduced. His name was Adriano Celentano, dubbed “moleggiato” or “springs” for his distinctive stage movements. As the shape resembles a coiled spring, it all makes sense. Cellentani is also known as Cavatappi, which translates from Italian to “corkscrew.”

My Mister found a recipe by Giada De Laurentiis that pretty much fit the bill for what we had in mind. Penne was the pasta of choice for Giada, but we were hell-bent on using the Cellentani. (I changed the last few steps to make the process easier, and included adding a garnish of fresh basil chiffonade.)

Making the sauce a day or two ahead (which is what I did) saves time and turns the meal into a quick weeknight dinner. Of course, you could also use your favorite jarred sauce to simplify things even more—but homemade just tastes better and avoids any unwanted additives.

IMG_4264

Cellentani with Turkey Meatballs and Homemade Tomato Sauce

  • Servings: 4-5
  • Difficulty: easy
  • Print

Ingredients

  • 1/4 cup plain dried bread crumbs
  • 2 tablespoons whole milk
  • 2 large eggs, lightly beaten
  • 3/4 cup grated Romano
  • 1 pound ground turkey, preferably dark meat
  • Salt and freshly ground black pepper
  • 1/4 cup extra-virgin olive oil
  • 5 cups tomato sauce, recipe follows
  • 1 pound dried Cellentani pasta
  • Fresh basil, chiffonade for garnish (optional)

Simple Tomato Sauce:

  • 1/2 cup extra-virgin olive oil
  • 1 small onion, chopped
  • 2 cloves garlic, chopped
  • 1 stalk celery, chopped
  • 1 carrot, chopped
  • Sea salt and freshly ground black pepper
  • 2 (32-ounce) cans crushed tomatoes
  • 2 dried bay leaves
  • 4 tablespoons unsalted butter, optional (we didn’t use any)

Directions

  1. In a large bowl add bread crumbs milk and mix until well combined. Mix in eggs and 1/2 cup Romano cheese and mix well.
    IMG_4266
  2. Add turkey and gently combine, being careful not to overwork the meat. Season with salt and pepper. Shape into golf-size balls.
  3. In a large skillet heat the oil over medium high heat. When almost smoking, add meatballs and without moving or turning the meat, allow it to brown for about 3 minutes. Turn meatballs and brown other side. Continue to cook until all sides are golden brown, about 8 minutes total.
    IMG_4268
  4. Add tomato sauce and bring to a boil. Lower heat and allow meatballs to simmer for 5 minutes. Turn off heat and keep warm on stove. Be careful not to over-handle the meatballs since they are soft and fragile.
    IMG_4269
  5. In a large pot, bring to a boil 6 quarts of salted water. Add pasta and cook until al dente, according to package directions. Drain Cellentani in a colander. Do not rinse pasta with water since you want to retain the pasta natural starches allowing the sauce to cling to them.
  6. Add the leftover 1 cup of tomato sauce to the now empty pasta pot, then stir in the drained Cellentani.
  7. In a large pasta serving bowl, add the pasta topped with the meatballs and sauce; or simply let diners self-serve directly from the cooking vessels.
  8. Top each serving with grated Romano and basil chiffonade, if using.
    IMG_4271

Simple Tomato Sauce:

Yields 6 cups

IMG_4234

  1. In a large casserole pot, heat oil over medium high heat. Add onion and garlic and sauté until soft and translucent, about 5 to 10 minutes.
  2. Add celery and carrots and season with salt and pepper. Sauté until all the vegetables are soft, about 5-10 minutes.
  3. Add tomatoes and bay leaves and simmer uncovered on low heat for 1 hour or until thick. Remove bay leaves and check for seasoning. If sauce still tastes acidic, add unsalted butter, 1 tablespoon at a time to round out the flavors (we didn’t use any butter).
    IMG_4240
  4. Add half the tomato sauce into the bowl of a food processor. Process until smooth. Continue with remaining tomato sauce.
    IMG_4241

http://www.lynnandruss.com

Adapted from a recipe by Giada De Laurentiis

Easy Thai Red Curry

When asked to choose a favorite ethnic-style of food, Thai usually rises to the surface. Why? Their cooking places emphasis on lightly prepared dishes with strong aromatic components and a spicy edge—right up my alley. Thai chef McDang characterizes their food as demonstrating “intricacy; attention to detail; texture; color; taste; and the use of ingredients with medicinal benefits, good flavor, as well as care being given to the food’s appearance, smell and context.”

Traditional Thai cuisine loosely falls into four categories: tom (boiled dishes)yam (spicy salads)tam (pounded foods), and gaeng (curries)—the last of which, we are concentrating on with this recipe. Found on DamnDelicious.net, this Easy Thai Red Curry tastes just like a restaurant-version, except perhaps better and certainly cheaper!

IMG_3778

Do you recall the homemade red curry paste I blogged about not too long ago? You may even have made some of your own since then. Well, it will come in real handy here. Of course you can always use a store-bought brand, but the flavors may be less prominent.

Because I had one on hand, and for a bit more veggie nutrients, I included a yellow bell pepper (red or orange would also work nicely). To raise the bar on your cooked basmati rice, use homemade chicken broth instead of water.

Interesting fact: In 2017, seven Thai dishes appeared on a list of the “World’s 50 Best Foods”, an online poll of 35,000 people worldwide by CNN Travel—Thailand had more dishes on the list than any other country.

IMG_3766

Easy Thai Red Curry

  • Servings: 4
  • Difficulty: easy
  • Print

Ingredients

  • 1 1/2 cups basmati rice
  • 1 Tbsp. canola oil
  • 1 1/2 lbs. boneless, skinless chicken breasts, cut into 1-inch chunks
  • Kosher salt and freshly ground black pepper
  • 2 shallots, minced
  • 3 cloves garlic, minced
  • 1 yellow (red or orange bell pepper), seeded and cut into 1/4″ x 2″ strips
  • 3 Tbsp. red curry paste
  • 1 Tbsp. freshly grated ginger
  • 1 13.5-oz. can coconut milk
  • 1 bunch broccolini, cut into 3-inch pieces
  • 2 green onions, thinly sliced
  • 3 Tbsp. chopped fresh cilantro leaves
  • 2 Tbsp. freshly squeezed lime juice

Directions

  1. In a large saucepan of 3 cups water, cook rice according to package instructions; set aside.
  2. Heat canola oil in a large stockpot or Dutch oven over medium heat. Season chicken with salt and pepper, to taste. Add chicken, shallots and garlic to the stockpot and cook until golden, about 3-5 minutes.
  3. Add in bell pepper strips, and cook for an additional 2 minutes.
  4. Stir in red curry paste and ginger until fragrant, about 1 minute.
    IMG_3770
  5. Stir in coconut milk. Bring to a boil; reduce heat and cook, uncovered, stirring occasionally, until reduced and thickened, about 10-15 minutes.
    IMG_3772
  6. Stir in broccolini until just tender, about 3 minutes. (I covered the pot and it still took 10 minutes to soften the broccolini.)
    IMG_3773
  7. Remove from heat; stir in green onions, cilantro and lime juice; season with salt and pepper, to taste. Serve immediately with rice and garnish with more cilantro and scallions.
    IMG_3775

http://www.lynnandruss.com

Adapted from recipe on damndelicious.com

Rules are Made to be Broken

These next two recipes from cookbook “The New Rules” by Milk Street (MS) were a mixed blessing. I chose them for a Meatless Monday meal, and because they both contained mustard seed, I thought it would bring them together. Not so much. And to their credit, MS did not intend for the both of them to be paired with each other.

Each in their own right were very good (although The Hubs thought the red onion mixture could’ve been less vinegary—at first). But to be honest, the flavor profiles were so very different, they didn’t really belong on the same plate. The Sweet-and-Sour Swordfish with its pickled red onions had a German bent; while the South Indian Sautéed Spinach was just as the name implies, Indian-influenced.

For a future combination, I might pair the sautéed spinach side with an entrée of Tandoori or Butter Chicken; and the fish with a simple rice or potato dish, or even sautéed greens without all of the additional spices that compete with the vinegary onions.

BTW, we had the leftover pickled red onions a day later as a replacement for onions in Sautéed Sausages with Grapes and Balsamic Glazed Onions, a recipe I posted back in 2016. Believe it or not, they had mellowed and sweetened making a perfect accompaniment to this dish. Read on and make up your own mind…

sweet sausauge pickled onions

Sweet-and-Sour Swordfish

IMG_4231

Rule No. 48: Keep Seafood Tender by Saving Acids for the End

Based on Italian agrodolce—the pairing of sweet and sour—the sugar and vinegar-seasoned red onions in this dish add punch to mild and meaty swordfish. MS also borrowed from Spanish escabeche and instructs us to marinate the fish after cooking so the steaks really absorb the flavors.

The fish should be served barely warm or at room temperature, a fact I wasn’t really comfortable about. But it was surprisingly good at that temperature. It can also be prepared ahead, refrigerated up to overnight and served chilled, if you prefer.

Nearly all fish and shellfish contain traces of mercury. And while swordfish has plenty of nutritional advantages, pregnant and nursing women should avoid eating swordfish because it can be higher in mercury than most commonly eaten fish such as shrimp, canned light tuna, salmon, pollock, and catfish.

Our swordfish was just under 1-pound since there was just the two of us, although I kept the amounts of the other ingredients the same. And indeed, there was leftover pickled onions which we incorporated with a sweet sausage and grapes meal the next day while eliminating that recipe’s balsamic onions.

NOTE: Don’t use a metal baking pan for marinating the fish, as metal may react with the acidity of the marinade and leave the dish with an off metallic taste. And don’t slice the fish until ready to serve. If sliced before marinating, the acid will cause the fish to turn an unappealing grey color.

Sweet-andSour Swordfish

  • Servings: 4
  • Difficulty: easy
  • Print

Ingredients

  • 2 12-oz. skinless swordfish steaks (each about 1 inch thick), patted dry
  • Kosher salt and ground black pepper
  • 2 Tbsp. grapeseed or other neutral oil, divided
  • 3 medium red onions, halved and thinly sliced
  • 2 Bay leaves
  • 1 cup plus 1 tablespoon white wine vinegar, divided
  • ¼ cup white sugar
  • 3 Tbsp. yellow mustard seeds

Directions

  1. Season the fish on all sides with salt and pepper.
    IMG_4211
  2. In a 12-inch nonstick skillet over medium-high, heat 1 tablespoon of oil until barely smoking. Add the fish and cook without disturbing until well browned, 5 to 7 minutes.
    IMG_4212
  3. Flip, reduce to medium and continue to cook until the fish is opaque throughout and the centers reach about 130°F, about another 5 minutes. Transfer to a small glass or ceramic baking dish and set aside; wipe out the pan.
    IMG_4214
  4. In the same pan over medium, heat the remaining 1 tablespoon oil until shimmering. Add the onions, bay and ½ teaspoon salt. Cook, stirring occasionally, until the onions are very soft, 5 to 7 minutes.
    IMG_4216
  5. Stir in 1 cup of vinegar, the sugar and the mustard seeds. Bring to a simmer and cook, stirring occasionally, until the liquid has thickened to a light syrup consistency, 5 to 7 minutes.
    IMG_4218
  6. Off heat, stir in the remaining 1 tablespoon vinegar.
  7. Immediately pour the onion mixture over the fish. Marinate for about 30 minutes at room temperature or cover and refrigerate up to overnight.
    IMG_4225
  8. To serve, remove the fish from the marinade, then slice each piece and transfer to a platter.
    IMG_4225
  9. Discard the bay from the marinade and spoon the onions and liquid around and over the fish.
    IMG_4228

http://www.lynnandruss.com

South Indian Sautéed Spinach

Rule No. 7: Bloom Seasonings in Fat for Bigger Flavor

This simple spinach sauté, inspired by a dish called palakura vepudu, is quick to make and has a wonderfully rich aroma and flavor. The secret is infusing the dish with a tarka—spices toasted in butter to bloom their flavors and fragrances. Cumin seeds and mustard seeds are used as the flavor foundation for the dish; alliums and other aromatics are cooked briefly in the tarka to soften their bite.

NOTE: Don’t use baby spinach for this dish, as the leaves quickly turn soggy and limp. Mature spinach is sturdier and more flavorful. Look for bunches with large, dark green leaves and snappy stems.

South Indian Sautéed Spinach

  • Servings: 4
  • Difficulty: easy
  • Print

Ingredients

  • 4 Tbsp. (½ stick) salted butter, cut into 4 pieces
  • 1 tsp. cumin seeds
  • 1 tsp. yellow mustard seeds
  • 4 medium garlic cloves, chopped
  • 1 jalapeño chili, stemmed and minced
  • 1 Tbsp. finely grated fresh ginger
  • 1 medium yellow onion, finely chopped
  • 1½ tsp. curry powder
  • Kosher salt and ground black pepper
  • 1½ lbs. bunch spinach, trimmed of bottom 1½ inches, roughly chopped

Directions

  1. In a large Dutch oven over medium, melt the butter. Add the cumin and mustard seeds, then toast, stirring often, until fragrant and sizzling, 45 to 90 seconds.
    IMG_4220
  2. Add the garlic, jalapeño, ginger, onion, curry powder, 1 teaspoon salt and ½ teaspoon pepper, then cook, stirring occasionally, until the onion is softened, 3 to 5 minutes.
    IMG_4222
  3. Add the spinach (which I left whole), turning to coat with the butter. Cover and cook until the stems are tender, about 4 minutes, stirring once about halfway through.
    IMG_4223
  4. Remove from the heat, then taste and season with salt and pepper.

http://www.lynnandruss.com


Cooking by “The New Rules”

Our enthusiasm runs deep with our first Milk Street (MS) cookbook, thus our recent splurge on their most recent tome “The New Rules” Recipes that will Change the Way You Cook. Excitedly combing through the pages, we were immediately smitten by all of the innovative recipes!

book cover

There is a 4-page upfront section that lists 75 rules that are sure to alter the way you cook. For instance, RULE NO. 13: Stop Stirring Your Polenta. Really?? Apparently, for the creamiest polenta, all you need is an oven, a couple of vigorous stirs and no endless whisking. You had me at “stop stirring.”

rules spread

How about libations? RULE NO. 75: Salt Your Drinks, Not Your Glassware. Unlike salting the rim of the glass—which overwhelms the flavors inside—a tiny amount of salt added to the drink itself enhances and brightens the other ingredients. OK, I’m game to try… one margarita coming right up…

I’m sure I’ll be blogging a fair amount of recipes from this book and I plan to highlight “The New Rule” with most of them, starting with this Thai Stir-Fried Beef with Basil (Pad Krapow Neua). And I was blown away with how good it was! Over the years, we’ve made Thai beef with basil on numerous occasions, but this rendition now sets the gold standard for us. (This summer, when the herb garden is ready for picking, I would like to try it with Thai basil.)

IMG_4201

Rule No. 68: Finish the Dish the Way You Start

Purists say Thai basil is a must for this dish, but Milk Street found that sweeter, slightly more subdued Italian basil yields a perfectly delicious stir-fry. They claim, for the fullest herbal flavor and fragrance, use both chopped basil (mixed with the cooked steak) and torn basil leaves (stirred in at the end).

The snap peas (which we doubled to 8 ounces) and red bell pepper add pleasing crunch, as well as vibrant colors. Use one or two serranos, depending on your heat preference—or, if you like, leave out the chilies altogether. We included two serranos with most of their seeds and it provided quite a punch, but that’s how we roll.

When it comes to the flank steak, make sure to pat dry after marinating. This, along with not crowding the pan, will allow the meat to achieve a nice sear instead of steaming. Serve with steamed white or brown (our choice) jasmine rice.

IMG_4185

Thai Stir-Fried Beef with (Lots of) Basil

  • Servings: 4
  • Difficulty: easy
  • Print

Ingredients

  • 1 lb. flank steak, halved lengthwise with the grain, then cut against the grain into ¼-inch-thick slices
  • 1 Tbsp. soy sauce
  • 3 Tbsp. fish sauce, divided
  • Ground white pepper
  • 4 Tbsp. peanut oil, divided
  • ¼ cup chopped fresh basil, plus 3 cups lightly packed, torn
  • 2 Tbsp. white vinegar
  • 4 oz. sugar snap peas, strings removed, halved on the diagonal
  • 1 red bell pepper, stemmed, seeded and sliced ½ inch thick
  • 1-2 serrano chilies, stemmed and sliced into thin rounds
  • 4 medium garlic cloves, thinly sliced
  • 1 bunch scallions, white and light green parts finely chopped, dark green tops cut into 1-inch pieces, reserved separately
  • 1 Tbsp. white sugar
  • 1 tsp. oyster sauce
  • White or brown long-grained steamed rice

Directions

  1. In a medium bowl, stir together the steak, soy sauce, 1 tablespoon fish sauce and ½ teaspoon white pepper. Let stand for 5 minutes, then drain and pat dry with paper towels.
    IMG_4186
  2. In a 12-inch skillet over high, heat 1 tablespoon of oil until barely smoking. Add half the meat in a single layer without crowding and cook without stirring until well browned, 1 to 1½ minutes.
    IMG_4187
  3. Turn the slices, then continue to cook until the second sides are well browned, another 1 to 1½ minutes. Transfer to a clean medium bowl.
  4. Repeat with 1 tablespoon of the remaining oil and the remaining meat. Transfer to the bowl, then stir in the chopped basil and vinegar.
    IMG_4190
  5. Add the remaining 2 tablespoons oil to the skillet and heat over medium-high until barely smoking. Add the snap peas, bell pepper and chilies. Cook, stirring occasionally, until the peas are lightly browned, about 3 minutes.
    IMG_4192
  6. Add the garlic and finely chopped scallion parts, then cook, stirring, until fragrant, about 30 seconds, then stir in the sugar.
    IMG_4195
  7. Add the scallion tops and the beef with any accumulated juices and cook, stirring, until most of the juices have evaporated, about 1 minute.
  8. Off heat, add the remaining 2 tablespoons fish sauce, the oyster sauce and torn basil, then stir until the basil is wilted, about 30 seconds. Taste and season with white pepper.

http://www.lynnandruss.com

Recipe from Milk Street “The New Rules”

Sweet Peppers and Pork with Sage and Honey

Here’s another super-simple, flavorful meal to add to your repertoire. Inspired by a dish from the Greek island of Ikaria, this skillet-cooked pork is colorful, savory-sweet and a cinch to prepare. The labyrinth of pork, peppers and onion is modestly seasoned with honey, sage and a good dose of black pepper.

According to 177 MilkStreet where we found this recipe, all that’s needed to complete the meal is warm bread, polenta or pilaf—we chose polenta, which was wonderful for soaking up the sauce.

This first time around, we followed the recipe to a tee, and it was delicious! Next time we make the dish, we don’t plan on changing a thing. We both felt that the amount of honey used while cooking was plenty and there was no need to drizzle any more as a garnish—but you may desire a sweeter note.

IMG_3896

Sweet Peppers and Pork with Sage and Honey

  • Servings: 4
  • Difficulty: easy
  • Print

Ingredients

  • 1 lb. boneless country-style pork spareribs, trimmed and cut into 1-inch chunks
  • Kosher salt and ground black pepper
  • 2 Tbsp. extra-virgin olive oil, plus more to serve
  • 2 bell peppers (orange, yellow, red or a combination), stemmed, seeded and cut into ½-inch strips
  • 1 medium red onion, halved and sliced ½ inch thick
  • 1 cup dry white wine
  • 2 Tbsp. honey, plus more to serve
  • 1 Tbsp. chopped fresh sage

Directions

  1. Make the polenta according to package directions, if using.
  2. Season the pork with ½ teaspoon each salt and pepper.
    IMG_3898
  3. In a 12-inch skillet over medium-high, heat the oil until shimmering. Add the pork in an even layer and cook without stirring until lightly browned on the bottom, about 3 minutes. Using a slotted spoon, transfer to a medium bowl and set aside.
    IMG_3900
  4. To the fat remaining in the skillet, add the bell peppers, onion, ½ teaspoon salt and 1 teaspoon pepper. Cook over medium-high, stirring occasionally, until slightly softened and browned, 2 to 4 minutes.
    IMG_3903
  5. Add the wine, honey and sage, scraping up any browned bits.
  6. Return the pork to the skillet along with any accumulated juices, then bring to a simmer and cook, stirring, until the pork is no longer pink at the center and the sauce clings lightly, 5 to 7 minutes.
  7. Taste and season with salt and pepper. Serve drizzled with additional oil and honey and sprinkled with pepper.
    IMG_3914

Tip: Don’t worry that the pork isn’t cooked through after searing. This step, which only partially cooks the meat, produces flavor-building browning for the sauce. The pork will finish after it is returned to the skillet to simmer with the vegetables.

http://www.lynnandruss.com


Flank Steak with Tomato-Eggplant Ragu

The flavors of Greek moussaka were borrowed for this quick-one pan meal found on 177MilkStreet.com. Here, seared flank steak is finished with a rustic sauce-like side of eggplant, tomatoes, garlic and herbs. Crumbled feta cheese adds briny notes that contrast nicely with the sweetness of the vegetables and the richness of the beef. Your mouth watering yet?

IMG_4017

I thought the star of the show was going to be the gorgeous flank steak we got from the Amish Meat stand at the Farmer’s Market. And while the beef was a fabulous cut, it was truly enhanced further with the amazing tomato-eggplant ragu. Everything came together in a perfect marriage in just over a half hour.

We served ours with a side of roasted fingerling potatoes which were first parboiled, slightly smashed, brushed with EVOO and sprinkled with a bit of salt, pepper and dried oregano to tie in with the flavors of the main meal.

TIPS: Don’t drain the juices from the tomatoes. The liquid helps form the sauce and prevents the eggplant from drying out so that the pieces become silky-soft. When slicing the flank steak for serving, make sure to slice it against the grain for the tenderest texture.

IMG_3993

Flank Steak with Tomato-Eggplant Ragu

  • Servings: 4
  • Difficulty: easy
  • Print

Ingredients

  • 1½ lbs. flank steak, trimmed, halved lengthwise, then crosswise
  • Kosher salt and ground black pepper
  • 4 Tbsp. extra-virgin olive oil, divided
  • 1 lb. eggplant, cut into 1-inch chunks
  • 14½ oz. can diced tomatoes
  • 4 medium garlic cloves, minced
  • 2 tsp. dried oregano
  • ¾ tsp. ground cinnamon
  • ½ cup lightly packed fresh mint, chopped
  • 1½ oz. feta cheese, crumbled (about ⅓ cup)

Directions

  1. Season the steak with salt and pepper. In a nonstick 12-inch skillet over medium-high, heat 2 tablespoons of oil until shimmering. Add the steak and brown on both sides, 6 to 8 minutes total, flipping the pieces once. (Our piece took 11 minutes to reach temperature.) Transfer to a plate and loosely cover with foil.
  2. In the same pan over medium-high, combine the remaining 2 tablespoons oil, the eggplant and 1 teaspoon salt. Cook, stirring occasionally, until browned and softened, 5 to 6 minutes.
    IMG_4002
  3. Reduce to medium and add the tomatoes with juices, the garlic, oregano and cinnamon. Cook, stirring occasionally, until thickened and the eggplant has begun to break down, about 5 minutes.
  4. Off heat, stir in any accumulated beef juices and half the mint. Taste and season with salt and pepper.
    IMG_4008
  5. Thinly slice the steak against the grain and place on a platter. Spoon the eggplant mixture on and around the steak, then sprinkle with feta and the remaining mint.
    IMG_4009
    IMG_4013

http://www.lynnandruss.com

Recipe  


Chicken Salad with Apple, Celery Root and Fennel

Need to feed a crowd? Recently I was a hostess at my local garden club monthly meeting. According to club rules, each hostess is asked to bring an appetizer, salad or dessert, keeping in mind that there is always a large attendance. Looking for a unique angle, I chose a hearty, non-green salad from our 177 Milk Street “Tuesday Nights” recipe book: Chicken Salad with Apple, Celery Root and Fennel.

IMG_3990

Céléri rémoulade is a classic French slaw-like salad made with celery root and mayonnaise. 177 Milk Street built on that and turned it into this bright, fresh chicken salad; a riff on Waldorf salad if you will. The following recipe is actually a triple version adaptation of the 4-serving recipe that Milk Street published.

The celery root is prepared two ways: Half is cut into matchsticks, half is shredded on the large holes of a box grater. The combination heightens the salad’s textural and visual appeal. When root vegetables (such as celery root) are cut, their cells are ruptured, releasing sugars and volatile hydrocarbons, the source of their sweetness and aromas—and grating ruptures the most cells.

As far as the chicken, simply buy two store-bought rotisserie chickens. Let them cool slightly and remove the skin, then shred all of the dark and light meat, being careful to remove any bones.

The salad was a HUGE hit! I didn’t plan on posting this blog quite so soon, but I got so many requests from garden club members, I decided to make it live the very next day.

IMG_3982

Chicken Salad with Apple, Celery Root and Fennel

  • Servings: 12-16
  • Difficulty: easy
  • Print

Ingredients

  • 1½ cup mayonnaise
  • ¾ cup whole-grain mustard
  • ¾ cup drained capers, roughly chopped, plus 1 tablespoon caper brine
  • 6 Tbsp. fresh squeezed lemon juice
  • Kosher salt and ground black pepper
  • 2 rotisserie chickens, skinned, shredded (yields about 2 lbs. of meat)
  • 1 large peeled celery root, half cut into 1-inch matchsticks, half shredded on the large holes of a box grater
  • 2 granny smith apples, cored, cut into 8 wedges, then sliced very thin
  • 1 very large fennel bulb, trimmed, quartered and thinly sliced
  • 1½ cups packed fresh flat-leaf parsley leaves, roughly chopped
  • 2 cups chopped walnuts, toasted

Directions

  1. Remove the skin, then shred the meat from the chicken carcasses.
  2. Prep all of the vegetables, and toast the walnut pieces.
  3. In a large bowl, stir together the mayonnaise, mustard, capers and brine, lemon juice and 1½ teaspoon pepper.
    IMG_3983
  4. Add the chicken, all of the celery root, apple, fennel, parsley and nuts.
  5. Fold with a rubber spatula until well combined.
    IMG_3987
  6. Taste and season with salt and pepper. Spoon into a large serving bowl or platter.
    IMG_3991

Tip: Don’t peel the apple; the skin adds a touch of color. Also, don’t use a sweet apple; the tartness of a Granny Smith perks up the other flavors.

http://www.lynnandruss.com

Cod with Rustic Tomato-Fennel Sauce

If the Mediterranean diet tends to suit your fancy, this lovely Cod with Rustic Tomato-Fennel Sauce should grab you attention. Leave out the bread and you have a healthy, low-carb meal in no time. The recipe works well with any firm, meaty fish such as cod, salmon, haddock or striped sea bass. You could even use extra-large shrimp.

The sauce is chockfull of flavor with the additions of garlic, capers, lemon, fennel and olives. In the original recipe, it calls for only 1 1/2 cups of marinara, whereas I used an entire 25 ounce jar, but did not include the 1/2 cup of water. I figured why water it down only to reduce the sauce afterward?

IMG_3322

Cod with Rustic Tomato-Fennel Sauce

  • Servings: 4
  • Difficulty: easy
  • Print

Ingredients

  • 3 Tbs. olive oil
  • 1 large bulb fennel, core removed, cut into 1/2-inch dice, fronds reserved
  • 4 cloves garlic, smashed and coarsely chopped
  • 1 cup coarsely chopped pitted Castelvetrano olives
  • 3 Tbs. capers, drained and rinsed
  • 1 small lemon, peel removed and finely chopped
  • 1 tsp. dried oregano
  • 1/2 to 1 tsp. crushed red pepper flakes
  • Kosher salt and freshly ground black pepper
  • 1-1/2 cups good-quality marinara sauce
  • 2 lbs. skinless cod fillets
  • Rustic crusty bread (optional)

Directions

  1. In a large skillet over medium heat, heat 2 Tbs. of the oil until shimmering. Add the fennel and cook, stirring occasionally, until translucent and light golden, about 7 minutes. Add the garlic and cook until fragrant, about 1 minute.
    IMG_3325
  2. Add the olives, capers, peel, oregano, and pepper flakes. Season lightly with salt and pepper, and cook, stirring, 1 minute.
    IMG_3327
  3. Add the marinara and 1/2 cup water (I did not add water, but added a lot more marinara), and reduce the heat to medium low. Gently simmer until the sauce is slightly thickened, 5 to 8 minutes.
    IMG_3330
  4. Meanwhile, pat the fish dry with paper towels, and season with salt and pepper. Heat the remaining 1 Tbs. oil in a large nonstick skillet over medium heat.
  5. Add the fish and cook, flipping once, until light golden-brown on the outside and the flesh is translucent when cut into, about 5 minutes total. Do not crowd the fish in the pan otherwise you’ll steam instead of brown them. You may have to sear in two batches.
  6. Spoon the sauce into shallow bowls, and top with a fish fillet. garnish with the reserved fennel fronds, and serve with the bread, if you like.
    IMG_3332

http://www.lynnandruss.com

Adapted from a recipe by Heather Meldrom from Fine Cooking


Salted Caramel and Chocolate. Need I say More?

My garden club annual fundraiser was on the horizon, and each attending member was expected to bring a finger food dessert such as cookies or bars. You know I’m always game for trying a new recipe, so after a short online search I came across these tempting Salted Caramel Chocolate Chip Bars found on aspicyperspective.com website.

Marketed as “sticky chocolate chip bars oozing with thick buttery caramel filling,” these cookie bars screamed decadent—a sure bet for the garden club’s biggest event of the year. With what seemed like a perfect marriage of sweet flavors and textures, I only made one slight alteration–—adding additional chocolate chips on the top.

IMG_3364

BTW, I fold in the chips instead of blending them in with the stand mixer, this way they don’t get chopped up. No need to bring out the heavy-duty mix master either. The dough came together easily enough just using my hand-held KitchenAide beaters and a large mixing bowl.

BUT, here’s the issue. While the recipe garnered almost a 5-star rating from hundreds of reviewers, no one seemed to mention the slicing problem. Even after cooling for 1 1/2 hours, then a 2-hour stint in the refrigerator, they still seemed too soft to cut effectively. So I put the covered dish in the freezer for 45 minutes. That finally did the trick. I was able to cut them down with crisp edges.

IMG_3320

Not a sweet eater myself, I did of course have to try a nibble… Good gracious, these puppies were VERY rich indeed—one small bar is enough to satisfy any sweet tooth. You also have to throw a strict diet out the window because each bar contains 285 calories, 39 grams of carbs and 28 grams of sugar. But who’s counting? I actually cut mine down into 48 squares, so the numbers weren’t quite as alarming.

I also had my husband and step-daughter sample the goods. After the first bite they registered sugar shock. Neither one is a huge caramel fan and felt perhaps incorporating only half of the amount would suffice. On the other and, a few of the garden club ladies loved them just the way they were.

BTW, these bars freeze really well. So if—and that’s a BIG IF—you have any leftover, tightly wrap and freeze them until the craving hits. Once thawed, they supposedly taste just as good as freshly baked.

NOTE: Make sure to use plain soft caramels such as Werthers. Do not buy a hard variety or ones with white creamy centers.

IMG_3296

Salted Caramel Chocolate Chip Bars

  • Servings: 30 bars
  • Difficulty: easy
  • Print

Ingredients

  • 1 cup unsalted butter, softened
  • 1 cup packed light brown sugar
  • 1/2 cup granulated sugar
  • 2 large eggs
  • 1 tsp. vanilla extract
  • 1 tsp. kosher salt
  • 1 tsp. baking soda
  • 2 1/2 cups all-purpose flour
  • 2 cups semisweet chocolate chips; plus another 1/4 cup for top, if desired
  • 14 oz. sweetened condensed milk
  • 10 oz. soft caramels, unwrapped
  • 1 tsp. flaked sea salt

Directions

  1. Preheat the oven to 350°F. Line a 9″ x 13″ baking dish with foil with the ends an inch or two longer than the length, and liberally coat with nonstick cooking spray.
  2. In the bowl of an electric mixer, beat the softened butter with both sugars until light and fluffy, about 2 minutes.
  3. Add the eggs, vanilla, salt, and baking soda. Mix well, then scrape the sides of the bowl with a spatula.
    IMG_3297
  4. Turn the speed to low and add the flour, beat to combine. Fold in the chocolate chips with a spatula.
    IMG_3300
  5. Press half of the cookie dough into the bottom of the prepared baking dish. This can be a little tricky, and a little sticky…
    IMG_3301
  6. In a medium sauce pot, add the sweetened condensed milk and unwrapped caramels. Set over medium-low heat and stir until the caramels melt, making a smooth caramel filling. Pour the filling over the cookie dough base.

    IMG_3303

  7. Drop the remaining cookie dough over the caramel filling in small teaspoons-sized clumps. If desired, sprinkle another 1/4 cup chips over the top.
  8. Bake the bars for 25-30 minutes, until the center is just set and lightly golden. (Mine took 35 minutes.) Sprinkle with sea salt flakes and allow the bars to cool completely—at least an hour and a half.
    IMG_3312
  9. Lift the bars out of the pan by the edges of the foil and cut into 30 to 48 bars. (After they cool down completely, I suggest wrapping them well and freeze them for 45 minutes in order to get a crisp cut.)
  10. Store in an airtight container at room temperature for up to 3 days.

Tightly wrap and freeze any leftovers for future cravings, thaw and savor 🙂

http://www.lynnandruss.com

Recipe was found on thespicyperspective.com and originally came from The Cookies & Cups Cookbook by Shelly Jaronsky. 

The Good Woman’s Chicken

This chicken recipe, with its delicious, slightly sweet sauce, orange segments, mushrooms, brandy and a hint of saffron, comes from the Andalusian province of Almeria, Spain. Curious title? Yes, and you might begin to question if you’re a good enough woman (or man) to make this dish. Throw caution to the wind my friends, no one will be judging you…

IMG_3855

Spanish translation is Pollo A La Buena Mujer (it also exists in French cooking as bonne femme). We happened upon it in La Cocina de Mama, a favorite Spanish cookbook from chef/author author Penelope Casas. According to Penelope’s intro, even Spain’s greatest chefs in their leisure time prefer the dishes passed down to them by their mamas and yayas. All of the book’s recipes are invariably simple and down-to-earth from home cooks all over Spain, as is this one.

As you know, we often make alterations to existing recipes, and we did some minor ones here. Given the fact that white meat tends to come to temperature before the dark does, we start cooking the legs, thighs and wings first. Then after 10 minutes, we add the breast pieces on top of the dark meat, but not submerged into the liquid, where they would cook faster. We first came across this method from another favorite chef, Molly Stevens, and it has worked well for us.

Other changes included slightly increasing the amount of garlic and mushrooms; and using a somewhat larger chicken than the 3 lb. bird indicated in the original recipe. All of these changes are in the recipe below.

Please note, all your past transgressions are overlooked, so go ahead and make the “Good Woman’s Chicken”.

The Good Woman's Chicken

  • Servings: 4
  • Difficulty: easy
  • Print

Ingredients

  • 1, 3 1/2 to 4 lb. chicken
  • Kosher or sea salt
  • Freshly ground black pepper
  • 2 Tbsp. olive oli
  • 4 garlic cloves, minced
  • 1 small onion, chopped
  • 1/2 lb. cremini mushrooms, stems trimmed away, and caps cut into 1/4″ slices
  • 3 Tbsp. brandy
  • 5 Tbsp. freshly squeezed orange juice
  • 1 small orange, peeled and divided into segments, removing as much pith as possible
  • 1/3 cup chicken broth, preferably homemade
  • 1/8 tsp. crumbled saffron threads

Directions

  1. Cut the chicken into small serving pieces, first detaching the wings and legs, then with kitchen shears, cutting the breast into 4 pieces, and each thigh in half crosswise.
    IMG_3840
  2. Sprinkle chicken pieces with salt and pepper.
  3. Heat the oil in a shallow casserole and brown the chicken all over. You will probably have to do this in a few stages so as not to crowd the pan and steam (instead of brown) the meat. Remove the chicken to a side plate.
  4. Add the garlic, onion, and mushrooms and sauté until the onion is softened, about 5 minutes.
    IMG_3846
  5. Stir in the brandy, orange juice, orange segments, broth and saffron; scraping up any browned bits. Bring to a boil.
    IMG_3847
  6. Place the dark meat pieces nestled into the onions, cover with a lid and cook for 10 minutes reducing the heat to a rolling simmer.
    IMG_3848
  7. Turn the dark meat and place the white meat pieces on top of them, cover and cook for another 35 minutes, covered.
    IMG_3851
  8. Serve from casserole dish.
    IMG_3852

Baked rice (recipe follows) makes a nice accompaniment.

http://www.lynnandruss.com

Baked Rice
Arroz al Horno

If at all possible, make this rice instead of just plain rice, you’ll be glad you did.

IMG_3859

Baked Rice

  • Servings: 4-6
  • Difficulty: easy
  • Print

Ingredients

  • 2 Tbsp. olive oil or butter
  • 2 Tbsp. minced onion
  • 1 cup Valencian (or Arborio) short-grain rice
  • 1 cup chicken broth
  • 2 Tbsp. minced fresh parsley
  • 1 1/2 tsp. fresh thyme
  • A few strands of saffron, crumbled
  • Kosher or sea salt

Directions

  1. Preheat the oven to 400 degrees
  2. Heat the oil in a deep casserole, and then add the onion and cook until the onion is softened. Stir in the rice coating it with the oil.
  3. Pour in the chicken broth and 1 cup water, stir in the parsley, thyme, saffron, and salt to taste, and bring to a boil.
  4. Remove from the flame, cover, and transfer to the oven. Cook for 15 minutes, remove from the oven, and
    let sit, covered, for 5 to 10 minutes before serving.

http://www.lynnandruss.com