All posts by LynnHoll

Unknown's avatar

About LynnHoll

I have been an artist and designer all my life incorporating graphic design for websites, gardens, publications, fabrics, interior design and cooking. I am now retired from my professional job, but still create artistic visions in all forms on a daily basis.

Heck Yeah It’s Healthy!

Mushrooms stand in for meat in this fresh version of a take-out favorite, Spring Vegetable Lo Mein. Asparagus and carrots give it a decidedly spring feel; and you’ll feel lighter too with only 300 calories per serving!

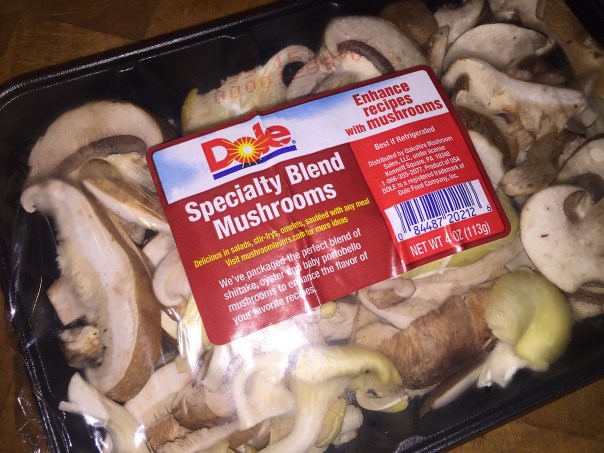
The recipes calls for oyster mushrooms, but the grocery store was not carrying them on their own, so we purchased a mushroom blend which included oysters. Personally, we don’t think it made any difference in taste, so don’t sweat it if you can’t find them. And as usual, I increased the quantity of each vegetable by about a third.

IMG_5725

Because of Russ’s commitment to eating gluten-free, we swapped out the lo mein noodles for Shirataki—noodles that are carbohydrate-free, because they are made with glucomannan starch, an indigestible dietary fiber made from the root of the konjac plant (whatever the heck that is!) They are also very low in calories, with little flavor of their own, but absorb the flavors you cook them with—perfect.

yam-noodle
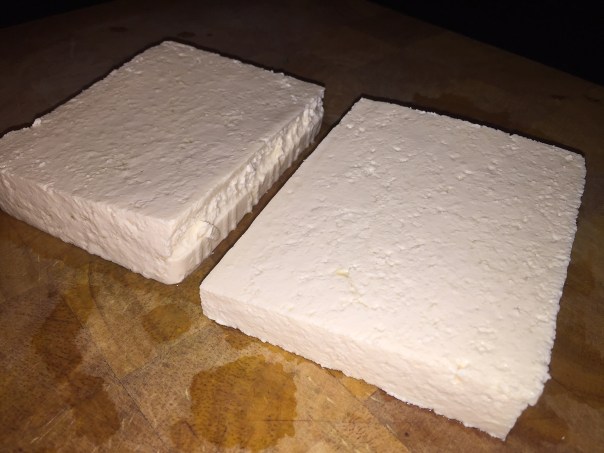
Prepackaged wet Shirataki noodles.

IMG_5724
The Shiratki noodles are rinsed and drained well before the sesame oil is added.

Shirataki noodles can be found both in dry and soft “wet” forms in Asian markets, or in many local supermarkets. When purchased wet, they are packaged in liquid, which is what we used. They normally have a shelf life of up to one year.

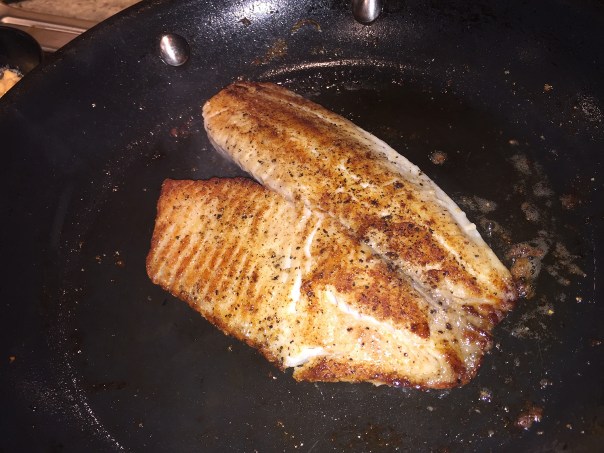
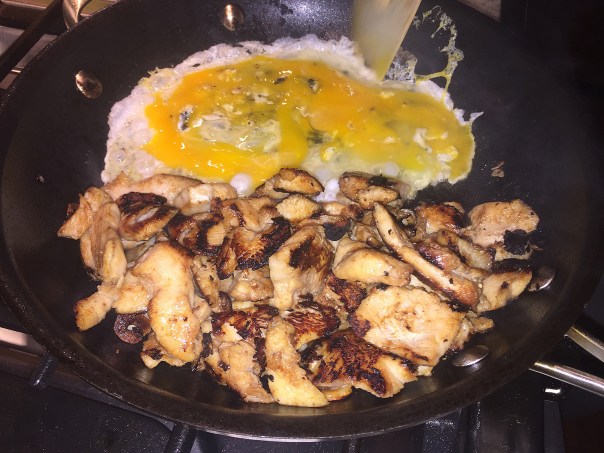
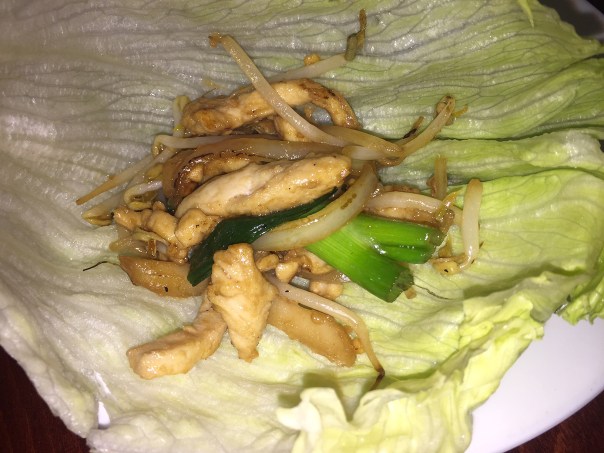
Spring Vegetable Lo Mein is delicious on its own, but for a more filling main course, we topped ours with a piece of roasted soy-glazed salmon. Another suggestion: topping each serving with a sunny-side-up egg. Or perhaps adding a handful of chopped peanuts, which I did for my leftover lunch… Just remember, these additions will up the calorie count… And yes, we did use a healthy dose of Sriracha!

IMG_5726
The veggies and garlic are prepped; and the soy sauce, oyster sauce, and sherry are whisked together in a small bowl.

Ingredients

  • Kosher salt
  • 9 oz. fresh Chinese lo mein egg noodles*
  • 1 Tbs. Asian sesame oil
  • 2 Tbs. low-sodium soy sauce
  • 1 Tbs. oyster sauce
  • 1 Tbs. dry sherry
  • 2 Tbs. peanut or canola oil
  • 1 clove garlic, minced
  • 8 oz. asparagus (about 1-1/4 cups), trimmed and cut on the diagonal into 2-inch pieces
  • 3-1/2 oz. oyster mushrooms (about 2 cups), stemmed and thinly sliced
  • 2-1/2 oz. matchstick-cut or julienned carrots (about 1 cup)
  • 4 scallions, trimmed and cut on the diagonal into 2-inch pieces, white and green parts separated
  • Sriracha, for drizzling (optional)
*TIP: Chinese egg noodles are classic Asian noodles made from wheat flour, water, and egg. Springy with a slight chew, these noodles are made in thin or thick strands. Look for fresh ones in the supermarket’s produce department; be sure they contain egg and aren’t tinted with food coloring instead.

IMG_5730
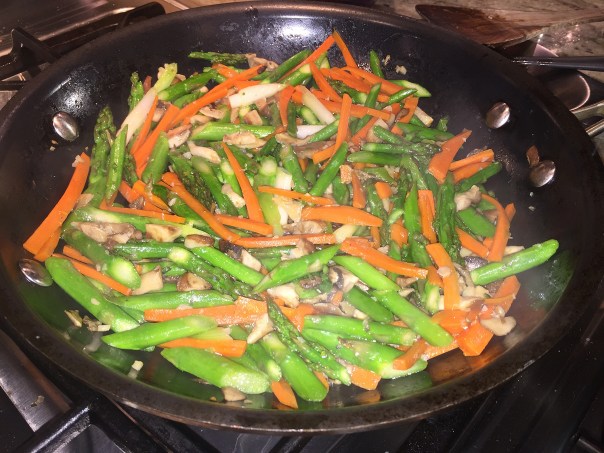
Asparagus, mushrooms, carrots, and scallion whites are added to sizzling garlic.

IMG_5732
Noodles and scallion greens are added to the cooked veggies for several minutes.

IMG_5737
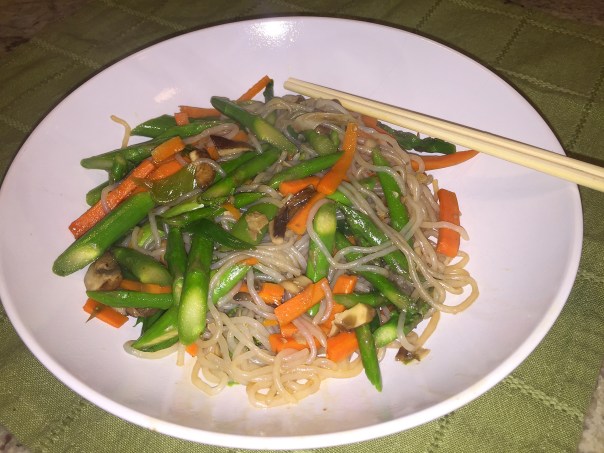
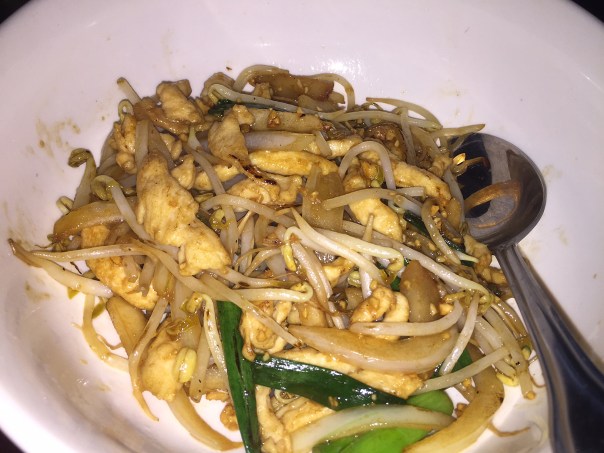
After the soy-sauce mixture is incorporated for a minute, plate the meal with or without a topper.

Directions

  1. Bring a 6-quart pot of well-salted water to a boil. Boil the noodles according to package directions until al dente. Rinse with cold water until cool, then drain well, shaking the colander to remove as much water as possible. Toss the noodles with the sesame oil.
  2. In a small bowl, whisk together the soy sauce, oyster sauce, and sherry.
  3. Heat the peanut or canola oil and garlic in a 12-inch nonstick skillet over high heat until the garlic sizzles, about 1 minute.
  4. Add the asparagus, mushrooms, carrots, and scallion whites. Add 1/2 tsp. salt, and stir frequently until the asparagus is tender and bright green and the mushrooms soften, about 2 minutes.
  5. Add the noodles and the scallion greens, reduce the heat to medium, and cook, stirring frequently until the noodles heat through, about 2 minutes. Add the soy sauce mixture, toss, and continue to cook, about 1 minute.
  6. Serve, drizzled with the Sriracha, if using (and of course we did.)

Adapted from Tony Rosenfeld of Fine Cooking

Two Speedy and Versatile Sides

Thumbing through our latest issue of Fine Cooking Magazine, Russ spotted these two mouth-watering sides. We adore leeks and mushrooms equally, so we decided then and there we wanted to make both of them for dinner during the upcoming week.

The intent was to pair them with two beautiful lamb steaks recently purchased from Aaron’s at the Newtown Farmer’s Market. Pan-searing the lamb would take as little time as cooking the veggies, so it was a perfect combo all around.

The simplest way to pan-sear a steak is to brown it in a real hot, oven-safe skillet for a few minutes on each side, then pop the skillet into a 400 degree preheated oven for 7-10 minutes depending on how you like your meat and how thick the steaks are.

IMG_5418
The lamb steaks are seared on each side for a few minutes in a real hot skillet.

IMG_5422
Russ checks the meat temperature after 8 minutes in a 400 degree oven.

Not a lamb aficionado? Try pairing them with beef steaks, braised chicken, or enjoy sans anything else as a vegetarian meal.

IMG_5413

Poached Leeks with Capers and Mustard Vinaigrette

This classic but quick French side dish gives leeks, often thought of as a supporting player, their own star turn. We found that the leeks were not tender enough after 5-7 minutes of boiling. It took ours twice that long, but I guess it would depend on how thick they were to start with.

Ingredients

  • 1 Tbs. sherry vinegar
  • 1/2 Tbs. Dijon mustard
  • Kosher salt and freshly ground black pepper
  • pinch of granulated sugar
  • 4 large leeks, roots and dark green tops trimmed
  • 1 Tbs. finely chopped fresh flat-leaf parsley
  • 1-1/2 tsp. finely chopped drained capers

Optional: Mash 1 anchovy in bowl before whisking in remaining vinaigrette ingredients.

IMG_5408
After trimming and cleaning, slice the leeks in half down to 1-inch above the root end.

IMG_5420
After nearly 15 minutes, the tender leeks drain on paper towels.

IMG_5428
The luscious mustardy vinaigrette, parsley and capers dress the leeks.

Directions

In a small bowl, whisk together the vinegar, mustard, 1/4 tsp. salt, a generous pinch of pepper, and the sugar. Slowly whisk in the oil.

Halve the leeks lengthwise to 1 inch above the root ends, leaving the ends intact, and rinse well. Bring the leeks to a boil in salted water, cover, reduce the heat, and simmer until tender, 5 to 7 minutes. Drain, slice through the root ends, and place cut side down on paper towels to drain more.

Transfer the leeks to a platter cut side up and spoon the vinaigrette over them. Sprinkle with the parsley and capers and serve.

by Laraine Perri from Fine Cooking

IMG_5410

Pan-Roasted Garlic-Butter Mushrooms

This quick side dish coaxes amazing flavor out of mushrooms with the oven’s high heat and the addition of a few simple ingredients. The ‘shrooms were so delicious, I could make a meal out of them alone!

Ingredients

  • 3 Tbs. unsalted butter
  • 2 Tbs. canola oil
  • 1 lb. cremini mushrooms, trimmed and halved, if large
  • 4 cloves garlic, minced
  • 4 Tbs. fresh flat-leaf parsley, chopped
  • Kosher salt and freshly ground black pepper
  • 2 Tbs. dry white wine
  • 1 tsp. fresh lemon juice

IMG_5415
Mushrooms, parsley and garlic are added to the hot butter an oil for a few minutes.

IMG_5430
After 8 minutes in a real hot oven, the mushrooms are ready for plating.

IMG_5432
The mustardy leeks and garlic mushrooms made great plate pals!

Directions

  1. Heat the oven to 450°F.
  2. In an oven-safe 12-inch skillet, heat the butter and canola oil over medium-high heat. Add the mushrooms, garlic, 2 Tbs. of the parsley, 1/2 tsp. salt, and 1/4 tsp. pepper.
  3. Cook, stirring, until lightly browned, about 3 minutes. Add wine and transfer to the oven. Roast until tender, about 8 minutes.
  4. Stir in lemon juice and the remaining 2 Tbs. parsley.

by Julissa Roberts from Fine Cooking

lamb.salad

A BONUS: There was plenty of lamb leftover so later in the week we had salads for dinner that utilized the leftover meat, leeks and mushrooms. We added some sliced radishes, yellow grape tomatoes and crumbled blue cheese, and for dressing, we just made more of the mustardy vinaigrette. Perfect, quick weeknight meal with very little clean-up!

Brazilian Skirt Steak with Golden Garlic Butter

“Oh Rio, Rio dance across the Rio Grand” Based on a dish you’ll find in many Rio de Janeiro restaurants, this recipe uses such simple ingredients but the flavor is boldly outstanding!

Flank steak and skirt steak are both long, odd-looking cuts of steak. Wonder if you’ve ever eaten either of them? If you’ve ever had fajitas, then chances are it was skirt steak. It is a thin, lean, long cut of beef from the diaphragm muscles of the cow, which has even more intense beefy flavor than flank steak, but contain more tough muscles, so it should only be cooked to rare or medium rare for the most tender texture. Make sure to cut against the grain when serving.

If your garlic has a green sprout growing in the center (the “germ”), be sure to remove it, because it will impart a bitter flavor to the final dish. We paired our steak with sautéed spinach and some reheated steak fries. Originally I planned to whip up some garlic mashed potatoes, but it was hot out (finally) and I wanted to use up some leftovers. Can’t get much simpler than that…

IMG_5606

Brazilian Skirt Steak with Golden Garlic Butter

  • Servings: 4
  • Difficulty: easy peasy
  • Print

Ingredients

  • 6 medium cloves garlic
  • Kosher salt
  • 1-1/2 lb. skirt steak, trimmed and cut into 4 pieces
  • Freshly ground black pepper
  • 2 Tbs. canola oil or vegetable oil
  • 2 oz. (4 Tbs.) unsalted butter
  • 1 Tbs. chopped fresh flat-leaf parsley

Directions

  1. Peel the garlic cloves and smash them with the side of a chef’s knife. Sprinkle the garlic lightly with salt and mince it.
  2. Pat the steak dry and season generously on both sides with salt and pepper. In a heavy-duty 12-inch skillet, heat the oil over medium-high heat until shimmering hot. Add the steak and brown well on both sides, 2 to 3 minutes per side for medium rare. Transfer the steak to a plate and let rest while you make the garlic butter.
  3. In an 8-inch skillet, melt the butter over low heat. Add the garlic and cook, swirling the pan frequently, until lightly golden, about 4 minutes. Lightly salt to taste.
  4. Slice the steak, if you like, and transfer to 4 plates. Spoon the garlic butter over the steak, sprinkle with the parsley, and serve.

IMG_5611
Sautéed the mature spinach in a separate pan as the meat was seared.

IMG_5612
The strips of meat had to be seared in batches.

IMG_5617
Russ slices against the grain on a cutting board with moat to catch the juices.

IMG_5616
The chopped garlic is browned in butter for a few minutes.

IMG_5621

Serving Suggestions

Serve with something that would also benefit from a hit of garlic, such as spinach or mashed potatoes.

http://www.lynnandruss.com

by Leticia Moreinos Schwartz from Fine Cooking

Greens are Greens, Right?

Sautéed Tilapia over Swiss Chard with Tarragon Butter was a definite winner for a whole host of reasons. First, it was quick and easy and perfect for a Meatless Monday dinner. Second, you couldn’t argue with the fresh, healthy ingredients. Third, we loved it—and tilapia happened to be on sale at the grocery store that week.

Here, fresh tarragon lends a haunting, delicate anise flavor to mild, quick-cooking tilapia fillets. And as luck would have it, we had enough fresh tarragon in our backyard herb garden. However, pleased as we were about getting the fish on sale, Russ grabbed collard greens instead of Swiss chard, and I didn’t notice until a few days later when preparing dinner.

Greens are greens, right? Not when you have to factor in the cooking time. While the chard cooks up in a matter of minutes, the collard greens have to cook, partially covered, for at least 45 minutes for chewy collards, or up to 2 hours for silky soft collards. So much for “quick.”

Luckily (or not, depending on if you were driving), Russ was once again stuck in a major traffic jam and wouldn’t be home for at least an hour, so that gave me ample time to cook the collards… and do some laundry, and read my email, and talk on the phone with my brother…

Our other side dish was Jasmine Rice with Toasted Pine Nuts and Chives, which was very good and easy to make. The buttery, toasty pine nuts added a hint of richness to the basic rice pilaf creating a rich flavor. Might try a bit more lemon juice next time to balance the flavors. In the end, everything came together beautifully—even though it was almost 9:00 by the time we finished dinner 😦

Many reviewers cut back on the overall amount of butter used, so we heeded their advice. Because of the greens faux pas, we had to use two skillets, but if you follow the directions and buy the chard, you’ll only have one pan to clean. The moral of the story? Pay attention to what you grab in the supermarket, or be ready to roll with the punches.

IMG_5590

Ingredients

  • 1 Tbs. extra-virgin olive oil
  • 2 cloves garlic, minced
  • 1 lb. Swiss chard, fibrous stems and ribs discarded; leaves coarsely chopped, washed, and dried
  • Kosher salt and freshly ground black pepper
  • 5 Tbs. unsalted butter (4 Tbs. cut into small pieces)
  • 2 tilapia fillets, 6 oz. each
  • 1 shallot, chopped
  • 1 Tbs. fresh lemon juice
  • 1-1/2 Tbs. chopped fresh tarragon

Directions

  1. Heat the oil in a 10- to 12-inch nonstick skillet over medium-high heat. Add the garlic and cook until fragrant, 30 to 45 seconds. Add a big handful of the Swiss chard and cook, tossing often, until it has collapsed enough to add more.
  2. Continue adding the chard in batches until it’s all in the pan and then cook until tender, 2 to 3 minutes. Season to taste with salt and pepper, divide the chard between two dinner plates, and keep warm.
  3. Wipe out the skillet and return it to medium-high heat. Add 1 Tbs. of the butter and let it melt. Sprinkle the tilapia with 1/4 tsp. salt and a few grinds of pepper.
  4. Add the tilapia and cook, turning once halfway through cooking, until it’s well browned and cooked through, 4 to 6 minutes. Top the chard with the tilapia and keep warm.
  5. Add the shallot to the skillet and cook, stirring occasionally, until lightly browned and beginning to soften, 30 to 60 seconds.
  6. Add the lemon juice; it should evaporate almost instantly, but if not, cook until nearly evaporated, about 30 seconds. Remove the skillet from the heat and add the 4 Tbs. butter pieces and tarragon, stirring constantly until the butter melts.
  7. Season to taste with salt and pepper. Pour the butter sauce over the fish and chard and serve immediately.

by David Bonom from Fine Cooking

IMG_5593
About 20 minutes into sautéing the collard greens with some minced garlic.

IMG_5597
The pine nuts are browning in butter for a few minutes before getting mixed into the rice.

IMG_5600
The third fillet browns in the skillet.

IMG_5598
The original two tilapia fillets keep warm on the greens while the last fillet cooks.

IMG_5601
Minced shallots are lightly browned in butter.

IMG_5602
Chopped tarragon is added to the browned shallots.

Jasmine Rice with Toasted Pine Nuts and Chives

Good and easy to make, the buttery, toasty pine nuts add a hit of richness to your basic rice pilaf and create a rich flavor. Might try a bit more lemon juice next time to balance the flavors.

Ingredients

  • 1 cup jasmine rice
  • Kosher salt
  • 3 Tbs. unsalted butter
  • 1/4 cup pine nuts
  • 2 Tbs. chopped chives
  • 2 tsp. lemon juice
  • Freshly ground black pepper

Directions

  1. Cook the rice according to package directions with a pinch of salt.
  2. Meanwhile, melt the butter in a small skillet over medium heat. Add the pine nuts and cook until the butter and nuts are browned, about 3 minutes.
  3. Combine with the rice and add the chives and lemon juice. Season to taste with salt and pepper.

by Ronne Day from Fine Cooking

Skewering Around with the Grahams

Memorial Weekend—the unofficial start of summer—and after that long, cold Spring, we were ready to party al fresco! And of course, what’s a summer holiday without a BBQ? Warm weather, check. Great food, check. Fabulous wine, check. Good friends, priceless!

And so the celebration began when the Grahams arrived. Enter Paula, Mike, his daughter Kelsey, and her fiancé Zach. Paula has this gorgeous Mexican-themed silver platter (I want one) that she explained was a gift from Mike’s sister on their wedding day. Always a conversation piece, her tasty appetizer of cucumber slices topped with sun-dried tomatoes, goat cheese, chives and a drizzle of balsamic reduction, was even more stunning arranged on the decorative plate.

IMG_5637

IMG_5642
Paula, Zach, Kelsey and Mike sip some wine while Russ mans the grill on the other side of the patio. The kebabs didn’t take long, so he didn’t miss much…

IMG_5641

Late last summer during a picnic at the Graham’s house, we lived vicariously while Kelsey and Zach regaled us with details about their 4-month trip around the world, August through December of 2014. Still intrigued, I asked what her favorite place was, and Kelsey responded “Can I pick three?” Enthusiastically and without hesitation, she named Vietnam because it was so breathtakingly beautiful and serene. The other two? South Africa and New Zealand, much for the same reasons… I guess anybody who still loves each other after four months of roughing it in some pretty remote locations, can weather being married… and so they got engaged last Fall and will tie the knot this September. Congrats!! 

But what’s cooking you ask? A Trio of Kebabs that are perfectly charred on the outside and tender within, with bold flavor and texture before and after the skewers hit the grill: Cumin-Chile Lamb Kebabs with Garlic Yogurt; Soy-Basted Chicken Kebabs with Sesame-Citrus Sprinkle; and Barbecue Pork with Blistered Chile–Pumpkin Seed Salsa.

IMG_5643
From left, grilled lamb, chicken and pork skewers.

Along with my infamous homemade guacamole, a loaded garden salad, and the Graham’s hors d’oeuvres, we also feasted on Cauliflower Rice Tabbouleh (pictured below)—a modern take on the classic Middle Eastern bulgur and herb salad. It swaps grains for cauliflower “rice,” making it nutritious, low-carb and gluten-free.

IMG_5638

In keeping with the low-carb and gluten-free theme, Russ made Buttermilk Panna Cotta with Fresh Blueberry Sauce for dessert. The buttermilk base is not sweet at all, but the blueberry sauce is where you can increase the sweetness to your heart’s delight.

IMG_5646

IMG_5647
Mike gets chummy as Russ enjoys his Panna Cotta.

Let’s talk kebabs. For starters, make sure to get the right cut of meat for the job. The key to a knockout skewer? Being choosy at the butcher counter. The ideal cuts are often (counterintuitively) boneless braising cuts. Full-flavored, well-marbled, and appealingly affordable, they welcome high heat and won’t dry out the way leaner cuts tend to.

All three of the following fabulous recipes are from Chris Morroco of Bon Appetit. Each type is cooked over direct heat for about 4 minutes until browned and beginning to char in spots. Then they are moved to the cooler side of your grill and cooked to desired doneness, about another 4-5 minutes—leaving you plenty of time to party with your guests.

And remember, it’s never too late to add more flavor! Periodically brushing tangy bastes—or just some extra marinade—onto your meat while grilling adds layer upon layer of glazey deliciousness.

Of the three, the unanimous favorite was the chicken kebabs, perfectly charred and succulent. Soy glaze added saltiness along with a deep color to these skewers; and the sesame-citrus sprinkle lent an impressive textured finish.

Russ and I concur that the next time, and there will definitely be a next time, we’ll double the size of the lamb cubes from 1″ that the recipe calls for to 2″—because in the end, they were a little too well done for our liking, although the taste was spot-on. A perfect cube is not essential, but try to get the lamb into roughly the same size pieces so they cook at the same rate.

And the pork kebabs, using the “stack” method of skewering, benefited from the intriguing blistered chile-pumpkin seed salsa, a personal favorite of mine! You can always ask your butcher to slice the pork shoulder on the electric slicer for you, which will ensure even pieces and save you time—a tip I should have heeded.

Even though chef-author Chris suggests using metal, we opted to use wooden skewers instead, which we soaked in water overnight (although the tips still burned in the end.) They are smaller in stature, take up less grill space, and were perfect for individual portions. Having plenty of chicken and pork, we doubled the recipes, resulting in some leftovers, but not many.

Yes, we were a bit ambitious in preparing all three different kebabs requiring separate approaches in preparation, but you can narrow it down to just one type for starters. So what are you waiting for, skewer up!

Bon Appetit’s advice:

Square hunks of meat do not always a good skewer make. Different cuts need to be handled distinctly to reach their fullest meaty potential—which means you should be slicing them yourself and skewering them properly. It requires a smidge more thought, but the payoff is huge. Here are three favorite techniques:

skewer-accordion-illo

The Accordion
Short rib shines when sliced against the grain into ribbons and threaded over and under onto skewers, creating folds that trap marinade—the way to go for bacon, too.

skewer-stack-illo

The Stack
Long strips of chicken thigh and pork shoulder can become unruly, so we pile them onto skewers in as compact a stack as possible, creating a uniform shape that cooks evenly.

skewer-cube-illo

The Cube
Turns out lamb shoulder is best cubed, but how you thread makes the difference. Leaving room between each nugget allows heat to circulate, rendering the fat and browning all sides.

Cumin-Chile Lamb Kebabs with Garlic Yogurt

Ingredients

Garlic Yogurt

  • 1 garlic clove, grated
  • ½ teaspoon finely grated lemon zest
  • 1 tablespoon fresh lemon juice
  • 1 cup plain Greek yogurt
  • Kosher salt, freshly ground pepper

Lamb and Assembly

  • 2 tablespoons cumin seeds
  • 1 tablespoon Sichuan peppercorns or 1 teaspoon black peppercorns
  • 2 teaspoons caraway seeds
  • 2 teaspoons crushed red pepper flakes
  • 1 teaspoon sugar
  • Vegetable oil (for grill)
  • pounds boneless lamb shoulder, cut into 1-inch pieces (we suggest 2″ cubes)
  • Kosher salt, freshly cracked pepper
  • Finely grated lemon zest (for serving)

Directions

Garlic Yogurt

  • Stir garlic, lemon zest, and lemon juice into yogurt in a small bowl to combine; season with salt and pepper.
  • Do Ahead: Yogurt can be made 3 days ahead. Cover and chill.

Lamb and Assembly

  1. Coarsely grind cumin seeds, peppercorns, caraway seeds, red pepper flakes, and sugar in spice mill or with mortar and pestle until only a few whole spices remain.
  2. Prepare a grill for medium-high, indirect heat (for a charcoal grill, bank coals on one side of grill; for a gas grill, leave one or two burners off). Oil grates.
  3. Thread lamb onto 6–8 skewers, leaving a small gap between each piece of meat. Season with salt, then sprinkle generously with spice blend, pressing it onto the meat with your hands to help it adhere if needed.
  4. Grill lamb over direct heat, turning every minute or so, until browned and beginning to char in spots, about 4 minutes. Move to cooler side of grill and continue to grill until lamb is cooked to desired doneness, about 4 minutes longer for medium-rare.
  5. Top garlic yogurt with cracked black pepper and a little lemon zest. Serve alongside lamb.

Do Ahead: Spice blend can be made 1 month ahead. Store airtight at room temperature.

Soy-Basted Chicken Kebabs with Sesame-Citrus Sprinkle

Ingredients

Sesame-Citrus Sprinkle

  • 2 tablespoons toasted white and/or black sesame seeds
  • 1 tablespoon thinly sliced chives
  • 1 teaspoon Aleppo-style pepper or other mild red pepper flakes
  • ½ teaspoon finely grated lemon zest
  • Kosher salt

Chicken and Assembly

  • cup (packed) light brown sugar
  • cup mirin (sweet Japanese rice wine)
  • cup soy sauce
  • ¼ cup unseasoned rice vinegar
  • pounds skinless, boneless chicken thighs
  • Vegetable oil (for grill)
  • Kosher salt

Directions

Sesame-Citrus Sprinkle

Mix sesame seeds, chives, Aleppo-style pepper, and lemon zest in a small bowl to combine; season with salt.

Chicken and Assembly

  1. Combine brown sugar, mirin, soy sauce, and vinegar in a small saucepan. Transfer ¼ cup mixture to a large resealable plastic bag. Working one at a time, slice chicken thighs in half lengthwise. Add to bag with marinade and massage marinade into chicken. Chill at least 2 hours or up to 12 hours.
  2. Meanwhile, bring remaining marinade to a simmer over medium-high heat and cook until reduced by half and slightly thickened (just shy of syrupy), 8–10 minutes. Remove glaze from heat.
  3. Prepare a grill for medium-high, indirect heat (for a charcoal grill, bank coals on one side of grill; for a gas grill, leave one or two burners off). Oil grates.
  4. Thread chicken onto 6–8 skewers, folding and piling onto itself to form a compact shape. Season lightly with salt and grill over direct heat, turning every minute or so, until browned and beginning to char in spots, about 4 minutes.
  5. Move to cooler side of grill and continue to grill, basting lightly with glaze and turning every 30 seconds or so, until cooked through and coated with glaze, about 5 minutes longer. Serve chicken topped with sesame-citrus sprinkle.

Do Ahead: Glaze can be made 12 hours ahead. Let cool; cover and chill. Bring to room temperature before using.

Ingredients

Salsa

  • ¼ large white onion
  • 2 jalapeños
  • ¼ cup chopped cilantro
  • ¼ cup finely chopped unsalted, roasted pumpkin seeds (pepitas)
  • ¼ cup olive oil
  • 3 tablespoons fresh lime juice
  • Kosher salt

Pork and Assembly

  • pounds boneless pork shoulder (Boston butt)
  • 2 tablespoons light brown sugar
  • 2 tablespoons mustard powder
  • 2 tablespoons paprika
  • 2 teaspoons garlic powder
  • 1 teaspoon freshly ground black pepper
  • ½ teaspoon cayenne pepper
  • Vegetable oil (for grill)
  • Kosher salt

Directions

Salsa

  1. Cook onion and jalapeños over a gas burner, turning often, until charred and beginning to soften, about 4 minutes (alternatively, cook in a hot dry medium skillet, preferably cast iron). Let cool.
  2. Finely chop onion.
  3. Remove seeds from chiles and finely chop. Toss onion, chiles, cilantro, pumpkin seeds, oil, and lime juice in a small bowl. Season with salt.

Do Ahead: Salsa can be made 1 day ahead. Cover and chill.

Pork and Assembly

  1. Freeze pork until very firm around the edges, 20–30 minutes. Slice ¼” thick, then cut crosswise into 1½”–2″ strips if needed. Cover and chill until ready to grill.
  2. Mix brown sugar, mustard powder, paprika, garlic powder, black pepper, and cayenne in a small bowl to combine.
  3. Prepare a grill for medium-high, indirect heat (for a charcoal grill, bank coals on one side of grill; for a gas grill, leave one or two burners off). Oil grates.
  4. Thread pork onto 6–8 skewers, folding and piling onto itself to form a compact shape. Season with salt, then sprinkle generously with brown sugar mixture in several passes, allowing a few minutes between each for rub to adhere.
  5. Grill over direct heat, turning every minute or so, until browned and beginning to char in spots, about 4 minutes.
  6. Move to cooler side of grill and continue to grill until cooked through, about 5 minutes longer. Serve pork topped with salsa.

Do Ahead: Dry rub can be made 1 month ahead; store airtight at room temperature.

The Hunt for Green Garlic

The hunt was on for green garlic. We earmarked three recipes for the upcoming week that called for the springtime delicacy. And a week prior, our Allium Invasion meal was supposed to include green garlic (blog posted April 7, 2016). When we couldn’t find it at any local grocery store, or Asian market, we thought for sure the Newtown Farmer’s Market would carry it this time of year. So one would think it would be easy to find in April, right? We figured wrong…

Green garlic is young garlic with tender leaves that is harvested early in the season before the bulb is fully formed. The easiest way to think about green garlic is that it’s baby garlic. It has a long green top that looks a bit like scallions, sometimes a tiny bulb at the end, and it may even be tinged with a bit of pink.

The immature garlic bulbs and edible green stalks have an amazing nutty-oniony flavor that is great fresh or cooked. The young, tender cloves don’t even need to be peeled before chopping. Green garlic is more mellow and less spicy in flavor then regular garlic, and can be used raw or cooked like scallions.

Serendipitously there was a produce stall in the farmer’s market that had some of the best and freshest vegetables we’ve seen. As soon as I spotted their leeks, I was smitten. The whites usually average six or so inches of the entire stalk, but these were nearly a foot and a half long—hardly any dark greens at all! So, even though we didn’t end up with the much-sought-after green garlic, we made quite a haul of fabulous produce for the week.

IMG_5245
Yes, we do get excited about leeks that have large areas of white and light green.

Don’t judge. Even without one of the main ingredients, we went ahead and made the recipe anyway: Smashed Twice-Cooked Potatoes with Leeks and Green Garlic. Instead of medium Yukon Golds, we opted for the baby-sized potato, although not too minute. And, you guessed it, we had to use regular garlic—though that didn’t seem to bother us one bit.

IMG_5261

You can steam and smash the potatoes in the morning if you’d like. The finished dish is great at room temp, and can also be reheated in hot oil again for another meal.

Ingredients

  • 2 1/2 pounds medium Yukon Gold potatoes
  • 1/3 cup olive oil, plus more for serving
  • Kosher salt, freshly ground pepper
  • 2 leeks, dark-green parts discarded, cut into 1″ pieces
  • 4 green garlic bulbs, white and pale-green parts only, or 2 garlic cloves, thinly sliced
  • 1 teaspoon finely grated lemon zest
  • 1 tablespoon fresh lemon juice

IMG_5247
We used small Yukon potatoes as opposed to medium-sized.

IMG_5249
The directions indicate to cut the leeks into one-inch pieces. That seemed way too large so we made slices about 1/8-inch thick. 

IMG_5251
Once cooled, the potatoes are lightly smashed.

IMG_5252
Smashed potatoes are browned on both sides in oil in a hot skillet.

IMG_5254
I added the leeks and garlic as soon as I turned the potatoes instead of waiting.

IMG_5255
Lemon zest and juice are tossed well with the cooked potatoes and seasoned with salt and pepper.

Directions

  1. Steam potatoes in a steamer basket in a covered pot filled with 2″ water until tender, 15-20 minutes. Transfer potatoes to a plate; let cool. Press with your hand to flatten until skins split and some flesh is exposed (a few may fall apart).
  2. Heat half of 1/3 cup oil in a large skillet over medium-high. Add half of potatoes; season with salt and pepper. Cook, tossing occasionally, until potatoes start to brown, 8-10 minutes. Add half of leeks and garlic; cook, tossing, until potatoes are brown and crisp and leeks are golden and soft, about 4 minutes. Transfer to a large bowl. Repeat with remaining oil, potatoes, leeks, and garlic.
  3. Add lemon zest and juice to potatoes and toss well; season with salt and pepper. Serve drizzled with more oil.

Recipe from Bon Apétit by Alison Roman

Vecchia Osteria by Pasquale

Justa harda working man trying to live the American dream! So says Pasquale Palino, (formerly of LaStalla, one of our Newtown faves), executive chef at Vecchia Osteria. It’s a wonderful Italian, bring-your-own, local, family-owned gem, conveniently located in the heart of Newtown, Bucks County, PA. The menu is authentic Italian cuisine—each dish made with the freshest ingredients and cooked to order. Who can argue?

I believe it’s been around for several years now so it’s a small wonder that we never heard of it until very recently. During the warm weather, they have a huge outdoor seating area which we looked forward to enjoying with friends Rosanne and Gary on a recent Saturday night. However, Mother Nature, who has been cranky the entire month of May, was still not cooperating, so we were seated inside.

But before we hit the road, Rosanne and Gary stopped by our digs for cocktails and hors d’oeuvres. It was a brief visit due to a time mix-up but we did get to enjoy an antipasto platter that Rosanne cleverly assembled (in a purple ceramic oblong basket from Italy, no less.) And earlier in the day I spotted a goat cheese and yogurt dip recipe in my Rachel Ray magazine that would pair perfectly with some seasonal fresh radishes.

IMG_5579

IMG_5575

Forward ho! Despite the nasty weather, it was packed when we got there, every seat was taken—a testament to Pasquale’s talents. If you plan on going, definitely call for reservations. Nearly every inch of wall—and ceiling—was covered with corks, framed photos, bunches of grapes, and light fixtures made of green wine bottles. And parts of the restaurant had copper tin ceilings for an old-world effect. The following images were taken from their website to give you a visual snapshot of the place without people.

6969e8_e2d406b2789a45fdb78572bbd2272033

6969e8_a3c1d9c10a774cfdb31ce8169ac8f7cf

6969e8_51eb51dcf5b248cea035a6ef91195b33

6969e8_1a98a44561c34d3d99349b899988e2c7

6969e8_8938549ab46a4c4a86f209ec33267574

Bright yellow walls and most of the serving vessels were a similar sunny hue lending a summery atmosphere to an otherwise dismal day. Our attention turned to the V.O. menu which lists many traditional Italian appetizers, soups, salads, pasta and meat choices. Service is not slow, but in true Italian fashion, you don’t feel rushed either. We spent a nice leisurely evening enjoying our food and wine and never felt like they were trying to “turn our table.”

Now about that food…

Yes, we did imbibe in some appy’s at our house just a short while ago, but we had to sample some of theirs because, after all, I needed fodder for this blog! In that vain, the Zarrilli’s split a plate of Calamari with Red Sauce, and the Mr. and I enjoyed the Roasted Red Peppers & Mozzarella.

IMG_5582

IMG_5584

Surprisingly we were all on the same page as far as entrée choices in that we each selected a veal dish (all veal entrees are served with the vegetable of the day).

Gary—Vitello alla Parmigiana, veal breaded and lightly pan fried, topped with fresh mozzarella and tomato sauce:
IMG_5588

Rosanne—Vitello Donatella, veal topped with roasted red peppers, crabmeat and fresh mozzarella in a white wine sauce:
IMG_5587

Russ and Lynn—Vitello ai Funghi, veal sautéed with wild mushrooms and sundried tomatoes in a marsala port wine sauce:
IMG_5585

Verily, if you choose to herein imbibe,
Ever must you follow the rules of Pasquale’s tribe,
Commandments, they are, to guide your culinary stay,
Consider them writ in stone, as they say!
Have no other chefs, Pasquale’s the one,
In here you must smile and have lots of fun,
Always leave, though, not linger, when you are done!

Our kitchen is popular, please patiently wait,
So keep your reservation, and don’t be late,
The fare is all original, Neapolitan style,
Everything’s freshly made, but that takes a while!
Red wine or white, please bring what will fit,
In here you can indulge, that’s why we’re a hit,
About overdrinking, FORGET ABOUT IT!

As we headed out the door for the car, the weather was even worse than when we came in! But we’ll be back, and hopefully dining al fresco!

Dine Seaside Tonight

Bright and full of flavor, Shrimp Scampi is quick enough for a weeknight meal, but it’s also sophisticated enough for a dinner party. So whether it’s just you or a gathering, serve it with pasta, rice, or crusty bread to sop up the yummy garlicky butter sauce.

This is one of the best scampi recipes we’ve ever had — most likely because of the shrimp stock. And the bonus is, since you only use a 1/4 cup of the stock, you have 2 cups leftover for another seafood meal or soup. Or, freeze some in 1/4 cup quantities so the next time you make this scampi, you won’t have to go through the entire process again!

For the shrimp, we had 1 1/4 pounds of shrimp with intact heads in the freezer. Which by the time we decapitated them, our volume was about one pound, as opposed to the 1 1/2 pounds the recipe calls for, making just enough to split between the two of us without any leftovers…. bummer.

Being aficionados of bold flavors, we doubled the amount of garlic and added a healthy 1/4 teaspoon of red pepper flakes. As a garnish, we reserved some of the chopped fresh parsley to add a pop of green sprinkled on the finished dish. Make sure to add a lemon wedge to each plate for a fresh squeeze of citrus as a final flavor enhancer.

A definite keeper!!

IMG_4713
Making the stock with veggies and shrimp shells. Note the black eyeballs of the crustacean heads.

IMG_4714
After removing shells and heads, the shrimp are patted dry and sprinkled with salt and pepper.

IMG_4715
After the stock is made, cook butter, parsley, garlic, and lemon zest for a few minutes.

IMG_4716
The shrimp are added briefly to the parsley-garlic sautée.

IMG_4717
As the heat is raised, other ingredients are incorporated before the shrimp are removed to finish the sauce.

Ingredients

  • 1-1/2 lb. extra jumbo shrimp (16 to 20 per lb.), peeled and deveined (shells reserved), tails left on, if you like
  • 1 medium carrot, chopped
  • 1 medium rib celery, chopped
  • 1 small yellow onion, halved
  • 1 bay leaf
  • Kosher salt and freshly ground black pepper
  • 2 oz. (4 Tbs.) unsalted butter
  • 1/4 cup finely chopped fresh flat-leaf parsley
  • 3 large cloves garlic, minced (2 Tbs.)
  • 1 Tbs. finely grated lemon zest
  • 1/4 cup dry white wine
  • 1 tsp. fresh lemon juice
  • Crushed red pepper flakes (optional)
  • Lemon wedges for serving

Directions

  1. In a 4-quart saucepan, combine the reserved shrimp shells, carrot, celery, onion, and bay leaf. Add 4 cups of water. Bring to a boil over medium-high heat, reduce the heat to a simmer, and cook for 30 minutes.
  2. Strain the stock through a fine-mesh sieve and reserve 1/4 cup for the scampi. (Freeze the rest for other uses.)
  3. Pat the shrimp dry and season with 1/2 teaspoon salt and 1/4 tsp. pepper. In a 12-inch heavy-duty skillet, melt 3 tablespoons of the butter over medium heat. Add the parsley, garlic, and lemon zest and cook, stirring occasionally, until the garlic is lightly golden, 1 to 2 minutes.
  4. Raise the heat to high, add the shrimp, and cook until they start to turn pink, about 1 minute. Add the wine and cook until reduced by half, 1 to 2 minutes. Add the reserved shrimp stock and simmer until the shrimp are just cooked through, 1 to 2 minutes.
  5. Add the lemon juice and crushed red pepper flakes, if using, and stir to coat.
  6. With a slotted spoon, transfer the shrimp to a serving plate. Whisk the remaining 1one tablespoon butter into the sauce. If the sauce seems thin, simmer it gently for a minute or two to thicken.
  7. Season to taste with salt and pepper, pour over the shrimp, and serve with the lemon wedges on the side.

NOTE: After the shrimp are cooked, remove them with a slotted spoon and swirl in the last tablespoon of butter; add the shrimp back to coat and serve.

IMG_4721
Whisk in the remaining tablespoon of butter and let thicken for a minute or two.

IMG_4723

by Melissa Pellegrino from Fine Cooking

Quackilicious!

How exciting, another new (somewhat local) BYOB with famed food critic Craig LaBan’s stamp of approval! As soon as we read the review on The Blue Duck we made reservations (highly recommended and easily accomplished online) for an upcoming Friday night with friends Barb and Brad.

But our plans came to a screeching halt because Mr. Hartman was stuck in a major traffic jam on his way home from work. When he finally did get home, he had no intention of getting back in a car and driving for any length of time, so we just went local in Langhorne.

take.two.clipboard

Two weeks later we attempted again, and made sure to make the reservations days in advance…

The Blue Duck is a bright little 40-seat restaurant set into an anonymous strip mall in Northeast Philly. The decor is pretty basic with white subway tile, a kitchen counter, and a long, wood community table up front beside the entrance. It succeeds with creative updates to such comfort food favorites as “Quack & Cheese,” burgers ground with pork roll, and more ambitious dishes that don’t necessarily all include duck. But throw your diet out the window because most offerings are not lo-cal. Treadmill here I come…

blue-duck.interior.room

It’s a BYOB, so a good craft beer or a hearty red wine are great choices to pair with the richness of it’s updated comfort food. Many intriguing specialties include chorizo mac; General Tso’s wings (and tacos); duck fries; cauliflower soup; deconstructed French onion soup; fried tri-color cauliflower; wild boar meatloaf; sweet potato gnocchi; scallops with barley salad; and Mason jar cheesecake. Or even something as refined as Moroccan-spiced cobia atop sunchoke risotto ringed by a light tomato broth. And how about Wild Boar Meatloaf wrapped in bacon?

IMG_5552
A partial look at the menu.

IMG_5555
Brad having a chuckle over something.

IMG_5554

Opened in the middle of a tiny strip mall in September, 2014, The Blue Duck is a locally-owned and locally-operated New American eatery in Northeast Philadelphia, where co-owners Joe Callahan, Kris Serviss and their staff prepare fresh ingredients daily to provide a unique and comforting dining experience to every person alive.

IMG_5557
An order of the infamous Blue Duck Fries.

Blue Duck Fries: A house favorite, they are hand-cut fries tossed in duck fat, smoked Gouda cheese sauce, shredded duck confit and scallions. We placed an order to share between the four of us, and while we wiped the plate clean, I was slightly disappointed that the fries were not more “crispy.”

IMG_5559
Their luscious Spring Onion Soup topped with grated cheddar.

IMG_5565
Microgreens top Russ’s Everything-Spiced Duck entree.

IMG_5568
Lynn’s Red Pepper Tagliatelle with asparagus and lump crab meat.

Russ started with a bowl of their Spring Onion Soup with cheddar cheese, brioche croutons (which he declined) and chili oil. For his entree, drum roll please, he chose the Eveything-Spiced Duck Breast, what a shocker! It came with roasted fingerling potatoes, brussels sprouts, and a whipped boursin cheese.

I had it all planned ahead of time to order the Pan-Seared Scallops, but at the last minute changed my mind and opted for the Red Pepper Tagliatelle with ramp pesto, asparagus and lump crab meat, loved it!

IMG_5560
Barb enjoyed her turkey patty burger with bacon and avocado.

IMG_5562
Close up of the House Grind Burger topped with your choice of cheese for Brad.

Our dining guests both ordered burgers. Barb selected the S.F.Y., a ground turkey patty with avocado, bacon, and cheddar on a brioche roll with habanero mayo. While hubby Brad, who adores burgers, (kid you not, he once said that if he ever had to choose a last meal, it would be a big, fat juicy burger) got the House Grind Burger made up of a homemade beef patty, lettuce, tomato, red onion and choice of cheese on a brioche roll slathered with a garlic mayo.

Does The Blue Duck still need to unruffle some feathers? Maybe a few. Glaring lights and a deafening noise level didn’t add any sophistication to our dining experience. Russ noted a few tables of all women and commented whenever that’s the case, loud raucous conversations are a by-product. Should I be offended? Probably, but it does seem to hold a kernel of truth… Once the crowd started thinning out, communication was much more pleasant.

Quack, quack, will we be back? Not sure this will be a must-do-again destination given the distance from our house, but I would recommend it if you’re going to be in the vicinity. The food is definitely top-notch!

The Blue Duck also offers brunch every Sunday from 10 a.m. – 3 p.m., highlighted by homemade Chicken & Waffles and their Duck Benedict.

Crispy Tofu with Sesame Asparagus

Great tofu is not an oxymoron. Simply put, it is tofu with a tender center surrounded by a well-seasoned, crisp crust and is one of the most satisfying bites of food which should be appreciated by all serious eaters, no matter your diet. But there’s a lot of bad tofu out there, and it’s easy to dislike when it’s soggy, mushy, or bland. Been there, done that…

The key to both crispness and browning is the removal of moisture, so the drier you get your tofu to begin with, the better the contrast will be between the crisp exterior and moist, tender interior.

IMG_5436

There’s all matter of ways to remove excess water from tofu. Some recipes recommend pressing your whole block of tofu to remove excess moisture before slicing. I’ve done this method often, and it works fine, but takes some time. Much easier is to slice the tofu, then lay the slices out flat on a cutting board or baking sheet lined with paper towels or a clean kitchen towel. More surface area = faster water removal = dinner on the table that much faster = happy family.

A coating of panko (Japanese breadcrumbs) is the secret to these ultracrisp tofu triangles. Hoisin sauce does double duty, adding flavor to the tofu’s coating and serving as a sweet-tangy dipping sauce.

Make sure that the pan is smoking hot before you add the asparagus, and then don’t touch it for at least a minute. You’ll get a great char on the asparagus and super flavor. One reviewer suggested that if you’re a total tofuphobe, this recipe would be fantastic on chicken tenders or long zucchini slices. Food for thought…

The dish goes well with a rice salad or an herb salad dressed with a simple Gingery Asian Vinaigrette.

IMG_5444

Ingredients

  • 1 14-oz. package extra-firm tofu, drained
  • 1/2 cup plus 3 Tbs. hoisin sauce
  • 4 Tbs. seasoned rice vinegar
  • 3/4 tsp. Asian chili garlic sauce
  • 2 large eggs
  • 4 tsp. Asian sesame oil
  • Kosher salt
  • 2 cups panko
  • 1/2 cup cornstarch
  • 1/4 cup plus 1 Tbs. peanut oil
  • 1 lb. medium asparagus, trimmed
  • Freshly ground black pepper
  • 2 tsp. toasted sesame seeds

Directions

  1. Slice the tofu in half crosswise. Slice each half once on the diagonal, lay cut side down, and cut each vertically into 3 slices, to make 12 triangles. Arrange the slices on double-thick layers of paper towels and press to remove as much moisture as possible. Repeat as necessary to dry the tofu well.
  2. In a small bowl, whisk 1/2 cup of the hoisin sauce, 3 Tbs. of the vinegar, and the chili-garlic sauce. Set aside.
  3. In a shallow dish, lightly beat the eggs with the remaining 3 Tbs. hoisin sauce and 1 Tbs. vinegar, 2 tsp. of the sesame oil, and 1/2 tsp. salt. Put the panko and cornstarch in separate shallow bowls. Lightly season the tofu on both sides with salt. Dredge each piece of tofu in the cornstarch, shaking off the excess, then in the egg mixture, and then in the panko, setting the triangles on a plate as you finish each one.
  4. Heat 1/4 cup of the peanut oil in a 12-inch nonstick skillet over medium-high heat. When the oil begins to shimmer, add half of the tofu triangles and cook, turning once, until golden and crisp, about 2 minutes per side. Transfer to a paper-towel-lined plate, and season lightly with kosher salt. Repeat with the remaining tofu.
  5. Wipe out the skillet, add the remaining 1 Tbs. peanut oil and return to medium-high heat. When the oil begins to shimmer, add the asparagus, and cook, turning, until crisp-tender, 3 to 5 minutes. Add the remaining 2 tsp. sesame oil and toss well. Season to taste with salt and pepper. Sprinkle with the sesame seeds. Serve the tofu and asparagus with the dipping sauce on the side.

IMG_5437
Block of tofu is drained. 
IMG_5440
Slice the tofu in half horizontally, and then each piece in half again to make four slabs.

IMG_5441
Each plank is cut into triangles of approximate size.

IMG_5442
Triangular tofu slices are drained on paper towels several different times to extract the moisture.

IMG_5446
In a shallow dish, lightly beat the eggs with the remaining hoisin sauce, vinegar, and sesame oil.

IMG_5447
Whisking the ingredients to well combined.

IMG_5452
Dust each tofu triangle in cornstarch, then the egg mixture, followed by a coating of panko crumbs.

IMG_5456
The tofu is browned on both sides for a few minutes, and done in two batches.

IMG_5457
Once crisped, lay the tofu on several layers of paper towels and salt immediately.

IMG_5458
Wipe out the skillet before you cook the asparagus.

By Laraine Perri from Fine Cooking, from the Make It Tonight series.

Michelin-Caliber “elements”

As has been our tradition since we began dating, when our respective birthdays arrive, the honoree chooses the venue, the other pays the tab. And this year, Russ chose elements (lower case “e”), a Michelin-caliber experience, situated in a lovely, loft-like second-floor space, braced in wooden rafters and stone, above Mistral in Princeton. Philly food critic Craig LaBan gives it a rating of 3 Bells. What can I say, my guy has good taste…

Mid-May is often a difficult time of year to obtain reservations at high end restaurants due to all kinds of celebrations. We know first-hand because it is a yearly ordeal for Russ’s birthday. As luck would have it, we actually got a booking, albeit at 8:15, on a Saturday night in mid-May. And with just nine tables in the main dining room, it was even more surprising. The dining Gods were on our side.

1.russ.lynn.at.elements
A waiter was kind enough to take our picture next to the open kitchen as we were leaving.

The elements team—executive chef and co-owner Scott Anderson, who according to LaBan “Anderson’s food can be as exceptionally delicious as it is quirky,” chef de cuisine Mike Ryan, and their team of visionaries in the kitchen—place a first-rate focus on fresh ingredients, many of which are sourced from local farmers and producers. They transform classic dishes into something altogether new utilizing innovative, modern techniques to draw out the purest flavors. Refreshingly, the seasonally driven menu changes daily and places a heightened focus on tasting menus. These descriptors reeled us in, hook, line and sinker!

In simple terms, a dinner at elements is this: Mannered. Urbane. Clever. Luxuriant. Restrained. Also, playful. Also, emotional.    — By Teresa Politano | For Inside Jersey

Elements, with its flexible approach allows diners to tackle anywhere from four courses on weeknights, five or more courses on weekends, and up to 20-plus for the $185 Grand Tasting. Holey-moley, one has to have a huuuugge appetite (not to mention wallet) for that! Since our reservations were on a Saturday, we were going to enjoy five courses…

Not finding any immediate street parking in downtown Princeton, there was a garage just a few short blocks away from our destination, so we took advantage and pulled in. Used to paying Philly prices, we were shocked to see the rate was only $5 for three hours. Even more shocked when we paid to drive out—a mere $1.75 total—the parking Gods seemed to be on our side too!

We initially entered into the bar Mistral on the first floor where a host immediately greeted us, and whisked upstairs via elevator to the modernly appointed elements on the second floor. Their attention to detail never wavered from the moment they pulled out my seat, to exchanging flatware between every course, to warm hand towels after the “amuse bouche” plates, and a final touch of warmed milk with your coffee.

After being seated by a window overlooking famed Witherspoon Street, we were presented with two dining options with separate menus (one had more courses, and of course cost more dinero), and a very large and thorough wine list from our friendly and knowledgable waiter, dressed in suit and spiffy bowtie. An inquiry was made regarding the wheat food allergy I noted in the online res, so when Russ told him he avoids gluten, they accommodated him with homemade gluten-free bread and substituted peas for the farro in the steak dish.

IMG_5482
Their homemade breads were unbelievable, enough that I finished the entire slice of the grain bread and a bit of the chewy, crusty loaf—and I don’t typically eat bread…

After selecting a Spanish red, Peña El Gato, from the Rioja region, one of the chefs appeared at our table with a bird’s nest in hand, filled with two beautiful quail eggs that were cured in wine lees and smoked to perfection with a delicate outer white and soft-boiled-like, creamy interior. I must confess, I’d never eaten a quail’s egg that I know of, but I was impressed.

IMG_5472
Two smoked quail eggs are presented table side in a gorgeous bird’s nest.

IMG_5473
We were told to pick up the eggs in hand and eat them that way.

Next up, while a stereo played Pink Floyd’s “Dark Side of the Moon” and other 70’s favorites, another chef delivered a little plate with two beautiful squares—but for the life of us we can’t remember what they were—other than very good. We think they were called Panisse…

IMG_5474
The second amuse bouche of the night that we think was called Panisse…

IMG_5477
Even the warm hand towels were presented on a beautiful ceramic plate.

Before the actual courses started to arrive, we received two warm hand towels on a beautiful artistic plate. In fact, each course was arranged on a different vessel that complimented the food. My coworker Francis informed me the day prior to our outing that elements crockery is made especially for the restaurant by John Shedd at his studio in nearby Rocky Hill—a place Francis’ wife Jane works. So of course I had to take a picture of the back of a signed plate…

IMG_5493

The orchestration of the cooking, plating and delivery is interesting to experience via the open kitchen. Each chef is responsible for one of the courses and when the time is appropriate, they not only bring it to your table, but explain in detail what everything is and how it was sourced and/or cooked. Our “five courses” are described in the menu below.

IMG_5468

IMG_5480
The “live” scallop dish was topped with little white radish flowers.

IMG_5483
Japanese Kanpachi Tataki with rhubarb, green almond and spring garlic was similar to ahi tuna.

IMG_5485
Neither of us had ever tasted Barrelfish before, but it won’t be the last time either.

IMG_5487
The ribeye was sublime, and the maitake mushrooms were out of this world! Interestingly, there were no potatoes or yogurt included even though the menu said otherwise.

The dessert had a deceptively simple name, “White Chocolate” even though it was anything but simple. It featured an earl grey custard, with bits of citrus and a lemony soy milk ice cream with small planks of speckled white chocolate and topped with candied kumquat slices. Those of you that know me, know that I typically never eat dessert, but this is one time where I made an exception and ate about half before turning the remainder over to a very happy birthday boy.

4.IMG_5490

To me, bathrooms always say something about the soul of a place, and elements two spacious “WCs” were topnotch with rolled cloth hand towels, a modern wooden receptacle in which to discard the used towels, gorgeous tile work, mood lighting and modern vessel sinks.

While waiting for the check, the final food presentation was an individually wrapped, homemade bourbon chocolate topped with a dash of sea salt covering a minty, creamy white interior. Of course I had to take a taste, and again Russ was forced to finish it 😉

IMG_5495

‘In order to create a more intimate link between kitchen and diner, each course was presented and explained by a different member of the kitchen staff including the Executive Chef, Scott Anderson, and the outstanding Sous Chef, Mike Ryan, who created and served the amazing… Michelin 3-star dish… courses I’ll remember for the rest of my life.’   — DC Dining Review

This dining experience will surely be one that we also remember for a very long time… Hmmm, my birthday is coming up in a few months… If you’re looking for a venue to celebrate a special occasion, you might want to explore elements.

A Sauce for All Reasons

Crispy Pork Cutlets with Lemon-Caper Sauce was one of those fast Make-It-Tonite meals from Fine Cooking. A briny-peppery mayonnaise adds zing to these slightly spicy fried pork cutlets. And WOW were they tasty! The sauce would pair perfectly with fish or chicken cutlets too. I could even go so far as to envision it as a dip for pretzels and chips, or a crudité platter. Endless possibilities abound!

With Russ eliminating wheat from his diet, we dredged the pork in gluten-free flour and bread crumbs which gave a nice crunchy texture to the exterior of the chops. Rounding out our meal was a Spring salad of bibb lettuce, baby spinach, blanched fresh peas, radishes and cilantro tossed in a lemon vinaigrette.

TIP: Use salt when mashing garlic to a paste. Begin by finely chopping the garlic. Sprinkle the chopped garlic with a big pinch of kosher salt—the salt is an abrasive that speeds the mashing and is keeps the garlic from sticking to the knife. Mash the garlic with the side of the knife against the board. Repeat over and over until it becomes a fine paste.

Ingredients

  • 4-1/2-inch-thick boneless pork chops (about 1 lb.)
  • 1/4 tsp. chipotle powder or smoked hot paprika
  • Kosher salt and freshly ground black pepper
  • 1 lemon
  • 1/2 cup mayonnaise
  • 2 Tbs. small capers, rinsed, drained, and coarsely chopped
  • 2 tsp. chopped fresh thyme
  • 1 large clove garlic, mashed to a paste with a pinch of kosher salt
  • 3-1/2 oz. (3/4 cup) all-purpose flour
  • 2 large eggs, beaten
  • 1-1/2 cups panko
  • 6 Tbs. olive oil

IMG_5056
Pounding the pork chop with a meat mallet.

IMG_5057
A comparison in thickness before and after the meat was pounded.

IMG_5058
The spice mixture. We used pimenton picante instead of chipotle powder.

IMG_5059
The chops get happy for awhile with their spice mixture.

IMG_5061
The ingredients for the sauce are added to a small bowl.

IMG_5063
The appearance of the sauce after all ingredients are combined.

Directions

  1. Pound each chop between two pieces of plastic wrap with a meat mallet or the bottom of a heavy pan until 1/4 inch thick. Mix the chipotle powder with 1 tsp. salt and 1/2 tsp. pepper and sprinkle on the chops.
  2. Finely grate the zest of half the lemon and then juice that half. Cut the remaining half into wedges for serving.
  3. In a medium bowl, mix the mayonnaise with the lemon juice and zest, the capers, 1 tsp. of the thyme, the garlic, 1 tsp. pepper, and 1/4 tsp. salt.
  4. Put the flour, eggs, and panko in separate shallow bowls. Toss the panko with the remaining 1 tsp. thyme and 1/2 tsp. salt. Dredge each cutlet in the flour, shaking off any excess, then in the egg, and then in the panko to coat well. Transfer to a plate or platter.
  5. Heat 3 Tbs. of the oil in a 10- to 12-inch nonstick skillet over medium-high heat until shimmering hot. Add 2 of the cutlets, reduce the heat to medium, and cook, flipping once, until browned on both sides and cooked through (cut into a thicker chop to check), about 4 minutes.
  6. Transfer to a plate lined with paper towels. Wipe out the skillet and repeat with the remaining 3 Tbs. oil and cutlets. Serve with the sauce and lemon wedges.

IMG_5065
Three separate bowls contain the beaten eggs, flour and panko mixture.

IMG_5066
After lightly flouring each chop, the meat is given an egg bath.

IMG_5067
The final step for the pork before it goes in the pan is a coating in the panko mixture.

IMG_5069
The chops are browned two at a time for about 4 minutes.

by Tony Rosenfeld from Fine Cooking

Traditional Thai Dish Gets an American Make-Over

Pad See Ew—the traditional popular Thai dish of chewy, lightly charred rice noodles, with chicken, crisp broccoli, and moist egg is bound with a sweet and salty soy-based sauce. In this Americanized version Thai-Style Stir-Fried Noodles with Chicken and Broccolini, eliminating much of the stirring in the stir-fry helps achieve the all-important char that characterizes pad see ew. So contain yourself and let the food stay put, stirring each ingredient just once or twice during cooking.

The 3 components to this dish are the noodles, the sauce, and the ingredients to stir fry. Have all of them ready to toss into the wok as once you start cooking, it only takes a few minutes so you don’t want to be scrambling around the kitchen. A heads up, while the total cooking time is only around 20 minutes, it requires a good bit of prep. And you need to cook the dish in batches, combining all of the components right before serving.

The unique technique with Pad See Ew is the cooking of an egg in the wok. Bits of scrambled egg gets stuck to the other ingredients and the char it creates adds to the authentic flavor of this dish.

The flat pad thai–style rice noodles that are used in this recipe can be found in the Asian foods section of most supermarkets. If you can’t find broccolini, you can substitute an equal amount of conventional broccoli, but be sure to trim and peel the stalks before cutting. We doubled the amount of broccolini because 10 ounces only measured one small bunch in the supermarket and we wanted a larger vegetable quotient.

IMG_5282

Ingredients

CHILE VINEGAR

  • ⅓ cup white vinegar
  • serrano chile, stemmed and sliced into thin rings

STIR-FRY

  • (6-ounce) boneless, skinless chicken breasts, trimmed and cut against grain into ¼-inch thick slices
  • teaspoon baking soda
  • ounces (¼-inch-wide) rice noodles
  • ¼ cup vegetable oil
  • ¼ cup oyster sauce
  • tablespoon plus 2 teaspoons soy sauce
  • tablespoons packed dark brown sugar
  • tablespoon white vinegar
  • teaspoon molasses
  • teaspoon fish sauce
  • garlic cloves, sliced thin
  • large eggs
  • 10 ounces broccolini, florets cut into 1-inch pieces, stalks cut on bias into ½-inch pieces (5 cups)

Directions

IMG_5283

  1. FOR THE CHILE VINEGAR: Combine vinegar and serrano in bowl. Let stand at room temperature for at least 15 minutes.
  2. FOR THE STIR-FRY: Combine chicken with 2 tablespoons water and baking soda in bowl. Let sit at room temperature for 15 minutes. Rinse chicken in cold water and drain well.
  3. Bring 6 cups water to boil. Place noodles in large bowl. Pour boiling water over noodles. Stir, then soak until noodles are almost tender, about 8 minutes, stirring once halfway through soak. Drain and rinse with cold water. Drain well and toss with 2 teaspoons oil.
    IMG_5292
  4. Whisk oyster sauce, soy sauce, sugar, vinegar, molasses, and fish sauce together in bowl.
  5. Heat 2 teaspoons oil and garlic in 12-inch nonstick skillet over high heat, stirring occasionally, until garlic is deep golden brown, 1 to 2 minutes. Add chicken and 2 tablespoons sauce mixture, toss to coat, and spread chicken into even layer. Cook, without stirring, until chicken begins to brown, 1 to 1½ minutes.
    IMG_5287
  6. Using tongs, flip chicken and cook, without stirring, until second side begins to brown, 1 to 1½ minutes. Push chicken to 1 side of skillet.
  7. Add 2 teaspoons oil to cleared side of skillet. Add eggs to clearing. Using rubber spatula, stir eggs gently and cook until set but still wet. Stir eggs into chicken and continue to cook, breaking up large pieces of egg, until eggs are fully cooked, 30 to 60 seconds. Transfer chicken mixture to bowl.
    IMG_5289
  8. Heat 2 teaspoons oil in now-empty skillet until smoking. Add broccolini and 2 tablespoons sauce and toss to coat. Cover skillet and cook for 2 minutes, stirring once halfway through cooking.
  9. Remove lid and continue to cook until broccolini is crisp and very brown in spots, 2 to 3 minutes, stirring once halfway through cooking. Transfer broccolini to bowl with chicken mixture.
  10. Heat 2 teaspoons oil in now-empty skillet until smoking. Add half of noodles and 2 tablespoons sauce and toss to coat. Cook until noodles are starting to brown in spots, about 2 minutes, stirring halfway through cooking. Transfer noodles to bowl with chicken mixture.
    IMG_5296
    IMG_5291
    IMG_5298
  11. Repeat with remaining 2 teaspoons oil, noodles, and sauce. When second batch of noodles is cooked, add contents of bowl back to skillet and toss to combine. Cook, without stirring, until everything is warmed through, 1 to 1½ minutes.
  12. Transfer to platter and serve immediately, passing chile vinegar separately.

IMG_5302

Recipe adapted from Cook’s Illustrated

Meatball and Artichoke Soup

In this unusual potage, little pork meatballs with a touch of cinnamon and pine nuts make an exceptionally tasty contribution to the soup from La Cocina De Mamá: The Great Home Cooking of Spain, a favorite cookbook by Penelope CasasBread is the thickening agent, as is so often the case with traditional Spanish soups, but which posed an issue for us since Russ has forgone wheat.

The fix? We would have used gluten-free bread, but we had none on hand. Instead, Russ stirred some of the broth with a heaping tablespoon of gluten-free flour and then mixed it back into the soup. Not ideal, but it was a satisfactory solution—no complaints on our end. The only other thing we’ll probably do different the next time around is double the amount of artichoke hearts.

It made for yummy lunches during the week.

IMG_5133

Ingredients

  • 4 cups plus 2 Tbsp. chicken broth, preferably homemade
  • 1 garlic clove, minced
  • 1/8 tsp. ground cinnamon
  • 1 Tbsp. minced fresh parsley
  • 2 Tbsp. finely chopped pine nuts
  • 1 lb. ground pork
  • 3 Tbsp. breadcrumbs
  • 4-6 artichoke hearts, fresh or frozen, quartered
  • 1 large egg, separated
  • Kosher or sea salt
  • Freshly ground pepper
  • 1/4 medium onion, finely chopped
  • 1/2 tsp. sweet paprika, preferably Spanish smoked
  • 3 Tbsp. olive oil
  • 1 slice bacon
  • 1 slice good quality sandwich bread, crusts removed

IMG_5135
The bread crumbs are soaked in chicken broth before adding the pork, pine nuts, bacon, parsley, cinnamon, garlic, and egg yolk.

IMG_5136
Little meatballs are shaped by hand and lined up on waxed paper.

IMG_5138
Whisk the egg white with a fork until foamy.

Directions

  1. In a medium bowl soak the bread crumbs in the 2 tablespoons chicken broth. Add the pork, pine nuts, bacon, parsley, cinnamon, garlic, egg yolk, 1/4 teaspoon salt, and the pepper to taste and mix well with your hands. Shape into meatballs not larger than 3/4 inch.
  2. In anther bowl, whisk the egg white with a fork until foamy. Heat 2 tablespoons of the oil in a shallow casserole. Dip the meatballs in the egg white, then sauté in the hot oil until barely cooked through. Remove to a warm platter and wipe out the casserole.
  3. Heat the remaining tablespoon oil in the casserole and slowly sauté the onion until softened. Stir in the paprika, then add the 4 cups broth, the artichokes, and the meatballs. Simmer uncovered for 15 minutes.
  4. Break up the bread slice and combine in a small bowl with 4 tablespoons broth taken from the casserole. Whisk until smooth. Stir into the soup, taste for salt, and serve.

IMG_5144

What the Fook?

Ed Mortka, never having been to the Chinatown section of Philadelphia, suggested we meet there for dinner and drinks this past Saturday. To that end, Russ did a little research and output a list of about 30 possible eateries. I narrowed it down to nine restaurants, and we sent those choices to the Mortkas, with Karen selecting the winner, Lee How Fook. Now that’s what I call teamwork!

However, our rendezvous started an hour-and-a-half before reservations allowing us time to walk the ‘hood. Our first choice for drinks was the questionably named Hop Sing Laundromat, on Race Street described as a swanky speakeasy-style bar with meticulously made cocktails. Claiming to be one of Philly’s best, it also comes with a list of rules—such as no phones—long wait lines, and a provocative owner known to be polarizing. Hmmm, sounds intriguing…

hop-sing-laundromat
The difficult to find entrance to Hop Sing Laundromat.

First, you have to find the place. With Ed and Russ both using smart phones you’d think it would’ve been easy. But Hop Sing does not have a sign out front, nor anything else to indicate it’s whereabouts. One clue, we noticed four middle-aged couples standing outside a metal-caged door, when eventually a doorman popped his head out. Based on a cash-only policy and a passerby’s comments about knowing some secret code, plus a strict dress code: no sneakers, no shorts, no tank tops, we said “The Fook With This” and opted to patronize another establishment, which led us to Bar Ly.

karen.ed.barly

lynn.russ.barly
Both couples enjoying pre-dinner drinks at Bar Ly.

It’s Chinatown’s first craft beer bar, that boasts a high-quality lineup of 60 taps. They also serve cocktails and wine by the glass, so something for everyone. And if you’re so inclined, large TV screens line the walls airing every possible sport for your viewing pleasure. Luckily it wasn’t loud, and it was happy hour so we enjoyed catching up over low-priced drinks. A little over an hour later, it was time to walk the few short blocks to dinner.

lee-how-fook1

Located on North 11th Street in Philadelphia, Zagat-rated, BYOB Lee How Fook has been in business for over 30 years. Chef and founder Shing Chung immigrated from China bringing his cooking talents to Philadelphia’s Chinatown in the 1970’s; while his son-in-law Andrew has turned it into a modern day BYOB classic gem with an authentic take on Cantonese cuisine.

And that authentic menu is extensive, with all choices very reasonably priced. In fact, one site says the price averages $30 per couple (our tabs were just slightly higher than that.) Choices include chef’s specials, restorative soups, whole steamed fish, and excellent hot pots, among many other options. I got to tell ya, it was extremely hard to narrow down to only a few selections.

IMG_5336
We all loved the pan-seared pork dumplings.

IMG_5340
The mixture for the lettuce wraps was made up of chicken, scallions, bean sprouts and sauce.

IMG_5343
A bit of meat mixture in a lettuce leaf before it is wrapped.

IMG_5339
A small bowl of Crab and Asparagus Soup.

Deciding to start with some shared appetizers, we chose Pan-Seared Pork Dumplings, Lettuce Wraps, and Crab and Asparagus Soup for four. There was audible ooohing an aaahing as we savored every bite. One complaint though, they brought the entrees while we were still enjoying the starters, so we felt a bit rushed. Oddly, several groups walked in after us but were turned away—unusual as there seemed to be numerous open tables in the relatively small restaurant.

IMG_5342
Ed’s Fried Noodles with Mixed Seafood entree.

IMG_5345
A close-up of Russ’s Duck with Black Bean Sauce.

Back to those entrees. Russ surprised no one when he ordered Duck with Black Bean Sauce, which arrived laden with crisp-tender vegetables. Ed chose the Pan Fried Noodles with Mixed Seafood and bok choy, and absolutely loved it. (He was the only one lucky enough to have leftovers.)

IMG_5346
Scallops in Mandarin Sauce enjoyed by both Lynn and Karen.

Karen and I both opted for the Scallops with Mandarin Sauce—with Karen ordering less-spicy, and me, extra-spicy. However we were both disappointed that the dish didn’t come with any vegetables. In hind sight we should’ve ordered additional veggie sides from their long list which included green beans, eggplant, broccoli, bok choy, and snow peas to name a few. We’ll know better next time.

After dinner, the night was still young so off we went in search of a place for coffee and dessert. Just up the street on 11th, A La Mousse which specializes in cleverly created customized cakes, Italian pastries, cannolis, cream puffs, and eclairs, seemed to fit the bill. We walked in and snagged a picnic table just in time before the rush piled in causing a line out the door.

a.la.mousee.tray.png
A worker shows off a tray of gorgeous sandwich desserts.

karen.russ
Karen and Russ ponder which desserts to order.

IMG_5353
Karen and Ed split a slice of Double Chocolate Mousse Cake.

IMG_5361
Russ enjoyed the artfully plated Tea-R-Misu dessert.

IMG_5362
Lynn’s Green Matcha Tea.

While still not too late, we decided to bid farewell after our leisurely dessert. But I know we’ll be back to Chinatown to check out a few more restaurants and perhaps even make it into Hop Sing Laundromat for those specialty cocktails—but I won’t be able to take any photos 😦