Category Archives: Uncategorized

Penne with Smoked Ham, Peas, and Mint

Refreshingly Spring! Fresh mint, a classic pairing with peas, brightens this creamy pasta dish. This melodious and quick meal came from Fine Cooking’s Make It Tonight series by Jessica Bard. Many of our recipes tend toward the spicy side of life, but this one exudes a mellower composite of flavors without being bland.

IMG_4373

The little mezze penne size made for a perfect mouthful without screaming pasta. And our ham was not smoked and weighed in at closer to over a half pound. No leftover ham? The recipe would work fine with one (or two) of those prepackaged slices. Or try a thick slice of pancetta to amp up the flavor.

Disappointingly the grocery stores weren’t carrying fresh peas, even though it was the height of Spring 😦 But the frozen variety worked quite nicely, just make sure to thaw them ahead of time. And I made a birdbrain move while shopping when I grabbed the feta cheese because I unknowingly picked up fat free, so to compensate, we also included some grated parm. All-in-all, we really liked this dish.

IMG_4367

Penne with Smoked Ham, Peas and Mint

  • Servings: 3-4
  • Difficulty: easy
  • Print

Ingredients

  • Kosher salt
  • 2 Tbs. extra-virgin olive oil
  • 1/2 medium yellow onion, thinly sliced lengthwise
  • 1/4 lb. sliced smoked ham, cut crosswise into 1-inch strips
  • 1/2 cup heavy cream
  • 1/8 tsp. freshly grated nutmeg
  • 1-1/2 cups fresh green peas (from 1-1/2 lb. peas in the pod) or thawed frozen peas
  • 1/2 lb. dried mini penne
  • 2-1/2 oz. feta, crumbled (about 1/2 cup)
  • 1/3 cup chopped fresh mint

Directions

  1. Bring a large pot of well-salted water to a boil.
  2. Meanwhile, heat the oil in a 12-inch skillet over medium-high heat. Add the onion and cook, stirring, until browned, about 3 minutes. Add the ham and cook, stirring, until heated through, about 1 minute.
  3. Add the heavy cream and nutmeg and bring to a boil. Add the peas, turn the heat down to medium, and simmer, stirring often, until the peas are cooked through, about 4 minutes. Remove from the heat.
    IMG_4371
  4. Cook the pasta according to package directions until al dente. Reserve 1/2 cup of the pasta cooking water, drain the pasta, and return it to the pot.
  5. Toss with the sauce, half of the cheese, and half of the mint, adding some of the reserved pasta water, if needed, to make a creamy sauce. Put all into a large pasta platter bowl or divide among 4 plates and top with the remaining cheese and mint.
    IMG_4372

IMG_4375

Deconstructed Chicken, Sausage and Veggie Kebabs

Woohoo! It is FINALLY grilling weather here in the Northeast U.S. After what seemed like an endless winter, the month of May blossomed with above average temps, low humidity, a soothing breeze, and a break from the wetness. Everywhere you look, people are smiling and I’m feeling human again…

Time to bust out the “ole barbie.” And while you can grill just about anything, we were in the mood for our tasty Deconstructed Chicken, Sausage and Veggie Kebabs. What’s nice about these puppies is you don’t have to thread every single morsel unto a skewer. The veggies all get dumped into a heated grill basket and only the meat pieces are speared. (Since the sausage cooks quicker than the chicken, they need to be on separate spikes.) Portioning the ingredients this way allows diners to eat as little or as much meat and vegetables as they prefer.

IMG_4400

Speaking of the meat, if you’re not a dark meat fan (white meat is usually my preference), go ahead and use chicken breasts instead. And while we opted for some Iberico Buttifara Spanish sausage, go wild and crazy with whatever brand your little heart desires—just make sure to choose fat links.

IMG_4387

And BTW, we prefer the flat metal skewers as opposed to the round wooden ones. Reasons being, you don’t have to soak them so they won’t catch fire, and because they’re flat the morsels stays in place; plus they are reusable—waste not, want not. An added grain such as couscous, rice, orzo or quinoa rounds out the meal.

NOTE: The spelling kabob is mostly used by North Americans as they try to transliterate the sound for the dish, kebab, that is made with grilled meat in Arab countries.

IMG_4389

Deconstructed Chicken, Sausage and Veggie Kebabs

  • Servings: 4
  • Difficulty: simple
  • Print

Ingredients

  • 1¼ lbs. boneless skinless chicken thighs, cut into 1½” pieces
  • 12 oz. (3) fat sausage links, cut into 18, 1″ pieces
  • 1 red pepper, cut into cubes
  • 1 yellow pepper, cut into cubes
  • 1 onion, cut into wedges
  • 12 mushroom caps
  • 1 zucchini, ½” slices
  • 8-10 whole, peeled garlic cloves, lightly smashed, large cloves cut in half

Balsamic Marinade: (makes 1¼ cups)

  • ½ cup balsamic vinegar
  • ½ cup canola oil
  • 2 Tbsp. dijon mustard
  • 2 Tbsp. honey
  • 1½ tsp. dried, crushed rosemary
  • 1 tsp. salt
  • ½ tsp. pepper

Directions

  1. To a small bowl add balsamic vinegar, dijon mustard, honey, crushed rosemary, salt, and pepper. Whisk together and slowly add in the canola oil whisking the entire time.
  2. In 2 quart-size ziplocs, add chicken to one bag and sausage pieces to the other with and ¼ cup of the balsamic mixture to each bag.
  3. Add the cut veggies to a jumbo ziploc with a ½ cup of the marinade and reserve the remaining ¼ cup mixture. Seal and shake to make sure all the veggies are coated.
    IMG_4391
  4. Place all 3 bags in the refrigerator for at least 30 minutes or up to 4 hours to marinate.
  5. Preheat grill to high heat (600-700 degrees F). Place the oiled veggie basket onto the grill to heat up for at 10 minutes.
  6. Remove the ziplocs from the refrigerator and start to assemble the meat onto skewers. Keep the chicken and sausage on separate skewers.
  7. Pour the veggies into the hot basket and turn them with a spatula every couple of minutes until crisp-tender, about 15 minutes total.
    IMG_4395
  8. Lower the heat to medium hot (about 400 degrees). Oil the grates and place kebabs on the grill.
  9. Turn each skewer a few times to char on all sides. The sausage will be done in about 4-5 minutes, so place those on top of the basket to keep warm while the chicken cooks another 3-4 minutes.
    IMG_4396
  10. Brush the remaining marinade on the chicken for one last flavor burst. Grill for 30 seconds more.
  11. Remove from grill. Place the veggies in a serving bowl and slide the meat off of the skewers onto a platter or individual plates.
    IMG_4398
  12. Serve over couscous, rice, or orzo.
    IMG_4403

http://www.lynnandruss.com

Glazed Apple Crumb Muffins—Sure To Impress

99.9% of the time I do not eat sweets or baked goods, especially for breakfast. But I volunteered for a Master Gardner event that took place starting early on a Saturday morning, and they requested donations of homemade breakfast items to help feed the crew.

Yeah, I could’ve bought a dozen bagels from a local bakery, but that’s just not the way I roll (pun intended). So after a bit of nosing around on the Internet, I found a tempting Glazed Apple Crumb Muffin recipe (thanks to sallysbakingaddiction) that I altered a bit. I particularly liked the fact that I had all of the ingredients on hand and didn’t have to make a special trip to the supermarket.

IMG_4447

Well, of course I had to try one before I submitted the muffins to the event, right? Wouldn’t want to put something out there that was inedible, you follow? While still warm, I sliced one in half and took a bite… then another bite… and another, until it was all gone! It literally melted in my mouth. Nobody was more shocked than me…

A dozen of these were earmarked for the event, one I ate, and one was saved for Hubby. Knowing his abhorrence of walnuts, I left that muffin sans nuts. Sometimes you feel like a nut, sometimes you don’t 😉 BTW, Russ ate his the next morning before heading to work, and he agreed, it was truly yummy.

How did they fare with the volunteer crew? I’m not totally sure, but several of my mates grabbed one during our lunch period and planned to nosh on it later…

IMG_4489Above, Chris holds one of the muffins as does Terri (can only see her arms in the lower right); while George gives us a radiant smile.

Glazed Apple Crumb Muffins

  • Servings: 14 muffins
  • Difficulty: moderately simple
  • Print

Ingredients:

CRUMB TOPPING

  • 1/3 cup packed light or dark brown sugar
  • 1 Tablespoon granulated sugar
  • 1 teaspoon ground cinnamon
  • 1/4 cup unsalted butter, melted
  • 2/3 cup all-purpose flour
  • 1/2 chopped walnuts or pecans (optional)

MUFFINS

  • 1/2 cup unsalted butter, softened to room temperature
  • 1/2 cup packed light brown sugar
  • 1/4 cup granulated sugar
  • 2 large eggs, at room temperature
  • 1/2 cup whole milk yogurt, at room temperature
  • 2 teaspoons vanilla extract
  • 1 3/4 cups all-purpose flour
  • 1 teaspoon baking soda
  • 1 teaspoon baking powder
  • 1 teaspoon ground cinnamon
  • 1/2 teaspoon salt
  • 1/4 cup milk (I used 2%), at room temperature
  • 1 1/2 cups peeled apple, 1/4″ dice (2 small apples)

GLAZE

  • 1 cup confectioners’ sugar
  • 3 Tablespoons heavy cream
  • 1/2 teaspoon vanilla extract

Directions:

  1. Make the crumb topping: In a medium bowl, combine both sugars, the cinnamon, and melted butter. Using a rubber spatula, stir in the flour. The crumb topping will be thick and crumbly. Set aside.
    IMG_4432
  2. Preheat oven to 425°F. Line a 12-count (or two 6-count) muffin pan(s) with cupcake liners. You may need a 2nd pan as this recipe makes up to 14 muffins, though you can always bake in batches using 1 pan. Set aside.
  3. Make the muffins: Using a stand mixer fitted with a paddle attachment, beat the butter and both sugars together on high speed until smooth and creamy, about 2 minutes. Scrape down the sides and bottom of the bowl as needed. Add the eggs, yogurt, and vanilla extract. Beat on medium speed for 1 minute, then turn up to high speed until the mixture is combined and uniform in texture. Scrape down the sides and bottom of the bowl as needed.
  4. With the mixer on off, add in flour, baking soda, baking powder, cinnamon, and salt. Mix on medium-low for a couple minutes to combine everything, scraping down sides as needed.
  5. Add the milk and apple, and mix on low speed until everything is combined.
  6. Spoon the batter evenly into each cup or liner, filling each almost to the top. Press a handful of the crumb topping into the top of each.
    IMG_4436
  7. Bake for 5 minutes at 425°F degrees, then keeping the muffins in the oven, lower the oven temperature to 350°F and bake for 15-17 more minutes or until a toothpick inserted in the center comes out clean. The total time these muffins take in the oven is about 20-22 minutes. Let cool for about 15 minutes before adding the glaze.
    IMG_4439
  8. Make the glaze: Whisk all of the ingredients together and drizzle over slightly warm muffins. Top with chopped nuts if using.
    IMG_4452

http://www.lynnandruss.com

Muffins stay fresh stored at room temperature for a few days– then transfer to the fridge for up to 1 week.

Make ahead tip: For longer storage, freeze glazed or unglazed muffins for up to 3 months. Allow to thaw overnight in the refrigerator, then bring to room temperature or warm up in the microwave if desired.

The Heat was On—and On…

I could’ve kicked myself… Recently, we were in National Harbor just south of DC for Russ’ 5-day NATCON conference with nearly 6,000 attendees. In years past, just as we did this time, our accommodations were at the gorgeous Gaylord Convention Center directly across the river from Alexandria, VA.

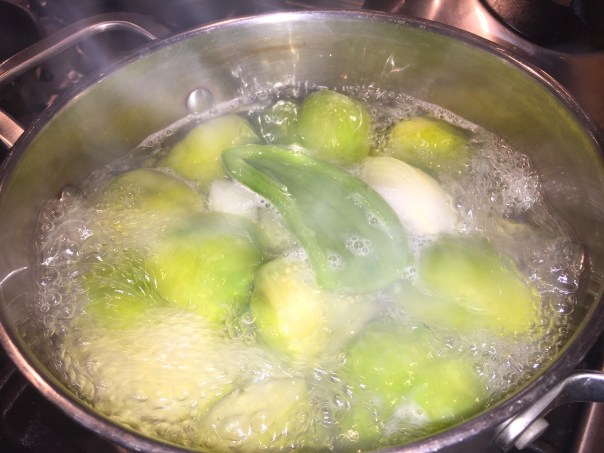
During one of our previous visits we had dined at Grace’s Madarin conveniently located across Waterfront Avenue. Upon entering, the stunning impact from a three-story waterfall and 33-foot Buddha greet you as you wind your way up the stairs to the eating area with panoramic views of the Potomac River from just about every table. This time we were dining with Russ’ fellow colleague, Dr. David Greenspan.

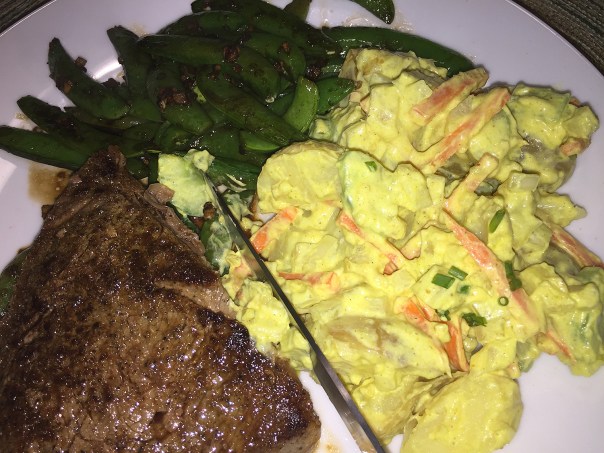
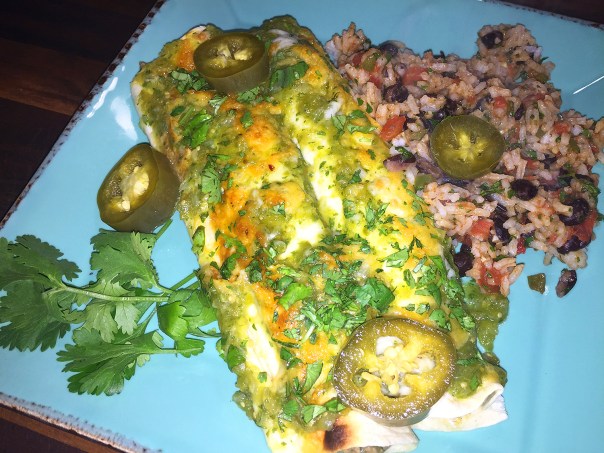
Because of our past history with the establishment, I didn’t feel it was necessary to concern myself with taking pictures for this blog. You may or may not recall a post from four years ago, “A Purse Chair?” In it I mentioned how the food at Grace’s was not necessarily a WOW factor. Well, our collective opinions were drastically altered and soared from mediocre to a definite WOWSER this time around, especially my Chengdu Chicken dish (new executive chef maybe?) But, as I said, I didn’t take any photos, so kick me now.

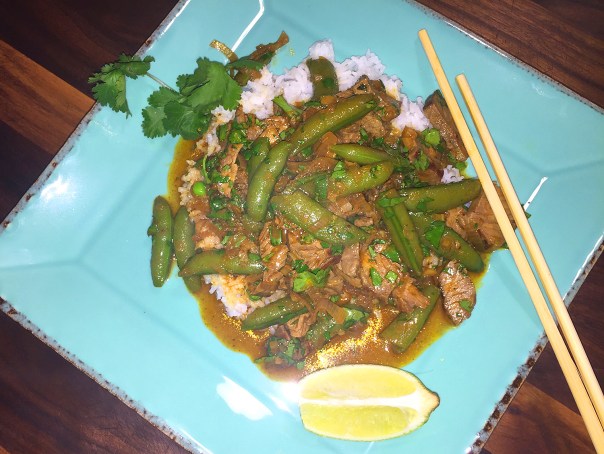
Russ and David’s dishes were also phenomenal but we agreed that mine was off-the-charts incredible, therefore I was on a mission to try and replicate it. After browsing the Internet for some recipes, we felt the one by Andrew Zimmern looked like the closest to what I had at Grace’s place—and with his culinary expertise, we knew it would be good regardless.

IMG_4362

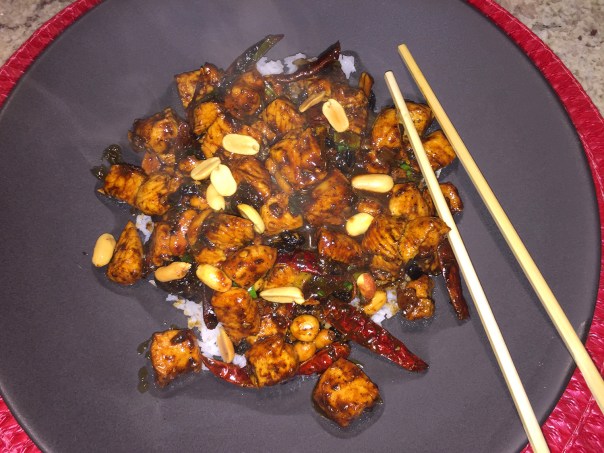
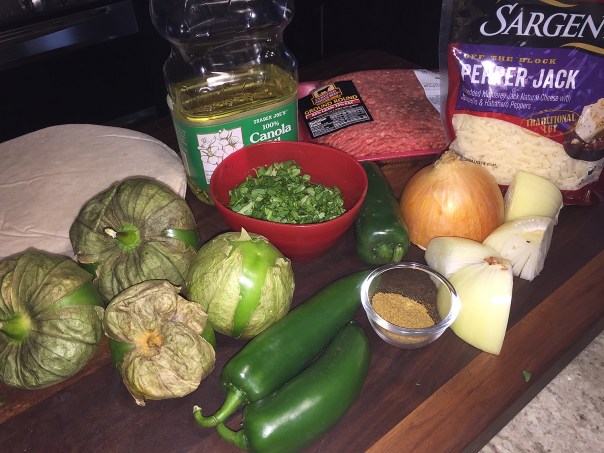
In his chile-spiked Spicy Chengdu-Style Chicken with Peanuts, “soaking the chicken overnight in rice wine and cornstarch makes the meat soft and tender. It also helps tighten the sauce and gives the chicken a twice-cooked slippery quality that’s a sign of good Chinese wok cookery.” We had pretty much all of the ingredients on hand—yes, it’s quite a lengthy list—except we were out of fermented chile bean paste and didn’t have black vinegar.

Because you need to marinate the cubed chicken overnight, Russ made a quick trip to our local Asian mart to get them. When it’s time to begin cooking, make sure you have all of your ingredients prepped before you start, once the wok is hot, this dish comes together in mere minutes. And be sure to time your rice so that it’s ready as soon as you’re done theatrically flipping the wok spatula.

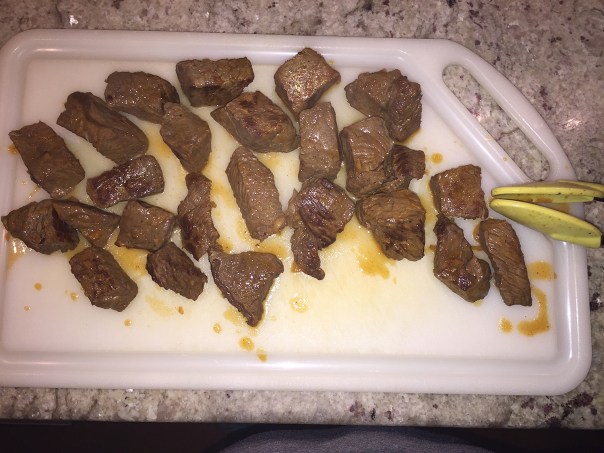
How’d it turn out? Well let’s just say I overdid the peppers to the point of bringing tears to Russ’ eyes! I did have a reason to increase the spice so it’s not like I sabotaged the dish on purpose. Because the amount of chicken was almost double what was called for, I mentally justified that it could stand for more sauce, which included an additional tablespoon of the chili sauce.

Plus, since our dried chiles hadn’t added much of a punch when last used in cooking, while at the Asian mart Russ picked up some more dried chiles, Mexican arbols to be exact. And not making the connection that these new chiles would be much more intense, I tripled, or even quadrupled the amount. Suffice it to say, our nasal passages were clear as a whistle when done eating 😉

If you negate the heat, the taste itself was quite good. So take my word for it, follow the recipe exactly—I will heed my own warning next time because I intend to master Chengdu Chicken

BTW, the purse chairs, below, were still doing their duty at Grace’s Mandarin but I didn’t need one because our table was up against a large window and had an appropriate-sized ledge that served the purpose.

purse.chair2.jpg

Spicy Chengdu-Style Chicken with Peanuts

  • Servings: 4
  • Difficulty: moderate
  • Print

Ingredients

  • 20 to 24 ounces diced skinless chicken breast and thigh meat
  • 2 tablespoons cornstarch
  • 3 tablespoons shaoxing or sake (rice wine)
  • 2 tablespoons toban djan (doban), fermented chile bean paste
  • 2 tablespoons dark soy
  • 2 tablespoons black vinegar
  • 1 tablespoon brown sugar
  • 4 tablespoons whole fermented salted Chinese black beans
  • 2 tablespoons Szechuan peppercorns, crushed
  • 12 dried whole Chinese chiles (tsin-tsin chiles or Mexican arbols work well)
  • 1 tablespoons sliced ginger
  • 1 tablespoons sliced garlic
  • 1/3 cup shelled peanuts (skinless)
  • 1/2 teaspoon ground white pepper
  • 2 tablespoons sugar
  • 4 tablespoons peanut oil
  • 1 cup chopped scallions
  • Cooked white rice for serving

Directions

  1. Combine the chicken, cornstarch, 1 tablespoon of the toban djan and rice wine, and mix well in a large Ziploc bag or bowl. Cover/seal and place in fridge for 24 hours.
  2. Drain chicken and discard any remaining marinade.
  3. Preheat wok over high heat for several minutes.
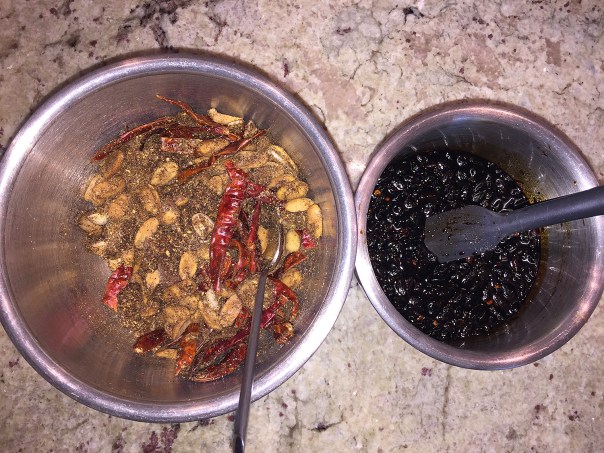
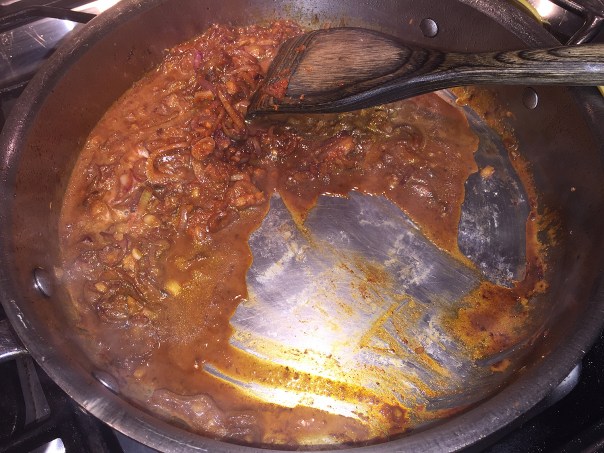
  4. Combine the remaining toban djan, soy, brown sugar, vinegar and black beans in a bowl. In a separate bowl, combine the peppercorns, dried chiles, ginger, garlic, peanut, white pepper and sugar. Reserve both bowls.
    IMG_4345
  5. When the wok is very hot, add the peanut oil and swirl. It should smoke and ripple immediately.
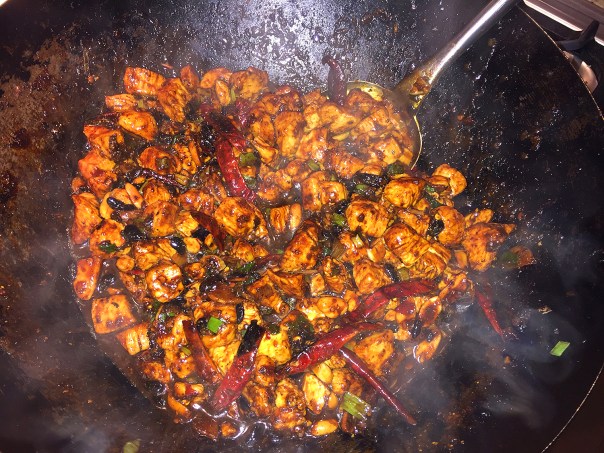
  6. Add the bowl of peppercorns, dried chiles, ginger, garlic, peanut, white pepper and sugar. Swirl in wok. They should scorch immediately.
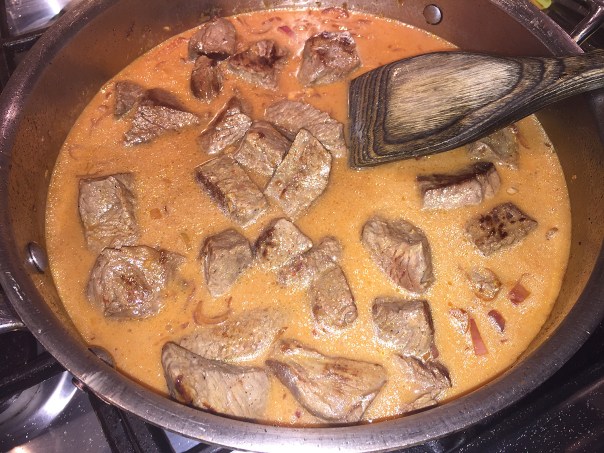
  7. Add the chicken and 2/3 of the scallions. Let the chicken scorch and wok toss until cooked through (about 2-3 minutes). Use wok tools so you don’t break the chiles and can scrape across sides and bottom of the wok safely.
    IMG_4358
  8. Add the bowl of liquid seasonings to the wok. Toss and cook for another minute or two. The sauce should reduce and tighten to a glaze.
    IMG_4356
  9. Toss in the remaining scallions and immediately spill contents out on a platter and serve with white rice.
    IMG_4359

http://www.lynnandruss.com

Cooked Endive? Perfect Side for a Seared Steak!

Looking for a quick, tasty meal that’s sure to appeal to the meat lovers in the family? Look no further because this Sear-Roasted Flat Iron Steak with Endive and Blue Cheese recipe will definitely win them over. Plus the side of Belgian endive is not your usual go-to veggie. Cooked until tender, peppery endive is great alongside this beefy steak slathered with blue cheese butter.

IMG_3939

Endive is a leaf vegetable belonging to the daisy family that can be used raw in salads or cooked, as in this recipe. There are three main varieties of cultivated endive: Curly endive, or frisée; Escarole, or broad-leaved; and Belgian endive, a form of common chicory, a different species from the other two. All are a very low caloric food that help you manage cholesterol levels, promote stronger bones, and improve your vision and brain health.

Pronunciation: on-DEEVE, en-DEEVE. There is a statement by the California Endive Farms that curly and broad-leaved endive is pronounced en-DIVE, while Belgian endive has the on-DEEV pronunciation…. dahling

Now about that cut of steak. The original recipe called for skirt steak which is usually a cinch to find at the supermarket. Not so when I went shopping for this meal. However, they were carrying flat iron steak (on sale too) which I know makes for a fabulous substitute. Wish I would have purchased more…

What’s the difference? Both are value cuts that come from various parts of the cow. The skirt steak is a thin, fibrous cut separating the chest from the abdomen, the cow’s diaphragm muscle. The flat iron is a flat muscle off the shoulder blade and is considered tender for something that lives so close to a joint. Anyway, either cut will suffice, with the flat iron taking twice as long in the oven (10 minutes as opposed to five) since it’s thicker to start with—and Russ and I both agree, a more tender cut of meat compared to skirt steak.

Our piece of meat weighed a bit less than the 1 1/4 pounds indicated, so I only cut it into three pieces. We’re both partial to caramelized onions with steak, so I sliced up two whole alliums, which as you know take nearly an hour on low heat to get a good caramelization, rendering them so sweet and tender they just melt in the mouth!

IMG_3943
I’m sure you’ve read about Russ’ aversion to walnuts, so I was the lucky recipient of any that landed on his plate!

What’s odd about this recipe is they tell you to make a certain quantity of the blue cheese butter mixture, but only use half of it—which was plenty BTW. Oh well, we just refrigerated the remainder for an upcoming meal, like a grilled steak, if and when the weather ever warms up?!

IMG_3927

Sear-Roasted Skirt Steak with Endive and Blue Cheese

  • Servings: 3-4
  • Difficulty: easy
  • Print

Ingredients

  • 4 Tbs. unsalted butter, at room temperature
  • 2 oz. mild blue cheese, such as Gorgonzola, crumbled (about 1/4 cup)
  • 1-1/4 lb. skirt steak, cut into 3-4 portions
  • Kosher salt and freshly ground black pepper
  • 1 Tbs. vegetable oil
  • 1 lb. Belgian endive (3 large or 6 small), cut lengthwise into 4 to 8 wedges depending on size
  • 1 Tbs. honey; more for drizzling
  • 2 Tbs. walnut pieces, lightly toasted
  • 2 Tbs. thinly sliced chives

Directions

  1. Position a rack in the center of the oven and heat to 350°F.
  2. In a small bowl, mash 2 Tbs. of the butter and the blue cheese. Set aside.
  3. Pat the steaks dry and season with salt and pepper. Heat the oil in a large skillet over medium-high heat. Add the steaks and cook, flipping once, until nicely browned, about 4 minutes.
    IMG_3929
  4. Reserving the skillet, transfer the steaks to a small baking sheet and roast until medium rare (130°F to 135°F), 3 to 5 minutes. (If using flat iron, cook for 10 minutes in the oven.) Let rest for 5 minutes.
    IMG_3931
  5. Meanwhile, arrange the endive in one layer in the skillet. Dot with the remaining 2 Tbs. butter and drizzle with the honey.
    IMG_3932
  6. Cover and cook over medium heat, stirring occasionally, until tender, about 5-7 minutes. Season to taste with salt and pepper.
    IMG_3934
  7. Arrange the steaks and endive on a platter. Slather the steaks with half of the blue cheese butter, and drizzle lightly with additional honey, if you like. Sprinkle with the walnuts and chives, and serve.
    IMG_3937

http://www.lynnandruss.com

By Shelley Wiseman from Fine Cooking

Tater Salad Twist

A speedy “Make-It-Tonight” staple from William Stewart of Fine Cooking harkens the advent of warmer weather with visions of outdoor BBQs and picnics dancing in my head. This riff, Curried Yogurt Potato Salad, gets a fresh Indian spin with curried yogurt dressing, bright ginger, and crisp vegetables. I was pleasantly surprised how creamy tasting and good it was without the addition of mayo or eggs!

The Persian cucumber is a variety of burpless cucumber, meaning its consumption is less likely to cause gastrointestinal upset than other types. This cucumber is also small, sweet and essentially seedless. I didn’t have luck locating Persian cucumbers but the seedless English variety was a fine substitute because they are similar to Persians, only longer in length and generally come wrapped in plastic.

In contrast to the thick, bumpy skin of the common garden cucumber, the Persian version features a smooth, thin skin that doesn’t require peeling. Its flesh is largely free of bitter-tasting seeds and is firm instead of watery, attributes that lend crunch and a mild sweetness.

The potato salad is especially yummy right after it is made, but can be served room temperature or even after refrigerated.

IMG_3969

Curried Yogurt Potato Salad

  • Servings: 6-8
  • Difficulty: easy
  • Print

Ingredients

  • 1-1/4 lb. baby Yukon Gold potatoes, halved (or quartered if large)
  • 1 Tbs. olive oil
  • 1 Tbs. grated fresh ginger
  • 3/4 tsp. curry powder
  • 3/4 cup plain whole-milk Greek yogurt
  • 1/2 tsp. finely grated lime zest, more for garnish
  • 1 tsp. fresh lime juice
  • Kosher salt
  • Freshly ground black pepper
  • 2 medium carrots, cut into matchsticks
  • 2 Persian cucumbers, sliced into thin half-moons
  • 1/2 sweet onion, finely diced

Directions

  • Put the potatoes in a large pot of  well-salted water. Bring to a boil over medium-high heat and cook until just tender, about 10 minutes. Drain and rinse under cold water.
  • Heat the oil in a small skillet over medium heat. Add the ginger and curry powder and cook, stirring, until fragrant, about 1 minute; transfer to a large bowl.
  • Whisk in the yogurt, lime zest, and juice, and 1-1/2 tsp. salt.
    IMG_3972
  • Add the carrots, cucumbers, and onion, and toss well, then add the potatoes and toss gently. Season to taste with salt and black pepper, and garnish with additional lime zest, if you like.
    IMG_3976

http://www.lynnandruss.com

IMG_3981
We served ours with sautéed sugar snap peas and a seared steak.

Kickin’ Up the Curry

Thai cuisine is one of my faves so when I can have it in quick fashion, I’m a happy camper. This Spicy Thai Beef Curry from the Fine Cooking’s Make It Tonight series was just the ticket for a weeknight dinner when I didn’t have a lot of time but craved a flavorful curry dish. Remember, our bodies are not just heavy machines that we tote around with us each day, and our culinary pleasure isn’t just a whim when it comes to the mechanics of eating—curry can be a joy to both eat and behold.

IMG_2849

The “spicy” title is a bit of a misnomer. Even though it calls for 1 to 2 teaspoons of red curry paste, almost all of the reviewers commented that they had, or wished they’d had, added more than the directions called for. So, being a connoisseur of all things with a kick, I added a healthy tablespoon full of the flavorful paste, resulting in a robust pungency that was not at all overpowering. If you possess a “delicate palette,” you may want to stick with the smaller amount first time out of the gate.

The directions do not instruct you to, but for a thicker sauce that will cling nicely to the meat and rice, after you remove the meat in Step 5, reduce the liquid over medium-high heat for about 6-8 minutes to thicken, then proceed with the remaining steps.

My only other suggestions would be to use fresh sugar snap peas if you can find them; and incorporate some sweet red bell pepper strips for added color and nutrition, but that’s totally up to you.

IMG_2832

Spicy Thai Beef Curry

  • Servings: 3-4
  • Difficulty: easy
  • Print

Ingredients

  • 1 Tbs. vegetable oil
  • 1-1/2 lb. beef sirloin tips
  • Kosher salt and freshly ground black pepper
  • 1/2 cup thinly sliced shallots (about 2 medium-large)
  • 1/4 cup finely chopped fresh ginger
  • 1 to 2 tsp. Thai red curry paste
  • 1/2 cup low-salt canned chicken broth
  • 1 13-1/2-oz. can unsweetened coconut milk
  • 1 Tbs. fish sauce
  • 1-1/2 cups fresh or frozen sugar snap peas
  • 1 large lime, zest finely grated and fruit cut into wedges
  • 1/3 cup chopped fresh cilantro

Directions

  1. Heat the oil in a 10-inch straight-sided sauté pan over medium-high heat. Season the sirloin tips with salt and pepper and sear the meat in batches until nicely browned on two sides, 1 to 2 minutes per side. Transfer to a plate.
    IMG_2834
  2. Reduce the heat to medium. Add the shallots to the pan and cook until just tender and lightly browned, 2 to 4 minute. Add the ginger and cook, stirring, until fragrant, about 1 minute.
    IMG_2836
  3. Add the curry paste and cook, stirring, about 30 seconds. Stir in 1/4 cup of the broth, scraping up any bits that are stuck to the pan.
    IMG_2837
    IMG_2839
  4. Add 1/3 cup of the coconut milk, stirring until the curry paste has blended in completely. Stir in the remaining coconut milk and broth. Add the fish sauce.
    IMG_2840
  5. Increase the heat to medium high. Return the beef to the pan (along with any juices), stir, and simmer until the meat is just cooked through, 8 to 12 minute. Remove the meat and transfer to a cutting board. (Here’s where you should reduce the liquid for a thicker sauce.)
    IMG_2841
  6. Take the pan off the heat. Stir the sugar snap peas into the sauce and cover the pan. Let the meat rest for 1 minute, then slice it thinly across the grain; return it to the pan along with the lime zest. If necessary, return the pan to medium heat until the peas are thawed and  heated through.
    IMG_2846
  7. Portion the curry into four warm bowls or deep dishes, sprinkle with the cilantro, and serve with the lime wedges.

http://www.lynnandruss.com

IMG_2847

By Joann Smart from Fine Cooking

Baked Rollatini of Flounder

Part of our international week of dinners, we wanted the Italian menu to be something other than pasta so this Baked Rollatini of Flounder entrée fit the bill nicely. Unlike other highly regarded cuisines, Italian cooking is usually simple to make with many dishes having only 4 to 8 ingredients. Italian cooks rely chiefly on the quality of the ingredients rather than on elaborate preparation. And so it almost is with this simple fish recipe with 10 ingredients—just be sure to have some great olive oil on hand.

“The Sicilians have a tradition of using breadcrumbs in many of their recipes, like involtini di pesce spada, or swordfish rollatini, which are dressed with dried- oregano- seasoned breadcrumbs and olive oil.”  —  Lidia Bastianich

Despite Lidia’s undisputed reputation as a great Italian chef, there were a few things we did, or will do in the future. For instance, I didn’t feel that half of a sliced lemon was enough to cover the bottom of the baking dish so I very thinly sliced the entire zested lemon to build the foundation, and used half of another lemon for the juice. Plus we found that a full cup of white wine was too much liquid, feeling a 1/2 cup would more than suffice (I noted this in the list below.)

IMG_4054
Oops, I’m noticing a few citrus pits I should have removed first, mea culpa!

And while this has nothing to do with Lidia’s choice of fish (her original recipe is Rollatini of Sole), it’s uncommon to find sole at our local supermarkets because here in North America we have no true sole, only flounders. They are interchangeable because both sole and flounder have delicate, flaky flesh and a mild, sweet taste; and while each are oval in shape, flounder is more rounded.

Oh, and the fact that Lidia’s cookbook says this serves six, that would be pretty meager rations in just about anyone’s household. We think two fillets per person is more realistic. Otherwise this delicious, delicate dinner was ever-so-satisfying and light. And in that vein, we served it simply with a side of sautéed asparagus.

IMG_4048

Baked Rollatini of Flounder

  • Servings: 3
  • Difficulty: easy
  • Print

Ingredients

  • 1/2 cup dry breadcrumbs
  • 1/2 cup grated Grana Padano or Parmigiano-Reggiano
  • 1/4 cup chopped fresh Italian parsley
  • large lemon, grated, then half of the lemon juiced, the other half thinly sliced
  • 2 teaspoons dried oregano
  • 6 tablespoons extra-virgin olive oil
  • 2 tablespoons unsalted butter, softened
  • 1/2 cup dry white wine
  • skinless fillets of flounder, about 1 1/2 pounds
  • 2 tablespoons drained tiny capers in brine

Directions

  1. Preheat the oven to 350 degrees.
  2. Toss together the breadcrumbs, grated cheese, parsley, lemon zest, and oregano in a bowl. Drizzle with 4 tablespoons of the olive oil, and toss until the crumbs are evenly coated with the oil.
    IMG_4053
    IMG_4055
  3. Coat the bottom of a 9-by-13- inch Pyrex baking dish with the softened butter. Arrange the lemon slices in 1 layer on the bottom of the baking dish. Pour in the lemon juice and white wine.
  4. Lay the fish on your work surface, and press the crumbs into the fish. Starting with the short side, roll each fillet up with crumbs on the inside, and secure closed with toothpicks.
    IMG_4057
  5. Arrange the fish in the baking dish atop the lemon slices, and scatter capers in the open spaces. Sprinkle any leftover crumbs over the fish, and drizzle with the remaining 2 tablespoons olive oil.
    IMG_4058
  6. Place the baking dish on the bottom rack of the oven, and bake until the flounder is just cooked through, about 25 minutes. Remove the toothpicks, spoon some of the capers and sauce over the fillets and serve.
    IMG_4063

http://www.lynnandruss.com

IMG_4064

A Quick Mexican Feast!

According to Liz Pearson from Fine Cooking, you don’t have to sacrifice authenticity for speed with these quick and flavorful enchiladas. And an easy, homemade salsa verde adds a tangy kick to this hearty Quick Beef Enchiladas with Salsa Verde.

IMG_4101

A few changes we made included flour tortillas instead of corn—only because the supermarket carried ooo-gobs of the flour variety, and zero of the corn. Plus, ours were 8″ in diameter as opposed to 6,” but they actually fit perfectly in the 9×13″ baking dish. I also got a little carried away with the amount of cheese inside each tortilla, so my leftover quantity for the top wasn’t going to cut it, therefore I included some shredded cheddar which added a nice pop of color.

The salsa verde was terrific, but take a note from me. I did a disservice when selecting the very large tomatillos as opposed to 15 small ones. Not a good idea. I unfortunately quartered them before boiling with the onion and jalapeños and they lost a lot of the pulp in the process. So do yourself a favor and buy the small ones and leave them whole when boiling.

Even though we like things spicy, I did seed and devein the peppers, but next time I think I’ll omit that step to retain more of the heat. But to remedy that fact, I topped mine with a few slices of pickled jalapeños. Two is typically a serving, but one was plenty for me especially with our side dish.

IMG_4108

The accompaniment of Mexican Tomato Rice & Beans recipe was also from Fine Cooking, but by chef Raghavan Iyer. When cooked using the absorption method, medium-grain rice yields a tender, starchy, slightly creamy kernel that’s ideal for saucy rice dishes like this one. Absolutely delicious! While neither recipe is difficult to make, they both require some prep work and use quite a few kitchen utensils/pots. Oh, but they are sooo worth it!

IMG_4082

Quick Beef Enchiladas with Salsa Verde

  • Servings: 6-8
  • Difficulty: moderate
  • Print

Ingredients

  • Kosher salt
  • 1 lb. tomatillos (about 15 medium), husked and rinsed
  • 3 jalapeños, stemmed and halved lengthwise (seeded, if you like)
  • 1 large yellow onion, half cut into 4 wedges, half chopped
  • 2/3 cup roughly chopped fresh cilantro
  • 1-1/2 Tbs. canola oil
  • 1 lb. lean ground beef
  • 2 tsp. ground cumin
  • Freshly ground black pepper
  • 8, 6-inch corn tortillas
  • 1-1/2 cups shredded Monterey Jack cheese

Directions

  1. Bring a medium pot of salted water to a boil. Add the tomatillos, jalapeños, and onion wedges; cover and simmer until tender, about 10 minutes.
    IMG_4084
  2. Drain well and transfer to a blender along with 1/3 cup of the cilantro. Purée until just slightly chunky and season to taste with salt.
    IMG_4086
  3. Meanwhile, heat 1 Tbs. of the oil in a large skillet over medium-high heat. Add the beef, chopped onion, cumin, 1 tsp. salt, and 1/4 tsp. pepper and cook, stirring occasionally to break up the meat, until cooked through, about 5 minutes.
    IMG_4085
  4. Stir 1/2 cup of the salsa verde into the beef.
    IMG_4089
  5. Position a rack about 6 inches from the broiler and heat the broiler to high. Grease a 9×13-inch metal or ceramic baking dish with the remaining 1/2 Tbs. oil.
  6. Wrap the tortillas in a few slightly damp paper towels and microwave on high until warm, 30 to 45 seconds.
  7. Working with one tortilla at a time, spoon some of the beef mixture down the center of the tortilla and sprinkle with 1 Tbs. of the cheese. Roll up snugly and transfer to the prepared baking dish, seam side down.
    IMG_4096
    IMG_4097
  8. Repeat with the remaining tortillas and beef mixture. Pour the remaining salsa verde over the enchiladas and sprinkle with the remaining cheese.
    IMG_4099
  9. Broil until golden brown and bubbly, 3 to 5 minutes. Garnish with the remaining cilantro and serve.
    IMG_4102

http://www.lynnandruss.com

Mexican Tomato Rice & Beans

IMG_4093

IMG_4078

Mexican Tomato Rice and Beans

  • Servings: 6-8
  • Difficulty: moderate
  • Print

Ingredients

  • 1 cup uncooked medium-grain white rice
  • 1 14-1/2-ounce can diced tomatoes (preferably “petite-cut”)
  • 2 Tbs. extra-virgin olive oil
  • 6 medium cloves garlic, finely chopped
  • 1 medium fresh jalapeño, cored and finely chopped (if you like spicy foods, leave in the ribs and seeds; if not, remove them)
  • 1 15-oz. can black beans, drained and rinsed
  • 2 tsp. kosher or fine sea salt
  • 2 tsp. ground cumin
  • 1 tsp. chili powder
  • 1/4 cup finely chopped fresh oregano leaves and tender stems
  • 1/4 cup finely chopped fresh cilantro leaves and tender stems

Directions

  1. In a 1-quart saucepan, combine the rice with 2 cups cold water. Bring to a boil over medium-high heat, cover, reduce the heat to low, and cook for 20 minutes. Remove from the heat and let the pan stand, covered, for another 5 minutes.
  2. While the rice steams, set a fine sieve in a bowl and drain the can of tomatoes. Pour the tomato juices into a 1-cup liquid measure. Add enough water to the tomato juices to equal 1 cup.
  3. Heat a 10- to 12-inch skillet over medium-high heat. Pour in the oil and stir-fry the garlic and jalapeño until the garlic browns and the jalapeño smells pungent, about 1 minute.
    IMG_4087
  4. Add the black beans, salt, cumin, and chili powder; stir two to three times to incorporate the mixture and cook the spices, about 30 seconds.
    IMG_4088
  5. Stir in the tomato juice and water mixture and bring to a boil. Adjust the heat to maintain a gentle boil and cook, stirring occasionally, until the beans absorb much of the liquid, 5 to 7 minutes.
    IMG_4090
  6. Add the tomatoes, oregano, cilantro, and cooked rice and cook, stirring occasionally, until the rice is warm, 1 to 2 minutes. Serve immediately.
    IMG_4093

http://www.lynnandruss.com

Stuffed Peppers by Lidia

Stuffed peppers are a comfort food for Russ. He loved them growing up—me, not so much. However, that all changed somewhere along the line decades ago, and we both now look forward to dining on the one-pot meal. Yes, there is a bit of prep to start with, but once the mild chilies are stuffed, it’s hands off.

Since Russ received Lidia Bastianich’s latest cookbook: Mastering the Art of Italian Cuisine: Everything You Need to Know to Be a Great Italian Cook, as a Christmas gift, we’ve been trying out quite a few of her recipes and have not been disappointed—until now. Now don’t get me wrong, the taste of the peppers was spot on, we just didn’t care for the watery sauce that accompanied them; the consistency was more like a broth. Even though you squeeze as much water out of the soaking bread as possible, there is still some residual moisture, plus the peppers themselves will release some more wetness.

IMG_3843

So here’s what we would do to remedy our dissatisfaction with the sauce. First, we’d double the amount of canned tomatoes (we like a lot of sauce), then, and most importantly, omit adding any additional water. Next, we’d incorporate some tomato paste to thicken, the amount is up to you but start with two tablespoons and add more to satisfy your preferences. I altered the ingredients list and directions below to reflect our changes.

IMG_3837
The whole peeled canned tomatoes are placed in a bowl and crushed by hand.

Because the bell peppers at the store were gigundo, I only used four instead of six, and selected all green ones. But you can use the red, orange and/or yellow bell peppers too, which tend to be a bit sweeter than the green.

Not noted in the directions below, I cooked ours in a 350 degree oven as opposed to heating on a stove burner. The total cooking time was lengthened by 15 minutes to address the size of our peppers. While mashed potatoes are traditionally served with stuffed peppers, we opted to omit them this time and pair them with a side salad.

IMG_3833

Stuffed Peppers

  • Servings: 6
  • Difficulty: moderate
  • Print

Ingredients

  • 3 tbsp extra virgin olive oil
  • 1 large onion, chopped
  • 2 28 oz cans whole San Marzano tomatoes, crushed by hand
  • 2-4 tablespoons tomato paste
  • 1 tbsp dried oregano
  • 2 tsp kosher salt
  • ¼ tsp crushed red pepper flakes
  • 5 cups crustless day old bread cubes
  • 2 lbs ground pork
  • 1 cup freshly grated Grana Padano
  • 2 large eggs, beaten
  • 6 medium bell peppers (any color combination)

Directions

  1. Heat a dutch oven large enough to hold the peppers upright in one layer over medium heat. Add the olive oil. When the oil is hot, add the onion, and cook until softened, about 10 minutes. Spoon about  half the onion into a large bowl to cool.
  2. To the onion in the pot, add the tomatoes and tomato paste. Season with 2 tsp of the oregano, 1 tsp of the salt, and the red pepper flakes.
  3. Put the bread cubes in a medium bowl with water to cover. Let them soak 5 minutes. Squeeze all of the excess liquid out of the bread, and add the squeezed bread to the cooled onion in the bowl.
    IMG_3836
  4. Add the ground pork, grated cheese, eggs, remaining tsp oregano, and remaining tsp salt. Mix with your hands to make a cohesive stuffing.
  5. Cut the tops from the peppers, remove the seeds and ribs and divide the stuffing among them. Nestle the peppers in the sauce, cover and simmer until the filling is cooked through and the peppers are tender, about 1 hour.
    IMG_3838
    IMG_3841
  6. Place each pepper in a shallow bowl, slice in half, and serve topped with sauce. Sprinkle with additional grated cheese if desired.
    IMG_3848

http://www.lynnandruss.com

Sherry-Infused Baked Sliced Potatoes

A coveted Spanish cookbook, “La Cocina de Mama” by chef author Penelope Casas, has brought us many a mouth-watering meal. So when we decided to prepare week-long dinners based on an International theme, we didn’t hesitate to start with her book.

Along with Penelope’s Chicken with Ham, Olives and Sherry, we paired it with Fernando’s Sherry-Infused Baked Sliced Potatoes—and what a duo they made! She happened across the delicious spud recipe while in Restaurante Bigiote in Sanlucar de Barrameda with a group of American gourmets in tow (wish I had been one of them!)

IMG_4027

They are simple and straightforward enough but with an extraordinary surprise ingredient: the subtle flavor of bone-dry Spanish sherry, such as Manzanilla or Fino. Since Russ likes to have a nip or two of this type of sherry while cooking on Sunday evenings, we always have some on hand. Not my cup of tea (or wine 🙂 ) for imbibing, but I do love sherry in cooking.

IMG_3996
A mandoline makes quick work of slicing uniformly thick potato slices.

IMG_3993

Fernando's Sherry-Infused Baked Sliced Potatoes

  • Servings: 4
  • Difficulty: moderately easy
  • Print

Ingredients

  • 3 1/2 tablespoons olive oil, divided
  • 1 1/2 pounds white potatoes, peeled and cut into 1/8 -inch slices
  • 1 teaspoon kosher or sea salt
  • 1/4 teaspoon freshly ground black pepper
  • 2 bay leaves, cut in halves
  • 1/4 medium-large onion, slivered into 1/4 -inch slices
  • 3 tablespoons manzanilla or dry fino sherry
  • 2 tablespoons minced fresh parsley

Directions

  1. Heat the oven to 300 degrees. Coat an 8-by-12-inch baking dish with one-half tablespoon olive oil. Add half the potatoes in a slightly overlapping layer and sprinkle with half the salt and pepper.
    IMG_3996
    IMG_3997
  2. Scatter the bay leaves and onion over the potatoes and cover with the remaining potatoes, sprinkling again with salt and pepper. Spoon the remaining oil over the potatoes.
    IMG_4001
    IMG_4002
  3. Bake for 30 minutes. Cover the pan lightly with foil and return it to the oven in a rotated position. Bake 20 minutes, until the potatoes are almost tender.
  4. Increase the oven temperature to 450 degrees. Sprinkle the sherry over the potatoes, cover again with foil and continue baking until the sherry is absorbed and the potatoes are tender, about 10 minutes. Sprinkle with parsley and serve.
    IMG_4022

http://www.lynnandruss.com

Oh Sherry, Sherry Baby—Sherry Can You Come Out Tonight?

Arguably the greatest Spanish food is found not in the nation’s restaurants, but in private homes off-limits to tourists, where women still cook the recipes their mothers and grandmothers cooked before them. Penelope Casas takes us into those homes to uncover the secrets of this simple, easily reproduced, and altogether marvelous cuisine. For La Cocina de Mamá, she has collected recipes from great chefs and traditional home cooks in every region of Spain.

la.cocina.cookbook

Having been enamored of her recipes and side stories since we bought the book a number of years ago, this Chicken with Ham, Olives and Sherry was one entrée we hadn’t tried yet. But since making it, it has risen to a top-contender spot when poultry becomes the meal of choice. The ingredients list does mention you can substitute prosciutto for the Serrano ham, but if at all possible, use the Spanish version.

About the Serrano Ham: The word Serrano means “from the mountains,” and refers to the cool dry climate necessary to cure hams in the traditional way. Today most moderately priced cured hams are produced in plants that simulate mountain conditions. Top of the line cured hams, called Jamon Iberico (not as yet imported to the United States) are in fact, naturally mountain cured and come from the extraordinary native Iberian pig.

The best cured ham sold in the United States today, according to Penelope (far superior to prosciutto), is the Redondo Iglesias Serrano ham that is imported from Spain and available from Tienda.com. We were able to order a thick slice (shown below) at our local upscale supermarket deli. Beware, the price is nearly $25 per pound, but you only need about a quarter pound.

IMG_4006

The chicken dish paired fabulously with Penelope’s recipe of Sherry-Infused Baked Sliced Potatoes which take a similar amount of time and get cooked in the oven while the chicken simmers on the stovetop.

IMG_4026

IMG_4030
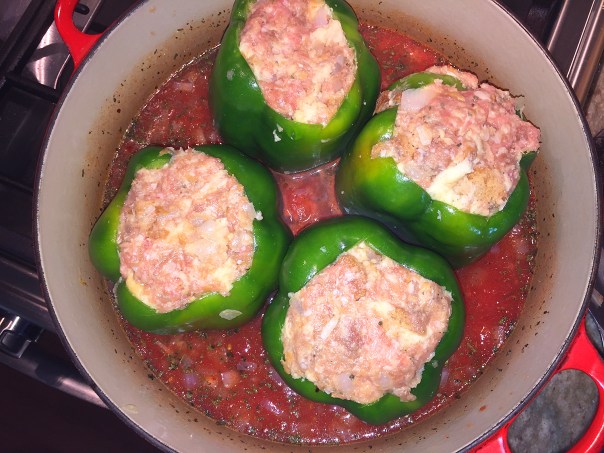
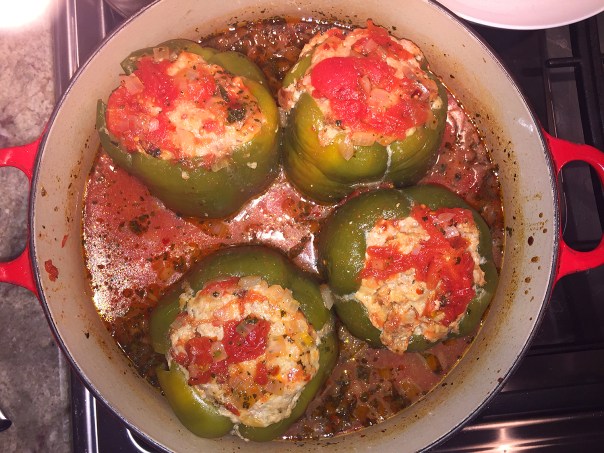
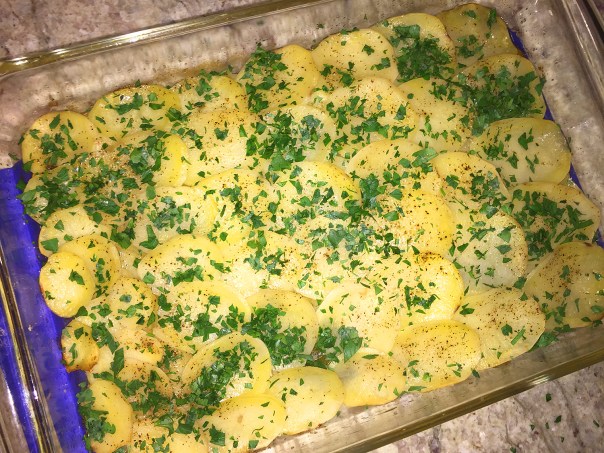
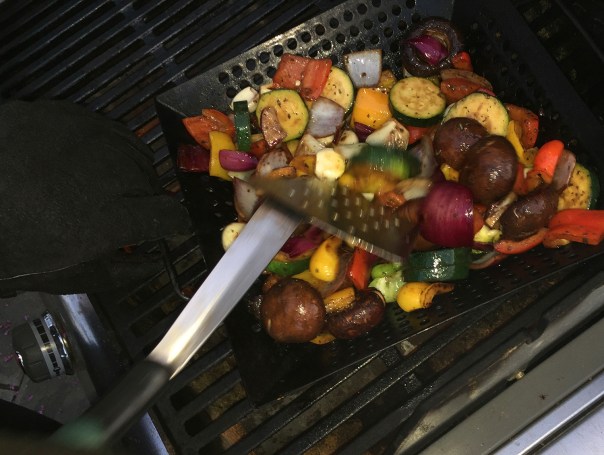
To complete the meal, we added a side salad for more veggies and fiber.

Chicken with Ham, Olives and Sherry

  • Servings: 4
  • Difficulty: easy
  • Print

Ingredients

  • 3 1/2-4 lb. chicken
  • Kosher or sea salt
  • 1/2 cup pitted and sliced Spanish green olives
  • 1/2 cup dry white wine
  • 3 tbsp. olive oil
  • 2 garlic cloves, minced
  • 1/2 medium onion, preferably Vidalia or other sweet type, chopped
  • 1/4 to 1/2 cup diced Serrano ham (or prosciutto, if you must)
  • 1 tsp. flour
  • 6 Tbsp. dry Manzanilla or Fino sherry
  • 1/2 cup chicken broth, preferably homemade
  • Freshly ground black pepper
  • 1 Tbsp. fresh thyme (or 1/2 tsp. dried)

Directions

  1. Cut the chicken into small serving pieces, first detaching the wings and legs, then with kitchen shears, cutting the breast into 4 pieces, and each thigh in half crosswise. Sprinkle with salt and pepper.
    IMG_4003
  2. In a small saucepan, combine the olives and wine. Bring to a boil and simmer for 5 minutes. Drain and reserve the olives.
    IMG_4005
  3. Heat the oil in a shallow casserole, and brown the chicken all over, about 5 minutes per side. Do in batches as necessary, and remove to plate when browned.
    IMG_4009
    IMG_4010
  4. Lower the heat and add garlic and onion and slowly sauté for 5 minutes.
  5. Scatter in the ham, cook for a minutes then stir in the flour.
    IMG_4015
  6. Add the sherry, broth, salt and pepper to taste, and thyme. Nestle the chicken pieces back into the pot with the breasts sitting on top of the dark meat. Cover and simmer for 40 minutes. Do not remove the lid during this time period.
    IMG_4017
  7. Add the reserved olives and simmer for 2 more minutes. Serve.
    IMG_4020

http://www.lynnandruss.com

IMG_4035

Bookmark This Weeknight Duo

“Make It Tonight” is a weekly series from Fine Cooking that we subscribe to and provides quick weeknight recipes. While of course not everyone of them caters to our personal preferences, the vast majority are pretty spot on. Take this simple and satisfying easy main course, Roast Chicken with Chickpeas dinner for instance. Here, crisp-skinned, bone-in chicken thighs braise in a stew of fragrant Indian spices, onion, and chickpeas, each flavoring the other.

IMG_3616

Because it was just the two of us, our package of poultry consisted on only five thighs, weighing in at two pounds instead of three. They all fit into one pan so there was no need to brown two batches, saving about 10 minutes.

And the “Make It Tonight” pairing of a Middle Eastern Savoy Cabbage Salad was a knock out side dish that was a perfect accompaniment to the flavors of the chicken. I mean, who doesn’t love pistachios?! I did cut the veggie ingredients in half for just the two of us, but made the full amount of dressing, and I’m glad I did. Personally, I do not like salads saturated with dressing, but in this case, after I initially added only half, we both agreed, it was so tasty and the vegetables were sturdy enough they could handle the entire amount. Yes, it was that good!

IMG_3609

Even if you’re not overly fond of chickpeas, the treatment in this recipe adds the perfect amount of pungency from both the spices and the thighs as they impart their juices during the roasting process. The end result takes the chickpeas to another level with a subtle crispness and a boat-load of flavor. And you can’t ignore the health benefits of these legumes.

Chickpeas are sometimes known as garbanzo beans. They are particularly high in fiber. The iron, phosphate, calcium, magnesium, manganese, zinc, and vitamin K in chickpeas all contribute to building and maintaining bone structure and strength. Plus, research shows that including chickpeas in the diet lowers the amount of low-density lipoprotein, or bad cholesterol, in the blood. Finally, the choline in chickpeas helps with sleep, muscle movement, learning, and memory.

IMG_3592

Roast Chicken Thighs with Chickpeas

  • Servings: 4
  • Difficulty: easy
  • Print

Ingredients

  • 1 Tbs. olive oil
  • 8 skin-on, bone-in chicken thighs (about 3 lb.)
  • Kosher salt
  • 1 small yellow onion, finely chopped
  • 4 medium cloves garlic, finely chopped
  • 2 tsp. ground turmeric
  • 2 tsp. ground cumin
  • 1 tsp. ground coriander
  • 1/4 tsp. cayenne pepper; more to taste
  • 1/2 cup lower-salt chicken broth
  • 2 15-oz. cans chickpeas, rinsed and drained
  • 1/4 cup chopped fresh cilantro
  • Lemon wedges, for serving

Directions

  • Position a rack in the center of the oven and heat the oven to 425°f.
  • Heat the oil in a 12-inch ovenproof skillet over medium-high heat. Pat the chicken dry if wet and season lightly with salt. Working in two batches, brown the chicken on both sides, about 10 minutes per batch, adjusting the heat as necessary. Transfer to a plate.
    IMG_3596
  • Pour off all but 1 Tbs. of the fat in the skillet. Add the onion, garlic, turmeric, cumin, coriander, cayenne, and 1/2 tsp. salt. cook over medium heat, stirring occasionally, until the onion softens, about 5 minutes.
    IMG_3599
  • Stir in the broth, scraping up any browned bits. Add the chickpeas and bring to a simmer. Return the thighs to the skillet, skin side up.
    IMG_3600
    IMG_3601
  • Transfer to the oven and roast until the chicken cooks through, 20 to 25 minutes. Top with the cilantro and serve with lemon wedges.

http://www.lynnandruss.com

IMG_3619

Middle Eastern Savoy Cabbage Salad

Middle Eastern ingredients like lemon, yogurt, cumin, and coriander flavor a creamy dressing that crinkly Savoy cabbage soaks right up. Use regular yogurt for the dressing; Greek yogurt is too thick. If you have extra dressing, (which I doubt you will) use it as a dip for vegetables or to dress another small salad. This would make a great lunch salad by itself.

IMG_3606

Middle Eastern Savoy Cabbage Salad

  • Servings: 4-6
  • Difficulty: moderately easy
  • Print

Ingredients

  • 1/2 small red onion, halved and thinly sliced
  • 1 small head Savoy cabbage, halved, cored, and sliced crosswise into 1/4-inch-thick ribbons (12 loosely packed cups)
  • 2 medium carrots, peeled and shaved into ribbons with the peeler (about 2 lightly packed cups)
  • 1/2 cup chopped fresh mint
  • 1 Tbs. extra-virgin olive oil
  • 1 tsp. ground cumin
  • 1 tsp. ground coriander
  • 2 Tbs. fresh lemon juice
  • 1 Tbs. finely grated lemon zest
  • 2 tsp. honey
  • Kosher salt
  • 1 cup plain whole-milk yogurt (not Greek)
  • 1/4 cup chopped salted pistachios
  • Freshly ground black pepper

Directions

  • Soak the onion in cold water to mellow it, about 20 minutes. Drain.
  • Meanwhile, in an 8-inch skillet, heat the oil, cumin, and coriander over medium-low heat until the spices are fragrant, about 2 minutes. Let cool completely.
    IMG_3603
  • Add the lemon juice and zest, honey, and 1/2 tsp. salt to the spices in the pan and stir to combine. With a silicone spatula, fold in the yogurt until well combined.
  • Put the cabbage, carrots, mint, and onion in a large serving bowl.
    IMG_3604
  • Toss the salad with about two-thirds of the dressing. Let sit for about 10 minutes to soften the cabbage.
  • Sprinkle the chopped pistachios over the salad. Grind some black pepper over the top and then drizzle with more dressing to taste. Season to taste with additional salt and pepper, and serve.

http://www.lynnandruss.com

In a Nod to Tuscany

In Italy, Tuscans living in rural areas were once referred to as mangiafagioli, or “bean eaters,” a reference to their consumption of economical bean dishes. The most traditional preparation is an ultrasimple wintry one in which dried cannellini beans are simmered with herbs and garlic until tender and then drizzled with olive oil for serving.

This riff on Tuscan-style beans gets a fuller seafood flavor with a quick concentrated stock from the shrimp shells used to simmer the beans. The shrimp also get cooked with the beans rather than separately, and minced anchovies meld with the sautéed aromatics. While the shrimp flavor the beans, the beans also insulate the shrimp from direct heat so that they stay plump and moist.

IMG_3458

To season the shrimp and keep them plump and juicy, brine them briefly, and add them late in the cooking process, cooking them gently. Canned beans and canned tomatoes make this dish fast and doable at any time of year; plus, the liquid from one of the cans of beans lends the stew good body. Plenty of fresh basil and lemon juice and zest provide freshness and nice acidity.

If like us, you have some homemade seafood stock on hand, you can skip Steps 2 through 5 and shave off about 15 minutes. Now that’s a real time saver! And it isn’t yet tomato season, so use canned tomatoes instead of the fresh ones. For ease, and because they maintain their shape due to the addition of calcium chloride, use the diced variety.

We loved how simple, yet tasty this dish was. The final flourish of fresh basil not only adds a nice pop of color, but lends an initial subtle peppery flavor, then evolves into a slightly sweet, aromatic punch. An essential ingredient in Italian and Mediterranean cuisine, basil pairs exquisitely with lemon, tomato and garlic, all of which are in this recipe.

Do yourself a favor and make a batch of homemade seafood stock, portioning it out into different sized containers, then freeze them until needed. You’ll thank yourself in the future…

IMG_3444

Tuscan Shrimp and Beans

  • Servings: 4
  • Difficulty: easy
  • Print

Ingredients

  • 2 tablespoons sugar
  • Salt and pepper
  • 1 pound large shell-on shrimp (26 to 30 per pound), peeled, deveined, and tails removed, shells reserved (If you have your own seafood stock, buy the shrimp already peeled.)
  • ¼ cup extra-virgin olive oil
  • 1 onion, chopped fine
  • 4 garlic cloves, peeled, halved lengthwise, and sliced thin
  • 2 anchovy fillets, rinsed, patted dry, and minced
  • ¼ teaspoon red pepper flakes
  • 2 15-ounce cans cannellini beans (1 can drained and rinsed, 1 can left undrained)
  • 1 14.5-ounce can diced tomatoes, drained
  • ¼ cup shredded fresh basil
  • ½ teaspoon grated lemon zest plus 1 tablespoon juice

Directions

  1. Dissolve sugar and 1 tablespoon salt in 1 quart cold water in large container. Submerge shrimp in brine, cover, and refrigerate for 15 minutes. Remove shrimp from brine and pat dry with paper towels.
    IMG_3446
  2. Heat 1 tablespoon oil in 12-inch skillet over medium heat until shimmering. Add shrimp shells and cook, stirring frequently, until they begin to turn spotty brown and skillet starts to brown, 5 to 6 minutes.
  3. Remove skillet from heat and carefully add 1 cup water. When bubbling subsides, return skillet to medium heat and simmer gently, stirring occasionally, for 5 minutes.
  4. Strain mixture through colander set over large bowl. Discard shells and reserve liquid (you should have about 1/4 cup). Wipe skillet clean with paper towels.
  5. Heat 2 tablespoons oil, onion, garlic, anchovies, pepper flakes, 1/4 teaspoon salt, and 1/8 teaspoon pepper in now-empty skillet over medium-low heat. Cook, stirring occasionally, until onion is softened, about 5 minutes.
    IMG_3448
  6. Add 1 can drained beans, 1 can beans and their liquid, tomatoes, and shrimp stock and bring to simmer. Simmer, stirring occasionally, for 15 minutes.
    IMG_3449
  7. Reduce heat to low, add shrimp, cover, and cook, stirring once during cooking, until shrimp are just opaque, 5 to 7 minutes.
    IMG_3451
  8. Remove skillet from heat and stir in basil and lemon zest and juice. Season with salt and pepper to taste.
    IMG_3453
  9. Transfer to serving dish, drizzle with remaining 1 tablespoon oil, and serve.

http://www.lynnandruss.com

IMG_3455

Adapted from Cooks Illustrated

Thick, Spicy, Rich, and Dee-lish.

Cutting back on carbs? Who said Italian night has to include pasta? This quick-cooking stew has onions, garlic, and spicy Italian sausage—classic flavors you expect in an Italian meal—and it’s warming and comforting too, the perfect antidote to these frigid temperatures. Of course if you can’t tolerate spicy, use sweet Italian sausage instead.

IMG_1980

This Spicy Sausage, Escarole and White Bean Stew recipe hits all the right buttons. Thick, spicy, rich, and delish. Plus it’s super easy to prepare. If you’re not into escarole or can’t find it, substitute spinach or kale. Just make sure that whatever greens you decide on, wash them real well and spin dry.

The jury is in, we loved it! Of course we used more sausage, escarole, and vinegar than originally called for (reflected in the directions below.) The only other change we’d make next time, is incorporating 2 cups of broth as opposed to one.

And if you don’t care about counting carbs, make some toasted bread rubbed with garlic and drizzled with olive oil for a nice accompaniment. Or, make your own garlic butter to spread on Italian or rustic bread.

IMG_1964

Spicy Sausage, Escarole and White Bean Stew

  • Servings: 4
  • Difficulty: easy
  • Print

Ingredients

  • 1 Tbs. extra-virgin olive oil
  • 1 medium yellow onion, chopped
  • 1 lb. hot Italian sausage, casings removed
  • 2 medium cloves garlic, minced
  • 2 15-oz. cans cannellini beans, rinsed and drained
  • 1 head escarole, chopped into 1- to 2-inch pieces, washed, and lightly dried
  • 1 cup low-salt canned chicken broth
  • 1 Tbsp. red-wine vinegar; more to taste
  • Kosher salt
  • 1/4 cup freshly grated Parmigiano-Reggiano (we used Grano Padano)

Directions

  1. Heat the oil in a heavy 5- to 6-qt. Dutch oven over medium heat. Add the onion and cook, stirring occasionally, until tender, 5 to 6 minutes.
    IMG_1968
  2. Add the sausage, raise the heat to medium high, and cook, stirring and breaking up the sausage with a wooden spoon or spatula until lightly browned and broken into small (1-inch) pieces, 5 to 6 minutes.
    IMG_1971
  3. Add the garlic and cook for 1 minute, then stir in the beans.
    IMG_1974
  4. Add the escarole to the pot in batches; using tongs, toss with the sausage mixture to wilt the escarole and make room for more.
    IMG_1978
  5. When all the escarole is in, add the chicken broth, cover the pot, and cook until the beans are heated through and the escarole is tender, about 8 minutes. Season to taste with the vinegar and salt. Transfer to bowls and sprinkle each portion with some of the Parmigiano.

http://www.lynnandruss.com

IMG_1982

Adapted from a recipe by Joann Smart from Fine Cooking