Category Archives: Uncategorized

Meatball and Artichoke Soup

In this unusual potage, little pork meatballs with a touch of cinnamon and pine nuts make an exceptionally tasty contribution to the soup from La Cocina De Mamá: The Great Home Cooking of Spain, a favorite cookbook by Penelope CasasBread is the thickening agent, as is so often the case with traditional Spanish soups, but which posed an issue for us since Russ has forgone wheat.

The fix? We would have used gluten-free bread, but we had none on hand. Instead, Russ stirred some of the broth with a heaping tablespoon of gluten-free flour and then mixed it back into the soup. Not ideal, but it was a satisfactory solution—no complaints on our end. The only other thing we’ll probably do different the next time around is double the amount of artichoke hearts.

It made for yummy lunches during the week.

IMG_5133

Ingredients

  • 4 cups plus 2 Tbsp. chicken broth, preferably homemade
  • 1 garlic clove, minced
  • 1/8 tsp. ground cinnamon
  • 1 Tbsp. minced fresh parsley
  • 2 Tbsp. finely chopped pine nuts
  • 1 lb. ground pork
  • 3 Tbsp. breadcrumbs
  • 4-6 artichoke hearts, fresh or frozen, quartered
  • 1 large egg, separated
  • Kosher or sea salt
  • Freshly ground pepper
  • 1/4 medium onion, finely chopped
  • 1/2 tsp. sweet paprika, preferably Spanish smoked
  • 3 Tbsp. olive oil
  • 1 slice bacon
  • 1 slice good quality sandwich bread, crusts removed

IMG_5135
The bread crumbs are soaked in chicken broth before adding the pork, pine nuts, bacon, parsley, cinnamon, garlic, and egg yolk.

IMG_5136
Little meatballs are shaped by hand and lined up on waxed paper.

IMG_5138
Whisk the egg white with a fork until foamy.

Directions

  1. In a medium bowl soak the bread crumbs in the 2 tablespoons chicken broth. Add the pork, pine nuts, bacon, parsley, cinnamon, garlic, egg yolk, 1/4 teaspoon salt, and the pepper to taste and mix well with your hands. Shape into meatballs not larger than 3/4 inch.
  2. In anther bowl, whisk the egg white with a fork until foamy. Heat 2 tablespoons of the oil in a shallow casserole. Dip the meatballs in the egg white, then sauté in the hot oil until barely cooked through. Remove to a warm platter and wipe out the casserole.
  3. Heat the remaining tablespoon oil in the casserole and slowly sauté the onion until softened. Stir in the paprika, then add the 4 cups broth, the artichokes, and the meatballs. Simmer uncovered for 15 minutes.
  4. Break up the bread slice and combine in a small bowl with 4 tablespoons broth taken from the casserole. Whisk until smooth. Stir into the soup, taste for salt, and serve.

IMG_5144

What the Fook?

Ed Mortka, never having been to the Chinatown section of Philadelphia, suggested we meet there for dinner and drinks this past Saturday. To that end, Russ did a little research and output a list of about 30 possible eateries. I narrowed it down to nine restaurants, and we sent those choices to the Mortkas, with Karen selecting the winner, Lee How Fook. Now that’s what I call teamwork!

However, our rendezvous started an hour-and-a-half before reservations allowing us time to walk the ‘hood. Our first choice for drinks was the questionably named Hop Sing Laundromat, on Race Street described as a swanky speakeasy-style bar with meticulously made cocktails. Claiming to be one of Philly’s best, it also comes with a list of rules—such as no phones—long wait lines, and a provocative owner known to be polarizing. Hmmm, sounds intriguing…

hop-sing-laundromat
The difficult to find entrance to Hop Sing Laundromat.

First, you have to find the place. With Ed and Russ both using smart phones you’d think it would’ve been easy. But Hop Sing does not have a sign out front, nor anything else to indicate it’s whereabouts. One clue, we noticed four middle-aged couples standing outside a metal-caged door, when eventually a doorman popped his head out. Based on a cash-only policy and a passerby’s comments about knowing some secret code, plus a strict dress code: no sneakers, no shorts, no tank tops, we said “The Fook With This” and opted to patronize another establishment, which led us to Bar Ly.

karen.ed.barly

lynn.russ.barly
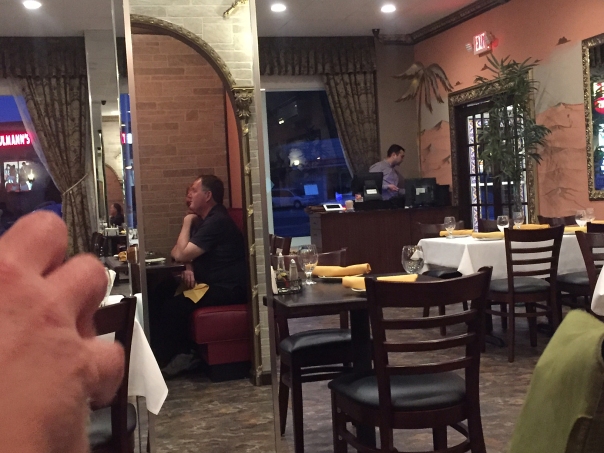
Both couples enjoying pre-dinner drinks at Bar Ly.

It’s Chinatown’s first craft beer bar, that boasts a high-quality lineup of 60 taps. They also serve cocktails and wine by the glass, so something for everyone. And if you’re so inclined, large TV screens line the walls airing every possible sport for your viewing pleasure. Luckily it wasn’t loud, and it was happy hour so we enjoyed catching up over low-priced drinks. A little over an hour later, it was time to walk the few short blocks to dinner.

lee-how-fook1

Located on North 11th Street in Philadelphia, Zagat-rated, BYOB Lee How Fook has been in business for over 30 years. Chef and founder Shing Chung immigrated from China bringing his cooking talents to Philadelphia’s Chinatown in the 1970’s; while his son-in-law Andrew has turned it into a modern day BYOB classic gem with an authentic take on Cantonese cuisine.

And that authentic menu is extensive, with all choices very reasonably priced. In fact, one site says the price averages $30 per couple (our tabs were just slightly higher than that.) Choices include chef’s specials, restorative soups, whole steamed fish, and excellent hot pots, among many other options. I got to tell ya, it was extremely hard to narrow down to only a few selections.

IMG_5336
We all loved the pan-seared pork dumplings.

IMG_5340
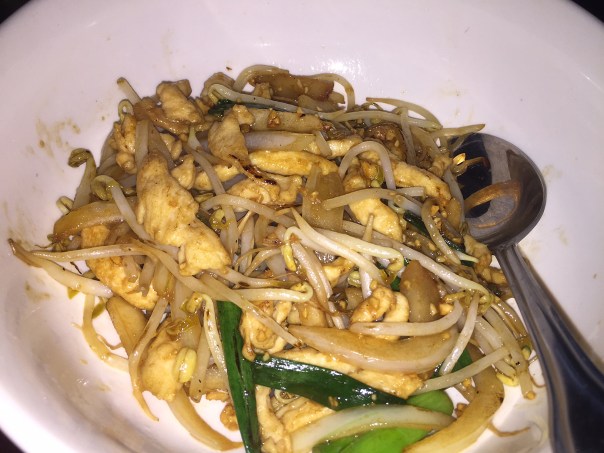
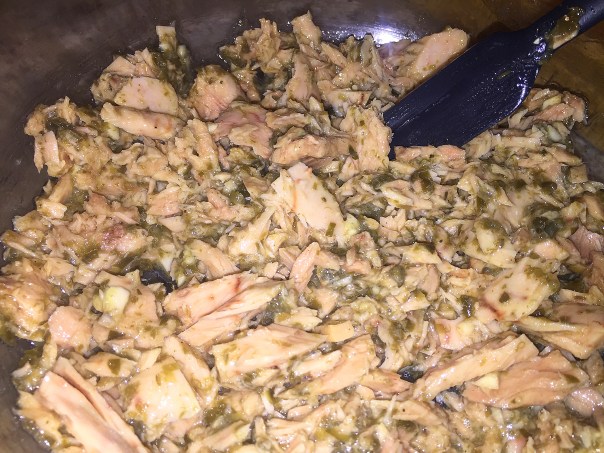
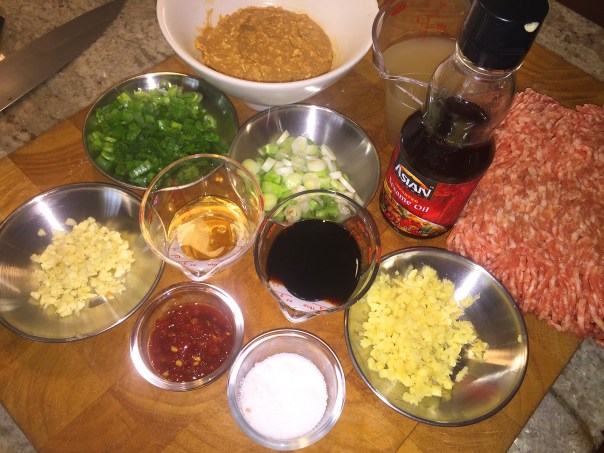
The mixture for the lettuce wraps was made up of chicken, scallions, bean sprouts and sauce.

IMG_5343
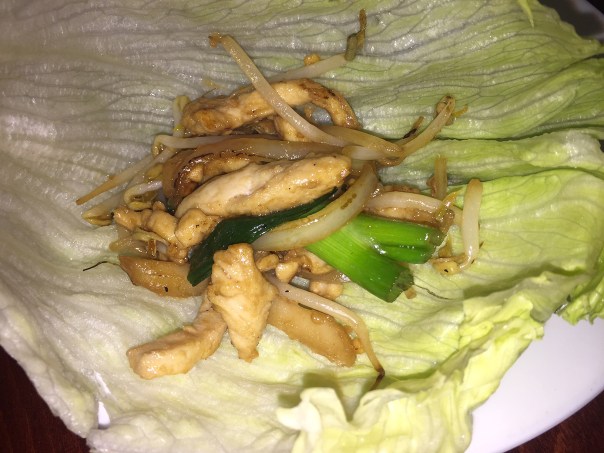
A bit of meat mixture in a lettuce leaf before it is wrapped.

IMG_5339
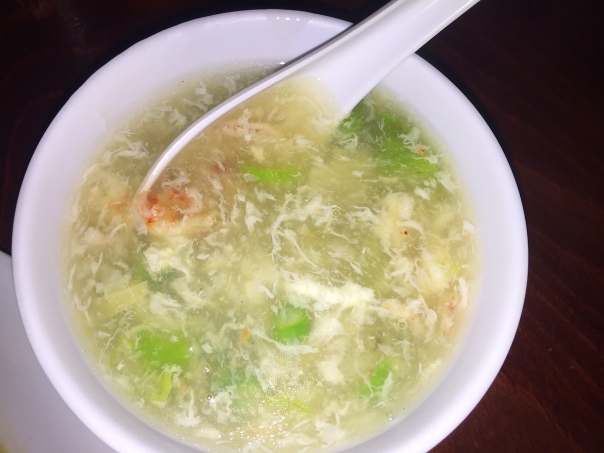
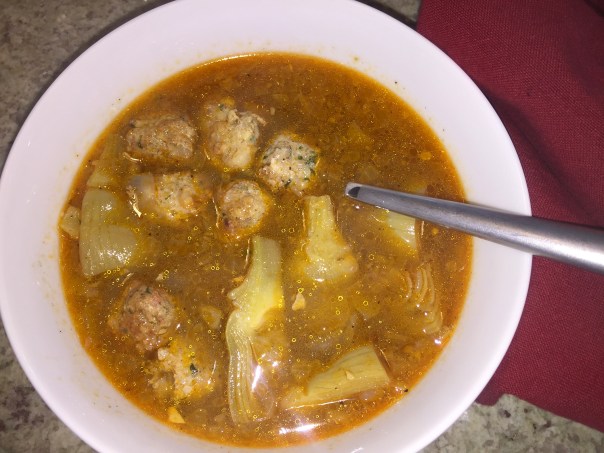
A small bowl of Crab and Asparagus Soup.

Deciding to start with some shared appetizers, we chose Pan-Seared Pork Dumplings, Lettuce Wraps, and Crab and Asparagus Soup for four. There was audible ooohing an aaahing as we savored every bite. One complaint though, they brought the entrees while we were still enjoying the starters, so we felt a bit rushed. Oddly, several groups walked in after us but were turned away—unusual as there seemed to be numerous open tables in the relatively small restaurant.

IMG_5342
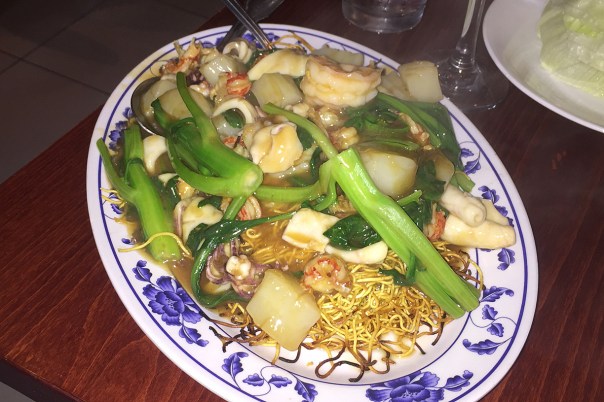
Ed’s Fried Noodles with Mixed Seafood entree.

IMG_5345
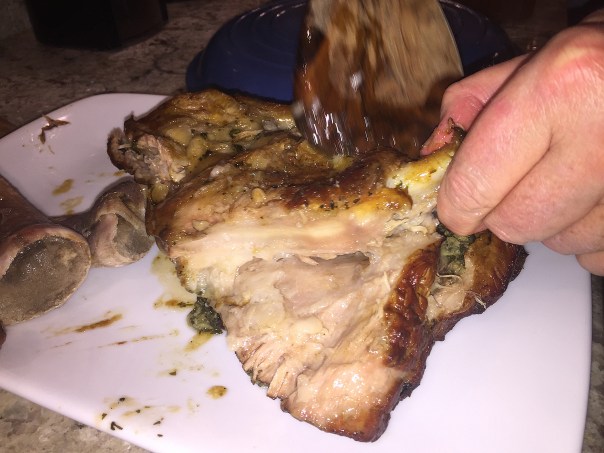
A close-up of Russ’s Duck with Black Bean Sauce.

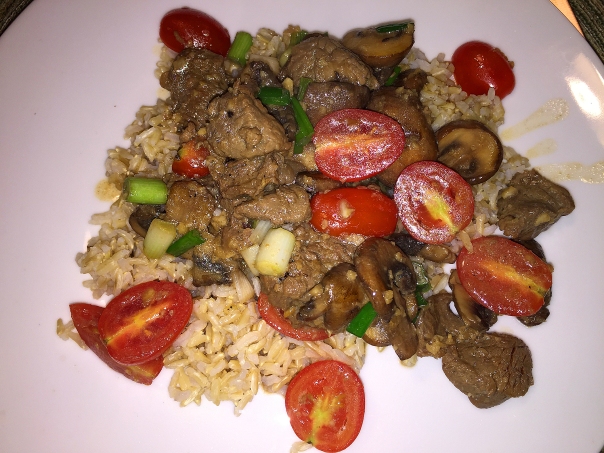
Back to those entrees. Russ surprised no one when he ordered Duck with Black Bean Sauce, which arrived laden with crisp-tender vegetables. Ed chose the Pan Fried Noodles with Mixed Seafood and bok choy, and absolutely loved it. (He was the only one lucky enough to have leftovers.)

IMG_5346
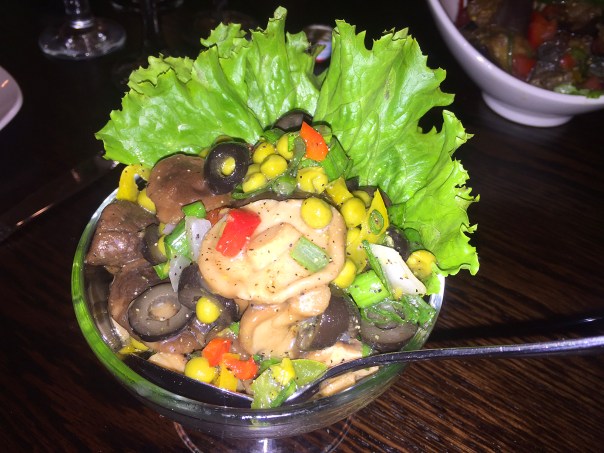
Scallops in Mandarin Sauce enjoyed by both Lynn and Karen.

Karen and I both opted for the Scallops with Mandarin Sauce—with Karen ordering less-spicy, and me, extra-spicy. However we were both disappointed that the dish didn’t come with any vegetables. In hind sight we should’ve ordered additional veggie sides from their long list which included green beans, eggplant, broccoli, bok choy, and snow peas to name a few. We’ll know better next time.

After dinner, the night was still young so off we went in search of a place for coffee and dessert. Just up the street on 11th, A La Mousse which specializes in cleverly created customized cakes, Italian pastries, cannolis, cream puffs, and eclairs, seemed to fit the bill. We walked in and snagged a picnic table just in time before the rush piled in causing a line out the door.

a.la.mousee.tray.png
A worker shows off a tray of gorgeous sandwich desserts.

karen.russ
Karen and Russ ponder which desserts to order.

IMG_5353
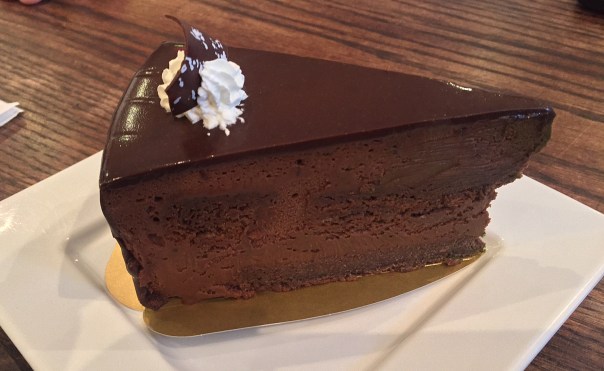
Karen and Ed split a slice of Double Chocolate Mousse Cake.

IMG_5361
Russ enjoyed the artfully plated Tea-R-Misu dessert.

IMG_5362
Lynn’s Green Matcha Tea.

While still not too late, we decided to bid farewell after our leisurely dessert. But I know we’ll be back to Chinatown to check out a few more restaurants and perhaps even make it into Hop Sing Laundromat for those specialty cocktails—but I won’t be able to take any photos 😦

Strange Bedfellows

Thai meets Italian—“ThaiTalian?” Our first thoughts, what an odd combination—Rotini with Ground Pork and Spicy Peanut Sauce, with its bright, Asian-inspired flavors paired with Italian rotini pasta—but it’s a great choice for holding onto the sauce. And the flavors were amazingly great, much to our initial skepticism.

And because we love spicy, we intended to make a side of Spicy Roasted Broccoli and Snow Peas with a few fresh Thai bird chiles, sambal oelek, minced ginger, garlic and a bit ‘o honey. But when I opened the bag of broccoli florets (which we usually don’t buy bagged), they were in pretty bad shape so into to the compost bucket they went. Instead, Russ wok-fried the snow peas and Thai chiles with some minced garlic and ginger then added a tablespoon of Chili Bean Sauce at the end—an excellent accompaniment!

Because we only had about a tablespoon of crunchy peanut butter on hand, I improvised and made my own with enough smooth peanut butter and finely chopped peanuts to equal the requisite 1/2 cup. This way I even had some of the chopped peanuts leftover to use as a garnish along with chopped cilantro and scallion greens.

Not a pork eater? Try using ground turkey or chicken. To make it low-carb, swap spaghetti squash for the pasta.

IMG_5164

Ingredients

  • Kosher salt
  • 12 oz. rotini (we used gluten-free)
  • 1-1/2 Tbs. Asian sesame oil
  • 5 medium scallions, thinly sliced, whites and greens separated
  • 2 Tbs. minced fresh ginger
  • 2 medium cloves garlic, minced
  • 1 lb. ground pork
  • 3 Tbs. soy sauce
  • 2 Tbs. unseasoned rice vinegar
  • 1 Tbs. sambal oelek or other Asian chile paste; more to taste
  • 1 Tbs. granulated sugar
  • 1/2 cup crunchy peanut butter, preferably natural
  • 2/3 cup lower-salt chicken broth
  • 1 medium lime, cut into 4 wedges
  • 1/4 cup chopped fresh cilantro (optional)

Directions

  1. Bring a large pot of salted water to a boil. Add the rotini and cook according to package directions until al dente.
  2. Meanwhile, heat a 12-inch heavy-duty skillet over medium heat. Add the oil, then the scallion whites. Cook, stirring, until softened, about 1 minute. Add the ginger and garlic and cook, stirring for 30 seconds.
  3. Crumble in the pork and cook, stirring occasionally, until it loses its pink color, about 5 minutes. Stir in the soy sauce, vinegar, sambal oelek, and sugar and cook until bubbling. Add the peanut butter and stir until incorporated. Pour in the broth, stir well, and bring to a simmer. Cook for 2 minutes, stirring occasionally.
  4. Reserve 1/2 cup of the pasta water, drain the pasta, and return it to the pot. Stir in the pork mixture and scallion greens. Thin the sauce with the pasta water, if necessary. Divide among plates or bowls, squeeze a lime wedge over each serving, and top with cilantro, if using.

IMG_5167
First sauté the scallion whites, ginger and garlic before adding the meat.

IMG_5168
Browning the meat with the garlic, ginger and scallion whites.

IMG_5170
Adding the peanut butter to the meat mixture.

IMG_5173
What the final sauce looks like before adding the pasta. We didn’t feel the need to thin with pasta water.

IMG_5178
Stir-fried snow peas before the chili bean sauce was added.

by Bruce Weinstein, Mark Scarbrough from Fine Cooking

Cod Heaven is Here

Wow, this Cod with Pancetta, Artichokes and Olives had us feeling fine on Cloud Nine. It was really a flavorful and delicious recipe that came together quickly. Despite the ease of preparation—the fish, sauce, and side dish all cook in one skillet—this is a restaurant-worthy dinner. If desired, serve it with good crusty bread to mop up the sauce. For a more low-carb dinner, we just paired with a side salad.

Can’t emphasize how much we truly loved this Mediterranean-style dish… and talk about healthy! Plus, we definitely almost doubled the amount of olives and increased the marinated artichokes too.

My only complaint is with Step 4 “Add the wine and cook until the pan is almost dry, about 1 minute.” It was more like 4-5 minutes for most of the liquid to evaporate. Minor issue I know, but it’s good to know ahead of time.

IMG_5148
All of the ingredients are measured and prepped.

Ingredients

  • 4 6-oz. pieces fresh cod loin fillet
  • Kosher salt and freshly ground black pepper
  • 2 Tbs. extra-virgin olive oil
  • 2 oz. pancetta, cut into 1/4-inch dice (about 1/4 cup)
  • 1 medium yellow onion, cut into 1/4-inch dice
  • 1 tsp. fresh thyme leaves
  • 1/8 to 1/4 tsp. crushed red pepper flakes
  • 1/2 cup dry white wine
  • 1 15-oz. can diced fire-roasted tomatoes in juice
  • 1 cup marinated artichoke hearts, drained and chopped
  • 1/2 cup large green olives, such as Castelvetrano, pitted and halved

IMG_5152
Once cooked, the pancetta is removed with a slotted spoon.

IMG_5153
The cod filets start browning in the oil after the pancetta is removed.

IMG_5154
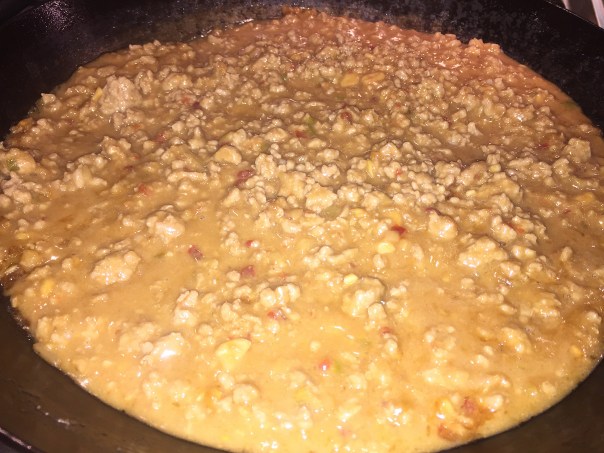
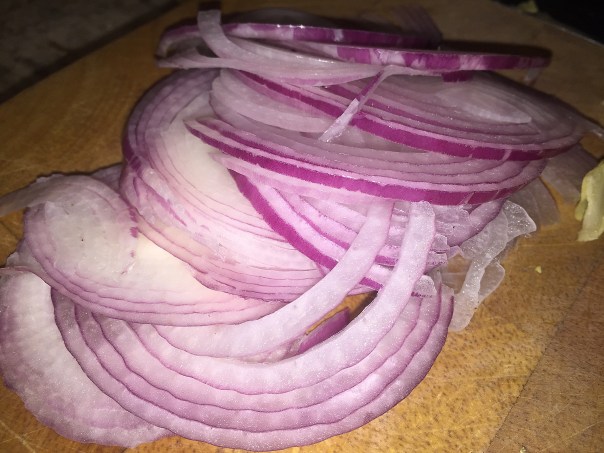
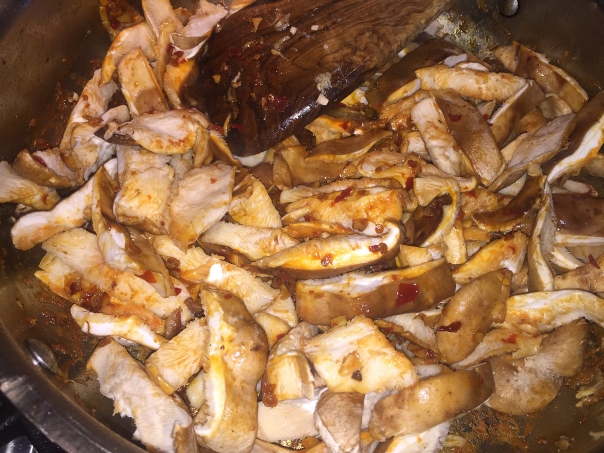
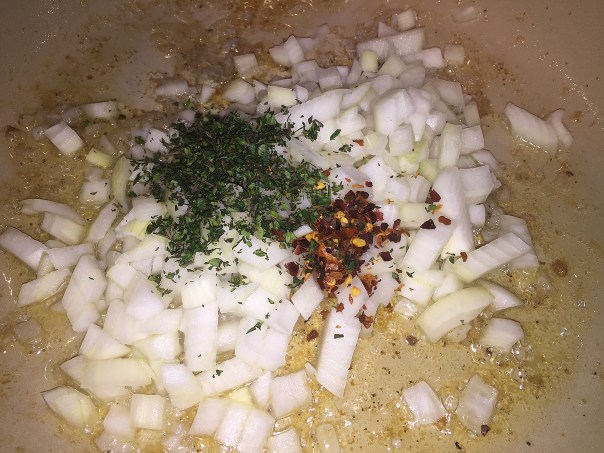
Remove the fish, then add the onion, thyme, and pepper flakes to the skillet.

IMG_5155
The onion is stirred until soft, about 4 minutes.

IMG_5157
After the wine is mostly evaporated, add the tomatoes and their juice, artichokes, and olives.

IMG_5160
Nestle the fish into the sauce, keeping the seared side exposed.

Directions

  1. Pat the cod dry and season with salt and pepper.
  2. Heat the oil in a 12-inch nonstick skillet over medium-high heat. Add the pancetta and cook, stirring, until crisp and golden, 2 to 4 minutes. Using a slotted spoon, transfer the pancetta to a paper-towel-lined plate, leaving the fat behind in the pan.
  3. Add the fish to the skillet and cook until slightly golden, about 3 minutes. Flip and transfer to a plate, seared side up.
  4. Add the onion, thyme, and pepper flakes to the skillet; cook, stirring, until the onion is soft, about 4 minutes. Add the wine and cook until the pan is almost dry, about 1 minute. Add the tomatoes and their juice, artichokes, and olives. Simmer, stirring occasionally, to meld the flavors, about 2 minutes.
  5. Lower the heat to medium and nestle the fish into the sauce, keeping the seared side exposed. Cover and cook until the fish is opaque and just cooked through, about 3 minutes. Sprinkle with the pancetta, divide among rimmed plates or wide, shallow bowls, and serve.

OUR NOTE: If not using a non-stick skillet, double the amount of olive oil.

by Christine Burns Rudalevige from Fine Cooking

Five-Star Weeknight Chicken

This classic, comforting dish (who doesn’t love succulent roast chicken?) takes a bit longer that the usual 3o minutes, but it’s almost entirely hands-off. Now Baked Chicken with Herbs, Garlic and Shallots is sure to be a staple of our weeknight dinner repertoire.

It’s unbelievably easy, resulting in beautifully crisped flavorful chicken! And the aromas while cooking are to die for. You may want to, as we did, add additional garlic and shallots because once roasted they are heavenly. Don’t overcrowd the baking dish, use lots of kosher salt and you will be rewarded with crispy chicken and nicely roasted garlic cloves that can be slathered onto warm crusty bread. If you prefer soft, creamy garlic, make sure to tuck the cloves under the chicken parts.

IMG_5213

Vary the herbs as you like, but stick to the hardy ones—thyme, rosemary, sage, and oregano. They’ll roast without burning and have a stronger flavor. While the instructions don’t mention chopping the herbs, I did give them a rough chop because the narrow pointed rosemary leaves were quite large.

The recipe calls for a whole chicken, and that’s what we use because Russ likes to cut out the back and keep the neck—to add to our bag of chicken parts in the freezer—and save for making stock at a future date. Plus, he likes the dark meat, I, the white. You could save time by buying pre-cut chicken parts, just remember to reduce the roasting time by about 10 minutes.

The next time we make this, and I’m sure it will be soon, we will add a 1/2 cup chicken stock to mix with the pan juices, and then bring the liquid to a boil and reduce in a small pan to make jus.

Our side was a Warm Potato and Watercress Salad (recipe follows chicken recipe) that paired well with the chicken and can be roasted in the same oven. Once the potatoes are removed from the oven, simply toss them in the homemade vinaigrette, add the greens until a bit wilted, and divide directly onto the dinner plates, not need to dirty another bowl.

IMG_5195

Ingredients

  • 1 chicken (3-1/2 to 4 lb.), cut into quarters
  • 3 Tbs. unsalted butter
  • 6 medium shallots, cut in half and peeled
  • 8 large garlic cloves, peeled
  • Leaves stripped from 10 sprigs fresh thyme
  • Leaves stripped from 8 sprigs fresh rosemary
  • 1-1/2 tsp. coarse salt
  • Freshly ground black pepper

IMG_5200
The chicken pieces are rubbed in the butter, herbs and oil and well salted.

Directions

  1. Heat the oven to 425°F. Rinse the chicken and pat it dry with paper towels. Cut away any excess fat and tuck the wings behind each breast.
  2. Put the butter into a large, shallow baking pan (the 10-1/2×15-1/2-inch Pyrex pan is ideal for this). Put the pan into the oven while it’s heating. When the butter is melted (about 10 minutes), remove the pan and set it on a heatproof surface or on a couple of potholders.
  3. Add the shallots, garlic, thyme, and rosemary, and swirl the pan to coat the ingredients in the butter.
  4. Dredge the chicken, skin side down, in the butter and herb mixture, and arrange, skin side up, in the pan. Sprinkle the chicken generously with the salt and pepper. Bake until the chicken is browned and cooked through, 50 to 60 minutes. (Ours was done after 50 minutes.)
  5. Serve with the shallots and garlic along with a drizzle of the pan drippings.

by Abigail Johnson Dodge from Fine Cooking

IMG_5201
Just look at these gorgeous little purple potatoes getting happy in olive oil and salt.

IMG_5204
Olive oil, lemon juice, Dijon mustard, salt and pepper make up the ingredients for the vinaigrette.

IMG_5205
Whisk the dressing ingredients well before tossing with the roasted potatoes.

Warm Potato and Watercress Salad

Ingredients

  • 2 bunches stemmed watercress
  • 9 oz. fingerling potatoes, any color
  • 3 Tbsp. olive oil
  • 1/2 tsp. kosher salt
  • 1 Tbsp. fresh lemon juice
  • 1/2 tsp. Dijon mustard
  • Salt and pepper to taste

Directions

  1. Halve the fingerling potatoes and toss them with the olive oil and salt. Arrange on a rimmed baking sheet. Roast in the same oven as the chicken, putting them in the oven 20 minutes before the chicken is done. Turn the potatoes after 10 minutes and cook another 10 minutes (20 minutes total) until golden brown and tender.
  2. Meanwhile make a simple vinaigrette with the olive oil, lemon juice, mustard, salt and pepper; whisk well.
  3. When the potatoes are done, pour some of the dressing over them on the hot baking sheet and toss. Add stemmed watercress and toss until it starts to wilt. Season with salt and pepper and serve with additional dressing on the side if desired.

Clean-Out-the-Fridge Frittata

Ever get to the end of the week and find a hodge podge of little bits of leftovers in the fridge? It certainly happens to us on occasion. What to do other than throw the food out, or into the compost pile? Make a dazzling frittata of course! We even have a special Spanish frittata platter which adds an artistic touch to the presentation.

The difference this time around was that Russ saw an episode on “Cocina con Bruno”—Cooking with Bruno, a Spanish cooking show he watches religiously— where Bruno flipped the frittata in a pan to cook the other side instead of finishing it in an oven. Sounded simple enough? Well it wasn’t. But we all know practice makes perfect, right?

But I digress… A well-made frittata is one of the world’s most perfect foods. It’s cheap, quick-cooking, and an efficient vehicle for leftovers—not to mention equally delicious at breakfast, lunch, and dinner. A frittata makes use of fully-cooked leftovers like last night’s roasted potatoes or this morning’s leftover bacon. And it tastes as good (and arguably better) cold or at room temperature as it does warm.

IMG_5121
The first side is starting to set before it is either flipped in the pan, or finished in the oven.

IMG_5123
Russ sprinkles on some grated parmesan before the flip.

If you’re starting from scratch, it’s best to fully cook any addition that might release moisture into the eggs—mushrooms, tomatoes, and summer squash or zucchini are common “wet” culprits than can water down your eggs. Sauté them separately.

This also holds true for aromatics, like onions, and sturdy veggies, like raw potatoes. They won’t get much more tender once you add the beaten eggs. Don’t be afraid of getting a little color on the vegetables: That’s what makes them so delicious!

Frittatas are easy to make, but that doesn’t mean you can throw caution to the wind and guess at the proportions. For every dozen eggs you use, some experts say you’ll need a half-cup of dairy, i.e. six-egg frittatas get a quarter-cup. Want to go smaller than that? Don’t bother. The beauty of a frittata is that it serves a crowd and keeps well. Russ doesn’t use dairy in every case, and this was one of those times.

A good frittata should have the texture of custard: trembling and barely set. You may want a deep golden-brown top, but the reality of it is, when the crust is golden, the interior is over-baked. If you must have a tanned top, try sprinkling cheese over it in the last few minutes of cooking time (if cooking in the oven.) 

Frittata is an egg-based Italian dish similar to an omelette or crustless quiche, enriched with additional ingredients such as meats, cheeses, vegetables or pasta. The word frittata is Italian and roughly translates to “fried”

I found this ideal infographic by June Kim which might help you in deciding (although the specs may differ somewhat) how much of what to throw in, and how long to cook. That is if you don’t do the flip method!

infographic.by.june.kim

Our ingredients for this frittata:

  • 6 eggs, slightly beaten (we only had 5 on hand)
  • 2 oz. pancetta, cut in 1/4” dice
  • 1/2 yellow pepper, 1/4” dice
  • 1/2 yellow onion, 1/4” dice
  • 3/4 cup grape tomatoes, cut in vertical slices
  • 2 Tbsp. finely minced fresh herbs: parsley, sage, chives
  • 1/4 cup (at most) parmesan cheese
  • 1 Tbsp. olive oil
  • Salt and pepper to taste
  • 1/4 cup dairy (if using)

The whole point of a frittata is that you can make it anytime, with almost anything. Just keep these few tips in mind:

SIZE IT RIGHT

If baking entirely in the oven, any 2-quart baking dish works well for this frittata. For a classic look, cook your frittata in a 12″ cast-iron skillet, then finish in the oven. Larger dimensions will work, too, but will yield shallower frittatas and require shorter cooking times.

GO EASY WITH THE BEATING

Beat the eggs only enough to blend the whites and yolks. Overbeating will cause the frittata to poof in the oven, then fall into a denser layer when cooling.

PRE-COOK YOUR MIX-INS

While just about anything can be stirred into the egg base, you should stick to ingredients that are already cooked. For anything with excess moisture, such as sautéed greens, be sure to squeeze out any liquid first.

IMG_5130
A little slice of yummy goodness any time of day.

The Mexi-Tattata

The following weekend Russ made another frittata, this time incorporating leftover baby fingerling potato slices, red pepper, onion, and heavy cream. However, he also wanted to use some cilantro and a jalapeno that were getting past their prime. Plus we had just purchased a hunk of Habanero-Jalapeno Cheddar Cheese from the Newtown Farmer’s Market.

IMG_5233
The veggies (potatoes, peppers and onion) are precooked to eliminate any moisture.

IMG_5235
Some habanero-jalapeno cheddar cheese is grated into the egg and dairy mixture.

As a final touch to the newly christened “Mexi-Tattata,” he sprinkled in about a 1/4 teaspoon of pimenton to the egg mixture. And instead of trying the flip-method again, he finished it under the broiler. Excellente!

IMG_5242


Take a Walk on the Mild Side, or Not

Curry-scented coconut milk simmers down to a thick and flavorful sauce for carrots, cauliflower, spinach, and chickpeas in this fragrant Indian Vegetable Curry one-pan dish. Eat hot, or not? That is the question.

With no hot curry powder on hand, we used regular Thai Red Curry paste with a touch of cayenne powder. In the end, it was a bit too much on the mild side for our tastes. Maybe actually using hot curry powder would be enough to take it up a notch or two. Point being, if you prefer bold and spicy, try to find hot curry powder, otherwise stick to the Thai red curry paste without any cayenne added.

Like a dingbat, I went and tossed in the entire can of coconut milk instead of just one cup, and wondered why Step 2 mentions adding water if the pan looks too dry. Mine wasn’t even close to dry! However, turns out is was a fortuitous mistake, we like our dishes saucy.

Definitely want to serve over long-grain or Basmati rice.

IMG_4823

Ingredients

  • 1 cup unsweetened coconut milk, stirred (not lite)
  • 12 oz. cauliflower florets, cut into bite-size pieces (about 3 cups)
  • 1 large carrot, sliced . inch thick on the diagonal
  • 1 medium yellow onion, halved and thinly sliced engthwise
  • 1 Tbs. minced fresh ginger
  • 2 tsp. minced garlic
  • 2 tsp. hot curry powder, such as Madras
  • Kosher salt
  • 3 oz. baby spinach (about 3 lightly packed cups)
  • One 15-oz. can chickpeas, drained and rinsed
  • 2 medium plum tomatoes, cut into 1/2-inch dice*
  • 3 Tbs. chopped fresh cilantro

Directions

  1. In a 12-inch skillet set over medium-low heat, stir together the coconut milk, cauliflower, carrot, onion, ginger, garlic, curry powder, and 1 tsp. salt.
  2. Raise the heat to high and bring to a boil; reduce to a simmer, cover, and cook, stirring often, until the cauliflower is tender when pierced with a knife, about 10 minutes. (If the pan looks dry, stir in water. cup at a time.)
  3. Stir in the spinach, chickpeas, and tomatoes and continue to cook until the chickpeas are heated through and the spinach is wilted, about 5 minutes.
  4. Stir in the cilantro, season to taste with salt, and serve.

On the side: Cook long-grain or basmati rice according to package directions, crushing some saffron threads and adding to the cooking water. Toss chopped fresh cilantro with the cooked rice.

IMG_4827

IMG_4830

—Robin Asbell, Fine Cooking

How to dice plum tomatoes

Plum tomatoes tend to have big seed chambers and less inner flesh than round tomatoes, so the most efficient technique for dicing them is a bit different: First, cut a thin slice from the bottom to create a flat surface on which to stand the tomato. Cut wide strips from the top, curving down to the bottom, to separate the flesh from the inner seed core. Cut all the flesh away in this manner, leaving the seedy core of the tomato; discard the core. Cut each strip of flesh lengthwise as wide as you want your dice to be, and then cut these strips crosswise into dice.

Samarkand

Quite by accident while driving home from a dinner out, we passed Samarkand Kebab House, self-described as “the best Uzbeki kitchen in the Philadelphia region.” It’s a BYO on Bustleton Pike in Feasterville, PA, and it caught our fancy.

Several weeks later I called to make reservations for a Friday night to include our friends Barb and Brad. During the res conversation I had some difficulty understanding the woman due to a heavy accent, but we managed to finalize the details, or so I had hoped. She asked which floor we would like to dine on (or words to that affect), and I inquired what the difference was. Apparently on weekends they have loud music and dancing on the first floor. Knowing we would want to converse over our meals, I opted for a second floor table.

samarkand.interior
Brad’s image is reflected in the mirrored post across from our booth.

First impressions upon arriving? Well, you walk into the second floor from the parking lot. And for 8:00 on a Friday night, it was all but empty. We were promptly seated at a booth and given menus, although it took a few requests before we finally got our water.

IMG_5085
Barb getting ready to press the “Call” button.

Intrigued by the button on the wall, Barb’s curiosity got the best of her and she pressed it. No loud sirens went off, in fact nothing happened. I’m sure the staff get a kick out of the “Americans” who seem compelled to touch it. During this curiosity phase, we began to peruse the extensive menu.

Both couples decided to split beautifully plated salads and share Stuffed Cabbage (pictured up top), which came with two delicious rolls per plate. Russ and I loved the Mushroom Salad, with marinated mushroom, green peas, black olives, green onions, vegetable oil and spices. And Brad and Barb split the highly recommended Vostochny Salad, with roasted eggplant, tomatoes, red and green peppers with dill, garlic and spices.

IMG_5087
The salad portion of the menu.

IMG_5091
Russ and I really liked our Mushroom Salad.

IMG_5092
Barb’s friends recommended she order the Vostochny Salad.

For dinner we all zeroed in on the Shish Kebabs, which are ordered per skewer (vertel in Russian.) Russ and I each chose a Veggie Shish Kebab assembled with tomatoes, onion, zucchini and red peppers. Our other choices were Salmon Kebab for me, and a Rolled Beef Kebab and Boneless Lamb Kebab for Russ. For our dining friends, Barb got a Chicken Kebab and Brad also chose the Rolled Beef.

The kebabs were accompanied with a small pitcher of spicy tomato sauce which some liberally poured over their entrees.

IMG_5086
An assortment of shish kebabs are reasonably priced per skewer.

IMG_5098
Two veggie, one kebab each of rolled beef and boneless lamb.

IMG_5099
Salmon and veggie kebabs topped with thinly sliced onion and a sprinkle of dill.

IMG_5101
Brad and Barb’s chicken and rolled beef kebabs arrived on the same platter.

Yes, we all agreed, the food was very good and we plan on making a return visit. Let’s just hope that there’s an uptick in patronage in the meantime so that they don’t shutter their doors.

No Cooking Required

Bring out that EASY button again. Some nights (many?) you just don’t feel like cooking, and Spinach and White Bean Salad with Tuna not only fulfills that wish, but you’ll be bowled over by the fabulous taste and healthy ingredients.

The bright, fresh combination of endive and spinach makes this salad an elegant lunch or light dinner. Water-packed canned tuna works fine, but oil-packed tuna has a richer, more satisfying flavor. Whenever possible splurge for the good stuffed packed in olive oil. We wait until La Tienda is having a sale, then we order a lot of Spanish ingredients—in this case, Serrats White Tuna in Olive Oil.

And if you’re using the high-end tuna, drain the oil into a container and use 3 tablespoons of that for the dressing instead of tossing it out. However, if canned tuna in water is what you have, then you will want to incorporate a good extra-virgin olive oil.

As an added bonus we sliced up some pitted black olives as a garnish on the salad. While it is best eaten shortly after tossing the ingredients, we had enough leftover for two lunches the next day. Yes, the spinach was a bit more wilted, but the flavors were just as wonderful.

A make-ahead option is to assemble the salad up to the point of incorporating the endive and spinach, mixing that in just before you serve. This will be a perfect recipe for the hot summer months…

IMG_5037

IMG_5042
The capers, garlic, salt and pepper will get minced together as a paste.

IMG_5044
Cut half of a red onion into very thin slices.

Ingredients

  • 2 Tbs. brine-packed capers, rinsed and drained
  • 1 medium clove garlic
  • Kosher salt and freshly ground black pepper
  • 3 Tbs. fresh lemon juice
  • 1 Tbs. Dijon mustard
  • 3 Tbs. extra-virgin olive oil
  • 2 5-oz. cans albacore tuna, drained
  • 1 15-oz. can cannellini or navy beans, rinsed and drained
  • 1/2 small red onion, very thinly sliced
  • 6 oz. (6 packed cups) baby spinach
  • 2 heads red or white Belgian endive, coarsely chopped

IMG_5041
Draining the oil from the good Spanish tuna for use in the dressing.

IMG_5047
The garlic caper paste gets mixed with lemon juice and the drained oil.

IMG_5048
Large tuna flakes are mixed into the dressing.

IMG_5051
Just prior to adding the greens, toss in the beans and onion. If you’re not going to eat right away, wait to add the spinach and endive.

Directions

Using a chef’s knife, mince and mash the capers and garlic with 1 tsp. salt and 1/4 tsp. pepper. Scrape into a large bowl and whisk in the lemon juice and mustard. In a slow stream, whisk in the oil until emulsified. Add the tuna, flaking it into large pieces, then the beans, onion, spinach, and endive. Toss gently with the dressing and serve.

by Liz Pearson from Fine Cooking

Filet Mignon, Say No More!

Can’t get much easier than this. Bite-sized morsels of beef tenderloin are flavored with garlic, stir-fried and combined with tomatoes and scallions for a simple one-dish meal to serve over rice.

Usually a pricey cut of meat if ordering at a restaurant or buying individual steaks, buying a whole beef tenderloin can be a great way to purchase a deliciously tender cut of beef at a savings and get several meals from it. And thanks to friend Rosanne, she picked us up a whole tenderloin at a great discount several months ago. We sliced it up into filet mignon steaks and packed the remainder as tips, then froze them all individually.

I believe we got eleven, 2″ thick filets plus the tips, averaging out to about $7 per steak, for filet mignon!! You know, the cut of meat that is considered the king of steaks because of its tender, melt in the mouth texture? So tender in fact, a prime filet mignon can literally be cut with a fork. OK, reign me in…

Tenderloin Tips with Garlic and Mushrooms is a quick stir-fry made from the parts of the whole tenderloin, as mentioned above, that are left over after slicing it into filet mignon. Flavored with garlic and combined with tomatoes, mushrooms and scallions, these tender bits of steak make a fabulous one-dish meal to serve over rice.

IMG_4948
Our frozen bag of filet tips of just under a pound thaws on the countertop.

IMG_4951
Minced garlic, soy sauce and Worcestershire sauce are combined in a medium bowl.

IMG_4954
Meat chunks are added to the mixture and marinate at least 15 minutes.

Must confess, based on the small amount of liquids, we were concerned there wouldn’t be enough sauce resulting in a dry meal. But at the very end, the tomatoes release their moisture and that tablespoon of butter coerced the other pan juices to meld producing a very flavorful stir-fry.

Ingredients

  • 1 lb beef tenderloin tips, cut into 1-inch cubes
  • 4 to 5 cloves garlic, very finely chopped
  • 2 tablespoons vegetable oil, divided
  • 2 teaspoons soy sauce
  • 1/2 teaspoon Worcestershire sauce
  • Salt and freshly ground black pepper
  • 8 ounces cremini or white button mushrooms, sliced
  • 1-1/2 cups grape or cherry tomatoes, halved
  • 4 to 5 scallions, chopped
  • 1 tablespoon butter
  • Steamed white or brown rice

IMG_4955
Mushroom slices are stir-fried until lightly golden brown.

IMG_4956
The beef mixture is added to the mushrooms and stir-fried a few minutes more.

Preparation 

  1. Combine the tenderloin tips, garlic, 1 tablespoon of the vegetable oil, soy sauce and Worcestershire in a mixing bowl. Season with salt and pepper and toss to coat the beef thoroughly. Set aside for 15 minutes at room temperature. (Ours sat in the marinade closer to 45 minutes.)
  2. Heat the remaining tablespoon of vegetable oil in a large, heavy skillet or wok over medium-high heat. Add the mushrooms and stir-fry until lightly browned, 4 to 5 minutes. Add the beef mixture and stir fry until browned on the outside, 2 to 3 minutes for medium rare.
  3. Add the tomatoes and scallions and toss to combine. Add the butter and continue cooking just long enough to coat the meat with the pan juices. Remove from the heat.
  4. To serve, plate individual servings of rice and top with the steak mixture.

IMG_4959
We ladled the completed stir-fry over brown rice.

We Lika Dukka

What to do with some leftover spring veggies? Taking stock of what was lurking in the crisper, I uncovered several ounces of fresh sugar snap peas and a handful of asparagus stalks. And then it occurred to me that our latest issue of Cooks Illustrated featured an article on sautéed sugar snap peas, which seemed like a good place to start.

Once I zeroed in on the ingredients, I was hooked! Pine nuts (love ’em), fennel seed (oh yeah), lemon zest (you bet), garlic, red pepper flakes and fresh basil, all winners! Of course there was no mention of asparagus, but since I didn’t have enough snap peas to start with, I decided to combine the two. This was also a teaching moment because I found out the combination of herbs and spices is called a dukka—an Egyptian condiment made of finely chopped nuts, seeds, and seasonings… and now I can pass this knowledge on to you…

IMG_4938
The toasted pine nuts and fennel seeds before they are chopped.

IMG_4939
Starting to finely chop the nuts, seeds, lemon zest and red pepper flakes.

Recipe title: Sugar Snap Peas with Pine Nuts, Fennel Seed and Lemon Zest. Insert the word “Asparagus” and I’m good to go! To ensure that the pods and peas cook through at the same rate, use a hybrid method that steams the sugar snap peas and asparagus briefly before sautéing them; the trapped steam transfers heat more efficiently than air does so that the veggies cook through more quickly.

Cutting the peas in half and the asparagus at a strong angle, further reduces the cooking time, so the pea pods retain more of their snap, and the pockets capture the seasonings rather than letting them slide to the bottom of the platter. Sprinkling the veggies with the dukka dresses up the simple preparation with distinct (but not overwhelming) flavor and crunch.

This veggie side dish is really, really good! Some other seasoning combinations could be: almonds, coriander seed and orange zest; or sesame seeds, fresh ginger and lemon zest. Because I always tend to measure seasonings on the broader scale, we had enough dukka leftover for a future vegetable side, so I put it in a small ziploc in the freezer until ready to use.

IMG_4935
The ingredients prepped and measured.

INGREDIENTS

  • tablespoons pine nuts
  • teaspoon fennel seeds
  • ½ teaspoon grated lemon zest
  • ½ teaspoon kosher salt
  • ⅛ teaspoon red pepper flakes
  • teaspoons vegetable oil
  • 12 ounces sugar snap peas, strings removed, halved crosswise on bias
  • tablespoons water
  • garlic clove, minced
  • tablespoons chopped fresh basil

IMG_4945
Our snap pea and asparagus side paired with a salmon patty.

DIRECTIONS

Do not substitute ground fennel for the fennel seeds in this recipe.

  1. Toast pine nuts in 12-inch skillet over medium heat, stirring frequently, until just starting to brown, about 3 minutes. Add fennel seeds and continue to toast, stirring constantly, until pine nuts are lightly browned and fennel is fragrant, about 1 minute longer.
  2. Transfer pine nut mixture to cutting board. Sprinkle lemon zest, salt, and pepper flakes over pine nut mixture. Chop mixture until finely minced and well combined. Transfer to bowl and set aside.
  3. Heat oil in now-empty skillet over medium heat until shimmering. Add snap peas and water, immediately cover, and cook for 2 minutes.
  4. Uncover, add garlic, and continue to cook, stirring frequently, until moisture has evaporated and snap peas are crisp-tender, about 2 minutes longer.
  5. Remove skillet from heat; stir in three-quarters of pine nut mixture and basil. Transfer snap peas to serving platter, sprinkle with remaining pine nut mixture, and serve.

An Avid Fan of Toban Djan

This Chicken, Shiitake and Watercress Stir-Fry gets deep complexity from Chinese fermented chile-bean sauce, also called toban djan, which can be found in the Asian section of well-stocked supermarkets. Grace Young, award-winning chef-author, extols the virtues of this sauce in her Stir-Frying to the Sky’s Edge cookbook and we’ve become avid converts.

We couldn’t resist stirring in an extra tablespoon of toban djan at the end. The dish comes together in a snap and is great with rice. Also fabulous as leftovers.

IMG_4838

Chicken, Shiitake and Watercress Stir-fry

  • Servings: 4
  • Difficulty: easy
  • Print

Ingredients

  • 1 lb. boneless, skinless chicken thighs, cut into 3/4-inch pieces
  • 1 Tbs. reduced-sodium soy sauce
  • 1 tsp. sake or Shaoxing
  • 2 tsp. cornstarch
  • Kosher salt
  • 2 Tbs. canola or other neutral oil
  • 1-1/2 Tbs. Chinese chile-bean sauce; more to taste
  • 2 tsp. minced fresh ginger
  • 6 oz. shiitake mushrooms, stemmed and sliced (about 2-1/2 cups)
  • 1/4 cup lower-salt chicken broth
  • 1 medium bunch watercress (6 oz.), stemmed
  • 1 Tbs. rice vinegar

IMG_4846
Marinating the chicken chunks in corn starch, sake and soy sauce.

IMG_4849
Browning the chicken in a skillet before removing to sauté the shiitakes.

IMG_4851
Mushrooms cook in oil with chili-bean sauce and ginger.

IMG_4855
After removing from heat, watercress and vinegar are stirred in.

Directions

  1. Put the chicken in a medium bowl and toss with 2 tsp. of the soy sauce, the sake, cornstarch, and 1/4 tsp. salt. Heat a wok or a 12-inch skillet over high heat. Add 1 Tbs. of the oil and the chicken to the pan in a single layer.
  2. Leave the chicken undisturbed for about a minute before stirring, and then cook, stirring occasionally, until browned and partially cooked, about 4 minutes. Transfer the chicken to a bowl.
  3. Return the pan to high heat. Add the remaining 1 Tbs. oil, the chile-bean sauce, and ginger to the pan, and stir to combine. Add the mushrooms, and cook, stirring frequently, until tender, about 2 minutes.
  4. Return the chicken and any accumulated juices to the pan. Stir in the broth and the remaining 1 tsp. soy sauce. Cook, stirring frequently, until the chicken is cooked through, about 2 minutes.
  5. Remove the pan from the heat and stir in the watercress, vinegar, and more chile-bean sauce to taste. Toss until the watercress wilts. Serve hot.

http://www.lynnandruss.com

By Laura B. Russell from Fine Cooking

Pasta with Red Sauce is So Last Season

Pasta night just got a little more interesting. Not just because the chef-author is Pamela Anderson—from Fine Cooking, not Baywatch—but if it gets you to try Pasta with Roasted Cauliflower, Arugula and Prosciutto, so be it. Your plate will resemble a foodie artist’s palette layering texture with color and flavor with bits of salty prosciutto mixed perfectly with roasted cauliflower, sweet grape tomatoes and peppery arugula.

A mouthful of satisfaction might be a good way to describe it. It’s too bad that most grocery stores only sell a limited amount of gluten-free pasta shapes. Because of that, we used rotini instead of orecchiette.

Our addition: As an extra bonus, add some toasted pine nuts for a mild, sweet, buttery crunch.

IMG_4728
Fresh sage leaves, and yes, a few more than 4 garlic cloves.

IMG_4729
Sage leaves and garlic cloves are put in a mini food processor.

IMG_4732
After the sage and garlic are minced, prosciutto is pulsed until coarsely chopped.

Ingredients

  • Kosher salt
  • One-half medium head cauliflower, cored and cut into 3/4-inch florets (3-1/2 cups)
  • 1 pint grape tomatoes
  • 3 Tbs. extra-virgin olive oil
  • Freshly ground black pepper
  • 9 large fresh sage leaves
  • 4 large cloves garlic, peeled
  • 6 thin slices prosciutto (about 4 oz.)
  • 12 oz. dried orecchiette
  • 5 oz. baby arugula (5 lightly packed cups)
  • 3/4 cup grated Parmigiano-Reggiano

IMG_4734
The cauliflower starts to turn brown after 15 minutes in a hot oven.

IMG_4735
The herb mixture is added to the cauliflower and tomatoes and roasted for another 5-7 minutes.

IMG_4737
Mix the roasted cauliflower mixture, arugula, and cheese into the cooked pasta, and top with pine nuts if using.

Directions

  1. Position a rack in the lower third of the oven and heat the oven to 425°F. Bring a large pot of well-salted water to a boil.
  2. Toss the cauliflower, tomatoes, oil, 3/4 tsp. salt, and 1/2 tsp. pepper on a rimmed baking sheet; spread in a single layer. Roast, stirring once or twice, until the cauliflower begins to turn golden and tender, about 15 minutes.
  3. Meanwhile, pulse the sage and garlic in a food processor until minced. Add the prosciutto and pulse until coarsely chopped. Once the cauliflower is golden, toss the herb mixture into the vegetables and continue to roast until fragrant and the cauliflower is golden brown, 5 to 7 minutes.
  4. Boil the orecchiette until al dente, 9 to 10 minutes. Reserve 1 cup pasta-cooking water. Drain the pasta and return it to the pot. Stir in the roasted cauliflower mixture, arugula, cheese, and enough pasta water to moisten. Season to taste with salt and pepper.
  5. Top with toasted pine nuts (optional.)

by Pamela Anderson from Fine Cooking

Expanding Our Culinary Chops

During one grocery shopping adventure we spotted breast of veal in the meat case. Russ mentioned he always wanted to cook one of those babies, so we bought it, and froze it for a future dinner. Encouraged by author Molly Steven’s cookbook notation in All About Braising “If you’ve never cooked or tasted a breast of veal, this is the place to start. The simple directness of the recipe brings out all the goodness this inexpensive cut has to offer.” Say no more…

The following photos of Breast of Veal Braised with Garlic, Parsley and Lemon tell a visual story of how gorgeous the meat looks during every stage of the cooking process. The taste was undeniably delicious, however I was not too thrilled about the amount of fat, in some portions, layered within the veal. Yes, you can remove it, but it’s something I’d rather not have to contend with. C’est la vie.

IMG_4549

IMG_4552
Browning both sides in shimmering oil.

IMG_4555
The end cap gets browned by holding the breast with tongs.

IMG_4556
Once browned, the meat is moved to a plater where juices will collect.

About that sauce. You can purchase the veal stock, or demi-glace, at the supermarket, usually sold in the meat counter. Demi-glace is one of the rich brown sauces from classic French cuisine, made by simmering bones, aromatics and wine for days, which extracts the gelatin from the bones, concentrates the flavors and thickens the sauce.

D’Artagnan (our choice) offers a classic veal demi-glace made according to traditional methods, beginning with the bone stock, which is slowly simmered until reduced by about half its volume. The liquid is strained, then red wine is added, and finally, a little tomato paste is stirred in. No additional gelatin is needed because the bones are rich in natural collagen. Nor is any salt or flour added. The result is a very concentrated stock that can be used as a base for other sauces, or by itself.

IMG_4547
Mashing garlic cloves and salt with pestle and mortar.

IMG_4551
Adding parsley and lemon zest to the garlic paste.

IMG_4559
Smear the garlic-parsley mixture all over the veal; pushing the seasoning into folds and crevices; then set the veal into a heavy lidded casserole and pour over any juices.

IMG_4573
After 2 hours the veal is braised uncovered for another 30 minutes.

The process from start to finish takes about 4 hours, so plan accordingly. Instead of using both a skillet and heavy-duty casserole as described in the directions, we just used the casserole pot from the get-go. One less item to clean, in our humble opinion.

Our sides included Butter Braised Radishes—something we’ve never tried before—and Mashed Parsnips—a dish we recently tried and fell head-over-heels for! (See blog on mashed parsnips under the Bits N Pieces tab.) Now back to the star of the show…

IMG_4578

IMG_4579
Once the veal is fully cooked, set it aside to cool somewhat. Gorgeous!

IMG_4582
With your hands, tug on the rib bones extending from the meat until they come loose, and feel around for any cartilage that may be present, wriggling and tugging until they come free.

IMG_4590
Set the veal (whole or sliced) into a shallow baking or ovenproof serving dish and pour over the degreased pan juices.

Ingredients

  • 2 Tbsp extra-virgin olive oil
  • 4 lb. bone-in breast of veal
  • 8 garlic cloves, peeled
  • Coarse salt
  • 1/4 cup finely chopped flat leaf parsley
  • Grated zest of one lemon
  • Freshly ground black pepper
  • 1 cup dry white wine or dry white vermouth
  • 1 cup veal stock, homemade or store bought

Directions

  1. Heat oven to 350 degrees.
  2. Heat oil in a heavy skillet large enough to hold the veal comfortably, over medium heat until it shimmers.
  3. Pat the veal dry with paper towels, and lower into skillet with tongs.
  4. Cook turning once until meat has a deep roasted appearance on both sides, about 8 minutes per side. Transfer to a platter to collect any juices that seep out, and let cool slightly.
  5. Discard fat from skillet and wipe out any charred bits with a damp paper towel, being careful not to dislodge the precious caramelized drippings. Set skillet aside.
  6. To make the garlic paste, drop the cloves into a mortar, sprinkle with 1 teaspoon salt, and smash and grind into a paste. Transfer to a small bowl and add the parsley, lemon zest, and a few grinds of black pepper.
  7. When the veal is cool enough to handle, use your fingers to smear the garlic-parsley mixture all over it; pushing the seasoning into folds and crevices as deep as you can without tearing the meat apart.
  8. Set veal into a heavy lidded casserole (3-4 quart), and pour over any juices that seeped from the veal.
  9. Return skillet to high heat and add the wine. Bring to a boil, scraping the bottom with a wooden spoon to dislodge and flavorful bits stuck there, and reduce down to about a 1/3 cup, about 8 minutes.
  10. Add the stock, bring to a boil, and boil for 3 minutes. Pour this liquid around the breast of veal—but not directly over the meat. Cover with parchment paper, pressing down so the paper nearly touches the veal and the edges hang about an inch over the sides of the pot. Set the lid in place.
  11. Slide the pot into the lower part of the oven to braise at a gentle simmer. After about 15 minutes, check to see that the liquid is not simmering too vigorously. if it is, reduce the oven by 10-15 degrees. Continue to braise gently for another 15 minutes more, then, using tongs, turn the veal over.
  12. After 2 hours, turn the veal again, more carefully this time as the meat may be starting to fall off the bone.
  13. Continue to braise, uncovered, so that the surface can caramelize, until the veal is completely tender, about 30 minutes more (2 1/2 hours total.)
  14. Remove the veal from the pot onto a platter or cutting board with a moat to catch the juices.Let sit for 20 to 30 minutes, until cool enough to handle. Turn the oven up to 325 degrees.
  15. With your hands, tug on the rib bones extending from the meat until they come loose. Discard. Feel around the veal for any cartilage that may be present, wriggling and tugging until they come free. You may have to pull the meat apart in a few places, but don’t worry.
  16. Degrease the pan juices as best you can, and taste for salt and pepper. There are two options for serving: carve the breast of veal in the kitchen, and then warm the pieces; or warm the whole glorious thing, present it at the table, and make a ceremony out of carving it!
  17. Which ever way you choose, it’s best to cut the breast into rustic hunks instead of neat slices. Set the veal (whole or sliced) into a shallow baking or ovenproof serving dish and pour over the degreased pan juices. Heat until warmed through, 15 to 25 minutes.

IMG_4597

Giving Mashed Potatoes a Run for Their Money

I’ve always adored mashed potatoes. They are to me that quintessential comfort food that brings back fond childhood memories of Sunday family dinners. Even the pickiest of kids (which I was) usually eat mashed potatoes.

To kick it up a notch yet keep the “mashed” theme, we substituted parsnips for the potatoes and added sweet and savory notes with ingredients such as dijon mustard and honey. In a word “divine!”

This is the second time we cooked them and made sure that we purchased a larger quantity than the paltry 4 little “snips” our first go around. You can use a food processor, ricer, or potato masher to obtain your preferred consistency. Use as a side dish for anything that you would normally include mashed potatoes with. You’ll be surprised how much you like them!

IMG_4594
About 8-10 parsnips equal 1 1/2 pounds, depending on size, and yield about 3-4 cups of mashed parsnips.

Ingredients and Directions

  1. Peel 1 1/2 pounds parsnips and cut into 1-inch pieces (cut out the cores if they’re woody, which is the case in most of the larger parsnips.)
  2. Cook in boiling water until they can easily be pierced with a fork, about 7 minutes. Drain well.
  3. Purée the parsnips in a food processor (preferable), ricer, or masher.
  4. Add 2 tablespoons melted butter,
    1-2 tablespoon(s) cream or milk,
    1/2 teaspoon Dijon mustard,
    and a 1/2 teaspoon honey.
  5. Season to taste with salt and pepper.

IMG_4575
Peeled, cored and sliced parsnips are ready to be boiled.