All posts by LynnHoll

Unknown's avatar

About LynnHoll

I have been an artist and designer all my life incorporating graphic design for websites, gardens, publications, fabrics, interior design and cooking. I am now retired from my professional job, but still create artistic visions in all forms on a daily basis.

Strawberry Explosion—’Tis the Season

Son Dan traveled from Massachusetts and stayed with us for a few days to celebrate his, and his Dad’s birthdays—they share the same date. A huge fan of strawberry pie since he was a kid, we knew just what to make instead of the traditional birthday cake. And the recipe was from Russ’s mom, a tried-and-true family tradition; changed up a bit with our gluten-free graham cracker crust in place of her traditional dough crust.

Local strawberry season was still a few weeks away so we purchased some organic berries for the pie, and some supermarket variety for the homemade ice cream, also on our agenda. Things were going along smoothly when making the frozen dessert until it was time to put the mixture into the “trusty” decades-old ice cream maker.

After letting it churn for nearly a half hour, it remained soupy and was not getting hard. Not a good sign at all. The culprit was the interior canister that had been in the freezer for a week was not maintaining a cold enough insulation. With no other choice, we mixed the macerated strawberries with the custard, placed into an airtight container, then into the freezer hoping for the best—which, according to Russ, wasn’t quite as creamy as it should have been but still edible, and tasty! Time for a new ice cream churner…

IMG_2292

We feel that “French-style” ice cream, made with a custard base relying on egg yolks, far surpasses the “Philadelphia-style” made without eggs. In texture as well as flavor, the egg yolk version has far more of the richness and creaminess that one looks for in ice cream. Besides adding sweetness, sugar gives ice cream a smoother, softer, more “scoopable” end product.

About the vodka… well, if you’ve ever put a bottle of vodka in the freezer, you know that it doesn’t freeze—it just gets frosty. So our “secret” trick to making homemade ice cream is using a little vodka in the recipe. It really does make the ice cream ever so smooth and luscious without changing the flavor. Cheers!

Strawberry Ice Cream

Ingredients

  • 16 ounces fresh strawberries (about 3 cups), hulled and sliced
  • Pinch Salt
  • 1 ¼ cups granulated sugar (8 3/4 ounces)
  • 1 ¼ cups whole milk
  • 1 ⅓ cups heavy cream
  • 6 large egg yolks
  • 1 teaspoon fresh lemon juice
  • 3 tablespoons vodka
  • 1 teaspoon vanilla extract

Directions

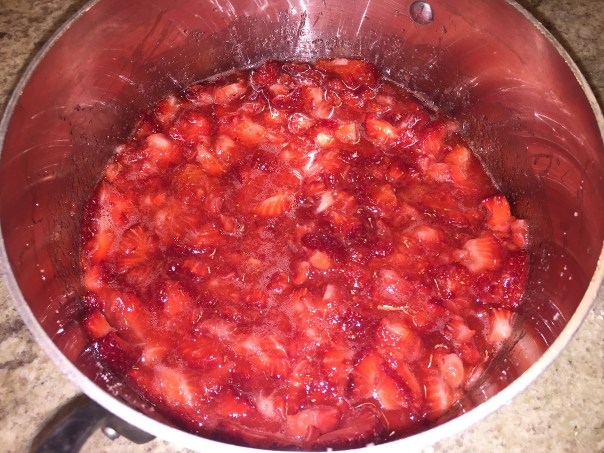
  1. Toss the strawberries, salt, and 1/2 cup of the sugar together in a medium nonreactive saucepan. Mash the berries gently with a potato masher until slightly broken down. Let stand, stirring occasionally, until the berries have released their juices and the sugar has dissolved, 40 to 45 minutes.
    IMG_1966
    IMG_1947
    IMG_1950
  2. Meanwhile, position a strainer over a medium bowl set in a larger bowl containing ice water. Heat the milk, cream, 1/2 cup of the sugar, and the salt in a medium saucepan over medium heat, stirring occasionally, until steam appears and the milk is warm (about 175 degrees), about 5 minutes.
    IMG_1954
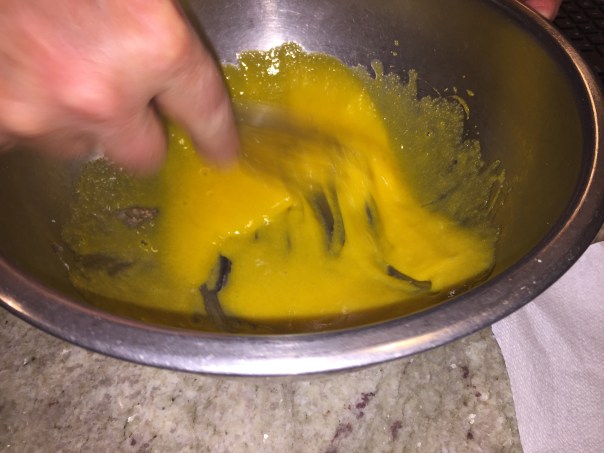
  3. While the milk is heating, whisk the yolks and remaining 1/4 cup sugar in a medium bowl until combined and pale yellow. Whisk about half the warm milk mixture into the beaten yolks, 1/2 cup at a time, until combined.
    IMG_1952
  4. Whisk the milk-yolk mixture into the warm milk in the saucepan; set the saucepan over medium heat and cook, stirring constantly with a wooden spoon, until steam appears, foam subsides, and the mixture is slightly thickened or an instant-read thermometer registers 180 to 185 degrees. (Do not boil the mixture, or the eggs will curdle.) Immediately strain the custard into the bowl set in the ice-water bath; cool the custard to room temperature, stirring it occasionally to help it cool.
    IMG_1956
    IMG_1958
  5. While the custard is cooling, set the saucepan containing the berries over medium-high heat and bring the mixture to a simmer, stirring occasionally, until the berries are softened and broken down, about 3 minutes total.
    IMG_1960
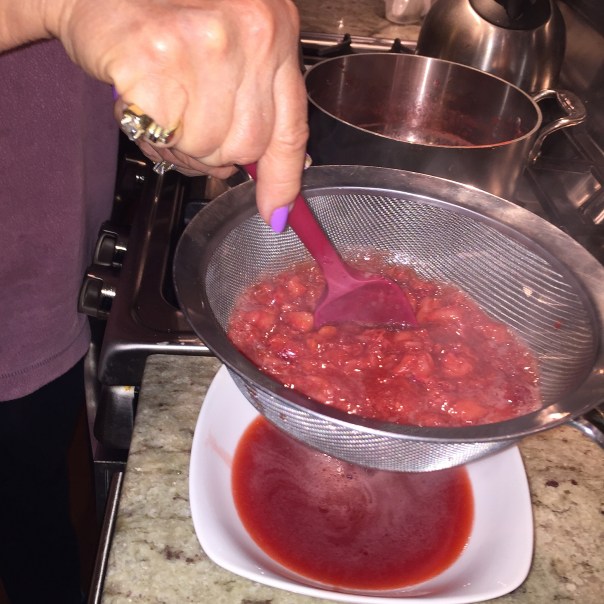
  6. Strain the berries, reserving the juices. Transfer the berries to a small bowl; stir in the lemon juice and vodka, then cool to room temperature, cover with plastic wrap, and refrigerate until cold.
    IMG_1961
    IMG_1962
  7. Stir the vanilla and the reserved juices into the cooled custard, cover the bowl with plastic wrap, and refrigerate until an instant-read thermometer registers 40 degrees or lower, at least 3 hours or up to 24 hours.
  8. Pour the custard into the ice cream machine canister and churn, following the manufacturer’s instructions, until the mixture resembles soft-serve ice cream. Add the strawberries and any accumulated juices; continue to churn the ice cream until the berries are fully incorporated and slightly broken down, 1 to 2 minutes.
    from.frozen.churner
    Above is the consistency the ice cream should be when coming out of the churner.
  9. Transfer the ice cream to an airtight container, press plastic wrap flush against the surface, cover the container, and freeze the ice cream until firm, at least 2 hours.

Mother Mary’s Fresh Strawberry Pie

IMG_1985

Together the cornstarch and gelatin produce just the right supple, lightly clingy glaze that was perfect for our strawberry pie. To account for any imperfect strawberries, the ingredient list calls for several more ounces of berries than will be used in the pie (save some to make the ice cream). If possible, seek out ripe, farmers’ market–quality berries. The pie is at its best after at least two or three hours of chilling; but is fine if made a day ahead.

IMG_1966

IMG_1967

Ingredients

Filling

  • 1 pie crust (9 inch) — pre-baked
  • 1 cup sugar
  • 1 cup water
  • 6 teaspoons cornstarch
  • 4 tablespoons strawberry gelatin powder
  • 2 pints strawberries

Graham Cracker Pie Crust

  • 1 1/2 cups finely ground graham cracker crumbs
  •  6 tablespoons butter, melted and slightly warm
  • 1/4 cup granulated sugar

Whipped Cream (optional)

  • 1 cup cold heavy cream
  • 1 tablespoon sugar

Directions

  • FOR THE PIE CRUST: Preheat the oven to 350 degrees F.
    IMG_1969
  • Add all the ingredients for the crust to a food processor and pulse until combined; it should feel like wet sand, and just come together.
  • Spread the mixture evenly into a 9-inch pie pan, using your finger tips, a spoon, or the flat bottom of a glass. Firmly press the mixture over the bottom and sides of the pan.
    IMG_1970
  • Put the pan on the middle rack of the oven and bake until the crust is light brown and firm to the touch, about 10 to 15 minutes. Remove from the oven and let cool.
  • FOR THE FILLING: Wash and dry strawberries. Hull and halve lengthwise; set aside.
    IMG_1972
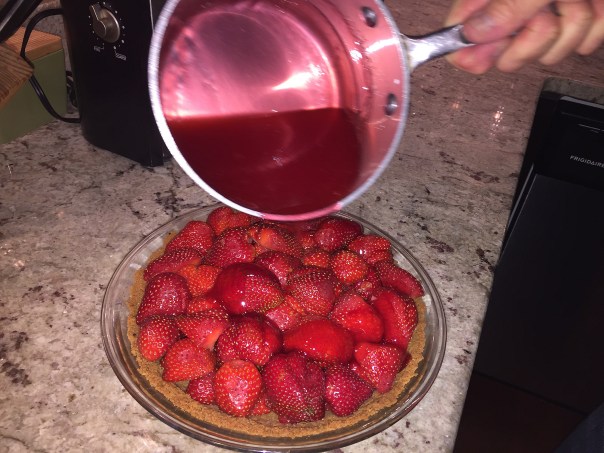
  • Add sugar, water and cornstarch to small saucepan. Bring to a full boil, then remove immediately from heat and stir in strawberry gelatin powder.
    IMG_1974
    IMG_1975
  • Allow to cool. Arrange strawberries in baked pie crust saving the largest best looking ones for the top.IMG_1973IMG_1976
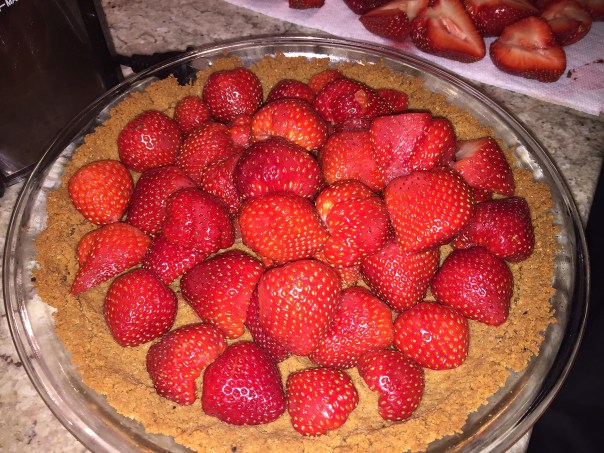
  • Pour gelatin mixture over berries, making sure to glaze all those on top layer. Refrigerate until set.
    IMG_1984
  • FOR THE WHIPPED CREAM: Just before serving, beat cream and sugar with electric mixer on low speed until small bubbles form, about 30 seconds.
  • Increase speed to medium; continue beating until beaters leave trail, about 30 additional seconds.
  • Increase speed to high; continue beating until cream is smooth, thick, and nearly doubled in volume and forms soft peaks, 30 to 60 seconds.
  • Cut pie into wedges. Serve with whipped cream.

IMG_1985

IMG_2016
Dan pretends he’s too full from dinner to eat pie, but believe me, he did!

Farm to Flavor

With the BIG SIX-ZER0 looming over Russ, and family coming in from the West Coast to help memorialize the occasion, hubby was in a tizzy on where to make reservations for his celebratory birthday dinner. Over the last couple of years we’ve been stockpiling articles on well-rated establishments—many of the farm-to-table persuasion. So after some “agonizing” research…

IMG_2230

A truly authentic farm-to-table dining experience in an 1800s Hopewell farm house, the Brick Farm Tavern at Double Brook Farm is a new breed of “gastro-farms,” where the restaurant is physically on the homestead grounds. The restaurant’s partners, Jon and Robin McConaugh, who previously worked on Wall Street and in sports media, relocated in 2004 from New York City to Hopewell to farm.

It all started with one cow and grew out of the desire for the McConaughy’s to know where their food comes from. From that first cow in 2004 to today’s fully operational working farm raising pigs, sheep, chickens, turkeys, goats, cows, and ducks the couple have never lost sight of what mattered most in their operation: humane and ethical animal treatment, energy sustainability and keeping it local. The animals are raised on pasture, never given hormones or antibiotics and harvested at an on-site abattoir.

We arrived at dusk to a well-manicured, stately brick exterior that opens into a series of rambling farmhouse rooms with original wood and stonework that have been beautifully refurbished. After handing over the car to the free valet service, we were given a choice of al fresco seating on their outdoor patio, or inside. We barely hesitated before choosing to stay indoors given the temps had soared to 97 earlier in the day.

The bar features local craft beers, artisanal cocktails and wine tastings—guided by their sommelier. Although when our waitress sent over the sommelier to describe our choice of red, his geography of the region of Spain was way off—we know because we traveled those areas in the past. Nonetheless, it was a very good red.

IMG_2238
Wednesdays are half-price bottles of wine night, so we lucked out!

IMG_2233

Off the front vestibule is a casual, cozy bar where the high ceiling and stone walls evoke a corporate retreat lodge. We wound our way through it and around into a more elegant dining room with a fireplace, which is where we were seated at a four-top in a cozy corner. FYI, Brick Farm also offers a less pricey bar menu if you so desire.

IMG_2239
Our West Coast in-laws, David Ruttan and Denise Hartman.

IMG_2241
Lynn and Russ getting cozy at the corner table.

IMG_2243
After the wine was served, we were treated to an amuse-bouche of pickled carrot, shaved radish, and celery root purée on a small curved spoon.

With an annual production of 15,000 free-range chickens, 2,000 ducks, 500 Berkshire pigs, and 500 sheep, as well as goats and turkeys, not to mention the Devon beef cattle they own that are grazing on the grassy acres at Thistle Creek in Central Pennsylvania, this restaurant is one of the most self-sustaining, closed-loop food projects in the region. Almost 100 percent of the proteins are grown on site (as they’ve done away with seafood), as are most of the vegetables, the cherry and hickory wood for the grill, and some hops and grain that is used at the brewery (Troon) and distillery (Sourland Mountain Spirits) opened on site.

Their best dishes are ultimately classic French ideas reimagined with a contemporary flair that highlight the prime ingredients. Our feast commenced with a board laden with homemade, whole grain bread from the Brick Farm’s sibling market-bakery-butcher-shop in downtown Hopewell. Seeing as how it was Russ’s birthday, he decided to get three courses starting with the very tasty Berkshire Pork Country Pâté, which he generously shared with all of us—and much to our delight, came with the same crusty bread, but toasted.

IMG_2244
IMG_2245
Russ’s first course, Berkshire Pork Country Pâté with pickled sunchoke, a Cabernet mustard and toast points.

IMG_2247
David, Russ and I all opted for the Whole Wheat & Wild Ramp Gnocchi Bolognese small plate, and we all concurred it was beyond fabulous! Not normally a huge gnocchi fan, these babies were so light and flavorful and paired perfectly with the tri-meat bolognese sauce—lamb, beef short rib, Berkshire pork—and chopped nicoise olives, every silken mouthful was heavenly. Hands down, my favorite dish of the night.

IMG_2251
The guys copied me once again with our choice of entreé: the tender medallions of Double Brook Katahdin Lamb, cooked to a perfect medium-rare and lightly drizzled with a cassia lamb jus. The tomato compote topping cast a memorable Mediterranean mood alongside the chaw of king oyster mushrooms, minted English peas and spinach and ricotta purée.

IMG_2250
Sister Dee decided to go a different route and ordered the Berkshire Pork with Hakurei turnip, Hen-of-the-Woods mushrooms, sweet potato, and fried black rice, all delicately topped with a pork jus. No complaints from her…

IMG_2255

This was a first, and unique touch—a dessert amuse-bouche! Served on the now familiar curved silver spoons, the combination a startling blend of pickled strawberry, Chantilly cream and almond streusel, well done, Brick!

IMG_2260
Both Russ and sister Dee were dessert-determined and Ana Musial’s desserts are just as evocative of the season and place as the savory courses. The Chocolate Gateau was Dee’s choice, one she said was the best chocolate dessert she’s ever had! It was a work of art on a plate as the cake was adorned with toasted Italian meringue, bourbon caramel and feuilletine (feuille means leaves) which tastes like crispy, thin little shards of sugar cone.

IMG_2258
The staff knew it was Russ’ birthday so on his Coffee Brulée they added a lit candle and scripted birthday wishes in chocolate directly on the plate. The ensemble included pieces of lady finger, ricotta cream, coffee pearls, espresso and chocolate tuile—named after the traditional curved roof tiles (tuile is French for tile) seen in France and elsewhere in the Mediterranean.

IMG_2237Russ and brother-in-law David sport their guayavera shirts.

IMG_2256There were plenty of worldly after-dinner drinks to choose from, so instead of dessert I had to have the “Last Word”—an artisanal cocktail composed of gin, green chartreuse, luxardo and lime juice, divine!

Fans of farm-to-table dining will find themselves very much at home at the Brick Farm Tavern, which strives to be as self-sufficient as any farm of 150 years ago. If you choose to go, reservations are strongly recommended, as this is a restaurant that has been filled with loyal customers since its opening. We are now glad to be considered patrons!

Pasta Carbonara

Late one Sunday morning we were trying to decide what to eat. With no leftovers, we considered a frittata, but with only three eggs in stock, that wasn’t going to cut it. Then a lightbulb went off in Russ’s noggin’. Having just purchased a fresh supply of good-quality double-smoked bacon from the Amish farmer’s market, he said he could whip up a Pasta Carbonara.

There are many theories for the origin of the name, which may be more recent than the dish itself. Since the name is derived from “carbonaro” (the Italian word for charcoal burner), some believe the dish was first made as a hearty meal for Italian charcoal workers. History notes, in 1950 it was described in the Italian newspaper La Stampa as a dish sought by the American officers after the allied liberation of Rome in 1944, and first described after the war as a Roman dish, when many Italians were eating eggs and bacon supplied by troops from the United States.

IMG_1871

Loosely based on a recipe found in Fine Cooking, Russ adjusted the instructions to fit our needs. Other ingredients included pasta: check, grated parm: check, frozen peas: check, fresh thyme, salt and pepper: check, check and check! As for the pasta, we had several long varieties on hand but settled on the pici—something we learned to make in a cooking class in Italy—although this was store-bought.

Be warned, this is a rich and filling dish where a little goes a long way. I seldom eat bacon and the only kind that seems to agree with me is a small amount of the aforementioned Amish double-smoked variety, so I figured this dish would be a safe bet. By the time we ate at 1:00, it filled the void for both breakfast and lunch. Check!

NOTE: In place of bacon, you could also use the more traditional pancetta.

Ingredients

  • 1 Tbs. olive oil
  • 1/3 lb. good-quality bacon, cut into thin strips about 1/4 inch thick
  • 2 large eggs, at room temperature
  • 2 tsp. fresh thyme leaves, coarsely chopped
  • 1/4 cup freshly grated Parmigiano-Reggiano; more for grating on the finished pasta
  • Kosher salt and freshly ground pepper
  • 1/2 lb. dried linguine or other pasta
  • 1/2 cup frozen peas

Directions

  • In a small sauté pan, heat the olive oil and cook the bacon until cooked through but not crisp.
    IMG_1860
  • Meanwhile, in a large metal bowl, lightly beat the eggs; add the thyme, cheese, salt, and pepper.
    IMG_1857
    IMG_1858
  • Cook the pasta in plenty of boiling salted water according to package directions.
  • About 1 min. before the pasta is done, add the peas to the boiling water. Scoop out and reserve about 1/2 cup of the pasta water. When the pasta is al dente, drain it and immediately add it and the peas to the bowl with the egg mixture.
    IMG_1865
  • Pour the bacon and the rendered fat onto the pasta and toss well until the sauce thickens and coats the pasta.IMG_1867
  • If necessary, add up to the entire 1/2 cup of the reserved pasta water to the pancetta pan to deglaze it (we didn’t need to), scraping up any bits stuck to the pan, and add as much of this as you like to the bowl of pasta. Taste for salt and pepper.
  • Grate more cheese and grind a little pepper on top of the finished pasta and serve immediately.
    IMG_1873

Cheese with Seafood? Your Call…

Try this riff on the classic combo of shrimp and asparagus, often paired together in pasta. Here, the addition of creamy coconut milk adds a fresh twist to the typical combination. Tagliatelle with Shrimp, Asparagus, and Coconut Milk is subtle and soothing, but the depth of flavor is definitely amped up in our case with the substitution of homemade seafood stock as opposed to a store-bought chicken broth.

IMG_1814

Another minor tweak we made was after the asparagus was cooked and taken out of the pan, we added one tablespoon of oil before dumping in the minced shallots to prevent sticking to the skillet. And horrors to some, we also enjoyed a spoonful of grated parm as a topper. Wait, what?

“The rich, salty flavors of cheese can too easily overwhelm the flavors of fish, forcing a contrast not only in intensity of flavor, but also a sacrifice of the integrity of both ingredients. Grated cheese over a fish pasta is considered either extraneous, excessive, or demeaning.”

There’s a conventional wisdom in every authentic Italian kitchen that fish and seafood shall never be served on the same plate with bacteria fermented, pressed, and aged into oblivion—cheese in other words. And it’s not just the Italians. Any home cook will one day come across some blog or foodie friend that’ll condemn a seafood-cheese relationship (not me), and many will not even remember where they heard it or why they believe it. Myself included. But I’ve always allowed my tastebuds to make up my mind for me.

Now about the cognac. If you don’t have any on hand, and don’t feel like running out and buying some, use brandy instead. No brandy? You can try lemon juice, but don’t use too much or else it will just make everything taste lemony instead of “cognacky.” This aged, double-distilled wine (or fermented fruit juice) can also be replaced with peach, apricot or pear juice.

There was no way all of the ingredients would fit into the skillet to be tossed. Instead, we put the cooked tagliatelle in a ginormous pasta serving bowl and poured the contents of the skillet over it, then twirled to make sure everything got happy together. Each person could then serve themselves their own portion and top with grated cheese—or not!

NOTE: A can of coconut milk is usually 15.5 ounces, so you will have some leftover from the one cup used in the recipe. I suggested that my husband use it in his morning fruit smoothie, and he thought that was a great idea!

IMG_1802

Ingredients

  • Kosher salt
  • 1/2 lb. dried tagliatelle or fettuccine
  • 1 lb. large shrimp (31 to 35 per lb.), preferably wild-caught, peeled and deveined
  • Freshly ground black pepper
  • 2 Tbs. extra-virgin olive oil
  • 1 lb. asparagus, trimmed, cut into 1-inch pieces
  • 1 large shallot, minced (about 1/4 cup)
  • 1 cup chicken broth or seafood stock (preferably homemade)
  • 1 cup well-shaken canned coconut milk
  • 3/4 cup frozen peas, thawed
  • 2 Tbs. Cognac
  • 2 Tbs. thinly sliced fresh chives

Directions

  1. Bring a large pot of well-salted water to a boil. Cook the pasta according to package directions until al dente. Drain, reserving 1 cup of the pasta water.
    IMG_1806
  2. Meanwhile, pat the shrimp dry and season with salt and pepper. Heat 1 Tbs. of the oil in a 12-inch skillet over medium heat.
    IMG_1807
  3. Add the shrimp and cook, stirring, until they just start to turn pink, 1 to 2 minutes. Transfer to a medium bowl.
    IMG_1808
  4. Add the remaining 1 Tbs. oil to the skillet, then add the asparagus, and cook, stirring frequently, until crisp-tender, 3 to 4 minutes. Transfer to the bowl of shrimp.
  5. Reduce the heat to low. Add the shallot to the skillet and cook, stirring, until softened, about 2 minutes.
    IMG_1809
  6. Add the broth and coconut milk, and bring to a boil over high heat; boil until the sauce is thickened and  reduced by half, about 5 minutes.
    IMG_1810
  7. Reduce the heat to low. Add the pasta, shrimp, asparagus, peas, Cognac, and chives to the skillet and toss to combine. Season to taste with salt and pepper. Add a little of the pasta water to loosen, if necessary, and serve.
    IMG_1811

IMG_1813

Adapted from Leticia Moreinos Schwartz from Fine Cooking

Grilled Excellence Exists

Chicken is probably the most popular go-to meat to whip up for dinner, but the same recipe served over and over can get tired, real fast. Luckily, you can jazz things up by learning a new technique, such as how to “spatchcock” chicken. Spatch-what? Don’t sweat it, there are any number of videos and tips on the Internet that’ll guide you in your first attempt.

The technique—splitting, then flattening a chicken—yields a perfect roasted chicken at least 15 minutes faster than a whole roasted bird. It also exposes more skin, which crisps up nicely at higher temperatures. Plus it’s much easier to serve because where to cut to separate the leg from the breast is completely obvious.

Our recipe, Spicy Asian Grilled Chicken, is a riff on the more familiar Italian-Style Gas-Grilled Chicken under a brick, and replaces Italian seasonings with soy, sake and chili garlic sauce. The meal actually came to fruition from the fact that we had a half bunch of Chinese broccoli leftover and wanted to use it up before it went bad. So Asian flavors permeated not only the chicken, but also our stir-fry of Chinese broccoli, mushrooms and scallions.

IMG_1881
After rinsing the Chinese broccoli, the stems were separated and chopped separately from the leaves because they need to be cooked longer in the wok.

IMG_1903
We stir-fried the vegetables with minced garlic and ginger while the chicken rested. 

You’ll love that you won’t have dry, overcooked white meat or undercooked dark meat. Because the chicken is flat, the legs are exposed to more heat and cook thoroughly, while the breasts stay juicy. Excellent! Only one flip required, so grab yourself a cold one.

It gets more interesting because you’ll be using your beloved cast-iron skillet. Placing the pan on the chicken while it cooks ensures that the skin will be evenly browned and well rendered—don’t skip this step. And make sure to use an oven mitt or dish towel to safely grip and maneuver the hot skillet, or things could get ugly fast…

IMG_1874
Our bird was about 3 3/4 pounds purchased fresh from the Amish Farmer’s Market.

Ingredients

  • 1, 3 1/2-4 lb. whole chicken, spatchcocked
  • 2 Tbsp. minced fresh garlic
  • 6 Tbsp. soy sauce
  • 1/4 c rice wine or sake
  • 1 Tbsp. chili garlic sauce
  • 2 Tbsp. extra virgin olive oil
  • 1 Tbsp. honey

Directions

  1. In a small bowl, mix together all of the ingredients except the chicken and set aside.
  2. Spatchcock the chicken: Place chicken breast-side down, with the legs towards you. Using sturdy scissors or poultry shears, cut up along each side of the parson’s nose and backbone to remove it, cutting through the rib bones as you go. Open the chicken out and turn over. Flatten the breastbone with the heel of your hand so that the meat is all one thickness. (Reserve and freeze the backbone for homemade stock.)
    IMG_1876
    The chicken backbone is cut out and removed to flatten the poultry.IMG_1878
  3. Fold the chicken to slide into a gallon size ziploc bag. Pour in the mixture and seal the bag. Flatten chicken as best you can and refrigerate for an hour, turning the bag every 15-20 minutes.
    IMG_1879
    IMG_1886
  4. Remove the chicken from the marinade onto a platter and pour the contents of the ziploc bag into a small pan. Bring the mixture to a gentle boil, add the honey, reduce and let simmer for 20 minutes or so while it thickens.
    IMG_1882
  5. Turn all burners to high. Place your cast-iron skillet on cooking grate. Heat with lid down until very hot, about 15 minutes. Scrape cooking grate clean. Leave primary burner on high and turn off other burner(s).
    IMG_1884
    Make sure to oil the bottom of the hot skillet so that it doesn’t stick to the skin.
    IMG_1885
  6. Place chicken skin-side down over cooler side of grill with legs facing fire, oil bottom of hot skillet and place lengthwise over breasts, cover grill, and cook until skin is lightly browned and grill marks appear, 25 to 28 minutes.
    IMG_1887
  7. Remove skillet from chicken. Using tongs or towel, grip legs and flip chicken (chicken should release freely from grill; use thin metal spatula to loosen if stuck), skin-side up, with breast facing the cool part of the grill. Place skillet over bird, cover grill, and cook until chicken is well browned, about 15 minutes.
    IMG_1888
    The chicken is flipped to breast side up before replacing hot skillet.
    IMG_1904
  8. Transfer chicken to cutting board, baste with reduced mixture, and let rest 10 minutes. Season with salt and pepper. Carve chicken and serve, passing any remaining sauce.

IMG_1909

Sautéed Tilapia over Swiss Chard with Tarragon Butter

Fresh tarragon lends a haunting, delicate anise flavor to mild, quick-cooking tilapia fillets in this recipe by David Bonom from Fine Cooking. And we LOVE-LOVED it!! The list of ingredients is short, the prep is minimal, the cooking time is only 10-12 minutes, but the payoff delivers in spades when it comes to flavor.

Chard is similar to spinach in that it wilts down to a ghost of its former self. So while two bunches may seem overkill at the onset, by the time it’s cooked down, you’ll end up with just four portions. Make sure to keep it warm in a tightly covered bowl or plate while you sauté the tilapia, which then gets added on top of the Swiss chard and covered again as you prepare the butter/tarragon sauce. (Note, I cut the butter by half, with the original recipe adding 8 Tbsp instead of 4.)

Before rinsing the chard, use a knife and slice along the main stem to remove it, then chop the rest into large pieces before rinsing and spin drying really well. Don’t throw away the stems, particularly if you’ve bought a colorful variety like Rainbow Chard. They’re good, though they take a little longer to cook then the leaves, so save them for another meal. Cut them crosswise into 1/4″ slices and sauté or braise. Just keep in mind that the red color will likely bleed into the other ingredients.

Swiss chard is not only one of the most popular vegetables along the Mediterranean but it is one of the most nutritious vegetables around and ranks second only to spinach of the world’s healthiest vegetables with an extremely high nutrient-density. The range of antioxidants in Swiss chard nutrition can be seen both in its deeply colored green leaves and also in the reds, purples, and yellows of its vibrant, multicolored stalks and veins.

Let’s talk about our wonderful side dish. Buttery, toasty pine nuts added a hit of richness to the jasmine rice pilaf, and that was amplified by adding homemade chicken broth in place of water. Finish with a generous squeeze of fresh lemon and a smattering of fresh chopped chives, and you have yourself a winning combination!

IMG_1780

Ingredients

  • 2 Tbs. extra-virgin olive oil
  • 4 cloves garlic, minced
  • 2 lbs. Swiss chard, fibrous stems and ribs discarded; leaves coarsely chopped, washed, and dried
  • Kosher salt and freshly ground black pepper
  • 4-8 Tbs. unsalted butter, cut into small pieces
  • 1 lb. tilapia fillets
  • 2 shallots, finely chopped
  • 2 Tbs. fresh lemon juice
  • 3 Tbs. chopped fresh tarragon

Directions

  1. Heat the oil in a 10- to 12-inch nonstick skillet over medium-high heat. Add the garlic and cook until fragrant, 30 to 45 seconds. Add a big handful of the Swiss chard and cook, tossing often, until it has collapsed enough to add more.
    IMG_1783
  2. Continue adding the chard in batches until it’s all in the pan and then cook until tender, 2 to 3 minutes. Season to taste with salt and pepper, divide the chard between two dinner plates, and keep warm.
    IMG_1785
  3. Wipe out the skillet and return it to medium-high heat. Add 1 Tbs. of the butter and let it melt. Sprinkle the tilapia with 1/4 tsp. salt and a few grinds of pepper.
    IMG_1786
  4. Add the tilapia and cook, turning once halfway through cooking, until it’s well browned and cooked through, 4 to 6 minutes. Top the chard with the tilapia and keep warm.
  5. Add the shallot to the skillet and cook, adding a little oil if necessary, stirring occasionally, until lightly browned and beginning to soften, 30 to 60 seconds.
  6. Add the lemon juice; it should evaporate almost instantly, but if not, cook until nearly evaporated, about 30 seconds.
    IMG_1787
  7. Remove the skillet from the heat and add the remaining butter pieces (depending on how much you wanted to use) and tarragon, stirring constantly until the butter melts. Season to taste with salt and pepper. Pour the butter sauce over the fish and chard and serve immediately.

IMG_1788
Once the fish is cooked, place it over the hot chard and cover tightly while you make the sauce.

IMG_1792
You can spoon the tarragon butter sauce over the platter or let folks add their own amount to individual plates.

IMG_1798
We were thrilled to have leftovers for lunch the next day. Because our rice side dish was so dang delicious, I included the recipe below…

Jasmine Rice with Toasted Pine Nuts and Chives

Ingredients

  • 1 cup jasmine rice
  • Kosher salt
  • 3 Tbs. unsalted butter
  • 1/4 cup pine nuts
  • 2 Tbs. chopped chives
  • 2 tsp. lemon juice
  • Freshly ground black pepper

Directions

Cook the rice according to package directions with a pinch of salt. Meanwhile, melt the butter in a small skillet over medium heat. Add the pine nuts and cook until the butter and nuts are browned, about 3 minutes. Combine with the rice and add the chives and lemon juice. Season to taste with salt and pepper.

by Ronne Day from Fine Cooking

Flora Sans Fauna

Hear Ye, Hear Ye: To all my vegan/vegetarian friends and wannabes—or even the meat eaters who just enjoy great tasting food—here’s a quaint dining establishment worth your while.

In Jenkintown, PA, a neighborhood of the Philly suburbs (and where Russ was residing when we met), this 16-seat enterprise, Flora Vegan Restaurant, is apparently one of the area’s most sought-after vegan spots. Originating as the vision of four high-school friends who shared a passion for food, they wanted to create a place that was intimate and comfortable, located in a small urban neighborhood, used locally-sourced ingredients, and served healthy dishes. And they certainly succeeded!

Opened in Fall 2014, Flora is an award-winning culinary BYO treasure where seasonal, local produce takes front and center stage at this self-proclaimed “vegetable restaurant.” Their prix-fixed menu changes seasonally to reflect the freshest produce and ingredients available, with an aim to provide an exceptional meal and experience fit for all diners, whether they are vegan, vegetarian, omnivores or carnivores.

After several months of trying to connect for a dinner out with friends Lisa and David Greenspan, below right, we nailed down a date in early May. Knowing Lisa was a vegetarian, it provided a good excuse for Russ to make a res at Flora, a place we’ve both been wanting to try for quite some time. With so few seats, we were lucky they could accommodate us on our preferred date and time.

IMG_1844
David and Lisa Greenspan, right, were fun dinner companions. For those of you who haven’t seen me in a while, I’ve gone back to the dark side—my hair that is…

Arriving at practically the same moment, we were seated in a cozy corner nook at the only available table, by managing owner and one of the four founding members, Dan Brightcliffe, who played host and waiter to the fully packed room, albeit a small one. We were offered a choice of sparkling water or tap, charmingly served in mason jars, and were so busy chatting that Dan had to come back three times to get our order when we hadn’t even as much as glanced at the menu.

With no ala carte menu, the restaurant is a reasonably priced prix-fixe spot that offers three and four course options served on small plates, but while the dishes may be petite (a few absurdly so), we didn’t end up going home hungry. Our plan of attack was ordering two four-course meals, and two of the three-course options.

IMG_1836
Seasonal Vegetables: Tossed in Za’atar Vinaigrette & Herbs

IMG_1835
Iceberg Salad: Crispy Shallots, Pickled Cauliflower, Carrots, Croutons & Creamy Herb Dressing. Not shown, Brussels Sprouts Three Ways: Raw, Salt-Wilted, Charred with Spicy Sriracha Vinaigrette & Sesame Seeds.

With each category offering four options we decided to get three choices, shown above, from the first course (no one got the Garlic & Spinach Soup figuring it would be too awkward to split between four people.) From the second course menu we went for one of everything, shown below.

IMG_1840
Seared Tahini Carrots: Smoky Baba Ganoush with Lemon Zest and Toasted Sesame Seeds—the party favorite for taste

IMG_1842
Irish Potato Boxty: 
House-made Scallion Aioli & Caramelized Onions—also high on the list

IMG_1841
Cauliflower Salad: 
White Bean Puree, Crunchy Quinoa, Lemon Zest and Cilantro—my favorite as far as presentation

IMG_1837
Green Pea & Roasted Garlic Arancini: Mint Salsa Verde—while very good, probably the least popular

On to the third course where we selected three of the four options, omitting the Spaghetti with Asparagus, Breadcrumbs & Lemon, and doubling up on the Spicy Chickpea & Vegetable Vindaloo. Our hands-down favorite was the Ragout of White Beans & Artichokes with Carrots, Spinach & Crostini.

IMG_1846
Ragout of White Beans & Artichokes with Carrots, Spinach & Crostini—two thumbs up

IMG_1849
Lasagna
with Seasonal Ingredients—wish the portion was larger

IMG_1847
Spicy Chickpea & Vegetable Vindaloo—a bit too spicy for Lisa

Each course was a sensual assault to our tastebuds! As we savored every morsel, conversations ran the gamut from best-loved restaurants of different ethnicities, to cooking classes (they did one in Istanbul, us in Spain), to how Lisa and David met (she was the pursuer), and our mutual love of gardening.

Lisa was astounded that we actually like grocery shopping and do it together, enjoying the process instead of viewing it as a chore. In their relationship David is the food shopper, although they admitted that they have started using the Whole Foods home delivery system. She said the first time was a learning experience and realized she had to be more specific in her descriptions, while the second delivery was spot on. Hmmm, food for thought—literally…

Now Russ considers himself a bit of a crème brulée aficianado and therefore zeroed in on the Banana Crème Brulée with carmelized bananas as one of the desserts. David on the other hand loves carrot cake and chose the Carrot Pudding with carrot cake spices, vegan cream cheese icing and candied almonds.

Lisa adored the crème brulée, and while I had a tiny sample, it didn’t appeal to me at all, nor was Russ very fond of it. After all, it’s a daunting task to make a custard-based dessert without dairy. The pudding seemed to make points with David, and Russ really enjoyed it also, but while I didn’t try it, I found it was the more appealing of the two.

IMG_1851
Banana Crème Brulée
with Carmelized Bananas

IMG_1852
Carrot Pudding with Carrot Cake Spices, Vegan Cream Cheese Icing & Candied Almonds

The service and course pacing of the restaurant was right on target. Without feeling rushed, time just flew when three hours later we realized everyone else had left and Dan and crew were trying to close up, so we took that as a hint to vacate and say our goodbyes while planning our next rendezvous. My only regret was not having a “doggie bag” to bring home…

Make a Date with this Chick

Most home cooks I know don’t have a lot of extra time during the week to make dinner. They want to do a minimum of prep work that results in something tasty that the entire family will eat. Dinner done. This succulent Baked Chicken with Herbs, Garlic & Shallots recipe fits the bill. It may likely become a staple of your weeknight dinner repertoire because once the prep is out of the way, it’s pretty much hands off for an hour.

IMG_1689

Vary the herbs as you like, but stick to the hardy ones—thyme, rosemary, sage, and oregano. They’ll roast without burning and have a stronger flavor. Because we adore roasted shallots and garlic, I increased the amount of these aromatics. After an hour getting happy with the herbs and chicken juices, the caramelized shallots in particular melt in your mouth and are fabulous when combined with almost every bite of the poultry.

IMG_1678
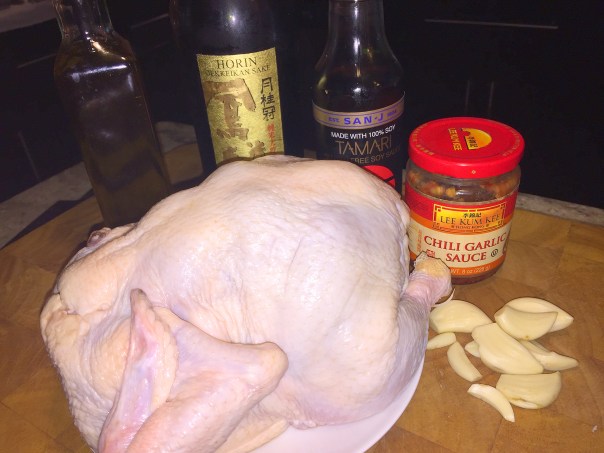
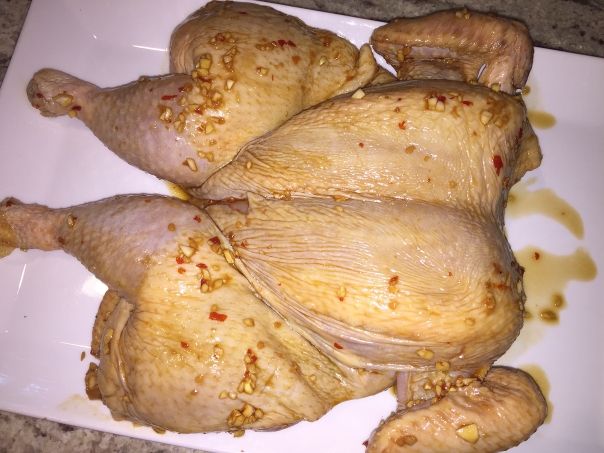
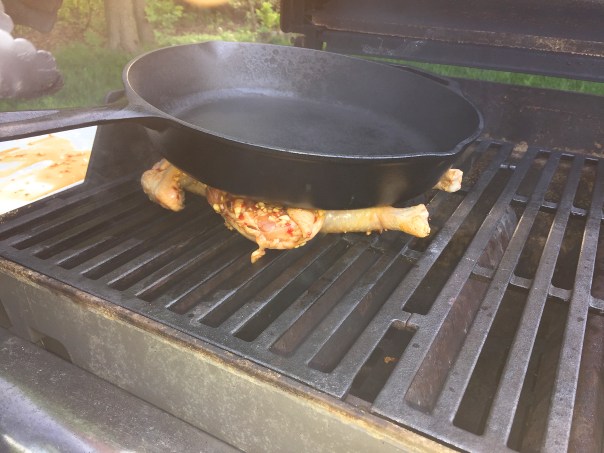
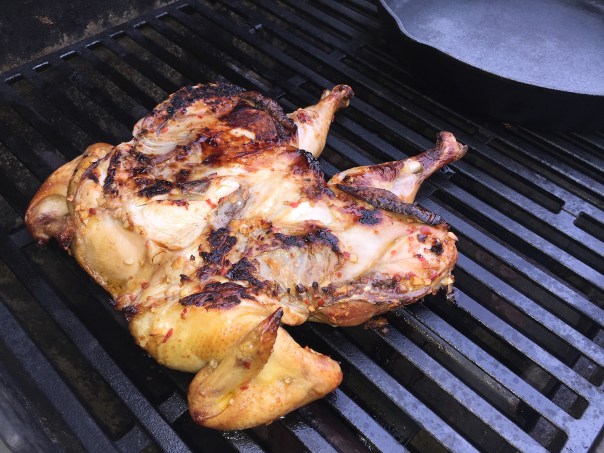
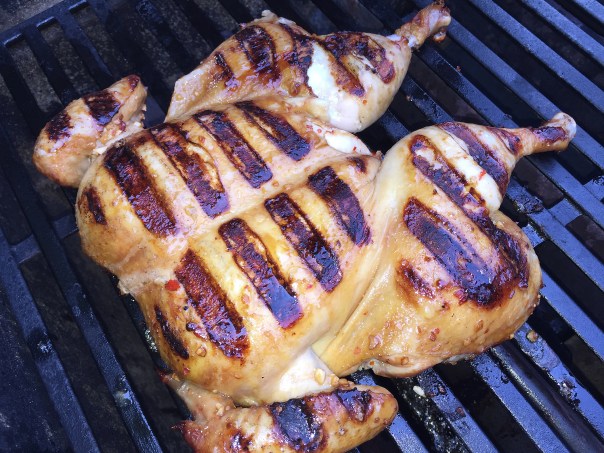
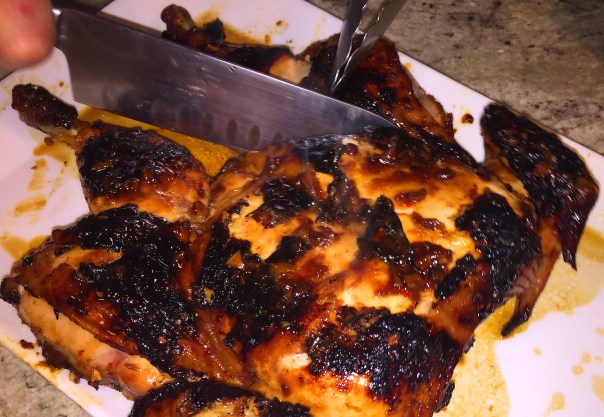
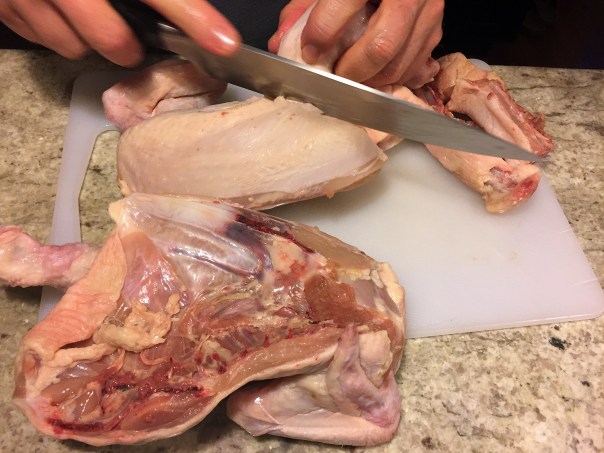
Russ butchers the whole chicken by first cutting out the back bone.

You may wonder why buy a whole chicken, then butcher it when you could just purchase legs, thighs and breasts independently. You can certainly do that and make the prep work even easier. But if like us, you want the extra wings, back and neck to make homemade chicken stock—something we always want to have on hand—than it makes a lot of sense. Plus it’s usually cheaper to buy a whole chicken than individual parts. You have to ask yourself, what’s more important, time or money?

“From a whole bird, you can produce a meal of chicken and vegetables to feed a family of four, a meal worth of leftovers, a bag of chicken pieces in the freezer for a future meal for a family of four, and a bag of chicken stock for another meal or two.”
—Trent Hamm of the Simple Dollar

To make a simple “jus” with the drippings, after chicken and shallots are done, remove them to a platter and cover loosely with foil. Stir in 1 cup boiling water or 1/2 water and 1/2 cup wine. Drizzle over the platter, or individual portions.

Make sure to pencil in a date on your calendar for dinner with this “chick!”

IMG_1679

Ingredients

  • 1 chicken (3-1/2 to 4 lb.), cut into quarters
  • 3 Tbs. unsalted butter
  • 6 medium shallots, cut in half and peeled
  • 8 large garlic cloves, peeled
  • Leaves stripped from 10 sprigs fresh thyme
  • Leaves stripped from 8 sprigs fresh rosemary
  • 1-1/2 tsp. coarse salt
  • Freshly ground black pepper

Directions

  1. Heat the oven to 425°F. Rinse the chicken and pat it dry with paper towels. Cut away any excess fat and tuck the wings behind each breast.
  2. Put the butter into a large, shallow baking pan (the 10-1/2×15-1/2-inch Pyrex pan is ideal for this). Put the pan into the oven while it’s heating. When the butter is melted (about 10 minutes), remove the pan and set it on a heatproof surface or on a couple of potholders.
    IMG_1683
  3. Add the shallots, garlic, thyme, and rosemary, and swirl the pan to coat the ingredients in the butter.
    IMG_1685
  4. Dredge the chicken, skin side down, in the butter and herb mixture, and arrange, skin side up, in the pan. Sprinkle the chicken generously with the salt and pepper.
    IMG_1691
  5. Bake until the chicken is browned and cooked through, 50 to 60 minutes. Serve with the shallots and garlic along with a drizzle of the pan drippings.

IMG_1690
Along with the shallots, we served ours with miso-flavored quinoa and a small side salad.

By Abigail Johnson Dodge from Fine Cooking

Checking Out Chinatown

Months before my West Coast foodie venture Gourmet Seattle Walking Tour in early April, we booked a similar tour in NYC with friends Gary and Rosanne Zarrilli for the end of April. It was marketed as “Upscale Asian eats with seated tastings including the very best of Dim Sum & Peking Duck and a view of Chinatown you can’t find on your own.” We were about to find out…

The day dawned with prospects of the temps hovering in the high-80’s, so summer attire was in definitely in order. With the tour commencing at 10:30 a.m. near Browery and East Broadway, in NYC, we had to be up bright and early. Our rendezvous was at the Zarrilli’s so we could take just one car into the City (commuting would have been long and costly.) Gary and Rosanne are old pros at schlepping into NYC, so we were glad to tag along in their wake.

Russ knew ahead of time that they do provide food substitutions for vegetarians, but unfortunately CANNOT provide food substitutions for any other food allergies such as gluten-free or dairy-free. With his gluten intolerance issues, he was going to have to make some sacrifices one way or the other. But he was willing…

The ride was smooth sailing until we hit the approach to the Holland tunnel, only one lane was open due to construction, causing a long back-up. Then we encountered some minor issues finding a parking garage in town that was conveniently only a few minutes walk to our destination—Michelin and Zagat-rated Dim Sum Go Go—a vegetarian-friendly restaurant located in the Chinatown Two Bridges section.

IMG_1708
A view from the second floor of Dim Sum Go Go.

It’s reputation as cheap, tasty dim sum ordered off a menu rather than snagged from a trolley makes this utilitarian Chinese less chaotic than the typical C-town outfits. Dim Sum Go Go is proud of it’s “Bib Gourmand Award.” Face it, not everyone can afford to eat at Michelin-starred restaurants, so Michelin’s version of “cheap eats,” known as the Bib Gourmand Awards feature restaurants at which you can get two courses plus a dessert or a glass of wine for under $40.

IMG_1710
Gary shows off his chopstick skills while we wait for the show to begin.

The first to arrive out of our group of 19, we were ushered upstairs and instructed to take a seat at one of a few designated tables while waiting for the others. What we didn’t anticipate was a group of around twenty 5- to 7-year-olds celebrating a birthday party at the other end of the rather small room. Let’s just say, our tour guide Raheem had to practically scream to keep above the loud raucous chatter of excited little ones. So much so that he said he’d wait until we were outside (it’s less noisy in Chinatown outside??) to give us the historical spiel.

IMG_1717
Raheem, center, starts explaining our first course while trying to talk loud enough for us to hear above the children’s chatter.

Those “others” in our tour included three young ladies who were in college together obtaining Physician Assistant degrees, and a dozen folks from the Punxsutawney Groundhog Club in town to see the Broadway play Groundhog Day. One of the guys made us honorary members for the day, and gave us all a large gold coin to commemorate the occasion.

IMG_1713

Nowadays, the term “dim sum” is a meal—usually taken on a weekend morning—that encompasses a vast roster of small dishes prepared as little bite-sized portions of food served in mini steamer baskets or on small plates and usually served with tea.

IMG_1718

As we were served our first course, a bamboo basket of three steamed dumplings: duck (and it actually looks like a duck head in the lower right); a combo of ginger, asparagus, and baby corn; and chives with shrimp, Raheem explained that “dim sum” means “to touch the heart.” He also described the three very tasty condiments, shown below, of which you could choose to dip your dumplings. They were all good but I was enamored with the green grated ginger and scallion concoction, while Russ favored the one with dehydrated shrimp and Virginia ham. The middle sauce had a real nice hot pepper kick to it which always appeals to me.

IMG_1712

The Fried Pork Dumpling, with shredded meat—not ground—was our next course and probably my favorite. Although I’ve had them many times in many different places, these were among the best. Wrapping up the Dim Sum meal was a steamed bun known as Bao, a complete meal conveniently packed away in a snowy-white, warm, soft bun. Filled most traditionally with a pork mixture, as these were, the perfect bao should be round, smooth and soft, and steamed in bamboo baskets, giving off a subtle woody scent.

Raheem explained that achieving the highest quality bun requires very exact practices performed by dedicated bao artists called “baoists.” Apparently, it’s a very long and complicated process from mixing the dough from scratch, all the way to the steaming, in a continuous motion without pause. Its origins has something to do with medicinal purposes, the history of which I cannot recall.

IMG_1720
We gather around our tour guide as he regales us with interesting facts.

After gathering the troops outside, Raheem gave us a history lesson on Chinatown that he couldn’t relate inside due to the kids. Wouldn’t you know, halfway into his lecture, those same kids came streaming out of Dim Sum right past us!?! We all looked at each other in horror thinking they’re on the tour with us, eeegads!

On our way to destination number two (without the children’s posse), Raheem led us in and around some back alleys (places we’d never wander on our own) all the while captivating us with colorful stories from years ago when the gangs, brothels, and opium dens ruled the roost. Meandering through Columbus Park we saw/heard a lot of Chinese musicians and everywhere were Asians of all ages playing cards and games of chance, a national pastime.

street.musicians

We made a quick pit-stop on Mott Street at a store that sold hundreds of edible items from nuts and candies to dried fish and fruits, many of which had samples out for tasting. One in particular that struck our fancy was the cajun-spiced dried butter bean. Strange yes, but a tasty little devil.

Peking.Duck.Banner

A few short steps away on the other side of the street was Peking Duck House. We were told that you can get a full Peking duck dinner (Russ’s absolute favorite) here for only $35 and it’s a BYO to boot. Oddly though, Raheem offered us a beer or glass of wine at an additional $6 to go with our duck rolls, and Gary and Russ took him up on the offer.

Duck in general is not easy to cook, and authentic Peking duck is loads more difficult. In China, Peking ducks are bred on farms near Beijing and force-fed a diet of grains and beans for several weeks before slaughter. Then they are prepared by a painstaking process that includes hanging to dry for six to eighteen hours. After roasting, the duck is sliced ritualistically, the meat going into one pile, small pieces of ultra-crispy skin with fat removed, into another.

IMG_1726
A closeup of one of the four cooked ducks that was wheeled out to our table.

Serving Peking duck is also complicated. It requires last-minute assembling, sometimes in the kitchen by cooks, more often tableside, as they did for our group. A pancake much like a crepe is packed with a few standard ingredients: skin, sauce, scallions. Then it’s folded or rolled up.

IMG_1725
The chefs prepare our portions, and we each got two rolls. You had the option of having them assembled in lettuce leaves instead if desired.

IMG_1728

IMG_1729

Third stop on the tour was West New Malaysia, a Bowery hideaway serving sizzling, authentic Malaysian food. Their menu is giant and composed almost entirely of real-deal Malay dishes, interspersed with Chinese, Thai, and various pan-Asian offerings. But our course was Roti Canai, the national dish for Indians in Malaysiaa type of flat bread served with dhal curry, a very mild and nutritious curry made up mainly of lentils, tomatoes, and chilies. Very few spices are used and sometimes potatoes and gourds are added.

IMG_1734

We were instructed to tear the hot flaky bread—handmade in paper thin layers aspiring to be a croissant—and dip it into the curry which may have had a chunk of potato (mine) or chicken (Russ), or both. When Raheem asked if anyone wanted a side of hot pepper dipping sauce, Russ enthusiastically asked for some. I was more into that then the curry but by this time I was too full to even pretend to eat most of it.

IMG_1733

IMG_1731

Our final stop was at Golden Manna Bakery for a Portugese custard. The place was jam packed with people and our group only made it all the more so. In fact, several just waited out on the sidewalk and Raheem brought out their individual custard. Already full, and not a dessert eater, I took mine wrapped to go (which I ended up throwing out anyway), but Rosanne, Gary and Russ all enjoyed theirs, saying they were light and not very sweet.

IMG_1736

It was only about 2:00, and we had hours of sunlight left so we decided to sightsee, walking nearly 5 miles through the financial district to Battery Park, then on to Ground Zero and the Freedom Center. We were eager to scope out its centerpiece, the $4 billion Oculus, a mind-boggling glass-and-steel structure designed by Spanish architect Santiago Calatrava which serves as the centerpiece of the World Trade Center Transportation Hub, incorporating 78,000 square feet of multi level state-of-the-art retail and dining.

IMG_1761
Rosanne and Lynn take a breather by a field of potted tulips with strong cooling breezes coming from the river.

IMG_1762
A memorial called “Reflecting Absence” honors the victims of the 9/11 attacks. It consists of a field of trees interrupted by the footprints of the twin towers. Pools of water fill the footprints, underneath which sits a memorial space whose walls bear the names of the victims.

IMG_1765
One World Trade Center is the main building of the rebuild after the 9/11 terrorist attacks. It is the tallest building in the Western Hemisphere, and the sixth-tallest in the world.

IMG_1767
The 800,000 square foot World Trade Center Transportation Hub called the Oculus, was completed in 2016 at a cost of $4 billion dollars! 

Weary from our travels, we all agreed it was time for an adult libation. And Rosanne thought Eataly would make a perfect spot. A bustling Italian marketplace with 40,000 square feet overflowing with five restaurants, six take-away counters, and a free food university, this place is mind-blowing. With vast arrays of cheeses, olive oils, meats and breads, our only disappointment was the meager selection of gluten-free pastas, when they had every shape, color and size of regular pasta.

IMG_1775
This adorable critter greets the customers as you enter into Eataly.

IMG_1770
Just a small sampling of their vast array of cheeses above, and condiments below.

IMG_1771

With about a 15-minute wait for a table in La Pizza & La Pasta, we were shortly seated by the large bay of windows overlooking the hub. The immediate dilemma was do we order glasses of wine or get a bottle? The bottle made more economical sense so with that decided, we had some trouble zeroing in on what to eat since none of us were super hungry.

IMG_1774

After three inquiries from the waitress, we opted to share two plates. One was the Spuntini: House Marinated OlivesFunghi Arrosto consisting of roasted cremini mushrooms with garlic and thyme, and Gamberetti a small bowl of poached shrimp mixed with calabrian chili and lemon juice. Each one superb in its own way.

IMG_1772

Our other platter was the Grande Piatto Misto Di Salumi & Formaggi, an assortment of their favorite cured meats and cheeses with housemade accompaniments arranged on a wooden cutting board. Even though it wasn’t a lot of food for four people, we couldn’t finish it all.

ten-ren.tea

Working our way back to the parking garage, Rosanne was on a mission to stop at the Ten-Ren Tea Shop on Mott Street. Ten-Ren which means “Heavenly Love” in Chinese was recommended by Raheem and has a worldwide reputation with over 74 stores in Taiwan and nearly 61 stores in the US, Canada, Japan and Malaysia. Both she and Russ purchased some loose leaf green tea.

Finally back to our parked car at 7:00 p.m., we were elated that the cost was only $20—for 9 hours in New York City!! The shock must have stayed with us for a spell because we went the wrong way back to the Holland Tunnel, and once we did navigate our way out, we passed the entrance to the NJ Turnpike and had to go miles out of our way. Oh well, small price to pay for good company and a great time in the nooks and crannies of Chinatown.

I hear there is a walking food tour in Brooklyn….

Greens and Beans

Creamy, earthy beans and plenty of greens make this delicately lemony soup satisfying enough for a light meal. We simply served Spinach and Leek Soup with Garlic and Cannellini Beans with a small side salad, but pair it with some good crusty bread—or a sandwich, if you’re really hungry.

The pale creamy-white beans with a firm texture and nutty flavor, otherwise known as cannellini beans, are particularly popular in Italian cuisine. They are a major source of protein and have a very low calorie count while increasing the feeling of being full. Some of the major health benefits of these little miracle workers include their ability to promote heart health, prevent cancer, lower cholesterol, stabilize blood sugar, reduce risk of colorectal adenomas and prevent wrinkles as well.

pot.of.cannellini.beans

Important for us sun lovers: antioxidants in cannellini beans play a role in protecting your skin. Because of the way it protects against oxidative stress, the free radical inhibiting properties of the beans can help keep your skin supple and youthful by preventing loss of skin elasticity caused by too much sunlight. (If only I’d known this decades ago!)

Most of us know that spinach, another main ingredient in this recipe, is one of the world’s healthiest foods. Remember Popeye who consumed vast amounts of the leafy green to give him strength? Well you may not look like a body builder after one meal, but cooking spinach actually increases its health benefits! Just half a cup of cooked spinach will give you thrice as much nutrition as one cup of raw spinach. When shopping for ingredients, look for mature spinach, rather than the baby variety for this soup because it wilts down to practically nothing when cooked.

The pièce de résistance is the topping of grated Gruyere cheese, an excellent melter, with its rich, creamy, slightly nutty taste. It blanketed all of the other elements under a velvety soft comforter of deliciousness, lending an overall decadence to a simple meal. SIGH.

IMG_1667

Ingredients

  • 2 Tbs. olive oil
  • 3 medium leeks, white and light-green parts only, trimmed and sliced 1/4 inch thick
  • 4 large cloves garlic, sliced lengthwise
  • 2 tsp. dried mustard
  • 6 cups lower-salt chicken broth (preferrably homemade)
  • 8 oz. spinach, rinsed, trimmed and cut into 1-inch ribbons (about 8 lightly packed cups)
  • 1 15.5-oz. can cannellini beans, rinsed and drained (our can was 19-oz.)
  • 2 Tbs. fresh lemon juice
  • Kosher salt and freshly ground black pepper
  • 1 oz. finely grated aged Gruyère (about 1/2 cup)
  • Extra-virgin olive oil, for serving

Directions

  1. In a 6-quart pot, heat the olive oil over medium-high heat. Add the leeks and cook, stirring often, until tender and browned in spots, about 5 minutes.
    IMG_1669
  2. Add the garlic and mustard, and cook, stirring, until fragrant, 15 seconds. Raise the heat to high, add the chicken broth, and bring to a boil.
    IMG_1670
    IMG_1671
  3. Add the spinach and beans, and cook until the spinach wilts. Stir in the lemon juice, and season to taste with salt and pepper.
  4. Serve topped with the cheese and a drizzle of extra-virgin olive oil.
    IMG_1675

By Ronne Day from Fine Cooking

Start Swooning—Succulent Chicken Too Good To Pass Up

Spring was finally in full force and the temps were getting warmer by the week, which usually signifies an end to our braising season. But a Sunday in late April was forecast to be cool, wet and windy, which got us thinking that maybe one last hoorah in the braised dish category was in order. However by the time the weekend rolled around, Saturday was the bogus day and Sunday dawned bright and sunny. Mother Nature loves to throw a curve ball every now and then, but it wasn’t enough to make us change our minds about that braised chicken.

And we all know, a good cook needs an assortment of chicken dishes to fall back on. Aside from roasting or frying (in addition to grilling which will happen very soon), braising chicken is a simple technique to master. It is said, chicken thighs make the best braises; and you want to use skin-on bone-in thighs for the best flavor. Though it could be done on the stovetop, this Braised Chicken with Lemon and Olives dish is oven-braised.

IMG_1660

The essence is a Mediterranean/Italian hybrid that I was literally swooning over as I savored every succulent mouthful. It’s so simple to make and exudes so much flavor from all of the fabulous ingredients, you’ll want to make it again and again. Because I prefer white meat, I added a couple of bone-in, skin-on breasts along with the thighs. I know, I know, conventional wisdom says the white meat will dry out, but keeping the skin and bones intact provides protection, so I was willing to take the risk.

It seems like most everyone is divided over white meat versus dark meat chicken. Between me and hubby there is a clear divide. He likes the dark meat, preferring the leg or thigh and I am solidly in the white meat camp. Although, while I’m still not a fan of poultry legs, I have been warming up to the thighs. And truth be told, I almost never eat the skin, but I do understand that it’s essential during the cooking process to keep it intact for the white meat to remain juicy.

IMG_1647

While I was prepping all of the ingredients, Russ came in from doing an errand and alarmingly said, “It supposed to be thighs, not a whole chicken! Did you buy the wrong thing??” The truth of it was, I was thinking ahead to another dish earmarked for later in the week that called for a whole chicken. Just pulled out the wrong bird is all, but not before taking the “group” photo of ingredients. Crisis averted.

The verdict between the braised breasts and the thighs? Both the dark and white meat were scrumptious and juicy with outstanding flavor notes from the Meyer’s lemon, fennel seed, herbs, garlic and olives—which by the way, become soft and malleable when braised. We both concur, we’re not sure we can wait for the Fall when the weather cools down to make this recipe again… nor should we have to…

Braised Chicken with Lemon and Olives

  • Servings: 4-6
  • Difficulty: easy
  • Print

Ingredients

  • 8 chicken thighs, skin-on and bone-in, about 3 1/2 to 4 pounds
  • Salt and pepper
  • ½ teaspoon red pepper flakes
  • 6 garlic cloves, minced
  • ½ teaspoon crushed fennel seeds
  • 1 tablespoon roughly chopped rosemary
  • 1 tablespoon olive oil
  • 2 Meyer lemons, cut in wedges
  • 1 cup flavorful olives with pits, a mixture of black and green, about 1 pound
  • 1 cup chicken broth
  • 3 tablespoons chopped parsley

Directions

  1. Pat chicken thighs dry with paper towels. Season well with salt and pepper and place in an earthenware baking dish in one layer, skin side up. Sprinkle with red pepper, garlic, fennel and rosemary and drizzle with olive oil. Rub seasoning into thighs on all sides. Tuck lemon wedges here and there. Let marinate for 15 minutes. Heat oven to 375 degrees.
    IMG_1648
    IMG_1650
  2. Put baking dish in oven, uncovered, and roast until skin browns lightly, about 20 minutes. Scatter olives evenly over chicken and add broth. Cover tightly and bake for 1 hour, until meat is very tender when probed with a skewer.
    IMG_1653
    IMG_1655
  3. Remove thighs and lemon wedges and arrange on a platter. Keep warm. Pour pan juices into a saucepan and quickly skim fat from surface. Over high heat, simmer rapidly until reduced by half. Spoon juices over chicken, sprinkle with parsley and serve.
    IMG_1657

http://www.lynnandruss.com

IMG_1664
To round out the dinner, we served our chicken with some garlicky mashed potatoes and fresh peas drizzled with a Tuscan herbed olive oil.

By 

Seriously BIG Flavor with Little Effort

Pernil is a brightly flavored roast pork dish from the Caribbean that is seriously tasty business. This version uses quick-cooking tenderloin in place of the more traditional pork shoulder, but it has the same robust flavorings, including garlic, cumin, oregano, vinegar, and lime. As I write about this delish dish, I fondly recall the tempting fragrant aromas wafting through the house…

In Puerto Rico, the dish covered in a garlicky marinade then roasted, is commonly shared during Christmas, and typically accompanied by arroz con gandules (rice with pigeon peas). When finished, the meat “falls off the bone” and the crispy skin (cuero) is separated, cleared of fat, and then served separately as cueritos (skin chips).

IMG_1617

But this Pernil-Style Pork Tenderloin is a quick weeknight version deserving of the “EASY” button. Granted it does not exactly match the caliber of an original slow-cooked, highly seasoned Puerto Rican pernil with the crackling skin, but it’s more than a decent enough facimile when you don’t have the luxury of time. In fact, I think it’s certainly company-worthy (but than you wouldn’t have any leftovers 😉 )

Although rice is typically served as a side, we paired ours with that yummy and very healthy Quinoa and Avocado Salad that I recently blogged about.

IMG_1593

Ingredients

  • 3 large cloves garlic, coarsely chopped
  • 2 small shallots, coarsely chopped
  • 4 Tbs. extra-virgin olive oil
  • 1 Tbs. distilled white vinegar
  • 1 tsp. chili powder
  • 3/4 tsp. ground cumin
  • 3/4 tsp. dried oregano
  • 1/2 tsp. granulated sugar
  • Kosher salt and freshly ground black pepper
  • 1 1-1/4-lb. pork tenderloin
  • 4 lime wedges

Directions

  1. Position a rack in the center of the oven and heat the oven to 400°F.
  2. In a food processor, combine the garlic, shallots, 3 Tbs. of the oil, the vinegar, chili powder, cumin, oregano, sugar, 3/4 tsp. salt, and 1/4 tsp. pepper. Pulse for several seconds to make a paste.
    IMG_1595
  3. Cut the tenderloin in half crosswise (we didn’t have to do this since our package came with two tenderloins) and then butterfly both halves by holding a knife parallel to the cutting board and cutting a lengthwise slit to within 1/2 inch of the other side of the tenderloin. Spread 1 Tbs. of the paste inside each slit. Tie with kitchen string or secure with toothpicks (I used both) and season with salt and pepper.
    IMG_1597
  4. Heat a heavy-duty, ovenproof, 10-inch skillet over high heat until hot and add the remaining 1 Tbs. oil, swirling the pan to coat the bottom. Add the tenderloins and sear on all sides until golden-brown, 3 to 4 minutes total.
    IMG_1607
  5. Transfer the skillet to the oven and roast for 8 minutes. Turn the tenderloins over and spread the remaining paste on top. Roast until an instant-read thermometer inserted in the thickest part of each registers 145°F, about 6 minutes more.
    IMG_1609
    IMG_1610
  6. Transfer to a cutting board, remove the string and/or toothpicks, and let rest for 5 minutes. Slice 1/2 inch thick and serve with the lime wedges.
    IMG_1615

IMG_1621
Scoop up any mixture that falls off while slicing the pork and add it to your plate. Squeeze some fresh lime over the medallions.

By Arlene Jacobs from Fine Cooking

All We Are Saying, Is Give Peas A Chance

It’s springtime and what veggie exemplifies this season of rebirth more than fresh peas? Sadly true in some cases, many people think peas are just a cheap restaurant side dish that adds some ‘green’ to your plate. In reality, they are little powerhouses of nutrition that are a boon for your health and the whole planet.

fresh.peas

In the weight management arena, peas are low-fat but high-everything-else. A cup of peas has less than 100 calories but lots of protein, fiber and micronutrients. Coming from peas’ strong anti-inflammatory properties are prevention of a whole host of issues including wrinkles, Alzheimer’s, arthritis, bronchitis, osteoporosis and candida.

Here’s an interesting fact, although considered a vegetable, green peas really are a fruit since they contain seeds developed from a flower—bet you didn’t know that! And our neighbor Canada is the largest producer of peas in the world. These little green wonders have such high-quality protein that many commercial protein powders are starting to use it to avoid the possible side effects of soy or dairy products.

So I’m giving you two different recipes in one blog highlighting peas as the centerpiece of each dish. First, is the Peas and Prosciutto Salad (below) that we served with our roast leg of lamb for Easter Dinner. Russ found it in our recent Bon Appétit magazine and thought it would make a perfect starter while the lamb rested after coming out of the oven. Topping it off with grated fresh horseradish over the salad adds a wonderful pop of flavor so don’t omit it.

IMG_1562.jpg
This Peas and Prosciutto Salad combines both blanched fresh peas from the pod and sugar snap peas.

Peas are a perfect match with ham and cream, and together, they create a fast but luxurious sauce in the second recipe of Creamy Linguine with Peas, Ham, and Sage. If you don’t like sage, (seriously?) feel free to leave it out or substitute another herb, such as thyme or tarragon.

IMG_1634

If like me, you’re concerned about the high fat content and calories in heavy cream, you can slim it down a notch, while keeping in mind the flavor and texture of the recipe may be slightly different than you would get using heavy cream. *For each cup of heavy cream in the recipe, melt 1/3 cup of unsalted butter and add it to ¾ cup of milk. (Note that if you use low-fat milk, you will want to add 1 tablespoon of flour to thicken the mixture.) Just melt the butter and let cool, then blend in a bowl with the milk. Stir until well mixed.

Alternatively, for each 1 cup of heavy cream in a recipe, you can use a substitute of butter and half-and-half. *Melt 1/6 cup of butter and allow it to cool. Be sure it does not solidify during the cooling process. Put 7/8 cup of half-and-half into a bowl and stir in the cool melted butter until they are well blended.

IMG_1625
TIP: Before you drain the pasta and peas, you’re instructed to reserve 1/2 cup of the cooking water (which I didn’t end up needing, although you may.) In prior recipes that required I save some of the pasta water, I unintentionally drained it all away, so putting a measuring cup in the strainer will remind you to reserve some of the liquid before you drain.

My instincts told me to add more sage (one of Russ’ favorite herbs) and some lemon zest to brighten up the dish. Unfortunately, all I had on hand was a half of a lemon that was already zested, so I just squeezed the juice over our plates and it did indeed add a bright note. Your call if you want to do the same.

Peas and Prosciutto Salad

IMG_1563

Ingredients

  • 1 tablespoon fresh lemon juice
  • ½ teaspoon Dijon mustard
  • 3 tablespoons olive oil
  • Kosher salt, freshly ground pepper
  • 1¼ cups shelled fresh green peas (from about 1¼ pounds pods), or frozen peas, thawed
  • 12 ounces sugar snap peas (about 3 cups), trimmed
  • 4 ounces arugula, tough stems removed (about 6 packed cups)
  • 4 ounces prosciutto, thinly sliced
  • Knob of fresh horseradish, peeled (for serving)

Directions

  1. Whisk lemon juice and mustard in a large bowl. Gradually add oil, whisking constantly until emulsified; season vinaigrette with salt and pepper.
  2. Working in batches, cook green peas and sugar snap peas in a large pot of boiling salted water until crisp-tender, about 2 minutes per batch. Immediately transfer to a bowl of ice water and swoosh peas around until cold; this sets their color and halts the cooking. Drain and pat dry with paper towels.
  3. Add green peas, sugar snap peas, and arugula to bowl with vinaigrette and toss until well coated with dressing; season with salt and pepper.
  4. Arrange salad on a platter and top with prosciutto. Finely grate horseradish over salad to your liking.

Creamy Linguine with Peas, Ham, and Sage

IMG_1622

Ingredients

  • 12 oz. fresh linguine (or fettuccine)
  • 1-1/2 cups shelled fresh peas or frozen peas, thawed
  • 2 cups heavy cream, or substitute as noted above*
  • 1 heaping Tbs. chopped fresh sage, more to taste
  • Kosher salt and freshly ground black pepper
  • 4 oz. ham, cut into bite-size pieces
  • 1-1/2 cups finely grated Parmigiano-Reggiano, more for serving
  • Lemon zest, optional

Directions

  1. Cook the linguine in boiling salted water according to package directions until al dente, adding the peas about 2 minutes before the pasta is done. Reserve 1/2 cup of the water and drain the pasta.
    IMG_1629
  2. Meanwhile, in a 12-inch skillet, simmer the cream, sage, 1 tsp. salt, and 1/2 tsp. pepper, stirring occasionally, over medium-high heat, until slightly thickened, about 3 minutes.
    IMG_1626
  3. Turn the heat down to medium, add the drained pasta and peas, ham, and Parmigiano; toss to combine and heat through. Add some of the cooking water to loosen the pasta, if necessary. Season to taste with salt and pepper and serve topped with more Parmigiano.
    IMG_1627

IMG_1632

Adapted from Caroline Campion and Kathy Brennan of Fine Cooking

Orfeo

It all began at Orfeo, located in the Army Building on 3rd Avenue in the Belltown section of Seattle. On one of the first sunny days they’ve had in ages, my 3-hour Gourmet Walking Tour started at this contemporary, Northwest-centric Italian restaurant. Orfeo impressed me so much that I encouraged my husband and his coworker to make dinner reservations with me the very next evening!

sign

A bit of a local legend, their Chef Kevin Davis takes land-based, seasonally-driven foods and features artisan cooking techniques. For the last fifteen years he has developed a strong reputation as a seafood chef, but this is a cuisine where the focus is on the food sourcing rather than the cooking technique.

A highlight of their kitchen, is the custom Spanish designed Woodstone Josper, a charcoal burning oven with a natural convection that circulates smoke around the food cooking inside of it. Orfeo also puts a strong focus on their traditional wood burning oven which turns out pizzas, and roasted meats and vegetables.

3ofusFrom left, Russ, David and Lynn.

wine
Every restaurant we dined at while in Seattle presented patrons with a huge wine list, and Orfeo was no exception. We finally settled on a local Pinot Noir from Willamette Valley, Oregon’s leading wine country.

Heather, my walking tour guide highly encouraged the group, should we get the opportunity to come back, to try the Mediterranean Mussels roasted over the coals. Knowing Russ’ penchant for mussels, it didn’t take much persuasion to get him to order them as his appetizer. He was thrilled with the mollusks that were tender and juicy seasoned with garlic, rosemary, preserved lemon and black pepper. They came topped with several thick slices of toasted homemade, whole grain bread that came in handy to mop up the flavorful sauce.

mussels
Not normally a bread eater, I couldn’t resist snatching a piece and tasting that mouth-watering sauce.

antipasto

Our dining guest that evening was David Greenspan, Chair of Psychiatry at Einstein Medical Center and Russ’ coworker who was also attending the National Behavioral Health Conference. He zeroed in on the Antipasto for starters with an assortment of cured meats, olive salad, tomatoes, white anchovies, pickled onions and bruschetta.

Before selecting his entrée, David wanted to know the backstory on Katie’s Pasta. Our server told us that Katie was the executive chef of the restaurant for some time and this was her favorite way of making pasta for herself. When she left the restaurant, they put this dish on the menu in honor of her. It’s a simple dish consisting of capellini made in house and tossed with garlic, truffle oil, basil and butter.

katies.pasta

steak

Sometimes you just have to have a good steak. And this was one of those days for Russ. Enticing him that night was the Meyers all-natural beef Blasted New York Steak with sliced roasted potatoes, topped with exotic mushrooms bathing in sauce au poivre. Since we were staying in a hotel and couldn’t bring home a doggie bag, Russ was forced to eat the entire meal!

polenta

It being Restaurant Week in Seattle, I took advantage of their 3-courses-for-$32 special menu. On it was the delicious Polenta Arrostita with bolognese sauce that I enjoyed on the Walking Tour the day before. It was so friggin’ good, I had to have it again. This time the polenta cake was smothered in a lamb bolognese (instead of pork) with exotic mushrooms and miner’s lettuce. I think it may have been even better the second time around…

swordfish

My entrée of choice was the beautifully plated and extremely flavorful Line Caught Hawaiian Swordfish with a salsa salmoriglio and asparagus gremolata perched on a bed of potato purée. Having ordered off of the special menu, I was allowed dessert, the third course. Not one to eat dessert, I let the guys decide which one they wanted to split and they unanimously chose the Lemon Tiramisu that consisted of lemon curd, dotted with fresh raspberries, and adorned with fresh mint and shaved white chocolate.

dessert

ice.cream
David also enjoyed a double scoop of Pistachio Ice Cream.

I highly recommend this forward thinking, Northwest-centric Italian restaurant if you ever get yourself to Seattle. Orfeo is the third restaurant from Chef Kevin and Terresa Davis, creators of Steelhead Diner and Blueacre Seafood.

Chew On This

Quinoa, the supergrain of the future, is loaded with health benefits. First and foremost, it is one of the most protein-rich foods we can eat because it is a complete protein containing all nine essential amino acids. So along with heart-healthy avocados, a side of Quinoa and Avocado Salad with Dried Fruit, Toasted Almonds, and Lemon-Cumin Vinaigrette is sure to win you points in the ‘eat well’ department.

quinoa
Besides its attractive maroon color, red quinoa has a slightly deeper, nuttier flavor than white quinoa. Both, however, are excellent in this bright, lemony salad.

If you need more convincing, quinoa contains almost twice as much fiber as most other grains. Fiber lowers cholesterol and glucose levels and may help you to lose weight as it takes a longer time to chew than does other foods. It makes you feel fuller for longer and is less “energy dense” which means it has fewer calories for the same volume of food.

avocados

And avocados are no slouch in the healthy eating department either. This fruit is prized for its high nutrient value and is often referred to as a superfood. They contain more potassium than bananas and are loaded with heart-healthy monosaturated fatty acids. In addition, like quinoa, avocados contain a relatively large amount of fiber.

Then you throw in dried fruits. Again more fiber! Plus, dried fruits like apricots and raisins used in this recipe contain high amounts of beta carotene, vitamin E, niacin, iron, magnesium, potassium and calcium. Dried fruits consist of little to no fat but also contain significant calories per serving, so it is with a watchful eye that you add a judicious amount.

almonds

And if that’s still not enough to sway you, let’s talk quickly about the health benefits of almonds. A high-fat food that’s good for your health? That’s not an oxymoron. Almonds help to lower the risk of heart disease and heart attacks. They do this by lowering the LDL (or bad) cholesterol in the body by significant amounts. And a quarter cup of almonds contains more protein than a whole egg. One last plug for almonds. They appear to not only decrease after-meal rises in blood sugar, but also provide antioxidants to mop up the smaller amounts of free radicals that still result.

OK, enough about how healthy all of the ingredients are. How about eating it because it tastes good? We were very impressed with this dish and plan on making it often—just love the crunch of the toasted almonds. I think it would be a great addition to a picnic or potluck because it can stay at room temperature for quite some time.

IMG_1591

Ingredients

  • 3 Tbs. raisins (preferably a mix of dark and golden)
  • 2 Tbs. dried apricots, thinly sliced
  • 1 cup red or white quinoa, rinsed well
  • Kosher salt
  • 1 large lemon
  • 3 Tbs. extra-virgin olive oil
  • 1/4 tsp. ground coriander
  • 1/4 tsp. ground cumin
  • 1/4 tsp. sweet paprika
  • 2 medium firm-ripe avocados (6 to 7 oz. each), pitted, peeled, and cut into 1/2-inch chunks
  • 2 medium scallions, white and light green parts only, thinly sliced
  • 2 to 3 Tbs. coarsely chopped toasted almonds
  • Freshly ground black pepper

Directions

  1. In a medium bowl, soak the raisins and apricots in hot water for 5 minutes. Drain and set aside.
    IMG_1592
  2. In a 2-quart saucepan, bring 2 cups water, the quinoa, and 1/2 tsp. salt to a boil over high heat. Cover, reduce the heat to medium low, and simmer until the water is absorbed and the quinoa is translucent and tender, 10 to 15 minutes. (The outer germ rings of the grain will remain chewy and white. Some germ rings may separate from the grain and will look like white squiggles.) Immediately fluff the quinoa with a fork and turn it out onto a baking sheet to cool to room temperature.
    IMG_1601
  3. Finely grate the zest from the lemon and then squeeze 1 Tbs. juice. In a small bowl, whisk the lemon zest and juice with the olive oil, coriander, cumin, paprika, and 1/4 tsp. salt.
    IMG_1598
    In a large bowl, toss the vinaigrette with the quinoa, raisins, apricots, avocado, scallions, and almonds. Season to taste with salt and pepper and serve.
    IMG_1603
    An easy way to cube the avocado flesh is to score it in both directions with a pairing knife, then scoop out with a tablespoon.

IMG_1606
No need to worry about keeping this salad warm because it can be eaten at room temperature.

By Deborah Madison from Fine Cooking