All posts by LynnHoll

Unknown's avatar

About LynnHoll

I have been an artist and designer all my life incorporating graphic design for websites, gardens, publications, fabrics, interior design and cooking. I am now retired from my professional job, but still create artistic visions in all forms on a daily basis.

One-pan Meal #5: Cod with Pancetta, Artichoke Hearts and Olives

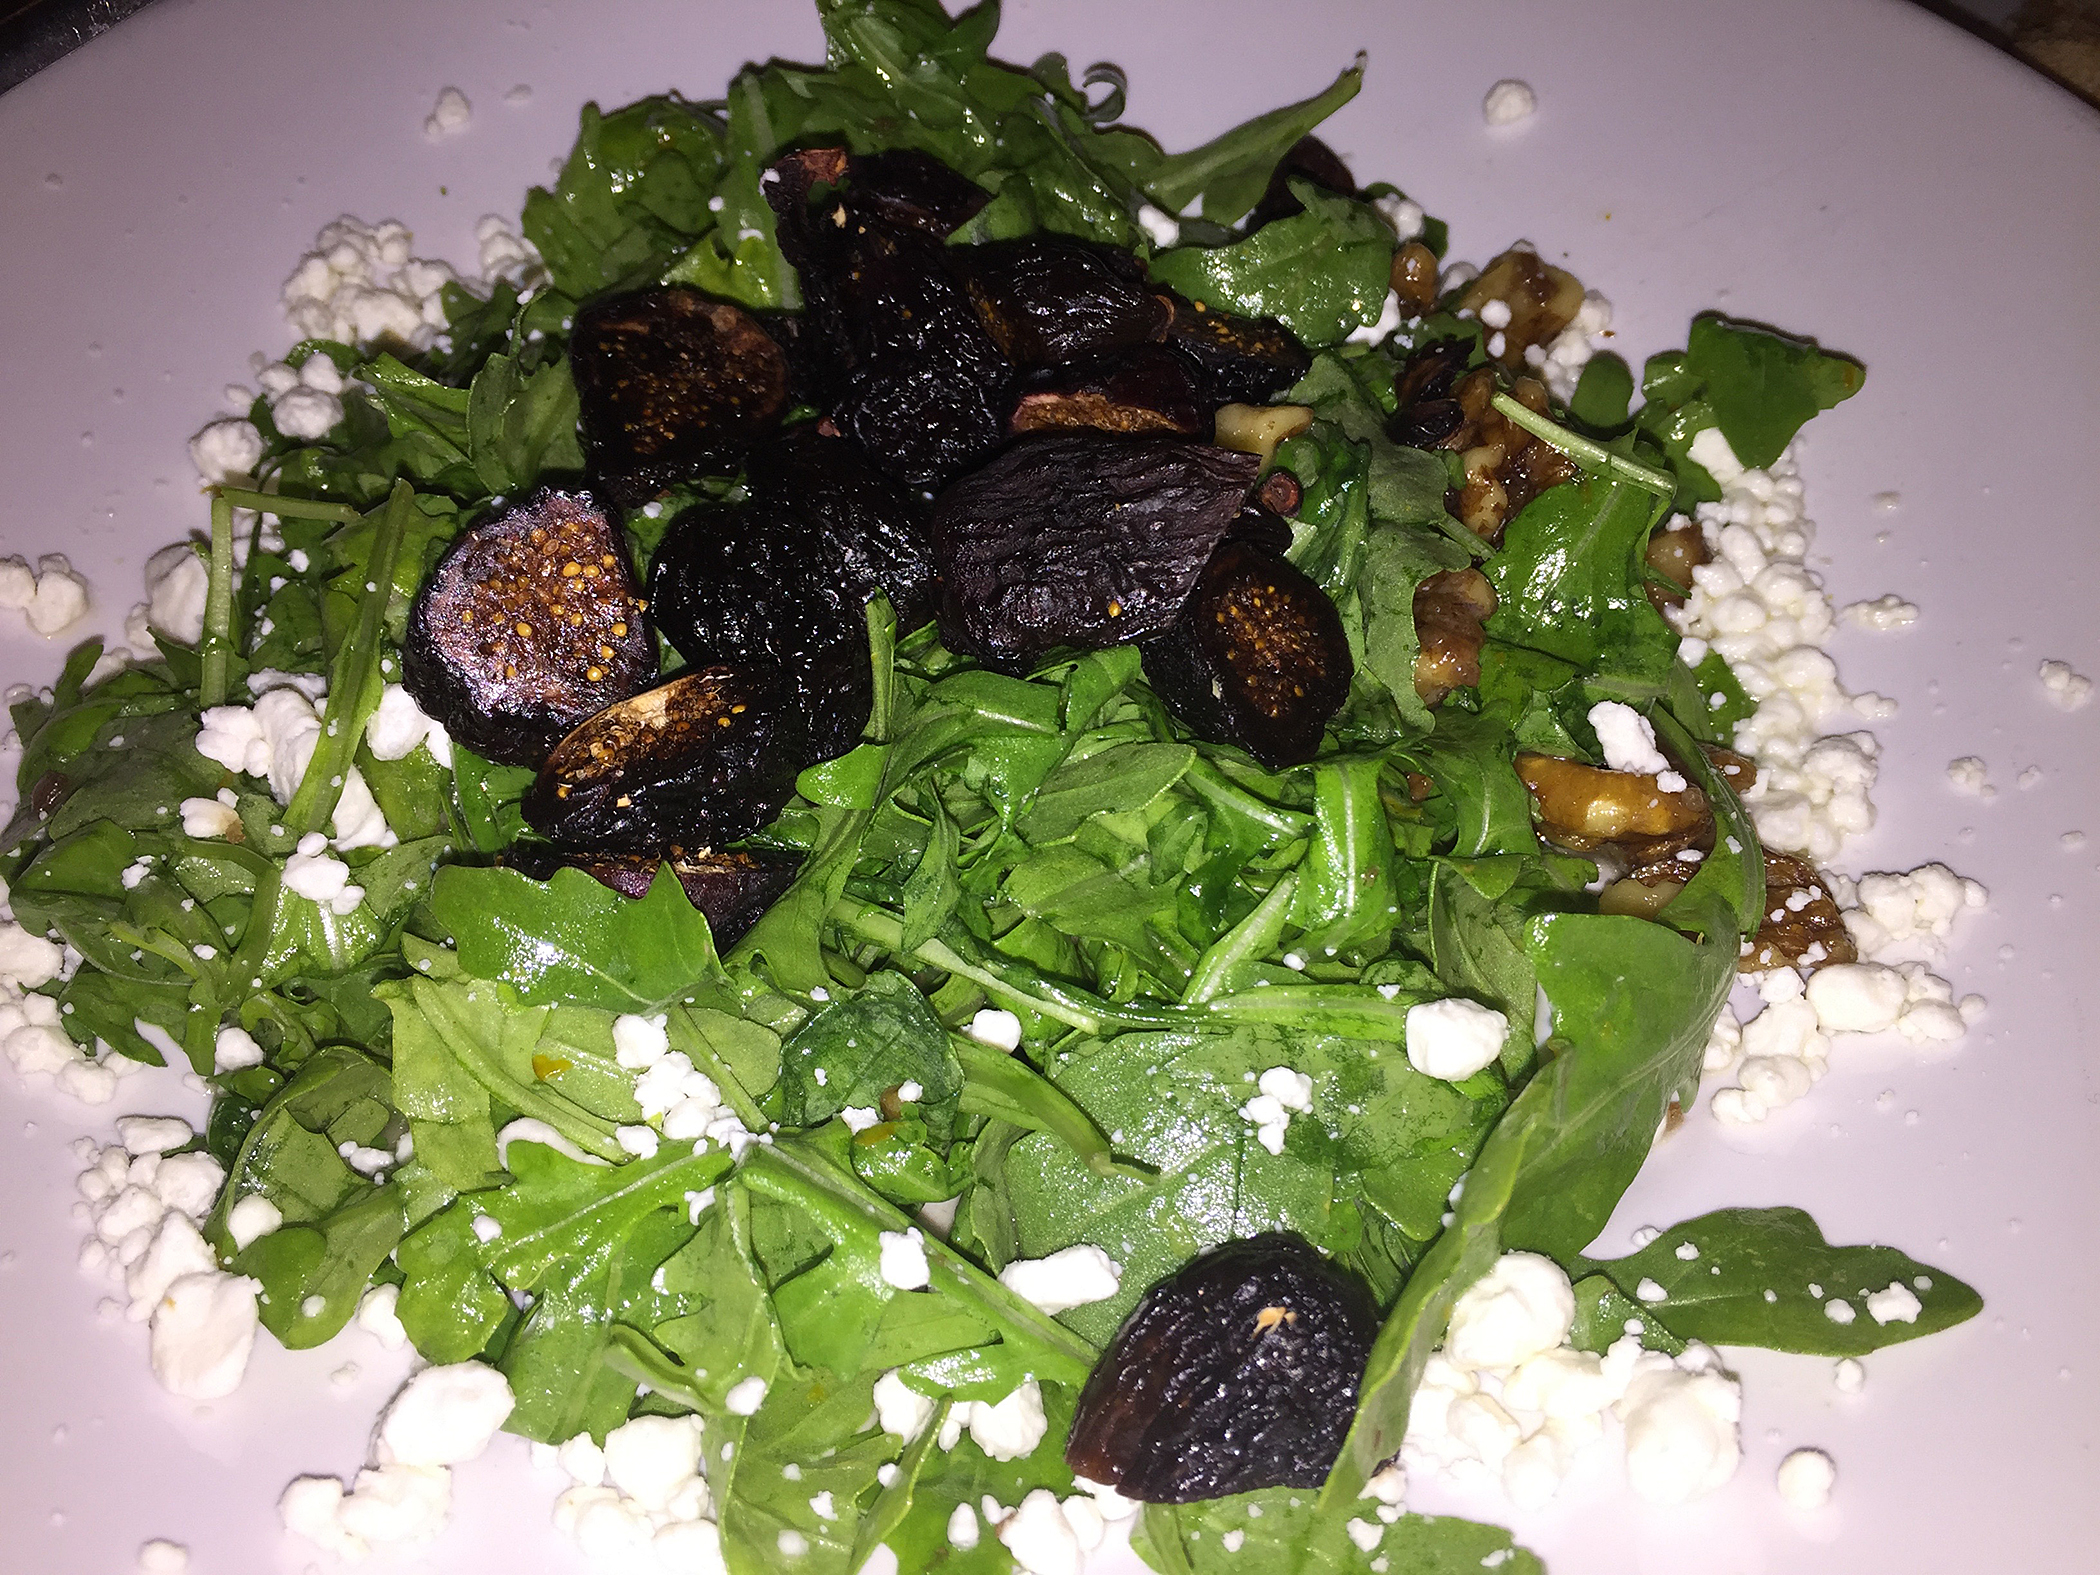
Keeping in the vein of easy dinners, we found this recipe to be a worthy contender—and it wraps up the series on one-pan meals. Despite the ease of preparation—the fish, sauce, and side dish all cook in one skillet—this is a restaurant-worthy dinner. We paired ours with a healthy baby kale side salad, however you could also serve with a crusty bread to mop up the sauce… and the leftovers were just as good…

IMG_2712
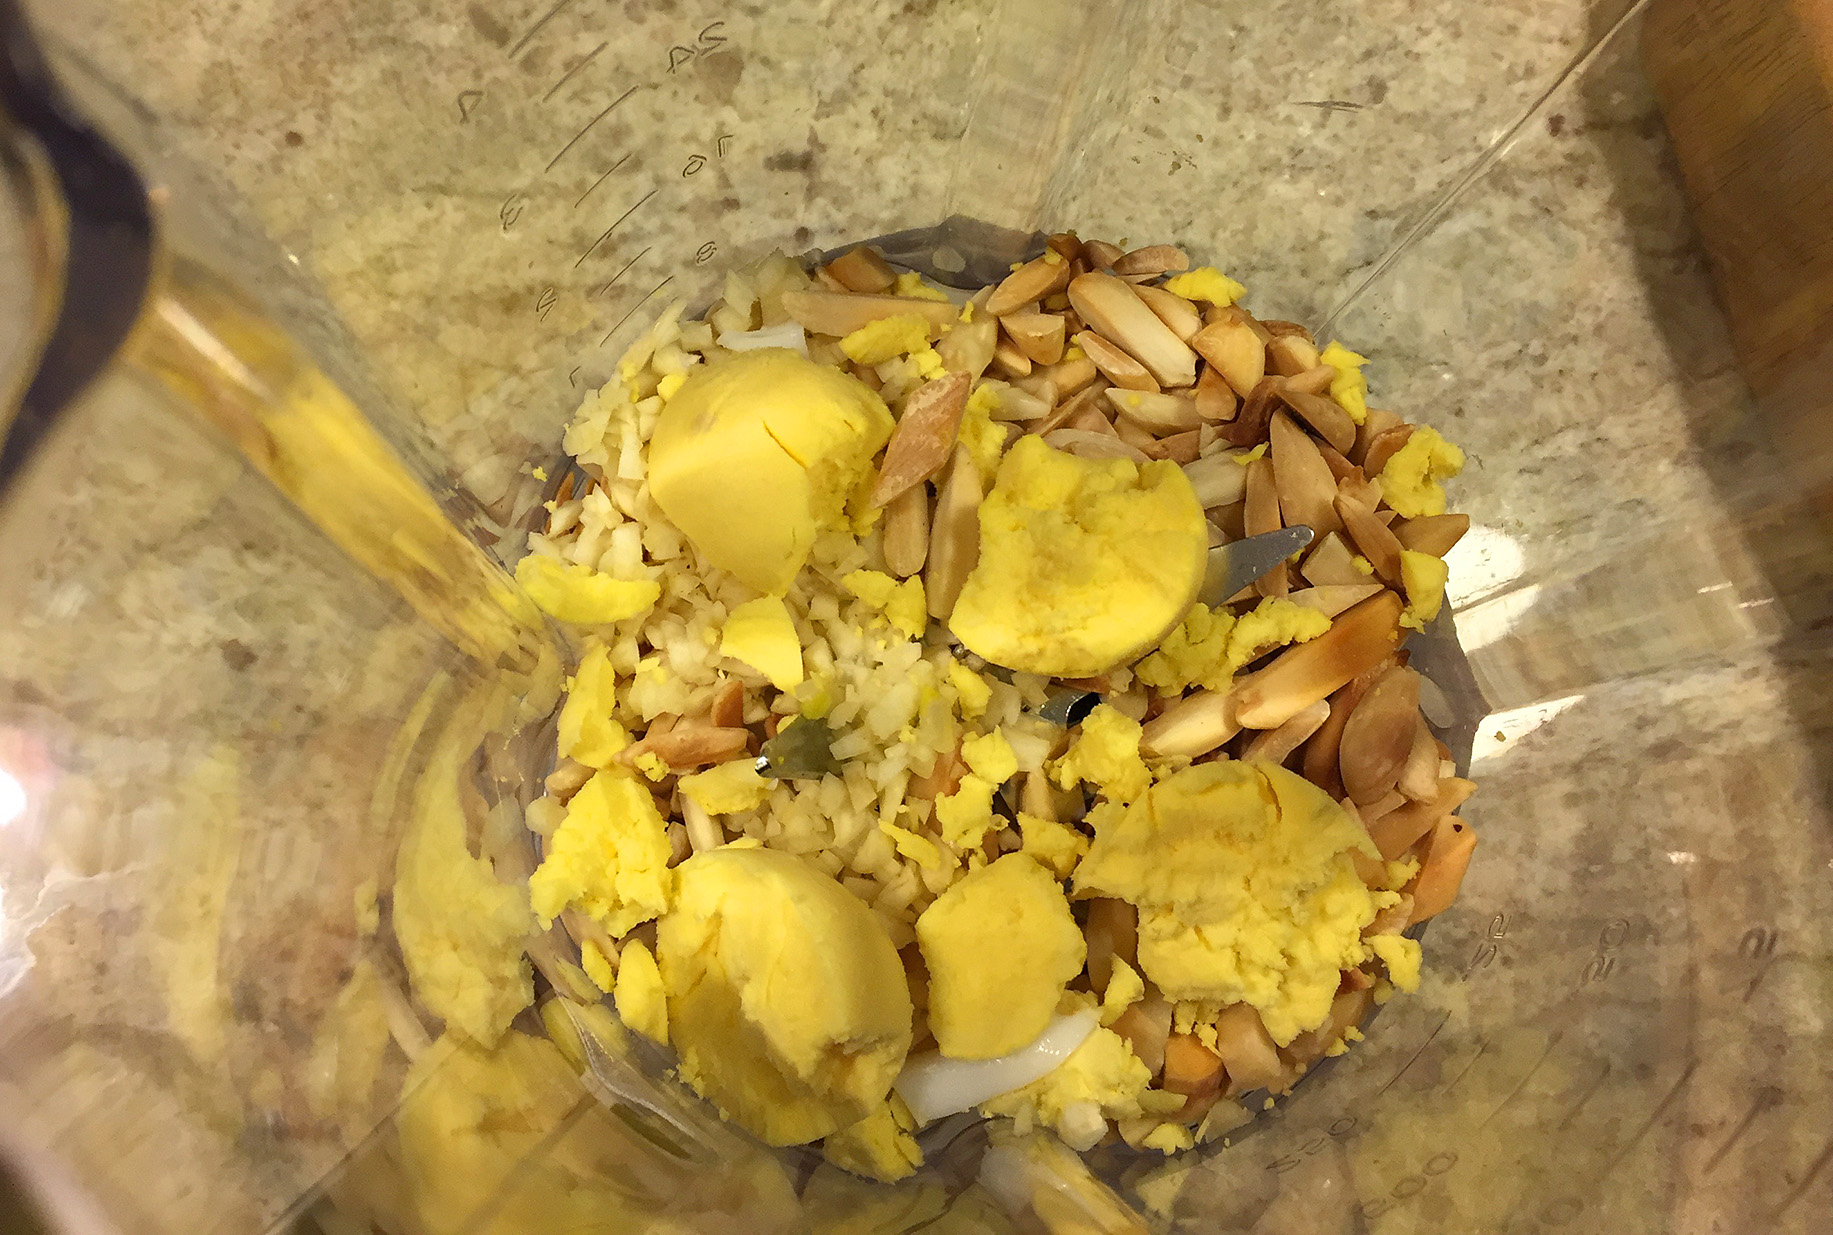
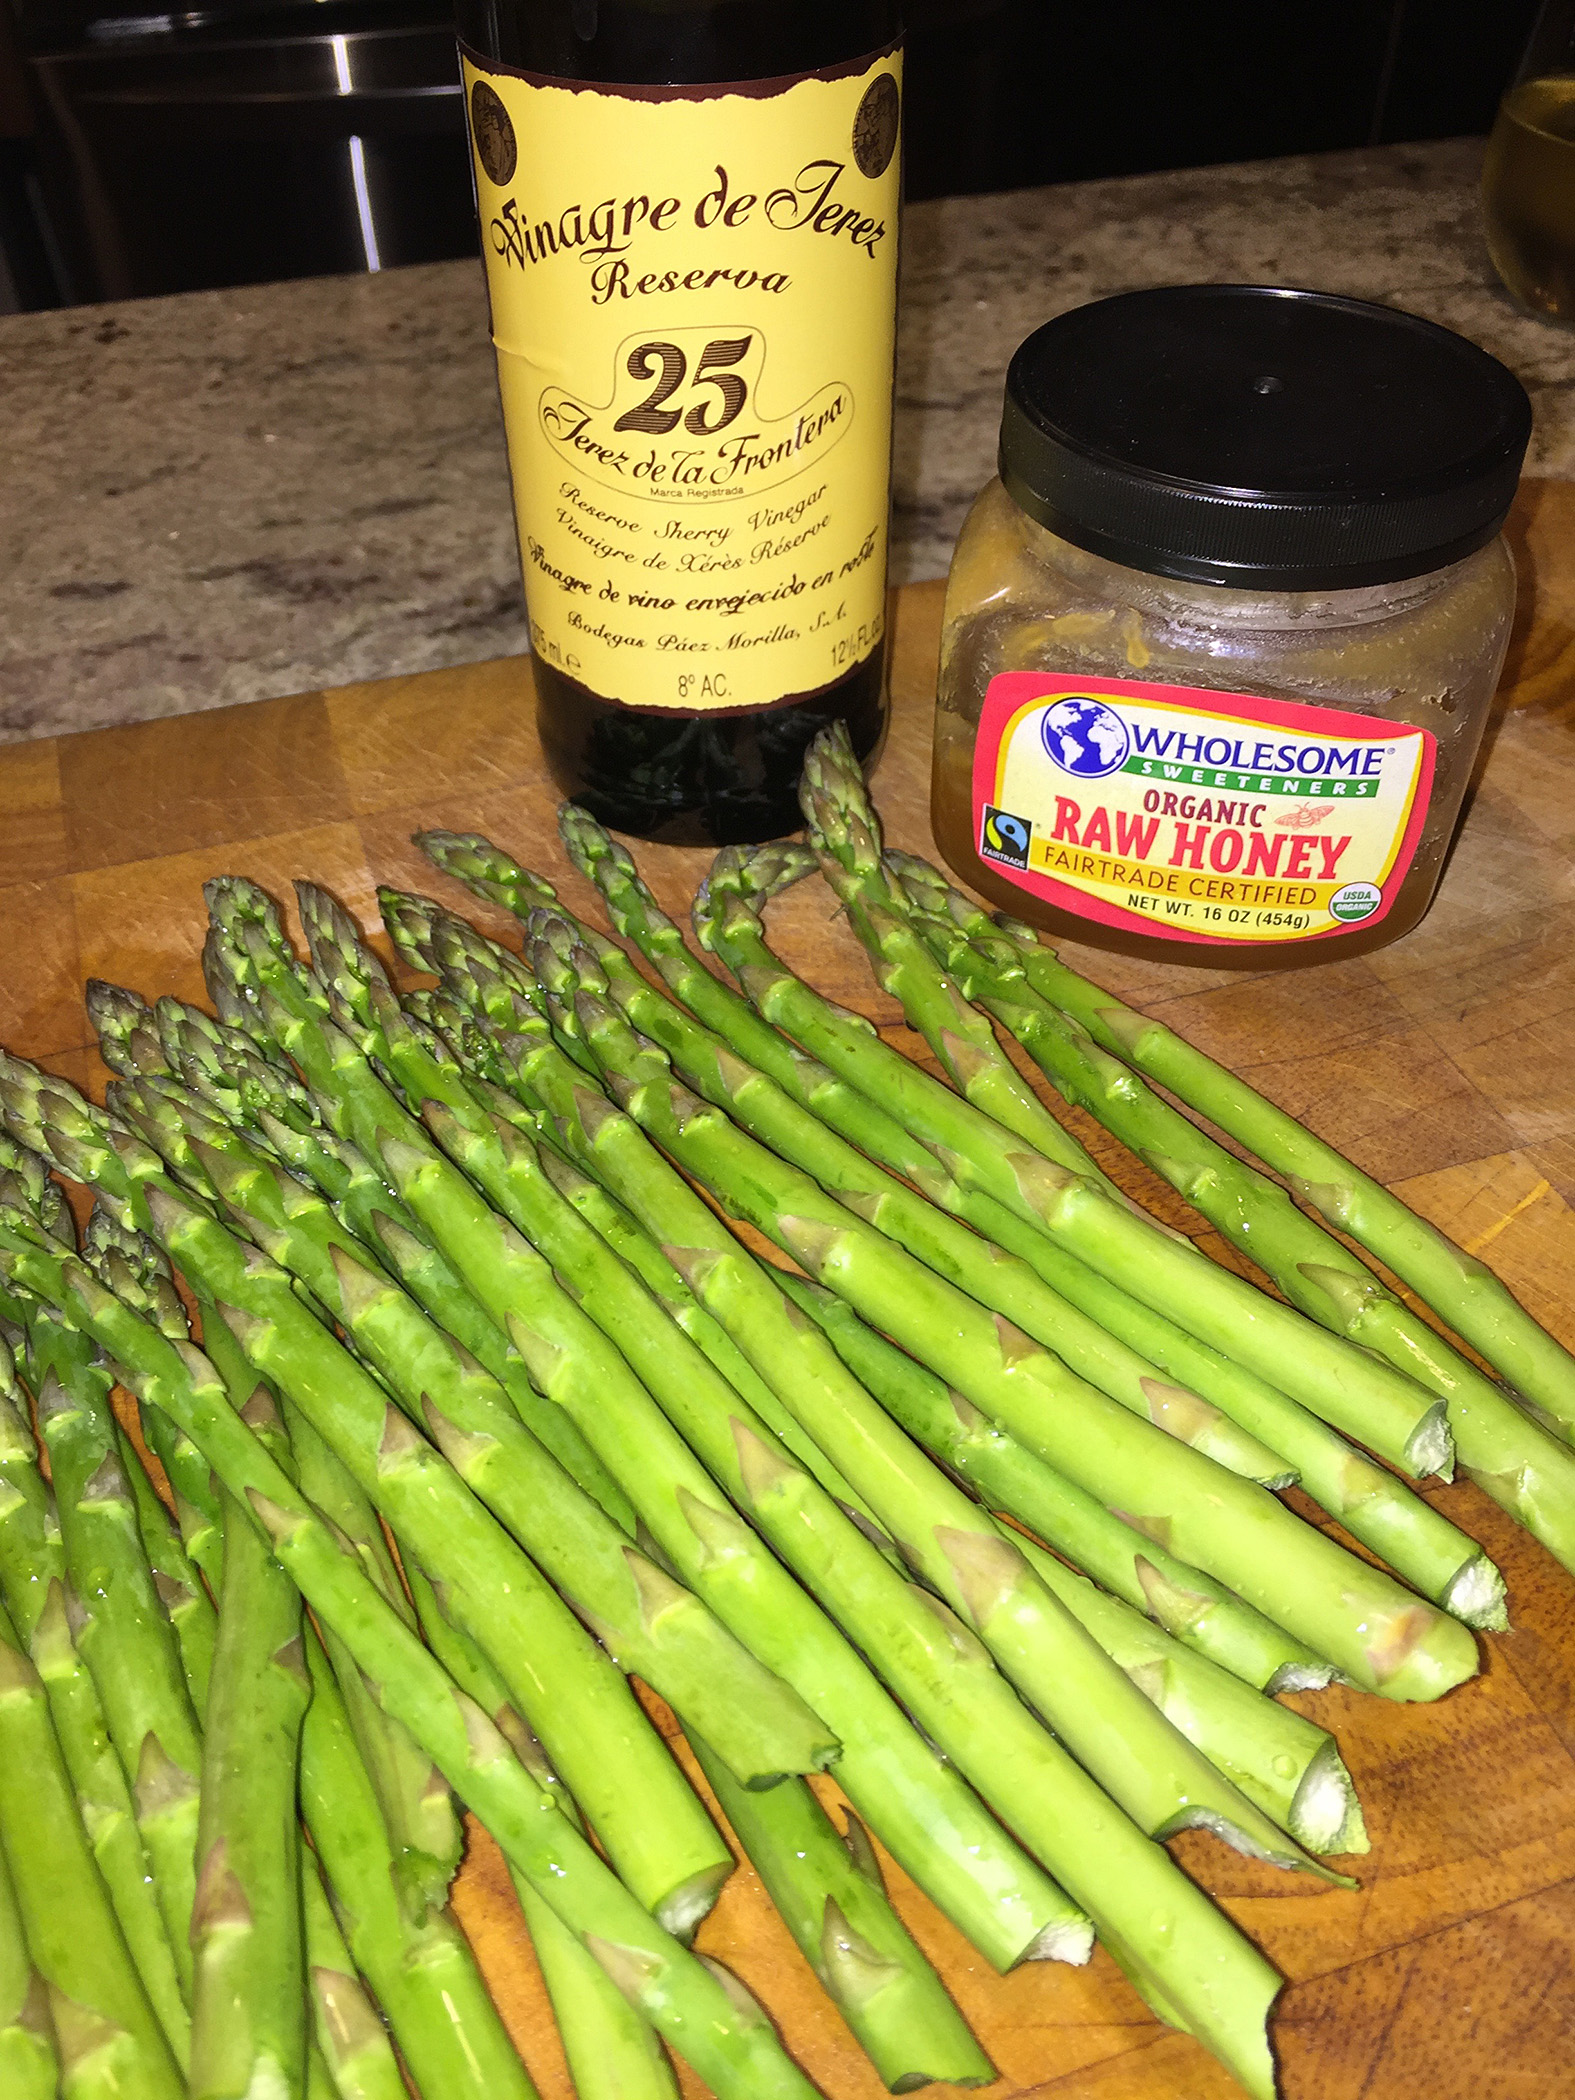
Ingredients laid out ready to start cooking.

Ingredients

  • 4 6-oz. pieces fresh cod loin fillet
  • Kosher salt and freshly ground black pepper
  • 2 Tbs. extra-virgin olive oil
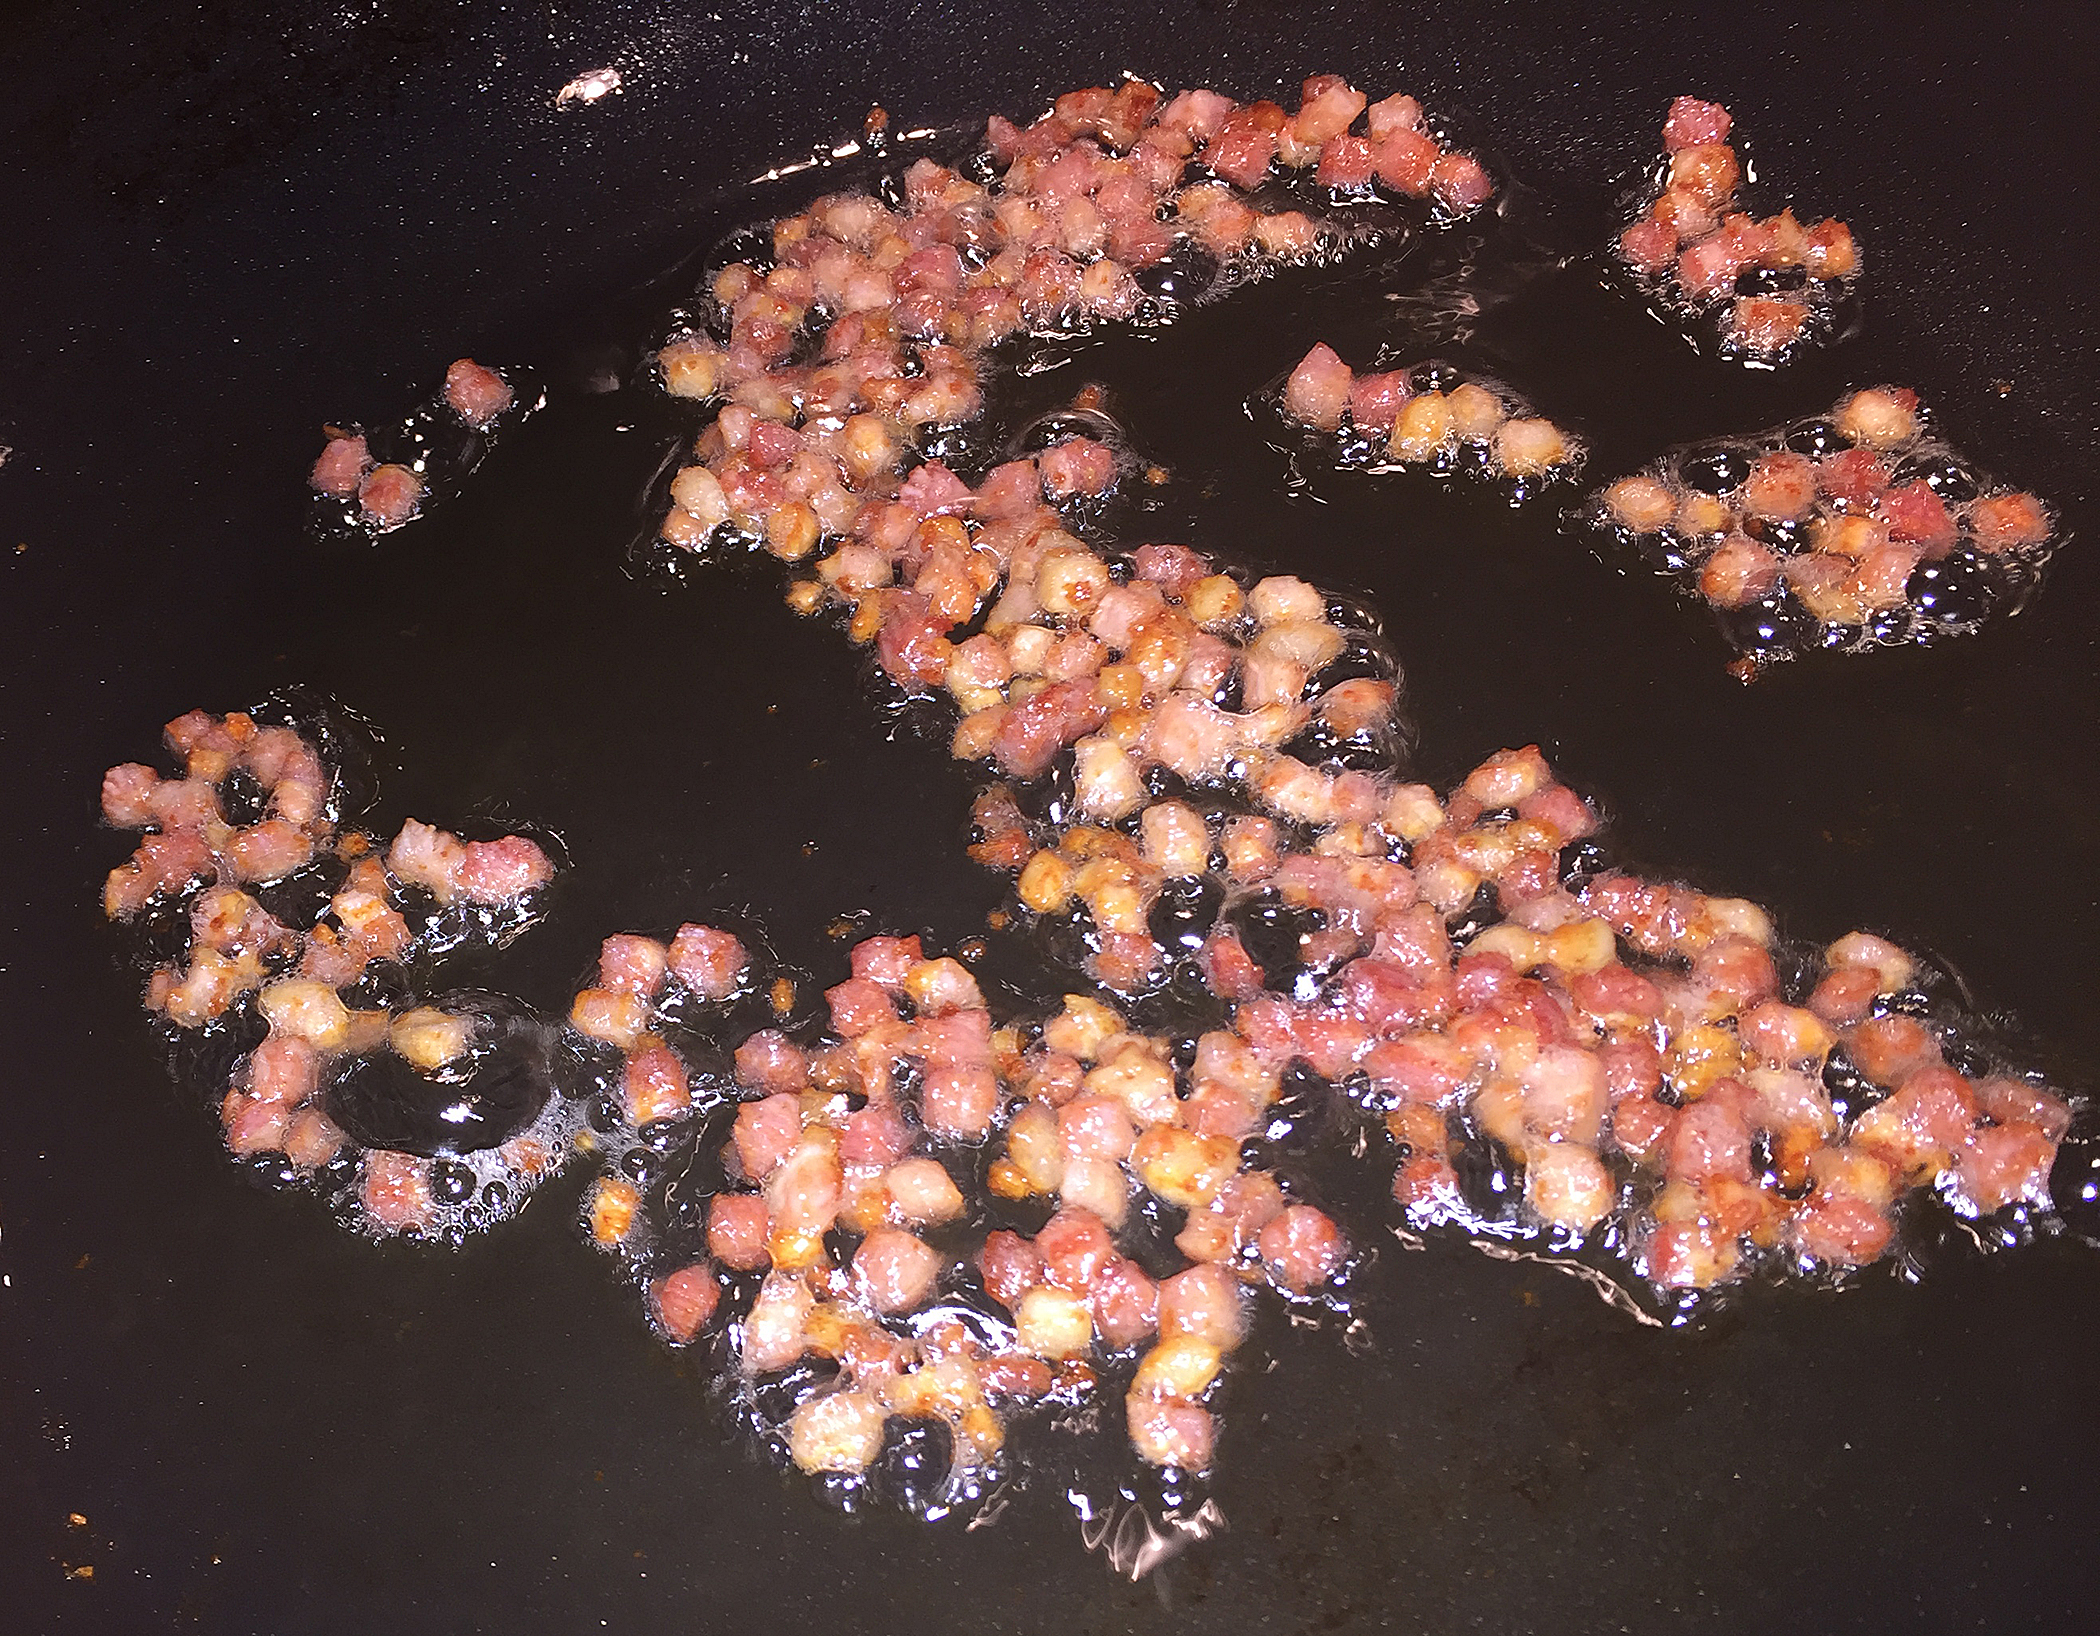
  • 2 oz. pancetta, cut into 1/4-inch dice (about 1/4 cup)
  • 1 medium yellow onion, cut into 1/4-inch dice
  • 1 tsp. fresh thyme leaves
  • 1/8 to 1/4 tsp. crushed red pepper flakes
  • 1/2 cup dry white wine
  • 1 15-oz. can diced fire-roasted tomatoes in juice
  • 1 cup marinated artichoke hearts, drained and chopped
  • 1/2 cup large green olives, such as Castelvetrano, pitted and halved

Directions

  1. Pat the cod dry and season with salt and pepper.
  2. Heat the oil in a 12-inch nonstick skillet over medium-high heat. Add the pancetta and cook, stirring, until crisp and golden, 2 to 4 minutes. Using a slotted spoon, transfer the pancetta to a paper-towel-lined plate, leaving the fat behind in the pan.
  3. Add the fish to the skillet and cook until slightly golden, about 3 minutes. Flip and transfer to a plate, seared side up.
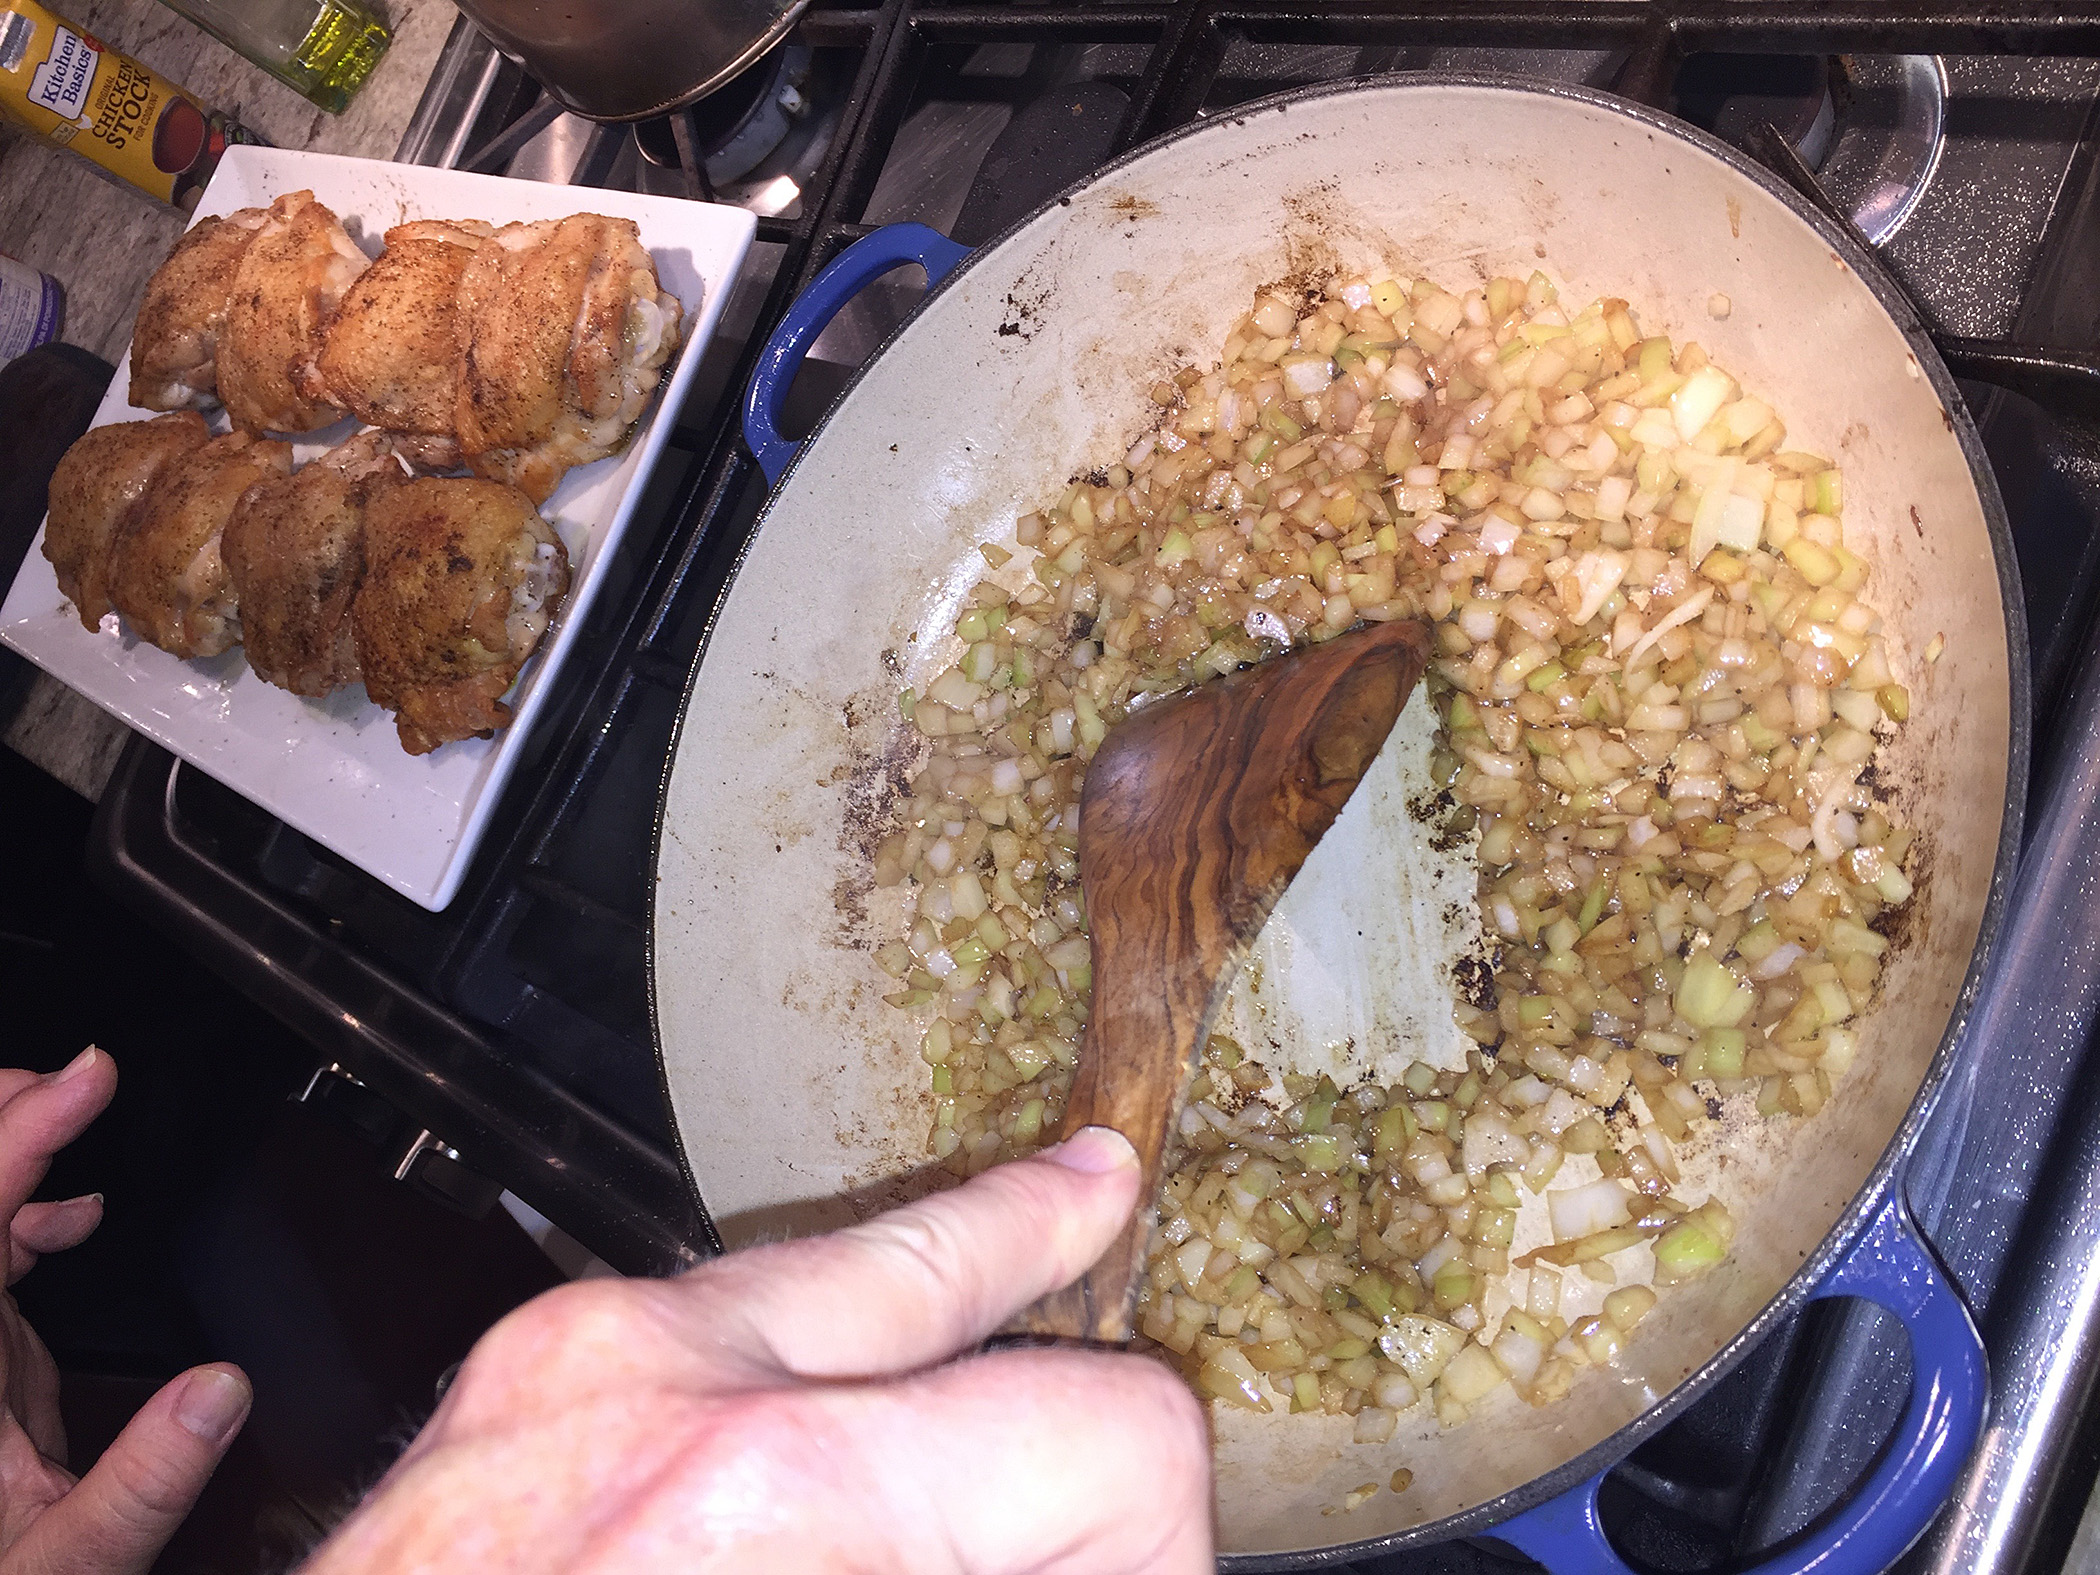
  4. Add the onion, thyme, and pepper flakes to the skillet; cook, stirring, until the onion is soft, about 4 minutes. Add the wine and cook until the pan is almost dry, about 1 minute. Add the tomatoes and their juice, artichokes, and olives. Simmer, stirring occasionally, to meld the flavors, about 2 minutes.
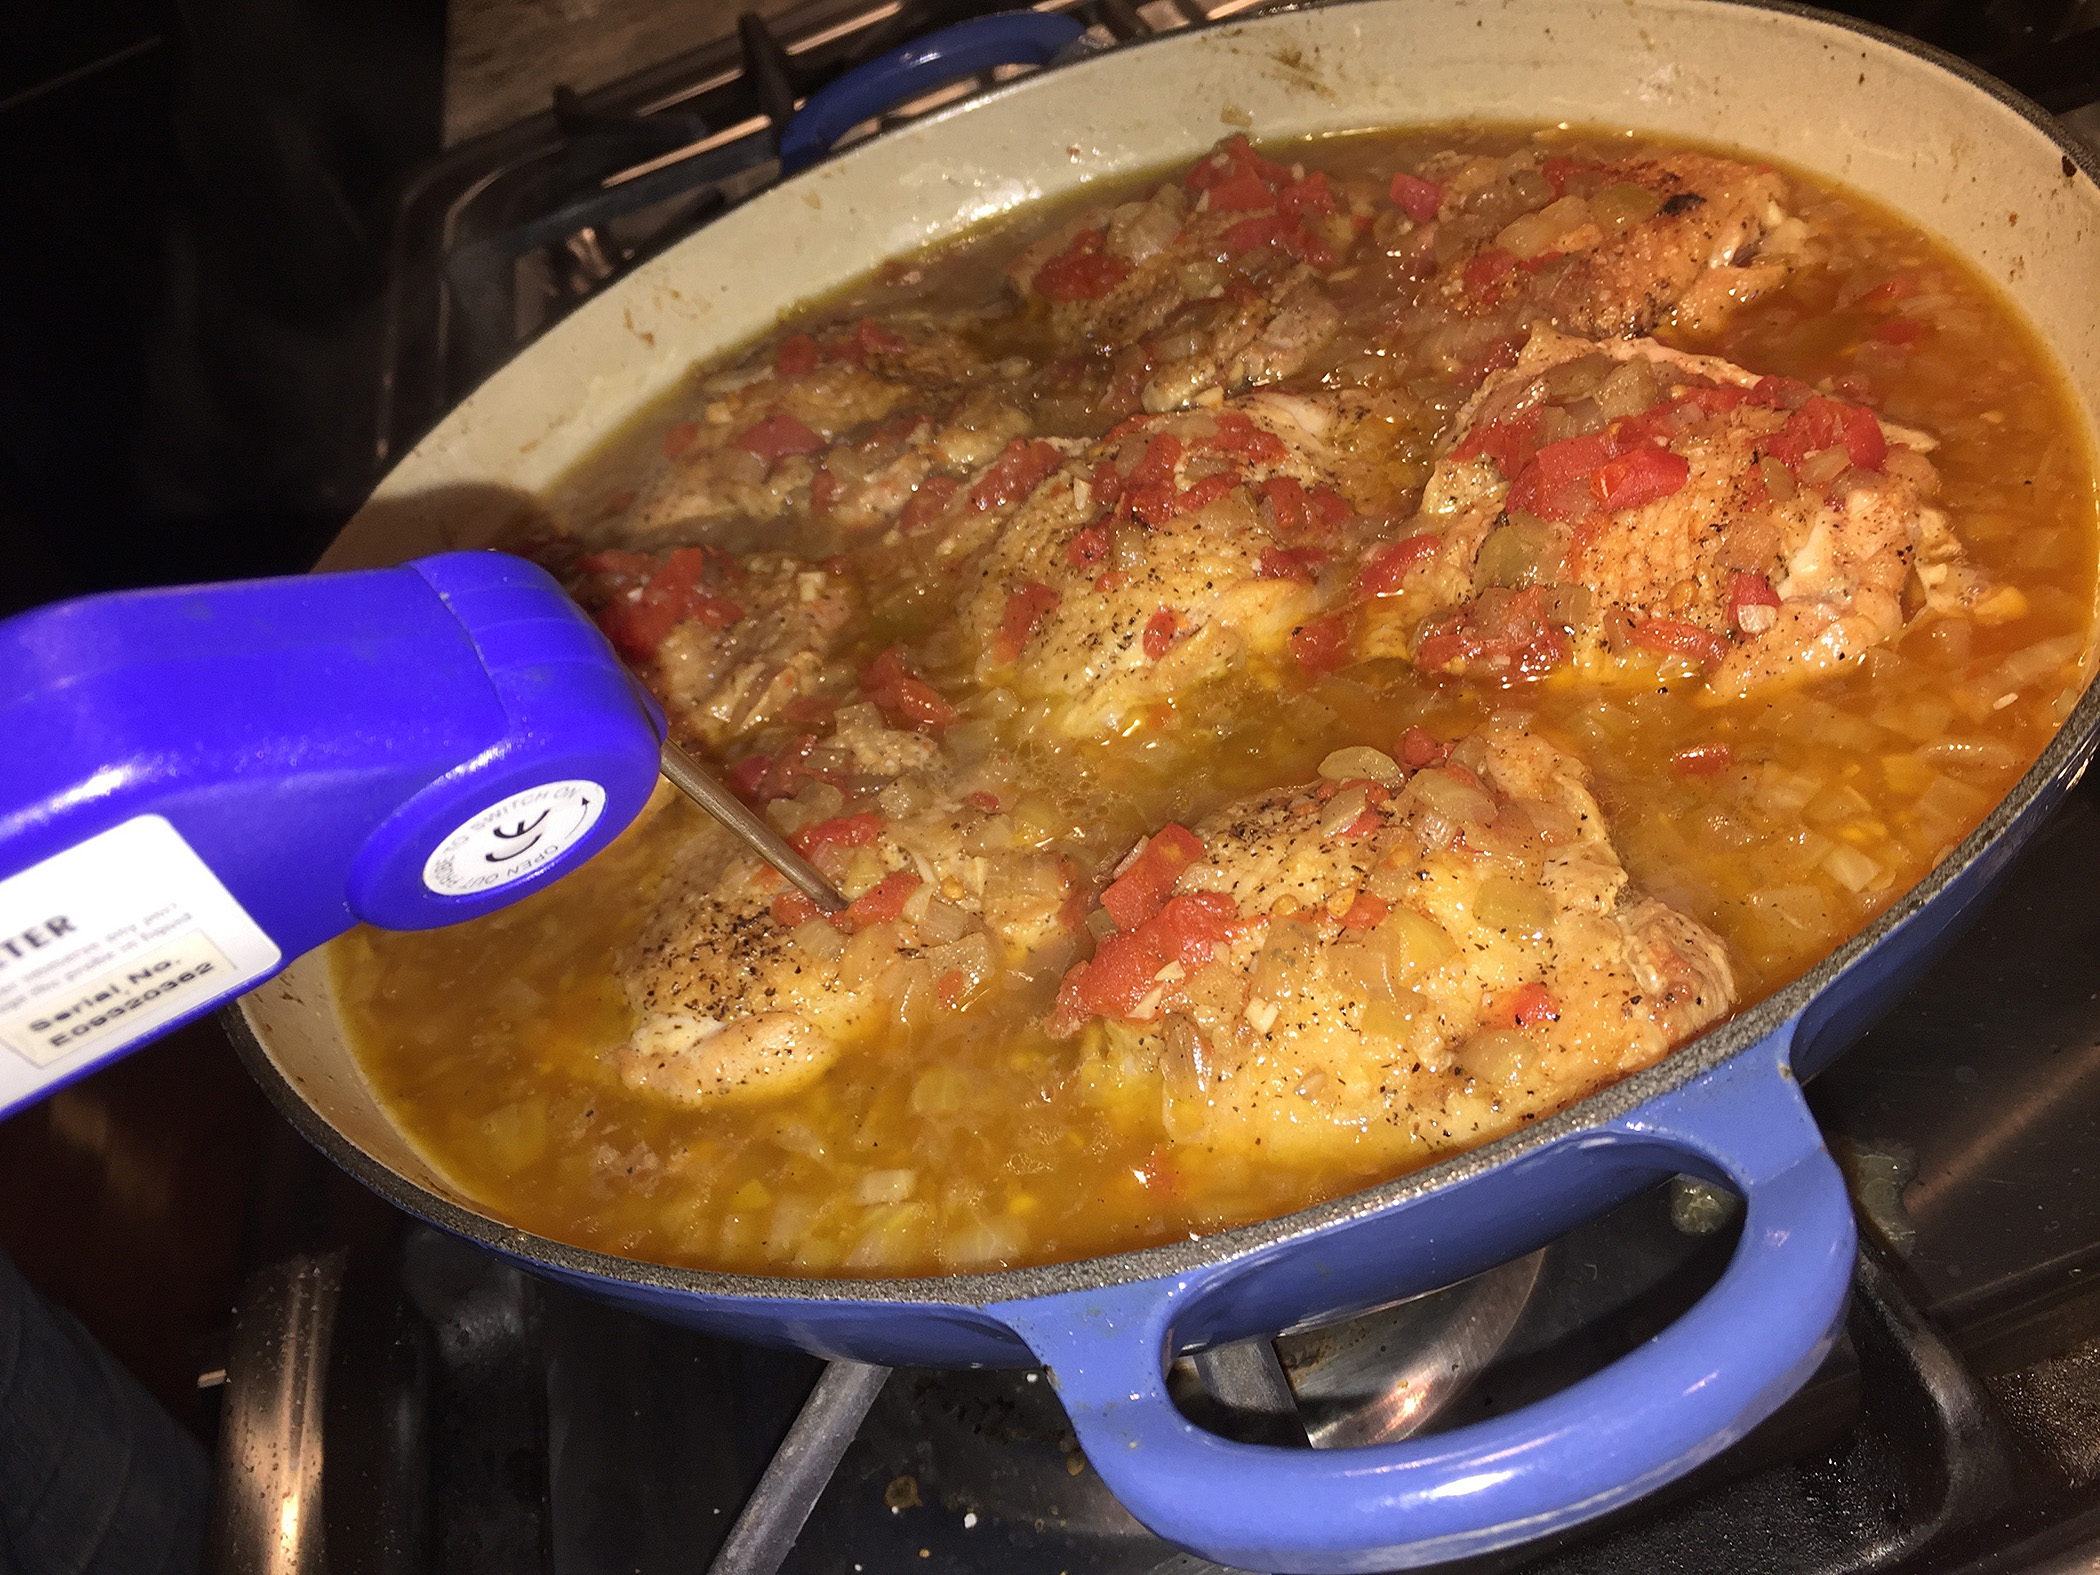
  5. Lower the heat to medium and nestle the fish into the sauce, keeping the seared side exposed. Cover and cook until the fish is opaque and just cooked through, about 3 minutes. Sprinkle with the pancetta, divide among rimmed plates or wide, shallow bowls, and serve.

IMG_2714
Nestling the fish into the cooked sauce for another 3 minutes.

IMG_2717
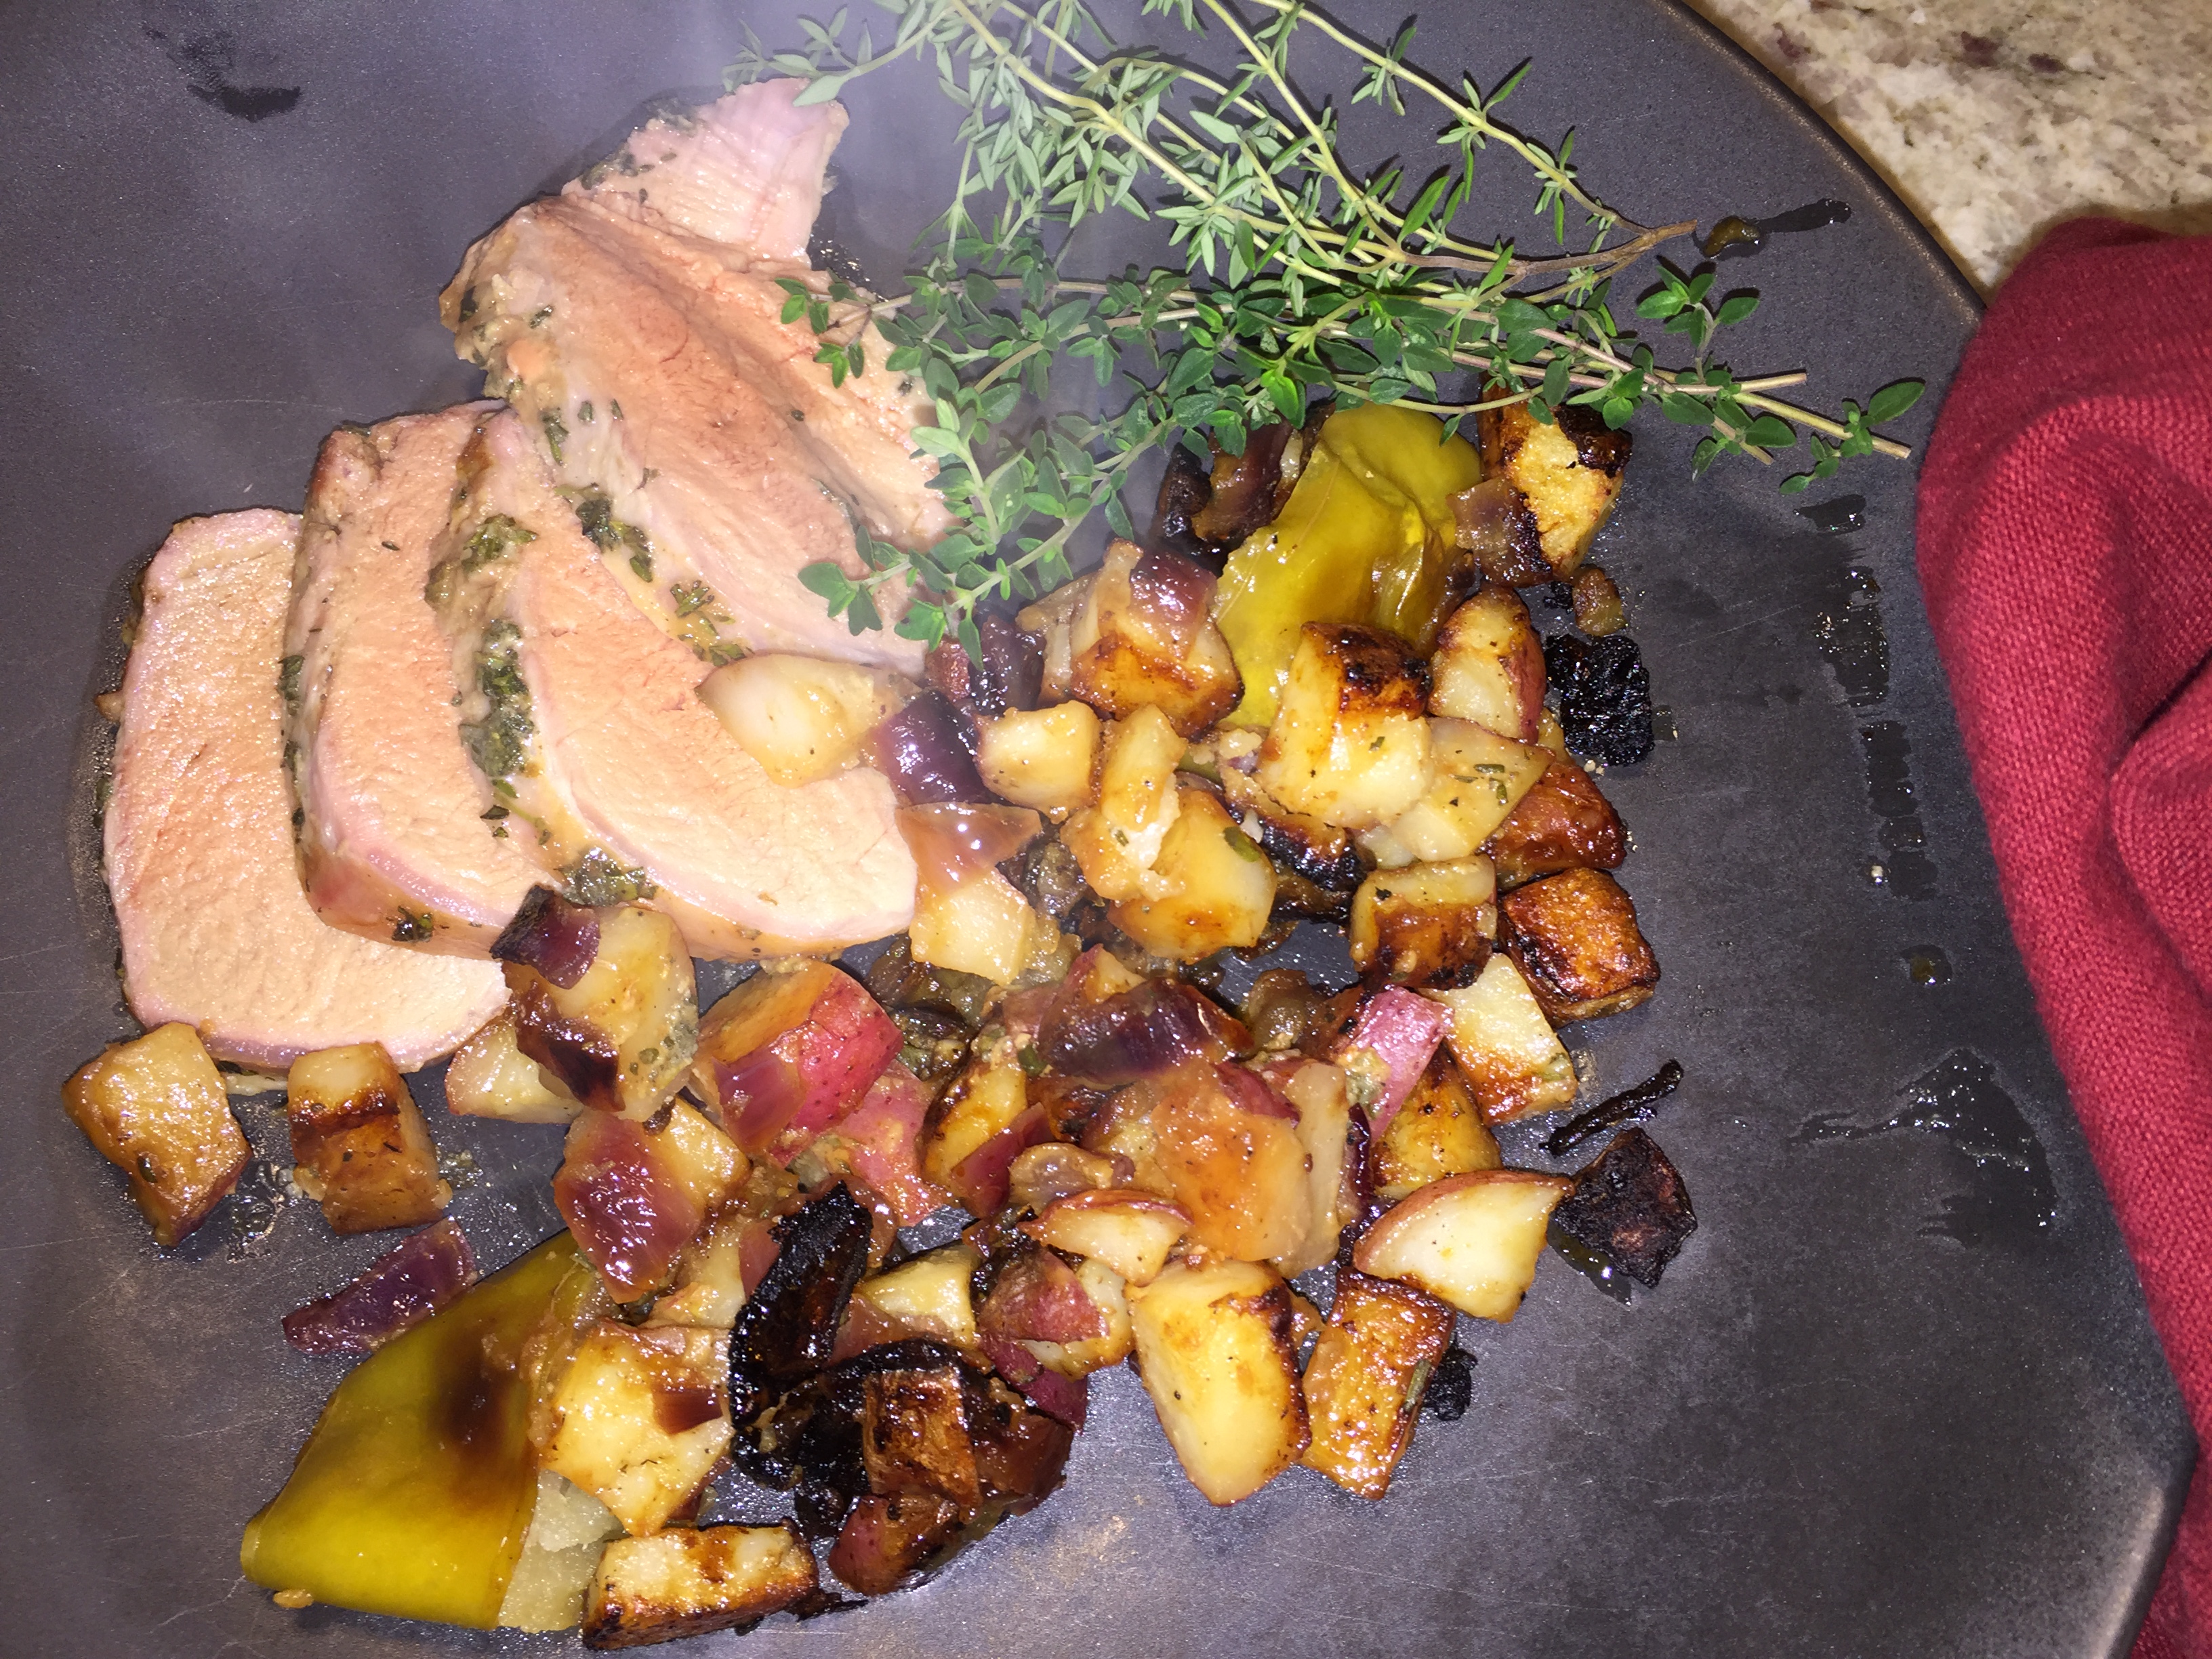
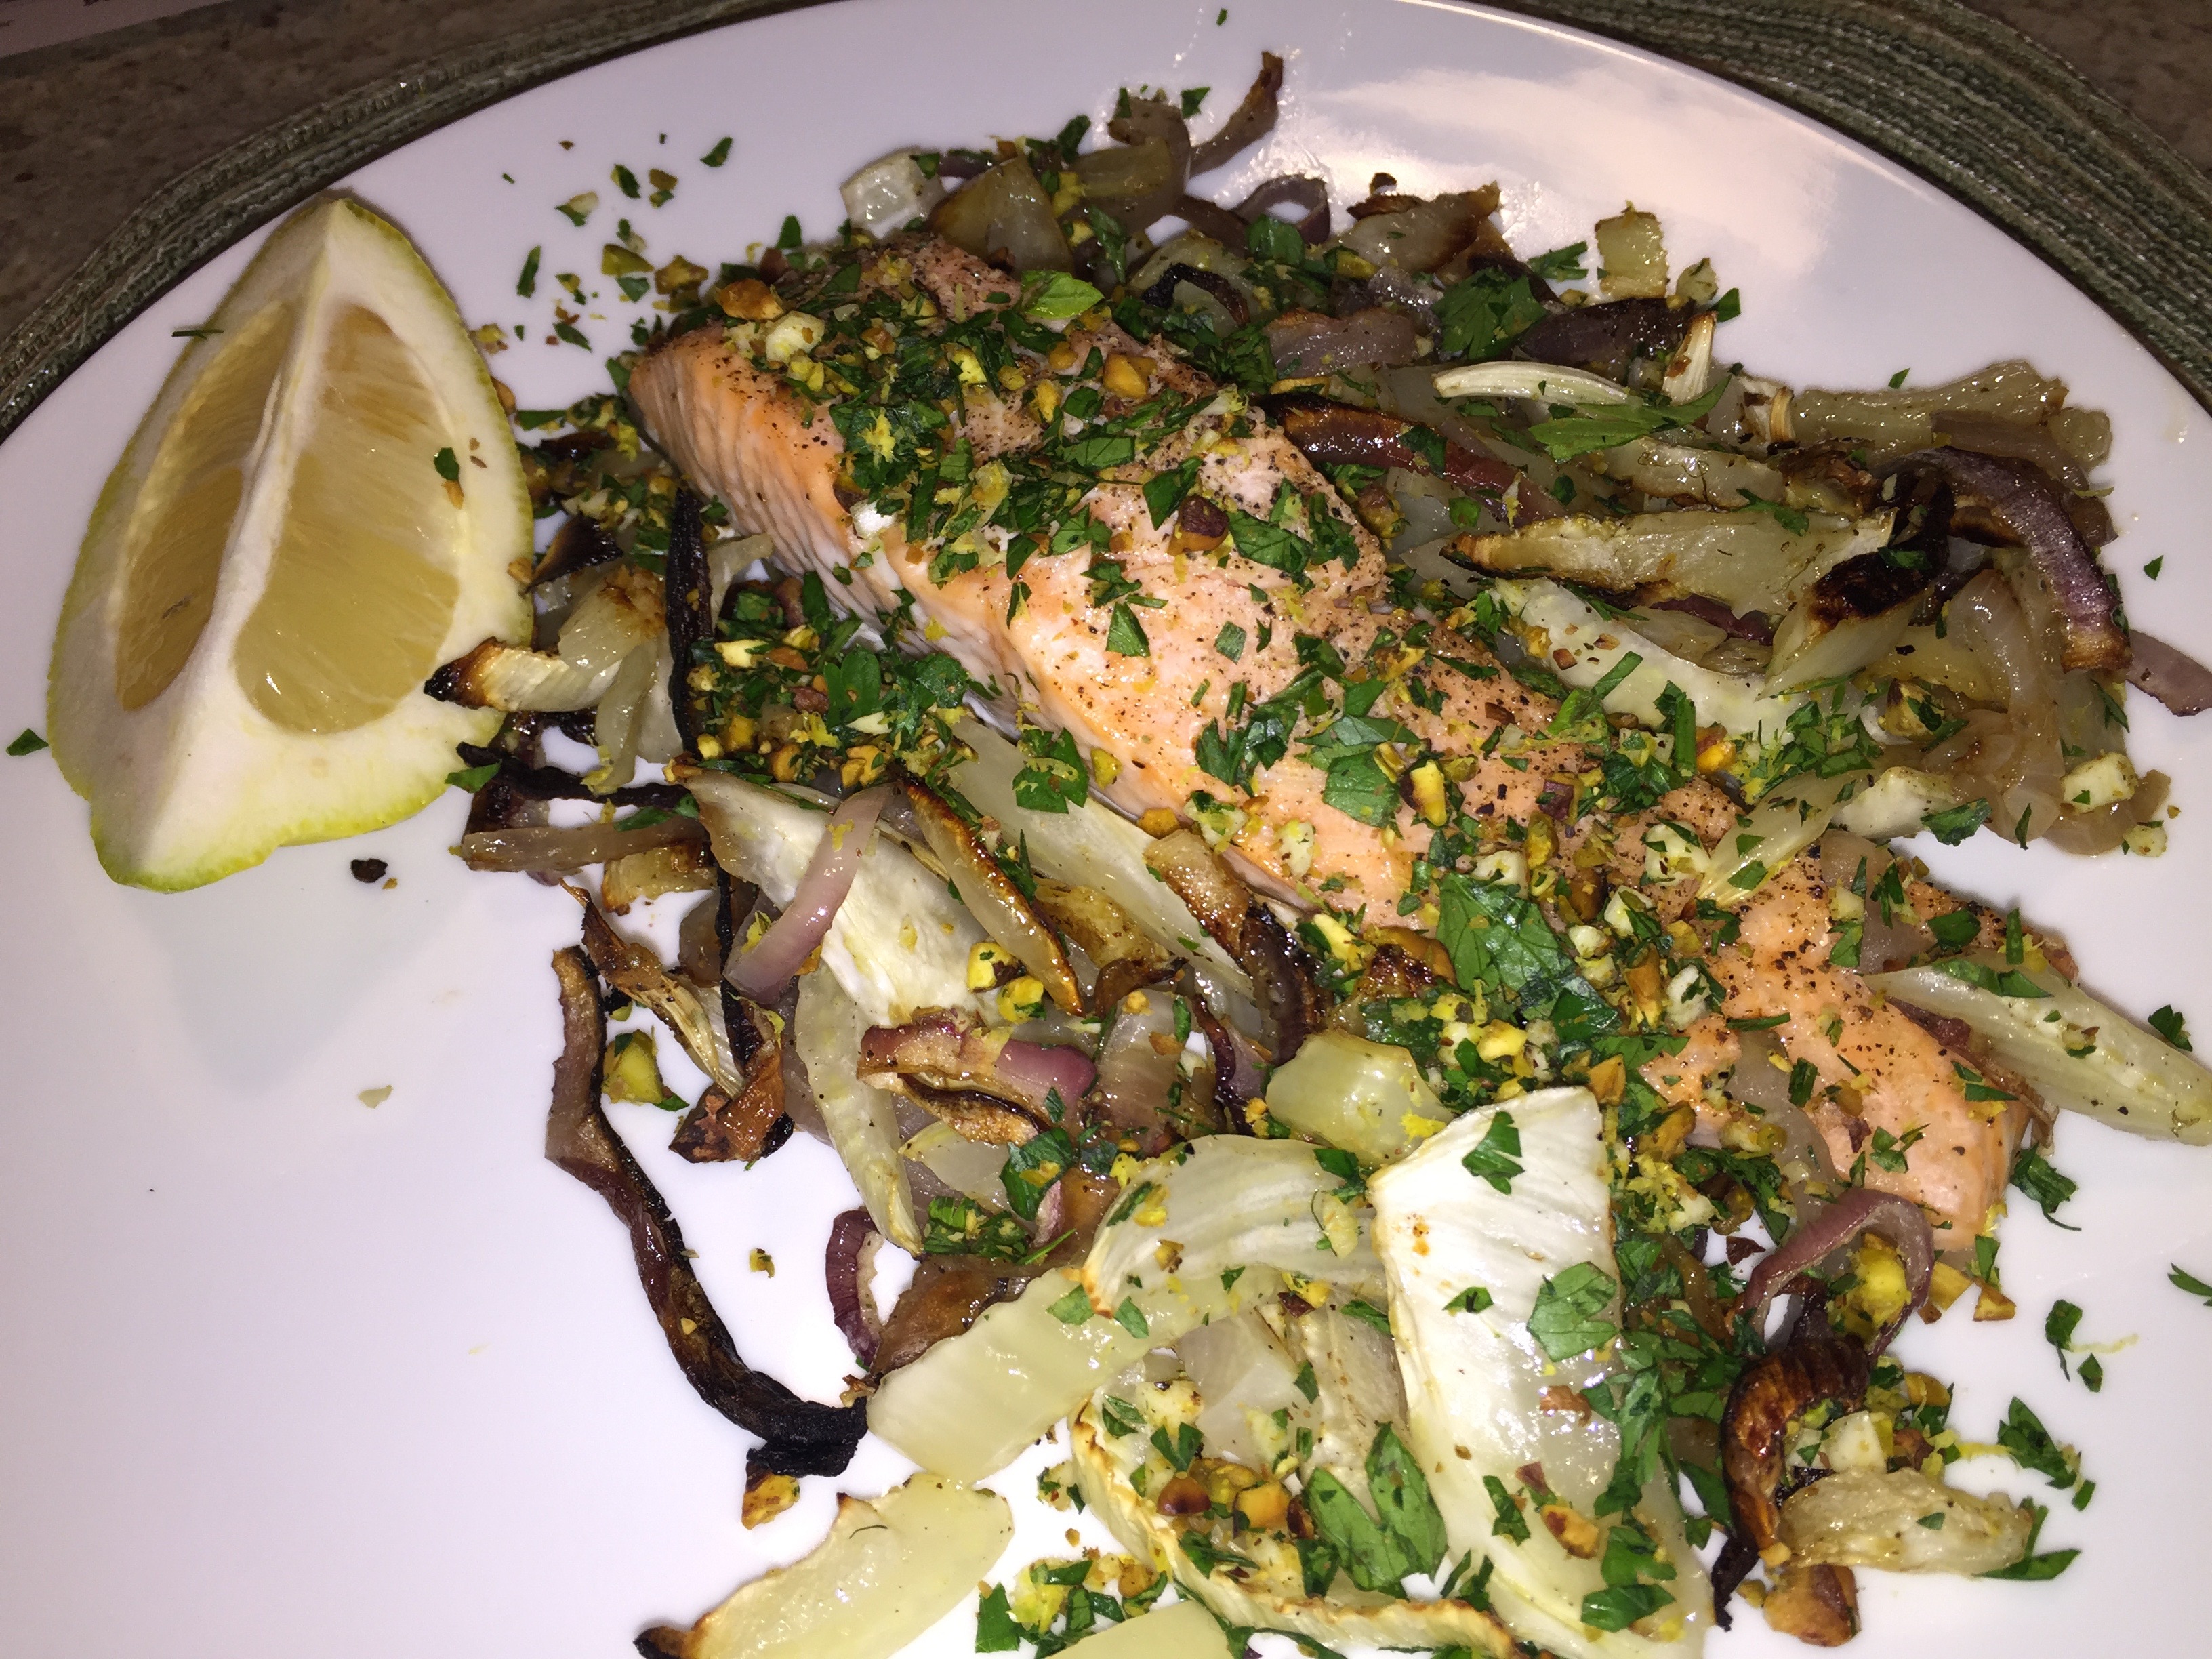
The one-pan meal is ready to plate.

Our note: If not using a non-stick skillet, double the olive oil to prevent the fish from sticking.

IMG_2719

by Christine Burns Rudalevige from Fine Cooking

Sinfully Sublime

You’ll think you died and went to heaven after tasting this Bourbon-Chipotle Ribeye Steak! Seriously. It’s as good, or better, than any steak ordered at Ruth’s Chris Steak House—yet you’ll pay a fraction of the cost. Granted it won’t be bottom of the barrel prices because good, thick ribeyes are not cheap. But don’t short change yourself and purchase a mediocre cut of beef. After all, you and your significant other are worth it, right?

IMG_2802
An almost-2-pound ribeye getting happy in it’s spice rub.

It’s meals like this that remind me why I’m not a vegetarian. The perfectly cooked, mouth-watering, juicy pink center of pure carnivorous bliss that melts in the mouth—oh YES, it was that good! With a side of delicious Sautéed Green Beans Caceres Style—haricots verts sautéed in a bit of pancetta and sweet smoked Spanish paprika—it’s a home run. And no carbs to boot! Don’t get me wrong, Russ has cooked/grilled some fabulous steaks during our years together, maybe even some better than this. But currently, this is the one that is on my radar, and in my dreams—YES, it was that good!

Of those superstar steaks, we found this recipe for two in a recent edition of our Fine Cooking Magazine. It’s a great way to cook a thick rib-eye indoors: sear it in a cast-iron skillet, then finish it in a hot oven. The smoky, boozy sauce is made right in the pan so it absorbs some of those browned bits from the meat. We made this on a weeknight, so time was a factor. All-in-all, with me prepping the ingredients prior to Russ getting home from work, and the actual cooking time, we were eating in about 45 minutes. And eat we did—savoring every succulent bite…

IMG_2809
Preparing the shallot and adobo sauce while the meat rests.

IMG_2812
Meat has to set for a few to seal in the juices, so once the steak rested for 10 minutes, Russ started carving by first removing the bone.

IMG_2817
Next he carved slices on a grooved cutting board to catch the yummy juices.

IMG_2821
A close-up of the steak with the chipotle shallot sauce.

IMG_2806
Cooking the pancetta for the green beans dish.

IMG_2808
A close-up of the haricots verts before plating.

IMG_2823
This was one of the most succulent and tasty steaks we’ve ever eaten! We gave it a 5-star rating on FineCooking.com.

Ingredients

  • 1 tsp. ground cumin
  • 1 tsp. smoked paprika
  • Kosher salt and freshly ground black pepper
  • 1 2-inch-thick, bone-in beef rib-eye steak (about 1-3/4 lb.)
  • 2 Tbs. minced shallot
  • 1 tsp. minced canned chipotle in adobo sauce
  • 2 Tbs. bourbon
  • 1/4 cup lower-salt chicken broth
  • 1 Tbs. unsalted butter

Directions

  1. Position a rack in the center of the oven and heat the oven to 400°F.
  2. In a small bowl, combine the cumin, paprika, 3/4 tsp. salt, and 1/2 tsp. pepper. Rub all over the steak.
  3. Heat a 10- to 12-inch cast iron skillet over high heat for about 2minutes. Sear the steak until well browned on one side, about 5 minutes. Flip and transfer the skillet to the oven. Roast until done to your liking (120°F for rare; 125°F for medium rare), 12 to 15minutes. Transfer the steak to a cutting board.
  4. Put the skillet over medium heat, add the shallot, and cook, stirring, until fragrant, about 1 minute. Add the chipotle and cook until fragrant, about 20 seconds. Remove the pan from the heat, add the bourbon, and swirl until the sizzling stops. Return the pan to the heat and add the broth, scraping up any bits stuck to the bottom of the skillet. Bring to a simmer. Swirl in the butter until melted. Remove from the heat.
  5. Slice the meat and serve with the sauce.

IMG_2811

Sautéed Green Beans Caceres Style

  • 1 1/2 pounds broad flat green beans, ends trimmed
  • 2 Tbsp. olive oil
  • 1/4 cup pancetta cut into 1/4-inch cubes (or Serrano ham or prosciutto with some fat)
  • 1/4 tsp. sweet paprika, preferably Spanish smoked
  • 1 tsp. red or white wine vinegar
  1. Bring a large pot of salted water to a boil. Add the beans, return to a boil, then cook at a high simmer for about 20 minutes.* Drain.
  2. heat the oil in a large skillet. Add the pancetta and sauté for a minute, the add the beans and sauté for another 2 minutes. Lower the heat, stir in the paprika and vinegar, and cook for another minute before serving.

*Because we substituted haricots verts for the flat beans, the amount of time we cooked the beans was much less. So keep an eye on whatever type of green bean you use and remove from heat and drain when crisp tender.

One-Pan Meal #4: Herbed Pork Tenderloin with Mustard-Roasted Apples and Potatoes

It’s been several weeks since I blogged about my one-pan meals, so here’s number four in the series of five recipes. A mixture of fresh rosemary, sage, and thyme coats quick-cooking pork tenderloin, which pairs beautifully with tender apples and potatoes. The whole thing makes your kitchen smell like a dream—and the flavor? Even better. Perfect autumn dinner… The leftover pork was cubed and used for a meal of Pork-Fried Rice a few nights later.

IMG_2564
The ingredients, minus the pork tenderloins.

Ingredients

  • Cooking spray
  • 1-1/2 lb. red potatoes, cut into 1/2-inch pieces
  • 1 large red onion, cut into 1/2-inch pieces
  • 5 Tbs. extra-virgin olive oil
  • 2 Tbs. country-style Dijon mustard
  • 2 medium cloves garlic, mashed to a paste with the side of a chef’s knife
  • Kosher salt and freshly ground black pepper
  • 2 small pork tenderloins (about 1 lb. each), trimmed
  • 1 Tbs. dark brown sugar
  • 1 Tbs. chopped fresh rosemary
  • 1 Tbs. chopped fresh sage
  • 1 Tbs. chopped fresh thyme
  • 1 Tbs. white wine vinegar
  • 2 green apples, cored and cut into 8 wedges each
  • Flaky sea salt
IMG_2567
Cubed red potatoes and onions on a rimmed sheet.
IMG_2569
Granny Smith apple wedges in dressing.
IMG_2572
Pork tenderloins covered with the rub.
IMG_2576
Tenderloins on top of the partially cooked potatoes and onions.
IMG_2582
Slicing the pork after resting for 10 minutes.
Directions
  1. Position a rack in the center of the oven and heat the oven to 450°F.
  2. Line a large rimmed sheet pan with aluminum foil or parchment and mist with cooking spray. Toss the potatoes and onion together on the prepared pan.
  3. In a small bowl, whisk together 1/4 cup of the oil, 1 Tbs. of the mustard, the mashed garlic, and a big pinch each of salt and pepper. Reserve 2 Tbs. and drizzle the remaining mixture over the vegetables on the sheet pan, tossing to coat. Spread the vegetables evenly and roast until beginning to soften and color slightly, 10 to 15 minutes.
  4. Meanwhile, pat the pork tenderloins dry with a paper towel. In a small bowl, combine the remaining 1 Tbs. oil and mustard with the sugar, 1 tsp. salt, and 1/2 tsp. pepper; rub all over the pork. Sprinkle the chopped fresh herbs to coat on all sides.
  5. Toss the apple wedges with the reserved 2 Tbs. of dressing, then toss with the vegetables on the pan. Place the tenderloins on top of the vegetables, leaving some space between the two pieces of meat.
  6. Roast, flipping the meat once halfway through, until the vegetables are browned and tender and an instant-read thermometer inserted into the thickest part of the pork registers 145°F, 25 to 30 minutes total.
  7. Transfer the pork to a cutting board and let rest, loosely covered with aluminum foil, for 10 minutes. Meanwhile, toss the vegetables with the vinegar.
  8. Slice the pork, sprinkle with sea salt, and serve with the vegetables.

IMG_2584

by Molly Gilbert from Fine Cooking

Halloween Sugar Cookies

What do skeletons say before eating?
Bone-Appetit’

IMG_2776

This year I became obsessed with upping my game when decorating Halloween cookies. In a wild frenzy lasting several weeks, I pinned all kinds of cookie images, depicting every possible holiday/event, onto my “Decorated Cookies” Pinterest board (over 800 pins and counting). Then I began watching tutorials on best practices for piping and flooding royal icing.

So of course that prompted me to haunt (pun intended) the craft stores to enlarge my baking and decorating repertoire. My purchases included green, purple, orange and black food colorant, a variety of sprinkles, a coffin cookie cutter (already had a pumpkin, ghost, witch, and half moon), and a box of 100 tossable pastry bags. After all, when using numerous colors at once, who wants to keep cleaning out your pastry bag between each color?? Not me! Also needed, various pastry bag tips and plastic squeeze bottles for “flooding” the icing.

IMG_2766

I was on a mission—much to the amusement of my husband Russ. My distribution plan was to give them out to a few neighbors who have young children aged 7 and under, and a platterful to Russ’ son David who now resides in a house with three other twenty-something males. And since Russ is on a wheat-free diet, we wouldn’t be keeping any at the house. Full steam ahead…

If you’re not familiar with making decorated sugar cookies, you need to know this is a 3-to-4 day process. First you mix the dough and let it refrigerate over night, then you roll out portions of the dough on a floured surface and cut out the shapes, baking them in a 400 degree oven. That’s the easy part. To decorate, you must pipe the outlines using stiff royal icing, followed by flooding the interior spaces with a thinned icing. It’s usually best to let them dry overnight before continuing with the detailed decorations.

IMG_2769

But to me, that’s where the fun begins! I found it’s easiest when you have every color in both a pastry bag for piping and detail, and a squeeze bottle for flooding. However, I needed more tips in the same sizes, so another trip to the craft store is in order before the next holiday! And if you’re adding sprinkles, make sure to scatter them over wet frosting. But most importantly, DO NOT stack them on top of one another until completely dry. Better yet, when completely dry, stack them with a layer of wax paper between each tier in an air tight container. Remember, you can also freeze them.

When I first started this blog, I posted the sugar cookie recipe under the “Sentimental Favorites” tab, but I’m going to repost the ingredients and directions here in case you’re interested.

IMG_2774

IMG_2772

RECIPE:

1 1/3 cup unsalted butter at room temperature
1 1/3 cup granulated white sugar
4 beaten eggs
2 tsp. pure vanilla
4 cups sifted all-purpose flour
1 Tbsp. baking powder
1 teaspoon salt

  • Cream softened butter in mixer. Gradually add sugar.
  • Add vanilla to beaten eggs and pour into creamed butter mixture.
  • Sift flour with baking powder and salt, and add to mix master.
  • If desired, add food colorant to dough.
  • Make dough, wrap in wax paper and refrigerate overnight, or for at least 4 hours.
  • Preheat oven to 400 degrees.
  • Roll out the dough to about 1/8″ thick onto a pastry cloth or countertop sprinkled with flour.
  • If you do this in sections, keep the unused portion in the frig.
  • Place cut out cookies onto cookie sheet (you can line with parchment paper if desired.)
  • Bake in oven for about 8 minutes, until just barely starting to brown underneath.
  • Place cookies on rack to completely cool before decorating.

Here’s a link to the Royal Icing recipe by Wilton.
Many reviewers, including myself, add a teaspoon or so of vanilla or other flavored extract.

When black cats prowl and pumpkins gleam,
May luck be yours on Halloween.

Eat, drink and be scary!

IMG_2779

Spanish Braised Chicken

The rich flavor and lush consistency of this classic dish—Pollo en Pepitoria—from Spain’s Castilla–La Mancha region depend on a sherry-based sauce thickened with ground almonds and egg yolks. In addition to being delicious, pepitoria is one of the oldest Spanish recipes around, one that dates back to the 13th century by Cervantes himself! And once you’ve tasted it, you’ll understand why it has persevered through hundreds of years!

IMG_2711

Any dry sherry, such as Fino or Manzanilla, will work in this dish, so for savory cooking purposes, stick with a dry, not sweet variety. We almost always have both brands on hand because not only do we often cook with it, Russ enjoys a drink of dry sherry now and again—not my cup of tea at all. We paired ours with a Grilled Asparagus with Honey and Sherry Vinegar from The New Spanish Table by Anya von Bremzen (recipe also follows.) And crusty bread would make a fine accompaniment if you don’t have a wheat issue.

INGREDIENTS

  • 8 (5- to 7-ounce) bone-in chicken thighs, trimmed
  • Salt and pepper
  • 1 tablespoon extra-virgin olive oil
  • 1 onion, chopped fine
  • 3 garlic cloves, minced
  • 1 bay leaf
  • 1/4 teaspoon ground cinnamon
  • 2/3 cup dry sherry
  • 1 cup chicken broth
  • 1 (14.5-ounce) can whole peeled tomatoes, drained and chopped fine
  • 2 hard-cooked large eggs, peeled and yolks and whites separated
  • 1/2 cup slivered blanched almonds, toasted
  • Pinch saffron threads, crumbled
  • 2 tablespoons chopped fresh parsley
  • 1 1/2 teaspoons lemon juice

IMG_2692
Browning the chicken thighs on both sides.

IMG_2693
Cooking the diced onion in the chicken drippings.

IMG_2694
Nestling the thighs into the onion and tomato mixture.

IMG_2701
Checking the chicken’s temperature for doneness.

IMG_2687
An interior shot of blender ingredients.

IMG_2703
Blended almond mixture is cooked with other ingredients to make the sauce. Almonds processed with garlic, saffron, and hard-cooked egg yolks add body and flavor to the braise.

INSTRUCTIONS

  1. Adjust oven rack to middle position and heat oven to 300 degrees.
  2. Pat thighs dry with paper towels and season both sides of each with 1 teaspoon salt and 1/2 teaspoon pepper. Heat oil in 12-inch skillet over high heat until just smoking. Add thighs and brown on both sides, 10 to 12 minutes. Transfer thighs to large plate and pour off all but 2 teaspoons fat from skillet.
  3. Return skillet to medium heat, add onion and 1/4 teaspoon salt, and cook, stirring frequently, until just softened, about 3 minutes. Add 2 teaspoons garlic, bay leaf, and cinnamon and cook until fragrant, about 1 minute. Add sherry and cook, scraping up any browned bits, until sherry starts to thicken, about 2 minutes. Stir in broth and tomatoes and bring to simmer. Return thighs to skillet, cover, transfer to oven, and cook until chicken registers 195 degrees, 45 to 50 minutes. Transfer thighs to serving platter, remove and discard skin, and cover loosely with aluminum foil to keep warm. While thighs cook, finely chop egg whites.
  4. Discard bay leaf. Transfer 3/4 cup chicken cooking liquid, egg yolks, almonds, saffron, and remaining garlic to blender jar. Process until smooth, about 2 minutes, scraping down jar as needed. Return almond mixture to skillet. Add 1 tablespoon parsley and lemon juice; bring to simmer over medium heat. Simmer, whisking frequently, until thickened, 3 to 5 minutes. Season with salt and pepper to taste.
  5. Pour sauce over chicken, sprinkle with remaining 1 tablespoon parsley and egg whites, and serve.

Grilled Asparagus with Honey and Sherry Vinegar

IMG_2698

IMG_2705

Ingredients

  • 2 pounds fat asparagus, trimmed
  • 4 Tbsp. fragrant extra-virgin olive oil
  • 1 1/2 tsp. honey
  • 3 Tbsp. sherry vinegar, preferably aged
  • Coarse salt (kosher or sea)
  • Freshly ground black pepper
  • Flaky sea salt, such as Maldon, for serving

Instructions

  1. Light the grill and preheat it to medium or preheat the broiler.
  2. Using a vegetable peeler, scrape off the tough outer skin from the lower stalk of the asparagus. Rinse, pat dry with paper towels, and toss with 1 tablespoon of olive oil.
  3. Place the honey, vinegar, and remaining 3 tablespoons olive oil in a small bowl and whisk to mix. Season lightly with coarse salt and pepper and set aside.
  4. Grill or broil the asparagus until tender and only lightly charred, turning once, about 3 minutes per side.
  5. Arrange on a serving plate, toss with the sauce, and sprinkle flaky sea salt on top. Serve at once.

IMG_2706
Platter of finished Spanish braised chicken thighs.

PICADA: A NUTTY THICKENER

Unlike stews, sauces, and stir-fries that are thickened with starches or dairy, many Spanish stews and braises get their rich, hearty body from a pesto-like nut-based thickener called apicada. The basic formula, which many sources claim dates back to at least the 13th or 14th century, includes finely ground almonds or hazelnuts (picar means “to chop”) and seasonings like garlic, herbs, and spices. But many versions also contain toasted or fried bread or even hard-cooked egg yolks, as in the recipe here. The ingredients are traditionally pounded to a thick paste with a mortar and pestle (we use a blender for speed) and stirred into the pot toward the end of cooking so that it can lend body, richness, and flavor to the cooking liquid.

Whole-wheat Pasta with Braised Squash, Chard, and Pistachios

cookbook.veggies

Here’s another tasty, meatless weeknight meal. If someone in the family insists on meat, add some crumbled cooked sausage for them to stir into their portion.

Ingredients

  • 3/4 lb. short whole wheat pasta
  • 5 Tbsp. unsalted butter
  • 2 leeks (white and light green parts only) halved and sliced
  • 1 small bunch Swiss chard, stems chopped and leaves sliced, separated
  • 1/2 kabocha (or other winter squash) about 2 pounds, peeled and cut into 3/4-inch pieces
  • 1 1/2 cups low-sodium vegetable broth
  • 2 oz. pecorino, grated (about 1/2 cup), plus more for serving
  • 1/3 cup roasted pistachios, chopped

Directions

  1. Cook the pasta according to package directions. Drain and return to the pot.
  2. Meanwhile, melt 3 tablespoons of the butter in a large skillet over medium-high heat. Add the leeks, chard stems, 1/2 teaspoon salt, and 1/4 teaspoon pepper. Cook, stirring occasionally, until tender, 4 to 6 minutes.
  3. Add the squash and broth and bring to a boil. Reduce heat and simmer, covered, until the squash is tender, 8 to 10 minutes.
  4. Add the squash mixture (and any liquid)), chard leaves, pecorino, the remaining 2 tablespoons of butter, and 1/2 teaspoon salt to the pasta and toss to coat.
  5. Serve topped with pistachios and additional pecorino.

finished.pasta

Our Notes: Instead of kabocha we used butternut squash; and we switched out the whole wheat pasta for the rad looking organic Trottole pasta. We doubted the squash would be tender in the allotted 8 to 10 minutes as directed, and sure enough, it took twice that amount of time!

And of course I needed that extra kick so I added a sprinkle of crushed red pepper!

—Recipe from Nov. 2014 issue of Real Simple Magazine.

Moussaka

Beloved by Greeks and non-Greeks alike, this hearty casserole is one of the best things you’ll ever eat. Like most good things, Moussaka takes time to make, but it feeds a crowd. Plus, leftovers are a treat. In other words, not a week night meal if everyone is still working—as is the case in our house…

IMG_2525

A hearty casserole, Moussaka features layers of eggplant and potatoes topped with a savory, tomatoey meat sauce and a creamy-yet-light béchamel that’s baked until browned and bubbly. One bite, and you swoon because the layers have melded together to create an incredibly delicious, comforting dish.

So after all of those easy one-pan meals I recently blogged about, this recipe was certainly more labor-intensive. But it was a perfect project for us both on a cool Sunday afternoon with the Eagles football game playing on TV in the background (and both of our teams, the Eagles and Steelers won!) So grab yourself a cooking buddy when you attempt this recipe—they’ll find it is well worth the effort in the end. We think of it as a lighter take on a lasagna because it has no pasta and very little cheese.

Our changes included using ground lamb, a more traditional Moussaka ingredient, instead of ground beef. We upped the quantity of meat from 1 pound to 1 1/2 pounds—and next time we’ll incorporate 2 pounds of meat. The recipe calls for one tablespoon of tomato paste but we added closer to three. In addition, with Russ eliminating wheat from his diet, we used a gluten-free product in place of the flour. Obviously it makes way too much for just two people, but we had leftovers AND we froze a large portion for a future meal.

Step-by-Step Tutorial (recipe follows)

IMG_2495
C
hopping onion and slicing eggplant.

IMG_2503
Salted eggplant draining in colander over sink.

IMG_2507
Rinsed eggplant drying on towel.

IMG_2499
Sautéeing onion in olive oil.

IMG_2501
Cooking ground lamb with the sautéd onion.

IMG_2505
Adding the chopped parsley, diced tomato and tomato paste to the meat and onion mixture.

IMG_2509
Frying the potato slices.

IMG_2511
Potato slices cool and get a sprinkle of salt.

IMG_2514
Layering the potato slices on top of each other in a greased pan.

IMG_2516
The next overlapping layer is the cooked eggplant slices.

IMG_2517
The third layer is the meat and onion mixture.

IMG_2520
Finishing the béchamel sauce with a brisk whisk.

IMG_2521
Pouring the béchamel over the layers.

For the meat sauce
  • 2 Tbs. extra-virgin olive oil
  • 2 medium yellow onions, finely chopped (about 2-1/2 cups)
  • Kosher salt and freshly ground black pepper
  • 1 lb. 80% lean ground beef
  • 1/2 cup dry red wine
  • 1/2 cup canned crushed tomatoes
  • 1/4 cup finely chopped fresh flat-leaf parsley
  • 1 Tbs. tomato paste
  • 1/4 tsp. freshly grated nutmeg
For the eggplant
  • 3 lb. eggplant (about 2 medium or 5 to 6 baby eggplant), trimmed and sliced crosswise about 1/4 inch thick
  • Kosher salt
  • 3 Tbs. extra-virgin olive oil; more as needed
  • Freshly ground black pepper
For the potatoes
  • 1 cup extra-virgin olive oil
  • 3 medium russet potatoes (about 2-1/2 lb.), rinsed and dried
  • Kosher salt
For the béchamel
  • 3 cups whole milk
  • 4 oz. (1/2 cup) unsalted butter
  • 2-1/4 oz. (1/2 cup) unbleached all-purpose flour
  • 2 large eggs, beaten
  • 1/2 oz. finely grated Parmigiano-Reggiano or pecorino romano (1/2 cup)
  • 1/8 tsp. freshly grated nutmeg; more to taste
  • Kosher salt
Make the meat sauce

Heat the oil in a 12-inch skillet over medium heat. Add the onions, a generous pinch of salt, and a few grinds of pepper. Cook, stirring occasionally, until translucent, 5 to 8 minutes.

Turn the heat up to medium high. Add the beef, a pinch of salt, and a few grinds of pepper. Cook, stirring occasionally and breaking up the meat, until browned, 7 to 10 minutes. Add the wine; turn the heat down to medium, and cook, stirring occasionally, until absorbed, about 3 minutes. Add the tomatoes, parsley, tomato paste, and nutmeg, and stir to combine. Turn the heat down to low and gently simmer to meld the flavors, stirring once or twice, about 5 minutes. Season to taste with salt and pepper. Set aside.

Salt the eggplant

Cover the bottom and sides of a large colander with a single layer of the eggplant slices and sprinkle generously with salt. Top with more layers of eggplant, salting each layer until you run out of slices. Let sit in the sink or over a large bowl for at least 30 minutes and up to 1 hour.

Pan-fry the potatoes
  1. Heat the oil in a heavy-duty 12-inch skillet, preferably cast iron, over medium heat until shimmering hot (about 375°F).
  2. Meanwhile, slice the potatoes crosswise into 1/4-inch rounds, discarding the end slices.
  3. Working in batches, slide 10 to 15 potato slices into the hot oil in a single layer. Fry, flipping once, until the potatoes are tender, about 4 minutes.
  4. Transfer to a paper-towel-lined tray and gently blot off the excess oil. Lightly season with salt. Repeat with the remaining potatoes.
Roast the eggplant
  1. Position racks in the upper and lower thirds of the oven and heat the oven to 350°F.
  2. Rinse the eggplant in cold water to remove excess salt. Press the slices between paper towels or clean kitchen towels to dry, then arrange them in a single layer on 2 large rimmed baking sheets. Lightly brush both sides of each slice with the olive oil and lightly season both sides with salt and pepper. Roast, flipping once, until tender and lightly browned, 30 to 35 minutes total.
Make the béchamel
  1. Heat the milk in a 2-quart saucepan over medium heat until steaming; set aside.
  2. Melt the butter in a 4-quart saucepan over medium-low heat. Add the flour and cook, whisking constantly, until golden, about 5 minutes. Slowly whisk in the hot milk and then simmer gently, whisking, until the raw flour taste is gone and the sauce thickens, about 5 minutes. Turn the heat down to low and gradually whisk in the eggs; whisk vigorously to combine. Remove from the heat.
  3. Set aside 1 Tbs. of the cheese for assembly, and add the remaining cheese to the sauce, along with the nutmeg and 1 tsp. salt; whisk until smooth. Season to taste with more salt and nutmeg.
Assemble and bake
  1. Position a rack in the center of the oven and heat the oven to 350°F. Lightly oil a 9×13-inch baking dish.
  2. Arrange the potatoes in an even layer on the bottom of the dish, overlapping the slices like shingles. Sprinkle evenly with 1 tsp. of the reserved cheese.
  3. Arrange the eggplant slices as you did the potatoes, and evenly sprinkle with 1 tsp. of the remaining cheese. Spread the meat sauce in an even layer on top of the eggplant. Pour the béchamel over the meat sauce and spread in an even layer. Evenly sprinkle with the remaining 1 tsp. cheese.
  4. Bake until the top is golden brown, 50 to 60 minutes. Let sit at room temperature for at least 30 minutes before serving.
Make Ahead Tips
  1. You can make the meat sauce up to 2 days ahead and refrigerate it, or freeze it for up to 3 months.
  2. You can refrigerate an unbaked moussaka for up to 24 hours. Let it come to room temperature before baking. Or freeze it for up to three months. Defrost it in the refrigerator overnight, and let it come to room temperature before baking.

IMG_2533

IMG_2529

After reading all this, you’re probably mumbling “No way!” but believe me when I tell you, it is worth every minute of prep!

by Christina Pelekanos from Fine Cooking

Nectar

YieLA_lg

And so it was on a recent Saturday night that we met long-time friends Marie and Tommy Collinson for dinner at Nectar. Ideally located between our two places of residence, I was intrigued to find out the Collinsons had previously dined there on numerous occasions; while Russ was there once for a luncheon, and it was my maiden voyage—but definitely not my last! Read about the experience under the Reconnecting with Friends tab…

One Pan Meal #3: Broiled Steak and Brussels Sprouts with Blue Cheese Sauce

In this one-sheet-pan supper, beefy New York strip steaks lend their flavorful drippings to sliced brussels sprouts sizzling below. To speedily prep the sprouts, use the slicing disk on your food processor, although I used the old-fashioned method—a knife. And for this reason, our slices might have been a bit thicker than called for, so we left them in the oven for the ten extra minutes while the steaks rested. Perfecto!

IMG_2451
Sliced brussels sprouts ready for roasting.

IMG_2453
The seasoned strip steaks on a rack above the sprouts.

Ingredients

  • Cooking spray
  • 20 oz. Brussels sprouts, thinly sliced
  • 6 Tbs. extra-virgin olive oil
  • Kosher salt and freshly ground black pepper
  • 2 1-inch-thick New York strip steaks
  • 1/4 cup sour cream
  • 3 oz. (about 1/4 cup) creamy blue cheese, such as Gorgonzola dolce
  • 1 tsp. white wine vinegar
  • 2 Tbs. thinly sliced fresh chives

IMG_2455
The finished sprouts will have charred ones on the edges, just mix them with the less charred.

IMG_2457
Slicing the medium-rare steaks after a ten minute rest.

Directions

  1. Position a rack about 6 inches from the broiler element, and heat the broiler on high.Line a large rimmed sheet pan with aluminum foil and mist it with cooking spray.
  2. Place the Brussels sprouts on the prepared pan, drizzle with 3 Tbs. of the oil, sprinkle with 1/4 tsp. each salt and pepper, toss to coat, and arrange in an even layer.
  3. Spray a wire rack with cooking spray, and place it over the sprouts, nudging them so the rack lies flat. Brush the steaks with 1 Tbs. of the oil and season both sides with salt and pepper. Place on the rack.
  4. Broil, flipping the steaks once, until the sprouts are tender and charred on the edges and the steaks are cooked to your liking, 3 to 5 minutes per side for medium rare (125°F to 130°F).
  5. Meanwhile, purée the sour cream, blue cheese, vinegar, and the remaining 2 Tbs. oil in a food processor or blender until smooth.Season to taste with salt and pepper. Transfer to a bowl and stir in the chives.
  6. Allow the steak and sprouts to rest for 10 minutes. Transfer the steak to a cutting board and thinly slice. Toss the sprouts to combine the more charred ones with the less charred ones. Stir the sauce and thin with water, if needed.
  7. Serve the steak and sprouts with the blue cheese sauce.

IMG_2460
The steaks and sprouts benefit from a dollop or two of the blue cheese sauce and a sprinkle of chives.

from Fine Cooking

One Pan Meal #2: Curried Chicken Thighs with Cauliflower, Apricots and Olives

An ideal recipe – wonderful result with low effort. This one-pan meal is a riff on Chicken Marbella, the famous Silver Palate dish featuring sweet roasted prunes and briny olives. In this version, made with boneless chicken thighs and cauliflower, the original seasonings are replaced with Moroccan-inspired spices, and dried apricots sub for the prunes. For the best flavor, start marinating the chicken in the morning or, better yet, the night before (which is what we did.)

End result? …a fabulous combination of flavors! Sprinkling it with cilantro and lemon juice after cooking made the whole dish shine. The super tasty juices from the chicken mellowed and enhanced the taste of the cauliflower, while the olives added a great salty-bite balanced by the sweetness of the apricot.

If I was forced to choose a favorite among the one-pan meals, this would have to be it. Although all of the others were also winners in my humble opinion.

IMG_2437

Ingredients

  • 8 boneless, skinless chicken thighs (about 2 lb. total)
  • 1/4 cup extra-virgin olive oil
  • 1 Tbs. apple cider vinegar
  • 4 tsp. curry powder
  • 1 tsp. smoked paprika
  • 1/2 tsp. ground cinnamon
  • 1/4 tsp. cayenne pepper
  • Kosher salt
  • 1 large head cauliflower, cut into bite-size florets
  • 3/4 cup coarsely chopped dried apricots, soaked in hot water for 5 minutes and drained
  • 1 cup pitted green olives, halved or quartered if large
  • 1/3 cup chopped fresh cilantro
  • 1 large lemon, cut into 4 to 6 wedges

IMG_2440
All ingredients layered on the pan before roasting.

IMG_2442
Checking for doneness after 35 minutes.

Directions

  1. In a medium bowl, combine the chicken thighs with 2 Tbs. of the oil, the vinegar,2 tsp. of the curry powder, 1/2 tsp. of the paprika, the cinnamon, cayenne, and 3/4 tsp. salt, tossing to coat. Cover and refrigerate for at least 8 hours and up to overnight.
  2. Position a rack in the center of the oven and heat the oven to 450°F. Line a large rimmed sheet pan with parchment. On the pan, combine the cauliflower with the remaining 2 Tbs. oil, 2 tsp. curry powder, 1/2 tsp. paprika, and 3/4 tsp. salt, tossing to coat. Add the apricots and olives, and spread in a single layer.
  3. Remove the chicken thighs from the marinade, fold them back into their original shape, and place them on top of the cauliflower, spaced evenly apart. (Discard any remaining marinade.) Roast, rotating the pan halfway through, until the cauliflower browns and the chicken cooks through (165°F), about 35 minutes.
  4. Remove the chicken from the pan and toss the cauliflower mixture with the pan drippings. Serve the chicken and cauliflower mixture sprinkled with the cilantro and the lemon wedges on the side.

IMG_2445
The plated meal, ready to dig in!

IMG_2447
The leftovers were perfect a few nights later when we did not feel like cooking.

by Molly Gilbert from Fine Cooking

One Pan Meal #1: Roasted Salmon and Fennel with Pistachio Gremolata

Intrigued by a recent article in Fine Cooking magazine that featured numerous recipes incorporating all ingredients cooked in one pan, we decided to give most of them a whirl. And we’re really glad we did! The first of which was the Roasted Salmon and Fennel with Pistachio Gremolata. The bright flavors and beautiful colors in this dish make it a company-worthy meal, but it’s quick enough for a weeknight, too—which is where we began.

I’ll be interspersing the remaining one-pan meals in between several upcoming blogs, so stay tuned. One mixes chicken thighs and cauliflower, and another steak with brussels sprouts. All three were extremely tasty and easy to make, so they’ll be on future menus, no doubt!

IMG_2414

Ingredients

  • 2 medium fennel bulbs (about 1-3/4 lb. total), cored and sliced into 1/2-inch-thick wedges
  • 1/2 medium red onion, thinly sliced
  • 3 Tbs. extra-virgin olive oil
  • Kosher salt and freshly ground black pepper
  • 4 6-oz. skinless salmon fillets
  • 1/2 cup packed fresh flat-leaf parsley, coarsely chopped
  • 1/2 cup salted shelled pistachios, coarsely chopped
  • 1 Tbs. finely grated lemon zest (from 1 large lemon)
  • 1 Tbs. finely chopped garlic
  • Flaky sea salt

IMG_2417
The roasted fennel and red onion.

IMG_2418
Laying the salmon filets on top of the roasted veggies.

Directions

  1. Position a rack in the center of the oven and heat the oven to 400°F.
  2. Line a large rimmed sheet pan with aluminum foil or parchment. On the pan, toss the fennel and onion with the olive oil and a big pinch each of salt and pepper. Spread the vegetables evenly and roast until tender and browned at the edges, 20 to 25 minutes.
  3. Push the vegetables into a pile to make a bed for the salmon. Place the fillets on top of the vegetables, spaced evenly apart, and season with salt and pepper. Roast until the salmon is just cooked through, 10 to 15 minutes.
  4. Meanwhile, in a medium bowl, combine the parsley, pistachios, lemon zest, and garlic to make the gremolata.
  5. Serve the salmon and vegetables topped with the gremolata and a sprinkling of sea salt.

IMG_2423
Plated entree with the gremolata sprinkled over everything. Yum! Made a great lunch the next day.

by Molly Gilbert from Fine Cooking

Spring Mill Café with Darling Daughter

IMG_2387
The Spring Mill Café
has been serving French country fare since 1978, a BYO that serves fabulous lunch, dinner and Sunday brunch. The historic property features the original Spring Mill general store, and the picturesque converted farmhouse. When the weather is nice, guests can dine outdoors adjacent the gardens, either on the patio or on one of the porches. They use local farmers and the Lancaster Farm Fresh Coop as much as possible, and the menus change to reflect the seasons.

Michele Haines established the cafe wanting to share the dishes her mother, grandmother, and great grandmother passed down. Specialties include hearty patés, traditional boeuf bourguignon, rabbit stew, cassoulet and fresh farm vegetables. Desserts include classics like chocolate mousse and tarte tatin. The Spring Mill Café’s relaxed and casual atmosphere invites you to enjoy the company and the food.

We have dined here as a couple, and as a family, on numerous occasions, but many years had lapsed since our last visit. So with daughter Julia, affectionately known as “Juwa” to her dad and me, in for a short visit from her new digs in the Los Angeles area, we figured it was time to put in another appearance.

IMG_2390

Our friendly and knowledgeable waitress informed us that tonight’s menu had just been updated (which is done about six times per year), so with a bottle of red and a bottle of white, we sipped our wine while contemplating dinner choices. For starters, Julia and I both selected a simple House Salad of lightly dressed greens, walnuts and yummy blue cheese crumbles; while Russ ordered the Roasted Beet Salad on greens with orange sections and topped with a hunk of ricotta cheese resembling a tortellini.

IMG_2396
The simple House Salad.

IMG_2398
A pleasantly plated Roasted Beet salad.

For entrees, all three of us zeroed in on the Sea Scallops L’orange, seared dry sea scallops with orange beurre blanc butter, caramelized fennel, and roasted potatoes. But to change things up, Russ decided instead on the Porc aux Légume d’automne, sliced pork sirloin with sherry mustard jus served with roasted squash and brussels sprouts. The dinners were just as fabulous as we remembered others to be in the past!

Absolutely convinced that Julia HATED fennel, she was shocked to learn that the tasty vegetable (“Oh my God this is soo good, what am I eating?”) mixed in with the roasted potatoes was, you guessed it—fennel! Sometimes it’s best not to have any preconceived notions about what you are about to eat…

IMG_2400
Sea Scallops L’orange entree.

IMG_2402
Sliced Pork Sirloin with sherry mustard jus.

When it came to dessert, something I rarely—if ever—partake of, Russ was too full but Julia still seemed to find room to enjoy a slice of their pecan-chocolate pie with whipped cream and fresh blueberries. And she finished every last bite!

IMG_2405
Julia’s little slice of heaven, pecan-chocolate pie.

IMG_2394
Russ with daughter “Juwa” in for a visit from California.

It would be just a matter of days before Julia flew back to the West Coast, so we sadly said our goodbyes for now—although not for good to Spring Mill Café.

Chance Meeting at Stone Terrace

stone.terrace.logo

In October of 2014, at a tasting event silent auction, I won a gift certificate to the Stone Terrace by John Henry in Hamilton, NJ. It’s been some years since we patronized this upscale restaurant and events facility, and wanted to make sure to use the certificate before it expired… although there was no apparent expiration date evident.

stone.terrace.bar

Knowing the possibility of getting a reservation during prime time on a weekend could be dicey, we booked online several days in advance for 7:30 on a Saturday. Once there, standing at the maitre d’ station, a shout out from the bar area calling my name took us by surprise! Who was sitting there enjoying cocktails but Rosanne and Gary Zarrilli! A complete shock because Rosanne and I had chatted about dining there as a foursome some months ago, but we never settled on a date. I guess you could say “serendipity” played a part in this chance meeting.

IMG_2370

The Z’s were there to hear the DJ in another room because they had booked him for an upcoming event of their own. We inquired if they’d already eaten and since they had an 8:00 rez, they gladly accepted our offer to join us.

IMG_2369

The night’s specials were so intriguing that we ordered most of our choices from those offerings. For starters both couples each shared an appetizer of the most delicious Crabmeat Stuffed Portobello Mushrooms with roasted red peppers and smoked mozzarella on a bed of greens. Did I say “fabulous“… four thumbs up!

IMG_2372

IMG_2373

Next we ordered two of their salad specials to split. The Z’s chose the Salad Three Ways, which included chopped tomatoes and basil, lightly dressed greens and sandwiched between the two was a large dollop of Burrata cheese with a balsamic drizzlea fresh Italian cheese made from mozzarella and cream. The outer shell is solid mozzarella, while the inside contains both mozzarella and cream, giving it an unusual, soft texture. Rosanne was ooohing and aaahing over that cheese! Our choice was the Arugula Salad with Figs, candied walnuts and crumbled goat cheese in a light vinaigrette. Lucky for me, Russ doesn’t like walnuts so I got all of them!

IMG_2379
Gary: Stuffed Shrimp made with their Famous crab stuffing

IMG_2381
Rosanne: Jumbo Lump Crab over Linguine Fra Diavolo.

IMG_2376
Lynn: Salmon with a Dijon Horseradish Sauce

IMG_2378
Russ: 20-ounce Dry Aged Ribeye with sautéed mushrooms and flash-fried baby spinach

All four entrees were cooked to perfection, and both mine and Gary’s dinners were accompanied by sides of perfectly cooked baby roasted potatoes and steamed green beans. Russ’ side of flash-fried spinach was unusually good.

Throughout the evening, our waitress Jennie, kept us entertained with her infectiousness laugh, smile and playful bantering. Now there was somebody who seemed to really take pleasure in her job and interacting with people… a sure means for a good tip!

IMG_2374

Mini-Meatloaves with Chili Sauce

Everyone will enjoy getting their own mini-meatloaf with a sweet-tangy glaze on top. An added bonus? This is gluten-free because it uses rolled oats instead of bread crumbs. We served ours with smashed baby potatoes sprinkled with chives and a side of steamed broccoli.

Perhaps you don’t eat red meat? This recipe is very versatile, so you could substitute a mix of ground veal and pork. Don’t eat pork? Use ground dark meat turkey and turkey bacon. We incorporated meatloaf mix (ground beef, veal and pork) with only 2 slices of bacon because ours was thick slab. And instead of broiling for the last couple of minutes, we just left the loaves in the 400 degree oven for another 5 minutes and they came out beautifully!

IMG_2343

Ingredients

  • Cooking spray
  • 1/2 medium sweet onion, coarsely chopped
  • 1/3 cup packed fresh flat-leaf parsley leaves
  • 4 slices bacon, coarsely chopped
  • 4 medium cloves garlic, coarsely chopped
  • 2/3 cup old-fashioned rolled oats
  • 1/4 cup boiling water
  • 1-1/4 lb. ground beef (85% lean)
  • 3 large eggs
  • Kosher salt and freshly ground black pepper
  • 3/4 cup chili sauce, such as Heinz

Directions

  1. Position a rack in the upper third of the oven and heat the oven to 400°F. Spray a large rimmed baking sheet with cooking spray and set aside.
  2. Pulse the onion, parsley, bacon, and garlic in a food processor until finely chopped.
  3. In a large bowl, combine the oats and boiling water, stirring to combine. Add the onion mixture, beef, eggs, 1-1/2 tsp. salt, and 1/2 tsp. pepper and mix well by hand.
  4. Shape the mixture into 4 small loaves (about 4×3 inches) on the prepared baking sheet. Brush 1/2 cup of the chili sauce over the top, and bake until cooked through (165°F), about 20 minutes.
  5. Turn the broiler on high, brush the loaves with the remaining 1/4 cup chili sauce, and broil until browned in spots, about 2 minutes. Serve.

IMG_2344

Recipe courtesy of Ronne Day from Fine Cooking

A Culinary Trip to Aman

group2

It had been about 4 months since the Ethnic Dining Group last met for a cultural dinner at Zorba’s in Fairmount Park. This most recent adventure took us to the Indian Bistro of Aman in Chalfont, PA. The food was really, really good and the companionship fun as always. Find out more on under the “Ethnic Dining” tab…

lynn.earle