All posts by LynnHoll

Unknown's avatar

About LynnHoll

I have been an artist and designer all my life incorporating graphic design for websites, gardens, publications, fabrics, interior design and cooking. I am now retired from my professional job, but still create artistic visions in all forms on a daily basis.

Simplify Things During the Holidays

plated.pork.and.pears
You need a break from all of the fancy, fussy, time-consuming meals you’re making during the holidays, so try this Pork Tenderloin with Pears and Cider—with flavors that are off the charts! A creamy sauce flavored with shallots, cider, and mustard brings together pork and fresh pears in this fabulous cool-weather dish. And while sautéed green beans and wild rice pilaf would make lovely accompaniments, we made baked sweet potatoes with a shallot butter, thyme and a drizzle of maple syrup. Perfecto!

And easy enough for a well-rounded weeknight meal. What’s not to like about it?

IMG_3124
Searing the pork tenderloins to get a nice browning going.

Ingredients

  • 1-1/4 lb. pork tenderloin, trimmed
  • 1 tsp. olive oil
  • Kosher salt and freshly ground black pepper
  • 1 oz. (2 Tbs.) unsalted butter
  • 2 firm-ripe Anjou pears, each peeled, cored, and cut into 8 wedges
  • 1/2 cup finely chopped shallots
  • 2 Tbs. sherry vinegar
  • 2/3 cup pear cider or apple cider
  • 3 Tbs. heavy cream
  • 1-1/2 tsp. Dijon mustard
  • 2 tsp. fresh thyme, minced

IMG_3127
While the pork is “resting,” cook the pear slices until lightly browned.

IMG_3130
After removing the pears from the pan, make the shallot sauce. 

platter1
Sliced tenderloin and pears arranged on a platter.

platter2
The finished platter with the cider sauce topping the meat.

Directions

  1. Position a rack in the center of the oven and heat the oven to 500°F.
  2. Pat the pork dry, rub it with the oil, and season generously with salt and pepper. Heat a heavy-duty 12 inch skillet over medium-high heat until very hot, and then sear the pork on all sides until golden brown, about 6 minutes total. Transfer to a small rimmed baking sheet and roast until an instant-read thermometer inserted into the thickest part registers 140°F, 10 to 15 minutes. Transfer the pork to a cutting board, tent with foil, and let rest for 5 minutes.
  3. Meanwhile, melt 1 Tbs. of the butter in the skillet over medium-high heat. Add the pears in a single layer and cook, flipping once, until just tender and lightly browned, about 3 minutes per side. Transfer to a plate and keep warm.
  4. Add the remaining 1 Tbs. butter and the shallots to the skillet and cook, stirring, over medium heat until the shallots are just beginning to turn golden, 2 to 3 minutes. Add the vinegar and stir, scraping up any brown bits. Add the cider and cook until slightly reduced, 2 to 3 minutes. Whisk in the heavy cream, mustard, and thyme and cook until slightly thickened, about 3 minutes. Season to taste with salt and pepper.
  5. Slice the pork and serve with the sauce and pears.

IMG_3131
Close-up of the baked sweet potato with shallot butter sauce.

Baked Sweet Potatoes

Scrub whole sweet potatoes and prick them in several places with a fork. You can microwave or bake in a 400 degree oven until soft enough to pierce easily with a fork.

Meanwhile, brown some finely chopped shallots in about a tablespoon of butter in a small skillet. In a small bowl, combine the shallots with more (up to you) room temperature butter, a little minced thyme, a drizzle of maple syrup, and finely chopped pecans (optional). Add a pinch of salt and mash everything together with a fork until well blended.

plated.pork.and.pears

Dark Chocolate Mint Bark

Pure chocolate amazingness right here. So festive and so addictive!

IMG_3188

For the past several years now I’ve been concocting different versions of chocolate bark for the holiday season. For 2015, it’s a tasty rendition on dark chocolate and mint—that is super simple to make. The surprise ingredient is incorporating Famous chocolate cookie wafers sandwiched between the two layers of luscious white and dark chocolate. And for the grand finale, topped with chopped Andes Creme De Menthe Thins.

Not only is it a treat to have in a candy dish for your noshing pleasure, but wrapped in holiday packaging makes for wonderful gift giving. So go ahead and make yourself a batch—or three…

IMG_3180

Ingredients

  • One box of 28 Andes Creme De Menthe Thins, coarsely chopped
  • Four, 4.25 ounce bars of Hershey’s Special Dark chocolate, melted
  • Approximately 16 ounces of white chocolate chips, melted
  • 30 Famous chocolate cookie wafers
  • Few drops of mint extract
  • A bit of green food coloring

IMG_3183
Layering on chocolate cookie wafers on the melted dark chocolate.

IMG_3184
Spreading on the tinted white chocolate over the refrigerated chocolate layers.

IMG_3187
The hardened candy before it is cut into chunks.

Directions

  1. Coarsely chop Andes mint candy and set aside.
  2. Place dark chocolate in a heat proof bowl (or double boiler) over (not on) simmering water and stir until melted.
  3. Pour melted chocolate onto a large rimmed baking sheet covered in parchment paper. Using an offset spatula smooth out chocolate until you achieve an even layer. Don’t worry about perfect edges. Clean out the bowl/pan to later melt the white chocolate.
  4. Press chocolate cookie wafers lightly into melted chocolate; and place pan into the refrigerate for 10 minutes to slightly harden the candy.
  5. Place white chocolate pieces into the now clean bowl over (not on) simmering water and stir until melted. Remove from heat.
  6. Add a tiny amount of green food coloring to tint the white chocolate and stir until thoroughly combined and even in color. Add a drop or two of mint extract; stir to combine.
  7. From the refrigerator remove pan with dark chocolate and wafers and pour tinted white chocolate on top. Smooth out using an offset icing spatula until you completely cover the bottom layers. Sprinkle chopped Andes candies on top.
  8. Return the fully assembled bark to the refrigerator for at least 30 minutes to harden completely. Cut into irregular shapes with a sharp chef’s knife. Store in the refrigerator in a tightly sealed container.

packaged.box
Boxed up and ready for any occasion.

Heck yeah, this is easy enough to make on a weeknight.

IMG_3123
Broiled Salmon with Ginger-Shiitake Glaze~

Salmon is one of our go to meals for Meatless Monday, and this particular recipe does not disappoint! The salmon was moist and the sauce was a lively combination of sweet and savory.

Though most glazes are applied with a brush, this chunky mixture of sautéed mushrooms and red peppers is spooned over the fish. The honey helps the crust brown, and a splash of vinegar and a spoonful of chili paste perk up the fish, while the vegetables add texture and color. The reds and greens lend a festive Christmas touch!

Although the author paired it with a stir-fried cabbage dish, we made a side of Stir-Fried Brussels Sprouts with an Asian flair (recipe follows.)

Recipe by Tony Rosenfeld from Big Buy Cooking

Ingredients

  • 2 lbs. salmon fillet, skin on
  • 3 Tbs. canola oil, more for the baking sheet
  • 1/4 tsp. ground coriander
  • Kosher salt and freshly ground black pepper
  • 1/2 small red bell pepper, finely diced (about 1/4 cup)
  • 3 scallions, trimmed and thinly sliced (white and green parts separated)
  • 2 Tbs. finely chopped ginger
  • 3-1/2 oz. shiitake mushrooms, stemmed and cut into 1/4-inch dice (about 1 cup)
  • 1/4 cup honey
  • 3 Tbs. rice vinegar
  • 1 Tbs. reduced-sodium soy sauce
  • 1 tsp. Asian chili sauce (like Sriracha)
  • 1 tsp. cornstarch

IMG_3102
The raw ingredients prepped for cooking.

IMG_3107
The oiled salmon sprinkled with coriander.

IMG_3110
Chopped red pepper and scallions.

IMG_3111
Adding chopped mushrooms to the softened veggies.

IMG_3113
The liquids are added to the veggies and the sauce starts to thicken.

IMG_3114
The cooked salmon prior to adding the chunky glaze.

Directions

  1. Position an oven rack about 8 inches away from the broiler element and heat the broiler to high.
  2. Oil a large, rimmed baking sheet. Set the salmon skin side down on the baking sheet, sprinkle with 1 Tbs. oil, the coriander, 1/2 tsp. salt, and 1/2 tsp. pepper, and let sit at room temperature (important) while you prepare the sauce.
  3. In a large (12-inch) skillet over medium heat, cook the red pepper, scallion whites, and ginger in the remaining 2 Tbs. oil, stirring occasionally, until the red pepper and scallions start to soften and brown, about 3 minutes. Add the mushrooms, raise the heat to medium-high, sprinkle with 1/4 tsp. salt, and cook, stirring, until they soften and start to brown, about 3 minutes. Add the honey, vinegar, soy sauce, chili sauce, and 1/4 cup water, and bring to a simmer. Whisk the cornstarch with 1 tsp. water and stir into the glaze. Return to a simmer and cook until the glaze thickens, about 1 minute. Remove from the heat.
  4. Broil the salmon until it starts to brown and becomes almost firm to the touch, about 8 minutes. Momentarily transfer to the stovetop and spoon the glaze over the salmon. Return to the oven and broil for about 1 more minute so the glaze browns and the salmon almost completely cooks through (check by using a paring knife to flake a thicker part of the fillet). Sprinkle with the scallion greens, transfer to a large platter, and serve.

Serving Suggestions
Serve with steamed rice and Stir-Fried Napa Cabbage with Chile and Basil.

  • 1 medium-small head napa cabbage (about 1-3/4 lb.)
  • 1 Tbs. canola oil
  • 3 medium cloves garlic, coarsely chopped (about 1 Tbs.)
  • 1 Tbs. fish sauce
  • 1-1/2 tsp. granulated sugar
  • 1/4 tsp. kosher salt
  • 1/2 medium serrano chile, coarsely chopped (don’t seed)
  • 1/4 cup roughly torn fresh basil leaves
  • 2 to 3 tsp. fresh lime juice
  • 2 medium scallions, thinly sliced on an extreme diagonal, for garnish

Directions

  1. Slice the cabbage in half lengthwise. Position one half cut side up and slice it across the middle at the point where the ruffled, leafy top gives way to white stem. Remove the core, slice the stem end lengthwise into 1-1/2-inch-thick wedges, and cut the wedges crosswise into 1-1/2-inch pieces (the leaves will separate). Cut the leafy half in the same way. Keep the leaves and stems separate. Repeat with the remaining half cabbage. You should have about 5 cups stems and 4 cups leaves.
  2. Stir-Fried Napa Cabbage with Garlic, Fresh Chile & Basil Recipe
  3. Heat a wok or a 12-inch skillet over high heat for about 45 seconds and then add the oil, swirling it to coat the pan. When the oil is hot and shimmering, add the garlic and the white stems. Stir-fry until the stems brown lightly in spots and begin to release some liquid, about 2 minutes. Add the fish sauce, sugar, salt, and chile and toss. Continue to stir-fry until the stems are barely tender, about 2-1/2 minutes.
  4. Add the cabbage leaves, stirring quickly to move them to the bottom of the pan. As soon as the stems are just tender and the tops are barely wilted, 30 to 40 seconds more, remove from the heat and stir in the basil and 2 tsp. lime juice. Season to taste with salt, garnish with the scallions, and add more lime juice, if you like. Serve immediately.

Other Side Dish: Stir-Fried Brussels Sprouts

Chop the rest of the red pepper from the salmon dish. Heat a tablespoon or so of canola or peanut oil in a large skillet over medium-high heat. Add some minced garlic and fresh ginger, and cook, stirring constantly , until fragrant. Add some trimmed, quartered (or halved, depending on size) Brussels Sprouts and cook, stirring until bright green. Add the red pepper, plus a tablespoon of soy sauce and a teaspoon or two of rice vinegar, then cover the skillet, reduce the heat to low, and cook until the sprouts and peppers are crisp tender. remove the lid, raise the heat, and cook until most of the liquid evaporates.

IMG_3109
The halved sprouts in the skillet with garlic and ginger. 

IMG_3119
A close-up of the cooked brussels sprouts.

IMG_3115
The salmon fillet covered with the chunky ginger shiitake glaze.

French Farmer’s Soup

french.farmers.soup.big.red

Because my memories of frozen lima beans during my “wonder years” were unpleasant at best, I was a bit hesitant for Russ to concoct this recipe. But I’ve had a revelation after tasting this grown-up soup. See the recipe under the “SOUPS” tab…

Pizza Party: Gluten-Free with Mrs. Z

Thanksgiving might be over, but happily, it’s always pizza season! And our pizza party formulated when Rosanne Zarrilli asked about weekend plans, and as luck would have it, we were wide open on Saturday night. So she suggested a relaxing, at home affair making pizzas and sipping wine. She was also aware that Russ has been wheat-free so she made a special effort to buy gluten-free pizza dough from Wegman’s
Thanks Mrs. Z—let the party begin!

gluten-free.package
A new visitor to the party, gluten-free crust from Wegman’s.

appetizer.plate
The appetizer platter.

xmas.plates
Festive plates await the appetizers…

We arrived with a bottle of wine and a platter of meats, cheeses and olives, figuring if they didn’t all get eaten prior to pizza sampling, we could use the leftovers for toppings. Not necessary since Rosanne had a wide assortment of goodies for the pies. In particular, she purchased Risoldi’s homemade Italian sausage, an old family recipe popular in Mercer County, NJ. In addition, Mrs. Z produced some of her homemade meatballs along with a variety of cheeses and veggies.

russ.wine.opener
Russ assists in opening the wine with a fancy contraption.

But before we started noshing, we enjoyed Rosanne’s wonderful holiday decorating touches. And if you know Rosanne, you know she always goes the extra mile—every inch of the house was spot-on festive! She even segued the Christmas theme into the dinner, starting with a beautiful and very tasty red tomato soup—Hearty Tomato Soup with Lemon and Rosemary, a recipe from Giada De Laurentiis’ repertoire (recipe follows.) Oh yeah babe, we’re making this again sometime real soon!

tomato.soup
A swirl of creme fraiche adorns the tomato soup.

Can’t have Christmas red with out a green, thus the salad; a concoction she made from the Skinny and Martha Stewart sites—her rendition of Waldorf Salad—without the chicken. (She purposely left half of the salad unadorned with walnuts knowing Russ’ aversion to the nut.) Ingredients included: Bibb lettuce, celery, cucumber, green apple, green grapes, and toasted walnuts. The dressing was made up of:

  • 3/4 c buttermilk  (she used lowfat)
  • 1/2 c mayo (she used lite)
  • 1 T lemon juice
  • 1+ T chives chopped
  • 1+ T parsley chopped
  • 2 T finely chopped shallot
  • 1/4 tsp celery salt
  • pepper

salad
The green “Waldorf” salad.

Now to the pizzas. First up, a gluten-free pie with that famous sausage, garlic, fresh basil, black olives, mushrooms, and mozzarella cheese. What helped make the crust crispy was rolling it out on corn meal, providing a wonderful crunch. The jury was in—we all were surprised how tasty this gluten-free version was—especially compared to some of the gloppy gluten-free pastas we’ve experienced in the past… Moving on…

pizza.dough
Rosanne prepares the gluten-free crust over some corn meal.

toppings
Some of the toppings waiting their turn to shine.

pizza1
Pizza number one using the gluten-free crust.

pizza2
Pizza number two using regular crust.

pizza3
A third pie using the gluten-free crust again.

Pie number two was a regular crust pizza with the infamous meatballs, red and yellow peppers, onion, basil, and ricotta cheese. Russ had to abstain, but I didn’t 🙂 Then came the final pizza, again using the gluten-free crust, and similar to the second pie as far as toppings. Lucky for us, there was a hefty portion of this last pizza leftover so we took it home and it enjoyed it for brunch on Sunday.

And God love Gary (Mr. Z.) About a month ago he had shoulder surgery and was still in an arm sling, trying his best to help out by pouring wine and doing dishes. We’ll just call that physical therapy 😀

******************************************

Hearty Tomato Soup with Lemon and Rosemary

Ingredients

  • 2 tablespoons butter
  • 1 onion, peeled and chopped
  • 2 carrots, peeled and chopped
  • 2 cloves garlic, chopped
  • 1 15-ounce can cannellini (white) beans, drained and rinsed
  • 1 28-ounce can crushed tomatoes
  • 3 cups chicken broth
  • 1 bay leaf
  • 1 sprig of fresh rosemary, plus 1 teaspoon, minced
  • 1/2 teaspoon red pepper flakes
  • 3/4 teaspoon salt
  • 1/2 teaspoon freshly ground black pepper
  • 2/3 cup creme fraiche
  • Zest of one lemon

Directions

  1. In a large soup pot, melt the butter over medium-high heat. Add the onion, carrots, and garlic and cook until the vegetables are tender, about 4 minutes. Add the beans, tomatoes, broth, bay leaf, 1 teaspoon rosemary, and red pepper flakes. Bring the soup to a boil over high heat, then reduce the heat to low and simmer for 30 minutes, covered.
  2. Puree the soup in a blender in batches, being careful to remove and discard the bay leaf. Return the soup to a soup pot and keep warm over low heat. Season with salt and pepper.
  3. In a medium bowl fold in the lemon zest and the remaining teaspoon of rosemary to 2/3 cup creme fraiche. To serve, ladle the soup into bowls and dollop each bowl with the lemon rosemary creme fraiche. Serve immediately.

feature.pie
Pizza, soup and salad, with good friends—not a bad way to pass a Saturday night.

Cozy Up This Weekend with Pork: It’s Forkin’ Delicious!

sliced.tenderloin

Be thinner than your dinner. Eat pork. A perfect fall/winter meal, and one we’ve made a few times because it’s quick, easy and mighty tasty! But if you decide to cook the braised cabbage gratin with it, plan on about 90 minutes from start to finish.

The chef, Mindy Fox, paired the pork dish with an escarole and apple salad but we had a head of savoy cabbage on hand and recalled a wonderful Braised Savoy Cabbage casserole from Molly Stevens All About Braising cookbook (see Feb. 23, 2014 blog under Braising Bonanza tab) and decided it would go perfectly with the Fennel-Rubbed Pork Tenderloin.

stirfrying.cabbage.fennel

champignon.cheese

adding.cheese

cooked.gratin

This time however we made a few alterations. Unable to purchase the Saint Marcellin cheese, we got a triple cream soft ripened with mushrooms called Champignon. And wanting to use up a small fennel bulb, we sliced it up and mixed it in with the shredded cabbage. Perfect combination!

rubbing.meat

plated.dinner

Please note that the following recipe also includes ingredients and directions for the escarole salad—which we didn’t make.

PORK TENDERLOIN:

Ingredients

  • 6 Tbs. plus 2 tsp. extra-virgin olive oil
  • 3 Tbs. cider vinegar
  • 1 small shallot, finely chopped
  • 1 tsp. Dijon mustard
  • Kosher salt
  • 1 small head fennel, fronds and tender stems finely chopped together, bulb cored and very thinly sliced
  • 2 cloves garlic, finely chopped
  • Freshly ground black pepper
  • 2 small pork tenderloins (1-3/4 to 2 lb. total)
  • 1 head escarole (about 12 oz.), leaves torn into small pieces
  • 1 Pink Lady or other sweet-tart red apple, thinly sliced

Directions

  1. Position an oven rack 6 inches below the broiler and heat the broiler on high. Line a large rimmed baking sheet with foil.
  2. In a small bowl, whisk 6 Tbs. of the oil, the vinegar, shallot, 1/2 tsp. of the mustard, and 1/4 tsp. salt; set aside.
  3. In another small bowl, combine the fennel fronds and stems, the remaining 2 tsp. oil and 1/2 tsp. mustard, the garlic, 1/2 tsp. salt, and 1/2 tsp. pepper.
  4. Rub the pork all over with the fennel mixture. Transfer to the prepared baking sheet and broil, flipping once, until just cooked through (145°F), about 15 minutes. Transfer to a cutting board and let rest for 5 minutes.
  5. Meanwhile, in a large bowl, toss the fennel bulb, escarole, apple, 1/4 tsp. salt, and a pinch of pepper with half of the dressing. Slice the pork and drizzle with any juice. Serve with the salad, passing the remaining dressing at the table.

From Fine Cooking Magazine by Mindy Fox

cooked.gratin
Braised Savoy Cabbage and Fennel.
(see Feb. 23, 2014 blog under Braising Bonanza tab)

Mini Chocolate Peanut Butter Cheesecakes

Last year for Thanksgiving I made Double-Chocolate Peanut Butter Pie, and our guests LOVED it! (Blog post November 28, 2014) This year these same guests (Barb and Brad) invited us to their home for the Thanksgiving feast, so I decided to make a mini-adaption of the same delicious dessert (I found a recipe on OMGChocolateDesserts.com from which to base my ingredients. My version is listed below.)

Since there were only going to be five of us for dinner (Barb’s sister Pat joined the party), and I didn’t want this decadent dessert tempting us after-the-fact, I cut the recipe in half and made only six mini-cheesecakes. They’re like “crack for sweet-tooth addicts,” so it’s best not to have many leftovers for the “users.”

IMG_3044
Actually their dog Chloe made an even half dozen attendees!

IMG_3038
With cocktail hour, we enjoyed a baked brie with apricot preserves.

IMG_3041
The star of the show, roasted turkey and stuffing.

IMG_3048
Barb and Brad showing off their gravy-making skills.

When we arrived late in the afternoon, the 16-pound, picture-perfect turkey was just pulled from the oven and “resting,” allowing time for cocktail hour with a baked brie appetizer—and enjoyed on their outdoor deck because the weather was balmy for late-November. Brad informed us that they cooked their bird according to the recipe of Melissa Clark, The New York Times Columnist and Food Journalist—author/coauthor of an astounding 32 cookbooks. Not only did it look fabulous, it tasted great too!

IMG_3055
Russ assists Brad in carving the bird.

Along with sides of mashed potatoes, stuffing, and homemade gravy, I made a very colorful and delectable Maple Dijon Roasted Brussels Sprouts and Butternut Squash with Cranberries and Bacon (recipe follows). Of the two optional ingredients, we chose to include the crumbled bacon, but omit the Feta cheese. Because it came out of the oven almost two hours before we ate dinner, we did reheat the veggies for about 10 minutes.

IMG_3053
Maple Dijon Roasted Brussels Sprouts and Butternut Squash with Cranberries and Bacon.

Since we were not going to have any leftovers this year, Brad graciously gave us the turkey carcass with which we plan to make a soup or gumbo in the near future. And while we do love to cook, it was rather pleasant not having to do all that goes into such a holiday meal for once…

IMG_3059
The plated meal with all the fixin’s.

********************Mini Cheesecakes 
INGREDIENTS
(makes 12)
For crust:
  • 1 cup finely crushed Famous chocolate wafer cookies
  • 4 tablespoons unsalted butter or margarine, melted
  • 1 tablespoon granulated sugar
For filling:
  • 16 oz cream cheese, softened
  • ½ cup peanut butter
  • ⅔ cup powder sugar
  • 1 teaspoon vanilla
  • 2 eggs
For topping:
  • 12 oz. semi-sweet Ghirardelli chocolate pieces
  • ½ cup heavy cream
  • 30 miniature Reese’s dark chocolate peanut butter cups, 6 sliced in half and the remainder coarsely chopped

A visual pictorial on making the cheesecakes:

IMG_3008
IMG_3011
IMG_3019
IMG_3020
IMG_3021
IMG_3061
INSTUCTIONS
  1. Preheat the oven to 325 degrees F and line a cupcake pan with paper liners.
  2. In a bowl mix together graham cracker (or cookie crumbs), sugar and melted butter.
  3. Divide crumbs in the cupcake liners and press it on the bootom. Bake for 10 minutes, remove from oven and set aside.
  4. In a large mixing bowl, mix together cream cheese, peanut butter, powder sugar and vanilla on medium speed until well combined.
  5. Beat in eggs (one by one) until evenly combined. DO NOT OVER MIX IT.
  6. Spoon cheesecake filling over the crusts and bake at 325 F for 20 minutes or until the toothpick comes out almost clean. (After 20 minutes, mine were nowhere near done, so I baked them for an additional 8 minutes.)
  7. Remove from oven and cool completely.
  8. Melt the chocolate pieces and stir in heavy cream. Spoon chocolate ganache on top of each cheesecake.
  9. Center a half of a peanut butter cup on each cheesecake followed by the chopped pieces. Then add a light drizzle of the ganache for garnish. (I even topped off each cake with several Ghirardelli pieces.)
  10. Store cheesecakes in refrigerator.

*************Brussels Sprouts and Butternut Squash

IMG_3052

INGREDIENTS
  • 1 pound butternut squash, peeled, chopped into 1-inch cubes
  • 1 pound Brussels sprouts, stems trimmed, sliced in half through stem
  • 2 tablespoons olive oil

Dijon Maple Butter Sauce

  • 1 teaspoon butter, melted
  • 1 teaspoon pure maple syrup
  • 2 teaspoons Dijon mustard
  • 2 teaspoons balsamic vinegar
  • 1/4 teaspoon salt
  • 1/4 teaspoon garlic powder
  • 1/8 teaspoon pepper

Garnish

  • 1/4 cup pecans, finely chopped
  • 1/4 cup dried cranberries
  • 1/4 cup Feta cheese or to taste—optional
  • 8 slices bacon, crumbled or taste—optional
IMG_3030
After roasting for 25 minutes, and before the sauce and pecans are added.
INSTRUCTIONS
  1. Preheat oven to 400 degrees F.
  2. In a small bowl, mix together the Dijon Maple Butter Sauce ingredients. Set aside.
  3. Line a large baking sheet with foil or parchment paper. Add Brussels sprouts and squash, drizzle with olive oil and toss to evenly coat.
  4. Evenly spread out vegetables and roast at 400 degrees F for 25 minutes.
  5. Toss vegetables with Dijon Maple Butter Sauce and 1/4 cup pecans (it will seem “wet but will soak in the vegetables) then roast another 10-20 minutes or until squash is fork tender.
  6. Toss Brussels sprouts and squash with cranberries and feta and bacon if desired. Serve warm.

IMG_3024
Close-up of the decadent Mini Chocolate Peanut Butter Cheesecakes.

Dorie Does It Again!

IMG_2974
Growing up I HATED pot roast. But to be fair, I pretty much hated anything that wasn’t a dessert or a snack until my mid-teens when I forced myself to start liking vegetables. Hard to believe I was that picky. Now I know that pot roast, when made according to a few fundamental rules, can be a totally delicious addition to your culinary repertoire… check out the blog and recipe under the “Braising Bonanza” tab…

When in Butler…

We all know, food is sustenance for our bodies—and family and friends offer nourishment for our souls. So when life gives you lemons, make lemonade… and that’s what we did…

It was a sad occasion that brought us out to Western, PA in early November. Russ’s beloved mother Mary passed away so we, along with his three grown children, and sister Dee and her husband David, all rendevoused to Concordia at Cabot, Mary’s current residence. Daughter Julia, sister Dee and her husband David all flew in from California (each on separate flights), while son Daniel commuted in from Massachusetts, and joined his mom and brother David to continue the trek from Glenside… Got all that??

Russ was already out there for several days prior to my arrival, so I drove a second car across the state. And good thing because we needed two vehicles for schlepping people around—not to mention transporting an assortment of household goods back East with us.

mary-lynn-yule-log
Making a tiramisu log cake with me for Christmas in 2014 is Mary—a dedicated foodie herself. Original blog posted on 12/25/14. Russ learned a lot of his cooking skills from Mary…

You may recall that Russ and I moved Mary from her house of 40 years into independent living last June. During that trip we visited several new—and delicious—restaurants in the area. So with those establishments in mind, we enjoyed a few good meals as a family, despite the difficult times. One such scrumptious meal was had at the not-so-new Saxonburg Inn— which last year we enjoyed with Mother Mary and her close friend Janet—but since I wrote about that last September under the blog title “Dining Out on the Mother’s Trip” I’ll concentrate on a few of the others.

Before the kiddos came to town, the four older adults planned to dine out at Savor in Sarver (say that three times fast!) It’s a quaint little BYO restaurant in a small strip mall with regional american cuisine, operated by chef/owner Mike Rogers. But before we journeyed to Savor in Sarver, Dee’s husband David got stranded on the highway when his shuttle from the Pittsburgh airport broke down—kid you not! So the foursome became a trio…

savor.front
The facade of Savor… in Sarver… There, you said it three times 😉

IMG_0065
We were impressed with the cutlery presentation at each table setting.

Their menu is not extensive, but the offerings are ever-so-tempting! Dee started with a side of the popular Savor Salad—fresh baby greens trimmed with chick peas, artichoke hearts, carrots, tomatoes and cucumbers, topped with the house feta vinaigrette dressing. Her entree choice was Keith’s Waterford Salmon—fresh salmon filet pinwheeled with a clever blend of feta cheese, roasted red peppers and spinach with aromatic sundried tomato lemon butter and set atop a pedestal of garlic smashed potatoes. Large enough to tote home a doggy bag…

What appealed to me was the combination Towering Turf and Surf Salmon, consisting of an exquisite crab cake and a cod filet amid three steak medallions with a splash of three pepper lemon beurre blanc set on a foundation of garlic smashed potatoes. And Russ finalized the decision with The Other Guy’s Crab Cake. It started with jumbo lump crab meat mixed with Chef’s special ingredients into a succulent baked crab cake with risotto, honey braised red cabbage and mango compote. They all sound fabulous don’t they? And they were…

IMG_0071
Dee’s luscious salmon filet pinwheels.

IMG_0067
A plate of surf and turf was Lynn’s entree.

IMG_0069
Jumbo lump crab cake baked with risotto for Russ.

And let me tell you, Dee’s bedraggled husband David was more than ready for a glass of wine by the time he finally arrived!

The next night was a Friday and we had reservations at Evolution Grille, a seasonal restaurant in Freeport that showcases progressive american cuisine, with a unique menu that blends traditional classics prepared with a contemporary flair. With a large variety of options, I knew it would appeal to everyone’s discerning palette—plus it’s BYO! Our waitress Jessica was a hoot, and certainly knew their menu backward and forward. That particular evening everyone was starving, having commuted, and/or in Russ and Dee’s case running around, all day without any lunch.

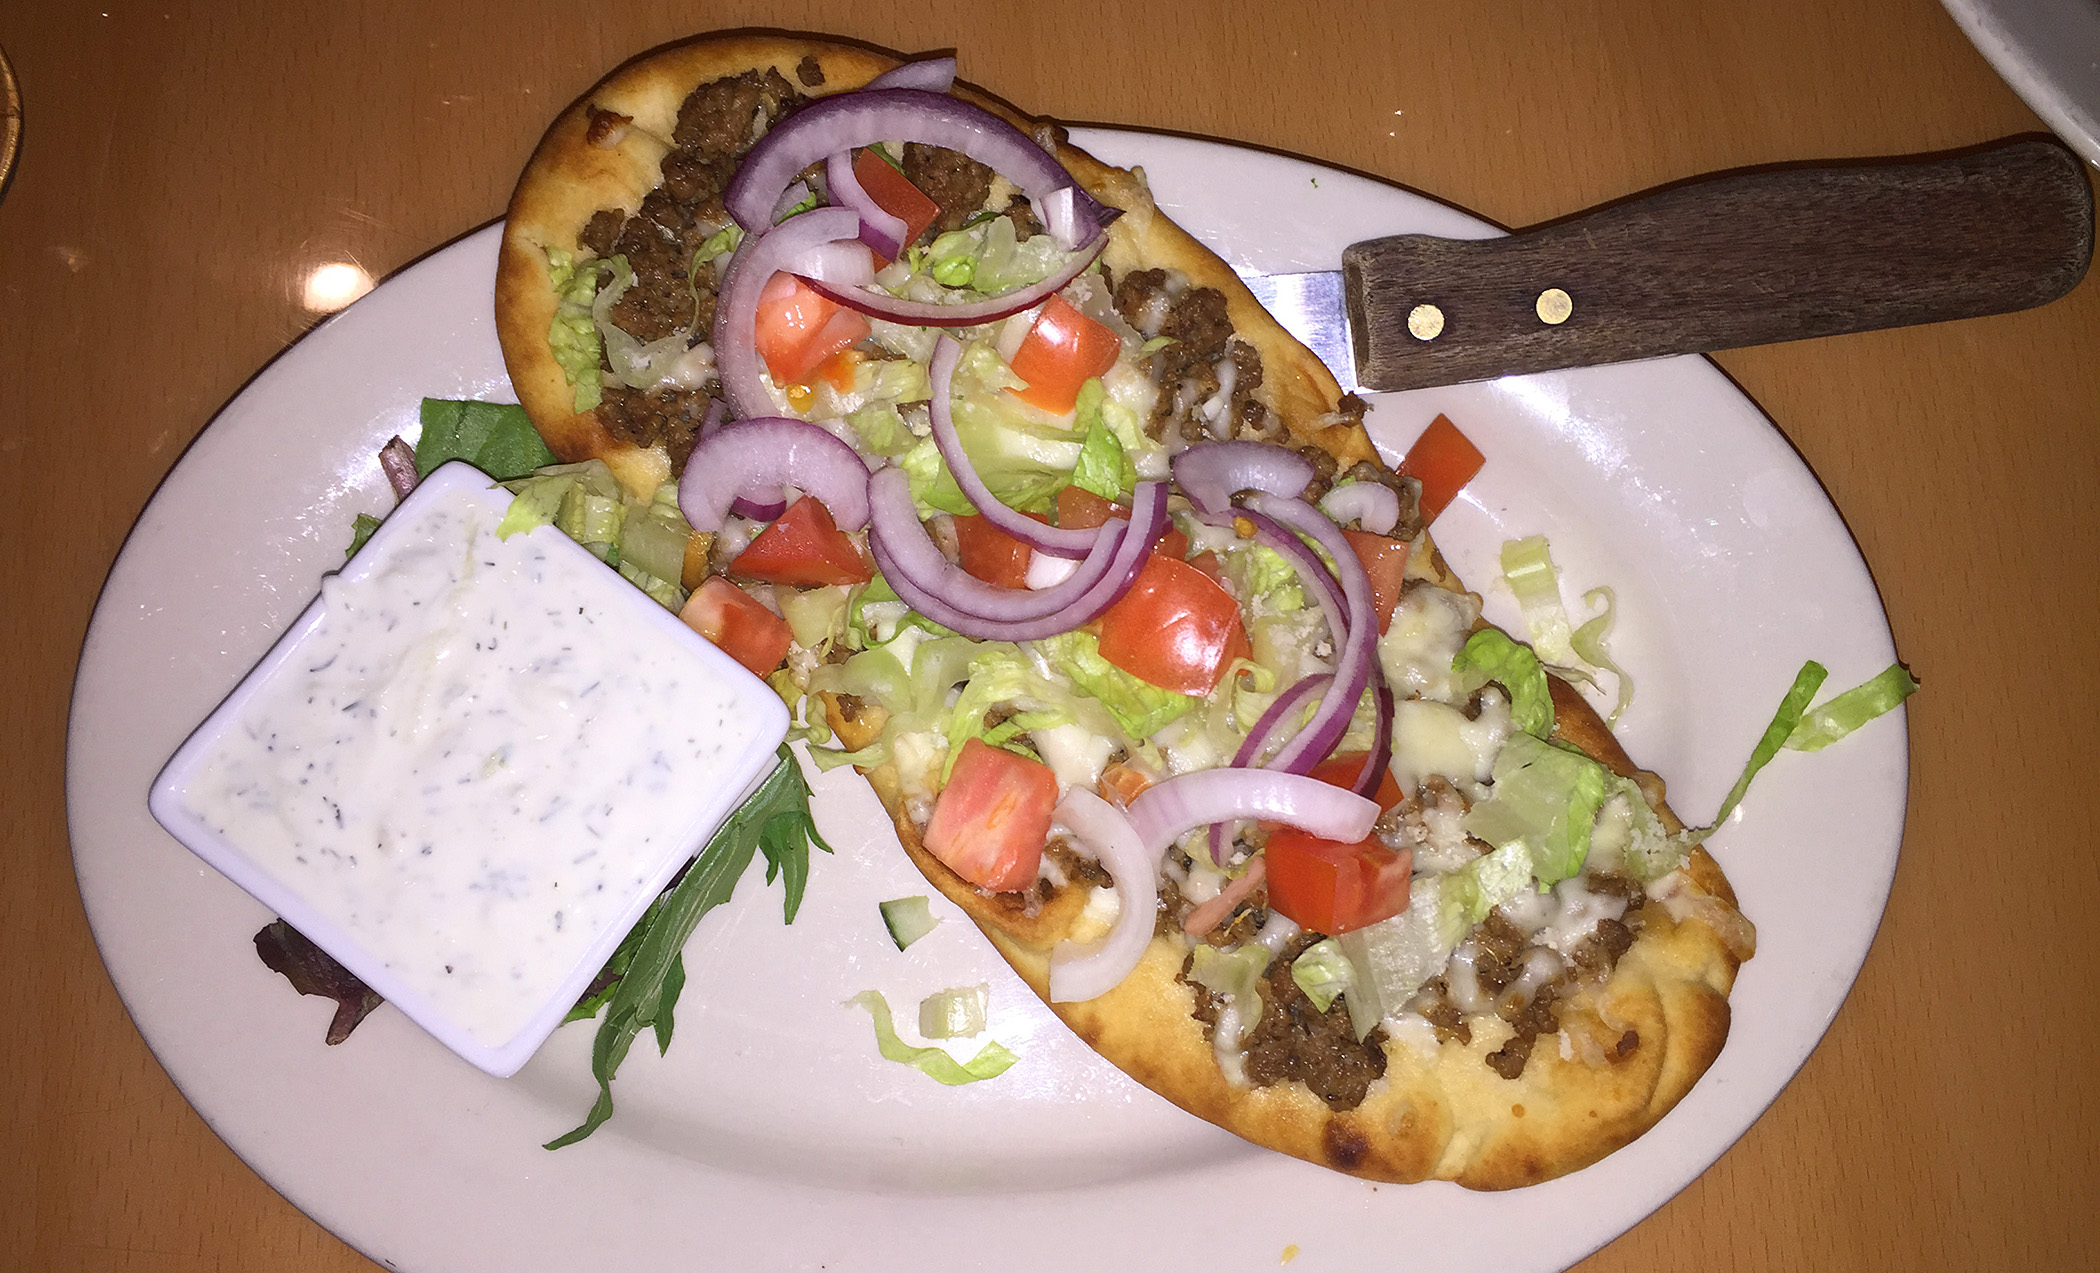
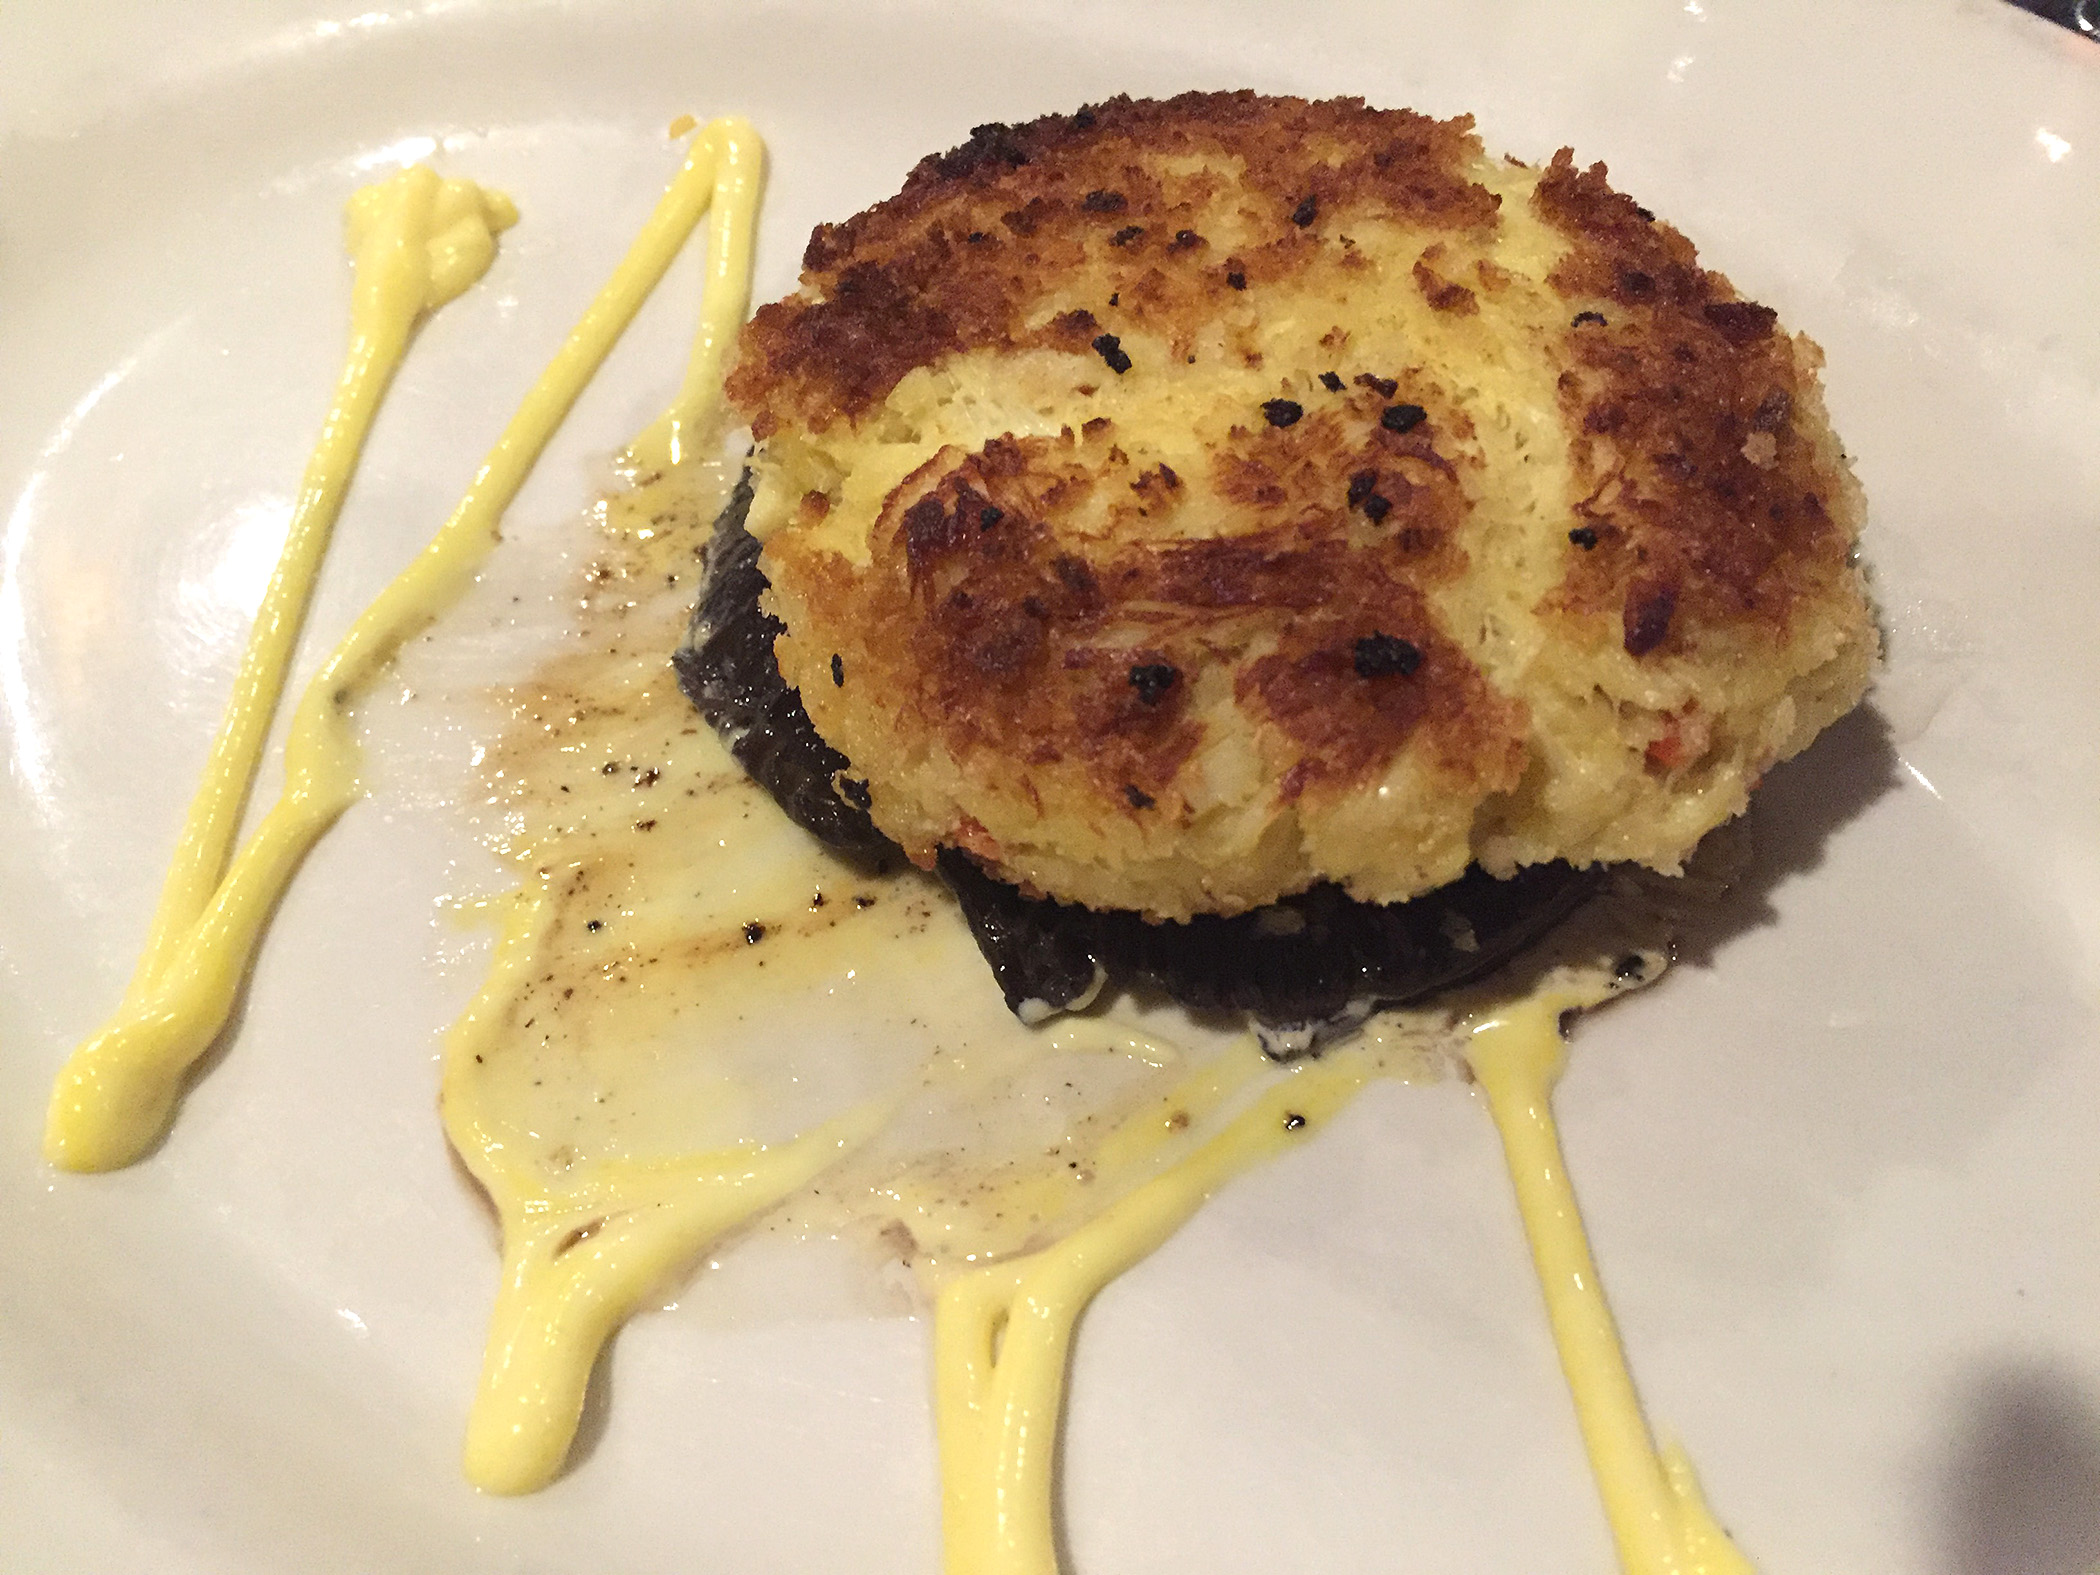
So appetizers were calling our names, loud and clear! Younger son David zeroed in on the Gyro Flatbread special that was loaded with ground lamb and veggies. Son Daniel and brother-in-law David, both chose the Pierogie of the month—their signature Tailgaters, filled with pastrami and caramelized onion. Julia and I decided to share the Scallop special dressed with gorgonzola and a balsamic drizzle—to die for!! And Russ enjoyed a special that consisted of a crab cake filled grilled portobello. Not a shy one in the bunch, we all shared and therefore got to taste a bit of everything.

IMG_2936
The loaded flatbread special appetizer.

IMG_2935
A house favorite, “Tailgater” pierogies.

IMG_2934
The divine scallop appetizer.

IMG_2932
An artfully plated crab cake stuffed portobello.

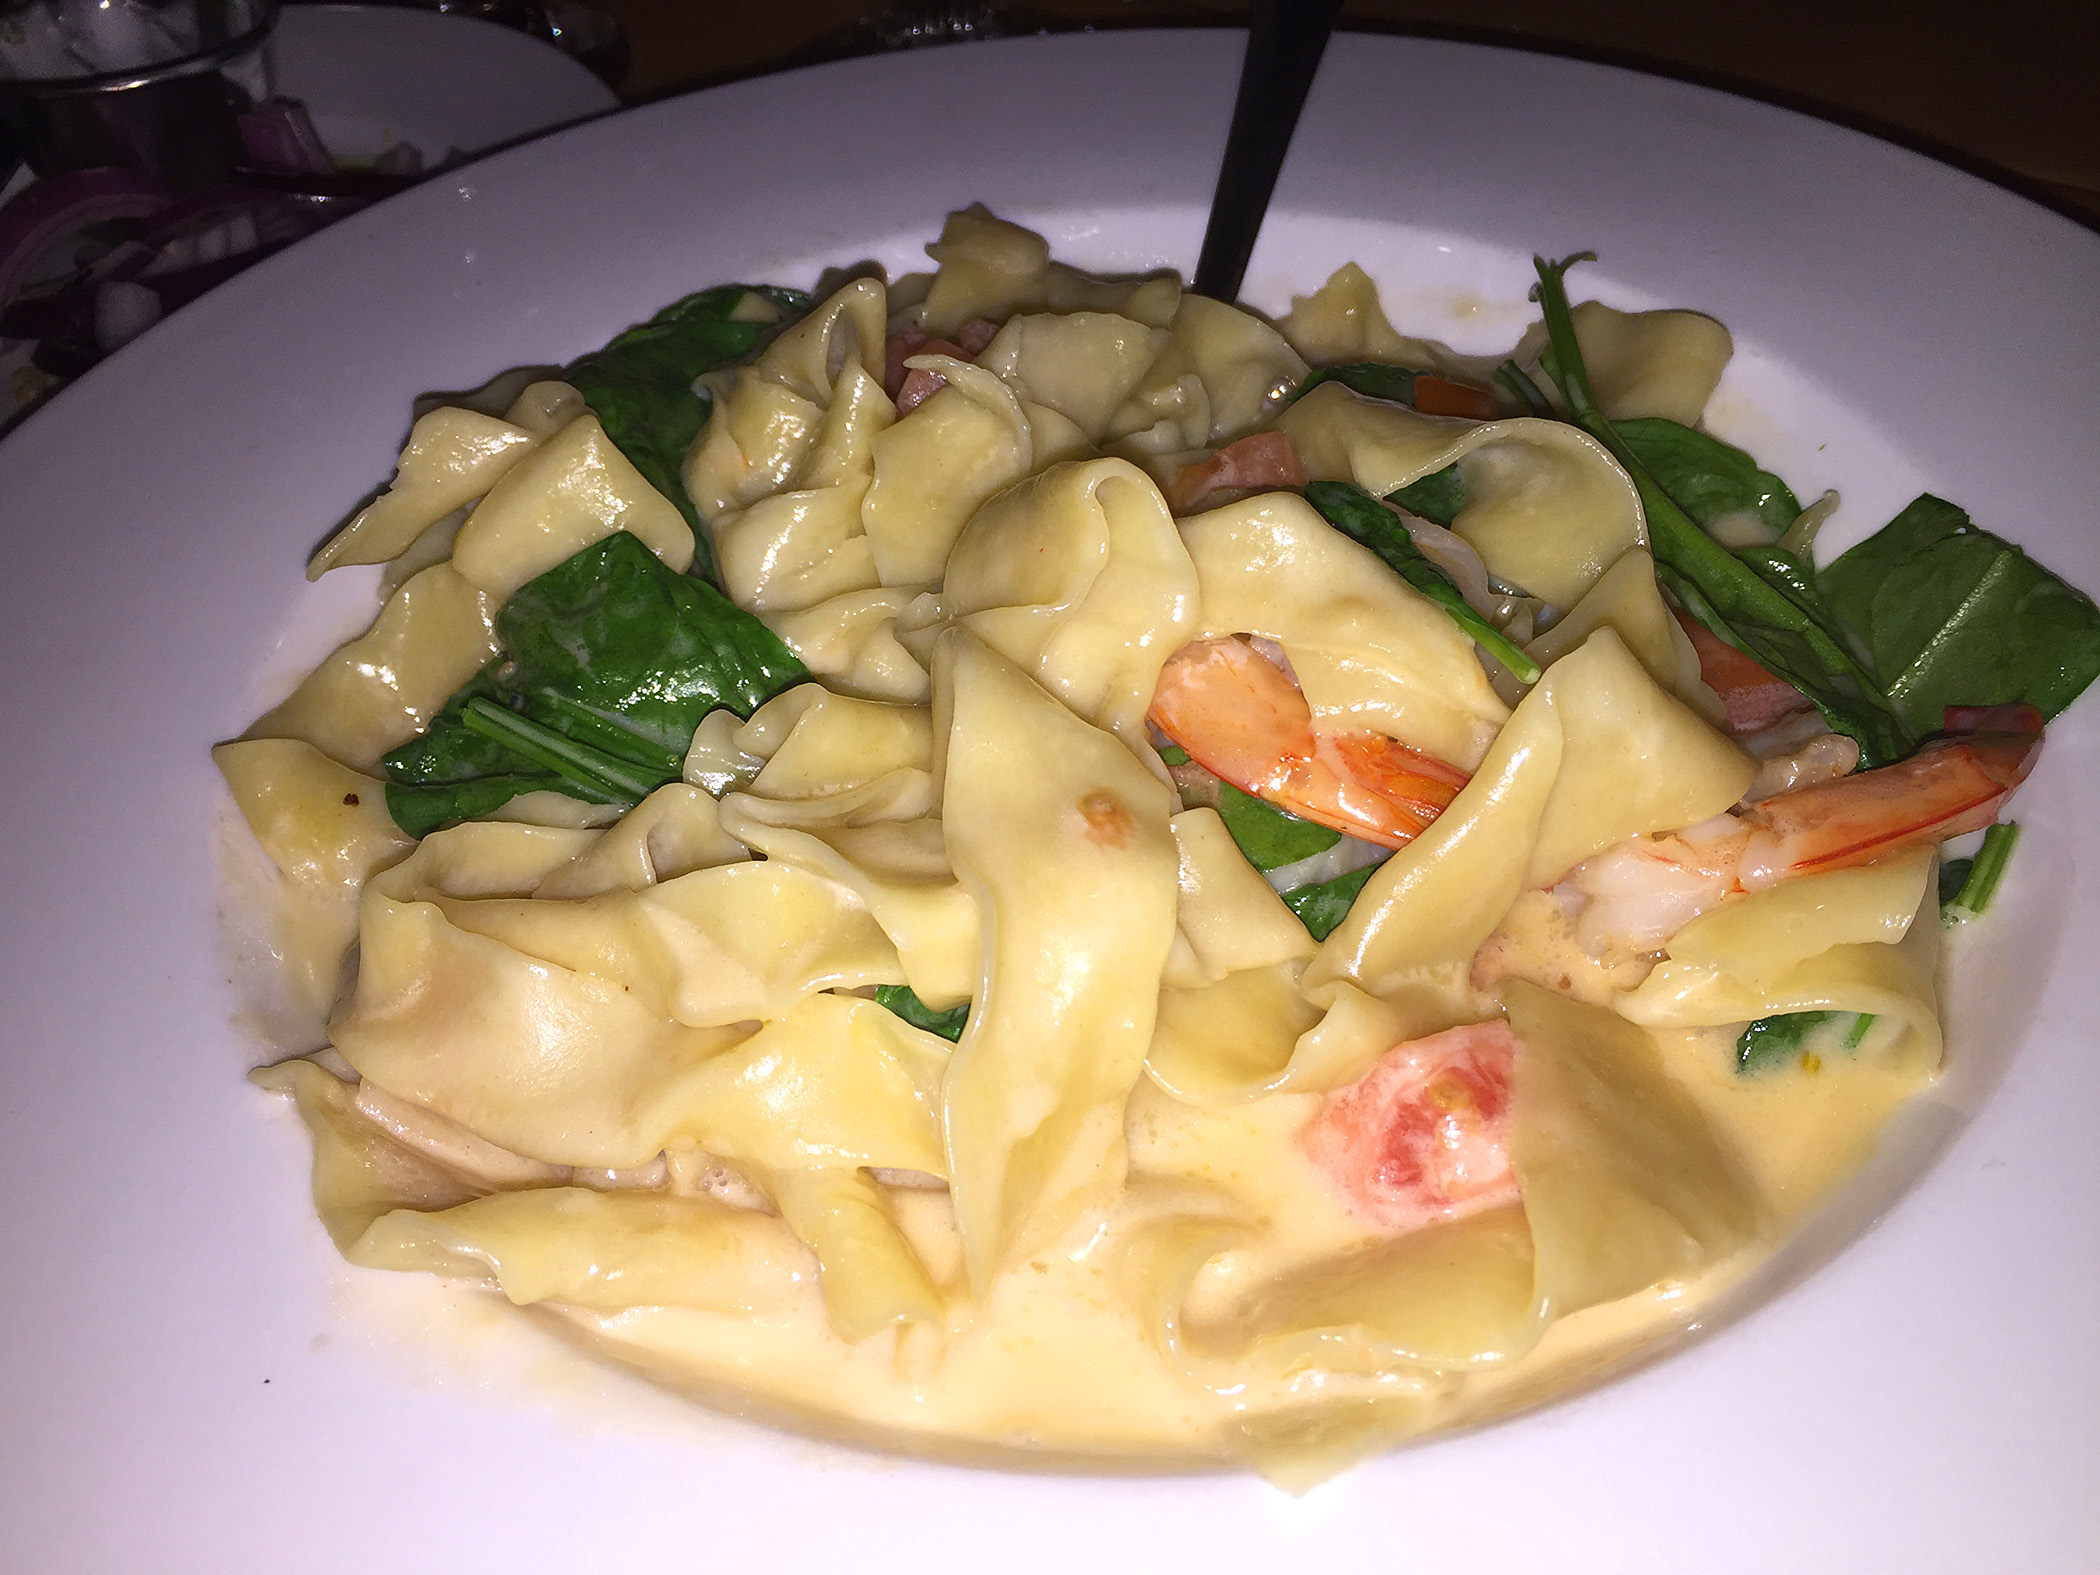
Now onto those entrees. The boys each ordered the Sarver Supreme Burger—6 oz burger, with peppercorn bacon, cheddar, BBQ sauce and a whopping tower of onion rings (and they both opted for chunky blue cheese instead of the cheddar.) Dee and I chose the Crab Cakes—two 5 oz jumbo lump, tabasco remoulade with root fries and vegetables; each having enough leftover for another meal. Julia truly enjoyed her Seafood Pasta—hand cut pappardelle, scallops, shrimp, tomatoes, spinach in a lobster sherry sauce. And the “men,” as men do, ordered the huge NY Strip Steak smothered in sautéed mushrooms, a special of the night.

IMG_2943
Daniel and David devoured these towering burgers and fries.

IMG_2945
Russ and big David managed to finish these behemoth steaks.

IMG_2938
This crab cake dinner with parsnip and sweet potato fries became two meals for both Dee and me.

IMG_2941
Julia loved this seafood pasta entree.

IMG_2949
Julia, Daniel and David Hartman patiently awaiting their appetizers.

IMG_2952
Brother-in-law David Ruttan and his lovely wife Dee Hartman.

So if you ever find yourself out in that neck of the woods, you have a few tried-and-true restaurants from which to choose. And despite the somber occasion, it was so good to see family and friends and bond over some excellent meals. With so many visits back to Butler County over the years, we all have fond memories of dining with Mary. God bless…

Asian-Style Glazed Salmon with Roasted Mushroom Salad

There are oodles of Asian marinades and a myriad of ways to cook salmon. This one was sent to us in our weekly “Make it Tonight” subscription that I wrote about a few blogs ago. If you like big, bold flavors then this recipe is for you—I would not recommend for someone who tends toward the bland. Both the rice vinegar and the mirin impart a slight sweetness in this dish, while the quick roasted mushrooms add an earthy counterpoint. And the grated ginger and tamari kick it up a couple of notches. The real star of this salmon is the glaze.

IMG_2931

As a side dish, Five-spice Red Cabbage Salad was suggested, but we were satisfied with just the salmon and mushroom mix for our weeknight meal. And I was highly suspicious of cooking the salmon for only 10 minutes—and I was right! After 10 minutes the fish was still very rare. So I checked after another 10 minutes, and added an additional 5 minutes on top of that to get the salmon to our liking, somewhere between medium and medium-rare. Part of the reason may have been that I cut our fillet into three pieces instead of the suggested four.

IMG_2925
Shiitake mushrooms with stems removed.

IMG_2921
Mushrooms brushed with sesame oil on rimmed baking sheet.

IMG_2926
After cooling a bit, the mushrooms are sliced down.

IMG_2928
The completed mushroom, scallion and red pepper salad.

Ingredients

  • 5 cups stemmed fresh shiitake mushrooms, or a mix of shiitakes and oyster mushrooms (about 1 lb. before trimming)
  • 1-1/2 Tbs. toasted sesame oil
  • 1/3 cup tamari or good-quality soy sauce
  • 1/3 cup mirin
  • 1/4 cup rice vinegar
  • 1 Tbs. finely grated fresh ginger (use a rasp-style grater or a ginger grater)
  • 1-1/2 tsp. cornstarch combined with 1-1/2 tsp. water
  • 1-1/2 lb. salmon fillet, preferably center cut, skin and pin bones removed; cut into four portions
  • 1/2 cup finely diced red bell pepper (about half a medium pepper)
  • 1/2 cup thinly sliced scallions (both white and green parts from about 1 small bunch)
  • Freshly ground black pepper

IMG_2924
Salmon fillets in casserole lined with tinfoil and topped with glaze.

Directions

  1. Position a rack in the center of the oven and heat the oven to 400°F. In a large bowl, toss the mushrooms with 1 Tbs. of the sesame oil. Arrange the mushrooms in a single layer on a rimmed baking sheet and roast until softened, 10 to 15 min. When cool enough to handle, slice the mushrooms into 1/4-inch slices and return them to the bowl.
  2. Meanwhile, in a small bowl, whisk the remaining 1/2 Tbs. sesame oil with the tamari (or soy sauce), mirin, rice vinegar, and ginger. Set aside 1/3 cup of this mixture and transfer the rest to a small saucepan. Bring to a boil over high heat. Add the cornstarch-water mixture and cook, stirring, until thickened, about 30 seconds. Remove from the heat.
  3. Line a 9×13-inch baking dish with foil. Arrange the salmon portions in the dish, skin side down and evenly spaced. Using a pastry brush, thickly dab the tops and sides of the salmon with the warm glaze. Use all of the glaze and don’t worry if some of it slides off of the fish. Bake until the salmon is cooked to your liking, about 10 min. for medium rare; 12 min. to medium; 14 minutes for medium well. (Cut into the thickest part of a fillet to check.) While the salmon cooks, add the red pepper, scallions, and reserved soy mixture to the mushrooms. Toss to combine and season to taste with pepper.
  4. Drizzle the fish with any glaze that has pooled in the baking dish and serve topped with the mushroom salad.

IMG_2930
Plated glazed salmon with mushroom salad.

A perfect dinner for Meatless Monday!

by Kate Hays from Fine Cooking

Reason alone to take a trip down your supermarket’s produce aisle

Sundays often find us making a homemade soup-of-the-week, perfect for a quick weeknight dinner or weekday lunch. Recently our interest was piqued with the description of smoky bacon, herby sage, and sweet apple that gives this Butternut Squash Soup with Apple and Bacon layers of flavor.

Don’t hesitate to make this one, it would make a great addition to your Thanksgiving menu… check out the recipe under the “SOUPS” tab…

IMG_2895

Sheet-Pan Spaghetti Squash Puttanesca

Probably not going to win over any hard-core meat and potato lovers, but this Sheet-Pan Spaghetti Squash Puttanesca is amazingly good, very filling—and healthy to boot! Certainly fits the bill for vegetarians and those on a gluten-free diet. Rather than pasta, serve the salty and spicy flavors of this classic Southern Italian dish with spaghetti squash “noodles” for a delicious, hearty vegetarian dinner.

IMG_2553
Visually it leaves a bit to be desired, but the taste is what counts!

Although not part of the original “One-Pan Meal” series, this is certainly a welcome addition to that fleet of recipes. After analyzing the ingredients, and reading several reviewer’s comments, we decided to triple the amount of garlic and anchovies. And next time will probably increase the amount of crushed red pepper flakes too—which give it a nice kick. You also might want to be a little more heavy-handed with the olives and capers… just sayin’…

Even though I am not in love with ricotta cheese, it did add a decent counter-balance to the other flavors. It was Russ’s idea to sprinkle on some grated parmesan as an additional garnish. In place of shiitake mushrooms, we think portobellos would be a good substitute… And the leftovers are great for lunch the next day.

INGREDIENTS

  • 1 large spaghetti squash (3 1/2–4 pounds)
  • Kosher salt, freshly ground black pepper
  • Nonstick vegetable cooking spray
  • 1 oil-packed anchovy fillet, drained, finely chopped (optional)
  • 1 garlic clove, finely chopped
  • 12 ounces cherry tomatoes (about 2 cups)
  • 1 pint shiitake mushrooms, stemmed, quartered (about 1 1/2 cups)
  • 1/4 cup pitted oil-cured black olives, chopped
  • 1 tablespoon drained capers
  • 1/2 teaspoon crushed red pepper flakes
  • 3 tablespoons olive oil, divided
  • 1/4 cup pine nuts
  • 1/4 cup coarsely chopped fresh basil, divided
  • 1/4 cup coarsely chopped fresh parsley, divided
  • 1/2 cup ricotta

Special equipment:

  • An 18×13″ rimmed baking sheet

PREPARATION

  1. Position rack in center of oven and preheat to 375°F. Halve squash lengthwise and scoop out seeds. Season inside of squash with salt and pepper. Coat baking sheet with cooking spray; lay halves cut side down on sheet and bake 30 minutes.
  2. Meanwhile, combine anchovy (if using), garlic, tomatoes, mushrooms, olives, capers, red pepper flakes, and 2 Tbsp. oil in a large bowl. Remove baking sheet from oven and transfer tomato mixture to sheet alongside squash. Return to oven and cook until squash is tender and shell is easily pierced, about 15 minutes more.
  3. Meanwhile, toast pine nuts in a dry small skillet over medium-low heat, tossing often, until golden brown, about 4 minutes. Immediately transfer to a plate; set aside.
  4. Remove sheet from oven. Scrape squash crosswise to pull strands from shells into a medium bowl; discard shells. Using the back of a fork or spoon, gently push down on tomatoes on sheet to break them up and release their juices. Scrape tomato mixture and any accumulated juices into bowl with squash. Add remaining 1 Tbsp. oil, then toss with half of basil, parsley, and reserved pine nuts. Divide among bowls and dollop with ricotta. Garnish with remaining basil, parsley, and pine nuts.

IMG_2538
Toasting the pine nuts.

IMG_2535
Combining the mushroom and tomato mixture.

IMG_2540
Add the vegetable mixture to the half-cooked squash.

IMG_2542
Russ wears kitchen gloves to handle the hot squash.

IMG_2545
When squash is finished roasting, scrape out the innards crosswise.

IMG_2553
Finished dish shown with a dollop of ricotta and a sprinkle of parmesan.

IMG_2540

Mangia!

A Plug for “Make it Tonight”

IMG_2862

Normally I wouldn’t use my blog as a pulpit for promoting products or services. But in this case I am making an exception. Russ recently found this offering from FineCooking.com, a food site where we’ve been satisfied members for years. It was intriguing enough that we decided to give it a try and we’re really glad we did!

For the low fee of $19.95 for one year’s worth of quick weeknight recipes, you receive 52 weeks of over 250 easy, 30-minute meals. Literally, less then a penny per day—not bad! Plus, you can download the plan and print out the included shopping list, or view it at the store on your mobile device. Destress and start the week with a stocked pantry and a ready plan for dinner every night.

Another plus is, they incorporate some of the same ingredients from one meal to another so that if followed, there is no waste. We’ve been picking and choosing usually two recipes from the supplied weekly total of five. And so far, our meals have been very good and down-right interesting. One of the first meals we made was the Spicy Chicken with Black Bean, Cranberry and Sweet Potato Salsa. This colorful all-in-one meal is full of bold Southwestern flavors, thanks to cumin, chili powder, and cayenne. It even suggested a side dish, in this case Roasted Cabbage Wedges. An odd combination, but it worked—and well! It found it’s way into our recipe bank for future repeats.

The prep is a bit time intensive with a fair amount of chopping and measuring, but once you start cooking, it goes fast.

IMG_2866

IMG_2868

Ingredients

  • 4 Tbs. canola oil; more for the broiler pan
  • 2 medium sweet potatoes, peeled and cut into 1/2-inch dice
  • 1/4 cup finely diced red or Vidalia onion
  • Kosher salt
  • 1 tsp. chili powder
  • 1/2 tsp. ground cumin
  • 1/8 tsp. cayenne
  • 4 boneless, skinless chicken breast halves
  • 1 large clove garlic, mashed to a paste
  • 1 tsp. finely grated lime zest
  • 2-1/2 Tbs. fresh lime juice
  • 1 15-oz. can black beans, rinsed
  • 1/4 cup dried cranberries
  • 1/4 cup chopped fresh cilantro
  • Freshly ground black pepper

Directions

  1. Position a rack about 6 inches from the broiler and heat the broiler to high.
  2. Heat 2 Tbs. of the oil in a 12-inch skillet over medium heat. Add the sweet potatoes and cook, stirring occasionally, until almost tender, about 10 minutes. Stir in the onion, 1/2 tsp. salt, and 1/4 cup water. Cover and cook for 1 minute. Uncover and cook, stirring, until the onion and sweet potatoes are tender and the water has evaporated, about 3 minutes. Keep warm.
  3. Meanwhile, combine 1 tsp. salt with the chili powder, cumin, and cayenne in a small bowl.
  4. Butterfly each chicken breast by slicing it horizontally almost but not entirely in half so you can open it like a book. Rub the spices all over.
  5. Lightly oil a broiler pan, put the chicken on it, and broil, flipping once, until just cooked through, 5 to 6 minutes total.
  6. In a medium bowl, combine the garlic, lime zest, juice, and 2 Tbs. of the canola oil. Add the potatoes and onions, black beans, cranberries, and cilantro and toss gently to combine. Season to taste with salt and pepper and serve with the chicken.

IMG_2870
by Katherine Eastman Seeley
from Fine Cooking

Directions for Roasted Cabbage Wedges

Cut small cabbage into thin wedges (four per half head), leaving the cores attached so that they stay intact. Brush the edges on both sides with olive oil and place on a foil-lined sheet. Sprinkle with salt, freshly ground pepper, and whole cumin seeds. Roast in a 450 degree oven, turning once, until tender and browned at the edges, about 30 minutes. Serve.

IMG_2861
Four cabbage wedges from half of a head, oiled, salt and peppered, and sprinkled with cumin seed prior to roasting.
IMG_2871

Best Ground Beef Chili

I make a great chili, if I must say so myself! And Russ says so too. So when we ran across this recipe in Cooks Illustrated Magazine, I felt a competitive urge to test it against my own. Plus, I was also intrigued about how they treated the ground meat with baking soda prior to cooking it. My curiosity got the best of me…

plated.bowl2

This chili recipe uses 85 percent lean ground beef for richness and flavor, and employs shockingly small amounts of pureed whole canned tomatoes and pinto beans to create a thick, rich dish. To keep the meat moist and tender, it is treated with salt and baking soda. Both ingredients help the meat hold on to moisture, so it doesn’t shed liquid during cooking. This means that 2 pounds of beef can be browned in just one batch. Finally, the homemade chili powder uses a combination of toasted dried ancho chiles, chipotle chiles in adobo, and paprika, along with a blend of herbs and spices to round it out.

And most importantly, the chili needs to simmer for 1 1/2 to 2 hours to fully tenderize it. Make sure to stir in any fat that collects on the top of the chili before serving since it contains much of the flavor from the fat-soluble spices in the chile powder. Therefore, skimming the bright orange fat from the finished chili will rob it of flavor. For deep, richly spiced complexity, don’t remove the fat—stir it back in.

This goes against my grain, but we decided to follow the recipe, and the results were a deeply fragrant and intensely flavored chili. Personally I like more beans and some veggies such as red, yellow and/or green bell peppers and sliced mushrooms. So perhaps next time’ I’ll add those ingredients to this basic recipe—or not, because this was indeed a very good chili! I’ll just get my veggie quota from a side salad…

NOTES: Because we did not have regular tortilla chips at home and I was too lazy to run out and buy them, I used Red Hot Blues Tortilla Chips in the processed spice mixture, which in the end I think was a better choice anyway. Next time we make this chili, Russ suggested buying a chuck roast and grinding it ourselves… I guess he thinks we have nothing else to do 😉

ingredients

Best Ground Beef Chili

  • Servings: 6-8
  • Difficulty: time intensive
  • Print

INGREDIENTS

  • pounds 85 percent lean ground beef
  • plus 2 cups tablespoons water
  • Salt and pepper
  • ¾ teaspoon baking soda
  • dried ancho chile, stemmed, seeded, and torn into 1-inch pieces
  • ounce tortilla chip, crushed (¼ cup)
  • tablespoons ground cumin
  • tablespoon paprika
  • tablespoon garlic powder
  • tablespoon ground coriander
  • teaspoons dried oregano
  • ½ teaspoon dried thyme
  • (14.5-ounce) can whole peeled tomatoes
  • tablespoon vegetable oil
  • onion, chopped fine
  • garlic clove, minced
  • 1—2 teaspoons minced canned chipotle chiles in adobo sauce
  • (15-ounce) can pinto bean
  • teaspoons sugar
  • tablespoons cider vinegar
  • Lime wedges
  • Coarsely chopped cilantro
  • Chopped red onion

INSTRUCTIONS

  1. Adjust oven rack to lower-middle position and heat oven to 275 degrees. Toss beef with 2 tablespoons water, 1 1/2 teaspoons salt, and baking soda in bowl until thoroughly combined. Set aside for 20 minutes.
  2. Meanwhile, place anchos in Dutch oven set over medium-high heat; toast, stirring frequently, until fragrant, 4 to 6 minutes, reducing heat if anchos begin to smoke. Transfer to food processor and let cool.
  3. Add tortilla chips, cumin, paprika, garlic powder, coriander, oregano, thyme, and 2 teaspoons pepper to food processor with anchos and process until finely ground, about 2 minutes. Transfer mixture to bowl. Process tomatoes and their juice in now-empty workbowl until smooth, about 30 seconds.
  4. Heat oil in now-empty pot over medium-high heat until shimmering. Add onion and cook, stirring occasionally, until softened, 4 to 6 minutes. Add garlic and cook until fragrant, about 1 minute. Add beef and cook, stirring with wooden spoon to break meat up into 1/4-inch pieces, until beef is browned and fond begins to form on pot bottom, 12 to 14 minutes. Add ancho mixture and chipotle; cook, stirring frequently, until fragrant, 1 to 2 minutes.
  5. Add remaining 2 cups water, beans and their liquid, sugar, and tomato puree. Bring to boil, scraping bottom of pot to loosen any browned bits. Cover, transfer to oven, and cook until meat is tender and chili is slightly thickened, 1 1/2 to 2 hours, stirring occasionally to prevent sticking.
  6. Remove chili from oven and let stand, uncovered, for 10 minutes. Stir in any fat that has risen to top of chili, then add vinegar and season with salt to taste. Serve, passing lime wedges, cilantro, and chopped onion separately. (Chili can be made up to 3 days in advance.)

http://www.lynnandruss.com

toasting.anchos
Toasting torn ancho chili pieces.

sweating.onions
Cooking the chopped onion and garlic.

browning.meat
Browning the meat in the onion mixture.

ancho.mix.to.meat
Added the ancho chili and spice mixture to browned meat.

chili.before.oven
Just prior to cooking in oven for 2 more hours.

taste.test
A small taste test before putting into oven.

IMG_2848
The chili after cooking in oven for two hours on low heat.

We wanted to test the taste difference before, and then again after the chili cooked in the oven for a couple of hours. And not surprisingly, the fully cooked chili had a discernible depth of flavor intensity that the earlier chili did not possess.

Diced avocado, sour cream, and shredded Monterey Jack or cheddar cheese are also good options for garnishing. This chili is intensely flavored and can be served with tortilla chips and/or plenty of steamed white rice—although we enjoyed it with just a smattering of red onion and fresh cilantro.
plated.bowl1