Peruvian Hospitality, with a Taste of Pisco

Back in June, we were invited to the home of Peruvian-born and raised Giuliana and Miguel, both of whom met at medical university, after which they relocated to the states. Our first encounter with Giuliana was at friends Paula and Mike Graham’s house for their respective sons high school graduation party. With Russ’s command of the Spanish language, we hit it off pretty quickly.

She extended an invitation to us in June to dine at her house for an authentic Peruvian-style dinner, but unfortunately, Giuliana had to fly to Peru for a family emergency the night of the scheduled event. Nearly 3 months later we received another offer to host us for dinner, which we quickly accepted. With their proximity near the Graham’s, Paula invited us to enjoy cocktail hour first in their backyard over some select cheeses, nuts and olives on an unusually balmy October evening.

IMG_0566
The “pre”cocktail hour at the Graham’s.

You see, even though the invitation was for 7:30, it is considered impolite to arrive on time—a formality I find hard to adjust to (not so much Russ 😉 ). According to Peruvian custom, being an hour late is “fashionable,” though we kind of split the difference pulling into their driveway around 8:00 p.m. with bottles of wine and fresh flowers in hand.

IMG_0570
Giuliana selects a vase for the flowers while Miguel uncorks the wine.

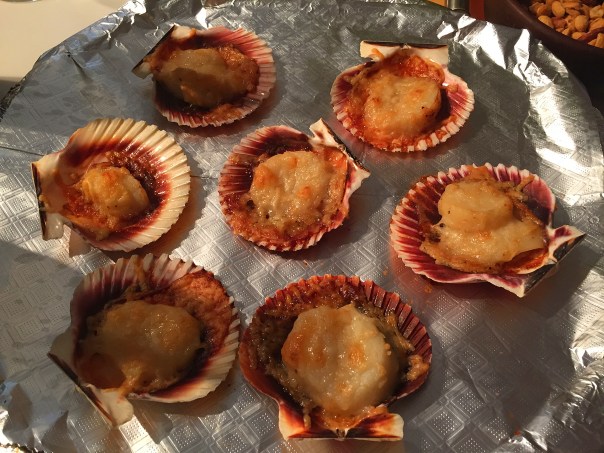
As soon as one enters, you can’t help but notice their comfortable home is full of bright colors and paintings from their native country. So without hesitation, the couple got the party started with some heavenly scallop appetizers, and a frothy glass of a pisco drink. What is pisco—other than very good? The story is an intriguing one…

IMG_0576

Pisco Portón is a super premium pisco, which is a Peruvian grape-based white spirit. It is crafted at Hacieda La Caraved, established in 1684 in Ica, Peru. Like all good things, pisco began as an act of rebellion. In 1641, the King of Spain—Philip IV—imposed heavy taxes on all wine produced in Peru. In response, his new world subjects dodged the onerous tax by distilling the year’s grape harvest. In hand-forged copper vats nearly four centuries ago, a new white spirit was born and christened pisco, a reference to the Port of Pisco from where this new spirit was exported. Pisco means ‘bird’ in the indigenous Quechua language. To this day, Peruvians call it their native spirit.

IMG_0575

While sipping our pisco-based drinks, Giuliana retrieved a few trays of cooked scallops with parmesan cheese from the oven that were baked right on sea shells for an artistic presentation.

IMG_0567

Dogs of the smaller variety always seem to gravitate to Russ, and their little collie, Rosa, was no exception. She found a very comfortable little nook at Russ’s feet by the bar stool.

IMG_0573

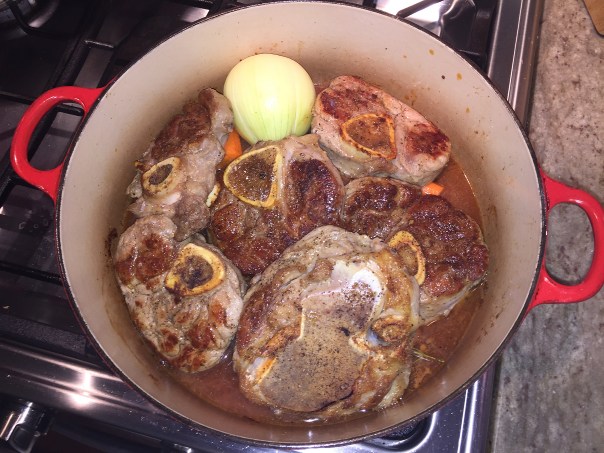
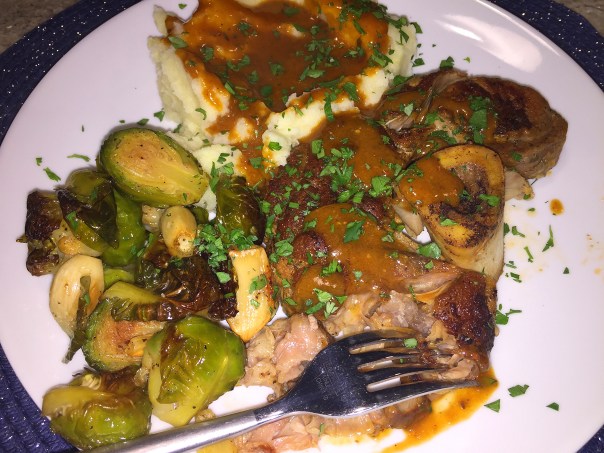
After some laughter and getting to know each other, it was time to move into the dining room for the Peruvian feast. The main attraction, for me at least, was the beautifully colored, and formed, mound of saffron rice and the shrimp, clam and squid stew with peas, along with a side of catfish fillets. The sauté was reminiscent of a Zarzuela. Other accompaniments included sides of corn, and an interesting salad composed of lettuce, hard boiled eggs, olives and cooked potato slices in a spicy pepper and cheese sauce.

IMG_0578

IMG_0582

IMG_0585

And even though I’m not a dessert eater, the crowning star of the show was the gorgeous homemade flan! There were also two citrus-based desserts, one with a lemon foam, and the other with an orange foam topping. (You can see I have no idea what they are called!)

IMG_0589

IMG_0588

We had an absolutely lovely evening, one we finally had to end because it was getting late and we still had a hike to get home. So before we said our goodbyes, I made sure to take a few snapshots of the ladies and then the gentlemen.

IMG_0592

IMG_0596

Until we pisco again, Chau…

The Sauce is Downright Sinful…

With a chill in the air and daytime highs in the 60’s, and night temps in the 40’s and 50’s, it was perfect weather to jump back into a braise-craze frenzy. And what better way then to showcase lovely farmer’s market veal shanks. By no means cheap, sometimes you have to cut loose a little and treat yourself, right?

Thumbing through one of our culinary magazines I happened across an advertisement for Wolf Gourmet’s Multi-Function Cooker that featured this Slow-Cooked Osso Buco with Mustard & Horseradish Gravy recipe. Need I say more? Osso Bucco is one of the more decadent gustatory pleasures, as the slow braise produces the most tender, succulent results accompanied by a rich, deeply flavored au jus… almost sinfully so… yet with no butter or cream.

IMG_4176

Making this braised classic in the Wolfe multi-function cooker lets you sear, slow-cook, and simmer the sauce all in the same pan. But in lieu of owning said cooker, we made the dish in our beloved Big Red—an enameled cast iron pot—which also allows the same functions (the directions below are based on using our pot.) No need to purchase a fancy cooker that you’ll have to try and find space for…

One huge positive about using Big Red instead of the Wolfe gadget was the shanks were fall-apart tender in half the time, only two hours as opposed to four! But God forbid you “discard the solids” in Step 4. Not in our house—that’s some mighty fine vittles you’d be tossing away. Instead, fish out the garlic cloves (which are brimming with healthy nutrients), mash them and add to the gravy fixin’s; and save the onions and carrots to serve with dinner or with any leftovers.

IMG_4146
We did not discard the onion, carrots or garlic cloves, they were just way to succulent too dispose of.

Yes, you will need a good portion of an afternoon to prep and cook this feast, but your family and friends will be duly impressed. During the cooking phase, you’ll have a few hours to attend to other pleasures. But trust me, the savory aromas wafting through the house will drive you crazy with anticipation.

For those of you a bit skittish about veal, the meat is tender, leaner than poultry, has just as much protein as beef, and is every bit as easy to cook at home as a steak or pork chop. Because of the stigma of raising caged animals, many customers shy away from veal. Happily, these days there are more humane options for raising veal—the calves are no longer chained to individual cages. Some are even raised free-range, on pasture—like the ones we got from the Amish farmer’s market.

Serve over creamy garlic mashed potatoes along with roasted root vegetables, or as in our case, roasted Brussels sprouts. With all it’s layers of flavor, the gravy was out-of-this world fabulous—we just wish there had been more of it. The recipe is sooo good, it’ll render you “Slap your Pappy” happy!

IMG_4127

Ingredients

  • 2 Tbs. olive oil
  • 4 veal shanks (about 4 lb.)
  • Kosher salt and freshly ground black pepper
  • 1 cup homemade or lower-salt canned chicken broth
  • 1 cup dry white wine (such as Sauvignon Blanc)
  • 2 Tbs. tomato paste
  • 2 carrots, peeled and cut in quarters crosswise
  • 1 medium yellow onion, peeled, root trimmed but left intact, and quartered lengthwise
  • 3 cloves garlic, smashed
  • 3 sprigs fresh thyme
  • 1 large bay leaf
  • 3 allspice berries
  • 2 Tbs. brandy
  • 1/2 tsp. prepared horseradish
  • 1/2 tsp. grainy prepared mustard
  • 1 tsp. all-purpose flour
  • 2 Tbs. sour cream
  •  2 Tbs. minced fresh flat-leaf parsley

Directions

  1. Set a stove-top burner to high and heat the olive oil until shimmering. Pat the shanks dry with paper towels, and sprinkle generously with salt and pepper.
    IMG_4128
  2. Sear the shanks in the pot until deep golden brown on one side, about 5 minutes. Turn and sear the other side, about 5 minutes. Reduce the heat to medium, remove, and set aside the shanks.
    IMG_4132
  3. Whisk the broth, wine, and tomato paste and add to the pot. Bring the broth mixture to a simmer, scraping the bottom to loosen any browned bits.
    IMG_4136
    IMG_4137
  4. Turn the burner to low and add the carrots, onion, garlic, thyme, bay leaf, and allspice.
    IMG_4138
  5. Nestle the shanks on top of the vegetables, cover, and cook until fall-apart tender, about 2 hours (4 hours if using the multi-function cooker.)
    IMG_4139
  6. Transfer the shanks to a cutting board and tent with foil to keep warm. Strain the contents of the vessel through a sieve into a heatproof bowl and discard the solids. Skim any fat from the top of the strained liquid (or use a fat separator).
    IMG_4145
  7. Return the liquid to the pot, and turn to medium-high. Bring to a boil and then simmer rapidly until reduced by half, about 10 minutes.
    IMG_4148
  8. Whisk in the brandy, horseradish, and mustard. In a small bowl, mix the flour into the sour cream, stir in a few tablespoons of the sauce, and then pour the sour cream mixture into the sauce, whisking vigorously to blend.
    IMG_4140
    IMG_4172
  9. Cook over low, stirring occasionally, for 5 minutes to blend the flavors. Meanwhile, transfer the shanks to 4 plates. Serve with the gravy and a sprinkling of parsley.
    IMG_4173

IMG_4177

Presented by Wolf Gourmet

Crusty Cleverness

Perfect for those friends or family that abide by a gluten-free diet (or don’t), this Asparagus and Two-Cheese Quiche with Hash-Brown Crust with fresh green asparagus and tarragon, is perfect for a Sunday brunch, anytime lunch, or light dinner. Get all the goodness of hash browns and a rich Fontina and goat cheese egg custard in this unexpected quiche.

IMG_4203

You’ll need a 10″ cast iron skillet or an oven-proof carbon steel pan for best results. Make sure to take your eggs out of the fridge ahead of time to come to room temperature because they whip up to a greater volume when they’ve had a chance to warm up a bit. Remove the eggs from the refrigerator about 30 minutes before use, or put them in a bowl of warm water while assembling the other ingredients.

Even though the original directions did not indicate to soak the potatoes in water after shredding, based on some reviewer’s comments it made sense because the process will prevent the potatoes from turning gray due to the oxidation of the starch in the spuds. After a few minutes in the cold bath, drain thoroughly and add a 1/2 teaspoon of lemon juice before squeezing out the excess water. Next time I may even use a second towel and repeat the squeezing process to ensure very dry potatoes.

Some reviewers wrote that they substituted frozen hash browns which would save several steps, but I’m a purist at heart (for the most part) and wanted to use the real McCoy. The biggest difference is the flavor. Frozen potatoes never taste nearly as good as fresh ones, although I’m sure to hear from detractors of that statement.

Also, I placed the pan of potatoes in the oven after the stove top method to brown more evenly thus creating a light brown crust on top, again vis-a-vis a reviewer’s comment and not part of the author’s directions. (These steps are included below.) Another oft remarked comment was the overwhelming taste of the tarragon. I happen to love that herb, but we barely had enough left at the end of the season in our garden to cobble together about 1 1/2 teaspoons worth, so keep that in mind when assembling yours.

Now let’s talk time and temperature. After browning the crust in the 400 degree oven, I lowered the temp to 350°F and baked the quiche for 35 minutes as per the instructions. It was no where near set, so I let it go another 15 minutes before I took it out, total time = 50 minutes. And the center was STILL a bit undercooked and could have stood another 5 minutes in the oven. In hind sight, I think I may have accidentally added 1/4 cup more half-and-half than the recipe calls for, which of course made the custard looser…

Every oven is different and our top bay needs a professional adjustment. Knowing that, I should have left the temp at 400°F. So it’s up to you what temperature you want to cook at, but just start keeping an eyeball on doneness after about 40 minutes. Just remember to pull the skillet out with a towel or hot pad because the handle will be scorching hot!

In the end, the quiche was quite good and quite large! We will be eating it for days, so it’s probably best to serve when you have company, or more family members at the table.

Do Ahead
Quiche can be made up to 1 day in advance. Cool to room temperature, then wrap with plastic and refrigerate. To reheat, bake at 325°F until warmed through, 15 to 20 minutes.

IMG_4178

Ingredients

  • 4 medium russet potatoes (about 2 pounds), peeled
  • 1 1/2 teaspoons kosher salt, divided
  • 3/4 teaspoon freshly ground black pepper, divided
  • 1/2 teaspoon fresh lemon juice
  • 2 tablespoons vegetable oil
  • 3 tablespoons unsalted butter, divided
  • 4 medium shallots, thinly sliced
  • 6 large eggs, room temperature
  • 1 1/4 cups half-and-half
  • 1 teaspoon mustard powder
  • Pinch of grated nutmeg
  • 1 tablespoon finely chopped tarragon (or less, depending on preference)
  • 5 ounces Fontina cheese, grated (about 1 1/2 cups)
  • 4 ounces fresh goat cheese, crumbled (about 3/4 cup)
  • 1/2 to 3/4 bunch asparagus, ends trimmed, cut into pieces. (I suggest thin asparagus.)

Directions

  1. Preheat oven to 400°F. Using the coarse grater disk on a food processor (best option) or the largest holes on a box grater, shred potatoes.
    IMG_4180
  2. Place hash browns in a large bowl of very cold water to remove some of the starch and to avoid discolorization. Drain, add lemon juice and transfer to a clean dishtowel. Gather together ends of towel, and thoroughly wring out excess liquid over the sink—repeating with another dry towel if necessary.
    IMG_4183
  3. Place potatoes in large bowl, toss with 1 tsp. salt and 1/2 tsp. pepper and set aside.
    IMG_4185
  4. Heat oil and 2 Tbsp. butter in a 10″ cast-iron skillet over medium-high until butter is melted. Add potatoes and immediately start forming into a crust by pushing potatoes flat against bottom and sides of pan with a 1/2-cup dry measuring cup. Continue cooking, pressing potatoes up sides of pan if they start shrinking, until potatoes are bound together and bottom of crust is starting to brown, about 10 minutes.
    IMG_4187
  5. Remove pan from burner and put into oven for 15 minutes to lightly brown the crust on the top side.
    IMG_4190
  6. Meanwhile, melt remaining 1 Tbsp. butter in a small skillet over medium heat. Add shallots and sauté until translucent, 5-6 minutes; set aside.
    IMG_4189
  7. Whisk eggs, half-and-half, mustard powder, nutmeg, remaining 1/2 teaspoon salt, and remaining 1/4 teaspoon pepper in another large bowl. Whisk in tarragon and set aside.
    IMG_4196
  8. Sprinkle Fontina cheese, goat cheese, and sautéed shallots evenly over bottom of crust, then pour in egg mixture.
    IMG_4192
    IMG_4193
    IMG_4194
    IMG_4197
  9. Arrange asparagus decoratively on top. (Next time I’ll get a bit more artistic and arrange in a star or circular pattern.) Bake until quiche is set and crust is well browned, 45-55 minutes. Let cool to room temperature before cutting into wedges and serving from the pan.
    IMG_4208
    The entire skillet can be placed on a trivet at the table for a rustic presentation.

IMG_4215
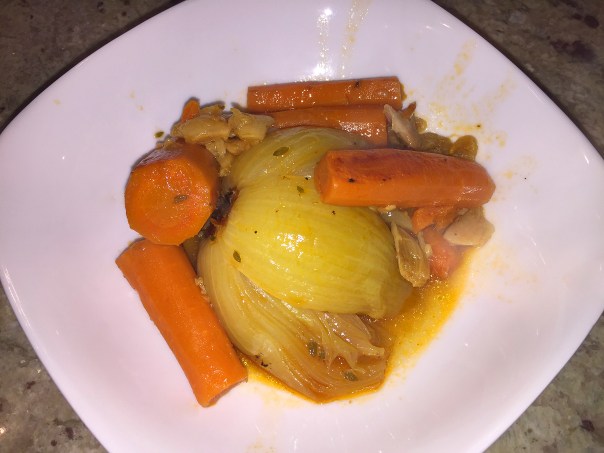
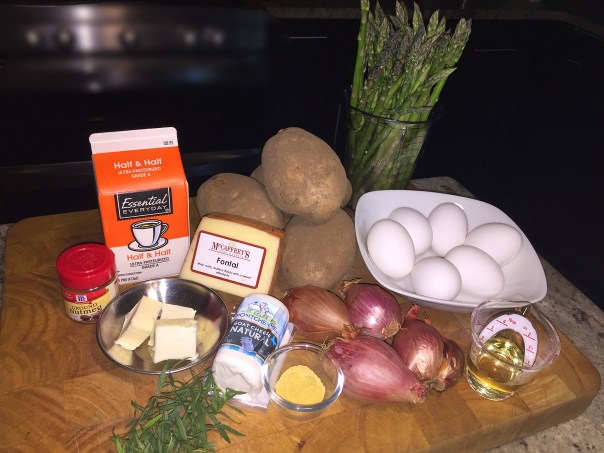
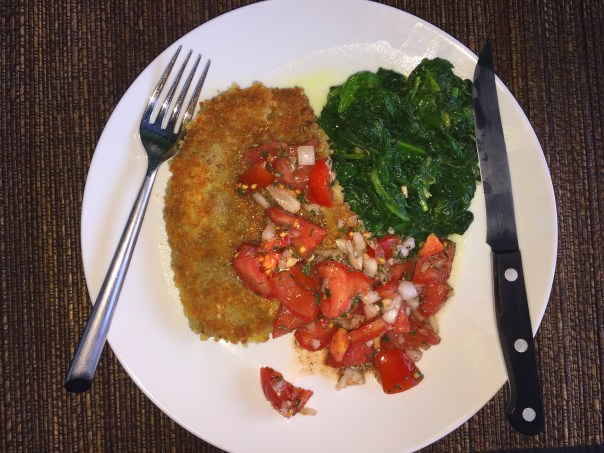
Serve with a side salad or fresh fruit to complete your meal.

Adapted from a recipe by Anna Stockwell, Epicurious

Soup: Simple Yet Sophisticated

Forget about popping vitamin A pills. We’re gonna get down with the real deal: CARROTS. They provide vitamin A and a host of other impressive health benefits including beautiful skin, cancer prevention and anti-aging. And remember when your mom said to eat your carrots to help maintain good vision? There’s some truth in the old wisdom that carrots are good for your eyes.

carrots

Carrots are perhaps best known for their rich supply of the antioxidant nutrient: beta-carotene, which has been shown to protect against macular degeneration and senile cataracts. The word “carrot” has its origins in the Greek word “karoton,” as “kar” describes anything with a horn-like shape. Many believe carrots were named after beta-carotene, which is found in abundance in this vegetable. However, the opposite actually holds true; beta-carotene was named after carrots.

And just as impressive, vitamin A and antioxidants protect the skin from sun damage; while deficiencies of said mineral cause dryness to the skin, hair and nails. Plus, vitamin A prevents premature wrinkling, acne, dry skin, pigmentation, blemishes and uneven skin tone. A downright superstar in my humble opinion.

IMG_4231
As an additional topping, we sprinkled a bit of spicy pepitas on the surface.

In addition to this root vegetable’s other benefits, it’s no surprise that in a Harvard University study, people who ate five or more carrots a week were less likely to suffer a stroke than those who ate only one or less of these orange wonders a month. So strap on your feedbag and indulge in a bowl of this luscious, healthy soup.

IMG_4198
I doubled the batch when making the soup. The recipe below is for a single batch.

Ingredients

  • 2 tablespoons (1/4 stick) butter
  • 1 cup chopped white onion
  • 1 pound large carrots, peeled, cut into 1/2-inch dice (about 2 2/3 cups)
  • 2 1/2 cups low-salt chicken broth
  • 1 1/2 teaspoons cumin seeds
  • 1 tablespoon honey
  • 1 teaspoon fresh lemon juice
  • 1/8 teaspoon ground allspice
  • 1/2 cup plain yogurt, stirred to loosen

Directions

  1. Melt butter in large saucepan over medium-high heat. Add onion; sauté 2 minutes.
    IMG_4209
  2. Mix in carrots. Add broth; bring to boil. Reduce heat, cover, and simmer until carrots are very tender, about 20 minutes.
    IMG_4216
  3. Stir cumin seeds in small skillet over medium-high heat until fragrant, 4 to 5 minutes; cool. Finely grind in spice mill.
    IMG_4201
    IMG_4202
  4. Remove soup from heat. Puree in batches in blender until smooth. Return to same pan.
    IMG_4217
    IMG_4219
  5. Whisk in honey, lemon juice, and allspice. Season with salt and pepper.
    IMG_4220
    Even though the instructions didn’t call for it, I added in half of the toasted cumin powder at this point, saving the remainder as a topping.
    IMG_4222
  6. Ladle soup into bowls. Drizzle yogurt over; sprinkle generously with cumin.

IMG_4236
With your spoon, swirl in a dollop of yogurt and some smoked cumin.

Recipe by The Bon Appétit Test Kitchen

Brats Taste the Wurst, In a Good Way

For much of the country, when Autumn breezes in, the outdoor temps cool, daylight wanes, and our culinary expectations shift away from Summer’s bounty toward an exciting hardier fare. Fall’s harvest is where we look for vegetables that are “good keepers,” such as the fundamentals in this Bratwurst with Cabbage and Apples recipe.

No doubt, fully-cooked sausages are a great choice for speedy weeknight dinners. Pairing them with cabbage braised in beer plus vinegar, cloves, and jelly, you’ve got yourself your own mini Oktoberfest in no time at all!

I wanted to use up some recently purchased bratwurst (a type of German sausage made from veal, beef, or most commonly pork), so I located a Fine Cooking recipe with the German sausage as the main ingredient. But lacking many of the other elements, I substituted what I did have on hand instead of running to the grocery store.

IMG_4011

The recipe below is based on what I strategically threw together. However, if you prefer to go the traditional route, the original fixings are mentioned in (italicized parentheses) next to each item. When pairing your beverage, the beer or wine in a recipe is a good candidate to serve alongside it. In this recipe, the lager will have a nice spice and even slight sweetness to stand up to the similar flavors in the food.

On another note, Russ is bound and determined to make his own sausages this year, so stay tuned for a future blog about our own homemade links—with hopeful expectations of better than the “wurst.”

Aufessen!

IMG_3996

Ingredients

  • 3 Tbs. olive oil
  • 2 leeks, white and light green parts only, halved and thinly sliced (1 medium yellow onion)
  • Kosher salt
  • 1/2 head, about 6 cups savoy cabbage, thinly sliced (red cabbage)
  • 1 large Honey Crisp apple, peeled and chopped (Granny Smith apple)
  • 2 oz. (4 Tbs.) unsalted butter, cut into pieces
  • 1/4 cup lager-style beer
  • 1/4 cup lime marmalade (red currant jelly)
  • 1/4 cup red wine vinegar
  • 1/8 tsp. ground cloves
  • Freshly ground black pepper
  • 4 bratwurst, knockwurst, or other cooked sausage of your choice
  • Mustard, for serving—Dijon preferred

Directions

  • Heat 2 Tbs. of the oil in a large skillet over medium heat. Add the leeks and a pinch of salt, and cook, stirring occasionally, until softened, about 3 minutes.
    IMG_4004
  • Add the cabbage and apple, and cook, tossing occasionally, until softened, about 5 minutes.
    IMG_4005
  • Stir in the butter, beer, jelly, vinegar, cloves, 1 tsp. salt, and a couple of grinds of pepper. cover and cook until the cabbage is tender, about 10 minutes.
    IMG_4008
    IMG_4009
  • Meanwhile, heat the remaining 1 Tbs. oil in a medium skillet over medium heat.
    IMG_4010
  • Add the sausages and cook, turning occasionally, until browned and heated through, 6 to 8 minutes.
  • Serve the cabbage with the sausages and some mustard on the side, if you like.


A Little Spice Is Nice

About a year ago I wrote a blog about a Creamy Corn Chowder recipe that was to die for! BUT, it took most of an afternoon to make. So with expediency in mind, here’s one—Spicy Corn Chowder—that’s just about as tasty, yet takes a fraction of the time from start to finish. Thanks to David Bonom of Fine Cooking for the instructions.

Bacon makes this creamy dish—with just the right amount of heat from a bit of chipotle chili powder—the ultimate early autumn comfort food. Don’t substitute frozen corn here; the flavor of this quick chowder depends on freshly cut kernels. Yes, fresh-picked corn is near it’s end here in the northeast, so take advantage of the last crop of the season.

fresh.corn.cobbs

Sweet corn is one of summer’s simplest, purest pleasures. A fresh-picked ear, grilled to caramelized perfection and lightly buttered, offers incredible, complex sweetness, an intoxicating texture and plenty of nutrition benefits to boot.

But many people have convinced themselves that sweet corn is bad (oh those dreaded carbs). That’s a shame. It’s easy to take a few real nuggets of fact and use them to come to a distorted conclusion about this super-delicious summer veggie. An ear of corn has about the same number of calories as an apple and less than one-fourth the sugar.

Some reviewers added a jalapeño pepper, paprika, cayenne, and chili powders instead of the chipotle powder, which would certainly give a zing, but I think the chipotle chile powder really makes this soup stand apart from others, without making it too spicy. If you prefer a milder kick, use a 1/4 teaspoon of the spice instead of a 1/2 teaspoon.

Although corn lovers often profess to have favorite varieties, variety is far less important than freshness—any corn can be ruined if it’s old. Nor is color a key to quality. Yellow, white, bi-color, it doesn’t really matter. Avoid corn with dry, pale husks and silks that are desiccated where they enter the cob. If pricked, kernels should squirt whitish juice. As for choosing the best-tasting corn, don’t buy a cob that’s more than 24 hours out of the field, that’s why it’s best to purchase at a farm stand. But hurry, the season is nearly done!


IMG_4091

Ingredients

  • 1/2 lb. thick-cut applewood-smoked bacon (6 slices), cut crosswise into 1/2-inch pieces
  • 1 medium yellow onion, cut into 1/2-inch dice
  • 3 scallions, thinly sliced
  • 2 celery ribs, cut into 1/2-inch dice
  • 1 red bell pepper, stemmed, seeded, and cut into 1/2-inch dice
  • 1 tsp. fresh thyme
  • 5 cups fresh corn kernels (from 10 medium cobs)
  • 1/2 tsp. pure chipotle chile powder
  • 2 cups half-and-half
  • 2 cups lower-salt chicken broth
  • 1 large russet potato, peeled and coarsely grated
  • Kosher salt
  • Grated Monterey Jack, for garnish (optional)

Directions

  1. Cut the kernels off the corn cobbs with a large, sharp knife on a rimmed baking sheet to prevent the kernels from scattering around your kitchen.
    IMG_4095
  2. Cook the bacon in a 5- to 6-quart Dutch oven or other heavy-duty pot over medium-high heat until browned and crisp, about 5 minutes. With a slotted spoon, transfer the bacon to a paper-towel-lined plate. Pour off and discard all but 2 Tbs. of the bacon fat.
    IMG_4096
  3. Return the Dutch oven to medium-high heat and add the onion, half of the scallions, the celery, bell pepper, and thyme. Cook, stirring occasionally, until the vegetables begin to soften, about 5 minutes.
    IMG_4097
  4. Add the corn and cook until softened, about 2 minutes. Stir in the chipotle powder and cook for 30 seconds.
    IMG_4099
  5. Add the half-and-half and chicken broth and bring to a boil. Add the grated potato, lower the heat to medium, and cook, covered, until the potato is cooked through, about 10 minutes.
    IMG_4098
    IMG_4101
  6. Season to taste with salt and transfer to 4 large soup bowls. Garnish with the reserved bacon and scallions, and the cheese, if using, and serve.

IMG_4108

When Unexpected Company Comes, Roast a Chicken!

With only two days notice that we would have overnight guests on a recent Tuesday, I quickly switched our weekly menus so that the Roast Chicken with Carrots, Baby Potatoes, Leeks and Bacon dish would be our feast for dinner. Never mind that we never made it before, that’s just the way we roll. (Luckily we’ve had very few disasters.)

IMG_4075

Nephew Desi and his recent bride Stacey, along with their way-too-cute 11-month-old son Aspen, were making their way back to Florida after two weeks in the Northeast for their wedding, and our house was conveniently located in the path toward the auto-train in Lorton, VA. (They stayed up with us pretty late that night and had to depart before the crack of dawn to drive for hours in rush hour traffic, ugh.)

IMG_4074

While the number of steps might seem a bit daunting, it is actually an easy recipe where everything goes in one pot, cooks for an hour or so in the oven, and voila, dinner! Little Aspen had just started walking so Stacey was keeping him occupied while he played peek-a-boo under our island, and Desi helped me with some of the prep.

IMG_4064

IMG_4067

The end result produced a perfectly moist chicken, although we could have probably left it in the oven a bit longer so the skin became even crispier. But it was already 8:00 and dark out, and since we were dining al fresco, we figured we shouldn’t delay dinner any longer than necessary.

In hindsight I realized I missed two steps. The potatoes should have been cut in half (or quarters), but I left them whole, although they were totally cooked through. And I also neglected to sprinkle the veggies with the chopped parsley, but nobody seemed to notice the omission.

Everyone loved the meal, and Aspen couldn’t get enough of the chicken! This rates a place in our treasured roasting recipes…

IMG_4059

Ingredients

  • 1, 3-4 whole chicken
  • Kosher salt and freshly ground black pepper
  • 2 Tbs. finely chopped fresh flat-leaf parsley, plus 10 small sprigs
  • 4 fresh or dried bay leaves
  • 1 Tbs. finely chopped fresh thyme, plus 4 sprigs
  • 3 large leeks, white and light green parts halved lengthwise, then sliced crosswise into 1/2-inch pieces and rinsed; plus dark green parts from 1 leek, rinsed and reserved
  • 3 strips thick-cut bacon, cut crosswise 3/8-inch thick
  • 1 Tbs. olive oil
  • 2 large cloves garlic, thinly sliced
  • 1 lb. carrots, peeled and cut into 1-inch pieces
  • 1 lb. baby multi-colored potatoes, cut in half or quartered
  • 1 1/2 cups chicken broth, preferably homemade
  • 2 Tbs. unsalted butter, softened

Directions

  1. Discard the giblets from the chicken, trim off any excess fat from the cavity and neck, and pat dry with paper towels.
  2. Generously season the chicken inside and out with 1 Tbs. salt and 1/2 tsp. pepper.
  3. Stuff the cavity with the parsley sprigs, 3 of the bay leaves (if fresh, crush slightly), 2 sprigs of thyme, and the dark leek greens.
  4. Tuck the wings behind the neck, using the wingtips to secure any loose neck skin if With only two days notice that we would have overnight guests necessary. Tie the legs together with string. Let rest at room temperature for 20 to 30 minutes.
    IMG_4062
  5. Meanwhile, position a rack in the center of the oven and heat the oven to 450 degrees.
  6. In a 6-quart round roaster, cook the bacon in the oil over medium-high heat, stirring occasionally, until it begins to brown, about 7 minutes.
    IMG_4063
  7. Leaving the bacon in the pan, spoon out and reserve all but 1 Tbs. fat.
  8. Reduce the heat to medium and add the leeks, garlic and remaining bay leaf and thyme sprigs, and season lightly with salt and pepper.
  9. Cook stirring occasionally until the leeks are soft and translucent, 5 to 7 minutes. Transfer to a plate.
  10. In the same pan, arrange half of the carrots and potatoes in an even layer, seasoning very lightly with salt and pepper, then scatter the leek mixture over the top. Layer the remaining carrots and potatoes over the leeks with more slat and pepper. Pour the broth over the vegetables.
    IMG_4069
    IMG_4071
  11. Pour 1 Tbs. of the reserved bacon fat into the cavity of the chicken. Rub the softened butter over the bird’s skin and sprinkle with the chopped thyme. Set the chicken, breast side up, on the vegetables.
    IMG_4072
  12. Roast the chicken until an instant-read thermometer inserted into the thickest part of the thigh registers 165 to 170 degrees, about 1 hour.
    IMG_4086
  13. Transfer the chicken to a platter, remove the string, cover loosely with foil, and let rest for about 15 minutes.
  14. Meanwhile, discard the thyme sprigs and bay leaf and keep the vegetables warm in the oven.
    IMG_4089
  15. Sprinkle the carrots and potatoes with the chopped parsley, arrange them around the chicken and serve.
    IMG_4088
    After the bird rested a while, Russ started carving the meat.

Recipe found in an All-Clad magazine advertisement

Another Historic Newtown Gem

Imagine a building dating back to 1836, the site of the only civil war “battle” fought in Bucks County. Now imagine that same building transformed into an upscale contemporary restaurant with the atmosphere and cuisine of a Center City fine dining establishment located right in historic Newtown, PA. Welcome to The Saloon

Sitting on a side porch is an old-fashioned carriage, a relic of the old general store from the early 1900’s. While the outside of the building has remained pretty much the same over the years—it has transitioned from a tavern to a general store, moving and storage business, a lawn equipment store, a speak easy (The Maennerchor Club), the Township House and eventually The Saloon—the inside has changed drastically with the times.

exterior

Although our reservations this balmy Friday evening were for seating on their spacious outdoor patio (which they added about 5 years ago), the reception area is outfitted with cushioned seating and modern low-lighting sconces augmented by soft votive candles. This ambiance carries into the dining areas, where the tables are covered in linens and the walls are painted in a blend of maroon and varying lighter colors, providing a contemporary upscale atmosphere.

IMG_4024

As for the menu, it is extensively Italian-American complemented by an ample selection of seafood items that include fresh fish. There is also a “lighter-fare” menu and a few nightly specials. While we tend to favor BYOs, they have a full-scale bar that features the martini in about every combination possible, with the Stoli Doli (vodka  with pineapple) being the most popular.

Admittedly our waiter was a bit of an odd duck, but certainly friendly and capable enough. While waiting for our glasses of wine, we received a bread basket (nothing special) and perused the menu. For starters, from the Light-Fare menu, we decided to split the Crab-Stuffed Portabella Mushroom chock-full of jumbo lump crab meat and topped with aged provolone and a pesto drizzle. Not only was it fabulous, it was ginormous!

IMG_4028

Under the fish selections they offer a choice of either salmon or tilapia, so I went with the Olivia style salmon sautéed with black and green olives, zucchini and roasted red peppers in a white wine sauce. Portions were adequate and the fillet was perfectly cooked and tender.

IMG_4030

Russ wasn’t as quick to decide but finally settled on Chicken Scarpariello sautéed with Italian sausage, hot and sweet peppers bathing in a roasted garlic sauce. He enjoyed the mix of ingredients and the melding of flavors. Instead of a side of pasta, we both chose an accompaniment of sautéed vegetable medley.

IMG_4032

IMG_4034

They have been more of a destination restaurant but with all of the recent building on Sycamore Street (i.e. The Promenade), it is much more pedestrian-friendly—however, almost 5 miles from home, it’s not necessarily walkable for us. We use to frequent this establishment often in years past, but it’s been quite some time since we’d been back. But the plan is to make sure we don’t let that happen again…


A Cuppa Joe and a Taste of the Arts

A Langhorne Borough mainstay, the Langhorne Coffee House sits on the corner of Bellevue and Maple in the center of town in the idyllic Bucks County, PA neighborhood. Dating back to the 1700s this area was known as Four Lanes End—a name that derives from the fact that the site was at the crossroads for travelers from Philadelphia to the Delaware River and Trenton, New Jersey.

coffee.house.exterior

The quiet town of Langhorne played a small part in the history of the Revolutionary War. Beleaguered patriots fled across New Jersey in the winter of 1776 where the NJ Legislature then met in Langhorne. According to Langhorne and Vicinity in Olden Times by Samuel Eastburn “… they met in the house of Gilbert Hicks at Four Lanes End to consider the state of the country.” And this is precisely the building that now houses the aforementioned coffee house.

Although we’ve lived in Langhorne for nearly 6 1/2 years, Russ and I only ate breakfast (wildly popular) there once, and never lunch. So when good friend Paula Graham mentioned she’d like to take me out for a retirement luncheon, the coffeehouse immediately came to mind. On a late-September balmy Friday we made a quick dash over and I made the decision to sit indoors so Paula could get enjoy the full ambience of the place.

IMG_6562
Paula holds one of their mismatched mugs aptly inscribed with a “Friends” message.

We chose a table by the self-serve beverage station that offers a mixed bag of mugs, a selection of fresh-brewed coffee, every variety of loose leaf tea and bags, hot sauces galore, with a selection of accompanying condiments. All smiles, the waitstaff is very friendly without rushing you giving us time to catch up.

IMG_6558

At one point early in the conversation, Paula noticed she forgot to put her rings on before she left home. Shortly thereafter, I was ready to start snapping some pics for this blog when I realized I left my phone at home. Paula commented “that’s even worse than forgetting your rings!”

We chatted away for quite awhile before placing orders of nearly the same thing! The stuffed tomato salad appealed to both of us, mine with tuna, Paula’s with egg; each coming with a slew of pickle slices and a small bag of potato chips. While the meals are nothing super-fancy or out of the ordinary, the food is ample, well-made and freshly prepared.

IMG_6565

IMG_6563

Nearly two hours had gone by when we noticed they were closing down for the day, so we headed for the door. Our waitress said goodbye but then quickly shouted “Wait, you DO have to pay!” Never having been given a tab, it didn’t occur to us that we hadn’t paid. Apparently that is more common than one would think…

IMG_6567

This popular little dining spot has both interior and exterior seating (when the weather allows) serving breakfast and lunch until 2:00 p.m. Local artist’s display their wares for sale on the walls and windowsills. The first Friday of every month from 6-10 p.m. is Artists on the Avenue, the coffee house’s monthly Artist Series. Each month a new fine art exhibition is executed and the artist(s) featured that particular month attends the opening reception for a meet and greet. I’m hoping to finally check out one of those very soon… perhaps even be the featured artist one day?


Power to the Pumpkin Seed

The approach of Fall was nearing with visions of pumpkins dancing in our heads (oops, wrong month for that expression) and one of our favorite Autumnal snacks is pumpkin seeds. So the minute Russ and I laid our eyes on this Sweet and Salty Pumpkin Seed Clusters recipe in a lifestyle magazine, we knew we had to make them. But it should come with a warning – you will NOT be able to stop eating these! The intoxicating combination of salty, honey sweetness, and pumpkin pie spices is seriously addictive.

IMG_4001

Fortunately these delicious little clusters are a relatively healthy treat because pumpkin seeds are one of the best plant sources of zinc, a mineral that is important for optimum immune function. Yes, there is refined sugar and honey in them, so you must be somewhat cognizant of how many you are consuming—but it will be difficult.

Also known as “pepita”—a Mexican Spanish term, these shell-free seeds are flat and oval in shape, and have a greenish color. Unlike the hard white seeds from a carving pumpkin, most pumpkin seeds bought from the supermarket do not have a shell, so use the raw green ones for the recipe. Not hard enough or tough enough to be called a brittle, these morsels have more of a cereal cluster consistency with a tad more crunch.

There are roughly 151 calories in an ounce, mainly from good fat and protein; and they are a great source of dietary fiber, woohoo! Another plus—animal studies have shown that pumpkin, pumpkin seeds, pumpkin seed powder and pumpkin juice can reduce blood sugar. This is especially important for people with diabetes, who may struggle to control their blood sugar levels.

And if like me you have trouble sleeping, you may want to eat some pumpkin seeds before bed. They’re a natural source of tryptophan, an amino acid that can help promote sleep—although it’s hard to imagine how these exciting little clusters could encourage the Zzzzs…

I made a double batch first time out of the gate and was glad I did, we loved them! Apparently so did Russ’s coworkers. I sent a small bunch to work with him, and within hours of his departure he emailed me asking when I planned to post the blog because his colleagues wanted the recipe. My guess is, you’ll love them too!

IMG_3989

Ingredients

  • 1 cup raw pumpkin seeds
  • 2 tablespoons honey
  • 2 tablespoons sugar
  • 1 teaspoon ground cinnamon
  • 1/4 teaspoon ground nutmeg, preferably fresh
  • 1/4 teaspoon ground ginger
  • 1/2 teaspoon sea salt
  • Pinch of ground cloves

Directions

  1. Preheat oven to 350 degrees. Line a rimmed baking sheet with parchment paper or a silicone baking sheet.
  2. In a medium bowl, toss together the pumpkin seeds, honey, sugar, cinnamon, nutmeg, ginger, cloves and salt until everything is thoroughly combined.
    IMG_3991
  3. Spread the mixture onto the prepared baking sheet and bake for 15 minutes, rotating the pan front to back halfway through the cooking time for even browning.
    IMG_3993
  4. Let the pumpkin seeds cool completely before breaking into clusters. Package them in a sealed jar or bag for gifting. Can be kept for up to 1 week (if they last that long!) in a sealed container.
    IMG_3995


Chicken Thighs with an Asian Twist

This Asian Chicken and Rice Noodle Salad is quick, easy and delicious. Perfect for warm evenings when you don’t want to heat up the kitchen or mop your brow. Although this salad may look like it’ll feed a small army, the rice noodles and shredded vegetables are very light, and the sweet, sour, and slightly spicy vinaigrette makes you want to keep eating.

I inadvertently tossed out the fennel fronds so I minced up some fresh chives to use as a garnish instead; plus topped with a smattering of chopped peanuts to add a nice crunch factor. And the grocery store was not carrying Napa cabbage went we went food shopping, therefore we bought a Savoy cabbage that worked well as a replacement. If you want to amp up the spiciness, just add more hot red peppers.

We enjoyed the leftovers for lunch the next day—just make sure to add the peanuts, if using, just before you eat the salad because they do not refrigerate well and loose their crunch.

IMG_3796

Ingredients

  • 1/2 cup distilled white vinegar
  • 3 Tbs. granulated sugar
  • 2 fresh long red chiles, stemmed and minced (about 1/4 cup)
  • Kosher salt
  • 2 medium carrots, coarsely grated
  • 1 medium bulb fennel, trimmed (fronds reserved), cored, and thinly sliced
  • 1 lb. boneless, skinless chicken thighs
  • Canola oil for the grill
  • Freshly ground black pepper
  • 4 oz. thin rice noodles (vermicelli)
  • 4 cups thinly sliced Napa cabbage (from 1/2 large head)
  • 1 Tbs. Asian sesame oil; more to taste
  • 1/4 cup chopped peanuts (our addition, optional)

Directions

  • Prepare a medium-high (400°F) gas or charcoal grill fire.
  • In a large bowl, stir the vinegar, sugar, chiles, and 1-1/2 tsp. salt until the sugar dissolves. Reserve 2 Tbs. dressing in a small bowl. Add the carrots and fennel to the large bowl and toss; set aside.
    IMG_3798
    IMG_3801
  • Pat the chicken dry and generously season with salt and pepper. Oil the grill grate.
    IMG_3800
  • Grill the chicken, turning once, until cooked through, about 10 minutes. Transfer to a cutting board, and let rest for a couple of minutes.
    IMG_3802
  • Meanwhile, prepare the noodles according to package directions. Drain, rinse briefly under cold running water, and transfer to the large bowl. Add the cabbage and sesame oil, toss well, and season to taste with salt, pepper, and more sesame oil.
    IMG_3804
  • Transfer the salad to a serving platter or plates. Slice the chicken thinly and arrange on top. Drizzle with the reserved dressing, garnish with fennel fronds, and serve.

IMG_3808

Recipe by Genevieve Ko

Big, Fat, Greek Salad

Souvlaki, a traditional Greek dish of skewered and grilled meat, is often served in pita as a sandwich. Here, in the Pork Souvlaki Salad with Black Pepper Tzatziki recipe, it’s reimagined as a fresh main course salad. The meat usually used in Greece is pork, although chicken, beef, and lamb may also be used.

If you are not familiar with tzatziki, it is a sauce served with grilled meats or as a dip and is made of yogurt mixed with cucumbers, garlic, salt, olive oil, sometimes with vinegar or lemon juice, and possibly some herbs like dill, mint, parsley, thyme etc. It is always served cold. Make sure you do not skip the step of squeezing out the excess liquid once you grate the cucumber.

If you’re so inclined, serve toasted pita alongside to round out the meal. Russ and I loved this simple, quick, healthy dinner salad. Other than adjusting some of the proportions for just the two of us, I pretty much made the recipe as it was published in Fine Cooking.

IMG_3838

Ingredients

  • 4 Tbs. extra-virgin olive oil; more for the pan
  • 3 Tbs. red wine vinegar
  • 3 large cloves garlic, minced
  • 1 tsp. dried oregano
  • 1-1/2 lb. pork tenderloin, cut into 20 rounds (about 1/2 inch thick)
  • 3/4 cup plain Greek yogurt
  • 1/2 English cucumber, peeled, grated, excess liquid squeezed out
  • 1 Tbs. fresh lemon juice; more as needed
  • Kosher salt and coarsely ground black pepper
  • 8 cups mixed baby greens
  • 1 cup grape tomatoes, halved
  • 1/2 cup crumbled feta

Directions

  • Prepare a grill for direct grilling over medium-high heat (about 400°F).
  • In a medium bowl, combine 1 tablespoon of the oil, 2tablespoon of the vinegar, a third of the garlic, and the oregano. Add the pork, toss to coat, and let sit at room temperature for 10 minutes.
    IMG_3845
  • Meanwhile, in a small bowl, stir together 1 tablespoon of the oil, the remaining garlic, the yogurt, cucumber, lemon juice, 1/4 teaspoon salt, and 1/2 teaspoon pepper. Set aside.
    IMG_3842
    IMG_3843
    IMG_3846
  • Thread 5 pieces of pork horizontally onto each of four 12-inch metal skewers or soaked wooden skewers, leaving about 1/2 inch of space between pieces. Season the pork with 1/2 teaspoon salt.
    IMG_3852
  • Grill, turning the skewers occasionally, until the pork is well marked and cooked through, 6 to 8 minutes total.
    IMG_3853
  • Meanwhile, in a large bowl, toss the greens, tomatoes, and feta with the remaining 1 tablespoon vinegar, then with 1/4 teaspoon salt, 1/8 teaspoon pepper, and the remaining 2 tablespoon oil.
    IMG_3847
  • Arrange the salad on plates or a serving platter. Lay the pork skewers on top, spoon some of the tzatziki over the pork, and serve with the remaining tzatziki on the side.

IMG_3855

By David Bonom from Fine Cooking

Ginger Salmon with Sesame Cucumbers

It’s a lot easier to make healthy choices when the meals are both good for you and crazy good tasting. Here’s one from Food Swings a new cookbook by Jessica Seinfeld (wife of comedian Jerry Seinfeld). This simple recipe Ginger Salmon wth Sesame Cucumbers is kind to your body, crowd-pleasingly delicious and even gluten-free.

IMG_1583

A word of caution if you have a gas oven broiler. They never work as well as they do in an electric oven, as was the case with ours. Our gas broiler was over-charring the salmon edges and the thick center was still too raw. To compensate, I lowered the temp to 425 degrees and let the salmon cook another 10 minutes (it was thicker than called for).

Content to usually take a back seat in salads, the humble cucumber takes a starring role in this side dish. You may think a cucumber is just a cucumber, right? There are actually close to 100 varieties grown in the world. Two of the most common are the English cucumber, and the regular slicer cucumber we use most often in our dishes.

English cukes are a variety that is generally sweeter than the regular, common cucumber. They are longer, sometimes a bit thinner, usually pricier and have very tiny seeds, although they’re often labeled “seedless.” To protect their thinner, unwaxed skin they are sold wrapped in plastic.

This accompanying cucumber salad was subtle in flavor and made a nice counterpoint to the bold flavors of the fish, which was fabulous! For the salad, I substituted a Thai red chile in place of the jalapeño (because I didn’t have one) which I thought would’ve kicked it up a notch, but didn’t seem to add any heat.

Ingredients for salmon:

  • 1 1/2 lbs. skinless salmon fillet, about 1 1/4″ thick
  • 1/3 c soy sauce
  • 2 Tbsp honey
  • 2 Tbsp fresh orange juice
  • 1 Tbsp grated fresh ginger, about a 1″ piece

Ingredients for cucumbers:

  • 1 Tbsp toasted sesame seeds
  • 1 English cucumber, thinly sliced
  • 1/2-to-1 jalapeño pepper, seeded and thinly sliced into half-moons
  • 2 Tbsp fresh lemon juice
  • 1 Tbsp extra virgin olive oil
  • 1/4 tsp kosher salt
  • 1 Tbsp chopped fresh dill

Directions

  1. To make the salmon: Place whole fillet in a large ziploc plastic bag. In a small bowl combine soy sauce, honey, orange juice and ginger. Reserve 3 tablespoons of the mixture and set aside. Pour the remaining mixture over the salmon.
    IMG_1577
  2. Squeeze out the and seal the bag. Refrigerate for 15-60 minutes to marinate (the longer the better, I say), flipping the bag over occasionally so booth sides marinate evenly.
  3. Heat broiler with oven rack about 4″ from the top. Line a rimmed sheet pan with foil.
    IMG_1579
  4. Place salmon on prepared pan and discard marinade.
  5. Broil for about 5 minutes, or until the top of the salmon begins to char. Pul pan out and spoon half of the reserved soy sauce mixture over salmon. Broil for 1 minute and add the remaining sauce. Broil for another 2 minutes. The top should be nice and charred but not burned.
    IMG_1581
  6. Check for doneness by inserting the tip of a paring knife into the thickest part of the salmon. If it’s not done to your liking, broil for another couple of minutes. Divide into 3 or 4 pieces and plate.
    IMG_1573
    IMG_1575
  7. To make the cucumber salad: In a medium bowl, combine cucumber, jalapeño, lemon juice, olive oil and salt. Stir in dill and toasted sesame seeds. Serve with salmon.

IMG_1582

A note about the author/philanthropist Jessica Seinfeld: Food Swings is her fourth book with an all-new collection of more than 125 delectable recipes that reflects the actual human eating experience: sometimes healthy, sometimes indulgent. It offers a range of simple and satisfying recipes that speak to both sides of your food brain.

Chili Rubbed Pork Chops with Corn Salsa

As summer starts to wind down, I wanted to make good use of the seasonal harvest still around, deciding on a grilled corn salsa to spotlight the delicious tomatoes and sweet corn, all too soon to be replaced by their tasteless, winter counterparts. Sob 😦

Our two beautiful, one-and-a-half-inch thick pork rib chops swam in a quick molasses brine for one hour. Then I rubbed the chops down with a chili rub and placed them back into the fridge overnight. The next day after grilling for a few minutes on each side, they were plated with a final flourish of the corn salsa.

The combination of the juicy, spicy pork and sweet corn salsa was excellent. It brought together the freshness of summer vegetables with the taste of the grill, keeping the season alive just a little bit longer.

The ingredients list below is for four servings. Other than the brine, I cut the elements in half for just the two of us.

Ingredients (for four servings)

  • 4 pork rib chops, 1 1/2″ thick

IMG_3604

IMG_3606

For the brine:

  • 1 quart of cold water
  • 2 tablespoons kosher salt
  • 2 tablespoons molasses

IMG_3608

For the rub:

  • 1 tablespoon paprika
  • 1 teaspoon chili powder
  • 1 teaspoon granulated garlic
  • 1 teaspoon onion powder
  • 1 teaspoon cumin
  • 1/2 teaspoon cayenne pepper
  • 1/2 teaspoon sugar
  • 1/2 teaspoon kosher salt
  • 1/4 teaspoon black pepper

IMG_3612

For the salsa:

  • 4 ears of corn, husked
  • 4 plum tomatoes, cored, seeded, and diced
  • 1 medium red onion, diced
  • 1 small jalapeño, seeded and diced
  • 3 heaping tablespoons of finely chopped cilantro
  • 3 cloves of garlic, minced
  • Juice from 1 lime
  • Kosher salt
  • Freshly ground black pepper

Directions

  1. To make the brine, mix the salt and molasses in the cold water until completely dissolved. Wash the pork chops and place in the brine, completely submerging them. Brine the pork in the refrigerator for 1 hour.

  2. While the pork is in the brine, mix all the ingredients for the rub together in a small bowl.

  3. Remove the pork chops from the brine and wash in cold water. Pat the chops dry with paper towels. Liberally season each chop all over with the rub, wrap in foil, and place back in the refrigerator for 2 hours to overnight.
    IMG_3608

  4. Heat one side of your gas grill. Remove the pork chops from the refrigerator to allow them to come to room temperature.

  5. Wrap the ears of corn in tin foil and place on the hotter side of the grill. Grill covered for 15 minutes, turning four times during cooking. Remove the foil from the corn and continue to cook until lightly browned all over, about another five minutes. Remove the corn from the grill and set aside to cool.
    IMG_3610
    IMG_3611

  6. Remove the pork chops from the foil and place them on the hotter side of the grill. Grill until each side is nicely browned, about 3 minutes per side. Move the chops to the cooler side of the grill, cover, and continue to cook until an instant read thermometer registers 135 degrees in the thickest part of the chop. Remove from the grill and tent with foil.
    IMG_3616

  7. Cut off the corn kernels into a medium bowl and discard the cobs. Add the rest of the salsa ingredients and gently toss until well combined. Taste and adjust seasoning with salt and pepper. Remove the pork chops from the foil, top with the corn salsa, and serve.

IMG_3621

Recipe adapted from Joshua Bousel of Serious Eats

Cube Steak Redux

Initially, I was not overwhelmed with the idea of this Parmesan-Panko Steaks with Fresh Tomato Salsa recipe because it reminded me of the Swiss Steak dinners served when I was a kid. And if you all remember, I was one picky eater back then! But my palette—maybe not me so much 😉 —has matured since then so I thought giving cubed steak another chance was only fair, plus Russ really wanted to try it.

Cube steak is a cut of beef, usually top round or top sirloin, tenderized and flattened by pounding with a meat tenderizer. The name refers to the shape of the indentations left by that process, called “cubing.” They cook up quick and are a great way to get all the benefits of grass fed beef without breaking the bank.

Here, a crisp panko crust and an Italian-style fresh tomato salsa transform the humble cube steaks into something unique. They’re quite easy to make and don’t take the skill of a master chef to achieve.

Maybe because it is the cut of meat used for Chicken Fried Steak, that it became somewhat of a turn-off for me. And frankly, even though I loved the tomato salsa, the meat itself was just a “meh” for me—but my man Russ thought much more highly of those steaks. Hey, we’re not consistently on the same page with everything.

To address Russ’s wheat intolerance, we used gluten-free panko and flour. Pairing the meat with sautéed baby spinach upped the health value of the dinner and added another pop of color, always a plus in my book…

IMG_2722

Ingredients

  • 1 lb. ripe tomatoes, cut into medium dice (about 3 cups)
  • 5 Tbs. extra-virgin olive oil
  • 1/4 cup finely chopped white onion
  • 1 Tbs. red wine vinegar
  • 2 tsp. chopped fresh oregano
  • 1 medium clove garlic, minced
  • Kosher salt and freshly ground black pepper
  • 4 beef cube steaks (1 to 1-1/4 lb. total)
  • 1-1/2 oz. (1/3 cup) all-purpose flour
  • 3 large eggs
  • 1-1/2 cups plain panko
  • 3/4 oz. finely grated Parmigiano-Reggiano (3/4 cup using a rasp grater)

Directions

  1. Combine the tomatoes, 1 Tbs. of the oil, the onion, vinegar, oregano, garlic, 1 tsp. salt, and 3/4 tsp. pepper in a medium bowl.
    IMG_2724
  2. Season the steaks with 1/2 tsp. salt and 1/2 tsp. pepper. Put the flour in a shallow dish, beat the eggs in a second shallow dish, and combine the panko and Parmigiano in a third shallow dish.IMG_2725IMG_2728
  3. Dredge the steaks in the flour, then in the egg, letting any excess drip back into the dish, and then in the breadcrumb mixture.
    IMG_2729
  4. Heat 2 Tbs. of the oil in a 12-inch skillet over medium-high heat. Cook 2 of the steaks, flipping once, until nicely browned and just cooked through, 4 to 6 minutes total.
    IMG_2731
  5. Transfer to a platter, cover, and keep warm. Repeat with the remaining steaks and 2 Tbs. oil. Serve the steaks topped with the salsa.

IMG_2734

By Carolyn Malcoun