Autumn Awesomeness

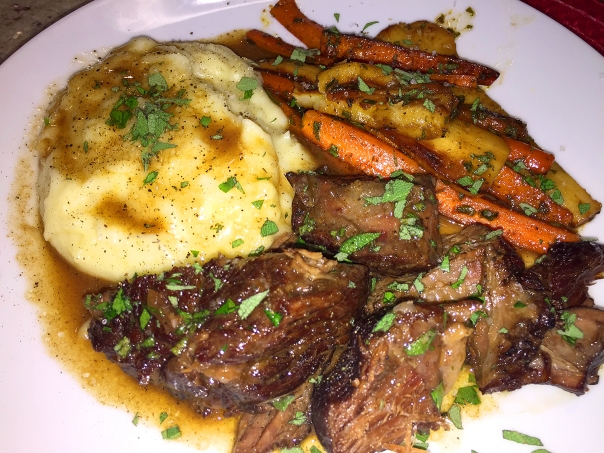
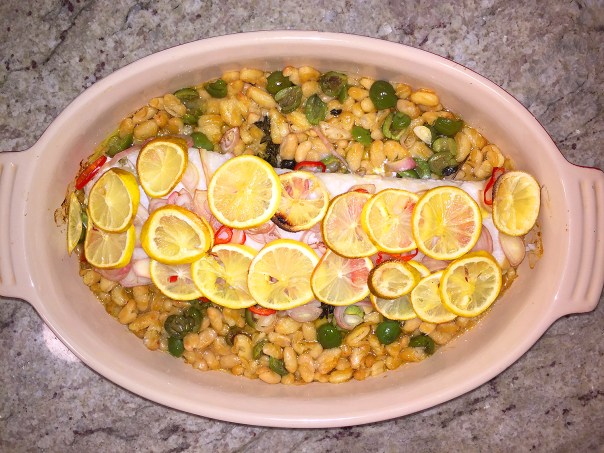
Knock me naked, this astounding company-worthy Cider-Sage Pork Loin with Potatoes and Apples dinner screams Autumn, where apple cider in a brine for pork loin imparts nuance and sweetness. Here, the cider does double duty, also starring in a flavorful pan sauce that gets drizzled on the finished dish. It is sooo good, you may want to double the amount…

IMG_9048

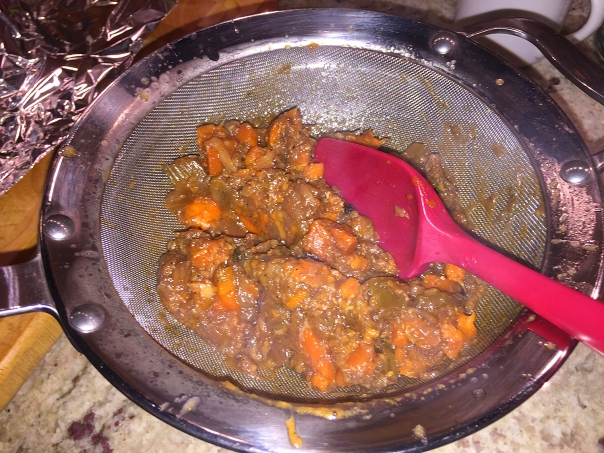
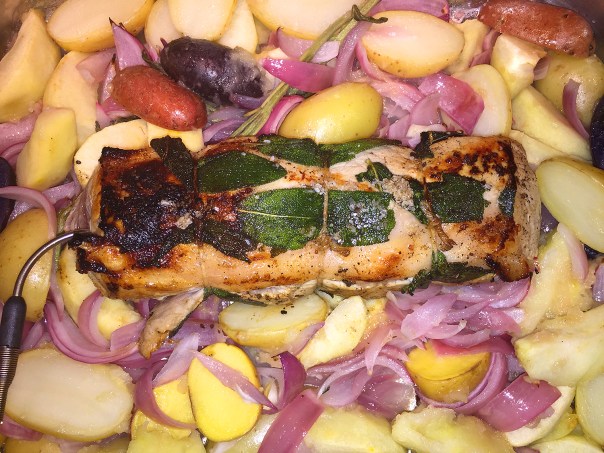
Several reviewers complained that the apple wedges got too mushy. Well yes, they did, but in a positive way. Once cooked into submission, they enveloped the other ingredients with an amazing blanket of tart sweetness, if you will. After all, Granny Smith’s are baking apples.

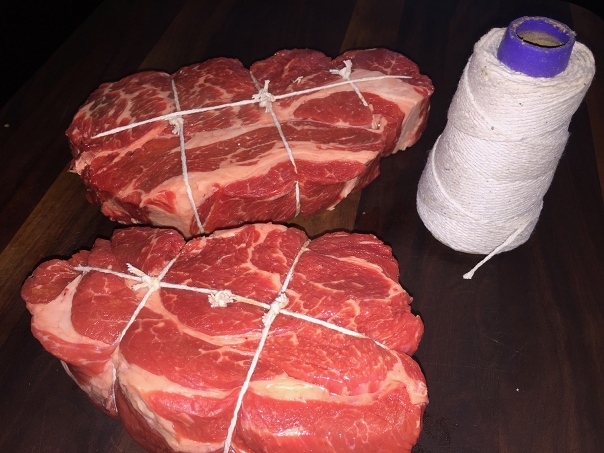
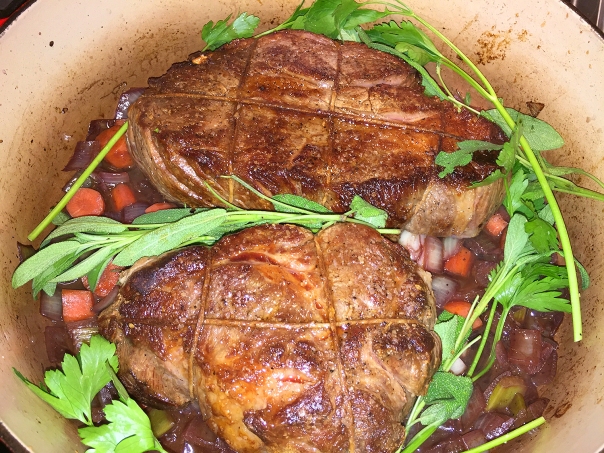
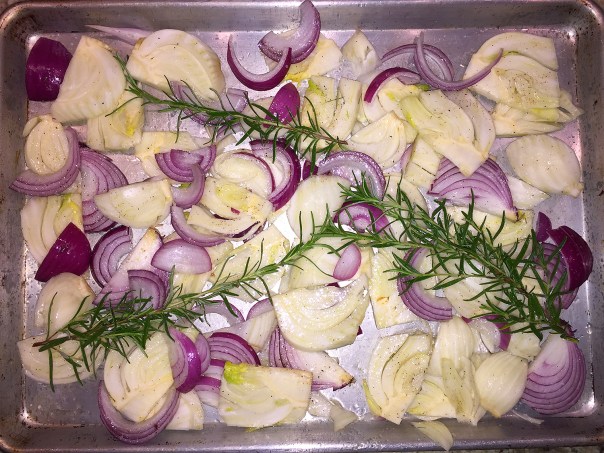
We had a small pork loin on hand that weighed just over half the size the recipe called for, but because we wanted all of that luscious sauce and veggies, we didn’t reduce the amount of the other ingredients. In fact, I added an additional red onion. And I included the sage stems with smaller leaves into the pan of roasting potatoes, apples and onions to impart even more sagey goodness—an herb that we just adore, especially in cool weather meals.

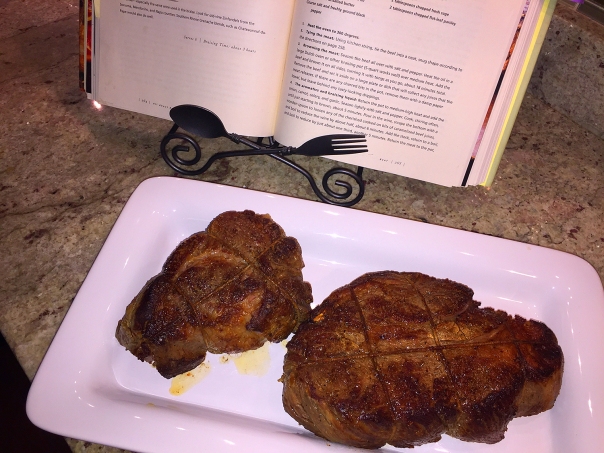
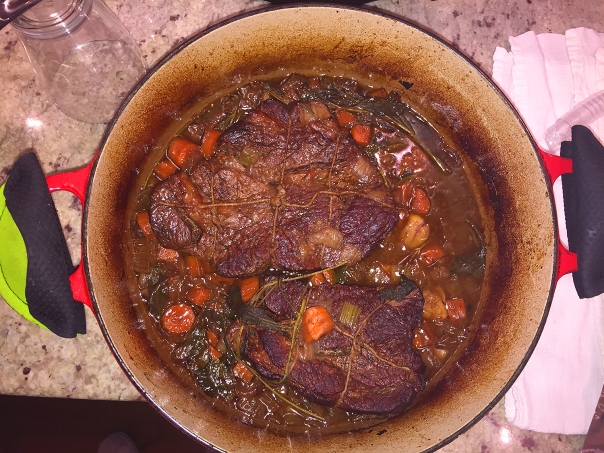
Because our pork loin was much smaller, it reached temperature in only 40 minutes. If at all possible, use a digital probe (such as a Thermoprobe ChefAlarm) that’s stays in the meat while it roasts. This way an alarm goes off exactly when it reaches 145° and alleviates any guesswork.

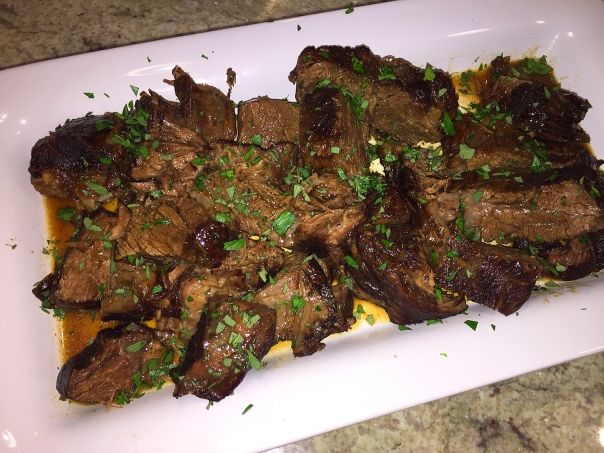
After it rests, and you slice it down, make sure to add any meat juices from the cutting board into that scrumptious sauce.

Cider-Sage Pork Loin with Potatoes and Apples

  • Servings: 6-8
  • Difficulty: easy
  • Print

Ingredients

For the brine

  • 4 cups apple cider
  • 1/2 cup granulated sugar
  • 1-3/4 oz. kosher salt (about 1/3 cup Diamond Crystal)
  • 3 cloves garlic, cut in half
  • 3 lb. center-cut pork loin
    IMG_9007

For the pork

  • 16 leaves fresh sage, 4 torn into large pieces
  • Freshly ground black pepper
  • 3 large Granny Smith apples (about 3-3/4 lb.), peeled and cut into 2-inch wedges
  • 1-1/2 lb. small creamer potatoes, such as Yukon Gold, halved
  • 1 large red onion (about 1 lb.), cut into 1/2-inch wedges (I added 2 onions)
  • 3 Tbs. olive oil
  • Kosher salt
  • 2 Tbs. unsalted butter
  • 2 Tbs. all-purpose flour
  • 1-1/2 cups apple cider

Directions

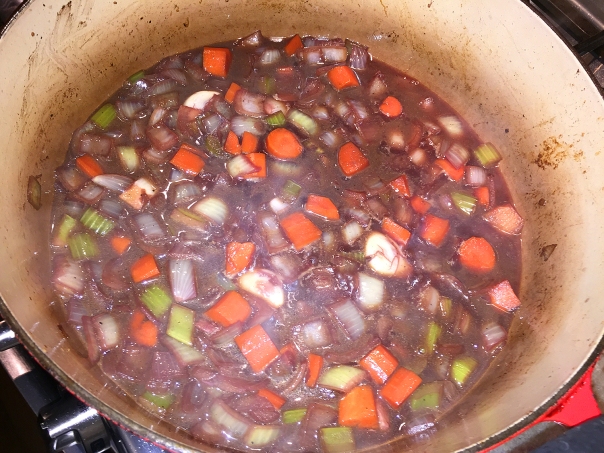
  1. BRINE: Put 2 cups of the cider in a small saucepan over medium-high heat. Bring to a simmer, and whisk in the sugar, salt, and garlic, adjusting the heat to maintain a simmer.
  2. Once the sugar and salt dissolve, remove the pan from the heat, add the remaining 2 cups cider, and let cool to room temperature.
  3. Transfer the loin to a large bowl or zip-top bag, pour in the brine, cover with plastic wrap or seal the bag, and refrigerate for 8 hours or overnight.
  4. PORK: Position a rack in the center of the oven, and heat the oven to 425°F. Remove the pork from the brine, and transfer to a large plate lined with paper towels. Discard the brine, and pat the loin dry.
    IMG_9010
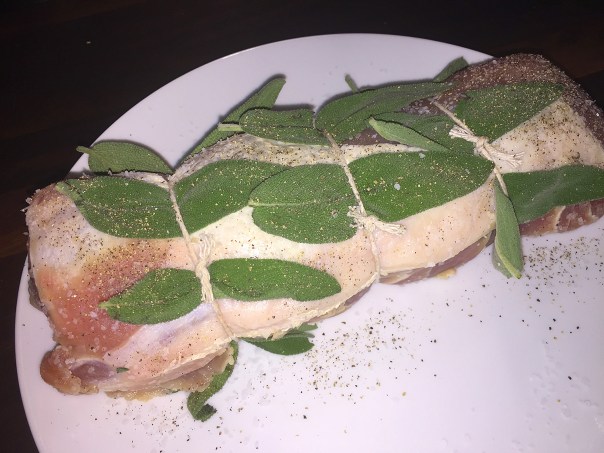
  5. Using kitchen twine, tie the loin in three places at even intervals. Slip the 12 whole sage leaves between the twine and meat, and season with 1 tsp. pepper.
    IMG_9027
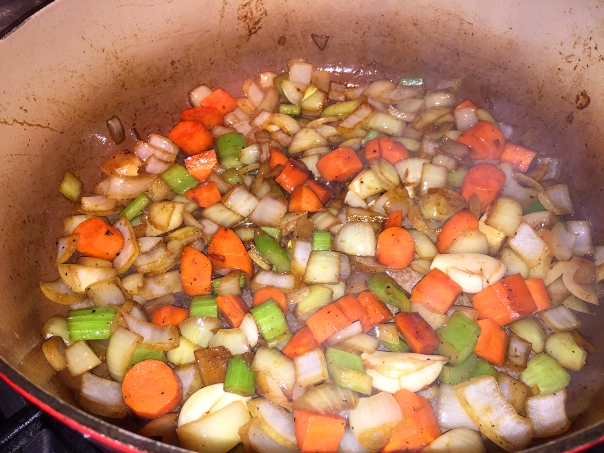
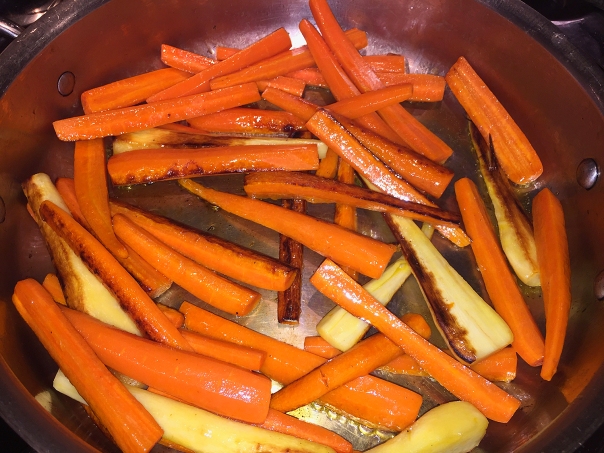
  6. In a large roasting pan, toss the apples, potatoes, and onion with 1-1/2 Tbs. of the oil and 1 tsp. salt. Roast until mostly tender, about 25 minutes.
    IMG_9023
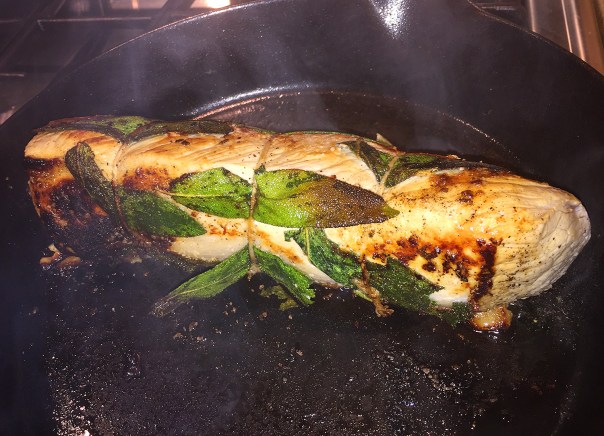
  7. Meanwhile, set a large heavy-duty skillet over medium-high heat. Add the remaining 1-1/2 Tbs. oil, and heat until shimmering. Set the loin in the skillet fat side down. Sear, undisturbed, until the meat browns and easily releases from the pan when you lift an edge with tongs, 2 to 3 minutes.
  8. Reduce the heat to medium, and sear the remaining sides, about 1 minute per side, or 6 minutes total. Set the skillet aside.
    IMG_9029
  9. Put the pork on top of the apples, potatoes, and onion in the roasting pan. Insert digital probe with alarm if you have one.
    IMG_9033
    IMG_9031
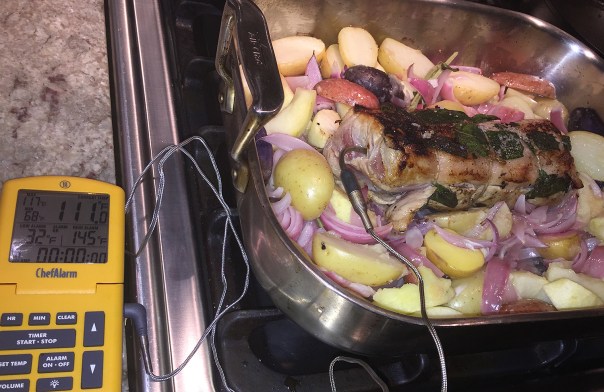
  10. Reduce the oven temperature to 350°F. Roast until an instant-read thermometer inserted into the thickest part of the roast registers 145°F, about 80 minutes; start checking after about 60 minutes (or sooner if preparing a smaller roast). Remove from the oven, and let rest for 15 minutes.
  11. While the pork is resting, make a pan sauce. Pour off and discard any fat from the skillet, and set the pan over medium-high heat.
  12. Add the butter, flour, and torn sage leaves. Cook, stirring to scrape up any brown bits on the bottom of the pan, until the flour is lightly browned, about 1-1/2 minutes.
    IMG_9041
  13. Add the cider, and bring to a boil, stirring constantly. Reduce to a simmer and cook, stirring until thickened, about 5 minutes. Season to taste with salt and pepper.
    IMG_9043
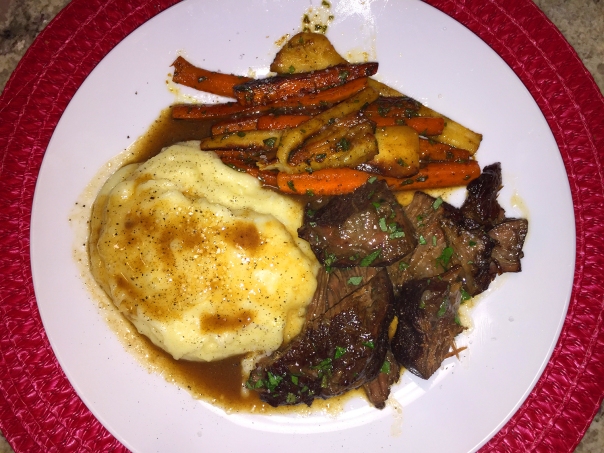
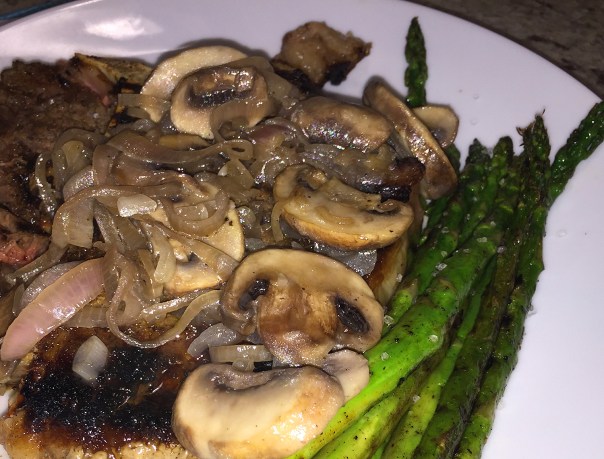
  14. Remove the twine from the roast, and thinly slice the pork. Serve with the apples, potatoes, onion, and a generous drizzle of the sauce.
    IMG_9046
    IMG_9052

http://www.lynnandruss.com

Recipe adapted from Tony Rosenfeld from Fine Cooking

Russ’ Seafood Soup

With ample homemade shellfish stock in the freezer, and blustery late-Autumn winds swirling outside, the Mr. figured it was a good day to make seafood soup. With its base of stock and tomatoes, rather than roux and cream, it’s a lighter and healthier soup than cream-based varieties. With bacon and potatoes you might even consider it a chowder.

IMG_8989
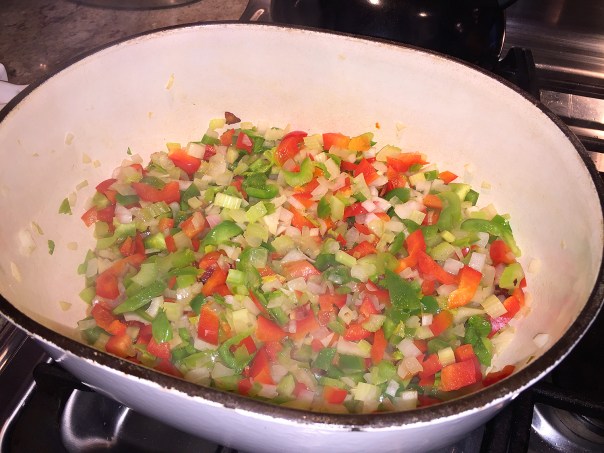
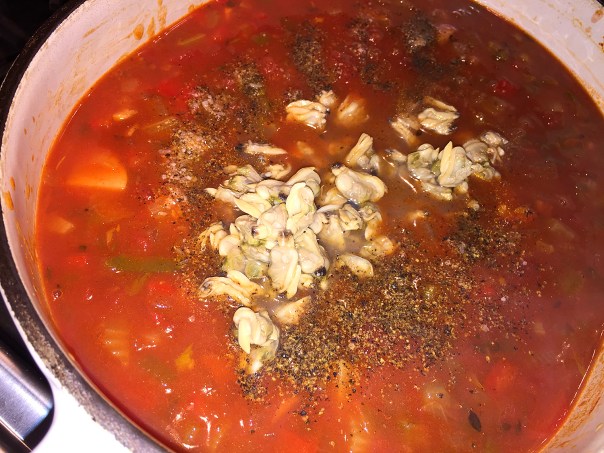
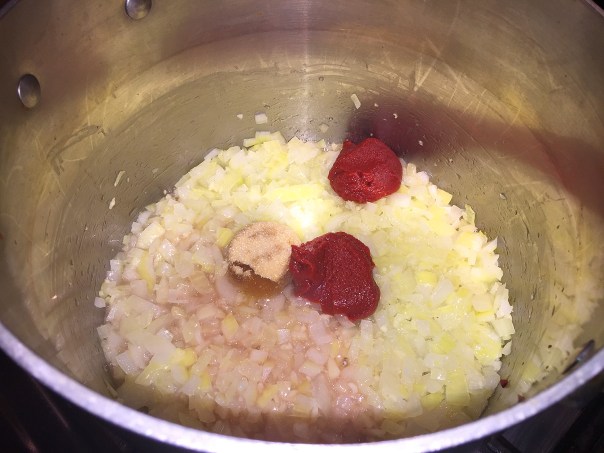
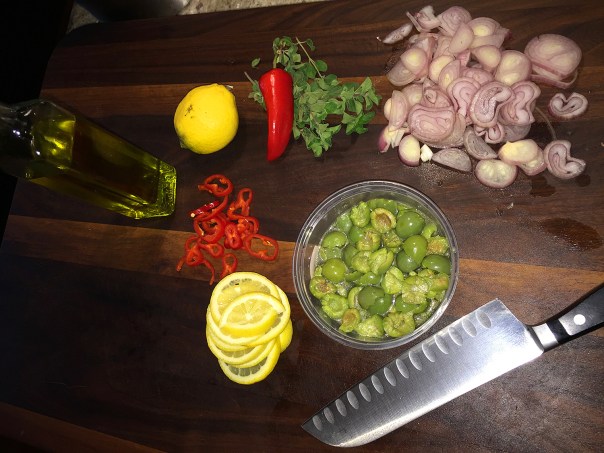
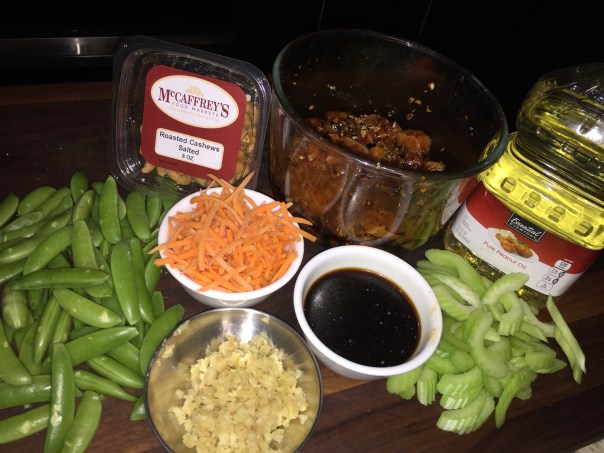
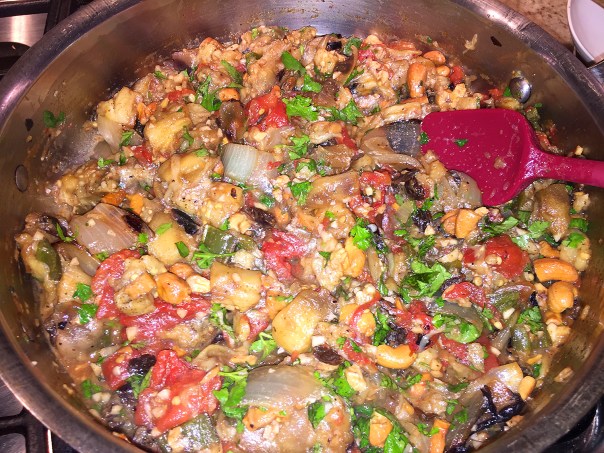
Russ preps the veggies. Then while those are simmering, he starts chopping the seafood.
IMG_8994

Personally I am not a clam fan, so Russ will often make this soup with small bay scallops in place of them, but the supermarket was only carrying the large sea scallops. As a substitution, I almost bought jumbo lump crab meat, but the price was so prohibitive that I succumbed and bought the baby clams.

The following day when we each enjoyed a small serving, it seems I hit the jackpot and got nearly 2 dozen clams in my portion while Russ barely got any. He was thrilled when I spooned them out and dropped them into his bowl. Yes, I’m a good wife… He even reciprocated with a few shrimp pieces into my bowl. Yes, he’s a good husband 😉

While the list of ingredients may seem a bit daunting, it’s actually quite easy to make, especially if you have the homemade seafood stock on hand. (Using a pressure cooker, you can make stock in a little over an hour.) In fact, not only did Russ make this soup, he also made homemade chicken stock and ham stock, all in one afternoon! Makes my heart ❤ proud—and my stomach happy 😉

Russ' Seafood Soup

  • Servings: 4 Quarts
  • Difficulty: easy
  • Print

Ingredients

  • 2 strips bacon, finely diced (chill for 10 minutes in the freezer to make it easier to cut; about 1/4 cup)
  • 2 Tbs. vegetable oil
  • 1 large yellow onion, finely diced
  • 1 large Spanish onion, finely diced
  • 1 large carrot, peeled and finely diced
  • 2 ribs celery, finely diced
  • 2 medium bell peppers, 1 red and 1 green, stemmed, seeded, and finely diced
  • 2 cloves garlic, minced
  • 1 28-oz. can crushed tomatoes
  • 1 bay leaf
  • 1/2 tsp. chopped fresh thyme
  • 1/2 lb. russet potatoes, peeled and cut into 1/2-inch dice
  • 4 cups shellfish stock, preferably homemade
  • 1 8-oz. can clam juice
  • 1 10-oz. can baby clams in juice (or 1/2 lb. bay scallops)
  • 1/2-lb. uncooked shrimp, shelled and roughly chopped
  • 1/2-lb. cod, roughly chopped
  • 1-1/2 tsp. kosher salt
  • 1/2 tsp. celery salt
  • 1 tsp. freshly ground black pepper
  • 5 dashes Tabasco sauce, or to taste
  • 3 dashes Worcestershire sauce, or to taste

Directions

  1. Place a medium (6- to 8-quart), heavy soup pot over medium-high heat. When hot, add the bacon. When it starts to brown in spots, lower the heat to medium and continue to cook until most of the fat has been rendered and the bacon is almost crisp, about 4 minutes.
  2. Add the vegetable oil, onions, carrots, celery, and bell peppers. Sauté, stirring occasionally, until very soft, 10 to 15 minutes.

    IMG_8988

  3. Add the garlic and sauté for another 2 minutes.
  4. Add the crushed tomatoes, bay leaf, thyme, and potatoes.
  5. Add the stock and clam juice to the pot. Stir to mix well. Bring to a boil over high heat, and then lower the heat to a simmer and cook for 30 minutes, stirring occasionally, or until the potatoes are fork-tender.
    IMG_8993
  6. Add the cod, shrimp and clams with their juice and season with the kosher salt, celery salt and pepper.
    IMG_8996
  7. Add the Tabasco and Worcestershire. Bring back to a simmer for several minutes until the seafood is opaque.
    IMG_9001
  8. Ladle into bowls and serve hot.

http://www.lynnandruss.com

Identity Crisis? Not in Flavor!

Is it chili… meatballs… stew? This mash-up implies an identity crisis, but no way José, Chili Meatballs in Black Bean and Tomato Sauce is jam-packed with flavor and melds together seamlessly. It’s a rich and warming Mexican take on meatballs and is perfect fare for cool weather dining—which is exactly what Mother Nature was dishing out on the raw and nasty day(s) I concocted this meal.

IMG_8929
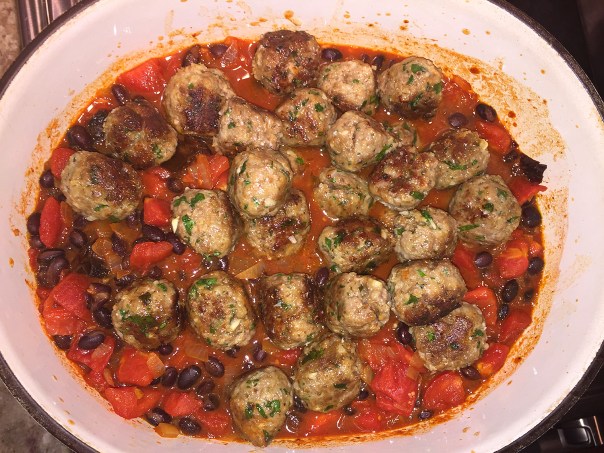
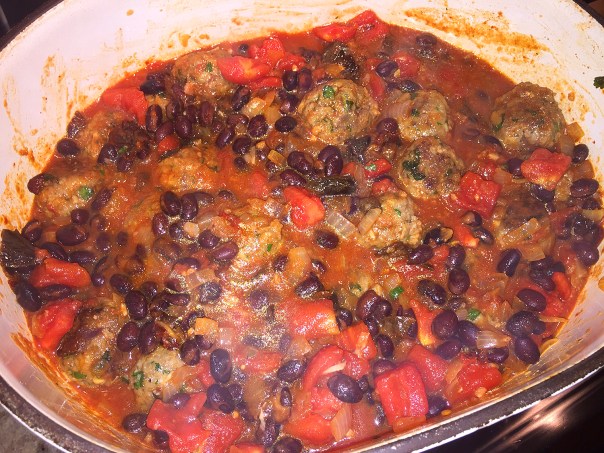
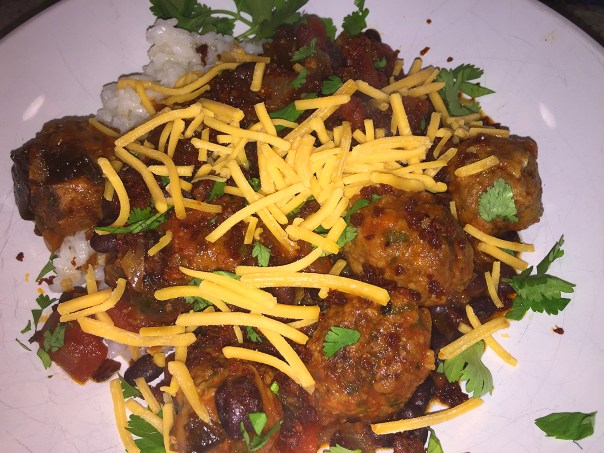
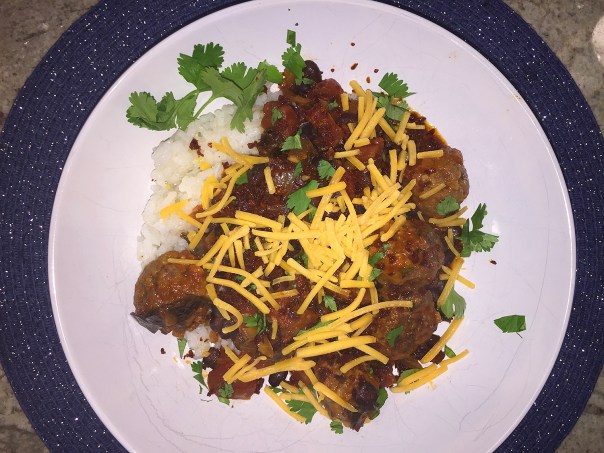
Instead of topping with sour cream (which I didn’t have on hand), I added shredded sharp cheddar.

Like other legumes, such as peanuts, peas, and lentils, black beans are prized for their high protein and fiber content. They are a real powerhouse and in addition to this meal tasting fantastic, the beans add some health benefits which include the prevention of cardiovascular diseases and a reduced risk of certain types of cancer.

Consuming black beans can also aid in digestion and the regulation of the body’s blood sugar levels. They can be beneficial for various nervous system functions, can reduce the chances of birth defects, neutralize the negative effects of sulfites, and even prevent impotence in men—hey, just sayin’.

Based on a few reviewers comments about the flavor profile of the meatballs themselves, I included a teaspoon of ground cumin to the mix (noted below). And even though we own multiple types of vinegars, malt wasn’t one of them so I substituted red wine vinegar. Then for garnish, instead of sour cream, I added shredded sharp cheddar, why not, it’s part chili, right? We also have at least a half dozen types of rice in the pantry so hubby suggested we appropriately use the Valencian Spanish short grain variety.

Since it is a bit time consuming, go ahead and prep the meatballs the day before if possible. Once rolled into balls, refrigerate until ready to cook. On meal day, I found it simpler to brown the meatballs in a skillet, and once removed, you can use the same skillet (do not wipe clean) to crisp the ground chorizo. Sauté the onion and garlic and remaining ingredients in a separate large, oven-proof, heavy pot that will go into the oven in Step 8.

All-in-all, definitely worth the effort. And just like most chilis and stews which tend to be even better when reheated, we were thrilled to have leftovers!

IMG_8883

Chili Meatballs in Black Bean and Tomato Sauce

  • Servings: 4-6
  • Difficulty: moderate
  • Print

Ingredients

  • 1 ounce dried ancho or other large dried red chiles
  • 1/2 cup boiling water
  • 1 cup fresh white breadcrumbs
  • 1/3 cup milk
  • 1 pound ground beef
  • 1 egg
  • 4 cloves garlic, divided
  • 1/2 cup cilantro leaves, finely chopped
  • 1 teaspoon ground cumin
  • 2 teaspoons ground coriander seeds
  • Sea salt and cracked black pepper
  • 1/4 cup extra-virgin olive oil
  • 1 yellow onion, finely chopped
  • 2 tablespoons tomato paste
  • 1 tablespoon brown sugar
  • 1 tablespoon malt vinegar (substitute red wine or apple cider vinegar)
  • 1/2 cup beef stock
  • 28-ounce can chopped tomatoes
  • 28-ounce can black beans, drained and rinsed (or 2, 14-ounce cans)
  • 1 tablespoon smoked paprika
  • 7-ounces dried chorizo, skin removed and roughly chopped
  • Steamed rice and sour cream, to serve

Directions

  1. Preheat oven to 400°F.
  2. Place the ancho chiles and boiling water in a bowl and allow to stand for 10–15 minutes or until soft. Cool slightly, drain, remove seeds and roughly chop the chiles, reserving the liquid. Set aside.
    IMG_8884
    IMG_8891
  3. Place the breadcrumbs and milk in a large bowl and mix well to combine. Set aside for 5 minutes or until the milk is absorbed.
  4. Add the beef, egg, half the garlic, cilantro, coriander seeds, cumin, salt and pepper and mix well to combine. Using wet hands, roll tablespoon-portions of the mixture into balls. Makes about 36 meatballs. (Can do Steps 1-4 up to a day beforehand.)
    IMG_8889
  5. Heat 1 tablespoon of the oil in a large, shallow, heavy-based ovenproof saucepan over medium heat. Cook the meatballs in batches, turning frequently, for 5–7 minutes or until browned.
    IMG_8915
  6. Remove the meatballs from the pan and set aside. Add 1 tablespoon of the oil, onion and remaining garlic to the pan and cook for 5–7 minutes or until lightly golden.
  7. Add the tomato paste, sugar and vinegar and cook for 1 minute.
    IMG_8909
  8. Add the beef stock, tomatoes, beans, reserved chopped chile, reserved soaking liquid, paprika, salt and pepper. Bring to a boil, return the meatballs to the pan and transfer to the oven.
    IMG_8921
  9. Bake uncovered for 20 minutes or until the sauce is reduced and the meatballs are cooked through.
    IMG_8922
  10. Meanwhile, place the chorizo in a food processor and process until finely chopped.
    IMG_8917
    IMG_8918
  11. Heat the remaining oil in a medium non-stick frying pan over high heat. Add the chorizo and cook, stirring frequently, for 5–6 minutes or until crispy.
    IMG_8925
  12. Serve the meatballs over steamed rice and top with the crispy chorizo and sour cream. Or, as in our case, some shredded sharp cheddar.
    IMG_8928

http://www.lynnandruss.com

Recipe adapted from one on Epicurious.com by Donna Hay


A Healthier Pad Thai

No need to feel guilty when eating Pad Thai. By making a few simple changes, you’ll enjoy a tasty and healthier version with the recipe below. Part of the plan is to bulk up the serving size of Pad Thai by adding in lots of healthy veggies like matchstick carrots, snap peas and scallions. And swap out ground chicken for the typical beef; then look for whole-grain brown rice pad Thai noodles to add an additional 3 grams of fiber to each serving.

IMG_8478

You have a choice of using store-bought Pad Thai sauce or making it yourself, which you can adjust to your own preferences. It might be a bit difficult to find at your regular grocer store, but check out an Asian Mart or order online ahead of time. With just a few clicks on the computer I was able to order a jar of Tamarind paste and it was delivered to my doorstep 2 days later. I liked the fact that I could make it to my own liking—and it didn’t disappoint!

IMG_8471

Healthier Chicken Pad Thai

  • Servings: 4-5
  • Difficulty: easy
  • Print

Ingredients

  • 8 ounces pad Thai rice noodles, preferably brown rice noodles
  • 2 teaspoons canola oil
  • 1 pound lean ground chicken, preferably organic
  • 2 cups matchstick carrots
  • 2 cups stringless snap peas
  • ½ cup chopped scallions
  • ½ cup pad Thai sauce, store bought or home-made*
  • Chopped peanuts and lime wedges for serving

Directions

  1. Bring a pot of water to a boil. Cook noodles in boiling water according to package instructions until al dente.
  2. Reserve 1 cup cooking liquid and drain the noodles.
  3. Meanwhile, heat oil in a large nonstick skillet over medium-high heat. Add ground chicken, and cook, crumbling with a wooden spoon until browned, 4 to 5 minutes.
  4. Add snap peas, carrots and scallions, and cook, stirring often, until the peas are bright green, 2 to 3 minutes.
    IMG_8476
  5. Add sauce, the noodles and about half of the reserved cooking liquid; stir with tongs to coat. Reduce heat to medium-low and simmer, adding more of the reserved cooking liquid to moisten if necessary.
  6. Cook, stirring occasionally, until the vegetables are crisp-tender, 2 to 3 minutes longer. Serve hot with chopped peanuts and lime wedges.
    IMG_8477

*Making your own Pad Thai sauce:

IMG_8465

Ingredients (makes 1 1/2 cups)

  • 1 cup Tamarind paste
  • ¼ cup water
  • ¼ cup fish sauce
  • 1 Tbsp soy sauce
  • ⅓ cup brown sugar
  • Lime zest, optional

Directions

  1. Combine all ingredients in a small saucepan over medium heat. Simmer until the brown sugar is dissolved, 2 to 3 minutes. (Do not let it reduce any further once the sugar is dissolved or it won’t be the right consistency for making Pad Thai.)
    IMG_8467
  2. IMPORTANT: At this point, you need to taste the sauce and adjust it to fit your taste. Some people like their sauce a bit more sweet, so if that’s you, add a bit more sugar and simmer for another minute. If you prefer a bit more salty/umami flavor, add a bit more soy or fish sauce. You can also add a bit of lime zest if you like a more pronounced citrus flavor.
  3. Store in an airtight container in the refrigerator for 3 weeks.

http://www.lynnandruss.com

Flip the Script

Creamy cannellinis studded with olives and chile flip the script on baked beans (though you can use chickpeas or butter beans instead of cannellini). Roast Cod with Cannellini Beans and Green Olives is one of those throw-together dinner recipes that relies on staples like canned beans and lemons; all you have to do is purchase some fish. You could cook said fish in less time on higher heat, but slow-roasting provides the best insurance against overcooking.

IMG_8830

That being said, the original recipe indicated you should cook the fish for 25-35 minutes at only 300°, but after reading several Bon Appétit reviews, many cooks said the temp was too low and the time not nearly long enough. So I took heed of their comments and cooked the cod at 325° for about 45 minutes. It was perfect! (My changes are indicated in the recipe below.)

But I think one of the main flavor boosts came from using homemade fish stock in place of the half cup of water. If you don’t have any, use chicken or vegetable broth, either of which will provide more depth of flavor than just water. And don’t omit those chiles. They add just enough heat and a pop of color to complete the dish.

Using a mandoline (which I should have used) will assist in getting those razor thin slices for the shallot, lemon and chiles. I had to slice down two lemons to cover—with an overlapping pattern—the entire length of the cod; plus my shallots were slightly too thick.

IMG_8834

When you go to plate individual servings, drizzle some very good extra-virgin olive oil over everything to bring it all together, lending a creamy silkiness to the dish. To complete the meal we paired ours with sautéed baby spinach with roasted garlic.

IMG_8816
IMG_8818

Roast Cod with Cannellini Beans and Green Olives

  • Servings: 4
  • Difficulty: easy
  • Print

Ingredients

  • 4 sprigs oregano
  • 2 15.5-oz. cans cannellini (white kidney) beans, rinsed
  • ½ cup Castelvetrano olives, pitted, torn
  • Kosher salt
  • 1½ lb. whole skinless cod fillet (substitute haddock, or halibut)
  • 1/2 cup homemade fish stock (substitute vegetable or chicken broth)
  • 2 small shallots, thinly sliced into rings
  • 1 Fresno chile, seeded, very thinly sliced into rings
  • 2 lemons, divided
  • 5 Tbsp. extra-virgin olive oil

Directions

  1. Preheat oven to 325°.
  2. Combine oregano, beans, olives, and ½ cup fish stock in a shallow 3-qt. baking dish; season lightly with salt.
    IMG_8819
  3. Place fish on top and nestle into beans; season fish generously with salt. Scatter shallots and chile slices over cod and beans.
    IMG_8820
  4. Very thinly slice 1 lemon and wriggle out seeds. Arrange slices, slightly overlapping, over surface of fish.
  5. Drizzle everything with oil and roast until fish is opaque throughout and flesh in the center flakes when gently pressed, 35-45 minutes, depending on the type and thickness of the fish. (Start checking at 35 minutes just to be sure.)


    IMG_8829

  6. Let rest, occasionally pressing beans down into the liquid so they don’t dry out, 5–10 minutes.
  7. Cut remaining lemon into wedges and serve alongside fish and beans for squeezing over.
    IMG_8832

http://www.lynnandruss.com

Adapted from a recipe by Claire Saffitz from Bon Appétit

Mushroom Ragoût with Cheese Ravioli

Great as a side dish or the main course, Mushroom Ragoût with Cheese Ravioli is sure to win over fungi lovers, like us. Though delicious made with cremini mushrooms alone, this one-pan sauce is even more spectacular if you use a mix of mushrooms (wish I would have thought of that before I food shopped.) FYI: All mushrooms are fungi, but not all fungi are mushrooms.

IMG_8553

Our package of frozen ravioli totaled 15 ounces, 50% more than the 10 ounces the recipe called for! It came with 12 large round raviolis, and with four per person, I don’t see how only ten ounces could provide dinner for four diners! Anyway something to keep in mind when making it for your family.

IMG_8559
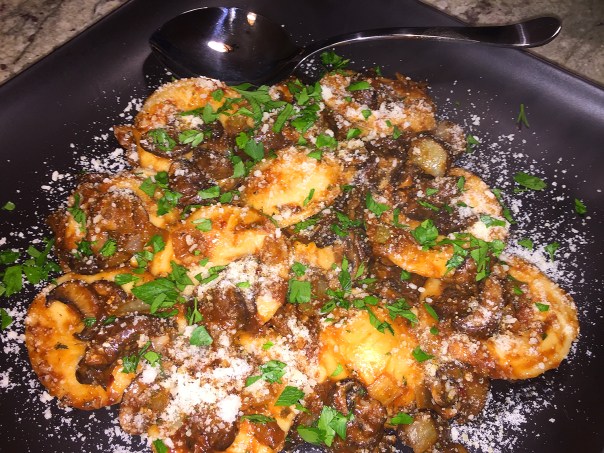
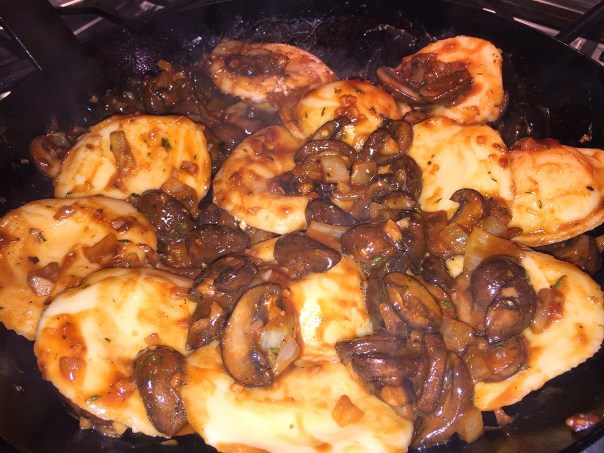
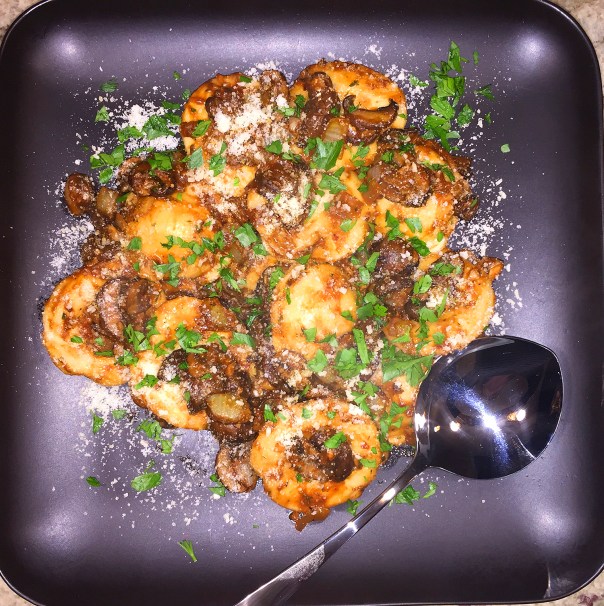
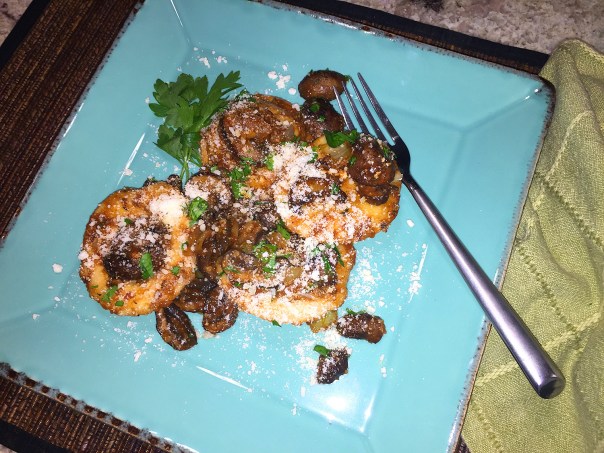
A plate of four large ravioli with mushroom ragoût constituted one serving.

And while the taste was fabulous with an earthy depth of flavor, we wished there had been more mushroom ragoût. In the future, I will definitely double all of the other ingredients to produce more balance between pasta and sauce—but the recipe below is the original.

IMG_8539

Mushroom Ragoût with Cheese Ravioli

  • Servings: 3-4
  • Difficulty: easy
  • Print

Ingredients

  • Kosher salt
  • 2-1/2 to 3 Tbs. extra-virgin olive oil; more as needed
  • 12 oz. cremini mushrooms, sliced about 1/4 inch thick
  • Freshly ground black pepper
  • 1 small yellow onion, chopped
  • 3 cloves garlic, minced
  • 1-1/2 tsp. tomato paste
  • 1-1/2 tsp. all-purpose flour
  • 1-1/2 tsp. chopped fresh thyme leaves
  • Pinch crushed red pepper flakes
  • 1/4 cup dry red wine
  • 1/4 cup lower-salt vegetable or chicken broth
  • 10 oz. fresh or frozen cheese ravioli or other cheese-stuffed pasta
  • 1 Tbs. chopped fresh flat-leaf parsley
  • Grated Parmigiano-Reggiano or Grana Padano

Directions

  1. Bring a large pot of well-salted water to a boil.
  2. Heat 1-1/2 Tbs. of the oil in a large skillet over medium-high heat. Add the mushrooms, 1/4 tsp. salt, and a few grinds of black pepper. Stir to combine, then spread the mushrooms out in the pan and cook, undisturbed, until well browned on one side, about 3 minutes.
    IMG_8541
  3. Stir and continue to cook until well browned all over and any liquid has evaporated, about 3 minutes. (If the mushrooms are dry and the pan begins to scorch, add a drizzle of oil.) Transfer the mushrooms to a plate.
  4. Add 1 Tbs. of the remaining oil in the same pan over medium heat. Add the onion and cook until translucent, about 2 minutes.
  5. Add the garlic and cook until fragrant, about 30 seconds. Add the tomato paste and cook, stirring, for 1 minute.
    IMG_8543
  6. Return the mushrooms and any liquid to the pan. Add the flour, thyme, and pepper flakes, and cook, stirring frequently, for 1 to 2 minutes.
  7. Add the wine, and stir until thickened.
  8. Add the broth, and simmer until the liquid reduces to a light sauce. Season to taste with salt and pepper.
    IMG_8545
  9. Meanwhile, cook the pasta in the boiling water according to package directions until al dente, drain, and add to the skillet with the mushrooms. Stir to coat over low heat. Serve topped with the parsley and cheese.
    IMG_8549

http://www.lynnandruss.com

IMG_8554

Original recipe by Lynne Curry from Fine Cooking

Cashew Chicken

Who doesn’t LOVE ❤ cashews? I pretty much love all nuts (even some of the human kind), but cashews have a special place in my heart. When I was quite young and my maternal grandfather was still alive, he owned and operated Eddie’s Bar. And in that bar he had this hotbox containing a treasure trove of warm roasted cashews. He knew I harbored a passion for them, so he would sneak me a large serving, along with an ice cold orange soda pop, whenever I’d stop in from playing outdoors. Yes, in those days it was OK for a young child to walk into a bar!

Now, many decades later, I still drool for salty roasted cashews, although I don’t traipse into a bar to get them (however I wouldn’t put it past me.) But I am tickled pink when I come across a recipe that calls for the luscious little fellows. This one however uses the unsalted variety, but because I could and I did, I incorporated the salty ones, and probably more than the half cup listed below 😉

IMG_8659

Likely one of the most beloved Chinese recipes in America, Cashew Chicken classically consists of dark meat chicken, sugar snap peas, carrots, and cashews in a light, silky sauce that barely clings to the chicken and that’s fragrant with ginger. Sadly, Cashew Chicken found at your local Chinese take-out is often nothing at all like it was intended to be, consisting rather of greasy, deep-fried chicken in a goopy gravy. Sound familiar? This simple stir-fry takes you squarely back to tradition, thanks to Grace Young.

Keep in mind, as with most stir-fries, make sure to have all of your ingredients prepped ahead of time, because when doing the actual stir-frying, there is no downtime and it goes crazy fast—about 5 minutes total. To add even more flavor, cook your rice with homemade chicken stock instead of water.

Overall, the quantity of veggies seemed a bit sparse so I increased the carrots, snap peas and celery all by about 50%. Being a cashew lover, this was a great week for me because just a few days prior we dined on Baingan Bharta, which also incorporated the delicious nuts!

yellow.red.fruit
Did You Know? The cashew fruit consists of two distinct parts: a fleshy stalk in the form of a pear—also called the cashew apple—with a brilliant yellow or red skin’ and a gray-brown colored nut (the cashew) in the shape of a kidney, which hangs from the lower end of the stalk or “apple.”

IMG_8646

Cashew Chicken

  • Servings: 2-3
  • Difficulty: moderately easy
  • Print

Ingredients

  • 1 pound skinless, boneless chicken thighs, cut into 1/2-inch cubes
  • 1 tablespoon minced garlic
  • 2 teaspoons soy sauce (for a richer tasting sauce, use dark soy sauce) 
  • 1 1/2 teaspoons cornstarch
  • 1 teaspoon plus 2 tablespoons Shao Hsing rice wine or dry sherry
  • 3/4 teaspoon salt
  • 1/8 teaspoon granulated sugar
  • 1/4 cup homemade chicken stock or canned chicken broth
  • 2 tablespoons peanut or vegetable oil 
  • 2 tablespoons minced ginger
  • 1/2 cup sugar snap peas (2 1/2 oz), strings removed
  • 1/2 cup carrots sliced 1/4 inch thick (or matchsticks)
  • 1/2 cup celery sliced 1/4 inch thick
  • 1/2 cup unsalted roasted cashews 

Directions

  1. In a medium bowl, combine the chicken, garlic, 1 teaspoon of the soy sauce, 1 teaspoon of the cornstarch, 1 teaspoon of the rice wine, 1/2 teaspoon of the salt, and sugar. Stir to combine.
    IMG_8648
  2. In a small bowl combine the broth, the remaining 1 teaspoon soy sauce, 2 tablespoons rice wine, and 1/2 teaspoon cornstarch.
  3. Heat a 14-inch flat-bottomed wok or a 12-inch skillet over high heat until a bead of water added vaporizes within 1 to 2 seconds of contact. Swirl in 1 tablespoon of the oil, tilting the wok to evenly coat the bottom of the pan.
  4. Add the ginger and, using a metal spatula, stir-fry until the ginger is fragrant, about 10 seconds. Push the ginger to the sides of the wok, carefully add the chicken mixture, and spread it evenly in a single layer. Cook the chicken, undisturbed, for 1 minute. Then stir-fry until the chicken is lightly browned but not cooked through, about 1 minute.
    IMG_8650
  5. Swirl the remaining 1 tablespoon oil into the wok, add the sugar snaps, carrots, celery, and cashews, and sprinkle with the remaining 1/4 teaspoon salt. Stir-fry just until the sugar snaps are bright green, about 1 minute.
    IMG_8655
  6. Restir the broth mixture and swirl it into the wok, adding it along the sides rather than into the middle. Stir-fry until the chicken is just cooked through, about 1 minute. Serve immediately over steamed rice, if using.
    IMG_8656

http://www.lynnandruss.com

IMG_8661

Recipe adapted from Grace Young

Skillet-Braised Green Curry Chicken

Winner, winner, chicken dinner—perhaps an 11 on a scale of 1 to 10. Chicken curries are often made with boneless, skinless chicken. Here, bone-in, skin-on thighs (and in our case, breasts) are cooked until the skin is nice and crisp; the contrast of that rich crackle with the bright, aromatic sauce was just magical! Certainly impressionable enough to serve to guests.

IMG_8803

I often tweak a recipe to align with our own culinary predilections. In this case, I cooked closer to 3 1/2 pounds of chicken and included two bone-in breasts (I prefer white meat) along with five thighs. And usually two cloves of garlic never cuts it, so I minced up four. And the most perplexing ingredient quantity was only 2 ounces of baby spinach, really?? I nearly quadrupled the amount, and as you can see by the photos, it didn’t overwhelm the dish.

For some reason the chicken pieces took between 10-12 minutes (the recipe suggests 6-8 minutes) to crisp and brown to my expectations; but the remainder of the directions were spot on. When everything was ready, we spooned the contents over cooked Thai rice noodles which not only made for a fabulous full-on meal, it also provided a striking presentation.

IMG_8785

Skillet-Braised Green Curry Chicken

  • Servings: 4
  • Difficulty: easy
  • Print

Ingredients

  • 1 Tbs. vegetable oil
  • 2 to 2-1/4 lb. bone-in, skin-on chicken thighs
  • Kosher salt and freshly ground black pepper
  • 1 medium yellow onion, diced
  • 3 Tbs. Thai green-curry paste; more to taste
  • 2 cloves garlic, minced
  • 1 13- to 15-oz. can coconut milk
  • 1 medium red bell pepper, thinly sliced
  • 1 Tbs. fish sauce
  • 1 packed tsp. light brown sugar
  • 2 oz. baby spinach (or much more like 7 oz. as we did)
  • 1 medium lime, cut into wedges
  • 1 Tbs. coarsely chopped fresh cilantro
  • Hot cooked rice or rice noodles

Directions

  1. Position a rack in the center of the oven, and heat the oven to 400°F.
  2. Meanwhile, heat the oil in a large cast-iron or other oven-safe skillet over medium-high heat. Pat the chicken dry with paper towels, and season with 1 tsp. salt and 1/4 tsp. pepper.
  3. Add the chicken to the skillet skin side down, and cook until the fat is rendered and the skin is crisp and golden, 6 to 8 minutes (do not flip; the chicken will cook more later).
    IMG_8789
  4. Transfer the chicken to a large plate. Remove all but 1 Tbs. of fat from the pan.
    IMG_8790
  5. Add the onion to the skillet, and cook over medium heat, stirring occasionally, until softened, 2 to 3 minutes.
  6. Add the curry paste and garlic, and cook, stirring, until fragrant, about 30 seconds.
    IMG_8793
  7. Add the coconut milk, bell pepper, fish sauce, sugar, and 1/4 tsp. salt. Scrape up any brown bits at the bottom of the pan with a wooden spoon, and bring to a simmer. Season to taste with additional curry paste.
    IMG_8795
  8. Return the chicken to the pan skin side up, along with any accumulated juices from the plate.
  9. Transfer to the oven uncovered, and braise until a thermometer inserted in the thighs registers 165°F, 20 to 30 minutes.
    IMG_8800
  10. Transfer the thighs to a plate, leaving the sauce in the skillet. Add the spinach to the skillet, and stir until wilted. Season to taste with juice from a couple of the lime wedges, salt, and pepper.
    IMG_8802
    The 7 ounces of baby spinach wilted down a lot more than shown here.
  11. Pour the sauce onto a serving platter or divide among plates, then nestle the chicken into the sauce and sprinkle with the cilantro. Serve with rice or noodles and the remaining lime wedges.
    IMG_8806

http://www.lynnandruss.com

Adapted from a recipe by By Christine Gallary from Fine Cooking

Show-Stopping Presentation

WOW your guests at Thanksgiving (or anytime) with this impressive Hasselback Butternut Squash with Bay Leaves side dish. The perfectly thin, uniform slices make any dish a showstopper. As the squash bakes, the slices fan out slightly for a crowd-pleasing presentation. Once cooked, the preparation is crusty on the outside and soft on the inside. Need I say more?

IMG_8757

The bay leaves tucked between some of the slices will perfume the vegetable as it cooks. While the squash spends its first round in the oven, you’ll prepare the glaze until it looks like rich caramel and then use it to baste with every 10 minutes or so while the squash finishes roasting to an almost shellacked-looking exterior.

When making the thin slices, put a thin dowel or chopstick on either side of the squash so that you don’t accidentally cut all the way through. If you’re interested in creating a similar effect with spuds, check out my blog from a couple of years ago on the impressive Hasselback Yukon Gold Potato.

A trick I use to aid in cutting the squash is to first score it in half with a fork along the length on both sides, then slice through the bottom seed end. Finally cut through the stem end which is a bit more difficult. And I have to admit, peeling a squash is sooo not my thing, so I enticed the Mr., who is stronger than me, to do the deed.

IMG_8725
IMG_8728
IMG_8735
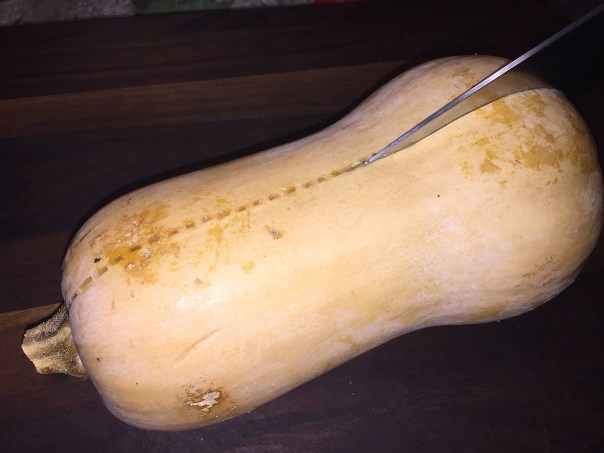
After scooping out the seeds, peel away the skin and pith.

A word to the wise about the Fresno pepper. You know I gravitate toward all things spicy, but I only left the slices in the glaze about 1 minute at the most, in Step 3. It was one hot chile pepper! They add a nice pop of color used as garnish at the end. Guests can always remove them if they don’t want any more heat. Me? I ate mine 😉

IMG_8723

Hasselback Butternut Squash with Bay Leaves

  • Servings: 6-8
  • Difficulty: moderate
  • Print

Ingredients

  • 1 large butternut squash (about 3 pounds total)
  • 1 tablespoon olive oil
  • Kosher salt, freshly ground pepper
  • 1 Fresno chile, thinly sliced
  • ¼ cup pure maple syrup, preferably grade B
  • 3 tablespoons unsalted butter
  • 2 tablespoons apple cider vinegar
  • 8 dried bay leaves

Directions

  1. Place a rack in upper third of oven; preheat to 425°. Halve squash lengthwise and scoop out seeds with a large spoon. Using a peeler, remove skin and white flesh below (you should reach the deep orange flesh). Rub all over with oil; season with salt and pepper.
    IMG_8737
  2. Roast in a baking dish just large enough to hold halves side by side until beginning to soften (a paring knife should easily slip in only about ¼”), 15–18 minutes.
  3. Meanwhile, bring chile, maple syrup, butter, and vinegar to a simmer in a small saucepan over medium-high, stirring occasionally and removing chile as soon as desired heat level is reached (set chiles aside for serving), until just thick enough to coat spoon, 6–8 minutes. Reduce heat to very low and keep glaze warm.
    IMG_8740
  4. Transfer squash to a cutting board and let cool slightly. Using a sharp knife, score rounded sides of squash halves crosswise, going as deep as possible but without cutting all the way through.
    IMG_8745
  5. Return squash to baking dish, scored sides up, and tuck bay leaves between a few of the slices; season with salt and pepper.
    IMG_8747
  6. Roast squash, basting with glaze every 10 minutes or so and using pastry brush to lift off any glaze in dish that is browning too much, until tender and glaze forms a rich brown coating, 45–60 minutes.
    IMG_8752
    IMG_8754
  7. Serve topped with reserved chiles.
    IMG_8755
    IMG_8759
    A serving size is about 5-6 slices.

Do Ahead: Squash can be roasted 4 hours ahead. Let cool until just warm; cover and store at room temperature. Reheat before serving.

http://www.lynnandruss.com

We paired our Hasselback squash with juicy, pan-grilled T-bone steaks seared to a perfect medium-rare, and grilled asparagus spears. Then for even more goodness, we smothered them in sautéed mushrooms and shallots. OMG, what a meal!

IMG_8761
IMG_8763

Hasselback squash recipe by Ann Redding & Matt Danzer from Bon Appétit

When in Doubt, Pull Out a Sheet Pan.

Not into a cleaning a lot of dishes tonight? Then Roast Sausage and Fennel with Orange—a one sheet-pan wonder dinner—is here for you. Roasting the sausages at a higher temperature helps them achieve the same golden brown color you’d get from searing them in a hot skillet, so why bother!

IMG_8641

Our local Amish Farmer’s Market was showcasing their homemade bratwurst the day we went shopping and expected to pick up the Italian sweet sausage links for this recipe. Somehow we both had the same bright idea to use the brats instead. I also added an extra navel orange because after cutting away the thick outer peel and pith, the amount of flesh was scant and I wanted a prominent citrus note.

Thinly sliced shallots, leeks, or cabbage would all be great here too. And think of fennel fronds as a bonus that comes with the bulb; use them anywhere you would another tender herb like parsley or dill. I may have gotten a bit carried away on the garnish 😉

IMG_8644

We served ours with a side of rainbow baby potatoes also rubbed in olive oil, with minced fresh rosemary, salt and pepper. They were put on a smaller sheet-pan lined with parchment paper, which when done, required no cleaning. If both pans fit in the same oven, you can cook them at the same temp. Since we have a double oven, I cooked them at 400° for slightly less time than the sausage combination, turning them once halfway through.

The leftovers were perfect for lunch later that week.

IMG_8621

Roast Sausage and Fennel with Orange

  • Servings: 3-4
  • Difficulty: easy
  • Print

Ingredients

IMG_8628

  • 2 medium fennel bulbs, fronds reserved, bulbs halved through root end, thinly sliced lengthwise
  • 1 small red onion, halved through root end, thinly sliced lengthwise
  • 3 sprigs rosemary
  • 4 Tbsp. extra-virgin olive oil, divided, plus more for drizzling
  • Kosher salt, freshly ground pepper
  • 6 sweet Italian sausages, about 1½ lb. total; (or use bratwurst like we did)
  • 1 medium navel orange
  • 1 Tbsp. red wine vinegar
  • Flaky sea salt

Directions

  1. Place a rack in highest position in oven; preheat to 425°. Combine fennel bulbs, red onion, and rosemary sprigs on a large rimmed baking sheet. Drizzle with 3 Tbsp. oil, season generously with kosher salt and pepper, and toss to combine. Arrange sausages on top, spacing evenly and nestling into vegetables.
    IMG_8631
    IMG_8633
  2. Prick sausages all over with the tip of a paring knife and drizzle with 1 Tbsp. oil. Roast until sausages are browned on top and cooked though and fennel is tender and deeply browned in spots, 25-35 minutes.
    IMG_8635
  3. Meanwhile, coarsely chop reserved fennel fronds (you want about ¼ cup); set aside.
  4. Cut the ends off orange(s) to reveal flesh. Rest orange upright on a cut side and cut down around orange to remove peel and white pith, rotating it as you go; discard peel.
    IMG_8626
  5. Working over a small bowl, hold orange in your hand and cut between membranes to release segments into bowl. Squeeze membranes to extract any remaining juice into bowl; discard membranes. Add vinegar to orange segments and juice and toss to combine; season with kosher salt and pepper.
    IMG_8630
  6. Remove baking sheet from oven. Using your hand or a spoon to block segments, pour juices from orange over sausage and fennel mixture. Set orange segments aside and let sausages and fennel mixture cool 5 minutes.
  7. Transfer sausages and fennel mixture to a platter. Crumble rosemary leaves over and scatter reserved orange segments and fennel fronds on top. Season with sea salt and a bit more pepper; drizzle with oil.
    IMG_8639

http://www.lynnandruss.com

Adapted from a recipe by Claire Saffitz from Bon Appétit

Polenta Pizza With Sausage, Swiss Chard, and Ricotta

I was excited when I first saw this recipe, although my enthusiasm subsided a tad once I took note of the “Total Time” needed to accomplish the meal. A pizza is a quick thing right? Not so much in this case because of the time necessary to prepare and cook the crust—though it’s a great alternative to pizza for gluten-free eaters.

IMG_8529

Okay, technically polenta baked into an oval crust isn’t a pizza, but what’s the point of obsessing over titles when the result is a crazy delicious dinner, perfect for a party with friends or a cozy night on the couch? The crispy toasted corn crust and cheesy sausage will win over anyone with taste buds.
—Real Simple Magazine

I forgave myself because at least I noted the time process early in the morning which allowed me to rethink my afternoon schedule. Just giving you fair warning here. Plus, I had to pat myself on the back for thinking to spread my roasted garlic olive oil paste (instead of plain EVOO) over the polenta crust before cooking it in Step 4. Another add-on was about a 1/4 cup of halved, cured, pitted black olives which gave a bit of a salty bite.

Our Italian hot sausage (you can use mild if preferred) came in a package of five links, so I just cooked all of them and saved the leftover meat to throw into a pasta dish later in the week—it would’ve been too much for the one pie.

It will seem like a whole lot of chard initially when you add it to the skillet, but just like spinach, it wilts down to about 10% of its volume. Chard tends to be gritty so give it a good rinse before you chop it up. I found hanging it over the kitchen faucet with the twist tie it came with is a good way to let it drip dry.

IMG_8496

IMG_8502

Was it worth it? The short answer is yes, we both loved the taste. When you have some downtime, I suggest you make the crust ahead of time, and even the sausage/chard topping if possible. When assembled later on, the pizza will be in the oven long enough to heat through everything. Then it truly does become a quick weeknight dinner.

Shopping tip: Make sure to buy instant polenta, not the regular kind, otherwise it won’t cook enough to make firm crust. A tip I should have paid heed to when I decided to add this to our weekly menu list. Without “instant” in our pantry, I had to run out and buy some after we had already done our grocery shopping 😦 —no pat on the back here.

IMG_8486

Polenta Pizza with Sausage, Swiss Card and Ricotta

  • Servings: 4
  • Difficulty: moderately easy
  • Print

Ingredients

  • 1½ teaspoon kosher salt, divided
  • 1 cup instant polenta
  • 5 tablespoons olive oil, divided
  • ¾ teaspoon freshly ground black pepper, divided
  • Roasted garlic paste (optional)
  • 3 hot Italian sausages, casings removed
  • 1 bunch Swiss chard, stems chopped and leaves torn into bite-size pieces
  • 1 14-ounce can whole peeled tomatoes, drained
  • ¾ cup ricotta cheese
  • 1/4 cup cured, pitted black olives, halved (optional)

Directions

  1. Bring 4 cups water and 1¼ teaspoons salt to a boil in a medium pot over high. Slowly whisk in polenta. Reduce heat to medium-low and cook, whisking often, until no lumps remain and polenta begins to pull away from sides of pot, 8 to 10 minutes. Remove from heat and stir in 1 tablespoon oil and ½ teaspoon pepper.
    IMG_8489
    IMG_8491
  2. Brush a large rimmed baking sheet with 1 tablespoon oil. Pour polenta onto baking sheet and spread to a ¼-inch-thick oval. Let cool slightly (about 10 minutes), cover loosely with plastic wrap, and chill until firm (about 45 minutes).
    IMG_8494
  3. Preheat oven to 400°F with rack in lowest position.
  4. Brush top of polenta with 1 tablespoon oil (or olive oil garlic paste if you have it). Bake until edges are golden brown and crisp, 45 to 50 minutes.
    IMG_8506
    I forgot to add in the ground pepper in Step 1, so I sprinkled it on after chilling it.
    IMG_8509
    IMG_8519
  5. Meanwhile, heat remaining 2 tablespoons oil in a large skillet over medium-high. Add sausage; cook, breaking it up with a wooden spoon, until no longer pink, about 5 minutes. Add chard stems and cook until tender, about 2 minutes.
    IMG_8505
  6. Add chard leaves and remaining ¼ teaspoon each salt and pepper. Toss until wilted, about 2 minutes.
    IMG_8512
    IMG_8515
  7. Top polenta with tomatoes (breaking them up as you go), sausage, and chard. Dollop cheese over top. If using, sprinkle on halved olives.
    IMG_8520
  8. Bake until cheese and greens begin to brown, 12 to 15 minutes. Serve immediately.
    IMG_8527

http://www.lynnandruss.com

IMG_8532

Adapted from a recipe found in Real Simple Magazine By Grace Elkus

Baingan Bharta is “The Bomb” (In a Good Way)

Baingan Bharta (pronounced BHURR-taah), refers to dishes in which the ingredients are roughly mashed either before or after the dish is prepared. In this spicy, smoky dish from the Punjab region of India, eggplant (baingan) is cooked until silky and tender, and then mixed with aromatics and spices.

When researching this dish, I found its preparation is very similar to baba ghanoush in that you roast and mash the eggplant before seasoning it with aromatics, herbs and spices, but its flavor profile is wildly different. Here, fresh ginger, garam masala and jalapeño add warmth, while the addition of lime juice provides brightness. This version keeps the veggies less mashed than many, and therefore more appealing to us.

IMG_8616
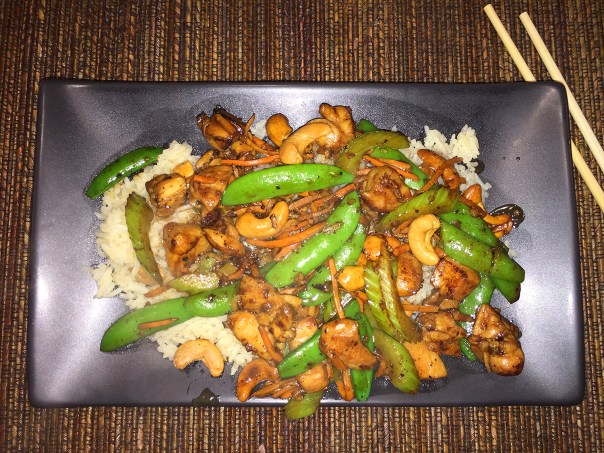
I cooked the rice in vegetable broth instead of water which gave it a nice light golden color and added a bit of flavor.

There is something about roasting baingan on an open fire in that its skin just changes everything and gives it an incredible flavor. The entire process takes about 8-10 minutes on a medium high flame and you’ll need to turn it every 1-2 minutes for even roasting. Or you can char the eggplant under the broiler as directed below, although you won’t get that distinctive smokiness. It will be piping hot once you roast it, so cover it with some foil and let it rest for a few minutes. This creates a bit of steam and loosens the skin.

IMG_8584
IMG_8595
To save time later on, I charred the eggplants earlier in the day, cooled and peeled them, then stored them in an airtight ziploc container until time to make dinner.

Since I had 4 small eggplants, I was going to try a combination of both methods, two on the stovetop, two in the oven. But roasting them over the open flame was so successful, that I did the final two the same way, with both on one burner—plus my gas broiler basically sucks, as I’ve mentioned before 😦 The tomatoes, onion and jalapeño did get charred under the broiler as directed.

IMG_8592

You can find ghee and the spice mix garam masala at most supermarkets, but if ghee is unavailable, butter works as an OK substitute. The plum tomatoes were just gorgeous at the grocery store so we bought four (the recipe calls for 3 regular). Afterward, i think the dish could have used even another one or two more tomatoes. And of course I had to include a few extra garlic cloves and an additional jalapeño 😉

We were totally unprepared for how good this dish was! Don’t omit the golden raisins because they gave just enough of a sweet note to offset the other pungent flavors. This meal is a perfect option for those adhering to a plant-based diet, or maintaining a Meatless Monday regimen. Serve over rice or with warm naan or other flatbread.

IMG_8596

Baingan Bharta

  • Servings: 3
  • Difficulty: moderate
  • Print

Ingredients

  • 2 Tbs. peanut or other neutral oil
  • 2 lb. eggplant (about 2 medium or 4 small)
  • 1-1/2 lb. ripe tomatoes (about 3 medium)
  • 1 medium sweet onion, peeled and quartered
  • 1 medium jalapeño
  • Kosher salt
  • 1 oz. (2 Tbs.) ghee or unsalted butter
  • 1/3 cup roasted salted cashews, coarsely chopped
  • 1/4 cup golden raisins
  • 4 cloves garlic, finely chopped or grated
  • 1-1/2 Tbs. grated fresh ginger
  • 2 tsp. garam masala
  • 1/4 cup coarsely chopped fresh cilantro
  • Cooked basmati rice or naan
  • 1 lime, cut into wedges

Directions

  1. Position a rack in the center of the oven, and heat the broiler on high. Brush some of the oil on a large rimmed baking sheet.
  2. Put the eggplant, tomatoes, onion, and jalapeño on the baking sheet. Pierce the eggplant all over with a knife, and brush the vegetables on all sides with the remaining oil. (Alternatively, roast the eggplant on a gas stove over the open flame.)
    IMG_8601
  3. Broil the vegetables, turning them a couple of times during cooking, until the eggplant are soft and well charred and the other vegetables are well charred in places, about 25-30 minutes.
    IMG_8604
  4. When cool enough to handle, peel and discard the stem and skin of the eggplant, tomatoes, and jalapeño (discard the seeds for less heat), leaving some charred bits behind, and transfer to a large bowl. Coarsely chop the vegetables, return them to the bowl, season with 1 tsp. salt, and stir to combine.
    IMG_8607
    IMG_8608
  5. In a large skillet, heat the ghee (or butter) over low heat. Add the cashews, raisins, garlic, ginger, garam masala, and 1 tsp. salt. cook, stirring frequently, until fragrant, about 5 minutes.
    IMG_8610
  6. Using a rubber spatula, transfer the eggplant mixture to the skillet.
    IMG_8613
  7. Raise the heat to medium, and cook, stirring frequently and breaking up any large pieces of eggplant, until just heated through, about 5 minutes.
    IMG_8615
  8. Season to taste with salt, top with the cilantro, and serve with rice or naan and lime wedges.
    IMG_8620

http://www.lynnandruss.com

Adapted from a recipe by Diana Andrews from Fine Cooking 

Casa Pepe in Córdoba

Our second trip to Spain centered on the Andalusian region in the southwest portion of the country, and our first few days were spent in Córdoba. Córdoba’s history can be traced back to prehistoric times, but the first historical reference is probably the Carthaginian settlement of ‘Kart-uba’, literally meaning “the City of Juba.” It was one of the few places in Europe where free Muslims, Jews and Christian people could mingle quite comfortably together. From 756 to 1031 it was the capital of al-Andalus (Islamic Spain).

As part of our trip, we had pre-scheduled a personal tour of the walled city with a third-generation tour guide Wallada (shown below with Russ) who was named after an Andalusian poet. At some point in her explanation of the history, Russ asked what her favorite restaurant was, and without hesitation she replied Casa Pepe. That was all we needed to hear…

walladah.guide

IMG_7849
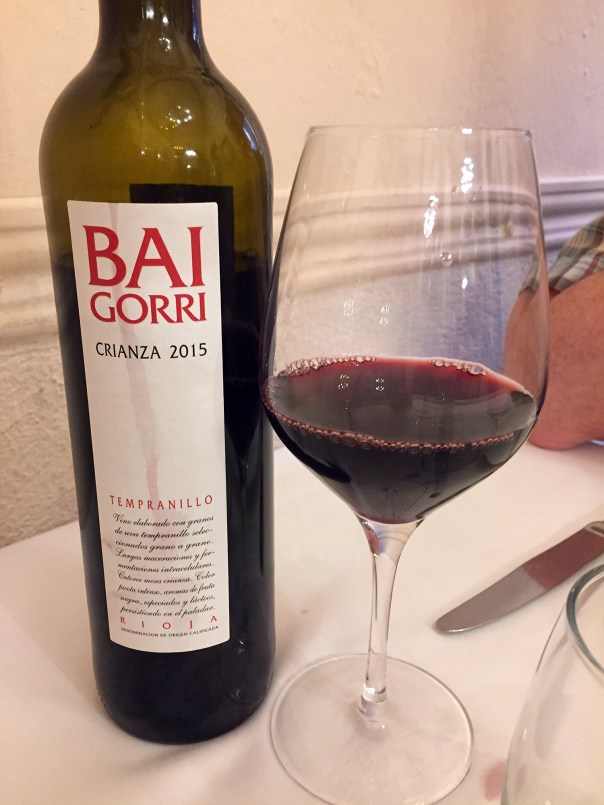
Casa Pepe de la Judería restaurant is located in the heart of the city’s Jewish quarter. They specialize in southern Spanish cuisine with a modern touch. It boasts an eclectic interior, replete with a typical Andalusian patio, pleasant dining rooms and a charming rooftop terrace. Our first choice of getting seated in the center courtyard was not possible due to the long list of hungry diners, so we were shown to a small room with soaring ceilings featuring a chandelier and a chocolate-colored back wall.

detalle-patio2

azotea-casa-pepe-de-dia2

IMG_7832

IMG_7831

While contemplating the menu, Russ was thrilled to see they stocked a Bai Gorri Tempranillo, a winery we patronized on our first trip to Spain over five years ago. It was a nice segue to begin our dining experience, and it only got better from there.

IMG_7838

For starters we ordered their well-merited Creamy Croquettes, individually hand-made with stewed meat and Ibérico ham. After one bite, we literally died and went to heaven! Soft, fluffy pillows of luscious goodness, they will forever be the ultimate croquette to which we will compare every future croquette we encounter.

IMG_7844

IMG_7841

Desiring some colorful vegetables, we also chose another starter of Grilled Lettuce Hearts with Garlic and Peppers. Typical of Córdoba, this method of preparing lettuce hearts is served with crunchy garlic fried in extra virgin olive oil. There wasn’t a morsel left on the platter. FYI, the area surrounding the nearby settlement of Montalbán is one of the largest garlic-producing areas in Spain.

IMG_7845

For my main, I couldn’t resist the Iberian Pork Fillet—after all we were on the Iberian Peninsula. Iberian pork is an especially tender and succulent meat because of the animal’s foraged diet of acorns and pasture. On top of being extremely tasty, it is also very healthy because its fat graining contains fatty acids that are beneficial to the cardiovascular system. Hands-down, the BEST pork I’ve ever eaten, my 100% acorn-fed grilled shoulder fillets came plated with roasted potatoes and Padrón peppers—their peculiarity lies in the fact that, while their taste is usually mild, a minority (10-25%) are particularly hot, although mine we are all on the milder side.

IMG_7848

For Russ, it was also all about the pork. His choice was the Taco of Iberian acorn-fed ‘Presa’ fillet, marinated and grilled. Taco in Spanish means “tube” which describes the tenderloin that was then sliced down and spread across the plate with a side of bright red piquillo peppers sprinkled with fresh chives. We did exchange a bite of each other’s pork, but we couldn’t choose a winner because both of them were truly memorable.

Of all the places we ate in Spain on this trip—and there were a LOT—Casa Pepe stands out as the pinnacle choice of the eating establishments. Thanks Wallada for the suggestion! If you ever happen to find yourself in Córdoba, don’t miss the opportunity to feast on some of the best pork and croquettes you’ll ever taste.

Roasting Whole Heads of Garlic. Because You Should.

For several decades I’ve been roasting whole heads of garlic with extra virgin olive oil—because it is soooo worth it. I am amazed to find out how many people still have never attempted making this simple and versatile caramelized deliciousness! So here is a quick “how to” on the uncomplicated technique, and how you came tame it’s brasher profile for its softer side.

As far as the process, there are numerous ways to go about it, but I find the steps below work best for me. Sometimes I don’t even slice off the tops before roasting, but doing so certainly makes it easier to squeeze out the caramelized paste when they are finished cooking. I’ve noticed that many cooks roast their bulbs at 400°F, but I do mine at a lower temp of 325° so that they don’t burn (which has happened in the past.)

IMG_8565

Doing it my way, you also don’t have any pans leftover to clean. Some chefs place the cut bulbs in a pie plate or in the cups of a muffin pan. I simply put them in a large piece of aluminum foil and fold it up to seal in the heat. When done, just toss the tinfoil in the garbage.

IMG_8563

Did you know roasting garlic changes its chemical makeup so that it’s easier to digest? You can eat a lot more garlic if it is completely cooked, with fewer side effects than you would get from eating raw garlic. And just imagine that heady aroma wafting through your house as they cook! Pungent cloves go silky and sultry, warm and welcoming, like a bonfire burned down to glowing embers.

For garlic aficionados, you can eat the caramelized roasted cloves directly out of the heads—just sayin’. Once roasted, you can store the whole cloves covered with olive oil. My preference however, is to blend them with EVOO into a velvety paste, put in a tightly sealed loc-n-loc, top with a thin layer of EVOO and refrigerate.

The applications for using roasted garlic are endless. You can spread some of this buttery, nutty deliciousness on a piece of crusty baguette or make toasty garlic bread. Or use the paste (or cloves) in pasta dishes, mashed or roasted potatoes, over and under skin for roasted chicken, add to soups or even mix it with sour cream for a dip. I recently spread it over a pizza crust before topping with the other ingredients.

If you’ve never made this, today’s a good day to start—you won’t regret it!

Roasted Garlic Heads

  • Servings: About 3/4 Cup
  • Difficulty: very easy
  • Print

Ingredients

  • 3 Large heads of garlic
  • Extra Virgin Olive Oil
  • Fresh thyme sprigs, optional

Directions

  1. Preheat your oven to 325°F
  2. Remove any loose papery skin from the heads and using a sharp knife, cut 1/4 inch from the top of cloves, exposing the individual cloves of garlic. Don’t worry if a few of them are still intact, the garlic will still squeeze out later.
  3. Place the garlic heads, cut side up, in tinfoil, drizzle heavily with extra virgin olive oil (top with fresh thyme if using) and fold to completely enclose. Put in the oven for at least 60, or up to 90 minutes.
  4. Remove from oven, open the tinfoil to release the steam.
    IMG_8564
  5. When cool, squeeze each clove into a mini-blender and drizzle in olive oil while puréeing until a thick homogenized paste forms.
    IMG_8572
    IMG_8574
  6. Place into a container, drizzle on another thin layer of EVOO over the top, seal tightly, and refrigerate, where it will last for several months.
    IMG_8577
    IMG_8580
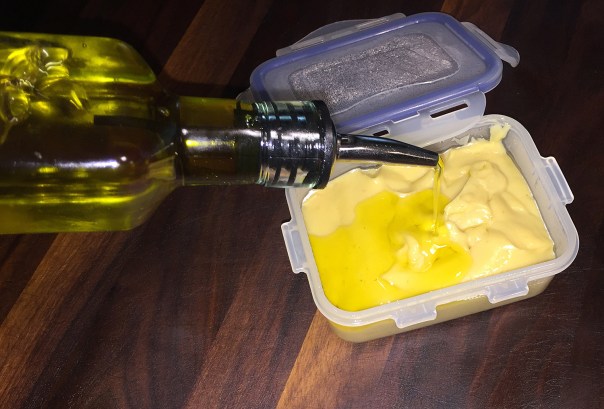
ALTERNATIVELY: Squeeze the cloves directly into a container and pour enough olive oil over to cover them completely. Close tightly with lid and refrigerate.
  7. When ready to use, take the container out of the fridge for about 30 minutes to soften and let the oil come to room temp. Spoon out necessary amount.

http://www.lynnandruss.com

Way More Than Meh…

For me, a pot roast dinner is certainly not the first meal that comes to mind when I think “company-worthy.” Until my later adult years, I’ve always considered it a “meh” meal. But this Zinfandel Pot Roast with Glazed Carrots & Fresh Sage recipe from cookbook author Molly Stevens altered my “meh” mindset. She thinks of it as dinner-party pot roast, and after making it, so do I—although for our first go-around, it was just for me and hubby, with leftovers of course.

IMG_8461

It may seem a bit unwieldy at first glance when you take note of the long list of ingredients and the number of steps in the directions. Don’t shy away though, it’s great for a slow, lazy weekend afternoon. Plan on about 4+ hours from start to finish. After the initial prep of browning the meat and making the braising liquid, the roast will cook unattended for three hours (with just one flip midway) and fill your home with tantalizing aromas—prepare your self.

According to Molly, while the basic technique is the same as a regular Sunday night pot roast, the herb-flecked carrot garnish makes it dressy enough for company. Instead of braising along with the beef, the carrots are glazed on top of the stove in a bit of the Zinfandel braising liquid just before serving, so that they remain bright and crisp—a fresh contrast to the gorgeously tender beef.

At Molly’s suggestion, we used a combination of parsnips and carrots, which both cook in the same amount of time. Your first choice for this recipe should be top blade roast because its neat shape makes it easy and elegant to carve for guests. You can certainly select other pot roast cuts, which we had to because no top blade was available. In fact, we bought two smaller chuck roasts as that was our only option.

Molly’s recipe only calls for two garlic cloves, but “go big or go home” I say, so I tossed in four large. And you know I’m always touting the use of homemade stock instead of store-bought, but with no homemade beef in-house, I incorporated the Better Than Bouillon brand. Next time, we’re seriously toying with the idea of increasing the amount of wine and stock by 50% (1 1/2 cups each) resulting in more of the cherished liquid—it was truly oralgasmic!

Our pot roast was paired with garlicky, buttery mashed potatoes, yum! (Creamy polenta would make a good substitute.) Oh, and those carrots, we agree they may have been the BEST ever! In our household, braising season has begun in earnest…

IMG_8420

Zinfandel Pot Roast with Glazed Carrots & Fresh Sage

  • Servings: 4-6
  • Difficulty: moderate
  • Print

Ingredients

  • One 3 ½ to 4-pound boneless beef chuck roast, preferably top blade roast
  • Coarse salt and freshly ground black pepper
  • 2 tablespoons extra virgin olive oil
  • 1 large yellow onion (about 8 ounces), coarsely chopped
  • carrot, coarsely chopped
  • celery stalk, coarsely shopped
  • 2-4 garlic cloves, peeled and smashed
  • 1 cup Zinfandel or other robust dry red wine
  • 1 cup beef, veal, or chicken stock, homemade or store-bought
  • Three large 3- to 4-inch leafy fresh sage sprigs
  • Two to three 6- to 8-inch leafy flat-leaf parsley sprigs
  • 8 to 10 black peppercorns

For the Carrots

  • 1 ½ pounds small to medium carrots, peeled, or ¾ pound each carrots and parsnips, peeled
  • 1 tablespoon extra-virgin olive oil
  • 1 tablespoon unsalted butter
  • Coarse salt and freshly ground black pepper
  • 1 tablespoon red wine vinegar
  • Pinch of sugar
  • 2 tablespoons chopped fresh sage
  • 2 tablespoons chopped flat-leaf parsley

Directions

  1. Heat the oven to 300 degrees.IMG_8418
  2. Tying the meat: Using a kitchen string, tie the beef into a neat, snug shape.
    IMG_8424
    IMG_8431
  3. Browning the meat: Season the beef all over with salt and pepper. Heat the oil in a large Dutch oven or other braising pot (5-quart works well) over medium heat. Add the beef and brown it on all sides, turning it with tongs as you go, about 18 minutes total. Remove the beef and set it aside on a large plate or dish that will collect any juices that the meat releases. If there are any charred bits in the pot, remove them with a damp paper towel, but leave behind any tasty-looking drippings.
    IMG_8430
    IMG_8434
  4. The aromatics and braising liquid: Return the pot to medium-high heat and add the onion, carrot, celery and garlic. Season lightly with salt and pepper. Cook, stirring often, until just starting to brown, about 5 minutes. Pour in the wine, scrape the bottom with a wooden spoon to loosen any of the cherished cooked-on bits of caramelized beef juices, and boil to reduce the wine by about half, about 6 minutes. Add the stock, return to a boil, and boil to reduce by just about one third, another 5 minutes.
    IMG_8436
    Return the meat to the pot, and add the sage, parsley, and peppercorns. Cover with a piece of parchment paper, pressing down so that it nearly touches the meat and the edges of the paper overhang the pot by about an inch. Set the lid in place.
  5. The braise: transfer the pot to the low third of the oven and braise at a gentle simmer, turning the roast once halfway through braising, until fork-tender, about 3 hours. Peek under the lid after the first 10 to 15 minutes to check that the liquid isn’t simmering too vigorously; if it is, lower the oven heat by 10 or 15 degrees.
    IMG_8438
  6. The garnish: while the beef braises, cut the carrots into sticks by cutting them crosswise in half, then cutting the halves lengthwise into sticks about 3 inches by ½ inch. This typically means cutting the thicker tops into quarters and the skinnier tips in half. (If using parsnips, remove any woody core before cutting them into sticks) You can chop the sage and parsley for the garnish now as well. Set aside.
    IMG_8445
  7. The finish: remove the pot from the oven. Lift the beef out with tongs or a sturdy spatula, set on a carving platter to catch the juices, and cover loosely with foil to keep warm. Strain the cooking liquid, pressing down on the solids to extract as much liquid as possible.
    IMG_8447
    Discard the spent aromatics (there is a lot of flavor in this and Russ likes to eat the solids and/or add to his mashed potatoes), and pour the liquid into a medium saucepan. Let the braising liquid settle, then if possible, spoon off and discard as much fat as you easily can with a wide spoon. Measure out ½ cup of the juices for glazing the carrots and set the rest aside in a warm spot.
    IMG_8451
  8. Glazing the carrots: heat the oil and butter in a large skillet (12 or 13 inch) over medium-high heat. When quite hot, add the carrots (and parsnips, if using), season with salt and pepper, and cook briskly, shaking or stirring them, until lightly glazed and brown in spots, about 8 minutes.
    IMG_8452
    Add the ½ cup braising liquid, cover partway, reduce the heat to medium, and simmer until tender but not at all mushy, 6 to 8 minutes. Uncover, raise the heat, and bring back to a boil. Add the vinegar, sugar, sage and parsley and cook until the liquid is reduced to a glaze, about 1 minute. Taste for salt and pepper.
  9. The finish: heat the remaining reserved cooking juices over medium-high heat, and boil for 1 or 2 minutes to concentrate their flavor. Taste. You may not need to add any salt or pepper, but do so if the juices are lacking in flavor.
    IMG_8454
  10. Serving: remove the strings from the roast. For a platter presentation, arrange the carrots (and parsnips, if using) around the pot roast. Alternatively, slice the roast into ½-inch thick slices and arrange the slices on dinner plates along with the carrots (and parsnips, if using). Spoon a bit of sauce over the meat and serve immediately. Pass any remaining sauce at the table.
    IMG_8457

http://www.lynnandruss.com