New and Improved Decorated Sugar Cookies

As you know, I’m a bit of a fanatic when it comes to Decorated Sugar Cookies with Royal Icing. I’ve been making them in some fashion or another since I was a young child. The past couple of years I have been using a new-and-improved cookie dough that stays in shape, doesn’t need to be refrigerated for hours, rolls out nicely and is easy to handle.

But the recipe got buried in another blog so I thought I’d post it in and of itself. The images depict a variety of reasons or seasons to make the cookies. Believe me, there is a cookie cutter for just about anything you can think of.

In fact, my next batch after the holidays will be for my garden club. I am a co-designer of one of the annual gala tables, with an overall theme of “Bloom with a View” and our specific table idea centers around an “Artist’s Studio” so stay tuned for an upcoming blog featuring those creative little devils.

IMG_2745Hearts for Valentine’s Day.

IMG_4696Hot air balloons for a child’s pastel-themed first birthday party.

spring cookiesFlowers and butterflies for my Master Gardner’s presentation.

IMG_1218
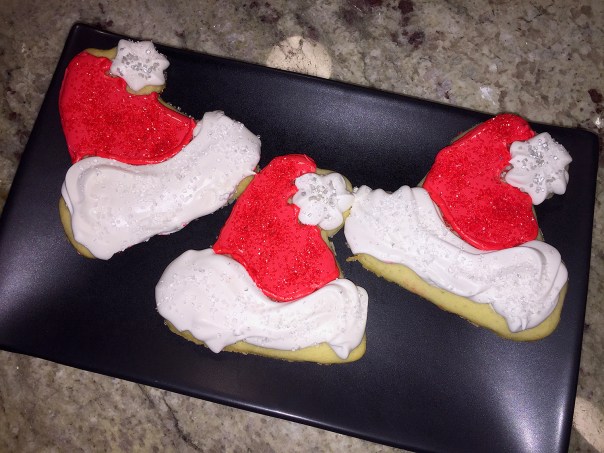
Santa Hats as a donation for a bake sale at an artist’s organization.

1.circle.santasIMG_0108

Circle Santas were introduced during the 2020 Christmas season.

Decorated Sugar Cookies

  • Servings: 3-6 dozen
  • Difficulty: cookie is easy; icing takes practice
  • Print

Ingredients

  • 2 sticks (1 cup), room temperature
  • 1 cup sugar
  • 1 egg
  • Zest from ½ a lemon (about 1 teaspoon)
  • 1 tsp baking powder
  • 1 tsp vanilla extract
  • 3 cups unsifted flour (plus more for rolling cookies out)
  • ½ tsp salt

Directions

  1. Preheat oven to 350 degrees.
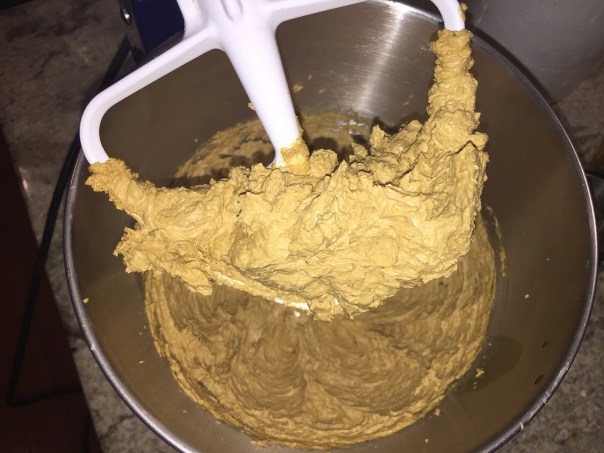
  2. Add the butter sticks and the sugar and cream together in a stand mixer, about 3 minutes.
  3. Scrape down the sides of the bowl and add the egg, lemon zest, baking powder and vanilla extract, then beat again for 2 minutes until a creamy.
  4. Add 3 cups flour and ½ teaspoon salt and mix on low speed to combine about 2 minutes.
  5. When done, form the dough into a ball.
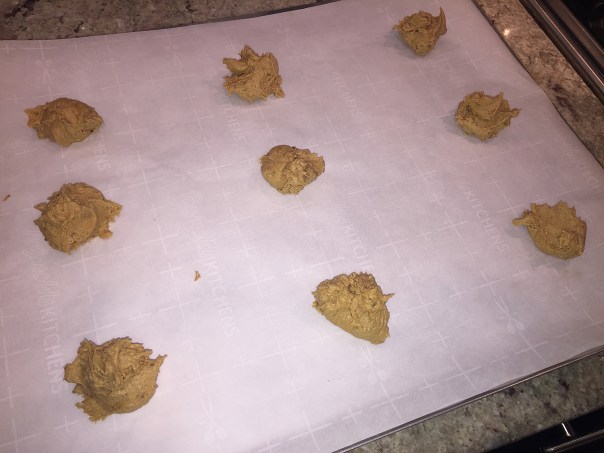
  6. On a floured surface or pastry cloth, roll out the cookie dough ball to desired thickness level, about an 1/8″ or a little thicker. Cut out shapes and place on an unrimmed baking sheet.
  7. Reform any leftover dough into another ball and repeat the process.
  8. Put baking sheet(s) in the freezer for 10 minutes.
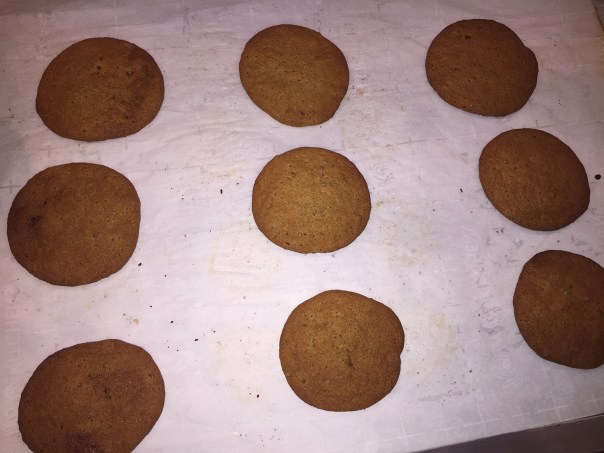
  9. After 10 minutes take the baking sheet out of the freezer and bake for 10-12 minutes, or until edges just start to turn a light brown. (Mine took the full 12 minutes.)
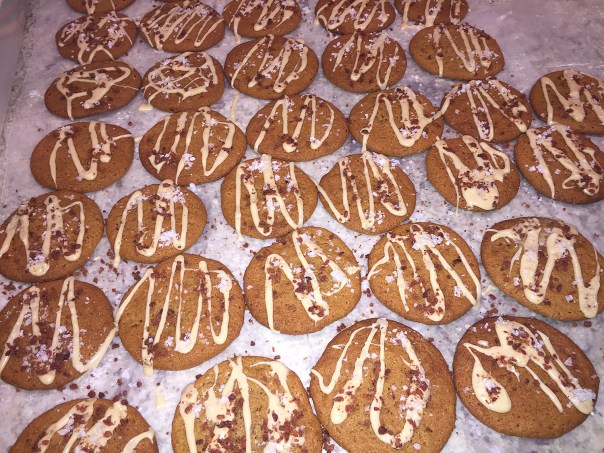
  10. Remove cookies from oven, allow to cool for a few minutes, then transfer them to a wire rack to cool completely before frosting. Decorate—or not—with Royal Icing.

ROYAL ICING

Ingredients

  • 1 lb. confectioners sugar
  • 3 Tbsp. meringue powder
  • 1 tsp. vanilla extract
  • 1/2 cup warm water

Directions

  1. In a stand mixer, beat the meringue powder and water for about 30 seconds on med-high speed.
  2. Stop the mixer, add the confectioners sugar and beat on low until incorporated. Turn the speed up to high and beat for 7 minutes. Stiff peaks will form.
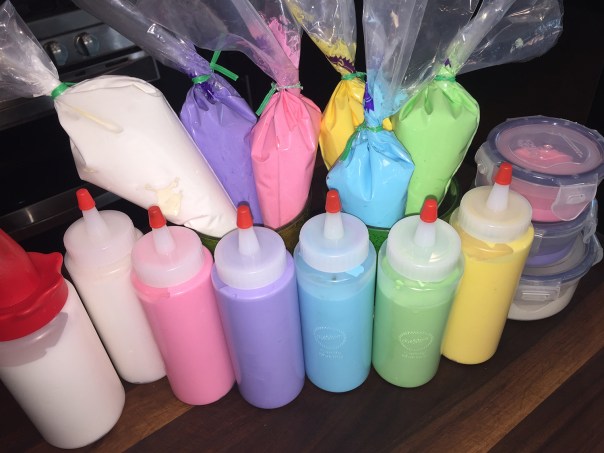
  3. Divide the frosting into bowls based on the number of colors you are using, remember white is a color too.
  4. Add your food coloring and mix each bowl thoroughly, adding a few drops of water as necessary.
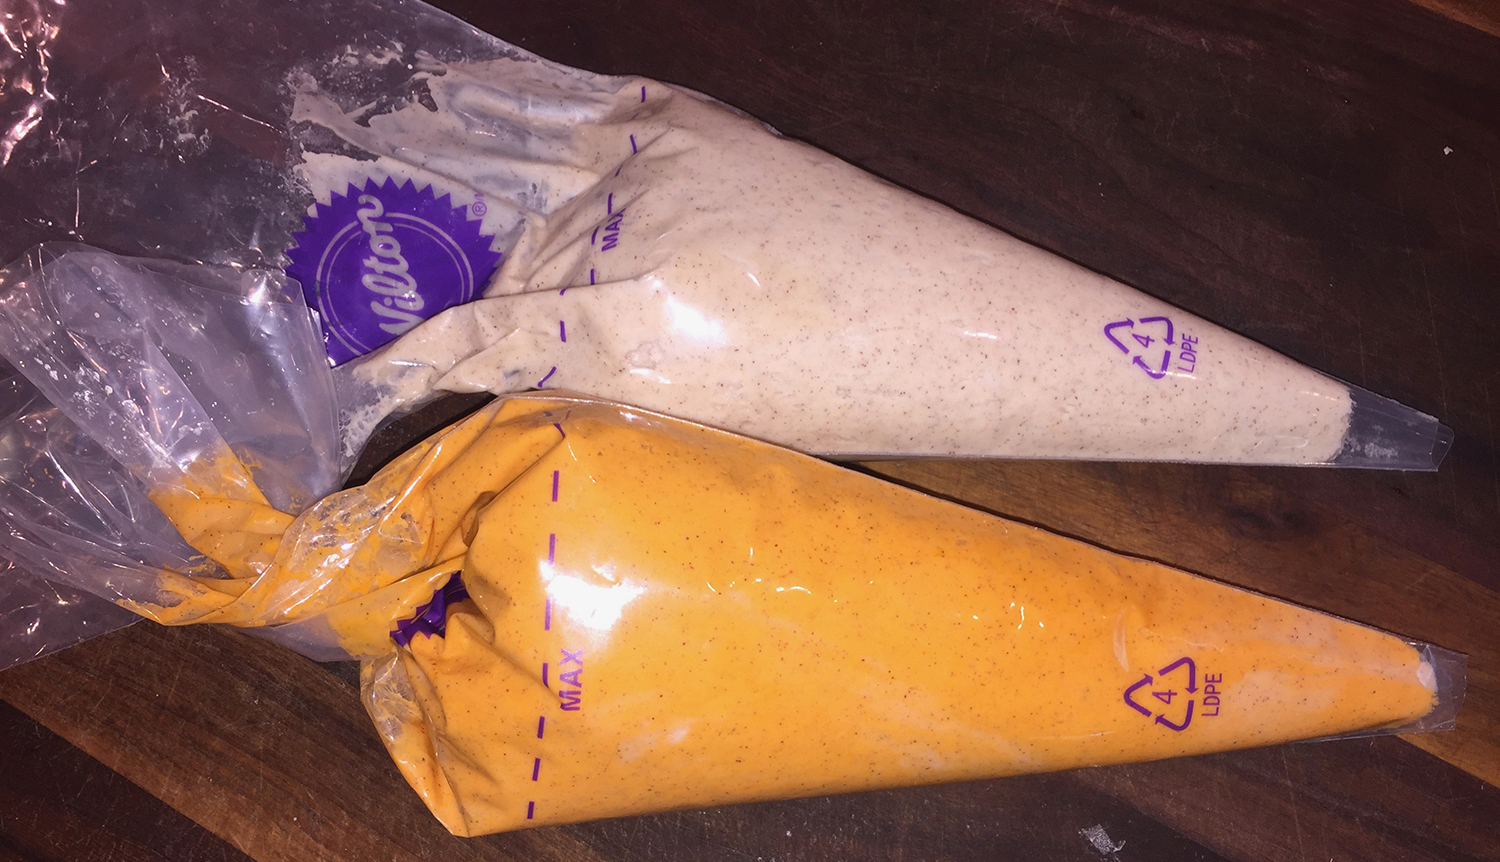
  5. Put about 1/3 of each color in separate pastry bags for piping. Thin out the remainder with more water (a 1/2 teaspoon at a time) to achieve a flooding consistency and add that to squeezable bottles as shown.
    IMG_4661
  6. Add finishing touches as desired.
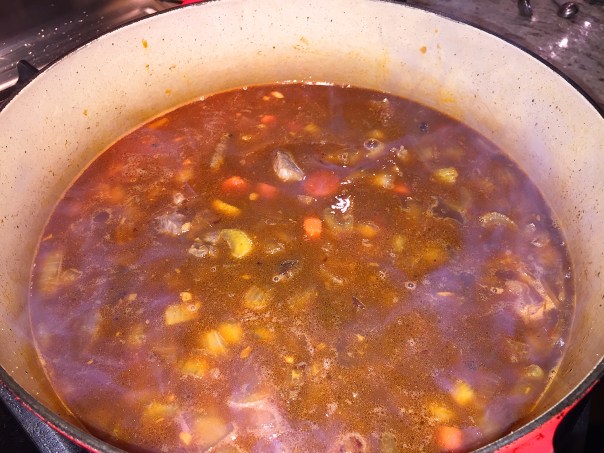
http://www.lynnandruss.com

Sofrito Scallops with Saffron Rice

It’s been five long years since we made this meal, can’t understand why because it’s fabulous! It only takes 45 minutes from start to finish so it’s a pretty impressive dish for a weeknight feast. Although the one thing I forgot to add this time around was the hot smoked paprika. Russ included it the first time and we loved the extra kick it provided.

Used with everything from beans, to meat, to fish, the versatile tomato-based sauce called sofrito is the soul of Latin American and Caribbean food. In this Cuban-inspired dish, bay scallops are tossed in the hot sofrito and then served with saffron-infused rice. The rice rallies up several notches with homemade shellfish stock replacing the water; so include it if at all possible. I also substituted tomato paste in place of the ketchup which added more body.

Cooking the meal for just the two of us provided enough leftovers for another meal altogether—and we weren’t complaining! This might come in handy over the hectic holiday season when you’re not in the mood to go out, or you want something quick, but a bit elegant.

IMG_9392

Sofrito Scallops with Saffron Rice

  • Servings: 4
  • Difficulty: easy
  • Print

Ingredients

  • 3 Tbs. extra-virgin olive oil
  • Pinch of saffron threads
  • 1-1/2 cups long-grain white rice
  • Kosher salt
  • 1 medium yellow onion, finely chopped (about 1 cup)
  • 1 small green bell pepper, finely chopped (about 3/4 cup)
  • 3 medium cloves garlic, minced (about 1 Tbs.)
  • 1 tsp. finely chopped fresh oregano (used dried if fresh is unavailable)
  • 1/2 tsp. ground cumin
  • 1/4 tsp. hot smoked paprika (optional)
  • Freshly ground black pepper
  • 1/2 cup dry white wine
  • 1 cup homemade shellfish stock (or water)
  • 1 8-oz. can tomato sauce, (or tomato paste)
  • 1 Tbs. ketchup
  • 1 lb. bay scallops
  • 1/2 lemon

Directions

  1. Heat 1 Tbs. of the oil and the saffron in a 4-quart saucepan over medium-high heat until the saffron is sizzling. Add the rice and stir to coat.
  2. Add 3 cups shellfish stock (or water) and 1-1/2 tsp. salt and bring to a boil. Boil for 1 minute; reduce the heat to a gentle simmer, stir once, cover, and cook until all of the water has been absorbed and the rice is tender, about 15 minutes.
    IMG_9395
  3. Meanwhile, heat the remaining 2 Tbs. oil in a 12-inch skillet over medium heat. Add the onion, green pepper, and garlic and cook, stirring, until the vegetables are soft, about 8 minutes.
    IMG_9397
  4. Stir in the oregano, cumin, smoked paprika (if using),1 tsp. salt, and 1/2 tsp. pepper. Add the wine and simmer until reduced by half, about 3 minutes.
    IMG_9398
  5. Stir in the tomato sauce and cup water; bring to a simmer. Turn the heat down to low, cover, and cook until slightly thickened, about 7 minutes.
  6. Stir in the ketchup (or tomato paste) and season to taste with salt and pepper.
    IMG_9400
  7. When the rice is ready, add the scallops to the hot sofrito and cook, stirring occasionally, until just cooked through, about 3 minutes.
    IMG_9404
  8. Transfer the rice to a large platter and top with the scallop mixture; or divide all among four dinner plates. Season to taste with lemon juice, and serve immediately.
    IMG_9409

http://www.lynnandruss.com

Adapted from a recipe by Julissa Roberts from Fine Cooking

Roast Chicken with Fingerling Potatoes, Leeks, and Bacon

Impress yourself and your guests with this Cast-Iron Roast Chicken with Fingerling Potatoes, Leeks, and Bacon. Once prep is out of the way, just pop the skillet with everything in it into the oven, and presto, an hour later it’s ready! Although you do have to let the chicken rest for 15 minutes for the juices to redistribute allowing you time to make a side salad if desired; or a sip or two of your chilled white wine.

Sautéing the leeks and garlic before layering them with the potatoes renders them meltingly tender and slightly caramelized. The roast chicken on top comes out incredibly juicy, with delicate herbal notes. And what a showstopper with that gorgeous crispy browned skin!

Prior to roasting, the fingerling potatoes need to be cut into 1/8-inch-thick rounds, the leeks sliced and thoroughly rinsed, and your herbs prepped as noted below. Then combine the softened butter with the chopped thyme to make a rub for the chicken (both inside and outside the skin if you like).

IMG_0151
IMG_0141
IMG_0142

As there were only the two of us for dinner, we had plenty of leftovers. But instead of just reheating the dinner as is, we used the poultry meat in Chicken Enchiladas a few nights later; the remaining potato mixture in a frittata; and the rib cage and bones to make more homemade chicken stock–even leaving the chopped leeks and herbs in the cavity! Now that’s getting our money’s worth!

IMG_0789.jpg

Another fabulous cast-iron chicken dish, the Cast-Iron Roast Chicken with Winter Squash, Red Onions, and Pancetta, can be found at this link.

Roast Chicken with Fingerling Potatoes, Leeks and Bacon

  • Servings: 4
  • Difficulty: easy
  • Print

Ingredients

  • 1 3-1/2- to 4-lb. whole chicken
  • Kosher salt and freshly ground black pepper
  • 2 Tbs. finely chopped fresh parsley, plus 10 small sprigs
  • 4 fresh or dried bay leaves
  • 1 Tbs. finely chopped fresh thyme, plus 4 sprigs
  • 4 large leeks, white and light-green parts halved lengthwise, then sliced crosswise into 3/8-inch pieces (about 4 cups) and rinsed; dark-green parts from 1 leek rinsed and reserved
  • 3 strips thick-cut bacon, cut crosswise 3/8-inch thick
  • 1 Tbs. olive oil
  • 2 large cloves garlic, thinly sliced
  • 1-1/2 lb. large fingerling potatoes, cut crosswise into 1/8-inch-thick rounds
  • 1-1/2 cups lower-salt chicken broth
  • 2 Tbs. unsalted butter, softened

Directions

  1. Discard the giblets from the chicken, trim off any excess fat from the cavity and neck, and pat dry with paper towels. Generously season the chicken inside and out with 1 Tbs. salt and 1/2 tsp. pepper.
    IMG_0143
  2. Stuff the cavity with the parsley sprigs, 3 of the bay leaves (if fresh, crush lightly), 2 sprigs of thyme, and the dark leek greens. Tuck the wings behind the neck of the chicken, using the wing tips to secure any loose neck skin, if necessary. Tie the legs together with string. Let rest at room temperature for 20 to 30 minutes.
    IMG_0145
  3. Meanwhile, position a rack in the center of the oven and heat the oven to 450°F.
  4. In a 12-inch ovenproof skillet, cook the bacon in the oil over medium-high heat, stirring occasionally, until it begins to brown, about 7 minutes. Leaving the bacon in the pan, spoon out and reserve all but 1 Tbs. fat.
    IMG_0148
  5. Reduce the heat to medium and add the leeks, garlic, and the remaining bay leaf and thyme sprigs, and season lightly with salt and pepper. Cook, stirring occasionally, until the leeks are soft and translucent, 5 to 7 minutes. Transfer to a plate.
    IMG_0149
  6. In the same pan, arrange half of the potatoes in an even layer, season very lightly with salt and pepper, then scatter the leek mixture over top. Layer the remaining potatoes over the leeks, and season very lightly with salt and pepper. Pour the broth over the vegetables.
    IMG_0157
    IMG_0159
  7. Pour 1 Tbs. of the reserved bacon fat into the cavity of the chicken. Rub the softened butter over the bird’s skin, and sprinkle with the chopped thyme. Set the chicken, breast side up, on the vegetables.
    IMG_0155
    IMG_0160
  8. Roast the chicken until an instant-read thermometer inserted into the thickest part of the thigh registers 165°F to 170°F, about 1 hour.
    IMG_0166
  9. Transfer the chicken to a platter, remove the string, cover loosely with foil, and let rest for about 15 minutes. Meanwhile, discard the thyme sprigs and bay leaf and keep the vegetables warm in the turned-off oven.
    IMG_0177
  10. Sprinkle the potatoes with the chopped parsley, arrange them around the chicken, and serve.

http://www.lynnandruss.com

IMG_0176

Our chicken weighed in at 4 1/4 pounds so after an hour, the breast meat was done but the legs weren’t quite at temp. So Russ removed them, placed them on top of the skillet potatoes and inserted back into the oven while the chicken rested. This not only crisped the leg skin, but also more of the potato surface.

Adapted from a recipe by Arlene Jacobs from Fine Cooking

Maple-Bacon Ginger Cookies. Because You Must.

Every year I add a new cookie recipe or two to my rotation of holiday treats. This year one of them was the Maple-Bacon Ginger Cookies found in the latest Bon Appétit Magazine. I figured they would make a great counterpart to the dozens of sweet confections already crafted.

Savory bacon and sweet maple syrup give a modern twist to classic ginger cookies. Just like the classics, these are crunchy on the outside and chewy on the inside. We were salivating at the thought, and while they were in the oven baking, I was already planning on making another batch.

IMG_0117

Well, there was no question we’d have to make another batch because the first set came out of the oven as one large flat mass. After a quizzical look with raised eyebrow cocked, Russ commented that it looked as though there was not enough flour in them. Oops, my bad. I looked at the written list of ingredients and quickly realized I had only incorporated 1 1/2 cups of flour, NOT the 2 1/3 listed.

IMG_0099Fiasco number one.

Maple-Bacon Ginger Cookies Take 2. We salvaged a few of the crunchier pieces for tasting purposes and to perhaps use as a topping for ice cream? We could toss the remainder outdoors to wildlife, but I’m pretty sure that is definitely not a good idea. All thoughts of what to do with the failed mess aside, we teamed up and started on a fresh batch.

Russ’ mission was to fry more bacon while I captained the mix master. No sooner had I started (very carefully) measuring the ingredients, when I heard Hubby swear under his breath. When questioned what was the matter, he replied he had just burnt half of the bacon. Knowing it is NOT a flavor profile that most folks associate with a “good cookie” he tossed the inedible strips and began—yet again. As two pretty accomplished chefs, it was just not our day…

IMG_0088Above, the bacon that didn’t burn…
IMG_0092
We used a mini processor to crumble the cooked bacon, then microwaved the remaining portion to use as a topping.

In my defense, I had gotten up at 4 a.m. the day before (not by choice, just never fell asleep, an annoying curse of mine) and starting making cookies and continued into the evening. Then woke up the next day (several hours later, thank you) and began again. When I finished icing the decorated sugar cookies (recipe link below), I thought why not quickly bake the ginger cookies…

Back to the amount of flour. The recipe indicated 2 1/3 cups or 11 ounces. Russ said it is always best to weigh your flour as opposed to using measuring cups. Well, if that’s the case, 11 ounces actually measured out to be 2 1/2 cups, not 2 1/3, so I made that notation in the recipe below.

If you want the bacon garnish to be extra crisp, you can either fry the already-cooked and minced bacon in a skillet for another minute before patting dry with paper towels and using; OR heat in a microwave on paper towel for 1 minute like we did. It is a bit dicey trying to get the bacon bits and sea salt to stick to the maple drizzle. You might have to coax some of it onto the frosting with a utensil.

After all that was it worth it? Thank goodness I can truthfully answer yes. Unfortunately, though I adore the smell of, and love the taste of bacon, it doesn’t love me back, so I eat it with caution, if at all. Plus I’m not a big dessert/sweet eater, but I “forced” myself to sample one so I could write this blog 😉

Maple-Bacon Ginger Cookies

  • Servings: 3 Dozen
  • Difficulty: moderate
  • Print

IMG_0119

Ingredients

  • 6 oz. (12 Tbs. or 1 1/2 sticks) unsalted butter, at room temperature
  • 3/4 cup granulated sugar
  • 1/2 cup pure maple syrup; more as needed
  • 1/4 cup molasses
  • 2 Tbs. grated fresh ginger
  • 1 tsp. ground ginger
  • 1 tsp. pure vanilla extract
  • 2 tsp. baking soda
  • 1/2 tsp. kosher salt
  • 1 large egg
  • 11 oz. (2-1/3 to 2-1/2 cups) all-purpose flour
  • 8 oz. bacon, cooked and finely chopped (about 3/4 cup)
  • 4 oz. confectioners’ sugar (about 1 cup), sifted
  • Flaky sea salt

Directions

  1. Position two racks in the upper and lower thirds of the oven, and heat the oven to 350°F.
  2. In the bowl of a stand mixer fitted with the paddle attachment (or using a hand-held mixer and a large bowl), add the butter, sugar, 1/4 cup of the maple syrup, the molasses, fresh and ground gingers, vanilla, baking soda, and salt. Beat on medium speed, scraping down the bowl as needed, until light and fluffy, about 5 minutes.
    IMG_0094
  3. Add the egg, and mix on low speed until just combined, scraping down the bowl as needed.
  4. Add the flour and 1/2 cup of the chopped bacon, and mix on low speed, scraping down the bowl as needed, until just combined.
  5. Portion large golf-ball-size pieces, about 2 Tbs. each, onto parchment-lined baking sheets, spacing them about 1 1/2 inches apart.
    IMG_0102
    After being spooked by the first fiasco, I spaced my cookies further apart, only placing 9 portions per sheet.
  6. Bake until the edges are set but the centers are still slightly soft, 13 to 15 minutes.
    IMG_0103
  7. Transfer the pans to wire racks, and let cool for about 30 minutes.
  8. In a medium bowl, whisk the confectioners’ sugar with the remaining ¼ cup maple syrup. Test the icing for a good drizzling consistency, and add more maple syrup 1/2 Tbs. at a time to thin, if necessary.
    IMG_0105
    Just starting to whisk together the icing; make sure it is very well blended with no lumps. I used the whisk to drizzle it over the cookies.
  9. Gently loosen the cookies from the parchment, and drizzle on the glaze. Top each with a sprinkling of the remaining 1/4 cup chopped bacon and a pinch of the sea salt. Store in an airtight container for up to 3 days.
    IMG_0109

http://www.lynnandruss.com

By William Stewart from Fine Cooking

Some of the other cookies I made are featured below with a link to their respective recipes. Just scroll down far enough in the blogs to find the recipes.

Peanut Butter and Chocolate Extravaganzas

IMG_0112

Staying-In-Shape Decorated Cookies

IMG_0114

Cool Beans Baby! It’s Stewp.

A soup that is so robust, it can be mistaken for stew… “Stewp” anyone? Escarole, Cannellini and Chicken Sausage Soup is hearty, tasty and pretty darn good for you too! Plus it takes less than a half hour to make. OK, what’s not to like? Not an escarole fan? Then exchange it for other greens such as spinach or kale.

IMG_9362

The Gilbert’s Kraft Sausages are individually vacuumed-packed for freshness and contain no antibiotics. The Caprese brand made with mozzarella, basil and sun-dried tomatoes pair well with the cannellini beans and escarole—our riff on Italian Wedding Soup, if you may. If Gilbert’s brand isn’t available in your area, use your favorite chicken or turkey sausage.

You could cut the recipe in half to four servings, but it’s so good, you will wish you had made the entire batch. And you know my mantra, when including stock, use homemade if at all possible, it just raises the taste-bar to a higher level.

Escarole, Cannellini and Chicken Sausage Soup

  • Servings: 8
  • Difficulty: easy
  • Print

IMG_9369

Ingredients

  • 4 tablespoons olive oil
  • 6 chicken sausage links, sliced at diagonal to 1/4″ thick
  • 5-6 garlic cloves, finely chopped
  • 2 small heads escarole, cleaned and chopped
  • 1 large white onion, small dice
  • 1 tsp. salt
  • 8 cups chicken broth, preferably homemade
  • 4 15-ounce cans cannellini beans, drained and rinsed
  • 2 2-3″ pieces Parmesan rind
  • 1/2 tsp. crushed dried rosemary
  • 1/4 tsp. dried red pepper flakes
  • Freshly ground black pepper

Directions

  1. Chop the escarole and place in a salad spinner full of cold water for several minutes, swishing a few times to loosen any dirt. Drain well, rinse again, and spin dry.
    IMG_9356
    IMG_9360
  2. Heat 4 tablespoons of olive oil in a heavy large pot over medium heat.
  3. Sauté the sausage pieces to a light brown, stirring occasionally, about 2 minutes. Remove from pot and set aside.
    IMG_9363
  4. Add the garlic and sauté until fragrant, about 15 seconds.
    IMG_9357
  5. Add the escarole and sauté until wilted, about 3 minutes. Add salt, rosemary and red pepper flakes.
  6. Add the chicken broth, beans, sausage slices and Parmesan cheese rinds. Cover and simmer until the beans are heated through, about 7 minutes.
  7. If necessary, season with salt and pepper, to taste.
  8. Remove parmesan rinds and discard.
  9. Ladle the soup into bowls. Sprinkle on grated parm if desired.

http://www.lynnandruss.com

Gift Yourself

Another mind-blowing braised dish by favorite chef/author Molly Stevens. I can’t even begin to tell you how much depth of flavor this lamb dish contains with the additions of preserved lemons, green olives, spices and veggies. Those green olives and preserved lemon give this Moroccan-influenced stew a tart-salty counterpoint to the sweet chunks of butternut squash.

IMG_9531

Earlier in the year, we purchased a large leg of lamb, portioning away what we needed at the time. The remainder was cut into cubes in 2-pound lots, vacuumed-sealed and frozen for later use, like now. Therefore, the amount we used for this recipe was shy by a pound; however we kept the remaining ingredients the same. (Since we used leg instead of shoulder, it took only 45 minutes in Step 12 to tenderize—shoulder will take about a half hour longer.)

IMG_9507
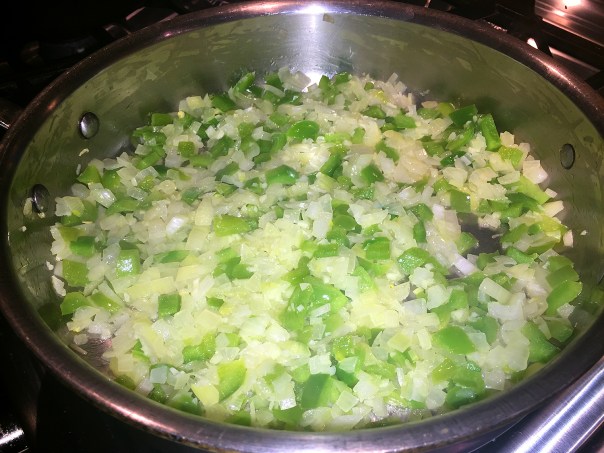
The Mr. looks spiffy in his Chef’s jacket and CIA toque (compliments of Gary and Rosanne) while he browns the lamb cubes.

Patience is needed when making this Moroccan Lamb Stew dinner because you’ll need a good three hours with prep and cooking. (See make ahead notation below.) To give you an idea, we started ours late on a Sunday afternoon and had dinner around 7:30. Because of the volume of ingredients serving 5 to 6 people, we had leftovers which we ate a few nights later over a bed of couscous—drooling once again 😉

NOTE: BTW, we usually keep a jar of preserved lemons in our auxiliary refrigerator. Many Moroccan and Middle Eastern recipes call for them—lemons that have been pickled in salt and their own juices. It’s quite easy to do, though takes at least three weeks before the lemons are ready to use. So plan ahead, it’s worth it.

We use Meyer lemons for making preserved lemons because they are milder than Eureka lemons (the regular lemon you buy at the store), they work beautifully preserved this way.

True, this recipe is more complex than many, but so are some relationships. I would marry this dish, but hubby might have an issue 😉

IMG_9528

Moroccan Lamb Stew

  • Servings: 5-6
  • Difficulty: moderate
  • Print

Ingredients

  • 3 lb. boneless lamb shoulder or leg, trimmed of excess fat and cut into 1-1/2- to 2-inch pieces
  • 3 Tbs. grapeseed oil or vegetable oil; more as needed
  • Kosher salt and freshly ground pepper
  • 1 medium yellow onion, coarsely chopped (about 1 cup)
  • 2 medium celery stalks, coarsely chopped (about 1/2 cup)
  • 1 medium carrot, coarsely chopped (about 1/3 cup)
  • 2 medium cloves garlic, minced
  • 1 Tbs. tomato paste
  • 1 tsp. caraway seeds
  • 1/4 tsp. cayenne
  • 1 cup dry white wine
  • 2-1/2 cups homemade or lower-salt store-bought beef broth
  • 2 cups onion wedges (3/4-inch wedges)
  • 2 cups diced butternut squash (1-inch dice)
  • 1 15-oz. can chickpeas, drained and rinsed
  • 1/2 cup halved pitted green olives
  • 1/4 cup chopped preserved lemon
  • 1/4 cup chopped fresh flat-leaf parsley

Directions

  1. Position a rack in the bottom third of the oven and heat the oven to 325°F.
  2. Spread the lamb on paper towels to dry for 10 to 20 minutes before browning. (You can use this time to chop the onion, celery, and carrot). If the meat is very wet, pat it dry.
  3. In a 6-quart Dutch oven or other heavy-duty pot, heat 3 Tbs. oil over medium to medium-high heat until shimmering hot. Season about one-third of lamb with salt and pepper and arrange it in a single layer in the pot (there should be at least 1/2 inch of space between the pieces).
    IMG_9504
  4. Brown well on at least 4 sides, adjusting the heat as necessary; each batch should take about 10 minutes to brown. Transfer the lamb to a large bowl or rimmed baking sheet as it browns and repeat with the rest of the lamb, seasoning with salt and pepper before browning. Once all of the lamb is browned, remove the pot from the heat to let it cool for a few minutes.
    IMG_9510
  5. Pour all but 2 Tbs. of the fat from the pot. (If there is not enough, add oil to equal 2 Tbs.) Return the pot to medium heat, then add the onion, celery, and carrot. Season with a pinch of salt and pepper, and cook, stirring often and scraping the bottom of the pot with a wooden spatula, until the vegetables begin to soften, 5 to 6 minutes.
    IMG_9509
  6. Stir in the garlic, tomato paste, caraway, and cayenne and cook, stirring occasionally, until fragrant, 1 to 2 minutes.
    IMG_9512
  7. Add the wine, stirring with the wooden spatula to dissolve any browned bits on the bottom of the pot. Raise the heat to medium high and boil to reduce by about half, 5 to 8 minutes.
  8. Add the beef broth and 1-1/2 cups water. Bring to a boil.
    IMG_9514
  9. Return the lamb to the pot along with any accumulated juice. Lower the heat to maintain a simmer.
    IMG_9516
  10. Crumple a 12×16-inch piece of parchment, then flatten it out. (Crumpling makes for easy handling.) Place the parchment directly on the surface of the stew, allowing the ends to come up the sides of the pot. Cover and put in the oven.
    IMG_9518
  11. After 1 hour of stewing, add the onion wedges to the pot. Cover with the parchment and lid, return to the oven.
    IMG_9519
  12. After another 30 minutes, add the squash. Cover with the parchment and lid, return the pot to the oven, and cook until the lamb is fork-tender, 45 minutes to 1-1/4 hours more. (Shoulder cuts will take longer than leg cuts.)
    IMG_9521
  13. Stir in the chickpeas, olives, preserved lemon, and parsley. Return to the oven for 5 minutes.
    IMG_9524
  14. If necessary, degrease the stew by laying a clean paper towel over the surface of the stew and gently pushing it into all the bumps and dips, then quickly peeling it off. Repeat as necessary with more paper towels. Season to taste with salt and pepper and serve.
    IMG_9526

Make Ahead Tips

The stew can be made up to 2 days ahead: Skip the degreasing step, cool to room temperature, cover, and refrigerate. Once the stew is chilled, lift the solidified fat off the top with a slotted spoon. Reheat the stew over medium-low heat to serve.

http://www.lynnandruss.com

Adapted from a recipe by chef/author Molly Stevens

A Real Neat Treat: Caper-Anchovy Butter

Here’s a ridiculously-easy-to-make flavored butter that elevates your steak from ordinary to elegant. And with some of the leftovers you can put a schmear on your side vegetables too. With the holidays approaching, it’s a simple way to impress your guests.

IMG_9469

Anchovies pack big flavor for such small fish. They’re so strong that only a small amount of anchovy is needed to add flavor to sauces, salad dressings, pasta and pizza. That same small amount also delivers health benefits in the form of essential fatty acids, protein and other nutrients.

Hubby even went a step further with the anchovies topping his side salad with several whole ones. Me, like many other people I know, only like them when they are mashed up, and can’t abide eating them whole.

IMG_9463

As far as the butter compound, make extra and freeze the remainder. Slice off as needed and let come to room temperature for future uses on potatoes, in eggs or pasta dishes, schmeared on bagels… you get the idea.

IMG_9453

Sirloin Steak with Caper-Achovy Butter

  • Servings: 2+
  • Difficulty: easy
  • Print

Ingredients

  • 2 anchovy fillets, rinsed and mashed
  • 1/4 tsp. chopped garlic
  • Kosher salt
  • 3 Tbs. unsalted butter, cut into 3 pieces
  • 2 tsp. finely chopped fresh parsley
  • 1/2 tsp. capers, rinsed and finely chopped
  • 1/4 tsp. finely grated lemon zest
  • Freshly ground black pepper
  • 1 Tbs. canola oil
  • 1-lb. Sirloin steak

Directions

  1. Mash the anchovy fillets into a paste on a cutting board with the side of a chef’s knife. Sprinkle the garlic with a pinch of kosher salt and mash it into a paste.
    IMG_9456
  2. Bring the butter to room temperature; or put the butter in a small microwave-safe bowl and microwave it on high in 10-second bursts until it just begins to melt. Mash the butter with a fork and stir in the anchovy paste, garlic, parsley, capers, lemon zest, and a few grinds of black pepper.
    IMG_9461
  3. Heat the oil in a 12-inch cast iron skillet over high heat. Season the steak generously with salt and pepper.
  4. Sear the steak on both sides until a meat thermometer reads 120°F for rare or 125°F for medium rare, 8 to 10 minutes total.
  5. Tent the meat with foil and let rest for 5 minutes. Cut the steak at an angle against the grain into 1/2″ slices and top with the butter compound.
    IMG_9465

http://www.lynnandruss.com

Adapted from a recipe found in Fine Cooking

Your Curry Is Calling

Up the ante by using boneless, skinless chicken, which cooks quickly but can lack flavor compared to bone-in, skin-on chicken thighs. Yes, thigh meat tends to have more essence, but I’m an aficionado of the white meat (while Hubby likes the dark meat), so recipes utilizing the fairer flesh appeal to me.

The depth of flavor starts right off the bat with your cooking fat—be it ghee, or oil. You need this bit of fat when you have this lean cut of meat and a lot of seasoning going on. While the honey lends a sweet, caramelize-y twist to this quick curry, if you want to up the heat, add a big pinch of cayenne pepper.

IMG_9449

Spices not only bring ample seasoning but texture to dishes. The triumvirate of onion, ginger, and garlic provides the deep base flavor of most curries, equivalent to onion, carrot and celery in the French tradition. (Note: garlic is not essential. Some Indians eschew it completely on account of its pungency and it is often left out of food served at weddings to avoid offending guests.) 

One hour to make dinner may not be everyone’s idea of a “quick” meal. Yes, you can use a rotisserie chicken and jarred sauce, but to achieve more authentic results, you need to step up your game. The complex flavors of curries include generous spicing of onion, ginger and garlic; and something to give it body. Here, it is the combination of tomatoes, honey, yogurt and coconut milk.

Bon Appétit says canned tomatoes are one of the easiest ways to build a sauce from a handful of ingredients, and coconut milk helps out too. You really want to get the sauce to a thick place, so reduce until it coats the spoon.

The original recipe calls for adding the raw chicken after the coconut milk has been cooked which would release moisture back into the thickened sauce. But I sear the meat first, leaving the luscious browned bits in the pan, and then add it back in toward the end, so no extra moisture thins the sauce.

For another layer of flavor, after portioning out, add a generous squeeze of fresh lime juice and scatter on some sliced scallions with the chopped cilantro and drizzle of yogurt sauce. Then have some thick, crusty bread handy to scoop up all the extra sauce, or serve alongside a pile of rice for a low-maintenance comfort food dinner. Speaking of rice, if you steam it in homemade chicken stock, you’ll add even more luscious depth to the dish. We can’t wait until we make this again!

Quick Tomato Chicken Curry

  • Servings: 4
  • Difficulty: moderate
  • Print

Ingredients

  • 4 tablespoons ghee, coconut oil, or extra-virgin olive oil, divided
  • 1 large red onion, cut into ½-inch wedges
  • 1 yellow bell pepper, seeded, stemmed, cut across the equator then into ½-inch strips
  • 1 2-inch piece ginger, peeled, finely grated
  • 4 garlic cloves, crushed
  • Kosher salt
  • 1 tablespoon plus 1 teaspoon garam masala
  • 1 bay leaf
  • ½ teaspoon crushed red pepper flakes
  • 2 tablespoons honey
  • 1 28-ounce can whole peeled tomatoes
  • 1 15-ounce can coconut milk
  • 3 skinless, boneless chicken breasts (about 1½ pounds total), cut into 1-inch-thick pieces
  • ½ cup whole-milk Greek yogurt
  • 2 scallions, thinly sliced on diagonal
  • ½ cup coarsely chopped cilantro

Directions

  1. Heat 1 tablespoon ghee/oil in a large wide saucepan over medium-high. Add chicken pieces and brown on all sides, about 3 minutes total, remove from pan and set aside. (You may have to do this in two batches so that the chicken browns instead of steams.)
    IMG_9431
  2. Add remaining ghee/oil, onion and pepper strips and cook, turning occasionally, until undersides are golden brown, about 4 minutes.
    IMG_9434
  3. Add ginger and garlic and cook, stirring, until softened, about 2 minutes; season with salt.
  4. Add garam masala, bay leaf, and crushed red pepper and cook until fragrant, about 30 seconds. Stir in honey and cook until slightly caramelized, about 1 minute.
    IMG_9435
    IMG_9437
  5. Add tomatoes along with juices and bring to a boil, smashing down on tomatoes with a wooden spoon until pieces are no bigger than 1″. Reduce heat to medium and cook, stirring often and scraping up browned bits from bottom of pot, until sauce thickens, 8–10 minutes.
    IMG_9438
  6. Add coconut milk and cook, stirring occasionally and simmer for 15 minutes.
    IMG_9442
    IMG_9444
  7. Add browned chicken strips and any accumulated juices and reduce heat to low.
  8. Cook, partially covered, until chicken is cooked through, 8–10 minutes. Season with salt.
    IMG_9447
  9. Stir yogurt, a big pinch of salt, and 2 Tbsp. water in a small bowl.
  10. Drizzle yogurt sauce over stew. Top with sliced scallions and cilantro. Serve over rice or noodles if desired.
    IMG_9452

Do Ahead: Curry (without yogurt sauce) can be made 2 days ahead. Cover and chill.

http://www.lynnandruss.com

Adapted from a recipe by Andy Baraghani from Bon Appétit

Kickin’ Off Cocktail Hour

When the weather outside is frightful, or even when it’s not, kick your cocktail hour up a notch with festive pomegranate seeds. The pomegranate is typically in season in the Northern Hemisphere from September to February, and in the Southern Hemisphere from March to May. So for us here in the Northeast US, ’tis the season!

IMG_9344

The name for the fruit is derived from Latin and literally means “seeded apple.” Only the seeds are edible and are found inside this large, rounded red fruit. An average pomegranate contains about 600 juicy seeds, also known as arils, which are encapsulated in white pith.

One of the essential benefits of pomegranate seeds is that this fruit is a powerhouse of various nutrients like calcium, potassium, phosphorus, vitamins C, B complex and K, folic acid, iron, protein, etc. It is also a rich source of dietary fibers, zinc, magnesium and carbohydrates. Also the bright red juice extracted from the pomegranate fruit has been proven to possess medicinal properties in a number of studies (TMI for this blog.)

I’m enthralled with many of the health benefits of pomegranate seeds and juice that have been attributed to their extremely strong antioxidant properties. But the antioxidants in pomegranate can also provide beauty benefits! Due to their ability to destroy free radicals, the antioxidants in pomegranate can help fight wrinkles and fine lines on the skin. Got your attention now?

IMG_9380

OK, so how do you extract those luscious arils and what do you do with them? The process is fairly easy, and the list of uses is only limited by your imagination, but I’m going to focus on how to dress up your cocktail hour for the holiday season with festive ice cubes.

IMG_9376

IMG_9346First, slice all around the equator piercing the tough skin but do not cut through, you don’t want to slice through the seeds inside.

IMG_9347
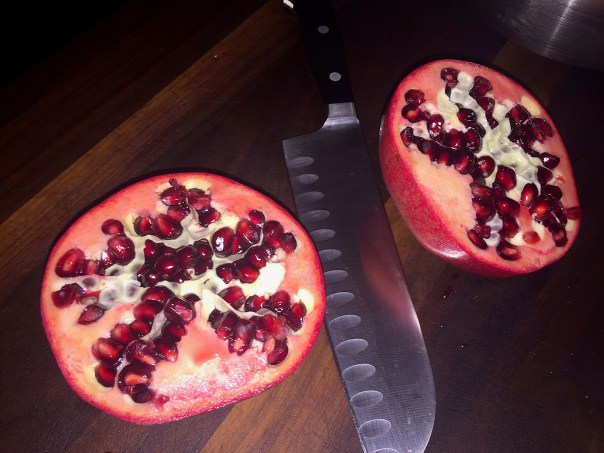
Twist the the halves in opposite directions until you can pull it apart. Then pull the skin outward to help loosen the insides.

IMG_9349
Place one of the halves upside down in your palm over a large bowl and tap often and sharply. This forces the arils to pop out into the bowl.


Repeat with other half. Remove any white pith that may have fallen into the bowl.

IMG_9353You’ll end up with around 600 seeds and some juice.

IMG_9354Place 5-7 seeds in each ice cube square then freeze for a few hours or overnight. When completely solid, pop the frozen cubes into a ziploc bag until ready to use.


Store the leftover seeds in an airtight container in the fridge for 5-7 days, or in the freezer for up to 4 months. Use them to in salads, cereal, smoothies—or more ice cubes!

Three Amigo Meatballs

Quite a while back, when I penned this blog, I’d been on a fennel kick, so when I saw this recipe in Redbook Magazine, it caught my eye immediately. Always looking to expand our repertoire of quick, tasty weeknight meals, the “three amigos” of Pork, Veal and Fennel Meatballs seem to fit the bill perfectly.

plated.meal2

It calls for a pound each of pork and veal, but since the meat we bought was prepackaged in certain amounts, we ended up with slightly more pork, and slightly less veal, which truth be told, didn’t seem to make a lick of difference! We also found it odd that the recipe calls for grated lemon rind—and rind usually is bitter, so we used lemon zest instead (which I noted below).

Pork, Veal and Fennel Meatballs

  • Servings: 60 mini meatballs
  • Difficulty: easy
  • Print

Ingredients

  • 1 cup fresh breadcrumbs (we used prepared panko breadcrumbs)
  • ¼ cup whole milk
  • 2 tsp sea salt
  • 2 tsp fennel seeds
  • 1 tsp dried chile flakes
  • 1 lb ground pork
  • 1 lb ground veal
  • 1 Tbsp finely grated lemon zest
  • 1 egg yolk
  • ½ cup finely grated Parmesan cheese, plus extra for serving
  • 2 Tbsp chopped thyme
  • 2 cloves garlic, crushed
  • Cracked black pepper
  • 2 Tbsp olive oil
  • 1 28-oz can tomato puree

raw.shaped.meatballs
The mixture made 59 small meatballs.

meatballs.sauteeing
If you are cooking all of the meatballs, you will have to sautée in batches. We froze half of them for a later meal.

meatballs.sauce.skillet
While the directions didn’t specify, we let the meatballs sit in the sauce for about 5 minutes to make sure they were heated through.

Directions

  1. Place breadcrumbs and milk in a large bowl and allow to stand 5 minutes.
  2. Place salt, fennel, and chile flakes in a mortar and pestle and grind to combine.
  3. Add salt mixture to breadcrumbs with pork, veal, lemon rind, egg yolk, Parmesan cheese, thyme, garlic, and pepper to taste and mix 2 to 3 minutes or until combined. Roll tablespoons of mixture into balls.
  4. Heat olive oil in a large, nonstick frying pan over high heat. Cook meatballs, in batches, 5 to 6 minutes until browned. Remove from pan and keep warm.
  5. Add tomato puree to pan and bring to a boil. Reduce heat to medium; cook 5 minutes.
  6. While sauce is cooking, cook pasta in a large saucepan of salted, boiling water 10 to 12 minutes or until al dente. Drain and transfer to a large dish. Add meatballs to sauce and stir gently to combine. Top pasta with meatballs and sauce and sprinkle with Parmesan to serve.

Makes 4 to 6 servings.

http://www.lynnandruss.com

plated.meal

The recipe pairs it with spaghetti, but not having any on hand, we opted to use a Black Pepper Fettucini from our pantry, and it made a great companion to the sauce.

Cider-Glazed Chicken Thighs

Go dig out your EASY button because Cider-Glazed Chicken Thighs couldn’t be simpler: just roast the chicken until cooked through, brush with a three-ingredient glaze, and broil until golden-brown. Roasted sweet potato and onion wedges make a fabulous accompaniment.

With just the two of us for dinner, I only cooked 4 thighs as opposed to eight, but kept the amount of the other ingredients the same. And OMG, our side dish, Roasted Sweet Potatoes with Apples and Maple-Sage Butter was super delicious!

img_9015

There is a 50° difference between the oven temp for the chicken and that of the sweet potato recipe. If you don’t have double ovens, preheat the oven to 450° with the racks far enough apart to accommodate the different baking sheets of ingredients. You will probably have to cook the potatoes several minutes longer so keep an eye on them.

Cider-Glazed Chicken Thighs

  • Servings: 4
  • Difficulty: easy
  • Print

Ingredients

  • 8 bone-in, skin-on chicken thighs, trimmed
  • 1 Tbs. extra-virgin olive oil
  • Kosher salt and freshly ground black pepper
  • 3/4 cup apple cider
  • 1 Tbs. honey
  • 1-1/2 Tbs. cold unsalted butter, cut into 1/4-inch pieces

img_8997
Chicken thighs are tossed with the oil, salt, and pepper, put on a baking sheet and arranged skin side up on the rack.

img_9010
The thighs are brushed with the cider-glaze several times through out the cooking process.

Directions

  1. Position a rack 6 inches from the broiler and heat the oven to 450°F. Line a large rimmed baking sheet with foil.
  2. In a large bowl, toss the chicken thighs with the oil, 1 tsp. salt, and 1/2 tsp. pepper. Put a rack on the baking sheet and arrange the chicken thighs skin side up on the rack. Roast until the thighs are lightly golden and an instant-read thermometer inserted in the thickest part without touching the bone registers 165°F, about 20 minutes.
  3. Meanwhile, in a small saucepan, bring the cider and honey to a boil over high heat. Reduce the heat to medium and simmer vigorously until the mixture has reduced to 1/2 cup, 8 to 10 minutes. Remove from the heat and whisk in the butter.
  4. Turn the broiler to high, brush the chicken thighs with the cider glaze, and broil for 1 minute. Brush with more glaze and broil again until deep golden-brown, 2 to 3 minutes. Remove the chicken from the oven, brush with more of the glaze, and serve.

http://www.lynnandruss.com

by Melissa Pellegrino from Fine Cooking

Roasted Sweet Potatoes with Apples and Maple-Sage Butter

Roasted sweet potatoes have a lush, tender texture and concentrated flavor. When paired with maple syrup and apples, they make a deliciously sweet side that works with anything from pan-seared steak to cider-glazed chicken thighs.

Use a firm, tart Granny Smith apple or try a crisp, slightly sweeter Pink Lady (a cross between a Golden Delicious and a Lady Williams.) We used two Granny Smiths instead of one because I wanted a more balanced ratio with the potatoes.

img_8993

Roasted Sweet Potatoes with Apples and Maple-Sage Butter

  • Servings: 4-6
  • Difficulty: easy
  • Print

Ingredients

  • 1-1/2 to 2 lb. sweet potatoes, peeled, halved crosswise, and cut into 3/4-inch-thick wedges
  • 2 Tbs. olive oil
  • Kosher salt and freshly ground black pepper
  • 2 Tbs. unsalted butter
  • 1 medium-large tart green or red apple, quartered, cored, cut into 16 wedges, wedges halved crosswise (we used two apples)
  • 1 Tbs. chopped fresh sage
  • 1-1/2 tsp. fresh lemon juice
  • 1 tsp. pure maple syrup

img_8995
Toss the sweet potato wedges in olive oil, salt an pepper.

img_8999
Spread the potatoes in a single layer on a large, rimmed baking sheet.

img_9002Core the apple(s) into 16 wedges, then cut them in half crosswise.

img_9008
Add the apples in a single layer and brown on both sides, then add the sage and stir until wilted.

img_9012

Directions

  1. Position a rack in the top third of the oven and heat the oven to 475°F.
  2. In a large bowl, toss the sweet potatoes with the oil, 1 tsp. salt, and a few grinds of black pepper. Spread the potatoes in a single layer on a large, rimmed baking sheet. Roast for 10 minutes; then flip the potatoes and continue roasting until tender and browned in spots, about 5 minutes more.
  3. While the potatoes roast, heat the butter in a 12-inch skillet over medium-high heat until melted and beginning to brown, 1 to 2 minutes. Add the apples in a single layer and brown on both sides, 1 to 2 minutes per side. Add the sage and stir until wilted, about 30 seconds. Off the heat, stir in the lemon juice and maple syrup. With a spatula, scrape the apples and butter into the bowl used for tossing the potatoes.
  4. When the potatoes are done, add them to the apples and gently combine with the spatula. Season to taste with salt and pepper, and serve.

http://www.lynnandruss.com

by Jennifer Armentrout from Fine Cooking

Rise and Dine

Crème Brûlée French Toast, Waffles with Strawberries and Whipped Cream, Syrupy Pancakes, yes, we’ve made all of these sweet dishes for company breakfast, but what about us folks who sit staunchly in the camp of the savory? Which is me, of course. Sugary foods tend to make me sluggish—not a positive start to my day.

french toast
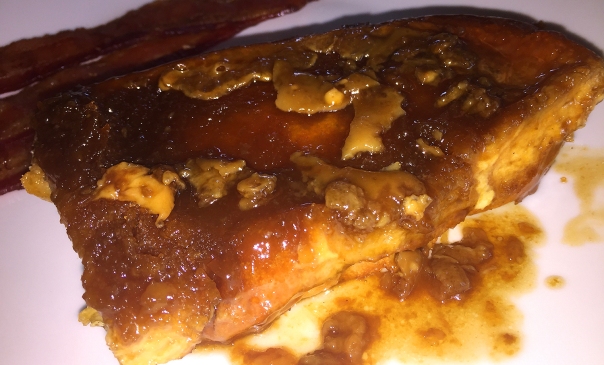
A slice of the beautiful-to-behold Crème Brûlée French Toast with a side of bacon.

To address this issue, there are omelets, fritattas, and quiches, all of which satisfy my desire for a savory, over sweet, breakfast. Now I can add this Hash-Brown Casserole recipe, found in our latest Fine Cooking Magazine, to my arsenal. The bell peppers, onion, ham, and cheese in this dish call to mind a Denver omelet. But instead of serving the hash browns on the side, they’re combined with the eggs for an easy, hearty breakfast bake that serves 6 to 8 people. Woohoo!

After 45 minutes in the oven, we did cover the casserole loosely with tin foil because it was nicely browned on top at this point but still too loose inside. Away visiting family when we made this, there was no scale access to weigh the ham, and we just know there was more than 8 ounces for sure (leftover from our Thanksgiving feast.)

IMG_9245

In addition, we added about a half cup of shiitake mushrooms which bulked up the volume even more so the total cooking time was 15 minutes longer than expected. Yes, there is a bit of prep involved, but then you can sit back and leisurely enjoy your cup of Joe with company (or not) for an hour or more.

Perfect for your stay-over family and friends during the long holiday season. Let me tell you, there was nary a crumb left between the six of us! And yes, you can also serve something sweet if you’re so inclined 😉 Stepdaughter Julia baked a few loaves of pumpkin bread which were a great accompaniment.

IMG_9283

Hash-Brown Casserole

  • Servings: 6-8
  • Difficulty: moderately easy
  • Print

Ingredients

  • 2 Tbs. olive oil; more for the baking dish
  • 1 medium yellow onion, diced
  • Kosher salt
  • 2 medium red bell peppers, cored, seeded, and diced
  • 8 oz. ham, diced (about 1-1/2 cups)
  • 2 tsp. chopped fresh thyme leaves
  • Pinch red pepper flakes
  • 1 20-oz. bag frozen shredded potatoes (do not thaw)
  • 10 large eggs
  • 1 cup whole or 2% milk
  • 2 Tbs. Dijon mustard
  • Freshly ground black pepper
  • 8 oz. shredded extra-sharp Cheddar (about 2 cups)
  • Hot sauce (optional)

Directions

  1. Position a rack in the center of the oven, and heat the oven to 375°F. Lightly coat a 9×13- inch baking dish with oil.
  2. Heat 2 Tbs. of oil in a large skillet over medium heat. add the onion, season with salt, and cook, stirring occasionally, until tender, about 8 minutes.
    IMG_9271
  3. Add the bell peppers, ham, thyme, and pepper flakes, and cook until heated through, about 2 minutes. Transfer to a large bowl.
    IMG_9272
  4. Add the potatoes, breaking up any large clumps, and 1 tsp. salt to the bowl, and stir to combine.
    IMG_9274
  5. Transfer to the baking dish, and spread in an even layer. Combine the eggs, milk, mustard, 3/4 tsp. salt, and 1/4 tsp. pepper in the same bowl, and whisk until smooth.
  6. Evenly pour over the vegetable mixture.
    IMG_9279
  7. Sprinkle with the cheese.
    IMG_9281
  8. Bake until the top is light golden brown and a knife inserted into the center comes out clean, about 1 hour. (Check after 45 minutes. if the casserole is browning too quickly, cover loosely with aluminum foil.)
  9. Let cool for 5 minutes before slicing. Serve warm with hot sauce on the side, if you like.
    IMG_9288

http://www.lynnandruss.com


Basic Parmesan Pomodoro

Now that the drama of Thanksgiving dinner is behind you, it’s nice to get back to a simple meal, and a basic pasta dish fits that ticket. But did you ever realize how much sugar—or even evil, high fructose corn syrup—is in jarred pasta sauces? Not necessarily a good thing so why not make your own. Here’s a Basic Parmesan Pomodoro recipe from Giada De Larentiis that eliminates any doubt.

With no sugar in it, a single carrot will provide the perfect sweetness while also lending a more rich, complex flavor. This recipe has you toss in large chunks of carrot, but if you so desire, you can grate or finely chop it up and leave in the sauce throughout the cooking process. Then up the ante even more by using whole grain penne instead of 100% flour pasta.

Parmesan rinds are easy to find at your local grocery store in the cheese section, but why not start your own collection. We save our parm rinds in a ziploc bag in the freezer and just pull out what we want to use as needed, they last for months and months! About those canned cherry tomatoes, I have yet to find them, so go ahead and use whole plum tomatoes if that’s all you have access to.

Basil was only available in those small plastic containers which don’t include the stems, but not to worry, the leaves alone added plenty of herby flavoring and aroma.

IMG_8940

Basic Parmesan Pomodoro

  • Servings: 5-6
  • Difficulty: easy
  • Print
Ingredients 

  • 1/3 cup plus 2 tablespoons extra-virgin olive oil
  • 5 cloves garlic, peeled and smashed
  • 3 large, full stems basil
  • Three 14-ounce cans peeled cherry tomatoes
  • 1 carrot, peeled and halved
  • 8 ounces Parmigiano-Reggiano rind, cut into 3-inch pieces
  • Kosher salt
  • 1 pound penne rigate pasta
  • 1/2 cup grated Parmigiano-Reggiano, plus more for serving
  • 3 to 4 tablespoons butter

Directions

  1. Heat a medium nonreactive saucepan over medium-high heat. Add 1/3 cup of the oil and the garlic, and reduce the heat to medium. Cook the garlic, stirring often and mashing gently with a wooden spoon, until golden brown and beginning to soften, 5 minutes. IMG_8943
  2. Add the basil, tomatoes and their juices, the carrots and cheese rinds. Stir with a wooden spoon to combine. Bring to a simmer and adjust the heat to maintain a simmer. Cook for 35 minutes stirring occasionally to prevent sticking. Add 1 teaspoon of the salt. Remove from the heat and cool slightly. IMG_8945 IMG_8947
  3. Remove the rinds, carrots and basil. At this point you can use an immersion blender to puree slightly or leave it as a chunky sauce (I prefer chunky). IMG_8949 
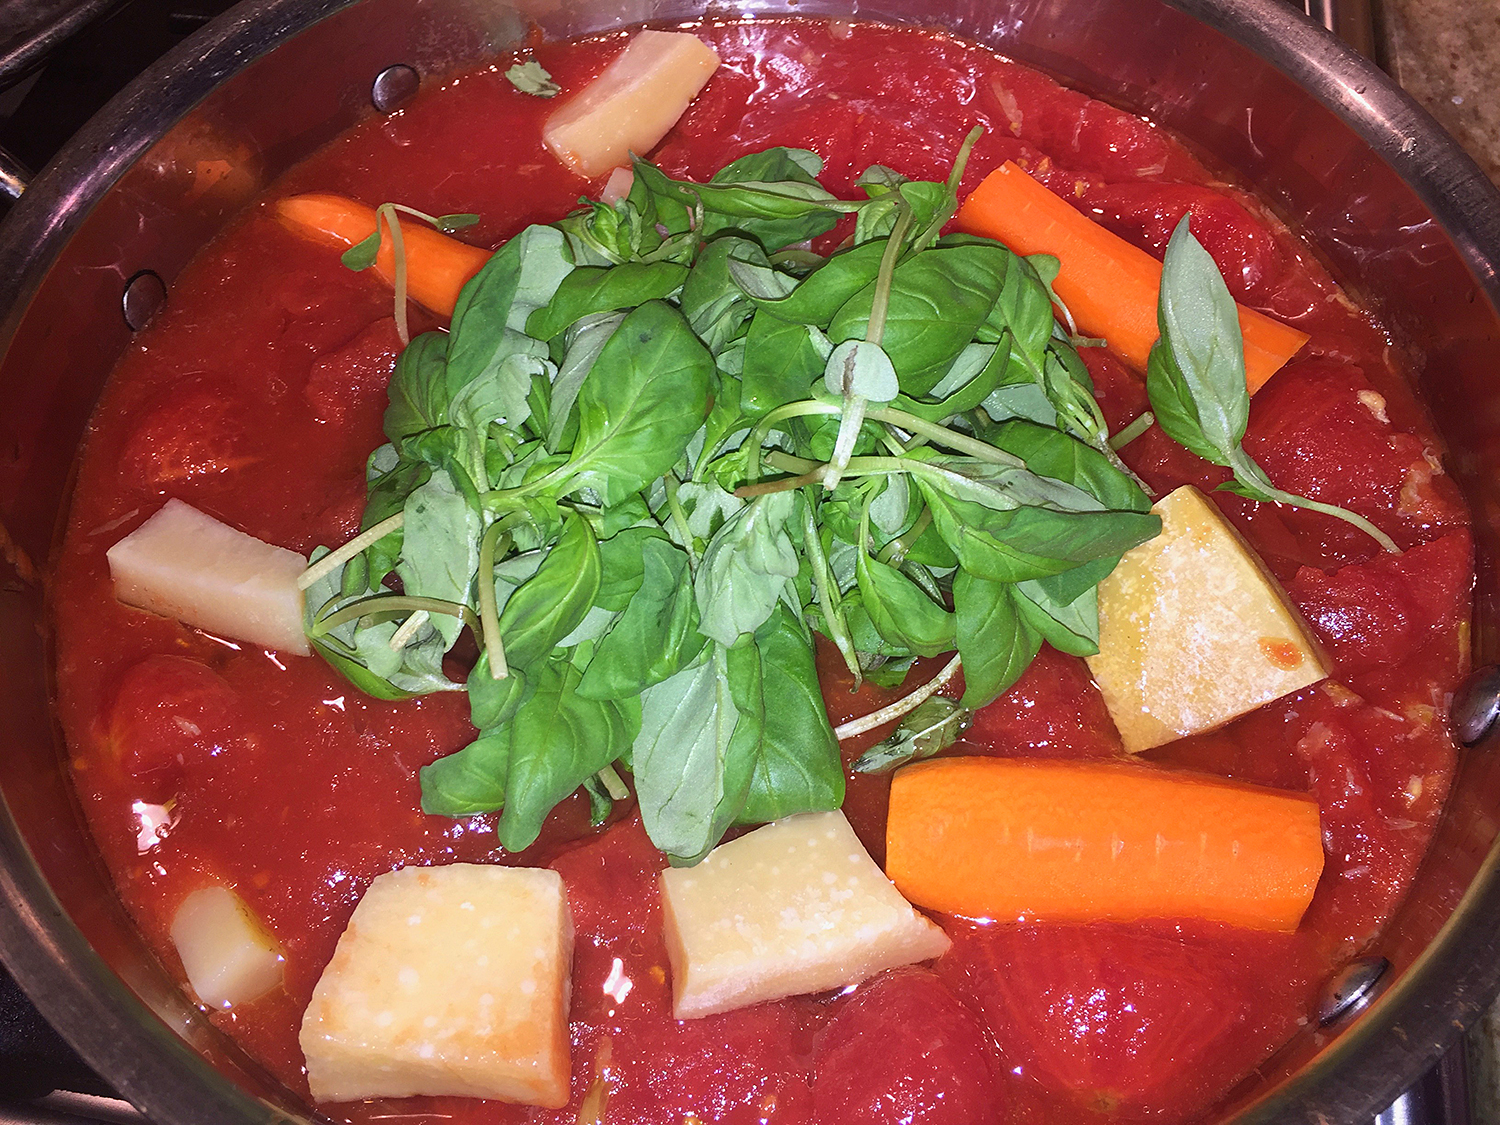
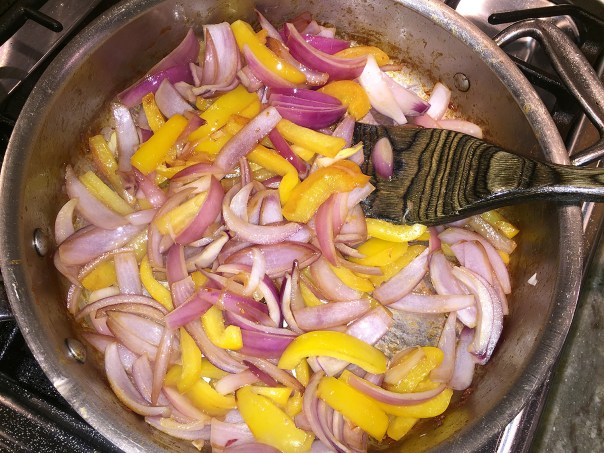
It’s OK if some of the basil leaves remain in the sauce. IMG_8950
  4. Bring a large pot of salted water to a boil. Cook the penne 2 minutes less than the package directions.
  5. Meanwhile, rewarm the sauce in a large, straight-sided skillet set over medium heat. Using a spider, strain the pasta from the water and add it directly into the pan with sauce, reserving 1/2 cup of the pasta water. IMG_8952
  6. Before stirring, sprinkle the pasta with the grated cheese. Toss the pasta, cheese and sauce together.
  7. Add the butter, the remaining 2 tablespoons olive oil and the reserved pasta water and continue to cook until the sauce is creamy and the pasta is al dente. IMG_8956
  8. Serve topped with more cheese if desired. IMG_8961

http://www.lynnandruss.com

Recipe courtesy of Giada De Laurentiis

Quick Skillet Chicken Pot Pie

I’m not a pot-pie person, but the Mr. just loves them. While flipping through my FB newsfeed, I came across a Bon Appétit post highlighting a Chicken Pot Pie with Acorn Squash. It was intriguing enough to entice me to take a peek. Turns out: It ain’t hard, but it does require that you add a new skill to your arsenal—making the the optimally flaky, thin dough stretched across the top of the skillet stew. Nope, I’d never done that—until now.

Believe it or not, a bit of sauerkraut was their new secret flavoring weapon. According to BA, it added a little bit of acid and funk, proving there was another use for it other than a hot dog topping, or the traditional pork and sauerkraut dinner. Plus I adored the idea of including some acorn squash in the creamy interior.

IMG_9077

OK, I might be a little hard-pressed to call this a quick and easy weeknight meal, but on the other hand, it’s not an all-afternoon project either. Perhaps making a homemade crust seems intimidating? Certainly my first thought. To ease your trepidation, you could use 1 sheet of puff pastry and a store-bought rotisserie chicken (or how about some of that leftover T-Day turkey?), which will shave off 30 minutes. But if you’re feeling ambitious (and would rather not shell out for the pre-made dough, which can be pricey), attempt the crust; it’s a skill worth learning. Yes it was!

IMG_9069

You can do Steps 8-11 ahead of time. I made my crust the day prior using a dough cutter as opposed to my fingers to massage the flour and butter. The dough is quite dry when you are kneading it, but it does finally come together. To keep overnight, lay it on parchment on an unrimmed cookie sheet and cover it with plastic wrap. Take out of the fridge the next day about an hour ahead of time to come to room temp.

Of course I added quite a bit more ingredients to the filling, using 1 3/4 pounds chicken, an entire baby acorn squash, the whole onion, and added a 1/2 cup peas. As always, to amp up flavor I replaced the water with 1 cup of homemade chicken stock. Because of the increases, I wished I’d doubled the sauerkraut too… next time…

My cast iron skillet was 10″ at the bottom but flared out to 11″ at the top. Even though I tried to stretch the crust beyond 10″, it was a bit shy of covering the top completely, and even shrunk a tad in the cooking process. Serves 4 as written below; 5-6 with all of the added ingredients.

Um, yes, I think I might now be a fan of pot pies—at least this one…

Chicken Pot Pie with Acorn Squash

  • Servings: 4
  • Difficulty: moderate
  • Print

Ingredients

  • ½ cup (1 stick) chilled unsalted butter, divided
  • 1 pound skinless, boneless chicken thighs, cut into ¾-inch pieces
  • ¾ medium onion, chopped
  • 2 celery stalks, chopped
  • ½ teaspoon kosher salt, plus more
  • ¼ teaspoon freshly ground black pepper, plus more
  • ¼ cup sauerkraut
  • ¼ acorn squash, seeds removed, peeled, cut into ¾-inch pieces
  • 1/2 cup frozen peas, thawed (optional)
  • 2 tablespoons plus 1 cup all-purpose flour; plus more for surface
  • 1 cup plus 2 tablespoons whole milk
  • 1 cup chicken stock, preferably homemade (use instead of water)
  • 1 large egg yolk

Directions

  1. Preheat oven to 450°.
  2. Melt 2 Tbsp. butter in a medium skillet over medium-high heat. Cook chicken, stirring occasionally, until just beginning to brown, 5–6 minutes. Transfer to a medium bowl with a slotted spoon.
    IMG_9054
  3. Melt 1 Tbsp. butter in same skillet over medium heat. Cook onion and celery, stirring occasionally and scraping up any browned bits from bottom of pan (the good stuff), until vegetables are beginning to soften, 6–8 minutes; season with salt and pepper.
    IMG_9055
  4. Add sauerkraut and cook until liquid is evaporated, about 1 minute.
  5. Add squash and cook, tossing occasionally, until slightly softened, about 5 minutes. (It took 10 minutes for my squash.)
    IMG_9057
  6. Return chicken and any accumulated juices, and add peas to skillet and sprinkle with 2 Tbsp. flour; toss to coat. Cook, stirring occasionally, until heated through, about 1 minute.
  7. Stir in 1 cup milk and 1 cup chicken stock and cook, stirring occasionally, until thickened to the consistency of heavy cream, about 10 minutes.
    IMG_9061
  8. Meanwhile, cut remaining 5 Tbsp. butter into small pieces (it should be cold). Whisk 1 cup flour, ½ tsp. salt, and ¼ tsp. pepper in a medium bowl. Toss butter in flour mixture to evenly coat.
  9. Working quickly, rub butter into flour with your fingertips (or use a dough cutter) to create large, shaggy pieces of dough (the idea is to smash the butter into the flour, creating a mix of flat and thin pieces).
    IMG_9012
  10. Drizzle remaining 2 Tbsp. milk over and knead until dough starts to come together, pressing to incorporate shaggy edges (it will still look a little dry).
    IMG_9013
  11. Turn dough out onto a lightly floured piece of parchment paper, waxed paper, or foil. Roll out to a 10″ circle, trimming any shaggy edges.
    IMG_9018
    IMG_9019
  12. Using parchment to help you, carefully invert dough over filling in skillet, covering it completely.
  13. Beat egg yolk and 1 Tbsp. water in a small bowl just to blend—congratulations, you just made egg wash. Cut 4 slits in dough to allow steam to escape and brush with egg wash.
    IMG_9065
  14. Bake pot pie until crust is golden brown and filling is bubbling around the edges, 14-17 minutes. Let cool 10 minutes before serving.
    IMG_9071IMG_9072
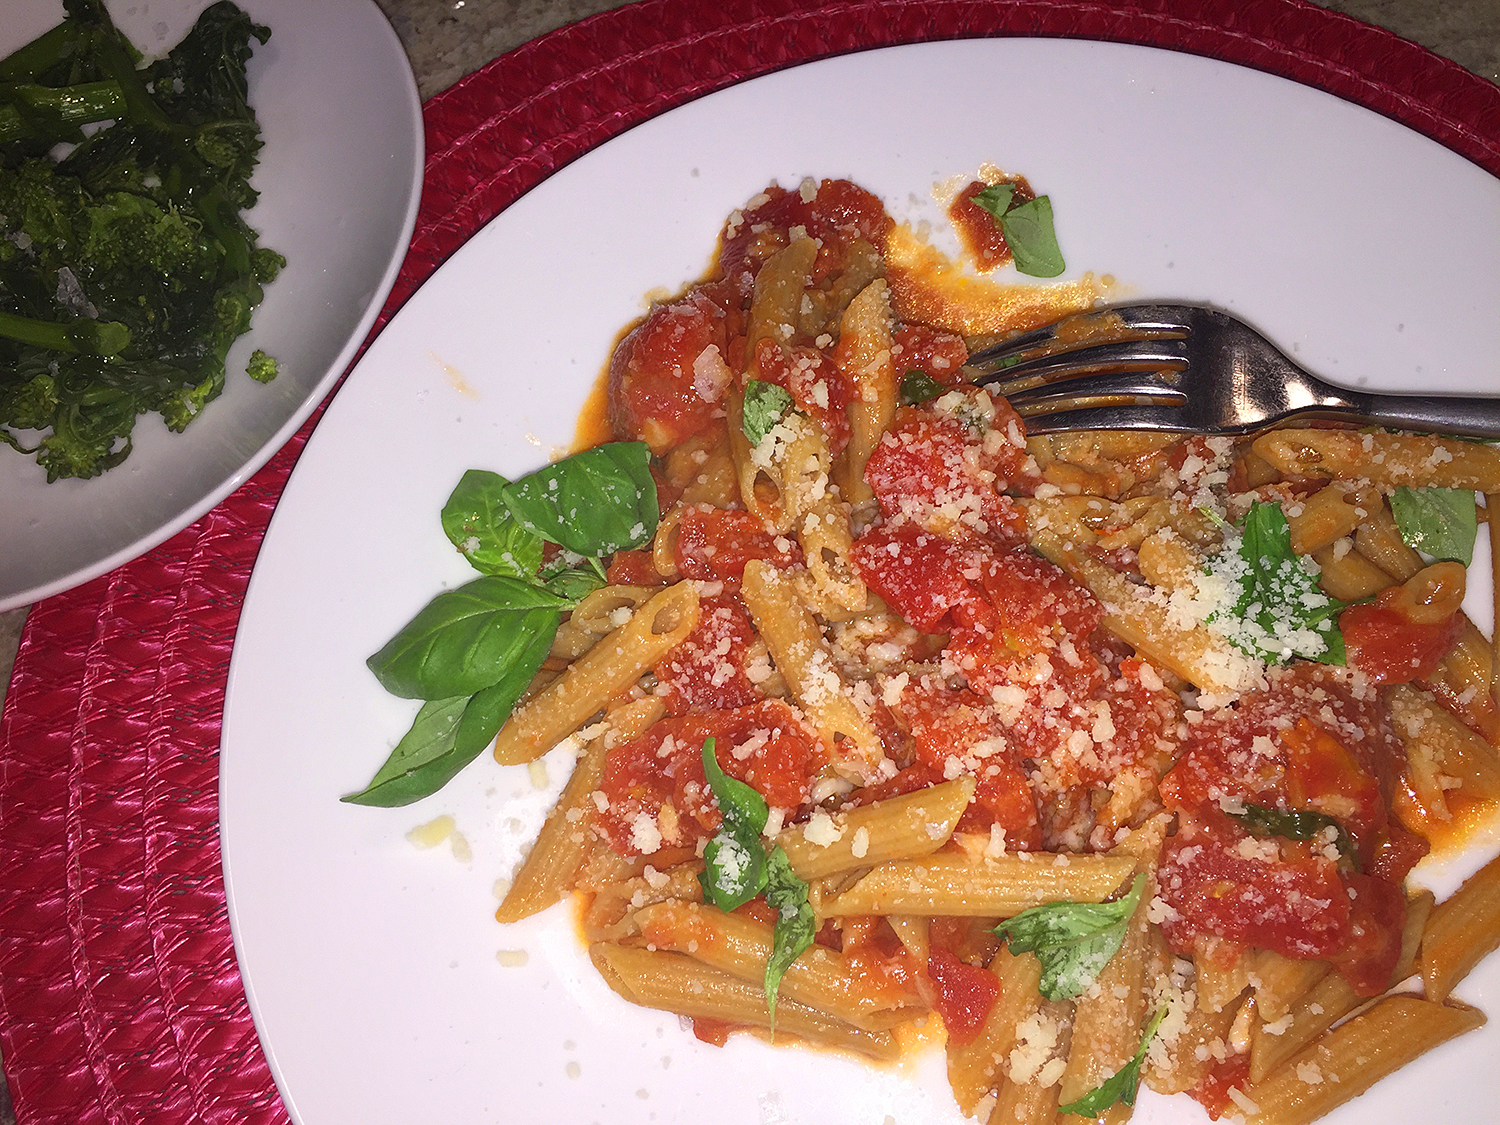
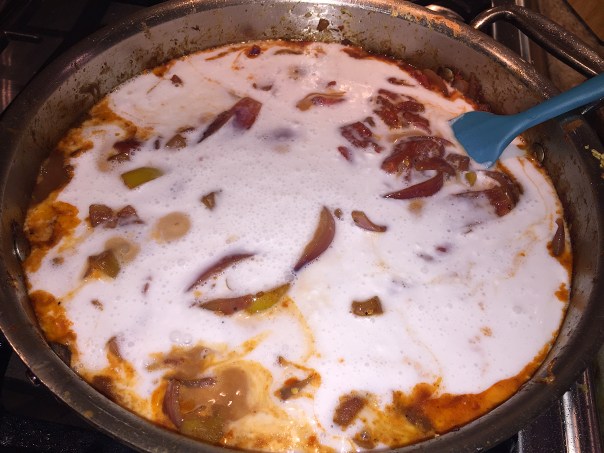
Slice through crust with a sharp knife and use a large spoon to ladle the contents into shallow bowls.
    IMG_9077

Do Ahead: Dough can be made 3 days ahead; keep chilled, or freeze up to 1 month.

http://www.lynnandruss.com

Adapted from a recipe by Elyssa Goldberg of Bon Appétit

Let the Good Times Swirl

Pumpkin Spice Cupcakes with Cream Cheese Frosting, the perfect dessert for Thanksgiving whether you are hosting or traveling to places near or far. Not only do they taste divine, but with the festive frosting approach, they’re sure to impress too. And the recipe makes two dozen, so you can even hold some back for yourself 😉

My incentive here was to find a seasonal cupcake for an upcoming art show/fundraiser for Artists of Yardley where I am a current member. Since joining, I have been donating something sweet for the Bake Sale portion of the November event; last year it was my decorated Santa Hat Sugar Cookies, shown below.


This year my creative juices flowed in another direction with cupcakes on my brain. I found this tempting recipe on TasteOfHome.com that possessed those warm, comforting flavors of Fall with cinnamon and pumpkin. And who the heck doesn’t salivate over cream cheese frosting?

IMG_9112

Of course I had to put my own spin on them—literally—by frosting with a tandum-hued swirl. The technique is pretty simple, and you could even take it a bit further by using three, or even four colors at once. But I was going for understated, not over the top. OK, maybe not totally understated as I had to sprinkle on a bit of white edible glitter for that finishing touch; and add maple extract instead of vanilla.

IMG_9106

I was always under the impression that any dairy product needed to be refrigerated, and cream cheese is dairy right? But according to one website, if you’re going to eat the cupcakes in the next day or two and your house stays around 70 degrees or cooler, they should be fine to sit on the counter—even if it is cream cheese frosting, which of course this is. So if you plan to make the cupcakes the day before you plan to share them, it’s okay to go ahead and frost them. In fact, you should, because the icing helps to keep them moist.

But just to be safe, I did store mine in the fridge inside of their decorative boxes before I transported them to the bake sale. I figure they’ll come to room temp when on display. Since I’m not into eating sweets for the most part, The Mr. was my taste tester… a drum roll please… he LOVED them!!

Pumpkin Spice Cupcakes with Cream Cheese Frosting

  • Servings: 2 Dozen
  • Difficulty: moderately easy
  • Print

Ingredients

  • 3/4 cup butter, softened
  • 2-1/2 cups sugar
  • 3 large eggs
  • 1 can (15 ounces) solid-pack pumpkin
  • 2-1/3 cups all-purpose flour
  • 1 tablespoon pumpkin pie spice
  • 1 teaspoon baking powder
  • 1 teaspoon ground cinnamon
  • 3/4 teaspoon salt
  • 1/2 teaspoon baking soda
  • 1/2 teaspoon ground ginger
  • 1 cup buttermilk

FROSTING:

  • 1 package (8 ounces) cream cheese, softened
  • 1/2 cup butter, softened
  • 4 cups confectioners’ sugar
  • 1 teaspoon vanilla (or maple) extract
  • 2 teaspoons ground cinnamon

Directions

  1. Preheat oven to 350°.
  2. In a large bowl, cream butter and sugar until light and fluffy. Add eggs, one at a time, beating well after each addition. Add pumpkin.
    IMG_9085
    IMG_9087
  3. Combine flour, pie spice, baking powder, cinnamon, salt, baking soda and ginger, whisk together until well blended; add to creamed mixture alternately with buttermilk, beating well after each addition.
    IMG_9088
    IMG_9090
  4. Fill 24 paper-lined muffin cups three-fourths full. Bake 25* minutes or until a toothpick inserted in the center comes out clean. (*Mine actually took 27-30 minutes.)
    IMG_9095
  5. Cool 10 minutes before removing from pans to wire racks to cool completely.
    IMG_9093
  6. For frosting, in a large bowl, beat cream cheese and butter until fluffy. Add confectioners’ sugar, vanilla and cinnamon; beat until smooth.
     

  7. If you want a multicolored effect, divide the icing into equal portions and add coloring to each, mix well. Put each color into a separate 6-8″ throw-away piping bag, then insert both (or all) of them into one large 12-16″ piping bag with a large star tip. You may have to do this a couple of times, depending on bag sizes.
    IMG_9103
  8. Starting in the center, squeeze the large piping bag to make a star on the top of the cooled cupcake, then move out to the edge while continuing to squeeze the bag. Circle around the outer edge first then continue to move inward until you reach the center and pull up. Repeat with each cupcake.
  9. Refrigerate leftovers (if you have any).

IMG_9114

Test Kitchen Tips

  1. For tender baked goods like muffins and cakes, the key is to mix gently. It also helps to whisk your dry ingredients well first, before combining them with any wet ingredients.
  2. These are bursting with autumn flavor, but if you want to take it over the top, try adding a little maple syrup to your frosting or a touch of maple extract to the cupcakes.
  3. It’s very easy to adjust the frosting consistency to your preference. Too stiff? Add milk a teaspoon at a time until the frosting is perfectly spreadable. Too thin? Beat in confectioner’s sugar 1/4 cup at a time until thickened.

http://www.lynnandruss.com

Adapted from a recipe found on TasteOfHome.com