Carcamusa Baby

Carcamusa, a traditional Spanish tapas dish, calls for three different types of pork—fresh pork, cured ham and chorizo—all simmered with seasonal vegetables in tomato sauce. Just seeing this recipe immediately reminded us of our Spanish vacation in Toledo, where Carcamusa is a specialty, and was a culinary highlight of our trip.

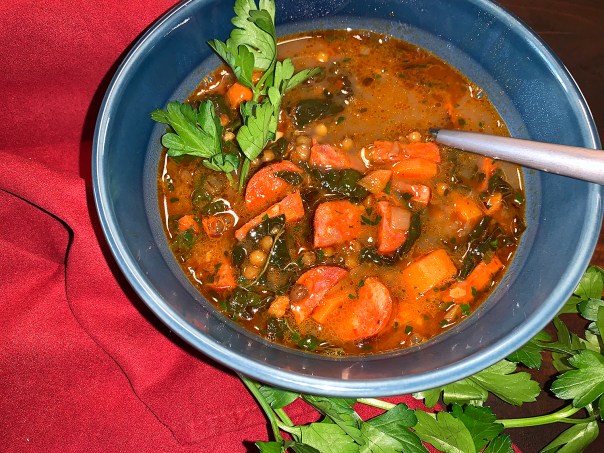
That day in Toledo, hungry for our mid-afternoon Menu del Dia (the most economical way to eat in Spain), we inquired from our hotel staff where we could dine on traditional fare. Without hesitation they eagerly suggested Bar Ludeña on Plaza Magdalena. Opened for nearly 60 years, this local hub was where we savored our first taste of the Spanish stew, or “chili” if you will. Their version showcased larger pieces of meat and included peas (shown below, right), and transported us to another dimension.

hanging meatInside the Bar Ludeña “bar area” where we waited for an outside table, hung varying legs of aged Jamón, a kind of dry-cured ham that is typically included in Carcamusa.

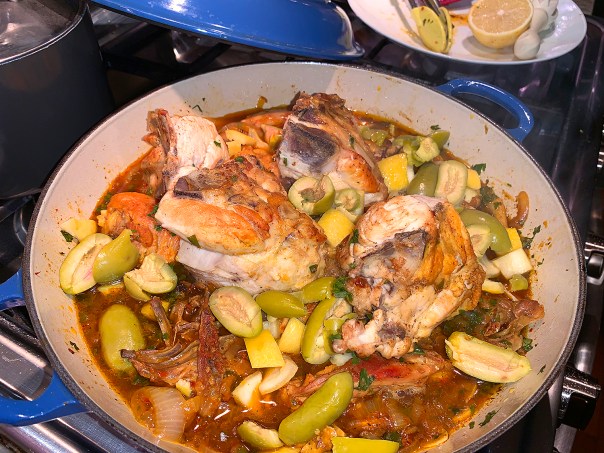
Otherwise known as Pork and Chorizo with Piquillo Peppers, it’s all about concentrating a few flavors to make a very bold taste, and isn’t that difficult to cook but the takes quite a bit of prep. However to simplify, 177 Milk Street skipped the ham and opted for jarred roasted red peppers (although we did use piquillos). I highly suggest locating jarred piquillo peppers from Spain (try online) because their flavor is slightly deeper, sweeter and more intense.

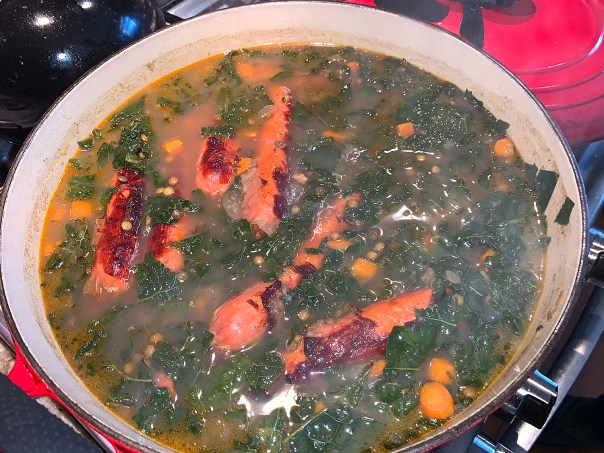
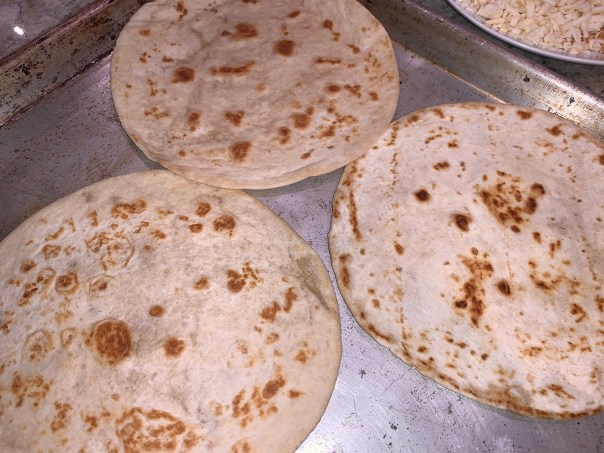
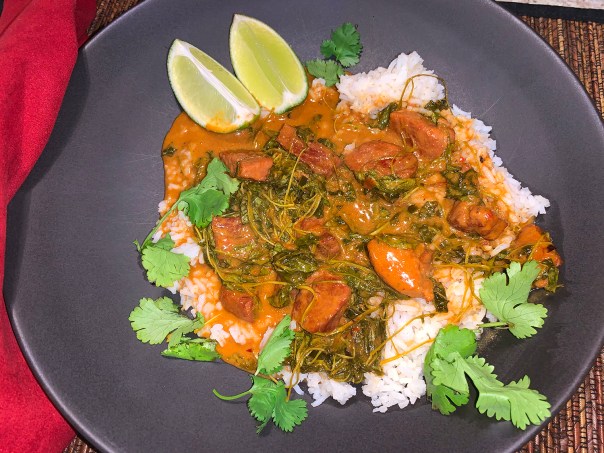
It is common to serve the dish with slices of grilled rustic bread. Often like chilis and stews, this Carcamusa was even more flavorful the next day after ingredients got a chance to marry and get happy with each other

NOTE: Don’t use Mexican chorizo, which is a fresh sausage, in place of the Spanish chorizo called for here. Spanish chorizo is dry-cured and therefore has a firm, sliceable texture similar to salami.

Carcamusa: Pork & Chorizo with Piquillo Peppers

  • Servings: 4 as a meal; 8 as a tapas
  • Difficulty: easy
  • Print

Ingredients

  • 6 oz. Spanish chorizo, casing removed, halved lengthwise and thinly sliced
  • 8 medium garlic cloves, peeled
  • 2½ tsp. dried oregano
  • 2½ tsp. ground cumin
  • Kosher salt and ground black pepper
  • 28 oz. can whole peeled tomatoes, drained, juices reserved
  • 1¼ lb. pork tenderloin, trimmed of silver skin and cut into ½-inch pieces
  • 3 Tbsp. grapeseed or other neutral oil, divided
  • 1 large yellow onion, finely chopped
  • ½ cup dry sherry, such as Fino
  • 1½ cups jarred piquillo (or roasted red peppers), patted dry and cut into ½-inch pieces
  • 1 cup packed flat-leaf parsley leaves, roughly chopped

Directions

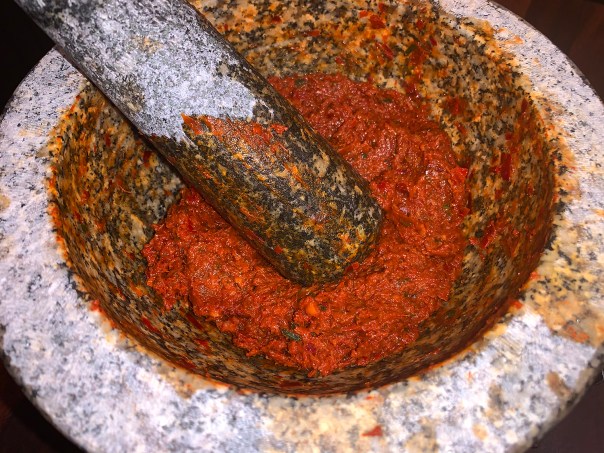
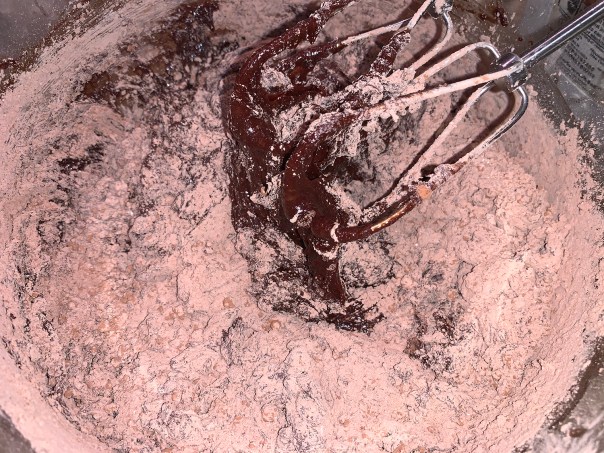
  1. In a food processor, combine half of the chorizo, the garlic, oregano, cumin, 1 teaspoon pepper and 3 tablespoons of the tomato juices. Process until smooth, about 2 minutes, scraping the sides of the bowl as needed.
    IMG_3787
  2. Transfer 3 tablespoons of the chorizo paste to a medium bowl and stir in 1 teaspoon salt and another 1 tablespoon of the tomato juices. Add the tenderloin and toss, then let marinate at room temperature for 15 minutes.
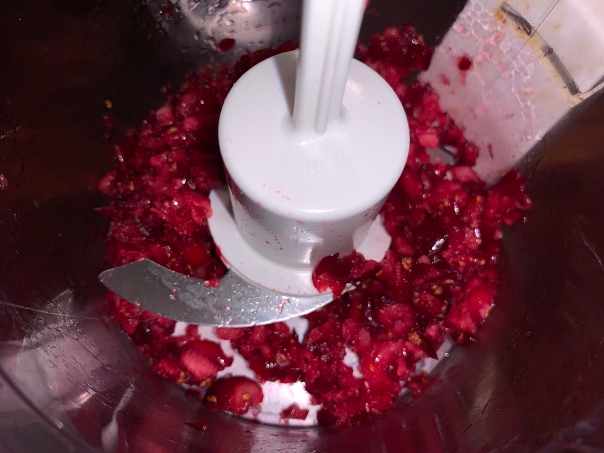
  3. Meanwhile, add the drained tomatoes to the chorizo paste in the processor and process until smooth, about 1 minute; set aside. (I used our mini processor which was filed to the top!)
    IMG_3791
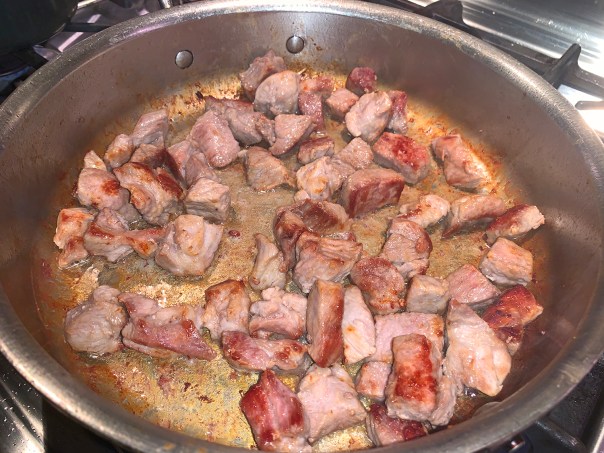
  4. In a 12-inch skillet over medium-high, heat 1 tablespoon of the oil until beginning to smoke. Add the pork in a single layer and cook without stirring until well-browned, 4 to 6 minutes. Return the pork to the bowl.
    IMG_3793
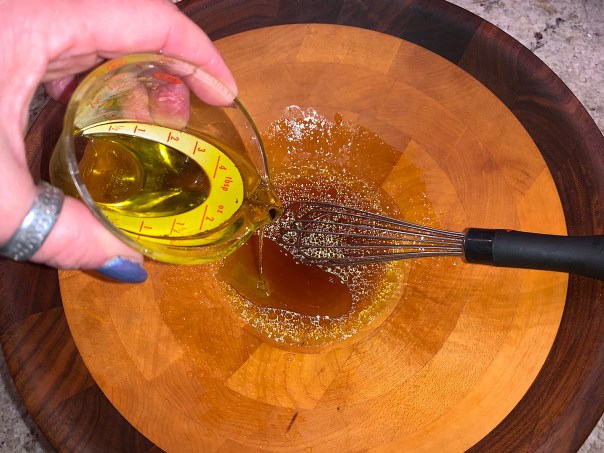
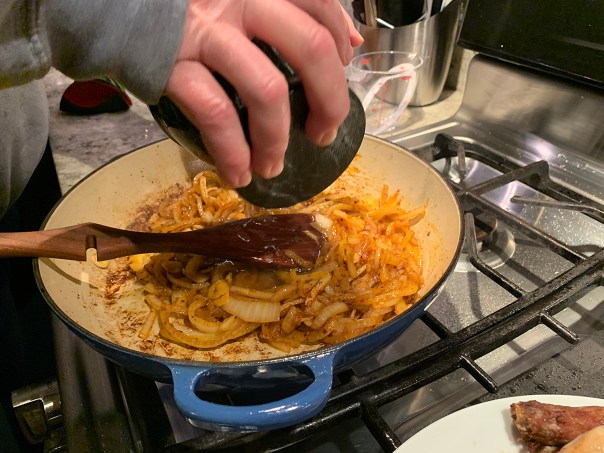
  5. Add the remaining 2 tablespoons oil to the skillet and heat over medium until shimmering. Add the onion, cover and cook, stirring occasionally, until softened, about 8 minutes.
    IMG_3794
  6. Pour in the sherry and cook, scraping up any browned bits, until most of the liquid evaporates, 2 to 4 minutes.
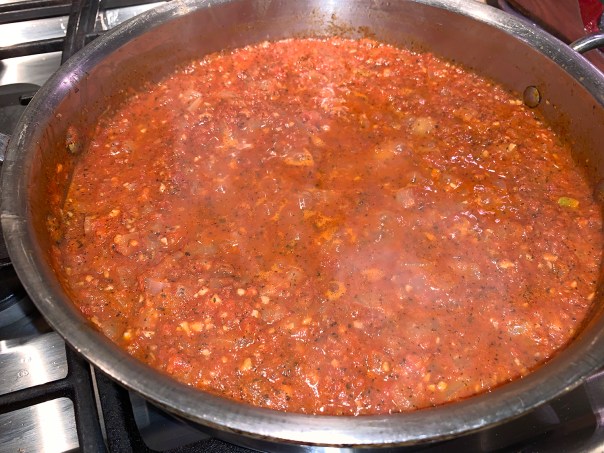
  7. Stir in the tomato-chorizo mixture and remaining tomato juice. Bring to a simmer, then reduce to medium-low. Cover and cook until the flavors meld, about 10 minutes.
    IMG_3795
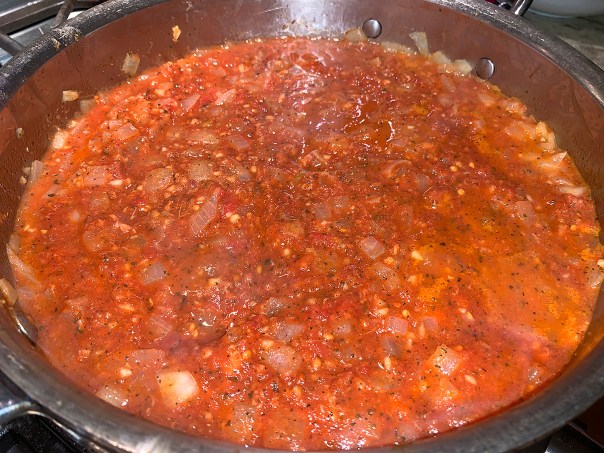
  8. Uncover and continue to cook, stirring occasionally, until slightly thickened, another 5 minutes. (Ours took 10 minutes before it showed signs of enough thickening.)
    IMG_3797
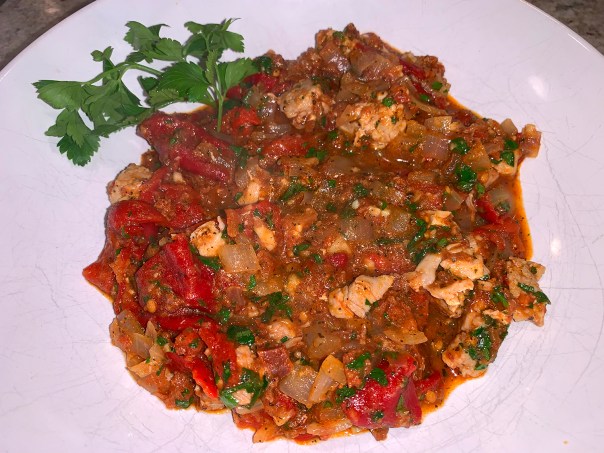
  9. Return the pork and any accumulated juices to the skillet and add the remaining chorizo and piquillo peppers. Cook, stirring occasionally, until the pork is heated through, about 5 minutes.
  10. Stir in the parsley, then taste and season with salt and pepper. Ladle into shallow bowls and serve hot with crusty bread.
    IMG_3802
    IMG_3804

http://www.lynnandruss.com

Recipe from 177 Milk Street

WOW-roccan Chicken

JUST WOW! Moroccan chicken with Green Olives and Preserved Lemons, a fantabulous dish from favorite chef/author Molly Stevens’ cookbook All About Braising. (Our hard cover copy is starting to fall apart, we’ve used it so often.) Yes, the dish does take some time to do the prep*, while the braise itself is only about 45 minutes. Definitely company-worthy, it’s probably best made on a weekend, or when you have some leisure time. A perfect dish for Baby Blue, our 4-quart, shallow Le Creuset braising Dutch oven.

As Molly states, it’s both familiar and exotic. The exotic is the combination of ginger, cumin, red pepper, saffron, and the salty piquancy of preserved lemons. The technique of including the chicken liver in the braise and then mashing it up to add to the finished sauce might make you take pause. If you are not a fan of chicken liver (I’m not), Molly urges you to try it here anyway—it won’t make the sauce taste at all livery, and she was right, it just helps thicken the sauce and the mashed liver contributes an earthiness and depth that you won’t be able to identify, but will savor. (Savor we did).

IMG_3731
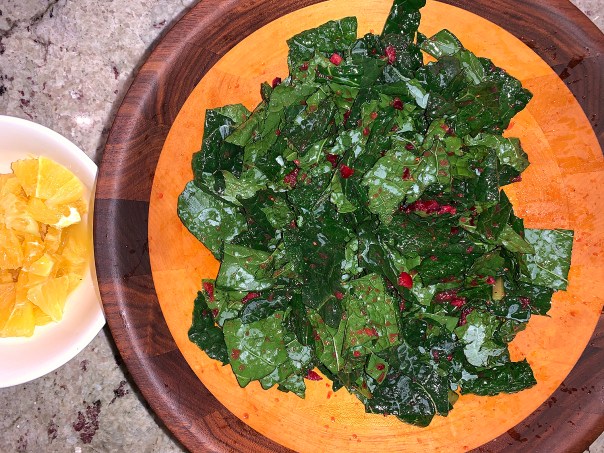
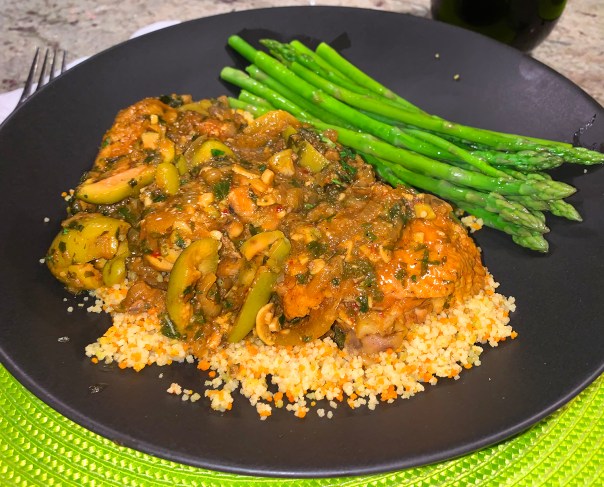
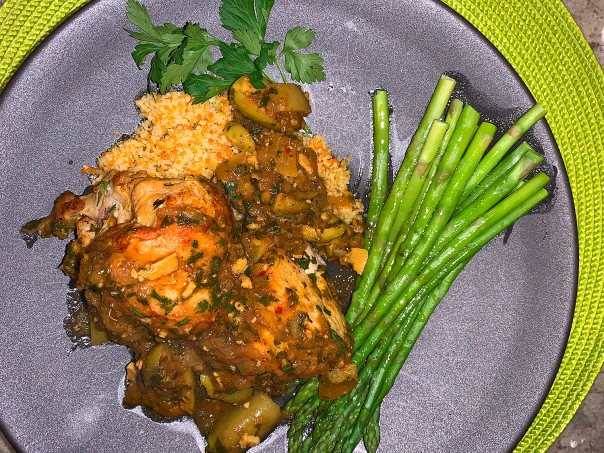
Couscous is traditional with this dish. We also included steamed asparagus.

As My Man Russ and I started to indulge in our first few mouthfuls, the sighs of contentment were audible. When he finally could speak, Russ commented “You can detect each spice—the smokiness of the pimentón, the heat of the red pepper flakes, and the warm, toasty flavor of the cumin. Together, the preserved lemon and fresh lemon juice lend the dish both high and low notes of citrus, underlined by the salty depth of the Cerignola olives.”

We highly recommend using pimentón (smoked paprika) as opposed to the unsmoked variety. And by all means, even though it is a very small amount, don’t neglect including the saffron. This spice is derived from the flower of the “saffron crocus” and has a subtle earthy and grassy flavor and aroma; yet sweet, similar to floral and honey (rawspicebar.com). Plus, it bestows a striking golden hue on every dish it graces!

*Word to the wise, if you haven’t made preserved lemons in advance and don’t have access to a good Middle Eastern market that sells them (check online), the dish will still be wonderful, although not as aromatic. Don’t substitute regular lemon peels for the preserved, they’re not the same thing at all. You can make your own, as we did. It’s quite easy to do, though takes at least three weeks before the lemons are ready to use. So plan ahead, it’s worth it.

IMG_3689

Moroccan Chicken with Green Olives and Preserved Lemon

  • Servings: 4-5
  • Difficulty: moderately easy
  • Print

Ingredients

Spice Mix

  • ½ teaspoon ground ginger
  • ½ teaspoon cumin seeds, toasted and ground (or ¼ teaspoon ground cumin)
  • ½ teaspoon fresh ground black pepper
  • ¼ teaspoon sweet pimentón (smoked Spanish paprika)
  • ¼ teaspoon crushed red pepper flakes
  • 1/8 teaspoon saffron threads, crumbled

Braise:

  • ½ cup green olives in brine, not pitted (we almost doubled the amount of olives)
  • One cut-up chicken, about 4 pounds (keep the back, neck, liver and wingtips)
  • ½ teaspoon kosher salt, divided
  • 2 tablespoons extra-virgin olive oil
  • 1 medium onion, thinly sliced
  • 3 cloves garlic, thinly sliced
  • ¾ cup dry white wine (or substitute water)
  • 1 lemon, halved
  • ¼ cup mixed chopped Italian parsley and cilantro, divided
  • 1 whole (4 quarters) preserved lemon
  • Fresh ground black pepper to taste
  • Hot, cooked couscous

Directions

  1. To prepare spice mix: In a small bowl, stir together the ginger, cumin, black pepper, pimenton, or paprika, red pepper, and saffron. In another bowl, cover the olives with cool water, and set aside to soak.
    IMG_3690
  2. Browning the chicken: rinse the chicken pieces with cool water, and dry them thoroughly with paper towels (otherwise they won’t brown well – moist meats steam and tend to stick to the pan). Heat the oil and butter in a large deep-sided skillet or shallow braising pan (4-quart capacity) over medium-high heat. While the oil and butter heat, season half the chicken pieces lightly with salt (keep in mind that the olives and preserved lemons will add saltiness).
  3. When the butter is sizzling, add the salted chicken pieces skin side down and sear, without disturbing, until the skin is crisp and evenly browned, about 4 minutes. Peel by lifting one edge with tongs to see that the skin side is browned, then turn with tongs and brown the second side, another 4 minutes or so. Transfer the browned chicken to a platter or tray to collect any drips.
  4. Pat the remaining chicken pieces again with paper towels just to be sure they are as dry as possible, and lightly salt both sides. Add these pieces to the pan skin side down and sear them as you did the first batch, transferring them to the platter with the other chicken when they are browned.
    IMG_3698
  5. The aromatics: Pour off all but about 1 tablespoon of fat from the pan and return the pan to medium heat. Add the onion and garlic, stir with a wooden spoon, and sauté until you can smell their fragrance and they begin to soften, about 3 minutes. (The bottom of the pan will develop a “fond” walnut-colored crust.) add the spice mix, stir, and sauté for a minute longer.
  6. The braising liquid: pour in the water to deglaze the pan, and stir and scrape the bottom with a wooden spoon to dislodge and dissolve the flavorful cooked-on crust.
    IMG_3703
    Russ first put the water in the mortar to eke out any of the residual spice mix.
  7. The braise: When the water boils, return the chicken legs and thighs, and the wing tips, back, neck, heart and gizzard, if using, to the pan. Tuck the liver (circled below), if using, between the pieces. Cover, reduce the heat to low, and braise the chicken for 10 minutes.
    IMG_3708
  8. Uncover the pan, and if the liquid is simmering too forcefully, lower the heat to a quiet simmer, or set a heat diffuser under the pan. Turn the legs and wings over with tongs, and place the chicken breast pieces skin side up on top of the legs and wings. (Adding the chicken breasts after 10 minutes prevents them from overcooking and drying out If you’re using all legs and thighs, add them all at the start.)
  9. Squeeze the juice from one lemon half over the chicken, and sprinkle over half the chopped herbs. Continue to braise gently for 20 minutes more.
  10. While the chicken braises, prepare the olives and preserved lemons: Drain and rinse the olives. Remove the pits by crushing them one by one with the side of a large knife and pulling out the pit. Most olives will remain in one piece, like an open book, but it’s fine if some olives break in two.
  11. Rinse the preserved lemon quarters under cool water, and remove and discard the pulp. Chop the peel into ½ inch pieces.
    IMG_3716
  12. Adding the olives and preserved lemons: after the chicken has braised for a total of 30 minutes (20 minutes after you added the breasts), lift the lid, add the olives and preserved lemons, and turn the chicken pieces again.
    IMG_3718
  13. Optional step, if using the liver: remove the liver from the pan, place it in a small bowl, and mash it to a paste with a fork. Set aside.
    IMG_3724
  14. Continuing the braise: replace the lid and continue to braise until the juices from the legs run clear when pierced with the tip of a sharp knife, another 10 to 15 minutes (for a total of 40 to 45 minutes). Transfer the chicken pieces to a serving dish or tray to catch the juices, and discard the wing tips, back, neck, heart and gizzard, if you used them. Cover the chicken loosely with foil to keep warm.
    IMG_3723
  15. The finish: Increase the heat under the braising liquid to medium-high and bring to a boil. Return the liver, if using, to the skillet and stir it into the sauce. Squeeze in the juice from the other half of the lemon. Simmer the sauce until it reduces just a bit, about 5 minutes.
    IMG_3725
  16. Add the remaining herbs. Taste for salt and pepper. Spoon the sauce over the chicken.
    IMG_3728
  17. Serve over hot couscous preferably made with homemade chicken stock instead of water.
    IMG_3735

http://www.lynnandruss.com

I’m still salivating! According to Molly, if you have any leftovers, it’s even better when reheated…

OOKA

Once a favorite haunt when the kids were growing up to celebrate various milestones, we hadn’t patronized OOKA, the Best of Philly Award-Winning restaurant, in ages. Opened in this location since 2000, and conveniently close to major transport routes on Easton Road in Willow Grove, PA, it offers both Hibachi and regular dining options—plus, it’s a B.Y.O.B!

OOKA offers only the freshest and most pristine dishes, including fish which is flown in daily from around the world. The ambiance is moody-Asian-modern and the able staff are all very polite and pleasant.

Shared Appetizers:

They offer Rolls, both raw and non-raw fish style; Sushi or Sashimi a la carte; Soups; Salads; and Hot and Cold appetizers. Three of us each decided on something different, but then we shared them all.

IMG_3481
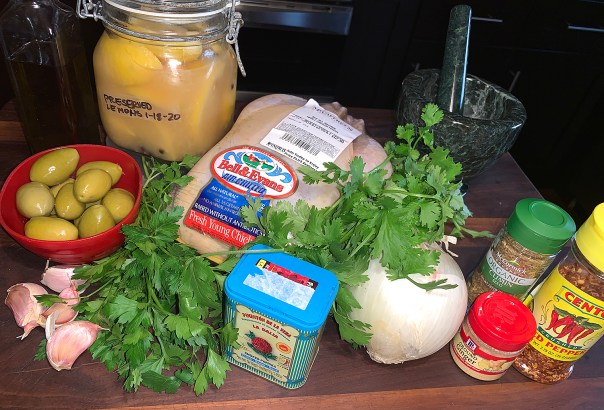
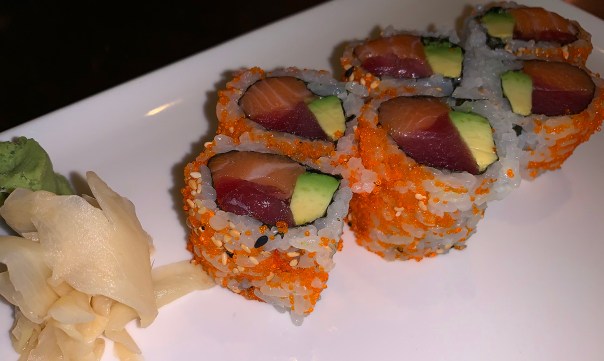
Out of Control Roll—6 freshly made tuna, salmon, avocado and tobiko rolls with pickled ginger and wasabi paste

IMG_3484Gyoza—6 crispy, pan-fried pork dumplings (they are also available with vegetables)

IMG_3486
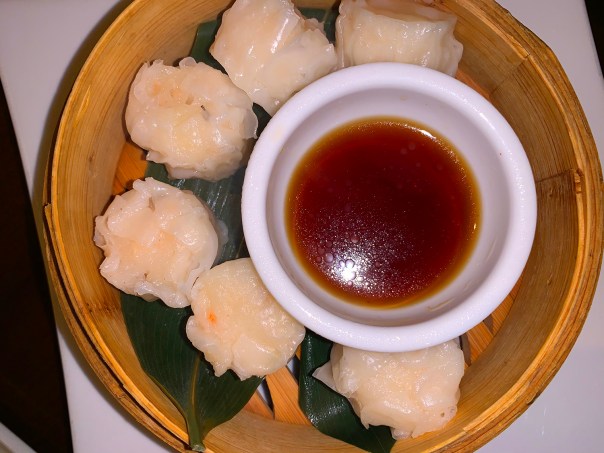
Shumai—6 delicate, melt-in-your mouth, steamed shrimp dumplings

Entrées/Rolls

Russ and I both decided on Dinner Entrées that came served with miso soup and a garden salad. We were impressed with the soup, both for flavor and how hot it was because it has been our experience that many restaurants tend to serve it luke warm. Julia, on the other hand, was tempted by the mouth-watering list of Signature Rolls.

IMG_3479

IMG_3489Roasted Long Island Duck Breast—Tender slices of duck breast, caramelized asian pear, Japanese eggplant, scallion, bathing in a sweet sake-soy reduction and served with a side of coconut flake crusted taro potato tempura sticks and a choice of white or brown rice. No surprise that this was Russ’s option!

IMG_3490Chicken Yakitori—Plump pieces of both white and dark meat chicken, skewered with bell pepper and onion slices served in a with teriyaki sauce and paired with a little bucket of tempura vegetables and that choice of rice. Lynn’s selection.

IMG_3491Lobster Dynamite Roll—An artfully plated signature roll with Maine lobster, avocado and mango inside, topped with spicy tuna and sweet chili sauce on the outside. Julia kept going back to this on the menu, and finally ordered it—she was not disappointed.

IMG_3494Ice Cream Tempura—A trio of fried ice cream flavors (chocolate, vanilla and strawberry), paired with orange puree and a coconut scented white chocolate sauce. Shared by father and daughter.

OOKA also has two other locations in Doylestown and Montgomeryville, PA.

Pasta, Chicken and Broccoli Throwdown

The ingredients for this Spicy Penne with Chicken, Broccoli and Chopped Olives recipe are pretty basic and not at all unusual. To us, kalamata olives enhance any dish with their salty, rich flavor, while here, they add a welcome twist to a basic chicken and broccoli pasta.

Admittedly, I made numerous changes which are noted in the recipe below. I doubled the amount of chicken, garlic and red pepper flakes; increased broccoli florets, olives and grated cheese; and added a couple of minced shallots and grape tomatoes. I mean, serving up to six dinner guests (as the original recipe indicated) with only a 1/2 pound chicken breast and the other meager amounts, well the servings would be rather paltry indeed, me thinks.

IMG_3206

Oh, and Good Lord, why would you throw away the garlic? In this family, that’s sacrilegious! I smashed the cloves into large chunks and left them in the finished dish. The Hubster and step-daughter ranted and raved about how good it was, and asked that I keep this in our regular rotation. I concur.

One issue with increasing a lot of the ingredients, I had to switch from a large nonstick skillet to a huge sauté pan when it was time to combine the pasta and broccoli with the chicken mixture. If you do not own a ginormous pan, one option to address this problem would be use two separate pans when combining, or cut the recipe below in half.

For a vegetarian option, omit the chicken and add red and green peppers, garbanzo beans, or any other legume or vegetable of your choice when the pasta and pasta water is added to the skillet.

Spice Penne with Chicken, Broccoli and Chopped Olives

  • Servings: 6
  • Difficulty: easy
  • Print

Ingredients

  • Kosher salt
  • 1/2 cup olive oil
  • 8 cloves garlic, smashed into large pieces
  • 2 shallots, peeled and thinly sliced
  • 2 tsp. chopped fresh rosemary
  • 1 tsp. crushed red pepper flakes
  • 2 large boneless, skinless chicken breast, sliced in half horizontally then cut into thin strips
  • 1 cup (or more) pitted Kalamata olives, quartered
  • 1 cup grape tomatoes, halved
  • 1 lb. penne
  • 12 oz. broccoli florets, cut into 1-1/2-inch pieces
  • 2 Tbs. fresh lemon juice
  • 1 1/4 cup freshly grated Pecorino-Romano

Directions

  1. Bring a large pot of well-salted water to a boil over high heat. Meanwhile, heat the oil, shallot and garlic in a very large skillet over medium heat, stirring gently so the cloves don’t break up, until they become light brown in places and very fragrant, 2 to 3 minutes.
  2. Add the rosemary and red pepper flakes and cook until they start to sizzle, about 15 seconds.
    IMG_3193
  3. Add the chicken, sprinkle with 1/4 tsp. salt, and cook, stirring often, until the chicken loses its raw color, about 3-5 minutes. Remove from the heat and stir in the olives and tomatoes.
    IMG_3194
    IMG_3197
  4. Add the penne to the boiling water and cook, stirring occasionally, until just barely al dente, 2 minutes less than the package instructions.
  5. Add the broccoli and cook until it turns bright green and the pasta is tender, about 2 minutes. Reserve 1/2 cup of the pasta water, and then drain the pasta and broccoli.
  6. Add the pasta and the pasta water to the skillet and cook uncovered over medium-high heat, stirring, until the pasta absorbs most of the liquid, about 2 minutes.
    IMG_3199
  7. Stir in the lemon juice and 1 cup of the Pecorino. Pour into a large pasta serving bowl and sprinkle with the remaining 1/4 cup Pecorino.
    IMG_3202

http://www.lynnandruss.com

Adapted from a recipe by Tony Rosenfeld from Fine Cooking

Sausage, Broccoli Rabe and Mozzarella Open-Face Quesadillas

How about putting a new spin on pizza night? The Sausage, Broccoli Rabe and Mozzarella Open-Face Quesadillas are more akin to thin crust pizza, which we favor. Just a quibble about the name. We all felt they looked more like a tostada than a quesadilla, but who really cares?

The crisp flour-tortilla base is what sets these hearty open-face quesadillas apart. With lots of melted cheese, vegetables, and meat, they are best eaten with a fork and knife. However, The Hubster and step-daughter both nixed the flatware and chowed down hands only.

One was more than plenty per person, maybe because I doubled the sausage and we served a simple side salad along with them. We all agreed they were a touch bland since we tend to gravitate toward bold flavors, so next time we’d probably substitute hot, spicy Italian sausage in place of the sweet. But all-in-all, we liked them.

IMG_3343

Sausage, Broccoli Rabe, and Open-Faced Quesadillas

  • Servings: 4
  • Difficulty: easy
  • Print

Ingredients

  • 4 tsp. olive oil
  • 4 8-inch flour tortillas
  • 1 lb. sweet Italian sausage, casings removed
  • 1 bunch broccoli rabe, thinly sliced 1/4 inch thick (about 4 cups)
  • 1 small yellow onion, peeled, cut in half, and thinly sliced 1/4 inch thick
  • Kosher salt and freshly ground black pepper
  • 1/4 cup roughly chopped fresh flat-leaf parsley
  • Zest of 1 lemon (about 2 tsp.)
  • 8 oz. smoked mozzarella, coarsely shredded

Directions

  1. Heat 1 tsp. of the oil in a 12-inch skillet over medium-high heat. Add one tortilla and cook, pressing lightly with a spatula, until lightly browned, about 30 seconds. Flip over and cook another 30 seconds the same way. Transfer to a large rimmed baking sheet. Repeat with the remaining oil and tortillas. All four will fit on a standard baking sheet if you fold up the edges a little bit. Set aside.
    IMG_3351
  2. Return the skillet to the heat. Add the sausage and cook, stirring often, until cooked through, about 5 minutes. Transfer to a bowl and set aside, leaving the drippings in the pan.
    IMG_3345
  3. Return the pan to the heat, and add the broccoli rabe, onion, 1/2 tsp. salt, and a few grinds of pepper. Stir well, then cover and cook, stirring occasionally, until tender, about 5 minutes. Stir in the parsley, zest, and sausage, and mix well.
  4. Divide the sausage-onion mixture evenly among the tortillas. Divide the cheese evenly among the tortillas, piling it on the sausage-onion mixture. Season to taste with salt and pepper.
    IMG_3353
  5. Position an oven rack about 6 inches from the broiler, and heat the broiler on high. Put the baking sheet under the broiler, and broil for until the cheese is nicely melted and starting to bubble and brown, about 4 minutes. Cut each quesadilla into quarters, and serve immediately.

http://www.lynnandruss.com

IMG_3357

Adapted from a recipe by Jessica Bard from Fine Cooking

From the Heart (with a Few Senior Moments)

As soon as I laid eyes on this article in Better Homes & Garden Magazine (BHG), I knew I had to make these Tri-Colored Heart Cookies. They appealed to both my sense of creativity and curiosity in trying new techniques. Plus, Valentine’s Day was right around the corner.

IMG_3598

However, I decided to go with my tried-and-true Staying In Shape dough recipe because the cookies don’t spread, and with the addition of a bit of lemon zest, they have a welcome brightness to the taste. The difference here is coloring the dough itself while still in the mix master. You will also need three or more small heart-shaped cookie cutters in various sizes, which are easily ordered online.

Now for my “senior moment” act. I had made the dough early in the morning and refrigerated them until my cookie cutters arrived. During that wait, I started scribing this blog, and it occurred to me that I added four eggs instead of two! I’m thinking OMG, the cookies will be misshapen and puffy. But instead of tossing it all, I decided to run a test.

Senior moment #2 was forgetting to freeze the baking sheet full of test cookies before I popped them in the oven. Surprisingly, they came out fine! Luckily I could proceed with the dough that I had, but from then on, I did freeze each baking sheet before popping them in the oven.

IMG_3640

Variations:

  • Brush colored dough with stripes of egg white and sprinkle on colored sugar, lightly pressing to adhere before cutting out cookies.
  • For striped cookies, place strips of varying dough colors next to each other. Brush egg white between each color so dough will fuse together while baking. Roll into one large sheet and cut out cookies at varying angles. (Don’t worry if the lines aren’t perfectly straight, it makes the cookies more interesting.)
  • A mixture of food coloring, egg white and water makes an edible watercolor you can brush on the dough before cutting out.
  • For touches of gold leaf, use an already prepared edible product or mix 1/2 tsp. edible luster dust with 1 tsp. vodka. Brush onto cooled cookies.
  • For a marbled effect, lightly knead two or three colors of leftover dough so that the variations of color are still visible. Roll out the dough and cut out the shapes.

The recipe below is doubled in order to get enough of each color.

IMG_3642

Tri-Colored Heart Sugar Cookies

  • Servings: 3 dozen
  • Difficulty: easy
  • Print

Ingredients

  • 4 sticks (2 cups), room temperature
  • 2 cups sugar
  • 2 eggs
  • Zest from 1 lemon
  • 2 tsp. baking powder
  • 2 tsp. vanilla extract
  • 6 cups unsifted flour (plus more for rolling cookies out)
  • 1 tsp salt

Directions

  1. Preheat oven to 350°F.
  2. Add the butter sticks and the sugar and cream together in a stand mixer, about 3 minutes.
  3. Scrape down the sides of the bowl and add the eggs, lemon zest, baking powder and vanilla extract, then beat again for 2 minutes until a creamy.
  4. Add 6 cups flour (2 cups at a time) and ½ teaspoon salt and mix on low speed to combine about 2 minutes.
  5. Remove approximately 1/3 of the dough and wrap in wax paper until ready to use.
  6. Add pink food coloring to the reminder 2/3 dough and mix until evenly colored. Remove 1/2 of the pink dough and wrap in wax paper.
  7. Finally add red food coloring to the remainder of the pink dough and mix thoroughly and wrap. Refrigerate all three dough balls until ready to use.
  8. On a floured surface or pastry cloth, roll out the cookie dough balls to desired thickness level, about an 1/8″ or a little thicker.
  9. Begin cutting out the smaller heart shapes then move the cut out pieces to fill in the holes in another color of dough. Use the largest cutters to make shapes around the filled in pieces.
    IMG_3613
  10. Place shapes on an unrimmed baking sheet.
  11. Reform any leftover dough into another ball and repeat the process.
  12. Put baking sheet(s) in the freezer for 10 minutes.
    IMG_3611
  13. After 10 minutes take the baking sheet out of the freezer and bake for 10 minutes, just before edges start to turn a light brown.
  14. Remove cookies from oven, allow to cool for a few minutes, then transfer them to a wire rack to cool completely. (See variations above for finishing touches.)
    IMG_3618

http://www.lynnandruss.com


Lasagna Stuffed Turkey Meatloaf

Some time back I came across a lasagna meatloaf recipe thinking what a novel idea, but then completely forgot about it, until now. I recall the instructions were not very clear and a little wonky, so I improvised one of my own, using ground turkey in place of beef—which of course you could use if so inclined.

I thought it might be an issue locating fresh lasagna sheets, but our local supermarket had them in the dairy aisle with other fresh pastas. You’ll just need to cut them down to the size of your loaf pan for easy layering.

A few things to keep in mind. First, don’t forget to prep the loaf pan with cooking spray, otherwise you might have an issue getting it to easily come out of the pan when inverting it onto a baking sheet. Second, try to completely cover the sides with the meat mixture so that when it’s done and resting, the interior cheese mixture doesn’t start oozing out (like mine did). Finally, it is critical to let it rest after broiling so that you don’t end up with a soupy mess when you begin to slice the loaf.

Although it is not indicated in the recipe below, next time I may add an egg to the ricotta mixture which should help firm up the interior. Other than that, the Hubster loved the Lasagna Stuffed Turkey Meatloaf (I think even more than I did!). Served with a simple salad, it was more than enough for a satisfying meal.

IMG_3553

Lasagna Stuffed Turkey Meatloaf

  • Servings: 4-6
  • Difficulty: easy
  • Print

Ingredients

  • 1 lb. ground turkey
  • 2/3 cup breadcrumbs
  • 1/4 cup finely chopped parsley
  • 3 cloves garlic, finely minced
  • 2 eggs, whisked
  • 1 Tbsp. tomato paste
  • 2 tsp. salt, divided
  • 1 1/2 tsp. pepper, divided
  • 2 cups ricotta
  • 4 fresh lasagna noodles cut to loaf pan length and width
  • 1 1/2 cups tomato sauce, or your preferred marinara; more for serving
  • 8 oz. Mozzarella, cut into thin slices
  • Grated parmesan, optional

Directions

  1. Preheat oven to 350ºF.
  2. Spray the interior of a large loaf pan with cooking spray.
  3. In a large bowl mix together turkey, bread crumbs, eggs, parsley, 1 teaspoon salt, 1/2 teaspoon pepper, garlic slices and tomato paste until combined.
    IMG_3554
  4. Press 3/4 of mix into prepared loaf tin along the bottom and press up the edges keeping a well in the middle.
    IMG_3556
  5. Mix together ricotta with 1 teaspoon salt and 1/2 teaspoon pepper.
  6. In the well, layer lasagna followed by ricotta, slices of mozzarella. Repeat with 3 more layers, ending with a lasagna noodle.
  7. Cover with remaining meat mixture to seal.
    IMG_3561
  8. Bake for 40 minutes covered with foil, remove foil and cook for another 10-15 minutes until the top meat is no longer pink.
  9. Adjust oven to broiler setting.
  10. Take out and flip over onto a small rimmed baking sheet lined with heavy-duty foil.
    IMG_3562
  11. Top with tomato sauce or marinara, and slices of mozzarella. Broil in the oven until golden brown and bubbly, about 5-6 minutes.
  12. Remove from oven and let sit for 10-15 minutes to solidify. If desired, lift foil from pan and slide entire meatloaf onto a serving platter.
    IMG_3570
  13. Cut into thick slices and serve with additional sauce and grated parmesan.

http://www.lynnandruss.com

The Goodbye Girl

It was the final countdown for daughter Julia. She, and her French bulldog Bentley had been staying with us for the better part of 2 1/2 months. But now it was time to spread her wings once again and relocate to LA, a place she lived four years ago, but had never gotten out of her system.

Julia, an enthusiastic recipient of many of our home cooked meals, exclaimed this last “good-bye” dinner, Sautéed Shrimp and Pancetta with Cheesy Polenta, was “probably the best I’ve had” since moving back in. A close second was the Best Ever Turkey Burgers, but that was another blog…

Her father and I were in full agreement. As simple as it was, the meal is truly impressive. Now of course, I made some alterations. It was originally supposed to be served over grits—not necessarily one of my faves. Our substitute was instant polenta, but mixed with homemade chicken stock, an instant flavor enhancer.

I also included the entire green pepper (why just half?), an extra garlic clove, and switched out fresh chives in place of the parsley in the final step. Oh, and I’m pretty positive that I sprinkled on a bit more cayenne than what was suggested, but that’s just how I roll—use your own judgement there. (All of these changes are noted in the recipe below.)

Goodbye Girl, and Mr. Bentley. We shall miss you both. But you can always take a walk down memory lane when reading this blog and remembering all of those delicious meals—and desserts!

IMG_3452

Sautéed Shrimp and Pancetta with Cheesy Polenta

  • Servings: 4
  • Difficulty: easy
  • Print

Ingredients

  • 3 Tbs. olive oil
  • 2 leeks (white and light-green parts only), halved lengthwise, thinly sliced, and rinsed
  • Kosher salt
  • 3 medium cloves garlic, minced
  • 3-1/2 cups chicken broth, preferably homemade
  • 1 cup quick-cooking polenta
  • 4 oz. extra-sharp Cheddar, coarsely grated (about 1 cup)
  • Freshly ground black pepper
  • 2 oz. 1/8-inch-thick sliced pancetta, cut into 1/8 x1-inch strips
  • 1-1/2 lb. jumbo shrimp, peeled and deveined
  • 1/4 tsp. cayenne
  • 1 large green bell pepper, seeded and finely diced
  • 1 Tbs. chopped fresh chives

Directions

  1. In a heavy-duty 4- to 5-quart pot, heat 2 Tbs. of the oil over medium heat. Add the leeks and 1/4 tsp. salt and cook, stirring occasionally, until softened, 4 to 5 minutes.
  2. Add the garlic and cook, stirring, for another 30 seconds.
  3. Add the chicken broth and 1/2 tsp. salt, cover, and bring to a boil over high heat.
    IMG_3457
  4. Whisk in the polenta, return to a boil, then reduce the heat to medium low and cook, partially covered, stirring frequently, until the broth has been absorbed and the polenta  is thick, about 5 minutes.
  5. Add the cheese and stir to melt. Season to taste with salt and pepper, remove from the heat, cover,  and keep warm.
    IMG_3460
  6. In a 12-inch nonstick skillet, cook the pancetta in the remaining 1 Tbs. oil over medium-high heat, stirring occasionally, until golden and starting to crisp, about 5 minutes.
    IMG_3461
  7. Meanwhile, pat the shrimp dry and put them in a large bowl. Sprinkle with the cayenne and 1/4 tsp. black pepper and toss to combine.
    IMG_3455
  8. Add the green pepper to the skillet and cook, stirring, until softened, 3 to 4 minutes.
    IMG_3463
  9. Add the shrimp and cook, stirring occasionally, until pink and just cooked through, 2 to 3 minutes. Stir in the chives.
    IMG_3466
  10. Distribute the polenta among 4 shallow bowls and serve the shrimp mixture over it.
    IMG_3470

http://www.lynnandruss.com

Adapted from a recipe by Nadia Arumugam from Fine Cooking

Gluten-Free Chocolate Peanut Butter Brownies with Ganache and Truffles

Looming in a few days hence, was a house party and we were tasked with bringing dessert. With much success in the past, I thought I’d give the Chocolate Peanut Butter Brownie recipe, another whirl. You may recall I’ve made them almost a year ago for Seder because they are flourless; and for a girl’s weekend away in NYC.

My over-the-top addition at that time was a smattering of Reese’s pieces and mini peanut butter cups as a final flourish, not only for color, but because who doesn’t like more peanut butter and chocolate?? This time my topping was cocoa dusted dark chocolate truffles (such as those from Trader Joe’s) for a sophisticated approach. Another change was using the recommended bittersweet chocolate for the ganache as opposed to the dark chocolate I chose before.

Made without flour, this easy brownie recipe yields the most decadent, fudgy, rich, and chewy brownie imaginable. And if that’s not enough, that top layer of ganache and truffles take them over the top and ensures triumph over the strongest of chocolate cravings. Plus, these from-scratch brownies are naturally gluten-free and don’t even require a mixer.

IMG_3449

Rule #1 with brownies: The baking time is an estimate, you really do need to watch your brownies closely to get the perfect brownie. You should rely on a toothpick. And unlike cake, you’re not looking for a clean toothpick when you pull it out. You want moist crumbs stuck all over that toothpick. Start checking on the edges of the pan. It cooks faster there and if you don’t pull the brownies out soon enough, you’ll have dry edges. NOT COOL. (Ours took the entire 37 minutes.)

The peanut butter is an important part of this recipe and it helps to really cut the overall richness and sweetness. Best to use a natural creamy peanut butter with a low sugar content, at 2 grams or less, such as Justins.

For that party, we had every intention of bringing a half gallon of good vanilla ice cream to pair with the brownies figuring it would make a nice counterpart to the rich chocolate. Alas, we forgot. But eagle-eyed Julia spotted the carton in the freezer and she quickly decided she would have them both for dessert that evening. (Yes, we did bring some leftovers home from the party.)

The next morning she informed me that she nuked the brownie for about 15 seconds to just soften the ganache/truffle topping, and waxed poetic over how the ice cream was a perfect partner and actually helped cut back on all that richness. It kind of defies logic that adding more sweetness tones down the richness, doesn’t it?? Enjoy…

Gluten-Free Chocolate Peanut Butter Brownies with Ganache and Truffles

  • Servings: 25 squares
  • Difficulty: easy
  • Print

Ingredients

Peanut Butter Filling

  • 3/4 cup peanut butter
  • 1/2 cup granulated sugar
  • 1 egg room temperature

Brownies

  • 12 oz semi-sweet or bittersweet chocolate chips
  • 6 tbsp unsalted butter cut into small cubes
  • 3/4 cup granulated sugar
  • 1 tsp vanilla extract
  • 3 eggs room temperature
  • 1/4 cup unsweetened cocoa powder
  • 1/3 cup cornstarch
  • 1/2 tsp salt
  • 1 cup mini semi-sweet chocolate chips

Gancahe

  • 10 oz bittersweet chocolate chopped
  • 1/2 cup heavy whipping cream
  • 7 oz. cocoa dusted dark chocolate truffles, roughly chopped (optional)

Directions

  1. Preheat oven to 350F.
  2. Lightly spray an 9-inch square baking pan with cooking spray. Line with parchment paper leaving an overhang for easy removal. Set aside.

Peanut Butter Filling

  1. In a medium bowl, combine peanut butter, sugar, and egg. Mix until throughly combined. Set aside.

Brownies

  1. In a large bowl, combine chocolate chips and butter. Melt in 30-second increments, on high heat in the microwave, stirring in between.
    Stir in sugar and vanilla until completely combined.
  2. Add eggs one a time, stirring in between until combined.
    In a small bowl, whisk together cocoa powder, cornstarch, and salt.
  3. Add dry mixture to wet mixture and stir vigorously until the mixture is smooth and begins to pull away from the sides of the bowl. This will take one or two minutes.
    IMG_3421
  4. Stir in the mini chocolate chips.
    IMG_3422
  5. Pour two-thirds of the brownie batter into the prepared pan and smooth the top with a spatula.
  6. Drop small spoonfuls of the peanut butter mixture on top of the brownie batter. (I flattened the spoonfuls in my hands for a more even coverage.)
    IMG_3424
  7. Spoon on remaining brownie batter and smooth with the back of a spoon or offset spatula. It doesn’t have to be perfect.
    IMG_3425
  8. Bake for 33-37 minutes or until an inserted toothpick comes out with a few moist crumbs. (Watch the brownies closely after 30 minutes. Don’t rely on the time so much as the inserted toothpick.)
  9. Let brownies cool completely on a cooling rack or in the fridge. (This could take up to 2 hours on the counter.)
    IMG_3428

Ganache

  1. Place bittersweet chocolate in a heat-proof bowl. (The smaller you make the chunks, the quicker it will melt with the cream.)
    IMG_3427
    Since the two Ghirardelli bars only weighed 8 ounces, I added 2 more ounces of bittersweet chocolate.
  2. Heat whipping cream until scalding hot and pour over the top of the chocolate.
    IMG_3430
  3. Let sit for 5 minutes and then stir until smooth. (If chocolate hasn’t melted all the way, heat on high heat in 15 second intervals in the microwave, stirring in between, until chocolate is fully melted.)
  4. Pour mixture over the top of the cooled brownies and use an offset spatula to spread over the top until smooth.
    Scatter the truffle chunks over the ganache. Refrigerate until the ganache has completely set up.
    IMG_3442
  5. Use the parchment paper overhang to pull the brownies out and cut into squares.
  6. Store in an airtight container for up to 3 days.

http://www.lynnandruss.com

Recipe adapted from one on momontimeout.com

Red Curry with Pork and Watercress

Remember the Red Curry Paste we made from scratch the other day? Well this Red Curry with Pork and Watercress recipe came from the same Fine Cooking Magazine (FC) article, and the reason we made the paste in the first place. OK, it was also to break in Hubby’s Christmas present from his sister Dee—the solid granite mortar and pestle hand carved from Thailand.

IMG_3227

According to the magazine article, you won’t find this curry in many Thai restaurants in the States, but it’s a popular choice among Bangkok residents. The sauce is thick and velvety thanks to a generous amount of coconut milk, which imparts sweetness. Its sweet profile is balanced by the mellow heat from the curry paste and sourness from the lime.

FC suggests, if you’re able to find it, using morning glory in place of the watercress, apparently it’s more authentically Thai. However, other than growing morning glory in my garden, I’ve never heard of eating it. Have you? It may seem like a lot of greens initially, but just like spinach, it wilts down considerably.

For a leaner option, swap pork butt for the pork belly (which we did). Serve the curry on generous helpings of steamed jasmine rice. Of course, if you don’t have the where-with-all to make homemade red curry paste, use a jarred version, it just won’t be quite as spectacular. We made the red curry paste two days in advance which saved loads of time.

The recipe only called for 1 pound of pork, which seemed very meager. Our package was about 1/3 more and even that was a stretch. I suggest using at least 1 1/2 pounds of meat, especially is you are serving four people.

IMG_3281

Red Curry with Pork and Watercress

  • Servings: 3-4
  • Difficulty: easy
  • Print

Ingredients

  • 2 Tbs. coconut or vegetable oil
  • 1 lb. pork belly (or butt), skin removed, cut into 3/4-inch chunks
  • 1/4 cup Red Curry Paste
  • 2 cups unsweetened coconut milk
  • 7 oz. watercress or morning glory, cut into 3-inch pieces (4 cups chopped)
  • 3 Tbs. tamarind concentrate or apple-cider vinegar; more to taste
  • 2 Tbs. fish sauce; more to taste
  • 2 Tbs. palm or brown sugar; more to taste
  • 1 kaffir lime, halved; or 3 kaffir lime leaves, finely chopped
  • Lime wedges, for serving
  • Steamed basmati rice made with homemade broth

Directions

  1. Heat the oil in a medium saucepan over medium-high heat. (Coconut oil comes in a solid state as opposed to liquid like most oils.)
    IMG_3282
  2. Sear the pork on all sides until browned. Transfer the pork to a plate. Discard all but 2 Tbs. of the oil from the pan.
    IMG_3285
  3. Return the pan to medium-high heat, add the curry paste, and cook, stirring, until fragrant, about 2 minutes. The paste will spatter, so use a lid or splatter guard.
    IMG_3286
  4. Add the coconut milk and pork with its juices; bring to a boil. Reduce the heat to low, and simmer, slightly covered, until the meat is tender, 45 to 50 minutes. Add water to ensure that the pork remains submerged.
    IMG_3289
  5. Once the pork is tender, add the watercress, tamarind, fish sauce, sugar, and lime. Return to a boil. Season to taste with more sugar, tamarind, and fish sauce.
  6. Turn off the heat, and let stand for 30 minutes to let the lime infuse the curry.
    IMG_3291
  7. Meanwhile, make rice according to package directions, steamed with homemade chicken stock instead of water, if possible.
  8. Remove and discard the lime for the curry, and then serve it over steamed rice.
    IMG_3294

http://www.lynnandruss.com

Adapted from a recipe by Perry Santanachote found in Fine Cooking Magazine

Hearty Spanish-Style Lentil and Chorizo Soup with Kale

When Winter is in full swing with blustery temperatures, it tempts one to hunker down and nest by a cozy fire with a cup of tea. Another option is to dine on this Hearty Spanish-Style Lentil and Chorizo Soup with Kale and be instantly warmed and satisfied.

Some reviewers thought 1 1/2 pounds was too much chorizo, so they cut back to 1 pound, sounds reasonable right? Not in this household. I’m not even sure there is such a thing as “too much chorizo” according to my husband. We increased to 2 pounds! (Although afterward, he acquiesced and said 1 pound would probably have been enough.)

And for another punch of meaty flavor, Hubby also incorporated a chopped, small-but-thick, piece of Jamón Serrano. The other change in elevating flavors was using our homemade ham stock. WOW, now that was a game changer! With all of that extra meat, he added another cup of water to the ham stock, making a total of 8 cups of liquid.

IMG_3233
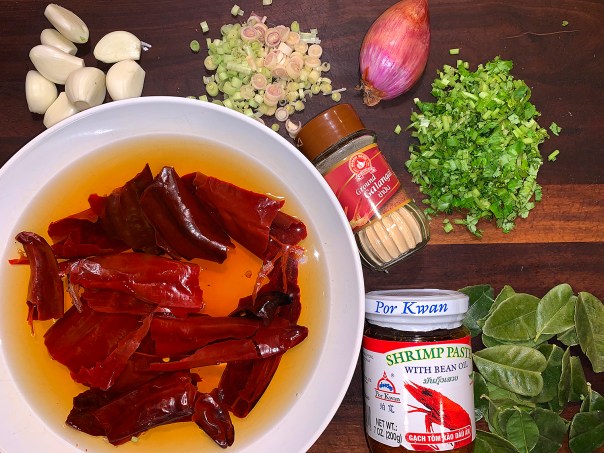
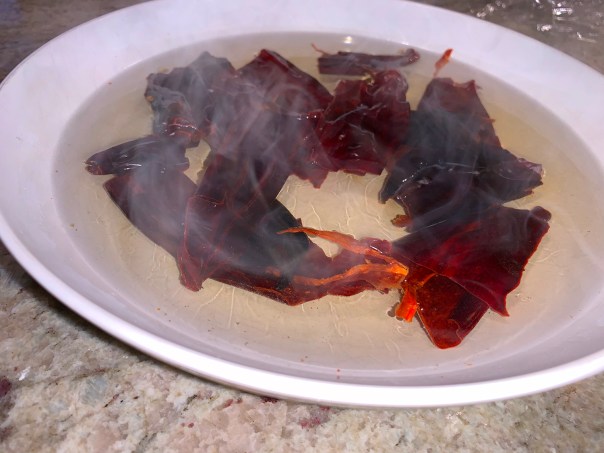
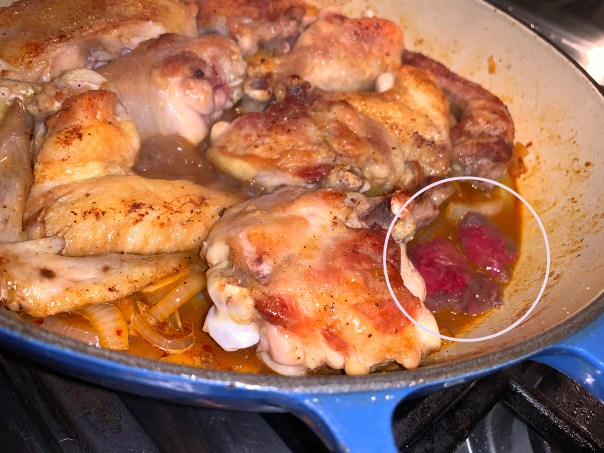
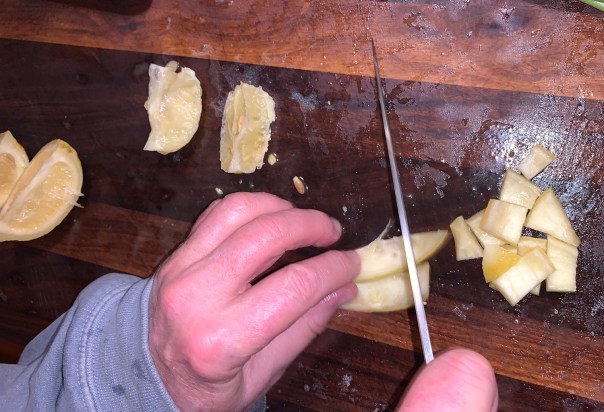
For a flavor boost, Russ decided to add some Jamón Serrano (shown above, lower right) while prepping the aromatics.

To ensure creamy, well-seasoned lentils with intact skins, soak them in a warm brine for 30 minutes before cooking. For a rich, vegetal flavor, sweat onion, carrot, and parsley in a covered pot to provide a background taste to the main ingredients: heady smoked paprika, meaty chorizo, earthy lentils, and tart sherry vinegar. For a finish, garnish it with an Indian preparation called a tarka, a mixture of spices and aromatics bloomed in oil.

Not to beat a dead horse, but you know by now we are not fans of curly kale, so we almost always use lacinato, or dinosaur kale in its place. They are both prepped the same way, so it’s up to you which variety you care to include.

IMG_3245

“We prefer French green lentils, or lentilles du Puy, for this recipe, but it will work with any type of lentil except red or yellow. Grate the onion on the large holes of a box grater. If Spanish-style chorizo is not available, kielbasa sausage can be used. Red wine vinegar can be substituted for the sherry vinegar. Smoked paprika comes in three varieties: sweet (dulce), bittersweet or medium hot (agridulce), and hot (picante). For this recipe, we prefer the sweet kind.”     —Cook’s Illustrated

TIP: Make sure to buy the Spanish cooking chorizo which is soft and uncured as opposed to the cured, hard Spanish chorizo.

Hearty Spanish-Style Lentil and Chorizo Soup with Kale

  • Servings: 6-8
  • Difficulty: easy
  • Print

Ingredients

  • 1 pound (2 1/4 cups) lentils, picked over and rinsed
  • Salt and pepper
  • 1 large onion
  • 5 tablespoons extra-virgin olive oil
  • 1 ½ pounds Spanish-style cooking chorizo sausage, pricked with fork several times
  • 3 carrots, peeled and cut into 1/4-inch pieces
  • 3 tablespoons minced fresh parsley
  • 7 cups water, plus extra as needed (we used homemade ham stock)
  • 3 tablespoons sherry vinegar, plus extra for seasoning
  • 2 bay leaves
  • ⅛ teaspoon ground cloves
  • 12 ounces kale, stemmed and cut into 1/2-inch pieces
  • 2 tablespoons sweet smoked paprika
  • 3 garlic cloves, minced
  • 1 tablespoon all-purpose flour

Directions

  1. Place lentils and 2 teaspoons salt in heatproof container. Cover with 4 cups boiling water and let soak for 30 minutes. Drain well.
  2. Meanwhile, finely chop three-quarters of onion (you should have about 1 cup) and grate remaining quarter (you should have about 3 tablespoons).
  3. Heat 2 tablespoons oil in Dutch oven over medium heat until shimmering. Add chorizo and cook until browned on all sides, 6 to 8 minutes. Transfer chorizo to large plate.
    IMG_3235
  4. Reduce heat to low and add chopped onion, carrots, 1 tablespoon parsley, and 1 teaspoon salt. (A chopped thick piece of Jamón Serrano was added with the carrots for another addition of flavor.) Cover and cook, stirring occasionally, until vegetables are very soft but not brown, 25 to 30 minutes. If vegetables begin to brown, add 1 tablespoon water to pot.
    IMG_3241
  5. Add lentils and sherry vinegar to vegetables; increase heat to medium-high; and cook, stirring frequently, until vinegar starts to evaporate, 3 to 4 minutes.
    IMG_3243
  6. Add 7 cups water (or ham stock), chorizo, bay leaves, and cloves; bring to simmer. Reduce heat to low, cover, and cook for 15 minutes. Stir in kale, cover, and continue to cook until lentils are tender, about 15 minutes longer.
  7. Heat remaining 3 tablespoons oil in small saucepan over medium heat until shimmering. Add paprika, grated onion, garlic, and ½ teaspoon pepper; cook, stirring constantly, until fragrant, 2 minutes. Add flour and cook, stirring constantly, 1 minute longer.
  8. Remove chorizo and bay leaves from lentils. Stir paprika mixture into lentils and continue to cook until flavors have blended and soup has thickened, 10 to 15 minutes.
  9. When chorizo is cool enough to handle, cut in half lengthwise, then cut each half into ¼-inch-thick slices. Return chorizo to soup along with remaining 2 tablespoons parsley and heat through, about 1 minute.
    IMG_3247
  10. Season with salt, pepper, and up to 2 teaspoons sherry vinegar to taste, and serve. (Soup can be made up to 3 days in advance.)

IMG_3255

http://www.lynnandruss.com

Adapted from a recipe found on CooksIllustrated.com

A Decadent Dinner for Your Date

You’ll impress not only your significant other, but yourself as well when you make this Steak Tips with Mushrooms and Blue Cheese recipe. Even though it’s a weekend and/or special occasion, you may still want quick and easy. To make the decadent meal even faster, you could pair it with frozen steak fries instead of homemade.

The savory combination of mushrooms and blue cheese can’t be beat when added to tender steak tips. Now what are steak tips? Also known as flap meat, they can be sold as whole steaks, cubes, or strips. How convenient, we just happened to have a bag of four flap meat strips in the freezer!

To ensure a substantial crust, get the pan very hot before adding the meat. Cooking steaks in a pan that isn’t properly preheated leads to meat that overcooks before developing a good crust. To build layers of flavor prepare the sauce in the same pan in which you cooked steaks. The browned bits left behind—known as fond—add valuable flavor to the sauce.

To ensure that most of the meat would end up medium-rare, we decided not to cut the strips into 2″ pieces, until after it was cooked and plated. Whisking half of the blue cheese into the sauce adds richness to the dinner and ensures that each bite is packed with blue cheese flavor. I was sooo excited to eat, I totally forgot to add the chopped chive garnish.

Our veggie side was char-roasted broccoli rabe. Don’t be alarmed that the leaves almost blacken, they taste great! To prepare, rinse, then chop off the bottom inch or two, and toss the remaining stalks with 2 tablespoons of peanut oil (which has a high smoke point), salt, pepper and a pinch of red pepper flakes. Arrange in a single layer on a rimmed baking sheet. Roast along with the potato wedges in a 450° oven for 15 minutes. (The potatoes take about 35 minutes.)

This wold be a great Valentine’s Day dinner for the meat lover(s) in your family.

Steak Tips with Mushrooms, Blue Cheese and Steak Fries

  • Servings: 4
  • Difficulty: easy
  • Print

Ingredients

STEAKS

  • 1 ½ lbs sirloin steak tips, cut into 2-inch pieces (we left our strips whole)
  • Salt and pepper
  • 3 Tbsp. vegetable oil
  • 4 large, meaty portobello mushroom caps, halved and sliced thin
  • 2 shallots, halved and sliced thin
  • ½ cup chicken broth
  • ½ cup heavy cream
  • ½ cup crumbled blue cheese
  • 2 Tbsp. minced fresh chives, more for potatoes if desired

STEAK FRIES

  • 2 lb. Yukon Gold potatoes, cut into 1/2″ wedges
  • 2 Tbs. peanut or grapeseed oil
  • 1/2 tsp. salt + 1/4 tsp. pepper

Directions

  1. Pat steak tips (or strips) dry with paper towels and season with salt and pepper. Heat 1 tablespoon oil in large skillet over medium-high heat until just smoking.
  2. Add steak tips and cook until well browned all over, 6 to 8 minutes. Transfer to serving platter and tent with foil.
    IMG_3262
  3. Add remaining oil, mushrooms, and ½ teaspoon salt to empty skillet. Cover and cook over medium heat until softened, 3 to 4 minutes.
  4. Add shallots and cook until softened, about 1 minute. Stir in broth, cream, and any accumulated beef juices and simmer, scraping up any browned bits, until slightly thickened, about 5 minutes.
  5. Off heat, whisk in ¼ cup cheese. Pour sauce over meat and sprinkle with remaining cheese and chives. Serve.
    IMG_3275

Cooking Fries:

  1. Position a rack in the upper third of the oven and preheat to 450°F.
  2. Toss the potato wedges on a large rimmed, parchment-lined, baking sheet with the oil, salt and pepper, arranging in a single layer.
    IMG_3256
  3. Roast until the potatoes begin to brown, about 15 minutes. Turn with a spatula, continue roasting until browned and crisp, 15 to 20 minutes more.
  4. Divide amongst serving plates and sprinkle with chopped chives, if desired.
    IMG_3279

http://www.lynnandruss.com

Adapted from a recipe found online at Cook’s Country

Sear-Roasted Pork Tenderloin with Garlic and Fennel

Relatively quick, moist, and savory, this Sear-Roasted Pork Tenderloin with Garlic and Fennel recipe delivers in spades. And pair it with the Kale Salad with Cranberry Vinaigrette (shown below), and you’ve got yourself a healthy, low-carb, low-fat, highly flavorful dinner.

IMG_3157

Fennel is a classic flavoring for pork because it brings out the sweetness of the meat. That, along with a decent punch of garlic and some chopped fresh herbs, you’ve got yourself a tasty bite of “the other white meat.”

This recipe is straightforward, but you can make it simpler by skipping the browning step. Instead, roll the raw tenderloin in the garlic mixture and roast for about 30 minutes. Although, we prefer to brown the meat and enjoy the extra depth of flavor from searing the exterior.

Sear-Roasted Pork Tenderloin with Garlic and Fennel

  • Servings: 6
  • Difficulty: easy
  • Print

Ingredients

  • 4 cloves garlic, finely chopped
  • 2 Tbs. chopped fresh sage
  • 2 Tbs. chopped fresh thyme
  • 4 tsp. fennel pollen or ground fennel seed
  • Kosher salt and freshly ground black pepper
  • 2 Tbs. olive oil; more as needed
  • 2 pork tenderloins (2 to 2-1/2 lb. total)
  • Chopped fresh flat-leaf parsley (optional)

Directions

  1. Position a rack in the center of the oven and heat to 350°F. Line a rimmed baking sheet with foil, then set a large wire rack on the sheet.
  2. Combine the garlic, sage, thyme, fennel, 2 tsp. salt, and 2 tsp. pepper in a small bowl (or right on the cutting board).
    IMG_3153
  3. Heat the oil in a large skillet over medium-high heat. Add the pork and cook, turning occasionally, until golden brown on all sides, 10 to 12 minutes. (You may need to sear the tenderloins separately, depending on pan size.) Transfer to the rack on the baking sheet and let stand until cool enough to handle.
  4. Meanwhile, spread half of the garlic-fennel mixture on a cutting board. Roll one of the tenderloins in the mixture (it won’t cover the pork completely), then return it to the rack on the baking sheet.
    IMG_3162
  5. Repeat with the rest of the garlic-fennel mixture and the other tenderloin. Scrape any remaining mixture from the board over the tenderloins, and press gently to adhere.
  6. Roast until the pork registers 130°F to 135°F on an instant-read thermometer, about 15 minutes. (Our 2 tenderloins weighed almost 3 1/2 lbs and took 30 minutes to register 130°.)
    IMG_3164
  7. Transfer to the cutting board, cover loosely with foil, and let rest for 5 to 7 minutes. Slice and serve, sprinkled with the parsley, if you like. Season to taste with salt and pepper.
    IMG_3168
    IMG_3169

http://www.lynnandruss.com

Recipe by meat author Bruce Aidells

The Mother Paste

Let me just say, be prepared to pound for about 40 minutes total. I know, starting with a negative is, well negative, but the end result is so worth it (plus, it was my husband who did all the pounding 🙂 ) Why? Just as béchamel is to French sauces, this fundamental Red Curry Paste (Prik Gaeng Kua) is the “mother” paste for almost all other Thai curries, so says the Fine Cooking article which highlighted this one from chef Perry Santanachote—a food stylist, recipe developer and writer.

According to Perry, in Thai, curry paste ingredients are called khreung gaeng, which translates to “the engine of the curry.” Comparing khreung gaeng prepared with a mortar and pestle to ones prepared with a food processor is like pitting a Bugatti against a Buick. They’ll both get you where you want to go, but one will provide a much more exhilarating experience.

The Hubs received his hand-carved, solid granite mortar and pestle as a Christmas gift from his sister Dee, but hadn’t used it until now. And just like any new utensil, it needed to be cleaned and seasoned before using. The steps for so doing are as follows:

  1. Wash in clean water without detergent and air dry.
  2. Grind roughly a small handful of uncooked white rice. Discard and repeat if necessary until the rice remains white and does not discolor.
  3. Add 4 cloves of raw garlic, 1 teaspoon cumin seeds, 1 teaspoon salt, and 1 teaspoon black pepper corns. Grind into a paste and discard.
  4. Again, wash in clean water without detergent and air dry.

Here, Russ begins the process of cleaning his set.

Notes for Making Curry Paste:

  • *Use chiles such as Mexican guajillo, puya, New Mexico, Anaheim, or California that are fragrant but not overly spicy.
  • Driest and/or hardest ingredients go in first, followed by ingredients with more moisture. Always leave the shrimp paste for last.
  • Use the curry paste immediately or store it in an airtight container covered with a thin layer of oil for up to one month in the refrigerator, or 3 months in the freezer.
    IMG_3229

A few comments about our ingredients. We could not locate kaffir limes, even at the Asian Mart. But we had some leaves in the freezer so we used those—although I would have preferred the lime zest. Then we forgot to look for fresh galangal, but had the powdered spice, so we found, and used, the conversion rate (4 1/2 teaspoons equalled 1/4 cup fresh galangal). As for the chiles, we had dried guajillos on hand, so that was perfect.

It was a real workout for Russ’s arms, but we were both excited to use the “mother” paste in an upcoming Thai Curry recipe. Stay tuned… In the meantime, I need to source where we can obtain fresh Kaffir limes. One such option is Importfood.com.

kaffir limes

“Kaffir lime peel is loaded with a fragrant citrus oil, but the flavor of the fruit is overwhelming if eaten fresh. The kaffir lime tree is grown and harvested mainly for the leaves which are a staple in Thai cooking, but the tree doesn’t produce many of these limes. As kaffir limes aren’t eaten fresh, and there’s limited use for them, growers typically strip the trees of all fruit each year to promote growth of the leaves. The fruit not only looks excellent but the culinary appeal is perfect: fragrant, strong citrus flavor. Put a slice of the bitter peel in your mouth and your lips get a tingling sensation of citrus unlike anything you’ve tasted.”

IMG_3219

Kale Salad with Cranberry Vinaigrette

  • Servings: Yields about 1 cup
  • Difficulty: moderate
  • Print

Ingredients

  • 1 oz. dried red spur chiles or other dried chiles*
  • 1/4 cup thinly sliced fresh lemongrass
  • 3 Tbs. minced galangal
  • 2 tsp. coarse salt
  • 1/4 cup minced garlic (from about 8 cloves)
  • 1/4 cup minced shallot (from 1 medium shallot)
  • 3 Tbs. minced fresh cilantro stems
  • 1 Tbs. kaffir lime zest (from about 2 small limes) or very thinly sliced kaffir lime leaves
  • 1 Tbs. shrimp paste
  • Coconut oil (optional)

Directions

  1. Remove the stems from the chiles. Shake out and discard the seeds. Break the chiles into pieces, and soak them in hot water for 20 to 30 minutes to soften.
    IMG_3217
  2. Meanwhile, in a heavy-duty mortar and pestle, pound the lemongrass and galangal until ground to a coarse paste, 3 to 4 minutes.
  3. Drain the chiles, and finely dice them. Add to the mortar in batches, sprinkling the salt over them after adding each batch. Pound until the mixture is fine and the oils are fully released from the chiles, about 15 minutes.
  4. Add the garlic, shallot, cilantro stems, and zest, and pound until all of the ingredients are fully incorporated into a smooth paste, about 20 minutes. You’re looking for a buttery consistency with no chunks, almost like tomato paste.
    IMG_3224
  5. Add the shrimp paste. It will almost melt into the curry paste as you spread it around.
    IMG_3228

http://www.lynnandruss.com

By Perry Santanachote found in Fine Cooking Magazine

Power Salad

More POWER to you. Kale may be one of those greens that you love to hate; or, you are definitely on board with it. Either way, I’ll bet you’re going to enjoy this Kale Salad with Cranberry Vinaigrette found on FineCooking.com. At the very least, you’ll feel a tad healthier after consuming all of the good-for-you ingredients.

Our dinner guest that evening, step-daughter Julia, was not even a fruit fan, especially cranberries, but she adored the dressing. And while the cranberries get chopped up in a food processor, admittedly any of the larger chunks she pushed aside. But she surprised even herself with finishing her portion.

IMG_3156

Speaking of cranberries, the supermarket was out of fresh, so I bought a packet of organic frozen (without sugar), and let them thaw about 30 minutes before chopping in the food processor. Cranberries are considered to be a superfood due to their high nutrient and antioxidant content.

In fact, I’m sure you’ve heard, research has linked the nutrients in cranberries to a lower risk of urinary tract infections, the prevention of certain types of cancer, improved immune function, and decreased blood pressure. Who’s not on board now?

The homemade vinaigrette softens the raw kale leaves, so it’s essential to let this salad sit for at least 15 minutes before serving. The longer it sits, the more tender the kale will become. (Ours was coated with dressing for an hour before eating.) We often find curly kale to be tough and bitter, so we usually substitute the lacinato variety, as we did here.

Without any cranberry juice on hand, and with only needing 1 tablespoon, I wasn’t about to run out to the store, so instead, I substituted 1 tablespoon of orange juice. Plus, after cutting down the orange sections, I put them in a small bowl until ready to assemble the salad. The accumulate juices added another component of flavor.

To make a full meal of it, add shredded rotisserie chicken, or nuts such as almonds or walnuts to keep it vegetarian.

Kale Salad with Cranberry Vinaigrette

  • Servings: 4-6
  • Difficulty: easy
  • Print

Ingredients

  • 1/2 cup fresh (or frozen) cranberries
  • 1 large navel orange
  • 2 Tbs. red wine vinegar
  • 1 Tbs. cranberry (or orange) juice
  • 1 Tbs. honey
  • 4 Tbs. extra-virgin olive oil
  • 2 tsp. peeled fresh ginger, finely grated on the small holes of a box grater
  • Kosher salt and freshly ground black pepper
  • 5 oz. lacinato (dinosaur) kale leaves, trimmed and coarsely chopped, or baby kale (5 cups)

Directions

  1. Using a sharp paring knife, cut off the ends of the orange to expose a circle of flesh. Stand the orange on an end and pare off the peel and pith in strips. Quarter the orange lengthwise; slice each quarter crosswise into 1/4-inch-thick pieces.
    IMG_3145
  2. Pulse the cranberries in a mini or regular food processor until finely chopped, about fifteen 1-second pulses. Set aside.
    IMG_3146
  3. Whisk together the vinegar, cranberry (or orange) juice, and honey in a large bowl. Slowly whisk in the olive oil. Whisk in the ginger and chopped cranberries and season to taste with salt and pepper.
    IMG_3149
  4. Toss the kale and the orange pieces, with their juices, in the dressing. Season to taste with salt and pepper. Let sit for 15 minutes to 1 hour before serving.
    IMG_3154

http://www.lynnandruss.com

Adapted from a recipe by Maryellen Driscoll of Fine Cooking