All posts by LynnHoll

Unknown's avatar

About LynnHoll

I have been an artist and designer all my life incorporating graphic design for websites, gardens, publications, fabrics, interior design and cooking. I am now retired from my professional job, but still create artistic visions in all forms on a daily basis.

Salmon a la Samuelsson

A long-time fan of Food Network, I often catch award-winning Chef Marcus Samuelsson as guest or judge on different shows such as The Taste and Chopped, where he was the winner of the second season of Chopped All-Stars. The Ethiopian-born Swede graduated from the Culinary Institute in Gothenburg, Sweden, and apprenticed in Switzerland, Austria, and France—impressive!

On top of owning many restaurants, Marcus is also an author of several cookbooks, so when I found his Grilled Salmon with Aleppo-Honey Glaze, Turnips, and Kale recipe in our latest issue of Bon Appetit, I just had to give it a whirl. Here, zesty ginger-spiked vegetables are the perfect foil to this richly glazed fish. With all of these bold flavors, this is not a dish for the delicate palette, nor for the typical meat-and-potatoes guy.

IMG_2363

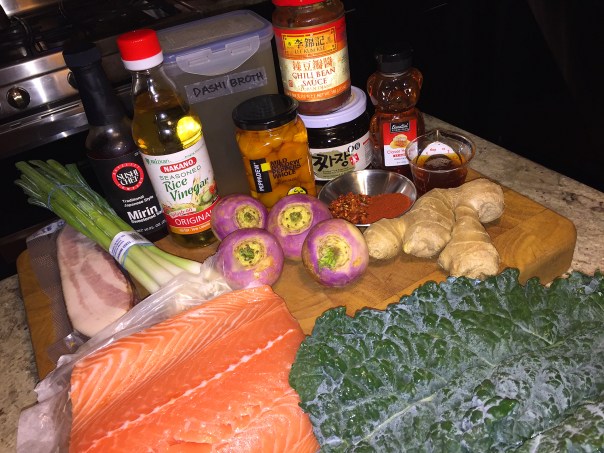
Now there are undoubtedly some ingredients that you won’t have in stock in your home pantry, or have ever even heard of. But that’s the beauty of enhancing your culinary repertoire—trying new things. So broaden your kitchen skills and take a stab at this tasty and healthy meal.

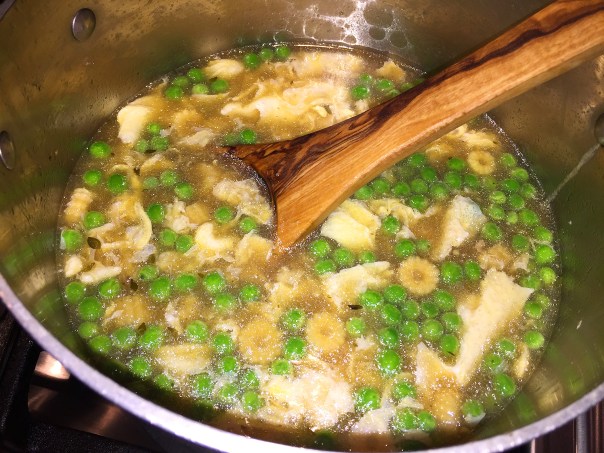
One item I was not familiar with, but that Russ has actually made in the past is dashi broth, an incredibly simple broth that forms one of the culinary cornerstones of Japanese cooking. It’s made in about 10 minutes with just three ingredients: water, kombu (dried kelp), and bonito fish flakes, which we had an unopened package of in the cupboard.

OK, I can hear you already, “yeah, right,” but trust me it is very simple. You can use dashi to make a fantastic bowl of miso soup (which is what Russ use to do), to poach fish or vegetables, or to add savory umami flavor to any number of Japanese dishes. You can also keep the dashi refrigerated for up to a week or frozen for up to three months. We had some leftover and will use it to make a stir-fry sauce for the following week.

IMG_2352

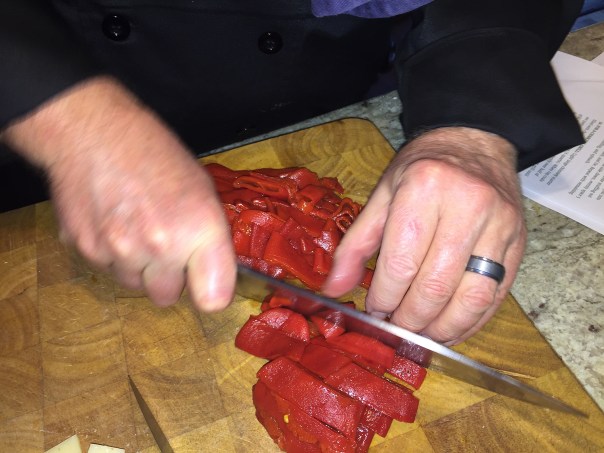
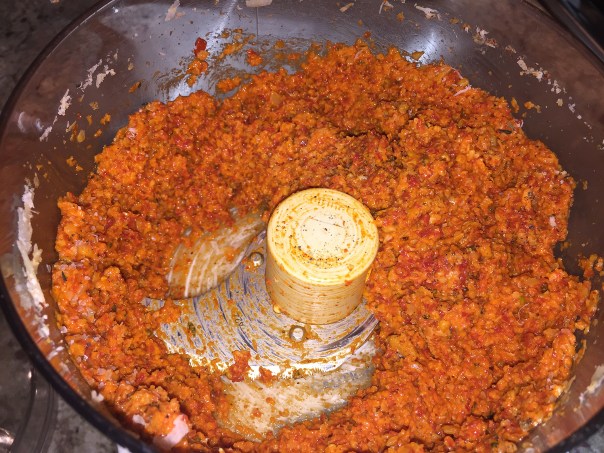
As far as the other ingredients, we had black bean sauce on hand, but decided to pick up black bean paste at our local Asian market as we bought the kombu. Never having heard of “Sweety Drops,” we easily purchased it’s substitute peppadew peppers (shown above) at the regular supermarket. Pretty much everything else—including toban djan—we had in stock or handily found at the local grocery store.

IMG_2356

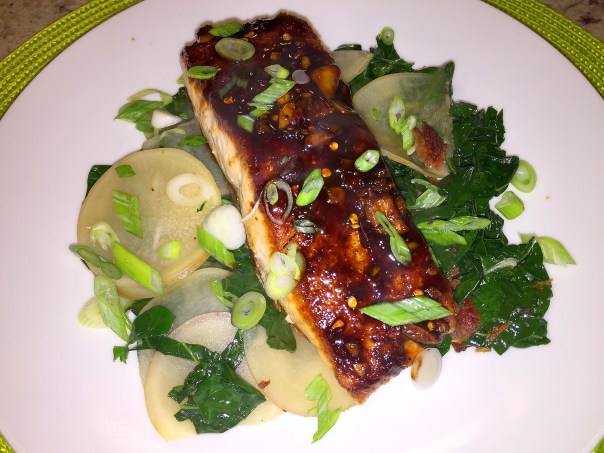
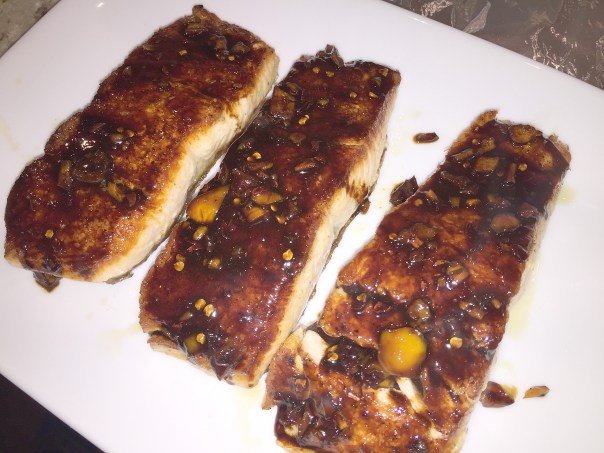
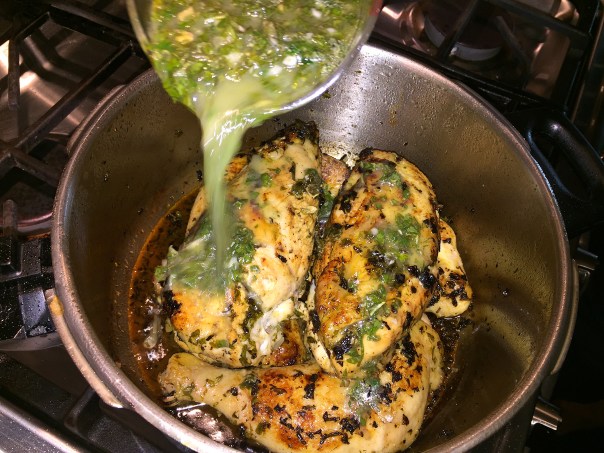
But just minutes before we were going to light the grill, Mother Nature put a kabash to our grilling plans with a torrential downpour, so we went to Plan B, which was pan-fry the fillets. Start with skin side up, then flip after about 10 minutes.

After a few minutes on the other side, start checking your salmon with a thermometer because at 110 to 125°F your salmon is medium rare; at 125°F to 140° you are beginning to enter medium to well-done territory—flakiness will increase, and a chalky texture will start to develop. So your goal is really to keep as much of the salmon below the 140°F temperature range (and preferably closer to the 125° range) as possible.

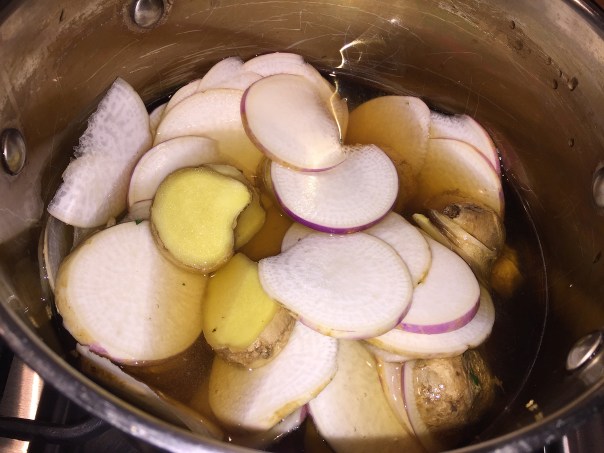
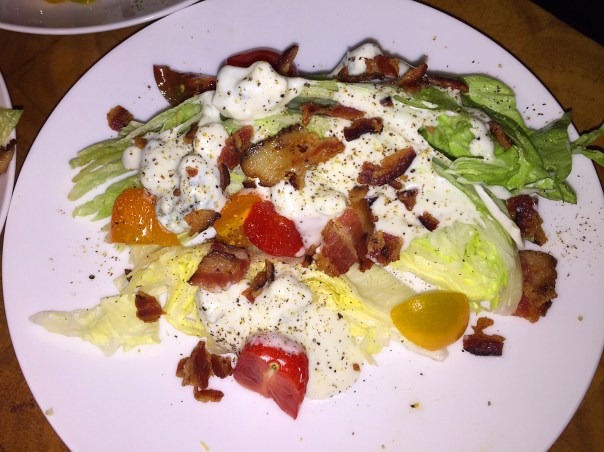
After boiling and marinating the thinly sliced turnips in essentially a LOT of mirin and ginger in the dashi, the end result produced sweet and gingery turnips that complimented well with the bitter kale and salty bacon bits. And that intensely rich sauce won our hearts. We were thrilled there were leftovers for another purpose. Unusual mix of ingredients, yes, but a meal we give two thumbs up! May have to check out more recipes from Marcus…

IMG_2348

Ingredients

For the Aleppo-honey glaze

  • 1/4 cup honey
  • 3 Tbs. black bean paste or sauce
  • 2 Tbs. Aleppo pepper, or 1 tbs. each crushed red pepper flakes and sweet paprika
  • 1-1/2 Tbs. toban djan or other chili paste
  • 3/4 cup Sweety Drops or coarsely chopped sweet peppadew peppers
  • 1/3 cup rice vinegar

For the turnips and ginger

  • 2-1/2 cups dashi broth
  • 1-1/4 cups mirin
  • 3/4 lb. turnips, peeled and thinly sliced, preferably on a mandoline
  • 8 oz. peeled fresh ginger, cut into 1-inch pieces

For the salmon and kale

  • 4 6-oz. skinless center-cut salmon fillets
  • 1-1/2 Tbs. olive oil
  • Kosher salt and freshly ground black pepper
  • 4 oz. dinosaur kale, stems removed and leaves thinly sliced crosswise
  • 2 slices bacon (about 2 oz.), cooked and chopped
  • 4 scallions, thinly sliced, for garnish

Preparation

Make the glaze

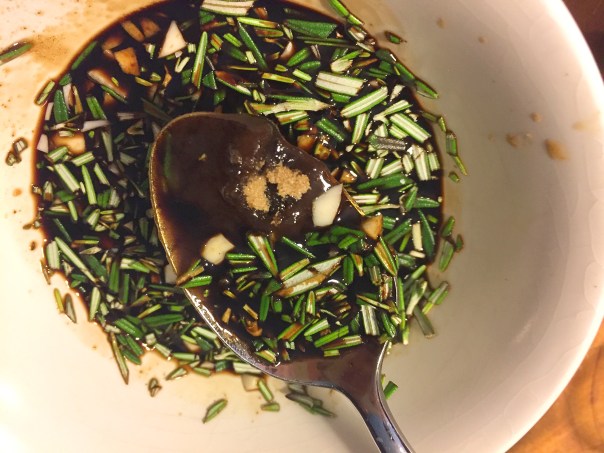
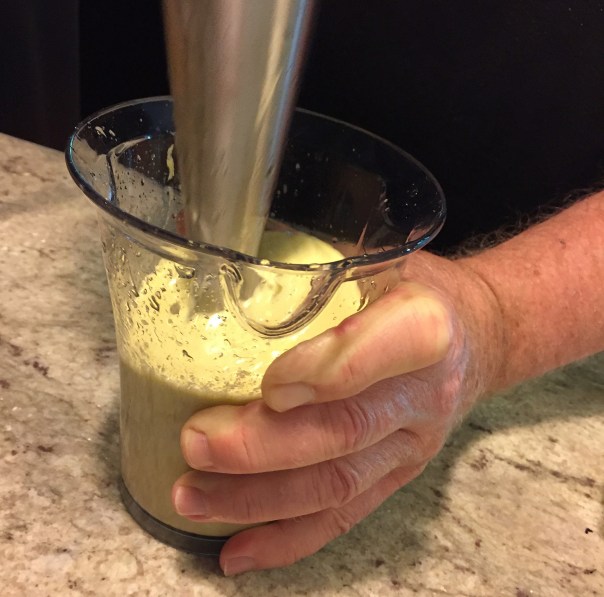
  • In a medium bowl, combine the honey, bean paste, Aleppo pepper, and toban djan. Purée the peppers and rice vinegar in a blender, and whisk into the honey mixture.
    IMG_2354

Cook the turnips and ginger

  • Bring the dashi and mirin to a simmer in a large pot over medium heat. Add the turnips and ginger, and cook until the turnips are tender, about 7 minutes. Remove from the heat, and let cool in the broth, about 15 minutes. Remove and discard the ginger. Strain the turnips from the liquid and reserve for some future use.
    IMG_2350
    IMG_2353

Grill the salmon and cook the kale

  • Prepare a medium (350°F to 375°F) gas or charcoal grill fire. Brush the salmon lightly on both sides with 1/2 Tbs. of the oil and season with a pinch of salt and pepper. Grill the fish, flipping once, until medium rare (125°F). Remove from the grill and brush each fillet with 1 tsp. of the glaze. Reserving any remaining glaze.
    IMG_2359
  • Heat the remaining oil in a large skillet over medium-high heat. Add the kale and cook, tossing until just wilted, about 2 minutes. Add the turnips and bacon, toss to combine, and season with salt and pepper.
    IMG_2360
  • To serve, divide the vegetables among four plates. Top with the grilled fish, and sprinkle with the scallions. Pass the remaining glaze at the table.

IMG_2366

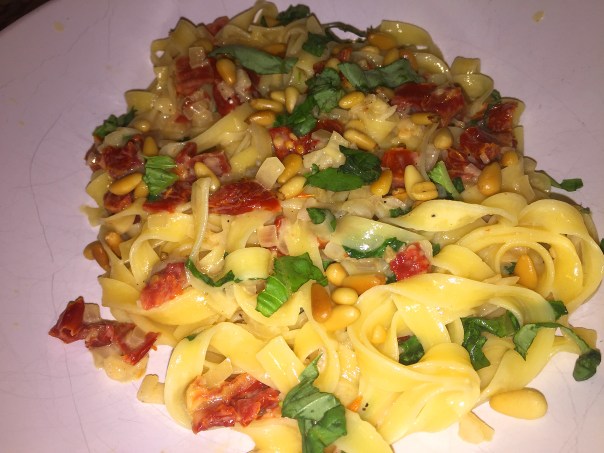
Update: With a good portion of the sauce leftover, a week later we used it on some grilled tuna steaks.

Whould’a Thunk?

Ginger, in an Italian pasta dish?? Though a cream sauce doesn’t sound like hot-weather fare, a burst of basil and a hit of fresh ginger brighten the light and silky sauce, and beautifully so. Initially skeptical of a cream sauce, the amount used is minimal, to the point that when the dish is plated, you don’t even notice any. But in combination, the concert of flavors all dance to together in perfect harmony.

IMG_2345

Six ounces of pasta just didn’t seem like enough for two entrée servings, so I increased all of the ingredients by 50% (or more) as indicated in the list below. Yet we did have some leftovers, enough for one lunch the following day—which was a pleasant bonus.

If using fresh pasta, it is very tender so don’t drain it in a colander. Instead, transfer it directly to the sauce. With gluten-free fettuccine in stock, we just used that instead of buying, or making fresh. Topped off with buttery pine nuts for a light crunch, the meal was satisfying on so many flavor levels. Adjust the ingredient quantities to your own personal preference. Next time I plan on increasing the quota of sun-dried tomatoes and fresh basil.

IMG_2331

Ingredients

  • Kosher salt
  • 3 Tbs. extra-virgin olive oil
  • 2-1/2 Tbs. pine nuts
  • 1/2 cup finely chopped shallot
  • 1 Tbs. minced fresh ginger
  • 4 1/2 Tbs. dry white wine
  • 1/2 cup lower-salt chicken or vegetable broth
  • 1/2 cup heavy cream
  • 3 Tbs. finely chopped oil-packed sun-dried tomatoes
  • Freshly ground black pepper
  • 9 oz. fettuccine, fresh if possible
  • 3/4 cup thinly sliced fresh basil
  • 1/2 cup finely grated Parmigiano-Reggiano or Grana Padano (1/4 oz.)

Directions

  • Bring a large pot of well-salted water to a boil.
    IMG_2335
    IMG_2336
  • Heat the oil in a 12-inch skillet over medium heat. Add the pine nuts and cook, stirring, until golden, 1 to 2 minutes. Transfer with a slotted spoon to a paper-towel-lined plate.
    IMG_2337
  • Add the shallot and ginger to the skillet and cook, stirring, until fragrant, about 1 minute.
    IMG_2338
    IMG_2339
  • Add the wine and cook, stirring, until almost evaporated. Stir in the broth, cream, and tomatoes, increase the heat to medium high, and cook until slightly thickened, about 2 minutes. Season generously with salt and pepper.
    IMG_2341
    IMG_2342
  • Cook the pasta until al dente, according to package directions. Drain, or if cooking fresh pasta, use tongs or a skimmer to transfer the pasta from the pot to the skillet. Add the basil and cheese, and toss. Top with the pine nuts and serve.

IMG_2347Recipe by Laraine Perri

Rain, Rain Go Away

The Spring weather had been testing our resolve for months. First the cold, then the super-hot, then cold again and finally a rain event or three, every single weekend. Our latest “outdoor” party wasn’t going to get a break either. In fact, Mother Nature was playing with us all day long with on-and-off showers and little bits of sun as a tease—while it was raining! Then two hours prior to company’s arrival, it starting pouring in earnest and the assault continued for hours… So much for patio-cruising…

IMG_2641
The ladies line up and couch-cruise; from left, Paula, Kim, Lynn and Jo.

Joining us for the evening were friends Paula and Mike Graham, and his very spry 92-year-old mother Jo, in for a visit from Seattle. Rounding out the party were Kim and Jeff (who we met through Paula and Mike nine months prior at the Graham’s daughter Kelsey’s wedding.)

As much as everyone wanted to get comfy on the patio furniture, we made the best of the situation and hunkered down indoors enjoying some tasty apps, sipping wine and laughing hysterically over our collective way of saying certain things. With Kim, a transplanted southern peach from South Carolina, Jeff hailing from Canada, me from Michigan, Jo and Mike from Seattle and Russ and Paula from the “Picksburgh area” there was quite a comical disparity in the way we labeled or said certain words.

IMG_2627
Kim and Jeff brought a delightful Carolina Citrus Pickled Shrimp appetizer packed with at least two pounds of plump pickled shrimp. We were the lucky recipients of the leftovers.

IMG_2628
We also munched on some deviled eggs from Paula and Mike, and my homemade guacamole.
IMG_2629

IMG_2645
On Father’s Day Eve, the guys stand tall; from left, Mike, Jeff and Russ.

But there was still the matter of grilling the pork tenderloins and asparagus in less than ideal conditions. Russ manned up with a ginormous umbrella. The poor guy, it seemed each time he went out the clouds opened up with rain, but then would temporarily stop when he came inside.

wedge.salad

Needless to say, the picnic-style dining occurred indoors. Our first course was the “what’s-old-is-new-again” wedge salad, assembled as a group effort by me, Kim and Paula. The main entrée was a new rendition of a grilled pork tenderloin that I blogged about last month that contained a stuffing of piquillo peppers, manchego cheese and pine nuts.

Although the original recipe called for a brown sugar coating on the outside of the meat, we omitted that step the first time, and also this time around. Russ said it would give the meat a caramelized exterior, but we weren’t keen on the idea of a sugary coating. This version was also supposed to have baby spinach, but somehow it never made the shopping list, so we just omitted it altogether. But the black olive and sun-dried tomato stuffing was so full of flavor that it wasn’t missed at all.

Completing the menu was our “go-with-everything” baked rice and a new recipe of grilled asparagus with a tarragon chimichurri sauce.

IMG_2630
Grilled asparagus with a tasty tarragon chimichurri sauce.

For a final sweet note at dessert time, Kim made a sinful Pecan Maple Pie Cake and Paula brought a choice of numerous mini cheesecakes and custards. After coffee and dessert, when no one could possibly eat or drink anymore, it was time to bid adieu, for folks all had a bit of a ride back home to get a good night’s sleep before partying all over again for their Father’s Day celebrations.

IMG_2635

IMG_2636

Grilled Stuffed Pork Tenderloin with Sun-Dried Tomatoes and Black Olives

IMG_2610

Ingredients

  • ½ cup pitted kalamata olives
  • ½ cup oil-packed sun-dried tomatoes, rinsed and chopped coarse
  • 4 anchovy fillets
  • 2 garlic cloves, minced
  • 1 teaspoon minced fresh thyme
  • 1 teaspoon finely grated lemon zest
  • 1 cup baby spinach, optional
  • Salt and pepper

Directions

  1. Pulse all ingredients except salt and pepper in food processor until coarsely chopped, 5 to 10 pulses; season with salt and pepper to taste.
    IMG_2614
    IMG_2615
  2. Cut each tenderloin in half horizontally, stopping 1/2 inch away from edge so halves remain attached. Open up tenderloins, cover with plastic wrap, and pound to 1/4-inch thickness. Trim any ragged edges to create rough rectangle. Sprinkle interior of each tenderloin with 1/8 teaspoon salt and 1/8 teaspoon pepper.
    IMG_2616
    IMG_2619
  3. With long side of pork facing you, spread half of stuffing mixture over bottom half of one tenderloin followed by 1/2 cup spinach, if using. Roll away from you into tight cylinder, taking care not to squeeze stuffing out ends.
    IMG_2621
    IMG_2623
  4. Position tenderloin seam side down, evenly space 5 pieces twine underneath, and tie. Repeat with remaining tenderloin, stuffing, and spinach (if using.)
    IMG_2625
  5. Turn all burners to high, cover, and heat grill until hot, about 15 minutes. Leave primary burner on high and turn off other burner(s).
  6. Clean and oil cooking grate. Coat pork with oil. Place pork on cooler side of grill, cover, and cook until center of stuffing registers 140 degrees, 25 to 30 minutes, rotating pork once halfway through cooking.
    IMG_2631
  7. Transfer pork to carving board, tent loosely with foil, and let rest for 5 to 10 minutes. Remove twine, slice pork into 1/2-inch-thick slices, and serve.

The Royal “T”reatment

Each June, Russ and I commemorate our dual anniversary of the day we met, and the day we got married—Flag Day, June 14. This year it was at none other than The Mansion Inn in New Hope, PA, a beautiful 1865 manor home and a magnificent example of baroque victorian architecture of the second French empire (with a bit of an angelic Addam’s Family mansion vibe…)

A month prior, on a stroll though New Hope with visiting family members, Russ pointed out the property which stands grandly behind a unique wrought iron grape-cluster fence forged in 1867 in Philadelphia. Russ wondered if it was still a B&B (it is) and if they served food (they do.) We didn’t think too much more about it until a GroupOn opportunity prompted us to purchase a coupon. Since our anniversary(s) were on the horizon, I thought it might make an interesting place to make some new memories.

A fire in November of 2010 destroyed the kitchen, and the house suffered from smoke damage throughout. The Mansion Inn was renovated and reopened in December of 2012 and now boasts a restaurant, five hotel rooms, and an event space. (It was unfortunate that the new outdoor backyard patio and pool were a few weeks away from being finished because the night we patronized the establishment, it was gorgeous out.)

Finally, in June 2016, it was adopted by two New York City businessmen turned foodies: Kris Tomasulo, a Yardley native (my old stomping grounds) and Pennsbury High School graduate, and his long-time friend Joe Grande. Reopening in early October, 2016, they’ve infused the venerable hostelry with a vibrant vision that assimilates well with the popular artists’ colony/tourist community.

mansion

Upon arriving, we walked up the steps to the white-pillared porch with stately arched doorways boasting intricately carved split brass door hinges and latches created by a certified 19th-century artisan, into the softly-lit charm of its restaurant, Royal T’s. (Kris’ son, Royal, inspired the name change—the “T,” of course, is for owner Tomasulo.)

IMG_2565

“We have put a ton of effort into the small details and pleasantly they have all been noticed. People appreciate the finer details from our plate presentation to our red wine glasses to our sphered ice cubes that we serve in our distilled cocktails, to the art on the wall.”

Its lavish interior with dove gray walls exudes a citified mind-set with chic-modern furniture, small bursts of vibrant red, and an all-embracing glow coming from wall sconces and Edison lightbulbs strewn throughout on individual pulley systems. A vamped-up bar includes a cozy lounge with two adjacent dining rooms to accommodate both locals and visitors.

IMG_2578

The night of our visit, only one waitress, Erin, was working the entire interior and exterior rooms (there is casual seating on the porch and a side garden with bright red cafe tables), who allowed us a choice of tables as the joint was sparsely filled that evening. So we selected a cozy corner with views looking out onto a side garden and the vibrant community strolling down Main Street.

IMG_2568

Erin was an endearing sort who had the unfortunate task of informing us that the seafood truck didn’t make their shipment that day so the only types available were shrimp and octopus—a bummer because I zeroed in on the Seared Wild Halibut with a sauce verte. Oh well, time to sip a little wine and rethink my choice…

IMG_2575

After settling on a wine selection, we took our time perusing the menu with razor-like determination. Regrettably, many of the selections centered around the unavailable seafood. But in the end, and at the waitress’s suggestion, I ordered the Thai Curry Vegetable with grilled shrimp which also had the same sides as the halibut—a medley of spring vegetables, over a mound of slightly nutty forbidden black rice, all in a delicate pool of a mildly fragrant coconut curry broth.

IMG_2569

But before our entrees, we shared the “Small Plate” Short Rib Poutine assembled in a hefty cast-iron skillet composed of shredded short rib meat and Wisconsin cheese curd over a stack of hand-cut fries dressed with a brown gravy and topped with a perfectly fried egg. That was a meal in itself, seriously!

IMG_2576

Russ couldn’t pass up the Grilled Lamb Chops and was thrilled that he didn’t because he claimed they were among the best ever—and believe you me, he’s had a lot of them! Four large harissa-rubbed succulent chops came plated on a bed of Israeli couscous adorned with chopped mint, tomato, za’atar and tzatziki.

In case you are wondering what those last two ingredients are, za’atar is an intensely aromatic and ancient spice blend and condiment (the Arabic word za’atar, pronounced ZAH-tahr, also means “thyme”.) And tzatziki is a sauce served with grilled meats or as a dip, made of salted strained yogurt mixed with cucumbers, garlic, salt, olive oil, sometimes with vinegar or lemon juice, and some herbs like dill, mint, parsley, or thyme. It is always served cold.

Woven into “T’s” menu are Italian touches and popular American favorites. Among them: Seafood Risotto (only available that night with shrimp), Seared Scallops, Bone-In Pork Loin, Porcini-Crusted Filet, Lobster Mac, French Onion Soup “Dumplings” and the ever-popular Royal “T” Burger. There are also a handful of interesting sides including Brussels Sprouts with honey Sriracha and bacon, and Wild Mushrooms fricassée.

When asked about dessert, neither of us could even think about it—although I should have asked out of curiosity. I still had half of my entree left over, which made for a fabulous lunch the next day!

So the next time you are wandering around New Hope, stop in for a bite or just enjoy an exotic cocktail on the veranda and watch the world go by, for it’s a perfect town to “people watch”…


A Delish Chicken Dish

Russ obtained this luscious Portuguese-Style Chicken recipe by Pierre Franey from NYTimes Cooking. The list of ingredients that included chicken breasts, bell peppers, tomatoes and saffron struck a positive note with both of us and the fact that it was doable on a working weeknight, elevated it to the top of our “want to try” library.

IMG_2550

The dish has a sauce based on tomatoes and is typical of casseroles found in Portugal. First the peppers, onions and garlic are sautéed in olive oil. Tomatoes and saffron, a spice associated with the Iberian peninsula, are added to the mixture. The chicken is browned first, then slowly cooked. The pan is deglazed with chicken stock and white wine before the other ingredients are combined.

French Chef Franey—hailing from the small Burgundy village of Saint-Vinnemer, Yonne, France—is fondly known to his followers as The New York Times “60-Minute Gourmet” columnist and for his popular cooking shows on public television, with his cuisine and recipes spanning a 60-year career. I have to admit, his name did not ring a bell, but you can be sure he is on our radar now!

This chicken dish was delish—and not only great tasting but a work of art on the plate with all of the wonderful colors. Serve over jasmine rice and your meal is complete!

IMG_2534

Ingredients

  • 2 tablespoons olive oil
  • 3 cups cored seeded sweet red, green and yellow peppers, cut into thin strips
  • 1 cup thinly sliced onions
  • 1 tablespoon finely chopped garlic
  • Salt and freshly ground pepper to taste
  • 1 cup canned crushed tomatoes
  • ¼ teaspoon saffron stems or 1/2 teaspoon turmeric
  • 2 tablespoons butter
  • 4 boneless skinless chicken breasts, about 1 1/4 pounds
  • 1 tablespoon finely chopped shallots
  • ¼ cup dry white wine
  • ¼ cup fresh or canned chicken broth
  • 4 tablespoons finely chopped parsley

Directions

  1. Heat the oil over medium high heat in a skillet. Add the peppers, onions, garlic, salt and pepper. Cook, stirring, about 3 minutes or until crisp tender. Then add the tomatoes and saffron. Cover and simmer 10 minutes.
    IMG_2538
  2. Meanwhile, melt the butter in a skillet large enough to hold the chicken breasts in one layer. Season the chicken with salt and pepper. Cook over medium heat until lightly browned, about 4 minutes.
    IMG_2541
  3. Turn the pieces, reduce the heat and cook about 5 minutes or until done. Do not overcook. Transfer the chicken to a warm platter and keep it warm.
    IMG_2545
  4. Add the shallots to the skillet and cook until wilted. Do not brown. Pour in the wine and scrape the bottom with a wooden spatula to dissolve any brown particles that may cling to the bottom of the skillet.
    IMG_2549
  5. Reduce the wine almost completely and add the chicken broth. Let this cook until it is almost totally reduced. Add the chicken breasts and any liquid that may have accumulated. Add the pepper and tomato mixture, bring to a simmer and add the parsley. Serve with rice.

IMG_2553


Petite Packs a Punch!

Love these little fellas! For a minimal amount of ingredients and prep, Grilled Skirt Steak Pinwheels really know how to strut their stuff! Though the filling is made with just three ingredients, it packs a huge flavor punch that’s savory, zingy, and fresh. And if you’re so inclined, an optional fourth ingredient could be minced garlic lightly slathered on the steak prior to the cheese layer.

Short but sweet—or should I say savory—blog. Like they say, good things come in small packages… But don’t be fooled by their petite stature, for they are filling indeed, especially with a couple of sides…

Ingredients

  • 1 whole 1-1/2-lb. skirt steak or 2 3/4-lb. pieces, trimmed of excess surface fat
  • Kosher salt and freshly ground black pepper
  • 4 oz. coarsely grated Parmigiano-Reggiano (about 1 cup)
  • 2 Tbs. finely grated lemon zest (from 2 large)
  • 3/4 cup finely chopped fresh flat-leaf parsley (from 1 large bunch)

Directions

  • If the steak is whole, cut it to make two even pieces. Lay the steak out on a work surface and cover with plastic wrap. Using a meat mallet, gently pound the steak until it is at least 4 inches wide and no more than 1/3 inch thick (it’s OK if one end is thinner). Season both sides of each steak with salt and pepper.
    IMG_2466
    IMG_2467
  • Sprinkle the cheese evenly over the steak, leaving a 1/2-inch border, and then sprinkle the lemon zest and parsley over the cheese. Press on the topping to flatten it. Working with one steak at a time and starting at the thinnest end, roll the steak up around the filling.
    IMG_2468
    IMG_2470
  • Tie a length of butcher’s twine around the middle, then tie two more pieces of twine around the pinwheel equidistant from the middle to each end. Cut the roll in half along the middle piece of twine and remove that piece of twine; you will now have two tied wheels.
    IMG_2471
  • Trim the ends for a flat surface, if necessary. Repeat with other steak to get 4 pinwheels total. (The wheels may be wrapped in plastic and refrigerated for a few hours; let them sit at room temperature while the grill heats )
    IMG_2474
  • Prepare a high (500°F to 600°F) charcoal or gas grill fire. Cook the pinwheels cut sides down, flipping once, until browned on both sides and cooked to your liking, about 6 minutes per side for medium rare (135°F). Let rest for 5 minutes before serving.
    IMG_2476
    IMG_2480


Take the Pressure Off

Ligurian Lemon Chicken—just another reason to get yourself a pressure cooker. Have you ever used one? It’s kind of like a slow cooker on super fast forward. Toss ingredients in the pot, fasten the lid on tight, and wait—but not long. The pressure cooker heats up and the trapped steam increases the internal pressure and allows the temperature to rise. Braising meats normally takes hours of low, slow cooking. With a pressure cooker you can get the same results on speed dial.

IMG_2429

Liguria is a coastal region of north-western Italy, popular with tourists for its beaches, towns and cuisine—thus this recipe. If the finely chopped herbs and garlic in the marinate remind you of pesto, you would be in the right culinary locality. Dishes from this northern Italian vicinity are often made with lots, and lots of herbs and garlic and this chicken dish is no exception. Interestingly, Liguria is the original source of pesto, one of the most popular sauces in Italian cuisine, which ties in nicely with my recent blog Primo Pesto Possibilities, but I digress…

If it wasn’t for the marinating, which takes 2-4 hours plus prep, the actual time in the pressure cooker, other than browning, is only 10 minutes. A marinade never totally penetrates most foods, at best, they flavor a thin outside layer. For chicken use these times as a guide: whole chicken, 4 to 12 hours; boneless breasts, 30 minutes to 2 hours; thighs, 1 to 6 hours; whole breast with skin and bone, up to 2 hours. Most important, never, ever reuse a leftover marinade because it can have harmful bacteria.

That being said, poultry can marinate for up to two days in the refrigerator, according to the USDA Food Safety and Inspection Service. But very acidic marinades can actually toughen the meat over time, and since this recipe has a LOT of lemon juice, it is very acidic and could compromise the meat. Also, DON’T marinate in aluminum containers or foil, because a chemical reaction could spoil the food.

A time saving step is to cut up the chicken (if you are using a whole bird) and make the marinade the night before. Put the chicken pieces in a ziploc, and the marinade in another sealed container. When you get home from work the next day, toss the sauce into the ziploc with the chicken for a few hours. That way, the pressure is off to do it all at once!

IMG_2402

INGREDIENTS

  • 4 lemons, three juiced and one for garnish
  • 2 garlic cloves
  • 3 sprigs of fresh rosemary (two for chopping, one for garnish)
  • 2 sprigs of fresh sage
  • 1/2 bunch of parsley leaves and stems
  • 4 tablespoon extra virgin olive oil
  • Salt and pepper
  • 1 chicken, cut into parts OR 1 package of bone-in chicken pieces
  • 1/2 cup of dry white wine
  • 4 ounce black gourmet salt-cured olives (Taggiesche, French, or Kalamata)

DIRECTIONS

  1. Finely chop the garlic, rosemary, sage, and parsley. Place in a container and add lemon juice, olive oil, salt and pepper. Mix well and set aside.
    IMG_2415
  2. Place the chicken pieces in a deep dish and cover with the marinade, then cover with plastic wrap; or place in a ziploc bag as shown above. Leave to marinate in the refrigerator for 2-4 hours. (Do not marinate overnight.)
    IMG_2417
  3. Heat olive oil and brown the chicken pieces on all sides for about 5 minutes, in two batches if necessary. Set aside.
    IMG_2419
  4. De-glaze pan with the white wine until it has almost all evaporated. Add the chicken pieces back in, dark-meat first. Drape the chicken breasts on top so that they do not touch the bottom of the pressure cooker. Pour the marinade on top.
    IMG_2420
  5. Close and lock. Turn heat to high. Cook for 8-10 minutes at high pressure (or for 18-20 minutes at low pressure). Release pressure.
  6. Take the chicken pieces out of pan and place covered on a serving dish. Reduce the liquid to 1/4 of its amount, or until it becomes thick and pour over chicken.
    IMG_2426
  7. Garnish with olives, lemon wedges and a sprinkle of small rosemary sprigs.

IMG_2430A side of polenta makes a great vehicle to soak up the luscious sauce.

Recipe from Fagor Pressure Cookers

Light and Lovely

Egg Drop Soup with Crab, Baby Corn, and Peas, this riff on a Chinese restaurant mainstay becomes a light and lovely supper which you can intensify with the addition of Sriracha. I can’t remember the last time I bought a can of baby corn! But it works beautifully when sliced into mini-rounds providing a fun texture and slight crunch to the soup. Typically eaten whole, they are also known as young corn, mini corn, cornlettes, or candle corn.

As always, whenever possible use homemade stock—in this case chicken or shellfish—for the most flavor. If you look at the nutrition label on a box or can of store-bought broth (yes, even the organic ones!), you’ll quickly realize that the industrially-produced version is an empty, processed food. In contrast, homemade broth starts with whole food: meat, fat, bones. Add a few veggies and herbs, and you have a tasty bowl of MSG-free, bioavailable nutrition.

A couple of notable changes: since my container of lump crabmeat came in an 8-ounce package, I used the entire amount. After all, what would I do with two ounces leftover? And at the price of lump crab meat, I certainly wasn’t going to waste it. Additionally, the can of baby corn was 14-ounces and the recipe only calls for four ounces, which seemed measly in MHO. So without exactly measuring, I probably added about a cups worth of slices.

Thickening with just two teaspoons of cornstarch didn’t happen either when I made this recipe. I had to add at least another tablespoon to get even a slight thickness, but you don’t want to go over board because the egg will swell the soup and give it some body.

So go ahead and purchase that can of “cornlettes” and enjoy a light, satisfying meal for lunch or dinner…

IMG_2404

Ingredients

  • 6 cups lower-salt chicken broth
  • 4 oz. canned whole baby corn, sliced into 1/4-inch-thick rounds (about 3/4 cup)
  • 1 Tbs. finely grated fresh ginger
  • 1 Tbs. soy sauce
  • 2 tsp. cornstarch
  • 3 large eggs, lightly beaten
  • 6 oz. crabmeat, preferably jumbo lump, picked over (about 1 cup)
  • 1/2 cup frozen peas
  • 1-1/2 tsp. seasoned rice vinegar
  • Freshly ground white pepper
  • 3 scallions, green parts only, thinly sliced
  • Hot sauce, such as Sriracha (optional)

Directions

  • In a 5-quart pot, bring the broth, baby corn, and ginger to a boil over medium-high heat. Reduce the heat to medium low, and simmer for about 5 minutes.
  • In a small bowl, combine the soy sauce and cornstarch; add it to the pot and cook, stirring, until bubbly and thickened slightly, about 5 minutes.
    IMG_2408
  • Pour the eggs into the pot in a slow, steady stream and cook without stirring until egg strands float to the surface, about 1 minute.
    IMG_2410
  • Add the crab, peas, vinegar, and 1/8 tsp. white pepper and cook, stirring occasionally, until heated through, about 4 minutes.
  • Break up any large pieces of egg, if necessary. Serve the soup garnished with the scallions and a little hot sauce, if you like.

IMG_2412


Paella & Panna Cotta Party Time

Each summer we try to grill at least one paella with a few friends, alfresco on our backyard patio. This year we did so in early June, so there would be plenty of time over the remainder of the season to create another paella—the quintessentially Spanish dish of saffron rice cooked and served in a wide, shallow skillet, spiked with meat and/or fish. An aromatic and filling staple from the Valencia region, this party-friendly rice dish is a great alternative to pasta, risotto, and casseroles when feeding a group. It’s easy and presents a complete meal packed with flavor.

Joining us for this feast were friends Gary and Rosanne Zarrilli. But before we got down to the business of making paella, we got down to the enjoyment of sampling Rosanne’s beautifully crafted appetizers of endive, blue cheese, toasted almond slivers and orange segments, and another of tasty Tuscan mushrooms stuffed with olive, pepper and cheese. We polished all of them babies off in no time!

IMG_2451

The paella pan is characterized by being round with a flat bottom and can be anywhere from a 12″ in diameter to several feet; ours is 16″. The one thing that doesn’t change is the height. It is about “first joint in the thumb deep” as the Spanish would say, so that the rice has maximum contact with the bottom of the pan.

Eat Real Fest Girards Paella Pan
Years ago, we ran across one while vacationing in the Riviera Maya that had to be six feet or more in diameter, similar to the one pictured here—now that’s a party!! (courtesy of the culture bite)

The best paellas have pockets of slightly burnt, charcoal-y rice that has stuck to the bottom of the pan only to be scraped off and circulated along with the perfectly-cooked mounds. But there’s a fine line between burning rice (the most popular is Bomba) for taste and accidentally burning too much and spoiling a meal.

IMG_2456
Russ and Gary man the paella grill.

Onions, garlic, quartered artichokes, green peas and red peppers make up the traditional vegetables. The required seasonings are Spanish smoked paprika and saffron, which gives paella its distinctive golden color. Saffron has long been, by weight, the most expensive ingredient in the world, but don’t fear, a little goes a long way and a few strands will produce a subtle flavor and lovely color. Meat and fish can take any number of varieties, but chicken and chorizo is standard, as are shrimp, clams, and mussels (we swapped out the mussels for bay scallops.)

The sofrito—that aromatic mixture of gently sautéed onions, garlic and tomatoes—is a lynchpin of Spanish cookery, and of most paellas. It is sometimes served with aioli, and most aficionados of paella prefer it tepid rather than hot, and with good reason: it tastes much better.

So the next time there’s a social gathering headed your way, whether it’s a birthday party, potluck, or just a Saturday dinner with good friends, and burgers or ribs seem a little ho-hum, try this easy alternative. It’s sure to surprise and delight even the most discriminating palates.

IMG_2457
Lynn and Rosanne add the finishing touches.

In a couple of earlier blog posts you can find a Classic Seafood Paella article, and the Classic Chicken Paella recipe.

IMG_2460
Gary digs in and the feast begins…

Now for dessert. Light and simple, panna cotta is all about texture. It should be a bit wobbly on the plate, and then melt quickly in your mouth. Not only does buttermilk add a bright flavor, but it also makes for a lighter, softer panna cotta. The sauce was inspired by our batch of fresh strawberries and chambord, a raspberry liqueur— which is subtle but adds a bit of depth and sophistication—just like you, right?

The following recipe is an adaptation of two recipes from Faith Durand of Fine Cooking.

IMG_2462

Buttermilk Panna Cotta with Strawberry Chambord Sauce

Ingredients

For the panna cottas

  • Cooking spray
  • 1-1/2 cups heavy cream
  • 2-1/2 tsp. unflavored powdered gelatin (substitute vegan gelatin for a vegetarian dessert)
  • 1/3 cup granulated sugar
  • 1-1/2 cups buttermilk
  • 1 tsp. pure vanilla extract
  • Pinch table salt

For the sauce

  • 12 oz. (about 2-1/2 cups) fresh or frozen strawberries
  • 1/4 cup chambord (raspberry liqueur)
  • 3 Tbs. granulated sugar
  • 2 Tbs. plus 1 tsp. fresh lemon juice
  • Pinch table salt
  • 1-1/2 tsp. cornstarch
  • 1 tsp. pure vanilla extract

Directions

Make the panna cottas

  • Lightly spray six 6- to 8-oz. ramekins, small bowls, or pastry molds with cooking spray.
    IMG_2444
  • Put the cream in a 2-quart saucepan and sprinkle with the gelatin. Allow the gelatin to soften for about 5 minutes. Place the saucepan over low heat and whisk in the sugar until the gelatin and sugar are completely dissolved, 2 to 3 minutes. Rub a little between your fingers to check. (Avoid simmering, which destroys the gelatin’s thickening ability; if you see bubbles, remove from the heat and let it cool.)
  • Off the heat, whisk in the buttermilk, vanilla and salt.
    IMG_2445
  • Transfer the mixture to a large measuring cup and divide among the prepared ramekins. Cover loosely with plastic wrap. Refrigerate until set, 1 to 2 hours.
    IMG_2447
  • Serve the panna cottas in their ramekins, or unmold: Moisten six serving plates with a little warm water (this makes it easier to center the panna cottas). Loosen the edges of a panna cotta with a fingertip, then slowly invert it onto a plate. Gently jiggle the ramekin side to side until the panna cotta slips out. Lift the ramekin, reposition the panna cotta on the plate, if needed, and pat the plate dry. Serve, chilled for a firm panna cotta or at room temperature for a softer one, with the strawberry sauce.

Make the sauce

  • If using fresh strawberries, halve them. If using frozen, thaw, drain, and halve them.
    IMG_2437
  • In a 2-quart saucepan, whisk together the chambord, sugar, lemon juice, and salt. Stir in the strawberries. Bring to a boil over medium heat, stirring occasionally. Reduce to a simmer and cook until the liquid thickens enough to coat the back of a spoon, about 5 minutes.
    IMG_2439
  • In a small bowl, stir the cornstarch with 1 tsp. water. Add to the strawberry sauce and cook until thickened, about 2 minutes. Remove from the heat and stir in the vanilla. Let cool to room temperature. If the sauce thickens during cooling, stir in water, 1 tsp. at a time, until it reaches your desired consistency.
  • Spoon over chilled panna cotta. Garnish with fresh mint if desired.

Five-Minute Marinated Skirt Steak

You don’t have to marinate a steak overnight to get great flavor—with this marinade, five minutes is all you need. The marinade is thicker than most, (if you use the entire cup of brown sugar—which we didn’t), but that helps it cling to the meat. For a rather small amount of steak, one cup of sugar (seriously?) seemed like overload so we cut it down to a 1/4 cup. And even though you only need to marinate for five minutes, ours sat in the ziploc bag for the entire hour to make sure all those luscious ingredients really permeated the meat well.

Looking at a raw skirt steak, it’s easy to see the lines of fat within the striations of meat. Don’t try to remove it. The fat adds flavor and bastes the meat as it melts away during cooking, which only takes just six minutes on the grill…. so don’t get too comfy sipping a cold one or you’ll overcook the steak.

In the meantime, think about what your sides are going to be beforehand. We served the steak with steamed French green beans and smashed new potatoes. All I did with the multi-colored spuds was boil them in salted water until tender, drain, put them back in the pot with a small amount of cream, chopped fresh rosemary, salt and pepper. Using a potato masher I lightly smushed them for a finished coarse mash. Easy and delicious!

IMG_1930

Ingredients

  • 1/4 cup packed light or dark brown sugar (original recipe calls for one cup)
  • 1/4 cup balsamic vinegar
  • 2 Tbs. Worcestershire sauce
  • 3 medium cloves garlic, coarsely chopped
  • 2 Tbs. coarsely chopped fresh rosemary
  • 1-1/2 lb. skirt steak, trimmed of excess surface fat
  • Kosher salt and freshly ground black pepper

Directions

  • Combine the sugar, vinegar, Worcestershire, garlic, and rosemary in a baking dish or zip-top bag large enough to hold the steak. Add the steak and turn to coat. Let sit at room temperature for at least 5 minutes and up to an hour.
    IMG_1933
    IMG_1935
  • Prepare a high (500°F to 600°F) charcoal or gas grill fire. Take the steak out of the marinade and season both sides generously with salt and pepper. Cut into smaller pieces to make grilling more manageable, if you like.
    IMG_1937
  • Grill, flipping once, until grill marks form on both sides and cooked to your liking, about 3 minutes per side for medium rare (135°F). Transfer to a cutting board and let rest for 5 minutes. Slice against the grain and serve.
    IMG_1940
    IMG_1943

IMG_1945

Recipe By Pat LaFrieda from Fine Cooking


Poolside Pasta Salad

Weekends during the summer season often finds us relaxing at the country club pool with books—or should I say kindles—in hand. While much of their food fare is the typical hotdogs, hamburgers, chicken wings, french fries and ooo-gobs of ice cream novelty items, they do offer a few health-friendly salads.

Good in a pinch, but that gets old, and expensive, so we try to be creative in what we whip together ourselves to tote with us, such as pasta salad. I know I don’t have to tell you this one simple truth, that not all macaroni salads are created equal. One tried-and-true option for us is our gluten-free macaroni, tuna and egg salad with lots of healthy veggies.

IMG_2385

Of course, you can adjust any of the ingredients, or quantities to suit your own needs. I personally don’t like mine real “wet” while hubby does, so I only use a half cup mayo as opposed to a whole cup like most recipes. Don’t like olives, then don’t include them. Prefer to use parsley instead of chives, then by all means do. And consider tossing in some chopped celery leaves, they add a nice texture and taste.

IMG_2375

I’m using the term “pasta salad” interchangeably here. The terms “macaroni salad” and “pasta salad” have different meanings in different places, but generally, at least in the U.S., creamy noodle salads are referred to as macaroni salads whereas oil & vinegar based ones are called pasta salads. While pasta obviously didn’t originate in the U.S. and pasta salads are popular worldwide, the traditional creamy macaroni salad is very much an American classic. You say toe-MAY-toe, I say toe-MAH-toe

Name aside, a cardinal sin is not enough salt. Carbs such as potatoes, pasta, legumes, etc—soak up salt like nothing else. Keep in mind, the word salad comes from the Latin base word sal which means “salt.” So don’t be afraid to be generous with the shaker.

Another item to consider is that while macaroni salad tastes best a couple of hours later after the flavors have had time to meld, it doesn’t make the ideal leftover food the next day because those noodles are thirsty and they’ll continue to soak up liquid, leaving you with a dry salad. If you do end up with leftovers the next day, you might want to add a little more of the mayo sauce before serving.

IMG_2368
Russ was adding the oil very slowly, then I took over and added it just a bit too fast…

IMG_2371
The homemade mayo was perfect, until just after I took the photo and it “broke.”

About that mayonnaise… I made an error in assuming we had enough on hand. Wrong. But Russ proudly announced he could make some, and he has many times before so I went with it. That is until it “broke,” meaning the oil separated from the egg. And that might be a little bit my fault, as I was the one adding the oil a little too fast, oops. Second time around he used our mini-processor and we had success. Yes, it probably would have been quicker, and cheaper, to have run out to the grocery store again…

IMG_2373

Ingredients

  • 8 oz. elbow macaroni, or other small pasta
  • 5 hard boiled eggs, sliced
  • 1, 12 oz. can albacore tuna in water, drained
  • 1/2 cup mayonnaise, preferably made with olive oil
  • 1 Tbsp. mustard
  • 1 Tbsp. vinegar
  • 2 Tbsp. capers, rinsed, drained and chopped
  • 1/2 cup pit-free kalamata olives, sliced into rounds
  • 1 thick carrot, shredded
  • 1 large rib celery, cut in half vertically then sliced thin at a diagonal
  • 1 small (or half of a large) red or green bell pepper, diced
  • 2 Tbsp. fresh chives, chopped
  • Salt and pepper to taste
  • 2 thinly sliced scallions, some greens saved for garnish

TIP: If you want to add a bit of a sweet note, incorporate ¼ cup sweet pickle relish and 1 tablespoon sugar.

Directions

  1. Hard boil 4 eggs, cool in ice bath, peel and slice with egg slicer or knife.
    IMG_2381
    Do your self a favor and buy one of these gizmos at the Dollar Store.
  2. Cook the pasta according to package directions, drain, rinse with cold water and let cool completely.
    IMG_2379
  3. In a small bowl, mix together the mayo, mustard, vinegar, capers, salt and pepper.
    IMG_2376
  4. In a large mixing bowl, add the pasta, tuna, olives, carrot, bell pepper, chives and celery. Toss in the mayo mixture and stir until well-coated.
    IMG_2380
  5. Add the egg slices on top and gently stir a few times to incorporate but not break up the pieces. Top with a sprinkling of thinly sliced scallion greens.
    IMG_2383
  6. Cover tightly and refrigerate for a couple of hours to meld flavors until ready for use.

Poolside or not, this is a good summer salad for wherever you are!

In-Your-Face Sauce

I must confess, I’ve never eaten at a Shake Shack joint (nor do I plan on patronizing one anytime soon), but in the Sunday supplement Parade magazine, I ran across an article about the place that serves this crazy-named Momofuku Sauce. I thought “WOW” these ingredients are right up our alley and just in time to slather on our Memorial Day grilled burgers.

IMG_2396

The Shake Shack version (which I looked up on the Internet) is labeled as sweet (I don’t know why), sour and a tiny bit spicy—well you know us, “tiny bit spicy” doesn’t quite cut it—so I switched out the ketchup for Sriracha sauce to amp up the boldness. There was a “WOW” factor alright, we loved it! Russ even enjoyed swiping his fries through the sauce as opposed to ketchup.

The Parade magazine recipe was only three ingredients long and included white miso (which we adore), so we plan on making that version next time, with the possible exception of including Sriracha for a portion of the ketchup. We even had a bit of fun at the expense of the name, saying “That was some mighty good MF’ing sauce!”

Ingredients

  • 1/2 cup mayonnaise
  • 1 tablespoon ketchup (or Sriracha)
  • 1 tablespoon yellow mustard
  • 4 slices kosher dill pickle, or 1 Tbsp. dill pickle relish
  • 1/4 teaspoon garlic powder
  • 1/4 teaspoon paprika
  • pinch cayenne pepper

Or the simple version

  • ¼ cup mayonnaise
  • ¼ cup ketchup
  • ¼ cup white miso paste

IMG_2390

IMG_2392

Directions

Combine all ingredients in blender until smooth, scraping down sides of blender with rubber spatula as necessary.

IMG_2400
We topped ours with a generous heap of caramelized onions.

Primo Pesto Possibilities

We recently purchased some beautiful little lamb loin chops at an amazing price, so when I came across these pesto recipes in Fine Cooking, I thought one of them (there were four) would make a perfect accompaniment for the chops. The smoky but bright flavor of charred bell peppers was a splendid complement and a pleasing pop of color for the grilled lamb chops, and our sides of herbed pesto baby potatoes and grilled asparagus rounded out a fabulous meal.

IMG_2320

IMG_2323

IMG_2327

Traditional pesto sauce, with its combination of olive oil, pine nuts, fresh basil, garlic and Parmesan cheese, is a healthy addition to any diet. While it is rather high in calories and fat, pesto offers a wealth of nutrients and a punch of flavor that many other sauces lack. When enjoyed in moderation, pesto can enhance your health and nutrient intake… a little goes a long way… Making pesto at home is simple and allows you to control the ingredients.

pesto.ingredients

One time saving step for the mixed herb pesto recipe (which we reduced by half) was the fact that I keep a stash of roasted garlic cloves in extra virgin olive oil in the fridge at all times. It comes in handy for many reasons, and in this case all I had to do was scoop out 1/3 cup, eliminating the first step altogether.

If you have some pestos leftover, there are any number of uses for them. Dip crusty, whole grain bread into pesto instead of slathering it with butter, as a condiment on a sandwich, drizzled over grilled veggies or served with raw veggies, layer in gratins or savory galettes, stir into your soup to add color and richness, whisk into a vinaigrette… as you can see the possibilities are endless. The pestos will keep, covered and refrigerated, for a few days; or even better, portioned and frozen.

Each recipe makes two cups, although we halved the herbed pesto—unfortunately so, as we absolutely loved it. Maybe one of the reasons was, I realized after the fact that I added 50 percent more cheese then called for. No matter, any combination that includes fresh herbs, nuts, garlic and good cheese can’t go wrong can it?

Roasted Yellow Pepper Pesto

Ingredients

  • 1-1/2 lb. yellow bell peppers (3 to 4, depending on size) or 2 cups jarred roasted peppers
  • 1-1/2 oz. Parmigiano-Reggiano or Grana Padano, coarsely grated (about 1/2 cup)
  • 1/2 cup olive oil
  • 1/4 cup sliced or slivered almonds
  • 1 small clove garlic
  • Kosher salt
  • 1/3 packed cup fresh flat-leaf parsley, coarsely chopped (about 1/2 oz.)

Directions

  • If using fresh peppers, roast over a gas burner, on a hot grill fire, or on a foil-lined baking sheet under the broiler, turning with tongs, until blackened or blistered all over, 6 to 10 minutes. Immediately put in a bowl, cover, and let steam for 15 minutes.
    IMG_2300
    IMG_2301
  • Once cool, remove the skins, then split open and remove the stems, seeds, and ribs.
    IMG_2304
  • Transfer the peppers to a food processor, and add the cheese, oil, almonds, garlic, and 1/2 tsp. salt.
    IMG_2305
  • Process until smooth, 2 to 3 minutes. Add the parsley, and pulse until combined but with some green flecks, 4 to 6 times. Use right away, or cover and refrigerate.
    IMG_2307

Mixed Herb Pesto

This is the perfect pesto to make when you have extra herbs on hand or an herb garden that’s working overtime. Delicious tossed with boiled or roasted potatoes, use it as you would conventional basil pesto. Though best made with mostly tender herbs, you could add a pinch of thyme or sage for some bold flavor. We used what we had on hand: parsley, tarragon, basil, and chives.

Ingredients

  • 1 cup olive oil; more as needed
  • 2/3 cup coarsely chopped garlic
  • Kosher salt
  • 2 packed cups mixed fresh tender herbs, such as cilantro, tarragon, dill, mint, and basil, leaves and tender stems (about 3 oz.)
  • 1 packed cup fresh flat-leaf parsley, leaves and tender stems (about 1-1/2 oz.)
  • 3 oz. Parmigiano-Reggiano or Grana Padano, coarsely grated (about 1 cup)
  • 1/2 cup raw cashews

Directions

  • In a small saucepan, combine the oil, garlic, and 1/2 tsp. salt. Cook over very low heat, adjusting the heat as necessary so that the oil just barely bubbles, until the garlic is soft but not brown, about 15 minutes.
  • Let cool completely, then transfer to a food processor.
    IMG_2309
  • Add the herbs, cheese, and cashews. Process until smooth, 2 to 3 minutes.
  • Add more oil to loosen, if necessary, and season to taste with salt. Use right away, or cover and refrigerate.

IMG_2313

IMG_2328

By Lisa Lahey from Fine Cooking


Another Great Reason To Use Your Cast Iron Skillet

Simple yet elegant, that’s what you get with Skillet-Roasted Rosemary Potatoes. We made them for son Dan’s birthday dinner along with a grilled boneless leg of lamb, and everyone adored the spuds. With only three other ingredients, it’s elevating the simple baked potato to a another level altogether, one you’ll want to repeat often.

The best kind of pan for roasting these potatoes is an old-fashioned cast-iron skillet. We used two 12-inch skillets for about 18 potatoes (36 halves) for six people and they practically disappeared. Smallish potatoes are best—2 or 3 inches in diameter—cut just in half, which keeps the interiors moist and creamy. Coarse sea salt, with the large crystals give a pleasant crunch without over-salting the potatoes—or kosher salt works nicely, too.

IMG_2014

Ingredients

  • 2 to 3 Tbs. olive oil
  • 8-inch sprig rosemary; more to taste
  • 3/4 tsp. kosher salt
  • 8 to 10 small red potatoes or other waxy potatoes

Directions

  1. Heat the oven to 425°F. Pour enough of the oil into a large cast-iron skillet, tilting it, to cover the bottom of the pan. Strip the leaves from the rosemary sprig and scatter them over the bottom of the pan.
  2. Sprinkle the salt over the rosemary. Scrub the potatoes, cut them in half, and set them cut side down on the rosemary and salt.
    IMG_2002
  3. Roast on the lowest oven rack until the potatoes are tender and the bottoms are crisp and well browned, 30 to 40 minutes.

By Ruth Lively from Fine Cooking

Just Roll With It

Family from the West Coast and Massachusetts were going to be staying with us for a spell and we wanted to serve something tasty without having to spend hours prepping or cooking in the kitchen. Enter Grilled Stuffed Pork Tenderloin from Cook’s Illustrated.

Pork tenderloin has many advantages that make it an ideal candidate for the grill: It’s quick-cooking, extremely tender, and has a uniform shape which allows for even cooking. But this cut is also mild and lean, making it prone to drying out. Stuffing this roast solves these problems by adding flavor and moisture.

Butterflying and pounding the pork in this recipe created a larger surface area for the filling, which we rolled up inside the tenderloin before trussing to prevent leakage. Pulsing bold ingredients in a food processor produced an intense paste that stayed put and didn’t ooze out.

A two-level fire, with the coals spread over half the grill, (or alternatively burners on a gas grill) allowed the pork to cook evenly without drying out. We opted not to coat the pork with a sprinkling of brown sugar on the outside of each tenderloin, but if you do, it will boost browning significantly.

One of the guests had dietary restrictions that prevented eating some of the stuffing ingredients so we also cooked a small tenderloin with just a bit of seasoning on the outside. Wanting leftovers for lunches during the week, we purposely cooked more than necessary—and glad we did, they were delicious as leftovers, and gave us a weeknight off from cooking!

Piquillo Pepper and Manchego Stuffing
(for Grilled Stuffed Pork Tenderloin)

Ingredients

  • 1 slice hearty white sandwich bread, torn into 1/2-inch pieces
  • ¾ cup piquillo peppers, rinsed and patted dry
  • 2 ounces Manchego cheese, shredded (1/2 cup)
  • ¼ cup pine nuts, toasted
  • 2 garlic cloves, minced
  • 1 teaspoon minced fresh thyme
  • ½ teaspoon smoked paprika
  • Salt and pepper

IMG_2033

IMG_2031

IMG_2029

IMG_2034

Directions

Pulse all ingredients except salt and pepper in food processor until coarsely chopped, 5 to 10 pulses; season with salt and pepper to taste.

Grilled Stuffed Pork Tenderloin

Ingredients

  • 4 teaspoons packed dark brown sugar (optional)
  • 2 ¼ teaspoons kosher salt
  • 1 ¼ teaspoons pepper
  • 2 (1 1/4 to 1 1/2-pound) pork tenderloins, trimmed
  • 1 recipe stuffing, see above
  • 1 cup baby spinach
  • 2 tablespoons olive oil

Directions

  1. Cut each tenderloin in half horizontally, stopping 1/2 inch away from edge so halves remain attached. (If using the brown sugar coating, combine sugar, 2 teaspoons salt, and 1 teaspoon pepper in bowl.)
    IMG_2035
  2. Open up tenderloins, cover with plastic wrap, and pound to 1/4-inch thickness. Trim any ragged edges to create rough rectangle about 10 inches by 6 inches. Sprinkle interior of each tenderloin with 1/8 teaspoon salt and 1/8 teaspoon pepper.
    IMG_2036
  3. With long side of pork facing you, spread half of stuffing mixture over bottom half of one tenderloin followed by 1/2 cup spinach. Roll away from you into tight cylinder, taking care not to squeeze stuffing out ends.
    IMG_2043
  4. Position tenderloin seam side down, evenly space 5 pieces twine underneath, and tie. Repeat with remaining tenderloin(s), stuffing, and spinach.
    IMG_2044
  5. FOR A CHARCOAL GRILL: Light large chimney starter filled with charcoal briquettes (6 quarts). When top coals are partially covered with ash, pour evenly over half of grill. Set cooking grate in place, cover, and heat grill until hot, about 5 minutes.
    IMG_2046
  6. FOR A GAS GRILL: Turn all burners to high, cover, and heat grill until hot, about 15 minutes. Leave primary burner on high and turn off other burner(s).
  7. Clean and oil cooking grate. Coat pork with oil (if desired, rub entire surface with brown sugar mixture.) Place pork on cooler side of grill, cover, and cook until center of stuffing registers 140 degrees, 25 to 30 minutes, rotating pork once halfway through cooking.
    IMG_2050
  8. Transfer pork to carving board, tent loosely with foil, and let rest for 5 to 10 minutes. Remove twine, slice pork into 1/2-inch-thick slices, and serve.

IMG_2053
Layer the slices on a platter and let the guests dig in!