All posts by LynnHoll

Unknown's avatar

About LynnHoll

I have been an artist and designer all my life incorporating graphic design for websites, gardens, publications, fabrics, interior design and cooking. I am now retired from my professional job, but still create artistic visions in all forms on a daily basis.

A Bittersweet Goodbye

Goodbyes are almost never easy. And after working for nearly 33 years at Mercer County Community College, I was retiring and ready for new adventures. But before I bid adieu to my colleagues, I wanted to bake up a batch of my appreciation for all of the years of accomplishments, blood, sweat and tears endured with these folks.

IMG_3142

OK, maybe that’s a bit dramatic, but I spent more time with many of them than I did my own friends and family—and actually, I consider quite a few of them real good friends now! But that’s the way of the work world, no regrets. I pondered over what I could bring to my office farewell get together, and realized most people I know can’t resist a decadent, fudgy, chocolate brownie.

IMG_3141

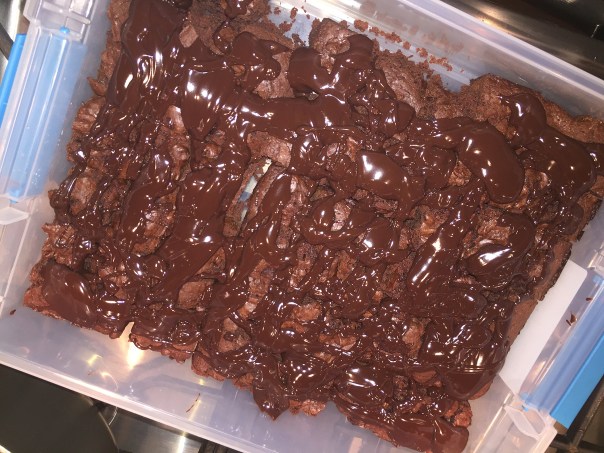
Ooey, gooey and chewy—these chocolate lovers dream brownies are made with cocoa, semisweet, bittersweet and dark chocolate—the whole enchilada! Below is a single recipe, of which I made three batches, but only doubled the ganache topping, which was plenty.

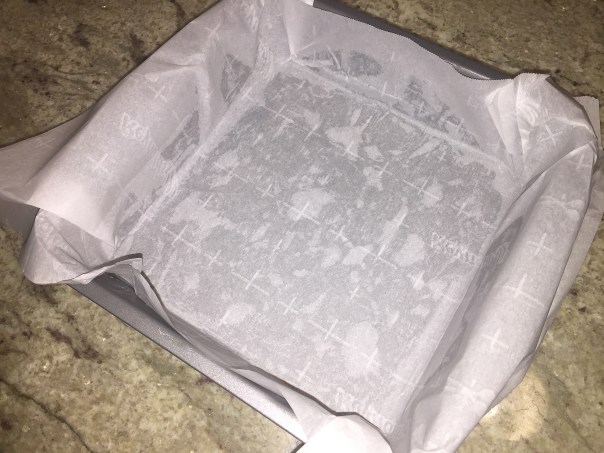
BTW, lining the pan isn’t busywork; it makes it super easy to remove the brownies.

Ingredients

  • 8 tablespoons (1 stick) unsalted butter, cut into pieces, plus more for pan
  • 4 ounces each semisweet AND bittersweet chocolate, chopped
  • 1 cup all-purpose flour, spooned and leveled
  • 1/4 cup unsweetened cocoa powder
  • 1/2 teaspoon baking powder
  • 1/2 teaspoon salt
  • 1 cup semisweet chocolate chips
  • 1 1/4 cups sugar
  • 3 large eggs

Dark Chocolate Ganache:

  • 1/2 cup heavy whipping cream 
  • 1 cup (6 oz.) dark chocolate morsels

Directions

  1. Preheat oven to 350 degrees. Brush a 9-inch square baking pan with butter. Line bottom and two sides with a strip of parchment paper, leaving a 2-inch overhang on the two sides. Butter paper, and set pan aside.
    IMG_3064
  2. In a small bowl, whisk flour, cocoa, baking powder, and salt; set aside.
    IMG_3070
  3. Place butter and chopped chocolate in a large heat-proof bowl set over (not in) a saucepan of gently simmering water. Heat, stirring occasionally, until smooth, 2 to 3 minutes; remove bowl from pan.
    IMG_3066
    IMG_3073
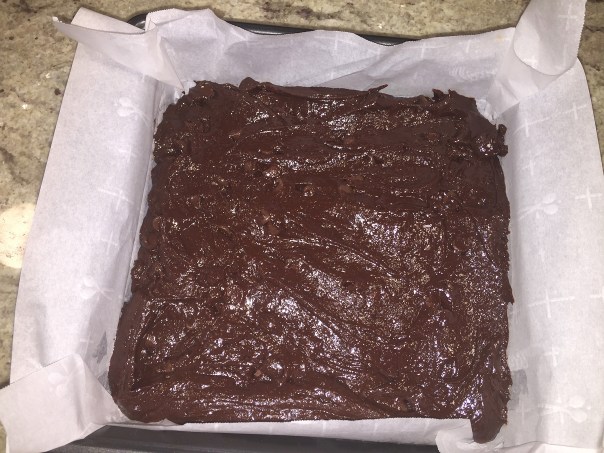
  4. Add sugar; mix to combine. Add eggs, and mix to combine. Add flour mixture; mix just until moistened (do not over mix). Add chocolate chips. Transfer batter to prepared pan; smooth top.
    IMG_3091
    IMG_3093
    IMG_3095
    IMG_3096
    IMG_3097
  5. Bake until a toothpick inserted in center comes out with a few moist crumbs attached, 50 to 60 minutes. Cool in pan for 30 minutes.
    IMG_3086
  6. Using paper overhang, lift brownies out of pan; transfer to a rack to cool completely (still on paper). On a cutting board, using a dampened serrated knife, cut into 16 squares.
    IMG_3089
  7. Drizzle ganache over cooled, cut brownies. Let ganache harden somewhat before packing. (It likely won’t harden completely.) Do not stack on top of each other.
    IMG_3103
  8. Store in single layers in an airtight container at room temperature, up to 2 days.

IMG_3098
Get ready for choco-shock!

For Dark Chocolate Ganache:
HEAT cream in 2-cup microwave-safe glass measure or small bowl on HIGH (100%) power for 60 seconds. Slowly add morsels. Cover with plastic wrap and let stand for 5 minutes. Stir well. Refrigerate any remaining ganache. Makes 1 cup. (Since I made three batches of brownies, I doubled, NOT tripled, the ganache.)

Desperation Salad

Ever get home from vacation and you don’t have the energy to food shop, or get yourself together to go out to eat, or even get take-out? Seems laughable, but we had recently dined at restaurants for six nights in a row during a mini vacation, and were looking forward to hunkering down at home, so we had to get creative with what was on hand. Time to raid the fridge…

IMG_3045

I remembered we had a single pork tenderloin in the freezer (which I could thaw quickly), some bibb lettuce still in good standing, and few other veggies that could be thrown together. But I also wanted to kick it up a notch and one easy way to accomplish that is to caramelize an onion; plus add a smattering of blue cheese crumbles, which is about all we had left anyway.

IMG_3043

So with that idea formulating, I sliced the onion and caramelized it in a pan over low heat for about an hour. Although this step takes a while, there’s not much you have to do after cutting it other than to stir the onions once in a while. (Substitute a thinly sliced raw red onion if you’re too lazy to caramelize one.) While the onion was making it’s own magic, I sliced one carrot, halved some grape tomatoes, and chopped 6 dried apricots—always a nice complement to pork.

IMG_3047

Use a rub of your choosing on the tenderloin (Adobo Secco is a good choice) and heat the grill to around 450 degrees. Clean the grates, oil them down then throw on the meat. We swear by the 7-6-5 method (see below), giving us a nice light pink juicy inside. And it’s not even necessary to tent the meat with foil for any length of time afterwards.

Assemble each plate starting with torn bibb lettuce leaves, tomatoes, radishes and apricots. Once the meat is sliced, add to each plate then top with the caramelized onions, blue cheese crumbles and your choice of dressing—we used a homemade vinaigrette.

IMG_3061

Of course desperate measures call for a little ingenuity, so use whatever you have on hand to assemble your “Desperation Salad.” I think of it as the dinner cousin to the Clean-Out-the-Fridge-Frittata.

This recipe makes two large salads or four smaller ones.

Ingredients

  • 1 small pork tenderloin, with rub of choice
  • 8 cups bibb lettuce, cleaned and torn
  • 1 caramelized onion (or thinly sliced raw red onion)
  • 1 large carrot, peeled and cut to 1/8″ slices on a diagonal
  • 8 large grape tomatoes, halved
  • 6 dried apricots, sliced in 1/8″ strips
  • 2 large radishes, thinly sliced
  • 1/4 cup loose blue cheese crumbles
  • Salad dressing of choice

Directions for 7-6-5 Method

  1. Preheat grill for about 10-15 minutes until around 450 degrees. Lift lid, clean grates of any debris, then oil them.
  2. Lay the tenderloin across the grate to get good grill marks, close the lid and set timer for 7 minutes.
  3. Once the 7 minutes are up, lift lid and turn the tenderloin over, close lid and set timer for 6 minutes.
    IMG_3051
  4. This time open the lid, turn off all burners and prop the meat on it’s side between two grates. Close lid and set timer for 5 minutes.
  5. Remove the meat to a cutting board and wait a minute or two if desired. Slice meat into 1/4″ slices on the diagonal. Place them on top of prepared salads.
    IMG_3052
    IMG_3055

Poached Pear in Point Pleasant

In it’s fourth season, The Poached Pear Bistro is a BYOB fine dining establishment whose mission is to offer familiar dishes presented in innovative ways. As their website describes, The Poached Pear draws influence from its namesake – a delicate, flavorful element that can be used in any dish from appetizer to dessert. The bistro embodies this notion of simplistic versatility by providing guests with an inviting yet upscale environment where they can enjoy bold, imaginative plates influenced by comforting classics.

IMG_3017
Russ sits in our little alcove by the window with some namesake artwork adorning the wall.

This would be our last night dining down the shore for the season, and just walking into the large vestibule—appointed with a modern vibe dressed in dove grey walls, crisp white trim, and avant-garde lighting—we could sense this was going to be a memorable dining experience. Seated at a cozy nook, a two-top right by the front window, in fact, the only table next to a window, our perky waitress opened our Gnarly Head Red, (a retirement gift from coworker Wendy) and recited the night’s specials.

IMG_3020

Noticing the restaurant was split into two separate dining spaces with two front doors (one now unused), our waitress confirmed my suspicion that it originally opened with just the one area, the other room added a few years later. With my decor curiosity in check, it was time to examine the menu, modest in length, but powerful in offerings with 9 starters, 5 soups/salads, 13 mains, and a list of a half-a-dozen sides. There is also a tempting mouth-watering dessert menu, but after dinner we were too full to even entertain the thought.

IMG_3022

My starter, one word “Ah-maaay-zing!” Simply called Garlic Shrimp this work of art was plated with three stacks of toasted reggiano parmigiano crostini, sumptuous oven-dried tomatoes, topped with micro basil and surrounded in a moat of silky something-or-other that made my taste buds sing. Russ saw me swoon as I took my first bite and politely asked if he could have a taste. Being the sweetheart that I am 😉 of course I gave him a smidgen 😉 and he concurred, it was out-of-this-world good!

IMG_3023

Not that his generous appetizer was second-rate by any means. He ordered a special of the night, Mussels and Clams in a sumptuous broth (we can’t remember the ingredients) with diced tomato and topped with a toasted crostini, frizzled carrots and micro cilantro. He all but licked the bowl clean.

IMG_3026

Could our Entrées top our Firsts? That was going to be a difficult task in my opinion. My choice was a duet of perfectly formed Crab Cakes, chock-full of jumbo lump floating in a sea of exquisite Meyer lemon aioli, accompanied by crisp-tender green beans and fingerling potatoes. While exceptionally good and among the best crab cakes I’ve ever had, I was still so enamored of my shrimp appetizer that I had to take the majority of my entrée to go. (I actually enjoyed my leftovers as lunch a few days later as I was writing this blog.)

IMG_3028

Mr. Russ? He was drawn to a personal fave of his, duck. But this innovative rendition, Duck Breast and Foie Gras, was topped with Vermont maple roasted butternut squash, and sautéed spinach, all generously drizzled with a blackberry duck jus. And yes, he also kindly shared a taste of his with me, and yes, it was amazing.

The prices are what you would expect for an upscale establishment, but the servings are more than ample and well worth it. If you ever find your self in Point Pleasant for dinner, do yourself a favor and make an advanced reservation at the The Poached Pear Bistro, you won’t be sorry…

About the Chef/Owner:

A year after opening, both the restaurant and the chef owner, Scott Giordano, won “Outstanding TASTE Awards” in 2015. His earliest memories recall the aromas of his grandmothers’ cooking and images of family gathered around the dinner table. Growing up in a tight-knit family where most occasions revolved around food, the culinary life came naturally to Scott.

He attended the Culinary Institute of America straight out of high school and, after graduating in 1988, began working as the Sous Chef under Chef Hans Egg at the Saddle River Inn in Saddle River, NJ. He then went on to serve as Executive Chef at The Park Restaurant in Park Ridge, NJ followed by Whispers Restaurant in Spring Lake, NJ.

Scott founded The Poached Pear Bistro in 2014 as a means of bringing people together in the same way his grandmothers’ cooking brought his family together. With his own personal flair, Scott adds a contemporary twist to the bistro’s dishes, showcasing the creativity and variety fine dining affords both chef and patron. Scott’s culinary upbringing, eclectic tastes, and wide range of experience have embedded themselves in The Poached Pear, inspiring the bistro to consistently deliver fresh, unexpected dishes in an open, welcoming environment.


Prime 13

At the height of summer, it’s prime steak season. People are visiting steakhouses in greater numbers, and throwing more of their own steaks on the grill. Backyards across the country are filling up with the sizzle and savory aroma of steaks. But as guests at a Jersey Shore B&B with no option to cook or grill, we made reservations on a Saturday night at Prime 13 in Point Pleasant, lauded as New Jersey’s #1 steakhouse and seafood restaurant.

outdoor.shot

Both the owner of Prime 13, Gerard Tortora and the executive chef, Jeremy Karp have over 40 years of culinary experience. In addition, both hail from Kearny, New Jersey and are New York Restaurant school graduates. Arguably, when you add the Jersey Shore’s most talented grill man, Alberto Argudo and their highly-skilled and knowledgeable staff, the dining experience is a well-orchestrated frenzy.

The protein-laden menu draws equally from land and sea, featuring house-cured bacon and char-grilled pork chops alongside wild-caught Brazilian lobster tails and a chef’s selection of oysters that changes daily. In the dining room, the chefs also serve as the entertainment. In addition to peeking into the open kitchen to check on their steaks, diners can watch the grill’s action on flat-screen televisions. Recessed lighting illuminates saturated walls, which hold rustic touches such as chalkboards and wrought-iron shutters.

indoor.shot

Seated in the center of the small, very blue dining room, we were relieved that we had sense enough to reserve a table days in advance because the waiting line (outside in the pouring rain) was a long one. For the BYO portion of our meal, we toted along a Meiomi Pinot Noir given to me as a retirement gift from coworker Jim, which we enjoyed while scrutinizing the foodie-friendly American comfort cuisine menu.

IMG_3007

For starters, we each ordered the Baby Wedge Salad, a deconstructed version with the typical wedge of iceberg, a few large rounds of pickled red onion, a large chunk of blue cheese, about 6 grape tomato halves, squares of crunchy bacon cubes and a side of blue cheese dressing. Brought to the table prior to our salads was a basket of two pretzel-like rolls with a grainy mustard dipping sauce. We started thinking maybe this tradition of pretzel bread rolls was a Jersey Shore phenomenon (although we liked the ones at Blend better.)

IMG_3010

IMG_3005

Our mission that night was medium-rare steak, so we concentrated on that portion of the menu. All steaks are wood fire grilled, and my prime NY Strip came in two sizes, 10-ounce and 14-ounce, so I went with the smaller size which was accompanied by sautéed mushrooms. Russ got the manly “as close to perfect as could be” Cedar River Farms, all natural 18-ounce Delmonico “Cowboy” rib-eye. And as mushroom aficionados, we shared a side of the Wild Mushroom Medley.

IMG_3011

IMG_3016

Both steaks were cooked perfectly. In the end, I had to once again doggie-bag half of my dinner. Thank goodness when packing for the trip, I had the foresight to load a cooler and ice packs for just this very reason. Now it was time to take the puddle-ridden walk to the rear of the parking lot and make our way back to Spring Lake. Stay tuned for evening number four…


A Birthday “Blend”

Each summer as July nears, we usually plan an annual trek to the Jersey Shore—around my birthday weekend if possible. Over time, we’ve stayed at numerous B&B’s but are often drawn back to the Ocean House in Spring Lake, aka “The Irish Riviera.” And we’ve dined at most restaurants in the surrounding area so I felt an urge to venture further away for my celebration dinner. Yes, it was time to “blend” into more areas of the shore…

IMG_2965
An example of one of the “summer cottages” along Ocean Ave. A summer getaway for barons of industry in the mid 1800s, this small community has retained much of the exclusive aura of its Victorian heyday.

IMG_2964
The pristine white sand beach and wide boardwalk stretch for 2 miles. 

Wanting low-key and an ocean view for dinner on the first night in town, we made a res at La Terrazza which has a patio right on Ocean Avenue in Belmar offering outdoor seating, perfect for people watching as they strut the promenade. Keeping it simple, we ordered a large specialty pie, the Capricciosa, assembled with pomodoro sauce, mozzarella, ham, artichoke hearts and mushrooms.

IMG_2962
I couldn’t even finish two slices, so we had nearly half a pie to take back for lunch the next day.

Back in my twenties (many of you remember hanging with me between the towns of Belmar and Point Pleasant), some good friends rented cottages in Manasquan, just two towns south of Spring Lake (SL) which, at the time, was way too ritzy (read costly) for our meager pocket books. Fast forward several decades and Spring Lake is where hubby and I now hang our hats when the shore beckons.

But since we’ve feasted on the finest SL and Belmar had to offer over the years, I made it a mission to broaden our culinary dining scope. Thus Manasquan, being in such close proximity to our digs, made for an easy endeavor and I booked a birthday res at the highly acclaimed eatery Blend on Main.

Chef and Owner Lou Smith opened Blend in Manasquan on March 1, 2014. His homegrown Jersey roots are what inspires him when creating the menu for Blend. Lou likes to cook in tune with the seasons and uses ingredients that are readily available—A-OK with us!

gran.reserva

But first, the wine. Russ wanted to mark the occasion with a special vintage, so while I got ready for the evening, he made a jaunt to the town liquor store and procured the Marques de Riscal Gran Reserva, which holds a special place in our hearts and is not all that easy to find. You see, years ago while on our honeymoon in the La Rioja region of Spain, we visited the The Marqués de Riscal winery, the oldest and most traditional of the area bodegas, and fell in love with the fruitage. In contrast to the winery, the stunning ultra-modern hotel, shown below, was erected in 2006 and designed by world-renowned architect Frank O. Ghery.

hotel.marques.de.riscal

We arrived at Blend right on time only to be confronted with a packed vestibule, and the hostess looked dazed when we asked about our 8:00 reservation. Uh-oh, not a good start. But within 5 minutes we were shown to our banquet seating along a back wall in the vast dining area which was smartly appointed with a soaring ceiling, a central two-way fireplace, and ample space between tables.

fireplace
A stock photo showing the fireplace. When we were there, the place was packed!

IMG_2982
A quote from Julia Child stenciled on an adjacent wall.

Our only complaint would be the almost deafening noise level amplified by the live guitarist amid the chatter of the diners. Our friendly waitress Jean luckily had a voice that carried and she was able to rise above the din. So while she opened our coveted Gran Reserva, she reviewed the night’s specials with us.

IMG_2981

Knowing we would patronize a steak house the following night, we concentrated on seafood, after all, we were at the shore. While perusing the menu, the busboy presented a plate of large pretzel-like buns with a side of the most delicious raspberry horseradish dipping sauce. Neither one of us eat much bread but we couldn’t resist each having a roll with that fabulous sauce (I have to try and mimic that recipe!)

IMG_2983

To start with, we shared the Blend Salad, artfully displayed on a large square platter with rocket greens, shaved fennel, pickled fennel vinaigrette, blood orange, and almond cloaked goat cheese. Not that we needed them—but we were celebrating my birthday—so for seconds, Russ decided on the Tuna Taco small plate consisting of tuna belly, sriracha aioli, wasabi tobiko roe, napa cabbage, yuzu soy, and toasted sesame. He thought they were great!

IMG_2988

I was all about the Crab Cake appetizer, an all lump molded crab round with no bread fillers, paired with roasted corn relish and baby micro greens, resting on a schmear of chipotle aioli. It seemed lighter and less dense than many crab cakes I’ve eaten, and it had a surprising crisp edge that added an interesting texture.

IMG_2986

Pretty full at this point, I still had an entree in the works, and in keeping with the seafood theme my choice was the Halibut, an onion crusted east coast halibut fillet nestled on sun choke puree, with a splash of lobster buerre blanc and topped with baby micro greens. The photo doesn’t do it justice, the portion was huge! As you may have guessed, three-quarters of the meal was packaged to go.

IMG_2996

My man also stayed with seafood and selected the Scallops Succotash consisting of four large, plump, perfectly sautéed dayboat scallops, atop a colorful sweet corn and lima bean succotash with a swash of chipotle tarter sauce. I had a taste and loved them! Right up there among the best scallops we’ve ever had.

IMG_2993

Pretty much bursting at the seams, and not a dessert eater, I opted to forgo any sweet ending. Russ couldn’t eat another bite either, so after paying the check and procuring my doggie bag, we bid adieu to Jean and sauntered back to the car for our ride to Ocean House, a few short miles away.

Next up, a blog on our third night out at Prime 13 in Point Pleasant….

Harissa-Yogurt Baked Chicken Thighs

Chicken is so versatile and this Harissa-Yogurt Baked Chicken Thighs recipe is an example of just that. The list of ingredients is minimal, unless you are going to make your own harissa, a spicy traditional moroccan red pepper sauce (recipe follows.) Harissa is a condiment made of spicy chiles, somewhat similar to gochujang. Look for it in jars, cans or tubes in the international foods section. You can also sometimes find it as a spice powder instead of a paste.

It’s used often in North African and Middle Eastern cooking, adding a kick to dishes like tagines. Ingredients vary, but harissa commonly contains smoked chiles, garlic, olive oil, cumin and caraway. And one way to simplify making your own, is to buy jarred fire roasted red peppers instead of charring bell peppers on the stove or grill.

Harissa pastes vary in heat level. Taste some of the harissa-yogurt sauce before putting it on the chicken, and adjust the amount of harissa paste to your liking. The paste will last for about a month, once opened, or made. Store it in the refrigerator with a light layer of olive oil on top to help keep it fresh. Alternatively, you can freeze small amounts in ice cube trays and defrost cubes as needed.

And the Roasted Chickpea, Avocado and Feta Salad is such a refreshing and different side dish. Crunchy roasted chickpeas add a surprising element to this simple salad, which pairs well with both Middle Eastern and Latin American flavors, such as this entrée.

IMG_2495

Ingredients

  • 1-1/2 lb. boneless, skinless chicken thighs
  • Kosher salt and freshly ground black pepper
  • 1/2 cup plain Greek yogurt
  • 1 Tbs. fresh lemon juice
  • 1-1/2 to 2 Tbs. harissa paste
  • 1 Tbs. chopped fresh mint

Directions

  • Position a rack in the upper third of the oven and heat to 425°F. Line a large rimmed baking sheet with foil and set a rack over it.
  • Season the chicken thighs with salt and pepper, and put them on the rack, smoother side up.
    IMG_2499
  • In a small bowl, combine the yogurt, lemon juice, 1/2 tsp. salt, and pepper to taste. Add the harissa to taste, and stir to combine.
    IMG_2501
  • Spoon the yogurt mixture over the chicken. Bake until the chicken is cooked through (165°F), about 20 minutes.
  • Heat the broiler on medium, and broil until the yogurt sauce is just starting to blacken in spots, 3 to 5 minutes. Sprinkle with the mint before serving
    IMG_2508

Roasted Chickpea, Avocado, and Feta Salad

IMG_2512

Ingredients

  • 1 15-oz. can chickpeas, drained
  • 1 Tbs. olive oil
  • Kosher salt and freshly ground black pepper
  • 1 ripe Hass avocado
  • 1/2 tsp. fresh lime juice, more to taste
  • 2 oz. feta, finely crumbled
  • 2 scallions, thinly sliced

IMG_2504

Directions

  • Heat the oven to 400°F.
    IMG_2498
  • Spread the chickpeas on a rimmed baking sheet, and pat dry. Toss with the oil, season with salt and pepper, and roast until golden and slightly crunchy, 25 to 30 minutes.
    IMG_2502
  • Mash the avocado with the lime juice, and spread on a platter or divide among plates. Top with the chickpeas, feta, and scallions. Season to taste with salt and more lime juice.
    IMG_2505

By recipes from Erica Clark

Homemade Harissa Paste:

Ingredients

  • 1 red pepper
  • 1/2 tsp coriander seeds
  • 1/2 tsp cumin seeds
  • 1/2 tsp caraway seeds
  • 1 1/2 tbsp olive oil
  • 1 small red onion, coarsely chopped (scant 2/3 cup / 90 g in total)
  • 3 cloves garlic, coarsely chopped
  • 3 hot red chiles, seeded and coarsely chopped
  • 1 1/2 tsp tomato paste
  • 2 tbsp freshly squeezed lemon juice
  • 1/2 tsp salt

Directions

  1. Place the pepper under a very hot broiler, turning occasionally for about 25 minutes, until blackened on the outside and completely soft. Transfer to a bowl, cover with plastic wrap, and allow to cool. Peel the pepper and discard its skin and seeds. (Or simply buy a jar of fire roasted red peppers.)
    IMG_2486
  2. Place a dry frying pan over low heat and lightly toast the coriander, cumin, and caraway seeds for 2 minutes. Remove them to a mortar and use a pestle to grind to a powder.
    IMG_2488
    IMG_2490
  3. Heat the olive oil in a frying pan over medium heat, and fry the onion, garlic, and chiles for 10 to 12 minutes, until a dark smoky color and almost caramelized.
    IMG_2491
  4. Now use a blender or a food processor to blitz together all of the paste ingredients until smooth, adding a little more oil if needed.
    IMG_2493
  5. Store in a sterilized jar in the fridge for up to 2 weeks or even longer.

IMG_2515

Salad Supremacy

This meaty main-course salad has loads of full flavor thanks to a glaze on the steak, a mustardy vinaigrette, and a generous sprinkling of blue cheese. Red onions, grilled to perfection, are sweet and caramelized, a delicacy all by themselves. Add them to this dinner salad of tender baby greens, thin slices of juicy umami steak, chunks of savory blue cheese, and you pretty much have supremacy on a plate.

Our red onion was the size of a small cantaloupe! To save time during the week, we grilled the onion slices two nights prior along with another dinner. Just make sure they get soft enough and start to caramelize. Once cooled, refrigerate the onions in a sealed container, then let them come to room temperature before assembling the salad.

Because the skirt steak took just three minutes total for medium rare, I cooked it on a grill pan on the stovetop (wasn’t about to heat up the outside grill in 90-something degree heat for a matter of only a few minutes!) Make sure to tent with foil for 5-10 minutes before slicing, so that the juices redistribute themselves; then pour those tasty drippings back over the sliced meat.

IMG_2953

Ingredients

  • 1 tsp. Worcestershire sauce
  • 1/4 cup plus 3 tsp. extra-virgin olive oil
  • 1 lb. skirt steak, trimmed and cut in half
  • 4 tsp. sherry vinegar
  • 1 tsp. Dijon mustard
  • 1 tsp. honey
  • 1/2 tsp. minced garlic
  • Kosher salt and freshly ground black pepper
  • 1 medium red onion, sliced crosswise in 1/4-inch-thick rounds
  • 6 oz. baby greens (6 packed cups)
  • 1 cup cherry tomatoes, halved
  • 3 oz. blue cheese, crumbled (about 3/4 cup)

Directions

  • Heat a large grill pan over medium-high heat or prepare a medium-high (400°F) gas or charcoal grill fire.
  • In a baking dish just large enough to hold the steak, combine the Worcestershire sauce and 1 tsp. olive oil. Add the steak and turn to coat both sides.
    IMG_2936
  • Combine the vinegar, mustard, honey, garlic, 1/2 tsp. salt, and several grinds of black pepper in a small bowl. Slowly whisk in the 1/4 cup olive oil.
    IMG_2939
    IMG_2943
  • Brush the onion slices with the remaining 2 tsp. olive oil, and grill until tender, about 4 minutes per side.IMG_2894
    IMG_2899
  • Season the steak with salt and pepper and grill (alongside the onion if you didn’t precook them), flipping once, 3 to 5 minutes total for medium rare. Transfer the steak to a cutting board, tent with foil, and let rest 5 minutes.
    IMG_2945
  • Toss the greens and tomatoes with just enough of the vinaigrette to coat lightly and divide among serving plates.
    IMG_2947
  • Slice the steak across the grain, separate the onion into rings, and arrange both over the greens. Sprinkle the blue cheese over the salad, drizzle with additional dressing, if you like, and serve.
    IMG_2948
    IMG_2950

By Laraine Perri

Here’s The Rub

One of my own, this Grilled Tarragon Chicken Breast recipe is perfect for a weeknight or weekend dinner for two. (Of course you can double it to feed four.) These succulent chicken breasts are bursting with flavor while the meat remains super moist. And the crispy skin is phenomenal! We paired it with steamed broccolini and caprese salad for a truly satisfying and healthy meal.

IMG_2866

I personally love tarragon which has a distinctive sweet Anise-like flavor described as uniquely spicy, sharp and aromatic; but if you’re not a fan, use fresh thyme or rosemary instead.

A couple of MEDICINAL FACTS: Tarragon has a mild anesthetic property when used medicinally. It also has sedative properties. If used as a tea it has calming properties and is used as a hyperactivity treatment. Herbalists will use the herb as an digestive aid because of its ability to breakdown meat fats and proteins. Supposed to be useful in treatment of rheumatoid and arthritic pain management.

IMG_2853

Ingredients

  • 2 large chicken breasts, bone-in, skin on (about 2 lbs. total)
  • 1/4 cup loosely packed fresh tarragon leaves
  • Juice and zest of 1/2 of one large lemon
  • 1 Tbsp. roasted garlic
  • 1 Tbsp. extra virgin olive oil (more for brushing on chicken underside)
  • 1/4 tsp. kosher salt
  • 1/8 tsp. freshly ground black pepper

Directions

  1. Put all of the rub ingredients (except the chicken) in a small mini blender and pulse a few times until blended.
    IMG_2855
    Once you pull the leaves off of the stems, it should approximate about a 1/4 cup.
    IMG_2856
  2. Loosen the skin under the breasts, and rub 1/2 the mixture under and above skin on one breast; repeat with remaining mixture on other piece.
    IMG_2857
  3. Turn all burners to high. Heat with lid down until very hot, about 15 minutes. Scrape cooking grate clean.
    IMG_2859
  4. Place chicken skin-side down on hot grill, brush the underside with olive oil, and cook until skin is browned and light grill marks appear, about 5 minutes. Using tongs or towel, flip chicken to skin-side up and grill another 5 minutes.
    IMG_2860
  5. Turn off the burner(s) on one side of the grill and move the chicken with thick part of breast facing the hot part of the grill. Cover grill and cook until chicken is well browned. If necessary, turn the chicken skin side up if it starts getting to dark before it’s done.
    IMG_2864
  6. After 20 minutes, check with an instant read thermometer. The chicken is done at 165 degrees. If it is not yet to temperature, cover the grill and cook another 5 minutes or so until done.
  7. Remove chicken pieces to a platter and tent with foil for 5 minutes.

IMG_2863

Sometimes Bigger Is Better!

Original plans had us dining at the home of Peruvian-born Guliana who we met (along with several of her visiting family members) as a guest at a graduation party hosted by friends Paula and Mike Graham. A few weeks later we got the invitation to come enjoy an ethnic cooked meal prepared by Guliana herself—all we had to do was supply beverages. Unfortunately, Guliana got called away to Peru due to a family emergency, but the rest of us all had that Saturday evening open so we went to Plan B…

IMG_2817
The place is so new that they don’t even have their sign up yet!

Arpeggio is an Italian/Mediterranean BYOB which opened in July, 1995 in Spring House, Montgomery County, PA, about 10 miles from the Graham’s home in Oreland. The original cozy 12-table space and the Spring House area were a perfect fit for restaurateurs Mary Cullom and Chef Hamdy Khalil and they thrived there for seven years. Then the larger space next door became available and since they were bursting at the seams, Arpeggio was lovingly expanded.

arpeggio_9585_2_1200
Restaurateurs Mary Cullom and Chef Hamdy Khalil.

In May 2003, they reopened with a new state of the art kitchen and a transformed décor. The kitchen sported a second wood burning oven in the back for the preparation of special entrées. The dining room featured a two-sided fireplace in the center, private wine lockers and an outdoor patio that is partially covered with a large gable.

But they relocated and enlarged once again! The latest location, which opened very recently, is roughly 75 yards across the parking lot, and the new space — which was designed by revered Philadelphia architectural and design firm DAS Architects — is a massive 4,550 square feet inside with 24-foot high soaring ceilings, an upscale upgrade from the previous 2,800 square feet!

IMG_2821
An interior view of one of the dining areas.

It was already after 8:00 by the time we arrived, and we figured since it was a summer weekend, many folks would be out of town. Wrong! The place was absolutely booming (they don’t take reservations) and we were told there was an hours wait time! Oy vay. But since it was a BYOB—and we carted a few good reds with us—we asked for some wine glasses and moseyed out to the large deck—which was not up and running for business yet.

IMG_2818
Russ, Mike and Paula discuss where to wait…

Yes, it took pretty much the full hour before our names were called. But we secured a nice corner table which allowed for easier conversation. And that conversation was, what were we going to order for starters?

IMG_2823

Most everything on their extensive menu is homemade and made to order with the finest and freshest ingredients available. They do not use any preservatives or trans fats in the preparation of any of the dishes. BTW, they also have full dairy-free, vegetarian, and gluten-free menus…

Back to the appetizers. We opted for the combo platter and beef skewers, described below.

IMG_2829
MEDITERRANEAN COMBO PLATTER: Sampling of humus, baba ganush, tabbouleh, falafel, stuffed grape leaves and feta; served with tahina and two fresh colossal pitas!
IMG_2831

IMG_2830
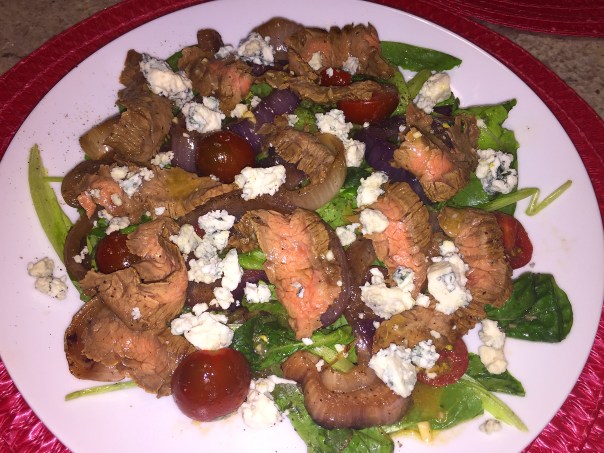
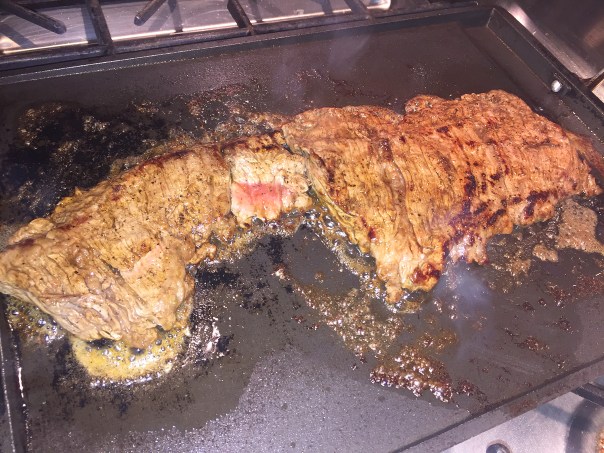
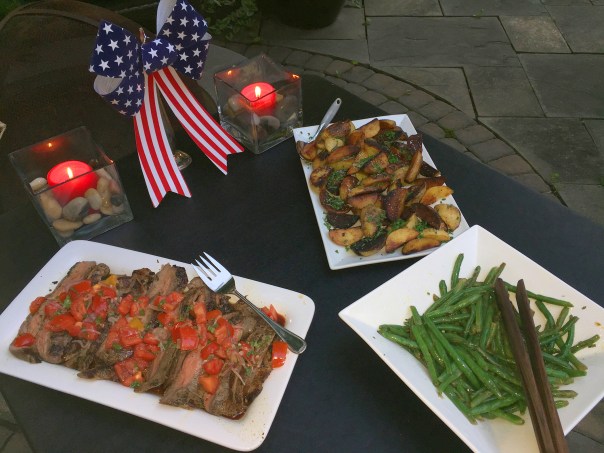
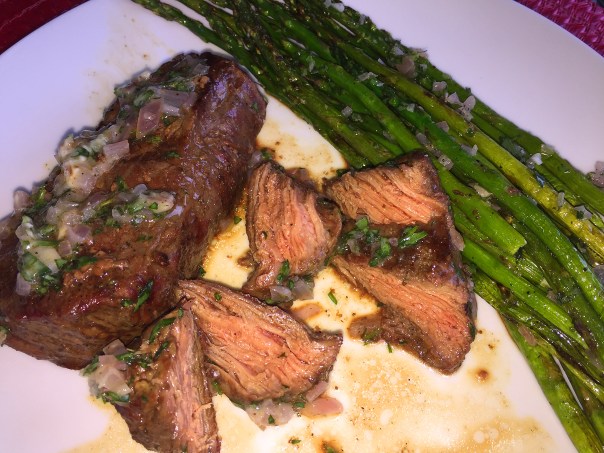
MEDITERRANEAN BEEF SKEWERS:
Lean and tender flank steak skewers in a Mediterranean style marinade; served over a bed of crispy onions.

Then we needed to get serious about entrées. After much back and forth, Paula opted for the Sea Bass, which she gushed over; Lynn selected the Mixed Grille; and the guys both chose the Chicken Taouk. What the heck is that? Shish Taouk is a traditional marinated chicken shish kebab of Middle Eastern cuisine. And since they offer a wide variety of Mediterranean offerings, it made sense.

IMG_2833
SEA BASS ATHENA:
Wood oven baked Australian sea bass in a delicious sauce with marinara, fresh tomatoes, onions and kalamata olives

IMG_2836
MIXED GRILLE:
 Scallops, jumbo shrimp and filet mignon, grilled; served with Tahina sauce, brown rice and grilled seasonal vegetables

IMG_2834
CHICKEN TAOUK:
Grilled tender and juicy chicken skewers marinated in Mediterranean style yogurt; served with rice, grilled veggies and toum (a delicious emulsified garlic sauce)

We are hoping that our next visit—yes, we plan to go again—they will reconsider taking advanced reservations. In the meantime, just plan on chilling on the large covered back deck until your name is called…

Crispy Salt-and-Vinegar Potatoes

Over the long July 4 holiday weekend we hosted an outdoor BBQ featuring Grilled Mediterranean Flank Steak with a Tomato-Basil Salsa (shown below) and wanted a couple of easy side dishes that would complement the entrée. Fortunately, Russ remembered he recently output a Crispy Salt-and-Vinegar Potatoes recipe that promised to be not only simple to make, but flavorful and wouldn’t fight the flavor profile of the meat.

IMG_2792

Ever start munching on those salt-and-vinegar potato chips, or the hand-cut fries drenched in malt vinegar and salt when cruising the boardwalk? Addicting right? Well, these spuds are like a grown up version of those savory snacks. Cooking the potatoes in vinegar seasons them from within, and a final drizzle boosts the flavor.

Vinegar is emerging as a functional food that not only adds interest to your meals, it may also significantly benefit your health. It has anti-cancer properties and shows promise for helping with heart health, brain health, and weight loss; and is said to be anti-glycemic and has a beneficial effect on blood sugar levels. There, now you should feel better about having some potatoes.

Just keep a close eyeball on them in the skillet. I was getting impatient that they weren’t crisping up soon enough so I raised the burner temp which resulted in charring the living sin on one side of the spuds in one of the pans. Not exactly the best way to impress guests…

4.plated.food
Our other side was sautéed fresh green beans with lemon zest, fresh thyme and olive oil.

Ingredients (serves four)

  • 2 pounds baby Yukon Gold potatoes, halved, quartered if large
  • 1 cup plus 2 Tbsp. distilled white vinegar
  • 1 tablespoon kosher salt, plus more
  • 2 tablespoons unsalted butter
  • Freshly ground black pepper
  • 2 tablespoons chopped fresh chives
  • Flaky sea salt (such as Maldon)

Directions

  1. Combine potatoes, 1 cup vinegar, and 1 Tbsp. kosher salt in a medium saucepan; add water to cover by 1”. Bring to a boil, reduce heat, and simmer until potatoes are tender, 20–25 minutes; drain and pat (or air) dry.
    IMG_2777
  2. Heat butter in a large skillet over medium-high heat. Add potatoes; season with kosher salt and pepper. Cook, tossing occasionally, until golden brown and crisp, 8–10 minutes. Drizzle with remaining 2 Tbsp. vinegar. Serve topped with chives and sea salt.
    IMG_2785
    Because we doubled the recipe, we used two cast iron skillets. Just make sure to keep an eye on them while cooking because they go from light brown to almost charred in a matter of minutes… I know, as that happened to one side of the ‘taters in one of my skillets, oops…

Recipe courtesy of bon appétit. Feature photo by Christina Holmes.

Love At First Bite

In this Grilled Tandoori-Style Chicken Thighs recipe, the combination of the yogurt, the natural juices of the meat and the intense heat created by the fire, ensures that the natural fats of the meat are sealed within the meat immediately. This creates a nice flavor without having to use or add external fats such as butter or oils.

IMG_2749

What is Tandoori cooking? Contrary to common belief, many people think that the word “tandoori” refers to a recipe, yet it can be better described as method of cooking. A tandoor is a clay oven large enough to hold a small fire created by slow burning wood or charcoal.

The marinade used in almost any tandoori dish starts with yogurt, as does this recipe. While this might sound a little strange, this is actually perfect for marinating meats because yogurt has a natural acidity and it is thick so it surrounds and holds to the meat well and keeps the herbs and spices in place.

In addition to the colors provided by the spices, tandoori marinades are also flavored traditionally with ginger, garlic, coriander powder, cayenne pepper, and garam masala. Garam masala, although not used here, is a combination of roasted and ground cardamom, cumin, cinnamon, cloves, nutmeg and black pepper.

After you have combined the spices and yogurt to your liking, immerse the meat into it. You want the meat to sit in this thick marinade preferably for several hours to absorb the flavors. Once the marinading is done, turn on your grill to full power. Remember that tandoori is cooked at very high temperatures and your barbeque grill will do the job perfectly. Get your grill as hot as you can and keep it closed as much as possible.

IMG_2751

To accompany our chicken entrée, which was love at first bite BTW, we made a Citrusy-Spiced Couscous with Avocado. Cook your couscous according to package directions. Once cooled and fluffed, stir in chopped sections of one orange, 1/4 cup of minced red onion, 1/4 cup chopped fresh cilantro and the zest of half an orange.

IMG_2742

Make a dressing from the juice of half an orange, 2 tablespoons extra virgin olive oil, salt and pepper to taste. Toss all ingredients well. Dice a whole ripe avocado and fold into couscous mix. Serve warm or at room temperature. We had some chicken leftover so we chopped it up and tossed it with the remaining couscous salad, which made for fabulous lunches the next day!

Ingredients

  • 1-1/2 Tbs. ground cumin
  • 1-1/2 tsp. curry powder
  • 1-1/2 tsp. kosher salt
  • 1 tsp. garlic powder
  • 1/2 tsp. ground ginger
  • 1/4 tsp. cayenne, adjust to suit your heat tolerance
  • 2 Tbs. vegetable oil; more for the grill
  • 3 Tbs. red-wine vinegar
  • 1/2 cup regular or nonfat plain yogurt
  • 2-1/2 lb. boneless, skinless chicken thighs (about 8 large, 10 medium, or 12 small), trimmed of excess fat
  • 3 Tbs. chopped cilantro

Directions

  • Mix the cumin, curry powder, salt, garlic powder, ginger, and cayenne in a medium bowl. Heat the oil in an 8-inch skillet over low heat.
    IMG_2737
  • Stir the spices into the oil and heat until they bubble and become fragrant, 30 to 60 seconds. Return the spice blend to the bowl and stir in the vinegar and then the yogurt.
    IMG_2738
    IMG_2739
  • Add the chicken thighs and toss to coat evenly. Let sit 10 minutes or cover and marinate in the refrigerator for up to 12 hours. (We marinated in a ziploc for 2 hours)
    IMG_2740
  • When ready to cook, prepare a hot charcoal fire or heat a gas grill with all burners on medium high for 10 minutes. Clean the hot grate with a wire brush and then lubricate it with an oil-soaked paper towel.
  • Put the chicken on the grate and grill (covered on a gas grill or uncovered over a charcoal fire) until one side has dark grill marks, 5 to 6 minutes for large thighs or 4 to 5minutes for medium and small thighs.
    IMG_2744
  • Turn and continue to grill until well marked on the other sides and cooked through, 5 to 6 min. longer for large thighs or 4 to 5 minutes for medium and small thighs. Move the thighs to a platter and let rest 4 to 5 minutes Sprinkle with chopped cilantro before serving.
    IMG_2753

To prepare as kebabs:

Trim the thighs and then slice them lengthwise into 1-1/2- to 2-inch-wide strips. Toss with the flavorings; then thread the chicken onto six 8- or 12-inch skewers (soak wood skewers in water for at least 20 minutes first), folding each strip in half as you skewer it. If some strips are very thick, cut them in half crosswise rather than folding them so that all the pieces of chicken are roughly the same size. Grill the kebabs, turning them every 4 to 5 minutes as dark grill marks form, until cooked through, 12 to 15 minutes total.

By Pamela Anderson (no, not the Baywatch Babe)

Cedar-Planked Salmon with Lemon-Pepper Rub and Horseradish-Chive Sauce

Grilling on soaked cedar planks has a lot of benefits: the planks char lightly, creating cedar smoke that delicately perfumes the food, and fish doesn’t stick to the grill grates because it’s on the planks. Plus, this spice rub—a simple mixture of salt, cracked black pepper, lemon zest, fresh thyme, and a bit of sugar—pairs really well with the cedar-smoke flavor.

And the horseradish-chive sauce is divine! Crème fraîche offers a distinct tart flavor similar to that of sour cream, but it has a thinner consistency. Crème fraîche doesn’t curdle easily under heat, which makes it suitable for cooking and adding richness to sauces and soups. Alas, we had just enough sour cream on hand, so we didn’t bother buying crème fraîche.

If you don’t have crème fraîche, several alternatives with a similar tanginess are equally versatile. You can use low-fat yogurt or full-fat yogurt varieties. Sour cream is another common substitute but it is thicker than crème fraîche, so if your recipe needs a thinner addition use a small amount of heavy cream and a whisk to thin it out. In sauces and soups, you can also use heavy cream but since cream is much thinner, use 1 part cream for every 2 parts of crème fraîche.

IMG_2714

Back to the salmon. Because it’s a simple technique, it’s easy to grill two fillets at once and use the leftover salmon the next day in a salad or sandwich. Which is precisely what we did. Our side of sautéed snow peas in a shallot, lemon vinaigrette was a perfect complement to the fish.

IMG_2696

Cedar-Planked Salmon with Lemon Pepper Rub and Horseradish Chive Sauce

  • Servings: 4-6
  • Difficulty: easy
  • Print

Ingredients

For the salmon

  • 1 Tbs. grated lemon zest, minced
  • 1 1/2tsp. chopped fresh thyme
  • 1/2 tsp. granulated sugar
  • Kosher salt and freshly ground black pepper
  • 2 2-lb. boneless, skin-on salmon fillets (preferably wild and no longer than 15 inches)
  • 2 Tbs. extra-virgin olive oil

For the horseradish-chive sauce

  • 1/2 cup crème fraîche
  • 3 Tbs. minced fresh chives
  • 1 1/2 Tbs. prepared horseradish
  • Kosher salt and freshly ground black pepper

Directions

  • Soak the cedar planks in water to cover for at least 1 hour. Drain the planks.

Prepare the sauce

IMG_2700

  • In a small bowl, stir the crème fraîche, chives, and horseradish. Season to taste with salt and pepper. Refrigerate.

Prepare the salmon

  • In a small bowl, combine the lemon zest, thyme, sugar, 1 1/2 tsp. salt, and 1 Tbs. pepper. Rub the mixture together with your fingers until the zest is distributed throughout.
    IMG_2698
    IMG_2699
  • Rub the salmon fillets on both sides with the olive oil and then set each fillet skin side down on a plank. Sprinkle the fillets with the lemon-pepper mixture, dividing it evenly. Gently rub the seasoning into the fillets. Let stand at room temperature while the grill heats.
    IMG_2702

Cook the salmon

  • Prepare a gas or charcoal grill fire for indirect cooking with high heat: On a gas grill, heat all burners on high; then turn off all but one burner just before cooking the salmon; on a charcoal grill, bank the coals to two opposite sides of the grill.
  • Arrange the planks over the cooler part of the grill, positioning them so that the thickest part of the fish is closest to the heat source.
    IMG_2710
  • Cover the grill and cook until the thickest part of each fillet registers about 135°F on an instant-read thermometer, 20 to 35 minutes depending on the thickness of the fillets. The planks may smoke a bit (this is fine) and will become very aromatic.
    IMG_2713
  • Let the fillets rest on the planks for 5 to 10 minutes before serving.
  • Cut the salmon fillets crosswise into serving portions and transfer to individual plates. Serve with the sauce.

http://www.lynnandruss.com

IMG_2716

By Dawn Yanagihara-Mitchell from Fine Cooking

Grilled Flap Steak and Asparagus with Béarnaise Butter

Flap steak, with the unflatteringly named cut, is similar to skirt and flank in that it comes from the less tender regions of the animal. It is ideal for marinating and needs to be cooked quickly on high heat to medium rare. Often cheaper than more popular cuts, this little underdog of the beef world has a wonderful meaty flavor and fine texture when prepared carefully.

Flap meat is a great choice for Mexican grilled meats, bistro steaks and stir-fries — some Asian meat markets simply call it “stir-fry meat.” And if you can’t find it, other long-fibered cuts such as flank or skirt steak are also lovely in recipes, though cooking times will have to be adjusted.

In the past, we have tried to find flap steak for certain recipes but failed to do so until we came across it at Costco. When grilled right, they’re tender, juicy, take on marinades extremely well, and have a robust beefy flavor that a lot of other cuts lack. That and they’re cheap, as mentioned earlier.

IMG_2689

It’s one of the most versatile of all the inexpensive cuts of beef. It takes great to fast-cooking methods like grilling or searing; is excellent cooked whole and sliced into thin strips; and it can’t be beat cubed and put on skewers. It has a coarse texture that grabs onto marinades and seasonings. It’s even great as a slow-cooked braise, where if comes apart into tender shreds.

Our package of flap meat came in strips that were thicker at one end, so we cut them into sections. This way the thinner portions were tossed on the grill after the thicker pieces so that they wouldn’t get overdone—a definite no-no in our book. Weighing in at 2-pounds, our steak was larger than called for, so I increased the compound butter ingredients just to be safe.

In this simple, yet elegant Grilled Flap Steak and Asparagus with Béarnaise Butter recipe, a compound butter packed with tarragon and shallot mimics the flavors of béarnaise sauce with much less effort. (If you have any left over, which we did, try it on salmon or rice.)

IMG_2667

Ingredients

  • 2 large sprigs fresh tarragon
  • 2 oz. (4 Tbs.) unsalted butter, softened
  • 2 Tbs. minced shallot
  • 1 Tbs. dry white wine or vermouth
  • 1 Tbs. white wine vinegar
  • Kosher salt and freshly ground black pepper
  • 1-1/2 lb. beef flap meat, cut into pieces of even thickness, if necessary
  • 1 bunch asparagus, preferably thick, trimmed
  • 1 Tbs. olive oil

Directions

  • Strip the tarragon leaves from the stems, finely chop the leaves to yield about 2 tsp., and set aside.
  • In an 8-inch skillet, melt 1 Tbs. of the butter over medium-low heat. Add the shallot and tarragon stems, and cook, stirring frequently, until the shallot is translucent, about 2 minutes.
    IMG_2671
  • Add the wine, vinegar, and 1 Tbs. water, increase the heat to medium, and cook until the liquid is mostly evaporated, about 3 minutes. Transfer to a small bowl, remove and discard the tarragon stems, and let cool completely.
  • Add the remaining 3 Tbs. butter, the chopped tarragon, 1/4 tsp. salt, and 1/8 tsp. pepper, and mix with a fork until well combined. Set aside until ready to use.
    IMG_2680
  • Prepare a medium-high (400°F to 475°F) gas or charcoal grill fire. Put the meat and asparagus on separate sides of a large rimmed baking sheet (or similar). Coat with the olive oil, and season generously with salt and pepper.
    IMG_2675
  • Grill the meat, turning every 2 minutes, until cooked to your liking, 6 to 8 minutes for medium (140°F). Transfer to a cutting board, cover loosely with foil, and let rest.
    IMG_2679
  • Meanwhile, grill the asparagus, turning after 1 minute, until charred and tender, 2 to 3 minutes. Transfer to a serving platter.
    IMG_2682
  • Thinly slice the meat against the grain, arrange on the platter with the asparagus, top both with dollops of the butter, and serve.

IMG_2688

IMG_2692

By Jennifer Armentrout from Fine Cooking


Café con Leche

A highly-rated, cozy BYO, Café con Leche serves a fusion of American with South-American and Mediterranean inspired cuisine, and is conveniently located in the heart of Newtown, PA. Daniel and Silvia Lucci have owned the cafe since 1997. Daniel, a craftsman of the cuisine, creates the most incredible dishes, utilizing the freshest and healthiest ingredients.

The name, Café con Leche (coffee with milk in Spanish), refers to the Puerto Rican tradition of serving coffee to household guests. A gesture of friendship, hospitality and community.

It had been many years, too many in fact, since we patronized Café con Leche. Back in the late-90’s, I frequented CCL with friends Brad and Barb, but my first visit with Mr. Russ was around the year 2000—about a year after we started dating—and we’ve been back only a few times since. Why? I have no earthly idea because it is a fabulous quaint little restaurant with incredible food!

IMG_2654
The door on the left leads you down to the restaurant; and the side alleyway brings you out onto State Street.

It’s in the basement of a building with offices above. You enter into a nicely appointed but narrow room with lots of windows and tables against the wall. Then, before proceeding into the regular dining area, you pass the tiny hostess and cashier section. The one disappointment of the night was that the grotto-like main eating space was as drab as I remembered it, with unappealing brown walls, exposed vents and pipes, and dated patterned oilcloths. A little could go a long way in sprucing the place up—just sayin’…

But back to the highlights. A healthy vegan menu entitled “Green Tea” was added in 2013 that offers a large and varied selection of 100% plant-based food menu. And as if that is not enough, CCL gives you even more options with their “Daily Specials” menu highlighting seven additional entrees and four more vegan choices.

IMG_2659

While our bottle of wine was being opened, we decided to split the Grilled Portabella Mushrooms with roasted red peppers, fresh mozzarella, and balsamico as our starter. They were delicious, and a good omen of things to come.

IMG_2663

For our entrées, we both were enticed by the “Daily Specials Menu” with Russ selecting a favorite of his, the Carnitas, barbequed pulled pork with Mexican rice, corn tortillas, and homemade guacamole—which was actually almost as good as mine. It was definitely a healthy portion of pork of which I tasted a small bite, and it was indeed phenomenal!

IMG_2666

The Grilled Wild Alaskan Cod was calling my name which came plated with a pronounced dollop of avocado salsa, and was served with a ginger carrot purée that was insanely flavorful and creamy, and a side of perfectly sautéed vegetables brimming with color.

IMG_2664

If you can overlook the dated decor, you’ll find a pleasant and knowledgeable waitstaff, fabulous food, and good service. We will definitely be back, and this time it won’t be years before we do so!

Island Time

Aloha fellow foodies! You will be dancing a hula over my riff on Hawaiian Garlic Shrimp inspired by the garlic shrimp served from food trucks along Oahu’s North Shore. This savory shrimp dish, found in Fine Cooking by Dabney Gough, is traditionally paired with “two scoops rice,” as they say on the island. But I had other plans…

The recipe sounded appealing and was based on a classic foundation of shrimp, garlic and butter, but was a bit one-dimensional and lacked some pizzaz. So I started thinking of how I could embellish the dish with more color and vegetables. In other words, create a colorful, edible, work of art.

IMG_2603

And what’s more Hawaiian than pineapple? It adds a slight sweet note, a pop of bright yellow, and an added texture. In another burst of ingenuity, I decided to incorporate a large ripe tomato and the remainder of a jar of some gorgeous orange-colored peppadew peppers, which are thin-skinned. (As a substitute, you could also use an orange bell pepper but it would need to be cooked down a bit.) With sliced scallion greens (leftover from the rice pilaf) as garnish, the meal now sang with color and taste!

Admittedly, Russ was hesitant of my new creation, but once he dug in, he was duly impressed. Use your own creativity and customize the ingredients to suit your personal preferences.

Our simple side dish of Lemony Scallion Rice Pilaf was a perfect accompaniment for the Hawaiian shrimp concoction. It’s a bit more involved than simply steaming rice, but it is so worth it. If short on time, it’s not a crime however to ladle the shrimp over plain rice.

IMG_2581

Ingredients

  • 1/2 cup all-purpose flour (we used gluten-free)
  • 2 tsp. sweet paprika
  • Kosher salt
  • 1 lb. extra-jumbo shrimp (16 to 20 per lb.), peeled, deveined, and patted dry
  • 1/2 cup peppadew peppers, cut  into 1/2″ pieces
  • 1 large ripe tomato, cored, seeded and cut into 1/2″ chunks
  • 1 cup fresh pineapple, cut into 1/2″ large dice
  • 3 Tbs. grapeseed or canola oil
  • 8 large cloves garlic, coarsely chopped (about 1/4 cup)
  • 1/2 cup sake or dry white wine
  • 4 Tbs. cold unsalted butter, cut into 4 pieces
  • 1/3 cup chopped fresh cilantro
  • 1 Tbs. fresh lemon juice (or more to taste)

IMG_2585
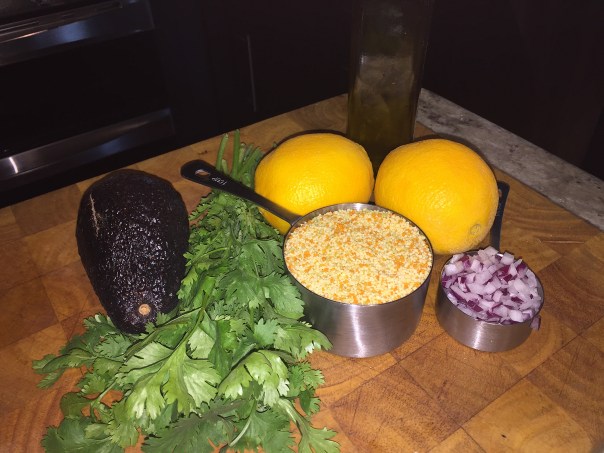
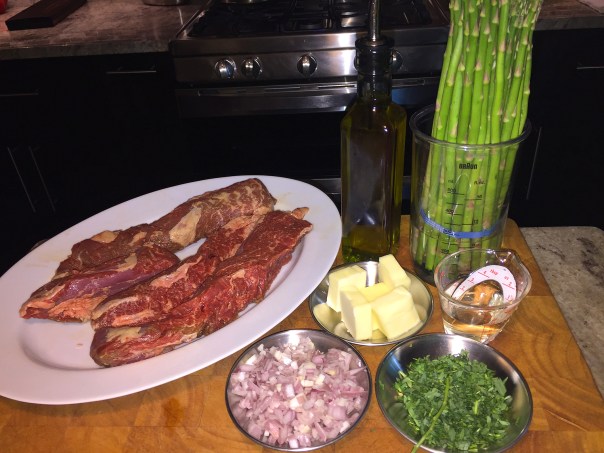
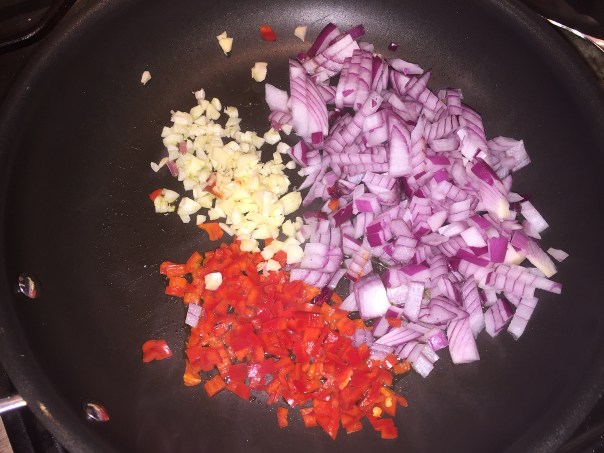
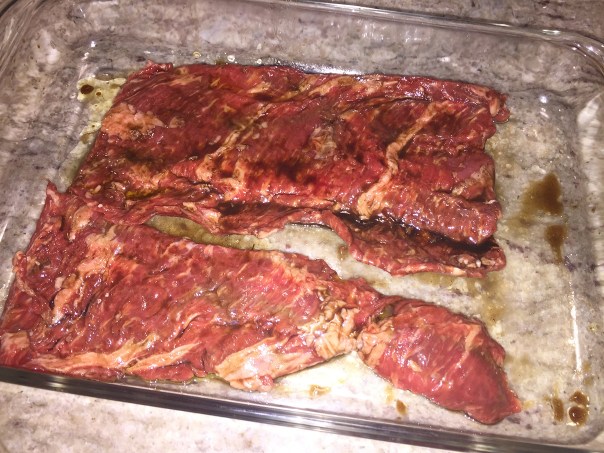
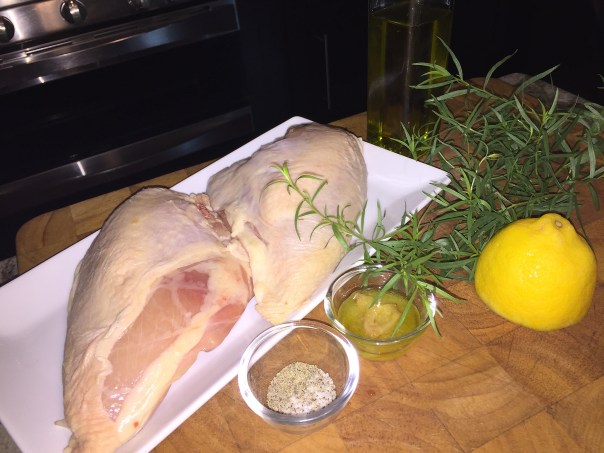
Make sure to prep everything to the right size before starting to cook.

Directions

  • In a shallow bowl, combine the flour, paprika, and 1-1/2 tsp. salt. Lightly dredge the shrimp in the mixture, shaking off the excess; set aside.
    IMG_2592
  • Heat a heavy-duty 12-inch skillet over medium-low heat. Add the oil, garlic, and a pinch of salt. Cook, stirring, until the garlic is tender, about 2 minutes. Using a slotted spoon, remove and reserve the garlic, leaving the oil in the pan.
    IMG_2593
    IMG_2595
  • Turn the heat up to medium high and add the shrimp in a single layer. Cook undisturbed for 2 minutes, then flip and cook until nearly opaque in the center, 1 to 2 minutes more.
    IMG_2597
  • Add the sake and 1/2 tsp. salt and cook, flipping the shrimp once, until the liquid is reduced by half, about 3 minutes. Add the butter and the reserved garlic, and cook, swirling the pan, until the sauce is emulsified.
    IMG_2598
    IMG_2599
  • Remove from the heat. Meanwhile, microwave pepper, tomato, and pineapple chunks on high for one minute. Stir into pan with shrimp, cover and let sit for about 60 seconds to meld the flavors.
    IMG_2601
  • Add the cilantro and lemon juice, and toss to combine. Season to taste with salt and serve over lemony rice pilaf.
    IMG_2603

Lemony Rice Pilaf with Scallions

Ingredients

  • 3 Tbs. unsalted butter
  • 12 scallions, thinly sliced, whites kept separate from greens
  • Kosher salt and freshly ground black pepper
  • 1/4 cup dry white wine
  • 1 cup jasmine rice
  • 1-3/4 cups lower-salt chicken broth, preferably homemade
  • 1 tsp. finely grated lemon zest
  • 2 tsp. fresh lemon juice

Directions

  • Melt the butter in a 3- to 4-quart saucepan over medium heat. Add the scallion whites, 1/4 tsp. salt, and a few grinds of pepper and cook, stirring often, until tender but not browned, about 5 minutes.
    IMG_2586
  • Add the wine and simmer to reduce by half, about 2-3 minutes. Add the rice and cook, stirring often, until it begins to crackle, 2 to 3 minutes. Add the broth, lemon zest, and 1 tsp. salt; bring to a boil. Cover and turn the heat down to low. Cook until the rice is tender and the liquid is absorbed, about 15 minutes.
    IMG_2589
  • Remove from the heat and let sit, covered, for 5 minutes. Fluff the scallion greens and lemon juice into the rice with a fork and serve.

IMG_2605
Almost makes one want to don a hula skirt and toss on a lei…