All posts by LynnHoll

Unknown's avatar

About LynnHoll

I have been an artist and designer all my life incorporating graphic design for websites, gardens, publications, fabrics, interior design and cooking. I am now retired from my professional job, but still create artistic visions in all forms on a daily basis.

It’s Not Your Mother’s Roast Squash

Abhorring most vegetables in my formative years, my memories of finally appreciating acorn squash was in my late-teens when Mom oven-roasted halves inverted in a pan with water, then flipped to brown, adding butter, brown sugar and nutmeg. I still enjoy this approach, but thumbing through my Real Simple magazine, I came across this intriguing alternative, Broiled Sweet and Spicy Squash. You know my penchant for anything spicy, so I wanted to somehow incorporate this acorn squash recipe into one of the upcoming weeknight meals.

IMG_3839

However, after reading the preparation, I decided to roast the squash slices in a 450 degree oven for 30 minutes—15 minutes per side—as opposed to broiling them for 10 minutes on one side only. My reasoning? First off, I’m not fond of gas oven broilers, they are uneven at best.

With that method, I visualized charred exteriors on one side with uncooked interiors. Plus, basting only one side of each slice with the tasty sauce? Not on my watch! With those flavors, I wanted to maximize the area getting happy. In addition, they didn’t mention lining the baking sheet with parchment, and as experience has taught me, this is a good idea.

Have you ever tried to cut thin slices from thick-skinned acorn squash? Not an easy task, but I managed. I first got out the meat cleaver, but visions of chopping off my fingers made me think otherwise. So with a large, sharp chef’s knife I managed to do a pretty decent job.

Intuition told me the amount of oil in the sauce was too much, so I decreased the amount slightly, using only three tablespoons instead of four. The ratio of spicy to sweet was balanced without one flavor overpowering the other, but you may want to adjust to your own personal preference.

After 30 minutes the squash was nicely caramelized on both sides, but the rest of my dinner wouldn’t be ready for about another 10 minutes, so I just turned off the oven, leaving the squash inside. The extra time added more caramelization resulting in perfectly tender yummy goodness.

IMG_3827
Slices of raw acorn squash.

IMG_3831
Slices are arranged on a rimmed baking sheet lined with parchment and basted with the sweet and spicy sauce.

IMG_3834
The caramelized squash after roasting.

Roasted Sweet N Spicy Squash

Ingredients

  • 1 small acorn squash, scrubbed (about 2 1/2 pounds)
  • 2 Tbsp. olive oil
  • 2 Tbsp. maple syrup
  • 1 Tbsp Sriracha or hot sauce
  • Kosher salt and black pepper
  • 1/3 cup cilantro

Directions

  1. PREHEAT oven to 450 degrees.
  2. CUT the top crown off the squash and scoop out the seeds.
  3. CUT into thin 3/4″ rings and spread in an even layer on a rimmed baking sheet, lined with parchment.
  4. COMBINE the oil, syrup and Sriracha and brush over the squash. Season with 1 teaspoon salt and 1/2 teaspoon pepper.
  5. ROAST about 15 minutes per side. Once turned, baste with more sauce.
  6. BRUSH any leftover sauce onto the squash slices. Sprinkle with the cilantro and serve warm.

IMG_3838

This meal is not quick, but it is 150% worth it.

A culinary trip back to Spain with Catalan-Style Beef Stew with Mushrooms. Supremely beefy and complexly flavored, Spanish beef stew is a little different than its American counterpart. It starts with a sofrito, a slow-cooked mixture of onions, spices, and herbs that builds a flavor-packed base. But plan on making this impressive dinner when you have at least four hours to spare. (You can prepare several steps a few days ahead of time, see note below.)

IMG_3794

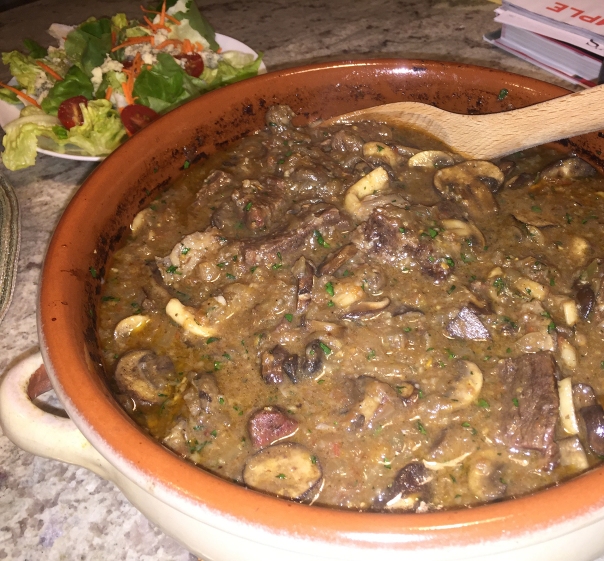
To produce a beefier-tasting stew, swap out the normal chuck-eye roast for boneless beef short ribs. When finishing the stew, incorporate a mixture of toasted bread*, toasted almonds, garlic, and parsley. This mixture, called a picada, brightens the stew’s flavor and thickens the broth.

Luckily this is one of those dishes that can continue to cook at a low temp beyond the allotted time. Shortly before our meal would have been ready to serve, we got a phone call from the West Coast, and just as that was ending another call from Michigan, both important and lengthy. After the calls, a neighbor stopped by to discuss their intended kitchen updates and wanted to see what we had already changed—which then turned into a discussion on vacation travels… All the while the tantalizing aromas are wafting through the house…

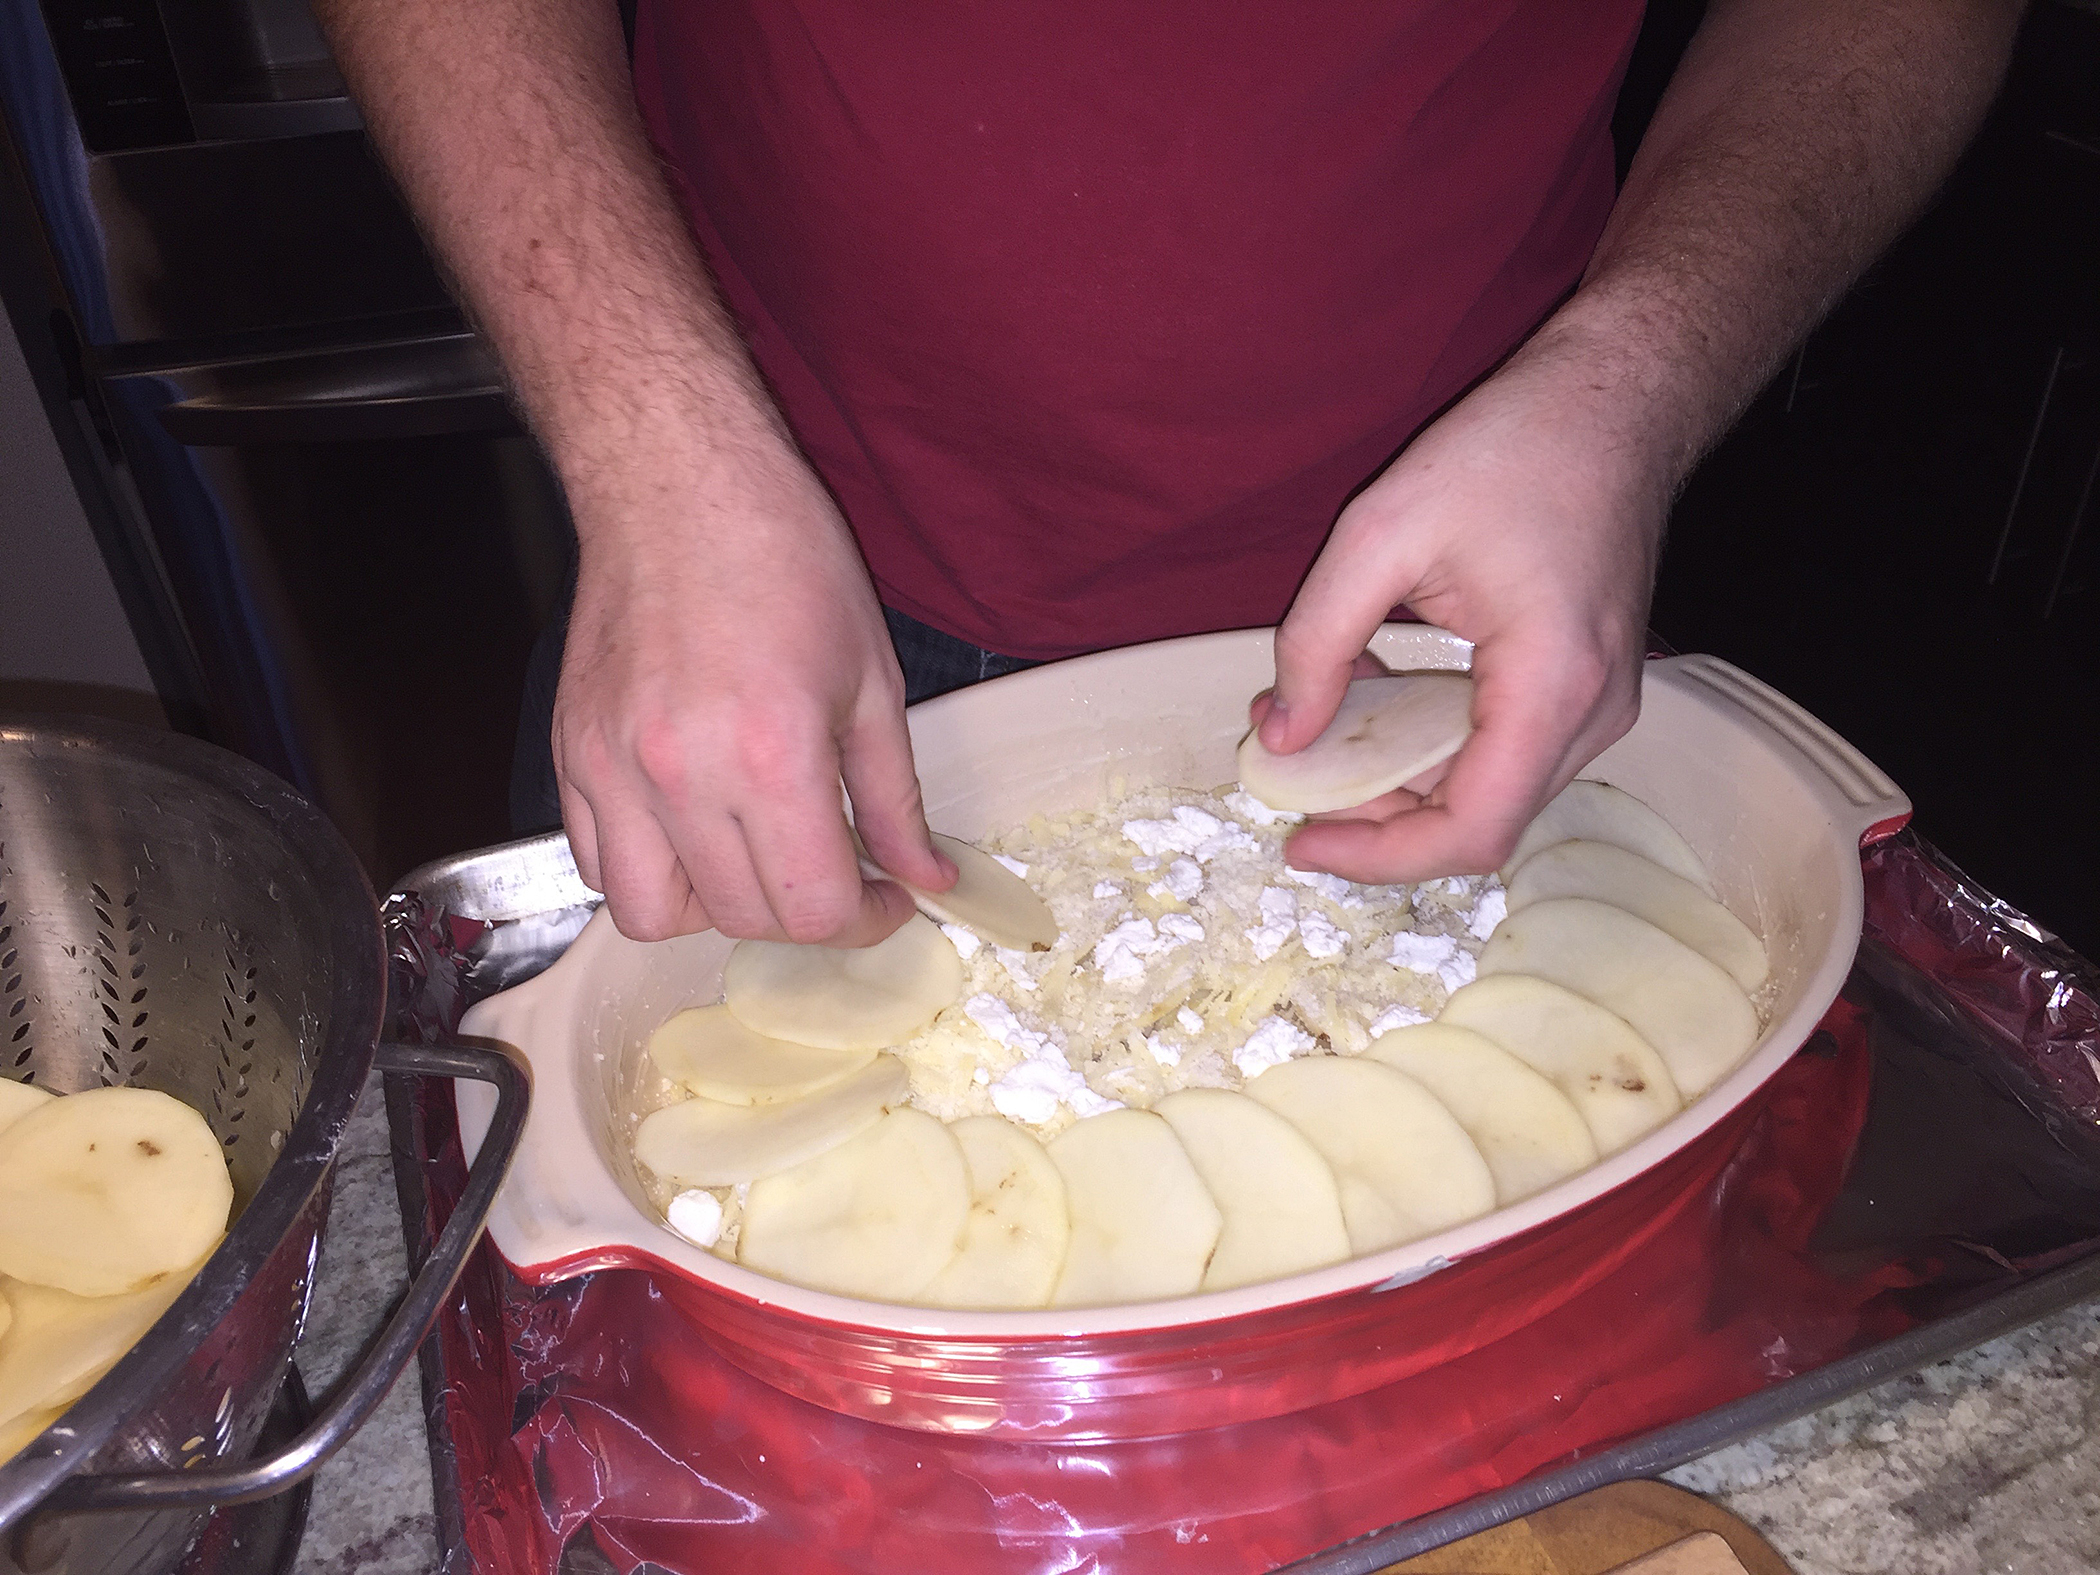
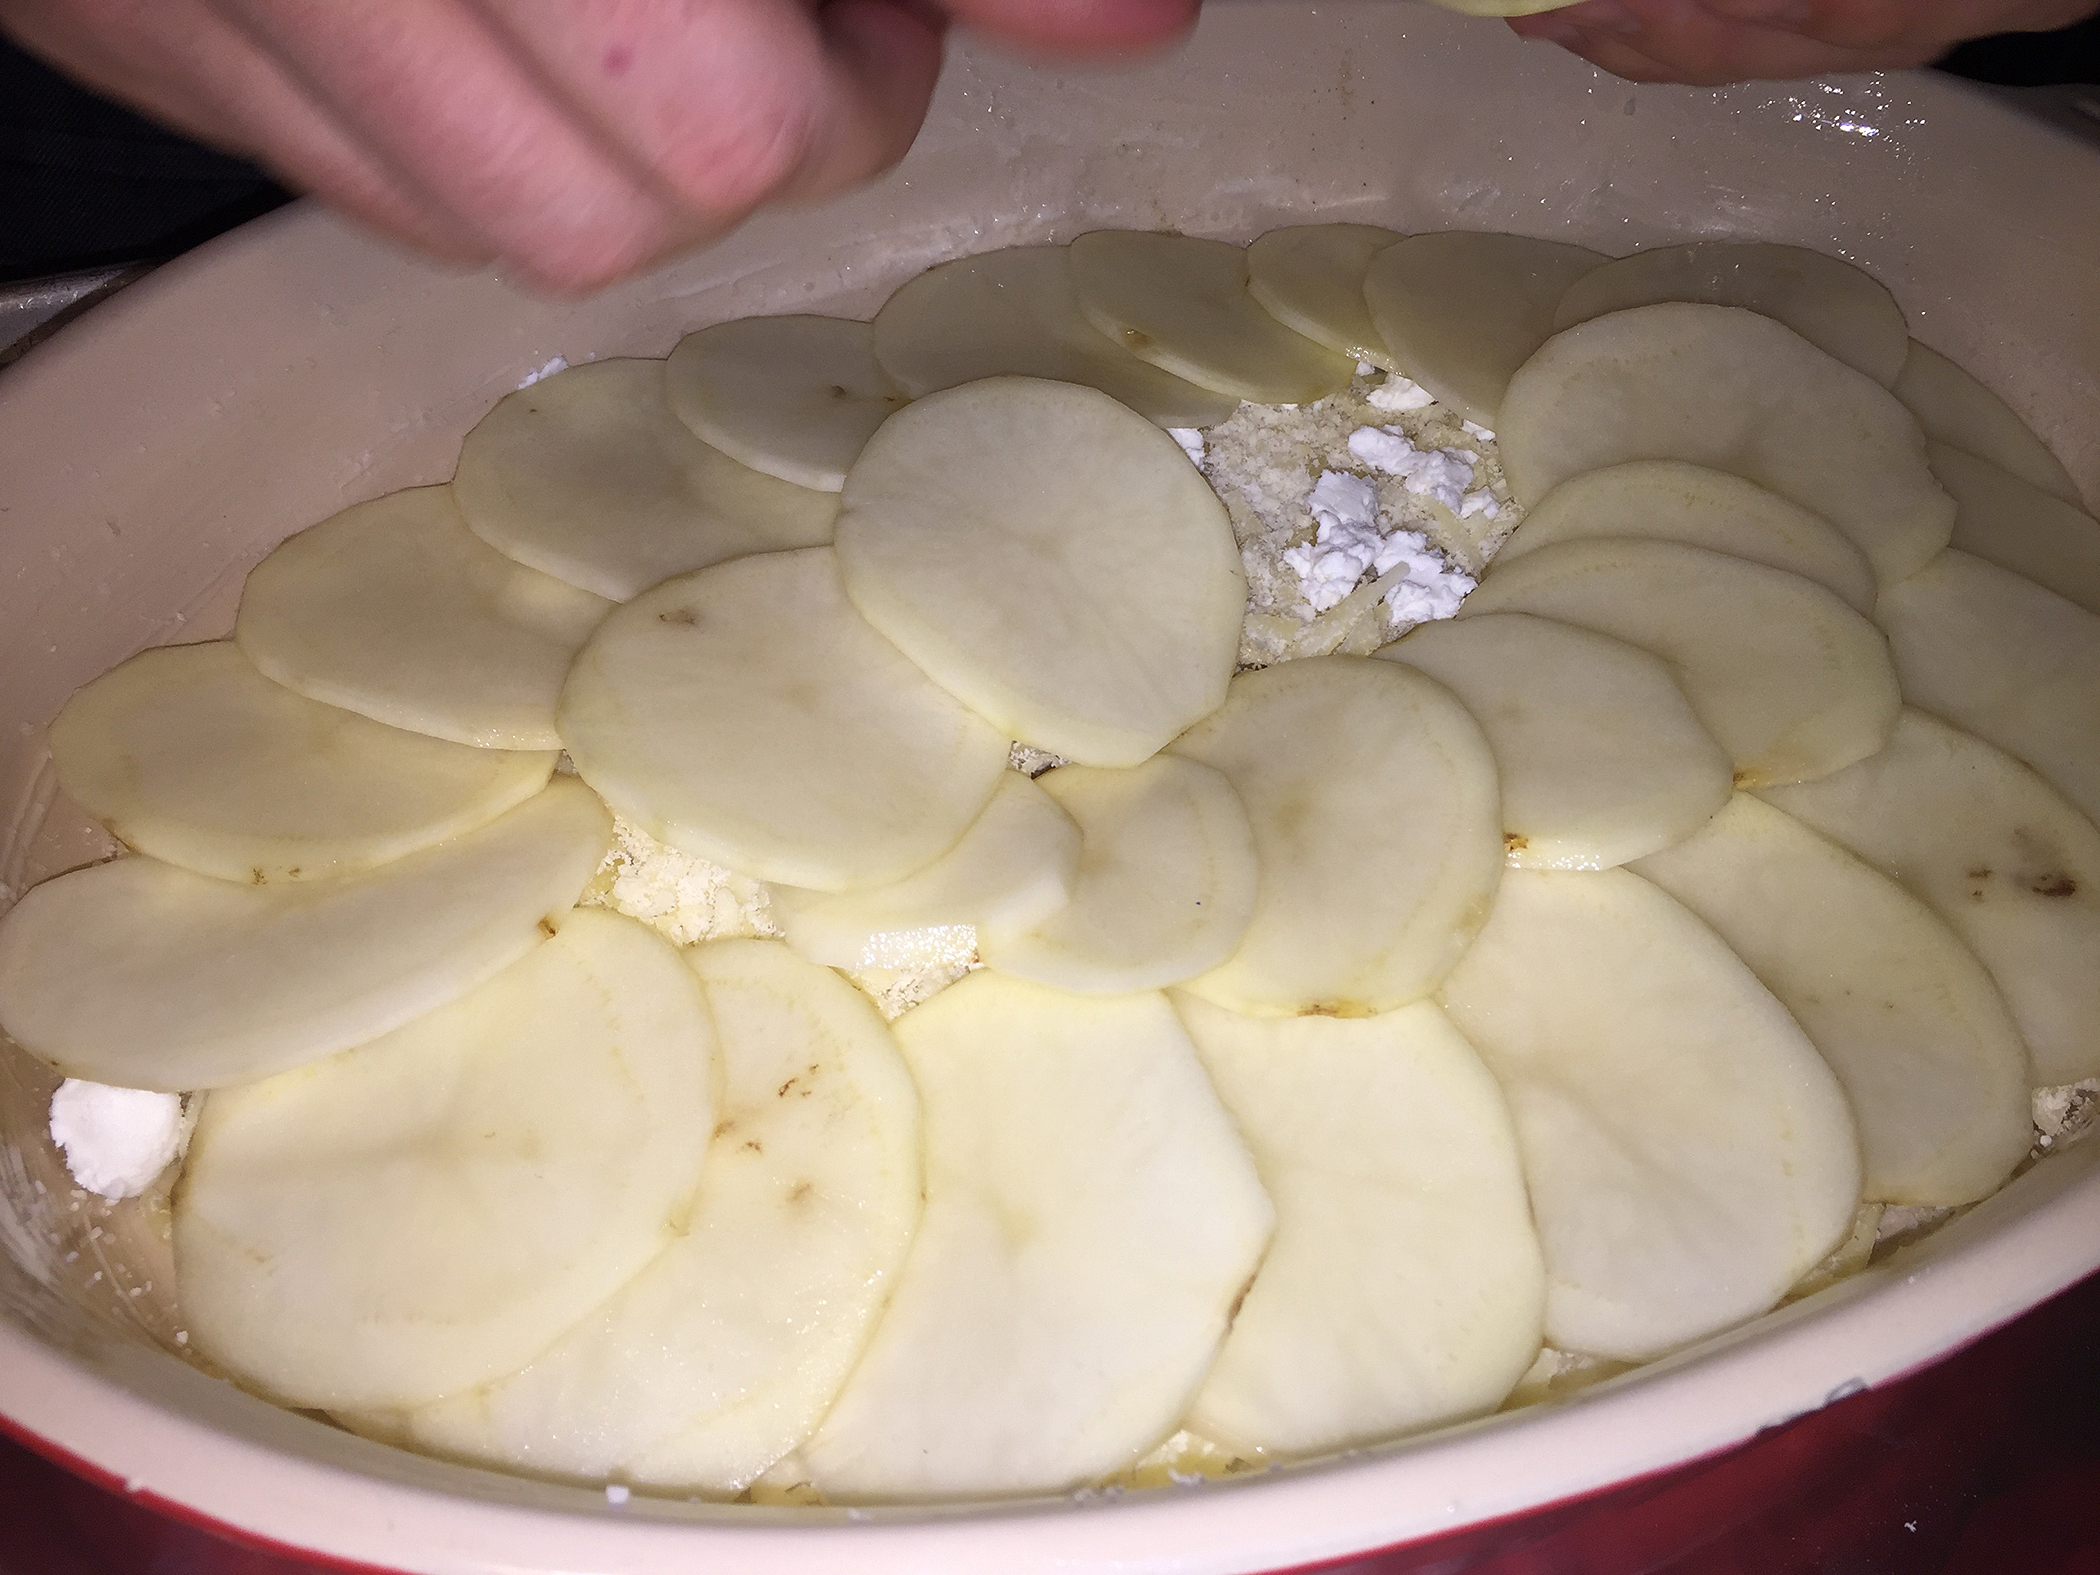
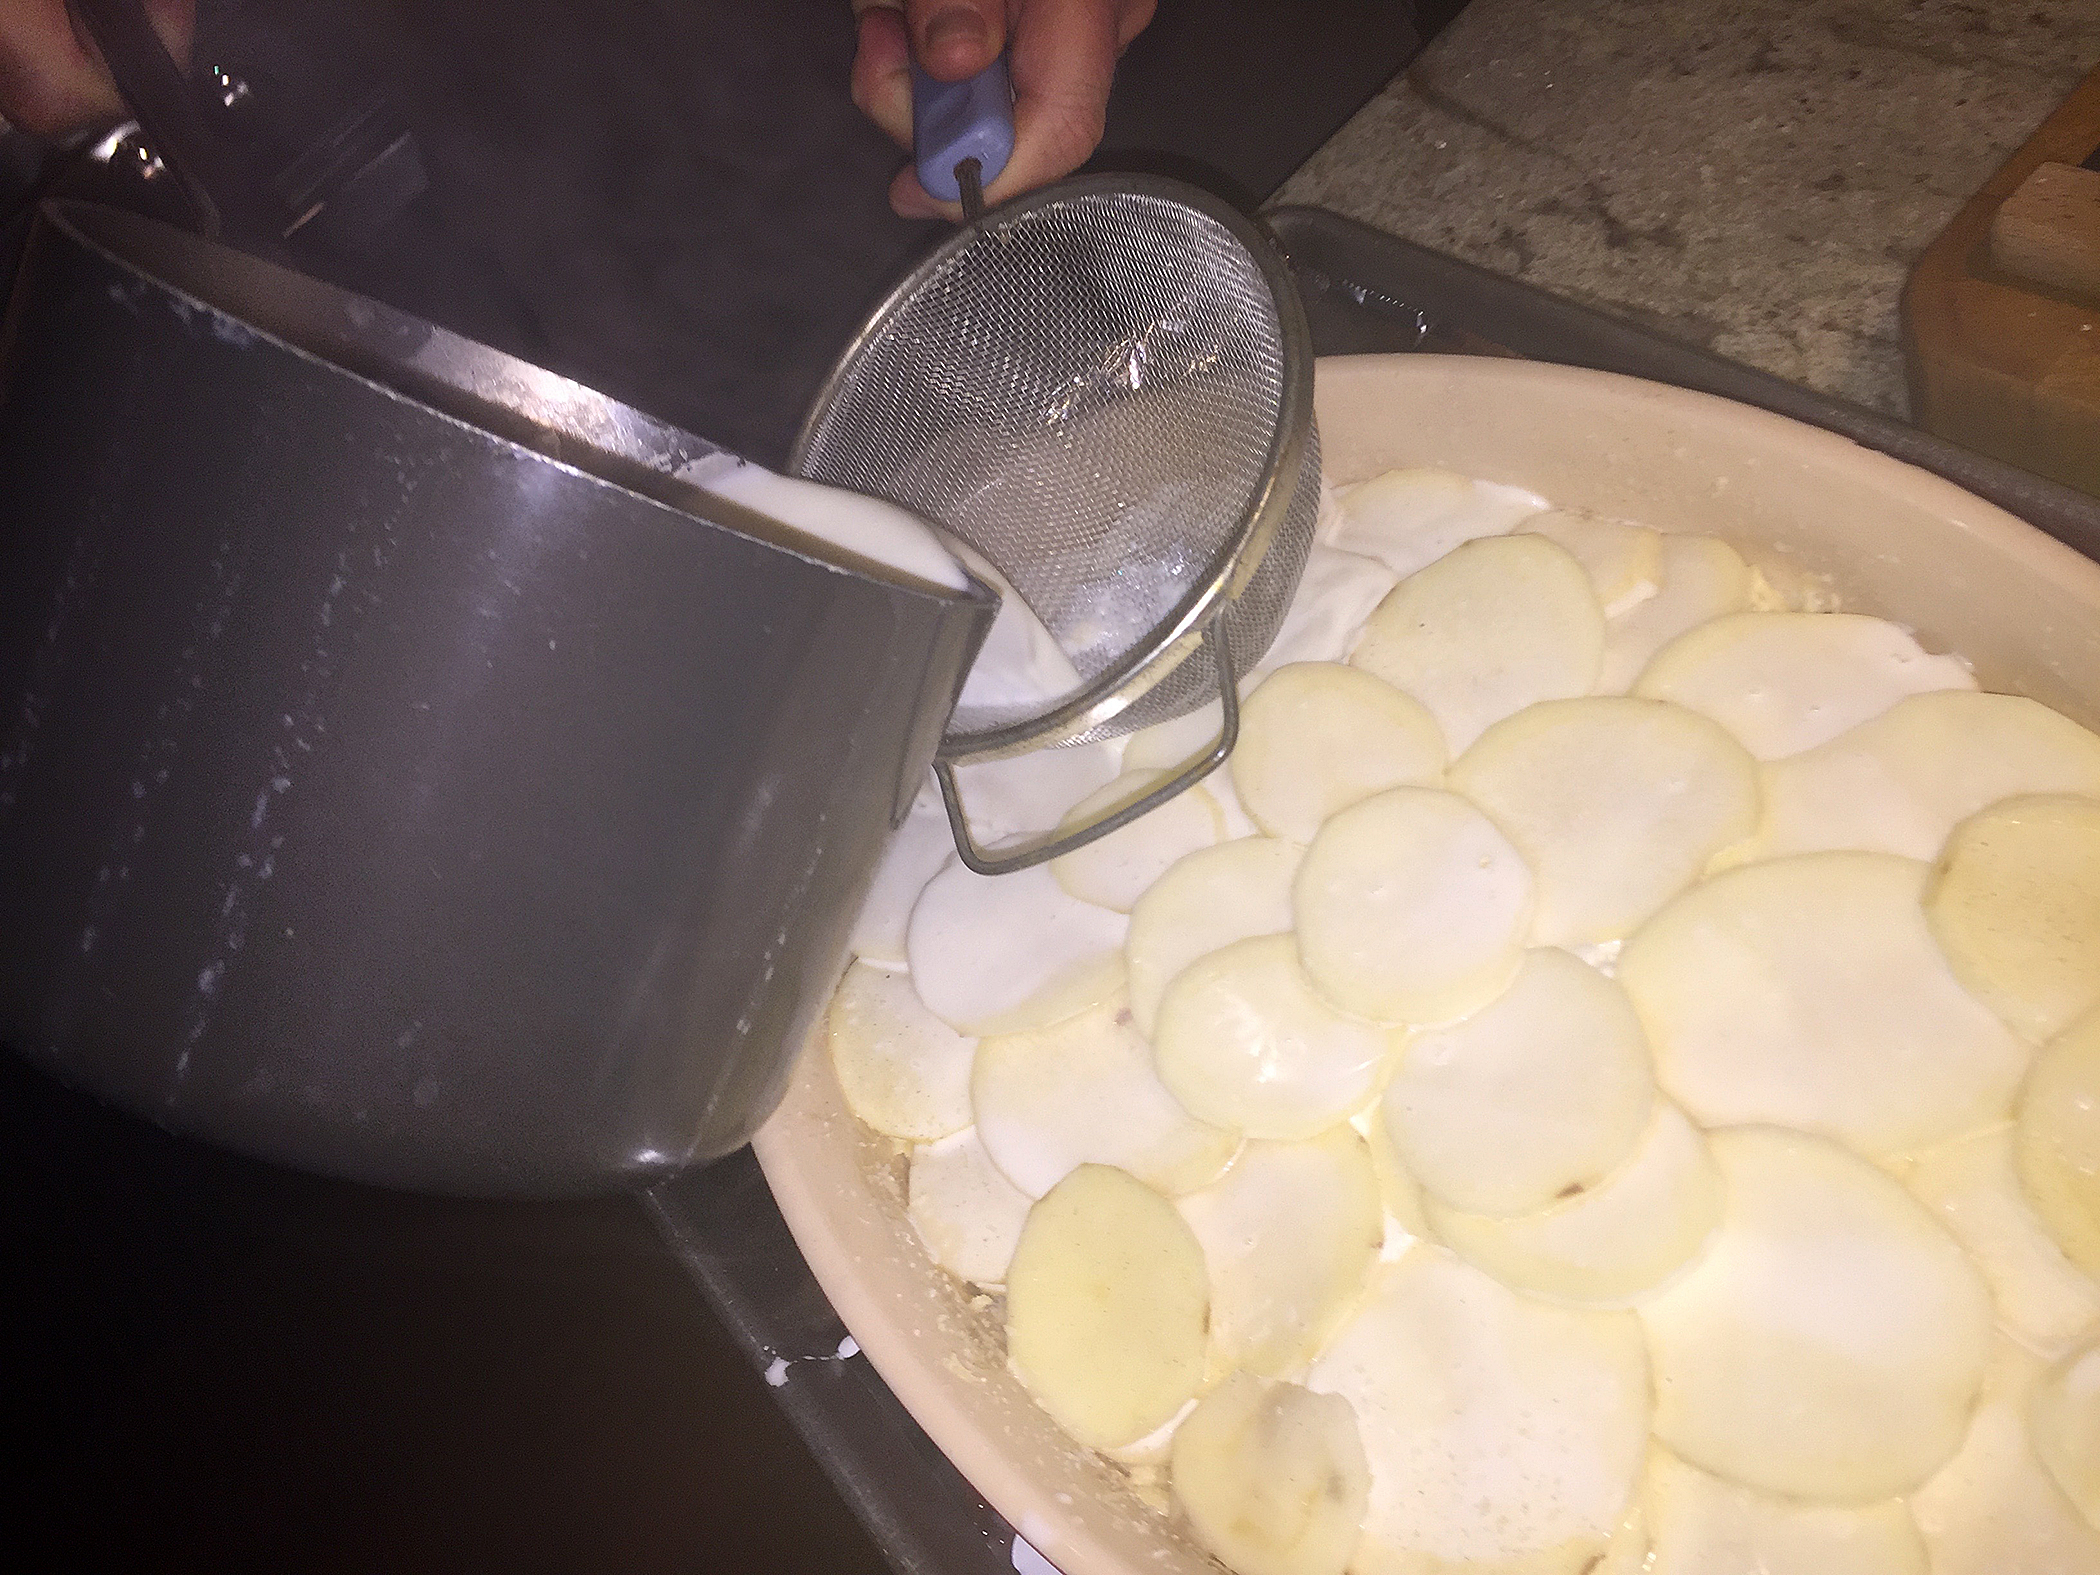
Finally it was 8:30 and we couldn’t wait any longer. And let me tell you, it certainly was worth the wait! Lots leftover too for another quick weeknight meal. Although we needed to get a few more potatoes to make additional garlicky mashed as a foundation for the stew. We only had one Russett potato for the original meal which didn’t provide for any leftovers.

IMG_3751

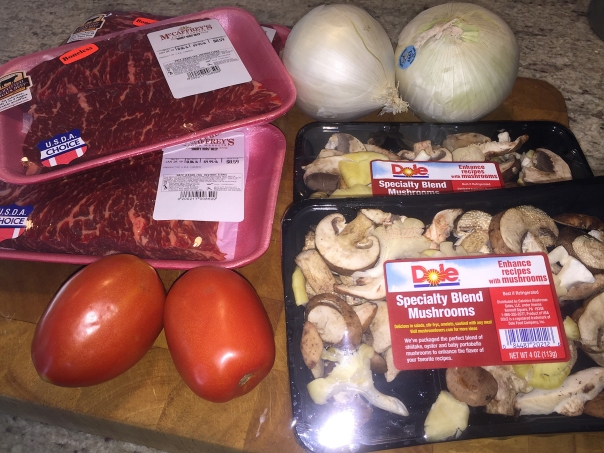
As far as the plum tomatoes, buying them in the dead of winter on the East Coast—not a good idea. The two we bought, while robust in size, were anemic in color and taste. In hindsight, since the plums get grated, we should just have used crushed canned tomatoes which would have provided a richer color and more depth of flavor.

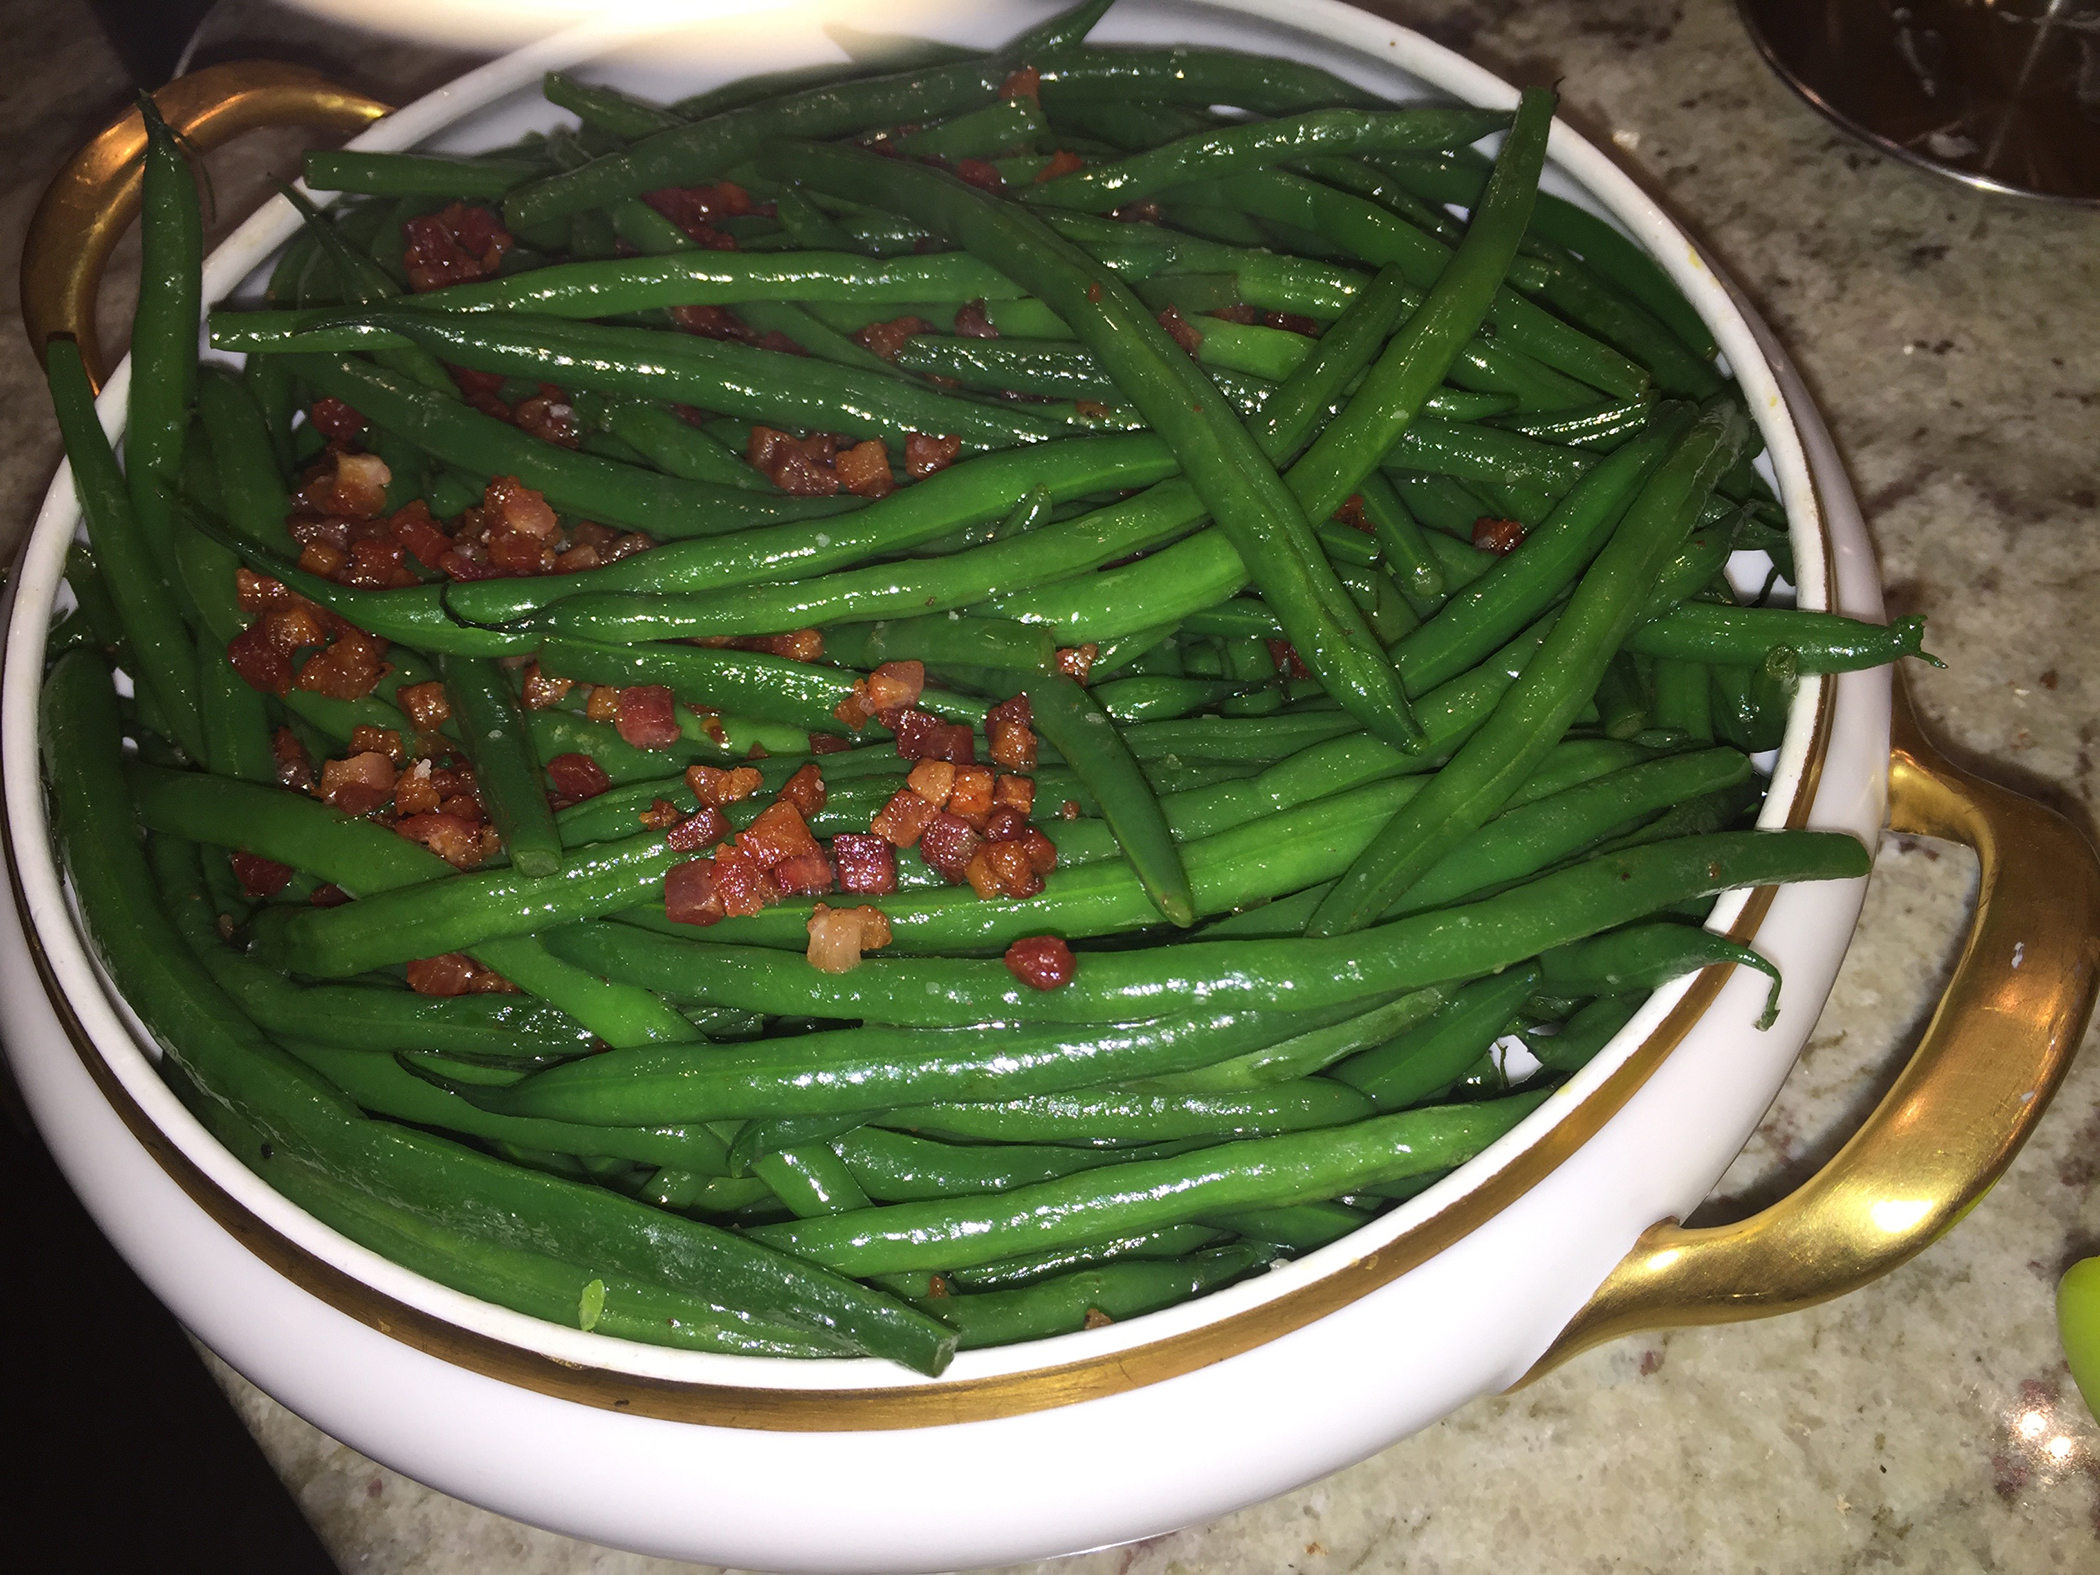
Instead of buying whole blanched almonds, we had toasted slivered almonds already on hand in the pantry. And the grocery store didn’t stock loose oyster mushrooms so we bought 8 ounces of “specialty blend” which included oysters, and we upped the mushroom ante by including another 6 or so ounces of white button shrooms that we wanted to use up—in our book, extra mushrooms is a good thing!

IMG_3788
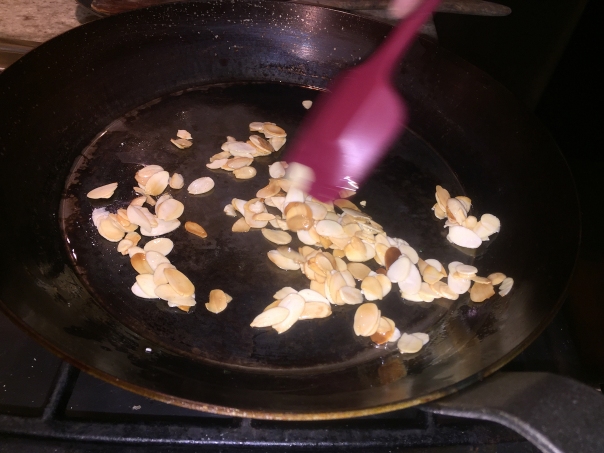
Slivered almonds are toasted in a carbon steel skillet.

IMG_3789
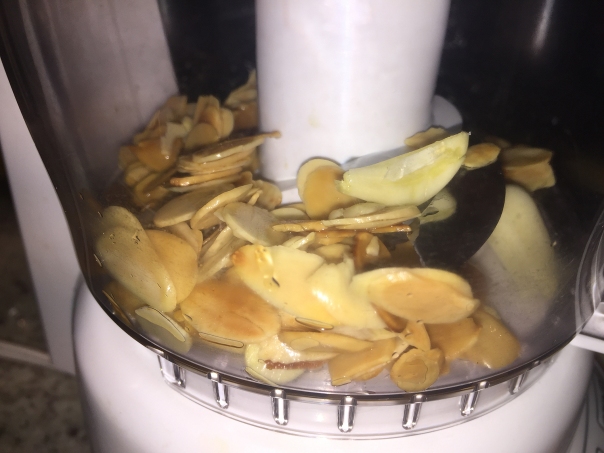
The toasted almonds and garlic are minced in a mini food processor.

*We substituted gluten-free bread crumbs in place of the white sandwich bread to address Russ’s wheat-free diet.

INSTRUCTIONS

STEW

tablespoons olive oil
large onions, chopped fine
½ teaspoon sugar
Kosher salt and pepper
plum tomatoes, halved lengthwise, pulp grated on large holes of box grater, and skins discarded
teaspoon smoked paprika
bay leaf
1 ½ cups dry white wine
1 ½ cups water
large sprig fresh thyme
¼ teaspoon ground cinnamon
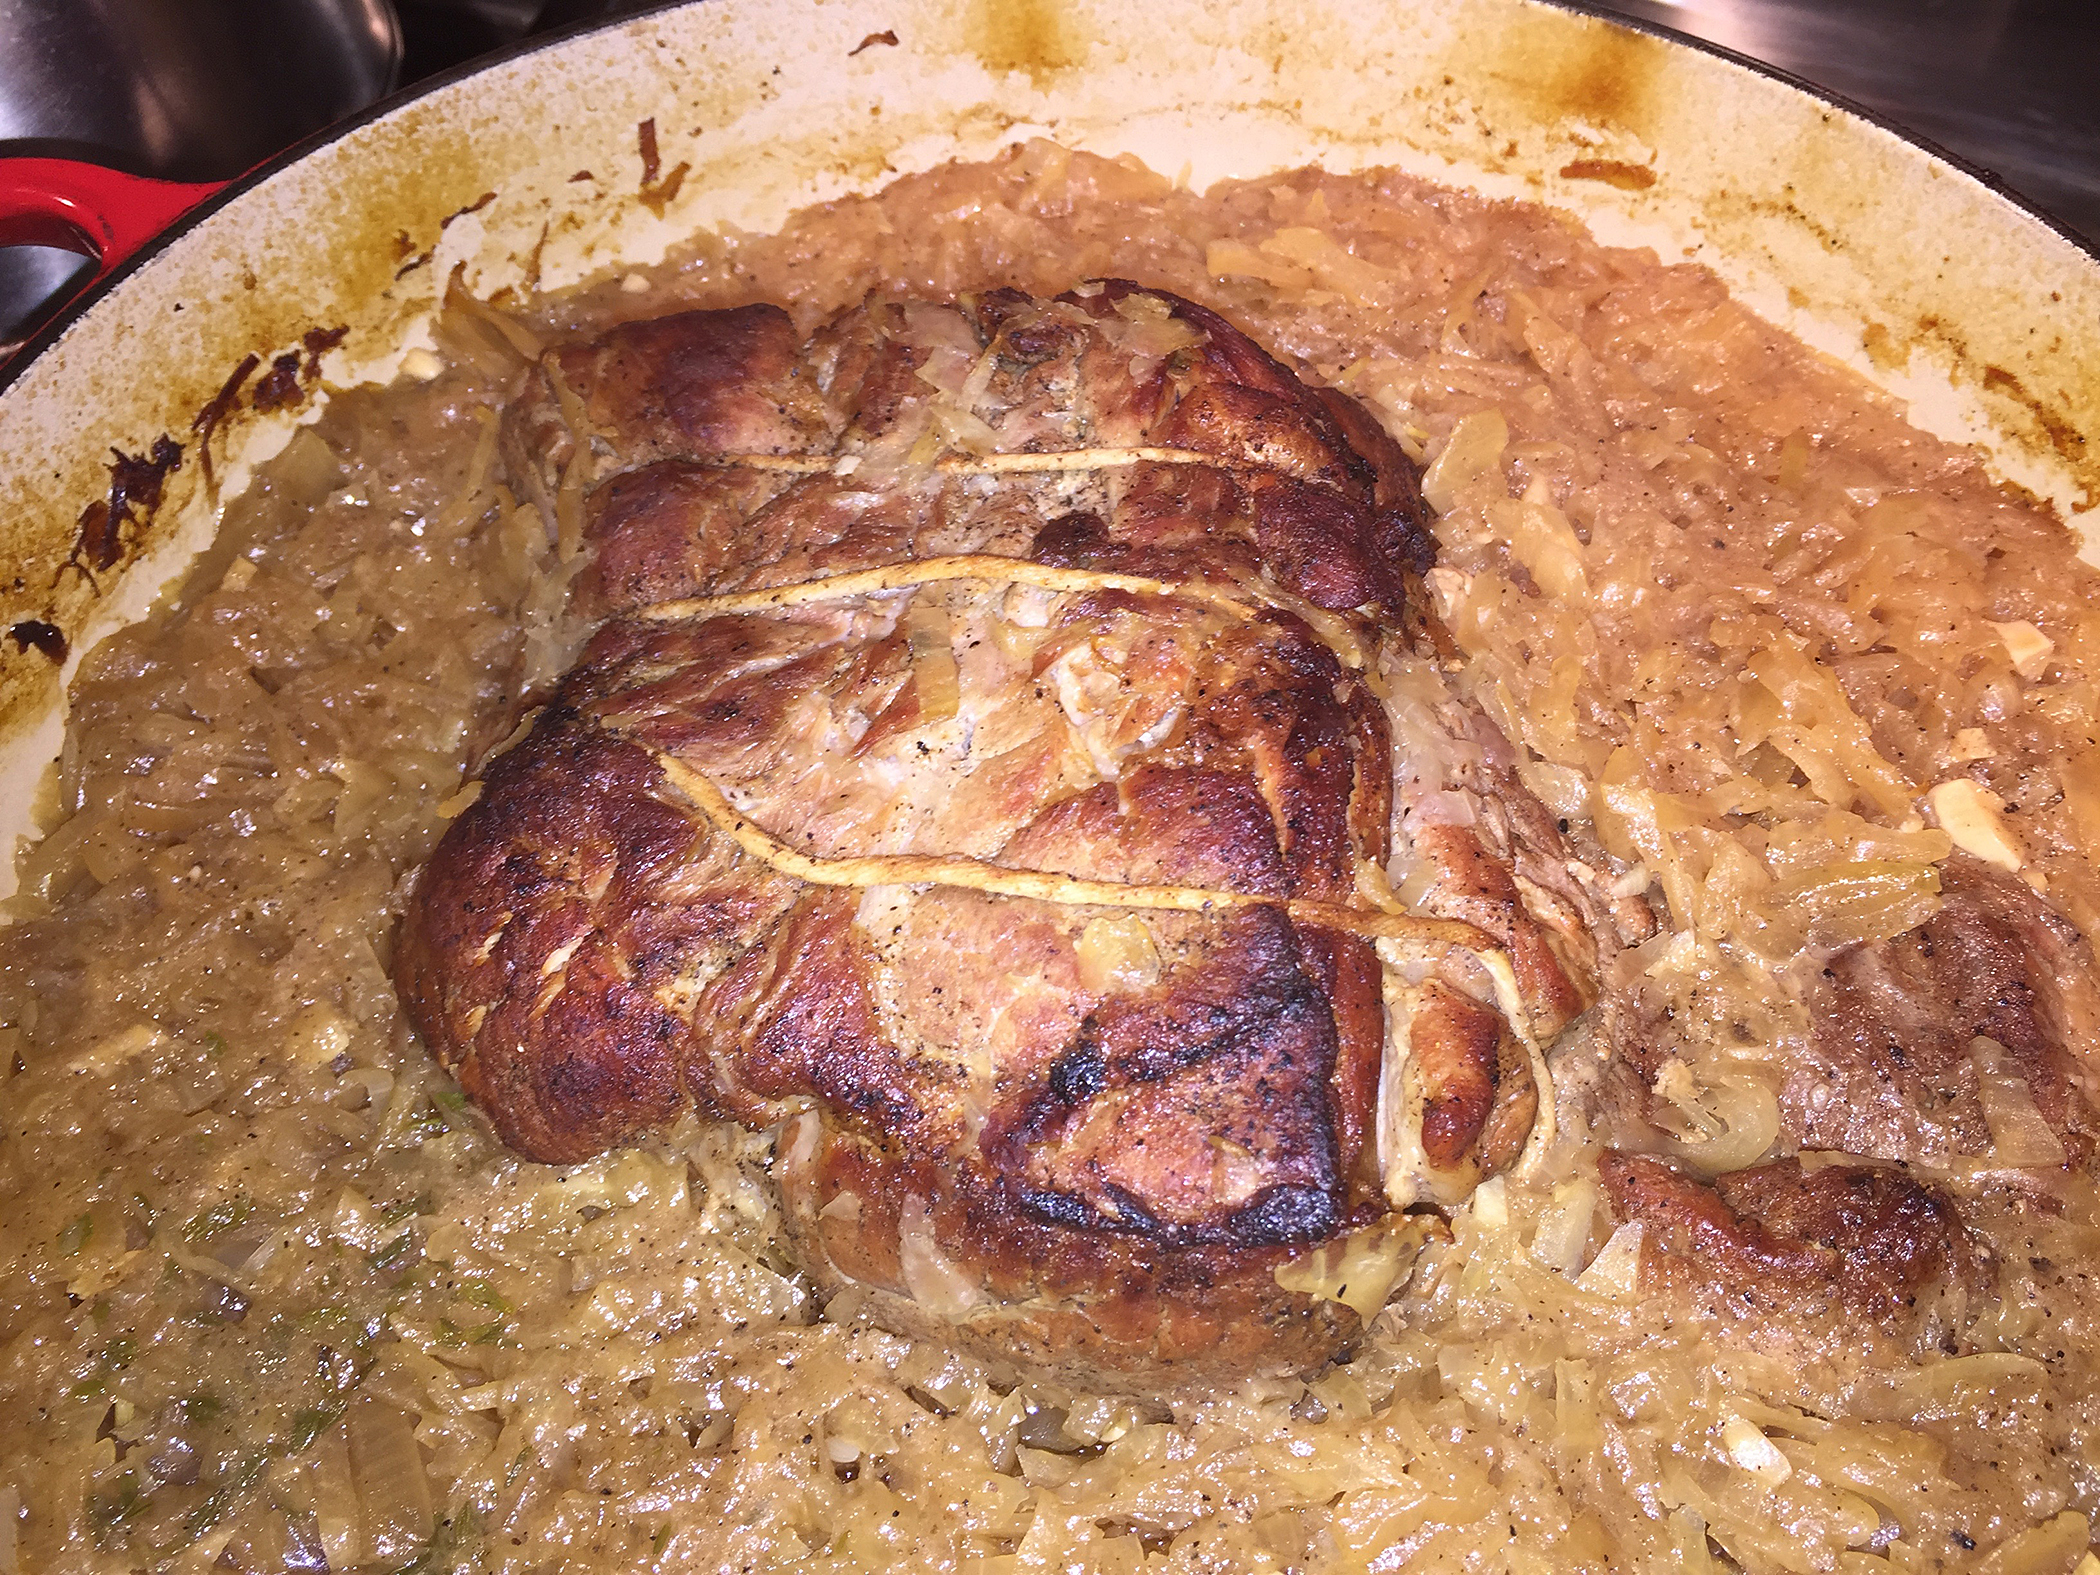
2 ½ pounds boneless beef short ribs, trimmed and cut into 2-inch cubes

IMG_3790
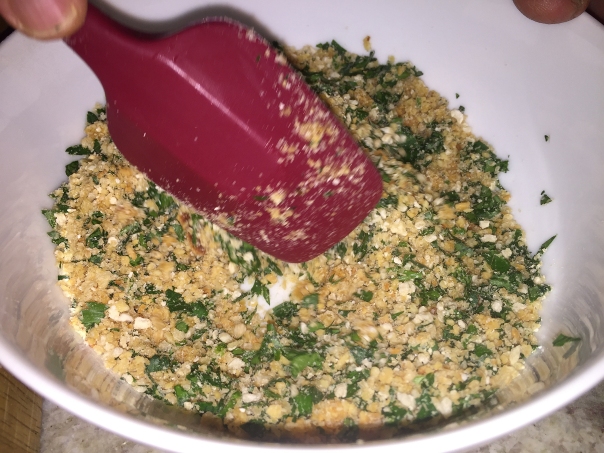
The chopped almonds and garlic are added to the bread crumbs and chopped parsely.

PICADA

¼ cup whole blanched almonds
tablespoons olive oil
slice hearty white sandwich bread, crust removed, torn into 1-inch pieces
garlic cloves, peeled
tablespoons minced fresh parsley
½ pound oyster mushrooms, trimmed
teaspoon sherry vinegar
IMG_3756IMG_3755
The sofrito mixture before it is added to the cooked onions.IMG_3778
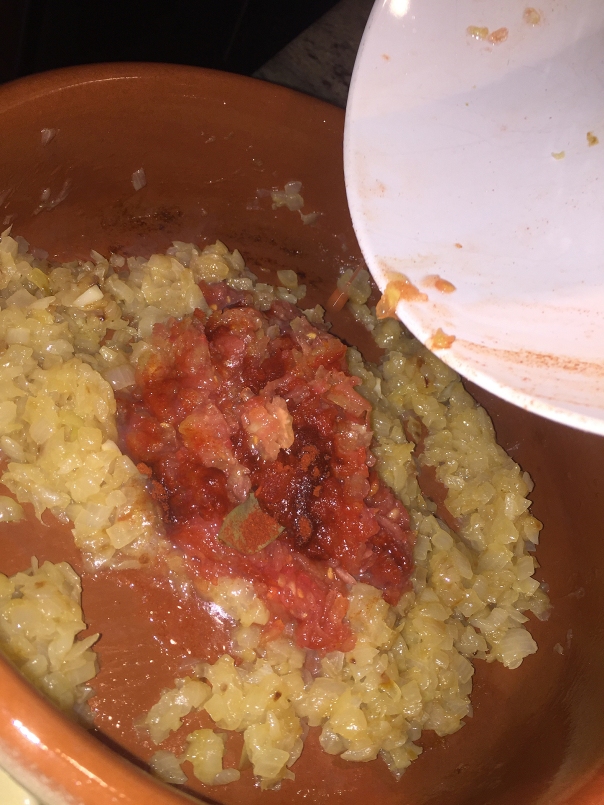
Adding the sofrito mixture to the caramelized onions.

IMG_3779
The sofrito before the wine, water, thyme and cinnamon are added.

IMG_3782
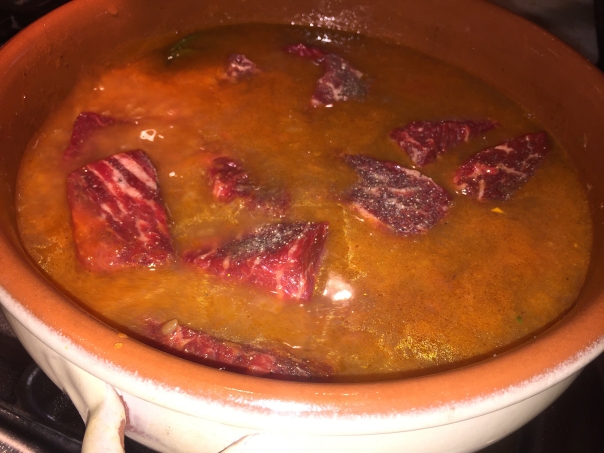
The cubed short ribs are added to the liquid before going into the oven.

IMG_3791
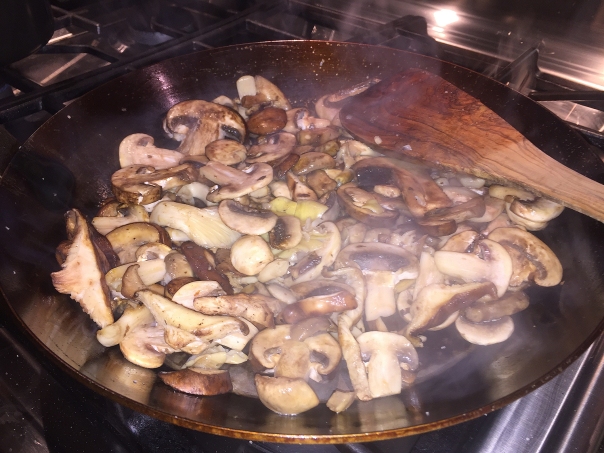
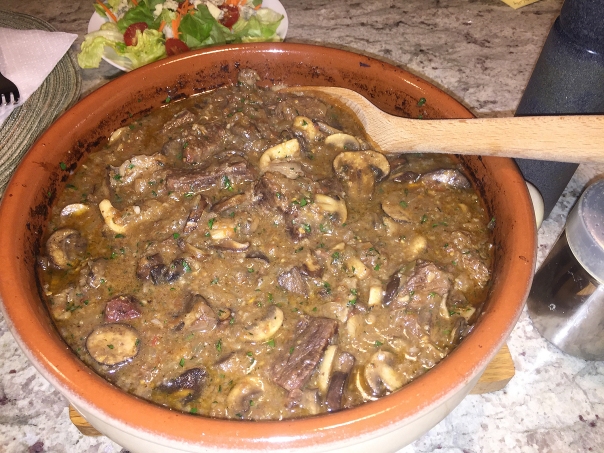
We used more than the 1/2-pound of mushrooms since we had them on hand. Once the stew is cooked, the mushrooms and picada get added.

INSTRUCTIONS

Remove the woody base of the oyster mushroom stem before cooking. An equal amount of quartered button mushrooms may be substituted for the oyster mushrooms. Or do what we did and use a mixture of oyster, shiitake and portobellos. Serve the stew with boiled or mashed potatoes or rice.

  1. FOR THE STEW: Adjust oven rack to middle position and heat oven to 300 degrees. Heat oil in Dutch oven (we used a clay Cazuela) over medium-low heat until shimmering. Add onions, sugar, and ½ teaspoon salt; cook, stirring often, until onions are deeply caramelized, 30 to 40 minutes.
  2. Add tomatoes, smoked paprika, and bay leaf; cook, stirring often, until darkened and thick, 5 to 10 minutes.
  3. Add wine, water, thyme, and cinnamon to pot, scraping up any browned bits. Season beef with 1½ teaspoons salt and ½ teaspoon pepper and add to pot. Increase heat to high and bring to simmer. Transfer to oven and cook, uncovered.
  4. After 1 hour stir stew to redistribute meat, return to oven, and continue to cook uncovered until meat is tender, 1½ to 2 hours longer.
  5. FOR THE PICADA: While stew is in oven, heat almonds and 1 tablespoon oil in 10-inch skillet over medium heat; cook, stirring often, until almonds are golden brown, 3 to 6 minutes. Using slotted spoon, transfer almonds to food processor.
  6. Return now-empty skillet to medium heat, add bread, and cook, stirring often, until toasted, 2 to 4 minutes; transfer to food processor with almonds. Add garlic and process until mixture is finely ground, about 20 seconds, scraping bowl as needed. Transfer mixture to bowl, stir in parsley, and set aside
  7. Return now-empty skillet to medium heat. Heat remaining 1 tablespoon oil until shimmering. Add mushrooms and ½ teaspoon salt; cook, stirring often, until tender, 5 to 7 minutes. Transfer to bowl and set aside.
  8. Remove bay leaf. Stir picada, mushrooms, and vinegar into stew. Season with salt and pepper. Serve.
TO MAKE AHEAD: Follow recipe through step 2 and refrigerate for up to 3 days. To serve, add 1 cup water and reheat over medium heat. Proceed with step 3.
IMG_3795
Recipe adapted from Cooks Illustrated

You’re Gonna Want to Bookmark This One

Stir-Fried Chili Scallops with Baby Bok Choy, a quick and easy meal for weeknights, this is a simple, elegant stir-fry; also perfect for entertaining—just add jasmine rice and a good white wine.

IMG_3710

Scallops have a delicate flavor that is complemented by strong seasonings; in this recipe chili bean sauce, ginger, and garlic bring that flavor to life. We made a switch-a-roo with the sea scallops by using the large shrimp we had on hand, and the spices complimented the shellfish perfectly. In fact, we would definitely make this again with shrimp.

The recipe calls for small baby bok choy, which may sound redundant, but baby bok choy can range in length from 3 to 8 inches. The vegetables are stir-fried for only 2 minutes, so you must choose the very small, tender, truly “baby” or dwarf bok choy. If you can’t find the tiny ones, go ahead and use the larger baby bok choy, you’ll just have to stir-fry it a few minutes longer.

About those shrimp. Russ prefers to buy them with their heads on so that he can have the their noggins and shells to make seafood stock sometime in the future. (And now that he has his pressure cooker, he’ll be making a lot more stock, yeah me!) But guess who had the pleasure—or not—of decapitating those little suckers? Since I get home from work earlier than Russ, I usually play the role of sous chef prepping the night’s meal. Decapitization—NOT my most favorite chore, by far…

But we cannot wait to make this dish again!

IMG_3697
Many of the prepared ingredients—notice the heads still on the shrimp…

Ingredients

  • 12 oz. medium fresh sea scallops (or large shrimp)
  • 2 Tbs. chicken broth
  • 1 Tbs. chili bean sauce
  • 2 tsp. soy sauce
  • 1/2 tsp. cornstarch
  • 2 Tbs. peanut or vegetable oil
  • 1 Tbs. minced ginger
  • 2 tsp. minced garlic
  • 1/2 tsp. salt
  • 8 small baby bok choy, trimmed and halved length-wise (about 4 cups)
  • 1 large red bell pepper, cut into 1/2-inch-wide strips (about 2 cups)
  • 1/3 cup chopped scallions

IMG_3700
Stir-frying the split shrimp with minced garlic and ginger.

IMG_3703
After the shrimp are removed, the baby bok choy and red pepper get their turn in the wok.

IMG_3709
Reintroduce the shrimp or scallops back into the wok with the vegetables.

Directions (substitute shrimp in place of scallops if desired) 

  1. Rinse the scallops under cold water, and set on paper towels. With more paper towels, pat the scallops dry. Cut the scallops (or shrimp) horizontally in half so that all the pieces are about 1/2 inch thick.
  2. In a small bowl combine the broth, chili bean sauce, soy sauce, and cornstarch.
  3. Heat a 14-inch flat-bottomed wok or 12-inch skillet over high heat until a bead of water vaporizes within 1 to 2 seconds of contact. Swirl in 1 Tbs. of the oil, add the ginger and garlic, then, using a metal spatula, stir-fry 10 seconds or until the aromatics are fragrant. Push the aromatics to the sides of the wok.
  4. Carefully add the scallops and spread them evenly in one layer in the wok. Cook undisturbed 1 minute, letting the scallops begin to sear. Sprinkle on 1/4 tsp. of the salt and stir-fry 30 seconds or until the scallops are opaque but not cooked through. Transfer the scallops and aromatics to a plate.
  5. Swirl the remaining 1 Tbs. oil into the wok, add the bok choy and bell peppers, sprinkle on the remaining 1/4 tsp. salt, and stir-fry 1 minute or until the bok choy just begins to turn bright green. (We had to stir-fry ours for more like 4 minutes because they weren’t the “baby-baby” size.)
  6. Return the scallops with any juices that have accumulated to the wok. Restir the broth mixture, swirl it into the wok, and stir-fry 1 minute or until the scallops are just cooked. Stir in the scallions.
  7. Serve over jasmine rice.

Recipe by Grace Young

IMG_3712

It’s Time That Broccoli Rabe Gets Some Love

Broccoli rabe not one of your favorites because of the bitterness and somber color? Well this recipe, Broccoli Rabe with Sun-dried Tomatoes and Pine Nuts, is sure to change your mind. It did mine… Check it out under the Bits N Pieces tab…

IMG_3696

Your One Way Ticket Out of Boring Chicken Snoozeville

You’ll adore this dish, Chinese Vietnamese Lemongrass Chicken, where the chicken is mellow, with a balance of sweet, spicy, garlicky, and salty flavors laced with an undertone of lemongrass. No particular flavor is overpowering, unless of course, like me, you have a heavy hand with the chiles. Long a fan of fresh lemongrass, whenever I see a recipe calling for this ingredient, I am immediately drawn to it. And since we’ve been trying a new recipe each week from Russ’ new cookbook Stir-Frying to the Sky’s Edge, by chef author Grace Young, this one stopped me in my tracks, or more precisely, stopped me from turning the pages.

lemongrass.stalks
When buying fresh lemongrass, select plump stalks with no signs of dryness—sometimes easier said than done—your best bet is an Asian market. Make sure to peel away the tough outer layers of the stalks until you reach the tender portion, which is the most flavorful part.

In retrospect, since we prefer lots of veggies in our stir-fries, next time I’ll add some chopped red and yellow peppers, and/or maybe some sliced carrots, not only giving the dish more visual appeal, but also tipping the scale toward healthier. And the recipe only called for 1 pound of chicken, but we had a package of 1 1/2 pounds of boneless chicken thighs—didn’t seem to matter.

Yup, another winner from Gracie!

Ingredients

  • 1 lb. skinless, boneless chicken thighs or breast, cut into 1/4-inch-thick slices
  • 2 tsp. cornstarch
  • 1/2 tsp. salt
  • 1/2 tsp. freshly ground pepper
  • 1 tsp. plus 2 Tbsp. peanut or vegetable oil
  • 1/3 cup chicken broth
  • 1 Tbsp. fish sauce
  • 2 stalks fresh lemongrass, tender parts minced (about 1/4 cup)
  • 1 Tbsp. monced garlic
  • 2 tsp. chopped jalapeño chiles, with seeds
  • 1 small yellow onion, thinly sliced, about 1/4 cup
  • 1 tsp. brown sugar

IMG_3578
Starting to stir-fry the chicken thigh strips.

IMG_3580
Next, stir-fry the lemongrass, garlic and chiles.

IMG_3582
Add the chicken and its juices back to the wok.

Directions

  1. In a medium bowl, combine the chicken, cornstarch, salt and pepper.Sitr to combine. stir in 1 teaspoon of oil.
  2. In a separate small bowl, combine the fish sauce and chicken broth.
  3. Heat a 14-inch flat-bottomed wok, or 12-inch skillet over high heat. Swirl in 1 tablespoon of the oil, carefully add the chicken, and spread it evenly in one layer. Cook undisturbed for 1 minute.
  4. Using a metal spatula, stir-fry 1 minute until the chicken is lightly browned but not cooked through. Transfer the chicken to a plate.
  5. Swirl the remaining 1 tablespoon oil into the wok, add the lemongrass, garlic and chiles, and stir-fry over medium heat  for 10 seconds or until aromatics are fragrant.
  6. Add the onions and stir-fry for 1 minute or until the onions start to brown.
  7. return the chicken with any juices that have accumulated to the wok and increase the heat to high.
  8. Swirl the broth mixture into the wok, sprinkle on the brown sugar, and stir-fry about 2 minutes or until the chicken id just cooked through.
  9. Serve over white or brown Jasmati rice.

IMG_3585

Adapting with a Little Know-How

Give your pork a holiday feel with the flavors of orange, rosemary and thyme in this fabulous Orange Herb and Pork Tenderloin recipe. A bed of sweet potato cubes lends the tender meat a little sweetness, and the tangy, butter-kissed sauce makes the most of the flavors in the marinade. And steamed bright green beans add a pleasant pop of color, just dress with a spritz of Fleur de Sel and a drizzle of a good flavored olive oil (in this case we used Herbs de Provence EVOO.)

IMG_3565

This recipe is an adaptation from an article we found in the McCaffrey’s Supermarket seasonal magazine “Real Food.” But caution! Plan ahead for this meal because the meat needs to marinate for 3 hours or up to overnight, cook for another hour
(?? seriously??), and then rest for another 5 minutes… Guess who didn’t take that into account when we planned to make it? If we had gone ahead and made it the weeknight we were planning to, we would be eating dinner at 2:00 a.m. Obviously, that wasn’t going to fly…

However, there is a happy ending. The weekend was coming up so we decided to marinate the tenderloin on Sunday, allowing it to get happy overnight, making a much easier go of it on a Monday evening. (OK, so this wasn’t one of those “Meatless Mondays” we often blog about.)

And we also thought about the cooking times. An hour for a pork tenderloin didn’t sit right with us, and I’m glad we paid attention to our intuition. After 30 minutes—half the time—the pork registered 150 degrees (not the 160 the recipe called for), which was where we wanted it to be, temperature-wise. Cooking it for an hour would have produced a dried, tough piece of meat.

Oh, and the sauce. I knew from experience that reducing it was going to take way longer than 3 minutes as per the recipe. Instead I started reducing it as soon as I put the meat and potatoes in the oven. And although it was thick enough after about 20 minutes, I just turned the heat way down until everything else was ready and swirled in the butter before pouring over the pork.

In the end, perfect…

IMG_3559
Cubed sweet potato and onion get tossed with oil and salt.

IMG_3560
The pork tenderloin marinated over night in orange and fresh herbs.

IMG_3563
Cutting the cooked pork into 1/4-inch slices.

IMG_3569
The plated meal.

Ingredients

  • 1 1/2 lbs. pork tenderloin
  • 1 Tbs. fresh rosemary, chopped
  • 2 Tbs. fresh thyme, chopped
  • 1/2 tsp. salt
  • 2 large oranges, zested and juiced
  • 1 tsp. black pepper, coarsely cracked
  • 4 TBs. extra virgin olive oil, divided
  • 1 tsp. apple cider vinegar
  • 3 cups chopped onion
  • 2 Tbs. unsalted butter
  • rosemary sprigs for garnish

Directions

  1. Unwrap tenderloin. If wet, pat dry with paper towels.
  2. In a large sealable plastic bag, combine rosemary, thyme, salt and 2 Tbs. orange zest. Add 3/4 cup juice, black pepper, 2 Tbs. oil, and vinegar, and massage bag to mix.
  3. Add tenderloin, press air out of bag, and seal tightly. Turn to coat with marinade. Refrigerate at least 3 hours or over night. The longer the better—and we marinated overnight.
  4. Preheat oven to 425 degrees. Transfer pork to a heavy sheet pan and refrigerate the marinade. Roast the pork for 25 to 30 minutes (checking periodically after 20 minutes for doneness), until a meat thermometer inserted in the thickest part reads 150 degrees. Let rest 5 minutes.
  5. After putting the pork into the oven, toss sweet potato cubes, onion, and 2 Tbs. oil in a large bowl, then toss onto a sheet pan covered with parchment or foil. Roast potatoes the same amount of time, 25-30 minutes, then remove from oven and cover loosely with foil to keep warm.
  6. While pork and potatoes are cooking, prepare the sauce. Pour marinade into a 1-quart saucepan. Boil marinade on med-high heat for 15-20 minutes, until thick and syrupy. Whisk in butter, swirling over the heat.
  7. Slice meat into thin slices (about 18). Serve 1/2 cup sweet potatoes topped with 3 slices pork and drizzle with sauce. Garnish with rosemary and serve.

IMG_3565

“Jau Yau” — one of the more advanced stir-frying techniques

IMG_3520

Thrilled by our first meal from Grace Young’s “Stir-Frying to the Sky’s Edge” we were excited to try another one of her recipes. Throughout the book, vivid photos accompanied many of them, making it hard to choose. We finally settled on the Stir-Fried Cumin-Scented Beef with Vegetables, a signature Hunan-style stir-fry of beef with cauliflower, carrots and tomatoes, seasoned with cumin, garlic, and red pepper flakes.

Apparently it is also an example of one of the more advanced stir-frying techniques, where chefs practice “jau yau,” or “passing through oil,” where bite-size pieces of meat, poultry or fish are blanched in oil before stir-frying. This process ensures that the ingredients will be more succulent and flavorful. And by golly, by gum, they were!

Always up for a challenge—and considering ourselves somewhat “advanced” in the cooking arena—we decided it’d be a “piece of cake!” And truth be told, it really was pretty simple, BUT you need to be prepared and move fast. Make sure all of your ingredients are cut to size and/or measured, and utensils are at the ready BEFORE you begin.

The night prior, Russ used up our scallions in another dish, and when I stopped at a local grocery store to pick up a bunch on my way home from work, they were completely sold out, so we improvised. I sliced up half of a small purple onion that was wrapped in the frig, throwing it in the wok at the same time as the other veggies. As a garnish, I minced up some fresh chives that added a nice pop of color.

Somehow we often end up with a myriad of leftover rice, potato or other side dishes tucked away for a few days in the refrigerator. So instead of cooking up another rice, we reheated some leftover wild rice that actually complimented the stir-fry quite well. Can’t wait to try another recipe!!

IMG_3504

NOTE: We needed to increase the 2 minutes alloted to stir-fry the veggies to crisp-tender to more like 5 minutes. Plus I would double the amount of cherry tomatoes next time.

Ingredients

  • 12 oz. lean flank steak
  • 1 T. cornstarch
  • 1 T. soy sauce
  • 2 tsp. Shao Hsing rice wine or dry sherry
  • 1 T. plus 1½ cups peanut or vegetable oil
  • 1 T. minced garlic
  • ½ tsp. red pepper flakes
  • 1 cup bite-sized cauliflower florets
  • ½ cup thinly sliced carrots
  • ½ cup grape or cherry tomatoes, halved
  • ¾ tsp. salt
  • 1 tsp. ground cumin
  • ½ cup thinly sliced scallions

IMG_3506
Doing the “jau yau” method on the beef pieces.

IMG_3511
Draining the beef on a bed of paper towels after the initial step of “passing through oil.”

IMG_3514
Next, stir-frying the veggies.

IMG_3519
Chopped chives serve as a garnish on the finished plate.

Directions

  1. Cut the beef with the grain into 2-inch-wide strips. Cut each strip across the grain into ¼-inch-thick slices.
  2. In a medium bowl, combine the beef, cornstarch, soy sauce and rice wine.
  3. Stir to combine. Stir in 1 T. of the oil. Heat the remaining 1½ cups oil in a 14-inch flat-bottomed wok over high heat until the oil registers 280 degrees on a deep-frying thermometer. Carefully add the beef and spread it evenly in one layer in the wok.
  4. Cook 15 seconds or until the beef is opaque but not cooked through. Turn off the heat.
  5. Remove the beef with a metal skimmer and put it on a plate lined with paper towels.
  6. Carefully remove the oil from the wok and reserve. Wash the wok and dry it thoroughly.
  7. Heat the wok over high heat until a bead of water vaporizes within 1 to 2 seconds of contact.
  8. Swirl in 1 T. of the reserved oil, add the garlic and red pepper flakes, then, using a metal spatula, stir-fry 20 seconds or until the aromatics are fragrant.
  9. Add the cauliflower, carrots and tomatoes, and sprinkle on ¼ tsp. salt.
  10. Reduce the heat to medium and stir-fry 2 minutes or until the vegetables are crisp-tender. Add the cumin and stir-fry 5 seconds.
  11. Return the beef to the wok, add the scallions, and sprinkle on the remaining ½ tsp. salt. Increase the heat to high and stir-fry 30 seconds to 1 minute, or until the beef is just cooked through.

— From “Stir-Frying to the Sky’s Edge,” by Grace Young.

Another One-Pan Wonder

IMG_3407

If simple, healthy and tasty is what you want, this recipe is what you need. Another one-pan wonder, Broiled Shrimp and Broccoli with Spicy Peanut Sauce, is taken from Fine Cooking author Molly Gilbert. Inspired by Southeast Asian shrimp satay, this one-pan dish is a weeknight favorite.

When Russ started combining the ingredients for the sauce, we both realized that, being the “sauce-lovin'” kind of people we are, we needed to double the amount—and we’re glad we did. Taste the peanut sauce before tossing it with the shrimp. If you want it spicier, add more Sriracha. And for those with a more delicate palette, reduce the amount.

And we knew that three minutes under the broiler for the initial step of the broccoli wouldn’t suffice, so we at least doubled the time. While we served it without anything else, you could add some rice or vermicelli for a more robust meal.

Ingredients

  • Cooking spray
  • 3 Tbs. creamy peanut butter,preferably natural
  • 2 Tbs. reduced-sodium soy sauce
  • 1-1/2 tsp. packed dark brown sugar
  • 1-1/2 tsp. Asian sesame oil
  • 1-1/2 tsp. Sriracha; more or less to taste
  • 1-1/2 tsp. plain rice vinegar
  • 1-1/2 tsp. freshly squeezed lime juice
  • 1-1/4 lb. extra-large shrimp(26 to 30 per lb.), peeled and deveined, and if desired, remove tails
  • 1 lb. 1-inch broccoli florets(about 4 cups)
  • 1 Tbs. olive oil
  • Kosher salt and freshly ground black pepper

IMG_3397
Whisking the peanut sauce ingredients.

IMG_3398
Tossing the shrimp with half of the peanut sauce mixture.

IMG_3401
The shrimp marinate in the peanut sauce.

IMG_3396
Broccoli florets are spread out on a foil lined rimmed baking sheet.

IMG_3404
After the broccoli has started to brown, arrange the shrimp around the pan.

Directions

  1. Position a rack about 6 inches from the broiler element and heat the broiler on high. Line a large rimmed sheet pan with aluminum foil and mist it with cooking spray.
  2. In a medium bowl, whisk the peanut butter, soy sauce, brown sugar, sesame oil, Sriracha, vinegar, lime juice, and 2 Tbs. warm water until smooth. Set aside half of the sauce for serving and toss the shrimp with the remaining sauce.
  3. On the prepared pan, toss the broccoli with the olive oil and season with salt and pepper. Arrange in a single layer and broil until lightly browned on the edges, about 3 minutes, keeping a close eye on the pan and tossing occasionally to prevent burning.
  4. Arrange the shrimp on and around the broccoli, spreading it out evenly. Return the pan to the oven and broil until the broccoli is charred on the edges and the shrimp are just cooked through, 3 to 5 minutes more.
  5. Serve the shrimp and broccoli with the reserved peanut sauce on the side for dipping.

IMG_3406
The peanut butter-Sriracha mixture is a flavorful dipping sauce.

Spicy Orange Chicken Stir-Fry

stirfry cookbook cover

Cookbook author and stir-fry guru, Grace Young, is a winner of the James Beard Award for International Cooking. She is known as the “Poet Laureate of the Wok” which enticed Russ to add her latest book, Stir Frying to the Sky’s Edge, to his Christmas list—and Santa granted his wish! It was also named one of the top cookbook’s of 2010 by NPR, Washington Post, Good Morning America, and Huffington Post. So with all of this acclaim, we were excited to start trying the recipes…

The first recipe we tried was Spicy Orange Chicken, which with a ripe tomato, an orange, and a chicken breast, combined with basic staples becomes a sumptuous meal through the genius of stir-frying. The chicken is pleasantly aromatic from the Sichuan peppercorns, ginger and orange zest, with just a hint of heat from the chili bean sauce. And what a beautiful presentation!

The sauce isn’t heavy at all. Even the spiciness is on the lighter side (at least according to my taste buds), with Sichuan peppercorns adding a floral, citrusy note. You can always leave them out or substitute 1/8 teaspoon cayenne pepper or crushed red pepper flakes; although I highly recommend getting yourself some Sichuan peppercorns if you’ve never tried them.

Grace’s passion for recording and preserving Chinese culinary traditions certainly pays off for us!

IMG_3377
It’s always best to measure and arrange all of the ingredients before you start cooking.

Spicy Orange Chicken Stir-Fry

  • Servings: 4
  • Difficulty: easy
  • Print

Ingredients

  • 1 pound skinless, boneless chicken breast, cut into 1/4-inch-thick bite-sized slices
  • 2 tablespoons finely shredded ginger
  • 2 tablespoons Chinese rice wine or dry sherry
  • 2 teaspoons soy sauce
  • 1 1/2 teaspoons cornstarch
  • 3/4 teaspoon sugar
  • 1/4 teaspoon ground white pepper
  • 1/4 teaspoon roasted and ground Sichuan peppercorns* (see NOTE below)
  • 1/4 cup chicken broth
  • 2 teaspoons rice vinegar
  • 2 tablespoons peanut or vegetable oil
  • 2 scallions, white and green parts separated and thinly sliced
  • Zest of 1 orange
  • 1 teaspoon chili bean sauce
  • 1 medium ripe tomato, cut into thin wedges (or 1 cup grape tomatoes)
  • 1/2 cup thinly sliced scallions
  • 3/4 teaspoon salt

IMG_3379
Adding the ingredients to the chicken slices.

IMG_3381
The chicken marinates for a short time while you prepare the next steps.

IMG_3383
Adding the tomatoes to the stir-fry.

IMG_3385
The rice vinegar mixture and scallions are added at the end.

IMG_3389
The stir-fry is ladled over some steamed Jasmati rice.

Instructions

  1. Marinate the chicken: In a large bowl, combine the chicken with 1 tablespoon of the ginger, 1 tablespoon of the rice wine, soy sauce, 1 teaspoon of the cornstarch, sugar, white pepper, and ground Sichuan peppercorns. Stir to combine and let sit for 5 to 10 minutes.
  2. In a small bowl, combine the broth, rice vinegar, the remaining 1 tablespoon rice wine, and 1/2 teaspoon cornstarch.
  3. Heat a wok (preferably flat-bottomed) or large 12-inch skillet over high heat. Add the oil and swirl to coat the bottom. Add the remaining 1 tablespoon ginger and stir-fry for 10 seconds, just until the ginger is fragrant.
  4. Push the ginger to the sides of the wok. Carefully add the chicken, spread it evenly in one layer in the wok, and allow it to sear undisturbed for 1 minute. Add the orange strips, scallion whites, and chili bean sauce. Stir-fry for 1 minute, until the chicken is lightly brown but not yet cooked through.
  5. Add the tomatoes and stir-fry for about 30 seconds. Re-stir the rice vinegar mixture and add it to the wok. Add the scallions, sprinkle on the salt, and stir-fry for another 1 minute, or until the chicken is cooked through. Transfer to a plate and serve.

*NOTE: Whenever Sichuan peppercorns are called for in a recipe, they must first be roasted and ground. Put a 1/4 cup in a dry, cold wok (or cast iron skillet) and remove any tiny stems. Stir over medium-low heat for 3 to 5 minutes until the peppercorns are very fragrant and slightly smoking. Be careful not to burn them. Once they’re cooled, grind them in a mortar, then store them in a jar.

http://www.lynnandruss.com

IMG_3389

Intentionally Easy Dinner

IMG_3370

Sea Scallops with Brussels Sprouts and Mustard Sauce—Outstanding and easy to make—just the ticket for our Christmas Day dinner! We cooked up a storm on Christmas Eve, and wanted to make Christmas Day a low-key event. So our morning with the three kids started with the (recently blogged about) Creme Brulée French Toast, made the day before and just heated in the oven, a store-bought vegetable quiche, and thick cut bacon.

The kids left shortly after noon to stay with their mom for a few days, so Russ and I went to the movies mid-afternoon. Knowing we wouldn’t have a lot of time to prep an evening meal afterward, we planned ahead with a couple of crab cakes and some seafood gumbo both from McCaffrey’s supermarket.

The main entreé was Sea Scallops with Brussels Sprouts and Mustard Sauce. Brussels sprouts have a slightly crunchy texture and a subtly sweet flavor that complements scallops. Thinly sliced, they cook in just a couple of minutes—a perfect accompaniment for this intentionally easy dinner. (Because Russ is omitting wheat, he dusted the scallops in a gluten-free flour.) The only thing left to do was uncork a bottle of wine and get the skillet simmering hot for the scallops.

IMG_3349
Add the shredded Brussels sprouts to a shimmering hot skillet.

IMG_3351
Transfer the cooked sprouts to a platter and cover to keep warm.

Ingredients

  • 10 oz. trimmed Brussels sprouts
  • 3 Tbs. olive oil
  • Kosher salt and freshly ground black pepper
  • 1 lb. dry-packed sea scallops, side muscle removed and patted dry
  • All-purpose flour
  • 2 Tbs. cold unsalted butter, cut into pieces
  • 1 Tbs. fresh lemon juice
  • 1 tsp. coarse-grained Dijon mustard

IMG_3355
The scallops get browned on both sides in just minutes.

IMG_3360
Arrange the seared scallops on the platter of cooked sprouts.

IMG_3363
Using the same skillet, whisk the mustard sauce ingredients together.

IMG_3365
Spoon the sauce over the scallops and sprouts and serve immediately.

Directions

  1. In a food processor fitted with the 2-mm slicing blade, shred the Brussels sprouts.
  2. Heat 2 Tbs. of the oil in a 12-inch nonstick skillet over medium-high heat until shimmering hot. Add the Brussels sprouts, season with salt and pepper, and toss to coat with the oil. Cover and cook until starting to soften, about 1-1/2 minutes. Transfer to a platter and keep warm.
  3. Season the scallops with salt and pepper. Dust both flat sides with all-purpose flour. Heat the remaining 1 Tbs. oil in the skillet over medium-high heat until shimmering hot. Add the scallops and cook, flipping once, until browned and just cooked through, about 5 minutes.
  4. Put the scallops on top of the Brussels sprouts and return the skillet to medium-low heat. Add the butter, lemon juice, mustard, and 2 Tbs. water and cook, stirring and scraping up any browned bits, until the butter is incorporated and the sauce has thickened, about 1 minute. Season to taste with salt and pepper, spoon over the scallops, and serve.

by Kristine Kidd from Fine Cooking

IMG_3346
The store-bought Seafood gumbo from McCaffrey’s Supermarket, which included large chunks of crab!

IMG_3373
The meal included store-bought crab cakes and a prepared rice dish.

IMG_3369
You bet we’re making this again!

Three-Cheese Potato Gratin

IMG_3291

By now, most of you know Molly Stevens is one our most revered chefs. So when we went looking for a potato gratin for the Christmas Eve meal, her name popped up in the search and we knew we had a winner. This gratin tastes more complex than simple cheese and potatoes—it’s comfort food yet sophisticated at the same time.

By no means diet-friendly, the Three-Cheese Potato Gratin is a calorie-buster with all of the whole milk, heavy cream, cheeses and butter (we even increase the amount of the cheeses.) But good God, it’s heavenly!! So if you are counting calories, (which at some point in our lives most of us are) just eat a small portion.

To create, it was a group effort with Russ, his son Dan and me all pitching in to assemble the casserole. Dan did a great job slicing the potatoes on the mandoline and grating the cheeses, while Russ prepared the milk and cream mixture. I buttered the dish and started the layering process, taking turns with Dan until complete.

With our standing Prime Rib Roast, and Haricot Verts with Pancetta (recipe follows), the gratin was a perfect match and made for a divine Christmas Eve dinner.

IMG_3269
Dan uses the mandoline to make perfectly even potato slices.

IMG_3270
The slices are all equally 1/8″ thick.

IMG_3272
Dan puts some muscle into shredding the Swiss cheese.

IMG_3280
Father and son bond over the cooking experience.

IMG_3273
Lynn adds the shredded cheese mixture to the first layer of potatoes.

IMG_3276
Next, Lynn crumbles goat cheese over the shredded cheese layer.

IMG_3278
Dan takes over to add the second layer.

IMG_3282
The final potato slice is added.

IMG_3285
Russ pours the infused cream mixture over all layers.

IMG_3287
On top of the cream, a final topping of the shredded cheeses.

IMG_3292
Luscious goodness after resting for twenty minutes, yum!

Ingredients

  • 2 tsp. unsalted butter, at room temperature
  • 1-1/2 cups whole milk
  • 1 cup heavy cream
  • 2 large cloves garlic, smashed and peeled
  • 2 to 3 sprigs rosemary, 3 inches long
  • Pinch freshly grated nutmeg
  • 4 oz. grated Swiss cheese (about 1 cup)
  • 2 oz. freshly grated Parmigiano-Reggiano (about 1/2 cup)
  • 2 lb. russet potatoes (3 to 4 medium)
  • Kosher salt and freshly ground white pepper
  • 4 oz. fresh goat cheese, crumbled (about 2/3 cup)

Directions

  1. Position a rack in the center of the oven and heat the oven to 350°F. Line a rimmed baking sheet with foil. Grease a 9×13-inch baking dish with the butter.
  2. Pour the milk and cream into a small saucepan. Add the garlic, rosemary, and nutmeg. Bring just to a simmer, cover, and remove from the heat. Set aside to infuse for at least 20 minutes. Combine the Swiss cheese and Parmigiano in a bowl.
  3. Peel the potatoes and, using a mandoline or your sharpest knife, slice them into 1/8-inch-thick rounds. Arrange about one-third of the potatoes in a single overlapping layer in the baking dish, season with kosher salt and white pepper, and top with one-third of the Swiss-Parmigiano mix. Scatter over half of the goat cheese. Add a second overlapping layer of potatoes, more salt and white pepper, another third of the Swiss-Parmigiano mix, and the remaining goat cheese. Make a third layer with the remaining potatoes and season with salt and white pepper. Press down lightly to compact the layer
  4. Remove the garlic and rosemary from the infused cream, and discard them. Set the cream over medium-high heat and watch carefully until it just begins to simmer; don’t let it boil. Pour the cream over the potatoes and sprinkle the remaining cheese on top.
  5. Set the baking dish on the foil-lined baking sheet, and bake until the top is deeply brown and the potatoes are completely tender when poked with a skewer, 1-1/4 to 1-1/2 hours. Let sit for 10 to 15 minutes before serving.

Ingredients

SERVINGS: 4

  • 12 ounces haricot green beans, trimmed
  • 3 ounces pancetta, coarsely chopped
  • 1 tablespoon butter

Preparation

  • Cook beans in large pot of boiling salted water until crisp-tender, about 4 minutes. Drain. Transfer to bowl of ice water; cool 5 minutes. Drain. Transfer beans to paper towels and pat dry.
  • Heat large skillet over medium heat. Add pancetta and sauté until crisp, about 3 minutes. Using slotted spoon, transfer to paper-towel-lined plate to drain. Increase heat to medium-high. Add butter to same skillet.
  • Add beans and stir until heated through, about 4 minutes. Season with salt and pepper. Stir in pancetta.

Recipe by Dorie Greenspan

IMG_3292

Prime Rib—The Best from Both Worlds

IMG_3304

This year for our Christmas Eve dinner, Russ combined two prime rib recipes, one from Cooks Illustrated, Perfect Prime Rib; and the other for it’s crown of herbs and spices from Fine Cooking, Slow-Roasted Prime Rib. Prior to cooking, we had the butcher cut the meat off the bone and then tie it back onto the ribs. This way it cooks as a “bone-in” roast, and is a real treat for those who like to chew the flavorful bones afterward.

Surprisingly, the Cooks Illustrated perfect prime rib recipe turned out to be one cooked in a 250-degree oven, which eliminates the gray banding. Unlike roasts that cook at higher temperatures, this one was rosy pink from the surface to the center and was so juicy and tender. By searing the meat on top of the stove before low-roasting it, you achieve a gorgeous browned and crusty exterior.

A luxurious centerpiece for a holiday menu, this three-bone prime-rib roast gets heaped with a big pile of smashed garlic, butter, and fresh herbs, then slow-cooked in a low oven for at least two hours, until the meat becomes meltingly tender, and the herbs and garlic infuse it through and through. Our roast took 25 minutes per pound to reach 125 degrees. Keep in mind, the temp will rise another 5-10 degrees or so as it rests under the foil tent.

Be sure to tie the prime rib two to three times between the rib bones or the outer layer of the meat pulls away from the rib-eye muscle, causing the roast to look unattractive. And since this is the star of the show, you wouldn’t want that to happen, would you?

Ingredients

  • 3-bone beef rib roast (about 7 lb.), preferably from the small or loin end and Prime grade
  • 3 Tbs. fleur de sel or other flaky sea salt
  • 1-1/2 Tbs. coarsely cracked black pepper
  • 1 Tbs. extra-virgin olive oil
  • 8 to 10 sprigs rosemary
  • 8 to 10 sprigs thyme
  • 10 medium cloves garlic, smashed and peeled
  • 3 Tbs. unsalted butter, cut into 1/2-inch cubes

IMG_3239
The uncovered raw roast is taken out of the frig to come to room temperature.

IMG_3259
Starting to sear one side of the roast.

IMG_3262
A sear on the final end cap finishes the process.

IMG_3264
The seared roast is crowned with fresh rosemary, thyme, garlic and butter cubes.

IMG_3288
The roast after it cooked for several hours on a low temp.

IMG_3298
Releasing the twine removes the bones for easier slicing.

IMG_3300
Slicing the beef before plating. Make sure to pour the juices back onto the meat.

Directions

  1. Place the roast, uncovered, on a rack in the refrigerator over night—this helps to dry age the beef.
  2. Take the beef out of the refrigerator 3 hours before cooking so it can come to room temperature.
  3. Position a rack in the center of the oven and heat oven to 325ºF.
  4. Turn on the exhaust fan. Heat a 12-inch skillet over high heat for 1 minute. Swirl in the olive oil and,  when the oil puts off its first wisp of smoke, place the beef in the pan, and sear it on all the outer sides (not the cut sides) until well browned, 6 to 8 minutes total.
  5. Use a set of tongs to flip the beef; be careful of splattering oil. With two sets of tongs, transfer the beef, bone side down, to a roasting rack set in a small roasting pan. Season the meat on all sides with the fleur de sel and cracked black pepper. Arrange the rosemary, thyme, garlic, and butter evenly on top.
  6. Roast the beef, basting every 30 minutes with a bulb baster, until a thermometer inserted into the center reads 120º to 125ºF for rare, about 2 hours. Cook to 130º to 135ºF for medium-rare (about 2-1/4 hours), 140º to 145ºF for medium (about 2-1/2 hours). Let the meat rest 20 minutes before carving (a bit longer is fine.)
IMG_3265
Next blog will highlight our accompaniments of Three-Cheese Potato Gratin and Haricot Verts with Pancetta.

Pork Brings Wealth and Prosperity in the New Year

Old ‘Hood Reunion

~During the late 1980’s and all of the 90’s, Barb and Brad (B&B), and Fran and Grant (F&G) were close neighbors of mine (and my ex) when we all resided on Manor Lane in Yardley, PA. After the devastating floods in 1996, F&G were the first to move out in 1997. B&B followed in 2000, and I finally left for drier pastures (with Russ) in 2011. But friends we remained. And so every Christmas season the three couples get together for some holiday cheer, and this year it happened to be at our place, Casa H.

We dined on Russ’s famous Braised Pork N ‘Kraut, the always tasty and versatile, “go-with-everything” Celery Root Puree, and homemade Solebury Farm Apple Sauce, and a festive side salad for starters.

IMG_3172

The custom of eating pork on New Year’s is based on the idea that pigs symbolize progress. The animal pushes forward, rooting itself in the ground before moving. It also signifies wealth and prosperity… Read more under the Reconnecting with Friends tab…

Scan 1
Fran, Lynn and Barb in the 1990’s on Manor Lane North.

An Enduring Holiday Tradition

~CRÈME BRÛLÉE FRENCH TOAST~

challah.loaf

Ooey, gooey goodness! Russ first came across this recipe in Gourmet Magazine in 1998. He’s been making it for his children (now adults in their twenties) almost every Christmas morning since, much to their delight!

To date, it has received nearly 600, 4 out of 4 “Forks” in the posted reviews. Of course you don’t have to wait until Christmas to make it, your family and company will thank you anytime of year…

Ingredients

  • 1 stick (1/2 cup) unsalted butter
  • 1 cup packed brown sugar
  • 2 tablespoons corn syrup
  • 1 braided Challah loaf, about 14 oz.
  • 5 large eggs
  • 1 1/2 cups half-and-half
  • 1 teaspoon vanilla
  • 1 teaspoon Grand Marnier
  • 1/4 teaspoon salt

sliced.bread
The braided Challah loaf is sliced and arranged on a rack to dry out.

IMG_3253
Preparing the “topping” for the french toast.

IMG_3256
The stale bread slices are positioned over the topping and then the cream mixture is poured all over.

IMG_3340
The baked french toast is ready for serving.

IMG_3343
The final step is to flip the bread over onto the plate to reveal the creme brulée topping.

Preparation

  1. In a small heavy saucepan melt butter with brown sugar and corn syrup over moderate heat, stirring, until smooth and pour into a 13- by 9- by 2-inch baking dish. Cut six 1-inch thick slices from center portion of bread, reserving ends for another use, and trim crusts. Arrange bread slices in one layer in baking dish, squeezing them slightly to fit.
  2. In a bowl whisk together eggs, half-and-half, vanilla, Grand Marnier, and salt until combined well and pour evenly over bread. Chill bread mixture, covered, at least 8 hours and up to 1 day.
  3. Preheat oven to 350° F. and bring bread to room temperature.
  4. Bake bread mixture, uncovered, in middle of oven until puffed and edges are pale golden, 35 to 40 minutes.
  5. Serve hot French toast immediately.