All posts by LynnHoll

Unknown's avatar

About LynnHoll

I have been an artist and designer all my life incorporating graphic design for websites, gardens, publications, fabrics, interior design and cooking. I am now retired from my professional job, but still create artistic visions in all forms on a daily basis.

Bellissimo Zuppa

Over-the-top delicious! This hearty Tuscan Sausage, Cannellini and Kale Soup is full of dynamite flavor—most of it from healthy ingredients. The crinkly, deep-green leaves of Lacinato kale (also called dinosaur or black kale) are ideal, but any variety of kale will work.

No surprise I’m sure that we used the hot Italian sausage as opposed to the sweet. Of course, we almost always increase the amount of garlic in any recipe, so this one was no exception. And as I always preach, using store-bought broth or stock is fine, but incorporating homemade takes the soup to another level.

One optional ingredient is a Parmigiano-Reggiano rind, which we keep a small ziplocked stash of in the freezer at all times. A good practice that you should get in the habit of because they come in handy for a variety of recipes, and last a long time.

FYI, one medium celery stalk does not 3/4-cup make, so use at least two—better yet three—stalks. Next time we’ll probably double the amount of kale too. Our final touch was a sprinkle of grated Parmigiano-Reggiano. If you’re so inclined, pair the soup with a chunk of crusty multigrain bread. And if you’re lucky enough to have any leftover, it’s perfect for lunch…Bellissimo!

Ingredients

  • 1-1/2 Tbs. extra-virgin olive oil
  • 1 medium yellow onion, finely chopped (1-1/2 cups)
  • 1 medium carrot, peeled and finely chopped (3/4 cup)
  • 1 medium celery stalk, finely chopped (3/4 cup)
  • 1-1/2 tsp. minced fresh rosemary
  • 2 Tbs. tomato paste
  • 2 large cloves garlic, minced (1 Tbs.)
  • 1 quart homemade or lower-salt chicken or vegetable broth
  • Two 15-oz. cans cannellini beans, rinsed and drained
  • 6 oz. Lacinato kale, center ribs removed, leaves chopped (about 4 firmly packed cups)
  • 1 Parmigiano-Reggiano rind (1×3 inches; optional)
  • 1-1/2 tsp. cider vinegar
  • Kosher salt and freshly ground black pepper
  • 2/3 lb. sweet or hot bulk Italian sausage, rolled into bite-size meatballs

Directions

  1. Heat 1 Tbs. of the oil in a 4- to 5-quart pot over medium heat. Add the onion, carrot, celery, and rosemary and cook, stirring occasionally, until the vegetables begin to soften, about 6 minutes. Add the tomato paste and garlic and cook until fragrant, 45 seconds.
  2. Add the broth, beans, kale, and Parmigiano rind (if using). Bring to a boil, reduce the heat to medium low, and simmer gently until the vegetables are tender, about 15 minutes.
  3. Meanwhile, heat the remaining 1/2 Tbs. oil in a 10-inch nonstick skillet over medium-low heat. Add the sausage meatballs, sprinkle with a pinch of salt, and cook, stirring occasionally, until browned and cooked through, about 10 minutes.
  4. Add the sausage to the soup and bring to a simmer over medium-high heat. Cook 5 minutes more to meld the flavors.
  5. Stir the cider vinegar into the soup and season to taste with salt and pepper.

Variations

To serve 1 vegetarian and 3 meat lovers: Use vegetable broth for the soup. Reduce the sausage to 1/2 lb. and cook the meatballs in the same fashion. After stirring the cider vinegar into the soup and seasoning to taste, set aside 1-3/4 cups of the soup for the vegetarian before adding the meatballs.

IMG_4743

by Ivy Manning from Fine Cooking

Saluté!

Within a 1/2-day of receiving a restaurant tip from friend Jeremy, I made reservations at the relatively new Italian BYOB, Saluté Ristorante, located in small strip mall on West Trenton Avenue in Morrisville, PA. (In it’s previous life, it used to be Center Fruit Gourmet.)

Friends Barb and Brad accompanied us on our maiden voyage to check out the new digs. The joint was hopping when we got there for our 8:00 Friday night reservation—thank goodness we made one! We were seated immediately at a corner table by the front window. (Top photo shows Barb and Russ with some of the posterized head shots behind them.)

The decor is atypical, with a large lighted tree smack in the center of the dining room and pop-art portraiture pictures adorning the walls. Of those, the only person I recognized was the owner Vincenzo because I had previously perused their website. Another wall sports a “digital” fireplace lending a nice touch to the decidedly modern atmosphere.

salute.interior2
A stock photo showing the dining room with a portrait of the owner Vincenzo, and the digital fireplace.

IMG_4747
A bit blurry, but you get the sense of the lighted tree as a main focal point.

Vincenzo Severino’s cuisine is the encapsulation of his passion for food and his obsession to please his patrons. His inspiration comes from his trips back to his beloved Sicily, where he breathes in as much as he can in order to translate his journeys into new and exciting dishes for his and Kathleen’s customers.

While we scanned the menus, a basket of warm crusty bread was delivered to the table. Then Russ asked our waitress about the possibility of getting gluten-free for his side of pasta. Come to find out, irritatingly enough, you can only get gluten-free if you order a pasta entree, not for your side!

How odd, every other restaurant that we’ve patronized with gluten-free options always allowed for this type of request. But apparently because they serve the pasta side “family-style,” we’d receive only one bowl of ziti to share amongst all diners. Which may have worked if we all wanted gluten-free…

But the food was so good, we decided it was a minor glitch in an otherwise great dining experience. Except for the noise! Wow, it was really loud until many diners finished their meals and started leaving. Perhaps it’s a good thing to arrive on the later side.

Because of the gluten-free debacle, Russ altered his choice and chose the GIAMBOTTA: Sweet Italian sausage with oven roasted peppers and onions with garlic and Italian seasonings. I zeroed in on the ALL’ARRABIATTA: Chicken breasts with hot finger peppers (this was the clincher for me) sautéed in olive oil, garlic and finished with marinara sauce, topped with mozzarella cheese. OMG, the chicken was perfectly cooked and succulent! (BTW, any of these chicken dishes can also be ordered with veal for a few dollars more.)

IMG_4750
For Russ, Giambotta—therefore avoiding the pasta issue.

IMG_4752
Lynn loved her All’Arrabiatta.

Portobello mushrooms was the ingredient that grabbed the attention of both of our dining guests because Barb got the PORTOBELLO: Portobello mushrooms sautéed with sun-dried tomatoes, roasted red peppers over chicken breasts and topped with fresh mozzarella cheese. And Mr. Brad followed suit with the TOSCANO: Chicken pieces with sliced portobello mushrooms, scallions, roasted garlic and pancetta bacon sautéed in marsala wine cream sauce.

IMG_4755
Close up of Barb’s Chicken Portobello.

IMG_4748
Brad’s divine Chicken Toscano.

Let’s suffice it to say, nobody went home hungry, in fact, most of us doggie-bagged a healthy portion of leftovers. Yes, we will definitely go again. But right now I’m getting ready to head out the door for another dining experience at Francisco’s along the Delaware River… Ciao!

“The Greatest” Deviled Eggs

Thumbing through my Facebook newsfeed, I saw a post from Bon Appétit and immediately sensed a challenge—to see if indeed these were “the greatest” deviled eggs. In this rendition, the filling is coarsely mashed and studded with crunchy celery and scallion. Is that a good thing? I had to find out…

It became a family affair. I hard boiled according to their directions, and against my better judgment, took them off the heat after 10 minutes. My tried-and-true method is putting the eggs in a pot of cold water, and once it comes to a steady boil, turn off the burner and let the eggs sit in the hot water for 15 minutes before plunging into an ice bath for 12 minutes.

Back to the “greatest” method… One cooled, I peeled them in preparation for the filling mixture. Russ sliced the first egg in half and disappointment set in as we saw that the yellows were not completely cooked, which meant the rest of them would probably be the same. They were.

So much for “the greatest” descriptor. But figuring that all kinds of ingredients were getting mixed in, we assumed it wouldn’t make much difference. And it didn’t. Take heed, if you’re not going to be serving these until the next day, chill the whites and filling separately until just before serving.

IMG_4687

IMG_4689

Enter son David who was joining us for the Easter repast. For an artistic touch, we thought it might look nice if the filling was piped on using a star tip. Wrong. Since there were chunks in the mixture, it clogged the tip. Plan B. Scoop out the mixture from the pastry bag with a long handled spoon and place into whites. Bingo!

IMG_4693

Topped with a sprinkle of finely chopped parsley, we were all set to indulge. So if not “the greatest” they were at least, very tasty…

Ingredients

  • Kosher salt
  • 8 large eggs
  • 3 tablespoons mayonnaise
  • 3 tablespoons very finely chopped celery
  • 2 tablespoons finely chopped drained pickle relish
  • 2 tablespoons very finely chopped scallion
  • 2 teaspoons yellow mustard
  • 2 teaspoons very finely chopped parsley, plus more for serving
  • 2 dashes hot sauce (such as Tabasco), plus more for serving
  • Freshly ground black pepper

Directions

  1. Bring a small pot of salted water to a boil. Carefully add eggs. Bring water to a simmer and cook eggs 10 minutes.(In my case, I should have cooked them another couple of minutes.) Drain and transfer to a bowl of ice water; let sit until cool enough to handle, about 10 minutes. Peel.
  2. Meanwhile, whisk mayonnaise, celery, relish, scallion, mustard, 2 tsp. parsley, and 2 dashes hot sauce in a medium bowl; season with salt and pepper.
  3. Halve eggs lengthwise. Scoop yolks into mayonnaise mixture and place whites on a plate. Gently mash yolks into dressing; season with salt and pepper. Using 2 forks, fill egg halves with yolk mixture.
  4. Top eggs with pepper and more parsley and serve with hot sauce.

Do Ahead: Eggs can be made 1 day ahead. Cover and chill egg whites and filling separately; fill just before serving.

Recipe by Hillstone Restaurant Group


Pure Potato Amazingness Right Here

You may have read the Easter Sunday Stuffed Lamb dinner I just blogged about. One of our sides was this fabulous Potato and Caramelized Onion Gratin. It can be made a day ahead of time and reheated in a 350 degree oven for 20-30 minutes, which is exactly what we did, thus saving precious time on meal day.

Caramelized onions add a wonderful touch of sweetness to a classic potato gratin. And, oh the aroma as it cooks in the oven, be prepared to swoon! Though Comté, a nutty and complex French cheese made in the Jura Mountains, is worth seeking out, Gruyère from neighboring Switzerland makes a good substitute. Luckily we had no difficulty in obtaining the Comté at our local supermarket.

If you have a mandoline, it makes quick work out of slicing perfectly thin and even potato slices, eliminating some of the sweat-equity out of the process. If you don’t own one, consider buying one, you won’t regret it. In the meantime, I hope your knife skills are honed…

IMG_4669
A mandoline makes perfectly thin, even potato slices.

Ingredients

  • 2 Tbs. unsalted butter
  • 1 Tbs. extra-virgin olive oil
  • 1 lb. yellow onions, thinly sliced (about 3-1/2 cups)
  • Kosher salt and freshly ground black pepper
  • 2 lb. Yukon Gold potatoes (about 5 large)
  • 1-1/2 tsp. chopped fresh thyme
  • 4 oz. grated Comté cheese (about 1-1/2 cups)
  • 2 cups whole milk
  • Pinch freshly grated nutmeg

IMG_4637
Raw onion slices will caramelize in about 45 minutes in oil and butter.

IMG_4641
About halfway into sweating the onions, they start to caramelize.

IMG_4668
The onions are ready when they attain this golden brown color.

Directions

  1. Position a rack in the center of the oven and heat the oven to 350°F.
  2. Heat 1 Tbs. of the butter and the olive oil in a 10-inch skillet over medium heat. Add the onions and cook without stirring until beginning to brown, 5 to 7 minutes. Sprinkle with 1/4 tsp. salt and 1/4 tsp. pepper.
  3. Reduce the heat to low and continue to cook, stirring and scraping the bottom of the pan frequently with a wooden spoon and spreading the onions evenly over the bottom of the skillet, until golden brown, 30 to 40 minutes. Add 1 Tbs. water at a time if the onions begin to stick to the skillet. Set aside to cool.
  4. Peel the potatoes. Using a mandoline or sharp knife, slice the potatoes into thin rounds (about 1/16 inch thick). Spread about one-third of the potatoes in the bottom of a 3-quart baking dish. Sprinkle with salt, pepper, and half of the thyme.
  5. Scatter half of the caramelized onions evenly over the potatoes, and top with one-third of the cheese. Make a second layer with half of the remaining potatoes. Sprinkle with salt and pepper, and top with the remaining thyme and onions. Top with one-third of the cheese. Top with a third and final layer of potatoes.
  6. In a 2-quart saucepan, bring the milk to a simmer. Stir in the nutmeg, and then pour the hot milk evenly over the potatoes. Top with the remaining cheese. Cut the remaining 1 Tbs. butter into small pieces and scatter on top.
  7. Bake until the potatoes are tender when pierced with a paring knife and the top is golden brown, 1 hour to 1-1/4 hours. Cover loosely with foil if the top begins to darken too quickly. Let the gratin cool for 10 to 15 minutes before serving.
Make Ahead Tips

You can make this up to one day in advance. Once cool, cover and refrigerate. Let come to room temperature for about an hour before reheating in a 350°F oven, covered loosely with foil until warmed through, about 20 minutes.

Recipe by Molly Stevens

IMG_4672
Start placing the potatoes in rows overlapping one another.

IMG_4673
After the first layer of potato and onions are down, start sprinkling on one third of the cheese.

IMG_4674
The final layer of potatoes are placed before pouring the warm milk and nutmeg.

IMG_4675
Topping with cheese and butter are the last step before the oven.

IMG_4682
After an hour and 20 minutes in the oven, it doesn’t come out any prettier than this!

Don Your Eatin’ Pants, You’re Gonna Want Seconds

As is typical for us on Easter, our go-to entree is roast lamb, instead of cooking ham. And as you know, we’ve been on a roll with lamb recipes in a variety of incarnations. This one, Apricot-and-Herb Stuffed Leg of Lamb, with it’s unconventional stuffing, has now become one of my faves!

Rolling the lamb around the filling means you get some of those bright stuffing flavors in just about every bite. For the best flavor, stuff the lamb the day before you roast it. And to make a gorgeous first impression, garnish the platter of lamb with some of the same herbs from the filling.

We didn’t change a thing with the ingredients or preparation, stuffing our meat a full 24 hours ahead of time to make sure all that yummy goodness penetrated the lamb as much as possible. The Potato and Caramelized Onion Gratin was also made a day ahead; but we waited until the last minute to cook the unusual combination of veggies in the Spring Vegetable Ragout. (Gratin recipe to follow soon.)

Contributing to the feast was “The Greatest” Deviled Eggs—according to Bon Appétit— hardboiled by me, filling made by Russ, and assembled by son David. Friends Barb and Brad brought a real tasty artichoke bruschetta spread with baguette toasts and a gorgeous chocolate bottom cheesecake loaded with chocolate chips for dessert.

Looks like we’ll be eating light the rest of the week…

IMG_4645
The leg of lamb as it looks coming from the butcher.

IMG_4636
The chopped apricots will soak in hot water for at least 5 minutes.

IMG_4649
Russ pounds out the meat to a uniform thickness.

IMG_4643
Once the apricots are done soaking, the herbs are added to make the paste.

IMG_4653
An even coating of paste is layered on top of the meat.

IMG_4656
The lamb is gently rolled onto itself.

IMG_4659
I assist as Russ ties up the roast.

IMG_4665
The meat is now tied up completely and ready for plastic wrap and a 24-hour stint in the refrigerator.

Ingredients

  • 1/3 cup small-diced dried apricots
  • 3 medium cloves garlic, peeled
  • 1 cup loosely packed fresh flat-leaf parsley leaves
  • 1/2 cup loosely packed fresh mint leaves
  • 1 Tbs. chopped fresh rosemary
  • 1 Tbs. Dijon mustard
  • Kosher salt and freshly ground black pepper
  • 3 Tbs. extra-virgin olive oil
  • 1 3-1/2- to 4-1/2-lb. boneless leg of lamb
  • 1 cup lower-salt chicken broth
  • 1/4 cup dry white wine or dry vermouth

IMG_4696
We check the temperature to make sure it is where we want it to be for medium-rare.

IMG_4699
Chicken broth and wine are added and begin to simmer in the roasting pan.

IMG_4701
After the roast has rested for 30 minutes, Russ slices it on a cutting board with a moat to catch all of the juices to add back to the roasting pan sauce.

Directions

  1. In a small bowl, cover the apricots with 1/4 cup boiling water; let soak for 5 minutes.
  2. Meanwhile, pulse the garlic, parsley, mint, rosemary, mustard, 3/4 tsp. salt, and 1/4 tsp. black pepper in a food processor until coarsely chopped. With the machine running, add the olive oil, and process to a thick paste. Drain the apricots and stir them in.
  3. Lay the meat flat and pat dry with paper towels. Trim any excess fat. If there are portions that are much thicker than others, butterfly the thicker portions of the lamb to make it evenly thick. Lightly pound the lamb with a meat mallet, if necessary, to further even it out and make it roughly rectangular in shape. Season lightly with salt and pepper.
  4. Spread the herb paste over the lamb, using your fingers to work it into any crevices. Starting at one short end, roll the lamb up tightly, making sure to roll the meat so slices will cut across the grain. Tie the roll snugly at 1-inch intervals with kitchen twine. For a more compact shape, tie the roast lengthwise with a piece of twine. If there is any herb paste left on the work surface, rub it on the outside of the lamb. Wrap the lamb well in plastic wrap and refrigerate for at least 8 and up to 24 hours.
  5. Let the lamb sit at room temperature for about 1 hour before roasting. Meanwhile, position a rack in the center of the oven and heat the oven to 350°F.
  6. Unwrap the lamb, transfer it to a small, flameproof roasting pan, and roast until an instant-read thermometer inserted into the center of the meat reads 125°F to 135°F for medium rare, 45 minutes to 1-1/4 hours; begin checking early. Transfer to a cutting board, tent with foil, and let rest for 20 to 30 minutes.
  7. Meanwhile, add the chicken broth and wine to the roasting pan. Simmer over medium heat, scraping up any pan drippings and stirring frequently, until slightly reduced, about 4 minutes.
  8. Cut the lamb into 1/2-inch-thick slices, snipping away the twine as you go, and transfer to a platter. Add any juice from the cutting board to the roasting pan. Strain the jus, and season to taste with salt and pepper. Serve the lamb with the jus.

Recipe by Molly Stevens

IMG_4705
The table is set and ready for guests.

IMG_4693
A platter of “The Greatest” deviled eggs—the jury is in, they were very good!

IMG_4680
The potato and caramelized onion gratin was heavenly.

IMG_4706
A vegetable ragout that included, sugar snap peas, scallion, turnips, radishes and baby spinach.

IMG_4702
A feast for the eyes—and the stomach!

IMG_4708
Barb’s homemade chocolate bottom cake/cheesecake combination.

Bye, Boring Salad. We’ve Moved On.

Roasted Butternut Squash Salad with Pears and Stilton—such a great way to get your veggies without being boring. Using just the top neck of the squash creates rounds of the same size for even roasting and is an excellent technique that results in perfectly roasted squash and a wonderful presentation.

IMG_4626

Stilton Cheese Facts:  This is one of the best British cheeses—suitable not only for celebrations, but also to perk up everyday dishes. It can only be produced in the three counties of Derbyshire, Nottinghamshire and Leicestershire. The distinctive feature of this cheese is magical blue veins radiating from the centre of the cheese.

And pears with Stilton are a natural together. Occasionally in the cooler months, Russ and I will enjoy a glass of wine with this combo. Although you may remember early on when I began writing this blog, I mentioned my distaste of Bleu Cheese of any kind, until miraculously when I was going through my divorce years ago, I all of a sudden loved it—go figure!

As far as the bacon, in my case, I just added a few crumbles because it doesn’t necessarily agree with me but I did want a touch of the flavor. And we crumbled our cheese around the salad (after the photos) for better distribution in every bite! Substitute toasted pecans or walnuts for the bacon if you are vegetarian, or like me, don’t eat much bacon.

The roasted squash was so good that we’re going to use it as a side vegetable with future entrees. We can’t figure out why, but it had a bit of a spicy bite to the taste, and all we used was the olive oil, salt, pepper and rosemary. Another keeper to add to our growing recipe library…

IMG_4617 (1)
Slicing through butternut squash is sooo much easier than acorn squash!

Ingredients

  • 1 large butternut squash (about 3 lb.)
  • 5 Tbs. extra-virgin olive oil
  • 1/2 tsp. chopped fresh rosemary
  • Kosher salt
  • Freshly ground black pepper
  • 6 slices thick-cut bacon, cut into 1/2-inch pieces
  • 1-1/2 Tbs. balsamic vinegar
  • 1 tsp. Dijon mustard
  • 1 medium head escarole (about 1 lb.), trimmed and torn into 1-1/2-inch pieces (about 10 lightly packed cups)
  • 2 medium firm-ripe pears (Bartlett or Anjou), peeled, cored, and sliced 1/8 inch thick
  • 6 oz. Stilton, cut into 8 wedges

IMG_4619
I placed the squash rounds on parchment to ensure there would be no sticking to the pan.

IMG_4620
After each side is brushed with olive oil, sprinkle on the salt, pepper and rosemary.

IMG_4622
Start building your salad by placing the roasted squash on the plate first.

Directions

  1. Position a rack in the center of the oven and heat the oven to 450°F.
  2. Cut off the narrow top portion of the squash close to where it widens (reserve the base for another use). Peel and slice it into 12 thin (about 1/4-inch) rounds.
  3. Brush both sides of the squash with 1 Tbs. of the oil and spread in a single layer on a large rimmed baking sheet. Sprinkle with the rosemary, 1/2 tsp. salt, and 1/2 tsp. pepper. Roast, turning once, until softened and browned, about 25 minutes.
  4. Meanwhile, in a 12-inch skillet, cook the bacon over medium heat, stirring occasionally, until crisp, 5 to 7 minutes. Transfer with a slotted spoon to paper towels to drain.
  5. In a small bowl, whisk together the vinegar, mustard, 1/2 tsp. salt, and 1/2 tsp. pepper. Slowly whisk in the remaining 4 Tbs. oil and season with more salt and pepper to taste.
  6. In a large bowl, toss the escarole and pears with enough of the vinaigrette to coat lightly. Season to taste with salt and pepper. Arrange the squash on 4 large dinner plates. Top each with a mound of the escarole and pears and sprinkle with the bacon. Tuck 2 wedges of Stilton into each salad and serve.

IMG_4625

by Tony Rosenfeld from Fine Cooking

Moroccan Lamb Shanks with Pomegranate

The lamb shanks are flavored with North African spices that wake up the rich meat and vegetables with a handful of pomegranate seeds and fresh mint leaves sprinkled on just before serving. Problem was, we didn’t take into account that grocery stores don’t carry pomegranates or their seeds at this time of year (February).

In North America, pomegranates have traditionally only been available during late summer to early winter. Recently, some suppliers have begun importing from the Southern Hemisphere during the rest of the year, but most availability is still limited to the traditional season… Now we know… And so do you!

IMG_4352

As an accompaniment for the Moroccan Lamb Shanks with Pomegranate, we found this intriguing Whole Roasted Cauliflower with Romesco by Mark Bittman on the NY Times Cooking site. In this recipe, a whole head of cauliflower is boiled and then roasted until gloriously browned. It is served with a rich romesco sauce, resulting in a the dish that is meaty and filling. It could even command center stage.

Normally we are all about cooking from scratch, but we certainly don’t eschew using premade products on occasion, and this was one of those times. We had a small jar of Romesco sauce imported from Spain in the pantry and decided just to go with that.

IMG_4288

The best laid plans… just as the lamb was finishing in the oven, and the cauliflower was getting prepped, but not yet cooked, we had a minor medical emergency that put the brakes on dinner. But this is one of those dishes that benefits from being reheated, so later that week, our main entree just needed warming, while we concentrated on roasting the cauliflower and making side salads.

When ready to enjoy this meal, Russ suggested we combine the cooked onion/carrot mix with the sauce using an immersion blender. Brilliant idea—but in the end we decided NOT to blend it—rather, it was a perfect addition for topping both the lamb and the cauliflower. (So much for the jarred romesco sauce!)

Recipe for the Whole Roasted Cauliflower with Romesco

Ingredients*

  • 3 red bell peppers
  • 1 medium-to-large head cauliflower
  • Olive oil
  • Salt and pepper
  • ½ cup Marcona almonds
  • 1 small garlic clove, peeled
  • 1 tablespoon sherry vinegar

*If you are using prepared romesco sauce, all you’ll need is the cauliflower and olive oil.

IMG_4342
A head of cauliflower is boiled for 15 minutes.

IMG_4345
Once boiled, the cauliflower is placed on a rimmed baking sheet, drizzled with olive oil and sprinkled with salt.

IMG_4349
The head is gloriously browned after about 45 minutes in 450 degree oven.

Directions

  1. Fill a large pot 2/3 of the way with water, and set to boil.
  2. If making your own romesco sauce, turn on the broiler, and put the rack about 4 inches from the heat source. Put the peppers on a foil-lined baking sheet, and broil, turning as each side browns, until they have darkened and collapsed, 15 to 20 minutes. Wrap the peppers in the same foil that lined the pan; when they are cool enough to handle, remove the skins, seeds and stems (this is easiest under running water). Set aside.
  3. Heat the oven to 450. Remove the leaves from the cauliflower. When the water boils, salt it generously. Submerge the head of cauliflower in the water, reduce the heat to a simmer and cook until you can easily insert a knife into the center, 15 minutes or more. Don’t overcook.
  4. Using two spoons or a shallow strainer, transfer the cauliflower to a rimmed baking sheet, and pat dry with paper towels. Drizzle all over with olive oil, sprinkle with salt and roast until it’s nicely browned all over, 40 to 50 minutes.
  5. Meanwhile if making the romesco sauce, combine the roasted red peppers, almonds, garlic, vinegar and a sprinkle of salt and pepper in a food processor. Turn the machine on and stream in 1/4 cup olive oil; purée into a thick paste. Taste, and adjust the seasoning.
  6. When the cauliflower is browned, transfer it to a serving platter. Cut it into slices or wedges, and serve the romesco on the side for dipping.

IMG_4284

Meat-Free Main Dish Alert—Kickin’ It Up a Notch

Cod is a very versatile fish, one that you can do a lot with. Because of its flexibility, we find we’ve been using it in many a recipe, especially for our commitment to Meatless Mondays. And when I read Cod With Asparagus Hash and Horseradish Sauce, in my Real Simple magazine, I was immediately drawn to the ingredients—one in particular, horseradish.

IMG_4610

You know how I like anything with a kick, or a bite, or a zing (sounding somewhat masochistic here), but the beauty of it is, the horseradish sauce is an accompaniment, so if if you’re not a fan, just don’t add it to your plate, or reduce the amount used. But for those of us who favor robust flavors, it is a welcome addition to the otherwise subdued ingredients. Oddly enough, the supermarket only carried prepared creamy horseradish, so we opted to buy a small chunk of fresh and grate it ourselves.

And consider these health benefits. Horseradish is low in calories and fat. However, it contains good amounts of dietary fiber, vitamins, minerals, and anti-oxidants. Certain active principles in it found to have anti-inflammatory, diuretic, and nerve soothing effects. In addition, the root has small amounts of essential vitamins such as folate, vitamin B-6 (pyridoxine), riboflavin, niacin, and pantothenic acid. Feeling better already…

To stay on point, even though Spring had just started, we were not able to locate raw Spring onions with their greens, so we bought a small onion version, and used scallion greens as a topper. Underwhelmed with only three onions in the recipe, we incorporated twice that amount. I just cooked them prior to browning the boiled potato pieces. And speaking of potatoes, the russets at the store were unusually small (notice in the photo below, they’re not much bigger than the lemon), so we used two of them.

Dill has long been at the bottom of my most-liked herbs list. But perhaps because I’ve been including it into recipes on a more frequent basis, it’s starting to grow on me (that’s a visual!) And it really does make a difference as a garnish in this recipe, so don’t omit it.

IMG_4601
The evening sun shining through the window on the cutting board as I begin to prep dinner. That “chunk” between the dill and lemon is raw horseradish.

INGREDIENTS

  • russet potato, cut into ¾-in. pieces
  • ½ teaspoon kosher salt, divided
  • ½ cup mayonnaise (we used light)
  • tablespoons horseradish
  • tablespoons fresh lemon juice, divided
  • ¼ cup extra-virgin olive oil, divided
  • ½ teaspoon black pepper, divided
  • spring onion bulbs, whites quartered and greens thinly sliced
  • bunch asparagus, cut into 2-in. pieces
  • (6-ounce) pieces boneless, skinless cod fillets
  • tablespoons roughly chopped dill

IMG_4604
Grated an ample amount of fresh horseradish for the side-sauce.

IMG_4607
Because our Spring onions weren’t raw, I cooked them before adding the boiled potato chunks to the skillet.

IMG_4609
After adding the asparagus, I covered the skillet for a few minutes to expedite the cooking process. 

DIRECTIONS

  1. Cook the potato in salted water until fork-tender, 8 minutes. Drain.
  2. Meanwhile, stir together the mayonnaise, horseradish, and 1 tablespoon of the lemon juice in a small bowl.
  3. Heat 2 tablespoons of the oil in a large skillet over medium-high. Add the potato, ¼ teaspoon salt, and ¼ teaspoon pepper; cook, turning occasionally, until brown and crisp, about 10 minutes. Add the onion whites and asparagus and cook, stirring, until the vegetables are tender, about 10 minutes. Transfer to a plate.
  4. Heat the remaining oil in the skillet over medium-high. Sprinkle the fish with the remaining salt and pepper. Cook, in batches, until opaque throughout, 2 to 3 minutes per side. Serve, sprinkled with the remaining lemon juice, the dill, and onion greens, with the asparagus hash and horseradish sauce on the side.

By Robby Melvin of Real Simple Magazine

IMG_4611
The horseradish-mayo sauce is pictured in the lower right.

HORSERADISH NOTES:

Horseradish is a member of the mustard family (sharing lineage with its gentler cousins, kale, cauliflower, Brussel sprouts and the common radish) and is cultivated for its thick, fleshy white roots.

The “hotness” from horseradish comes from isothiocyanate, a volatile compound that, when oxidized by air and saliva, generates the “heat” that some people claim clears out their sinuses.

The bite and aroma of the horseradish root are almost absent until it is grated or ground. During this process, as the root cells are crushed, isothiocyanates are released. Vinegar stops this reaction and stabilizes the flavor. For milder horseradish, vinegar is added immediately. 

About as Simple as Soup Gets

Chickpea, Leek and Spinach Soup—Russ’s comment when I was making this soup ended up being the title for the blog. This is for all of my followers who can’t fathom spending too much time in the kitchen, but want to eat well.

It really is very simple and doesn’t take long at all, especially if you have some homemade stock on hand, which we did. Of course you can always use store bought too, it just won’t have the depth of flavor of homemade.

IMG_4566

Any number of other tender greens could take the place of the spinach. Try baby kale, watercress or even dandelion greens. I must admit, I’ve never cooked with dandelion greens—can’t get past the weed factor. But my motto is “never say never…”

While the recipe calls for two leeks, we only used one because ours was almost the size of a small baseball bat—kid you not! We got it in the organic section of a local supermarket. The white and light green part was about 90% of the stalk, and it was as thick as my wrist, truly unusual! I regret not taking a photo before I sliced it up.

Unless you detest chickpeas, you’ll love this soup!

Ingredients

  • 2 tbsp. extra-virgin olive oil
  • 2 medium leeks, white and light green parts only, thinly sliced, washed and drained
  • 2 15- to 16-ounce cans chickpeas, drained and rinsed
  • 2 cloves garlic, thinly sliced
  • 4 cups chicken or vegetable stock or broth (preferably homemade)
  • 1 lemon, juiced (3 Tbsp.)
  • 1 tbsp. fresh thyme, chopped

IMG_4561
For starters, the leeks are cooked in hot oil for 5 to 7 minutes.

IMG_4562
Chickpeas and garlic sliced are tossed into the softened leeks.

IMG_4563
Now the stock and water (if you are using it) is incorporated.

IMG_4564
As a final step, the baby spinach is added.

Directions

  1. In a 4-qt. pot heat oil over medium heat. Add leeks, cook, stirring occasionally, 5-7 minutes or until very tender but not browned (reduce heat if leeks begin to brown.) Stir in chickpeas and garlic. Cook about 2 minutes.
  2. Add stock and 1 cup water. (We just used all stock, no water.) Bring to a boil. Reduce heat, and add lemon juice.
  3. Simmer, uncovered, 5 minutes. Gradually stir in the spinach and thyme. Cook until the spinach is wilted, about 1 minute.
  4. Season to taste with kosher salt and pepper, serve immediately.

Adapted from a recipe in a recent issue of Better Homes and Gardens

IMG_4567
The homemade stock was so flavorful, the soup tasted as though it actually had chicken in it.

Not Your Typical Beef Stir-Fry, and That’s a Good Thing

Traditionally, Crispy Tangerine Beef is made by frying multiple batches of lightly battered beef in about 8 cups of oil. Yikes! You can simplify by replacing the batter with a coating of cornstarch and freezing the dredged pieces of beef for easier handling as well as decreasing the oil to 3 cups.

IMG_4538

Cook’s Illustrated’s version didn’t initially thrill me with the vast quantities of oil. The most common misconception (mine included) about deep-frying battered foods is that the results are always greasy. But this doesn’t have to be the case at all.

When battered foods are deep-fried in hot oil, water in the batter and near the exterior of the meat turns to vapor and exits. Once the water exits, there is space for a small amount of oil to take its place. The amount of oil absorbed is directly proportional to the amount of water lost. The more water out the more oil in.

But the Crispy Tangerine Beef takes in even less oil than expected, only two tablespoons overall, yeah! Since cornstarch has virtually no moisture to lose on its own, this means that all the moisture lost during frying comes from the beef alone.

The sauce uses tangerine peel—you could incorporate zest as well—to add complex bitter notes. Make sure your strips contain some pith. By caramelizing the citrus peel before building the sauce, it mimics the flavor of dried tangerine peels that are typically used. Next time we’re thinking about buying the dried peels directly from an Asian market ahead of time. Beware, the ingredients call for juice from two fruits to make a 1/2 cup liquid, but it took three tangerines to generate that amount.

In Step 7, the sauce is supposed to thicken in about 45 seconds. Ours didn’t start to firm up until 4 minutes! In the future, we’ll increase the sauce ingredients by 50 percent because we prefer more volume. However, that being said, it may be that the sauce thickened even more once we added back the meat which had been coated in corn starch, itself a thickener.

No matter, we loved the dish! Although it was passable when I reheated the next day for lunch, it’s best eaten right away.

IMG_4518

Ingredients

  • 1 ½ pounds beef flap meat, trimmed
  • tablespoons soy sauce
  • tablespoons cornstarch
  • 10 (3-inch) strips tangerine or orange peel, sliced thin lengthwise (¼ cup), plus ¼ cup juice (2 oranges)
  • tablespoons molasses
  • tablespoons dry sherry
  • tablespoon rice vinegar
  • 1 ½ teaspoons toasted sesame oil
  • cups vegetable oil
  • jalapeño chile, stemmed, seeded, and sliced thin lengthwise
  • garlic cloves, minced
  • tablespoons grated fresh ginger
  • ½ teaspoon red pepper flakes
  • scallions, sliced thin on bias

IMG_4514
The coated beef strips after being in the freezer for 45 minutes.

IMG_4521
Russ checks the oil to see if it has reached 375 degrees.

IMG_4523
In thirds, the beef strips are stir-fried for about 1 1/2 minutes in the hot oil.

IMG_4527
After stir-frying, the beef is transferred to a paper towel-lined rimmed baking sheet.

Directions

  1. Cut beef along grain into 2½- to 3-inch-wide lengths. Slice each piece against grain into ½-inch-thick slices. Cut each slice lengthwise into ½-inch-wide strips. Toss beef with 1 tablespoon soy sauce in bowl. Add cornstarch and toss until evenly coated.
  2. Spread beef in single layer on wire rack set in rimmed baking sheet. Transfer sheet to freezer until meat is very firm but not completely frozen, about 45 minutes.
  3. Whisk remaining 2 tablespoons soy sauce, orange juice, molasses, sherry, vinegar, and sesame oil together in bowl.
  4. Line second rimmed baking sheet with triple layer of paper towels. Heat vegetable oil in large Dutch oven (we used a wok) over medium heat until oil registers 375 degrees. Carefully add one-third of beef and fry, stirring occasionally to keep beef from sticking together, until golden brown, about 1½ minutes.
  5. Using spider, transfer meat to paper towel–lined sheet. Return oil to 375 degrees and repeat twice more with remaining beef. After frying, reserve 2 tablespoons frying oil.
  6. Heat reserved oil in 12-inch skillet over medium-high heat until shimmering. Add orange peel and jalapeño and cook, stirring occasionally, until about half of orange peel is golden brown, 1½ to 2 minutes.
  7. Add garlic, ginger, and ­pepper flakes; cook, stirring frequently, until garlic is beginning to brown, about 45 seconds. Add soy sauce mixture and cook, scraping up any browned bits, until slightly thickened, about 45 seconds (or longer as the case may be.)
  8. Add beef and scallions and toss. Transfer to platter and serve immediately over hot steamed rice.

IMG_4530
In a separate skillet, cook the tangerine peel and jalapeño strips until partially golden brown.

IMG_4532
Next add the garlic, ginger, and ­pepper flakes and cook until fragrant, about 1 minute.

IMG_4533
Add the soy sauce mixture and cook, scraping up any browned bits, until slightly thickened.

IMG_4536
Finally, add in beef and scallions and toss to coat.

IMG_4539
Ladle over steamed rice.

Adapted from Cook’s Illustrated

This Soup is About to Become Your New Obsession

Both mushrooms and spinach are versatile health foods that are great in any number of recipes. This Mushroom-Spinach Soup With Middle Eastern Spices is a very hearty, chunky soup filled with bits of browned mushroom and silky baby spinach. A combination of sweet and savory spices – cinnamon, coriander and cumin – gives it a deep, earthy richness.

For the most complex flavor, we used several kinds of mushrooms and cooked them until they were dark golden brown and well caramelized.

In place of the 5 cups of water, we used homemade chicken broth which intensifies the flavor. Next time we’re making a double batch!

IMG_4437
Shallots are finely diced.

IMG_4439
A variety of mushrooms are chopped.

IMG_4441
All of the mushrooms are now prepped for the browning stage.

Ingredients

  • 6 tablespoons unsalted butter or extra-virgin olive oil
  • 1 ¼ pounds mixed mushrooms (such as cremini, oyster, chanterelles and shiitake), chopped
  • ½ pound shallots, finely diced
  • 1 tablespoon tomato paste
  • 2 teaspoons chopped fresh thyme leaves
  • 1 ½ teaspoons ground cumin
  • 1 teaspoon ground coriander
  • ¾ teaspoon ground cinnamon
  • Pinch ground allspice
  • 2 ½ teaspoons kosher salt, more to taste
  • 1 teaspoon black pepper
  • 5 ounces baby spinach
  • Fresh lime juice, to taste
  • Plain yogurt, for serving (optional)

IMG_4451
The seasonings and herbs are measured.

IMG_4454
Getting a golden brown to the mushrooms and shallots.

Directions

  1. Heat 3 tablespoons butter or oil in a large pot over medium-high heat. Add half the mushrooms and half the shallots; cook, stirring occasionally, until most of the liquid has evaporated and the mushrooms are well browned, 10 to 12 minutes. Transfer mushrooms to a bowl and repeat with remaining butter, mushrooms and shallots.
  2. Return all mushrooms to the pot and stir in tomato paste, thyme, cumin, coriander, cinnamon and allspice; cook until fragrant, about 1 minute.
  3. Stir in 5 cups water, the salt and the black pepper. Bring mixture to a simmer over medium heat and cook gently for 20 minutes. Stir in baby spinach and let cook until just wilted, 1 to 2 minutes.
  4. Using an immersion blender or food processor, coarsely purée soup. Mix in lime juice. Thin with water, as needed. Taste and adjust seasoning, if necessary. Serve with dollops of yogurt if you’d like.

By Melissa Clark of NY Times Cooking

IMG_4468


Duck, Duck, Delish!

Braised Duck with Pinot Noir, Cherry Tomatoes and Grapes~

Growing up, it wasn’t unusual for us to have duck for dinner. While it certainly wasn’t a main staple, duck was occasionally served on Sunday or a holiday, like Christmas—partially due to the fact that my mom’s dad (“Grandpa” to us kids) hunted duck and rabbit (which we also sporadically dined on.)

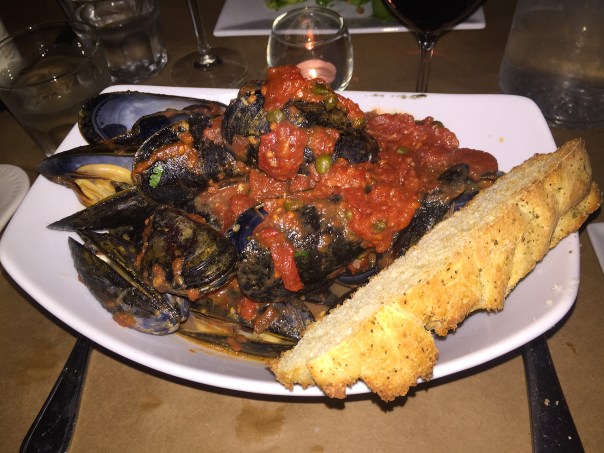
Fast forward many decades and it’s not uncommon while we’re dining out for Russ to select duck as an entree, but for some reason, not so much me. I think the last time I ordered it was for my birthday a few years ago at Agricola in Princeton—and that dinner was divine!

2duck-two-ways
Duck Two Ways entree at Agricola.

Duck doesn’t make its way into our kitchen too often, however lately, we’ve been envisioning cooking the bird for a Sunday meal, so we finally made the commitment. Unfortunately for us, our supermarket was out of stock—fresh and frozen—which put a serious dent into our meal plans 😦 So I put in an order for the following week…

Don’t fear the duck. Forget all those stereotypes about stringy, greasy and gamy birds. Chefs and foodies say duck doesn’t deserve its bad reputation, you just need to know how to prepare it properly. Respect the duck. In other words, don’t cook it like chicken. That’s a typical mistake for newbies, and one that prompts kitchen disasters. On the other hand, this recipe is simple enough even for the fledgling chef.

Intent on cooking the whole bird, Food & Wine showcased Braised Duck with Pinot Noir, Cherry Tomatoes and Grapes—sort of a cousin to coq au vin—which seemed like a winning combination. In the end, the cooked duck is split and broiled after braising to crisp the skin.

My mom’s roasted ducks were always pierced periodically throughout the cooking process to render the fat slowly. This recipe does not call for that procedure so I was somewhat skeptical, but figured if it was rated 5-star in Food & Wine, who was I to second-guess?

BTW, there is no white meat on a duck, even the breast is dark meat.

Now what to serve with it? Ever heard of Colcannon? Me neither. Colcannon traditionally combines mashed potato and cabbage, but there are as many versions as there are cooks in Ireland. This one uses softened and crunchy cabbage, as well as garlic and leeks for extra depth. (Great idea for St. Patty’s Day!) Our veggie side was Bourbon-Glazed Carrots, which added a nice pop of color as well as a sweet-savory note.

The following photos show the different stages of the duck as it is prepared and cooked:

IMG_4446
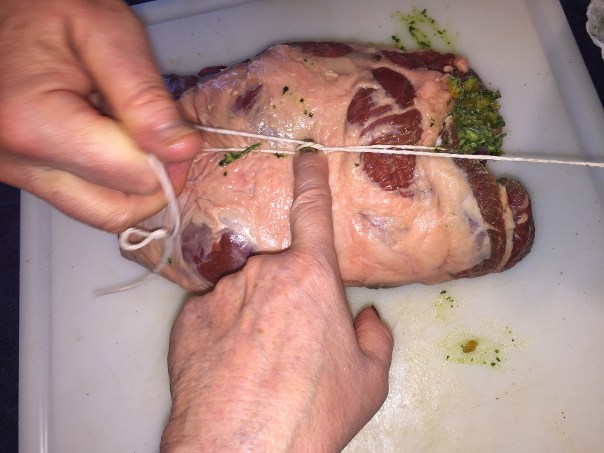
Russ salts the bird inside and out.

IMG_4456
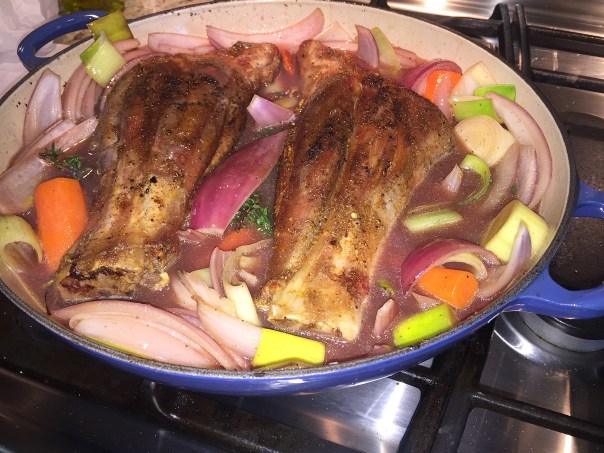
After resting for 30 minutes, the salted bird is added, breast side down, to the cast iron pot with a bottle of pinot noir, peppercorns, bay leaf and garlic.

IMG_4459
After 20 minutes the duck is ready to turn onto its back.

IMG_4463
With breast side up, it is now ready for another 20 minutes in the oven.

IMG_4470
Tomatoes and black grapes are added for the last 45 minutes at a lower 300 degree heat.

IMG_4479
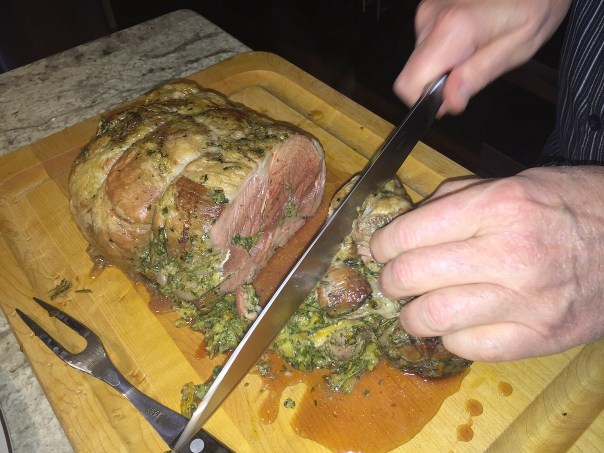
Russ cuts the duck in half to prepare it for the broiler.

IMG_4492
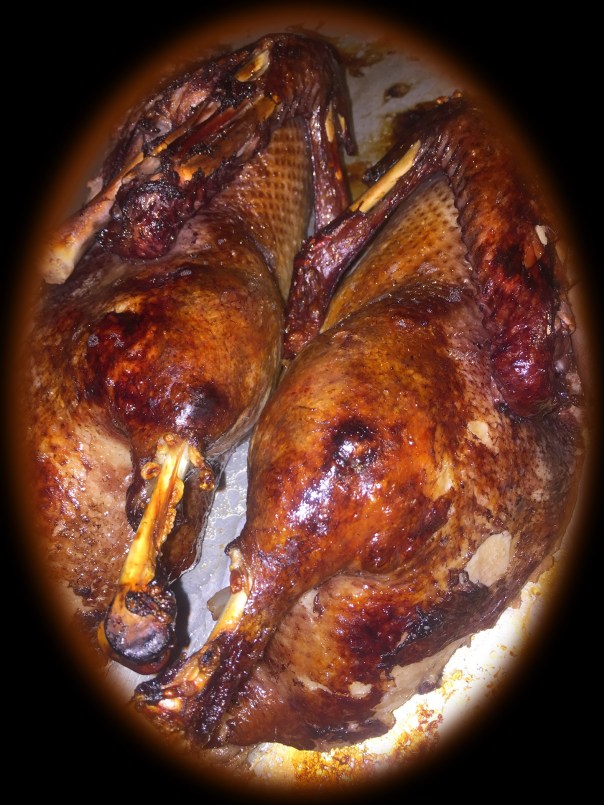
The duck emerges golden brown from several minutes under the broiler.

Duck Entree Ingredients

  • One 5-pound duck, giblets removed
  • Salt
  • One 750-milliliter bottle Pinot Noir
  • 10 black peppercorns
  • 2 garlic cloves, crushed and peeled
  • 1 bay leaf
  • 1 pound cherry tomatoes
  • 1/2 pound red or black seedless grapes, stems discarded

Directions

  1. Preheat the oven to 450°. Rub the duck inside and out with salt. Let stand at room temperature for 30 minutes.
  2. Set the duck, breast side down, in a very large enameled cast-iron casserole. Pour the wine on top and add the peppercorns, garlic and bay leaf. Braise the duck uncovered in the oven for 20 minutes, until it starts to brown. Turn the duck breast side up, sprinkle with salt and add the tomatoes and grapes. Braise uncovered for 20 minutes. Reduce the oven temperature to 300°. Cover the casserole and braise the duck for about 45 minutes longer, until an instant-read thermometer inserted in the thickest part of the thigh registers 160°.
  3. Transfer the duck to a rimmed baking sheet. Strain the pan juices into a saucepan; reserve the tomatoes and grapes and discard the remaining solids. Skim off the fat and boil the juices until reduced to 1 cup, 20 minutes. (It was more like 40 minutes for us to reduce to 1 cup.) Add the cherry tomatoes and grapes; season with salt and pepper.
  4. Preheat the broiler. Using poultry shears or a large, sharp knife, cut the duck in half. Arrange the duck halves on the baking sheet, skin side up. Broil the duck 6 inches from the heat for about 4 minutes, rotating the pan as necessary, until the skin is crisp. Carve the duck and serve with the pan sauce.

Duck Recipe By Andreas Viestad

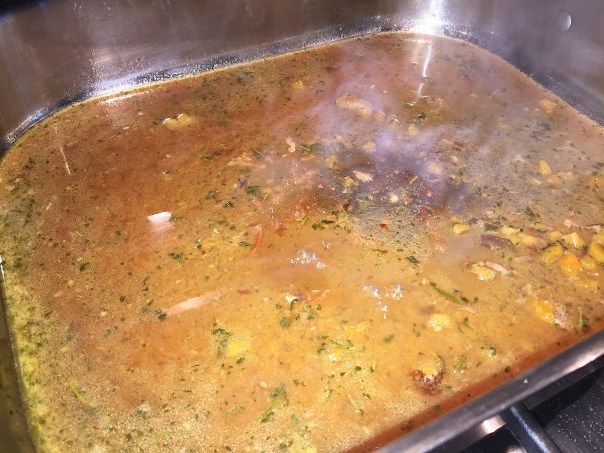
This group of photos depicts the sauce in progress:

IMG_4471
After the solids are removed from the liquid, it is added to a fat separator.

IMG_4474
The liquid simmers for 20-40 minutes to reduce down to one cup.

IMG_4489
The cooked tomatoes and grapes are added back to the reduced sauce.

IMG_4496
The unbelievably tasty sauce is plated in a bowl for serving at the table.

Cooking Notes:

A braised dish won’t render the skin crispy, so that’s why you need to put it under the broiler at the end. But while it will brown and crisp the skin, it won’t be “crispy.” More than likely you’ll want to remove the fatty skin from the succulent breast meat.

You might want to brush up on how to actually carve a duck before you attempt it. Their anatomy is very different from a chicken, as Russ can attest!

IMG_4502
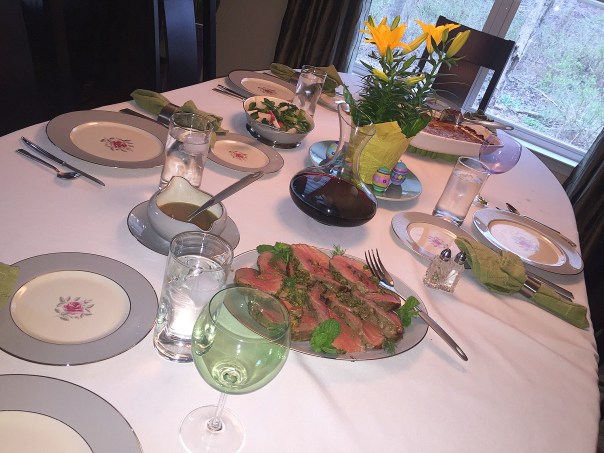
The complete meal of braised duck, colcannon and bourbon-glazed carrots.

COLCANNON

Ingredients

  • 5 medium Yukon Gold potatoes (about 1¾ pounds)
  • Kosher salt
  • 6 tablespoons unsalted butter, divided
  • 2 leeks, white and pale-green parts only, sliced in half lengthwise, thinly sliced crosswise
  • 2 garlic cloves, thinly sliced
  • 2 cups (packed) shredded savoy cabbage (from about ¼ large head), divided
  • cups milk
  • ½ cup heavy cream
  • Freshly ground black pepper
  • 1 scallion, thinly sliced

IMG_4472
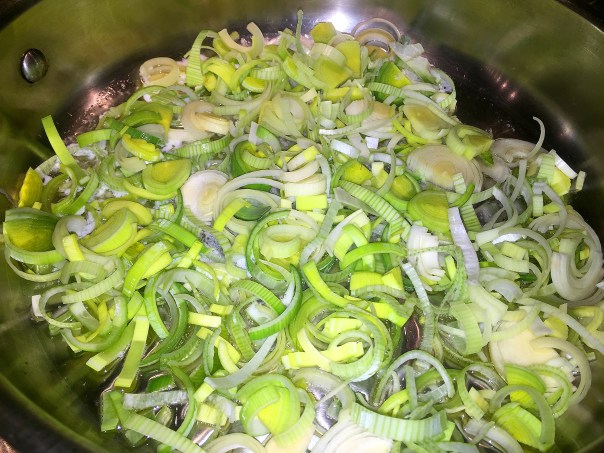
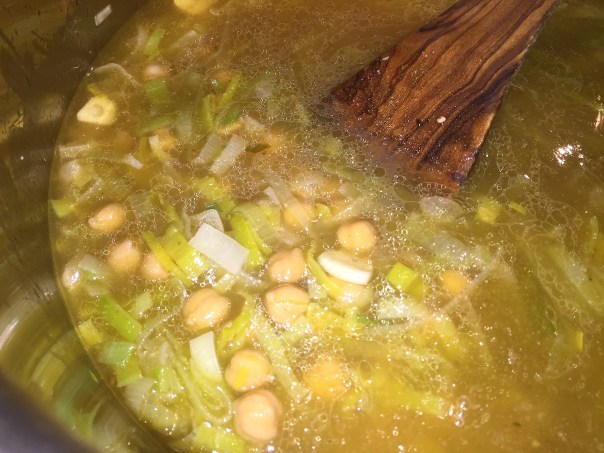
Start sautéeing the sliced leeks while the potatoes finish cooking.

IMG_4475
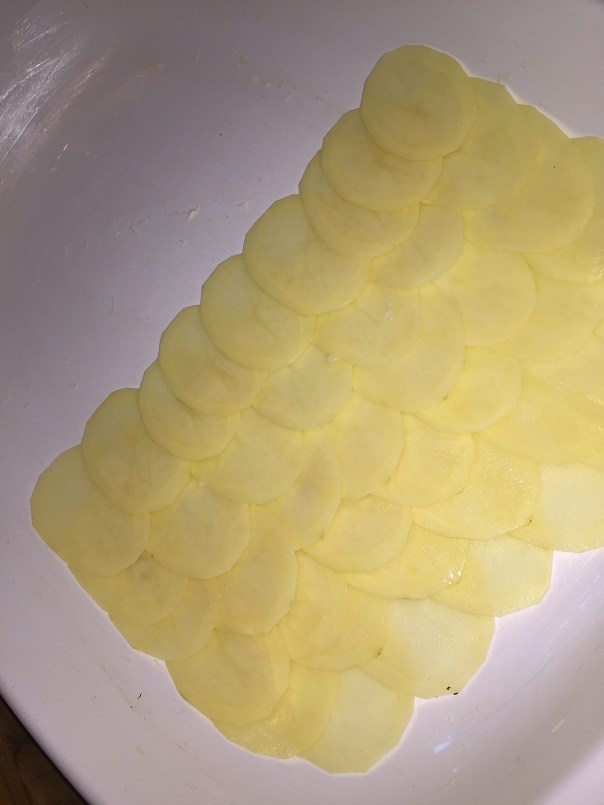
Once the potatoes are cool enough to handle, peel them.

IMG_4483
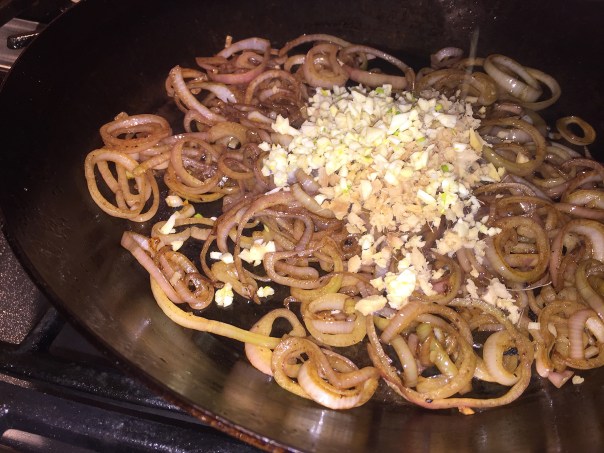
Before adding the milk and cream, make sure the leeks and garlic are starting to brown.

IMG_4484
Bring the milk and leek mixture to a simmer before adding the potatoes.

IMG_4486
Start mashing the potatoes with a masher. The longer you do it, the creamier they’ll be.

IMG_4494
Top the colcannon with butter and sliced scallions.

Directions

  1. Cover potatoes with water in a small pot; season with salt. Bring to a boil over medium-high heat, then reduce heat and simmer until a paring knife slides easily through the flesh, 30–40 minutes. Drain, let cool slightly, and peel.
  2. Meanwhile, melt 4 Tbsp. butter in a large saucepan over medium heat. Add leeks and cook, stirring frequently, until very soft, 8–10 minutes. Add garlic and cook, stirring frequently, until garlic is fragrant and leeks are just beginning to brown around the edges, about 3 minutes longer.
  3. Add 1 cup cabbage and cook, stirring constantly, until wilted. Add milk and cream and bring to a simmer.
  4. Add potatoes and remaining 1 cup cabbage, then coarsely mash with a potato masher. Season with salt and pepper.
  5. Transfer colcannon to a large serving bowl. Top with remaining 2 Tbsp. butter and sprinkle with scallion.

Recipe by Chris Morocco of Bon Appétit

IMG_4491

Zagat-Rated Italian Trattoria

As thankful recipients of a gift card for Il Forno Cafe and Trattoria in West Windsor, New Jersey, we made dinner reservations for this highly recommended Italian BYOB one Saturday in February. IL Forno’s traditional cuisine and inviting ambiance is the perfect place to dine with family and friends—or just yourselves.

Chef owner, Jeff Malloy, brings 20 plus years of outstanding culinary expertise, along with accolades from the Zagat-rated restaurant, with his simplistic food that has vibrant fresh flavors that come alive as you dine in the rustic “industrial” barn setting with soaring ceilings.

Thank goodness we made reservations because the place was packed, yet we were seated immediately at a small half-booth table up against one of the brick walls. However, I was starting to get my “knickers in a knot” when, after a good 15 minutes, no one had acknowledged our presence or opened our bottle of wine. Seeing my impatience beginning to blossom, Russ quickly hailed the maître d’ who sent our waitress over within seconds—crisis avoided.

They offered several tempting “specials” on top of their regular options, and lucky for Russ, they’ve expanded their gluten-free choices to include pasta, breads, and pizzas. The menu also lists several vegetarian and lighter-fare selections for those so inclined.

IMG_4270

IMG_4278

And so inclined I was. For starters I had the Arugula Salad, lightly dressed with lemon olive oil, shaved parmesan cheese and toasted pine nuts. My entree was Vegetable Lasagna: a “pasta-less” lasagna made with zucchini, yellow squash, and eggplant, with chickpea puree and plum tomato sauce. While it was certainly flavorful, somehow I did miss having ribbons of pasta nestled throughout the dish.

IMG_4271

IMG_4273

As an appetizer, Russ enjoyed Mussels Puttanesca with olives, capers, anchovies, and a plum tomato sauce. His dish was piled high with about 2 dozen plump, succulent mollusks in a fresh and tasty sauce. Not normally a bread eater, I enjoyed his toasted slice of crusty bread topped with some of the sauce—yummy!

IMG_4276

For his dinner, he chose the Rigatoni BologneseIL Forno’s famous bolognese sauce—which is not red—on gluten-free pasta. Only complaint here was he wished there had been more of that famous sauce!

We gladly took home doggie bags since neither one of us could finish dinner, and that left no room for dessert, but the offerings included Tiramisu, “Hot-Chocolate” Mousse, Homemade Cannoli, and a Flourless Chocolate Cake. Tempting choices for those of you with a sweet tooth.

About two weeks later I had the opportunity to again dine at Il Forno’s, this time for lunch. Surprisingly, my friend Erica and I were the only two patrons lunching that day! I enjoyed the delicious Tuna Salad, a scoop of tuna salad over a bed of fresh arugula, red onion, capers and lemon olive oil drizzle.

The Chicken IL Forno tempted Erica with its grilled chicken breast, sautéed cherry tomatoes, sun-dried tomatoes, sautéed arugula, lemon and white wine, usually served with a side of pasta. At her request, she asked to have the pasta switched out for broccoli. What Erica wasn’t thrilled about was there was no sun-dried tomatoes as indicated in the description. However the waitress brought her a small dish full upon request.

Unlike me, Erica indulges in dessert, and the Tiramisu got her attention that day. Once delivered, she commented “I hope it tastes as good as it looks.” And after just one bite, she verified that indeed it did!

tuna.salad
Lynn’s tuna salad entree.

chicken il forno
Chicken Il Forno with a side of broccoli instead of pasta.

tiramisu.best
The artfully plated, and oh so delicious tiramisu.

This Tasty Salad is Waiting to Meet You

As a dinner in late Winter, Warm Ginger Steak Salad is versatile enough to be appropriate any time of year. Use a mixture of curly, sturdy frisée with some baby spinach for this salad because many mesclun mixes just don’t have enough sturdy greens to stand up to the heat of a warm dressing.

IMG_4336

Not fans of chow mein noodles, we added thinly sliced radishes as the crunch factor. Knowing there would probably be leftovers, we didn’t dress all of the greens with the meat and sauce mixture. Instead, we packaged the salad greens separately from the cooked meat mixture and brought that to work for lunches the following day, combining the two when ready to eat. Worked out beautifully!

IMG_4323
Most of the ingredients are assembled, although not necessarily prepped.

Ingredients

  • 1 Tbs. peanut or canola oil
  • 9 oz. New York strip steak, 1 inch thick
  • 1/2 tsp. coarse salt; more to taste
  • Scant 1/4 tsp. freshly ground black pepper; more to taste
  • 2 large shallots, thinly sliced
  • 2 tsp. minced fresh ginger
  • 1 tsp. minced garlic
  • 1/4 cup dry sherry
  • 2 Tbs. soy sauce
  • 2 tsp. toasted sesame oil
  • 8 cups loosely packed salad greens, preferably a mixture of frisée and baby spinach leaves
  • 1/2 small cucumber, peeled, seeded, and thinly sliced
  • 3/4 cup wide chow mein noodles

IMG_4328
Depending on thickness, sear the steaks in a hot skillet approximately 3-4 minutes per side.

IMG_4331
After you remove the steaks from the pan, add the shallots and cook about 3 minutes.

IMG_4332
Next add the ginger and garlic and cook about one minute until fragrant.

IMG_4334
Stir in the sherry, soy sauce, and sesame oil, then add the steak slices.

IMG_4327
The frisée and baby spinach are waiting for the warm steak mixture.

Directions

  1. Heat the oil in a 10-inch heavy skillet (preferably cast iron) over medium-high heat until very hot but not smoking. Season the steak on both sides with the salt and pepper.
  2. Put the steak in the hot oil and sear for 3 min. Turn the steak and cook for another 2 to 3 min. for rare or 4 min. for medium rare (keep in mind that the steak will cook more later). Take the skillet off the heat, transfer the steak to a cutting board, and cover loosely with foil.
  3. Return the skillet to medium heat. Add the shallots and cook, stirring frequently, until lightly browned on the edges and slightly frizzled, about 3 min. Add the ginger and garlic and cook until fragrant, about 1 min. Slide the skillet off the heat and let cool slightly. Stir in the sherry, soy sauce, and sesame oil.
  4. Trim the fat from the side of the steak and cut the steak into thin (1/8-inch) slices. Add the steak slices and any accumulated juices to the skillet; season with salt and pepper and stir until well coated.
  5. Toss the steak and liquid with the greens until well blended and slightly wilted. Top with the cucumbers and chow mein noodles and serve immediately.

by Abigail Johnson Dodge from Fine Cooking

IMG_4335

Velvety Beef, Without Velveting

Say What? You may have read my 1.13.16 post “Jau-Yau…” an example of one of the more advanced stir-frying techniques, where chefs practice “jau yau,” or “passing through oil,” in which case bite-size pieces of meat, poultry or fish are blanched in oil before stir-frying, ensuring that the ingredients will be more succulent and flavorful.

IMG_4245

Cooks Illustrated discovered that in order to produce a stir-fry with velvety, tender beef normally only found in Chinese restaurants, you need to choose the right cut of meat and treat it correctly. So you mean to tell me there is an easier way than jau-yau??

This recipe for Beef Stir-Fry with Bell Peppers and Black Pepper Sauce sounded like a good alternative to us. Problem was, it calls for flank steak and we forgot to buy it when we did our weekly grocery shopping. So when I realized the morning of the intended dinner that we didn’t have the main ingredient, I stopped at the grocery store on the way home.

Can you believe they did not have ANY flank steak? Not especially pleased with this turn of events, I found my only plausible choice was a few packages of “stir-fry beef round strips” that were already cut into appropriate-sized pieces. Suspicious though I was, saving a step or two, couldn’t hurt…

We know that flank steak, cut across the grain into bite-size pieces, delivers a great beef flavor and a moderate chew. But we didn’t know that soaking the meat briefly in a mild baking soda solution while adding some cornstarch to the marinade before flash searing it in a very hot pan—finishes the job of delivering meltingly tender, restaurant-quality beef stir-fry.

IMG_4227
The beef strips marinate in baking soda and water for five minutes.

IMG_4229
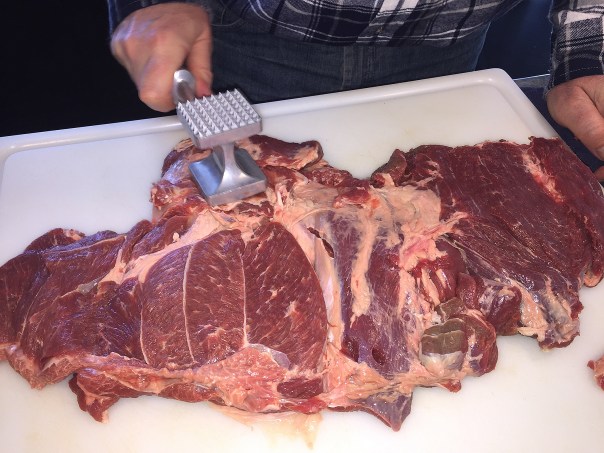
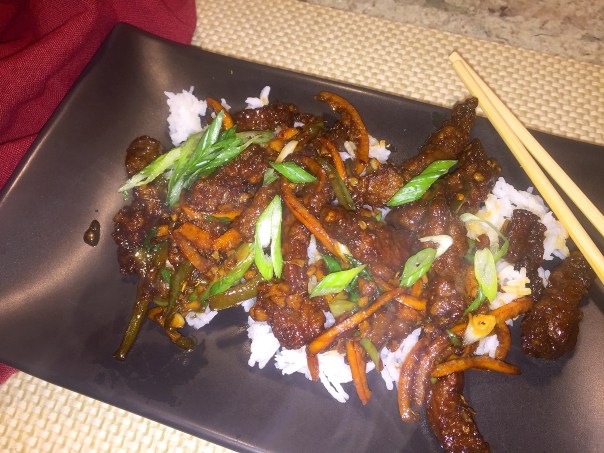
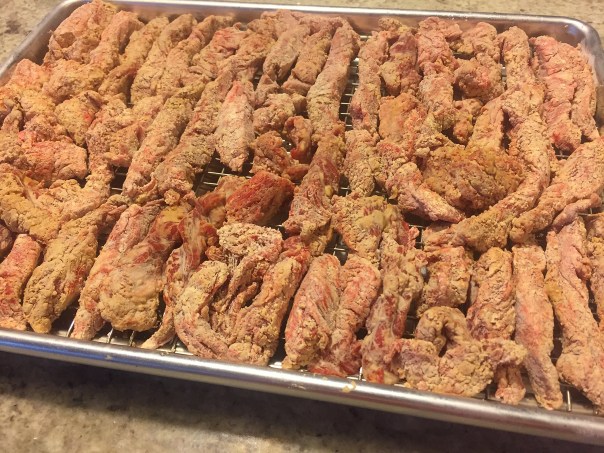
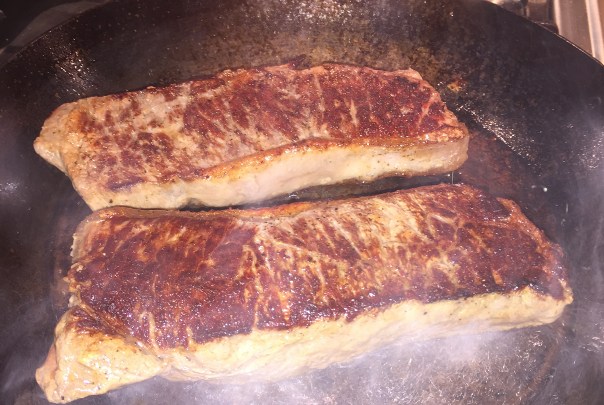
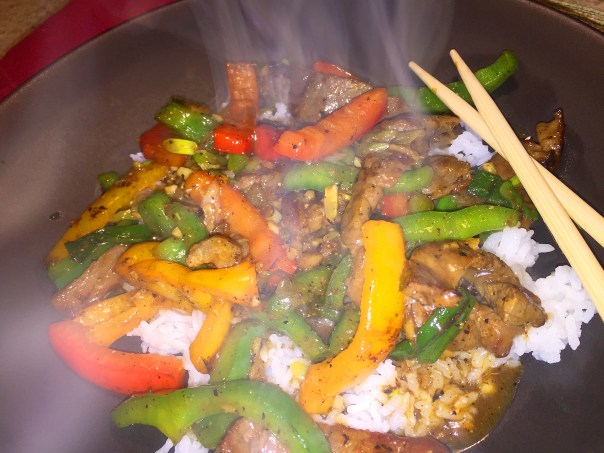
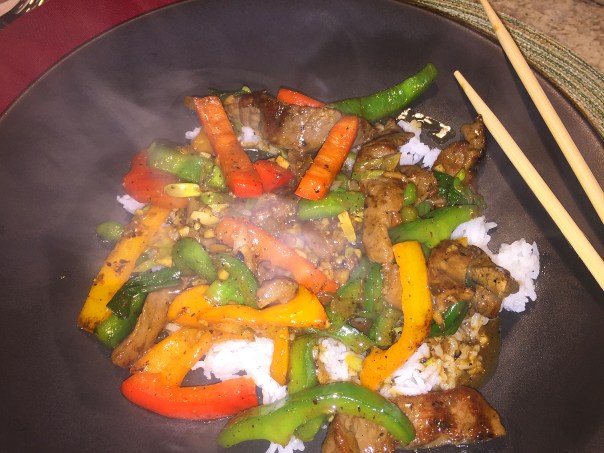
Marinated beef strips sear briefly in a hot wok before stir-frying.

IMG_4236
The cooked meat is placed in a bowl while you stir-fry the veggies.

Wowser, absolutely no complaints from us—this meal was three thumbs up! (And may be even better if using flank steak.) We tweaked the directions to add the scallion greens at the very end instead of with the bell peppers. Otherwise, we are happy fans of the streamlined “Velvet Technique.”

Hmmm, we wonder if this could apply to chicken, pork and shrimp?

IMG_4234
Pepper strips get a whirl around the wok for a good 4-5 minutes.

IMG_4238
Scallion whites, garlic and ginger get their turn.

IMG_4241
The remaining sauce is whisked into the ingredients for a final stir-fry.

Ingredients

  • tablespoon plus ¼ cup water
  • ¼ teaspoon baking soda
  • pound flank steak, trimmed, cut into 2- to 2 ½-inch strips with grain, each strip cut ­crosswise against grain into ¼-inch-thick slices
  • tablespoons soy sauce
  • tablespoons dry sherry or Chinese rice wine
  • teaspoons cornstarch
  • 2 ½ teaspoons packed light brown sugar
  • tablespoon oyster sauce
  • teaspoons rice vinegar
  • 1 ½ teaspoons toasted sesame oil
  • teaspoons coarsely ground pepper
  • tablespoons plus 1 teaspoon vegetable oil
  • red bell pepper, stemmed, seeded, and cut into ¼-inch-wide strips
  • green bell pepper, stemmed, seeded, and cut into ¼-inch-wide strips
  • scallions, white parts sliced thin on bias, green parts cut into 2-inch pieces
  • garlic cloves, minced
  • tablespoon grated fresh ginger

Directions

  1. Combine 1 tablespoon water and baking soda in medium bowl. Add beef and toss to coat. Let sit at room temperature for 5 minutes.
  2. Whisk 1 tablespoon soy sauce, 1 tablespoon sherry, 1½ teaspoons cornstarch, and ½ teaspoon sugar together in small bowl. Add soy sauce mixture to beef, stir to coat, and let sit at room temperature for 15 to 30 minutes.
  3. Whisk remaining ¼ cup water, remaining 2 tablespoons soy sauce, remaining 2 tablespoons sherry, remaining 1½ teaspoons cornstarch, remaining 2 teaspoons sugar, oyster sauce, vinegar, sesame oil, and pepper together in second bowl.
  4. Heat 2 teaspoons vegetable oil in 12-inch nonstick skillet over high heat until just smoking. Add half of beef in single layer. Cook without stirring for 1 minute. Continue to cook, stirring occasionally, until spotty brown on both sides, about 1 minute longer. Transfer to bowl. Repeat with remaining beef and 2 teaspoons vegetable oil.
  5. Return skillet to high heat, add 2 teaspoons vegetable oil, and heat until beginning to smoke. Add bell peppers and cook, stirring occasionally, until vegetables are spotty brown and crisp-tender, about 4 minutes. Transfer vegetables to bowl with beef.
  6. Return now-empty skillet to medium-high heat and add remaining 4 teaspoons vegetable oil, scallion whites, garlic, and ginger. Cook, stirring frequently, until lightly browned, about 2 minutes. Return beef and vegetables to skillet and stir to combine.
  7. Whisk sauce to recombine. Add to skillet and cook, stirring constantly, until sauce has thickened, about 30 seconds. Toss in scallion greens and serve immediately over steamed rice.

IMG_4243

Technique: Cutting Flank Steak for Stir-Fry

Cut steak with grain into 2- to 2 1/2 -inch strips, then cut each strip crosswise against grain into 1/4-inch-thick slices.

Velvety Beef, Without Velveting

The ultratender texture of the stir-fried beef served in Chinese restaurants comes from a classic technique known as velveting, which involves coating the meat and blanching it in a pot of oil before stir-frying even takes place. Here’s a more streamlined way to protect and tenderize the meat.

TRADITIONAL VELVETING: Marinate in cornstarch and egg white; blanch in oil to set coating   RESULTS: Good but messy and time-consuming

STREAMLINED VELVETING: Keep cornstarch; add baking soda   RESULTS: Extra-supple meat and less fuss