
Yes, I know this is a food blog but one that encompasses “all things food and drink” so I’m stretching the parameters here to embrace leaf cast birdbaths—after all, our feathery friends need to drink too!
My maiden foray happened in the fall of 2015, with the assistance of my husband and his friend Earle who was in visiting from Colorado. (Hey, those bags of cement and sand are quite heavy!) Initially my husband was shocked that I was starting with such a big frond. He thought I should begin with a smaller candidate such as a hosta or hydrangea leaf. Go BIG, or go home, I say!

I grow a few potted elephant ears each season which gives me some choices in the Fall.

Earle and Russ help measure the proper mix of ingredients for my first-ever casting.

Lynn and Earle add water to the mix of sand and cement to a consistency of toothpaste. This is obviously not the venue to be a fashionista!

My first leaf casting was too deep for birds; and I didn’t level the base which caused it to tip forward. It now resides in Michigan with my younger sister as an outdoor dog bowl…

Because I had some leftover wet mixture, I actually did create a few small leaves, above and below. I thought they’d make good practice samples when testing paint colors.

A few weeks later I attempted my second elephant ear, all on my own, and had great results, after learning what “not to do” from the first go-round. In my first attempt, I made the casting too deep. Creating the “ideal” depth of a bird bath is kind of like trying to figure out whether McDonald’s, Burger King or Wendy’s has the best fast food. Some birds prefer it one way, and other birds prefer it another way. However, most common backyard bird baths have a depth at less than 2 inches at its lowest point (usually the middle), which works for many species.
The second casting sat properly but was a bit too shallow, and the paint job was too shiny—as was the first. Although they appealed to my love of color.
Keep in mind when choosing your leaves, smaller songbirds will go in depths at about 1 inch. Preferably you’ll end up with some flexibility because your structure likely won’t be the same depth throughout the entire surface. Larger baths have slopes that give the shape various depths—ideally accommodating larger and smaller birds.
The basic process of making a leaf casting involves covering the back side of a leaf with a cement/sand/water mixture, letting it dry and harden, then removing the leaf to reveal the shape and design of the leaf in concrete. Since there’s no mold, every casting is unique, and, of course, coloring the casting allows for endless possibilities. It is a creative and exciting project, and the results can be artistically stunning.
FYI: cement is the raw material consisting of clay and limestone; concrete is the final product that results when cement is mixed with sand and water.
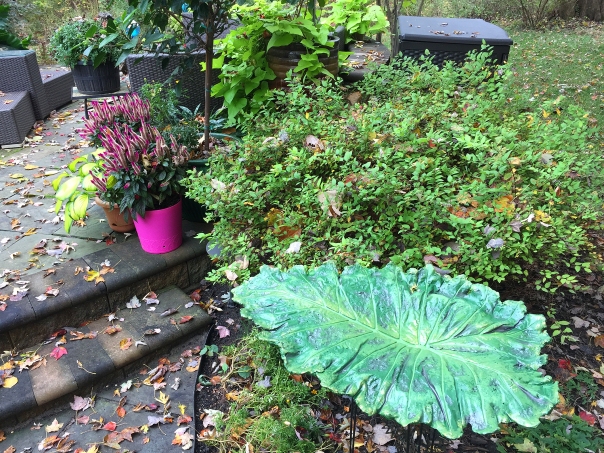
As far as positioning your bird bath, the bird brain is picky! Most birds prefer a bath that is partially exposed with very low vegetation under it but wanting a tree or shrub nearby so they can hop or fly a short distance to the bath, or fly from the bath quickly to the tree if danger approaches. Last of all, be patient! It takes a while for the birds to become accustomed to the bath. They won’t use it for at least a couple of weeks, until they know they aren’t going to be in harm’s way… It won’t hurt to hang a bird feeder nearby either 😉
TIP: If you’re keeping the casting outdoors, it’s a good idea to paint a sealer product used for tile over the entire surface—top and bottom.
Another project was in mid-October, 2017, and I was going to fly solo again. Even though two years had passed since my last endeavor, I was surprised how easy and quickly the venture progressed. It only took about one hour’s time from start to finish, until the drying process—which takes days! Third time’s the charm, right?
GONK!
After three full days the concrete was still quite wet and easily crumbled when I pinched the edges. At day 5, when the concrete was still not hard, I broke it into pieces and began again. Not completely sure where I went wrong, I was a little more careful in measuring the amounts of cement and sand, making sure to err on the side of more cement and acrylic fortifier.
This time success! I let it dry face down on the sand for 3 days (removing the collar after 24 hours) before bringing it in the house, flipping it over, and removing the real elephant ear leaf, allowing the top side to thoroughly dry before I painted it. In fact, I was out of the country on vacation so it had a full two weeks of drying time.
Here is a step-by-step pictorial. (The list of needed items and process directions follow the photos.)

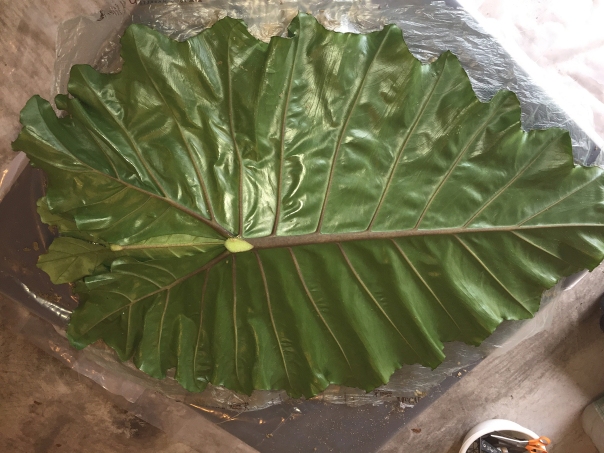
Choosing my leaf from a potted patio elephant ear plant. You can see my second casting sitting in a plant stand at mid-right.

With heavy-duty tape, seal over any holes on the top side of the leaf.

A smaller elephant ear was taped over the back edge to cover the back opening.
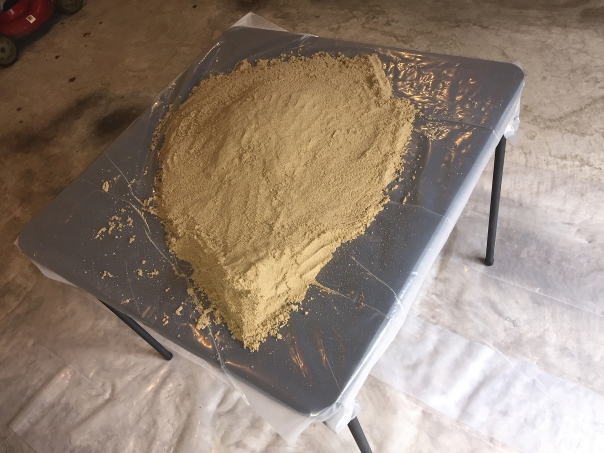
I mounded wet sand in the middle of a thick-plastic covered card table in a well-ventilated area.

My leaf measured just over 39 inches long, barely fitting the card table.

After positioning the leaf over the sand, I had to add more to increase the overall width to accommodate my large elephant ear.
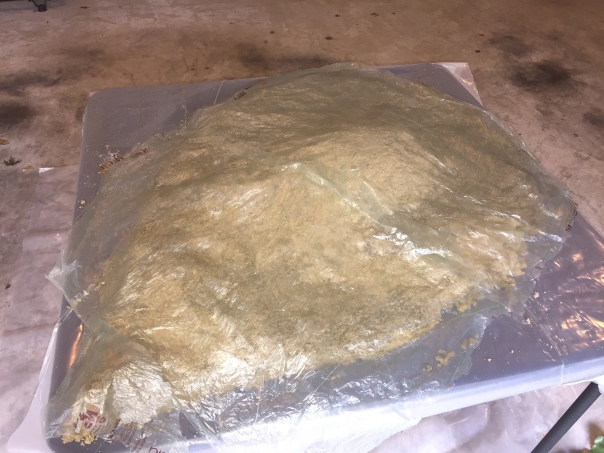
The moist sand is covered with a thin sheet of plastic like that from a dry cleaner bag.
The leaf is put upside down over the plastic. The sand is then adjusted to push the leaf tip up so that it will have a natural curl downward when finished. Also to undulate the curling edges for a natural look.

Once your leaf is positioned, start mixing the cement, sand, acrylic sealer and water.

Scoop a small blob of the mixture at a time, forming it into a thin patty, and pressing it onto the back of the leaf, starting at the midrib and working outward. It’s best if you can stop the mixture just before the edge of the leaf. You’ll get a cleaner edge in the end.

Add a plastic ring over the stem area, and level it, to create a base for insertion in a plant stand. You can smooth out the back and edges of the leaf while the concrete is still wet. Now be patient, it will take days to dry…
About 24 hours into the drying process I removed the plastic ring before the concrete got too hard, and to hasten the drying of the base.

The dried casting was moved indoors for another 10 days while I was away. The lighter areas seem to be a result of some of the mixture not being thoroughly mixed together, but it ended up working in my favor. I used a dremel rotary tool to smooth the leaf edges and to remove the softer lighter areas that then provided a rougher surface for the birds.

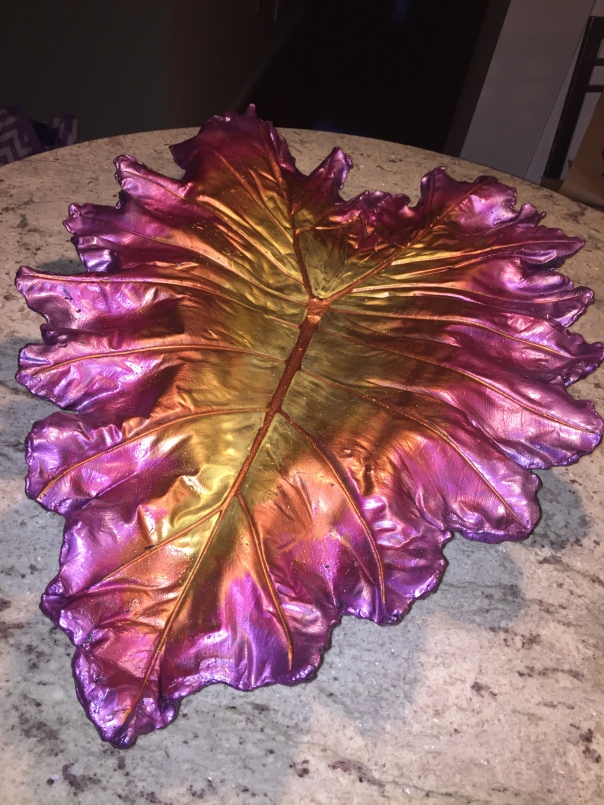
The base coat of paint goes on and I used the actual elephant ear plant as inspiration. Once dry, I painted the underside the same base color.
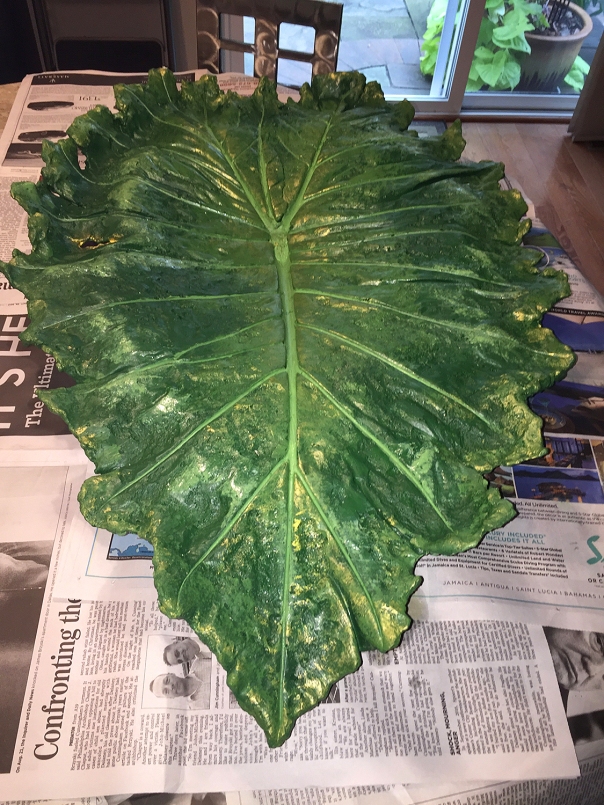
Next I colorized the veins. Then my “bling gene” surfaced and I just couldn’t help adding some pops of gilded color—as highlights in a lighter shade, above; and shadows with a purplish tint, below—although I did so with restraint 😉


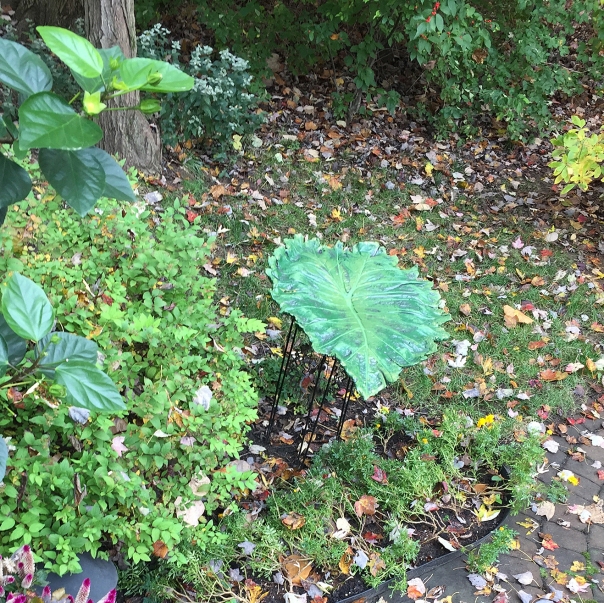
Finally, two coats of a flat sealant are spray painted on both sides. Once dry, it is positioned in place in a plant stand in the garden… Now to wait for the birds to enjoy it…
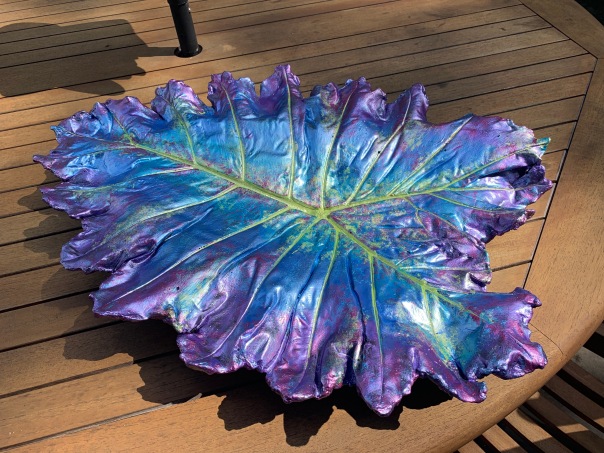
 I could not restrain my “bling gene” in September 2019 when I colorized this bird bath!

Brought back the bling yet again in 2020.
Items Needed:
- Portland cement type 1 (grey or white)
- sandbox sand
- concrete acrylic fortifier
- acrylic or latex paint
- 8-inch plastic round “collar”
- tile sealer
- water
- plastic tub without corners (where cement can hide) for mixing cement
- thin plastic bags for making casting
- large, thick sheet of plastic for covering container of cement
- waterproof rubber or latex gloves: thick ones for mixing cement, thinner ones for making casting
- face mask for mixing cement
- goggles for mixing cement
- freshly cut leaves to cast. Choose ones with pronounced veins and interesting margins, such as hosta, rhubarb, Dutchman’s Pipe, ligularia, gunnera, rodgersia—and my favorite, elephant ears
Process:
- Set up a work table in a cool, well-ventilated area out of direct sun. Cover the table with a sheet of plastic. Mix some sand with enough water to dampen it, and make a mound of sand on the table that’s larger than your leaf. Cover the sand with a thin plastic bag such as a dry cleaner bag.
- Cut off the stem so that it is level with the leaf. Cover any holes with heavy duty tape on the right side of the leaf. If you are going to use it as a bird bath, you will also need to tape a much smaller elephant ear over the back leaf opening so that it will contain water when finished.
- Lay the leaf upside down on top of the plastic-covered sand and gently move the sand around underneath the leaf so it supports all parts of the leaf. You may need to remove the leaf a couple of times to form the sand into a mound that will better support the leaf. Make the bottom tip of the leaf point upward so when the casting is finished and turned over, the tip will have a natural-looking downward curl.
- To mix the cement, don face mask and thick gloves and mix 3 parts Portland cement and 3 parts sandbox sand in the plastic tub. Mix 1/4 cup concrete acrylic fortifier into 1 cup of water and add to the cement/sand mixture a little at a time. Continue adding plain water until cement is the consistency of toothpaste. The mixture should hold together if you squeeze it. If you add too much water, add more cement—not sand—to thicken it. Mix slowly to avoid incorporating air, which will make bubbles in your casting. Keep the mixture covered to keep it from beginning to set in the container.
- With your hands protected by thin gloves, scoop a small blob of the mixture at a time, forming it into a thin patty, and pressing it onto the back of the leaf, starting at the midrib and working outward. Aim for a thickness of about 1/4 to 3/8 inch over the entire back, making the midrib extra thick to give the leaf support. If possible, stop just short of the outer edge of the leaf (so you can peel the leaf away.)
- To make the plant stand platform, position a 1 1/2-to-2″-high plastic ring (I cut out a section of an old plastic flower pot) approximately where the stem was and fill it with the cement mixture, using a level to make sure it is not crooked.
- To get a more finished edge, use a small paintbrush to brush the cement mixture towards the edges. Just don’t make the edges too thin or they may break off.
- For large castings that need more strength, you can sandwich a layer of overlapping drywall mesh tape in between two layers of cement mixture. I haven’t tried this but I’ve seen directions online.
- When you’re finished, lightly cover the casting with a plastic bag or plastic wrap to hold in the moisture so it will dry more slowly.
- Immediately wash the concrete tub outside with a garden hose so the cement mixture won’t set and ruin the tub.
- Let the leaf casting sit for a few days. The longer the curing time, the stronger the final concrete casting will be. The concrete will dry faster at warmer temperatures than at cool temperatures.
- Small leaves may be dry after only 2 days, larger leaves will take longer. The concrete will turn light-colored when it’s dry. Then gently lift the casting off the sand and turn it over. Let it sit another couple of days before handling it. The real leaf will be stuck to the casting, so peel it off, using needle nose pliers, if needed, to carefully remove the leaf from deep veins without chipping the casting.
- Once completely dry, I use a dremel tool to clean up any rough edges.

- Painting: I used water-based acrylic paint on the leaves, adding different colors in layers. (AC Moore and Michaels carry a large variety of colors.) Watered down paint makes a wash that leaves hints of color. You can apply the paint with an almost dry natural sponge, apply it with a paintbrush and then wipe it lightly with a damp sponge, or use an air brush. You can use a smaller paintbrush to add color to the veins, or sponge on color so it seeps into the veins and then lightly wipe the leaf with a damp sponge to remove most of the color on the raised portions of the leaf. Let your creative juices flow and try different techniques.


I remember seeing this in your garden and was very impressed with how beautiful it turned out. You did a great job!
LikeLike
Thanks Lorraine. That was an older bird bath. I just finished this one a few weeks ago…
LikeLike
This a great project lynn. Love all of them
LikeLike
Thanks Maureen. Maybe next Fall you can do one with me…
LikeLike
Looking forward to it!!
LikeLike
Nice project and very informative
LikeLike
Thanks!!
LikeLike
I love the color, reminds me of the vintage Carnival Glass in the 70’s. I would LOVE to know what you used and how you achieved that purplr, blue, green shiny color. AMAZING!
LikeLike
Jean, first I paint an undercoat all over, usually black or some other dark color. Then I simply use art and crafts metallic paints and blend them together with a brush. When dry, I add 2 coats of glossy, satin or matte spray varnish.
LikeLike
What do you use as a sealer?
LikeLike
I’ve used several (different brands) spray sealants, some glossy, some satin, some clear.
LikeLike
These are absolutely stunning!! Getting ready to make one. And when reading thru instructions I don’t understand the plastic collar. Is this to attach a stand later to the leaf? Is the inside of the collar filled with cement? Thks !
LikeLike
Val, thanks for the compliment! The plastic collar (which I cut off about 2-3″ round from a plastic flower pot) is to create a base on the bottom of the leaf which is then inserted into a plant stand when finished. Is it totally necessary? No, you could just rest a rounded bottom on a plant stand or other object, but it won’t be as stable. Hope this helps.
LikeLike